Stampin’ Up! Butterfly Brilliance Gala

Good Wednesday morning my stamping friends and Happy St. Patrick’s Day to you. Even if you are not Irish, today everyone has just a bit in them. I don’t have any Irish in me (just Italian), but growing up my mom always made corn beef and cabbage on St. Patrick’s Day. Don’t forget to wear your Green today!! We’re halfway through the week and heading towards the weekend, hope you are making some fun plans.

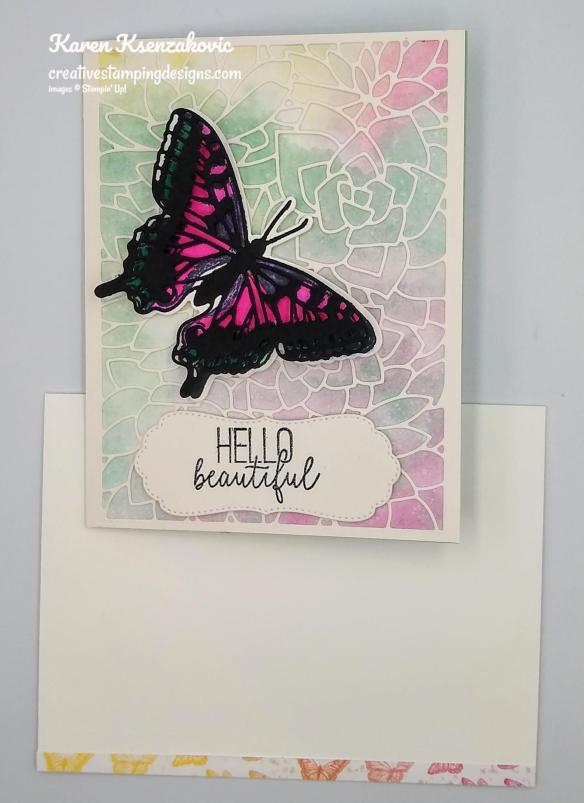
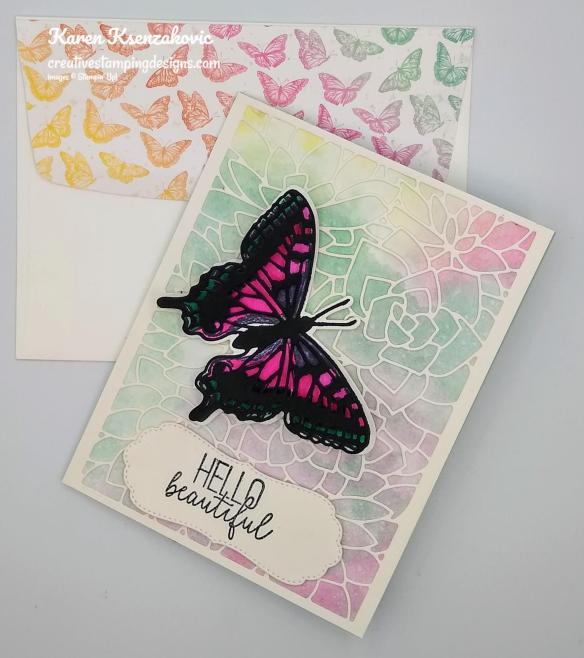
It’s time for another inspiration challenge for The Card Concept. For the next 2 weeks we have a Butterfly Brilliance challenge. Here is my card that was inspired from the challenge photo.
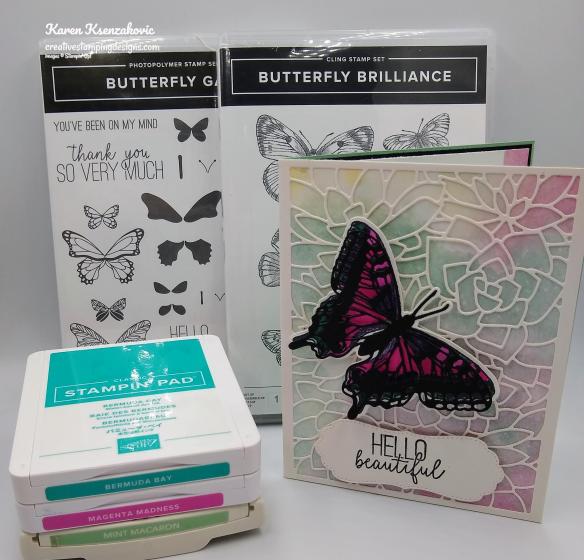
I used the Stampin’ Up! Butterfly Brilliance Bundle and the Stampin’ Up! Butterfly Gala Photopolymer Stamp Set. The butterfly was my main inspiration for my clean and layered card today.
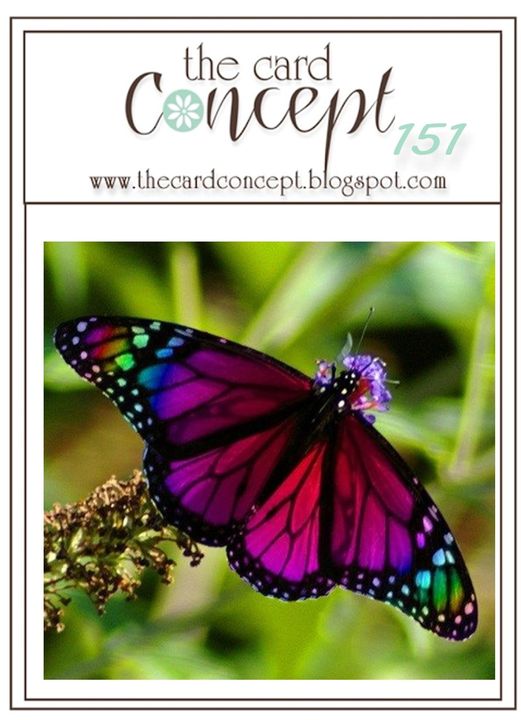
I hope you will take a moment to visit The Card Concept and join us this week to play along with our challenge #151. How are you inspired by this photo?
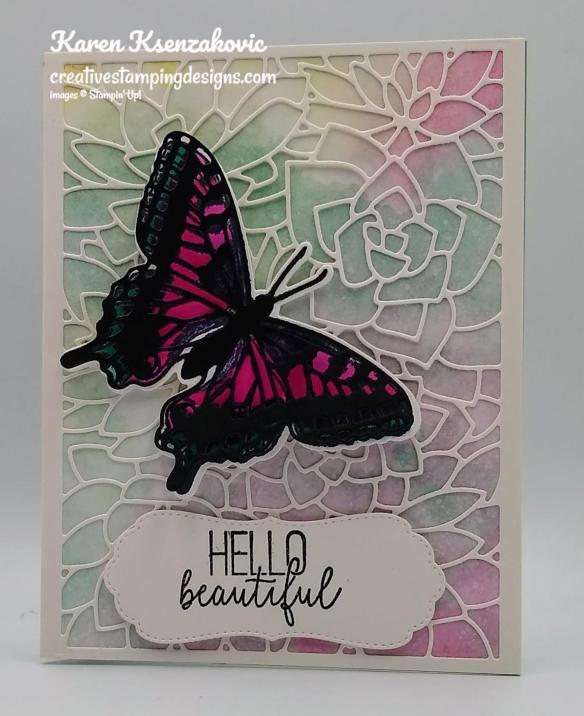
I started by cutting a Shimmery White card front using the Potted Succulents Dies and adhered it to a panel of Butterfly Bijou Designer Series Paper using Multipurpose Liquid Glue. I adhered the card front to a Mint Macaron card base using Stampin’ Seal.
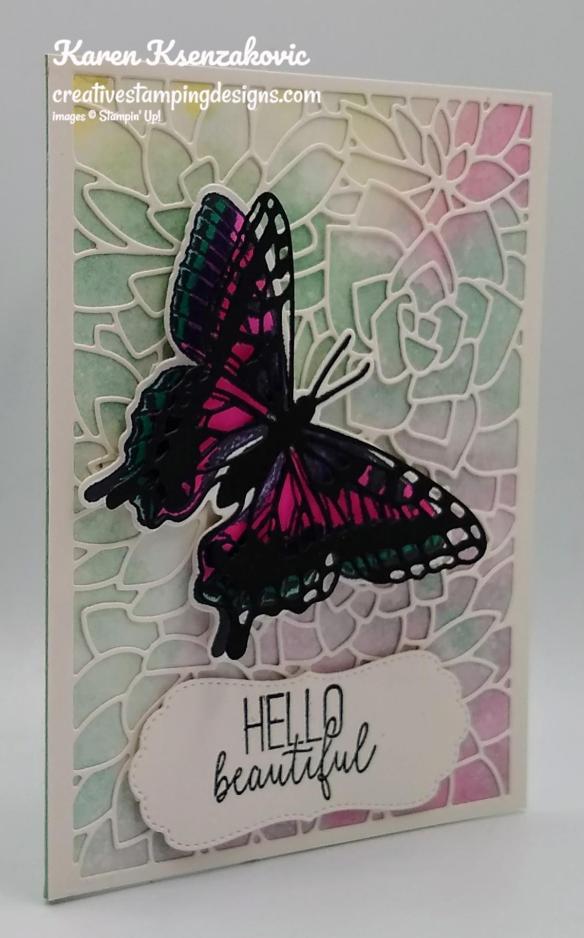
I stamped the largest butterfly from the Stampin’ Up! Butterfly Brilliance Cling Stamp in Tuxedo Black Ink on a panel of Basic White cardstock. I cut the butterfly out using my Brilliant Wings Dies. I colored the butterfly in using my Bermuda Bay, Highland Heather and Magenta Madness Stampin’ Blends Markers. From a panel of Basic Black cardstock I cut the largest detailed butterfly using the Brilliant Wings Dies and adhered it to the colored butterfly using Multipurpose Liquid Glue just on the butterfly body and fluffed the wings out. I adhered the butterfly to the card front using Stampin’ Dimensionals.
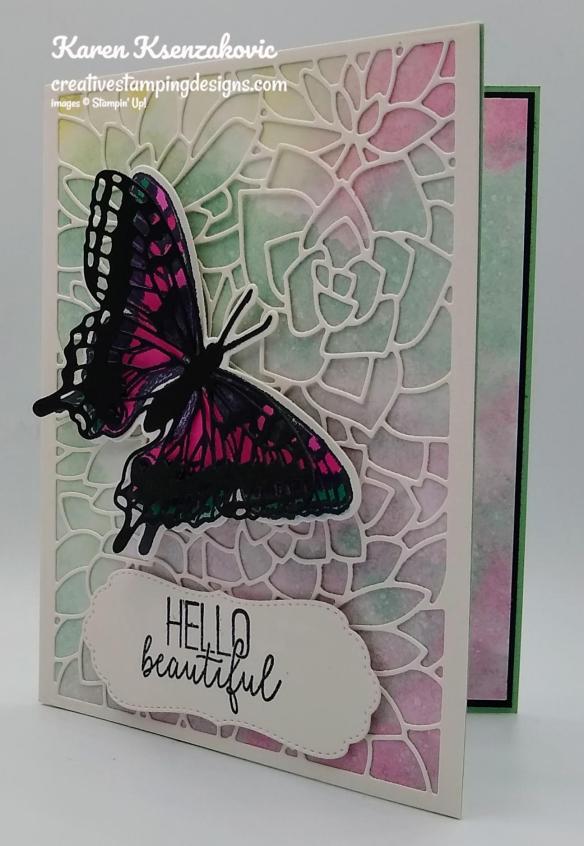
On a panel of Shimmery White cardstock I stamped the sentiment from the Stampin’ Up! Butterfly Gala Photopolymer Stamp Set in Tuxedo Black Ink. I immediately sprinkled it with my Clear Stampin’ Emboss Powder and set it using my Heat Tool. I cut the sentiment out using the Potted Succulents Dies and adhered it to the card front using Stampin’ Dimensionals.
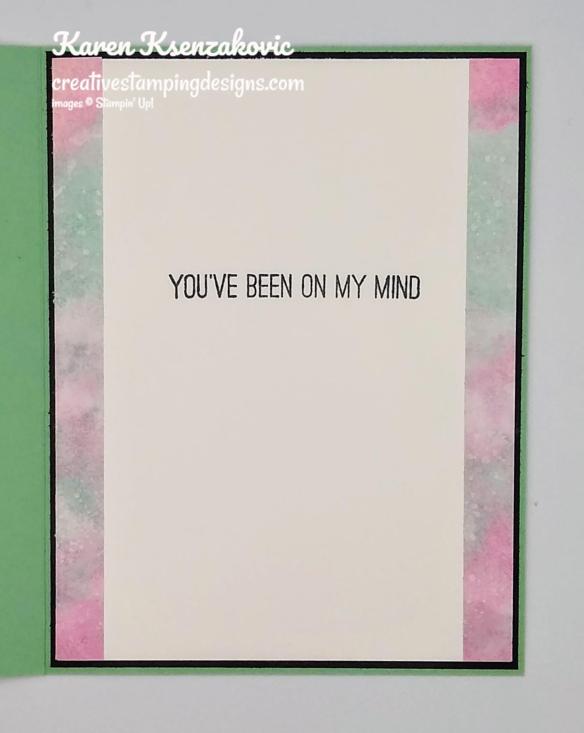
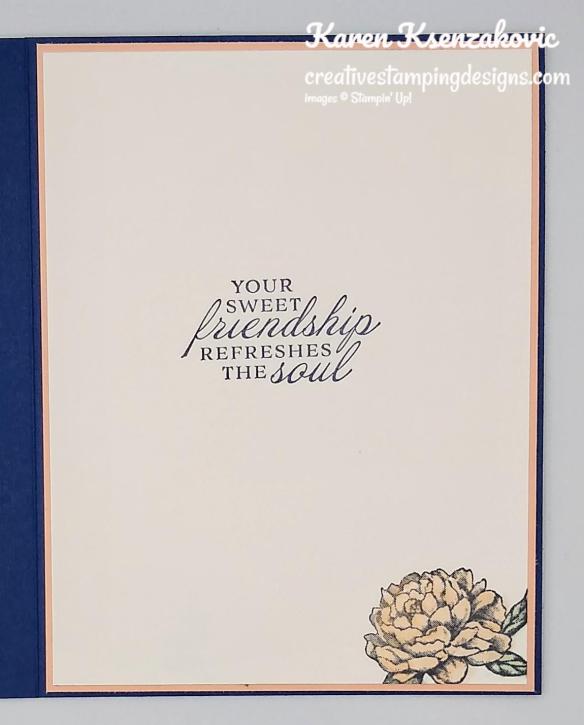
On the inside I stamped the sentiment from the Butterfly Gala stamp set in Tuxedo Black Ink in the center of a Basic White panel. I adhered 2 strips of Butterfly Bijou DSP to either side of the panel using Stampin’ Seal. I adhered the Basic White panel to a Basic Black mat using Stampin’ Seal and then to the inside of the Mint Macaron card base using Multipurpose Liquid Glue.
To complete my card I adhered a strip of Butterfly Bijou DSP to the envelope front and a panel to the envelope flap.
Thank you for visiting by my blog today. I hope you liked my card and will give it a try. Happy Stamping!!

****************************************************************************************************

Join me today at 4pm on my Facebook Live.

I’m planning to go live on my Facebook page with a project today at 4:00pm ET.  Please join me to see what card I will be making today.

*********************************************************************************************************

If you need any stamping supplies, I’d love to be your Demonstrator. Just click HERE to go directly to my online store or drop me an email if you have any questions. 

MY CURRENT HOST CODE IS: 2QRN664Q

Use this host code when you order $50 or greater and receive a free gift from me! If your order is over $150, please do not use this code, but you’ll still get the free gift. The free gift is your choice of any 1 item valued up to $10.00 from the 2020-2021 Annual Catalog or the January-June 2021 Mini Catalog!   For any orders $50 or more I will also send you my monthly class tutorials.  Click HERE or go to my Customer Rewards for more details and to see what this months tutorials are.

 Click HERE to shop the clearance rack.

Please remember to use my current Host Code and make sure that you can see my name on the final checkout page listed as your Demonstrator when you order so that you know that you’re ordering with me and you’ll get my rewards! 

Happy Stamping, Karen!

*********************************************************************************************************

So Cool

Subscribe March 11 – April 10

  • The So Cool Paper Pumpkin Kit is a little taste of summer fun, with enough supplies to make 12 colorful, shaped cards with coordinating envelopes. Six card bases are popsicle shaped, the other six are semicircles: three watermelons and three rainbows. All of the cards are splashed with cheerful, vivid watercolor images. The kit also includes two full-size, matching sticker sheets, die-cut accents, fun embellishments, and more.
  • This kit was designed with kids in mind, as a way to spark their creative imagination and introduce them to papercrafting.
  • The So Cool Kit makes a great gift! It’s an even better way to enjoy some quality time with those special little ones in life.
  • Even though the So Cool Kit was designed with kids in mind, these fun-shaped cards, featuring vivid watercolors, are versatile enough to gift to kids of all ages—the young in years and the young at heart. They’re a great way to send some “sunshine in a card!” Who wouldn’t love that?
  • The kit’s exclusive So Cool Stamp Set is versatile, offering sentiments that can be used for multiple occasions such as birthdays, congrats, cheer, and more! It’s a great addition to any crafter’s collection.

Details

  • Kit includes enough supplies to make 12 fresh, fun-shaped cards—6 popsicles and 6 blank semicircles to color—and coordinating envelopes. Kit includes card bases, 2 full sticker sheets, decorative die-cut pieces, embellishments, and more.
  • Envelope size: 4-1/2″ x 5-3/4″ (11.4 x 14.6 cm)
  • Coordinating colors: Blackberry Bliss, Bermuda Bay, Bumblebee, Cinnamon Cider, Old Olive, Terracotta Tile
  • Coordinates with the Ice Cream Corner Suite from our January–June 2021 Mini Catalog.

Subscribe to the April Paper Pumpkin Kit between 11 March and 10 April at paperpumpkin.com!

Note: Supplies may be limited toward the end of the subscription period.

THERE’S MORE TO LOVE IN THE COORDINATING ICE CREAM CORNER SUITE!

154567

154567
ICE CREAM CORNER DESIGNER SERIES PAPER

Keep the creative fun going by pairing the So Cool Kit with the Ice Cream Corner Designer Series Paper (154567) featured in our 2021 January–June Mini Catalog. It’s a great way to use the kit’s stamps, ink, stickers, and more to further indulge your craving for summer fun. Plus, the paper is part of the matching Ice Cream Corner Suite, so there’s virtually no end to the possibilities!

Coordinating colors: Bermuda Bay, Blackberry Bliss, Cinnamon Cider, Old Olive, Petal Pink, Pool Party, Purple Posy, So Saffron, Soft Sea Foam, Terracotta Tile

Click this link to view the suite and start shopping.

*********************************************************************************************************

Available Now!!!
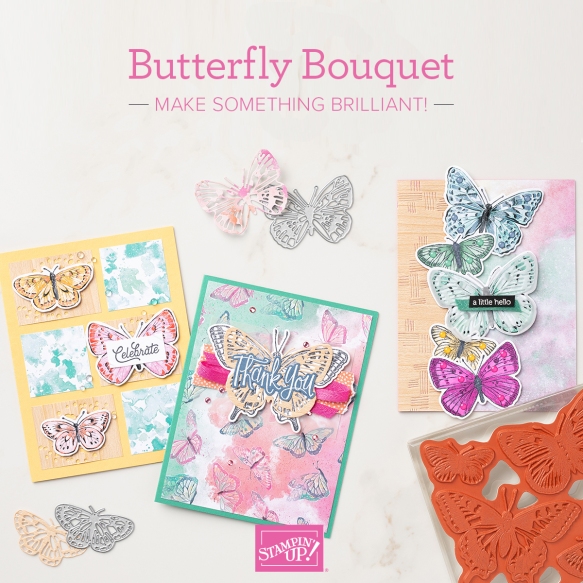
Bring in the beauty of nature with the artistic designs of the Butterfly Brilliance Bundle and coordinating designer series paper, along with textured specialty paper that will put a pop of brilliance on every project. The Butterfly Brilliance Collection will be available March2 — May 3, 2021.

*********************************************************************************************************

The 2019-2021 In-Colors will be retiring soon. See the complete list of items in my online store Here.

*********************************************************************************************************

Card stock cuts for this project:

  • Basic Black Cardstock 3 3/4″ X 3″ (detailed butterfly), 4 1/8″ X 5 3/8″ (inner liner mat)
  • Basic White Cardstock 3 3/4″ X 3″ (butterfly), 4″ X 5 1/4″ (inner liner)
  • Mint Macaron Cardstock 8 1/2″ X 5 1/2″ (card base scored and folded at 4 1/4″)
  • Shimmer White Cardstock 4 1/4″ X 5 1/2′ (card front), 1 1/2″ X 4 1/4″ (sentiment)
  • Butterfly Bijou Designer Series Paper 4 1/4″ X 5 1/2″ (card front), 2 – 1/2″ X 5 1/4″ (inner liner strips), 1/4″ X 6″ (envelope), 2 1/2″ X 6′ (envelope)

*********************************************************************************************************

Product List

Stampin’ Up Friend Like You Inside Out card for Fun Fold Friday

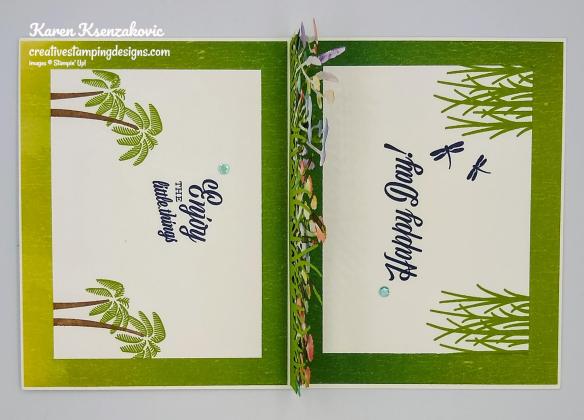
Good Friday morning my stamping friends and welcome to my Fun Fold Friday. How was everyone’s week? Are you ready for the weekend? I’ll be working both days this weekend again. Saturday at the hardware store and Sunday at the dog bakery. Of course it’s suppose to be a beautiful weekend so I’m sure both places will be crazy busy.

Today’s card I made on my Facebook Live video on Wednesday. If you were able to join me or watched the replay, thank you. If you’d like to watch my video and stamp along, the measurements are below along with the links to my Facebook page and my YouTube channel. Here’s my card for today.

I used the Stampin’ Up! Friend Like You Photopolymer Stamp Set along with the Artistry Blooms Designer Series Paper for my card today.

I started by adhering a panel of Artistry Blooms DSP to a Night of Navy mat using Stampin’ Seal. I stamped the sentiment from the Friend Like You stamp set in Granny Apple Green Ink on a panel of Basic White cardstock which I cut using the Tasteful Labels Dies. I stamped the dragonfly image from the Friend Like You stamp set in Night of Navy Ink on the side of the sentiment. I adhered the sentiment to the card front using Stampin’ Dimensionals. I added a few Artistry Blooms Adhesive-Backed Sequins to the card front. I tied a small bow using the 1/8″ Night of Navy ribbon from the Playing With Patterns Ribbon Combo Pack and adhered it to the sentiment using a Glue Dot.

For the card base I scored a 9 1/2″ X 5 1/2″ panel of Thick Basic White cardstock at 4 1/4″, 4 3/4″ and 5 1/4″. I folded the card base in half on the 4 3/4″ score line. I folded the card base back on the 4 1/4″ & 5 1/4″ score lines. I adhered the center together using Tear & Tape.

On one side of the inside (which will be the outside), I adhered a panel of Artistry Blooms DSP using Multipurpose Liquid glue. On a panel of Basic White cardstock I stamped the sentiment from Friend Like You stamp set in Night of Navy Ink in the center of the panel. I stamped the grass image from the Friend Like You stamp set in Granny Apple Green Ink on the bottom of the panel. I stamped the dragonfly mage from the Friend Like You stamp set in Night of Navy Ink. I adhered the Basic White panel on top of the Artistry Blooms DSP using Stampin’ Seal.

On the other side of the inside I adhered another panel of Artistry Blooms DSP using Multipurpose Liquid Glue. On a panel of Basic White cardstock I stamped the sentiment from the Friend Like You stamp set in Night of Navy Ink. I stamped the palm tree image from the Friend Like You stamp set on the bottom of the panel using Soft Suede and Granny Apple Green Ink. I adhered the Basic White panel on top of the Artistry Blooms DSP using Stampin’ Seal.

Using my Friendly Silhouette Dies and cut 2 of the floral dies from a panel of Basic White cardstock and one of the cattail dies from a panel of Granny Apple Green cardstock. I colored the cattails in using my Soft Suede Stampin’ Blends Markers. I colored the floral dies in using my Bermuda Bay, Calypso Coral, Daffodil Delight, Flirty Flamingo, Granny Apple Green, Highland Heather, Poppy Parade and Seaside Spray Stampin’ Blends Markers. I adhered the cattail die behind one of the floral dies using Glue Dots. I adhered the floral die to one side of the raised cardstock using Multipurpose Liquid glue. I adhered the double die to the back side of the raised cardstock using Multipurpose Liquid Glue making sure it is facing forward. I added a couple Artistry Blooms Adhesive-Backed Sequins to both of the Basic White panels by the sentiments.

To finish my card I decorated a Basic White Medium Envelope. I stamped the palm trees and dragonflies images from the Friend Like You on the envelope front in Granny Apple Green, Night of Navy and Soft Suede Inks. I adhered a panel of the Artistry Blooms DSP to the envelope flap.

Thank you for stopping by my blog today. I hope you liked my card and will give it a try. The list of measurements are below if you’d like to stamp along while watching the video. You can watch my video on my Facebook page Here.

You can also view the video on my YouTube channel  Here. Happy Stamping!!

*********************************************************************************************************

If you need any stamping supplies, I’d love to be your Demonstrator. Just click HERE to go directly to my online store or drop me an email if you have any questions. 

MY CURRENT HOST CODE IS: 2QRN664Q

Use this host code when you order $50 or greater and receive a free gift from me! If your order is over $150, please do not use this code, but you’ll still get the free gift. The free gift is your choice of any 1 item valued up to $10.00 from the 2020-2021 Annual Catalog or the January-June 2021 Mini Catalog!   For any orders $50 or more I will also send you my monthly class tutorials.  Click HERE or go to my Customer Rewards for more details and to see what this months tutorials are.

 Click HERE to shop the clearance rack.

Please remember to use my current Host Code and make sure that you can see my name on the final checkout page listed as your Demonstrator when you order so that you know that you’re ordering with me and you’ll get my rewards! 

Happy Stamping, Karen!

*********************************************************************************************************

Available Now!!!

Bring in the beauty of nature with the artistic designs of the Butterfly Brilliance Bundle and coordinating designer series paper, along with textured specialty paper that will put a pop of brilliance on every project. The Butterfly Brilliance Collection will be available March2 — May 3, 2021.

*********************************************************************************************************

The 2019-2021 In-Colors will be retiring soon. See the complete list of items in my online store Here.

*********************************************************************************************************

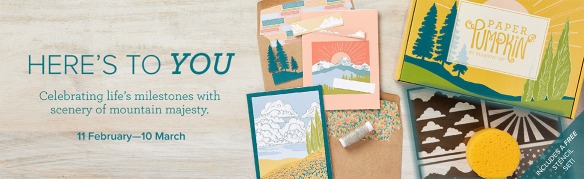
Here’s To You

Subscribe February11th – March 10th

Three cheers for mountain air, a sky filled with sunshine, and finding joy in life’s journey! Adventure awaits inside this month’s majestic, mountain-themed kit. With enough elements and embellishments to create eight cards and coordinating envelopes, the Here’s to You Paper Pumpkin Kit is the perfect pick for celebrating life’s little moments and mountain-high milestones!

What makes March’s kit one-of-a-kind? The spectacular set of four free stencils—and a stamping sponge—that you’ll find inside! Pair this pack of stunning stencils with the kit’s contents to stamp a springtime scene, then store the set to stamp for any season in the future. Clean up your binoculars and dust off your hiking boots—the Here’s to You Paper Pumpkin Kit is ready to lead you on an excursion to explore your creativity!

ABOUT THE MARCH KIT

Details

  • Kit contains enough supplies to create 8 cards—4 each of 2 designs—and coordinating envelopes. The kit’s contents include printed card bases, die-cut paper pieces, embellishments, adhesive, and more!
  • Card size: 4-1/4″ x 5-1/2″ (10.8 x 14 cm)
  • Envelope size: 4-1/2″ x 5-3/4″ (11.4 x 14.6 cm)
  • Coordinating colors: Bumblebee, Calypso Coral, Old Olive, Petal Pink, Pretty Peacock, Seaside Spray
  • Includes four free stencils and a stamping sponge!
  • Arrives in a cute and collectible box.

Subscribe to the March 2021 Paper Pumpkin Kit between 11 February and 10 March at paperpumpkin.com!

Note: Supplies may be limited toward the end of the subscription period.

*********************************************************************************************************

Card stock cuts for this project:

  • Basic White Cardstock 4″ x 2 1/4″ (sentiment), 2 – 3 1/4″ X 4 1/2″ (inner liners), 2 – 2 1/2″ X 6″ (floral die)
  • Granny Apple Green Cardstock 2 1/2″ X 6″ (cattail die)
  • Night of Navy Cardstock 4 1/8″ X 5 3/8″ (card front mat)
  • Thick Basic White Cardstock 9 1/2″ X 5 1/2″ (card base scored and folded at 4 1/4″, 4 3/4″ & 5 1/4″)
  • Artistry Blooms Designer Series Paper 4″ X 5 1/4″ (card front), 2 – 4 1/8″ X 5 3/8″ (inner liners), 2 – 3/8″ x 5 3/8″ (top pieces of card base ), 2 1/2″ X 6″ (envelope flap)

*********************************************************************************************************

Product List

Paper Snips

$10.00

Stampin’ Up! Flowering Cactus Friendship Card

Good Tuesday morning my stamping friends. How has everyone’s week started off? Before I get to my card for today, I want to wish my very special fur baby a Happy 13th Birthday. I ordered her a special birthday cupcake from the Hungry Hound (one of my other jobs). She’ll be getting that later tonight after she eats her dinner 😉

This was 2008 when we first got Jasmine. Little girl with big paws.
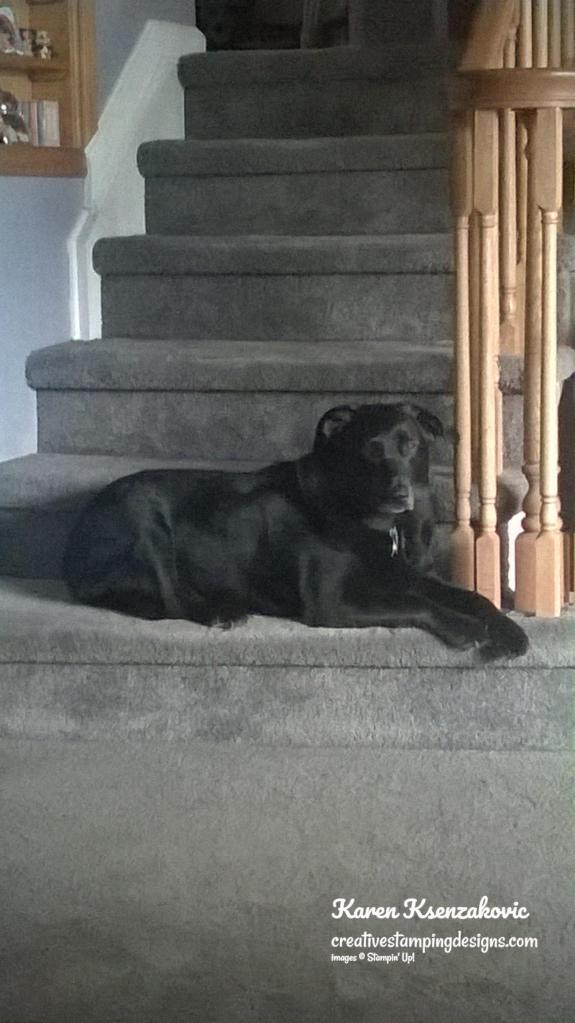
She used to love laying on the last step watching everything/everyone go by
One of her favorite places to lay during the spring/summer
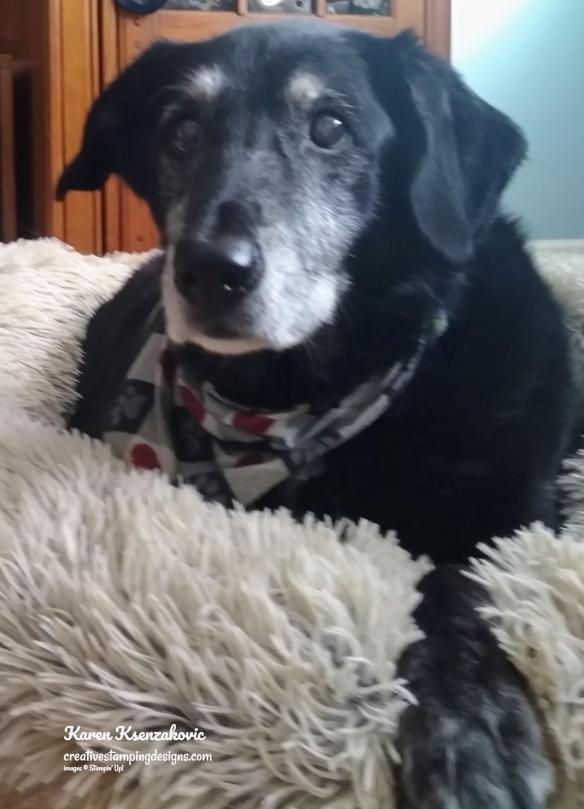
Her most recent picture in her new bed. She never liked beds till this year

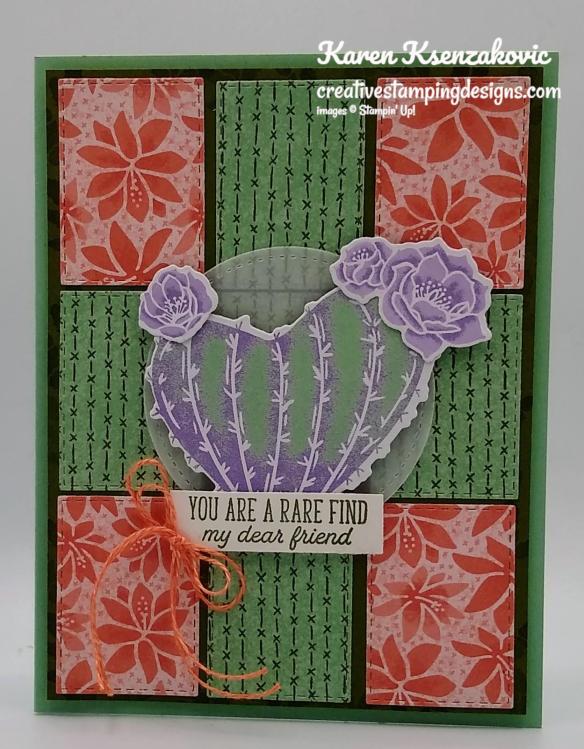
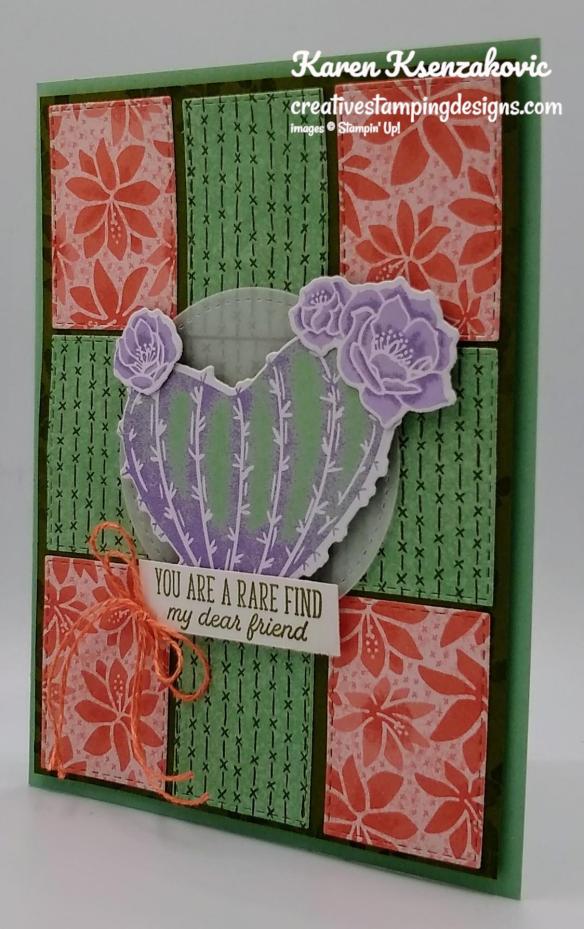
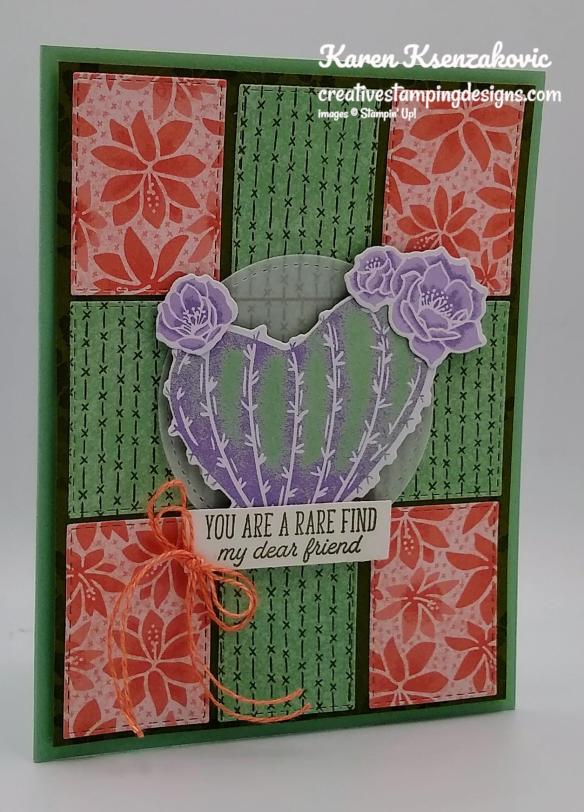
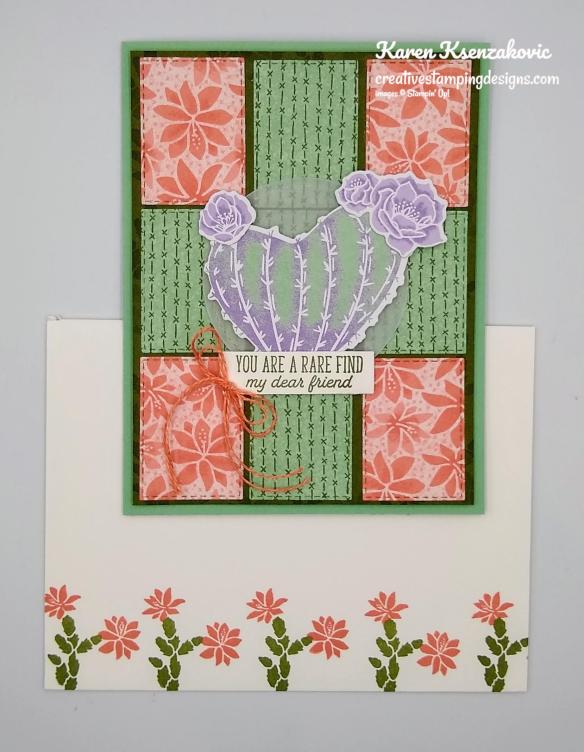
Ok, on to my card for today. I used one of my favorite sets from the January-June 2021 Mini Catalog for today’s card the Stampin’ Up! Flowering Cactus Product Medley. I don’t usually purchase the kits, but when I saw this one I just knew I needed it. Here’s my card for today.

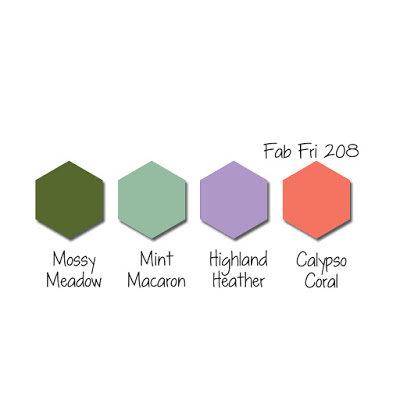
My colors are from Fab Friday Challenge #208.

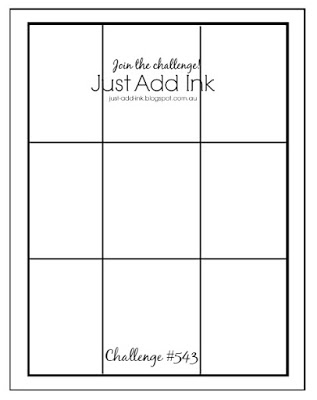
My design is from Just Add Ink Challenge #543.

I also joined in with Hand Stamped Sentiments Inspiration Challenge #358.

I started by cutting 9 rectangles from 2 different panels of the Flowering Cactus Designer Series Paper using my Stitched Rectangle Dies and adhering them to a Mossy Meadow card front using Multipurpose Liquid glue. I adhered the card front to a Mint Macaron card base using Stampin’ Dimensionals.

In the Flowering Cactus DSP there is a panel that has all of the cactus and flowers to match up with the Flowering Cactus Dies. I cut everything out since I wasn’t sure what I was planning on using . I cut a panel of Vellum using my Stitched Shapes Dies and adhered it to the center of the card front using Stampin’ Seal. I adhered one of the die cut cactus to the Vellum using Stampin’ Dimensionals. I adhered the Highland Heather cactus flowers to the cactus using Glue Dots.

On a strip of Basic White cardstock I stamped the sentiment from the Stampin’ Up! Flowering Cactus Photopolymer Stamp Set in Mossy Meadow Ink. I adhered the sentiment to the bottom of the cactus using Glue Dots and Stampin’ Dimensionals. I tied a double bow using the Calypso Coral Linen Thread, that comes in the Flowering Cactus Product Medley, and adhered it using a Glue Dot.

On the inside I stamped the sentiment from the Flowering Cactus stamp set in Mossy Meadow Ink in the center of a Basic White panel. I stamped the smallest cactus from the Flowering Cactus stamp set next to the sentiment in Mossy Meadow Ink and the flowers in Calypso Coral Ink. I adhered the Basic White panel to a Mossy Meadow mat using Stampin’ Seal and then to the inside of the Mint Macaron card base using Multipurpose Liquid Glue.

To finish my card I decorated a Basic white Medium Envelope. I stamped the smallest cactus from the Flowering Cactus stamp set across the bottom front of the envelope in Mossy Meadow and Calypso Coral Inks. I adhered a panel of the Flowering Cactus DSP to the envelope flap.

Thank you for stopping by my blog today. I hope you liked my card and will give it a try. Happy Stamping!!

*********************************************************************************************************

If you need any stamping supplies, I’d love to be your Demonstrator. Just click HERE to go directly to my online store or drop me an email if you have any questions. 

MY CURRENT HOST CODE IS: 2QRN664Q

Use this host code when you order $50 or greater and receive a free gift from me! If your order is over $150, please do not use this code, but you’ll still get the free gift. The free gift is your choice of any 1 item valued up to $10.00 from the 2020-2021 Annual Catalog or the January-June 2021 Mini Catalog!   For any orders $50 or more I will also send you my monthly class tutorials.  Click HERE or go to my Customer Rewards for more details and to see what this months tutorials are.

 Click HERE to shop the clearance rack.

Please remember to use my current Host Code and make sure that you can see my name on the final checkout page listed as your Demonstrator when you order so that you know that you’re ordering with me and you’ll get my rewards! 

Happy Stamping, Karen!

*********************************************************************************************************

Available Now!!!

Bring in the beauty of nature with the artistic designs of the Butterfly Brilliance Bundle and coordinating designer series paper, along with textured specialty paper that will put a pop of brilliance on every project. The Butterfly Brilliance Collection will be available March2 — May 3, 2021.

*********************************************************************************************************

The 2019-2021 In-Colors will be retiring soon. See the complete list of items in my online store Here.

*********************************************************************************************************

Here’s To You

Subscribe February11th – March 10th

Three cheers for mountain air, a sky filled with sunshine, and finding joy in life’s journey! Adventure awaits inside this month’s majestic, mountain-themed kit. With enough elements and embellishments to create eight cards and coordinating envelopes, the Here’s to You Paper Pumpkin Kit is the perfect pick for celebrating life’s little moments and mountain-high milestones!

What makes March’s kit one-of-a-kind? The spectacular set of four free stencils—and a stamping sponge—that you’ll find inside! Pair this pack of stunning stencils with the kit’s contents to stamp a springtime scene, then store the set to stamp for any season in the future. Clean up your binoculars and dust off your hiking boots—the Here’s to You Paper Pumpkin Kit is ready to lead you on an excursion to explore your creativity!

ABOUT THE MARCH KIT

Details

  • Kit contains enough supplies to create 8 cards—4 each of 2 designs—and coordinating envelopes. The kit’s contents include printed card bases, die-cut paper pieces, embellishments, adhesive, and more!
  • Card size: 4-1/4″ x 5-1/2″ (10.8 x 14 cm)
  • Envelope size: 4-1/2″ x 5-3/4″ (11.4 x 14.6 cm)
  • Coordinating colors: Bumblebee, Calypso Coral, Old Olive, Petal Pink, Pretty Peacock, Seaside Spray
  • Includes four free stencils and a stamping sponge!
  • Arrives in a cute and collectible box.

Subscribe to the March 2021 Paper Pumpkin Kit between 11 February and 10 March at paperpumpkin.com!

Note: Supplies may be limited toward the end of the subscription period.

*********************************************************************************************************

Card stock cuts for this project:

  • Basic White Cardstock 1/2″ X 1 3/4″ (sentiment), 4″ X 5 1/4″ (inner liner)
  • Mint Macaron Cardstock 8 1/2″ x 5 1/2″ (card base scored and folded at 4 1/4″)
  • Mossy Meadow Cardstock 4″ X 5 1/4″ (card front), 4 1/8″ X 5 3/8″ (inner liner mat)
  • Vellum Paper 3″ X 3″
  • Flowering Cactus Designer Series Paper 2″ X 6″ panel, 3 1/2″ X 6″ panel, 6″ X 6″ panel, 2 1/2″ X 6′ (envelope flap)

*********************************************************************************************************

Product List

Stampin’ Up! Berry Blessings

Good Tuesday morning my fellow stampers. How has everyone’s week started off? Yesterday I went to work and they said rain, so I brought my umbrella. My office is in the center of the store and I don’t have any windows. After a couple hours in the back, I came out and to my surprise there were about 3″ of snow covering the parking lot and sidewalks. I don’t think this snow is ever going to stop and go away. With the sun shining the other day, even though it was cold, it looked like spring was trying to make an appearance.

I used a Sale-A-Bration Bundle for today’s card that you can earn free with a qualifying order, but only until Sunday February 28th. Here’s my card for today.

I used the Stampin’ Up! Berry Blessings Photopolymer Stamp Set that is bundled with the Berry Delightful Designer Series Paper as a Sale-A-Bration item. You can earn this bundle with a $100 order and it pairs up wonderfully with the Stampin’ Up! Sweet Strawberry Bundle.

I started by adhering a panel of the Berry Delightful DSP to a Balmy Blue mat using Stampin’ Seal and then to a Pacific Point card base using Stampin’ Seal.

Using the Berry Blessings stamp set, on a panel of Basic White cardstock I stamped the outline leaves image in Shaded Spruce Ink a few times. I stamped the leaves fill image in Granny Apple Green Ink over the outline image. I stamped the blueberry outline image in Pacific Point Ink matching up the berries and leaves. I stamped the berry fill image over the outline image in Balmy Blue Ink. I cut the panel out using my Stitched So Sweetly Dies. I adhered the artwork to a Pacific Point mat which I cut using the larger die from the Stitched So Sweetly Dies, using Stampin’ Seal. I adhered the matted artwork to the card front using Stampin’ Dimensionals.

On a strip of Basic White cardstock I stamped the sentiment from the Berry Blessings stamp set in Pacific Point Ink and cut it into a banner using the Banner Pick A Punch. I adhered the sentiment to the card front using Multipurpose Liquid Glue. I added a few Blue Adhesive-Backed Gems to the card front.

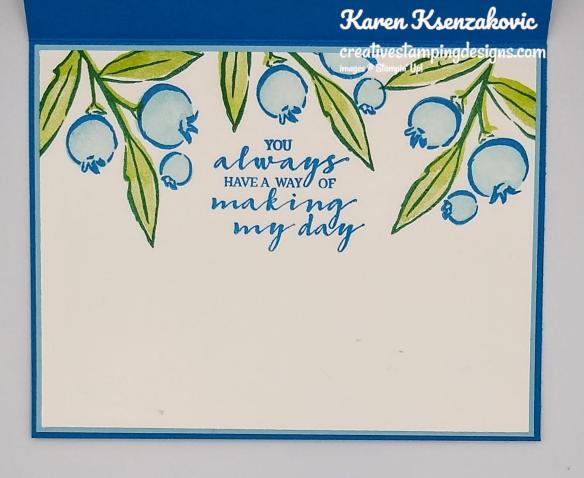
On the inside I stamped the sentiment from the Berry Blessings stamp set in Pacific Point Ink in the center of a Basic White panel. I stamped the outline leaves image from the Berry Blessings stamp set in Shaded Spruce Ink across the top of the panel. I stamped the leaves fill image in Granny Apple Green Ink over the outlined image. I stamped the outline blueberry image in Pacific Point Ink and the blueberry fill image in Balmy Blue Ink over the outlined image. I adhered the Basic White panel to a Balmy Blue mat using Stampin’ Seal and then to the inside of the Pacific Point card base using Multipurpose Liquid Glue.

To finish my card I decorated a Basic White Medium Envelope. I stamped the leaves and blueberry images the same as I did for the card on the envelope front. I adhered a panel of the Berry Delightful DSP to the envelope flap.

Thank you for stopping by my blog today. I hope you liked my card and will give it a try. Happy Stamping!!

*********************************************************************************************************

If you need any stamping supplies, I’d love to be your Demonstrator. Just click HERE to go directly to my online store or drop me an email if you have any questions. 

MY CURRENT HOST CODE IS: 9BCVNW9D

Use this host code when you order $50 or greater and receive a free gift from me! If your order is over $150, please do not use this code, but you’ll still get the free gift. The free gift is your choice of any 1 item valued up to $10.00 from the 2020-2021 Annual Catalog or the January-June 2021 Mini Catalog!   For any orders $50 or more I will also send you my monthly class tutorials.  Click HERE or go to my Customer Rewards for more details and to see what this months tutorials are.

 Click HERE to shop the clearance rack.

Please remember to use my current Host Code and make sure that you can see my name on the final checkout page listed as your Demonstrator when you order so that you know that you’re ordering with me and you’ll get my rewards! 

Happy Stamping, Karen!

*********************************************************************************************************

Final Week of Sale-A-Bration!! Only 5 Days!!

Have you gotten all the FREE items you wanted!

This image has an empty alt attribute; its file name is 122020_sab_jan_us-en.jpg

Stampin’ Up!’s Sale-a-bration event is happening now!!  It will look a little different…it runs from January 5 through February 28 and there will be a second Sale-a-bration event later this year, but the shop, host and join benefits are still a part of the event!!

During Sale-A-Bration, you can earn FREE products. For every $50 or $100 you spend, you can choose between two purchasing levels of free products!  There are 8 free products available to pick from at the $50 level and 2 free products to pick from at the $100 level!

Stampin’ Up! is offering an exclusive host stamp set called Punch Party and you can get it for FREE with an order of $300 or greater placed during Sale-a-bration or by hosting a workshop with orders totaling $300 or greater during Sale-a-bration!  You can see the stamp set below.  You can read more details and find the list of punches that it coordinates with on page 17 in the Sale-a-bration Brochure.

This image has an empty alt attribute; its file name is stampin-up-party-punch-photopolymer-stamp-set-creativestampingdesigns.com_-2.jpg

If you’re interested in setting up a host code for yourself to see if you can collect orders totaling $300+ from yourself and your stamping friends, email me at creativestampingdesigns@gmail.com. I’d be happy to get you set up.

*********************************************************************************************************

Coming Soon!!!

Bring in the beauty of nature with the artistic designs of the Butterfly Brilliance Bundle and coordinating designer series paper, along with textured specialty paper that will put a pop of brilliance on every project. The Butterfly Brilliance Collection will be available March2 — May 3, 2021. Want it early??? This could be part of your starter kit for joining Stampin’ Up!

Final Week to Join and get Your 5 FREE Packs of Designer Series Paper

There’s no better time to join Stampin’ Up! than during Sale-A-Bration.   Stampin’ Up! has this AMAZING offer of five packs of 6″ x 6″ Designer Series Paper from the upcoming 2021-2022 Annual Catalog with your Starter Kit if you join during Sale-a-bration! You can not buy this DSP now, so why not get it FREE!. For $99 you get to choose $125 worth of products that will ship for free and Stampin’ Up! will also send you 5 packs, that’s 200 sheets of paper a $57.50 value, absolutely FREE. This offer ends February 28, 2021!!

This image has an empty alt attribute; its file name is 20201_sab_p16-2.jpg

Here are the details:

  • Starter Kit Price:  $99 + tax and it ships for free!
  • Starter Kit includes:
    • $125 in Stampin’ Up! merchandise of your choice from the current Annual Catalog, 2021 Mini Catalog or the online store (includes clearance rack items!).
    • 5 free packs of 6″ x 6″ Designer Series Paper (200 sheets in total!!) from the upcoming 2021-2022 Annual Catalog.  The packs are: Brights, Neutrals, Regals, Subtles & 2020-2022 In Colors…that’s $57.50 in free designer paper with your kit!!
    • 8 Annual Catalogs, 8 Mini Catalogs and 8 Sale-a-bration Brochures and a few additional business supplies.
  • You’ll get the following perks from Stampin’ Up! when you join:
    • At least a 20% discount on everything that you order as a Demonstrator!
    • Early peeks at new release items and preorders for new items for about a month before they are available to purchase!
    • The ability to attend Demonstrator exclusive Stampin’ Up! events!
    • No pressure to sell to anyone, hold classes or workshops or run a business.  You can simply order for yourself and get the discount!  And as long as you have at least $300 in sales per quarter, you’ll continue as an active Demonstrator and continue to get the discount.  If you aren’t able to maintain the $300 per quarter minimums, you simply go back to being a customer, no commitment required and no penalty if you decide that being a Demonstrator isn’t right for you.

Whether you’d like to start a business or would simply like to be a hobby demonstrator and get the great discount, I am here to help support you in any way that I can!

*********************************************************************************************************

The 2019-2021 In-Colors will be retiring soon. Why not stock up now and earn some free Sale-A-Bration items. See the complete list of items in my online store Here.

*********************************************************************************************************

Here’s To You

Subscribe February11th – March 10th

Three cheers for mountain air, a sky filled with sunshine, and finding joy in life’s journey! Adventure awaits inside this month’s majestic, mountain-themed kit. With enough elements and embellishments to create eight cards and coordinating envelopes, the Here’s to You Paper Pumpkin Kit is the perfect pick for celebrating life’s little moments and mountain-high milestones!

What makes March’s kit one-of-a-kind? The spectacular set of four free stencils—and a stamping sponge—that you’ll find inside! Pair this pack of stunning stencils with the kit’s contents to stamp a springtime scene, then store the set to stamp for any season in the future. Clean up your binoculars and dust off your hiking boots—the Here’s to You Paper Pumpkin Kit is ready to lead you on an excursion to explore your creativity!

ABOUT THE MARCH KIT

Details

  • Kit contains enough supplies to create 8 cards—4 each of 2 designs—and coordinating envelopes. The kit’s contents include printed card bases, die-cut paper pieces, embellishments, adhesive, and more!
  • Card size: 4-1/4″ x 5-1/2″ (10.8 x 14 cm)
  • Envelope size: 4-1/2″ x 5-3/4″ (11.4 x 14.6 cm)
  • Coordinating colors: Bumblebee, Calypso Coral, Old Olive, Petal Pink, Pretty Peacock, Seaside Spray
  • Includes four free stencils and a stamping sponge!
  • Arrives in a cute and collectible box.

Subscribe to the March 2021 Paper Pumpkin Kit between 11 February and 10 March at paperpumpkin.com!

Note: Supplies may be limited toward the end of the subscription period.

*********************************************************************************************************

Card stock cuts for this project:

  • Balmy Blue Cardstock 2 – 4 1/8″ X 5 3/8″ (card front and inner liner mats)
  • Basic White Cardstock 3″ X 4″ (artwork), 3/4″ X 2 3/4″ (sentiment), 4″ X 5 1/4″ (inner liner)
  • Pacific Point Cardstock 8 1/2″ X 5 1/2″ (card base scored and folded at 4 1/4″), 3 1/2″ X 4 1/2″ (artwork mat)
  • Berry Blessings Designer Series Paper 4″ X 5 1/4″ (card front), 2 1/2″ X 6″ (envelope flap)

*********************************************************************************************************

Product List

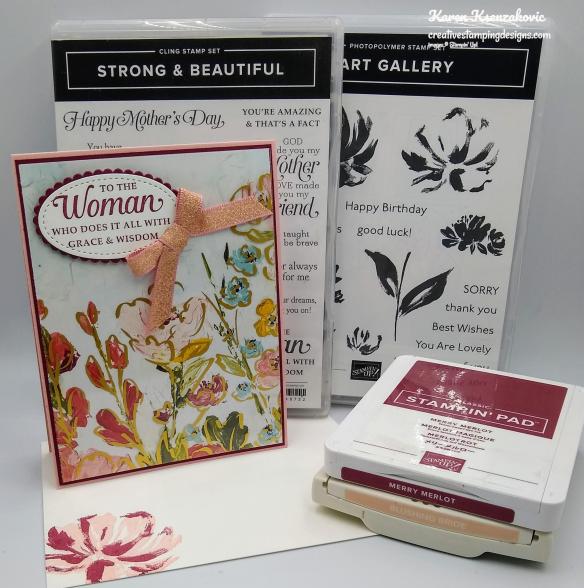
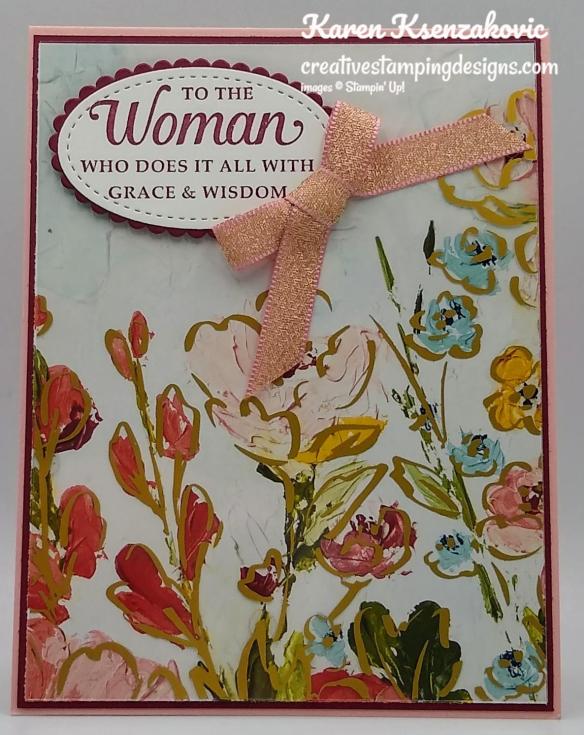
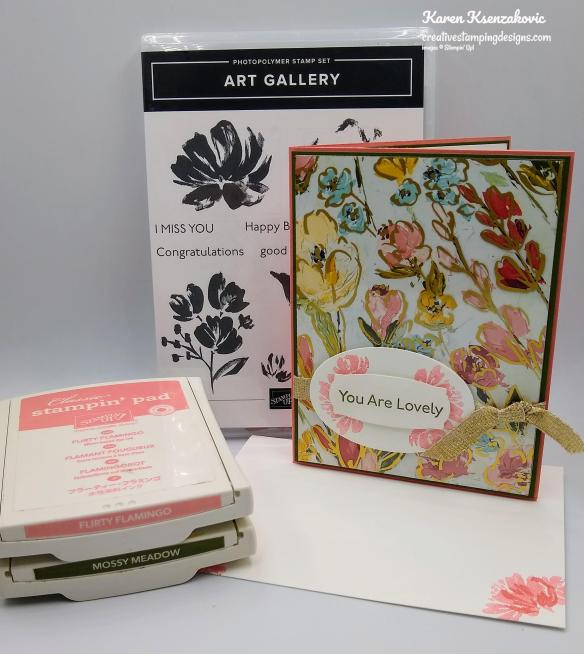
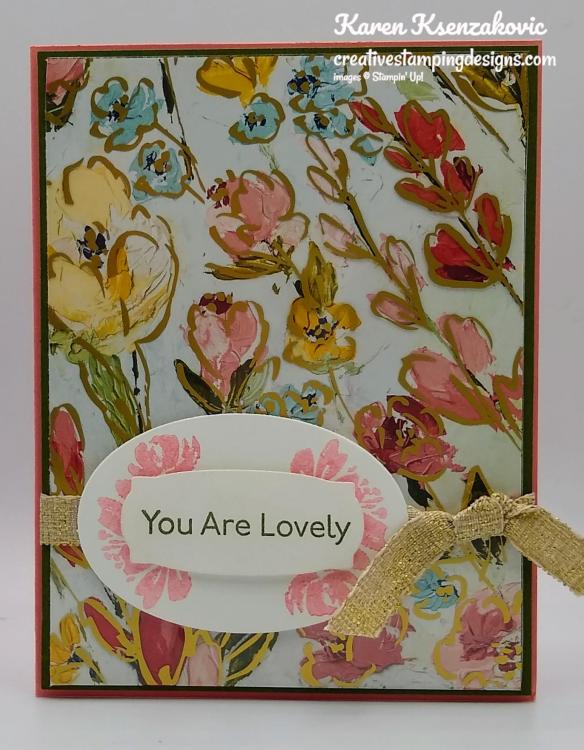
Stampin’ Up! Art Gallery Quick and Easy Card Pack

Good Saturday morning my stamping friends. How has everyone’s weekend started off? I’ll be at work all day today and tomorrow. Last I heard, we will not be getting snow this weekend, but it’s still early to tell.

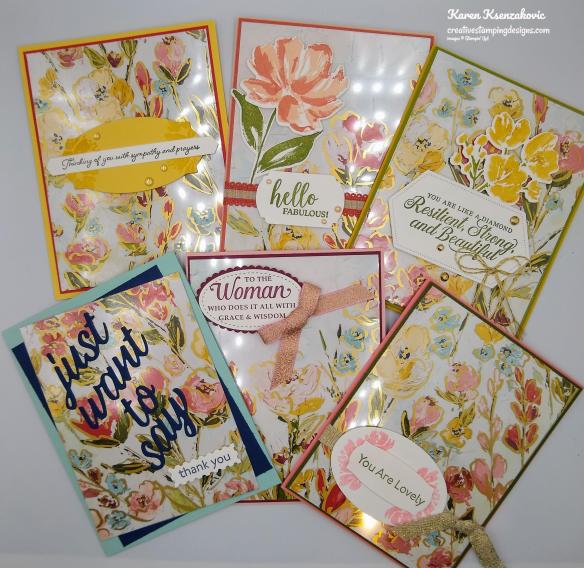
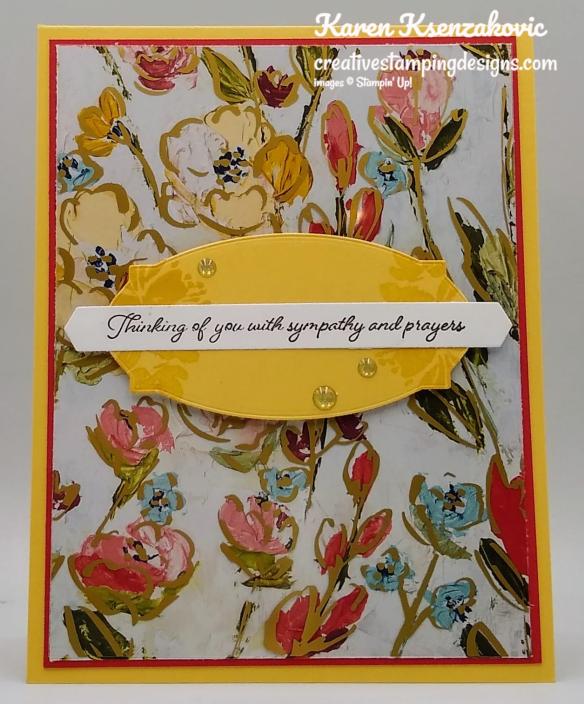
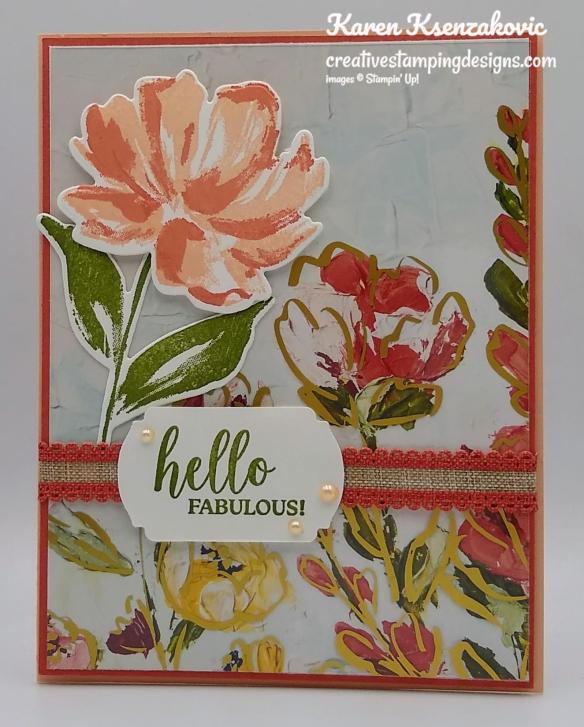
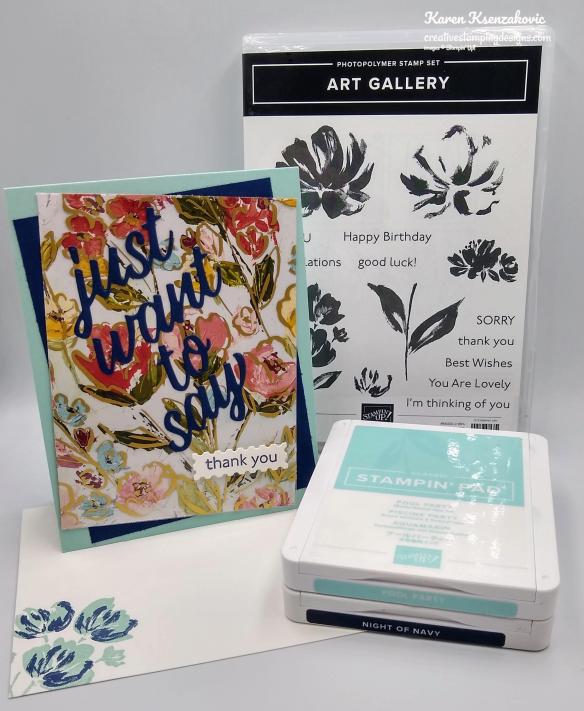
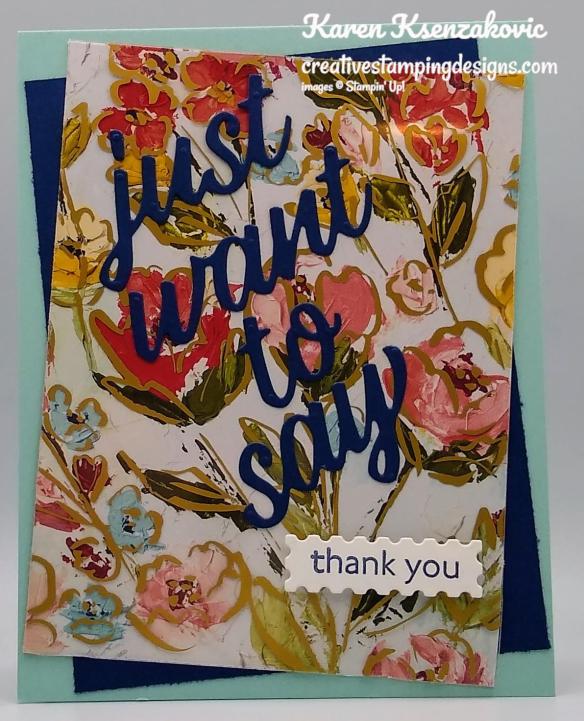
Today I have something a little different for you. I don’t have step by step instructions for you since I made a pack of cards. This would make a great gift for someone tied up with some ribbon or put in one of our Acetate Card Boxes and decorated. If you have any questions about any of the cards, please message me and I will explain how I made them. Here are the cards.

I used 1 sheet of the Fine Art Floral Designer Series Paper and 1 sheet of the Golden Garden Designer Series Acetate to make all 6 cards. I placed the acetate over the DSP, tacked it in a couple places using Glue Dots and cut 4″ X 5 1/4″ panels.

This card I used So Saffron and Poppy Parade cardstock and just did a simple layering. I stamped the sentiment from Stampin’ Up! Many Messages Cling Stamp Set in Soft Suede Ink and cut it our with the Messages Dies. Adhered it to Hippo and Friends die cut mat and adhered it to the card front.

This card I used Petal Pink and Terracotta Tile cardstock and just did a simple layering. I stamped the sentiment from Stampin’ Up! Dressed To Impress Photopolymer Stamp Set in Old Olive Ink and cut it our with the Label Me Fancy Punch and adhered it to the card front. Stamped the large flower from the Stampin’ Up! Art Gallery Photopolymer Stamp Set in Petal Pink & Terracotta Tile, stem in Old Olive and cut images out with Floral Gallery Dies.

This card I used Bumblebee and Old Olive cardstock and just did a simple layering. I stamped the sentiment from Stampin’ Up! Strong & Beautiful Cling Stamp Set in Old Olive Ink, cut it our with the Stitched Nested Labels Dies and adhered it to the card front. Stamped the flower from the Stampin’ Up! Art Gallery Photopolymer Stamp Set using my Bumblebee and Old Olive Stampin’ Write Markers and cut image out with Floral Gallery Dies.

This card I used Pool Party and Night of Navy cardstock and just did an angle layering. I stamped the sentiment from Stampin’ Up! Art Gallery Stamp Set in Night of Navy Ink, cut it out with the Floral Gallery Dies and the large sentiment out of Night of Navy cardstock and adhered them to the card front.

This card I used Blushing Bride and Merry Merlot cardstock and just did a simple layering. I stamped the sentiment from Stampin’ Up! Strong & Beautiful Cling Stamp Set in Merry Merlot Ink, cut it our with the Stitched Shapes Dies. I cut a scalloped mat from Merry Merlot cardstock using the Layering Ovals Dies, adhered the sentiment and adhered it to the card front.

This card I used Flirty Flamingo and Mossy Meadow cardstock and just did a simple layering. I stamped the sentiment from Stampin’ Up! Art Gallery Photopolymer Stamp Set in Mossy Meadow Ink, cut it our with the Messages Dies. I cut an oval mat using the Layering Ovals Dies, adhered the sentiment and adhered it to the card front.

Thank you for stopping by my blog today. I hope you liked my card pack and will try it. Happy Stamping!!

*********************************************************************************************************

If you need any stamping supplies, I’d love to be your Demonstrator. Just click HERE to go directly to my online store or drop me an email if you have any questions. 

MY CURRENT HOST CODE IS: 9BCVNW9D

Use this host code when you order $50 or greater and receive a free gift from me! If your order is over $150, please do not use this code, but you’ll still get the free gift. The free gift is your choice of any 1 item valued up to $10.00 from the 2020-2021 Annual Catalog or the January-June 2021 Mini Catalog!   For any orders $50 or more I will also send you my monthly class tutorials.  Click HERE or go to my Customer Rewards for more details and to see what this months tutorials are.

 Click HERE to shop the clearance rack.

Please remember to use my current Host Code and make sure that you can see my name on the final checkout page listed as your Demonstrator when you order so that you know that you’re ordering with me and you’ll get my rewards! 

Happy Stamping, Karen!

*********************************************************************************************************

Here’s To You

Subscribe February11th – March 10th

Three cheers for mountain air, a sky filled with sunshine, and finding joy in life’s journey! Adventure awaits inside this month’s majestic, mountain-themed kit. With enough elements and embellishments to create eight cards and coordinating envelopes, the Here’s to You Paper Pumpkin Kit is the perfect pick for celebrating life’s little moments and mountain-high milestones!

What makes March’s kit one-of-a-kind? The spectacular set of four free stencils—and a stamping sponge—that you’ll find inside! Pair this pack of stunning stencils with the kit’s contents to stamp a springtime scene, then store the set to stamp for any season in the future. Clean up your binoculars and dust off your hiking boots—the Here’s to You Paper Pumpkin Kit is ready to lead you on an excursion to explore your creativity!

ABOUT THE MARCH KIT

Details

  • Kit contains enough supplies to create 8 cards—4 each of 2 designs—and coordinating envelopes. The kit’s contents include printed card bases, die-cut paper pieces, embellishments, adhesive, and more!
  • Card size: 4-1/4″ x 5-1/2″ (10.8 x 14 cm)
  • Envelope size: 4-1/2″ x 5-3/4″ (11.4 x 14.6 cm)
  • Coordinating colors: Bumblebee, Calypso Coral, Old Olive, Petal Pink, Pretty Peacock, Seaside Spray
  • Includes four free stencils and a stamping sponge!
  • Arrives in a cute and collectible box.

Subscribe to the March 2021 Paper Pumpkin Kit between 11 February and 10 March at paperpumpkin.com!

Note: Supplies may be limited toward the end of the subscription period.

*********************************************************************************************************

Product List

Art Gallery Bundle


Floral Gallery Dies


Many Messages Bundle


Messages Die


$34.00


Gilded Gems


$7.00


Gold Glitter Enamel Dots


Pearl Basic Jewels


Hippo & Friends Dies


Label Me Fancy Punch


Layering Ovals Dies


Stitched Shapes Dies


Mini Glue Dots


$5.25


Multipurpose Liquid Glue


Stampin' Dimensionals


Stampin' Seal


$8.00


Bone Folder


$7.00


Paper Snips


$10.00


Paper Trimmer


$25.00


Clear Block Bundle


Stamparatus


$49.00

Stampin’ Up! Berry Blessings for The Happy Inkin’ Thursday Blog Hop

Good Thursday morning my stamping friends and welcome to our Happy Inkin’ Thursday Blog Hop. I hope everyone is doing well today and staying healthy. If you are hopping over from Akiko, thank you for stopping by my blog. This week we have a theme challenge. Be sure to take a moment to hop around to see everyone’s awesome projects. Here is my card for today.

I used the Free Stampin’ Up! Berry Blessings Bundle from the Sale-A-Bration! Catalog. This bundle is free with a qualifying order of $100. You get the stamp set and a full pack of Berry Delightful Designer Series Paper. Our challenge this week was to use anything from the Sale-A-Bration! Catalog

I started by adhering a panel of the Berry Delightful Designer Series Paper to a Pacific Point card base using Stampin’ Seal. I cut a panel of Pacific Point cardstock using the Ornate Borders Dies on both sides. I adhered a panel of Berry Delightful DSP to the center of the die cut panel using Stampin’ Seal. I adhered the matted panel to the card front using Multipurpose Liquid Glue.

I embossed a panel of Granny Apple Green cardstock using the Painted Texture 3D Embossing Folder and adhered it to a Pacific Point mat using Multipurpose Liquid Glue. I adhered the matted panel to the card front using Stampin’ Dimensionals.

On a panel of Basic White cardstock I stamped the outline leaf image from the Stampin’ Up! Berry Blessings Photopolymer Stamp Set in Shaded Spruce Ink. I stamped the leaf fill image in Granny Apple Green Ink over the outlined image. I stamped the blueberry outline image from the Berry Blessings stamp set in Pacific Point Ink on the leaf and the fill image in Pacific Point Ink, stamped off once, over the outline image. I stamped the sentiment from the Stampin’ Up! Sweet Strawberry Photopolymer Stamp Set in Pacific Point Ink above the blueberries. I cut the panel out using the Stitched Shapes Dies. I cut a scalloped square from a panel of Pacific Point cardstock using the Layering Squares Dies. I adhered the artwork to the scalloped square using Stampin’ Seal and then to the card front using Stampin’ Dimensionals on the top half and Glue Dots on the bottom half.

On the inside I stamped the sentiment from the Berry Blessings stamp set in Pacific Point in the center of a Basic White panel. I stamped the outlined leaf image from the Berry Blessings stamp set in Shaded Spruce Ink on the bottom of the panel. I stamped the leaf fill image over the outlined image in Granny Apple Green Ink. I stamped the outline blueberry image from the Berry Blessings stamp set in Pacific Point Ink and the blueberry fill image in Pacific Point Ink, stamping off once, over the outlined image. I adhered the Basic White panel to a Granny Apple Green mat using Stampin’ Seal and then to the inside of the Pacific Point card base using Stampin’ Seal.

To complete my card I decorated a Basic White Medium Envelope. I stamped the leaf and blueberry images from the Berry Blessings stamp set on the envelope front the same as I did for the card front and inner liner. I adhered a panel of Berry Delightful DSP to the envelope flap.

Thank you for visiting my blog today. I hope you liked my card and will give it a try. Now that you’ve seen my card, take a minute to hop through all our projects today. If you click on the Next Blog button, you’ll go to Amy’s page. Or you can just click on the names below to go directly to all their blogs! Happy Hopping!!

Amy Koenders:

Mary Deatherage:

Kristi Gray:

Jaimie Babarczy:

Sue Prather:

Akiko Sudano:

Karen Ksenzakovic: You Are Here

*********************************************************************************************************

If you need any stamping supplies, I’d love to be your Demonstrator. Just click HERE to go directly to my online store or drop me an email if you have any questions. 

MY CURRENT HOST CODE IS: C4XDWQT6

Use this host code when you order $50 or greater and receive a free gift from me! If your order is over $150, please do not use this code, but you’ll still get the free gift. The free gift is your choice of any 1 item valued up to $10.00 from the 2020-2021 Annual Catalog or the January-June 2021 Mini Catalog!   For any orders $50 or more I will also send you my monthly class tutorials.  Click HERE or go to my Customer Rewards for more details and to see what this months tutorials are.

 Click HERE to shop the clearance rack.

Please remember to use my current Host Code and make sure that you can see my name on the final checkout page listed as your Demonstrator when you order so that you know that you’re ordering with me and you’ll get my rewards! 

Happy Stamping, Karen!

*********************************************************************************************************

Bouquet of Hope

Subscribe January 11 – February 10

What is Paper Pumpkin? Paper Pumpkin is our monthly One-Stop Box™ that offers a unique variety of paper projects for subscribers of any skill level to enjoy! These thoughtfully-themed and all-inclusive craft kits encourage you to explore your creativity, try new techniques, and discover your potential in papercrafting.

Paper Pumpkin introduces you to an impressive collection of Stampin’ Up! products, from our one-of-a-kind ink pads to our eye-catching embellishments. Plus, the carefully-chosen components of each Paper Pumpkin kit highlight the unbeatable versatility and coordination our products provide! This easy and exciting way to stock up on supplies—and create small-batch projects for occasions of any kind—inspires you to continue crafting. With Paper Pumpkin, it’s simple: share what you love, and help others enjoy creativity!

The Bouquet of Hope Paper Pumpkin Kit provides enough supplies to create nine cards and coordinating envelopes. This soft, sympathetic kit includes patterned card bases, die-cut floral elements, ribbon, embellishments, and more!

The kit’s exclusive Bouquet of Hope Stamp Set features supportive sentiments centered around comfort, care, hope, and love. Such a versatile stamp set can be used throughout the year! Sadly, there is heartache in the world all around us. We all know someone who could use a heartfelt, handmade card that gives sympathy and strength during a difficult time. This kit’s cards are a must to have on-hand!

ABOUT THE FEBRUARY KIT

Details

  • Kit contains enough supplies to create 9 cards—3 each of 3 designs—and coordinating envelopes. Kit includes card bases, decorative die-cut pieces, embellishments, and more.
  • Card size: 4-1/4″ x 5-1/2″ (10.8 x 14 cm)
  • Envelope size: 4-1/2″ x 5-3/4″ (11.4 x 14.6 cm)
  • Coordinating colors: Basic Black, Bumblebee, Just Jade, Merry Merlot, Mossy Meadow, Rococo Rose
  • Coordinates with the Flower & Field Designer Series Paper, an exclusive Sale-A-Bration item.

Subscribe to the February 2021 Paper Pumpkin Kit between 11 January and 10 February at paperpumpkin.com!

Note: Supplies may be limited toward the end of the subscription period.

COORDINATING PRODUCT

155223 | Flower & Field Designer Series Paper

  • Earn this pack of paper for FREE with a purchase of $50 USD or more during Stampin’ Up!’s Sale-A-Bration promotion! 

*********************************************************************************************************

Card stock cuts for this project:

  • Basic White Cardstock 2 1/2″ X 2 1/2″ (artwork), 4″ X 5 1/4″ (inner liner )
  • Granny Apple Green Cardstock 1 1/2″ X 4″ (card front panel), 4 1/8″ X 5 3/8″(inner liner mat)
  • Pacific Point Cardstock 4 1/4″ X 11″ (card base scored and folded at 5 1/2″), 3″ x 5 1/4″ (card front dsp mat), 1 3/4″ X 4″ (card front embossed panel mat), 2 1/2″ X 2 1/2″ (artwork mat)
  • Berry Delightful Designer Series Paper 4″ X 5 1/4″ (card front), 2″ X 5 1/4″ (card front panel), 2 1/2″ X 6″ (piece for envelope flap)

*********************************************************************************************************

Product List

Stampin’ Up! CAS Quite Curvy Hello

Good Tuesday morning my fellow stampers. How has everyone’s week started off? It’s gotten a bit cold here and they are calling for snow a couple times this week, YAY!!! I don’t want that little stuff though, I want a storm that I have to stay home and craft all day.

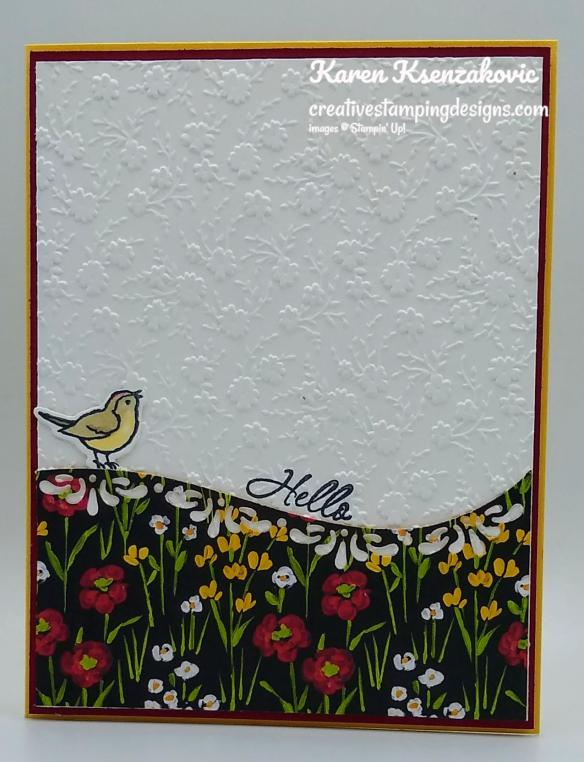
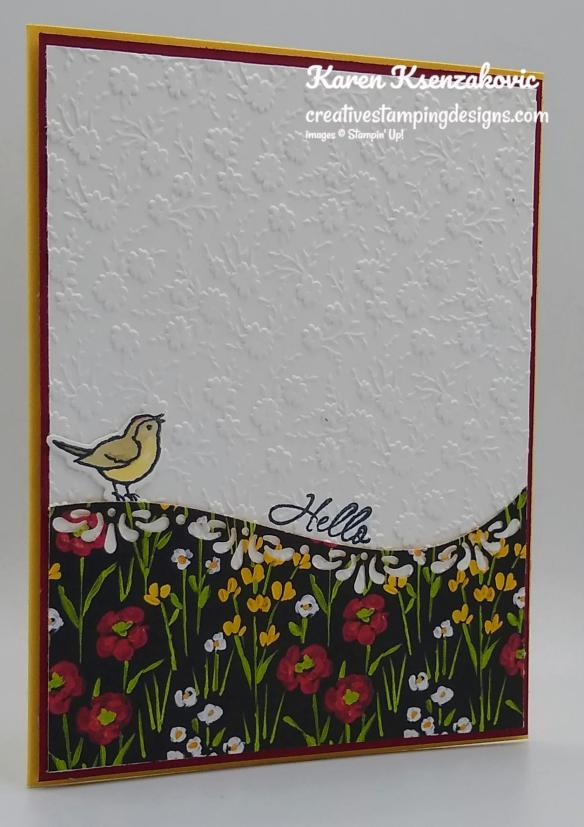
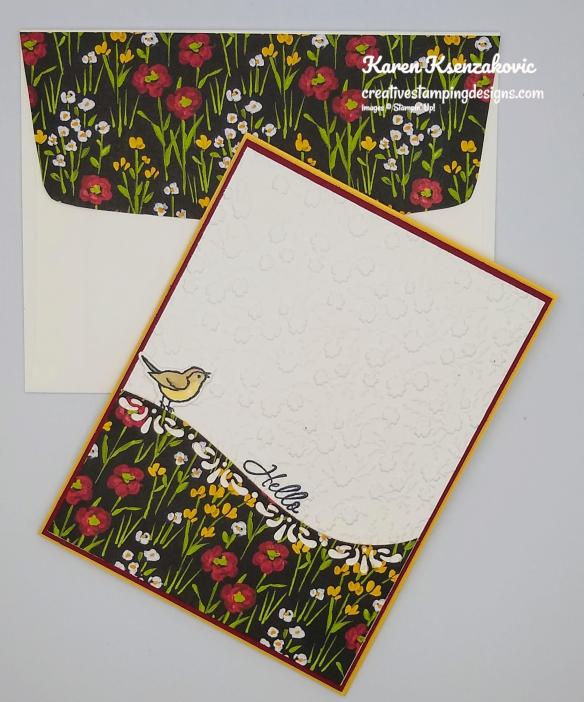
Today is my last card as a guest designer for the CAS Colours & Sketches Challenge. I’ve had a lot of fun this month designing with them. I used the Stampin’ Up! Quite Curvy Bundle for my card today along with some FREE Sale-A-Bration DSP. Here’s my card for today.

Here is the sketch from CAS Colours & Sketches Challenge #404.

I started by stamping the sentiment from the Stampin’ Up! Quite Curvy Photopolymer Stamp Set in Tuxedo Black Ink on a Basic White card front. To make sure I had it in the right place, I cut a panel of Flower & Field Designer Series Paper (FREE Sale-A-Bration item), using the Curvy Dies and set it down on the card front. I embossed the Basic White panel using the Ornate Floral 3D Embossing Folder and adhered it to a Cherry Cobbler mat using Multipurpose Liquid Glue.

I adhered the cut panel of DSP to the card front using Multipurpose Liquid Glue. I adhered the matted panel to a So Saffron card base using Stampin’ Dimensionals. The Flower & Field Designer Series Paper is a pack of 12 X 12 DSP that is free with a qualifying order of $50.

On a scrap of Basic White cardstock I stamped the bird from the Quite Curvy stamp set in Tuxedo Black Ink and colored it in using my Crumb Cake and So Saffron Stampin’ Blends Markers. I cut the bird out using the Curvy Dies and adhered it to the card front using Glue Dots.

On the inside I stamped the sentiment from the Quite Curvy stamp set in Tuxedo Black Ink in the center of a Basic White panel. I stamped the floral image from the Quite Curvy stamp set in Tuxedo Black Ink below the sentiment and colored it in using my Cherry Cobbler, Granny Apple Green and So Saffron Stampin’ Blends Markers. I adhered the Basic White panel to a Cherry Cobbler mat using Stampin’ Seal and then to the inside of the So Saffron card base using Stampin’ Seal.

To finish my card I decorated a Basic White Medium Envelope. I stamped the floral image from the Quite Curvy stamp set in Tuxedo Black Ink on the envelope front and colored it in using my Cherry Cobbler, Granny Apple Green and So Saffron Stampin’ Blends Markers. I adhered a panel of the Flower & Field DSP to the envelope flap.

Thank you for stopping by my blog today. I hope you liked my card and will give it a try. Happy Stamping!!

*********************************************************************************************************

If you need any stamping supplies, I’d love to be your Demonstrator. Just click HERE to go directly to my online store or drop me an email if you have any questions. 

MY CURRENT HOST CODE IS: C4XDWQT6

Use this host code when you order $50 or greater and receive a free gift from me! If your order is over $150, please do not use this code, but you’ll still get the free gift. The free gift is your choice of any 1 item valued up to $10.00 from the 2020-2021 Annual Catalog or the January-June 2021 Mini Catalog!   For any orders $50 or more I will also send you my monthly class tutorials.  Click HERE or go to my Customer Rewards for more details and to see what this months tutorials are.

 Click HERE to shop the clearance rack.

Please remember to use my current Host Code and make sure that you can see my name on the final checkout page listed as your Demonstrator when you order so that you know that you’re ordering with me and you’ll get my rewards! 

Happy Stamping, Karen!

*********************************************************************************************************

Bouquet of Hope

Subscribe January 11 – February 10

What is Paper Pumpkin? Paper Pumpkin is our monthly One-Stop Box™ that offers a unique variety of paper projects for subscribers of any skill level to enjoy! These thoughtfully-themed and all-inclusive craft kits encourage you to explore your creativity, try new techniques, and discover your potential in papercrafting.

Paper Pumpkin introduces you to an impressive collection of Stampin’ Up! products, from our one-of-a-kind ink pads to our eye-catching embellishments. Plus, the carefully-chosen components of each Paper Pumpkin kit highlight the unbeatable versatility and coordination our products provide! This easy and exciting way to stock up on supplies—and create small-batch projects for occasions of any kind—inspires you to continue crafting. With Paper Pumpkin, it’s simple: share what you love, and help others enjoy creativity!

The Bouquet of Hope Paper Pumpkin Kit provides enough supplies to create nine cards and coordinating envelopes. This soft, sympathetic kit includes patterned card bases, die-cut floral elements, ribbon, embellishments, and more!

The kit’s exclusive Bouquet of Hope Stamp Set features supportive sentiments centered around comfort, care, hope, and love. Such a versatile stamp set can be used throughout the year! Sadly, there is heartache in the world all around us. We all know someone who could use a heartfelt, handmade card that gives sympathy and strength during a difficult time. This kit’s cards are a must to have on-hand!

ABOUT THE FEBRUARY KIT

Details

  • Kit contains enough supplies to create 9 cards—3 each of 3 designs—and coordinating envelopes. Kit includes card bases, decorative die-cut pieces, embellishments, and more.
  • Card size: 4-1/4″ x 5-1/2″ (10.8 x 14 cm)
  • Envelope size: 4-1/2″ x 5-3/4″ (11.4 x 14.6 cm)
  • Coordinating colors: Basic Black, Bumblebee, Just Jade, Merry Merlot, Mossy Meadow, Rococo Rose
  • Coordinates with the Flower & Field Designer Series Paper, an exclusive Sale-A-Bration item.

Subscribe to the February 2021 Paper Pumpkin Kit between 11 January and 10 February at paperpumpkin.com!

Note: Supplies may be limited toward the end of the subscription period.

COORDINATING PRODUCT

155223 | Flower & Field Designer Series Paper

  • Earn this pack of paper for FREE with a purchase of $50 USD or more during Stampin’ Up!’s Sale-A-Bration promotion! 

*********************************************************************************************************

Card stock cuts for this project:

  • Basic White Cardstock 2 – 4″ X 5 1/4″ (card front and inner liner)
  • Cherry Cobbler Cardstock 2 – 4 1/8″ X 5 3/8″ (card front and inner liner mats)
  • So Saffron Cardstock 8 1/2″ X 5 1/2″ (card base scored and folded at 4 1/4″)
  • Flower & Field Designer Series Paper 2″ X 4″ (card front panel), 2 1/2″ X 6″ (piece for envelope flap)

*********************************************************************************************************

Product List

Stampin’ Up! Friends Are Like Seashells Fun Fold

Good Friday morning my stamping friends and welcome to my Fun Fold Friday. How was everyone’s week? Is anyone doing anything for the weekend? I’ll be working all weekend at both jobs.

Today’s card I made on my Facebook Live video on Wednesday. If you were able to join me or watched the replay, thank you very much. If you’d like to watch my video and stamp along, the measurements are below along with the links to my Facebook page and my YouTube channel. Here’s my card that I made.

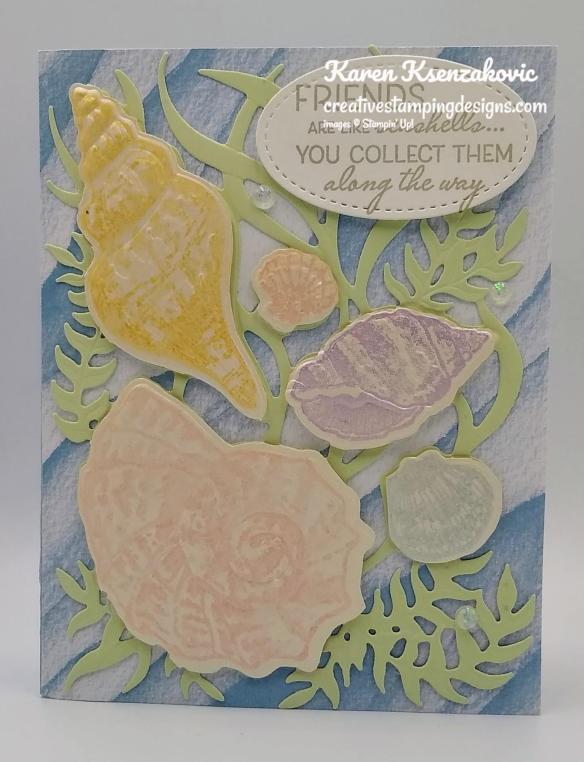
I used just about everything from the Stampin’ Up! Sea & Sand Suite for my card. I will explain everything the best I can, but it’s much easier if you watch the video. This card also used the most colors I’ve ever used on a card. To me, there are a lot of colors in the ocean.

I started by adhering a panel of Sea & Sand Designer Series Paper to a Seaside Spray card base using Multipurpose Liquid Glue. I cut a panel of Pearlescent Specialty Paper using the largest die from the Seaside Shells Dies. I stamped all the coordinating shells from the Stampin’ Up! Friends Are Like Seashells Photopolymer Stamp Set in Blushing Bride, Highland Heather, Petal Pink, Seaside Spray and So Saffron Inks right on the die cut piece. I embossed the die cut piece using the Seashells 3D Embossing Folder then snipped the shells away from the seaweed using my Paper Snips.

Using the largest die from the Seaside Shells Dies again, I cut a panel of Soft Seafoam cardstock and embossed it using the Seashells 3D Embossing Folder. I adhered the Soft Seafoam die cut/embossed panel to the card front using Multipurpose Liquid Glue. I adhered the stamped shells, that I snipped, to the Soft Seafoam die cut panel using Stampin’ Dimensionals.

On a panel of Basic White cardstock I stamped the sentiment from the Friends Are Like Seashells stamp set in Sahara Sand Ink and cut the panel using the oval from the Stitched Shapes Dies. This part was a little different from my video. On my video I stamped the sentiment on a panel of the Pearlescent Specialty Paper, but the sentiment didn’t show up dark enough so I re- stamped it on Basic White. I adhered the sentiment to the card front using Stampin’ Dimensionals. I added a few Opal Rounds to the card front.

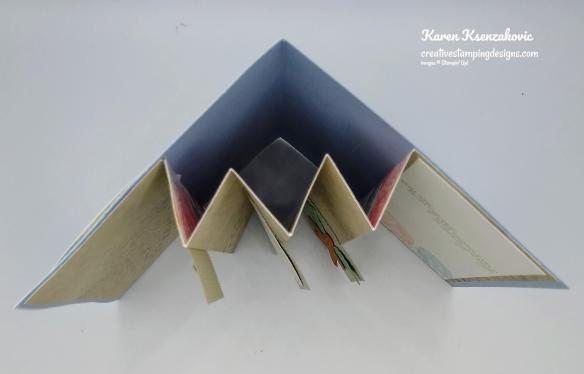
The inside is where the fun fold comes in. I took a piece of Sea & Sand DSP and folded it like an accordion. I adhered the front 2 1/4″ panel to the front inside of the card base using Tear & Tape. I added Tear & Tape to the back 2 1/4″ panel, folded the DSP into the accordion and folded the back of the card base on top of it.

It will look like the above photo from the top.

I took a panel of Sahara Sand cardstock and cut 3 squares from the Stitched Shapes Dies. I embossed them using the Subtle 3D Embossing Folder. Using the Friends Are Like Seashells stamp set and scraps of cardstock I stamped the smallest shell in Pool Party Ink on Pool Party cardstock. I stamped the starfish in Cinnamon Cider Ink on Cinnamon Cider cardstock. I stamped one of the seaweed images in Pear Pizzazz Ink on Pear Pizzazz cardstock and the other seaweed image in Mint Macaron Ink on Mint Macaron cardstock. I stamped the sand dollar image in Sahara Sand Ink on Basic White cardstock. I cut all the images out using the Seaside Shells Dies. I adhered the dies to the squares the way I wanted using Glue Dots then adhered the squares to the folds on the DSP using Multipurpose Liquid Glue, only on half of the square. I stamped the sentiment from Friends Are Like Seashells stamp set in the center of a Basic White panel in Sahara Sand Ink. Using the Friends Are Like Seashells stamp set I stamped the sand image in Sahara Sand Ink on the bottom of the Basic White panel. I stamped one of the shells in Blushing Bride Ink and the other in Seaside Spray Ink on top of the sand. I adhered the Basic White panel to the back inside of the card base using Stampin’ Seal.

To finish my card I decorated a Basic White Medium Envelope. Using the Friends Are Like Seashells stamp set, I stamped the sand image in Sahara Sand across the bottom front of the envelope. I stamped the seaweed image in Pear Pizzazz Ink, one of the shells in Blushing Bride Ink, the other shell in Seaside Spray Ink and the starfish in Cinnamon Cider Ink. I adhered a panel of Sea & Sand DSP to the envelope flap.

Thank you for stopping by my blog today. I hope you liked my card and will give it a try. The list of measurements are below if you’d like to stamp along while watching the video. You can watch my video on my Facebook page Here.

You can also view the video on my YouTube channel Here. Happy Stamping!!

*********************************************************************************************************

If you need any stamping supplies, I’d love to be your Demonstrator. Just click HERE to go directly to my online store or drop me an email if you have any questions. 

MY CURRENT HOST CODE IS: C4XDWQT6

Use this host code when you order $50 or greater and receive a free gift from me! If your order is over $150, please do not use this code, but you’ll still get the free gift. The free gift is your choice of any 1 item valued up to $10.00 from the 2020-2021 Annual Catalog or the January-June 2021 Mini Catalog!   For any orders $50 or more I will also send you my monthly class tutorials.  Click HERE or go to my Customer Rewards for more details and to see what this months tutorials are.

 Click HERE to shop the clearance rack.

Please remember to use my current Host Code and make sure that you can see my name on the final checkout page listed as your Demonstrator when you order so that you know that you’re ordering with me and you’ll get my rewards! 

Happy Stamping, Karen!

*********************************************************************************************************

Bouquet of Hope

Subscribe January 11 – February 10

What is Paper Pumpkin? Paper Pumpkin is our monthly One-Stop Box™ that offers a unique variety of paper projects for subscribers of any skill level to enjoy! These thoughtfully-themed and all-inclusive craft kits encourage you to explore your creativity, try new techniques, and discover your potential in papercrafting.

Paper Pumpkin introduces you to an impressive collection of Stampin’ Up! products, from our one-of-a-kind ink pads to our eye-catching embellishments. Plus, the carefully-chosen components of each Paper Pumpkin kit highlight the unbeatable versatility and coordination our products provide! This easy and exciting way to stock up on supplies—and create small-batch projects for occasions of any kind—inspires you to continue crafting. With Paper Pumpkin, it’s simple: share what you love, and help others enjoy creativity!

The Bouquet of Hope Paper Pumpkin Kit provides enough supplies to create nine cards and coordinating envelopes. This soft, sympathetic kit includes patterned card bases, die-cut floral elements, ribbon, embellishments, and more!

The kit’s exclusive Bouquet of Hope Stamp Set features supportive sentiments centered around comfort, care, hope, and love. Such a versatile stamp set can be used throughout the year! Sadly, there is heartache in the world all around us. We all know someone who could use a heartfelt, handmade card that gives sympathy and strength during a difficult time. This kit’s cards are a must to have on-hand!

ABOUT THE FEBRUARY KIT

Details

  • Kit contains enough supplies to create 9 cards—3 each of 3 designs—and coordinating envelopes. Kit includes card bases, decorative die-cut pieces, embellishments, and more.
  • Card size: 4-1/4″ x 5-1/2″ (10.8 x 14 cm)
  • Envelope size: 4-1/2″ x 5-3/4″ (11.4 x 14.6 cm)
  • Coordinating colors: Basic Black, Bumblebee, Just Jade, Merry Merlot, Mossy Meadow, Rococo Rose
  • Coordinates with the Flower & Field Designer Series Paper, an exclusive Sale-A-Bration item.

Subscribe to the February 2021 Paper Pumpkin Kit between 11 January and 10 February at paperpumpkin.com!

Note: Supplies may be limited toward the end of the subscription period.

COORDINATING PRODUCT

155223 | Flower & Field Designer Series Paper

  • Earn this pack of paper for FREE with a purchase of $50 USD or more during Stampin’ Up!’s Sale-A-Bration promotion! 

*********************************************************************************************************

Card stock cuts for this project:

  • Basic White Cardstock 3″ X 2″ (sentiment), 2″ X 2″ (sand dollar), 2″ X 5 1/8″ (inner liner)
  • Cinnamon Cider Cardstock scrap
  • Mint Macaron Cardstock scrap
  • Pear Pizzazz Cardstock scrap
  • Pool Party Cardstock scrap
  • Sahara Sand Cardstock 2″ X 5 1/2″ (stitched squares for inside)
  • Seaside Spray Cardstock 8 1/2″ X 5 1/2″ (card base scored and folded at 4 1/4″)
  • Soft Seafoam Cardstock 4 1/4″ X 5 1/2″ (large die cut panel)
  • Pearlescent Specialty Paper 4 1/4″ X 5 1/2″ (large die cut panel)
  • Sea & Sand Designer Series Paper 4 1/4″ X 5 1/2″ (card front), 10 1/2″ X 5 3/8″ (inside panel scored and folded at 2 1/4″, 3 1/4″, 4 1/4″, 5 1/4″, 6 1/4″, 7 1/4″ & 8 1/2″), 2 1/2″ X 6″ (piece for envelope flap)

*********************************************************************************************************

Product List

Paper Snips

$10.00

Stamparatus

$49.00

Stampin’ Up! Posted For You Love CAS

Good Sunday morning my stamping friends. Is everyone having a good weekend? I’m going into work today. It seemed very odd having yesterday off, I’m definitely not complaining. I usually work every Saturday so it was nice not having to get up and out of the house early.

I have a pretty Clean and Simple card for you today, at least I think it is. I used the Stampin’ Up! Posted For You Bundle along with the Peony Garden Designer Series Paper. Here’s my card for today.

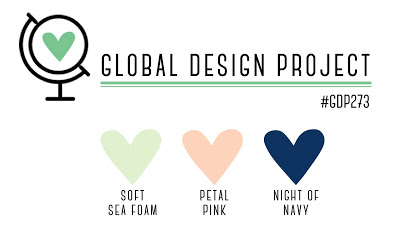
My colors are from the Global Design Project #273.

I started by stamping the sentiment from the Stampin’ Up! Posted For You Cling Stamp Set on the bottom of a panel of the Peony Garden DSP in Night of Navy Ink. I adhered the panel to a Night of Navy card base using Stampin’ Seal.

I embossed a strip of Soft Seafoam cardstock using the Parisian Flourish 3D Embossing Folder and adhered it to the card front using Multipurpose Liquid Glue.

On a panel of Basic White cardstock I stamped the image from the Posted For You stamp set in Tuxedo Black Ink and colored it in using my Petal Pink and Soft Seafoam Stampin’ Blends Markers. I punched the image out using the Rectangle Postage Stamp Punch and adhered it to a Night of Navy mat using Stampin’ Seal. I adhered the artwork to the card front using Stampin’ Dimensionals. I added a few Night of Navy Holiday Rhinestone Basic Jewels to the card front.

On the inside I stamped the sentiment from the Stampin’ Up! Prized Peony Cling Stamp Set in Night of Navy Ink in the center of a Basic White panel. I stamped the small flower from the Prized Peony stamp set on the bottom of the panel in Tuxedo Black Ink and colored it in using my Petal Pink and Soft Seafoam Stampin’ Blends Markers. I adhered the Basic White panel to a Petal Pink mat using Stampin’ Seal and then to the inside of the Night of Navy card base using Multipurpose Liquid Glue.

To finish my card I decorated a Basic White Medium Envelope. I stamped the small flower from the Prized Peony stamp set in Tuxedo Black Ink on the bottom front of the envelope and colored them in using my Petal Pink and Soft Seafoam Stampin’ Blends Markers. I adhered a panel of Peony Garden DSP to the envelope flap.

Thank you for stopping by my blog today. I hope you liked my card and will give it a try. Happy Stamping!!

*********************************************************************************************************

If you need any stamping supplies, I’d love to be your Demonstrator. Just click HERE to go directly to my online store or drop me an email if you have any questions. 

MY CURRENT HOST CODE IS: C4XDWQT6

Use this host code when you order $50 or greater and receive a free gift from me! If your order is over $150, please do not use this code, but you’ll still get the free gift. The free gift is your choice of any 1 item valued up to $10.00 from the 2020-2021 Annual Catalog or the January-June 2021 Mini Catalog!   For any orders $50 or more I will also send you my monthly class tutorials.  Click HERE or go to my Customer Rewards for more details and to see what this months tutorials are.

 Click HERE to shop the clearance rack.

Please remember to use my current Host Code and make sure that you can see my name on the final checkout page listed as your Demonstrator when you order so that you know that you’re ordering with me and you’ll get my rewards! 

Happy Stamping, Karen!

*********************************************************************************************************

Tomorrow is the Last Day for Double Creative Stamping Designs Rewards

To kick off the ordering, I’m offering a double Creative Stamping Reward point ordering special!!

You’ll get DOUBLE Creative Stamping Reward points for every order of $50 or greater (before shipping and taxes) through, Monday, January 11!!  Plus you’ll earn a free Sale-A-Bration goody from Stampin’ Up! for every $50 in merchandise that you order too! 

Don’t forget to add the Host Code above if your order is under $150 to get your free thank you gift.  Please don’t add the host code to orders over $150, you automatically get the free thank you gift and Stampin’ Rewards/Host Cash from Stampin’ Up!  For more information about my Creative Stamping Reward points (my buyer reward program), Click Here.

Click Here to head over to my online store to start shopping now!

*********************************************************************************************************

Sending Hearts

TODAY IS THE LAST DAY TO SUBSCRIBE!!

Love is in the air! Send a little love to someone special with the Sending Hearts Paper Pumpkin Kit. From heaps of heart-shaped elements to paper pieces in red and pink, this month’s kit has everything you need to create eight adorable cards—with coordinating envelopes—for Valentine’s Day, anniversaries, and every celebration of love in between!

With the add-on to January’s sweet and sentimental kit, there’s even more love to share! The add-on—called Little Love Boxes—includes 20 tiny, printed boxes and 24 die-cut, heart-shelled snails and sentiment labels. When combined with the remaining components from the Sending Hearts kit, you can create treat packaging, additional cards, and so much more!

ABOUT THE JANUARY KIT

Details

  • Kit contains enough supplies to create eight cards—four each of two designs—and coordinating envelopes.
  • Card size: 4-1/4″ x 5-1/2″ (10.8 x 14 cm)
  • Envelope size: 4-1/2″ x 5-3/4″ (11.4 x 14.6 cm)
  • Coordinating colors: Basic Black, gold, Petal Pink, Poppy Parade, Smoky Slate, white

ABOUT THE ADD-ON

Name Little Love Boxes

Details

  • Add-on contains 20 printed mini boxes and 24 die-cut decorative pieces and sentiment labels.
  • Item number: 156842
  • Price: $8 USD/$11 CAD 
  • Available 1 January, while supplies last!

Subscribe to the January 2021 Paper Pumpkin Kit between 11 December and 10 January at paperpumpkin.com!

ADD-ON ORDERING INFORMATION

Purchase the Little Love Boxes add-on to the Sending Hearts Paper Pumpkin Kit on stampinup.com, or by placing an order through my online store. The add-on will be available starting 1 January, while supplies last. You must be a Paper Pumpkin subscriber to order the add-on.

  • Little Love Boxes (156842)
  • $8 USD | $11 CAD

Note: Add-on is not included in January’s Paper Pumpkin subscription. It must be purchased through a separate order. 

Note: Supplies may be limited toward the end of the subscription period.

*********************************************************************************************************

Card stock cuts for this project:

  • Night of Navy Cardstock 8 1/2″ X 5 1/2″ (card base scored and folded at 4 1/4″), 2 1/8″ X 1 1/2″ (artwork mat)
  • Petal Pink Cardstock 4 1/8″ X 5 3/8″(inner liner mat)
  • Soft Seafoam Cardstock 4 1/4″ X 1 5/8″ (card front strip)
  • Peony Garden Designer Series Paper 4 1/8″ X 5 3/8″ (card front), 2 1/2″ X 6″ (envelope flap)

*********************************************************************************************************

Product List

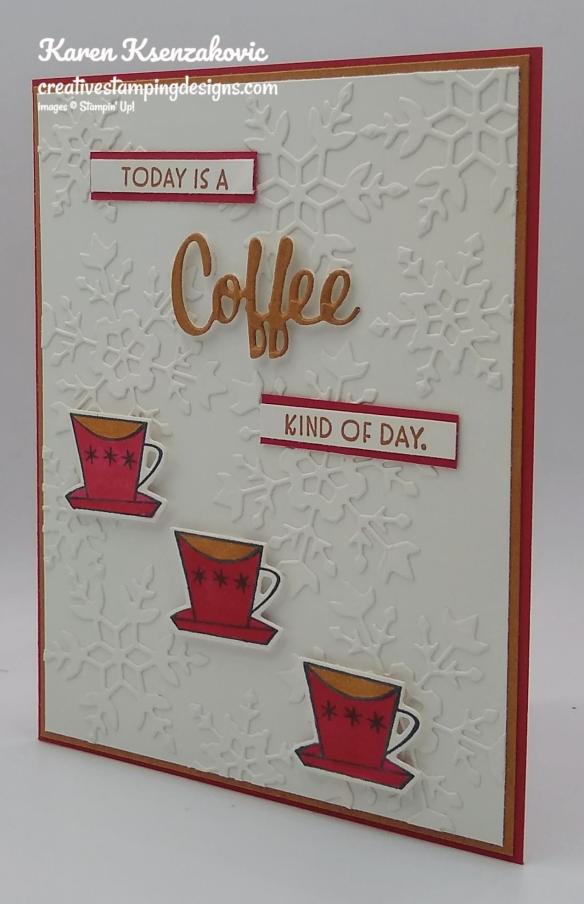
Stampin’ Up! Nothing’s Better Than Coffee for The Card Concepts

Good Wednesday morning my stamping friends. How is everyone doing today? We’re halfway through the week and on our way to the weekend.

I’m very excited today to be a part of the Design Team for The Card Concepts. I was so honored when they asked me to join their team. The Card Concepts is a 2 week Inspirational Challenge. Here is my card for today.

This challenge is Winter Warmth.

I hope you will take a moment to visit The Card Concept to join us and play along.

I was inspired by the entire photo from the cappuccino, colors and the snowflakes.

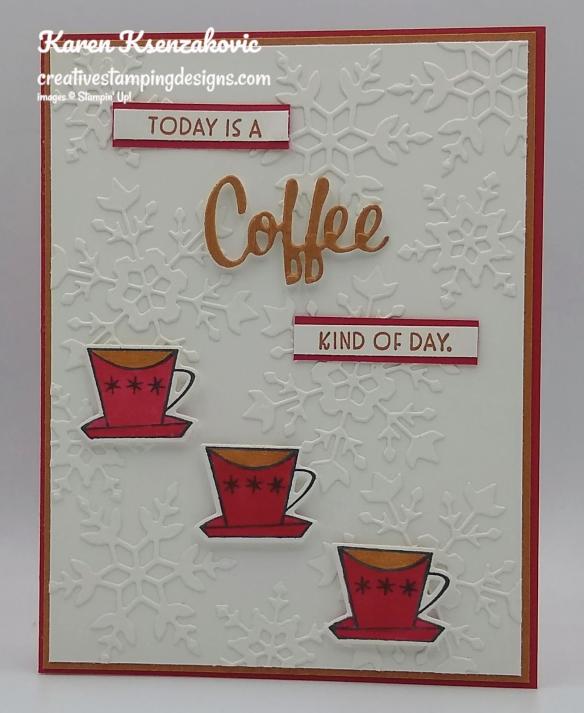
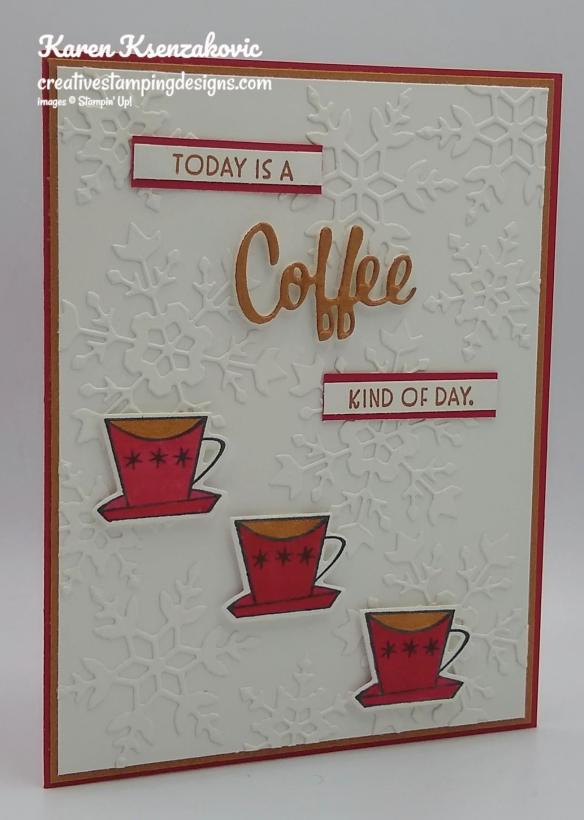
I started by adhering a panel of Whisper White cardstock to an Adhesive Sheet and cut multiple snowflakes out using my So Many Snowflakes Dies. I adhered the snowflakes to a 4 1/4″ X 5 1/2″ panel of Whisper White cardstock then cut it down to a 4″ X 5 1/4″ panel.

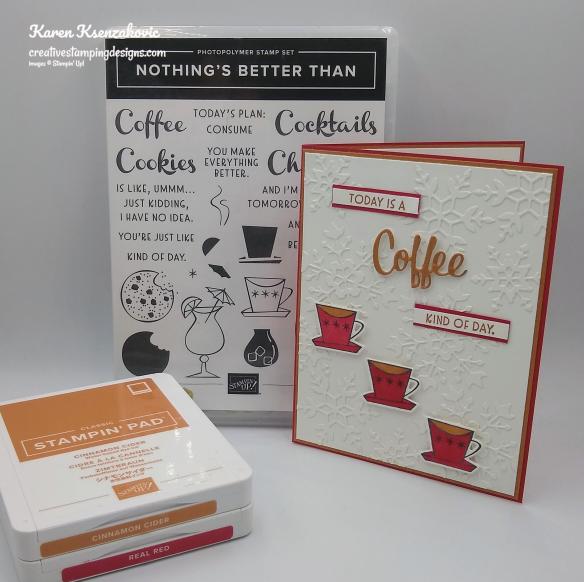
On thin stirps of Whisper White cardstock I stamped the sentiments from the Stampin’ Up! Nothing’s Better Than Photopolymer Stamp Set in Cinnamon Cider Ink. On another panel of Whisper White cardstock I stamped the coffee cup image from the Nothing’s Better Than stamp set in Tuxedo Black Ink 3 times and colored them in using my Cinnamon Cider and Real Red Stampin’ Blends Markers. I cut the images out using my Love You More Than Dies. I cut the ‘coffee’ sentiment out of a panel of Cinnamon Cider cardstock that I had adhered to a Foam Adhesive Sheet using my Love You More Than Dies.

I adhered the thin sentiment strips to Real Red mats using Stampin’ Seal and then to the card front using Multipurpose Liquid Glue. I adhered the ‘coffee’ sentiment to the card front. I adhered the 3 cups of coffee to the card front using Stampin’ Dimensionals. I adhered the card front to a Cinnamon Cider mat using Stampin’ Seal and then to the card front using Multipurpose Liquid Glue.

On the inside I stamped the sentiment from the Nothing’s Better Than stamp set in Cinnamon Cider Ink in the center of a Whisper White panel. I stamped the coffee cum image from the Nothing’s Better Than stamp set in Tuxedo Black Ink on the bottom of the panel and colored them in using my Cinnamon Cider and Real Red Stampin’ Blends Markers. I adhered 2 of the smallest snowflakes I cut from the So Many Snowflakes Dies on either side of the sentiment. I adhered the Whisper White panel to a Cinnamon Cider mat using Stampin’ Seal and then to the inside of the Real Red card base using Multipurpose Liquid Glue.

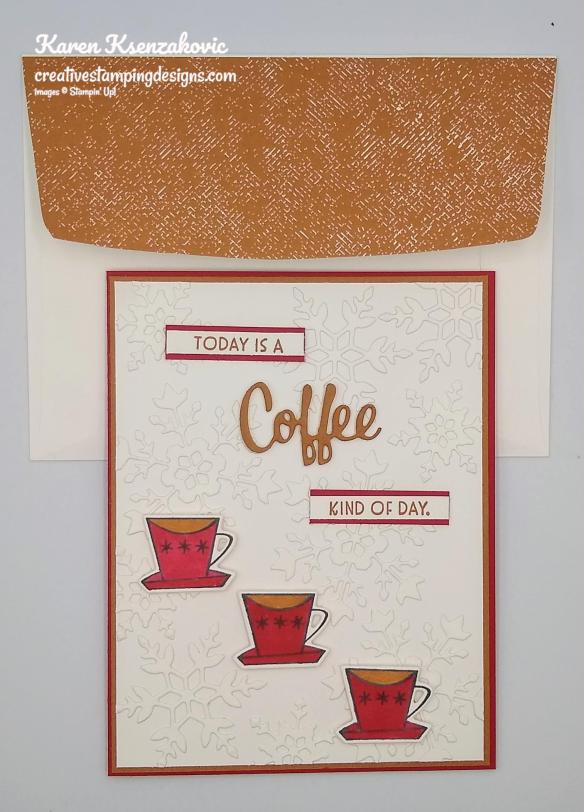
To finish my card I decorated a Medium Whisper White Envelope. I stamped the coffee cup image from the Nothing’s Better Than stamp set 3 times across the bottom of the envelope front and colored the images in using my Cinnamon Cider and Real Red Stampin’ Blends Markers. I adhered a panel of the Cinnamon Cider 2020-2022 In-Color Designer Series Paper to the envelope flap.

Thank you for stopping by my blog today. I hope you liked my card and will give it a try. Happy Stamping!!

****************************************************************************************************

Join me today at 4pm on my Facebook Live.

I’m planning to go live on my Facebook page with a project today at 4:00pm ET.  Stop by my Facebook page at 4pm ET to see what card I will be making today.

*********************************************************************************************************

If you need any stamping supplies, I’d love to be your Demonstrator. Just click HERE to go directly to my online store or drop me an email if you have any questions. 

MY CURRENT HOST CODE IS: C4XDWQT6

Use this host code when you order $50 or greater and receive a free gift from me! If your order is over $150, please do not use this code, but you’ll still get the free gift. The free gift is your choice of any 1 item valued up to $10.00 in the 2020-2021 Annual Catalog!   For any orders $50 or more I will also send you my monthly class tutorials.  Click HERE or go to my Customer Rewards for more details and to see what this months tutorials are.

 Click HERE to shop the clearance rack.

Please remember to use my current Host Code and make sure that you can see my name on the final checkout page listed as your Demonstrator when you order so that you know that you’re ordering with me and you’ll get my rewards! 

Happy Stamping, Karen!

*********************************************************************************************************

Sending Hearts

Subscribe December 11-January 10 

Love is in the air! Send a little love to someone special with the Sending Hearts Paper Pumpkin Kit. From heaps of heart-shaped elements to paper pieces in red and pink, this month’s kit has everything you need to create eight adorable cards—with coordinating envelopes—for Valentine’s Day, anniversaries, and every celebration of love in between!

With the add-on to January’s sweet and sentimental kit, there’s even more love to share! The add-on—called Little Love Boxes—includes 20 tiny, printed boxes and 24 die-cut, heart-shelled snails and sentiment labels. When combined with the remaining components from the Sending Hearts kit, you can create treat packaging, additional cards, and so much more!

ABOUT THE JANUARY KIT

Details

  • Kit contains enough supplies to create eight cards—four each of two designs—and coordinating envelopes.
  • Card size: 4-1/4″ x 5-1/2″ (10.8 x 14 cm)
  • Envelope size: 4-1/2″ x 5-3/4″ (11.4 x 14.6 cm)
  • Coordinating colors: Basic Black, gold, Petal Pink, Poppy Parade, Smoky Slate, white

ABOUT THE ADD-ON

Name Little Love Boxes

Details

  • Add-on contains 20 printed mini boxes and 24 die-cut decorative pieces and sentiment labels.
  • Item number: 156842
  • Price: $8 USD/$11 CAD 
  • Available 1 January, while supplies last!

Subscribe to the January 2021 Paper Pumpkin Kit between 11 December and 10 January at paperpumpkin.com!

ADD-ON ORDERING INFORMATION

Purchase the Little Love Boxes add-on to the Sending Hearts Paper Pumpkin Kit on stampinup.com, or by placing an order through my online store. The add-on will be available starting 1 January, while supplies last. You must be a Paper Pumpkin subscriber to order the add-on.

  • Little Love Boxes (156842)
  • $8 USD | $11 CAD

Note: Add-on is not included in January’s Paper Pumpkin subscription. It must be purchased through a separate order. 

Note: Supplies may be limited toward the end of the subscription period.

*********************************************************************************************************

Card stock cuts for this project:

  • Cinnamon Cider Cardstock 2 – 4 1/8″ X 5 3/8″ (card front and inner liner mats), 1 1/2″ X 2″ (sentiment)
  • Real Red Cardstock 8 1/2″ X 5 1/2″(card base scored and folded at 4 1/4″), 2 – 3/8″ X 1 1/2″ (sentiment mats)
  • Basic White Cardstock 2 – 4 1/4″ X 5 1/2″ (snowflakes & card front), 1″ X 5″ (coffee cups), 2 – 1/4″ X 1 1/2″ (sentiments), 4″ X 5 1/4″ (inner liner)

*********************************************************************************************************

Product List