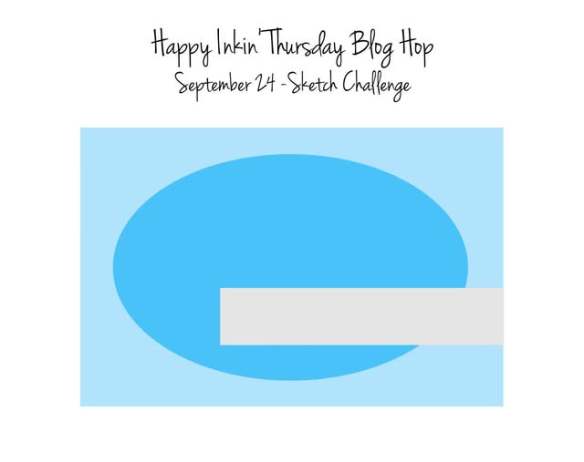
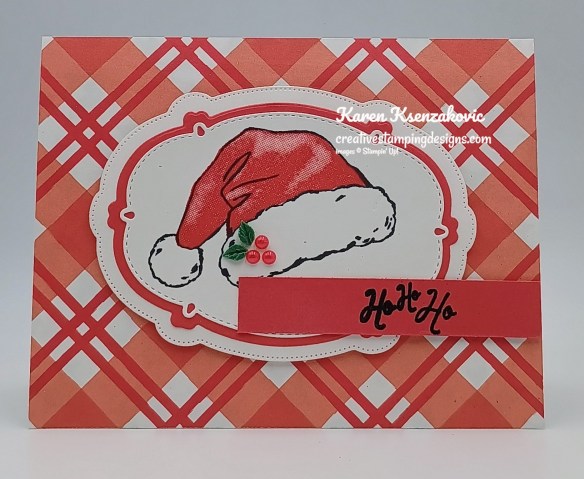
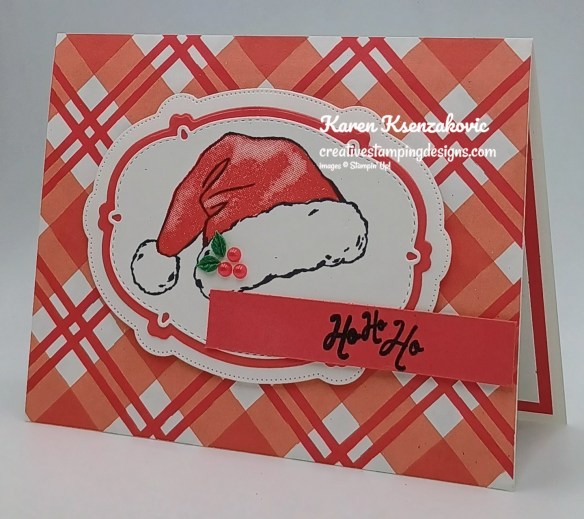
Good Thursday morning stamping friends welcome to our Happy Inkin’ Thursday Blog Hop. If you are starting with me, thank you, I hope you will stop by everyone’s blog to see the beautiful projects they have created this week. If you are hopping over from Mary’s blog, thank you for stopping by. This week we have a Sketch Challenge to work with. If you’d like to see a quick video on how I made this card, Click Here to go to my Instagram Reels. Here is my card using this week’s sketch.
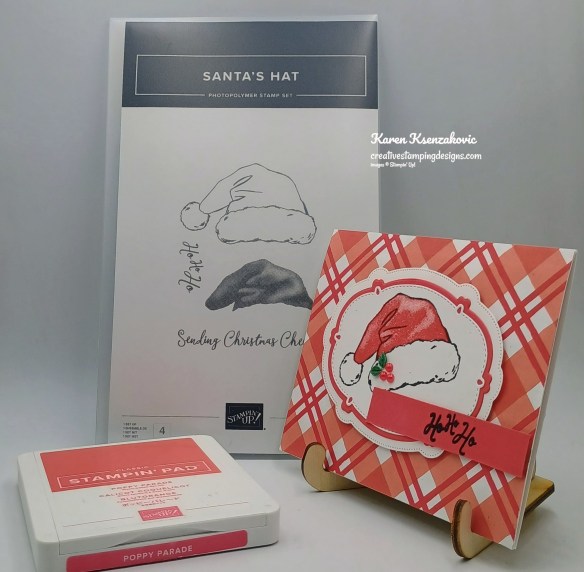
I used the Stampin’ Up! Santa Hat Stamp Set, Timeless Christmas Designer Series Paper and Sweet Words & Labels Dies for my card today.
This is our sketch for this week
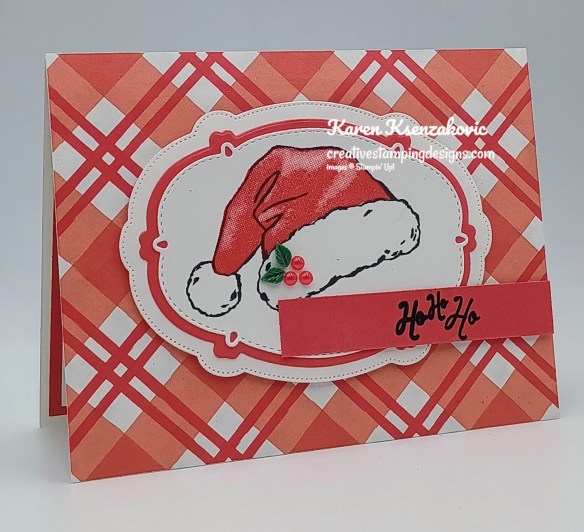
Adhere a panel of Timeless Christmas DSP to a Basic White Thick card base. Cut a Basic White panel using the smaller and larger Sweet Words & Labels Dies. Cut a panel of Poppy Parade using the next middle Sweet Words & Labels Dies.
Stamp the details Santa hat image from the Santa Hat stamp set in Black Ink on the smallest die cut panel of Basic White. Stamp the solid hat image from the Santa Hat stamp set in Poppy Parade Ink. Adhere the Basic White die cut to the Poppy Parade die cut. Adhere the layered panel to the larger Basic White die cut.
Adhere the layered die cut panel to the card front with Stampin’ Dimensionals. Stamp the sentiment from the Santa Hat stamp set in Versamark Ink on the panel of Poppy Parade. Sprinkle the sentiment with Black Embossing Powder and set it with the Heat Tool. Adhere the sentiment to the card front with Stampin’ Dimensionals. Add an Adhesive-Backed Christmas Berries to the Santa hat.
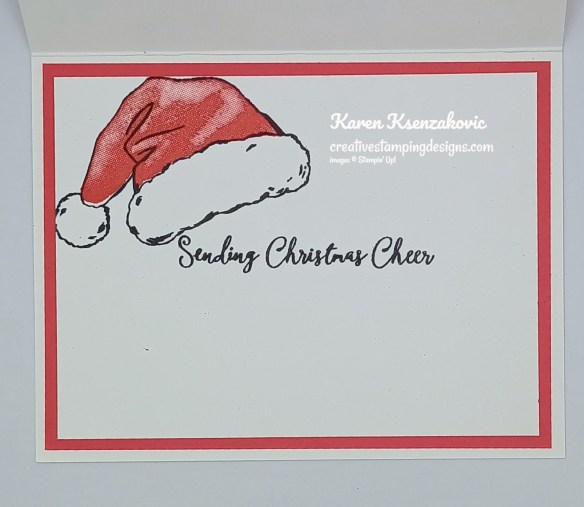
Stamp the sentiment from the Santa Hat stamp set in Black ink on a panel of Basic White. Stamp the detailed Santa hat image from the Santa Hat stamp set in Black Ink above the sentiment. Stamp the solid Santa hat image from the Santa Hat stamp set in Poppy Parade Ink. Adhere the Basic White panel to a Poppy Parade mat then to the inside of the Basic White Thick card base.
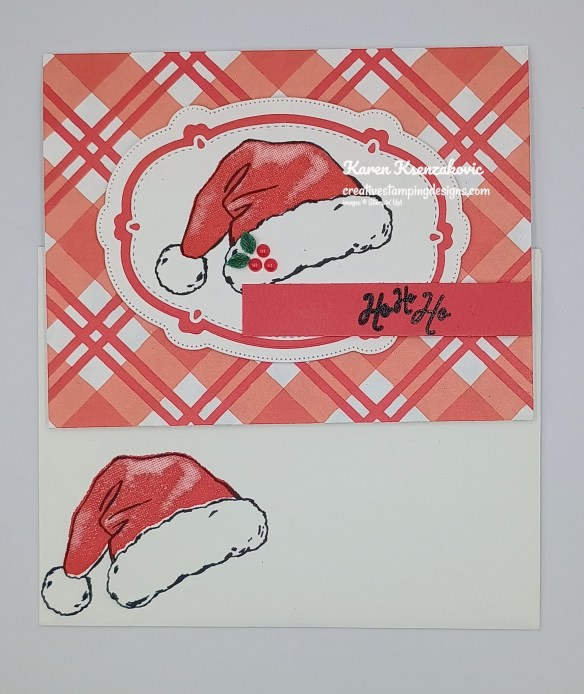
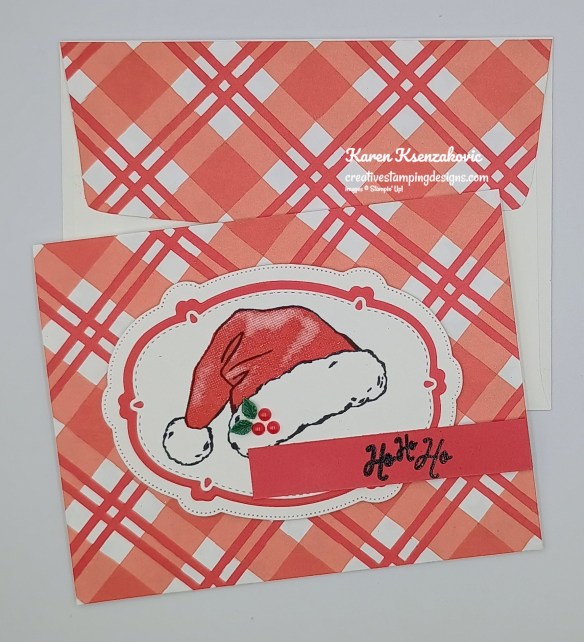
Decorate a Basic White Medium Envelope to complete your card. Stamp the detailed Santa hat image from the Santa Hat stamp set in Black Ink on the envelope front. Stamp the solid hat image in Poppy Parade Ink over the detailed image. Adhere a panel Timeless Christmas DSP to the envelope flap.
Thank you for stopping by my blog today. Now that you’ve seen my card, let’s get on with the hop! Click the next button below to hop over to see what Tara has created. Happy Hopping
Just in case you get lost along the way, here is a list of the team members involved in the hop today.
If you need any stamping supplies, I’d love to be your Demonstrator. Just click HERE to go directly to my online store or drop me an email if you have any questions.
Good Monday morning stamping friends, welcome to a new week. How was your weekend? It’s starting to cool off a bit here in NJ and I’m not sure I like that.
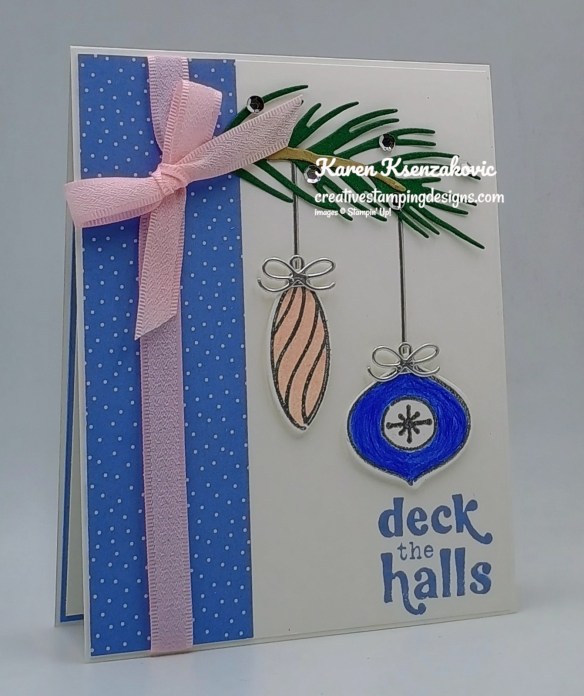
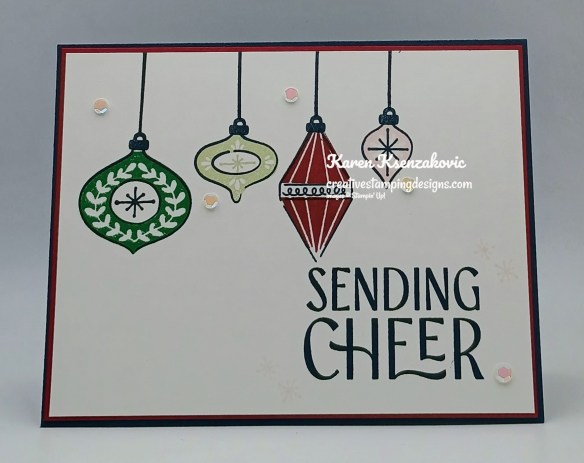
I thought I’d share a holiday card with you today featuring an Online Exclusive Bundle that’s available right now. I love traditional color holiday cards, but I really love non-traditional color cards too. Here’s my card for today.
I used the Stampin’ Up! Online Exclusive Festive Cheer Bundle along with the new Creative Celebrations 6 x 6 Mix & Match Specialty Designer Series Paper for my card today.
On a panel of Basic White, stamp the ornament images from the Festive Cheer stamp set in Versamark Ink. Sprinkle the images with Silver Embossing Powder and set it using the Heat Tool. Using the Festive Cheer Dies, cut the ornaments out, cut the pine bough from a panel of Peaceful Pine, the bough branch from a panel of Crumb Cake and the ornament holders, strings and bows from a panel of Silver Foil. Adhere the ornament hanger and bows to the ornaments.
Stamp the sentiment from the Festive Cheer stamp set in Hydrangea Hue Ink on the bottom of a Basic White panel. Adhere a panel of the Creative Celebrations DSP to the side of a Basic White card front. Wrap a piece of Brely Blush 3/8″ Bordered Ribbon around the side of the panel and tie a bow. Adhere the card front to a Basic Whtie Thick card base.
Adhere the branch die cut to the pine bough die cut. Adhere the pine bough to the card front, tucked behind the bow. Adhere the Silver Foil strings to the card front tucked behind the pine bough. Adhere the ornaments to the card front with Stampin’ Dimensionals. Add a few Adhesive-Backed Sparkle Sequins to the pine bough.
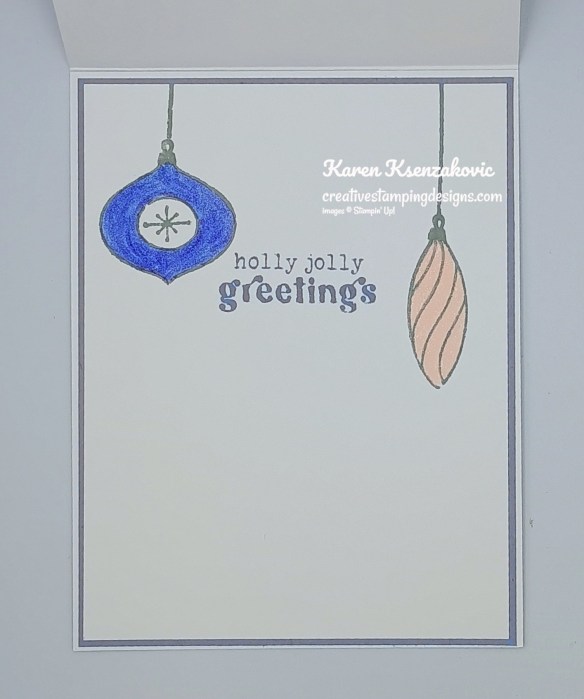
Stamp the sentiment from the Festive Cheer stamp set in Hydrangea Hue Ink on a panel of Basic White. Stamp the ornament images from the Festive Cheer stamp set in Smoky Slate Ink on either side of the sentiment. Stamp the ornament hanger and string images from the Festive Cheer stamp set in Smoky Slate Ink. Color the images using Hydrangea Hue & Barely Blush Shimmer Brushes. Adhere the Basic White panel to a Hydrangea Hue mat then to the inside of the Basic White Thick card base.
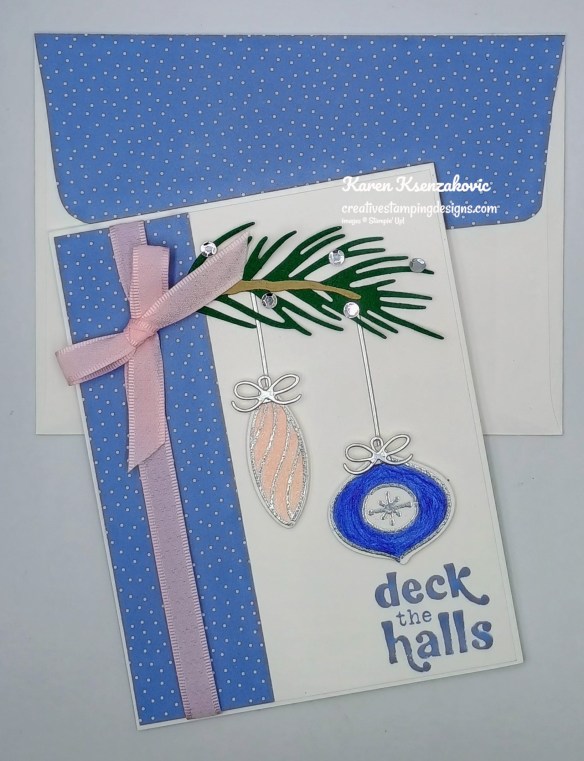
Decorate a Basic Whtie Medium Envelope to finish the card. Stamp the ornament images from the Festive Cheer in Smoky Slate Ink on the envelope front. Stamp the ornament hanger and string from the Festive Cheer stamp set in Smoky Slate Ink. Color the ornaments using the Hydrangea Hue & Barely Blush Shimmer Brushes. Adhere a panel of Creative Celebrations DSP to the envelope flap.
Thank you for stopping by my blog today. I hope you like the card and will give it a try. Happy Stamping!!
If you need any stamping supplies, I’d love to be your Demonstrator. Just click HERE to go directly to my online store or drop me an email if you have any questions.
Final Week to Register for my Creative Stamping Designs Class by Mail
Introducing a Creative Stamping Designs Class by Mail. As a lot of you know I love my Sunflowers and when they came out with the Sunflower Fields Suite I knew I wanted it immediately. I’ve decided to offer a Class by Mail and I’d love for you to join in. I spent all day Sunday designing cards just for this class and I hope you love them!! I created 10 different cards featuring products from the suite along with a couple other products. I will be putting together videos walking you through cutting the DSP for your cards and creating them. I will also have a color, step-by-step printable PDF for you.
Here’s what you will be getting from me:
Full pack of Sunflower Fields Designer Series Paper
Full roll of the Mossy Meadow/Very Vanilla 1/4″ Gingham Ribbon
Full pack of Radiant Gems
Cardstock kits cut up for 8-10 different cards (you will choose the DSP you want to use)
Link to class Video so you can make the cards at your leisure
Printable PDF of the cards with pictures and instructions
Pillow Gifts from me as a Thank You for joining my class
The Stampin’ Up! Radiant Sunflowers Bundle and Stampin’ Up! Poetry Petals Bundle are not included in the class price but, you will have the option to purchase them at a 10% discounted price along with other products that will be used for the class. You must order the bundle through the Google Form in order to get the discount. There is no substitution of products, and the price includes everything listed above. I will be purchasing everything the 1st week of September. I will cut up all the kits and label them, record the video and plan on shipping everything out by the last week of September. If I’m able to ship them sooner I will, but I’m giving myself enough time for the products to arrive, sort them and to get everything cut up for you.
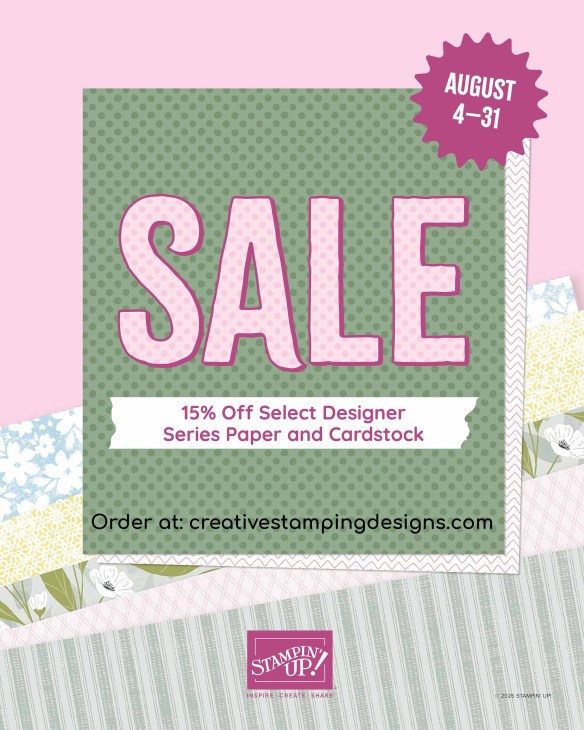
15% Off Select Designer Series Paper & Cardstock – August 4-31
Are you looking for the perfect card stock or Designer Series Paper for your next project? Stampin’ Up! has got you covered! Starting August 4-31, enjoy 15% off select Designer Series Paper and card stock. Stock up on your favorites or explore new colors and patterns during this sale! Here are the sale details:
Sales Period: August 4–31
Ordering Deadline: August 31, 2026, at 11:59 p.m. (MT)
While supplies last.
You’ll find all qualifying items in one convenient location once the sale begins on August 4—it will be located in the “Designer Series Paper and Cardstock Sale” page in the online store.
Head over to my Online Store beginning August 4 – 31 to shop the sale!!
Final Week to Sign Up – Sept-Dec Catalog & Online Exclusive Product Shares!!
It’s time again. The new September – December 2026 Catalog will be arriving in your mailbox real soon and you’re going to want all that beautiful Designer Series Paper, Ribbon and/or Embellishments. My September – December 2026 Catalog and September Online Exclusive Product Shares are open for ordering. You can order just the DSP share, just the Two-Tone cardstock share, just the Ribbon share or just the Embellishment share, or you can have it all!!
I’m offering a Designer Series PaperShare, Two-Tone Cardstock Share, Ribbon Share & Embellishment Share from the September – December 2026 Catalog, along with the upcoming September 2026 Online Exclusives and I’d love to have you join!! I’m placing my share order early on September 1st and I’m going to use the expedited shipping option so I should be able to have the shares cut, bundled and back out to you by the end of the week of September 7th. Wouldn’t you love to have all of the gorgeous new Designer Series Papers in the Stampin’ Up! Sept – Dec 2026 Catalog and the upcoming Sept 2026 Online Exclusives? What is a Paper Share you ask? It’s a sample of each of the new Designer Series Papers from the Catalog and Online Exclusives. Shares give you a good working sample of all of the papers so that you can decide which ones to order in full packs! If you were to purchase all of the DSP in the new Catalog and Online Exclusives, it would cost you over $250.00 plus shipping.
New Designer Series Paper Share – $30.00 plus $10.00 for Priority Mail Shipping
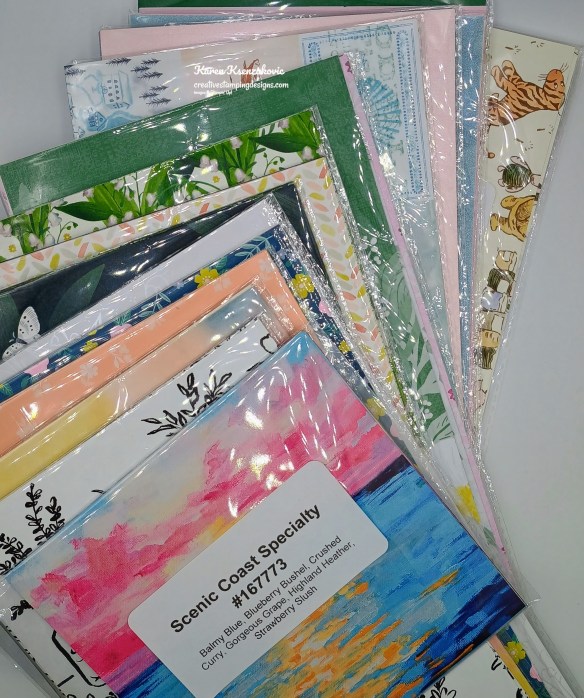
How my shares work: I order full packs of all of the Designer Series Papers listed below, I cut them into 6″ X 6″ pieces (or 6″ X 12″ pieces for double shares) and give you one panel of each design from each pack on the list. I pack up the paper in a cellophane bag with labels listing the Name, Item # and Colors in the pack and mail it back out to you just as quickly as I can!
New Designer Series Paper Share – $30.00 plus $10.00 for Priority Mail shipping
You will receive one 6×6 sheet of each design from the following DSP packs (the number after the name indicates how many 6×6 sheets of that paper pack you will receive):
A Little Christmas (6)
All Wrapped Up Specialty (6)
Alpine Winter (6)
Autumn Opulence Specialty (5)
Autum Woodland Glimmer Specialty (3)
Creative Celebrations 6 x 6 (4)
Hearth & Home (3)
Metal Effects Specialty (3)
Mosaic Garden (6)
Neutral Noel Specialty (6)
Painted Patch (6)
Radiant Foils Specialty (3)
Sunflower Fields (6)
Texture & Tone (3)
Timeless Christmas (3)
Timeless Metallic Specialty (3)
Whispering Woods (3)
Winter Dreams Specialty (3)
Yuletide Carold (3)
In all, you’ll receive 84 – 6” x 6” sheets of designer or specialty paper!
Double Designer Series Paper Share – $60.00 Plus $10.00 Shipping
As a gift from me for ordering a Double Share of Designer Series Paper, I will include a Happiest Season Tags Mix & Match Ephemera Pack #168493. This gift is only for ordering a Double DSP Share.
Two-Tone Cardstock Share
Do you like the Two-Tone Cardstock but don’t want to buy a whole pack? You can add a share of the 3 different Two-Tone Cardstock packs for an additional $4.00 or purchase them separately for $4.00 + $10 Shipping
You will receive one 6×6 sheet of each color from each of the packs (the number after the name indicates how many 6×6 sheets of that paper pack you will receive):
Autumn Fields (6)
Home For Christmas (4)
Memorable Garden (6)
In all, you’ll receive 16 – 6” x 6” sheets of cardstock!
Double Share of the Two-Tone Cardstock – $8.00 plus $10.00Shipping
If you’d like double shares of the designer paper or cardstock, I’m offering those too! I’ll cut the 12″ x 12″ sheets into 6″ × 12″ so that you’ll be able to get 3 full A2 size card fronts from each sheet and you’ll get double sheets of the 6″ x 6″ since they’re already precut.
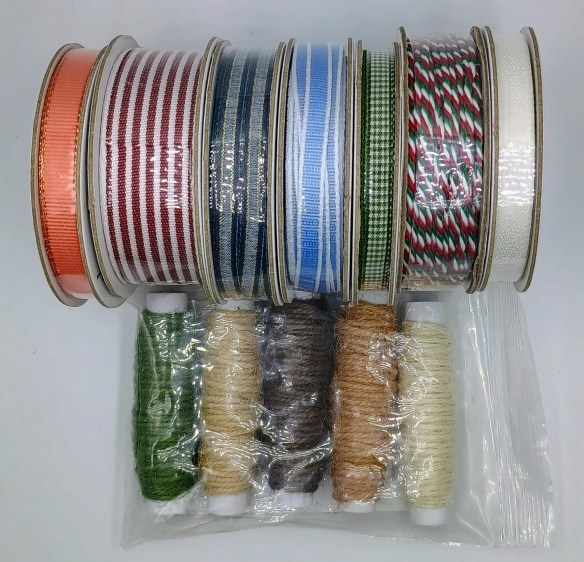
Ribbon Share – $21.25 plus $10.00 Shipping
All ribbons will come individually wrapped and labeled with the name and number of the product.
1/4 of a Roll of each:
Calypso Coral With Copper 3/8″ Bordered Ribbon
Cherry Cobbler & White 1″ Striped Grosgrain Ribbon
Hydrangea Hue 1/4″ Bordered Ribbon
Mossy Meadow & Very Vanilla 1/4″ Gingham Ribbon
Multicolored Christmas Baker’s Twine
Secret Sea & Gold 14″ Satin Ribbon
White 3/8″ Textured Ribbon
1/2 of each spool:
Neutrals Jute Combo Pack
Double Ribbon Share – $42.50 Plus $10.00 Shipping and you will be getting 1/2 of the roll or each ribbon.
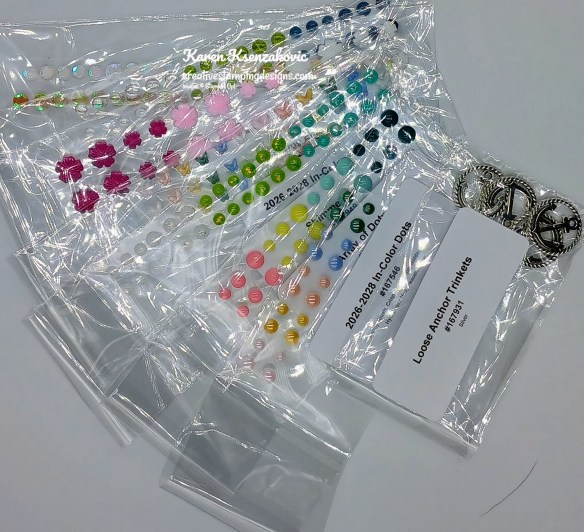
Embellishment Share – $16.50 plus $10.00 Shipping
I’m also offering an Embellishment Share. I will divide the embellishments up and package them in a cello bag with the name and number for easy ordering, just like I do with the paper and ribbon.
You will receive (approximate # listed):
Christmas Berries (5)
Christmas Epoxy Shapes (34)
Glossy Garden Dots (24)
Gold Adhesive-Back Dots (30)
Painted Patch Adhesive-Back Dots (40)
Radiant Gems (30)
Adhesive-Back Snowflakes (40)
Adhesive-Back Sparkle Sequins (40)
Double Share of the Embellishments – $33.00 plus $10.00 Shipping
Anyone is welcome to join in my shares (please note, I can only ship to addresses within the US). To make ordering the shares a little easier, I have created a form for you to submit, that way you can order any combination of shares you want. I will send out PayPal Invoices by August 29th and they will be due by August 30th.
Good Wednesday morning stamping friends, we’re halfway through the week. I hope your week is going well.
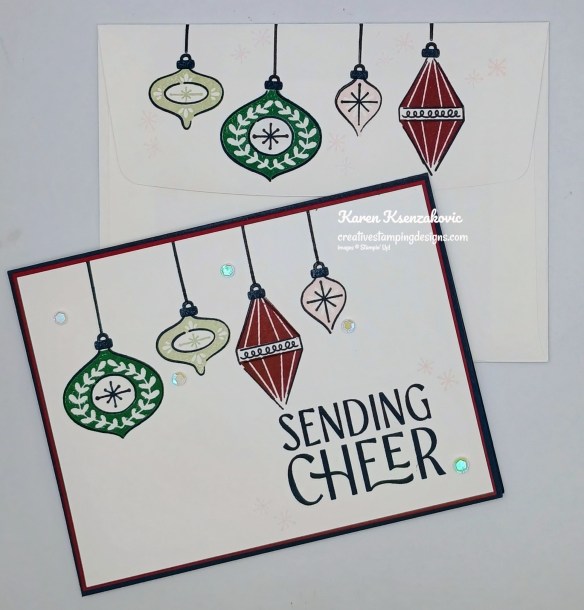
I played with a Christmas set today from the July Online Exclusives and made a CAS card. I don’t usually do simple, but I wanted to make something that’s easy to replicate for multiple Christmas cards. Here’s my card for today.
I used the Stampin’ Up! Festive Cheer Stamp Set for my card today.
Stamp the outline ornament images from the Festive Cheer stamp set in Secret Sea Ink on a panel of Basic White. Stamp the solid ornament images from the Festive Cheer stamp set in Peaceful Pine, Basic Beige, Cherry Cobbler and Barely Blush Inks.
Stamp the ornament top image from the Festive Cheer stamp set on the ornaments in Secret Sea Ink. Stamp the ornament string image from the Festive Cheer stamp set in Secret Sea Ink from the ornaments to the topo of the Basic White panel.
Stamp the sentiment from the Festive Cheer stamp set in Secret Sea Ink on the bottom of the panel. Adhere the Basic White panel to a Cherry Cobbler mat. Adhere the layered panel to a Secret Sea card base. Add a few Sunset Sparkle Sequins around the card front.
Stamp the sentiment from the Festive Cheer stamp set in Secret Sea Ink on a panel of Basic White. Stamp the 2 larger outlined ornament images from the Festive Cheer stamp set on either side of the sentiment in Secret Sea Ink. Stamp the solid ornament images in Cherry Cobbler and Peaceful Pine Inks over the outlined images. Adhere the Basic White panel to a Cherry Cobbler mat then to the inside of the Secret Sea card base.
Decorate a Basic White Medium Envelope to finish the card. Stamp the smaller outline ornament image from the Festive Cheer stamp set in Secret Sea Ink on the top of the envelope front and all of the outline images in Secret Sea Ink on the envelope flap. Stamp the ornament tops and string images in Secret Sea Ink. Stamp the solid ornament images in Barely Blush, Basic Beige, Cherry Cobbler and Peaceful Pine Inks over the outlined images.
Thank you for stopping by my blog today. I hope you like the card and will give it a try. Happy Stamping!!
If you need any stamping supplies, I’d love to be your Demonstrator. Just click HERE to go directly to my online store or drop me an email if you have any questions.
I’ve got an ordering special for you starting Tues August 4-Mon August 10.
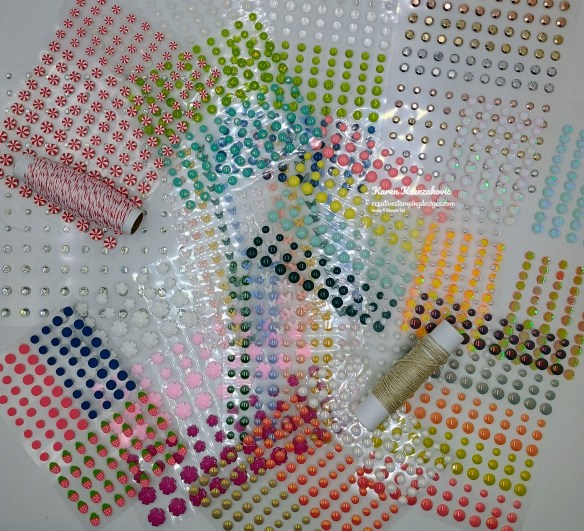
With any order or $50 or more (before tax & shipping and after rewards) you can choose a FREE Embellishment, Linen Thread or Real Red & White Baker’s Twine as a gift from me. You can go Here to the Embellishments to pick what you would like.
Please Note that I’ll be placing my order early Tuesday August 11. If you haven’t sent over your choice or your choice is not orderable, I will automatically choose a pack of Embellishments for you.
September-December Catalog & Online Exclusive Product Shares Open for Ordering!!
It’s time again. The new September – December 2026 Catalog will be arriving in your mailbox real soon and you’re going to want all that beautiful Designer Series Paper, Ribbon and/or Embellishments. My September – December 2026 Catalog and September Online Exclusive Product Shares are open for ordering. You can order just the DSP share, just the Two-Tone cardstock share, just the Ribbon share or just the Embellishment share, or you can have it all!!
I’m offering a Designer Series PaperShare, Two-Tone Cardstock Share, Ribbon Share & Embellishment Share from the September – December 2026 Catalog, along with the upcoming September 2026 Online Exclusives and I’d love to have you join!! I’m placing my share order early on September 1st and I’m going to use the expedited shipping option so I should be able to have the shares cut, bundled and back out to you by the end of the week of September 7th. Wouldn’t you love to have all of the gorgeous new Designer Series Papers in the Stampin’ Up! Sept – Dec 2026 Catalog and the upcoming Sept 2026 Online Exclusives? What is a Paper Share you ask? It’s a sample of each of the new Designer Series Papers from the Catalog and Online Exclusives. Shares give you a good working sample of all of the papers so that you can decide which ones to order in full packs! If you were to purchase all of the DSP in the new Catalog and Online Exclusives, it would cost you over $250.00 plus shipping.
New Designer Series Paper Share – $30.00 plus $10.00 for Priority Mail Shipping
How my shares work: I order full packs of all of the Designer Series Papers listed below, I cut them into 6″ X 6″ pieces (or 6″ X 12″ pieces for double shares) and give you one panel of each design from each pack on the list. I pack up the paper in a cellophane bag with labels listing the Name, Item # and Colors in the pack and mail it back out to you just as quickly as I can!
New Designer Series Paper Share – $30.00 plus $10.00 for Priority Mail shipping
You will receive one 6×6 sheet of each design from the following DSP packs (the number after the name indicates how many 6×6 sheets of that paper pack you will receive):
A Little Christmas (6)
All Wrapped Up Specialty (6)
Alpine Winter (6)
Autumn Opulence Specialty (5)
Autum Woodland Glimmer Specialty (3)
Creative Celebrations 6 x 6 (4)
Hearth & Home (3)
Metal Effects Specialty (3)
Mosaic Garden (6)
Neutral Noel Specialty (6)
Painted Patch (6)
Radiant Foils Specialty (3)
Sunflower Fields (6)
Texture & Tone (3)
Timeless Christmas (3)
Timeless Metallic Specialty (3)
Whispering Woods (3)
Winter Dreams Specialty (3)
Yuletide Carold (3)
In all, you’ll receive 84 – 6” x 6” sheets of designer or specialty paper!
Double Designer Series Paper Share – $60.00 Plus $10.00 Shipping
As a gift from me for ordering a Double Share of Designer Series Paper, I will include a Happiest Season Tags Mix & Match Ephemera Pack #168493. This gift is only for ordering a Double DSP Share.
Two-Tone Cardstock Share
Do you like the Two-Tone Cardstock but don’t want to buy a whole pack? You can add a share of the 3 different Two-Tone Cardstock packs for an additional $4.00 or purchase them separately for $4.00 + $10 Shipping
You will receive one 6×6 sheet of each color from each of the packs (the number after the name indicates how many 6×6 sheets of that paper pack you will receive):
Autumn Fields (6)
Home For Christmas (4)
Memorable Garden (6)
In all, you’ll receive 16 – 6” x 6” sheets of cardstock!
Double Share of the Two-Tone Cardstock – $8.00 plus $10.00Shipping
If you’d like double shares of the designer paper or cardstock, I’m offering those too! I’ll cut the 12″ x 12″ sheets into 6″ × 12″ so that you’ll be able to get 3 full A2 size card fronts from each sheet and you’ll get double sheets of the 6″ x 6″ since they’re already precut.
Ribbon Share – $21.25 plus $10.00 Shipping
All ribbons will come individually wrapped and labeled with the name and number of the product.
1/4 of a Roll of each:
Calypso Coral With Copper 3/8″ Bordered Ribbon
Cherry Cobbler & White 1″ Striped Grosgrain Ribbon
Hydrangea Hue 1/4″ Bordered Ribbon
Mossy Meadow & Very Vanilla 1/4″ Gingham Ribbon
Multicolored Christmas Baker’s Twine
Secret Sea & Gold 14″ Satin Ribbon
White 3/8″ Textured Ribbon
1/2 of each spool:
Neutrals Jute Combo Pack
Double Ribbon Share – $42.50 Plus $10.00 Shipping and you will be getting 1/2 of the roll or each ribbon.
Embellishment Share – $16.50 plus $10.00 Shipping
I’m also offering an Embellishment Share. I will divide the embellishments up and package them in a cello bag with the name and number for easy ordering, just like I do with the paper and ribbon.
You will receive (approximate # listed):
Christmas Berries (5)
Christmas Epoxy Shapes (34)
Glossy Garden Dots (24)
Gold Adhesive-Back Dots (30)
Painted Patch Adhesive-Back Dots (40)
Radiant Gems (30)
Adhesive-Back Snowflakes (40)
Adhesive-Back Sparkle Sequins (40)
Double Share of the Embellishments – $33.00 plus $10.00 Shipping
Anyone is welcome to join in my shares (please note, I can only ship to addresses within the US). To make ordering the shares a little easier, I have created a form for you to submit, that way you can order any combination of shares you want. I will send out PayPal Invoices by August 29th and they will be due by August 30th.
15% Off Select Designer Series Paper & Cardstock – August 4-31
Are you looking for the perfect card stock or Designer Series Paper for your next project? Stampin’ Up! has got you covered! Starting August 4, enjoy 15% off select Designer Series Paper and card stock. Stock up on your favorites or explore new colors and patterns during this sale!
Here are the sale details:
Sales Period: August 4–31
Ordering Deadline: August 31, 2026, at 11:59 p.m. (MT)
While supplies last.
You’ll find all qualifying items in one convenient location once the sale begins on August 4—it will be located in the “Designer Series Paper and Cardstock Sale” page in the online store.
Head over to my Online Store beginning August 4 to shop the sale!!
Good Wednesday morning stamping friends. We’ve made it halfway through the week and we’re on our way to the weekend. We had some pretty bad thunderstorms here yesterday and we’re expecting more today.
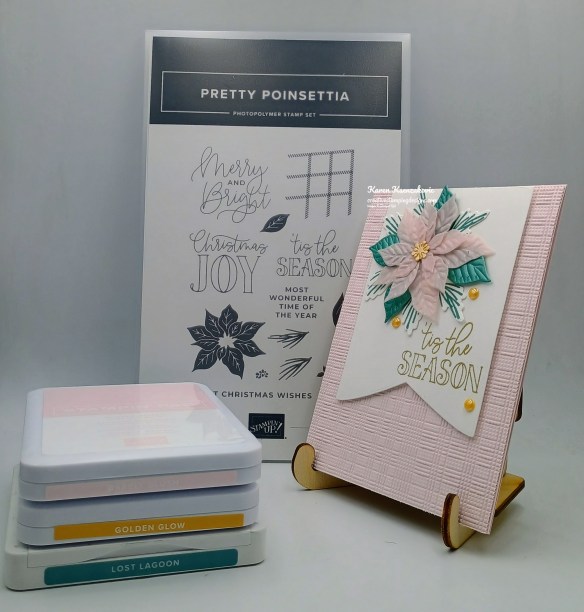
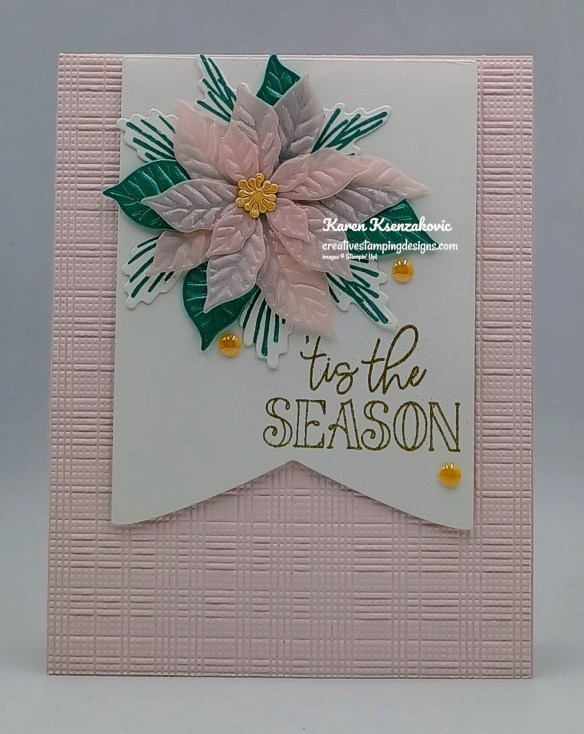
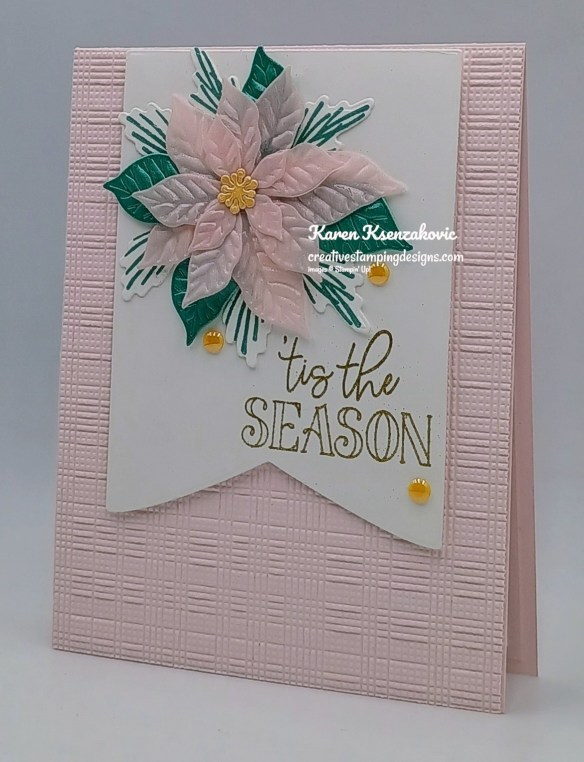
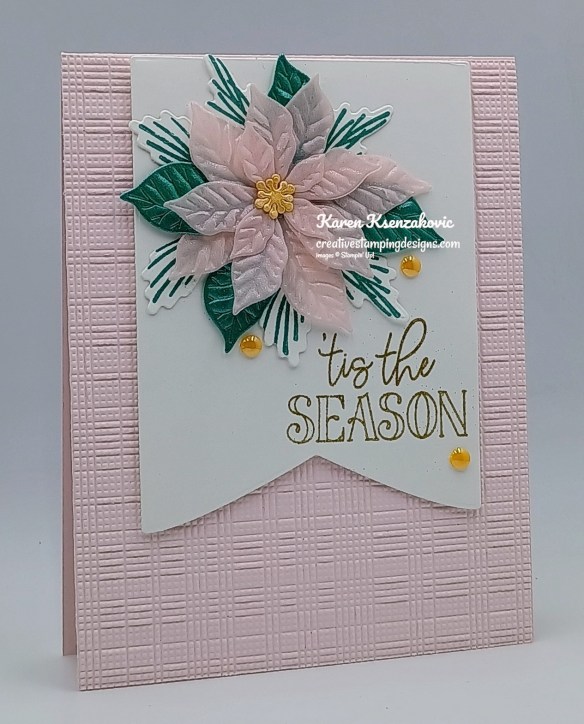
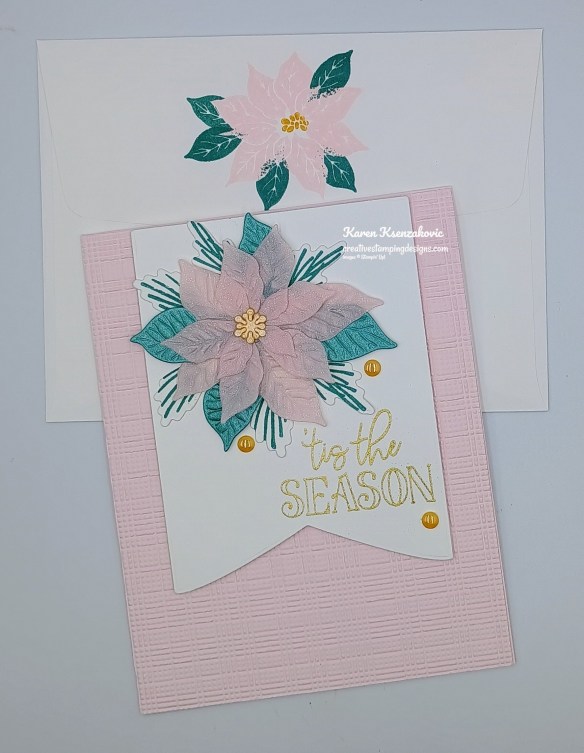
This past weekend Tara and I had our monthly class Christmas in July. It got me in the mood to make another Christmas card, this one I added a sneak peek of something coming in September. Here’s my card for today.
I used the Stampin’ Up! Pretty Poinsettia Bundle, Party Banner Dies and the new Softly Woven 3D Embossing Folder, that will be available September 1, for my card today.
Emboss a panel of Barly Blush using the Softly Woven EF. Adhere the embossed panel to a Barely Blush card base.
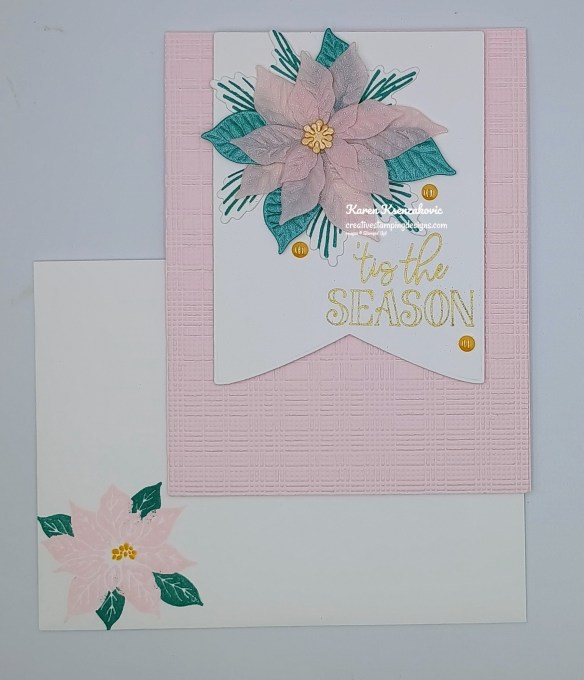
Using the Party Banner Dies, cut the 7th from the smallest die from a panel of Basic White. Stamp the sentiment from the Pretty Poinsettia on the bottom of the banner in Versamark Ink. Sprinkle the sentiment with Gold Embossing Folder and set it with the Heat Tool. Adhere the banner to the card front with Stampin’ Dimensionals.
Using the Small Blending Brush, add Lost Lagoon Ink to a Pool Party panel of the Pastel Shimmer paper. Using the Pretty Poinsettia Dies, cut the largest flower die from the blended panel, cut the other 3 flowers from a panel of Sunset Shimmer Vellum. Adhere the flower petals together with Glue Dots. On a panel of Basic White, stamp the pine bough image from the Pretty Poinsettia stamp set in Lost Lagoon Ink. Cut the images out using the Pretty Poinsettia Dies. Cut the flower center from a scrap of Golden Glow Pearlized paper and adhere them to the center of the flower with a Glue Dot. Adhere the poinsettia to the top of the banner with Stampin’ Dimensionals. Adhere the pine boughs under the flower. Add a few 2026-2028 In-Color Dots to the card front
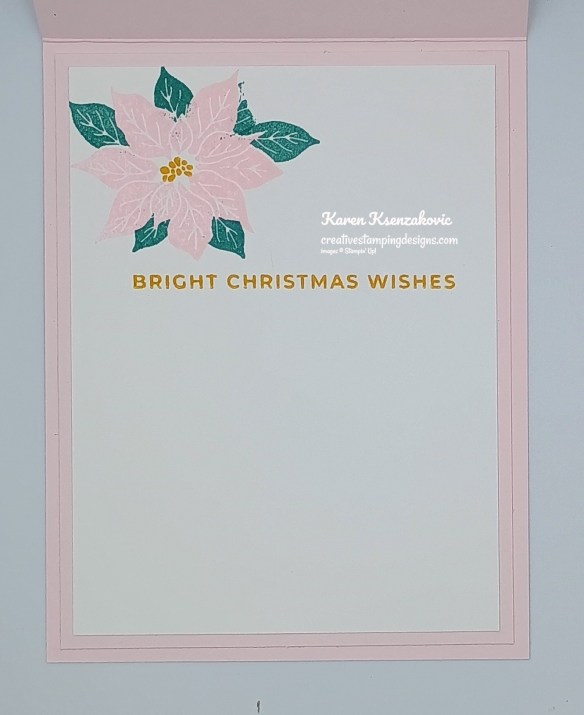
Stamp the sentiment from the Pretty Poinsettia stamp set in Golden Glow Ink on a panel of Basic White. Stamp the poinsettia image from the Pretty Poinsettia stamp set in Barely Blush Ink on the top of the panel. Stamp the flower center in Golden Glow Ink. Stamp the leaf image from the Pretty Poinsettia stamp set in Lost Lagoon Ink around the flower. Adhere the Basic White panel to a Barely Blush mat then to the inside of the Barely Blush card base.
Decorate a Basic White Medium Envelope to finish your card. Stamp the poinsettia image from the Pretty Poinsettia stamp set in Barely Blush Ink on the envelope front and flap. Stamp the flower center in Golden Glow Ink and the leaves around the flower in Lost Lagoon Ink.
Thank you for stopping by my blog today. I hope you like the card and will give it a try. Happy Stamping!!
If you need any stamping supplies, I’d love to be your Demonstrator. Just click HERE to go directly to my online store or drop me an email if you have any questions.
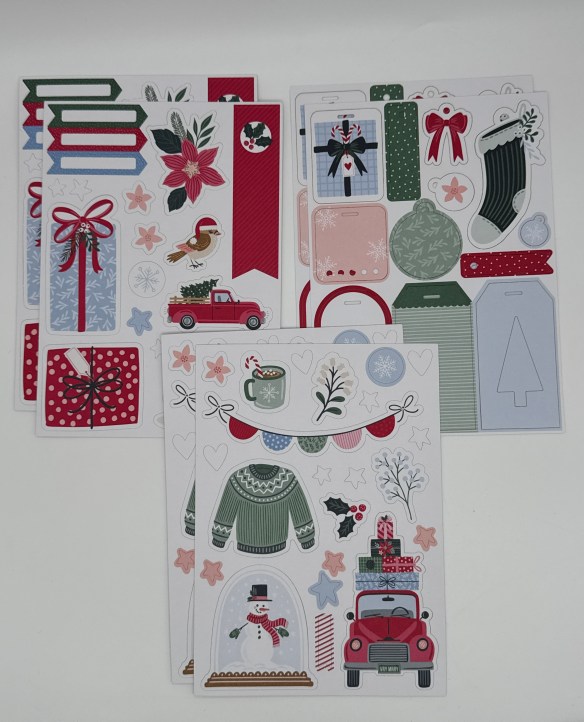
I’ve received the September – December 2026 catalogs and mailed them to my customers, so be on the look out if you are a customer of mine. It’s filled with holiday related items and I can’t wait for you all to see it!
If you’ve ordered from me within the last year, you automatically are on my mailing list for the new catalogs. If you are not a current customer of mine but would like to be and would like to get a copy of the upcoming catalog, simply place an order through my Online Store and I’ll mail you a copy of the catalog too!
September-December Catalog & Online Exclusive Product Shares Open for Ordering!!
It’s time again. The new September – December 2026 Catalog will be arriving in your mailbox real soon and you’re going to want all that beautiful Designer Series Paper, Ribbon and/or Embellishments. My September – December 2026 Catalog and September Online Exclusive Product Shares are open for ordering. You can order just the DSP share, just the Two-Tone cardstock share, just the Ribbon share or just the Embellishment share, or you can have it all!!
I’m offering a Designer Series PaperShare, Two-Tone Cardstock Share, Ribbon Share & Embellishment Share from the September – December 2026 Catalog, along with the upcoming September 2026 Online Exclusives and I’d love to have you join!! I’m placing my share order early on September 1st and I’m going to use the expedited shipping option so I should be able to have the shares cut, bundled and back out to you by the end of the week of September 7th. Wouldn’t you love to have all of the gorgeous new Designer Series Papers in the Stampin’ Up! Sept – Dec 2026 Catalog and the upcoming Sept 2026 Online Exclusives? What is a Paper Share you ask? It’s a sample of each of the new Designer Series Papers from the Catalog and Online Exclusives. Shares give you a good working sample of all of the papers so that you can decide which ones to order in full packs! If you were to purchase all of the DSP in the new Catalog and Online Exclusives, it would cost you over $250.00 plus shipping.
New Designer Series Paper Share – $30.00 plus $10.00 for Priority Mail Shipping
How my shares work: I order full packs of all of the Designer Series Papers listed below, I cut them into 6″ X 6″ pieces (or 6″ X 12″ pieces for double shares) and give you one panel of each design from each pack on the list. I pack up the paper in a cellophane bag with labels listing the Name, Item # and Colors in the pack and mail it back out to you just as quickly as I can!
New Designer Series Paper Share – $30.00 plus $10.00 for Priority Mail shipping
You will receive one 6×6 sheet of each design from the following DSP packs (the number after the name indicates how many 6×6 sheets of that paper pack you will receive):
A Little Christmas (6)
All Wrapped Up Specialty (6)
Alpine Winter (6)
Autumn Opulence Specialty (5)
Autum Woodland Glimmer Specialty (3)
Creative Celebrations 6 x 6 (4)
Hearth & Home (3)
Metal Effects Specialty (3)
Mosaic Garden (6)
Neutral Noel Specialty (6)
Painted Patch (6)
Radiant Foils Specialty (3)
Sunflower Fields (6)
Texture & Tone (3)
Timeless Christmas (3)
Timeless Metallic Specialty (3)
Whispering Woods (3)
Winter Dreams Specialty (3)
Yuletide Carold (3)
In all, you’ll receive 84 – 6” x 6” sheets of designer or specialty paper!
Double Designer Series Paper Share – $60.00 Plus $10.00 Shipping
As a gift from me for ordering a Double Share of Designer Series Paper, I will include a Happiest Season Tags Mix & Match Ephemera Pack #168493. This gift is only for ordering a Double DSP Share.
Two-Tone Cardstock Share
Do you like the Two-Tone Cardstock but don’t want to buy a whole pack? You can add a share of the 3 different Two-Tone Cardstock packs for an additional $4.00 or purchase them separately for $4.00 + $10 Shipping
You will receive one 6×6 sheet of each color from each of the packs (the number after the name indicates how many 6×6 sheets of that paper pack you will receive):
Autumn Fields (6)
Home For Christmas (4)
Memorable Garden (6)
In all, you’ll receive 16 – 6” x 6” sheets of cardstock!
Double Share of the Two-Tone Cardstock – $8.00 plus $10.00Shipping
If you’d like double shares of the designer paper or cardstock, I’m offering those too! I’ll cut the 12″ x 12″ sheets into 6″ × 12″ so that you’ll be able to get 3 full A2 size card fronts from each sheet and you’ll get double sheets of the 6″ x 6″ since they’re already precut.
Ribbon Share – $21.25 plus $10.00 Shipping
All ribbons will come individually wrapped and labeled with the name and number of the product.
1/4 of a Roll of each:
Calypso Coral With Copper 3/8″ Bordered Ribbon
Cherry Cobbler & White 1″ Striped Grosgrain Ribbon
Hydrangea Hue 1/4″ Bordered Ribbon
Mossy Meadow & Very Vanilla 1/4″ Gingham Ribbon
Multicolored Christmas Baker’s Twine
Secret Sea & Gold 14″ Satin Ribbon
White 3/8″ Textured Ribbon
1/2 of each spool:
Neutrals Jute Combo Pack
Double Ribbon Share – $42.50 Plus $10.00 Shipping and you will be getting 1/2 of the roll or each ribbon.
Embellishment Share – $16.50 plus $10.00 Shipping
I’m also offering an Embellishment Share. I will divide the embellishments up and package them in a cello bag with the name and number for easy ordering, just like I do with the paper and ribbon.
You will receive (approximate # listed):
Christmas Berries (5)
Christmas Epoxy Shapes (34)
Glossy Garden Dots (24)
Gold Adhesive-Back Dots (30)
Painted Patch Adhesive-Back Dots (40)
Radiant Gems (30)
Adhesive-Back Snowflakes (40)
Adhesive-Back Sparkle Sequins (40)
Double Share of the Embellishments – $33.00 plus $10.00 Shipping
Anyone is welcome to join in my shares (please note, I can only ship to addresses within the US). To make ordering the shares a little easier, I have created a form for you to submit, that way you can order any combination of shares you want. I will send out PayPal Invoices by August 29th and they will be due by August 30th.
15% Off Select Designer Series Paper & Cardstock – August 4-31
Are you looking for the perfect card stock or Designer Series Paper for your next project? Stampin’ Up! has got you covered! Starting August 4, enjoy 15% off select Designer Series Paper and card stock. Stock up on your favorites or explore new colors and patterns during this sale!
Here are the sale details:
Sales Period: August 4–31
Ordering Deadline: August 31, 2026, at 11:59 p.m. (MT)
While supplies last.
You’ll find all qualifying items in one convenient location once the sale begins on August 4—it will be located in the “Designer Series Paper and Cardstock Sale” page in the online store.
Head over to my Online Store beginning August 4 to shop the sale!!
Good Wednesday morning my stamping friends. How is everyone doing today? We’re halfway through the week and on our way to the weekend already.
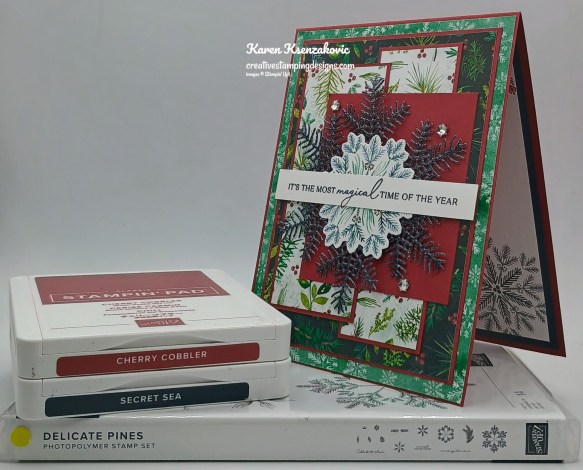
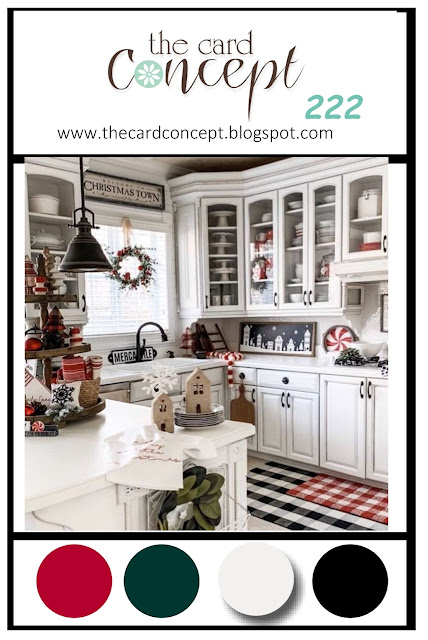
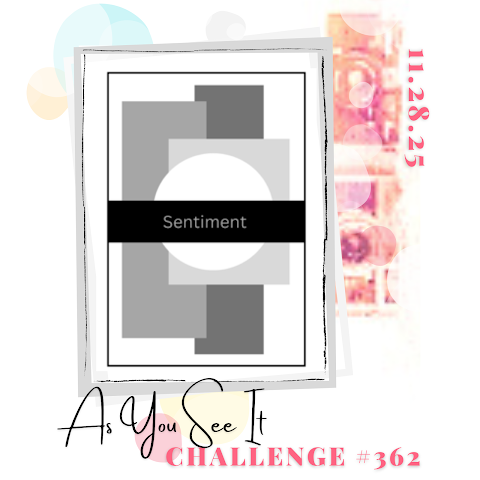
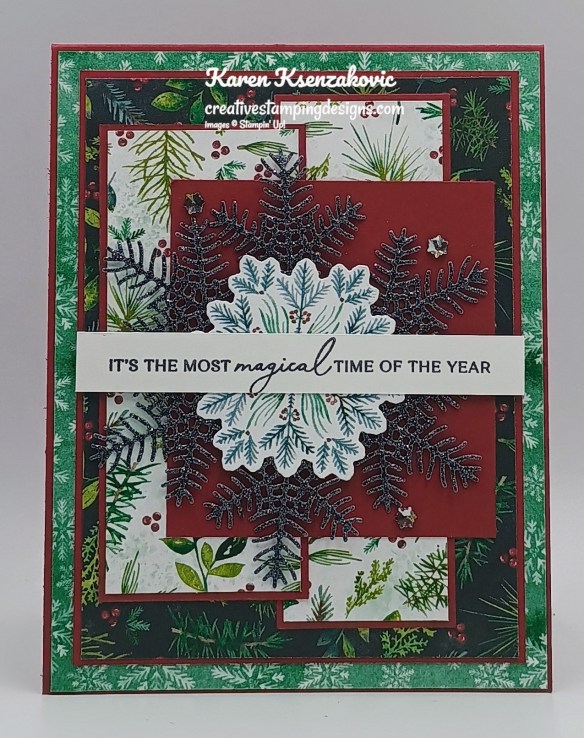
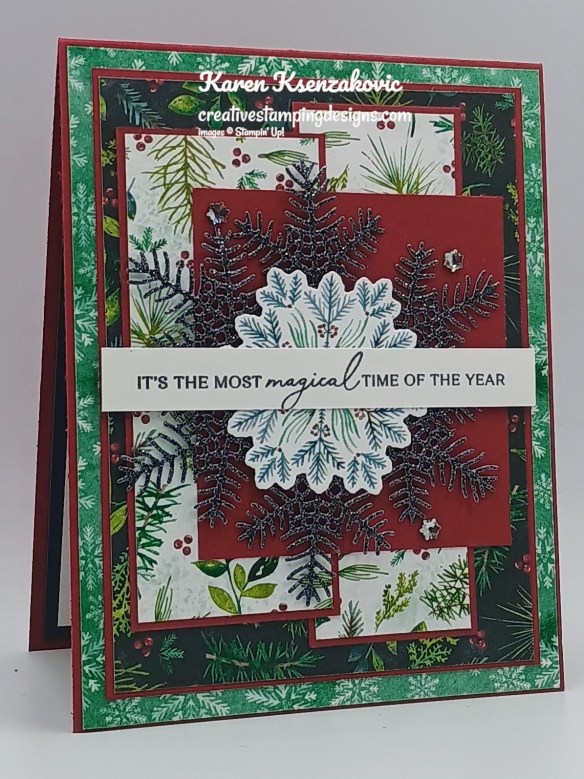
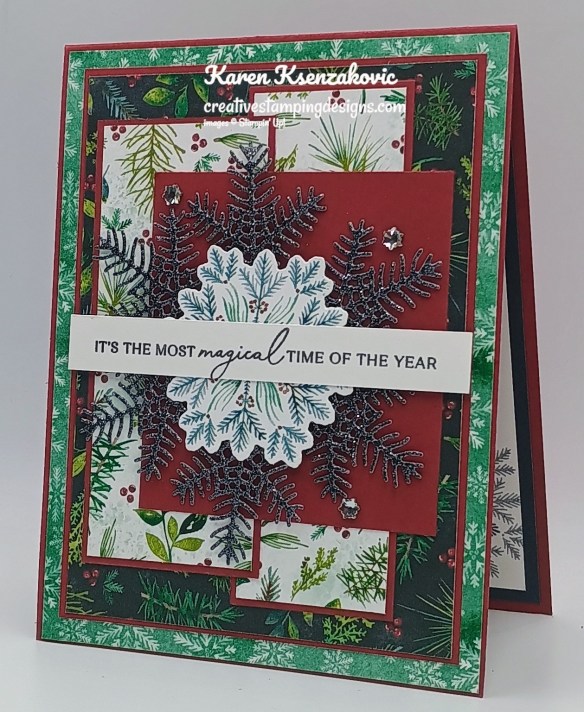
Today’s card is for the inspiration challenge from The Card Concepts. The inspiration photo #222 is Christmas Gathering. I used lots of layered on my card, since that is one of my favorite kinds of cards to make. If you’d like to see a quick video of how I made this card, Click Here to go to my Instagram Reels. Here’s my card for today.
I used the Stampin’ Up! Delicate Pines Bundle along with the Elegant Pine Snowflakes Designer Series Paper for my card today. I was inspired by the colors along with the snowflake in the photo for my clean and layered card today.
I hope you will take a moment to visit The Card Concepts and join us for our challenge 222. How are you inspired by the photos?
Adhere a panel of Elegant Pine Snowflakes DSP to a Cherry Cobbler card base. Adhere a smaller panel of Elegant Pine Snowflakes DSP to a Cherry Cobbler mat. Adhere the layered panel to the card front.
Adhere the 2 panels of Elegant Pine Snowflakes DSP to coordinating Cherry Cobbler mats. Adhere the 2 layered panels to the card front. Using the Delicate Pines Dies, cut 3 of the large pine boughs from a panel of Peaceful Garden Glimmer Paper and cut the medium snowflake from a panel of Elegant Pine Snowflakes DSP. Adhere the 3 large pine boughs together. Adhere the die cut snowflake on top of the pine boughs. Adhere the die cut panel to the panel of Cherry Cobbler, off centering it. Adhere the layered panel to the card front.
On a strip of Basic White, stamp the sentiment from the Delicate Pines stamp set in Secret Sea Ink. Adhere the sentiment across the center of the snowflake. Add a few Faceted Snowflakes to the card front.
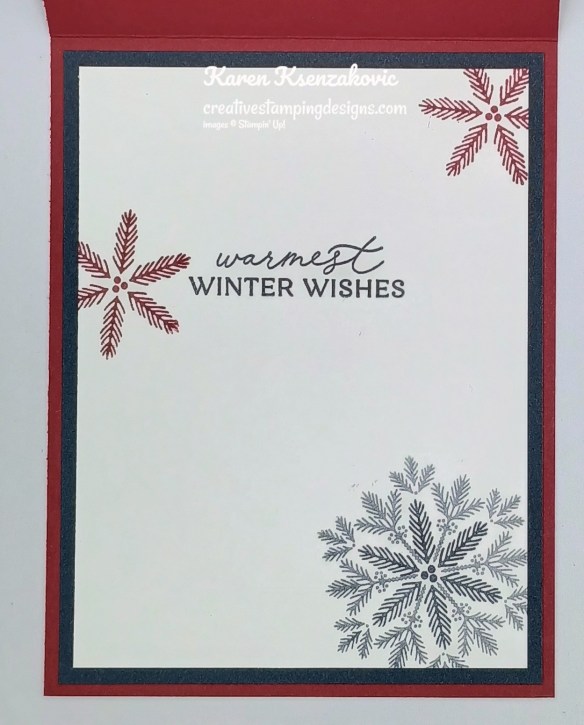
Stamp the sentiment from the Delicate Pines stamp set in Secret Sea Ink on a panel of Basic White. Stamp the medium and small snowflake images from the Delicate Pines stamp set in Cherry Cobbler and Secret Sea Inks on the panel. Adhere the Basic White panel to a Secret Sea mat then to the inside of the Cherry Cobbler card base.
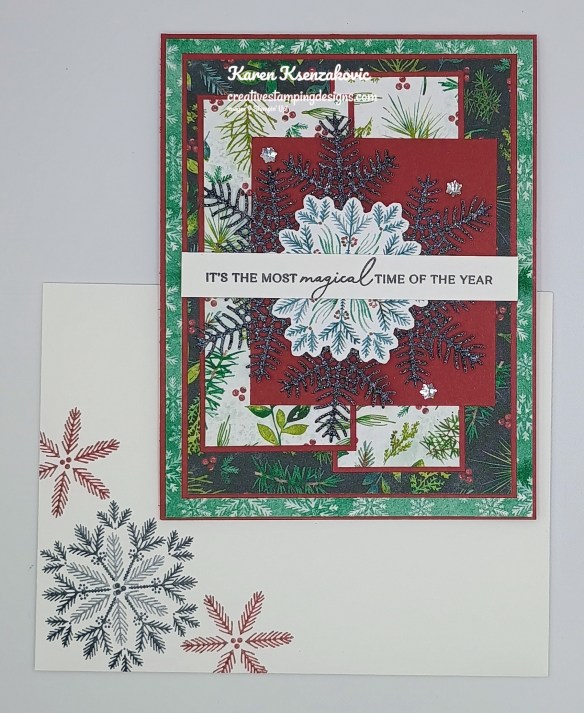
Decorate a Basic White Medium Envelope to finish the card. Stamp the snowflake images from the Delicate Pines stamp set in Cherry Cobbler and Secret Sea Inks on the envelope front. Adhere a panel of Elegant Pine Snowflakes DSP to the envelope flap.
Thank you for stopping by my blog today. I hope you like the card and will give it a try. Happy Stamping!!
If you need any stamping supplies, I’d love to be your Demonstrator. Just click HERE to go directly to my online store or drop me an email if you have any questions.
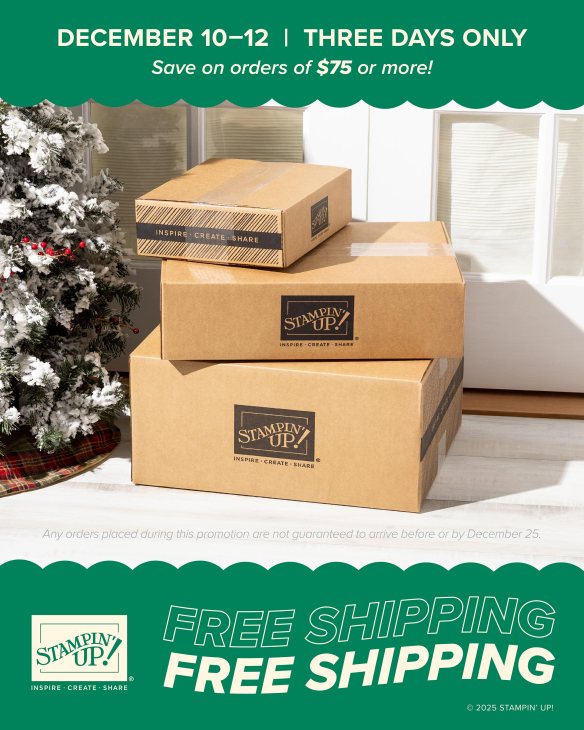
Free Shipping for Orders of $75+ before tax – 3 Days Only – Starting Today
Stampin’ Up! announced that they are offering FREE shipping on orders of $75+ from December 10-12!!
Here are the details:
Free shipping begins at 12:01 AM MT on December 10.
Free shipping ends at 11:59 PM MT on December 12.
Free shipping is for three days only. Orders must be opened and closed from December 10–12.
Free shipping automatically applies to your cart after the qualifying amount has been met, which is $75 (before tax).
Coupon codes and Stampin’ Rewards will lower your order’s retail amount. Orders must meet the qualifying amount to be eligible for free shipping.
The additional cost for expedited shipping is not covered by this promotion.
Prepaid 3-, 6-, and 12-month Paper Pumpkin subscriptions and month-to-month subscriptions do not qualify for free shipping. Refills, past kits, and add-ons do qualify toward free shipping, but you must be a subscriber to purchase. Subscriptions billed and shipped this month will be charged for the normal amount ($27.00 shipping included) + tax.
Please keep in mind that due to the high volume of orders and the Christmas season, the distribution center may fall behind their typical shipping time frames. They will do all we can to return to our regular service levels as quickly as possible. Any orders placed during this promotion are not guaranteed to arrive before or by December 25.
Get your orders ready and get them placed in the online store between December 10-12! And as an added bonus, if you haven’t already earned the December Product Of The Month, your $75 order with free shipping will qualify you to earn that item for $5!!
Let me know if you have any questions. Have fun shopping!
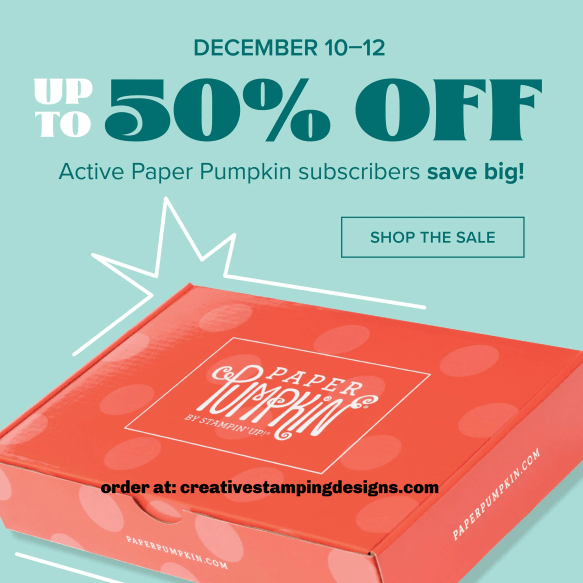
Save Up To 50% off on Past Paper Pumpkin Refills December 10-12
Big savings start today! From December 10–12, Paper Pumpkin subscribers can get up to 50% off on refills, past kits, and add-ons! Bonus: the sale items also qualify for FREE SHIPPING during the sale!
This sale is only open to active subscribers! Today, December 9, is the last day to save on prepaid Paper Pumpkin subscriptions with the Cyber Monday Sale! So if you’re interested in subscribing but haven’t done it yet, subscribe now and get that great deal on the prepaid kits then shop the refills, past kits and add-ons sale starting tomorrow!
Hurry—this sale is only while supplies last! Click here to see the great products that will be on sale December 10-12!
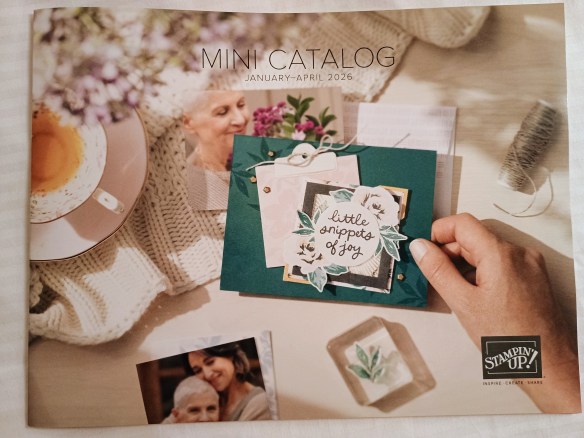
My January – April 2026 Mini Catalog and January Online Exclusive Designer Series Paper, Ribbon and Embellishment Shares are open for ordering. You can order just the DSP share, just the Two-Tone cardstock share, just the Ribbon share or just the Embellishment share, or you can it all!! For all the information, Click Here.
Anyone is welcome to join in my shares (please note, I can only ship to addresses within the US). To make ordering the shares a little easier, I have created a form for you to submit, that way you can order any combination of shares you want. Click Here for the form. I will send out PayPal Invoices by January 2nd.
Deadline to sign up for my share is Saturday January 3rd at 5:00 PM ET.
Basic White Cardstock 1/2″ x 3 3/4″(sentiment), 3 3/4″ x 5″(inner liner)
Cherry Cobbler Cardstock 4 1/4″ x 11″(card base scored & folded at 5 1/2″), 3 3/5″ x 5″ panel, 1 1/2″ x 4 1/2″ panel, 1 3/4″ x 4″ panel, 2 3/4″ x 3″ panel
Secret Sea Cardstock 4″ x 5 1/4″ panel
Elegant Pine Snowflakes Designer Series Paper 4 1/8″ x 5 3/8″ panel, 3 5/8″ x 4 7/8″ panel, 1 3/8″ x 4 3/8″ panel, 1 5/8″ x 3 7/8″ panel, 2 1/4″ x 6″ panel
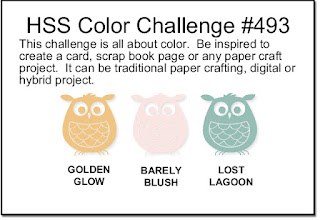
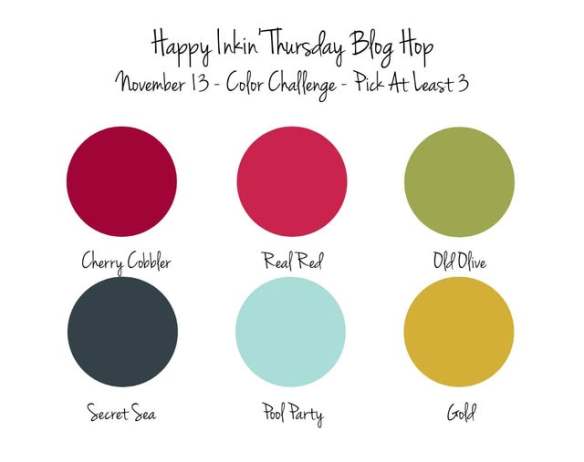
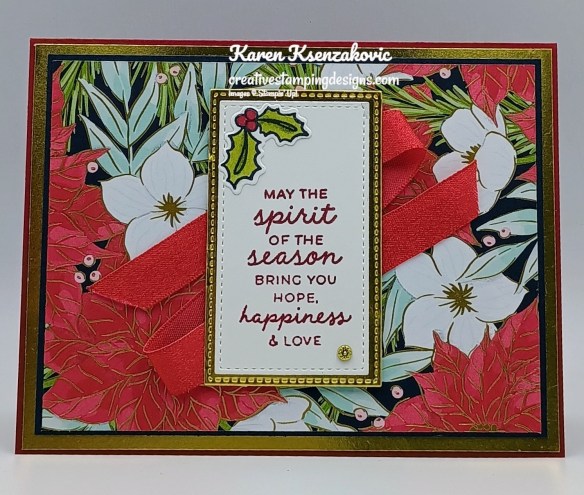
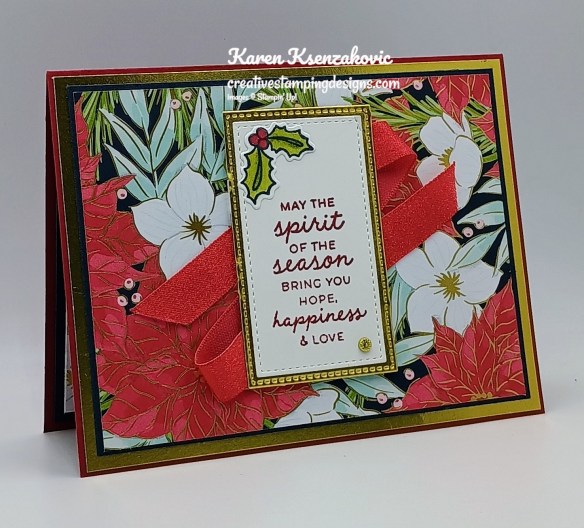
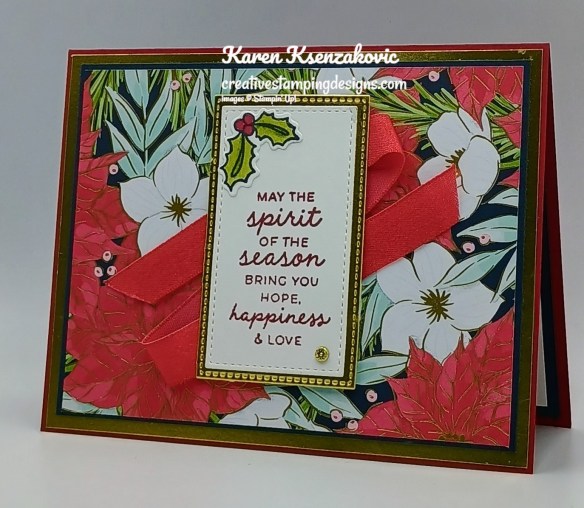
Good Thursday morning stamping friends and welcome to our Happy Inkin’ Thursday Blog Hop. If you are starting with me, thank you. I hope you will stop by everyone’s blog to see what they have created this week. If you are hopping over from Mary’s blog, thank you for stopping by. This week we have Color Challenge. If you’d like to see a quick video on how I made this card, Click Here to go to my Instagram Reels. Here is my card using this week’s colors.
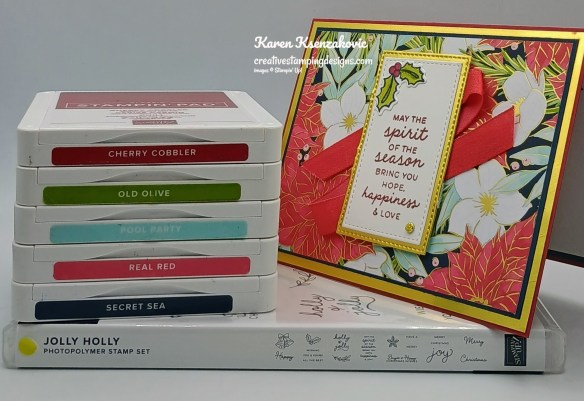
I used the Stampin’ Up! Jolly Holly Bundle along with the Traditions of Christmas Specialty Designer Series Paper for my card today.
These are our colors for this week.
Cut the larger rectangle and the sentiment using the Jolly Holly Dies from a panel of Gold Foil. Adhere a panel of Traditions of Christmas DSP to a Secret Sea mat. Adhere the layered panel to the Gold Foil mat.
Adhere the layered panel to a Cherry Cobbler card base. On a panel of Basic White, stamp the sentiment from the Stampin’ Up! Jolly Holly Photopolymer Stamp Set in Cherry Cobbler Ink. Stamp the holly/berries image from the Jolly Holly stamp set on the panel in Tuxedo Black Ink. Color the holly image using Cherry Cobbler and Old Olive Stampin’ Blends Markers. Using the Jolly Holly Dies, cut the sentiment using the smaller rectangle and the holly image.
Adhere the sentiment to the Gold Foil mat. Adhere the holly/berries to the top of the sentiment. Adhere a piece of Real Red Shiny Ribbon to the card front. Adhere the layered sentiment to the card front over the ribbon with Stampin’ Dimensionals. Add a Flower Accent to the card front.
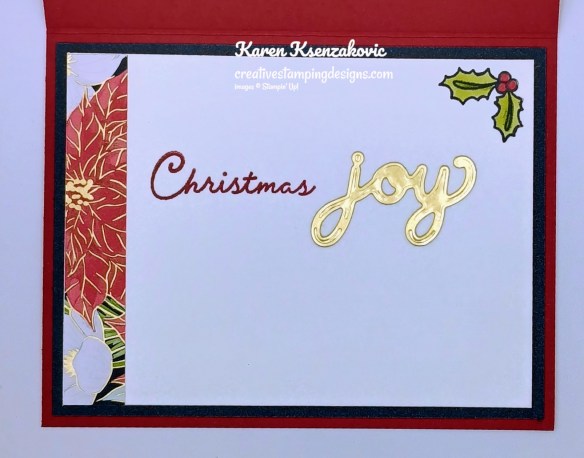
Stamp the sentiment from the Jolly Holly stamp set on a panel of Basic White in Cherry Cobbler Ink. Adhere the Gold Foil sentiment next to the stamped sentiment. Adhere a panel of Traditions of Christmas DSP to the side of the panel. Adhere the Basic White panel to a Secret Sea mat then to the inside of the Cherry Cobbler card base.
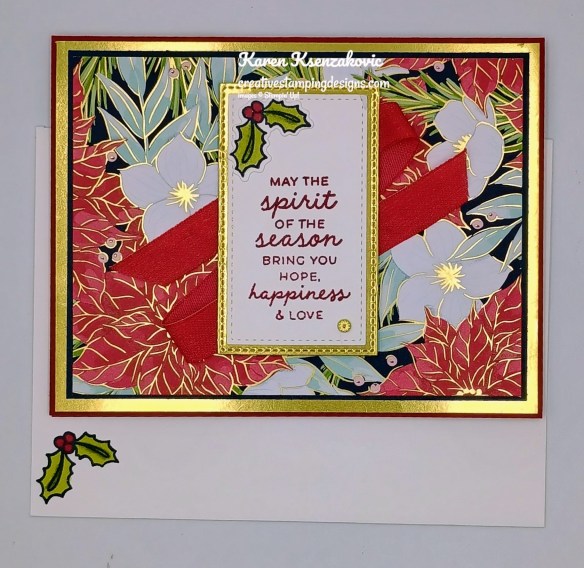
Decorate a Basic White Medium Envelope to complete your card. Stamp the holly image from the Jolly Holly stamp set in Tuxedo Black Ink on the envelope front. Color the image using Cherry Cobbler and Old Olive Stampin’ Blends Markers. Adhere a panel of Traditions of Christmas DSP to the envelope flap.
Thank you for stopping by my blog today. Now that you’ve seen my card, let’s get on with the hop! Click the button below to hop over to see what Akiko created. Happy Hopping!!
Just in case you get lost along the way, here is a list of the team members involved in the hop today.
If you need any stamping supplies, I’d love to be your Demonstrator. Just click HERE to go directly to my online store or drop me an email if you have any questions.
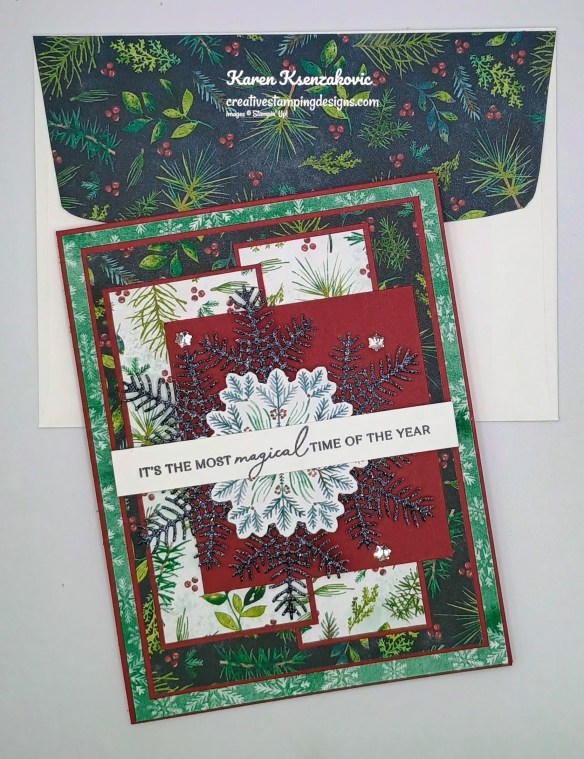
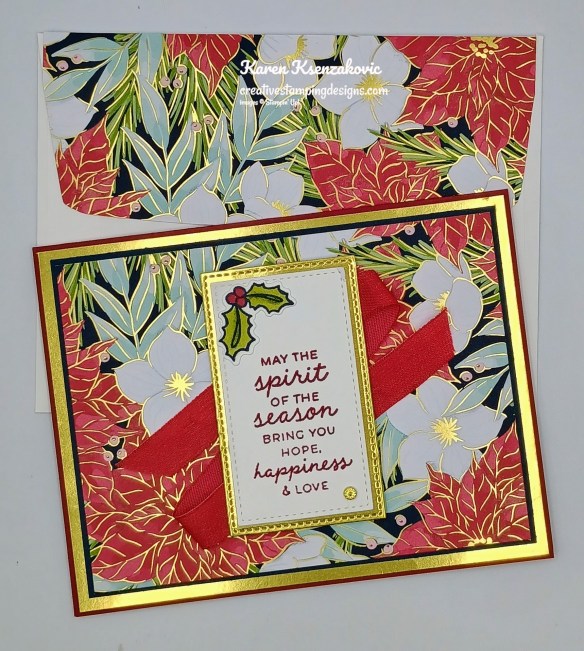
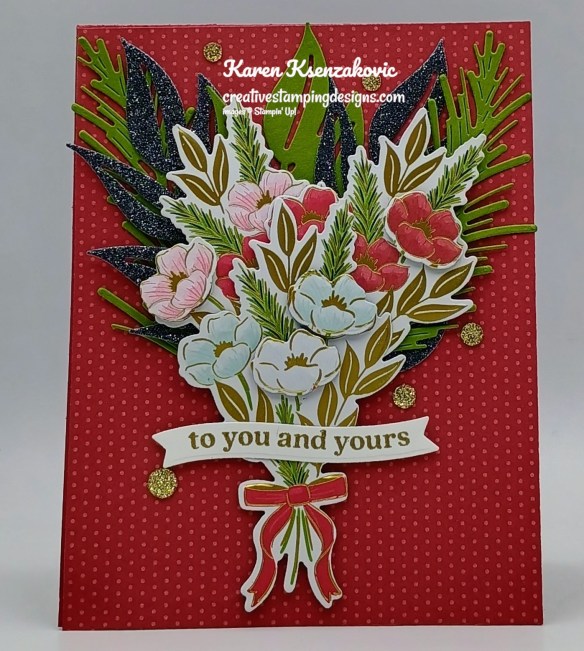
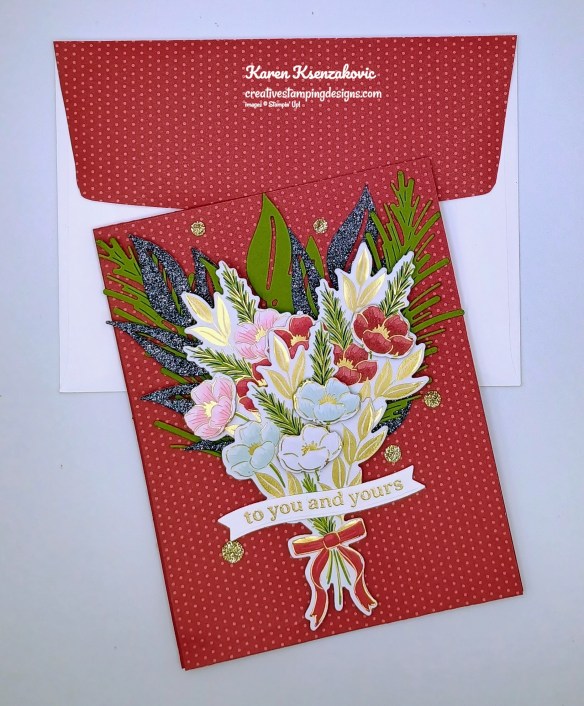
Good Tuesday morning my stamping friends welcome to Amy’s Inkin’ Krew Team Blog Hop. It’s the 2nd Tuesday of the month so that means Blog Hop Day!! If you are starting with me, be sure to hop around to see everyone’s beautiful projects. If you’ve hopped over from Amy’s blog, welcome to my blog and thank you for stopping by. The theme this month is “Merry Christmas/Happy Holiday”. If you’d like to see a quick video on how I made this card, Click Here to go to my Instagram Reels. Here’s my card for today.
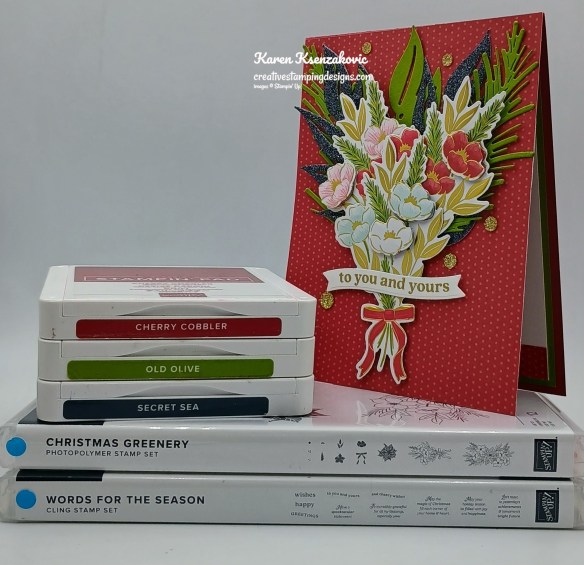
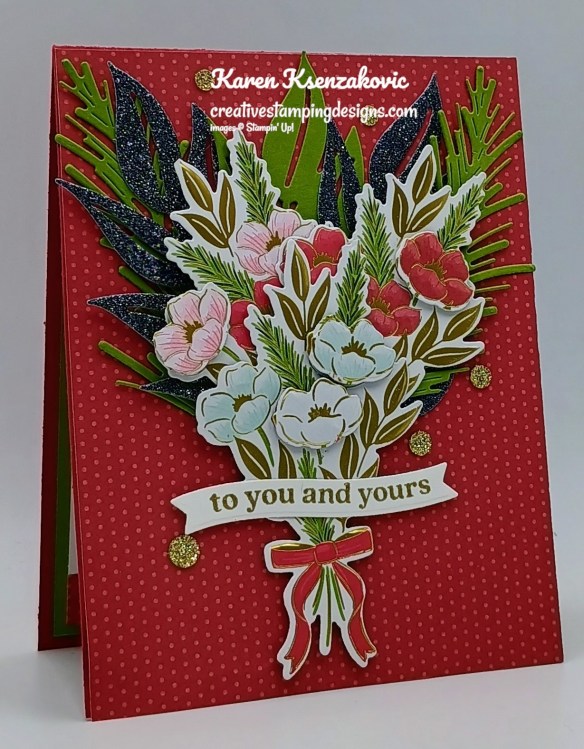
I used the Stampin’ Up! Words for The Season Bundle along with the Traditions of Christmas Specialty Designer Series Paper and Stampin’ Up! Christmas Greenery Bundle for my card today.
Adhere a panel of the Traditions of Christmas DSP to a Cherry Cobbler card base.
Using the Christmas Greenery Dies cut 3 of the bouquets from the Traditions of Christmas DSP, 2 of the pine boughs from a panel of Old Olive, 2 of the leaves from a panel of Peaceful Garden Glimmer paper and 1 from a panel of Old Olive. Arrange a bouquet how you like them and adhere it to the card front with Stampin’ Dimensionals.
On a panel of Basic White, stamp the sentiment from the Stampin’ Up! Words for The Season Cling Stamp Set in Versamark Ink. Sprinkle the sentiment with Gold Embossing Powder and set it with the Heat Tool. Cut the sentiment out with the Words of The Season Dies. Adhere the sentiment to the card front over the bouquet stems. Add a few Traditional Sparkling Sequins to the card front.
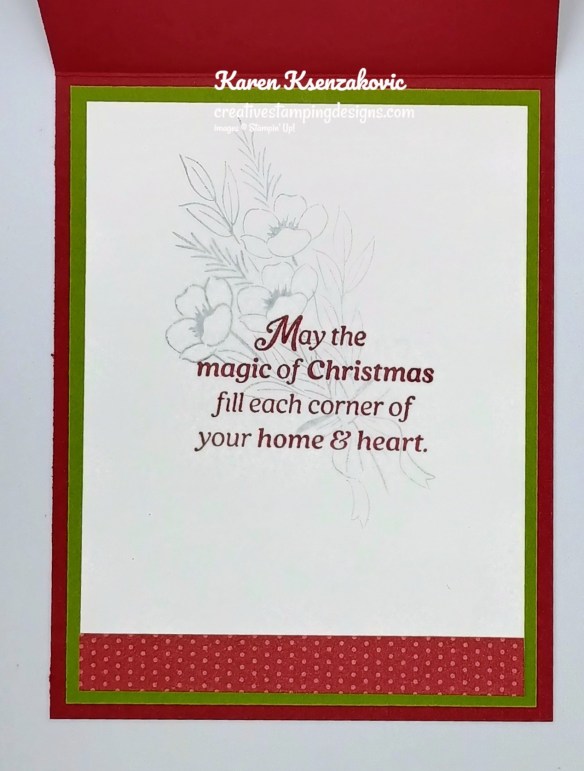
On a panel of Basic White, stamp the sentiment from the Words of the Season stamp set in Cherry Cobbler Ink. Stamp the bouquet image from the Stampin’ Up! Christmas Greenery Photopolymer Stamp Set in Secret Sea Ink, stamping off 2 times on scrap paper, over the sentiment.
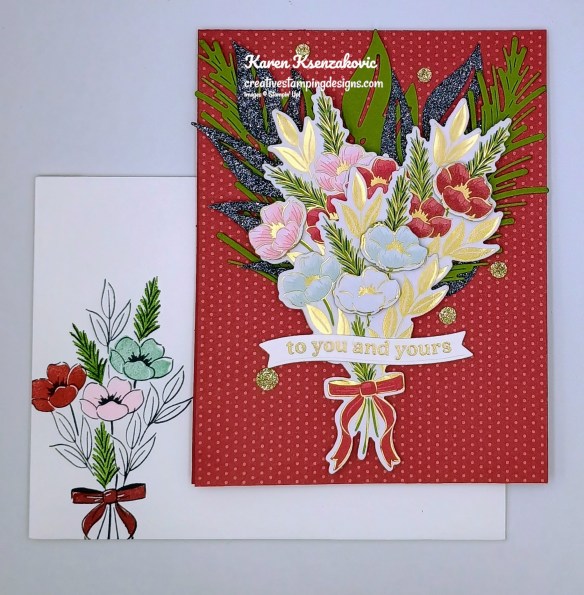
Decorate a Basic White Medium Envelope to complete your card. Stamp the bouquet image from the Christmas Greenery stamp set in Secret Sea Ink on the envelope front. Stamp the small solid flower image from the Christmas Greenery stamp set in Bubble Bath, Pool Party and Real Red Ink over the outlined image. Stamp the pine boughs in Old Olive Ink and the bow in Cherry Cobbler Ink over the outlined image. Adhere a panel of Traditions of Christmas DSP to the envelope flap.
Thank you for stopping by my blog today. Now that you’ve seen my card, let’s get on with the hop! Click on the Next Blog button to move on to Christie’s project or click the Previous Blog button to go back to see the project that Amy created. Happy Hopping.
Just in case you get lost along the way, here is a list of the team members involved in the hop today.
If you need any stamping supplies, I’d love to be your Demonstrator. Just click HERE to go directly to my online store or drop me an email if you have any questions.
Basic White Cardstock 1″ x 3″(sentiment), 3 3/4″ x 5″(inner liner)
Cherry Cobbler Cardstock 4 1/4″ x 11″(card base scores & folded at 5 1/2″)
Old Olive Cardstock 4 1/4″ x 5 1/2″(die cuts), 4″ x 5 1/4″(inner liner mat)
Traditions of Christmas Specialty Designer Series Paper 4 1/4″ x 5 1/2″(card front), 1/2″ x 4″(inner liner), 2 1/4″ x 6″(envelope), pieces for die cuts
Good Wednesday morning stamping friends. We’re halfway through the week already. I have this feeling November is going to fly by just like October did. We had our Stamp Camp Class at my home last night. Everyone had a lot of fun creating cards and laughing. I decided with how hectic December always is, especially since Thanksgiving is so late this year again, we’re going to skip our December class and resume in January. So, since we’re skipping a month, the ladies made 5 cards last night, 2 which were fun folds.
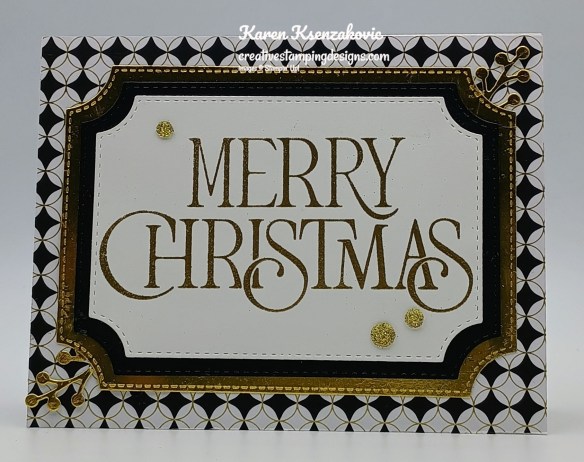
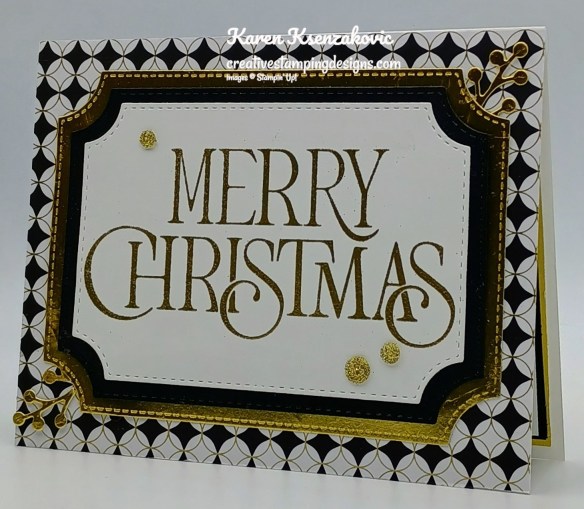
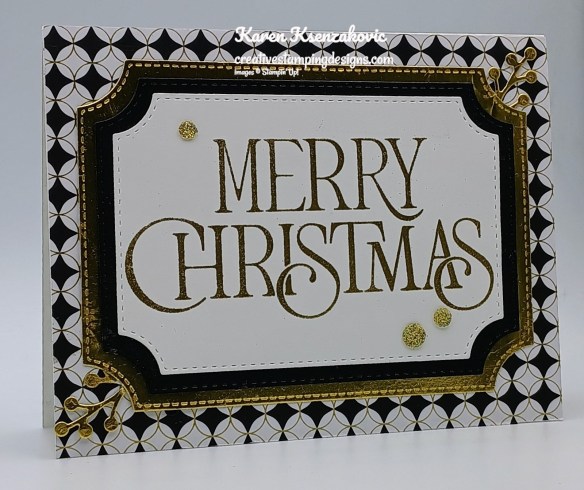
I have a quick card for you today This is one of those Christmas cards that’s easy to reproduce a lot of in a short amount of time. If you’d like to see a quick video on how I made this card, Click Here to go to my Instagram Reels. Here’s my card for today.
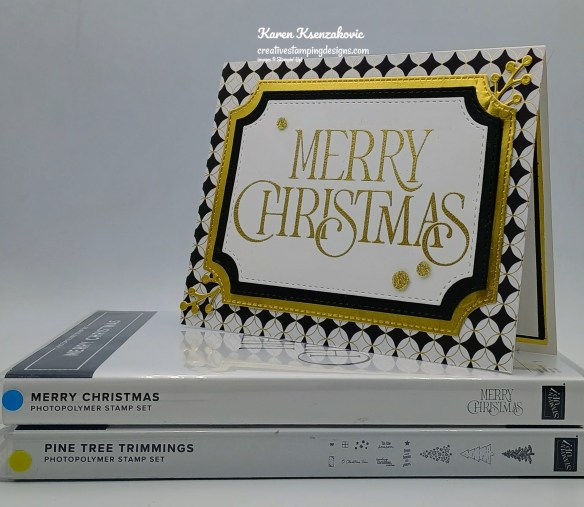
I used the Stampin’ Up! Merry Christmas Photopolymer Stamp Set along with the Modern Christmas Specialty Designer Series Paper, Branching Out Dies and Stampin’ Up! Pine Tree Trimmings Photopolymer Stamp Set for my card today.
Adhere a panel of Modern Christmas DSP to a Basic White Thick card base.
Cut panels of Basic Black and Gold Foil using the largest & 2nd largest Branching Out Dies. Cut the sprig die from the Branching Out Dies from the panel of Gold Foil. On a panel of Basic White, stamp the sentiment from the Merry Christmas stamp set in Versamark Ink. Sprinkle the image with Gold Embossing Powder and set it using the Heat Tool. Cut the sentiment panel out using the 3rd largest Branching Out Dies.
Adhere the sentiment to the Basic Black die cut mat then to the Gold Foil die cut mat. Adhere the sprig to the back of the layered panel. Adhere the layered panel to the Basic White card base. Add a few Traditional Sparkling Sequins to the card front.
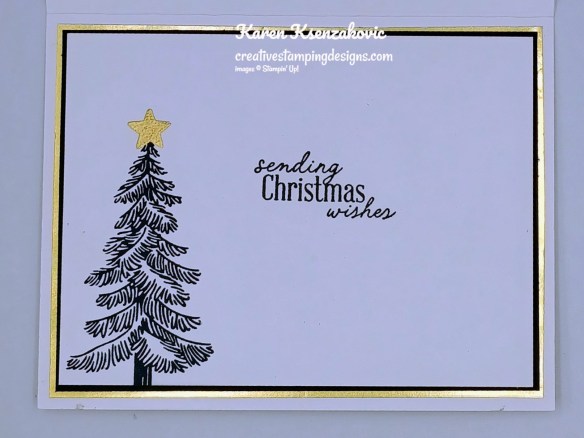
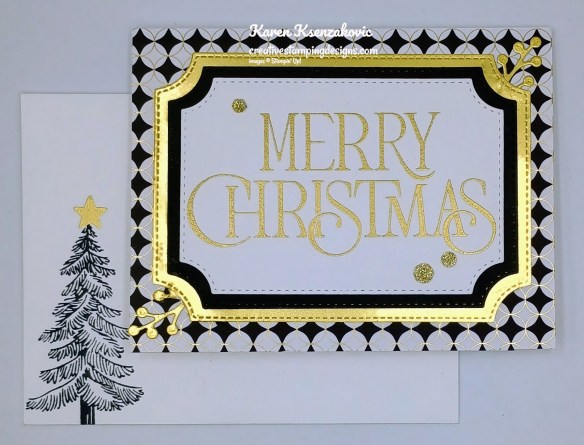
Stamp the sentiment from the Pine Tree Trimmings stamp set in Tuxedo Black Ink on a panel of Basic White. Stamp the tree image from Pine Tree Trimmings stamp set in Tuxedo Black Ink on the bottom of the panel. Stamp the star image from Pine Tree Trimmings stamp set in Versamark Ink on top of the tree. Sprinkle the image with Gold Embossing Powder and set it using the Heat Tool. Adhere the Basic White panel to a Basic Black mat and Gold Foil mat, then to the inside of the Basic White Thick card base
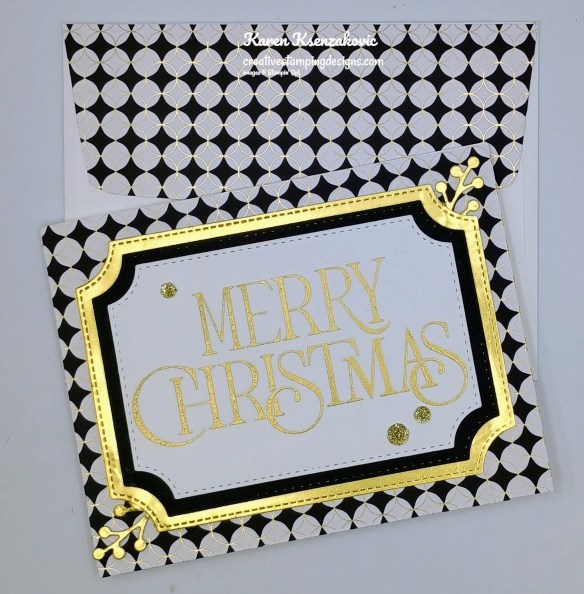
Decorate a Basic White Medium Envelope to finish the card. Stamp the tree image from Pine Tree Trimmings stamp set in Tuxedo Black Ink on the envelope front. Stamp the star image from Pine Tree Trimmings stamp set in Versamark Ink on top of the tree. Sprinkle the star with Gold Embossing Powder and set it using the Heat Tool Adhere a panel of Modern Christmas DSP to the envelope flap.
Thank you for stopping by my blog today. I hope you like the card and will give it a try. Happy Stamping!!
If you need any stamping supplies, I’d love to be your Demonstrator. Just click HERE to go directly to my online store or drop me an email if you have any questions.
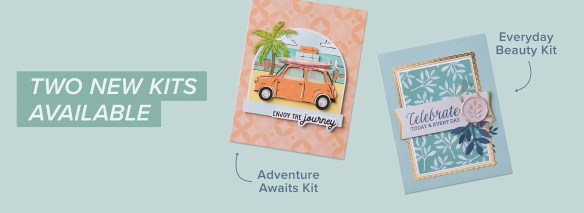
Kits Collections include designed projects that come in a range of project types. They are perfect for new crafters, busy crafters, or crafters who want quick and easy projects.
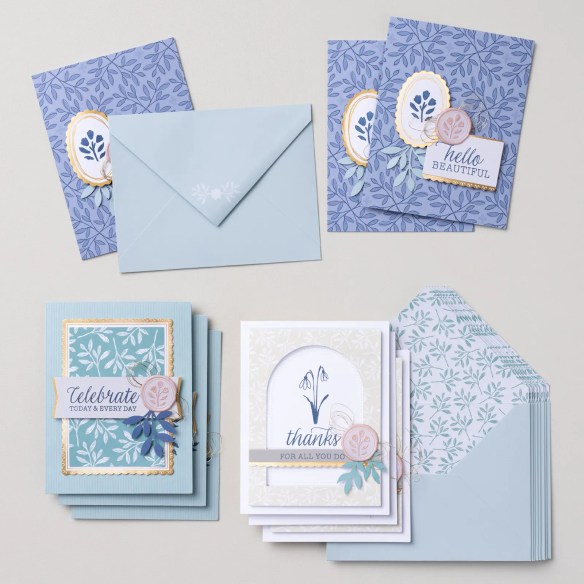
Everyday Beauty Kit
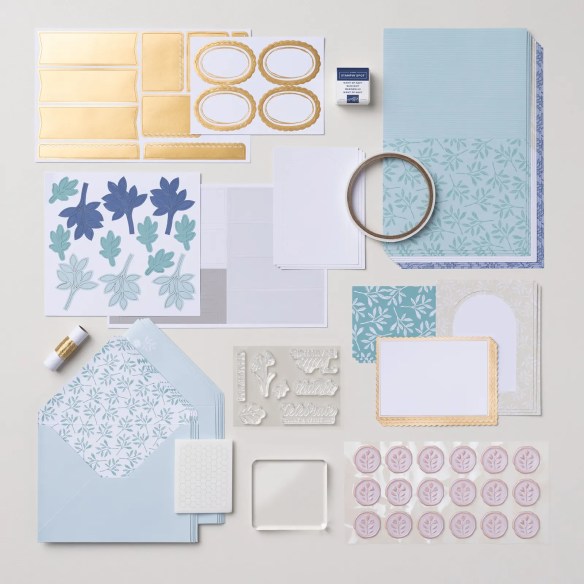
Create the perfect card for any occasion using the all-inclusive Everyday Beauty Kit. This kit comes with everything you need to make three unique card designs: printed card bases and coordinating envelopes with lovely botanical patterns, precut paper pieces, timeless faux wax seals, shimmering metallic thread, and a versatile stamp set that you can use on countless other projects.
DETAILS – Makes 9 cards: 3 each of 3 designs – Folded card size: 5-1/2″ x 4-1/4″ (14 x 10.8 cm) – Colors: Basic Beige, gold, Gray Granite, Lost Lagoon, Night of Navy, Petal Pink – Also available in French and German
Kit includes one of each item listed below. – Everyday Beauty Photopolymer Stamp Set – Clear stamp block – Night of Navy Classic Stampin’ Spot – Step-by-step instructions – 9 printed envelopes – Faux wax seal stickers – Metallic thread – Adhesive
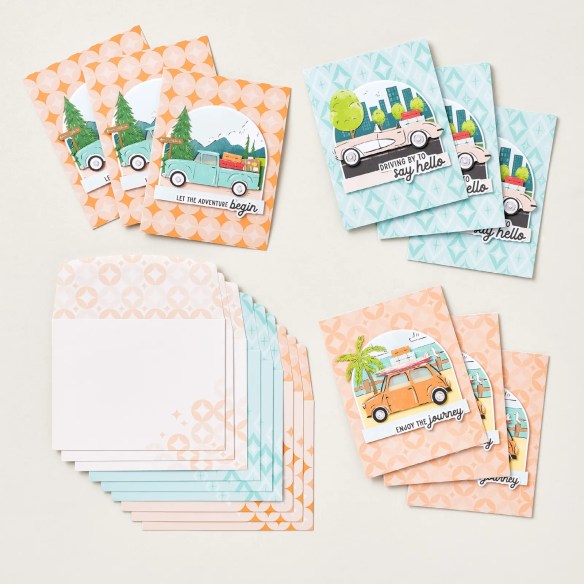
Let your creativity take the driver’s seat with the Adventure Awaits Kit. Coast in the retro colors and hand-drawn artwork that can be either feminine or masculine. With printed sentiments, precut paper, and vellum details, this kit comes with everything you need to make nine cute cards.
DETAILS – Makes 9 cards: 3 each of 3 designs – Folded card size: 5-1/2″ x 4-1/4″ (14 x 10.8 cm) – Colors: Basic Black, Coastal Cabana, Crushed Curry, Garden Green, Granny Apple Green, Pecan Pie, Petal Pink, Poppy Parade, Pretty Peacock, Timid Tiger – Sentiments printed in English, French, and German
Kit includes one of each item listed below. – Step-by-step instructions – 9 printed envelopes – Vellum – Adhesive
The Brushed with Beauty Craft Class will stream live on November 20 and will feature the Brushed with Beauty Suite Collection. The class will be available for purchase before and after the live stream. This is open to everyone. Want to sign up to be a demonstrator and get your discount? Contact me today at creativestampingdesigns@gmail.com and I’ll help you and answer any questions you may have. You can add the suite of products for this class to your starter kit.
You can order the class product and additional supplies needed so you have everything ready to go before you view the class starting November 4th from my Online Store.
Here are the class details:
Available for Purchase: November 4
Price: $30 (Suite not included)
Live Stream: November 20 at 2:00 p.m. (MT)
Where: An exclusive Facebook page
Class: Brushed with Beauty Craft Class (170074)
You can watch live or view the on-demand recording at your convenience.
Product: Brushed with Beauty Suite Collection (167100)
Language: The class will be presented in English.
Video on Demand: Stampin’ Up! will record this live class, which will be available as a video on demand right after the live stream. Videos with English, French, German, and Dutch captioning will be available through the Facebook page one week after the live stream.
Look for the class in the online store beginning November 4th!! As a little bonus, the class will be considered a regular store item, so you’ll earn Stampin’ Rewards from Stampin’ Up! (if you’ve opted in to the program) when you purchase it and the class fee will count toward your order total for my Creative Stamping Designs Reward Points from me!!
Good Sunday morning stamping friends. I hope you are all having a wonderful weekend. I’ll be at work again all day today, what kind of plans do you have?
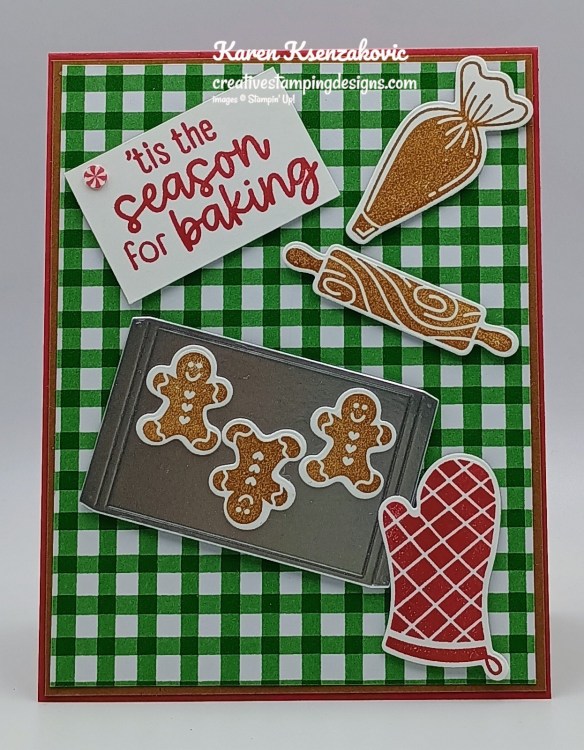
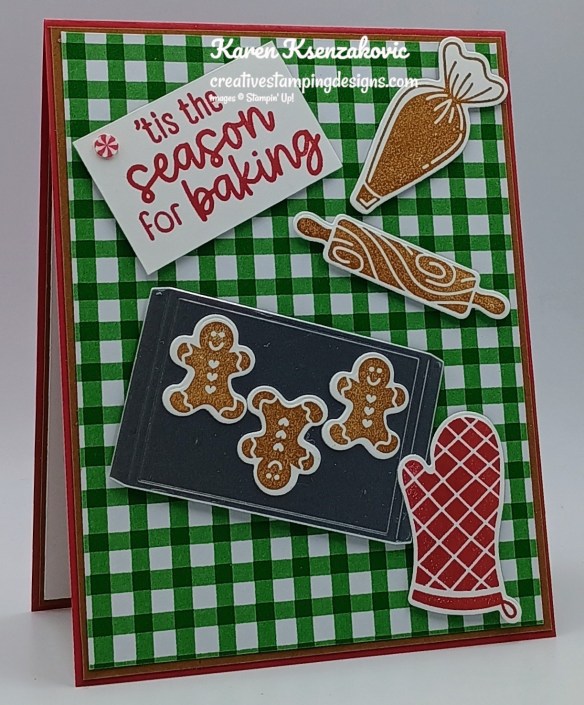
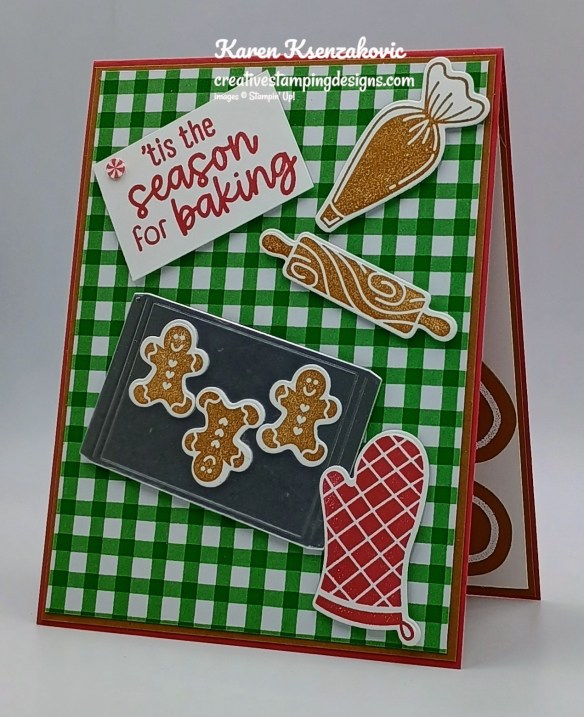
I played with a couple fun sets for my card today. This card fits in with what my holidays are like. Here’s my card for today.
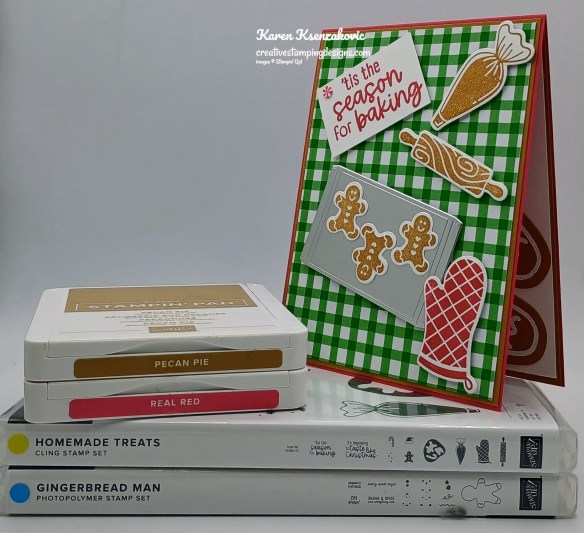
I used the Stampin’ Up! Homemade Treats Bundle along with the Christmas Tags & More Mix & Match 6 x 6 Specialty Designer Series Paper and Stampin’ Up! gingerbread Man Bundle for my card today.
Adhere a panel of Christmas Tags & More DSP to a Pecan Pie mat. Adhere the layered panel to the Real Red card base.
On a panel of Basic White, stamp the gingerbread man, rolling pin and pastry bag images from the Stampin’ Up! Homemade Treats Cling Stamp Set in Pecan Pie Ink. Stamp the oven mit image from the Homemade Treats stamp set in Real Red Ink. Cut the mages out using the Homemade Treats Dies. Cut the cookie sheet die from a panel of Silver Foil using the Homemade Treats Dies. Adhere the gingerbread men to the cookie sheet. Adhere all the die cut pieces to the card front with Stampin Dimensionals.
On a panel of Basic White, stamp the sentiment from the Homemade Treats stamp set in Real Red Ink. Adhere the sentiment to the card front with Stampin’ Dimensionals. Add a Real Red & White Adhesive-Backed Peppermint to the sentiment.
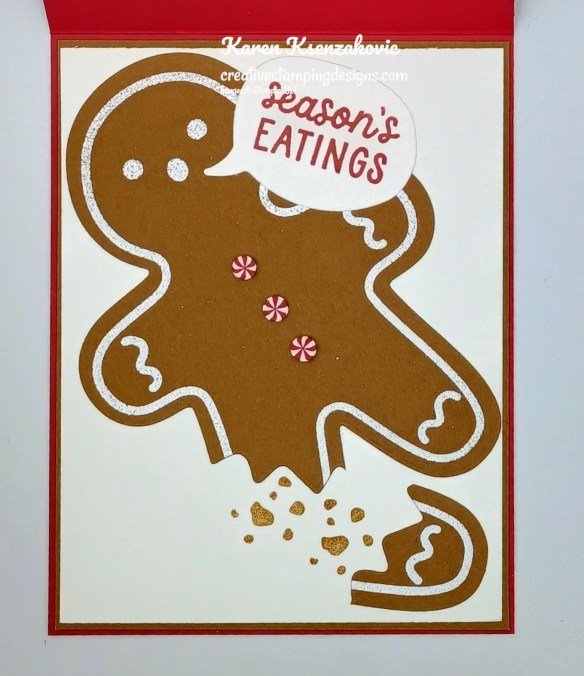
Stamp the large gingerbread man and the gingerbread man’s face from the Stampin’ Up! Gingerbread Man Photopolymer Stamp Set in Versamark Ink on a panel of Pecan Pie. Sprinkle the image with White Embossing Powder and set it with the Heat Tool. Cut the image out with the Gingerbread Man Dies. Use the Zigzag die from the Gingerbread Man Dies to cut off his leg. Stamp the crumb image from the Gingerbread Man stamp set in Pecan Pie on the bottom of a Basic White panel. Adhere the gingerbread man to the Basic White panel. Adhere the cut off leg piece to the bottom of the panel. On the panel of Basic White, stamp the sentiment from the Gingerbread Man stamp set in Real Red Ink and cut the sentiment out using bubble die from the Gingerbread Man Dies. Adhere the sentiment to the gingerbread man. Add a few Real Red & White Adhesive-Backed Peppermints to the gingerbread man. Adhere the Basic White panel to a Pecan Pie mat then to the inside of the Real Red card base.
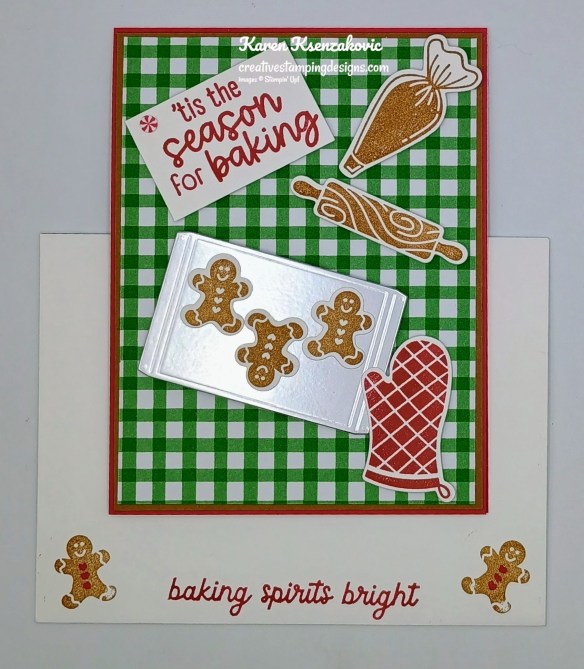
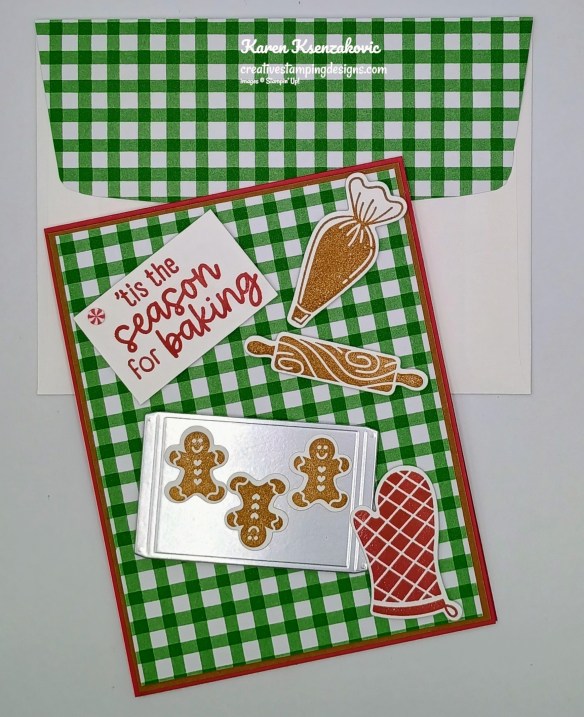
Decorate a Basic white Medium Envelope to finish your card. Stamp the sentiment from the Gingerbread Man stamp set in Real Red Ink on the envelope front. Stamp the small gingerbread man from the Homemade Treats stamp set on either side of the sentiment. Adhere a panel of Christmas Tags & More DSP to the envelope flap.
Thank you for stopping by my blog today. I hope you like the card and will give it a try. Happy Stamping!!
If you need any stamping supplies, I’d love to be your Demonstrator. Just click HERE to go directly to my online store or drop me an email if you have any questions.
Good Saturday morning stamping friends welcome to the weekend and HAPPY NOVEMBER!!! I’m still trying to figure out where October went. I hope you’re starting to make some plans for the weekend. It’s the 1st of the month and I’ll be in the office doing my bills and hopefully finish them early enough to get them to the post office.
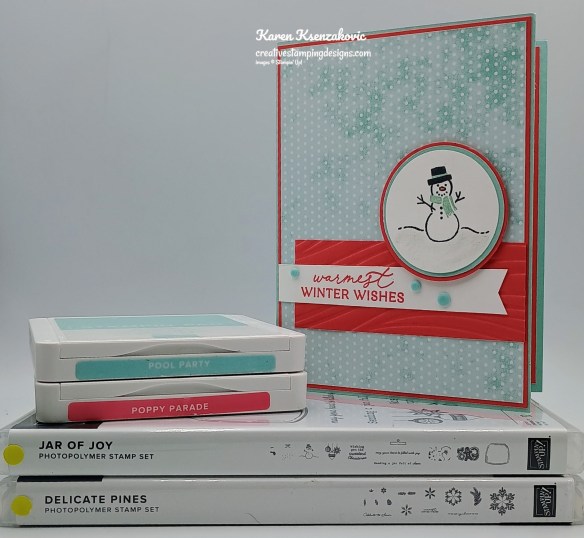
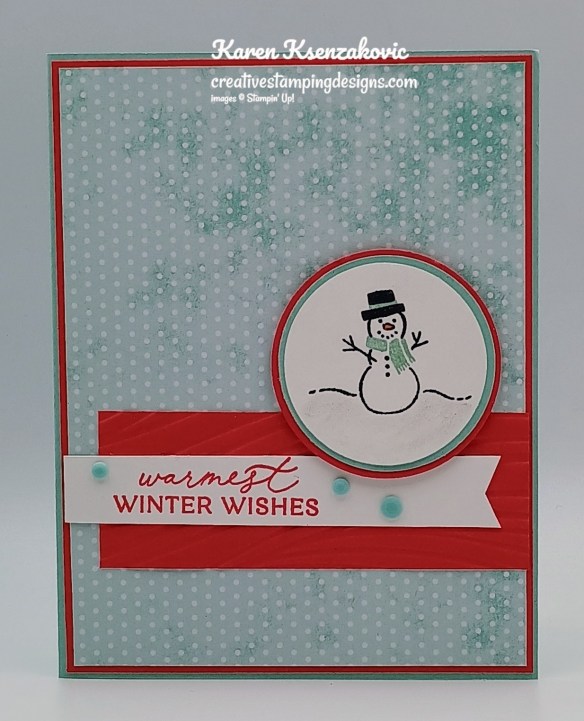
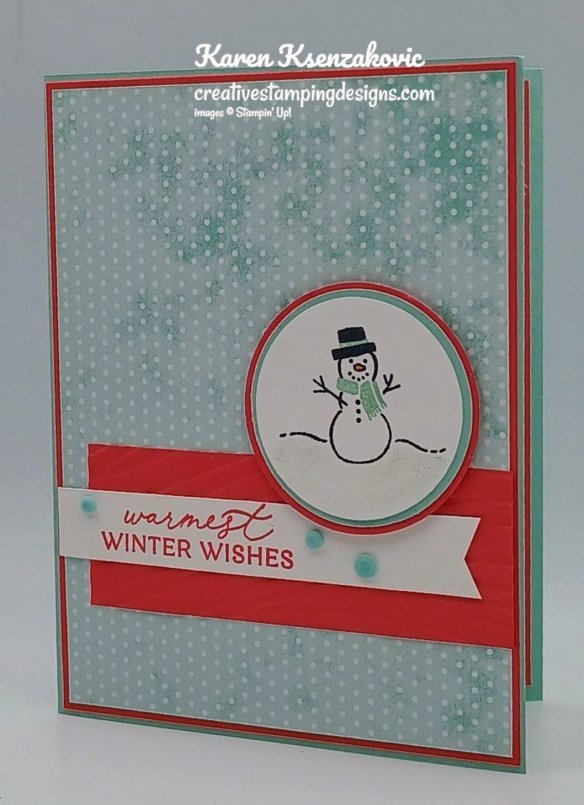
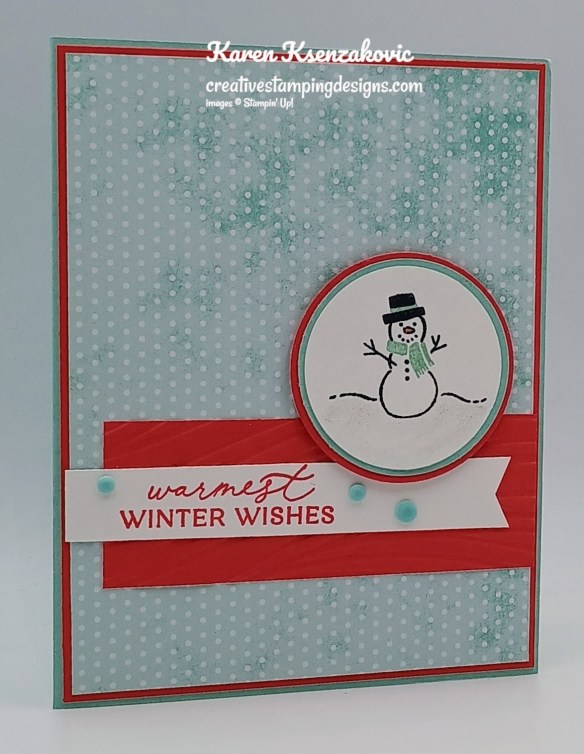
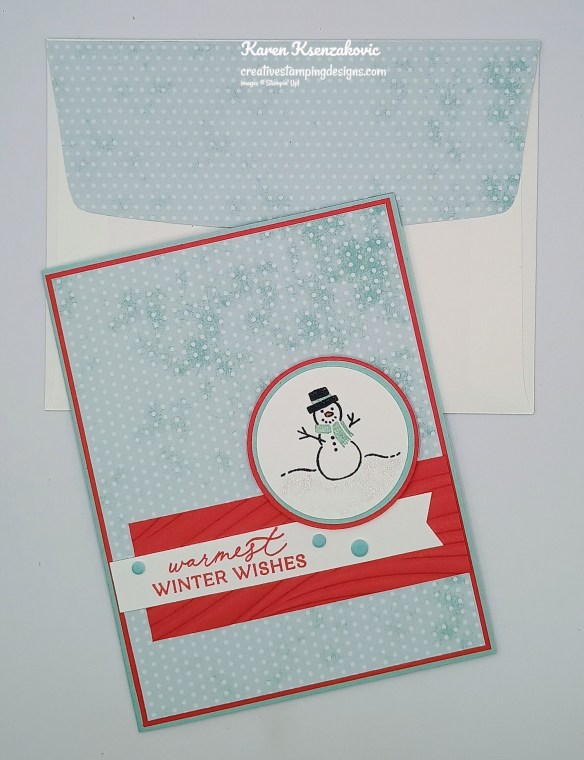
I have a quick card for you today using 2 colors that I never thought i would like this much together. If you’d like to see a quick video on how I made this card, Click Here to go to my Instagram Reels. Here’s my card for today.
I used the Stampin’ Up! Jar of Joy Photopolymer Stamp Set along with the North Pole Delivery Specialty Designer Series Paper, Soft Waves 3D Embossing Folder, Stampin’ Up! Delicate Pines Photopolymer Stamp Set and Circle Punches for my card today.
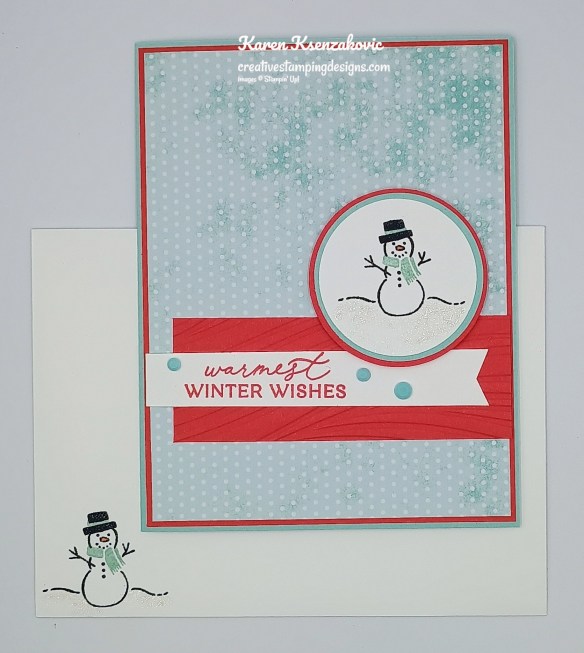
Adhere a panel of North Pole Delivery DSP to a Poppy Parade mat. Adhere the layered panel to a Pool Party card base.
Emboss a panel of Poppy Parade using the Soft Waves EF. Adhere the embossed panel to the card front. On a panel of Basic White, stamp the sentiment from Delicate Pines stamp set in Poppy Parade Ink. Cut the ends into a banner using scissors. Adhere the banner to the card front over the embossed panel.
Cut a panel of Basic White using the 1 3/4″ Circle Punch. Cut a panel of Pool Party using the 1 7/8″ Circle Punch. Cut a panel of Poppy Parade using the 2″ Circle Punch. On the Basic White circle, stamp the snowman image from the Jar of Joy stamp set in Tuxedo Black Ink. Stamp the scarf and hat trim image from the Jar of Joy stamp set in Pool Party Ink over the snowman image. Add Clear Wink of Stella to the snow below the snowman. Adhere the Basic White circle to the Pool Party circle. Adhere the layered panel to the Poppy Parade circle. Adhere the layered panel to the card front with Stampin’ Dimensionals. Add a few Dear Dots to the card front.
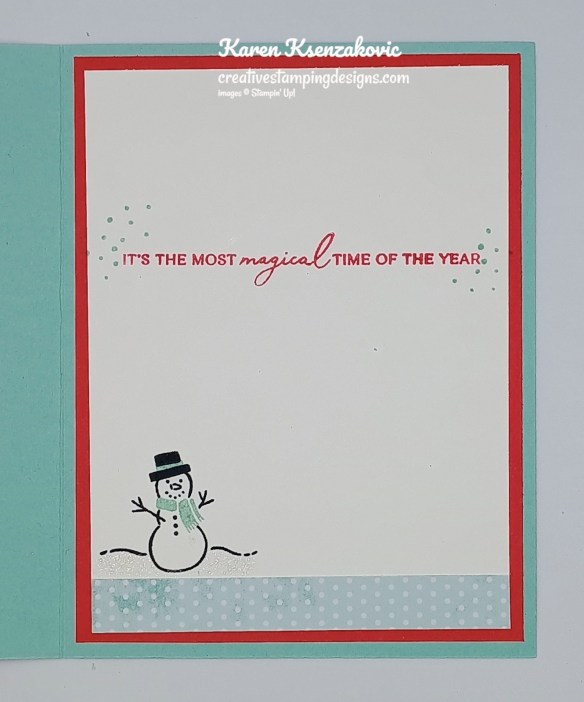
On a panel of Basic White stamp the sentiment from the Delicate Pines stamp set in Poppy Parade Ink. Adhere a panel of North Pole Delivery DSP to the bottom of the panel. Stamp the snowman image from the Jar of Joy stamp set in Tuxedo Black Ink on the bottom of the panel. Stamp the scarf & hat trim image from the Jar of Joy stamp set in Pool Party Ink over the snowman image. Stamp the snow image next to the sentiment in Pool Party Ink. Adhere the Basic White panel to a Poppy Parade mat then to the inside of the Pool party card base.
Decorate a Basic White Medium Envelope to finish the card. Stamp the snowman image from the Jar of Joy stamp set in Tuxedo Black Ink on the envelope front. Stamp the scarf & hat trim image in Pool Party Ink. Adhere a panel of North Pole Delivery DSP to the envelope flap.
Thank you for stopping by my blog today. I hope you like the card and will give it a try. Happy Stamping!!
If you need any stamping supplies, I’d love to be your Demonstrator. Just click HERE to go directly to my online store or drop me an email if you have any questions.



![Santa's Hat Photopolymer Stamp Set (English) [ 168408 ]](https://assets1.tamsnetwork.com/images/EC042017NF/168408s.jpg "Santa's Hat Photopolymer Stamp Set (English) [ 168408 ]")
![Basic White 8 1/2" X 11" Cardstock [ 166780 ]](https://assets1.tamsnetwork.com/images/EC042017NF/166780s.jpg "Basic White 8 1/2\" X 11\" Cardstock [ 166780 ]")
![Basic White 8 1/2" X 11" Thick Cardstock [ 159229 ]](https://assets1.tamsnetwork.com/images/EC042017NF/159229s.jpg "Basic White 8 1/2\" X 11\" Thick Cardstock [ 159229 ]")
![Poppy Parade 8-1/2" X 11" Cardstock [ 119793 ]](https://assets1.tamsnetwork.com/images/EC042017NF/119793s.jpg "Poppy Parade 8-1/2\" X 11\" Cardstock [ 119793 ]")
![Timeless Christmas 12" X 12" (30.5 X 30.5 Cm) Designer Series Paper [ 168537 ]](https://assets1.tamsnetwork.com/images/EC042017NF/168537s.jpg "Timeless Christmas 12\" X 12\" (30.5 X 30.5 Cm) Designer Series Paper [ 168537 ]")
![Poppy Parade Classic Stampin' Pad [ 147050 ]](https://assets1.tamsnetwork.com/images/EC042017NF/147050s.jpg "Poppy Parade Classic Stampin' Pad [ 147050 ]")
![Versamark Pad [ 102283 ]](https://assets1.tamsnetwork.com/images/EC042017NF/102283s.jpg "Versamark Pad [ 102283 ]")
![Basics Wow! Embossing Powder [ 165679 ]](https://assets1.tamsnetwork.com/images/EC042017NF/165679s.jpg "Basics Wow! Embossing Powder [ 165679 ]")
![Heat Tool (Us And Canada) [ 129053 ]](https://assets1.tamsnetwork.com/images/EC042017NF/129053s.jpg "Heat Tool (Us And Canada) [ 129053 ]")
![Sweet Words & Labels Dies [ 167627 ]](https://assets1.tamsnetwork.com/images/EC042017NF/167627s.jpg "Sweet Words & Labels Dies [ 167627 ]")
![Adhesive Backed Christmas Berries [ 168549 ]](https://assets1.tamsnetwork.com/images/EC042017NF/168549s.jpg "Adhesive Backed Christmas Berries [ 168549 ]")
![Basic White Medium Envelopes [ 159236 ]](https://assets1.tamsnetwork.com/images/EC042017NF/159236s.jpg "Basic White Medium Envelopes [ 159236 ]")
![Stampin' Cut & Emboss Machine [ 149653 ]](https://assets1.tamsnetwork.com/images/EC042017NF/149653s.jpg "Stampin' Cut & Emboss Machine [ 149653 ]")
![Mini Glue Dots [ 103683 ]](https://assets1.tamsnetwork.com/images/EC042017NF/103683s.jpg "Mini Glue Dots [ 103683 ]")
![Multipurpose Liquid Glue [ 110755 ]](https://assets1.tamsnetwork.com/images/EC042017NF/110755s.jpg "Multipurpose Liquid Glue [ 110755 ]")
![Stampin' Dimensionals [ 104430 ]](https://assets1.tamsnetwork.com/images/EC042017NF/104430s.jpg "Stampin' Dimensionals [ 104430 ]")
![Stampin' Seal [ 152813 ]](https://assets1.tamsnetwork.com/images/EC042017NF/152813s.jpg "Stampin' Seal [ 152813 ]")
![Paper Trimmer [ 152392 ]](https://assets1.tamsnetwork.com/images/EC042017NF/152392s.jpg "Paper Trimmer [ 152392 ]")
![Bone Folder [ 102300 ]](https://assets1.tamsnetwork.com/images/EC042017NF/102300s.jpg "Bone Folder [ 102300 ]")
![Detail Scissors [ 170902 ]](https://assets1.tamsnetwork.com/images/EC042017NF/170902s.jpg "Detail Scissors [ 170902 ]")
![Take Your Pick [ 144107 ]](https://assets1.tamsnetwork.com/images/EC042017NF/144107s.jpg "Take Your Pick [ 144107 ]")






![Festive Cheer Bundle (English) [ 168133 ]](https://assets1.tamsnetwork.com/images/EC042017NF/168133s.jpg "Festive Cheer Bundle (English) [ 168133 ]")
![Festive Cheer Photopolymer Stamp Set (English) [ 168126 ]](https://assets1.tamsnetwork.com/images/EC042017NF/168126s.jpg "Festive Cheer Photopolymer Stamp Set (English) [ 168126 ]")
![Festive Cheer Dies [ 168132 ]](https://assets1.tamsnetwork.com/images/EC042017NF/168132s.jpg "Festive Cheer Dies [ 168132 ]")
![Crumb Cake 8-1/2" X 11" Cardstock [ 120953 ]](https://assets1.tamsnetwork.com/images/EC042017NF/120953s.jpg "Crumb Cake 8-1/2\" X 11\" Cardstock [ 120953 ]")
![Hydrangea Hue 8 1/2" X 11" Cardstock [ 167687 ]](https://assets1.tamsnetwork.com/images/EC042017NF/167687s.jpg "Hydrangea Hue 8 1/2\" X 11\" Cardstock [ 167687 ]")
![Peaceful Pine 8 1/2" X 11" Cardstock [ 167691 ]](https://assets1.tamsnetwork.com/images/EC042017NF/167691s.jpg "Peaceful Pine 8 1/2\" X 11\" Cardstock [ 167691 ]")
![Silver 12" X 12" (30.5 X 30.5 Cm) Foil Sheets [ 163387 ]](https://assets1.tamsnetwork.com/images/EC042017NF/163387s.jpg "Silver 12\" X 12\" (30.5 X 30.5 Cm) Foil Sheets [ 163387 ]")
![Hydrangea Hue Classic Stampin' Pad [ 167677 ]](https://assets1.tamsnetwork.com/images/EC042017NF/167677s.jpg "Hydrangea Hue Classic Stampin' Pad [ 167677 ]")
![Smoky Slate Classic Stampin' Pad [ 147113 ]](https://assets1.tamsnetwork.com/images/EC042017NF/147113s.jpg "Smoky Slate Classic Stampin' Pad [ 147113 ]")
![Metallics Wow! Embossing Powder [ 165678 ]](https://assets1.tamsnetwork.com/images/EC042017NF/165678s.jpg "Metallics Wow! Embossing Powder [ 165678 ]")
![Barely Blush Shimmer Brush [ 167664 ]](https://assets1.tamsnetwork.com/images/EC042017NF/167664s.jpg "Barely Blush Shimmer Brush [ 167664 ]")
![Hydrangea Hue Shimmer Brush [ 167663 ]](https://assets1.tamsnetwork.com/images/EC042017NF/167663s.jpg "Hydrangea Hue Shimmer Brush [ 167663 ]")
![Barely Blush 3/8" (1 Cm) Bordered Ribbon [ 167550 ]](https://assets1.tamsnetwork.com/images/EC042017NF/167550s.jpg "Barely Blush 3/8\" (1 Cm) Bordered Ribbon [ 167550 ]")




![Cherry Cobbler 8-1/2" X 11" Cardstock [ 119685 ]](https://assets1.tamsnetwork.com/images/EC042017NF/119685s.jpg "Cherry Cobbler 8-1/2\" X 11\" Cardstock [ 119685 ]")
![Secret Sea 8 1/2" X 11" Cardstock [ 165624 ]](https://assets1.tamsnetwork.com/images/EC042017NF/165624s.jpg "Secret Sea 8 1/2\" X 11\" Cardstock [ 165624 ]")
![Barely Blush Classic Stampin Pad [ 167678 ]](https://assets1.tamsnetwork.com/images/EC042017NF/167678s.jpg "Barely Blush Classic Stampin Pad [ 167678 ]")
![Basic Beige Classic Stampin Pad [ 163806 ]](https://assets1.tamsnetwork.com/images/EC042017NF/163806s.jpg "Basic Beige Classic Stampin Pad [ 163806 ]")
![Cherry Cobbler Classic Stampin' Pad [ 147083 ]](https://assets1.tamsnetwork.com/images/EC042017NF/147083s.jpg "Cherry Cobbler Classic Stampin' Pad [ 147083 ]")
![Peaceful Pine Classic Stampin Pad [ 167679 ]](https://assets1.tamsnetwork.com/images/EC042017NF/167679s.jpg "Peaceful Pine Classic Stampin Pad [ 167679 ]")
![Secret Sea Classic Stampin' Pad [ 165285 ]](https://assets1.tamsnetwork.com/images/EC042017NF/165285s.jpg "Secret Sea Classic Stampin' Pad [ 165285 ]")
![Sunset Sparkle Sequins [ 167785 ]](https://assets1.tamsnetwork.com/images/EC042017NF/167785s.jpg "Sunset Sparkle Sequins [ 167785 ]")

![Pretty Poinsettia Bundle (English) [ 168147 ]](https://assets1.tamsnetwork.com/images/EC042017NF/168147s.jpg "Pretty Poinsettia Bundle (English) [ 168147 ]")
![Pretty Poinsettia Photopolymer Stamp Set (English) [ 168140 ]](https://assets1.tamsnetwork.com/images/EC042017NF/168140s.jpg "Pretty Poinsettia Photopolymer Stamp Set (English) [ 168140 ]")
![Pretty Poinsettia Dies [ 168146 ]](https://assets1.tamsnetwork.com/images/EC042017NF/168146s.jpg "Pretty Poinsettia Dies [ 168146 ]")
![Barely Blush 8 1/2" X 11" Cardstock [ 167689 ]](https://assets1.tamsnetwork.com/images/EC042017NF/167689s.jpg "Barely Blush 8 1/2\" X 11\" Cardstock [ 167689 ]")
![Pastels Shimmer 12" X 12" (30.5 X 30.5 Cm) Specialty Paper [ 167198 ]](https://assets1.tamsnetwork.com/images/EC042017NF/167198s.jpg "Pastels Shimmer 12\" X 12\" (30.5 X 30.5 Cm) Specialty Paper [ 167198 ]")
![Sunset Shimmer Vellum 12" X 12" (30.5 X 30.5 Cm) Specialty Paper [ 167784 ]](https://assets1.tamsnetwork.com/images/EC042017NF/167784s.jpg "Sunset Shimmer Vellum 12\" X 12\" (30.5 X 30.5 Cm) Specialty Paper [ 167784 ]")
![2026–2028 In Color™ 12" X 12" (30.5 X 30.5 Cm) Pearlized Specialty Paper [ 167766 ]](https://assets1.tamsnetwork.com/images/EC042017NF/167766s.jpg "2026–2028 In Color™ 12\" X 12\" (30.5 X 30.5 Cm) Pearlized Specialty Paper [ 167766 ]")
![Golden Glow Classic Stampin' Pad [ 167676 ]](https://assets1.tamsnetwork.com/images/EC042017NF/167676s.jpg "Golden Glow Classic Stampin' Pad [ 167676 ]")
![Lost Lagoon Classic Stampin' Pad [ 161678 ]](https://assets1.tamsnetwork.com/images/EC042017NF/161678s.jpg "Lost Lagoon Classic Stampin' Pad [ 161678 ]")
![Small Blending Brushes [ 160518 ]](https://assets1.tamsnetwork.com/images/EC042017NF/160518s.jpg "Small Blending Brushes [ 160518 ]")
![Party Banners Dies [ 165264 ]](https://assets1.tamsnetwork.com/images/EC042017NF/165264s.jpg "Party Banners Dies [ 165264 ]")
![2026–2028 In Color™ Dots [ 167546 ]](https://assets1.tamsnetwork.com/images/EC042017NF/167546s.jpg "2026–2028 In Color™ Dots [ 167546 ]")
![Stampin' Hot Foil System Na & Craft Class [ 170009 ]](https://assets1.tamsnetwork.com/images/EC042017NF/170009s.jpg "Stampin' Hot Foil System Na & Craft Class [ 170009 ]")
![Silver Stampin' Hot Foil Rolls [ 170067 ]](https://assets1.tamsnetwork.com/images/EC042017NF/170067s.jpg "Silver Stampin' Hot Foil Rolls [ 170067 ]")

![Delicate Pines Bundle (English) [ 166074 ]](https://assets1.tamsnetwork.com/images/EC042017NF/166074s.jpg "Delicate Pines Bundle (English) [ 166074 ]")
![Delicate Pines Photopolymer Stamp Set (English) [ 166067 ]](https://assets1.tamsnetwork.com/images/EC042017NF/166067s.jpg "Delicate Pines Photopolymer Stamp Set (English) [ 166067 ]")
![Delicate Pines Dies [ 166073 ]](https://assets1.tamsnetwork.com/images/EC042017NF/166073s.jpg "Delicate Pines Dies [ 166073 ]")
![Elegant Pine Snowflakes 12" X 12" (30.5 X 30.5 Cm) Designer Series Paper [ 166066 ]](https://assets1.tamsnetwork.com/images/EC042017NF/166066s.jpg "Elegant Pine Snowflakes 12\" X 12\" (30.5 X 30.5 Cm) Designer Series Paper [ 166066 ]")
![Peaceful Garden 12" X 12" (30.5 X 30.5 Cm) Glimmer Paper [ 165929 ]](https://assets1.tamsnetwork.com/images/EC042017NF/165929s.jpg "Peaceful Garden 12\" X 12\" (30.5 X 30.5 Cm) Glimmer Paper [ 165929 ]")
![Faceted Snowflakes [ 166077 ]](https://assets1.tamsnetwork.com/images/EC042017NF/166077s.jpg "Faceted Snowflakes [ 166077 ]")
![Adhesive Sheets [ 152334 ]](https://assets1.tamsnetwork.com/images/EC042017NF/152334s.jpg "Adhesive Sheets [ 152334 ]")


![Jolly Holly Bundle (English) [ 166120 ]](https://assets1.tamsnetwork.com/images/EC042017NF/166120s.jpg "Jolly Holly Bundle (English) [ 166120 ]")
![Jolly Holly Photopolymer Stamp Set (English) [ 166117 ]](https://assets1.tamsnetwork.com/images/EC042017NF/166117s.jpg "Jolly Holly Photopolymer Stamp Set (English) [ 166117 ]")
![Jolly Holly Hybrid Embossing Folder [ 166119 ]](https://assets1.tamsnetwork.com/images/EC042017NF/166119s.jpg "Jolly Holly Hybrid Embossing Folder [ 166119 ]")
![Traditions Of Christmas 12" X 12" (30.5 X 30.5 Cm) Specialty Designer Series Paper [ 165853 ]](https://assets1.tamsnetwork.com/images/EC042017NF/165853s.jpg "Traditions Of Christmas 12\" X 12\" (30.5 X 30.5 Cm) Specialty Designer Series Paper [ 165853 ]")
![Gold Foil Sheets [ 132622 ]](https://assets1.tamsnetwork.com/images/EC042017NF/132622s.jpg "Gold Foil Sheets [ 132622 ]")
![Tuxedo Black Memento Ink Pad [ 132708 ]](https://assets1.tamsnetwork.com/images/EC042017NF/132708s.jpg "Tuxedo Black Memento Ink Pad [ 132708 ]")
![Cherry Cobbler Stampin' Blends Combo Pack [ 154880 ]](https://assets1.tamsnetwork.com/images/EC042017NF/154880s.jpg "Cherry Cobbler Stampin' Blends Combo Pack [ 154880 ]")
![Old Olive Stampin' Blends Combo Pack [ 154892 ]](https://assets1.tamsnetwork.com/images/EC042017NF/154892s.jpg "Old Olive Stampin' Blends Combo Pack [ 154892 ]")
![Flower Accents [ 165171 ]](https://assets1.tamsnetwork.com/images/EC042017NF/165171s.jpg "Flower Accents [ 165171 ]")
![Real Red 1/2" (1.3 Cm) Shiny Ribbon [ 165876 ]](https://assets1.tamsnetwork.com/images/EC042017NF/165876s.jpg "Real Red 1/2\" (1.3 Cm) Shiny Ribbon [ 165876 ]")



![Words For The Season Bundle (English) [ 165798 ]](https://assets1.tamsnetwork.com/images/EC042017NF/165798s.jpg "Words For The Season Bundle (English) [ 165798 ]")
![Words For The Season Cling Stamp Set (English) [ 165716 ]](https://assets1.tamsnetwork.com/images/EC042017NF/165716s.jpg "Words For The Season Cling Stamp Set (English) [ 165716 ]")
![Words For The Season Dies (English) [ 165797 ]](https://assets1.tamsnetwork.com/images/EC042017NF/165797s.jpg "Words For The Season Dies (English) [ 165797 ]")
![Christmas Greenery Bundle [ 165873 ]](https://assets1.tamsnetwork.com/images/EC042017NF/165873s.jpg "Christmas Greenery Bundle [ 165873 ]")
![Christmas Greenery Photopolymer Stamp Set [ 165870 ]](https://assets1.tamsnetwork.com/images/EC042017NF/165870s.jpg "Christmas Greenery Photopolymer Stamp Set [ 165870 ]")
![Christmas Greenery Dies [ 165872 ]](https://assets1.tamsnetwork.com/images/EC042017NF/165872s.jpg "Christmas Greenery Dies [ 165872 ]")
![Old Olive 8-1/2" X 11" Cardstock [ 100702 ]](https://assets1.tamsnetwork.com/images/EC042017NF/100702s.jpg "Old Olive 8-1/2\" X 11\" Cardstock [ 100702 ]")
![Traditional Sparkling Sequins [ 165875 ]](https://assets1.tamsnetwork.com/images/EC042017NF/165875s.jpg "Traditional Sparkling Sequins [ 165875 ]")



![Merry Christmas Photopolymer Stamp Set (English) [ 169233 ]](https://assets1.tamsnetwork.com/images/EC042017NF/169233s.jpg "Merry Christmas Photopolymer Stamp Set (English) [ 169233 ]")
![Pine Tree Trimmings Photopolymer Stamp Set (English) [ 166040 ]](https://assets1.tamsnetwork.com/images/EC042017NF/166040s.jpg "Pine Tree Trimmings Photopolymer Stamp Set (English) [ 166040 ]")
![Basic Black 8-1/2" X 11" Cardstock [ 121045 ]](https://assets1.tamsnetwork.com/images/EC042017NF/121045s.jpg "Basic Black 8-1/2\" X 11\" Cardstock [ 121045 ]")
![Modern Christmas 12" X 12" (30.5 X 30.5 Cm) Specialty Designer Series Paper [ 165990 ]](https://assets1.tamsnetwork.com/images/EC042017NF/165990s.jpg "Modern Christmas 12\" X 12\" (30.5 X 30.5 Cm) Specialty Designer Series Paper [ 165990 ]")
![Branching Out Dies [ 165775 ]](https://assets1.tamsnetwork.com/images/EC042017NF/165775s.jpg "Branching Out Dies [ 165775 ]")

![Homemade Treats Bundle (English) [ 166017 ]](https://assets1.tamsnetwork.com/images/EC042017NF/166017s.jpg "Homemade Treats Bundle (English) [ 166017 ]")
![Homemade Treats Cling Stamp Set (English) [ 166013 ]](https://assets1.tamsnetwork.com/images/EC042017NF/166013s.jpg "Homemade Treats Cling Stamp Set (English) [ 166013 ]")
![Homemade Treats Dies [ 166016 ]](https://assets1.tamsnetwork.com/images/EC042017NF/166016s.jpg "Homemade Treats Dies [ 166016 ]")
![Gingerbread Man Bundle (English) [ 165785 ]](https://assets1.tamsnetwork.com/images/EC042017NF/165785s.jpg "Gingerbread Man Bundle (English) [ 165785 ]")
![Gingerbread Man Photopolymer Stamp Set (English) [ 165778 ]](https://assets1.tamsnetwork.com/images/EC042017NF/165778s.jpg "Gingerbread Man Photopolymer Stamp Set (English) [ 165778 ]")
![Gingerbread Man Dies [ 165784 ]](https://assets1.tamsnetwork.com/images/EC042017NF/165784s.jpg "Gingerbread Man Dies [ 165784 ]")
![Pecan Pie 8 1/2" X 11" Cardstock [ 161717 ]](https://assets1.tamsnetwork.com/images/EC042017NF/161717s.jpg "Pecan Pie 8 1/2\" X 11\" Cardstock [ 161717 ]")
![Real Red 8-1/2" X 11" Cardstock [ 102482 ]](https://assets1.tamsnetwork.com/images/EC042017NF/102482s.jpg "Real Red 8-1/2\" X 11\" Cardstock [ 102482 ]")
![Christmas Tags & More 6" X 6" (15.2 X 15.2 Cm) Mix & Match Specialty Designer Series Paper [ 165907 ]](https://assets1.tamsnetwork.com/images/EC042017NF/165907s.jpg "Christmas Tags & More 6\" X 6\" (15.2 X 15.2 Cm) Mix & Match Specialty Designer Series Paper [ 165907 ]")
![Silver Foil Sheets [ 132178 ]](https://assets1.tamsnetwork.com/images/EC042017NF/132178s.jpg "Silver Foil Sheets [ 132178 ]")
![Pecan Pie Classic Stampin' Pad [ 161665 ]](https://assets1.tamsnetwork.com/images/EC042017NF/161665s.jpg "Pecan Pie Classic Stampin' Pad [ 161665 ]")
![Real Red Classic Stampin' Pad [ 147084 ]](https://assets1.tamsnetwork.com/images/EC042017NF/147084s.jpg "Real Red Classic Stampin' Pad [ 147084 ]")
![Real Red & White Adhesive Backed Peppermints [ 164050 ]](https://assets1.tamsnetwork.com/images/EC042017NF/164050s.jpg "Real Red & White Adhesive Backed Peppermints [ 164050 ]")

![Jar Of Joy Photopolymer Stamp Set (English) [ 166176 ]](https://assets1.tamsnetwork.com/images/EC042017NF/166176s.jpg "Jar Of Joy Photopolymer Stamp Set (English) [ 166176 ]")
![Pool Party 8-1/2" X 11" Cardstock [ 122924 ]](https://assets1.tamsnetwork.com/images/EC042017NF/122924s.jpg "Pool Party 8-1/2\" X 11\" Cardstock [ 122924 ]")
![North Pole Delivery 12" X 12" (30.5 X 30.5 Cm) Specialty Designer Series Paper [ 165837 ]](https://assets1.tamsnetwork.com/images/EC042017NF/165837s.jpg "North Pole Delivery 12\" X 12\" (30.5 X 30.5 Cm) Specialty Designer Series Paper [ 165837 ]")
![Pool Party Classic Stampin' Pad [ 147107 ]](https://assets1.tamsnetwork.com/images/EC042017NF/147107s.jpg "Pool Party Classic Stampin' Pad [ 147107 ]")
![Poppy Parade Classic Stampin' Pad [ 119782 ] (Retired)](https://assets1.tamsnetwork.com/images/EC042017NF/119782s.jpg "Poppy Parade Classic Stampin' Pad [ 119782 ] (Retired)")
![1-3/4" (4.4 Cm) Circle Punch [ 119850 ]](https://assets1.tamsnetwork.com/images/EC042017NF/119850s.jpg "1-3/4\" (4.4 Cm) Circle Punch [ 119850 ]")
![1 7/8" (4.8 Cm) Circle Punch [ 165259 ]](https://assets1.tamsnetwork.com/images/EC042017NF/165259s.jpg "1 7/8\" (4.8 Cm) Circle Punch [ 165259 ]")
![2" (5.1 Cm) Circle Punch [ 133782 ]](https://assets1.tamsnetwork.com/images/EC042017NF/133782s.jpg "2\" (5.1 Cm) Circle Punch [ 133782 ]")
![Soft Waves 3 D Embossing Folder [ 164695 ]](https://assets1.tamsnetwork.com/images/EC042017NF/164695s.jpg "Soft Waves 3 D Embossing Folder [ 164695 ]")
![Clear Wink Of Stella Glitter Brush [ 141897 ]](https://assets1.tamsnetwork.com/images/EC042017NF/141897s.jpg "Clear Wink Of Stella Glitter Brush [ 141897 ]")
![Dear Dots [ 165848 ]](https://assets1.tamsnetwork.com/images/EC042017NF/165848s.jpg "Dear Dots [ 165848 ]")


