Stampin’ Up! Snowflake Kisses for Fun Fold Friday

Good Friday morning stamping friends and welcome to my Fun Fold Friday. Happy Halloween!!! I hope you all had a wonderful week and are looking forward to the weekend. It’s the end of the month so most of you know where I’ll be and it’s not in my card studio.

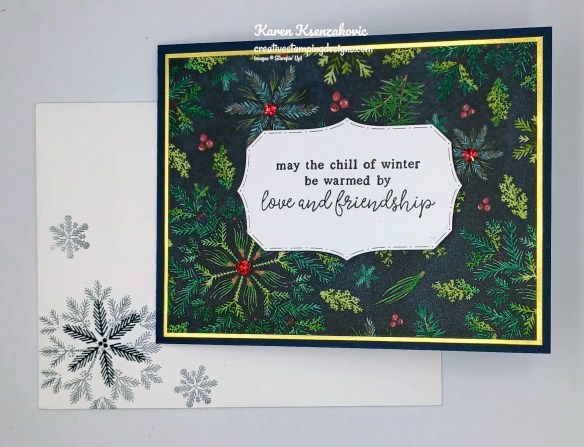
Today’s card it the one I made live yesterday on my YouTube channel. If you were able to hop on to watch, thank you!! If you weren’t and would like to watch my video you can see it Here. The measurements are below so that you can watch and stamp along with me. Here’s my card for today.
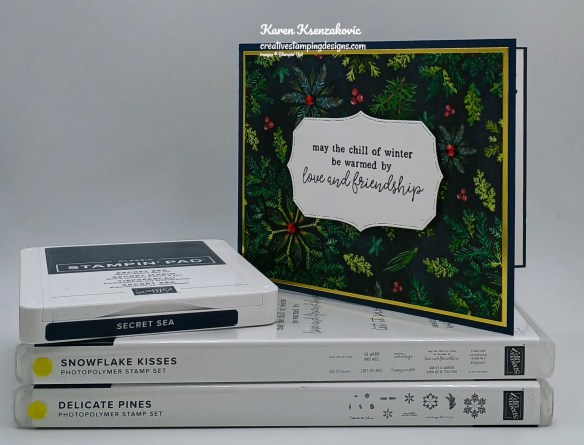
Stampin' Up! Snowflake Kisses Fun Fold 1 creativestampingdesigns.com

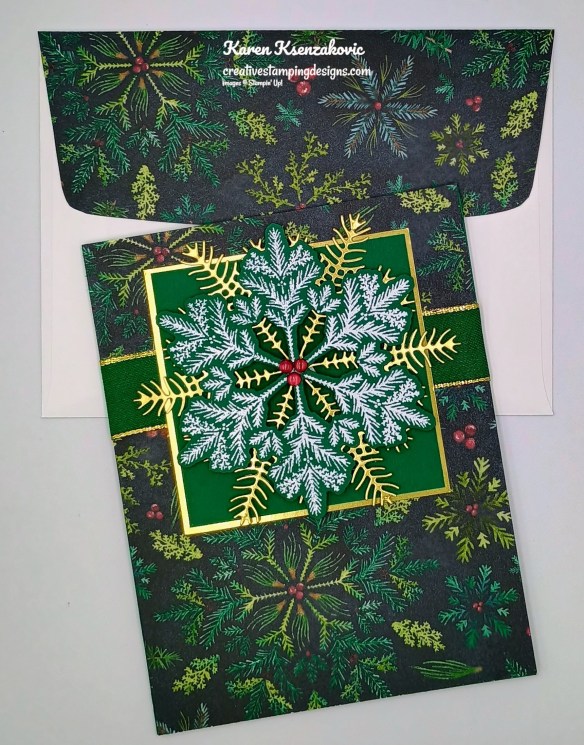
I used the Stampin’ Up! Snowflake Kisses Bundle along with the Elegant Pine Snowflakes Designer Series Paper, Traditional Labels Dies, Stampin’ Up! Delicate Pines Photopolymer Stamp Set, Gold Foil Sheets and Vellum Specialty Paper (available Nov 4th) for my card today.
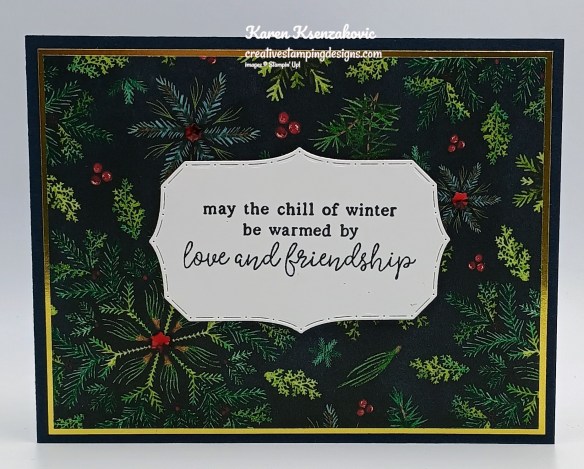
Stampin' Up! Snowflake Kisses Fun Fold 2 creativestampingdesigns.com

Adhere the panel of Elegant Pine Snowflakes DSP to the Gold Foil Mat. Adhere the layered panel to the front of the Secret Sea card base.
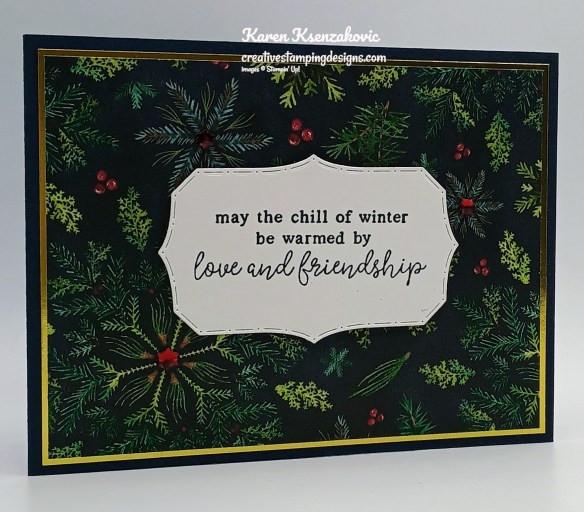
Stampin' Up! Snowflake Kisses Fun Fold 3 creativestampingdesigns.com

Stamp the sentiment from the Stampin’ Up! Snowflake Kisses Photopolymer Stamp Set in Secret Sea Ink on the panel of Basic White. Cut the sentiment out using the Traditional Labels Dies. Adhere the sentiment to the card front using Stampin’ Dimensionals. Add a few Faceted Snowflakes to the card front.
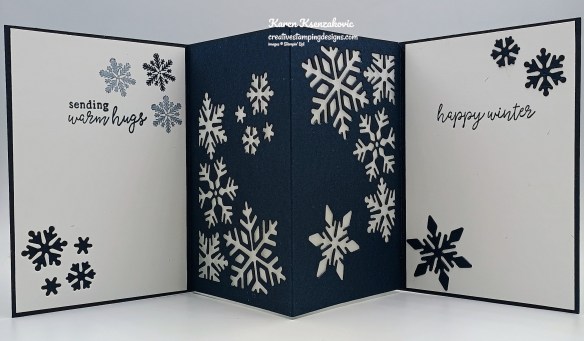
Stampin' Up! Snowflake Kisses Fun Fold 4 creativestampingdesigns.com

Score the smaller panel of Secret Sea as listed below. Using the Snowflake Kisses Dies, cut snowflakes out on either side of the center score line (but not over the top of it).
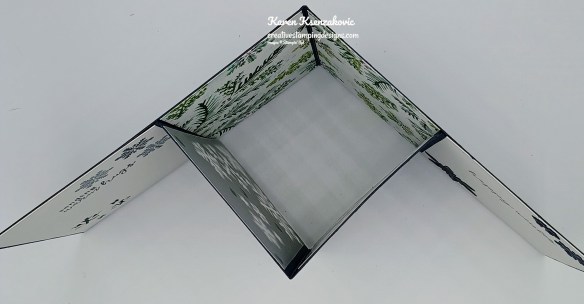
Stampin' Up! Snowflake Kisses Fun Fold 5 creativestampingdesigns.com

Adhere the 2 smaller panels of the Elegant Pine Snowflakes DSP to the inside center of the Secret Sea card base. Add Tear & Tape to the 1/2″ sides of the die cut panel. Adhere the 2 Vellum panels to the back of the die cut panel. Fold the die cut panel in half with the tear & tape folded out and place it 1/4″ from the outside edge of the Secret Sea card base. Remove the strip of the Tear & Tape and fold the card base over the die cut panel. Flip the card base over and do the same to the other side.
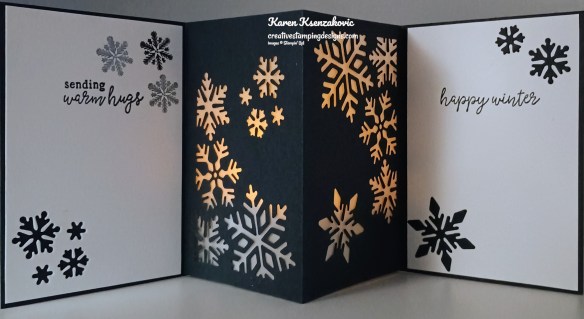
Stampin' Up! Snowflake Kisses Fun Fold 6 creativestampingdesigns.com

Stamp the sentiments from the Snowflake Kisses stamp set in Secret Sea Ink on the 2 panels on Basic White. Stamp the small snowflake image from the Delicate Pines stamp set on the panel in Secret Sea Ink, stamping off once on scrap paper. Die cut one of the panels in the corner using the smallest collage of snowflakes dies from the Snowflake Kisses Dies. On the other panel, add the small snowflakes that were cut from the center panel to the corners. Adhere the Basic White panels to the inside of the Secret Sea card base on either side of the mechanism. A tealight will fit inside to make the snowflakes glow.
Stampin' Up! Snowflake Kisses Fun Fold 7 creativestampingdesigns.com

Decorate a Basic White Medium Envelope to finish your card. Stamp the snowflake images from the Delicate Pines stamp set in Secret Sea Ink, full strength and stamped off once on scrap paper. Adhere a panel of Elegant Pine Snowflakes to the envelope flap.
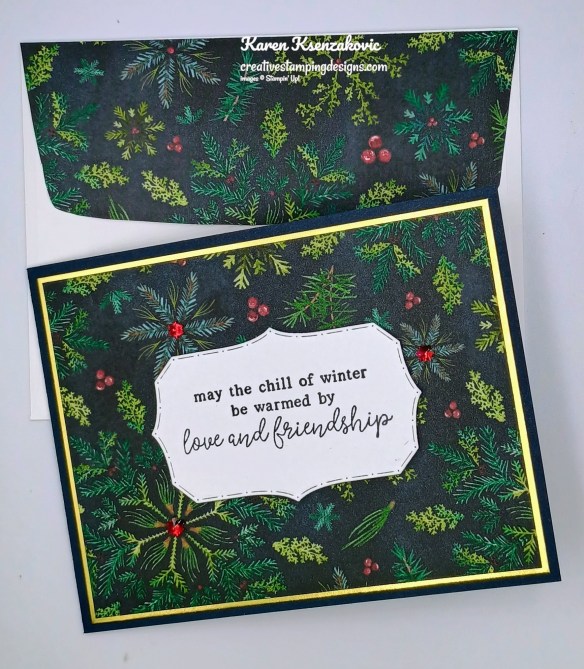
Stampin' Up! Snowflake Kisses Fun Fold 8 creativestampingdesigns.com

Thank you for stopping by my blog today. I hope you liked my card and will give it a try. I hope you will CASE this card and please feel free to post it in the comments of my Facebook page under my post. I’d love to see your take it. You can watch my video on my YouTube Channel HERE.

If you watch this on my YouTube channel, please remember to subscribe so that you will get notified when a new video goes live. Thank you to those that have subscribed already. Happy Stamping!!

*********************************************************************************************************

If you need any stamping supplies, I’d love to be your Demonstrator. Just click HERE to go directly to my online store or drop me an email if you have any questions. 

*********************************************************************************************************

Come Join My Team

LAST DAY for Stampin’ Up! BEST JOINING SPECIAL EVER – October 1 – 31

Why not give this a try, you have nothing to lose. Order your Starter kit today and in a couple weeks you can preorder the new January-April 2026 Mini Catalog products, YAY!! Contact me today at creativestampingdesigns@gmail.com and we can talk about signing you up. As an extra bonus for joining my team, you get to attend ALL my Monthly Online Classes FREE. That’s just a little perk and Thank You for joining with me
From October 1 to 31, anyone who purchases the Starter Kit can choose between two amazing offers.  In addition to FREE shipping, FREE business supplies, and a FREE Paper Pumpkin kit, you can either get $125 worth of products for just $35, an amazing first time ever offer, OR $189 worth of products for just $99!  
Here are the details:

  • Promotion dates:  October 1-31
  • New team members who purchase their starter kit from October 1 to 31 will be able to choose between these two offers:
    • $125 worth of products for just $35
    • $189 worth of products for just $99
  • New demonstrators who submit their Independent Demonstrator Agreement (IDA) before October 1 or after October 31 will not be eligible for these offers.
  • Deadline to join:  October 31, 2025, at 11:59 p.m. (MT)

As an added bonus, the Demonstrator preorder has begun for the November Online Exclusives and those items can be added to your Starter Kit or purchased with the Demonstrator discount once you join!

Click Here to get started!!

********************************************************************************************************

Last Day to order My Holiday Essential Pack

My Holiday Essential Pack is back for ordering October 11 – 31. Everyone seemed to love this essential pack when I offered it in August so I thought I’d offer it again since Holiday card making is approaching fast.

I’m offering a Holiday Essential Pack to get those holiday cards made. Let’s get a head on making those Holiday cards this year. Get all your adhesives ordered now so you don’t run out while you’re in the middle of making those Holiday cards.

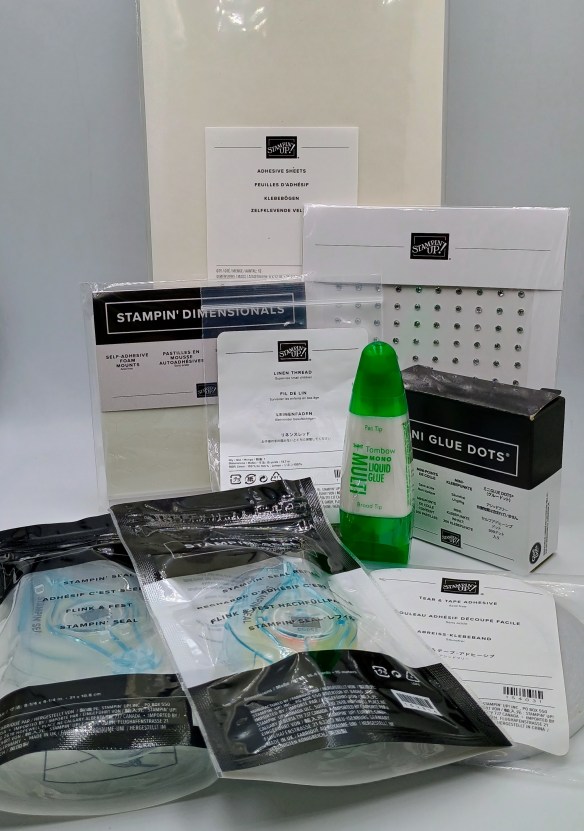
Each Kit will Include Full Packs of:

  • Adhesive Sheets
  • Liquid Glue
  • Mini Glue Dots
  • Stampin’ Dimensionals – 2 Packs
  • Stampin’ Seal
  • Stampin’ Seal Refill
  • Tear & Tape Adhesive
  • Linen Thread
  • Rhinestone Basic Jewels

If you were to order all this separately it would cost $65.25 + shipping. I’m offering it for $56.00 plus $9.00 for Priority Mail Shipping. All orders must be submitted by October 31st. I’ll be placing 2 separate orders, once on October 22 for the first group and a 2nd order on November 1st. Once everything arrives, I’ll package it up in a cut little bag and ship it out to you.

As an EXTRA BONUS I’ll also throw in a pack of Basic White Medium Envelopes

Click Here to place your order for the Essential Pack Today!! Deadline to order is Friday October 31st

********************************************************************************************************

Card stock cuts for this project:

  • Basic White Cardstock 2 1/2″ x 4″(sentiment), (2) – 2 7/8″ x 4 1/8″(inner liners)
  • Secret Sea Cardstock 4 1/4″ x 11″(card base scored & folded at 5 1/2″), 6 1/2″ x 4 3/16″(Inner mechanism scored & folded at 1/2″, 3 1/4″ & 6″)
  • Elegant Pine Snowflakes Designer Series Paper – 3 7/8″ x 5 1/8″(card front), (2) – 2 3/8″ x 4 1/8″(inner panels), 2 1/4″ x 6″(envelope flap)
  • Gold Foil Sheet 4″ x 5 1/4″(card front mat)
  • Vellum Paper – (2) – 2 1/2″ x 4 1/8″ (mechanism panels)

*********************************************************************************************************

Product List

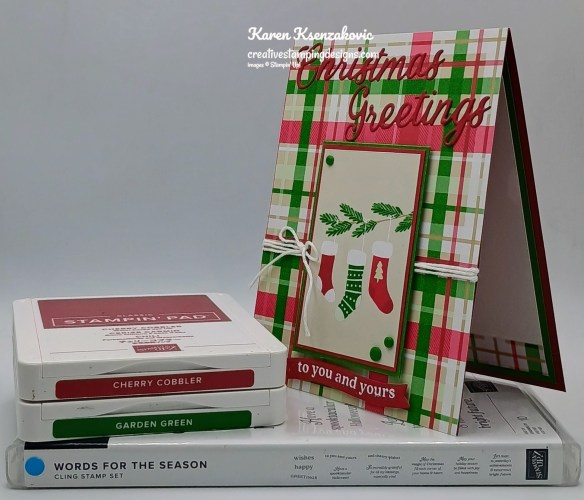
Stampin’ Up! Words for The Season for The Happy Inkin’ Thursday Blog Hop

Good Thursday morning stamping friends and welcome to our Happy Inkin’ Thursday Blog Hop. If you are starting with me, thank you. I hope you will stop by everyone’s blog to see what they have created this week. If you are hopping over from Mary’s blog, thank you for stopping by. This week we have Theme Challenge. If you’d like to see a quick video on how I made this card, Click Here to go to my Instagram Reels. Here is my card using this week’s theme.

Stampin' Up! Words For The Season Greetings 1 creativestamppingdesigns.com

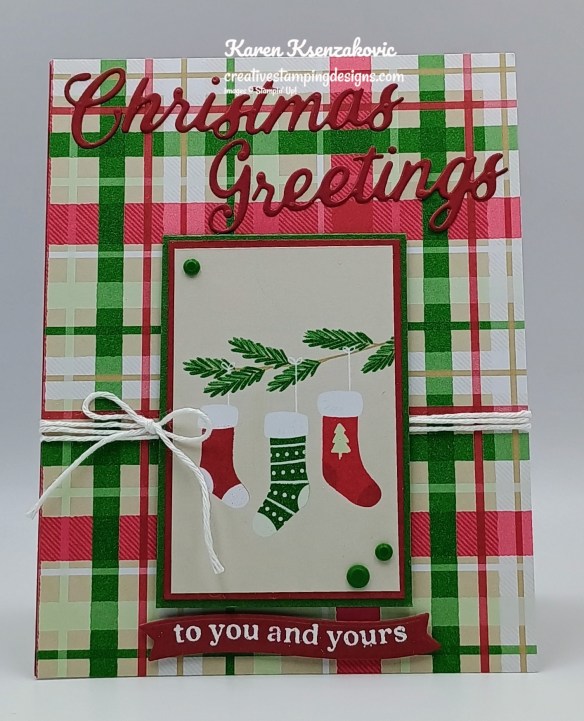
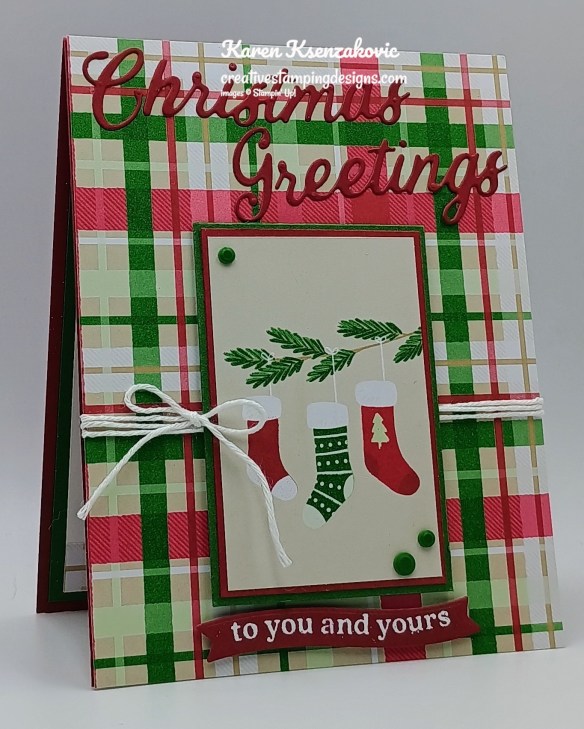
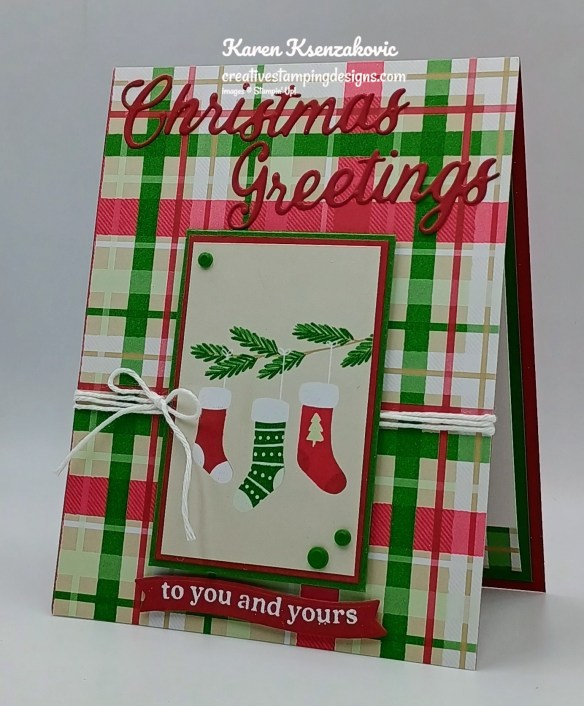
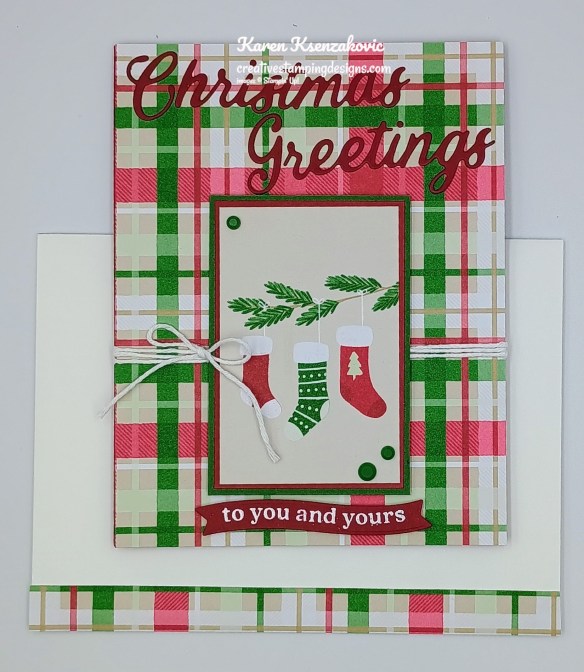
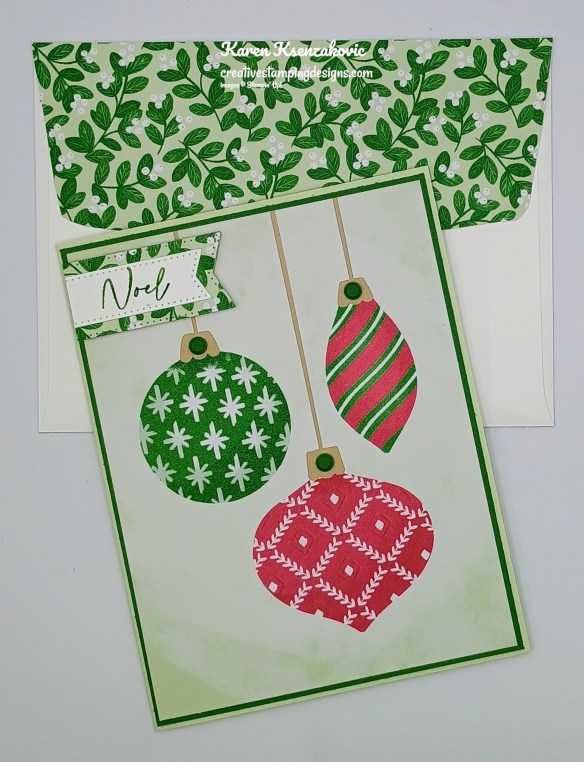
I used the Stampin’ Up! Words for The Season Bundle along with the Christmas Tags & More Mix & Match 6 x 6 Specialty Designer Series Paper for a quick and easy card today.

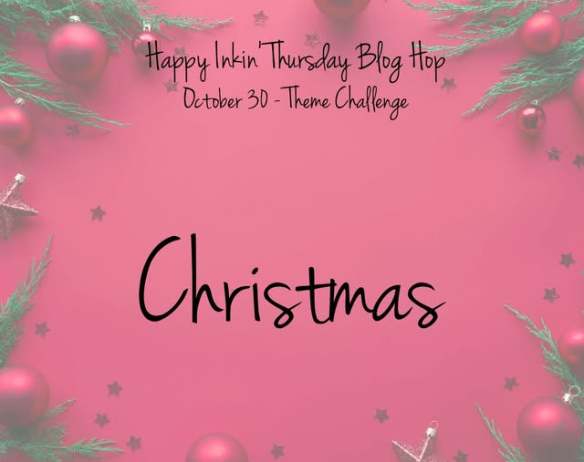
This is our theme for this week

Stampin' Up! Words For The Season Greetings 2
 creativestamppingdesigns.com

Using the Words for The Season Dies, cut the sentiment out from the panel of Cherry Cobbler. Adhere the sentiment to the top of the Christmas Tags & More DSP panel. Wrap a piece of White Baker’s Twine around the panel and tie a bow.

Stampin' Up! Words For The Season Greetings 3 creativestamppingdesigns.com

Adhere the panel of Christmas Tags & More DSP to Cherry Cobbler and Garden Green mats. Adhere the layered panel to the card front over the Baker’s Twine. Adhere the card front to a Cherry Cobbler card base,

Stampin' Up! Words For The Season Greetings 4 creativestamppingdesigns.com

On a panel of Cherry Cobbler, stamp the sentiment from the Stampin’ Up! Words for The Season Cling Stamp Set in Versamark Ink. Sprinkle the sentiment with White Embossing Powder and set it using the Heat Tool. Cut the sentiment out using the Words for The Season Dies. Adhere the sentiment on the bottom of the card front. Add a few Dear Dots to the card front.

Stampin' Up! Words For The Season Greetings 5 creativestamppingdesigns.com

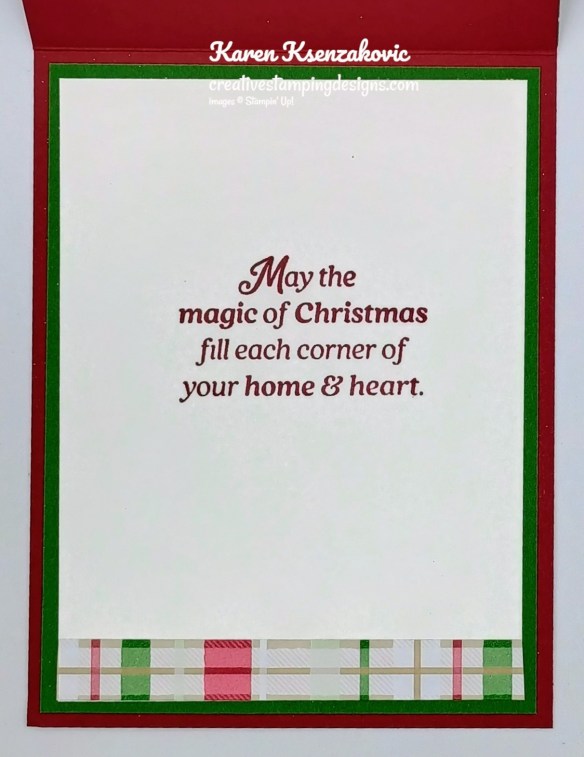
Stamp the sentiment on a panel of Basic White. Adhere a panel of Christmas Tags & More DSP to the bottom of the panel. Adhere the Basic White panel to a Garden Green mat then to the inside of the Cherry Cobbler card base.

Stampin' Up! Words For The Season Greetings 6 creativestamppingdesigns.com

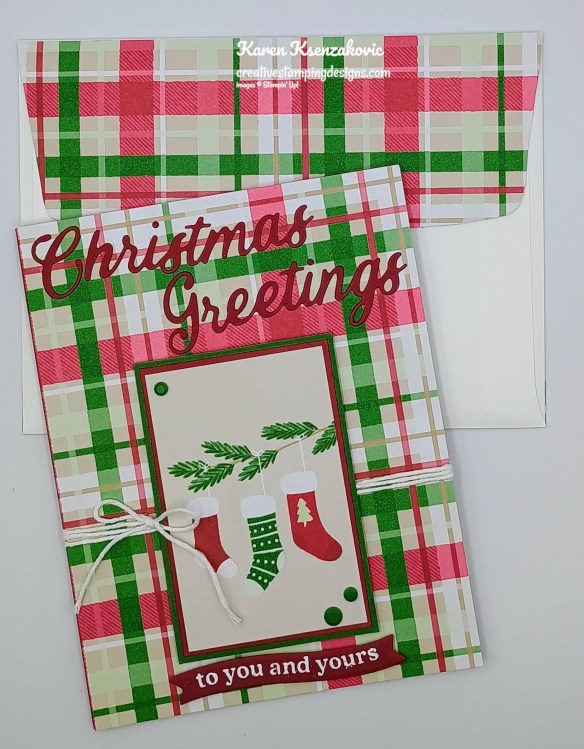
Decorate a Basic White Medium Envelope to complete your card. Adhere a strip of the Christmas Tags & More DSP to the envelope front and a panel to the envelope flap.

Stampin' Up! Words For The Season Greetings 7 creativestamppingdesigns.com

Thank you for stopping by my blog today.  Now that you’ve seen my card, let’s get on with the hop!  Click the button below to hop over to see what Akiko has created. Happy Hopping!!

Just in case you get lost along the way, here is a list of the team members involved in the hop today.

Amy Koenders

Mary Deatherage

Karen Ksenzakovic You Are Here

Akiko Sudano

Tara Carpenter

Terry Lynn Bright

Nicole Bloxom

*********************************************************************************************************

If you need any stamping supplies, I’d love to be your Demonstrator. Just click HERE to go directly to my online store or drop me an email if you have any questions. 

*********************************************************************************************************

Final Days for Stampin’ Up! BEST JOINING SPECIAL EVER – ENDS October 31

From October 1 to 31, anyone who purchases the Starter Kit can choose between two amazing offers.  In addition to FREE shipping, FREE business supplies, and a FREE Paper Pumpkin kit, you can either get $125 worth of products for just $35, an amazing first time ever offer, OR $189 worth of products for just $99!  
Here are the details:

  • Promotion dates:  October 1-31
  • New team members who purchase their starter kit from October 1 to 31 will be able to choose between these two offers:
    • $125 worth of products for just $35
    • $189 worth of products for just $99
  • New demonstrators who submit their Independent Demonstrator Agreement (IDA) before October 1 or after October 31 will not be eligible for these offers.
  • Deadline to join:  October 31, 2025, at 11:59 p.m. (MT)

As an added bonus, the Demonstrator preorder has begun for the November Online Exclusives and those items can be added to your Starter Kit or purchased with the Demonstrator discount once you join!

Click Here to get started!!

*********************************************************************************************************

Card stock cuts for this project:

  • Basic White Cardstock 3 3/4″ x 5″(inner liner)
  • Cherry Cobbler Cardstock 4 1/4″ x 11″(card base scored & folded at 5 1/2″), 1 3/4″ x 3 1/4″(die cut), 1″ x 3″(sentiment), 2 1/8″ x 3 1/8″(DSP panel mat)
  • Garden Green Cardstock 2 1/4″ x 3 1/4″(DSP panel mat), 4″ x 5 1/4″(inner liner mat)
  • Christmas Tags & More Mix & Match Specialty 6 x 6 Designer Series Paper 4 1/4″ x 5 1/2″(card front), 2″ x 3″(card front panel), 1/2″ x 3 3/4″(inner liner), 1/2″ x 6″ & 2 1/4″ x 6″(envelope)

*********************************************************************************************************

Product List

Stampin’ Up! Peace on Earth

Good Saturday morning stamping friends. We are having the best time every here in GA. We’ve been doing a lot of laughing, catching up and eating. There’s always a lot of eating going on when we’re together. Yesterday started with James’ delicious Blueberry French toast and homemade Hash Browns. Lunch was a little lighter with a Baked Potato bar & Salad. We had an amazing Dijon-Crusted Roast Pork Loin with Cranberry & Apple Chutney along with his famous Carrot Souffle (which he really needs to make a double batch of), Roasted Brussels Sprouts and Spinach & Mushroom Risotto.

Today’s card is one of the cards I prepared for our shoebox card swap. We all have to bring a card for everyone else to make at the retreat. I used a design I made a few weeks ago and just changed up the DSP.  If you’d like to see a quick video of how I made this card, Click Here to go to my Instagram Reels. Here’s my card for today.

Stampin' Up! Peace on Earth 1 creativestampingdesigns.com

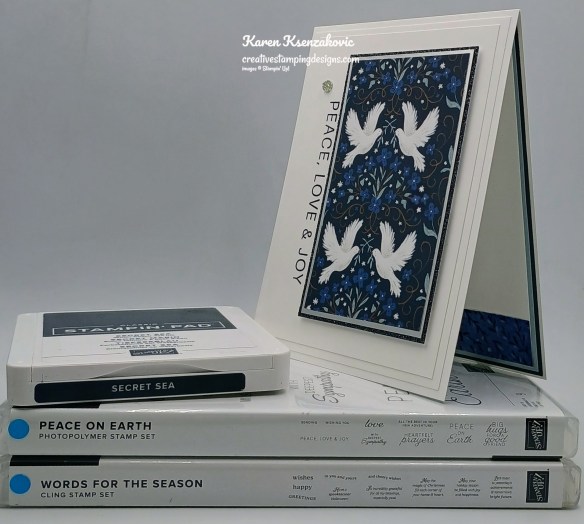
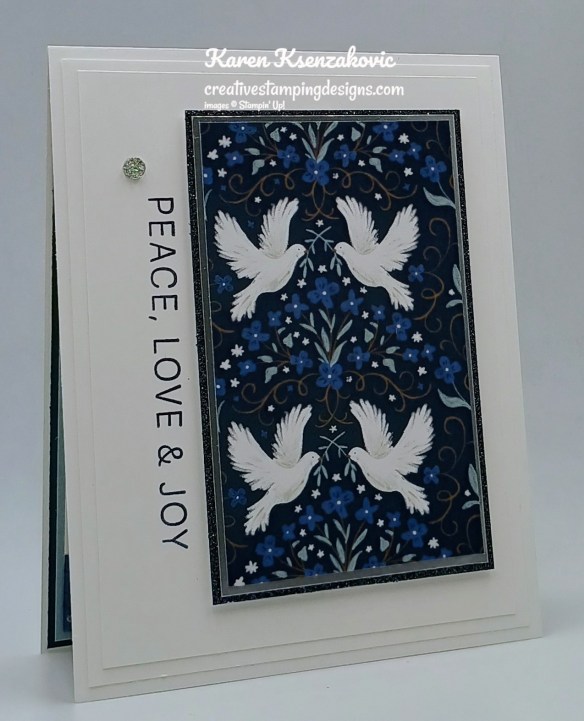
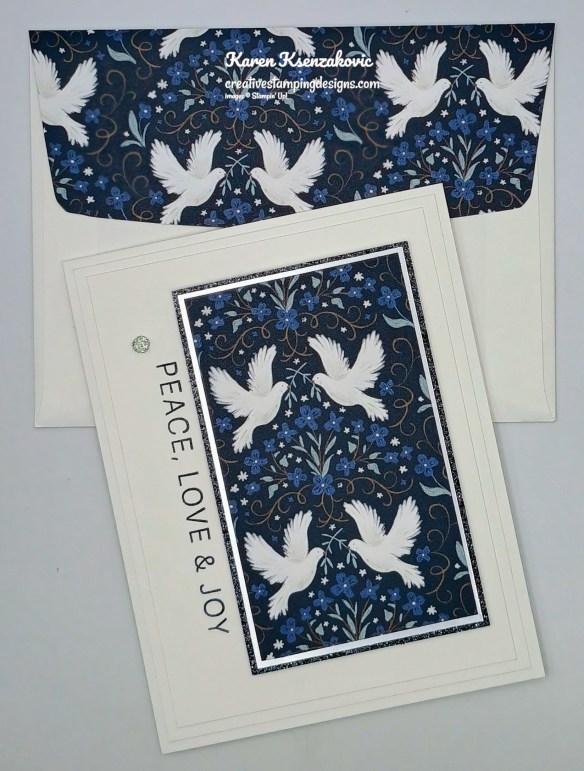
I used the Stampin’ Up! Peace On Earth Photopolymer Stamp Set along with the Peaceful Garden Designer Series Paper, Peaceful Garden Glimmer Paper, Silver Foil Sheets, Stampin’ Up! Words for the Season Cling Stamp Set and Stampin’ Up! Textured Notes Cling Stamp Set for my card today.

Stampin' Up! Peace on Earth 2 creativestampingdesigns.com

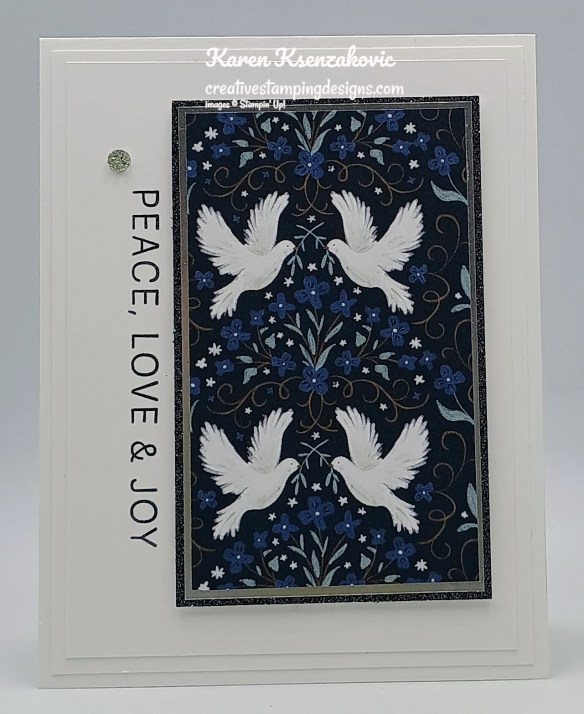
Stamp the sentiment from the Peace on Earth stamp set in Secret Sea Ink on the panel of Basic White.

Stampin' Up! Peace on Earth 3 creativestampingdesigns.com

Adhere the Basic White panel to a Basic White mat. Adhere the layered panel to a Basic White Thick card base.

Stampin' Up! Peace on Earth 4 creativestampingdesigns.com

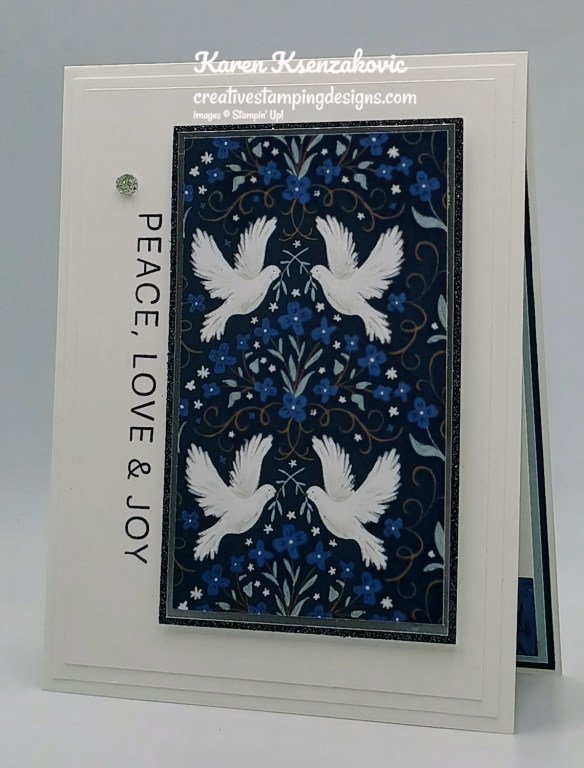
Adhere the panel of Peaceful Garden DSP to the Silver Foil mat. Adhere the layered panel to a Peaceful Garden Glimmer mat. Adhere the layered panel to the card front with Stampin’ Dimensionals. Add a Drusy Adhesive-Backed Embellishment.

Stampin' Up! Peace on Earth 5 creativestampingdesigns.com

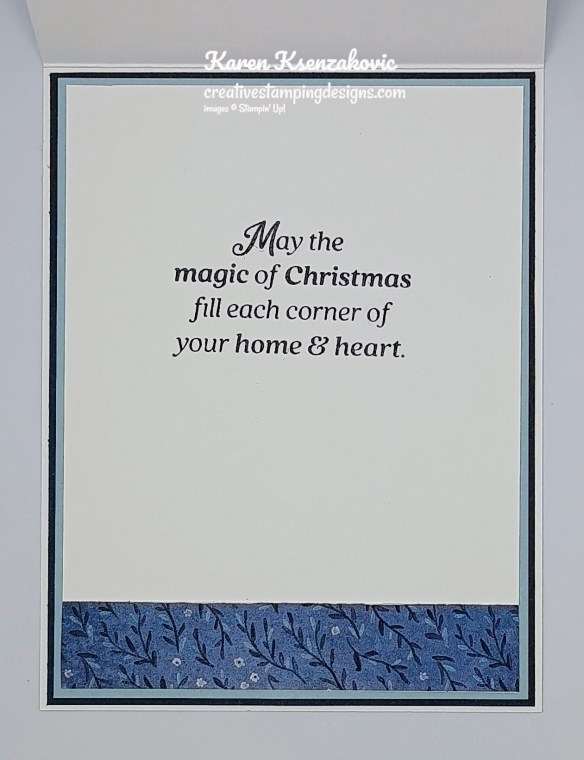
Stamp the sentiment from Words for the Season stamp set in Secret Sea Ink on a panel of Basic White. Adhere a panel of Peaceful Garden DSP to the bottom of the panel. Adhere the Basic White panel to a Cloud Cover mat and a Secret Sea mat then to the inside of the Basic White Thick card base.

Stampin' Up! Peace on Earth 6 creativestampingdesigns.com

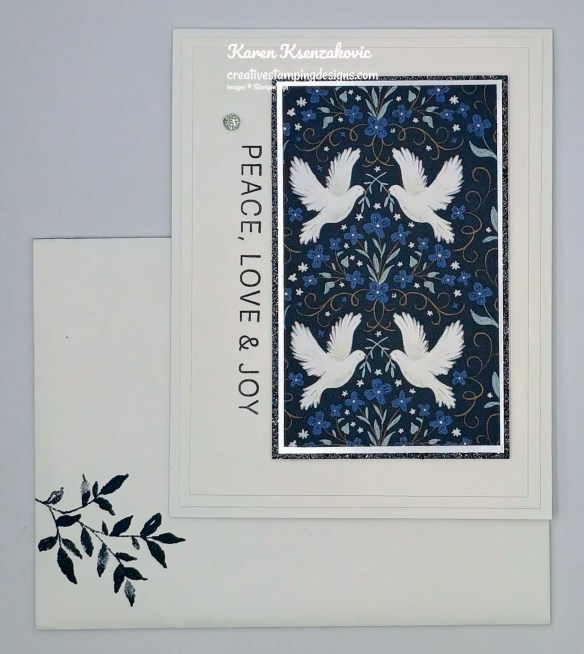
Decorate a Basic White Medium Envelope to finish your card. Stamp the small leaf image from the Textured Notes stamp set on the envelope front in Secret Sea Ink. Adhere a panel of Peaceful Garden DSP to the envelope flap.

Stampin' Up! Peace on Earth 7 creativestampingdesigns.com

Thank you for stopping by my blog today. I hope you like the card and will give it a try. Happy Stamping!!

*********************************************************************************************************

If you need any stamping supplies, I’d love to be your Demonstrator. Just click HERE to go directly to my online store or drop me an email if you have any questions. 

*********************************************************************************************************

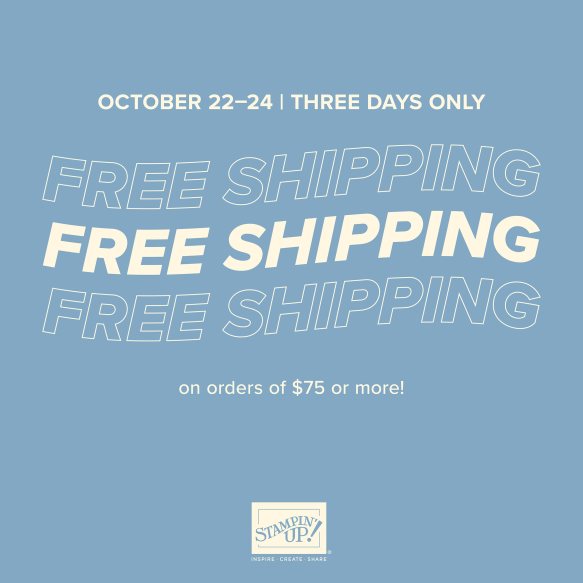
FREE SHIPPING Starts TODAY, October 22 – October 24 on orders of $75 or more

  • All order types qualify for this promotion.
  • Free shipping is for three days only. Orders must be opened and closed from October 22–24.
  • Free shipping automatically applies to your cart after the qualifying amount has been met, which is $75 USD (before tax).
  • Coupon codes and Stampin’ Rewards will lower your order’s retail amount. Orders must meet the qualifying amount to be eligible for free shipping.
  • The additional cost for expedited shipping is not covered by this promotion.
  • Prepaid 3-, 6-, and 12-month Paper Pumpkin subscriptions and month-to-month subscriptions do not qualify for free shipping. Refills, past kits and add-ons do qualify toward free shipping, but you must be a subscriber to purchase. Subscriptions billed and shipped this month will be charged for the normal amount ($27.00 USD shipping included) + tax.

Sales Period: October 22–24

Ordering Deadlines

  • Phone: October 24 at 6:59 p.m. (MT)
  • Online: October 24 at 11:59 p.m. (MT)

*********************************************************************************************************

Come Join My Team

Only 9 Days Left for Stampin’ Up! BEST JOINING SPECIAL EVER – October 1 – 31

What would you say about getting $125 in products of your choice for ONLY $35? Or how about getting $189 in products of your choice for only $99? I don’t know about you, but I’d say YES!!!!! Are you new to stamping or do you know someone that wants to get started but doesn’t know where to start. I’m here to help you. I recommend for someone brand new to stamping to start with our all-inclusive kits. It’s a great place to start and you can add the New Kits along with New preorder Online Exclusive products to your starter kit.

Crafting is even more fun with community, and there’s never been a better time to join. Become a demonstrator and enjoy all the perks that come with that, like a 20–25% product discount, exclusive early access to the latest releases and catalogs, the opportunity to earn a modest supplemental income, the chance to attend incredible training and crafting events, and so much more! Have you ever thought about joining the Stampin’ Up! community? Are you into scrapbooking and have you seen all the new scrapbook products Stampin’ Up! has? Wouldn’t you love to get all these products at a discount? Why not consider joining the Stampin’ Up! community between October 1-31, and save on everything you buy? Are you new to stamping and don’t know where to start, but would like to join to save? Ask me for help, I’m here to help and assist you anyway that I can. OCTOBER is the best time ever to join!! The best part is you can put November Online Exclusive preorder items in the Starter Kit. Contact me and we can talk about signing you up. There’s never an obligation to sell, you can join to enjoy the discount for yourself. Why not give it a try, you have nothing at all to lose!!

From October 1 to 31, anyone who purchases the Starter Kit can choose between two amazing offers.  In addition to FREE shipping, FREE business supplies, and a FREE Paper Pumpkin kit, you can either get $125 worth of products for just $35, an amazing first time ever offer, OR $189 worth of products for just $99!  

Promotion Period: October 1–31

Ordering Deadlines

  • Online: October 31, 2025, at 11:59 p.m. (MT)

********************************************************************************************************

My Holiday Essential Pack is Back

My Holiday Essential Pack is back for ordering October 11 – 31. Everyone seemed to love this essential pack when I offered it in August so I thought I’d offer it again since Holiday card making is approaching fast.
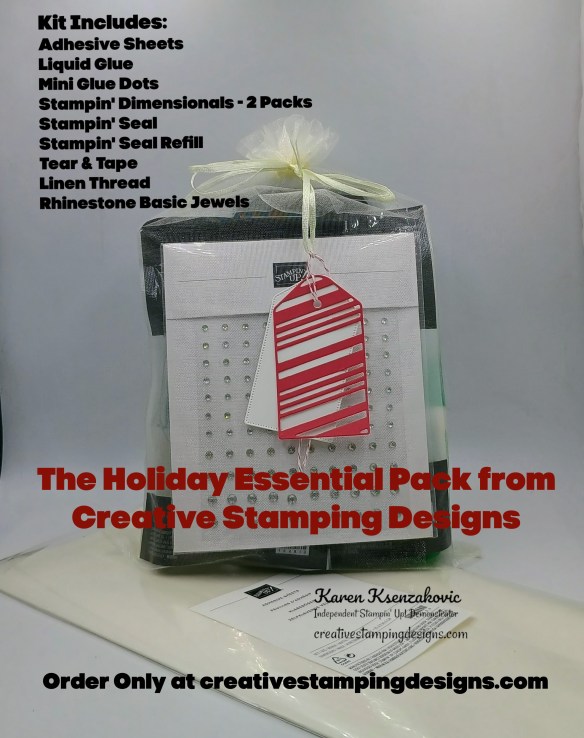
I’m offering a Holiday Essential Pack to get those holiday cards made. Let’s get a head on making those Holiday cards this year. Get all your adhesives ordered now so you don’t run out while you’re in the middle of making those Holiday cards.

Each Kit will Include Full Packs of:

  • Adhesive Sheets
  • Liquid Glue
  • Mini Glue Dots
  • Stampin’ Dimensionals – 2 Packs
  • Stampin’ Seal
  • Stampin’ Seal Refill
  • Tear & Tape Adhesive
  • Linen Thread
  • Rhinestone Basic Jewels

If you were to order all this separately it would cost $65.25 + shipping. I’m offering it for $56.00 plus $9.00 for Priority Mail Shipping. All orders must be submitted by October 31st. I’ll be placing 2 separate orders, once on October 22 for the first group and a 2nd order on November 1st. Once everything arrives, I’ll package it up in a cut little bag and ship it out to you.

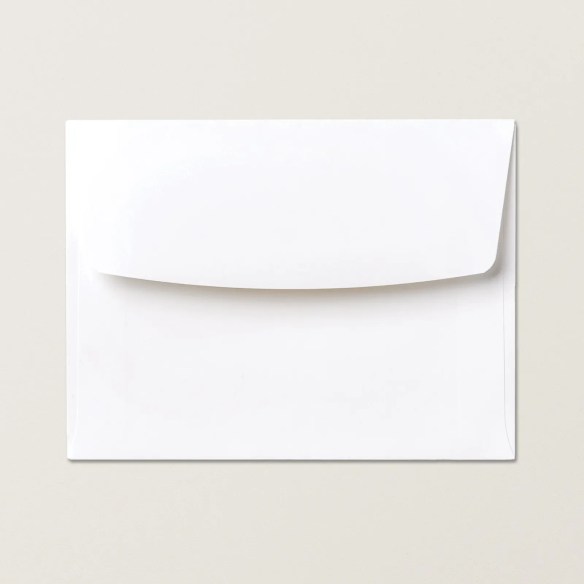
As an EXTRA BONUS I’ll also throw in a pack of Basic White Medium Envelopes
Click Here to place your order for the Essential Pack Today!! Deadline to order is Friday October 31st

********************************************************************************************************

Card stock cuts for this project:

  • Basic White Cardstock 3 3/4″ x 5″ & 4″ x 5 1/4″(card fronts), 3 7/8″ x 5 1.8″(inner liner)
  • Basic White Thick Cardstock 4 1/4″ x 11″(card base scored & folded at 5 1/2″)
  • Cloud Cover Cardstock 4″ x 5 1/4″(inner liner mat)
  • Secret Sea Cardstock 4 1/8″ x 5 3/8″(inner liner mat)
  • Peaceful Garden Designer Series Paper 2 3/8″ x 4″(card front), 5/8″ x 3 7/8″(inner liner), 2 1/4″ x 6″(envelope)
  • Peaceful Garden Glimmer Paper 2 5/8″ x 4 1/4″(card front mat)
  • Silver Foil 2 1/2″ x 4 1/8″(card front mat)

*********************************************************************************************************

Product List

Stampin’ Up! Joyful Tidings CAS

Good Monday morning stamping friends and welcome to a new week. How was your weekend? We had such a good time yesterday at out October Online Class using the Stampin’ Up! Delicate Pines bundle. Tara and I created 6 beautiful cards for everyone to make. Already looking forward to our next class.

today I have a super quick and easy card for you. this card is perfect to make multiples of. If you’d like to see a quick video of how I made this card, Click Here to go to my Instagram Reels. Here’s my card for today.

Stampin' Up! Joyful Tidings CAS 1 creativestampingdesigns.com

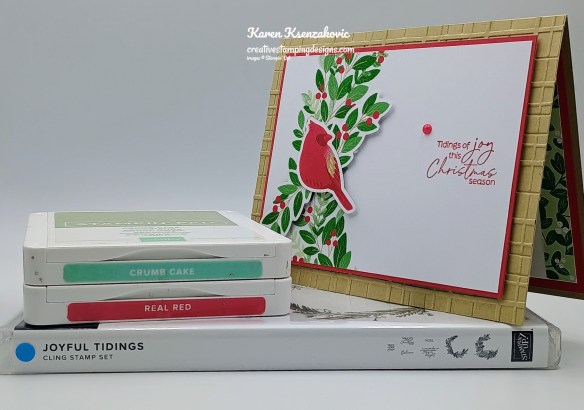
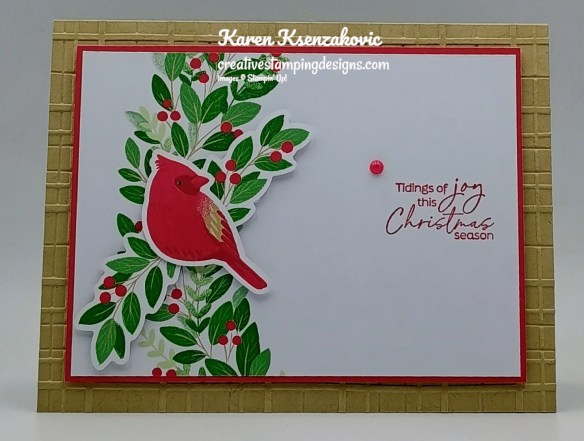
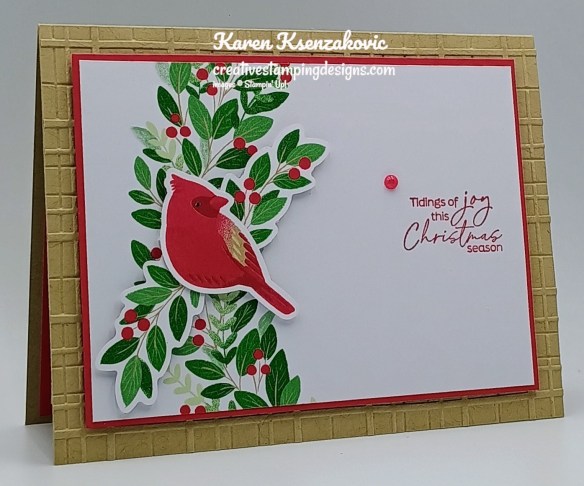
I used the Stampin’ Up! Joyful Tidings Cling Stamp Set along with the Forever Plaid 3D Embossing Folder and Christmas Tags & More 6 x 6 Mix &Match Specialty Designer Series Paper for my card today.

Stampin' Up! Joyful Tidings CAS 2 creativestampingdesigns.com

Emboss a Crumb Cake card front using the Forever Plaid EF. Adhere the embossed panel to a Crumb Cake card base.

Stampin' Up! Joyful Tidings CAS 3 creativestampingdesigns.com

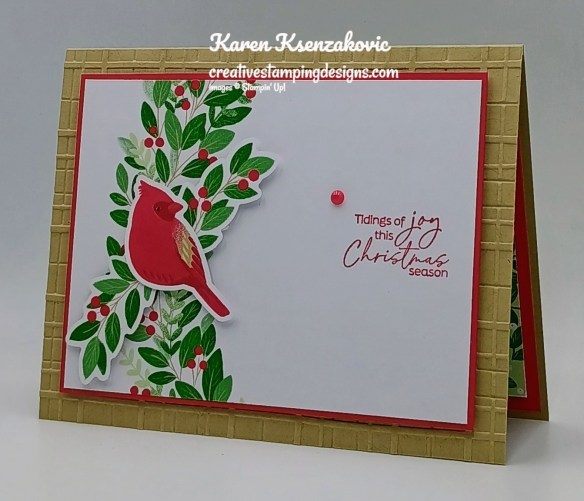
Stamp the sentiment from the Joyful Tidings stamp set in Real Red Ink on panel of Christmas Tags & More DSP. Adhere the stamped panel to a Real Red mat. Adhere the layered panel to the Crumb Cake card base with Stampin’ Dimensionals.

Stampin' Up! Joyful Tidings CAS 4 creativestampingdesigns.com

Adhere the die cut pieces from the Christmas Tags & More DSP to the card front with Stampin’ Dimensionals. Add a Delightful Decorative Dot to the card front.

Stampin' Up! Joyful Tidings CAS 5 creativestampingdesigns.com

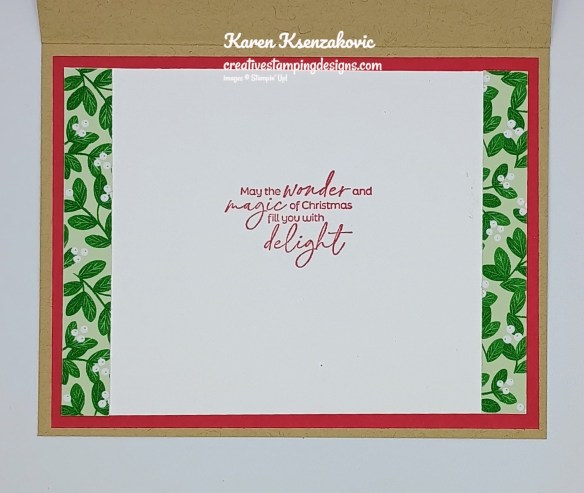
Stamp the sentiment from Joyful Tidings stamp set in Real Red Ink on a panel of Basic White. Adhere 2 panels of Christmas Tags & More DSP to the sides of the panel. Adhere the Basic White panel to a Real Red mat then to the inside of the Crumb cake card base.

Stampin' Up! Joyful Tidings CAS 6 creativestampingdesigns.com

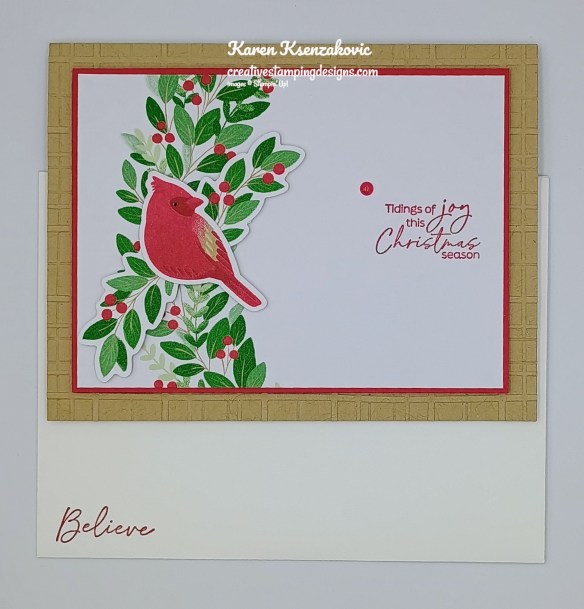
Decorate a Basic White Medium Envelope to finish your card. Stamp the sentiment from Joyful Tidings stamp set in Real Red Ink on the envelope front. Adhere a panel of Christmas Tags & More DSP to the envelope flap.

Stampin' Up! Joyful Tidings CAS 7 creativestampingdesigns.com

Thank you for stopping by my blog today. I hope you like the card and will give it a try. Happy Stamping!!

*********************************************************************************************************

If you need any stamping supplies, I’d love to be your Demonstrator. Just click HERE to go directly to my online store or drop me an email if you have any questions. 

*********************************************************************************************************

Come Join My Team

Stampin’ Up! BEST JOINING SPECIAL EVER – October 1 – 31

What would you say about getting $125 in products of your choice for ONLY $35? Or how about getting $189 in products of your choice for only $99? I don’t know about you, but I’d say YES!!!!! Are you new to stamping or do you know someone that wants to get started but doesn’t know where to start. I’m here to help you. I recommend for someone brand new to stamping to start with our all-inclusive kits. It’s a great place to start and you can add the New Kits along with New preorder Online Exclusive products to your starter kit.

Crafting is even more fun with community, and there’s never been a better time to join. Become a demonstrator and enjoy all the perks that come with that, like a 20–25% product discount, exclusive early access to the latest releases and catalogs, the opportunity to earn a modest supplemental income, the chance to attend incredible training and crafting events, and so much more! Have you ever thought about joining the Stampin’ Up! community? Are you into scrapbooking and have you seen all the new scrapbook products Stampin’ Up! has? Wouldn’t you love to get all these products at a discount? Why not consider joining the Stampin’ Up! community between October 1-31, and save on everything you buy? Are you new to stamping and don’t know where to start, but would like to join to save? Ask me for help, I’m here to help and assist you anyway that I can. OCTOBER is the best time ever to join!! The best part is you can put November Online Exclusive preorder items in the Starter Kit. Contact me and we can talk about signing you up. There’s never an obligation to sell, you can join to enjoy the discount for yourself. Why not give it a try, you have nothing at all to lose!!

From October 1 to 31, anyone who purchases the Starter Kit can choose between two amazing offers.  In addition to FREE shipping, FREE business supplies, and a FREE Paper Pumpkin kit, you can either get $125 worth of products for just $35, an amazing first time ever offer, OR $189 worth of products for just $99!  

Promotion Period: October 1–31

Ordering Deadlines

  • Online: October 31, 2025, at 11:59 p.m. (MT)

********************************************************************************************************

My Holiday Essential Pack is Back

My Holiday Essential Pack is back for ordering October 11 – 31. Everyone seemed to love this essential pack when I offered it in August so I thought I’d offer it again since Holiday card making is approaching fast.

I’m offering a Holiday Essential Pack to get those holiday cards made. Let’s get a head on making those Holiday cards this year. Get all your adhesives ordered now so you don’t run out while you’re in the middle of making those Holiday cards.

Each Kit will Include Full Packs of:

  • Adhesive Sheets
  • Liquid Glue
  • Mini Glue Dots
  • Stampin’ Dimensionals – 2 Packs
  • Stampin’ Seal
  • Stampin’ Seal Refill
  • Tear & Tape Adhesive
  • Linen Thread
  • Rhinestone Basic Jewels

If you were to order all this separately it would cost $65.25 + shipping. I’m offering it for $56.00 plus $9.00 for Priority Mail Shipping. All orders must be submitted by October 31st. I’ll be placing 2 separate orders, once on October 22 for the first group and a 2nd order on November 1st. Once everything arrives, I’ll package it up in a cut little bag and ship it out to you.

As an EXTRA BONUS I’ll also throw in a pack of Basic White Medium Envelopes

Click Here to place your order for the Essential Pack Today!! Deadline to order is Friday October 31st

********************************************************************************************************

Card stock cuts for this project:

  • Basic White Cardstock 3 3/4″ x 5″(inner liner)
  • Crumb Cake Cardstock 5 1/2″ x 8 1/2″(card base scored & folded at 4 1/4″), 4 1/4″ x 5 1/2″(card front)
  • Real Red Cardstock 3 5/8″ x 4 7/8″(card front panel), 4″ x 5 1/4″(inner liner mat)
  • Christmas Tags & More 6 x 6 Mix & Match Specialty Designer Series Paper 3 1/2″ x 4 3/4″(card front), (2) – 1/2″ x 3 3/4″(inner liner), 2 1/4″ x 6″(envelope flap)

*********************************************************************************************************

Product List

Stampin’ Up! Delicate Pines

Good Wednesday morning stamping friends. We’re halfway through the week, halfway through the month and halfway through the awesome Joining Special. I can’t believe it’s already the 15th of October. Where is time going? If you’re thinking about joining with the amazing Joining Special, right now is the Perfect Time to join. More information below.

I have a CAS card for you today that is easy to duplicate when you have a lot of holiday cards to make. If you’d like to see a quick video of how I made this card, Click Here to go to my Instagram Reels. Here’s my card for today.

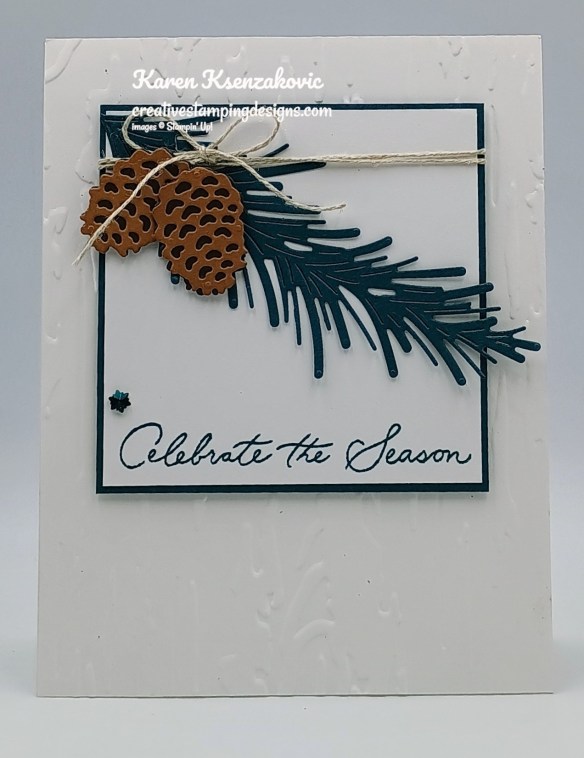
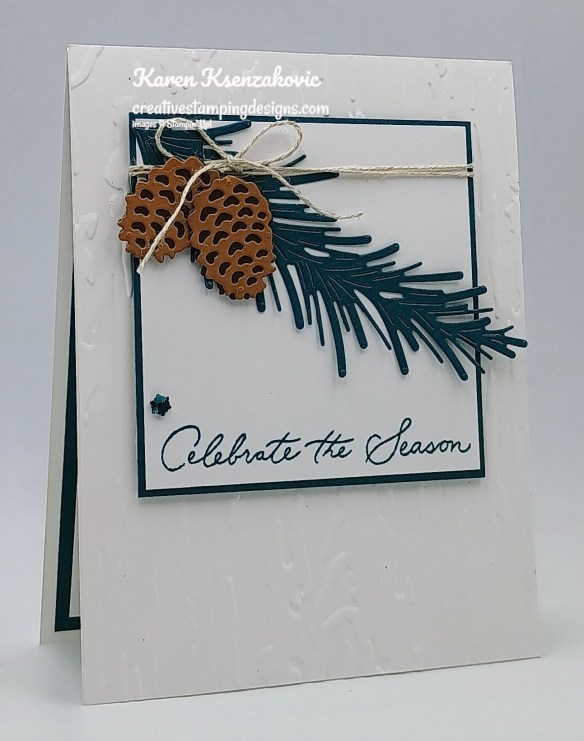
Stampin' Up! Delicate Pines CAS 1 creativestampingdesigns.com

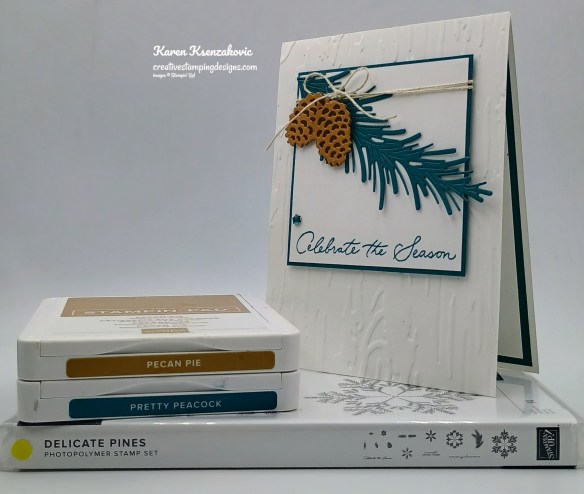
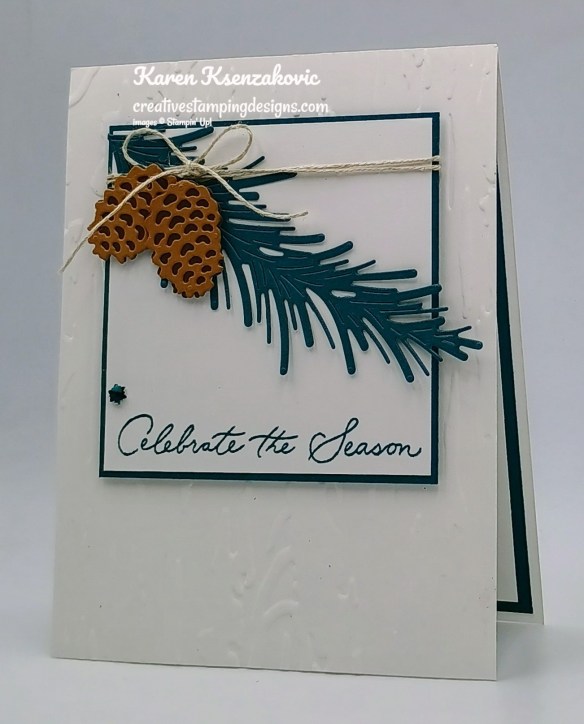
I used the Stampin’ Up! Delicate Pines Bundle along with the Christmas Greenery Dies and Birch Wood 3D Embossing Folder for my card today.

Stampin' Up! Delicate Pines CAS 2 creativestampingdesigns.com

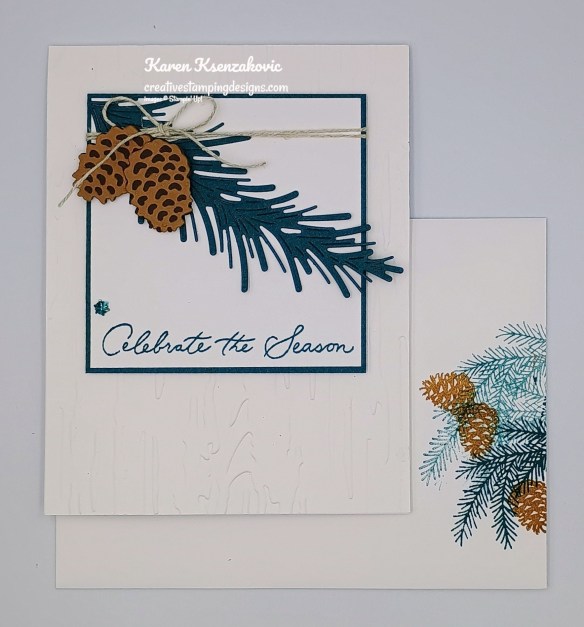
Emboss a panel of Basic White using the Birch Wood EF. Adhere the embossed panel to a Basic White Thick Card Base,

Stampin' Up! Delicate Pines CAS 3 creativestampingdesigns.com

Cut the pine bough from a panel of Pretty Peacock using the Christmas Greenery Dies. Cut the pinecones dies using the Delicate Pines Dies from panels of Early Espresso and Pecan Pie. Stamp the sentiment from the Stampin’ Up! Delicate Pines Photopolymer Stamp Set in Pretty Peacock Ink on the bottom of a Basic White panel. Adhere the sentiment panel to a pretty Peacock mat.

Stampin' Up! Delicate Pines CAS 4 creativestampingdesigns.com

Adhere the pine bough to the top of the sentiment panel with Glue Dots. Wrap a piece of Linen Thread around the layered panel 2 times and tie a bow. Adhere the detailed pinecones to the solid pinecones. Adhere the layered pinecones to the pine bough with Stampin’ Dimensionals. Adhere the layered panel to the card front with Stampin’ Dimensionals. Add a Faceted Snowflake to the card front..

Stampin' Up! Delicate Pines CAS 5 creativestampingdesigns.com

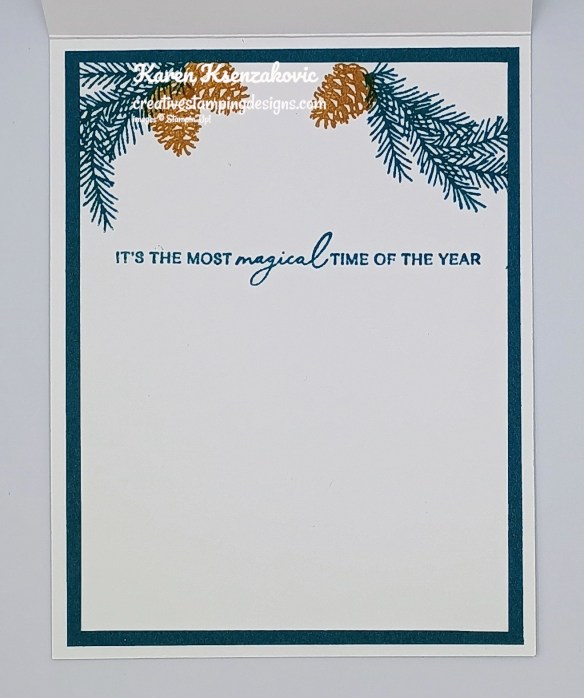
Stamp the sentiment from the Delicate Pines stamp set in Pretty Peacock In on a panel of Basic White. Stamp the pine bough image from the Delicate Pines stamp set on the top of the panel in Pretty Peacock Ink. Stamp the pinecones image on the pine bough in Pecan Pie Ink. Adhere the Basic Whit panel to a Pretty Peacock mat then to the inside of the Basic White Thick card base.

Stampin' Up! Delicate Pines CAS 6 creativestampingdesigns.com

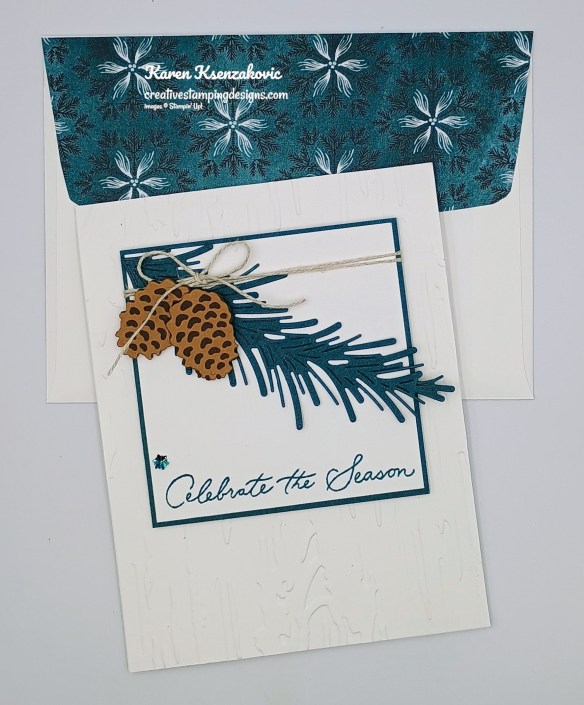
Decorate a Basic White Medium Envelope to finish your card. Stamp the pine bough image from the Delicate Pines stamp set in Pretty Peacock Ink on the envelope front. Stamp the pinecones image in Pecan Pie Ink. Adhere a panel of Elegant Pine Snowflakes DSP to the envelope flap.

Stampin' Up! Delicate Pines CAS 7 creativestampingdesigns.com

Thank you for stopping by my blog today. I hope you like the card and will give it a try. Happy Stamping!!

*********************************************************************************************************

If you need any stamping supplies, I’d love to be your Demonstrator. Just click HERE to go directly to my online store or drop me an email if you have any questions. 

*********************************************************************************************************

Join My Team with Stampin’ Up! BEST JOINING SPECIAL EVER – October 1 – 31

What would you say about getting $125 in products of your choice for ONLY $35? Or how about getting $189 in products of your choice for only $99? I don’t know about you, but I’d say YES!!!!! Are you new to stamping or do you know someone that wants to get started but doesn’t know where to start. I’m here to help you. I recommend for someone brand new to stamping to start with our all-inclusive kits. It’s a great place to start and you can add the New Kits along with New preorder Online Exclusive products to your starter kit.

Crafting is even more fun with community, and there’s never been a better time to join. Become a demonstrator and enjoy all the perks that come with that, like a 20–25% product discount, exclusive early access to the latest releases and catalogs, the opportunity to earn a modest supplemental income, the chance to attend incredible training and crafting events, and so much more! Have you ever thought about joining the Stampin’ Up! community? Are you into scrapbooking and have you seen all the new scrapbook products Stampin’ Up! has? Wouldn’t you love to get all these products at a discount? Why not consider joining the Stampin’ Up! community between October 1-31, and save on everything you buy? Are you new to stamping and don’t know where to start, but would like to join to save? Ask me for help, I’m here to help and assist you anyway that I can. OCTOBER is the best time ever to join!! The best part is you can put November Online Exclusive preorder items in the Starter Kit. Contact me and we can talk about signing you up. There’s never an obligation to sell, you can join to enjoy the discount for yourself. Why not give it a try, you have nothing at all to lose!!

From October 1 to 31, anyone who purchases the Starter Kit can choose between two amazing offers.  In addition to FREE shipping, FREE business supplies, and a FREE Paper Pumpkin kit, you can either get $125 worth of products for just $35, an amazing first time ever offer, OR $189 worth of products for just $99!  

Promotion Period: October 1–31

Ordering Deadlines

  • Online: October 31, 2025, at 11:59 p.m. (MT)

********************************************************************************************************

My Holiday Essential Pack is Back

My Holiday Essential Pack is back for ordering October 11 – 31. Everyone seemed to love this essential pack when I offered it in August so I thought I’d offer it again since Holiday card making is approaching fast.

I’m offering a Holiday Essential Pack to get those holiday cards made. Let’s get a head on making those Holiday cards this year. Get all your adhesives ordered now so you don’t run out while you’re in the middle of making those Holiday cards.

Each Kit will Include Full Packs of:

  • Adhesive Sheets
  • Liquid Glue
  • Mini Glue Dots
  • Stampin’ Dimensionals – 2 Packs
  • Stampin’ Seal
  • Stampin’ Seal Refill
  • Tear & Tape Adhesive
  • Linen Thread
  • Rhinestone Basic Jewels

If you were to order all this separately it would cost $65.25 + shipping. I’m offering it for $56.00 plus $9.00 for Priority Mail Shipping. All orders must be submitted by October 31st. I’ll be placing 2 separate orders, once on October 22 for the first group and a 2nd order on November 1st. Once everything arrives, I’ll package it up in a cut little bag and ship it out to you.

As an EXTRA BONUS I’ll also throw in a pack of Basic White Medium Envelopes

Click Here to place your order for the Essential Pack Today!! Deadline to order is Friday October 31st

********************************************************************************************************

Card stock cuts for this project:

  • Basic White Cardstock 4 1/4″ x 5 1/2″(card front), 3 1/8″ x 3 1/8″(sentiment), 3 3/4″ x 5″(inner liner)
  • Basic White Thick Cardstock 4 1/4″ x 11″(card base scored & folded at 5 1/2″)
  • Early Espresso Cardstock 1 1/4″ x 2″(die cuts)
  • Pecan Pie Cardstock 1 3/4″ x 1 3/4″(die cuts)
  • Pretty Peacock Cardstock 3 1/4″ x 3 1/4″(sentiment mat), 2 1/2″ x 4 1/2″(die cut), 4″ x 5 1/4″(inner liner mat)
  • Elegant Pine Snowflakes Designer Series Paper 2 1/4″ x 6″(envelope flap)

*********************************************************************************************************

Product List

Stampin’ Up! Decorative Trees

Good Sunday morning stamping friends. I hope your weekend is going well. It’s a rainy one here in NJ, so great time to stay in and play catch up.

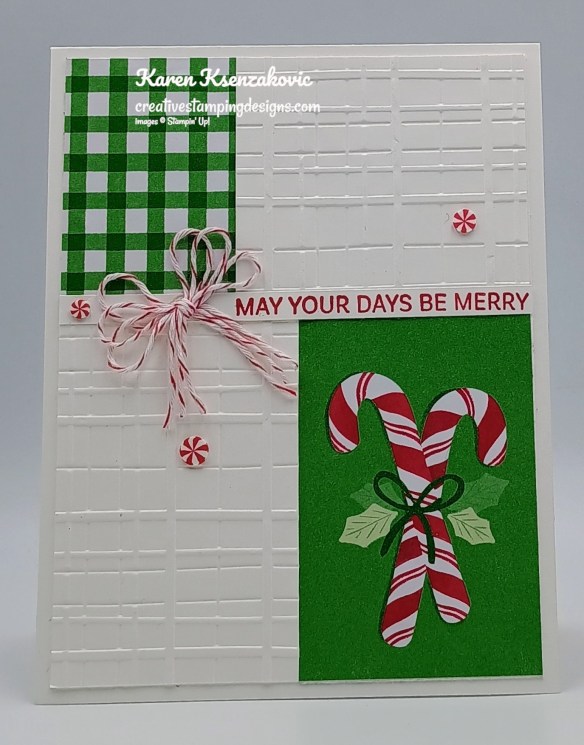
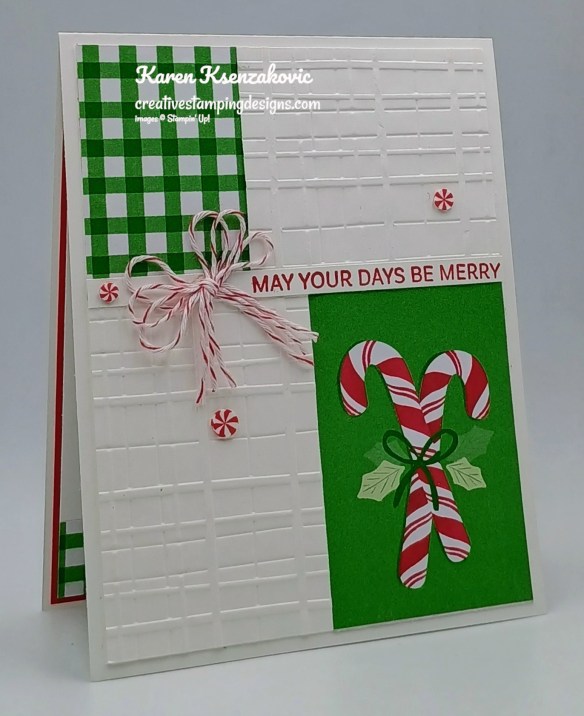
Today’s card is a CAS one using an older stamp set and new DSP. Here’s my card for today.

Stampin' Up! Decorative Trees 1 creativestampingdesigns.com

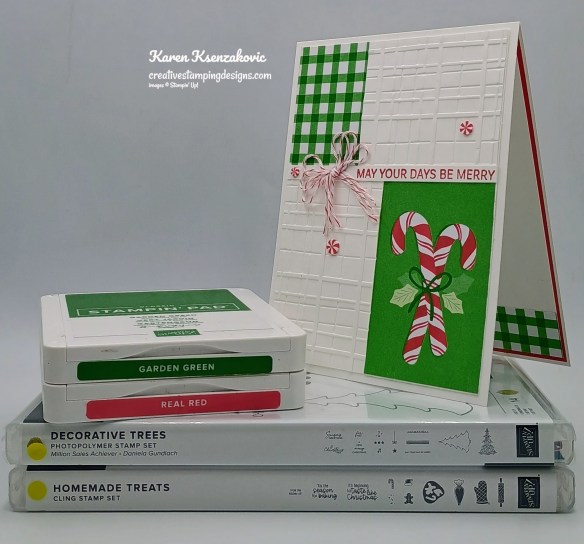
I used the Stampin’ Up! Decorative Trees Photopolymer Stamp Set along with the Christmas Tags & More 6 x 6 Specialty Designer Series Paper, Forever Plaid 3D Embossing Folder and Stampin’ Up! Homemade Treats Cling Stamp Set for my card today.

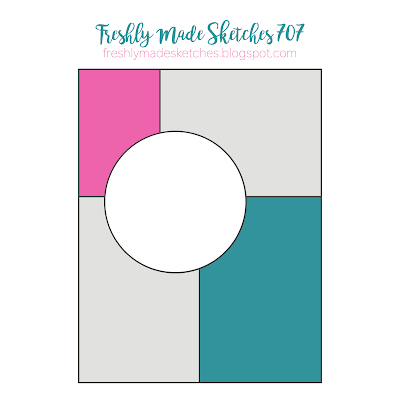
My design is from Freshly Made Sketches Challenge #707

Stampin' Up! Decorative Trees 2 creativestampingdesigns.com

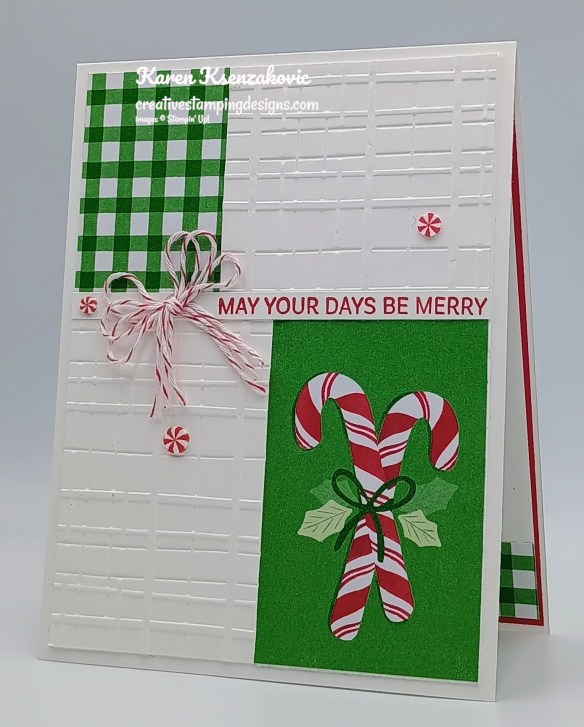
Emboss 2 panels of Basic White using the Forever Plaid EF. Adhere the embossed panels to a Basic White Thick card base. Adhere 2 panels of Christmas Tags & More DSP to the card front.

Stampin' Up! Decorative Trees 3 creativestampingdesigns.com

Stamp the sentiment from Decorative Trees stamp set in Real Red Ink on a strip of Basic White. Adhere the sentiment to the card front.

Stampin' Up! Decorative Trees 4 creativestampingdesigns.com

Tie a multi-loop bow using the Real Red & White Baker’s Twine. Adhere the bow to the card front. Add a few Real Red & White Adhesive-Backed Peppermints to the card front.

Stampin' Up! Decorative Trees 5 creativestampingdesigns.com

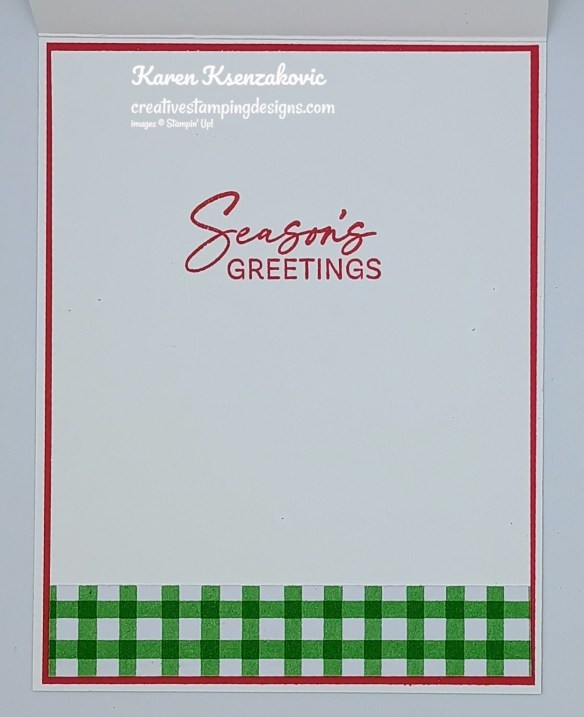
Stamp the sentiment from the Decorative Trees stamp set in real Red Ink on a panel of Basic White. Adhere a panel of Christmas Tags & More DSP to the bottom of the panel. Adhere the Basic White panel to a Real Red mat then to the inside of the Basic White Thick card base.

Stampin' Up! Decorative Trees 6 creativestampingdesigns.com

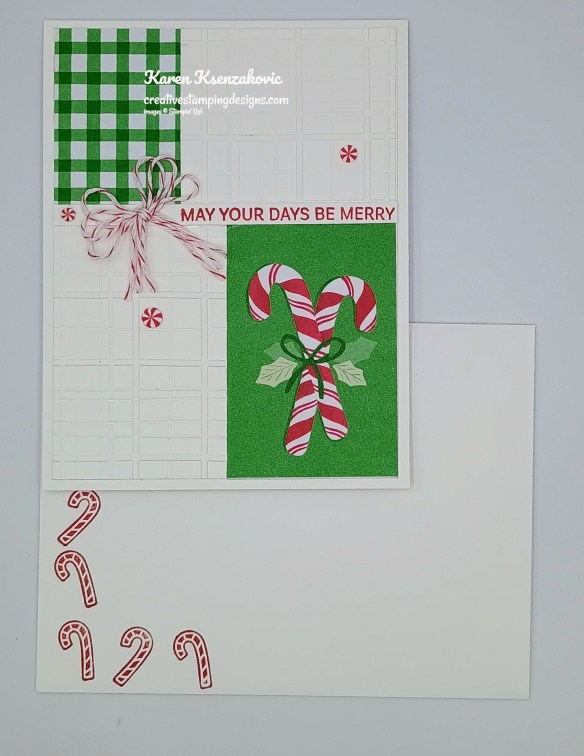
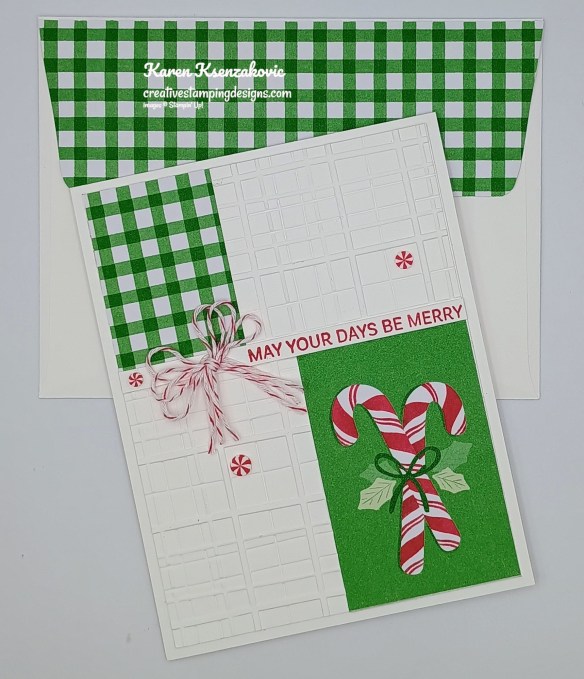
Stamp the candy cane image from the Homemade Treats stamp set in Real Red Ink on the envelope front. Adhere a panel of Christmas Tags & More DSP to the envelope flap.

Stampin' Up! Decorative Trees 7 creativestampingdesigns.com

Thank you for stopping by my blog today. I hope you like the card and will give it a try. Happy Stamping!!

*********************************************************************************************************

If you need any stamping supplies, I’d love to be your Demonstrator. Just click HERE to go directly to my online store or drop me an email if you have any questions. 

*********************************************************************************************************

Join My Team with Stampin’ Up! BEST JOINING SPECIAL EVER – October 1 – 31

What would you say about getting $125 in products of your choice for ONLY $35? Or how about getting $189 in products of your choice for only $99? I don’t know about you, but I’d say YES!!!!! Are you new to stamping or do you know someone that wants to get started but doesn’t know where to start. I’m here to help you. I recommend for someone brand new to stamping to start with our all-inclusive kits. It’s a great place to start and you can add the New Kits along with New preorder Online Exclusive products to your starter kit.

Crafting is even more fun with community, and there’s never been a better time to join. Become a demonstrator and enjoy all the perks that come with that, like a 20–25% product discount, exclusive early access to the latest releases and catalogs, the opportunity to earn a modest supplemental income, the chance to attend incredible training and crafting events, and so much more! Have you ever thought about joining the Stampin’ Up! community? Are you into scrapbooking and have you seen all the new scrapbook products Stampin’ Up! has? Wouldn’t you love to get all these products at a discount? Why not consider joining the Stampin’ Up! community between October 1-31, and save on everything you buy? Are you new to stamping and don’t know where to start, but would like to join to save? Ask me for help, I’m here to help and assist you anyway that I can. OCTOBER is the best time ever to join!! The best part is you can put November Online Exclusive preorder items in the Starter Kit. Contact me and we can talk about signing you up. There’s never an obligation to sell, you can join to enjoy the discount for yourself. Why not give it a try, you have nothing at all to lose!!

From October 1 to 31, anyone who purchases the Starter Kit can choose between two amazing offers.  In addition to FREE shipping, FREE business supplies, and a FREE Paper Pumpkin kit, you can either get $125 worth of products for just $35, an amazing first time ever offer, OR $189 worth of products for just $99!  

Promotion Period: October 1–31

Ordering Deadlines

  • Online: October 31, 2025, at 11:59 p.m. (MT)

********************************************************************************************************

My Holiday Essential Pack is Back

My Holiday Essential Pack is back for ordering October 11 – 31. Everyone seemed to love this essential pack when I offered it in August so I thought I’d offer it again since Holiday card making is approaching fast.

I’m offering a Holiday Essential Pack to get those holiday cards made. Let’s get a head on making those Holiday cards this year. Get all your adhesives ordered now so you don’t run out while you’re in the middle of making those Holiday cards.

Each Kit will Include Full Packs of:

  • Adhesive Sheets
  • Liquid Glue
  • Mini Glue Dots
  • Stampin’ Dimensionals – 2 Packs
  • Stampin’ Seal
  • Stampin’ Seal Refill
  • Tear & Tape Adhesive
  • Linen Thread
  • Rhinestone Basic Jewels

If you were to order all this separately it would cost $65.25 + shipping. I’m offering it for $56.00 plus $9.00 for Priority Mail Shipping. All orders must be submitted by October 31st. I’ll be placing 2 separate orders, once on October 22 for the first group and a 2nd order on November 1st. Once everything arrives, I’ll package it up in a cut little bag and ship it out to you.

As an EXTRA BONUS for the 1st 10 people that order I’ll also throw in a pack of Basic White Medium Envelopes

Click Here to place your order for the Essential Pack Today!! Deadline to order is Friday October 31st

********************************************************************************************************

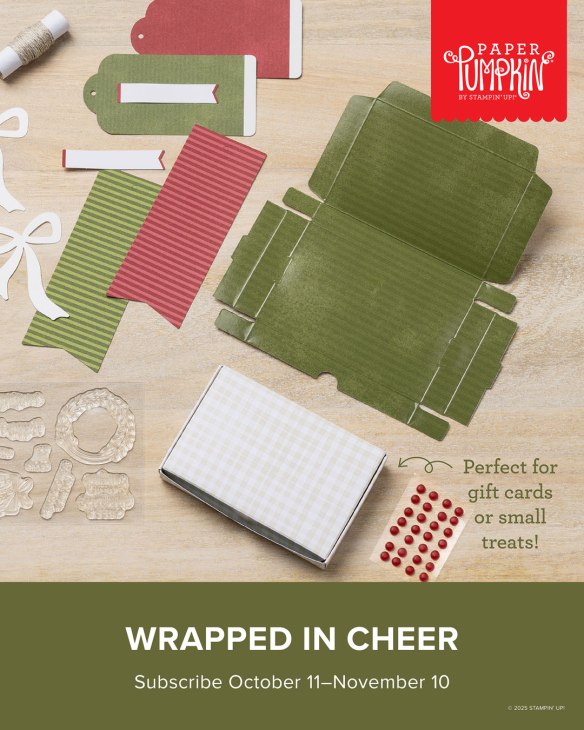
Wrapped In cheer November Paper Pumpkin
Subscribe October 11 – November 10

Craft festive goody boxes perfect for holding gift cards or small treats!

  • Makes 8 projects: 4 each of 2 tag designs with 8 identical coordinating boxes
    • Foldable box bases and precut paper pieces
    • Linen thread and red dot embellishments
    • Coordinating colors: Basic Beige, Cherry Cobbler, Mossy Meadow, Old Olive
    Delicate greenery pieces with double-sided printing add a sophisticated touch

Subscribe to the November Paper Pumpkin Kit between 11 October and 10 November by clicking here!

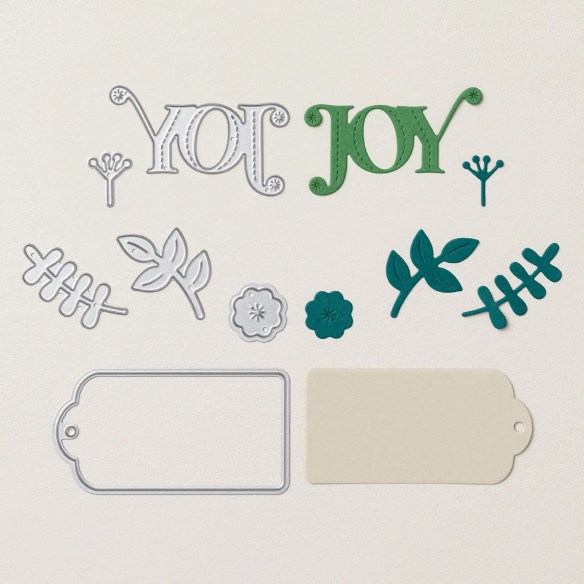
Don’t miss the coordinating
Abundant Joy Dies Add-On!

Make the most of your Paper Pumpkin kits with the Abundant Joy Dies add-on! Quickly and cleanly cut out a gift tag, a flower, sprigs of greenery, or the word Joy to elevate your crafting projects. These additional dies are designed to work with THREE Paper Pumpkin Kits: the Cozy Christmas Paper Pumpkin Kit, the Wrapped in Cheer Paper Pumpkin Kit, and the Watercolor in Bloom Paper Pumpkin Kit. Pair these dies with other Stampin’ Up! products for even more creative options!

DETAILS
– 6 dies
– Largest die: 2-7/8″ x 1-1/2″

#167855 $12.00

*********************************************************************************************************

Card stock cuts for this project:

  • Basic White Cardstock 2″ x 3″ & 2 1/4″ x 2 1/2″(card front panels), 1/4″ x 4″(sentiment), 4″ x 5 1/4″(inner liner)
  • Basic White Thick Cardstock 4 1/4″ x 11″(card base scored & folded at 5 1/2″)
  • Real Red Cardstock 4 1/8″ x 5 3/8″(inner liner mat)
  • Christmas Tags & More 6 x 6 Mix & Match Specialty Designer Series Paper 2″ x 3″ &1 1/2″ x 2 1/4″(card front panels), 3/4″ x 4″(inner liner), 2 1/4″ x 6″(envelope flap)

*********************************************************************************************************

Product List

Stampin’ Up! Pine Tree Trimmings for The Happy Inkin’ Thursday Blog Hop

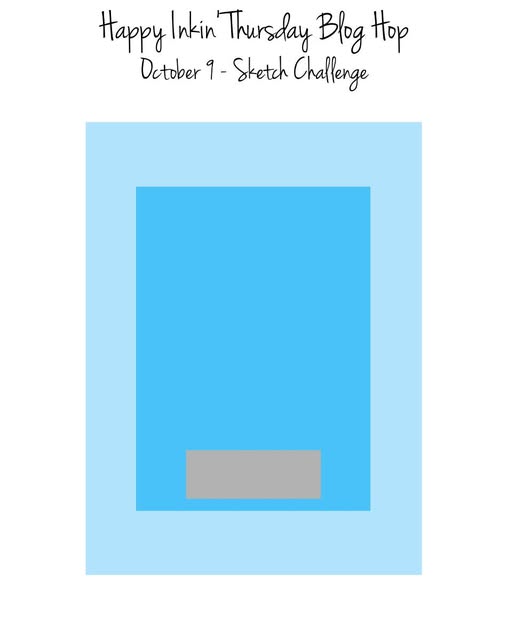
Good Thursday morning stamping friends and welcome to our Happy Inkin’ Thursday Blog Hop. If you are starting with me, thank you. I hope you will stop by everyone’s blog to see what they have created this week. If you are hopping over from Mary’s blog, thank you for stopping by. This week we have Sketch Challenge. If you’d like to see a quick video on how I made this card, Click Here to go to my Instagram Reels. Here is my card using this week’s sketch.

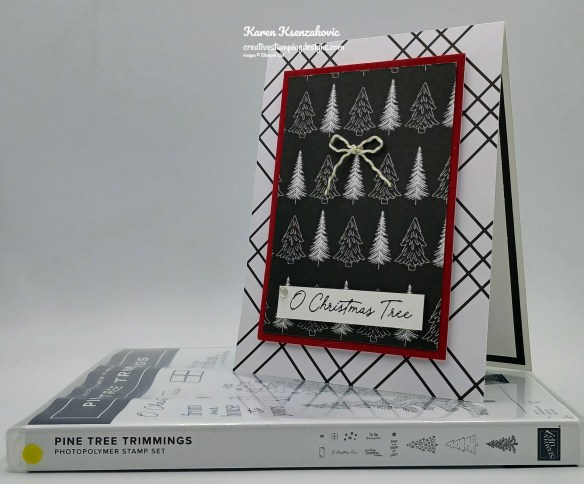
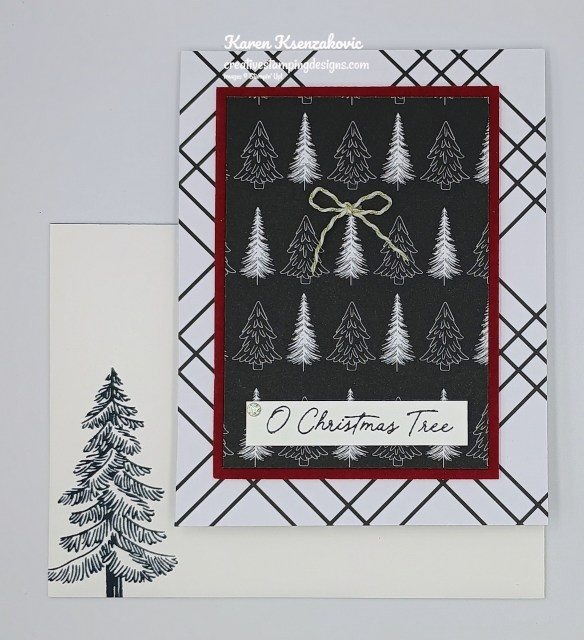
Stampin' Up! Pine Tree Trimmings in Black & White 1 creativestampingdesigns.com

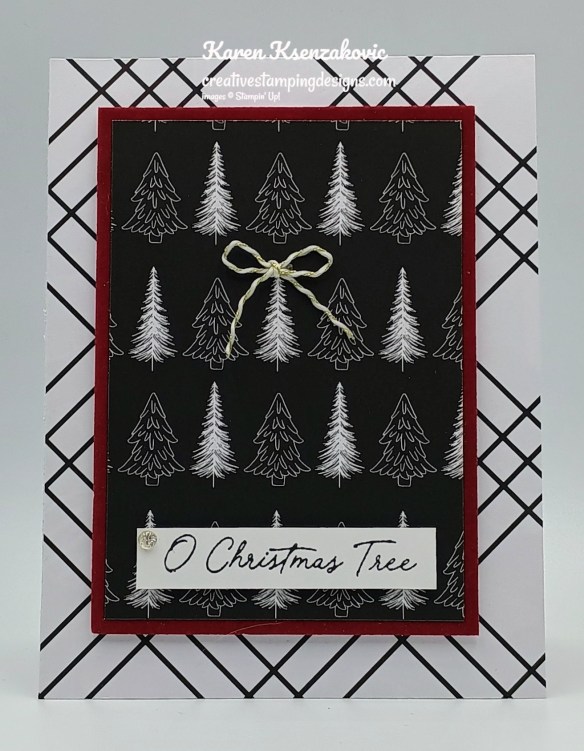
I used the Stampin’ Up! Pine Tree Trimmings Photopolymer Stamp Set along with the Modern Christmas Specialty Designer Series Paper and All-Season Velvet Specialty Paper for my card today.

Here’s our sketch for this week

Stampin' Up! Pine Tree Trimmings in Black & White 2 creativestampingdesigns.com

Adhere a panel of Modern Christmas DSP to a Basic White Thick card base with Stampin’ Seal.

Stampin' Up! Pine Tree Trimmings in Black & White 3 creativestampingdesigns.com

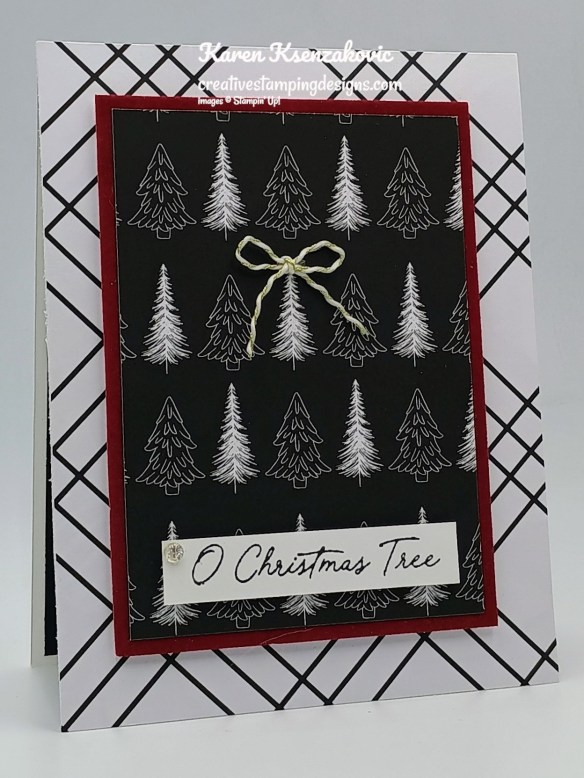
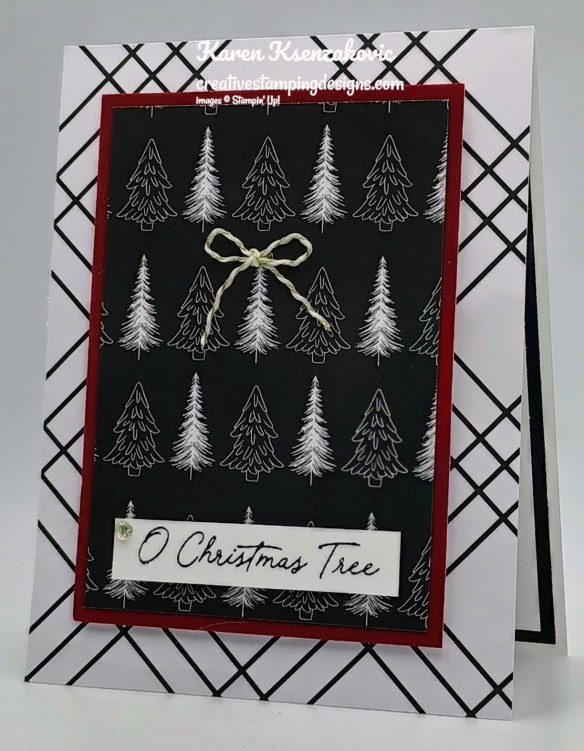
Adhere a smaller panel of Modern Christmas DSP to an All-Season Velvet Paper mat with Liquid Glue. Adhere the layered panel to the card front with Stampin’ Dimensionals.

Stampin' Up! Pine Tree Trimmings in Black & White 4 creativestampingdesigns.com

Stamp the sentiment from the Pine Tree Trimmings stamp set in Tuxedo Black Ink on a panel of Basic White. Adhere the sentiment to the card front with Stampin’ Dimensionals. Tie a small bow using the Black & White & Gold Baker’s Twine and adhere it to the top of the tree with a Glue Dot. Add an Iridescent Foil Gem to the sentiment.

Stampin' Up! Pine Tree Trimmings in Black & White 5 creativestampingdesigns.com

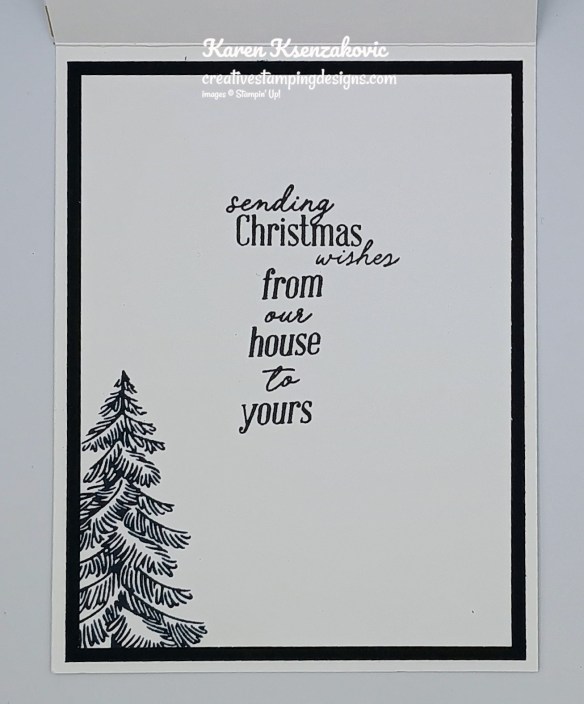
Stamp the sentiments from the Pine Tree Trimmings stamp set in Tuxedo Black Ink on a panel of Basic White. Stamp the tree image from the Pine Tree Trimmings stamp set on the bottom of the panel. Adhere the Basic White panel to a Basic Black mat then to the inside of the Basic White Thick card base.

Stampin' Up! Pine Tree Trimmings in Black & White 6 creativestampingdesigns.com

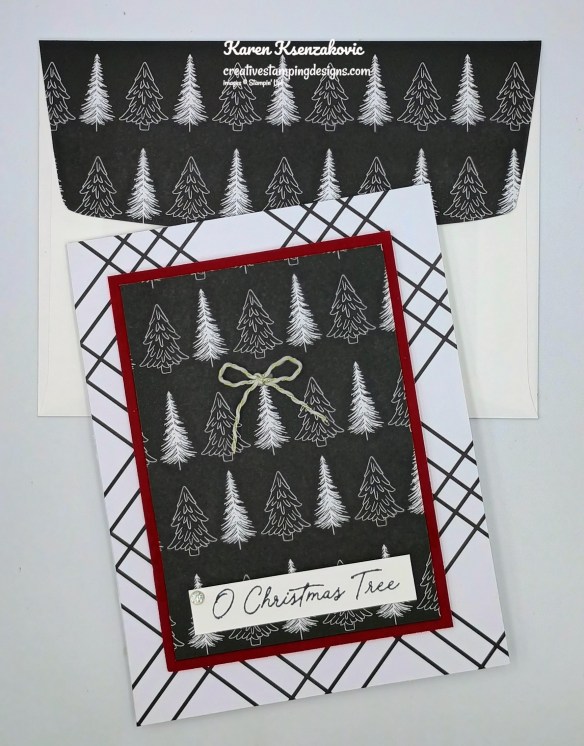
Decorate a Basic White Medium Envelope to finish your card. Stamp the tree image from the Pine Tree Trimmings stamp set in Tuxedo Black Ink on the envelope front. Adhere a panel of Modern Christmas DSP to the envelope flap.

Stampin' Up! Pine Tree Trimmings in Black & White 7 creativestampingdesigns.com

Thank you for stopping by my blog today.  Now that you’ve seen my card, let’s get on with the hop!  Click the button below to hop over to see what Akiko has created. Happy Hopping!!

Just in case you get lost along the way, here is a list of the team members involved in the hop today.

Amy Koenders

Mary Deatherage

Karen Ksenzakovic You Are Here

Akiko Sudano

Tara Carpenter

Nicole Bloxom

*********************************************************************************************************

If you need any stamping supplies, I’d love to be your Demonstrator. Just click HERE to go directly to my online store or drop me an email if you have any questions. 

*********************************************************************************************************

Card stock cuts for this project:

  • Basic Black Cardstock 4″ x 5 1/4″(inner liner mat)
  • Basic White Cardstock 1/2″ x 2 1/2″(sentiment), 3 3/4″ x 5″(inner liner)
  • Basic White Thick Cardstock 4 1/4″ x 11″(card base scored & folded at 5 1/2″)
  • Modern Christmas specialty Designer Series Paper 4 1/4″ x 5 1/2″(card front), 3″ x 4 1/4″(card front panel), 2 1/4″ x 6″(envelope flap)
  • All Season Velvet Specialty Paper 3 1/4″ x 4 1/2″(card front panel mat)

*********************************************************************************************************

Product List

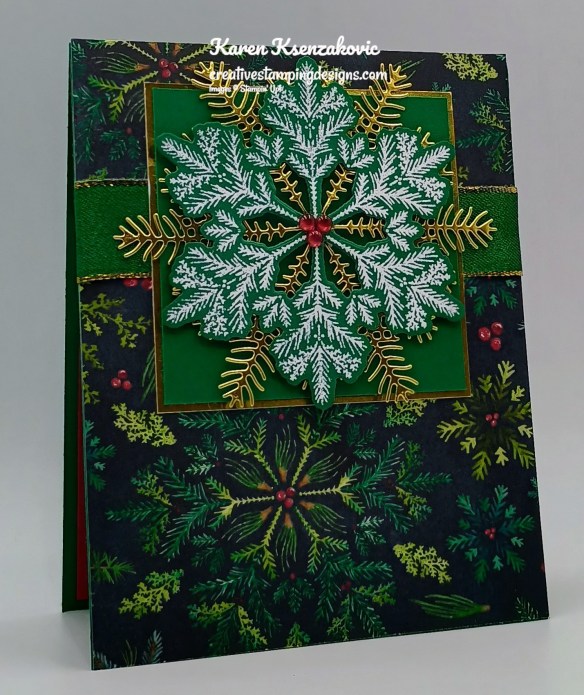
Stampin’ Up! Delicate Pines in Shaded Spruce

Good Tuesday morning my stamping friends. I hope your week has started off well.

My card today is playing with one of my favorite Online Exclusive Suites and it just happens that this is the bundle that Tara and I are using for our Online Class this month. Here’s my card for today.

Stampin' Up! Delicate Pines in Shaded Spruce 1 creativestampingdesigns.com

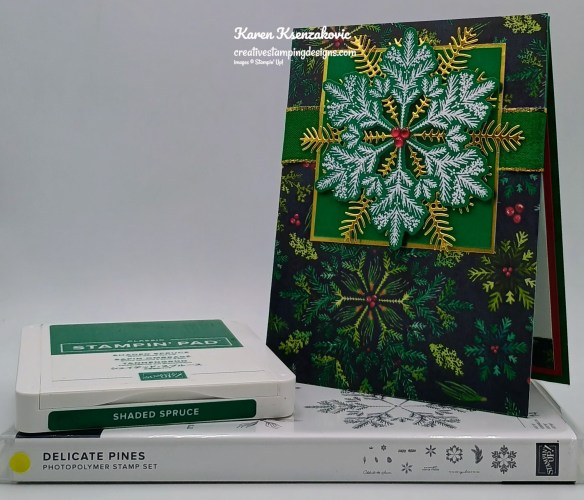
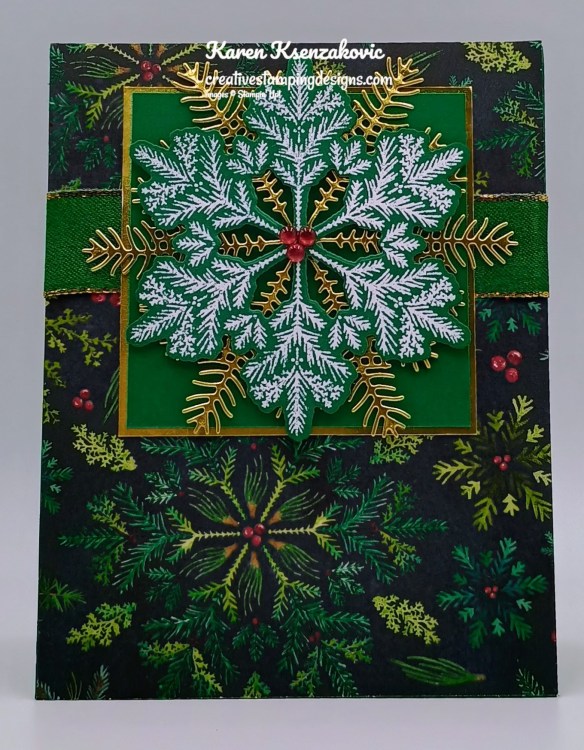
I used the Stampin’ Up! Online Exclusive Delicate Pines Bundle along with the Elegant Pine Snowflakes Designer Series Paper for my card today.

Stampin' Up! Delicate Pines in Shaded Spruce 2 creativestampingdesigns.com

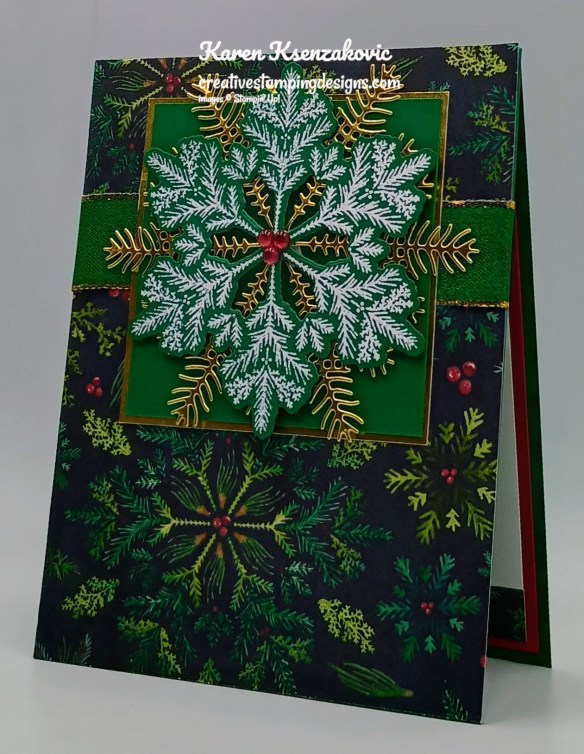
Wrap a piece of Shaded Spruce 7/8″ Gold Edged Ribbon around a panel of Elegant Pine Snowflakes DSP and secure it on the back with Stampin’ Seal. Adhere the panel to a Shaded Spruce card base with Liquid Glue.

Stampin' Up! Delicate Pines in Shaded Spruce 3 creativestampingdesigns.com

On a panel of Shaded Spruce, stamp the large snowflake image from the Stampin’ Up! Delicate Pines Photopolymer Stamp Set in Versamrk Ink. Sprinkle the image with White Embossing Powder and set it using the Heat Tool. Cut the image out using the Delicate Pines Dies. From the panel of Gold Foil, cut 3 of the large pine boughs using the Delicate Pines Dies. Adhere the Gold Foil boughs to the back of the die cut snowflake using Glue Dots.

Stampin' Up! Delicate Pines in Shaded Spruce 4 creativestampingdesigns.com

Adhere the panel of Shaded Spruce to the Gold Foil mat with Stampin’ Seal. Adhere the layered panel to the card front, over the ribbon with Liquid Glue. Adhere the die cut snowflake to the center of the Shaded Spruce panel with Stampin’ Dimensionals. Add a Cherry Cobbler & Pearl Adhesive Backed Berries to the center of the snowflake.

Stampin' Up! Delicate Pines in Shaded Spruce 5 creativestampingdesigns.com

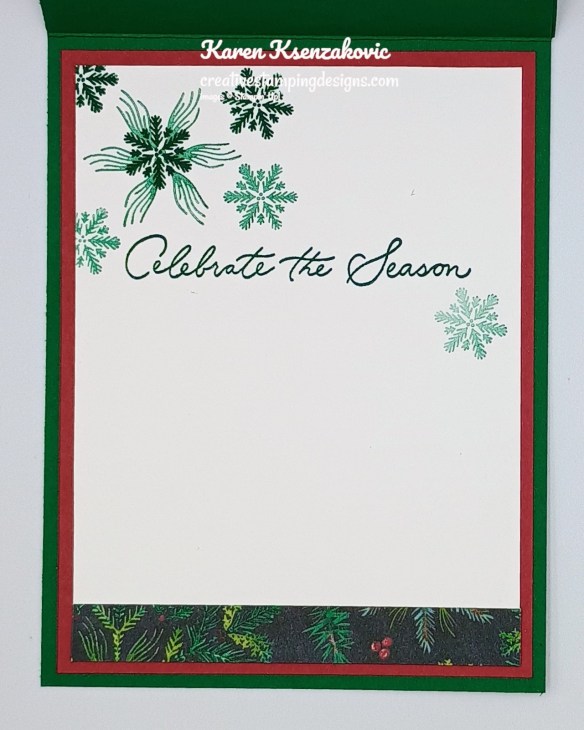
Stamp the sentiment from the Delicate Pines stamp set in shaded Spruce Ink on a panel of Basic White. Stamp the snowflake images from the Delicate Pines stamp set in Shaded Spruce Ink by the sentiment some stamped full strength, some stamped off once, and some stamped off twice. Adhere the panel of Elegant Pine Snowflakes DSP to the bottom of the panel. Adhere the Basic White panel to a Cherry Cobbler mat then to the inside of the Shaded Spruce card base.

Stampin' Up! Delicate Pines in Shaded Spruce 6 creativestampingdesigns.com

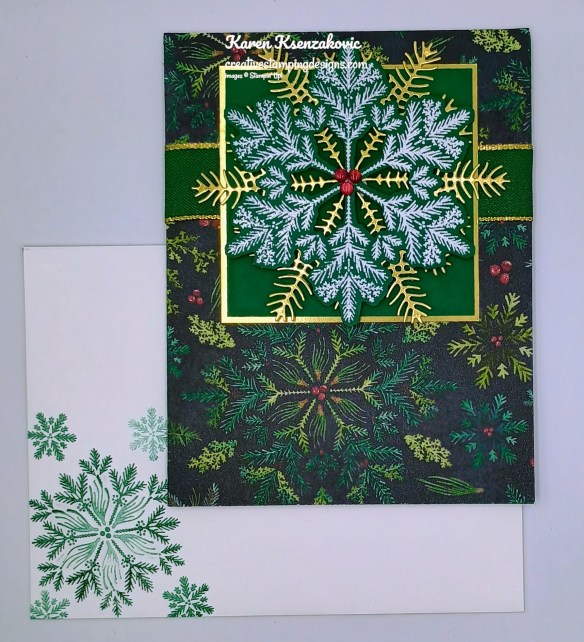
Decorate a Basic White Medium Envelope to finish your card. Stamp the snowflake images from the Delicate Pines stamp set in Shaded Spruce Ink on the envelope front. Adhere a panel of Elegant Pine Snowflakes DSP to the envelope flap.

Stampin' Up! Delicate Pines in Shaded Spruce 7 creativestampingdesigns.com

Thank you for stopping by my blog today. I hope you like the card and will give it a try. Happy Stamping!!

*********************************************************************************************************

If you need any stamping supplies, I’d love to be your Demonstrator. Just click HERE to go directly to my online store or drop me an email if you have any questions. 

*********************************************************************************************************

Stampin’ Up! Kits Collection Sale – October 6-8 ALL KITS on Sale for Up To 30% OFF

This three-day sale is the perfect opportunity to stock up on your favorite kits from the Kits Collection.  Stampin’ Up!’s kits come with everything you need for a fun and creative experience.  From season’s greetings to birthday wishes to home decor, you can find almost anything to suit your crafting needs in the Kits Collection.  And with up to 30% off, it’s the perfect time to grab that kit (or two, or three!) that you’ve been eyeing, maybe even add them to a Starter Kit.  Some kits may sell out faster than others, so don’t wait to start shopping on October 6!

Kits Collection Sale Details:

  • Sales Period: October 6–8
  • All kits in the Kits Collection will range from 10–30% off during this three-day sale.
  • Sale excludes Paper Pumpkin Kits, Scrapbooking Workshop Kits, and Starter Kits.
  • Available while supplies last.
  • Salle ends:  October 8, 2025, at 11:59 p.m. (MT)

Head over to the Kits Collection right here to get your list ready for Monday October 6th!  Have fun shopping!

*********************************************************************************************************

Earn TRIPLE Creative Stamping Designs Rewards from me October 6-8

How about earning Triple Reward Points during the Kits Sale? I thought that would be a great incentive to get yourself those kits you’ve been debating about getting. THAT’S 3X THE REWARDS FOR YOU FROM ME!!!  Starting October 6-October 8, I’m offering Triple Rewards for all orders over $50 (before tax & shipping)!! How does this work? For a $50 you’ll earn 3 rewards, $100 you’ll earn 6 rewards, $150 you’ll earn 9 rewards, etc. Head over to my Online Store and get those orders in early and earn those Triple Rewards!!

*********************************************************************************************************

Join My Team with Stampin’ Up! BEST JOINING SPECIAL EVER – October 1 – 31

What would you say about getting $125 in products of your choice for ONLY $35? Or how about getting $189 in products of your choice for only $99? I don’t know about you, but I’d say YES!!!!! Are you new to stamping or do you know someone that wants to get started but doesn’t know where to start. I’m here to help you. I recommend for someone brand new to stamping to start with our all-inclusive kits. It’s a great place to start and you can add the New Kits along with New preorder Online Exclusive products to your starter kit.

Crafting is even more fun with community, and there’s never been a better time to join. Become a demonstrator and enjoy all the perks that come with that, like a 20–25% product discount, exclusive early access to the latest releases and catalogs, the opportunity to earn a modest supplemental income, the chance to attend incredible training and crafting events, and so much more! Have you ever thought about joining the Stampin’ Up! community? Are you into scrapbooking and have you seen all the new scrapbook products Stampin’ Up! has? Wouldn’t you love to get all these products at a discount? Why not consider joining the Stampin’ Up! community between October 1-31, and save on everything you buy? Are you new to stamping and don’t know where to start, but would like to join to save? Ask me for help, I’m here to help and assist you anyway that I can. OCTOBER is the best time ever to join!! The best part is you can put November Online Exclusive preorder items in the Starter Kit. Contact me and we can talk about signing you up. There’s never an obligation to sell, you can join to enjoy the discount for yourself. Why not give it a try, you have nothing at all to lose!!

From October 1 to 31, anyone who purchases the Starter Kit can choose between two amazing offers.  In addition to FREE shipping, FREE business supplies, and a FREE Paper Pumpkin kit, you can either get $125 worth of products for just $35, an amazing first time ever offer, OR $189 worth of products for just $99!  

Promotion Period: October 1–31

Ordering Deadlines

  • Online: October 31, 2025, at 11:59 p.m. (MT)

*********************************************************************************************************

Card stock cuts for this project:

  • Basic White Cardstock 3 3/4″ x 5″(inner liner)
  • Cherry Cobbler Cardstock 4″ x 5 1/4″(inner liner mat)
  • Shaded Spruce Cardstock 4 1/4″ x 11″(card base scored & folded at 5 1/2″), 2 7/8″ x 2 7/8″(snowflake mat), 3 1/2″ x 3 1/2″(snowflake)
  • Elegant Pine Snowflakes DSP 4 1/4″ x 5 1/2″(card front), 1/2″ x 3 3/4″(inner liner), 2 1/4″ x 6″(envelope)
  • Gold Foil Sheets 3″ x 3″(snowflake mat), 4″ x 4 1/4″(die cuts)

*********************************************************************************************************

Product List

Stampin’ Up! Wishing You Joy CAS

Good Monday morning stamping friends. How was your weekend? I got to spend most of yesterday in my craft studio playing catch up. I did take a few breaks to take my pup for a walk. It never fails, every time I just get started with a card, Coraline decides that she wants to go out.

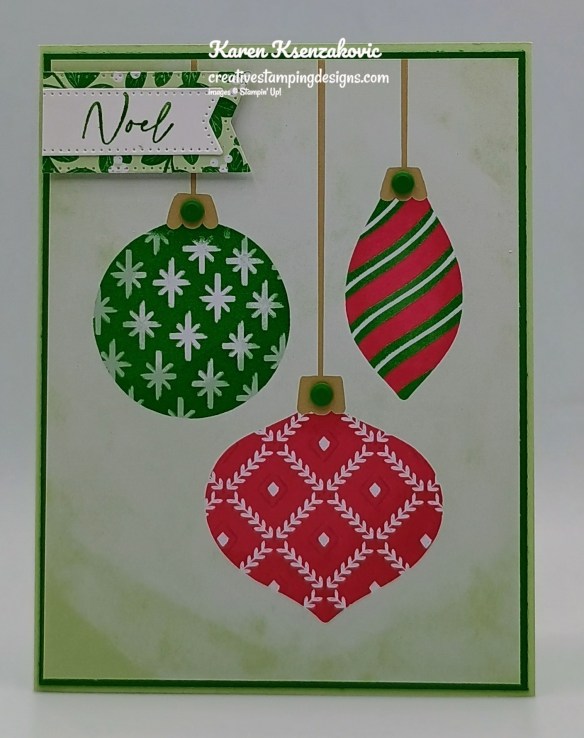
I made a super simple card today letting the DSP do the work for me. This is one of those cards that you can make multiple of in less than an hour.  If you’d like to see a quick video on how I made this card, Click Here to go to my Instagram Reels. Here’s my card for today.

Stampin' Up! Wishing You Joy CAS 1 creativestampingdeisgns.com

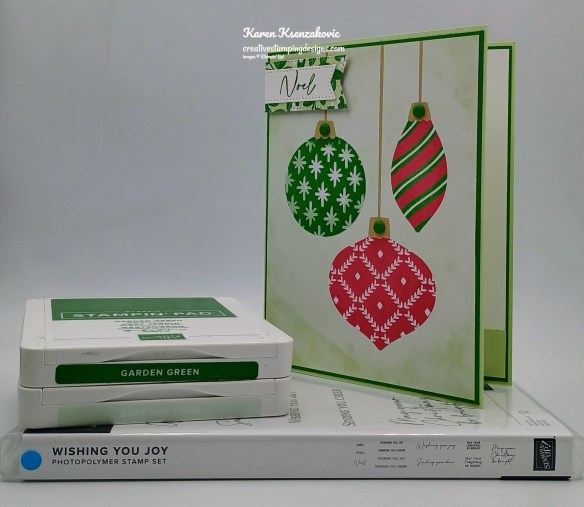
I used the Stampin’ Up! Wishing You Joy Photopolymer Stamp Set along with the Christmas Tags & More 6 x 6 Specialty Designer Series Paper and Stylish Shapes Dies for my card today.

Stampin' Up! Wishing You Joy CAS 2 creativestampingdeisgns.com

Adhere a panel of Christmas Tags & More DSP to a Garden Green mat with Stampin’ seal.

Stampin' Up! Wishing You Joy CAS 3 creativestampingdeisgns.com

Adhere the layered panel to a Soft Sea Foam card base with Stampin’ Seal.

Stampin' Up! Wishing You Joy CAS 4 creativestampingdeisgns.com

Stamp the sentiment from Wishing You Joy stamp set in Garden Green Ink on a panel of Basic White. Cut the sentiment out using the Stylish Shapes Dies. Cut a panel of Christmas Tags & More DSP using the Stylish Shapes Dies. Adhere the sentiment to the DSP mat with Stampin’ Seal. Trim the sentiment and mat using the Paper Trimmer. Adhere the sentiment to the card front with Stampin’ Dimensionals. Add a few Dear Dots to the ornaments

Stampin' Up! Wishing You Joy CAS 5 creativestampingdeisgns.com

Stamp the sentiment from the Wishing You Joy stamp set in Garden Green Ink on a panel of Basic White. Adhere a panel of Christmas Tags & More DSP to the bottom of the panel. Adhere the Basic White panel to a Garden Green mat then to the inside of the Soft Sea Foam card base.

Stampin' Up! Wishing You Joy CAS 6 creativestampingdeisgns.com

Decorate a Basic White Medium Envelope to finish your card. Adhere a panel of Christmas Tags & More DSP to the bottom of the envelope front. Stamp the sentiment from the Wishing You Joy stamp set on the envelope front. Adhere a panel of Christmas Tags & More DSP to the envelope flap.

Stampin' Up! Wishing You Joy CAS 7 creativestampingdeisgns.com

Thank you for stopping by my blog today. I hope you like the card and will give it a try. Happy Stamping!!

*********************************************************************************************************

If you need any stamping supplies, I’d love to be your Demonstrator. Just click HERE to go directly to my online store or drop me an email if you have any questions. 

*********************************************************************************************************

Starting TODAY Monday October 6-8 ALL KITS on Sale for Up To 30% OFF

This three-day sale is the perfect opportunity to stock up on your favorite kits from the Kits Collection.  Stampin’ Up!’s kits come with everything you need for a fun and creative experience.  From season’s greetings to birthday wishes to home decor, you can find almost anything to suit your crafting needs in the Kits Collection.  And with up to 30% off, it’s the perfect time to grab that kit (or two, or three!) that you’ve been eyeing, maybe even add them to a Starter Kit.  Some kits may sell out faster than others, so don’t wait to start shopping on October 6!

Kits Collection Sale Details:

  • Sales Period: October 6–8
  • All kits in the Kits Collection will range from 10–30% off during this three-day sale.
  • Sale excludes Paper Pumpkin Kits, Scrapbooking Workshop Kits, and Starter Kits.
  • Available while supplies last.
  • Salle ends:  October 8, 2025, at 11:59 p.m. (MT)

Head over to the Kits Collection right here to get your list ready for Monday October 6th!  Have fun shopping!

*********************************************************************************************************

Earn TRIPLE Creative Stamping Designs Rewards from me October 6-8

How about earning Triple Reward Points during the Kits Sale? I thought that would be a great incentive to get yourself those kits you’ve been debating about getting. THAT’S 3X THE REWARDS FOR YOU FROM ME!!!  Starting October 6-October 8, I’m offering Triple Rewards for all orders over $50 (before tax & shipping)!! How does this work? For a $50 you’ll earn 3 rewards, $100 you’ll earn 6 rewards, $150 you’ll earn 9 rewards, etc. Head over to my Online Store and get those orders in early and earn those Triple Rewards!!

*********************************************************************************************************

Join My Team with Stampin’ Up! BEST JOINING SPECIAL EVER – October 1 – 31

What would you say about getting $125 in products of your choice for ONLY $35? Or how about getting $189 in products of your choice for only $99? I don’t know about you, but I’d say YES!!!!! Are you new to stamping or do you know someone that wants to get started but doesn’t know where to start. I’m here to help you. I recommend for someone brand new to stamping to start with our all-inclusive kits. It’s a great place to start and you can add the New Kits along with New preorder Online Exclusive products to your starter kit.

Crafting is even more fun with community, and there’s never been a better time to join. Become a demonstrator and enjoy all the perks that come with that, like a 20–25% product discount, exclusive early access to the latest releases and catalogs, the opportunity to earn a modest supplemental income, the chance to attend incredible training and crafting events, and so much more! Have you ever thought about joining the Stampin’ Up! community? Are you into scrapbooking and have you seen all the new scrapbook products Stampin’ Up! has? Wouldn’t you love to get all these products at a discount? Why not consider joining the Stampin’ Up! community between October 1-31, and save on everything you buy? Are you new to stamping and don’t know where to start, but would like to join to save? Ask me for help, I’m here to help and assist you anyway that I can. OCTOBER is the best time ever to join!! The best part is you can put November Online Exclusive preorder items in the Starter Kit. Contact me and we can talk about signing you up. There’s never an obligation to sell, you can join to enjoy the discount for yourself. Why not give it a try, you have nothing at all to lose!!

From October 1 to 31, anyone who purchases the Starter Kit can choose between two amazing offers.  In addition to FREE shipping, FREE business supplies, and a FREE Paper Pumpkin kit, you can either get $125 worth of products for just $35, an amazing first time ever offer, OR $189 worth of products for just $99!  

Promotion Period: October 1–31

Ordering Deadlines

  • Online: October 31, 2025, at 11:59 p.m. (MT)

*********************************************************************************************************

Card stock cuts for this project:

  • Basic White Cardstock 3/4″ x 2″(sentiment), 4″ x 5 1/4″(inner liner)
  • Garden Green Cardstock (2) – 4 1/8″ x 5 3/8″(card front & inner liner mats)
  • Soft Sea Foam Cardstock 5 1/2″ x 8 1/2″(card base scored & folded at 4 1/4″)
  • Christmas Tags & More 6 x 6 Mix & Match Specialty Designer Series Paper 4″ x 5 1/4″(card front), 1 1/2″ x 2 1/2″(sentiment mat), 3/4″ x 3 3/4″(inner liner), 1/4″ x 6″ & 2 1/4″ x 6″(envelope)

*********************************************************************************************************

Product List

Stampin’ Up! Traditional Labels & 3 New Kits Now Available!!

Good Wednesday morning stamping friends and Happy October!!! I hope you are all having a great week so far. Today’s the day you want to sign up and join the Stampin’ Up! community. Come join my team, I’d love to have you join us.

I made my favorite kind of card today featuring lots of layers. If you’d like to see a quick video on how I made this card, Click Here to go to my Instagram Reels. Here’s my card for today.

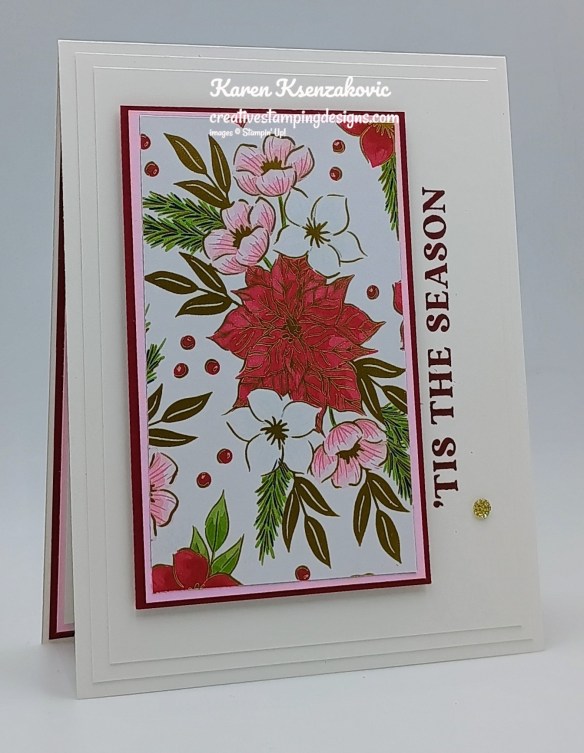
Stampin' Up! Traditional Labels CAS 1 creativestampingdesigns.com

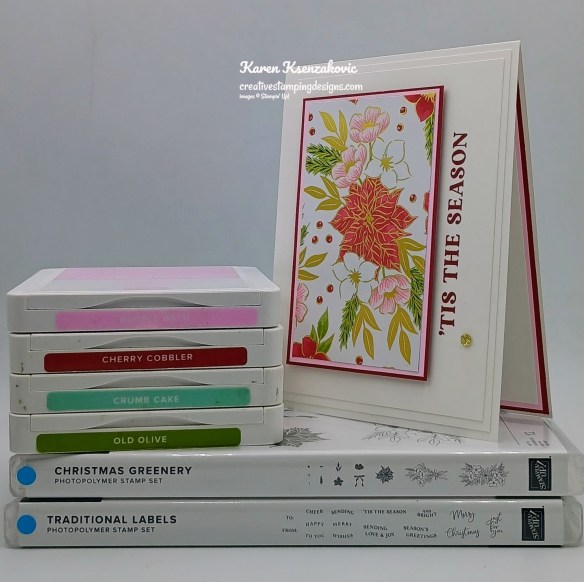
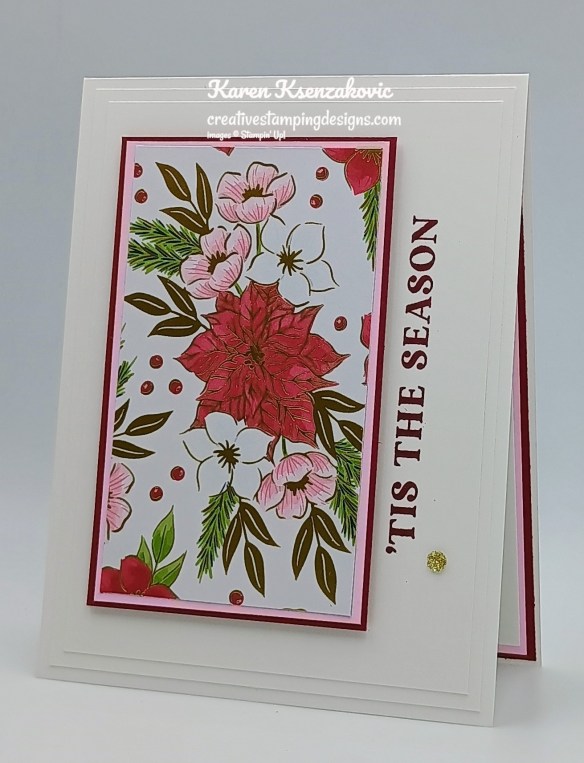
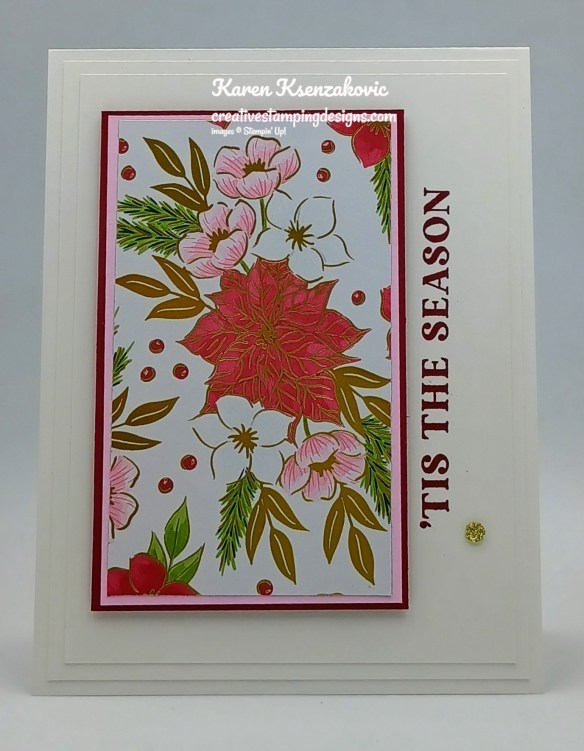
I used the Stampin’ Up! Traditional Labels Photopolymer Stamp Set along with the Traditions of Christmas Specialty Designer Series Paper and the Stampin’ Up! Christmas Greenery Photopolymer Stamp Set for my card today.

Stampin' Up! Traditional Labels CAS 2 creativestampingdesigns.com

On a panel of Basic White, stamp the sentiment from the Traditional Labels stamp set in Cherry Cobbler Ink. Adhere the stamped panel to a Basic White mat with Stampin’ Seal.

Stampin' Up! Traditional Labels CAS 3 creativestampingdesigns.com

Adhere the layered panel to a Basic White Thick card base with Stampin’ Seal. Adhere a panel of Traditions of Christmas DSP to a Bubble Bath mat with Stampin’ Seal.

Stampin' Up! Traditional Labels CAS 4 creativestampingdesigns.com

Adhere the layered DSP panel to a Cherry Cobbler mat with Stampin’ Seal. Adhere the layered panel to the Basic White stamped panel with Stampin’ Dimensionals, keeping the sentiment to the side of the layered DSP panel. Add a gold Traditional Sparkling Sequins to the card front.

Stampin' Up! Traditional Labels CAS 5 creativestampingdesigns.com

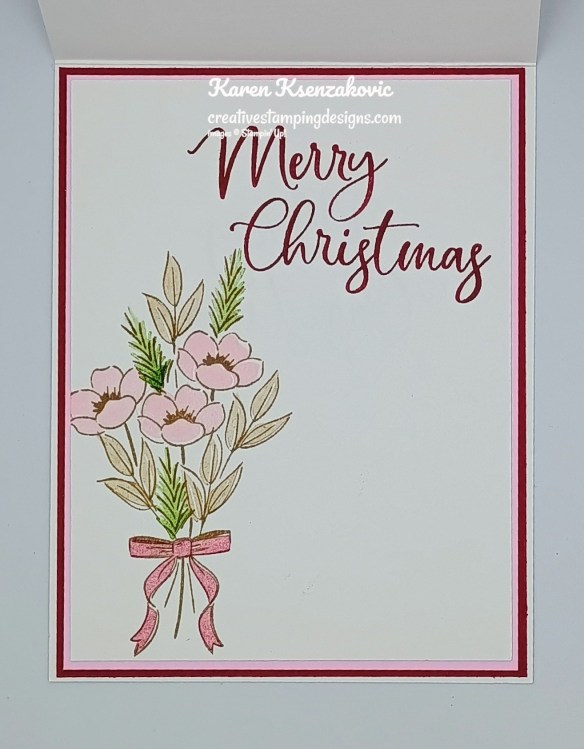
Stamp the sentiments from the Traditional Labels stamp set in Cherry Cobbler Ink to a Basic White panel. Stamp the floral bouquet outlined image from the Christmas Greenery stamp set in Crumb Cake Ink on the side of the panel. Stamp the small-solid flower image from the Christmas Greenery stamp set in Bubble Bath Ink over the outlined image. Stamp the solid bow image from the Christmas Greenery stamp set in Cherry Cobbler Ink, stamping off once on scrap paper, over the outlined image. Stamp the leaf image from the Christmas Greenery stamp set in Crumb Cake Ink, stamping off once on scrap paper, over the outlined image. Stamp the bough image from the Christmas Greenery stamp set in Old Olive Ink, stamping off once on scrap paper, over the outlined image. Adhere the Basic White panel to a Bubble Bath mat and a Cherry Cobbler mat then to the inside of the Basic White Thick card base.

Stampin' Up! Traditional Labels CAS 6 creativestampingdesigns.com

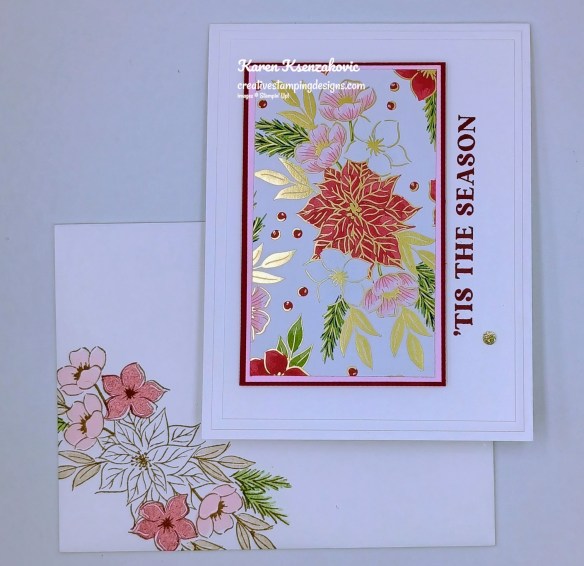
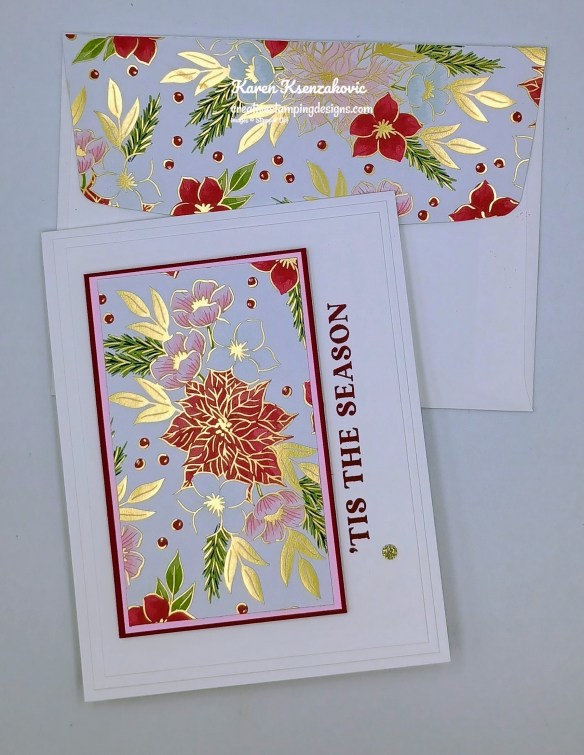
Decorate a Basic White Medium Envelope to finish your card. Stamp the larger floral image from the Christmas Greenery stamp set in Crumb Cake Ink on the envelope front. Stamp the small-solid flower images in bubble Bath and Cherry Cobbler Inks over the outlined image. Stamp the solid leaf image in Crumb Cake Ink and the bough image in Old Olive Ink. Adhere a panel of Traditions of Christmas DSP to the envelope flap.

Stampin' Up! Traditional Labels CAS 7 creativestampingdesigns.com

Thank you for stopping by my blog today. I hope you like the card and will give it a try. Happy Stamping!!

*********************************************************************************************************

If you need any stamping supplies, I’d love to be your Demonstrator. Just click HERE to go directly to my online store or drop me an email if you have any questions. 

*********************************************************************************************************

Stampin’ Up! BEST JOINING SPECIAL EVER – October 1 – 31

What would you say about getting $125 in products of your choice for ONLY $35? Or how about getting $189 in products of your choice for only $99? I don’t know about you, but I’d say YES!!!!! Are you new to stamping or better yet, do you know someone that wants to get started but doesn’t know where to start. I’m here to help you. I recommend for someone brand new to stamping to start with our all-inclusive kits. It’s a great place to start and starting October 1st there will be New Kits along with New preorder Online Exclusive products that you can add to your starter kit.

Crafting is even more fun with community, and there’s never been a better time to join. Become a demonstrator and enjoy all the perks that come with that, like a 20–25% product discount, exclusive early access to the latest releases and catalogs, the opportunity to earn a modest supplemental income, the chance to attend incredible training and crafting events, and so much more! Have you ever thought about joining the Stampin’ Up! community? Are you into scrapbooking and have you seen all the new scrapbook products Stampin’ Up! has? Wouldn’t you love to get all these products at a discount? Why not consider joining the Stampin’ Up! community between October 1-31, and save on everything you buy? Are you new to stamping and don’t know where to start, but would like to join to save? Ask me for help, I’m here to help and assist you anyway that I can. OCTOBER is the best time ever to join!! The best part is you can put November Online Exclusive preorder items in the Starter Kit. Contact me and we can talk about signing you up. There’s never an obligation to sell, you can join to enjoy the discount for yourself. Why not give it a try, you have nothing at all to lose!!

From October 1 to 31, anyone who purchases the Starter Kit can choose between two amazing offers.  In addition to FREE shipping, FREE business supplies, and a FREE Paper Pumpkin kit, you can either get $125 worth of products for just $35, an amazing first time ever offer, OR $189 worth of products for just $99!  

Promotion Period: October 1–31

Ordering Deadlines

  • Online: October 31, 2025, at 11:59 p.m. (MT)

*********************************************************************************************************

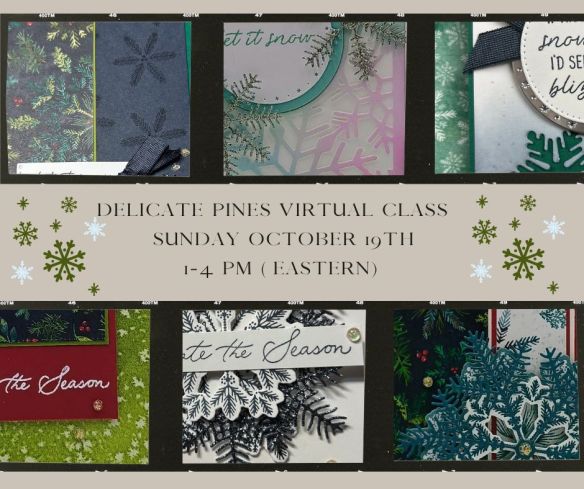
October Delicate Pines Online Holiday/Winter Card Class Registration Open NOW

Tara Carpenter and I are teaming up to offer another fun online class using Stampin’ Up! Online Exclusive Delicate Pines Bundle along with the Snowflake Kisses Bundle and Elegant Pines DSP.  We will be creating 6 different Holiday/Winter cards during the class including 2 Beginner Stamper cards, 2 Casual Stamper Cards and 2 Advanced Stamper Cards.  Click Here to Reserve Your Spot

The class fee includes:

  • Stampin’ Up! Iridescent Foil Gems (full pack)
  • Stampin’ Up! Secret Sea 3/8″ Faux Linen Ribbon (full pack)
  • Pre-cut card kits to complete each card
  • Zoom class with complete instructions to complete each card
  • PDF with detailed directions

During sign up you will have the option to add additional items to your order that you can take advantage of at no additional shipping cost.  These items are optional, however if you want to recreate the cards you will need them. If you’ve attended a previous class, you were given a discount code, there is a spot to put that code on the form and the discount only applies to the products that you check off that you wish to purchase, not the class.  Since the Bundles are already discounted, the discount does not apply to them either.

The class will be held Sunday October 19th (this is a week earlier than our normal classes due to Tara and I attending our yearly retreat) from 1 to 4 pm Eastern Time via Zoom.  This allows anyone in the United States to participate live!  Can’t join us live… no worries, we will record the session so it can be replayed at any time.

I will email written directions that will include directions, cardstock cuts as well as photos to help you create each card.

The bundles are not included in the price of the class.  You can purchase the bundle through me at an additional 10% discount of the Online Exclusive price (see below).

Class Cost $35 + $10 (Priority Shipping) 

Additional purchased items will be included in the above shipping price.  I will invoice you through PayPal and invoices must be paid by October 5th to insure I can get the products delivered, packaged up and out to you with enough time.  

Deadline: Sunday October 5th 

Click Here to Register for our October Class. Let me know if you have any questions.

********************************************************************************************************

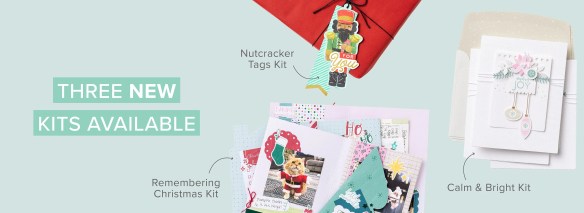
3 New Kits Now Available

Kits Collections include designed projects that come in a range of project types. They are perfect for new crafters, busy crafters, or crafters who want quick and easy projects.

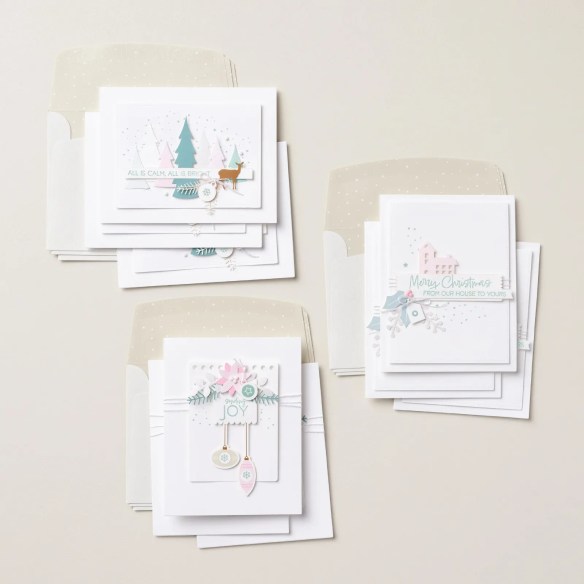
Calm & Bright Kit

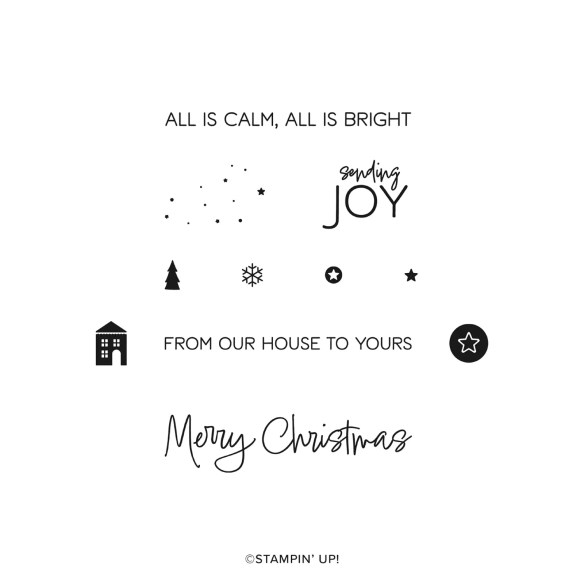
Celebrate the warmth of home and the quiet magic of the festive season with the Calm & Bright Kit. A clean and simple design style paired with a soft color palette sets the tone for creating serene, sophisticated cards. Neutral bases and intricate die cuts—tiny houses, holly leaves, and banners—layer beautifully to form peaceful focal points, while stamped sentiments like From Our House to Yours and All is Calm, All is Bright add a heartfelt and timeless touch.

– Makes 9 cards: 3 each of 3 designs
– Folded card size: 4-1/4″ x 5-1/2″ (10.8 x 14 cm)
– Colors: Basic Beige, Gray Granite, Lost Lagoon, Pecan Pie, Pool Party, Pretty in Pink, white
– Also available in French and German

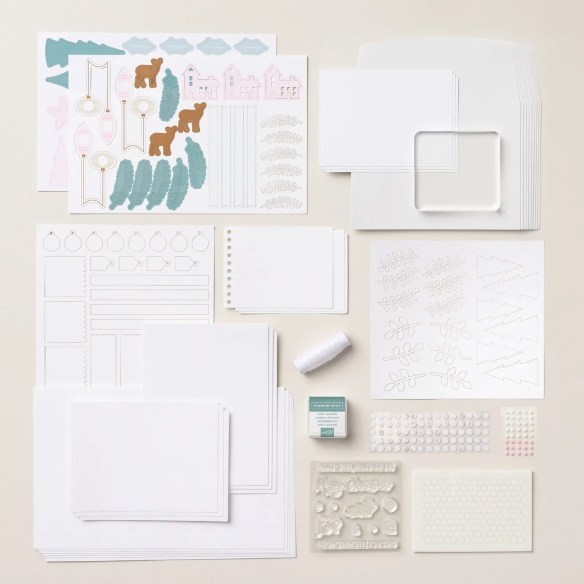
Kit includes one of each item listed below:
– Calm & Bright Stamp Set
– Clear stamp block
– Lost Lagoon Classic Stampin’ Spot
– Step-by-step instructions
– Shimmer vellum paper, textured paper, twine
– Adhesive

#166461

++++++++++++++++++++++++++++++++++++++++++++++++++++++++++++++++++++++

Nutcracker Tags Kit

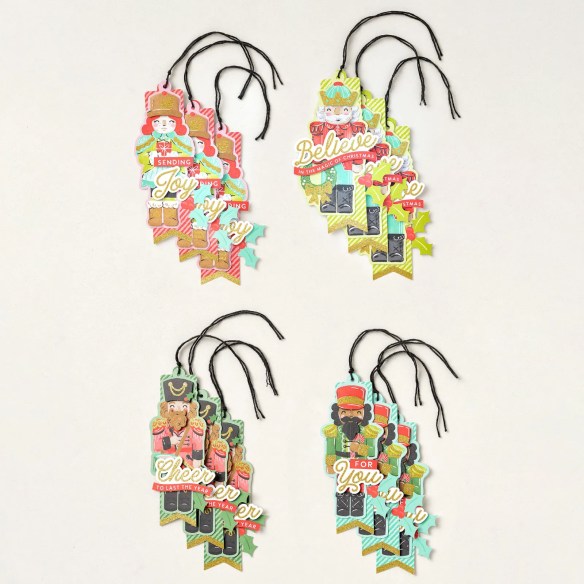
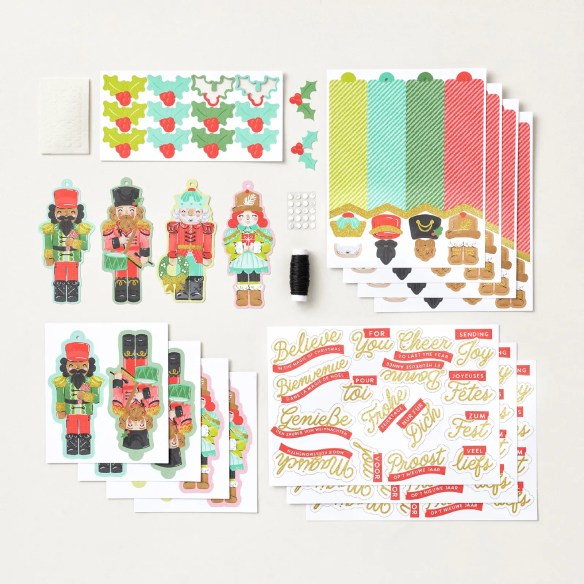
Don’t crack under the Christmas gift-wrapping pressure. Make your gifts stand out under the tree with the Nutcracker Tags Kit. Featuring festive nutcrackers and glittery sentiments about the magic of Christmas and welcoming the new year, this kit makes it easy to create handmade tags bursting with festive spirit. It’s a fun and merry way to add extra magic to every gift. Now let’s get cracking!

– Makes 12 tags: 3 each of 4 designs
– Colors: Basic Black, Darling Duckling, Garden Green, Gold, Pecan Pie, Poppy Parade, Shy Shamrock
– Sentiments printed in Dutch, English, French, and German

Kit includes one of each item listed below:
– Step-by-step instructions
– Stripe tags, precut pieces, labels, baker’s twine
– Adhesive

#166226

++++++++++++++++++++++++++++++++++++++++++++++++++++++++++++++++++++++

Remembering Christmas Kit

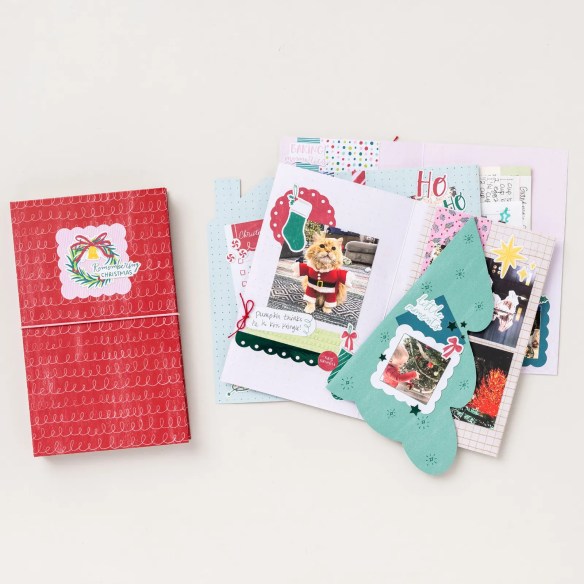
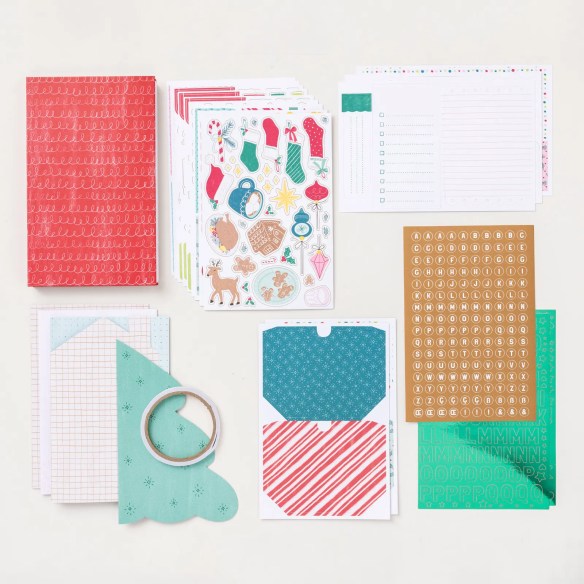
Turn your festive moments into a cherished keepsake with the Remembering Christmas Kit! With plenty of space for photos and journaling, you can easily create a festive album filled with your favorite Christmas highlights. Combine die-cut letters, Christmas-patterned paper, and fun ephemera like bows, stars, and stockings to craft a merry album full of Christmas cheer. Display it proudly each season and relive those joyful memories year after year!

– Colors: Coastal Cabana, Crushed Curry, Early Espresso, Granny Apple Green, Pecan Pie, Pretty in Pink, Pretty Peacock, Pumpkin Pie, Real Red, Shaded Spruce
– Sentiments printed in English, French, and German

Kit includes one of each item listed below:
– Step-by-step instructions
– Includes an album, pre-cut paper pieces, ephemera, stickers, letters, adhesive-backed pre-cut sentiments

#166230

*********************************************************************************************************

Card stock cuts for this project:

  • Basic White Cardstock 3 3/4″ x 5″ &4″ x 5 1/4″(card front mats), 3 7/8″ x 5 1/8″(inner liner)
  • Basic White Thick Cardstock 4 1/4″ x 11″(card base scored & folded at 5 1/2″)
  • Bubble Bath Cardstock 2 1/2″ x 4 1/8″(card front mat), 4″ x 5 1/4″(inner liner mat)
  • Cherry Cobbler Cardstock 2 5/8″ x 4 1/4″(card front mat), 4 1/8″ x 5 3/8″(inner liner mat)
  • Traditions of Christmas Specialty Designer Series Paper 2 3/8″ x 4″(card front), 2 1/4″ x 6″(envelope flap)

*********************************************************************************************************

Product List