Stampin’ Up! Snowman Season for Happy Inkin’ Thursday Blog Hop

Happy Halloween my fellow stampers!  It’s time for our Happy Inkin’ Thursday Blog Hop.  This week we have a color challenge.  I can’t wait to see what everyone created with these colors.  Here is what I came up with.

Here are our colors for this week.

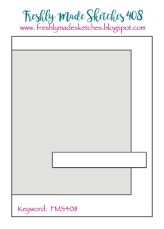
My card played along with the Fab Friday Sketch Challenge #175.  Here is their sketch.

I started by adhering a panel of the Let It Snow Specialty Designer Series Paper to a Shaded Spruce card base using Multipurpose Liquid Glue.

On a small panel of Whisper White cardstock I stamped the snowman image from the Stampin’ Up! Snowman Season Photopolymer Stamp Set.  I stamped the main part of the image in Tuxedo Black Memento Ink, the tree and pompom on his hat I colored with my Shaded Spruce Stampin’ Write Marker and the tree trunk I colored with my Soft Suede Stampin’ Write Marker.  I colored the snowman’s nose, hat and scarf in using my Real Red and Shaded Spruce Stampin’ Blends Markers.  I cut the image out using the 2nd largest circle from the Stitched Shapes Dies.  I adhered the stitched circle to a scalloped circle cut from my Layering Circles Dies in Real Red Glimmer Paper using Multipurpose Liquid Glue.  I adhered the matted artwork to the card front using Stampin’ Dimensionals.

On a strip of Shaded Spruce cardstock I stamped the sentiment from the Snowman Season stamp set in Versamark Ink.  I immediately sprinkled it with White Stampin’ Emboss Powder and set it using my Heat Tool.  I adhered the sentiment to the card front using Stampin’ Dimensionals and a Glue Dot.  I adhered a strip of Real Red Glimmer Paper under the sentiment using Snail.  I added a few Red Rhinestone Basic Jewels to the card front.

On the inside I stamped the sentiment from the Snowman Season stamp set in Shaded Spruce Ink in the center of a Whisper White panel.  I stamped the snowflake image from the Snowman Season stamp set on either side of the sentiment in Coastal Cabana Ink and once over the sentiment in Coastal Cabana Ink stamping off once.  I added 2 thin strips of the Let It Snow Specialty DSP to either side of the panel using Snail.  I adhered the Whisper White panel to the inside of the Shaded Spruce card base using Multipurpose Liquid Glue.

To finish my card I decorated a Medium Whisper White Envelope.  I stamped the snowman image from the Snowman Season stamp set in Tuxedo Black Memento Ink on the envelope front and colored it in the same as I did for the artwork.  I adhered a panel of the Let It Snow Specialty DSP to the envelope flap.

Thank you for visiting my blog today.  I hope you liked my card and will give it a try. Now that you’ve seen my card, take a minute to hop through all our projects today.  If you click on the Next Blog button, you’ll go right to Amy’s page. Or you can just click on the names below to go directly to all the blogs!  Happy Hopping!!

Karen Ksenzakovic: You Are Here

****************************************************************************************************

If you need any stamping supplies, I’d be very happy to be your Demonstrator. Just click HERE to go directly to my online store or drop me an email if you have any questions. 

MY CURRENT HOST CODE IS: DDDXNW6A 

For any orders $50 or more I will send you my monthly class tutorials.  Click HERE or go to my Customer Rewards to see what this months tutorials are.

Click HERE to shop the clearance rack.

Happy Stamping, Karen!

****************************************************************************************************

CHRISTMAS IS COMING EARLY THIS YEAR

AVAILABLE NOVEMBER 1ST, THE NEW CHRISTMASTIME IS HERE SUITE

We hope you’re ready to make this holiday season magical, because the Christmastime Is Here Suite is! This exclusive, limited-time collection of festive, floral coordinating products has everything you need to share love, joy, and creativity this holiday season.

Products from the Christmastime Is Here Suite will be available while supplies last only starting November 1st, 2019

Here’s a sneak peek video of what’s included in the suite.

****************************************************************************************************

WINTER WONDERS PAPER PUMPKIN PART TWO
SUBSCRIBE TO PAPER PUMPKIN BY NOVEMBER 10, 2019

The holiday season will be here before we know it. And along with putting up the Christmas tree and spending snowy nights by the fire, Paper Pumpkin subscribers will be looking forward to opening their holiday kit. Christmastime papercrafting with Paper Pumpkin has become an annual tradition!
So to deliver more of what subscribers love this holiday season, in November Stampin’ Up! is offering Christmas tags kit. This kit makes it easy to add a handmade, personal touch to your holiday giving—without a lot of fuss. It’s Christmas made easy with Paper Pumpkin!

November Kit
Kit details: Makes 24 holiday-themed gift tags of 4 various sizes and designs.
Coordinating colors: Early Espresso, Pool Party, Poppy Parade, and Shaded Spruce

Subscribe for the November kit at paperpumpkin.com from October 11th – November 10th.

The October and November kits coordinate; however, each kit is all-inclusive and can stand alone.

If you’re interested in subscribing to Paper Pumpkin, you can either sign up for a subscription where you are billed monthly for your kit or you can purchase a prepaid subscription in my online store. To see more information and to sign up for the monthly subscription,  Click Here. To see the options for prepaid subscriptions in my online store, Click Here.

****************************************************************************************************

Card stock cuts for this project:

  • Shaded Spruce Cardstock 8 1/2″ X 5 1/2″ (card base scored and folded at 4 1/4″), 3 1/4″ X 5/8″ (sentiment strip)
  • Whisper White Cardstock 4″ X 5 1/4″ (inner liner), 3″ X 3″ (artwork)
  • Let It Snow Specialty Designer Series Paper 4 1/8″ X 5 3/8″ (card front), 2 – 1/4″ X 4″ strips for inner liner,  piece for envelope flap
  • Real Red Glimmer Paper 3″ X 3″ (scallop mat for artwork), 2 1/2″ X 1/2″ (strip under sentiment)

****************************************************************************************************

Product List

Stampin’ Up! Playful Pengiun Frost

Good Wednesday morning my fellow stampers.  Hope you are all having a wonderful week so far.  We’re half way through already, which means the weekend is right around the corner.  In just a little over 2 weeks I will be leaving for OnStage in Hartford.  I’m so looking forward to meeting up with some of my team members and seeing the next Occasions Catalog.

Today’s card was inspired by my Upline’s weekly challenge she had for us.  I did both the color and sketch on the same card.  Here’s my card.

Here are her colors and sketch she gave to us to work from.

I used a technique I haven’t done in a while.  I used my Sponge Brayer on the Feels Like Frost Specialty 6 X 6 Designer Series Paper to change the background to Mossy Meadow.  Once I had it the shade I liked, I adhered it to a Mossy Meadow card base using Multipurpose Liquid Glue.

On a piece of Whisper White cardstock I stamped the penguin image from the Stampin’ Up! Playful Penguins Cling Stamp Set in Tuxedo Black Memento ink.  I stamped the scarf and hat image from the Playful Penguins stamp set in Real Red Ink on the Whisper White cardstock.  I cut the penguin image out using the oval from the Stitched Shapes Dies and I fussy cut the scarf and hat using my Paper Snips.  I adhered a piece of Silver 3/8″ Metallic Edged Ribbon on the card front using Snail and adhered the artwork over the ribbon using Stampin’ Dimensionals.

I cut a couple of the boughs out using the Beautiful Boughs Dies from scraps of Mossy Meadow cardstock.  I cut the swirls out using the Christmas Cardinal Dies from a scrap of Real Red Glimmer Paper.  I adhered the boughs under the artwork using Glue Dots.  I adhered the swirls over the boughs using a tiny dot of Multipurpose Liquid Glue.  I added a few Rhinestone Basic Jewels which I had colored using my Dark Basic Black Stampin’ Blends Marker.

On the inside I stamped the penguin image from the Playful Penguins stamp set in Tuxedo Black Memento Ink on the side of a Whisper White panel.  I stamped the sentiments from the Playful Penguins stamp set in Mossy Meadow Ink in the center of the panel.  I adhered the Whisper White panel to a Real Red mat using Snail and then to the inside of the Mossy Meadow card base using Multipurpose Liquid Glue.

To finish my card I decorated a Medium Whisper White Envelope.  I stamped the penguin image from the Playful Penguins stamp set on the envelope front and the envelope flap in Tuxedo Black Memento Ink.

Thank you for stopping by my blog today.  I hope you liked my card and will give it a try. Happy Stamping!!

****************************************************************************************************

If you need any stamping supplies, I’d be very happy to be your Demonstrator. Just click HERE to go directly to my online store or drop me an email if you have any questions. 

MY CURRENT HOST CODE IS: 3F496G6J

For any orders $50 or more I will send you my monthly class tutorials.  Click HERE or go to my Customer Rewards to see what this months tutorials are.

Click HERE to shop the clearance rack.

Happy Stamping, Karen!

****************************************************************************************************

CHRISTMAS IS COMING EARLY THIS YEAR

AVAILABLE NOVEMBER 1ST, THE NEW CHRISTMASTIME IS HERE SUITE

We hope you’re ready to make this holiday season magical, because the Christmastime Is Here Suite is! This exclusive, limited-time collection of festive, floral coordinating products has everything you need to share love, joy, and creativity this holiday season.

Products from the Christmastime Is Here Suite will be available while supplies last only starting November 1st, 2019

Here’s a sneak peek video of what’s included in the suite.

****************************************************************************************************

WINTER WONDERS PAPER PUMPKIN PART TWO
SUBSCRIBE TO PAPER PUMPKIN BY NOVEMBER 10, 2019

The holiday season will be here before we know it. And along with putting up the Christmas tree and spending snowy nights by the fire, Paper Pumpkin subscribers will be looking forward to opening their holiday kit. Christmastime papercrafting with Paper Pumpkin has become an annual tradition!
So to deliver more of what subscribers love this holiday season, in November Stampin’ Up! is offering Christmas tags kit. This kit makes it easy to add a handmade, personal touch to your holiday giving—without a lot of fuss. It’s Christmas made easy with Paper Pumpkin!

November Kit
Kit details: Makes 24 holiday-themed gift tags of 4 various sizes and designs.
Coordinating colors: Early Espresso, Pool Party, Poppy Parade, and Shaded Spruce

Subscribe for the November kit at paperpumpkin.com from October 11th – November 10th.

The October and November kits coordinate; however, each kit is all-inclusive and can stand alone.

If you’re interested in subscribing to Paper Pumpkin, you can either sign up for a subscription where you are billed monthly for your kit or you can purchase a prepaid subscription in my online store. To see more information and to sign up for the monthly subscription,  Click Here. To see the options for prepaid subscriptions in my online store, Click Here.

****************************************************************************************************

Card stock cuts for this project:

  • Mossy Meadow Cardstock 8 1/2″ X 5 1/2″ (card base scored and folded at 4 1/4″), scrap for boughs
  • Real Red Cardstock 4 1/8″ X 5 3/8″ (inner liner mat)
  • Whisper Whtie Cardstock 4″ X 3″ (artwork), 4″ X 5 1/4″ (inner liner)
  • Real Red Glimmer Paper scraps for scrolls
  • Feels Like Frost 6 X 6 Specialty Designer Series Paper 4 1/8″ X 5 3/8″ (card front)

****************************************************************************************************

Product List

Stampin’ Up! Brightly Gleaming Lots of Cheer

Good Tuesday morning my fellow stampers.  How has everyone’s week started out?  Hope you all have a very productive one.  We’re nearing the end of the month and the beginning of the next, so I’ll be working more than normal.

For today’s card I used a stamp set from the Annual Catalog and one from the Holiday Catalog along with some of the gorgeous Designer Series Paper.  Here’s my card.

For today, I played along with the Sunday Stamps Sketch Challenge #216.  Here is their sketch.

I started by adhering a panel of the gorgeous Brightly Gleaming Specialty Designer Series Paper to a thick Very Vanilla card  base using Multipurpose Liquid Glue.  On a small panel of Very Vanilla cardstock I stamped the ornament image from the Stampin’ Up Lots of Cheer Cling Stamp Set in Versamark Ink.  I immediately sprinkled it with Copper Stampin’ Emboss Powder and set it using my Heat Tool.  I carefully colored the ornament in using my Dark Night of Navy and Pretty Peacock Stampin’ Blends Markers.  I fussy cut the ornament out using my Paper Snips.

I stamped a couple of the pine boughs from the Stampin’ Up! Peaceful Boughs Cling Stamp Set in Mossy Meadow Ink on a panel of Mossy Meadow cardstock.  I stamped the sentiment from the Lots of Cheer stamp set in Versamark Ink next to the stamped boughs.  I immediately sprinkled it with my White Stampin’ Emboss Powder and set it using my Heat Tool.

I adhered the Mossy Meadow panel to a Copper Foil Sheet mat using Multipurpose Liquid Glue.  I adhered 2 thin strips of Copper Foil Sheet to the card front using Snail.  I adhered the ornament by the boughs and on the foil strips using Stampin’ Dimensionals and adhered the card front to the card base using Stampin’ Dimensionals.

On the inside I stamped the ornament image from the Lots of Cheer stamp set in Night of Navy Ink, stamping off 3 times, to the center of a Very Vanilla panel.  I stamped the sentiment from the Lots of Cheer stamp set over the ornament image in Mossy Meadow Ink.  I adhered the Very Vanilla panel to a Mossy Meadow mat using Snail and then to the inside of the Thick Very Vanilla card base using Multipurpose Liquid Glue.

To finish my card I decorated a Medium Very Vanilla Envelope.  I stamped the ornament image from the Lots of Cheer stamp set in Mossy Meadow and Night of Navy Inks on the envelope front.  I adhered a panel of the Brightly Gleaming Specialty DSP to the envelope flap.

Thank you for visiting my blog today.  I hope you liked my card and will give it a try. Happy Stamping!!

****************************************************************************************************

If you need any stamping supplies, I’d be very happy to be your Demonstrator. Just click HERE to go directly to my online store or drop me an email if you have any questions. 

MY CURRENT HOST CODE IS: 3F496G6J

For any orders $50 or more I will send you my monthly class tutorials.  Click HERE or go to my Customer Rewards to see what this months tutorials are.

Click HERE to shop the clearance rack.

Happy Stamping, Karen!

****************************************************************************************************

CHRISTMAS IS COMING EARLY THIS YEAR

AVAILABLE NOVEMBER 1ST, THE NEW CHRISTMASTIME IS HERE SUITE

We hope you’re ready to make this holiday season magical, because the Christmastime Is Here Suite is! This exclusive, limited-time collection of festive, floral coordinating products has everything you need to share love, joy, and creativity this holiday season.

Products from the Christmastime Is Here Suite will be available while supplies last only starting November 1st, 2019

Here’s a sneak peek video of what’s included in the suite.

****************************************************************************************************

WINTER WONDERS PAPER PUMPKIN PART TWO
SUBSCRIBE TO PAPER PUMPKIN BY NOVEMBER 10, 2019

The holiday season will be here before we know it. And along with putting up the Christmas tree and spending snowy nights by the fire, Paper Pumpkin subscribers will be looking forward to opening their holiday kit. Christmastime papercrafting with Paper Pumpkin has become an annual tradition!
So to deliver more of what subscribers love this holiday season, in November Stampin’ Up! is offering Christmas tags kit. This kit makes it easy to add a handmade, personal touch to your holiday giving—without a lot of fuss. It’s Christmas made easy with Paper Pumpkin!

November Kit
Kit details: Makes 24 holiday-themed gift tags of 4 various sizes and designs.
Coordinating colors: Early Espresso, Pool Party, Poppy Parade, and Shaded Spruce

Subscribe for the November kit at paperpumpkin.com from October 11th – November 10th.

The October and November kits coordinate; however, each kit is all-inclusive and can stand alone.

If you’re interested in subscribing to Paper Pumpkin, you can either sign up for a subscription where you are billed monthly for your kit or you can purchase a prepaid subscription in my online store. To see more information and to sign up for the monthly subscription,  Click Here. To see the options for prepaid subscriptions in my online store, Click Here.

****************************************************************************************************

Card stock cuts for this project:

  • Mossy Meadow Cardstock 4 1/2″ X 3 1/4″ (card front), 4″ X 5 1/4″ (inner liner mat)
  • Very Vanilla Cardstock 3 7/8″ X 5 1/8″ (inner liner), 3″ X 2″ (card front ornament)
  • Thick Very Vanilla Cardstock 4 1/4″ X 11″ (card base scored and folded at 5 1/2″)
  • Copper Foil Sheets 4 5/8″ X 3 3/8″ (card front mat), 2 – 1/4″ X 4 1/2″ (strips on card front)
  • Brightly Gleaming Specialty Designer Series Paper 4 1/4″ X 5 1/2″ (card front), piece for envelope flap

****************************************************************************************************

Product List

Stampin’ Up! Itty Bitty Toile Christmas

Good Monday morning my fellow stampers.  How was everyone’s weekend?  Hope you were able to make some time for yourselves.

I have a very clean and simple, quick and easy card for you today using some Designer Series Paper.   My card also uses the least amount of colors I have every made a card with, 2.  My cards usually have a minimum of 3 colors, but I wanted to try something a little different than my normal.  Here’s my card.

My design was inspired by Freshly Made Sketches Challenge #408.  Here’s their sketch.

I also played along with the Watercooler Wednesday Challenge #244.  Here’s their theme.

I started by adhering a panel of Toile Tidings Designer Series Paper to a Garden Green Mat using Snail.

I adhered the matted DSP to a Thick Very Vanilla card base using Multipurpose Liquid Glue.

On a strip of Very Vanilla cardstock I stamped the sentiment from the Stampin’ Up! Itty Bitty Christmas Cling Stamp Set in Garden Green Ink.  I cut the sentiment out using the smallest die from the Stitched Rectangle Dies.  I adhered it to a Garden Green mat using Snail and then to the card front using Stampin’ Dimensionals.  I added a Garden Green Toile Tidings Glitter Enamel Dot to the sentiment.

On the inside I stamped the sentiment from the Stampin’ Up! Toile Christmas Cling Stamp Set in the center of a Very Vanilla panel in Garden Green Ink.  I stamped the scroll image from the Toile Christmas stamp set in Garden Green Ink below the sentiment.  I adhered the Very Vanilla panel to a Garden Green mat using Snail and then to the inside of the Thick Very Vanilla card base using Multipurpose Liquid Glue.

To finish my card I decorated a Medium Very Vanilla Envelope.  I adhered a strip of the Toile Tidings DSP to the envelope front and a panel to the envelope flap.

Thank you for stopping by my blog today.  I hope you liked my card and will give it a try. Happy Stamping!!

****************************************************************************************************

If you need any stamping supplies, I’d be very happy to be your Demonstrator. Just click HERE to go directly to my online store or drop me an email if you have any questions. 

MY CURRENT HOST CODE IS: 3F496G6J

For any orders $50 or more I will send you my monthly class tutorials.  Click HERE or go to my Customer Rewards to see what this months tutorials are.

Click HERE to shop the clearance rack.

Happy Stamping, Karen!

****************************************************************************************************

CHRISTMAS IS COMING EARLY THIS YEAR

AVAILABLE NOVEMBER 1ST, THE NEW CHRISTMASTIME IS HERE SUITE

We hope you’re ready to make this holiday season magical, because the Christmastime Is Here Suite is! This exclusive, limited-time collection of festive, floral coordinating products has everything you need to share love, joy, and creativity this holiday season.

Products from the Christmastime Is Here Suite will be available while supplies last only starting November 1st, 2019

Here’s a sneak peek video of what’s included in the suite.

****************************************************************************************************

WINTER WONDERS PAPER PUMPKIN PART TWO
SUBSCRIBE TO PAPER PUMPKIN BY NOVEMBER 10, 2019

The holiday season will be here before we know it. And along with putting up the Christmas tree and spending snowy nights by the fire, Paper Pumpkin subscribers will be looking forward to opening their holiday kit. Christmastime papercrafting with Paper Pumpkin has become an annual tradition!
So to deliver more of what subscribers love this holiday season, in November Stampin’ Up! is offering Christmas tags kit. This kit makes it easy to add a handmade, personal touch to your holiday giving—without a lot of fuss. It’s Christmas made easy with Paper Pumpkin!

November Kit
Kit details: Makes 24 holiday-themed gift tags of 4 various sizes and designs.
Coordinating colors: Early Espresso, Pool Party, Poppy Parade, and Shaded Spruce

Subscribe for the November kit at paperpumpkin.com from October 11th – November 10th.

The October and November kits coordinate; however, each kit is all-inclusive and can stand alone.

If you’re interested in subscribing to Paper Pumpkin, you can either sign up for a subscription where you are billed monthly for your kit or you can purchase a prepaid subscription in my online store. To see more information and to sign up for the monthly subscription,  Click Here. To see the options for prepaid subscriptions in my online store, Click Here.

****************************************************************************************************

Card stock cuts for this project:

  • Garden Green Cardstock 4 5/8″ X 3 1/2″ (card front mat), 2 9/16″ X 1/2″ (sentiment mat), 4 1/8″ X 5 3/8″ (inner liner mat)
  • Very Vanilla Cardstock 3″ X 3/4″ (sentiment), 4″ X 5 1/4″ (inner liner)
  • Thick Very Vanilla Cardstock 4 1/4″ X 11″ (card base scored and folded at 5 1/2″)
  • Toile Tidings Designer Series Paper 4 1/2″ X 3 1/16″ (card front), piece for envelope flap

****************************************************************************************************

Product List

Stampin’ Up! Feels Like Frost Merry Christmas for Fun Fold Friday

Good Friday morning my fellow stampers and welcome to Fun Fold Friday.  How was everyone’s week?  The weekend is upon us once again, have we made any plans?  Another weekend I will be working.

Today I used the gorgeous Feels Like Frost Specialty Designer Series Paper to do most of the work for my card.  I also pulled out a stamp set and dies from the Annual Catalog.  Take a look.

Isn’t this paper stunning?  I started by embossing a Purple Posy card base using the Subtle 3D Embossing Folder.  I also embossed the band across the front of the card using the Subtle 3D Embossing Folder.

I adhered a panel of the Feels Like Frost Specialty DSP to my thin Whisper White card base using Multipurpose Liquid Glue.  I adhered the band to the back of the card base, so that it wrapped around the front, using Snail.  I adhered the Whisper White card base to the Purple Posy card base using Multipurpose Liquid Glue.  I adhered 2 thin strips of the Feels Like Frost Specialty DSP to either side of the thin card base using Multipurpose Liquid Glue.  I stamped the Christmas sentiment from the Stampin’ Up! Merry Christmas To All Photopolymer Stamp Set on the bottom front of the DSP in Smoky Slate Ink.

I cut the Merry sentiment out of Silver Foil Sheet using the Merry Christmas Dies and adhered it to the band using my Fine Tip Glue Pen.  I added a few Rhinestone Basic Jewels to the card front to add a little more sparkle.

On the inside I stamped the sentiment from the Merry Christmas To All stamp set in Smoky Slate Ink.

To finish my card I decorated a Medium Whisper White Envelope.  I stamped the scroll images from the Merry Christmas To All stamp set in Purple Posy Ink on the envelope front and the envelope flap.

Thank you for stopping by my blog today.  I hope you liked my quick and easy Fun Fold card and will give it a try.  Happy Stamping!!

****************************************************************************************************

If you need any stamping supplies, I’d be very happy to be your Demonstrator. Just click HERE to go directly to my online store or drop me an email if you have any questions. 

MY CURRENT HOST CODE IS: 3F496G6J

For any orders $50 or more I will send you my monthly class tutorials.  Click HERE or go to my Customer Rewards to see what this months tutorials are.

Click HERE to shop the clearance rack.

Happy Stamping, Karen!

****************************************************************************************************

CHRISTMAS IS COMING EARLY THIS YEAR

AVAILABLE NOVEMBER 1ST, THE NEW CHRISTMASTIME IS HERE SUITE

We hope you’re ready to make this holiday season magical, because the Christmastime Is Here Suite is! This exclusive, limited-time collection of festive, floral coordinating products has everything you need to share love, joy, and creativity this holiday season.

Products from the Christmastime Is Here Suite will be available while supplies last only starting November 1st, 2019

Here’s a sneak peek video of what’s included in the suite.

****************************************************************************************************

WINTER WONDERS PAPER PUMPKIN PART TWO
SUBSCRIBE TO PAPER PUMPKIN BY NOVEMBER 10, 2019

The holiday season will be here before we know it. And along with putting up the Christmas tree and spending snowy nights by the fire, Paper Pumpkin subscribers will be looking forward to opening their holiday kit. Christmastime papercrafting with Paper Pumpkin has become an annual tradition!
So to deliver more of what subscribers love this holiday season, in November Stampin’ Up! is offering Christmas tags kit. This kit makes it easy to add a handmade, personal touch to your holiday giving—without a lot of fuss. It’s Christmas made easy with Paper Pumpkin!

November Kit
Kit details: Makes 24 holiday-themed gift tags of 4 various sizes and designs.
Coordinating colors: Early Espresso, Pool Party, Poppy Parade, and Shaded Spruce

Subscribe for the November kit at paperpumpkin.com from October 11th – November 10th.

The October and November kits coordinate; however, each kit is all-inclusive and can stand alone.

If you’re interested in subscribing to Paper Pumpkin, you can either sign up for a subscription where you are billed monthly for your kit or you can purchase a prepaid subscription in my online store. To see more information and to sign up for the monthly subscription,  Click Here. To see the options for prepaid subscriptions in my online store, Click Here.

****************************************************************************************************

Card stock cuts for this project:

  • Purple Posy Cardstock 4 1/4″ X 5 1/2″ (card base), 5″ X 1″ (band scored at 1 1/4″)
  • Whisper White Cardstock 3″ X 11″ (card base/front scored and folded at 5 1/2)
  • Silver Foil Sheet 4″ X 2″ (sentiment)
  • Feels Like Frost 6 X 6 Specialty Designer Series Paper 3″ X 5 1/2″, 2- 1/4″ X 5 1/2″ (strips on side of whisper white card base), piece for envelope flap

****************************************************************************************************

Product List

Stampin’ Up! Perfect Plaid for the Happy Inkin’ Thursday Blog Hop

Good Thursday morning my fellow stampers.  I was so excited to be asked to join in with the weekly ‘Happy Inkin’ Thursday Blog Hop’ and today is the first day for me to join in.  If you are hopping over from Akiko, thank you for stopping by. This week was a fun Sketch Challenge.  Be sure to hop around to see everyone’s beautiful projects, I’m sure you will love them.  Here’s what I came up with for their sketch.

Here is the sketch I got to work from.

I started by adhering a panel of Wrapped In Plaid Specialty Designer Series Paper to a Cherry Cobbler  card base using Multipurpose Liquid Glue.  I stamped the sentiment from the Stampin’ Up! Perfectly Plaid Cling Stamp Set in Versamark Ink on the bottom of a Shaded Spruce cardstock panel.  I immediately sprinkled it with Gold Stampin’ Emboss Powder and set it using my Heat Tool. I adhered the Shaded Spruce card front on top of the Wrapped In Plaid Specialty DSP using Multipurpose Liquid Glue.

I cut out the largest circle from the Stitched Shapes Dies from Whisper White cardstock, I then embossed it using the Pinewood Planks 3D Embossing Folder.  I cut out the largest scalloped circle from the Layering Circles Dies from a Gold Foil Sheet.  I adhered the Whisper White stitched circle to the Gold Foil scalloped circle using Multipurpose Liquid Glue.

I punched out 3 trees using my Pine Tree Punch, one in Cherry Cobbler, one in Shaded Spruce and one in Wrapped In Plaid Specialty DSP.  I adhered the Cherry Cobbler and Shaded Spruce trees to the Whisper White circle using Multipurpose Liquid Glue.  I adhered the DSP tree on top of the other 2 using Stampin’ Dimensionals.  I tied a knot from a piece of Shaded Spruce/Gold Striped 3/8″ Ribbon and adhered it to the matted stitched circle using a Glue Dot.  I adhered the artwork to the top of the Shaded Spruce card front using Stampin’ Dimensionals.

On the inside I stamped the sentiment from the Perfectly Plaid stamp set in Shaded Spruce Ink in the center of a Whisper White panel.  I stamped the plaid tree image from the Perfectly Plaid stamp set in Cherry Cobbler and Shaded Spruce Inks on the bottom of the Whisper White panel.  I punched another tree using my Pine Tree Punch from a piece of Wrapped In Plaid Specialty DSP and adhered it on top of the stamped trees using Multipurpose Liquid Glue.  I adhered the Whisper White panel to a Shaded Spruce mat using Snail and then to the inside of the Cherry Cobbler card base using Multipurpose Liquid Glue.

To finish my card I decorated a Medium Whisper White Envelope.  I stamped the plaid tree image from the Perfectly Plaid stamp set in Cherry Cobbler and Shaded Spruce Inks on the bottom front of the envelope.  I adhered a panel of the Wrapped In Plaid Specialty DSP to the envelope flap.

Thank you for visiting my blog today.  I hope you liked my card and will give it a try. Now that you’ve seen my card, take a minute to hop thru all our projects today If you click on the Next Blog button, you’ll go right to Amy’s page. Or you can just click on the names below to go directly to all the blogs!  Happy Hopping!!

Karen Ksenzakovic: You Are Here

****************************************************************************************************

If you need any stamping supplies, I’d be very happy to be your Demonstrator. Just click HERE to go directly to my online store or drop me an email if you have any questions. 

MY CURRENT HOST CODE IS: 3F496G6J

For any orders $50 or more I will send you my monthly class tutorials.  Click HERE or go to my Customer Rewards to see what this months tutorials are.

Click HERE to shop the clearance rack.

Happy Stamping, Karen!

****************************************************************************************************

CHRISTMAS IS COMING EARLY THIS YEAR

AVAILABLE NOVEMBER 1ST, THE NEW CHRISTMASTIME IS HERE SUITE

We hope you’re ready to make this holiday season magical, because the Christmastime Is Here Suite is! This exclusive, limited-time collection of festive, floral coordinating products has everything you need to share love, joy, and creativity this holiday season.

Products from the Christmastime Is Here Suite will be available while supplies last only starting November 1st, 2019

Here’s a sneak peek video of what’s included in the suite.

****************************************************************************************************

WINTER WONDERS PAPER PUMPKIN PART TWO
SUBSCRIBE TO PAPER PUMPKIN BY NOVEMBER 10, 2019

The holiday season will be here before we know it. And along with putting up the Christmas tree and spending snowy nights by the fire, Paper Pumpkin subscribers will be looking forward to opening their holiday kit. Christmastime papercrafting with Paper Pumpkin has become an annual tradition!
So to deliver more of what subscribers love this holiday season, in November Stampin’ Up! is offering Christmas tags kit. This kit makes it easy to add a handmade, personal touch to your holiday giving—without a lot of fuss. It’s Christmas made easy with Paper Pumpkin!

November Kit
Kit details: Makes 24 holiday-themed gift tags of 4 various sizes and designs.
Coordinating colors: Early Espresso, Pool Party, Poppy Parade, and Shaded Spruce

Subscribe for the November kit at paperpumpkin.com from October 11th – November 10th.

The October and November kits coordinate; however, each kit is all-inclusive and can stand alone.

If you’re interested in subscribing to Paper Pumpkin, you can either sign up for a subscription where you are billed monthly for your kit or you can purchase a prepaid subscription in my online store. To see more information and to sign up for the monthly subscription,  Click Here. To see the options for prepaid subscriptions in my online store, Click Here.

****************************************************************************************************

Card stock cuts for this project:

  • Cherry Cobbler Cardstock 8 1/2″ X 5 1/2″ (card base scored and folded at 4 1/4″), 2 1/2″ X 2 1/2″ (pine tree)
  • Shaded Spruce Cardstock 2 3/4″ X 5 3/8″ (card front), 4 1/8″ X 5 3/8″ (inner liner mat), 2 1/2″ X 2 1/2″ (pine tree)
  • Whisper White Cardstock 4″ X 5 1/4″ (inner liner), 4″ X 4″ (stitched circle)
  • Gold Foil Sheets 4″ X 4″ (scalloped circle)
  • Wrapped Ink Plaid Specialty Designer Series Paper 4 1/8″ X 5 3/8″ (card front), 2 1/2″ X 5″ (pine trees), piece for envelope flap

****************************************************************************************************

Product List

Stampin’ Up! Peaceful Boughs

Good Wednesday morning my fellow stampers.  Today’s the day!! Stampin’ Up! 24-Hour Sale, 15% off select stamp sets.  Don’t miss out on these great buys.  More information below about this along with the list of sets on sale.

My upline gave us our colors and sketch for this week to work with.  I am in full Christmas card mode now and when I saw the colors I had to think how I can make them work for a Christmas card.  Here’s what I came up with.

Here is the sketch and colors she gave us.

I started by stamping the pine boughs from the Stampin’ Up! Peaceful Boughs Cling Stamp Set in Mint Macaron Ink on a Whisper White panel.  I colored the stems in using my Dark Soft Suede Stampin’ Blends Marker.  I cut a few boughs out of Mint Macaron cardstock using the Beautiful Boughs Dies.  I cut 3 pinecones out in Soft Suede and 3 in Terracotta Tile cardstock using the Beautiful Boughs Dies.  I adhered the Mint Macaron boughs to the artwork using Glue Dots.  I adhered the Terracotta Tile pinecones to the Soft Suede pinecones using my Fine Tip Glue Pen and then adhered them to the artwork using Stampin’ Dimensionals.

I adhered the artwork to a Soft Suede mat using Snail and then to a Mint Macaron card base using Stampin’ Dimensionals.

On a small strip of Whisper White cardstock I stamped the sentiment from the Stampin’ Up! Itty Bitty Christmas Cling Stamp Set in Soft Suede Ink.  I made the sentiment strip into a banner and adhered it to a Soft Suede mat, using Snail, which I also made into a banner.  I adhered the banner to the card front using Stampin’ Dimensionals.  I added a couple Terracotta Tile 2019-2021 In-Color Faceted Dots to either side of the banner.

On the inside I stamped the sentiment from the Peaceful Boughs stamp set in Soft Suede Ink in the center of a Whisper White panel.  I stamped the pine bough image from the Peaceful Boughs stamp set in Mint Macaron Ink over the sentiment stamping off once.  I adhered the Whisper White panel to a Soft Suede mat using Snail and then to the inside of the Mint Macaron card base using Multipurpose Liquid Glue.

To finish my card I decorated a Medium Whisper White Envelope.  I stamped the pine bough image from the Peaceful Boughs stamp set in Mint Macaron Ink on the envelope front and envelope flap, some in full strength ink and some stamped off once.

Thank you for stopping by my blog today.  I hope you liked my card and will give it a try. Happy Stamping!!

****************************************************************************************************

If you need any stamping supplies, I’d be very happy to be your Demonstrator. Just click HERE to go directly to my online store or drop me an email if you have any questions. 

MY CURRENT HOST CODE IS: 3F496G6J

For any orders $50 or more I will send you my monthly class tutorials.  Click HERE or go to my Customer Rewards to see what this months tutorials are.

Click HERE to shop the clearance rack.

Happy Stamping, Karen!

****************************************************************************************************

October 23 is the big day! For 24-HOURS ONLY, you can save 15% on select stamp sets!

Stamp Set Sale Details:

  • Get select sets at a 15% discount.
  • Ordering Deadline:  October 23, 2019; 11:50 pm (MT)
  • All order types qualify for this promotion.
  • All selected stamp sets can be applied to Starter Kits.
  • Discount applies to select stamp sets only when purchased individually during the 24-hour promotion period.
  • Bundles featuring stamp sets from the promotion will not be discounted.
  • If you purchased a stamp set prior to the sale, Stampin’ Up! will not be offering exchanges or credits.
  • In the event that Stampin’ Up! runs out of any item offered, promotional pricing will be honored on items backordered, up to the point it reaches the backorder limit. Once an item reaches the backorder limit and is not orderable, it will no longer be available during the promotion and will not be available to order until additional inventory arrives in stock.  Click Here or on image below to open up a full-size printable list list of stamp sets that will be on sale on Wednesday, Oct 23!

Please feel free to contact me if you have any questions. Don’t forget, THIS IS A ONE DAY ONLY SALE and is only happening TODAY Wednesday, October 23 so be sure to get your orders placed by 11:50pm MT!

****************************************************************************************************

CHRISTMAS IS COMING EARLY THIS YEAR

AVAILABLE NOVEMBER 1ST, THE NEW CHRISTMASTIME IS HERE SUITE

We hope you’re ready to make this holiday season magical, because the Christmastime Is Here Suite is! This exclusive, limited-time collection of festive, floral coordinating products has everything you need to share love, joy, and creativity this holiday season.

Products from the Christmastime Is Here Suite will be available while supplies last only starting November 1st, 2019

Here’s a sneak peek video of what’s included in the suite.

****************************************************************************************************

WINTER WONDERS PAPER PUMPKIN PART TWO
SUBSCRIBE TO PAPER PUMPKIN BY NOVEMBER 10, 2019

The holiday season will be here before we know it. And along with putting up the Christmas tree and spending snowy nights by the fire, Paper Pumpkin subscribers will be looking forward to opening their holiday kit. Christmastime papercrafting with Paper Pumpkin has become an annual tradition!
So to deliver more of what subscribers love this holiday season, in November Stampin’ Up! is offering Christmas tags kit. This kit makes it easy to add a handmade, personal touch to your holiday giving—without a lot of fuss. It’s Christmas made easy with Paper Pumpkin!

November Kit
Kit details: Makes 24 holiday-themed gift tags of 4 various sizes and designs.
Coordinating colors: Early Espresso, Pool Party, Poppy Parade, and Shaded Spruce

Subscribe for the November kit at paperpumpkin.com from October 11th – November 10th.

The October and November kits coordinate; however, each kit is all-inclusive and can stand alone.

If you’re interested in subscribing to Paper Pumpkin, you can either sign up for a subscription where you are billed monthly for your kit or you can purchase a prepaid subscription in my online store. To see more information and to sign up for the monthly subscription,  Click Here. To see the options for prepaid subscriptions in my online store, Click Here.

****************************************************************************************************

Card stock cuts for this project:

  • Mint Macaron Cardstock 8 1/2″ X 5 1/2″ (card base scored and folded at 4 1/4″)
  • Soft Suede Cardstock 3 3/8″ X 4 5/8″ (artwork mat), 3 1/8″ X 5/8″ (banner mat), 4″ X 5 1/4″ (inner liner mat). 1 1/2″ X 3″ (pinecones)
  • Terracotta Tile Cardstock 1 1/2″ X 3″ (pinecones)
  • Whisper White Cardstock 3 1/4″ X 4 1/2″ (artwork), 3″ X 1/2″ (banner), 3 3/4″ X 5″ (inner liner)

****************************************************************************************************

Product List

Stampin’ Up! Playful Penguins

Good Tuesday morning my fellow stampers.  How has everyone’s week started off?  Hope it’s going to be a productive one for you.  Don’t forget, tomorrow is the big Stampin’ Up! 24-Hour Sale.  Lots of wonderful stamp sets at a 15% discount.  If there are some you have been wanting, you don’t want to miss this great opportunity.

For today’s card I used the color and sketch challenge that my upline had given us last week.  Each week this month she is giving us a new challenge to do.  I have to admit, I did struggle with the colors for this one a little bit.  Here’s my card.

Here are the colors and sketch she gave us.

I started by embossing a Night of Navy card front using the Winter Knit 3D Embossing Folder.  I wrapped a piece of Old Olive/Pretty Peacock 3/8″ Reversible Ribbon around the card front on an angle.  I adhered the card front to a Night of Navy card base using Multipurpose Liquid Glue.

On a small panel of Whisper White cardstock I stamped the penguin image from the Stampin’ Up! Playful Penguins Cling Stamp Set in Tuxedo Black Memento Ink.  I stamped the ground snow image from the Playful Penguins stamp set in Versamark Ink below the penguin and immediately sprinkled it with Shimmer White Stampin’ Emboss Powder.  I set it using my Heat Tool.  I stamped the falling snow image from the Stampin’ Up! Peaceful Boughs Cling Stamp Set in Versamark Ink all around the penguin.  I sprinkled it with my Shimmer White Stampin’ Emboss Powder and set it using my Heat Tool.  I adhered the artwork to an Old Olive mat using Snail.  On a scrap piece of Whisper White cardstock I stamped the scarf and hat image from the Playful Penguins stamp set in Granny Apple Green Ink.  I fussy cut them using my Paper Snips.  I adhered the scarf and hat to the penguin image using Glue Dots.

On a strip of Whisper White cardstock I stamped just the outline image of the banner from the Stampin’ Up! Toile Christmas Cling Stamp Set using my Night of Navy Stampin’ Write Marker.  I stamped the sentiment from the Playful Penguins stamp set in Old Olive Ink inside the banner and cut the banner out using the Christmas Cardinal Dies.  I adhered the artwork to the card front using Stampin’ Dimensionals and the sentiment banner over the artwork using Stampin’ Dimensionals.  I added a couple Granny Apple Green Glitter Enamel Dots to the ends of the banner.

On the inside I stamped 2 of the sentiments from the Playful Penguins stamp set in Old Olive Ink in the center of a Whisper White panel.  I stamped the penguin image from the Playful Penguins stamp set in Tuxedo Black Memento Ink on the bottom of the panel.  I adhered the Whisper White panel to an Old Olive mat using Snail and then to the inside of the Night of Navy card base using Multipurpose Liquid Glue.

To finish my card I decorated a Medium Whisper White Envelope.  I stamped the penguin image from the Playful Penguins stamp set on the envelope front and the envelope flap in Tuxedo Black Memento Ink.

Thank you for stopping by my blog today.  I hope you liked my card and will give it a try. Happy Stamping!!

****************************************************************************************************

If you need any stamping supplies, I’d be very happy to be your Demonstrator. Just click HERE to go directly to my online store or drop me an email if you have any questions. 

MY CURRENT HOST CODE IS: 3F496G6J

For any orders $50 or more I will send you my monthly class tutorials.  Click HERE or go to my Customer Rewards to see what this months tutorials are.

Click HERE to shop the clearance rack.

Happy Stamping, Karen!

****************************************************************************************************

October 23 is the big day! TOMORROW!!

For 24-HOURS ONLY, you can save 15% on select stamp sets!

Stamp Set Sale Details:

  • Get select sets at a 15% discount.
  • Ordering Deadline:  October 23, 2019; 11:50 pm (MT)
  • All order types qualify for this promotion.
  • All selected stamp sets can be applied to Starter Kits.
  • Discount applies to select stamp sets only when purchased individually during the 24-hour promotion period.
  • Bundles featuring stamp sets from the promotion will not be discounted.
  • If you purchased a stamp set prior to the sale, Stampin’ Up! will not be offering exchanges or credits.
  • In the event that Stampin’ Up! runs out of any item offered, promotional pricing will be honored on items backordered, up to the point it reaches the backorder limit. Once an item reaches the backorder limit and is not orderable, it will no longer be available during the promotion and will not be available to order until additional inventory arrives in stock.  Click Here or on image below to open up a full-size printable list list of stamp sets that will be on sale on Wednesday, Oct 23!

Please feel free to contact me if you have any questions. Don’t forget, THIS IS A ONE DAY ONLY SALE and is only happening on Wednesday, October 23 so be sure to get your orders placed that day!

****************************************************************************************************

CHRISTMAS IS COMING EARLY THIS YEAR

AVAILABLE NOVEMBER 1ST, THE NEW CHRISTMASTIME IS HERE SUITE

We hope you’re ready to make this holiday season magical, because the Christmastime Is Here Suite is! This exclusive, limited-time collection of festive, floral coordinating products has everything you need to share love, joy, and creativity this holiday season.

Products from the Christmastime Is Here Suite will be available while supplies last only starting November 1st, 2019

Here’s a sneak peek video of what’s included in the suite.

****************************************************************************************************

WINTER WONDERS PAPER PUMPKIN PART TWO
SUBSCRIBE TO PAPER PUMPKIN BY NOVEMBER 10, 2019

The holiday season will be here before we know it. And along with putting up the Christmas tree and spending snowy nights by the fire, Paper Pumpkin subscribers will be looking forward to opening their holiday kit. Christmastime papercrafting with Paper Pumpkin has become an annual tradition!
So to deliver more of what subscribers love this holiday season, in November Stampin’ Up! is offering Christmas tags kit. This kit makes it easy to add a handmade, personal touch to your holiday giving—without a lot of fuss. It’s Christmas made easy with Paper Pumpkin!

November Kit
Kit details: Makes 24 holiday-themed gift tags of 4 various sizes and designs.
Coordinating colors: Early Espresso, Pool Party, Poppy Parade, and Shaded Spruce

Subscribe for the November kit at paperpumpkin.com from October 11th – November 10th.

The October and November kits coordinate; however, each kit is all-inclusive and can stand alone.

If you’re interested in subscribing to Paper Pumpkin, you can either sign up for a subscription where you are billed monthly for your kit or you can purchase a prepaid subscription in my online store. To see more information and to sign up for the monthly subscription,  Click Here. To see the options for prepaid subscriptions in my online store, Click Here.

****************************************************************************************************

Card stock cuts for this project:

  • Night of Navy Cardstock 8 1/2″ X 5 1/2″ (card base scored and folded at 4 1/4″), 4 1/4″ X 5 1/2″ (card front)
  • Old Olive Cardstock 4 1/8″ X 5 3/8″ (inner liner mat), 2 1/16″ X 3 1/16″ (artwork mat)
  • Whisper White Cardstock 4″ X 5 1/4″ (inner liner), 2″ X 3″ (artwork), 1 1/2″ X 5″ (banner, scarf & hat)

****************************************************************************************************

Product List

Stampin’ Up! 15% off Select Stamp Set Sale

Hello my fellow stampers.  This is my 2nd post today.  I just wanted to let you all know about the Stampin’ Up! 24- Hour Sale.

October 23 is the big day! For 24-HOURS ONLY, you can save 15% on select stamp sets!

Stamp Set Sale Details:

  • Get select sets at a 15% discount.
  • Ordering Deadline:  October 23, 2019; 11:50 pm (MT)
  • All order types qualify for this promotion.
  • All selected stamp sets can be applied to Starter Kits.
  • Discount applies to select stamp sets only when purchased individually during the 24-hour promotion period.
  • Bundles featuring stamp sets from the promotion will not be discounted.
  • If you purchased a stamp set prior to the sale, Stampin’ Up! will not be offering exchanges or credits.
  • In the event that Stampin’ Up! runs out of any item offered, promotional pricing will be honored on items backordered, up to the point it reaches the backorder limit. Once an item reaches the backorder limit and is not orderable, it will no longer be available during the promotion and will not be available to order until additional inventory arrives in stock.  Click Here or on image below to open up a full-size printable list list of stamp sets that will be on sale on Wednesday, Oct 23!

Please feel free to contact me if you have any questions. Don’t forget, THIS IS A ONE DAY ONLY SALE and is only happening on Wednesday, October 23 so be sure to get your orders placed that day!

****************************************************************************************************

If you need any stamping supplies, I’d be very happy to be your Demonstrator. Just click HERE to go directly to my online store or drop me an email if you have any questions. 

MY CURRENT HOST CODE IS: 3F496G6J

For any orders $50 or more I will send you my monthly class tutorials.  Click HERE or go to my Customer Rewards to see what this months tutorials are.

Click HERE to shop the clearance rack.

Happy Stamping, Karen!

****************************************************************************************************

CHRISTMAS IS COMING EARLY THIS YEAR

AVAILABLE NOVEMBER 1ST, THE NEW CHRISTMASTIME IS HERE SUITE

We hope you’re ready to make this holiday season magical, because the Christmastime Is Here Suite is! This exclusive, limited-time collection of festive, floral coordinating products has everything you need to share love, joy, and creativity this holiday season.

Products from the Christmastime Is Here Suite will be available while supplies last only starting November 1st, 2019

Here’s a sneak peek video of what’s included in the suite.

****************************************************************************************************

WINTER WONDERS PAPER PUMPKIN PART TWO
SUBSCRIBE TO PAPER PUMPKIN BY NOVEMBER 10, 2019

The holiday season will be here before we know it. And along with putting up the Christmas tree and spending snowy nights by the fire, Paper Pumpkin subscribers will be looking forward to opening their holiday kit. Christmastime papercrafting with Paper Pumpkin has become an annual tradition!
So to deliver more of what subscribers love this holiday season, in November Stampin’ Up! is offering Christmas tags kit. This kit makes it easy to add a handmade, personal touch to your holiday giving—without a lot of fuss. It’s Christmas made easy with Paper Pumpkin!

November Kit
Kit details: Makes 24 holiday-themed gift tags of 4 various sizes and designs.
Coordinating colors: Early Espresso, Pool Party, Poppy Parade, and Shaded Spruce

Subscribe for the November kit at paperpumpkin.com from October 11th – November 10th.

The October and November kits coordinate; however, each kit is all-inclusive and can stand alone.

If you’re interested in subscribing to Paper Pumpkin, you can either sign up for a subscription where you are billed monthly for your kit or you can purchase a prepaid subscription in my online store. To see more information and to sign up for the monthly subscription,  Click Here. To see the options for prepaid subscriptions in my online store, Click Here.

****************************************************************************************************

Stampin’ Up! Itty Bitty Christmas CAS Card

Good Monday morning my fellow stampers.  How was everyone’s weekend?  Anyone do anything fun?  I finally had a weekend day off and it was cold and rainy.  The good thing about that was, I got to spend a lot of time at my craft table.

As promised last week, I’m in full Christmas card mode.  I send a lot of Christmas/Holiday cards out, so I really need to get moving.  I have a very quick & easy, clean & simple card for you today.  Here’s my card.

The colors of my card were inspired by Just Add Ink Challenge #479.  Here are their colors.

My design was from Freshly Made Sketches Challenge #407.  Here is their sketch.

I also played along with Inspire. Create. Challenge #054.  Here is their theme.

I started by adhering a panel of Let It Snow Specialty Designer Series Paper to a Coastal Cabana card base using Multipurpose Liquid Glue.

I cut the snowflakes out of Sparkle Glimmer Paper using the Christmas Layer Dies.  I adhered the snowflakes to the card front using Multipurpose Liquid Glue.  I stamped the sentiment from the Stampin’ Up! Itty Bitty Christmas Cling Stamp Set in Pear Pizzazz Ink on a strip of Whisper White cardstock.  I adhered the sentiment to the card front using Stampin’ Dimensionals.

I added a Coastal Cabana Holiday Rhinestone Basic Jewel to the top corner of the sentiment banner.

On the inside I stamped the sentiment from the Stampin’ Up! Greatest Part of Christmas Host Exclusive Cling Stamp Set, in the center of a Whisper White panel in Pear Pizzazz Ink.  I stamped the snowflake image from the Stampin’ Up Frosted Foliage Cling Stamp Set in Coastal Cabana Ink around the sentiment stamping off once.  I adhered a strip of the Let It Snow Specialty DSP to the bottom of the panel using Snail.  I adhered the Whisper White panel to the inside of the Coastal Cabana card base using Multipurpose Liquid Glue.  I added a small Sparkle Glimmer Paper snowflake to the bottom of the panel.

To finish my card I decorated a Medium Whisper White Envelope.  I stamped the snowflake image from the Frosted Foliage stamp set in Coastal Cabana Ink on the envelope front.  I adhered a panel of the Let It Snow Specialty DSP to the envelope flap.

Thank you for stopping by my blog today.  I hope you liked my card and will give it a try.  Happy Stamping!!

****************************************************************************************************

If you need any stamping supplies, I’d be very happy to be your Demonstrator. Just click HERE to go directly to my online store or drop me an email if you have any questions. 

MY CURRENT HOST CODE IS: 3F496G6J

For any orders $50 or more I will send you my monthly class tutorials.  Click HERE or go to my Customer Rewards to see what this months tutorials are.

Click HERE to shop the clearance rack.

Happy Stamping, Karen!

****************************************************************************************************

CHRISTMAS IS COMING EARLY THIS YEAR

AVAILABLE NOVEMBER 1ST, THE NEW CHRISTMASTIME IS HERE SUITE

We hope you’re ready to make this holiday season magical, because the Christmastime Is Here Suite is! This exclusive, limited-time collection of festive, floral coordinating products has everything you need to share love, joy, and creativity this holiday season.

Products from the Christmastime Is Here Suite will be available while supplies last only starting November 1st, 2019

Here’s a sneak peek video of what’s included in the suite.

****************************************************************************************************

WINTER WONDERS PAPER PUMPKIN PART TWO
SUBSCRIBE TO PAPER PUMPKIN BY NOVEMBER 10, 2019

The holiday season will be here before we know it. And along with putting up the Christmas tree and spending snowy nights by the fire, Paper Pumpkin subscribers will be looking forward to opening their holiday kit. Christmastime papercrafting with Paper Pumpkin has become an annual tradition!
So to deliver more of what subscribers love this holiday season, in November Stampin’ Up! is offering Christmas tags kit. This kit makes it easy to add a handmade, personal touch to your holiday giving—without a lot of fuss. It’s Christmas made easy with Paper Pumpkin!

November Kit
Kit details: Makes 24 holiday-themed gift tags of 4 various sizes and designs.
Coordinating colors: Early Espresso, Pool Party, Poppy Parade, and Shaded Spruce

Subscribe for the November kit at paperpumpkin.com from October 11th – November 10th.

The October and November kits coordinate; however, each kit is all-inclusive and can stand alone.

If you’re interested in subscribing to Paper Pumpkin, you can either sign up for a subscription where you are billed monthly for your kit or you can purchase a prepaid subscription in my online store. To see more information and to sign up for the monthly subscription,  Click Here. To see the options for prepaid subscriptions in my online store, Click Here.

****************************************************************************************************

Card stock cuts for this project:

  • Coastal Cabana Cardstock 4 1/4″ X 11″ (card base scored and folded at 5 1/2″)
  • Whisper White Cardstock 4″ X 5 1/4″ (inner liner), 1/2″ X 2 3/4″ (sentiment banner)
  • Let It Snow Specialty Designer Series Paper 4 1/8″ X 5 3/8″ (card front), 1/2″ X 4 ” (strip on bottom of inner liner), piece for envelope flap
  • Sparkle Glimmer Paper 3 1/4″ X 2 1/2″ (snowflakes)

****************************************************************************************************

Product List