Good Tuesday morning my stamping friends. How has everyone’s week started? I hope everyone is doing well and finishing up all your cards to get in the mail early. I’m having a class tonight and the ladies will be making a few more Christmas cards to add to their stash. They may even be making this one. Before my class though I will be gong in for surgery. I’ve had trigger finger in both of my hands and I just couldn’t stand the pain anymore or the locking of my fingers. I am having both hands operated on at the same time, I must be nuts. I was told that I am to use my hands immediately, so I figured why not have a class. The first thing my daughter said when I told her I was having surgery was ” so you’ll be ok to bake cookies this year then right?”. You can see where her priorities are, lol.
So today I have a card that looks more involved than it really is. Once you get the couple pieces cut out, it goes together really quick. I was very hesitant about getting the Toile Tiding Designer Series Paper, I wasn’t sure I was going to like it. It’s only 2 colors + Very Vanilla, Garden Green on one side and Real Red on the other. I’m so happy I bought it, I really love the designs on this paper. Once again I was inspired by one of my team members, Akiko, who made this card for our weekly blog hop a couple weeks ago. Here is her card. Here’s my take on it.

I started by cutting a circle in a Very Vanilla card front using the 2nd largest circle from the Layering Circles Dies. As in my description, I have a little sneak peek of something coming January 3, 2020 in the new Mini Catalog (formally known as the occasions catalog). I embossed the Very Vanilla panel using the new Parisian Flourish 3D Embossing Folder, isn’t it just gorgeous. Using the largest scallop circle from the Layering Circles Dies, I cut a piece of Real Red cardstock. I used the 2nd largest circle die from the Layering Circles Dies to cut the inside of the scallop circle to make a frame. I adhered the scallop frame to the Very Vanilla card front using Multipurpose Liquid Glue. I cut a panel of Toile Tidings DSP using the largest circle die from the Layering Circles Dies making sure to get the image I wanted in the circle. I adhered the Toile Tidings DSP circle behind the Very Vanilla panel using Stampin’ Dimensionals.

I wrapped a piece of Garden Green 3/8″ Double-Stitched Ribbon around the panel and tied a knot. I adhered the Very Vanilla panel to a Garden Green card base using Stampin’ Dimensionals.

On a scrap of Very Vanilla cardstock I stamped the sentiment from the Stampin’ Up! Toile Christmas Cling Stamp Set in Garden Green Ink. I cut the sentiment out using the Christmas Cardinal Dies. I adhered the cut sentiment to the card front using Stampin’ Dimensionals. I added a few Real Red Toile Tidings Glitter Enamel Dots to the card front.

On the inside I stamped the sentiment from the Toile Christmas stamp set in Garden Green Ink in the center of a Very Vanilla panel. I stamped the branch image from the Toile Christmas stamp set on either side of the panel in Garden Green Ink. I colored the berries on the branches in using my Real Red Stampin’ Blends Markers. I adhered the Very Vanilla panel to a Real Red mat using Snail and then to the inside of the Garden Green card base using Multipurpose Liquid Glue.


To finish my card I decorated a Medium Very Vanilla Envelope. I stamped the branch image from the Toile Christmas stamp set in Garden Green Ink on the envelope front. I colored the berries on the branch in using my Real Red Stampin’ Blends Marker. I adhered a panel of the Toile Tidings DSP to the envelope flap.
Thank you for visiting my blog today. I hope you liked my card and will give it a try. Happy Stamping!!
****************************************************************************************************
If you need any stamping supplies, I’d be very happy to be your Demonstrator. Just click HERE to go directly to my online store or drop me an email if you have any questions.
MY CURRENT HOST CODE IS: NVSKQ72X
For any orders $50 or more I will send you my monthly class tutorials. Click HERE or go to my Customer Rewards to see what this months tutorials are.
Click HERE to shop the clearance rack.
Happy Stamping, Karen!
****************************************************************************************************
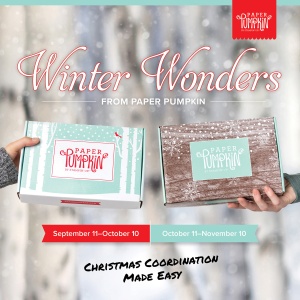
SOMETHING FOR EVERYTHING PAPER PUMPKIN
SUBSCRIBE TO PAPER PUMPKIN BY DECEMBER 10, 2019

December’s Something for Everything kit includes a super-versatile stamp set complete with 13 sentiments that can be used for occasions ranging from wedding, to get well, birthdays, and more! Plus, the three full-sized card designs (four of each) are gorgeous AND multiuse. Paper Pumpkin’s December kit makes it easier than ever to give a handmade card to a friend—no matter what the occasion!
This is an all-card kit, with 13 sentiments to cover tons of occasions from weddings, get well, birthday, and more, this set does it all.
Kit details: Makes 12 cards and envelopes
Card size: 4 1/4″ x 5-1/2″ (10.8 x 14 cm)
Envelope size: 4-1/2″ x 5-3/4″ (11.4 x 14.6 cm)
Coordinating colors: Crushed Curry, Grapefruit Grove, Old Olive, Shaded Spruce, Terracotta Tile
- Subscribe for the December kit at paperpumpkin.com from November 11–December 10.
- Supplies may be limited toward the end of each subscription period.

Interested in subscribing to Paper Pumpkin? You can either sign up for a subscription where you are billed monthly for your kit or you can purchase a prepaid subscription in my online store. To see more information and to sign up for the monthly subscription, Click Here. To see the options for prepaid subscriptions in my online store, Click Here.
****************************************************************************************************
Card stock cuts for this project:
- Garden Green Cardstock 4 1/4″ X 11″ (card base scored and folded at 5 1/2″)
- Real Red Cardstock 4″ X 5 1/4″ (inner liner mat), 3 1/2″ X 3 1/2″ (scallop frame)
- Very Vanilla Cardstock 4″ X 5 1/4″ (card front), 3 3/4″ X 5″ (inner liner)
- Toile Tidings Designer Series Paper
****************************************************************************************************
Product List
")
")


 Double-Stitched Ribbon")


")
")
")


 Specialty Designer Series Paper")


")


")


 Designer Series Paper")


")
")


 Cardstock")


 Shimmer Ribbon")


 Reversible Ribbon")