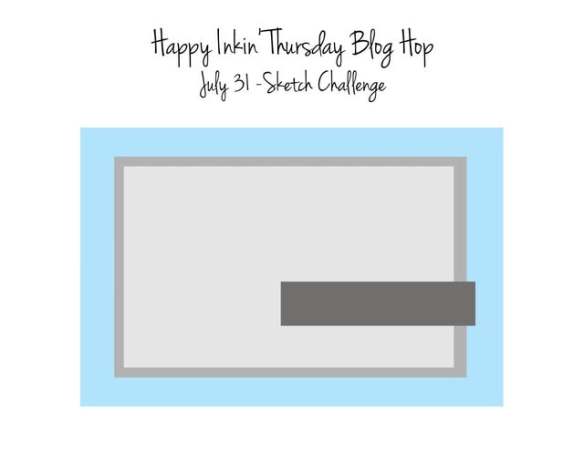
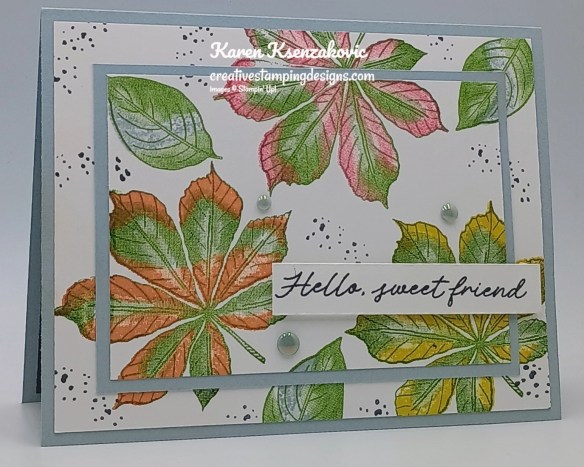
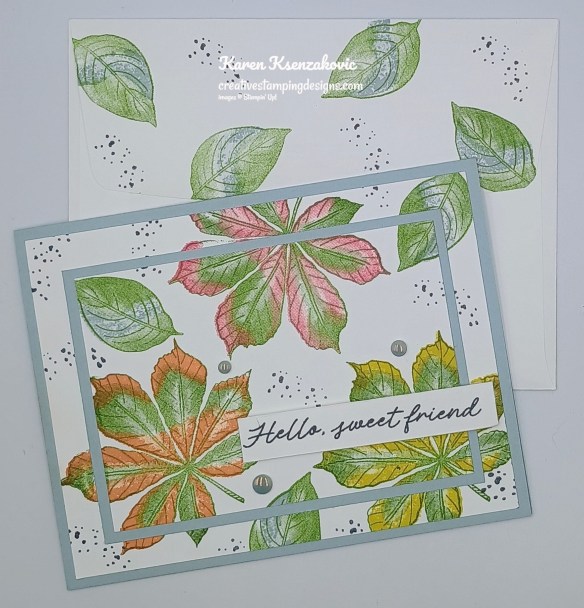
Good Thursday morning stamping friends and welcome to our Happy Inkin’ Thursday Blog Hop. If you are starting with me, thank you. I hope you will stop by everyone’s blog to see what they have created this week. If you are hopping over from Mary’s blog, thank you for stopping by. We have a new team member joining the hop today. Be sure to stop by Nicole’s blog and say hi. This week we have Sketch Challenge. If you’d like to see a quick video of how I made this card, Click Here to go to my Instagram Reels. Here is my card using this week’s sketch.
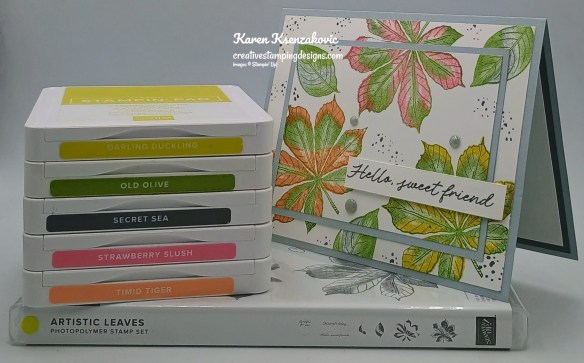
I used the Stampin’ Up! Artistic Leaves Photopolymer Stamp Set and the 2025-2027 In-Colors, to do some double time stamping for my card today.
This is our sketch for this week.
Lightly adhere the panels of Basic White together so that you can easily take them apart. Randomly stamp the large and small solid leaf images from the Artistic Leaves stamp set in Old Olive Ink around the adhered panels.
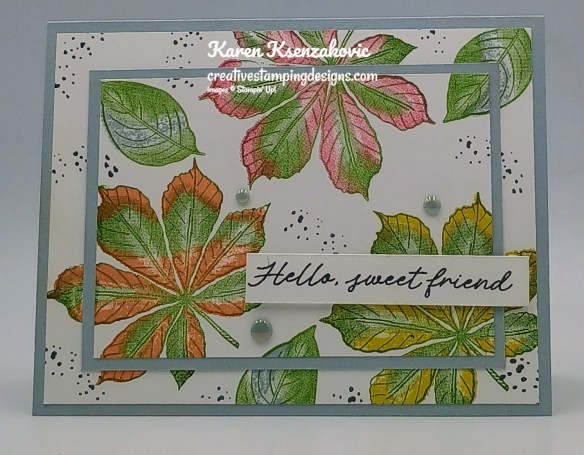
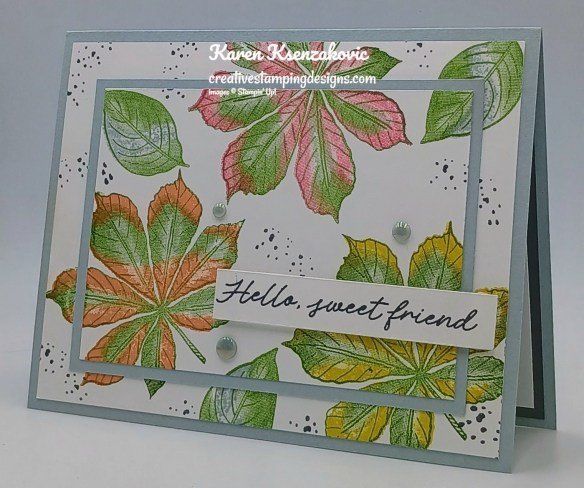
Stamp the large, detailed leaf image from the Artistic Leaves stamp set in Darling Duckling, Strawberry Slush and Timid tiger Inks over the solid images. Stamp the small, detailed leaf image from the Artistic Leaves stamp set in Cloud Cover Ink over the small, solid leaf images. Stamp the splatter image from the Artistic Leaves stamp set in secret Sea Ink randomly around the layered panels. Adhere the smaller Basic White panel to a Cloud Cover mat with Stampin’ Seal. Adhere the layered panel to the larger Basic White panel, matching up the leaf outlines.
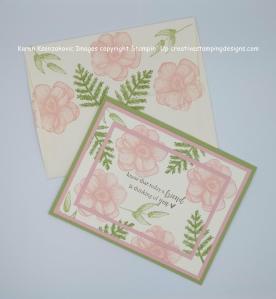
Adhere the layered panel to a Cloud Cover card base. Stamp the sentiment from Artistic Leaves stamp set in Secret Sea Ink on a panel of Basic White. Adhere the sentiment to the card front with Stampin’ Dimensionals. Add a few 2025-2027 In-Color Flat Pearls to the card front.
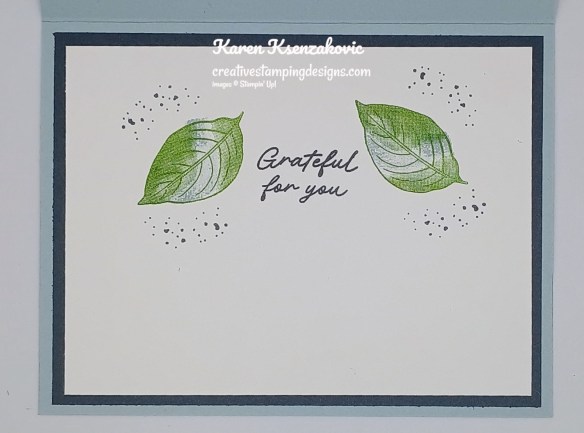
Stamp the sentiment from the Artistic Leaves stamp set in Secret Sea Ink on a panel of Basic White. Stamp the small leaf image from the Artistic Leaves stamp set, on either side of the sentiment in Old Olive Ink. Stamp the small, detailed leaf image in Cloud Cover Ink over the solid leaf images. Stamp the splatter image in Secret Sea Ink around the leaves. Adhere the Basic White panel to a Secret Sea mat then to the inside of the Cloud Cover card base.
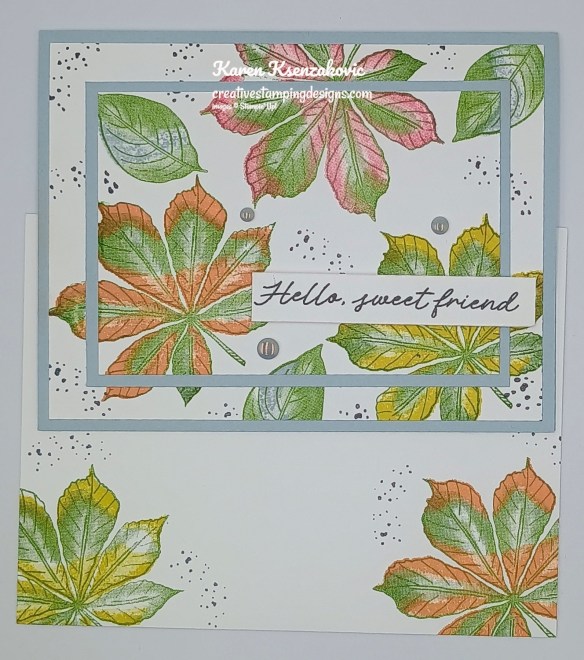
Complete the card by decorating a Basic White Medium Envelope. stamp the large leaf image from the Artistic Leaves stamp set in Old Olive Ink on the envelope front. Stamp the large, detailed leaf image from the Artistic Leaves stamp set in Darling Duckling and Timid tiger over the solid leaf image. Stamp the small leaf image from the Artistic Leaves stamp set in Old Olive Ink on the envelope flap. Stamp the small, detailed leaf image in cloud Cover over the solid image. Stamp the splatter image in Secret Sea Ink around the leaves on the envelope front and flap.
Thank you for stopping by my blog today. Now that you’ve seen my card, let’s get on with the hop! Click the button below to hop over to see what Tara has created. Happy Hopping!
Just in case you get lost along the way, here is a list of the team members involved in the hop today.
If you need any stamping supplies, I’d love to be your Demonstrator. Just click HERE to go directly to my online store or drop me an email if you have any questions.
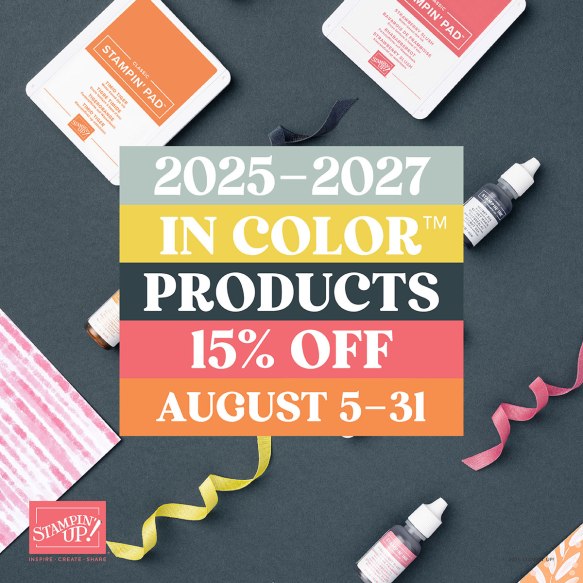
2025-2027 In-Color Products Sale starting August 5
Starting August 5, select products that feature the new 2025–2027 In Colors™ are 15% off! This is a great opportunity to purchase new In Color products at a discount, so grab products you love—like ink, two-tone cardstock, and Designer Series Paper—and get everything you need to create projects that showcase Stampin’ Up!’s amazing color coordination!
Promotion Details:
Sales Period: August 5–31
Ordering Deadline: August 31, 2025, at 11:59 p.m. (MT)
Sale includes select inks, cardstock, Designer Series Paper, embellishments, and other products that include these new In Colors. Only products featured on the 2025–2027 In Colors page are included in this promotion.
Products are available only while supplies last.
You can find the 2025-2027 In Color sale items that will be on sale beginning August 5 right here! Get your list ready and shop early for the best selection!
Good Tuesday morning stamping friends. I hope your week has started off well. We’re back up to the 80’s again today here with the sun shining and the pollen count very high. I feel like all I’m doing lately is sneezing.
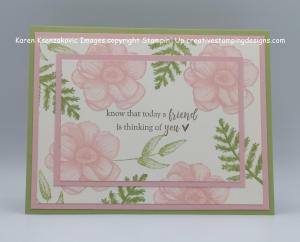
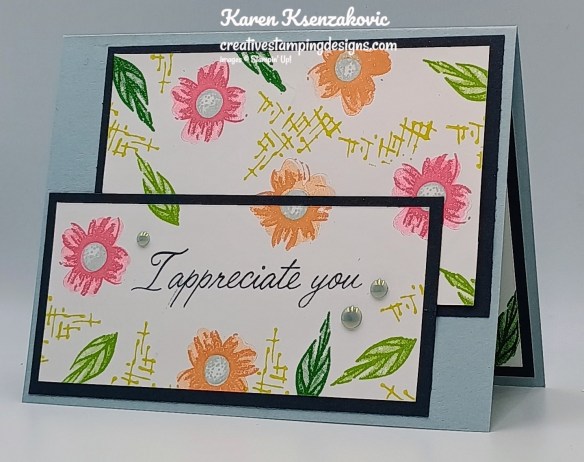
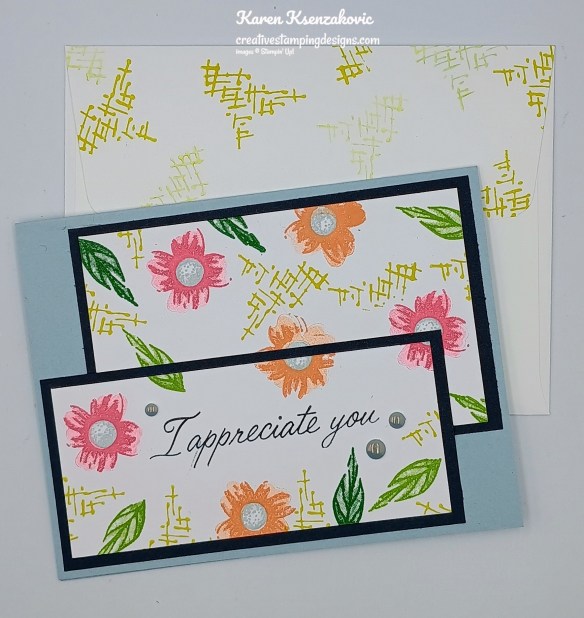
Today’s card shows off all the new 2025-2027 In-Colors with a little bit of green. This is also a new Online Exclusive set that will be available starting May 6th. Here’s my card for today.
I used the Stampin’ Up! Online Exclusives Impressions Abloom Photopolymer Stamp Set along with the Stampin’ Up! Happy Hibiscus Photopolymer Stamp Set for my card today.
Stamp the sentiment from the Impressions Abloom stamp set in Secret Sky Ink on the panel of Basic White. Lightly adhere the 2″ x 4 1/2″ panel of Basic White on the 2 3/4″ x 4 1/2″ panel of Basic White. Randomly stamp the detailed flower image from Impressions Abloom stamp set in Strawberry Slush and Timid Tiger Inks. Stamp the solid flower image from the Impressions Abloom stamp set in Strawberry Slush and Timid tiger Inks, stamping off once on scrap paper, over the detailed images. Stamp the detailed flower center image from the Impressions Abloom stamp set in Secret Sea Ink, stamping off on scrap paper once, in the center of the flowers. Stamp the solid flower center image in Secret Sea Ink, stamping off 2 times on scrap paper, over the detailed image in the flower centers.
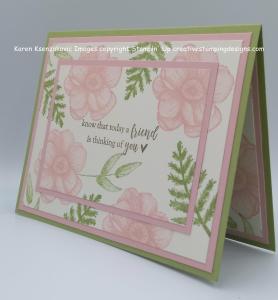
Stamp the detailed leaf image from the Impressions Abloom stamp set in Garden Green and Granny Apple Green Inks randomly round. Stamp the solid leaf image in garden Green and Granny Apple Green Inks, stamping off once on scrap paper, over the detailed leaf images. Stamp the hash image from the Happy Hibiscus stamp set in Darling Duckling Ink randomly around the panels.
Adhere the Basic White panels to the coordinating Secret Sea mats using Stampin’ Seal. Adhere the larger layered image to the card basic using Liquid Glue. Adhere the smaller layered panel to the card base, matching the flowers and leaves, to the bottom of the panel using Liquid Glue. Add a few 2025-2027 In-Color Flat Pearls to the card front.
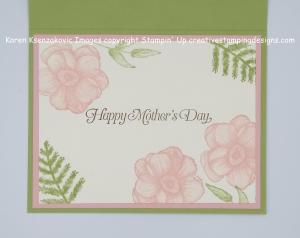
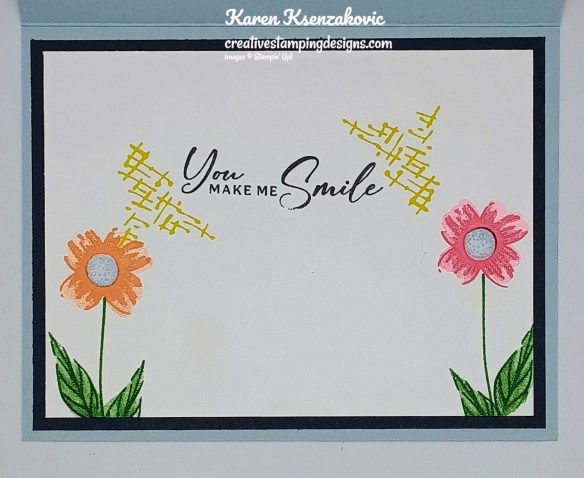
On a panel of Basic White, stamp the sentiment from Happy Hibiscus stamp set in Secret Sea Ink. Stamp the stem and detailed leaf images from Impressions Abloom stamp set in Garden Green Ink on the bottom of the panel. Stamp the solid leaf image in garden Green Ink, stamping off once on scrap paper. Stamp the detailed flower image from the Impressions Abloom stamp set in Timid Tiger and Strawberry Slush Inks on the stem. Stamp the solid flower image in timid tiger and Strawberry Slush Inks, stamping off once on scrap paper, over the detailed images. Stamp the hash image from the Happy Hibiscus stamp set in Darling Duckling on either side of the sentiment. Adhere the Basic White panel to a Secret Sea mat then to the inside of the Cloud Cover card base.
Decorate a Basic White Medium Envelope to finish the card. Stamp the flower, stamp and leaf images from the Impressions Abloom stamp set on the envelope front in Darling Duckling, Garden Green, Secret Sea, Strawberry Slush and Timid Tiger Inks the same as for the card. Stamp the hash image from the Happy Hibiscus stamp set in Darling Duckling Ink on the envelope flap.
Thank you for stopping by my blog today. I hope you like the card and have this set on your wish list for the new catalog coming May 6th. Happy Stamping!!
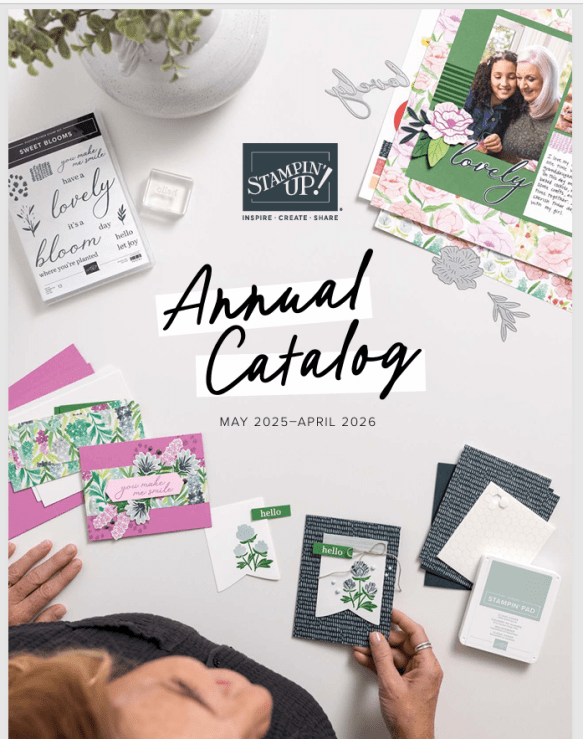
My 2025 – 2026 Annual Catalog and May Online Exclusive Designer Series Paper and Ribbon Shares are open for ordering. You can order just the DSP share, just the ribbon share or you can order both.
I’m offering a Designer Series Paper share from the 2025-2026 Annual Catalog, Two-Tone Cardstock Share along with the upcoming May Online Exclusives and I’d love to have you join!! I’m placing my share order early on May 6th and I’m going to use the expedited shipping option so I should be able to have the shares cut, bundled and back out to you during the week of May 12th. Wouldn’t you love to have all of the gorgeous new Designer Series Papers in the Stampin’ Up! 2025-2026 Annual Catalog and the upcoming May Online Exclusives? What is a Paper Share you ask? It’s a sample of each of the new Designer Series Papers from the Catalog and Online Exclusives. Shares give you a good working sample of all of the papers so that you can decide which ones to order in full packs! If you were to purchase all of the DSP in the new Catalog and Online Exclusives, it would cost you over $250.00 plus shipping and if you were to purchase all the ribbon it would cost you over $65.00.
New Designer Series Paper Share – $51.00 plus $9.00 for Priority Mail Shipping
How my shares work: I order full packs of all of the Designer Series Papers listed below, I cut them into 6″ X 6″ pieces (or 6″ X 12″ pieces for double shares) and give you one panel of each design from each pack on the list. I pack up the paper in a cellophane bag with labels listing the Name, Item # and Colors in the pack and mail it back out to you just as quickly as I can!
New Designer Series Paper Share – $51.00 plus $9.00 for Priority Mail shipping
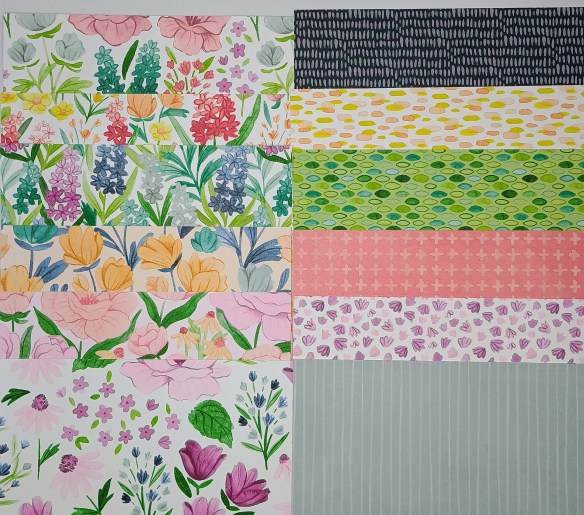
You will receive one 6×6 sheet of each design from the following DSP packs (the number after the name indicates how many 6×6 sheets of that paper pack you will receive):
2024-2026 In Color Designer Series Paper (10)
2025-2027 In Color Designer Series Paper (10)
Brights Designer Series Paper (20)
Neutrals Designer Series Paper (20)
Regals Designer Series Paper (20)
Subtles Designer Series Paper (20)
Beautiful Gallery (12)
Boho Vibes (8)
Celebratory Sips (6)
Florals in Bloom (6)
Floral Impressions (6)
Flower Garden Foils Specialty (6)
Irresistible Designs Specialty (3)
Kintsugi Inspirations Specialty (6)
Turtle-y Cute (6)
Weekend Adventures (3)
In all, you’ll receive 162 – 6” x 6” sheets of designer or specialty paper!
Two-Tone Cardstock Share – $6 plus $9.00 Priority Mail Shipping
Have you been wanting to try the Two-Tone Cardstock but didn’t want to buy a whole pack? You can add a share of the 4 different Two-Tone Cardstock packs for an additional $6 or purchase them separately for $6 + $9 Priority Shipping
You will receive one 6×6 sheet of each color from each of the packs (the number after the name indicates how many 6×6 sheets of that paper pack you will receive):
Celebrate Together (6)
Memories in Bloom (6)
Turtle-y Cute (6)
Weekend Adventures (6)
In all, you’ll receive 24 – 6” x 6” sheets of cardstock!
If you’d like double shares of the designer paper or cardstock, I’m offering those too! I’ll cut the 12″ x 12″ sheets into 6″ × 12″ so that you’ll be able to get 3 full A2 size card fronts from each sheet and you’ll get double sheets of the 6″ x 6″ since they’re already precut.
New Ribbon Share – $20.00 plus $9.00 Priority Mail Shipping
All ribbons will come individually wrapped and labeled with the name and number of the product.
One-Fourth of a Roll of each:
Cloud Cover 3/8″ Linen Ribbon
Darling Duckling 3/8″ Linen Ribbon
Secret Sea 3/8″ Linen Ribbon
Strawberry Slush 3/8″ Linen Ribbon
Timid Tiger 3/8″ Linen Ribbon
Basic Beige 3/8″ Classic Ribbon
Shaded Spruce & Soft Sea Foam 1/2″ Ribbon
Gold Striped 3/8″ Mesh Ribbon Online Exclusive
If you’d like double shares of the Ribbon, you will be getting 1/2 of the roll or each ribbon.
Anyone is welcome to join in my shares (please note, I can only ship to addresses within the US). To make ordering the shares a little easier, I have created a form for you to submit, that way you can order any combination of shares you want. Click Here for the form. I will send out PayPal Invoices on May 4th.
Deadline to sign up for my share is Saturday May 3rd at 5:00 PM ET.
Let me know if you have any questions, I’m more than happy to help you. Thank you for joining in my Shares this year!!
Tara Carpenter and I are super excited about offering you this Free Online Zoom Class
Do you struggle with different ways to use all your Designer Series Paper? Tara and I are teaming up for a Zoom class to show you 6 different cards using just Designer Series Paper and a Sentiment. Of course, we’ll add embellishments and maybe ribbon or twine, but this class will primarily be using DSP. We have picked a pack of DSP with all the new 2025-2027 In-Colors and that’s what we will be focusing on. You can see the DSP starting on page 40 of the 2025-2026 Annual Catalog. The class will be held on Sunday May 18th from 1pm-5pm ET. The best part is you can earn this class absolutely FREE. You will cut all the cardstock and DSP of your choice prior to the class so you are ready to go. We will NOT be cutting up cardstock or DSP the day of the event. You will choose the color cardstock and your favorite DSP to use from what you purchase. Please remember to order early so that you receive it on time to prep for the class.
The class requirements:
Visit my Online Store on or after May 6th and purchase 1 pack of Florals in Bloom 12″ x 12″ Designer Series Paper (165175), 1 pack of the 2025-2027 In-Color Cardstock Assortment Pack (165623) and 1 pack of the 2025-2027 In-Color Flat Pearls (165192)
Once you have made your purchase Click Here to sign up
Once you sign up you will receive:
Zoom class with complete step by step instructions to complete each card as we go.
PDF with detailed directions and photos
A Link to the recorded class after we are done so you can watch it again and make more cards.
When you Sign Up for the class, I will send you the complete PDF the week before the class so that you can cut up the color cardstock of your choice and the Designer Series Paper of your choice. Everyone’s card will be unique since you will pick your favorite designs of DSP and color cardstock.
The class will be held on Zoom and anyone in the United States is welcome to purchase the class and join us! If you are unable to join us for the live event, but would still like to participate in the class, we will be recording the session so you can watch the replay any time and make the cards. We will also be emailing written tutorials with instructions and cardstock cuts so that you will have a reference too.
Class Cost: This class is FREE to customers who make the purchase through my Online Store.
If you are a Demonstrator and would like to attend the class and get the PDF, there will be a $20 charge that will be billed through PayPal. I know you would like to purchase the products yourself getting your discount but still would like to attend.
Class Sign up Deadline: Sunday May 11th at 5pm ET
Click Here to register for the class now!! Let me know if you have any question
Did you miss out on retired Bundles, Stamp Sets, Dies or Embossing Folders? I’ve updated my list with products from the Online Exclusives and September – December 2024 Mini Catalog along with a few others. Click Here to go to my retirement list. If you see something you would like, send me an email at creativestampingdesigns@gmail.com and I will pull the item(s) pack it up and send you a price. Feel free to contact me if you have any questions.
Don’t miss the coordinating Hugs Abloom Dies Add-On!
Make the most of your Paper Pumpkin kits with the Hugs Abloom Dies add-on! Quickly and cleanly cut out a flower, leaf sprig, sentiment label, or Hugs sentiment to elevate your crafting projects. These additional dies are designed to work with THREE Paper Pumpkin Kits: the Inked Occasions Paper Pumpkin Kit, the Mountain Majesties Paper Pumpkin Kit, and the Full of Charm Paper Pumpkin Kit. Pair these dies with other Stampin’ Up! products for even more creative options!
DETAILS – 4 dies – Largest die: 2-1/2″ x 1-1/4″ (6.4 x 3.2 cm) – Use with a Stampin’ Cut & Emboss Machine (sold separately)
You must be a current Paper Pumpkin subscriber to purchase this item. To become a subscriber, visit www.stampinup.com/paperpumpkin.
Note: Supplies may be limited toward the end of the subscription period.
Good Wednesday morning stamping friends. We’re halfway through the week already and on our way to the weekend.
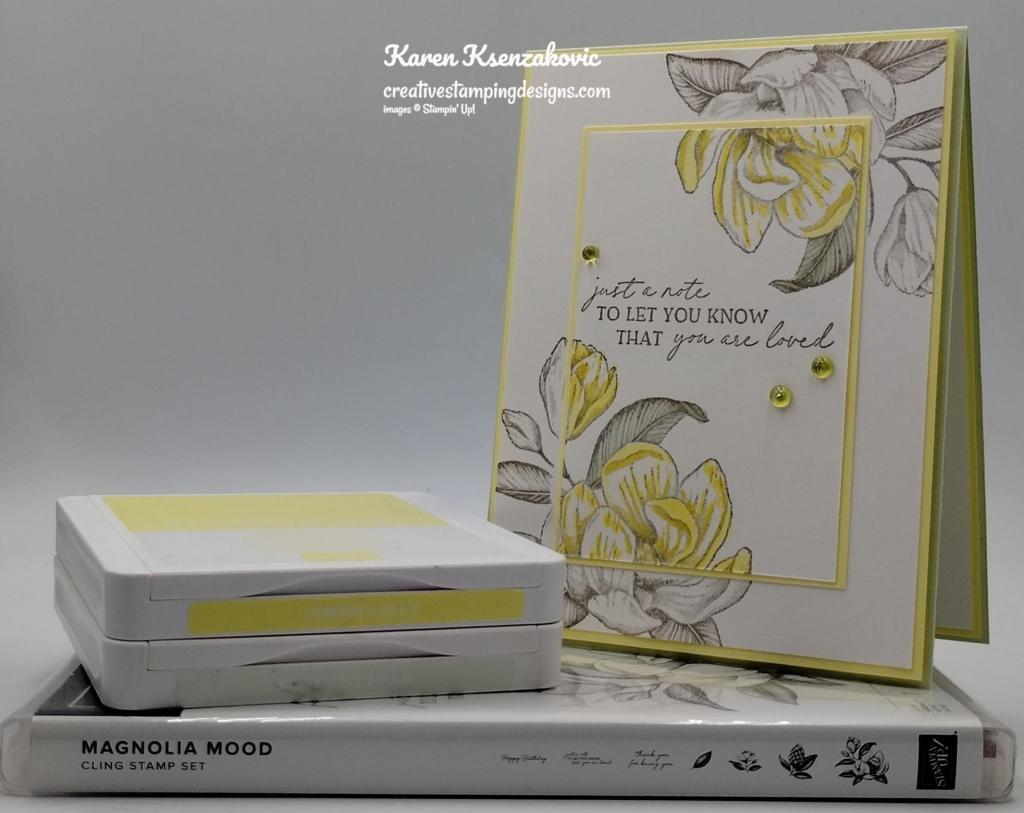
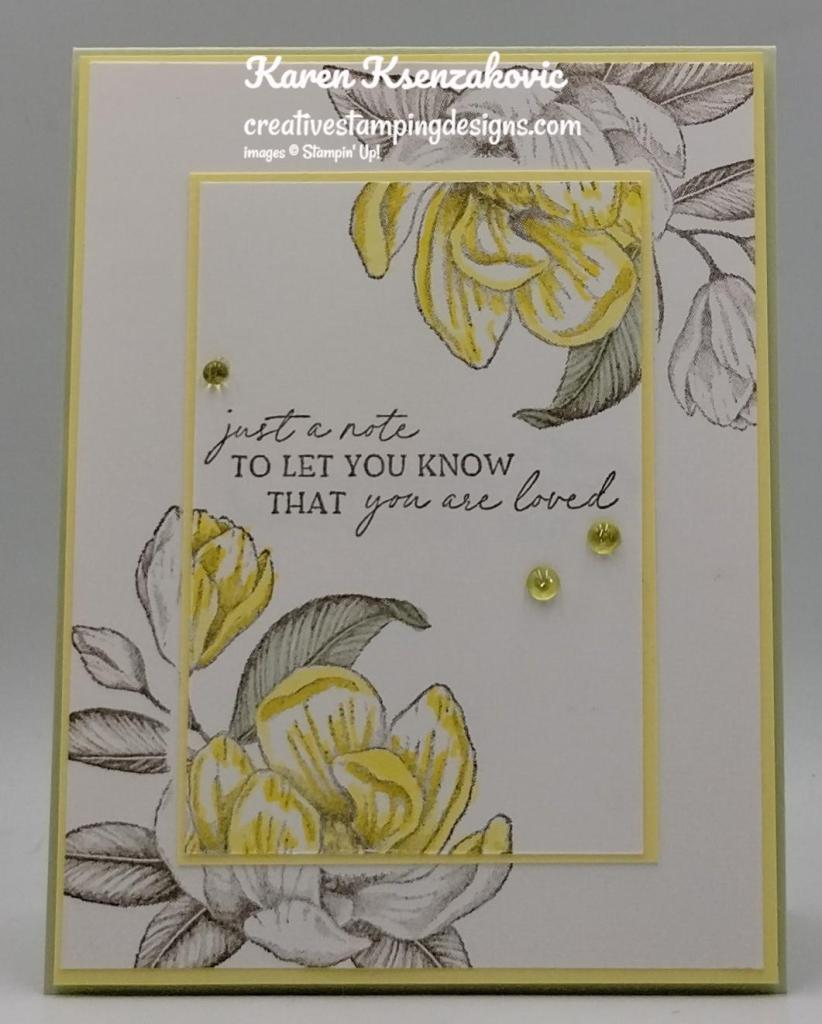
I did the Double Time Stamping technique and Spotlight technique for today’s card. I tried to make today’s card using just Stamps, Ink and Paper, but I couldn’t control myself with adding embellishments. If you’d like to see a quick video of how I made this card, Click Here to go to my Instagram Reels. Here is my card for today.
I used the Stampin’ Up! Online Exclusive Magnolia Mood Cling Stamp Set for my card today.
Put a small amount of Stampin’ Seal on the back of the small Basic White panel and press it against your jeans a couple times to reduce the stickiness. Adhere it to the center of the Basic White panel. Stamp the sentient from the Magnolia Mood stamp set in Gray Granite Ink in the center of the panel. Stamp the large flower image from the Magnolia Mood stamp set in Gray Granite Ink on the top and bottom of the panel, making sure to be stamping on both panels.
Remove the smaller panel and color the flower images using Lemon Lolly and Soft Sea Foam Stampin’ Blends Markers. Adhere the colored panel to a Lemon Lolly mat using Stampin’ Seal. Adhere the layered panel to the larger Basic White panel, lining up the flower images on both panels. Adhere the layered panel to a Lemon Lolly mat using Liquid Glue.
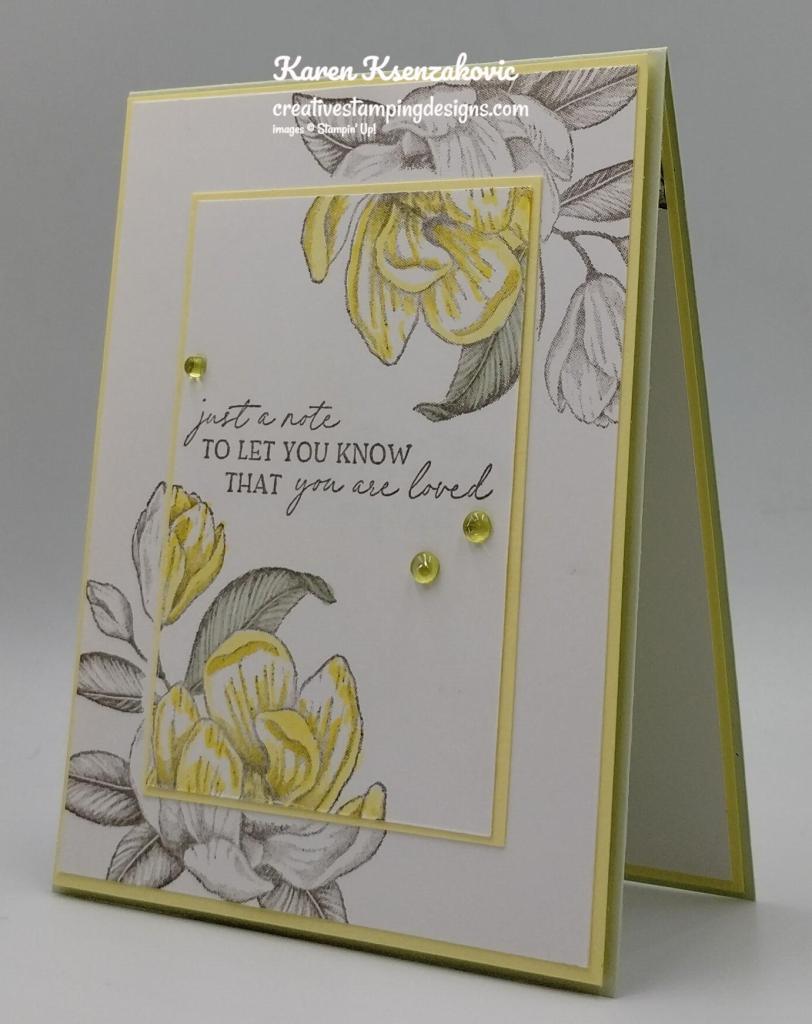
Adhere the layered panel to a Soft Sea Foam card base using Stampin’ Dimensionals. Add a few Lemon Lolly Tinsel Gems.
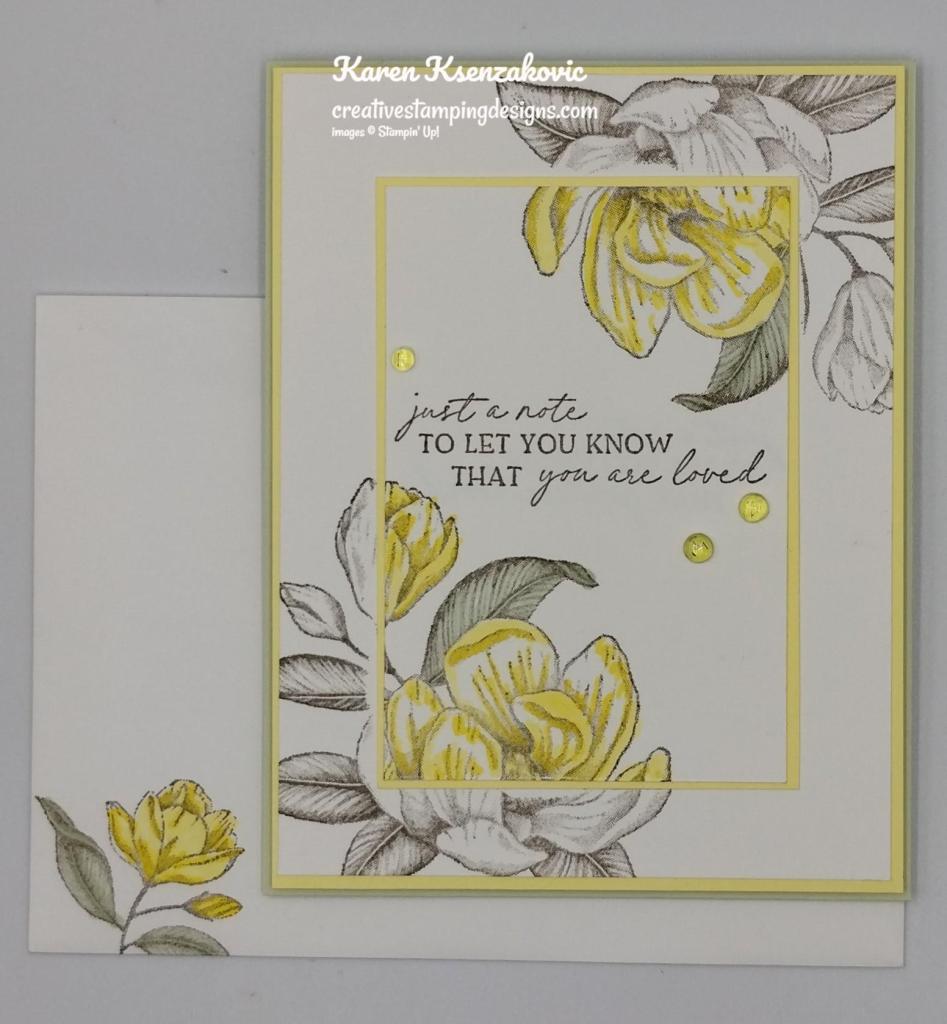
On the inside, stamp the sentiment from the Magnolia Mood stamp set in Gray Granite Ink on a panel of Basic White. Stamp the small flower image and the leaf image from the Magnolia Mood stamp set on the top and bottom of the panel in Gray Granite Ink. Color the images using Lemon Lolly and Soft Sea Foam Stampin’ Blends Markers. Adhere the Basic White panel to a Lemon Lolly mat then to the inside of the Soft Sea Foam Card base.
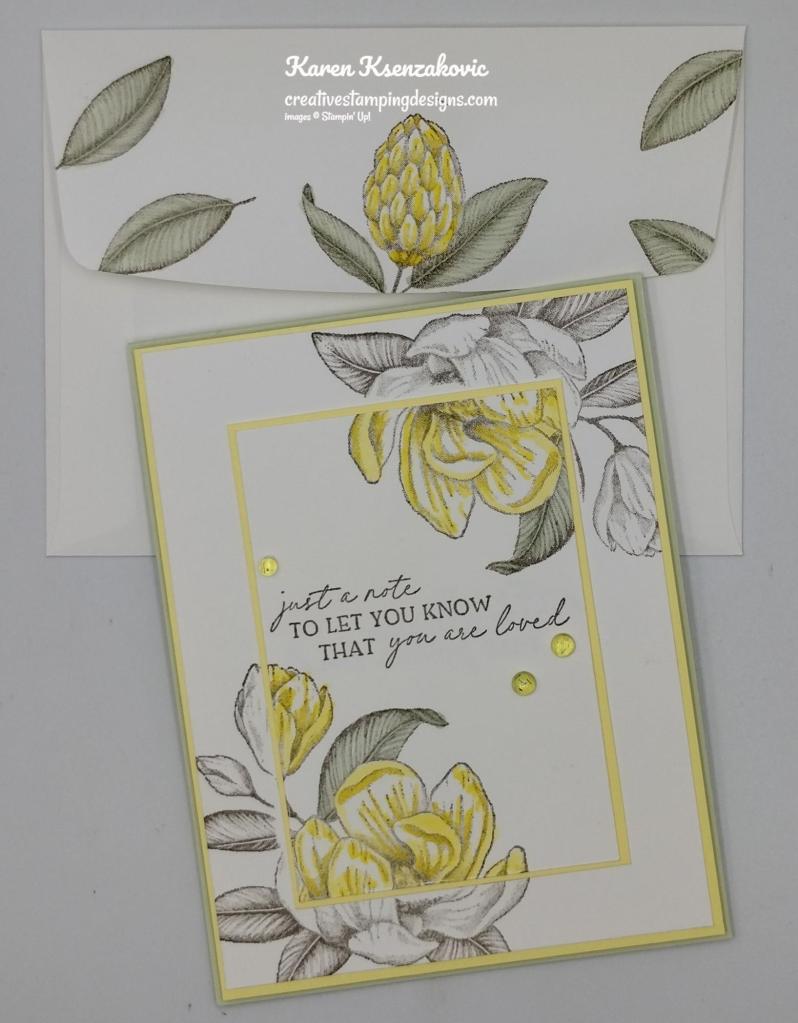
To finish the card, decorate a Basic White Medium Envelope. Stamp the small flower image from the Magnolia Mood stamp set on the envelope front in Gray Granite Ink. Stamp the flower bud image and leaf image from the Magnolia Mood stamp set in Gray Granite Ink on the envelope flap. Color the images using Lemon Lolly and Soft Sea Foam Stampin’ Blends Markers.
Thank you for stopping by my blog today. I hope you like the card and will give it a try. Happy Stamping!!
If you need any stamping supplies, I’d love to be your Demonstrator. Just click HERE to go directly to my online store or drop me an email if you have any questions.
MY CURRENT HOST CODE IS: KFUKW3ZY
Use this host code when placing an order with me. When you order $50 or greater you will receive a free gift from me! If your order is over $150, please do not use this code, but you’ll still get the free gift. The free gift is your choice of any 1 item valued up to $10.00 from the 2024-2025Annual Catalog, or from the Online Exclusives! Unfortunately, packs of cardstock are no longer an option for a free gift. Shipping has become too expensive to ship and it’s costing me as much to ship as the cardstock costs. For any orders $50 or more I will also send you my monthly class tutorials. Click HERE or go to my Customer Rewards for more details and to see what this month’s tutorials are.
Please remember to use my current Host Code and make sure that you can see my name on the final checkout page listed as your Demonstrator when you order so that you know that you’re ordering with me, and you’ll get my rewards!
Redemption Period: August 1-31, 2024 Ordering Deadline: August 31, 2024 at 11:59 p.m. (MT)
There is no limit to the number of coupon codes you can redeem on an order during the redemption period. If using multiple codes, they must be separated by a space.
Coupon codes may be redeemed one time only. They cannot be redeemed after the August 31.
Coupon codes may be redeemed for any product (excluding Starter Kits). They cannot be used on exchanges.
Bonus Days coupon codes can be applied to month-to-month Paper Pumpkin subscriptions and new prepaid subscriptions.
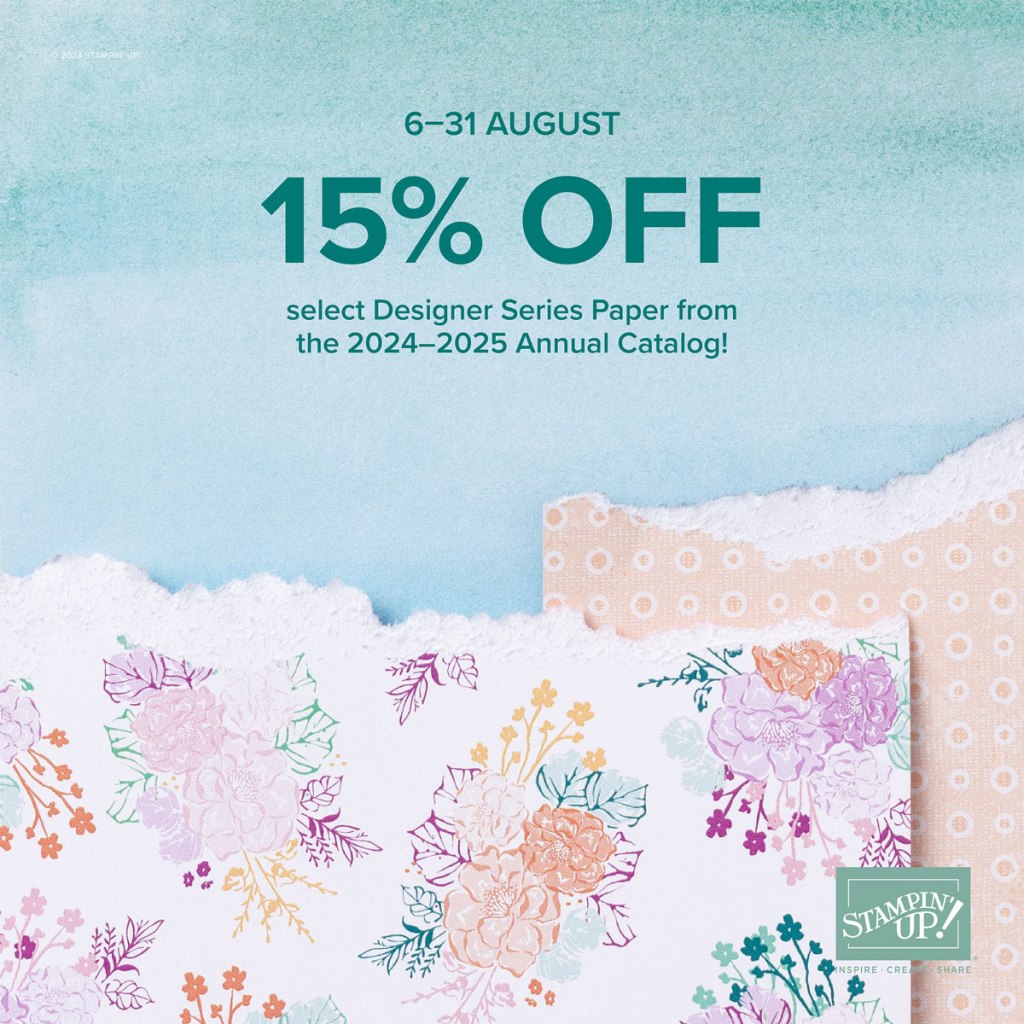
Designer Series Papew Sale – 15% off August 6th-31st
Between August 6-31, you can shop select Designer Series Paper from the 2024–2025 Annual Catalog at 15% off! This is the perfect time to stock up and save on some of your favorite paper.
Designer Series Paper Sale Details:
Sales Period: August 6-31, 2024
Ordering Deadlines: August 31 at 11:59 p.m. (MT)
The fourteen paper packs included in the sale can be found listed in This Flyer
Only the select packs of papers listed on the flyer are included in the sale.
You CAN redeem your Bonus Days coupons when you order the sale papers!
You must open and close the order during the allotted dates to receive the discount.
There are NO limits on ordering. However, product is only available while supplies last.
Designer Series Paper purchased with Stampin’ Rewards or as part of a Starter Kit WILL qualify for the discount.
Head over to my Online Store beginning August 6 and get 15% off your favorite packs of paper!!
Kits Collection by Stampin’ Up! is all about making crafting fun, accessible, and inclusive! We’re always working hard to design a collection full of different product options to allow you oodles of options when it comes to finding that perfect project or gift.
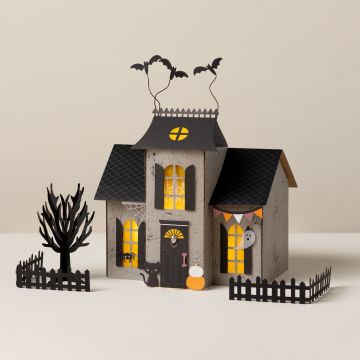
Haunted Home Kit
Get your Halloween crafting on with the Haunted Home Kit! This kit comes with all the paper pieces you need to assemble your very own haunted paper house. You’ll start with cardboard walls, precut vellum, and other paper pieces for accessorizing. Assemble the house following the instructions then add your own ghostly touch to it. It’s the perfect paper crafting activity for any gathering with fellow crafters, friends, and family during the spooky season!
Please note that you will need a glue gun to assemble the home.
Kit includes: *Cardboard Home Pieces * Predesigned projects * Step-by-step instructions * Precut vellum and die cut paper pieces * Enough adhesive to complete projects *A 10-1/2″ x 8-1/2″ x 1-1/4″ printed designer box for storage or crafting on the go.
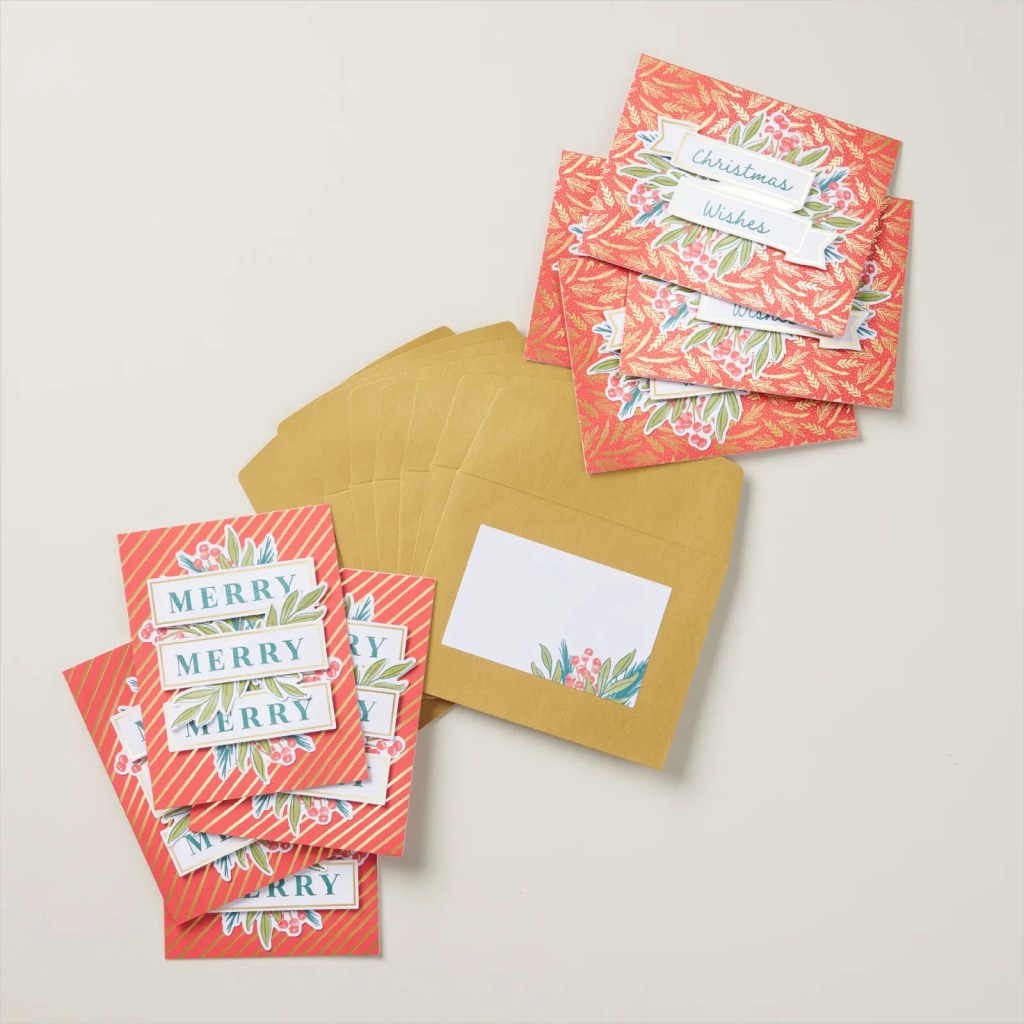
Keep your Christmas card crafting easy AND elegant with the Christmas Wishes Kit! This kit comes with bright red card bases detailed with gold foil and coordinating gold, shimmer envelopes. Create your own Christmas cards using the precut paper pieces, the stamp set, and Stampin’ Spot. Use the included address labels to send your cards to your recipients!
Kit includes: *Christmas Wishes Photopolymer Stamp Set *Clear Stamp Block *Pretty Peacock Stampin’ Spot *Predesigned projects *Step-by-step instructions *Precut pieces (No prep work! Get right to crafting) *Makes 8 cards: 4 each of 2 designs *Folded card size: 5-1/2″ x 4-1/4″ (14 x 10.8 cm) *8 envelopes and 8 address labels *Enough adhesive to complete projects *A 9-7/8″ x 6-1/2″ x 2-3/4″ (25.1 x 16.5 x 7 cm) printed designer box for storage or crafting on the go
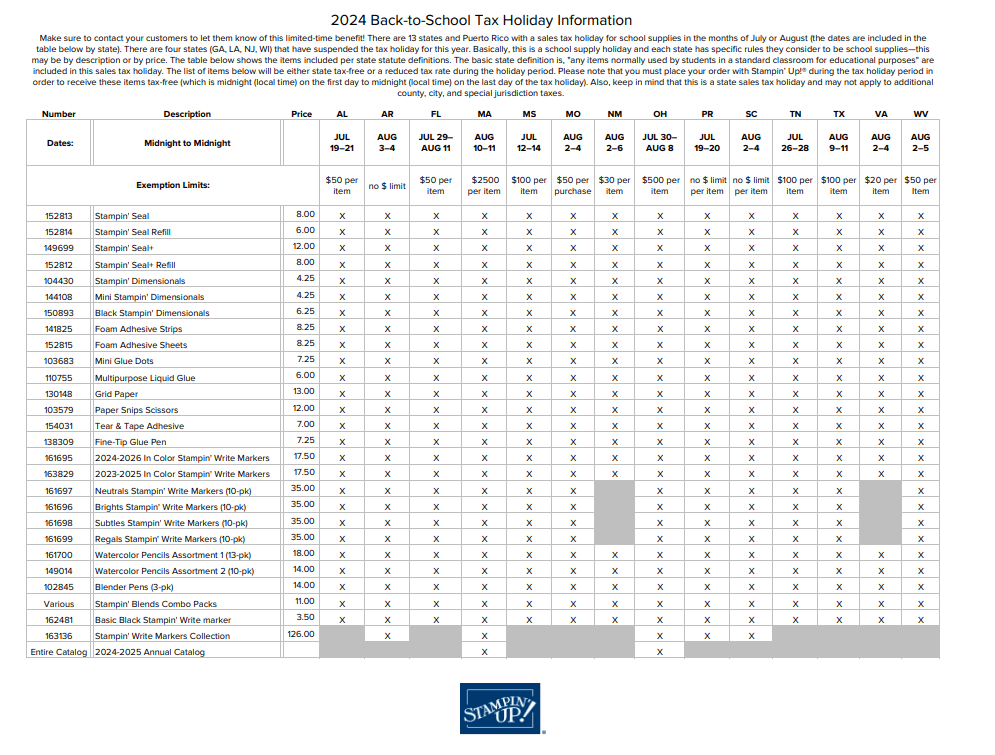
Thirteen states and Puerto Rico are having Back-to-School Sales Tax Holidays this year and some Stampin’ Up! items qualify for the tax break in those states!
The states with upcoming tax holidays are: Alabama, Arkansas, Florida, Massachusetts, Mississippi, Missouri, New Mexico, Ohio, South Carolina, Tennessee, Texas, Virginia and West Virginia. So if you live in one of those states or Puerto Rico, take a second to download the spreadsheet below and mark your calendar!
Here is the list of states having sales tax holidays, what the dates are and what supplies will be tax free during the holiday (click on the image to download a full-size printable page):
Subscribe to Paper Pumpkin for a monthly, all-inclusive crafting kit that’s a fun surprise! Each kit includes a photopolymer stamp set, Classic Stampin’ Spot, and step by step instructions to complete exclusive paper craft projects, including cards, tags, and gift packaging. And don’t miss the special add-on that coordinates with the next three months!
With the August Paper Pumpkin, Time for Cake, bring on a birthday bash with elegant birthday cards made with rose gold details!
• Makes 9 cards, 3 each of 3 designs • Project includes printed card bases, coordinating envelopes, and labels • Embellishments and rose gold cord • Coordinating colors: Moody Mauve, Night of Navy (Classic Stampin’ Spot), Petal Pink, Pecan Pie, Pretty in Pink, Wild Wheat
Don’t miss the coordinating Every Celebration Dies Add-On!
This exclusive add-on (item 164991) coordinates with the three upcoming kits! Paper Pumpkin subscribers can purchase it beginning 11 July. The add-on is available only while supplies last, so it’s best to shop early!
Subscribe to the August Paper Pumpkin Kit between 11 Julu and 10 August by clicking here!
Note: Supplies may be limited toward the end of the subscription period.
Good Saturday morning my stamping friends and welcome to the weekend. I hope you have some plans in the works. I’ll be working today and hoping it will be busy to make the day go by quickly.
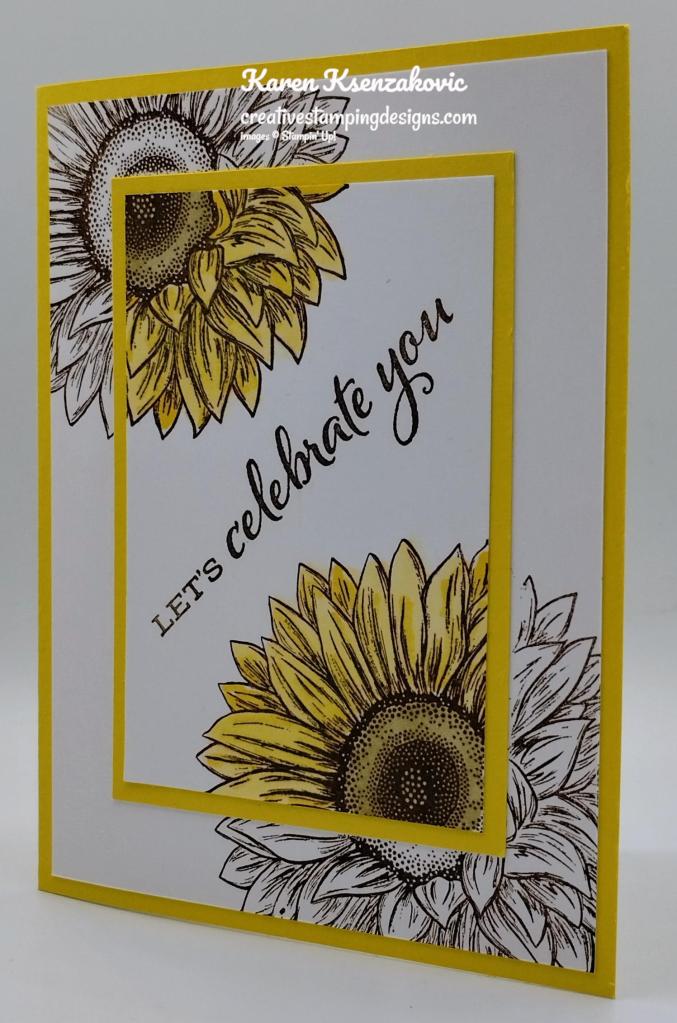
Today’s card is one we made at our team meeting this past Monday. I was excited to lead mystery stamping and I showed everyone 2 techniques in one card using just Stamps, Ink and Paper. Here’s my card for today.
I used the Stampin’ Up! Celebrate Sunflowers Cling Stamp Set and the Stampin’ Up! Go To Greetings Cling Stamp Set for my card today.
I started by lightly adhering the small panel of Basic White cardstock to the larger panel of Basic White cardstock. I stamped the large sunflower image from the Celebrate Sunflowers stamp set on the 2 corners of the panels in Soft Suede Ink.
I took the panels apart and using my Daffodil Delight and Soft Suede Stampin’ Blends Markers, I colored just the images on the small panel. I stamped the sentiment from the Celebrate Sunflowers stamp set on the small panel in Soft Suede Ink.
I adhered the small panel to the Daffodil Delight mat using Stampin’ Seal. I adhered the layered panel to the larger stamped panel using Multipurpose Liquid Glue lining up the flowers. I adhered the layered panel to the Daffodil Delight card base using Multipurpose Liquid Glue.
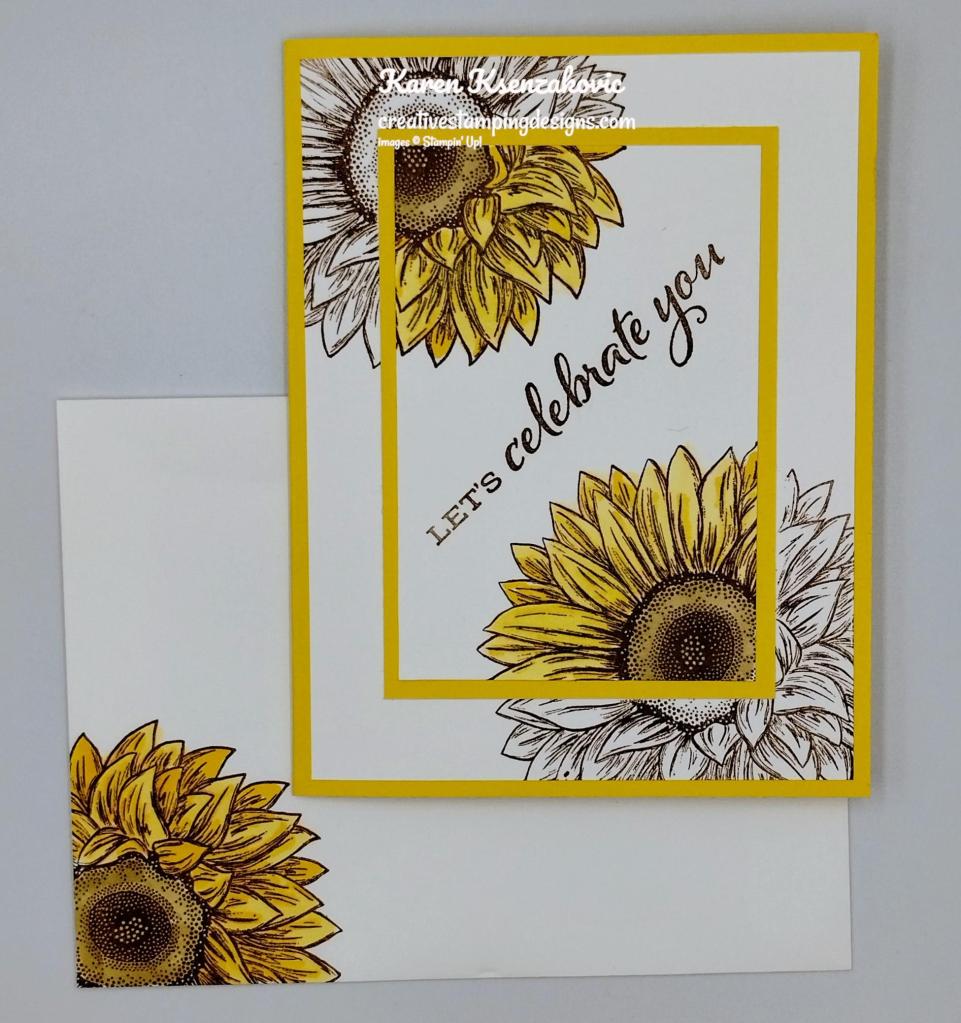
On the inside, I stamped the sentiment from the Celebrate Sunflowers stamp set in Soft Suede Ink on a Basic White panel. I stamped the sentiment from the Go To Greetings stamp set in Soft Suede Ink below the 1st sentiment. I stamped the large sunflower image from the Celebrate Sunflowers stamp set in Soft Suede Ink on the bottom of the panel. I colored the image using my Daffodil Delight and Soft Suede Stampin’ Blends Markers. I adhered the Basic White panel to a Soft Suede mat then to the inside of the Daffodil Delight card base.
To finish my card, I decorated a Basic White Medium Envelope. I stamped the sunflower image from the Celebrate Sunflowers stamp set on the envelope front and flap in Soft Suede Ink. I colored the images using my Daffodil Delight and Soft Suede Stampin’ Blends Markers.
Thank you for stopping by my blog today. I hope you liked the card and will give it a try. Happy Stamping!!
If you need any stamping supplies, I’d love to be your Demonstrator. Just click HERE to go directly to my online store or drop me an email if you have any questions.
MY CURRENT HOST CODE IS: 7KF3QB4G
Use this host code when placing an order with me. When you order $50 or greater you will receive a free gift from me! If your order is over $150, please do not use this code, but you’ll still get the free gift. The free gift is your choice of any 1 item valued up to $10.00 from the 2022-2023 Annual Catalog or the January-April 2023 Mini Catalog! Unfortunately, packs of cardstock are no longer an option for a free gift. Shipping has become too expensive to ship and it’s costing me as much to ship as the cardstock costs. For any orders $50 or more I will also send you my monthly class tutorials. Click HERE or go to my Customer Rewards for more details and to see what this month’s tutorials are.
Please remember to use my current Host Code and make sure that you can see my name on the final checkout page listed as your Demonstrator when you order so that you know that you’re ordering with me, and you’ll get my rewards!
In response to changing policies at Stampin’ Up – I’m adjusting my Ordering Gift policy as well. I’m having to get a little more tough on the adding of Host codes when you place your order thru my Online Store.
Not to worry – you’re still going to get that $10 ordering gift for orders of $50 (before shipping & tax) or greater. And the gift is still any 1 SU! product up to that $10 value – which includes some of our fun Host Sets!
But – if you DO NOT use the Host code for your orders of less than $150 (this is the RETAIL total before Shipping & Handling), then you’ll have two options:
You’ll need to call Stampin’ Up! (1-800-Stamp-Up) and ask them to add it for you. They’re very helpful and will get it done quickly! OR….
If your order was over the $50 threshold but under $150, then…you’ll forfeit that $10 ordering gift and rewards – this is the Bummer Option – and I REALLY don’t want to do this, SO please remember to add my Current Host Code.
Good things take time, but you can start creating them now with the All the Little Things Paper Pumpkin kit! This kit includes nine cards, three each of three designs, with elegant designs and bright colors. The iridescent foil is the shining detail to bring your crafts together. You can make a card for anyone and for any occasion!
And don’t wait, because anyone who subscribes to this month’s kit will get a FREE box organizer! This organizer fits perfectly inside your Paper Pumpkin box and is great for keeping your supplies from past kits organized, so you know right where everything is!
This kit includes:
9 cards, 3 each of 3 designs, and 9 coordinating envelopes.
1 photopolymer stamp set with celebratory sentiments.
1 Shaded Spruce Stampin’ Spot.
Precut cherry blossom paper pieces with iridescent foil.
Good Monday morning my stamping friends. How was everyone’s weekend? Who has today off for Presidents Day? I don’t. That’s a disadvantage of working retail. Even though I work in the office, we’re still open.
Today’s card is pretty much the basics of Stamps, Ink and Paper. I did add a little embellishment, since I thought it just needed a little something extra. I also did one of my favorite techniques, double time stamping. I just love double and triple time stamping. I also did the Spot Light Technique. Here’s my card for today.
I used the Stampin’ Up! Fragrant Flowers Photopolymer Stamp Set and the Stampin’ Up! Go To Greetings Cling Stamp Set for my card today.
I started by lightly adhering a small panel of Basic White cardstock to a larger panel of Basic White cardstock. I stamped the large flower image from the Fragrant Flowers stamp set in Smoky Slate Ink on the corners of the panels. I removed the small panel and stamped the sentiment from the Go To Greetings between the flowers in Smoky Slate Ink.
Using my Pool Party Stampin’ Blends Markers, I colored just the flowers on the small panel. I adhered the small panel to a Pool Party mat using Stampin’ Seal. Lining up the flowers, I adhered the layered panel to the larger stamped Basic White panel using Stampin’ Seal.
I adhered the layered panels to a Pool Party card base using Stampin’ Seal. I added a few Iridescent Pastel Gems to the card front.
On the inside, I stamped the sentiment from the Go To Greetings stamp set in Smoky Slate Ink on a Basic white panel. I stamped the smaller flower image from the Fragrant Flowers stamp set in Smoky Slate Ink on the 2 corners of the panel. I colored just the flowers in using my Pool Party Stampin’ Blends Markers. I adhered the Basic White panel to a Smoky Slate mat then to the inside of the Pool Party card base.
To finish my card, I decorated a Basic White Medium Envelope. I stamped the smaller flower from the Fragrant Flowers stamp set in Smoky Slate Ink on the envelope front and colored it using my Pool Party Stampin’ Blends Markers. I adhered a panel of Subtle 6 X 6 Designer Series Paper to the envelope flap.
Thank you for stopping by my blog today. I hope you like my card and will give it a try. Happy Stamping!!
If you need any stamping supplies, I’d love to be your Demonstrator. Just click HERE to go directly to my online store or drop me an email if you have any questions.
MY CURRENT HOST CODE IS: BFQ24SXS
Use this host code when placing an order with me. When you order $50 or greater you will receive a free gift from me! If your order is over $150, please do not use this code, but you’ll still get the free gift. The free gift is your choice of any 1 item valued up to $10.00 from the 2022-2023 Annual Catalog or the January-April 2023 Mini Catalog! Unfortunately, packs of cardstock are no longer an option for a free gift. Shipping has become too expensive to ship and it’s costing me as much to ship as the cardstock costs. For any orders $50 or more I will also send you my monthly class tutorials. Click HERE or go to my Customer Rewards for more details and to see what this month’s tutorials are.
Please remember to use my current Host Code and make sure that you can see my name on the final checkout page listed as your Demonstrator when you order so that you know that you’re ordering with me, and you’ll get my rewards!
In response to changing policies at Stampin’ Up – I’m adjusting my Ordering Gift policy as well. I’m having to get a little more tough on the adding of Host codes when you place your order thru my Online Store.
Not to worry – you’re still going to get that $10 ordering gift for orders of $50 (before shipping & tax) or greater. And the gift is still any 1 SU! product up to that $10 value – which includes some of our fun Host Sets!
But – if you DO NOT use the Host code for your orders of less than $150 (this is the RETAIL total before Shipping & Handling), then you’ll have two options:
You’ll need to call Stampin’ Up! (1-800-Stamp-Up) and ask them to add it for you. They’re very helpful and will get it done quickly! OR….
If your order was over the $50 threshold but under $150, then…you’ll forfeit that $10 ordering gift and rewards – this is the Bummer Option – and I REALLY don’t want to do this, SO please remember to add my Current Host Code.
Coming on March 1, 2023, Stampin’ Up! is going to be having Online Exclusive Products and the first will be available starting March 1st. Click Here for a printable PDF flyer with the items that will be available. If you like what you see, there is a way you can get them NOW. If you join Stampin’ Up! before the end of February, you can either add the items to your starter kit, or you can pre-order them once you join. This is just one of the perks of being a demonstrator.
Amazing Joining Special during Sale-a-bration January 5 – February 28
Stampin’ Up! has an amazingly awesome joining special. You get to choose what you want. All the options ship for free and include a past Paper Pumpkin Kit along with some business supplies in case you want to make this a business. There is NoObligation to sell, you do NOT have to use this as a business, you can join just to enjoy the discount for yourself. I would LOVE to have you on my team. Join as a hobby demonstrator and enjoy all the benefits of a business demonstrator.
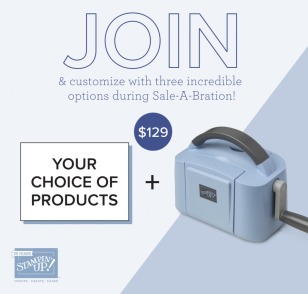
Option #1 This exclusive Boho Blue Mini Stampin’ Cut & Emboss Machine ($63 value) + Your choice of $175 of Stampin’ Up! products for only $129.00. The Boho Blue is one of the new In-Colors coming for 2023-2025.
Option #2 The original White Mini Stampin’ Cut & Emboss Machine (a $63 value), + Your choice of $175 of Stampin’ Up! products for only $129.00
Option #3. Your choice of $175 of Stampin’ Up! products for only $99.00.
If you have a LONG shopping list, this is a great way to get everything you always want at a discount. Enjoy at least a 20% discount on the products you purchase. Why wait, this is such an awesome deal, and it only sticks around until February 28th. Join now and start enjoying that discount right away!!! Contact me at creativestampingdesigns@gmail.com and we can talk about you joining. We have people on our team from all over the United States. We get together monthly via Zoom; we have team Facebook pages where we share what we make and ask questions. This was one of the best decisions I’ve ever made, I’ve made a lot of new friends from all over.
It’s Paper Pumpkin’s 10-year anniversary and we want to celebrate how much we’ve grown! This month’s kit is all about happy greetings, organic and botanical designs digitally painted by our in-house artists, along with all-occasion sentiments to celebrate the happy moments in life and recognize the people around you who help you grow!
And as part of our anniversary celebration, the March Paper Pumpkin Kit includes a FREEGIFT featuring a plant and pot builder to make all your projects plant-astic!
This kit includes:
All the supplies you need to create 9 cards: 3 each of 3 designs; and coordinating envelopes.
An all-occasion stamp set to recognize the people in your life who help you grow with greetings and beautiful botanical images.
1 Polished Pink Classic Stampin’ Spot
Paper pieces and embellishments with digitally-painted designs and images.
Mini Stampin’ Dimensionals.
1 FREE additional stamp set, which includes a plant and pot builder to make plant-astic projects!
Completed card size: 5-1/2″ x 4-1/4″ (14 x 10.8 cm)
Good Wednesday morning my stamping friends. How is everyone doing today? We’re halfway through the week and on our way to the weekend. I hope you are starting to make some fun plans.
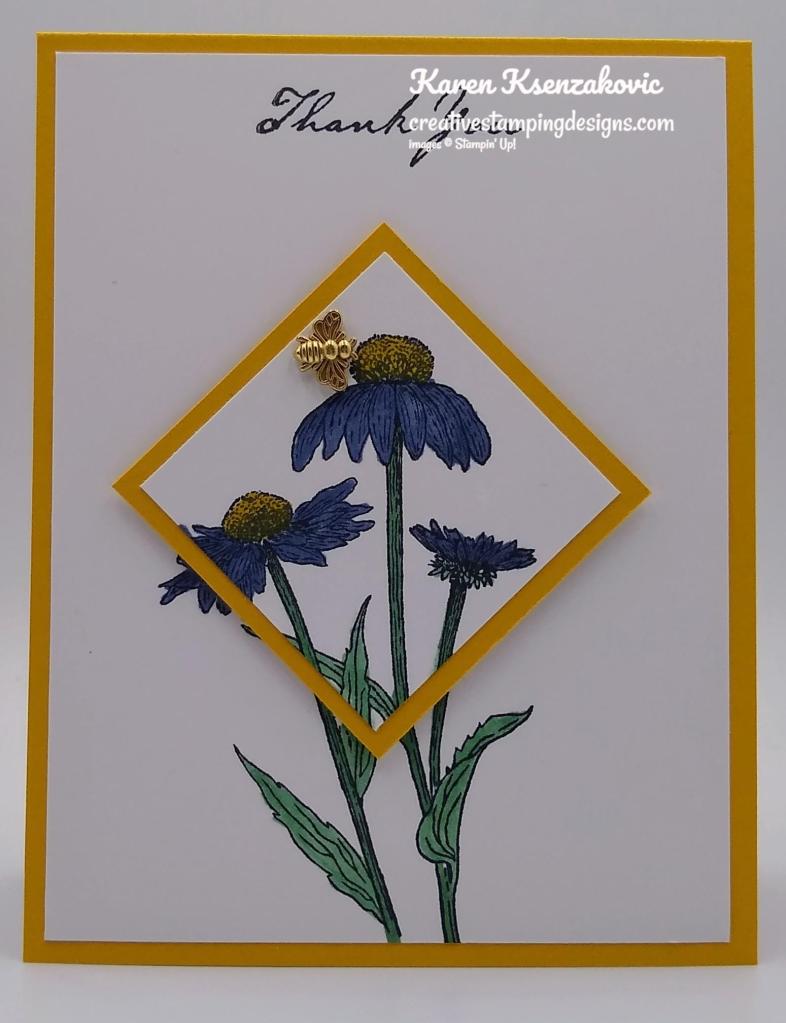
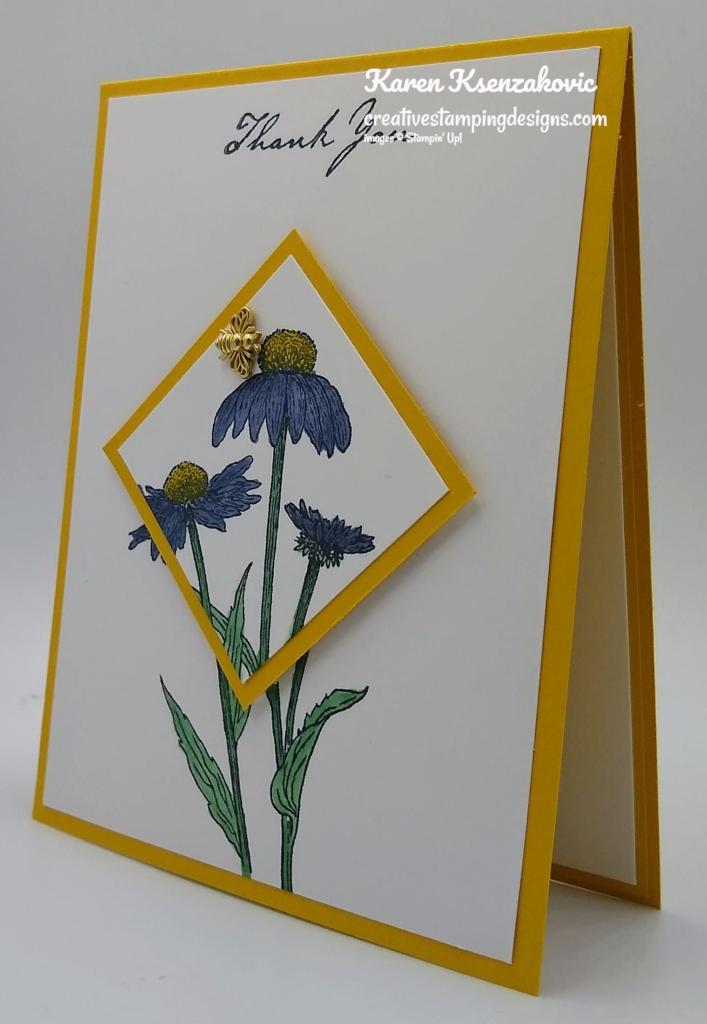
Today I have a Clean and Simple card with a sneak peek for you. Here’s my card for today.
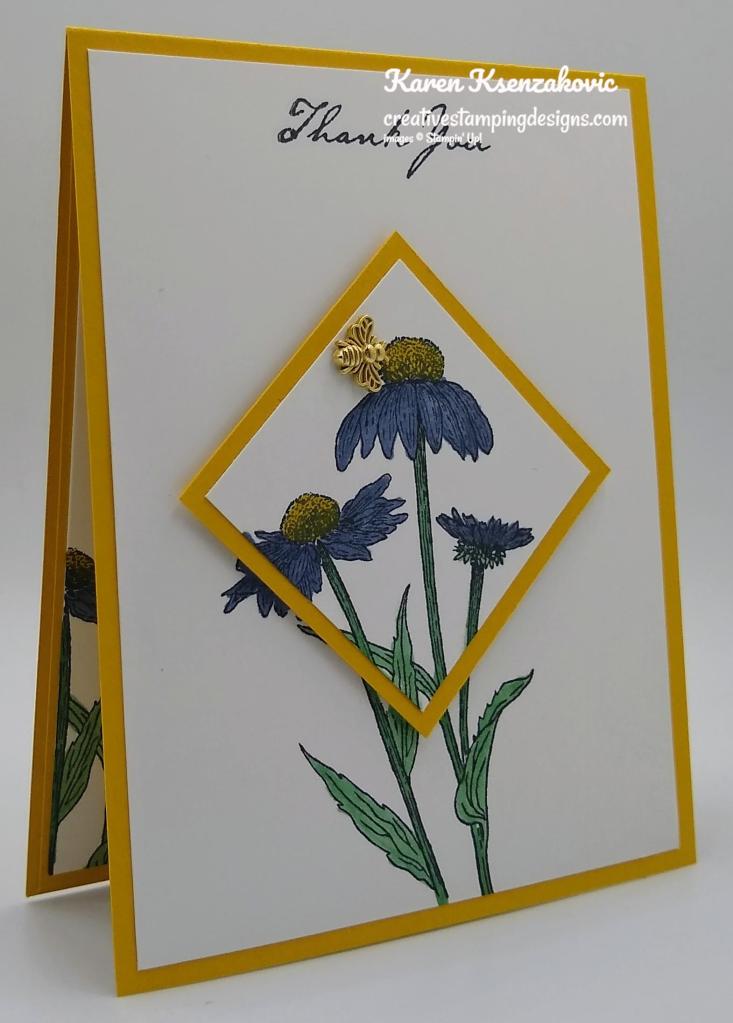
I used the new Stampin’ Up! Nature’s Harvest Cling Stamp Set for my card today. This set will be available on Tuesday August 3rd.
I started by adhering a small panel of Basic White cardstock on a Basic White cardstock with the tiniest amount of Stampin’ Seal just to hold it in place. I stamped the large cone flower image from the Nature’s Harvest stamp set in Tuxedo Black Ink. I carefully removed the small panel so that it wouldn’t stick to the card front. I colored the image in on the small panel and the card front using my Just Jade & Misty Moonlight Stampin’ Blends Markers. I colored the flower center in using my Bumblebee Stampin’ Write Marker.
I adhered the Basic White card front to a Bumblebee card base using Stampin’ Seal. I adhered the small panel to a Bumblebee mat using Stampin’ Seal. I adhered the layered panel to the card front, matching up the images, using Stampin’ Dimensionals.
I stamped the sentiment from the Nature’s Harvest stamp set in Tuxedo Black Ink on the top of the panel. I adhered a Bumblebee Trinket to the small panel with a Glue Dot.
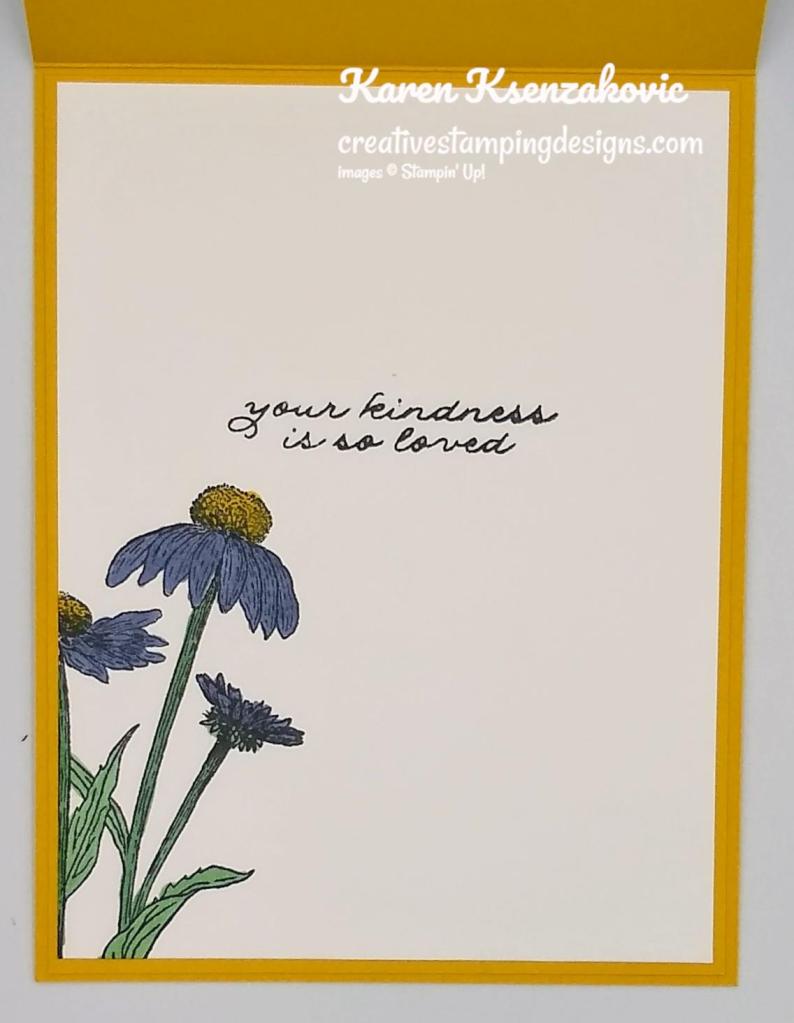
On the inside I stamped the sentiment from the Stampin’ Up! Ornate Thanks Photopolymer Stamp Set in Tuxedo Black Ink on a Basic White panel. I stamped the cone flower image on the bottom of the panel in Tuxedo Black Ink and colored the image in using my Just Jade & Misty Moonlight Stampin’ Blends Markers and my Bumblebee Stampin’ Write Marker. I adhered the Basic White panel to a Bumblebee mat using Stampin’ Seal and then to the inside of the Bumblebee card base using Multipurpose Liquid Glue.
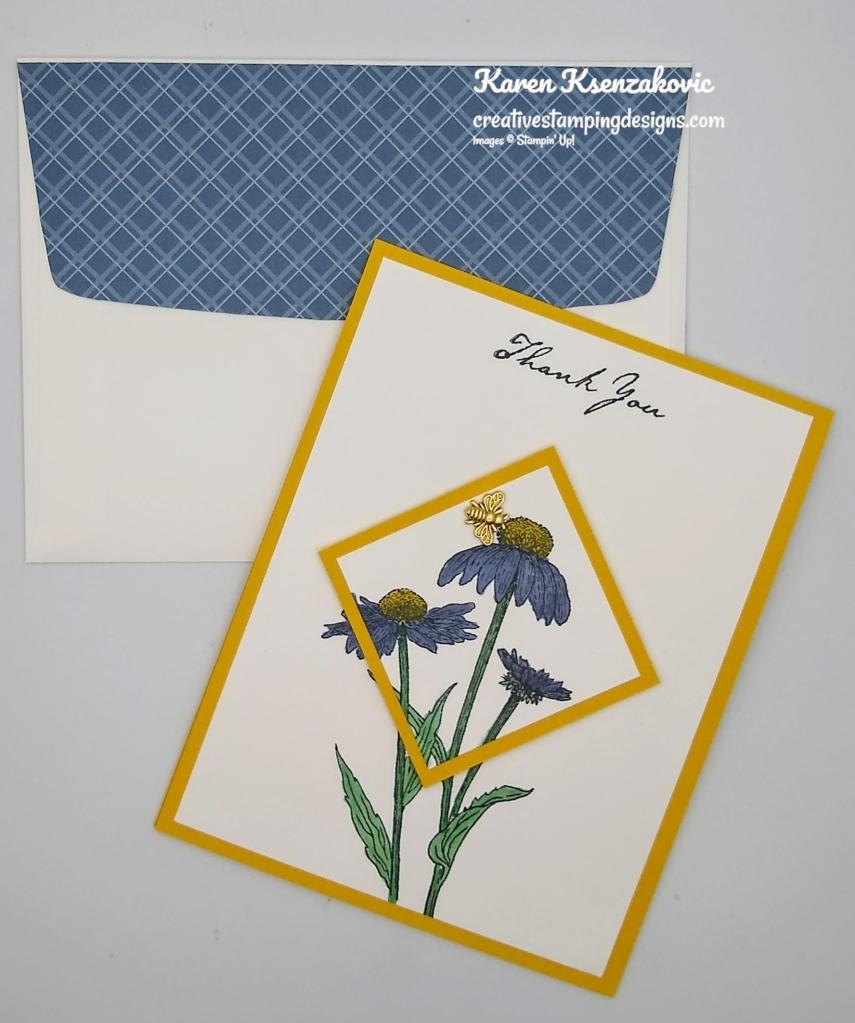
To finish my card I decorated a Basic White Medium Envelope. I stamped the cone flower image from the Nature’s Harvest stamp set on the envelope front in Tuxedo Black Ink and colored it in the same as on the card. I adhered a panel of the 2020-2022 In-Color 6 X 6 Designer Series Paper to the envelope flap.
Thank you for stopping by my blog today. I hope you liked my card and will give it a try. Products will be available on Tuesday August 3rd when the July-December 2021 Mini Catalog goes live. This is really a beautiful set and you will want to put this on your list. Happy Stamping!!
If you need any stamping supplies, I’d love to be your Demonstrator. Just click HERE to go directly to my online store or drop me an email if you have any questions.
MY CURRENT HOST CODE IS: CEWAN9UD
Use this host code when you order $50 or greater and receive a free gift from me! If your order is over $150, please do not use this code, but you’ll still get the free gift. The free gift is your choice of any 1 item valued up to $10.00 from the 2020-2021 Annual Catalog or the January-June 2021 Mini Catalog!For any orders $50 or more I will also send you my monthly class tutorials. Click HERE or go to my Customer Rewards for more details and to see what this months tutorials are.
Please remember to use my current Host Code and make sure that you can see my name on the final checkout page listed as your Demonstrator when you order so that you know that you’re ordering with me and you’ll get my rewards!
July-December 2021 Mini Catalog Designer Series Paper
I’m offering a Designer Series Paper share from the Stampin’ Up! July-December 2021 Mini Catalog and I’d love to have you join!! I’m placing my share order early on August 3 and I’m going to use the expedited shipping option so I should be able to have the shares cut, bundled and back out to you during the week of August 9.
How my shares work: I order full packs of all of the Designer Series Papers listed below, I cut them into 6″ x 6″ pieces (or 6″ x 12″ pieces for double shares) and give you one panel of each design from each pack on the list. I pack up the paper in a cellophane bag and mail it back out to you just as quickly as I can! Shares give you a good working sample of all of the papers so that you can decide which ones to order in full packs!
Here are the Designer Series Paper Shares that I am offering from the new Mini Catalog!
New Designer Series Paper Share – $25.00 plus $5.00 for 1st Class Mail shipping
You will receive one 6×6 sheet of each design from the following new DSP packs (the number behind the name indicates how many 6×6 sheets of that paper pack you will receive):
Gingerbread & Peppermint 6″ x 6″ – 12
Painted Christmas – 6
Whimsy & Wonder Specialty – 6
Sweet Stockings – 6
Peaceful Place Specialty – 6
Blackberry Beauty Specialty – 6
Cute Halloween 6″ x 6″ – 8
Harvest Meadow – 6
Heartwarming Hugs – 6 (returning)
Kraft 6″ x 6″ – 2
Brushed Metallic – 3 (returning)
Red & Green Foil Sheets – 2 (returning)
Silver Foil Specialty Pack – 3 (one of each)
Snowy White Velvet Sheets – 1
Gold Shimmer Vellum – 1
Cork Specialty Paper – 1 ***please note that Cork paper will be approximately 6″ x 6″ as the sizes of the original papers may vary slightly.
In all, you’ll receive 75 – 6” x 6” sheets of new designer or speciality paper!
Double DSP Share – $50 + $7.75 Shipping by Priority Mail – if you’d like double shares of the designer paper, that’s fine too. I’ll cut the designer paper sheets into 6×12 so that you’ll be able to get 3 full A2 size card fronts from each sheet (except for the Gingerbread & Peppermint, Cute Halloween and Kraft 6″ × 6″, you’ll get double sheets of those since they’re already precut).
Anyone is welcome to join in my share (please note, I can only ship to addresses within the US). If you’d like to join, either complete the form below or email the following information to creativestampingdesigns@gmail.com
Your first and last name
The email address that is connected to your PayPal account. I only accept PayPal for payment. ***You do not need to have a PayPal account to pay the invoice, you can choose to pay by credit card without having a PayPal account.
FREE Gift From Me! – As a bonus for joining my share, you’ll also get a sampler of some of the Sale-a-bration Designer Series Paper Packs!
Deadline to sign up for my share is Sunday, August 1 at 5:00 PM ET.
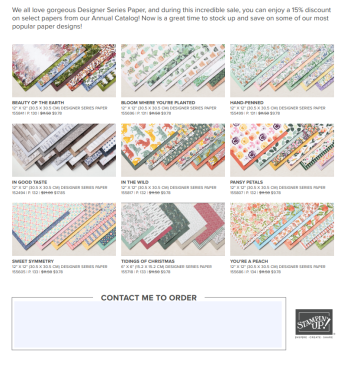
SAVE 15% ON DESIGNER SERIES PAPER JULY 1 – AUGUST 2!
We all love gorgeous Designer Series Paper, and during this incredible sale, you can enjoy a 15% discount on select papers from the 2021–2022 Annual Catalog! July is a great time to stock up and save on some of Stampin’ Up!’s most popular paper designs!
PROMOTION DETAILS:
Sales Period: July 1 – August 2
All order types qualify for this promotion.
There is no limit to how many packages of Designer Series Paper may be purchased during this promotion.
Only select Designer Series Papers are available at a 15% discount during this promotion.
Orders must be placed—and closed—during the promotion period for the 15% discount to apply.
Designer Series Paper ordered as part of a Starter Kit or with Stampin’ Rewards qualify for the 15% discount.
Order Deadline: August 2, 2021 at 11:59 PM (MT)
Click on image below for a printable PDF of the Sale Designer Series Papers
Empower yourself and others with the Hope Box Paper Pumpkin Kit! Created from the heart and soul of Stampin’ Up! cofounder, Shelli, the Hope Box Paper Pumpkin Kit reminds us why life is precious. This month’s Paper Pumpkin kit includes supplies to create nine encouraging cards and coordinating envelopes in an inspiring color palette, and a specially designed Hope Box!
The Hope Box is designed to be a keepsake box—keep mementos of cherished memories or reminders of what’s yet to come. Collect treats and trinkets that represent what hope means to you in your Hope Box and look inside for inspiration or share it with a friends who could use some uplifting!
What will you put in your Hope Box? Letters, song lyrics, inspiring quotes, and photographs are powerful reminders of hope and connection—and great additions to a Hope Box.
Kit contains supplies to create nine cards and coordinating envelopes and comes in a special box!
The box is specially designed to turn into a Hope Box—a keepsake box full of cherished items to add hope to your life or in the lives of others.
Includes an exclusive stamp set and a Classic Stampin’ Spot
Card size: 4-1/4″ x 5-1/2″ (10.8 x 14 cm)
Envelope size: 4-1/2″ x 5-3/4″ (11.4 x 14.6 cm)
Coordinating colors: Bermuda Bay, Blackberry Bliss, Bumblebee, Melon Mambo, Petal Pink, Pool Party, Poppy Parade
Subscribe to the August 2021 Paper Pumpkin Kit between 11 July and 10 August at paperpumpkin.com!
Note: Supplies may be limited toward the end of the subscription period.
Good Sunday morning my stamping friends. How is everyone’s weekend going? I have the next few days off from work, so I’m doing a happy dance. Plans are to get my daughter’s room painted today and tomorrow, then Tuesday put everything back in place. We’ll see what happens.
I have a clean and simple card for you today doing the Double Time Technique. All I used was Stamps, Ink and Paper, just the basics. Here’s my card for today.
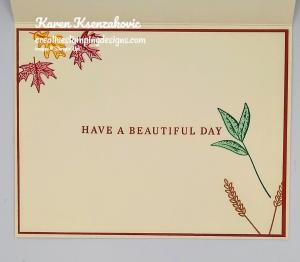
I lightly adhered a panel of Very Vanilla cardstock to a Very Vanilla card base making sure it was centered. I stamped the sentiment from the Stampin’ Up! Beautiful Autumn Photopolymer Stamp Set in Cajun Craze Ink in the center of the panel.
I first stamped all the outlines of the leaves from the Beautiful Autumn stamp set in Cherry Cobbler, Pumpkin Pie and Shaded Spruce Inks randomly around the panel. I stamped all the fill images from the Beautiful Autumn stamp set in the leaves, all stamped off once, in Bumblebee, Just Jade and Real Red Inks. I stamped the wheat image from the Beautiful Autumn stamp set in Cinnamon Cider Ink.
I carefully removed the Very Vanilla panel and adhered it to a Cajun Craze mat using Stampin’ Seal. I adhered the matted panel, making sure to line up all the leaves and stems, to the Very Vanilla card base using Stampin’ Seal.
On the inside is stamped the sentiment from the Beautiful Autumn stamp set in Cajun Craze Ink in the center of a Very Vanilla panel. I stamped the outline leave images from the Beautiful Autumn stamp set in Cherry Cobbler, Pumpkin Pie and Shaded Spruce Inks. I stamped the leaf fill images from the Beautiful Autumn stamp set, all stamped off once, in Bumblebee, Just Jade and Real Red Inks. I stamped the wheat image from the Beautiful Autumn stamp set in Cinnamon Cider Ink. I adhered the Very Vanilla panel to a Cajun Craze mat using Stampin’ Seal and then to the inside of the Very Vanilla card base using Multipurpose Liquid Glue.
To finish my card I decorated a Medium Very Vanilla Envelope. I stamped the outline leaf images from the Beautiful Autumn stamp set in Cherry Cobbler, Pumpkin Pie and Shaded Spruce Inks on the envelope front and flap. I stamped the leaf fill images from the Beautiful Autumn stamp set, all stamped off once, in Bumblebee, Just Jade and Real Red Inks. I stamped the wheat image from the Beautiful Autumn stamp set in Cinnamon Cider Ink on the envelope flap.
Thank you for stopping by my blog today. I hope you liked my card and will give it a try. Happy Stamping!!
If you need any stamping supplies, I’d love to be your Demonstrator. Just click HERE to go directly to my online store or drop me an email if you have any questions.
MY CURRENT HOST CODE IS: 4Z2KHBVY
Use this host code when you order $50 or greater and receive a free gift from me! If your order is over $150, please do not use this code, but you’ll still get the free gift. The free gift is your choice of any 1 item valued up to $10.00 in the 2020-2021 Annual Catalog!For any orders $50 or more I will also send you my monthly class tutorials. Click HERE or go to my Customer Rewards for more details and to see what this months tutorials are.
Bonus Days from Stampin’ Up! are back!! For every $50 merchandise that you purchase between July 1 and August 3, you’ll earn a $5 coupon that can be redeemed between August 4 and 31!
Here are the details:
An email address is required to participate; Bonus Days coupon codes can be delivered only via email.
If you earn multiple codes from a single order, you will receive one email with multiple codes. If you earn multiple codes from multiple orders, they will receive separate emails for each code earned.
All order types qualify for this promotion. Fax and email orders still require an email address.
Orders that are started before the promotion begins will not go toward earning coupon codes.
There is no limit to the number of coupon codes you can earn per order or throughout the duration of the Bonus Days earning period!!
Deadline for coupon earning: August 3, 2020 at 11:50 PM (MT)
Click hereto head over to my online store to start earning those coupons now! Don’t forget to use my current Host Code so that you will get your free gift from me, any 1 item in the catalog valued up to $10 with a qualifying order. Detail about the free gift are here. Let me know if you have any questions.
Get your shopping lists ready and start earning those coupons!
With Paper Pumpkin, you are provided with everything you need to explore your creativity and discover new ways to craft. As we navigate a “new normal” in today’s world, there’s plenty of opportunity to papercraft! And, more importantly, there’s no better time than now to create something that’ll show the essential people in your life just how awesome you think they are.
Lately, it’s become especially clear who the everyday heroes are—they’ve always surrounded us! Teachers, doctors, hairdressers, nurses, delivery workers, cashiers, and even our friends, kids, and family members go above and beyond to enrich our lives. These people are truly the world’s greatest at what they do!
Celebrate and appreciate the everyday heroes in your life with the August Paper Pumpkin Kit. The cards included in this kit are specifically designed for celebrating life’s champions!
The intended use of this kit is to celebrate and appreciate life’s champions and everyday heroes.
Especially during this time, this is something anyone can do to make a difference. The August kit makes it easy!
Distinktive stamps are photo-realistic stamps that create an impressive detailed image with a single stamp.
The Distinktive stamps included in August’s kit are an especially excellent feature for new stampers still exploring their creativity!
Masculine card designs can be difficult to find, this kit has a real masculine feel.
While the elements of the August kit can be used to show appreciation for anyone, the masculine card designs are perfect for the men in your life!
About the August Kit:
Kit contains enough supplies to create nine cards and coordinating envelopes.
Card size: 4-1/4” x 5-1/2” (10.8 x 14 cm)
Envelope size: 4-1/2” x 5-3/4” (11.4 x 14.6 cm)
Coordinating Colors: Bumblebee, gold, Mint Macaron, Pacific Point, Soft Suede, white
The kit’s stamp set includes Distinktive stamps
Subscribe to the August 2020 Paper Pumpkin Kit from 11 July to 10 August at paperpumpkin.com!
Note: Supplies may be limited toward the end of the subscription period.
I’m cleaning my shelves and drawers out to make room for lots of new goodie. I have my list right HERE and I’m trying to keep it up to date. Check it out and let me know if there is anything you’d like to get. If you are looking for something and don’t see it on the list, drop me a line and I will look through my stash to see if I missed it. I have lots of older DSP too that I don’t have listed if there is any that you are looking for.
Good Thursday morning my fellow stampers. How is everyone doing today? Hope everyone’s week is moving along smoothly.
I have a pretty easy card for you today, though it does look a little involved, it’s not. I’ve used a few different stamp sets for you today. Here’s my card.
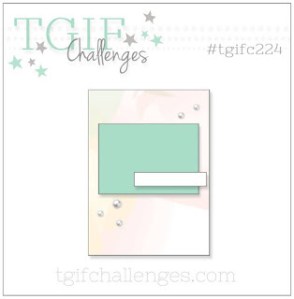
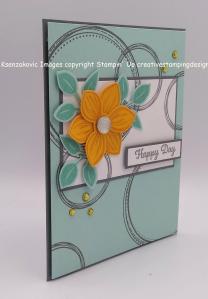
To my surprise, my card played along with a few different challenges today. First off is TGIF Sketch Challenge #224. Here is their sketch.
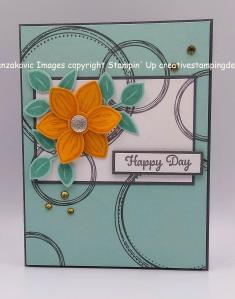
I started by adhering the small Whisper White panel to the Pool Party card front with the tiniest amount of Snail just to hold it in place. I then randomly stamped the large and small circle images from the Stampin’ Up Swirly Frames Photopolymer Stamp Set in Basic Gray Ink on the 2 panels overlapping some of the circles. I adhered the Whisper White panel to a Basic Gray mat using Snail. I then adhered the matted panel to the card front using Multipurpose Liquid glue matching the circles.
On a scrap of Mango Melody cardstock I stamped the flower image from the Stampin’ Up Floral Essence Photopolymer Stamp Set in Mango Melody Ink twice. I punched the flowers out using the Perennial Flower Punch. I adhered the flowers together using a Glue Dot and adhered it to the artwork panel using a Stampin’ Dimensional. I stamped the leaf image from the Floral Essence stamp set 3 times in Pool Party Ink on a scrap of Pool Party cardstock and punched them out using the Leaf Punch. I adhered the leaves under the flower using Glue Dots.
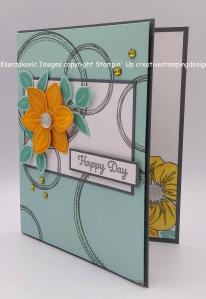
On a small strip of Whisper White cardstock I stamped the sentiment from the Stampin’ Up Itty Bitty Birthdays Stamp Set in Basic Gray Ink. I adhered the sentiment strip to a Basic Gray mat using Snail. I adhered the sentiment to the card front using Stampin’ Dimensionals. I adhered the card front to a Basic Gray card base using Stampin’ Dimensionals. I colored a few Clear Rhinestone Basic Jewels using my Mango Melody Stampin’ Blends Markers. I adhered the colored rhinestones to the card front.
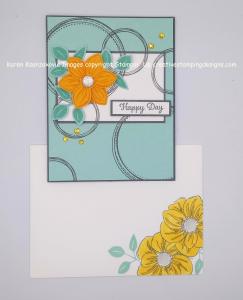
On the inside I stamped another flower image from the Floral Essence stamp set in Basic Gray Ink on the top and bottom of a Whisper White panel. I stamped the leaf image from the Floral Essence stamp set in Pool Party Ink around the flowers. I colored the flowers in using my Mango Melody Stampin’ Blends Markers. I stamped the inside of the flowers with the flower center image from the Floral Essence stamp set in Basic Gray Ink stamping off once. I stamped the sentiment from the Floral Essence stamp set in Basic Gray Ink in the center of the panel. I adhered the Whisper White panel to the inside of the Basic Gray card base using Multipurpose Liquid Glue.
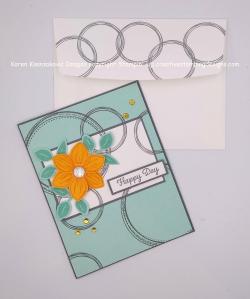
To finish my card I decorated a Medium Whisper White Envelope. I stamped the flower image from the Floral Essence stamp set in Basic Gray Ink on the envelope front. I stamped the leaves from the Floral Essence stamp set in Pool Party Ink around the flowers. I colored the flowers in the same as I did for the card. I stamped the small circle image from the Swirly Frames stamp set in Basic Gray Ink on the envelope flap.
Thank you for stopping by my blog today. I hope you liked my card and will give it a try. Happy Stamping!!
If you need any stamping supplies, I’d be very happy to be your Demonstrator. Just click HERE to go directly to my online store or drop me an email if you have any questions.
MY CURRENT HOST CODE IS: 66KPP6BN
For any orders $50 or more I will send you my monthly class tutorials. Click HERE or go to my Customer Rewards to see what this months tutorials are.
EXTRA, EXTRA!! JOINING PROMOTION JULY 1, 2019 – AUGUST 31, 2019
From July 1 until August 31, new demonstrators will receive an additional $30 to put toward bonus products in their Starter Kit (for a total of $155 in merchandise for $99)!! THEN, they’ll receive a $10 coupon code the following month. Are you interested? Keep reading to learn more!
Dates: July 1 – August 31 at 11:50 PM MT
Details:
The bonus at initial sign up allows demonstrators to pick $30 more than usual. You will pay $99 to sign up and choose $155 worth of Stampin’ Up! products in your Starter Kit.
Coupon codes will be sent between the fifth and seventh business day of the following month the new demonstrator signs up.
The email address listed in a new demonstrator’s profile will be used to send the $10 coupon code.
Coupon codes may be redeemed only once.
Coupon codes expire October 31, 2019; after this date, they will no longer be valid.
New demonstrators who submit their Independent Demonstrator Agreement (IDA) before July 1 or after August 31 will not be eligible for this promotion.
If you’ve ever considered purchasing that Starter Kit, now is a great time! We’d love to have you join and get that discount for yourself or start your own business!!
If you are interested in joining my team click HERE for details or email me. I’d love to have you on my team.
I have gathered up a lot of retired Stamp Sets, Embossing Folders & Dies and put a list together for anyone interested. I have single Stamp Sets along with Stamp Sets bundled with Dies or Punches. Take a look and see if there is anything that you missed out on getting and would still like. Click Here to go to my list.
Good Saturday morning my fellow stampers. I don’t usually do posts on the weekends, but I wanted to show you one last Sale-A-Bration card. Tomorrow is your last day to order any Sale-A-Bration items.
RUN DON’T WALK TO YOUR COMPUTERS TO PLACE YOUR ORDERS.
Today’s card I used the gorgeous Distinctive Stampin’ Up Painted Seasons Stamp Set and the Stampin’ Up Part Of My Story Stamp Set. I also tried the Double Time Technique for my card. I am really going to miss this Distinctive set. Here’s my card.
I started by taking 2 panels of Very Vanilla cardstock and put the tiniest amount of Snail in the center to just hold them in place. I stamped the sentiment from the Part Of My Story stamp set in Soft Suede Ink in the center of the top panel. I stamped the flower image from the Painted Seasons stamp set randomly around on the cardstock in Blushing Bride Ink. I stamped the fern image from the same stamp set in Pear Pizzazz Ink randomly between the flowers. I stamped the leaf image from the same stamp set in Pear Pizzazz Ink stamping off once.
I adhered each of the Very Vanilla panels to a Blushing Bride mat using Snail. I lined up the images and adhered the smaller matted panel to the larger matted panel using Multipurpose Liquid Glue.
I then adhered the artwork to a Pear Pizzazz card base using Multipurpose Liquid Glue.
On the inside I stamped the flowers, ferns and leaves from the Painted Seasons stamp set randomly on a panel of Very Vanilla cardstock. I stamped the sentiment from the Stampin’ Up Strong And Beautiful Stamp Set in Soft Suede Ink in the center of the Very Vanilla panel. This stamp set has the most beautiful sentiments and font in it. I adhered the Very Vanilla panel to a Blushing Bride mat using Snail and then to the inside of the Pear Pizzazz card base using Multipurpose Liquid Glue.
To finish my card I decorated a Medium Very Vanilla Envelope. I stamped the flower, fern and leaf images from the Painted Seasons stamp set randomly on the envelope front and the envelope flap the same as I did for the card front.
Thank you so much for taking the time to visit my blog today. I hope you liked my Double Time card and will give it a try. Enjoy your weekend. Happy Stamping!!
If you need any stamping supplies, I’d be very happy to be your Demonstrator. Just click here to go directly to my online store or drop me an email if you have any questions.
Whether you have an entire room or a small corner in your home for stamping, your creative space should be tailored to you. Stampin’ Up!’s new product line, Storage by Stampin’ Up!, provides you with modular storage solutions that let you organize—and customize—your space your way!
PRODUCT DETAILS
Product Launch: April 1, 2019
Can be added to any type of order beginning April 1, 2019.
No order limits apply.
Storage by Stampin’ Up! will be featured in the 2019–2020 annual catalog.
FEATURES AND BENEFITS
Storage by Stampin’ Up! is designed to store and showcase your Stampin’ Pads, Stampin’ Ink Refills, Stampin’ Blends, Stampin’ Write Markers, Watercolor Pencils, and other accessories. Here are some other features and benefits of Storage by Stampin’ Up!:
Keeps products organized, tidy, visible, and trackable at all times.
Ensures that your Stampin’ Pads, Stampin’ Write Markers, and Stampin’ Blends are all stored horizontally, as recommended.
Designed to be stylish, durable, compact, stackable, and modular.
Blends in naturally with most home decor with its white neutral color.
Stacks vertically and can be arranged to fit practically any flat workspace.
Easily assembled and disassembled for rearrangement and/or cleaning.
Click the image below to open the flyer with full details:
Click this image for some example ways to configure the storage pieces:
Here at Paper Pumpkin, we love providing easy, fast, and fun creative experiences for our subscribers. We do this in a cost-saving and time-efficient way: by delivering a cute package filled with fun paper-crafting goodies . . . right to your door.
In addition to providing everything you need to make a pre-designed, all-inclusive project, we also have another goal in mind: to help you unlock and explore your creativity by introducing you to exciting and innovative products from Stampin’ Up!
In April’s Paper Pumpkin kit, we’re pleased to announce that we’ll be treating you to something extra-special: Stampin’ Up!’s brand new Distinktive® stamp images.
About Distinktive Stamps
Distinktive stamps give you photo-realistic images with just one stamp. They have a special texture that gives added depth and dimension in a single step.
These stamps are available only from Stampin’ Up! and are made using a patent-pending process.
Distinktive stamps are available in red rubber and photopolymer; Paper Pumpkin’s April kit includes photopolymer stamps.
Shop Distinktive stamps in the online store by searching “Distinktive,” or look for the Distinktive icon in Stampin’ Up! catalogs.
Click HERE to go to my store to subscribe to April’s Paper Pumpkin before April 10th.
April I will be starting my Online Host Club and I have a couple of spots open. If you have a long wish list and you want to purchase Stampin’ Up supplies a little at a time, this might just be the perfect solution for you. For more information click HERE. If you are interested in joining in, please email me at creativestampingdesigns@gmail.com.


![Artistic Leaves Photopolymer Stamp Set (English) [ 166162 ]](https://assets1.tamsnetwork.com/images/EC042017NF/166162s.jpg "Artistic Leaves Photopolymer Stamp Set (English) [ 166162 ]")
![Basic White 8 1/2" X 11" Cardstock [ 166780 ]](https://assets1.tamsnetwork.com/images/EC042017NF/166780s.jpg "Basic White 8 1/2\" X 11\" Cardstock [ 166780 ]")
![Cloud Cover 8 1/2" X 11" Cardstock [ 165621 ]](https://assets1.tamsnetwork.com/images/EC042017NF/165621s.jpg "Cloud Cover 8 1/2\" X 11\" Cardstock [ 165621 ]")
![Secret Sea 8 1/2" X 11" Cardstock [ 165624 ]](https://assets1.tamsnetwork.com/images/EC042017NF/165624s.jpg "Secret Sea 8 1/2\" X 11\" Cardstock [ 165624 ]")
![Cloud Cover Classic Stampin' Ink Refill [ 165279 ]](https://assets1.tamsnetwork.com/images/EC042017NF/165279s.jpg "Cloud Cover Classic Stampin' Ink Refill [ 165279 ]")
![Darling Duckling Classic Stampin' Pad [ 165277 ]](https://assets1.tamsnetwork.com/images/EC042017NF/165277s.jpg "Darling Duckling Classic Stampin' Pad [ 165277 ]")
![Old Olive Classic Stampin' Pad [ 147090 ]](https://assets1.tamsnetwork.com/images/EC042017NF/147090s.jpg "Old Olive Classic Stampin' Pad [ 147090 ]")
![Secret Sea Classic Stampin' Pad [ 165285 ]](https://assets1.tamsnetwork.com/images/EC042017NF/165285s.jpg "Secret Sea Classic Stampin' Pad [ 165285 ]")
![Strawberry Slush Classic Stampin' Pad [ 165286 ]](https://assets1.tamsnetwork.com/images/EC042017NF/165286s.jpg "Strawberry Slush Classic Stampin' Pad [ 165286 ]")
![Timid Tiger Classic Stampin' Pad [ 165278 ]](https://assets1.tamsnetwork.com/images/EC042017NF/165278s.jpg "Timid Tiger Classic Stampin' Pad [ 165278 ]")
![2025–2027 In Color™ Flat Pearls [ 165192 ]](https://assets1.tamsnetwork.com/images/EC042017NF/165192s.jpg "2025–2027 In Color™ Flat Pearls [ 165192 ]")
![Basic White Medium Envelopes [ 159236 ]](https://assets1.tamsnetwork.com/images/EC042017NF/159236s.jpg "Basic White Medium Envelopes [ 159236 ]")


![Take Your Pick [ 144107 ]](https://assets1.tamsnetwork.com/images/EC042017NF/144107s.jpg "Take Your Pick [ 144107 ]")


![Happy Hibiscus Photopolymer Stamp Set (English) [ 164877 ]](https://assets1.tamsnetwork.com/images/EC042017NF/164877s.jpg "Happy Hibiscus Photopolymer Stamp Set (English) [ 164877 ]")
![Garden Green Classic Stampin' Pad [ 147089 ]](https://assets1.tamsnetwork.com/images/EC042017NF/147089s.jpg "Garden Green Classic Stampin' Pad [ 147089 ]")
![Granny Apple Green Stampin' Pad [ 147095 ]](https://assets1.tamsnetwork.com/images/EC042017NF/147095s.jpg "Granny Apple Green Stampin' Pad [ 147095 ]")


")


")
")


")

 Designer Series Paper")


")

 Designer Series Paper")