Stampin’ Up! Celebrate Sunflowers Spotlight

Good Saturday morning my stamping friends and welcome to the weekend. I hope you have some plans in the works. I’ll be working today and hoping it will be busy to make the day go by quickly.

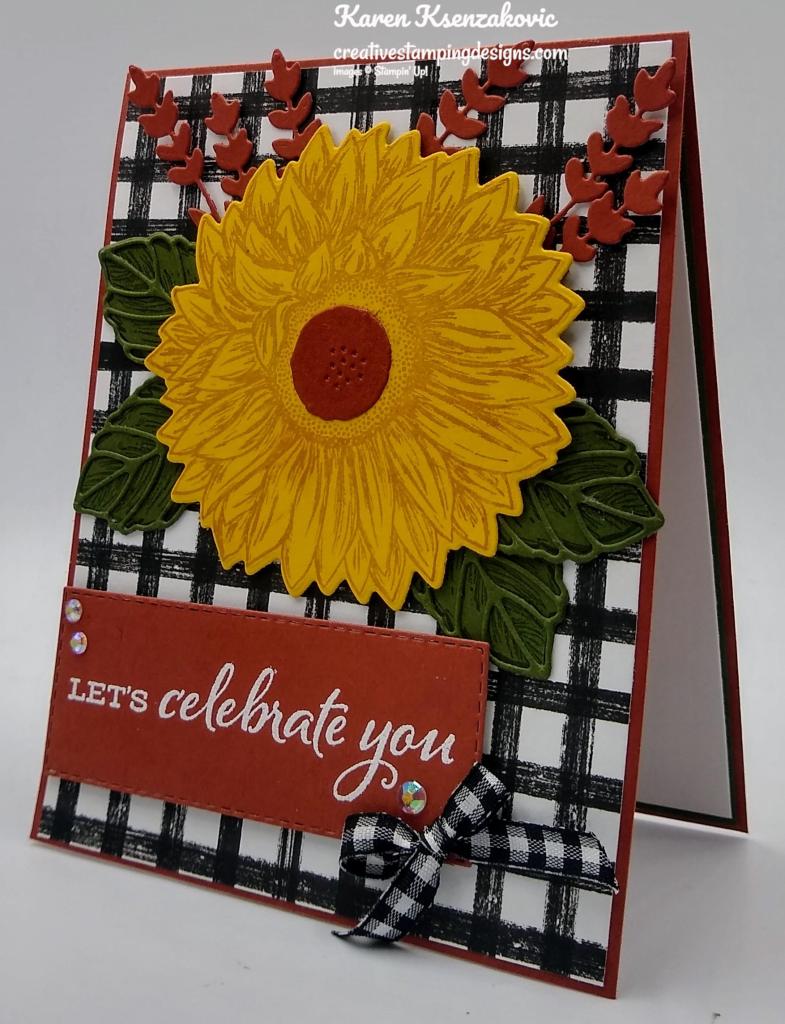
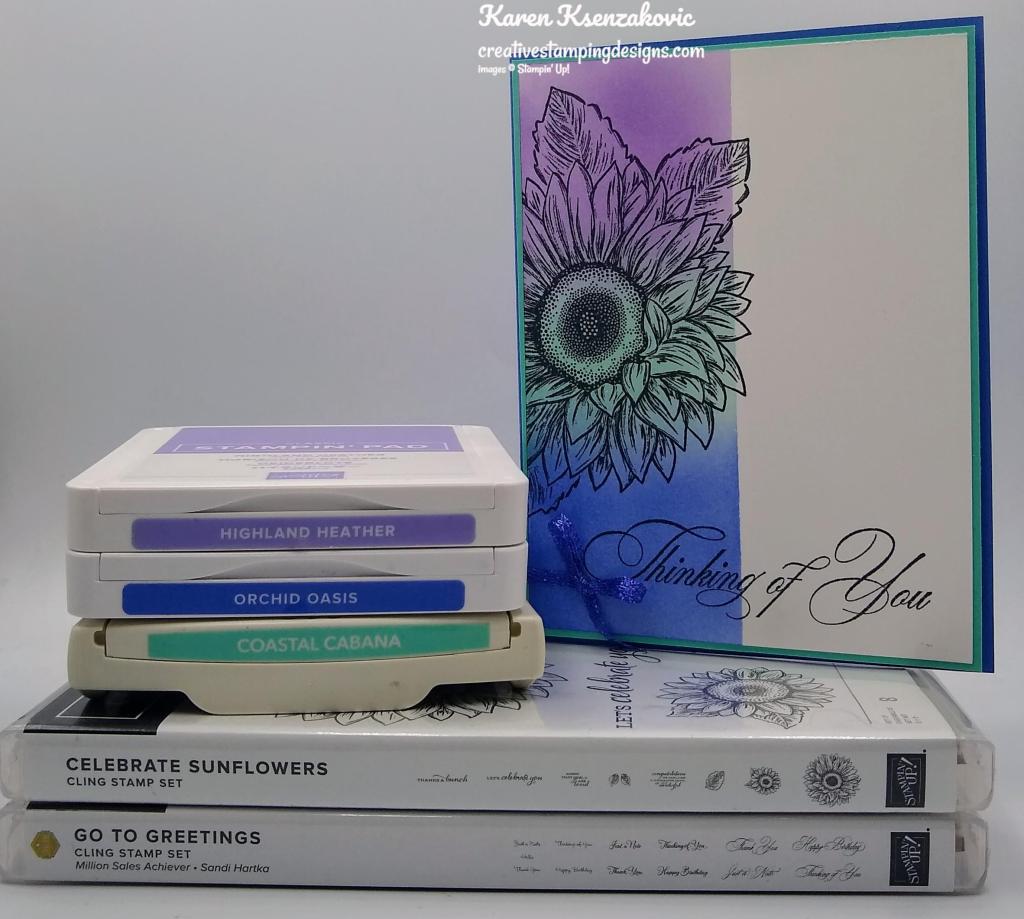
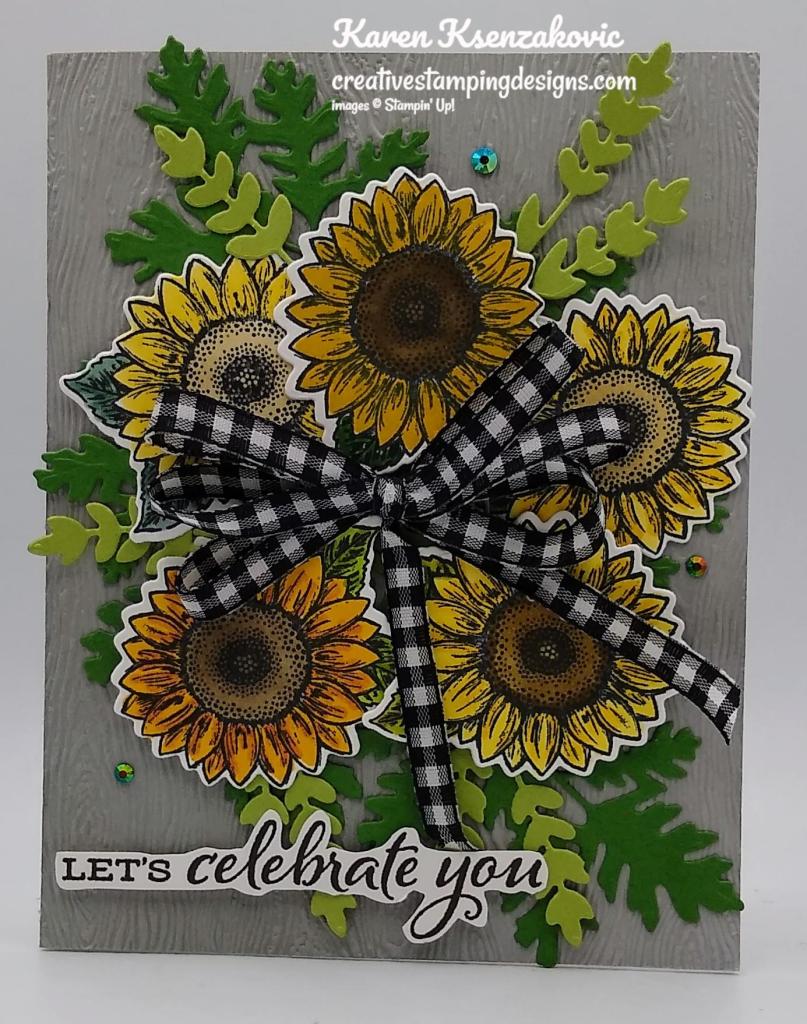
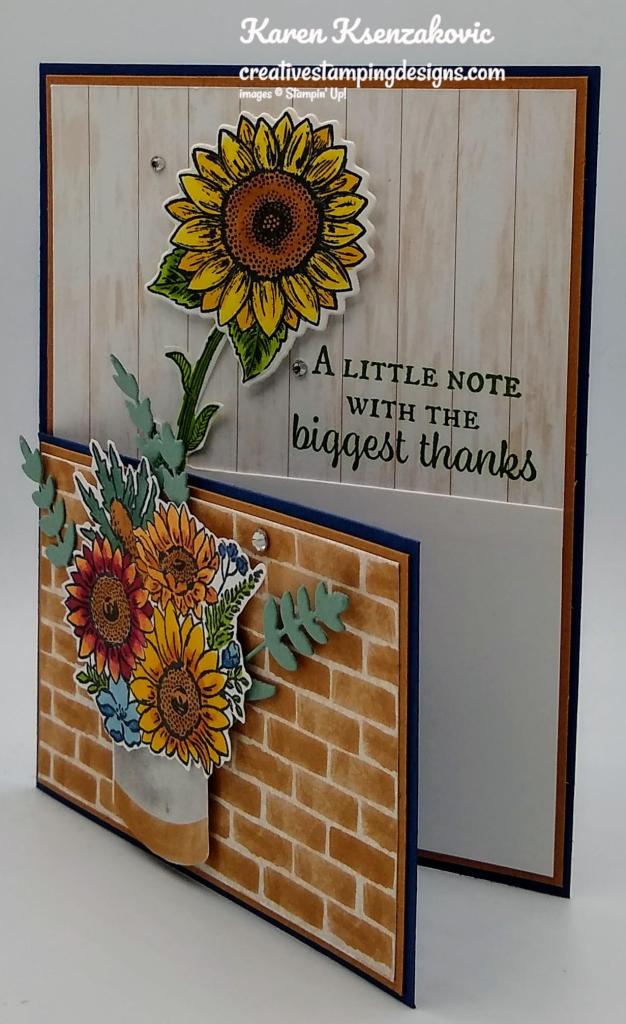
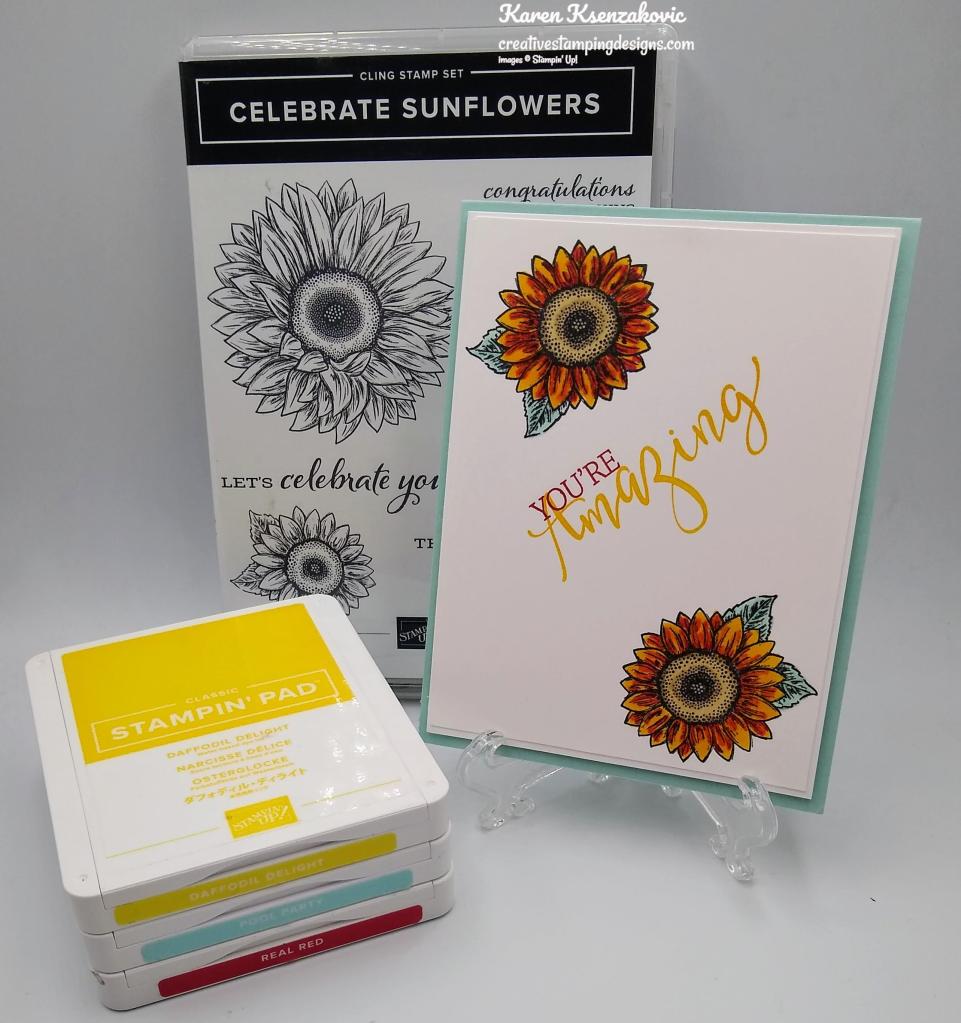
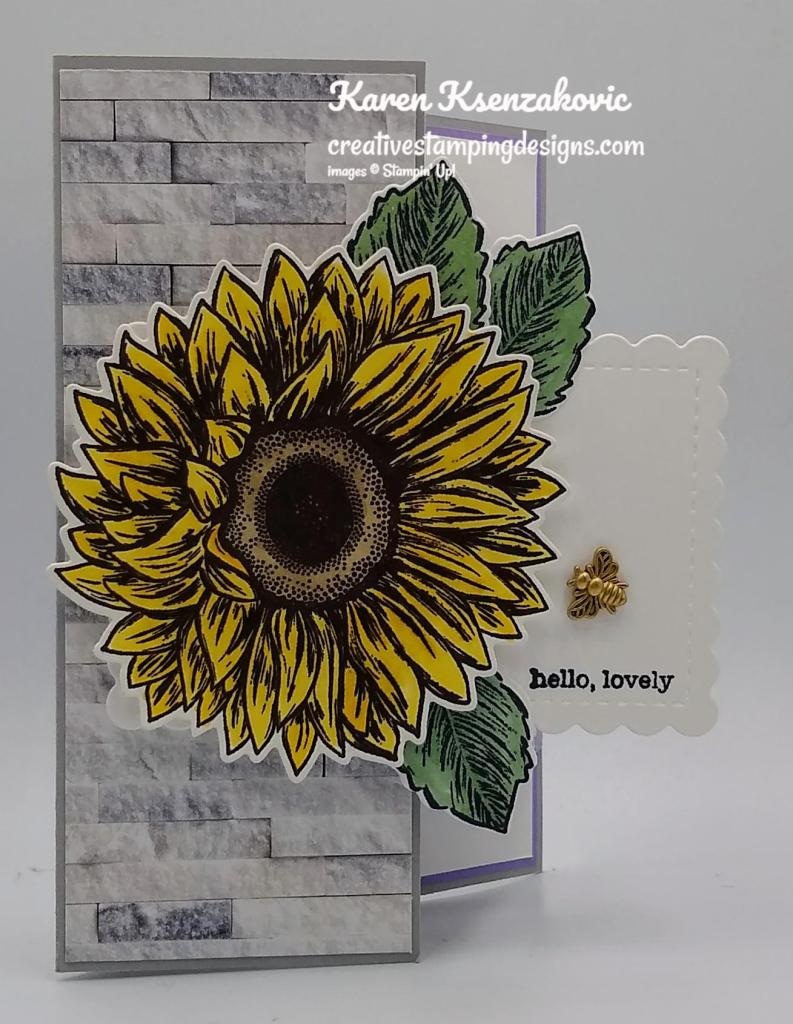
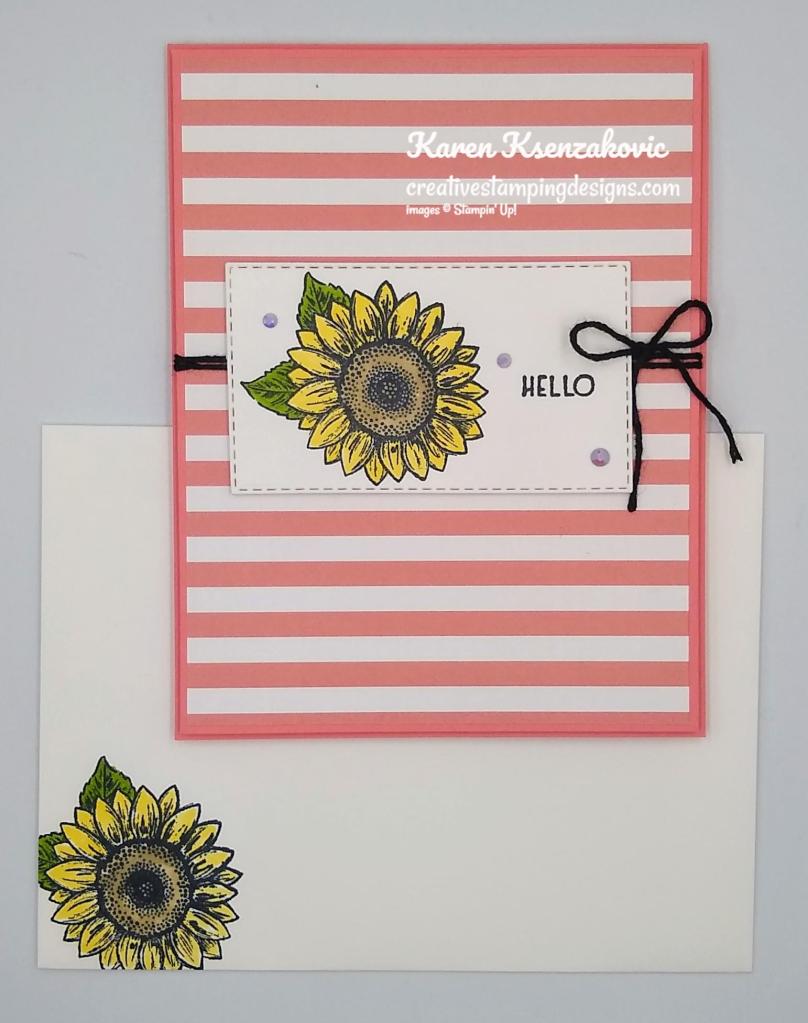
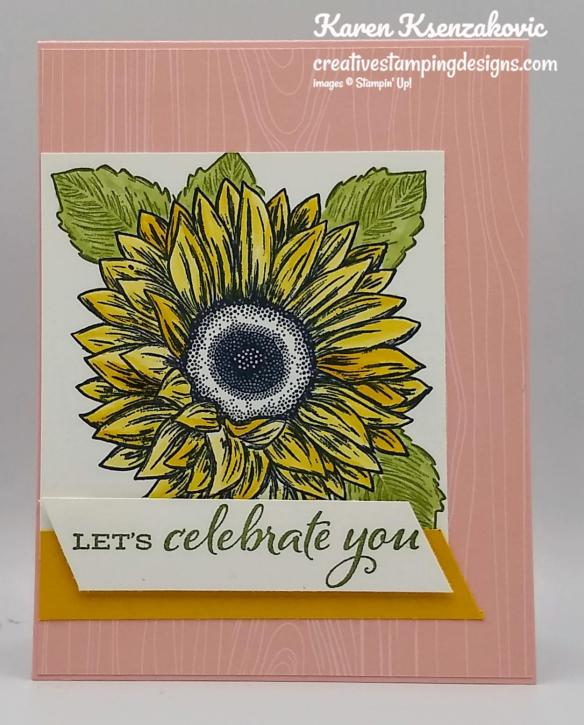
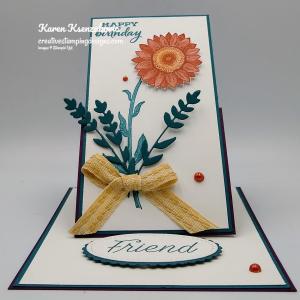
Today’s card is one we made at our team meeting this past Monday. I was excited to lead mystery stamping and I showed everyone 2 techniques in one card using just Stamps, Ink and Paper. Here’s my card for today.

Stampin' Up! Celebrate Sunflowers Spotlight 1 creativestampingdesigns.com

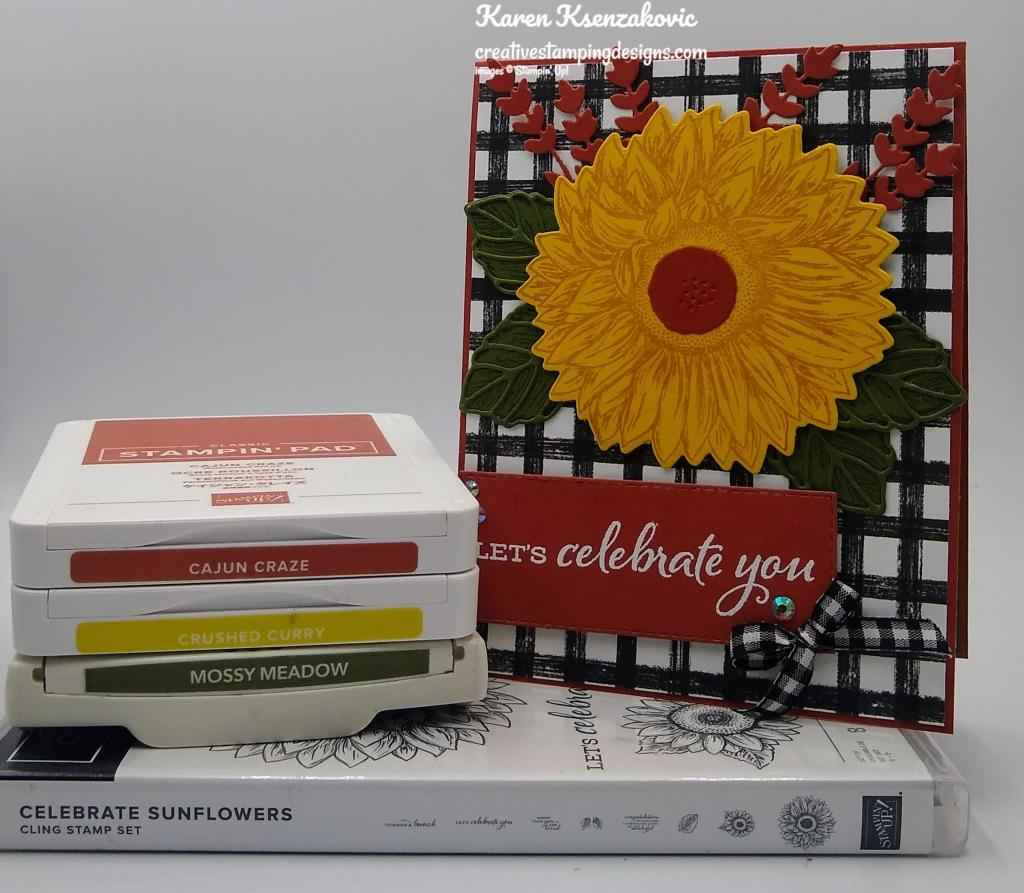
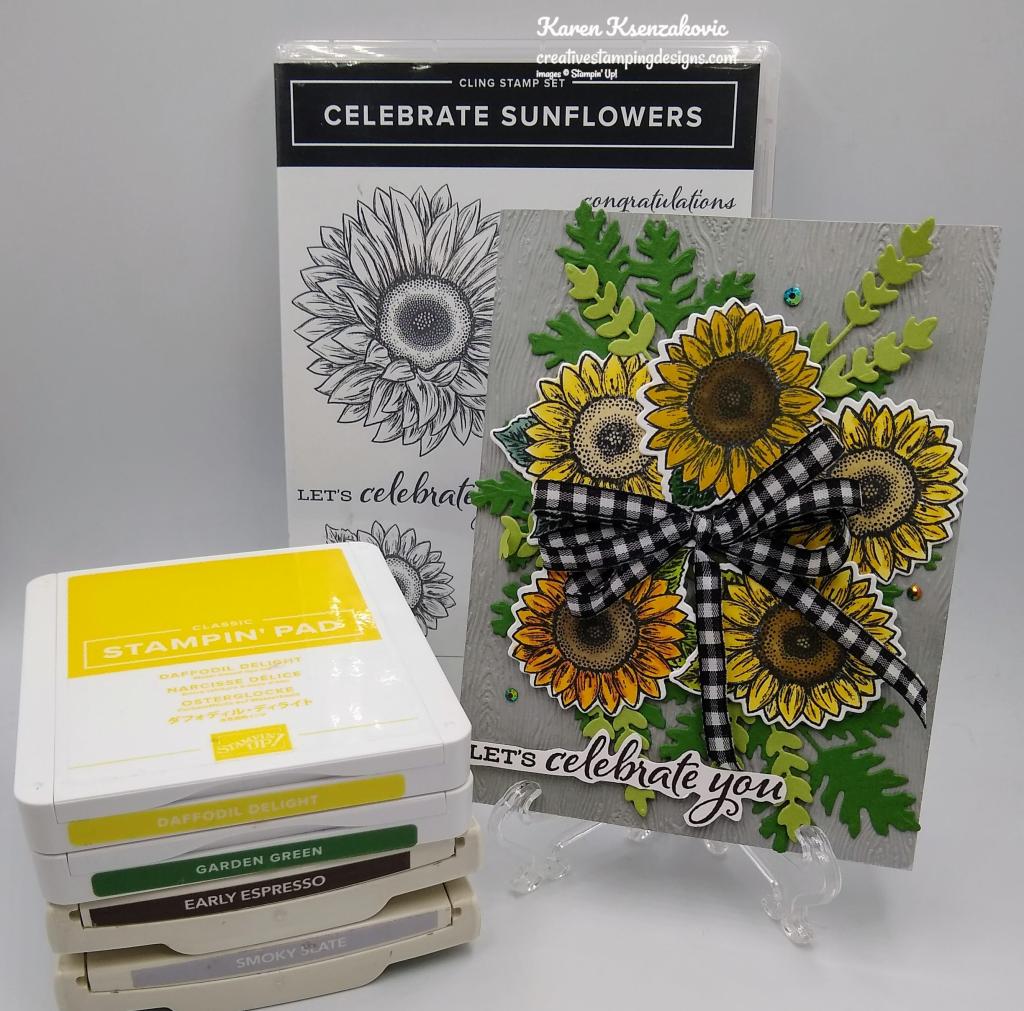
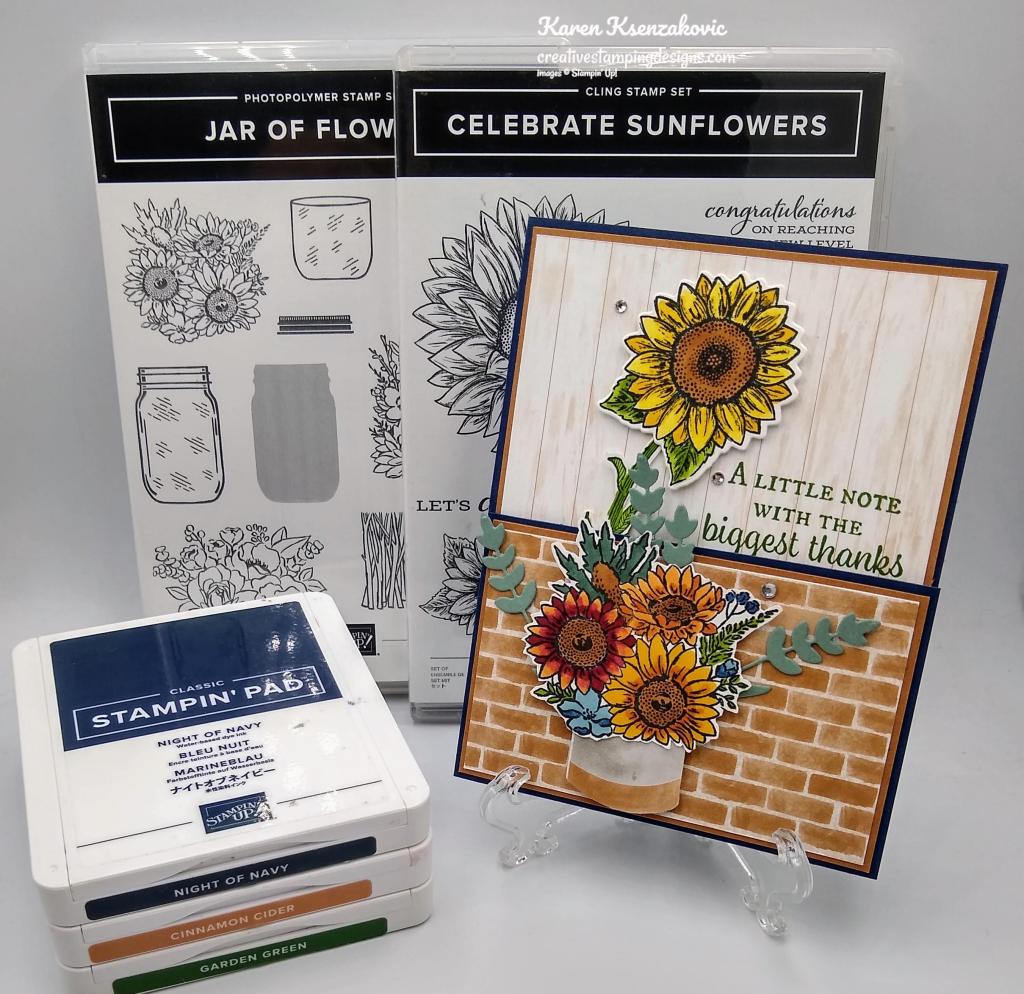
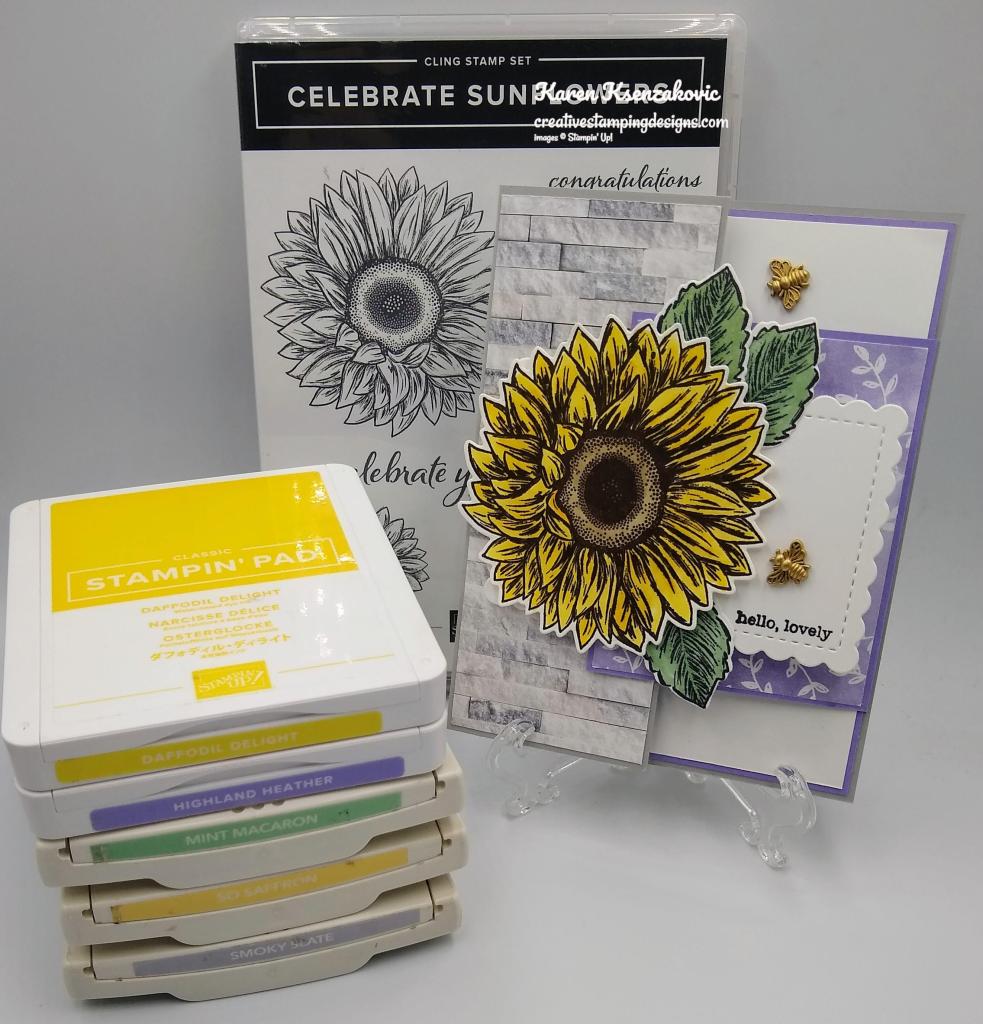
I used the Stampin’ Up! Celebrate Sunflowers Cling Stamp Set and the Stampin’ Up! Go To Greetings Cling Stamp Set for my card today.

Stampin' Up! Celebrate Sunflowers Spotlight  2 creativestampingdesigns.com

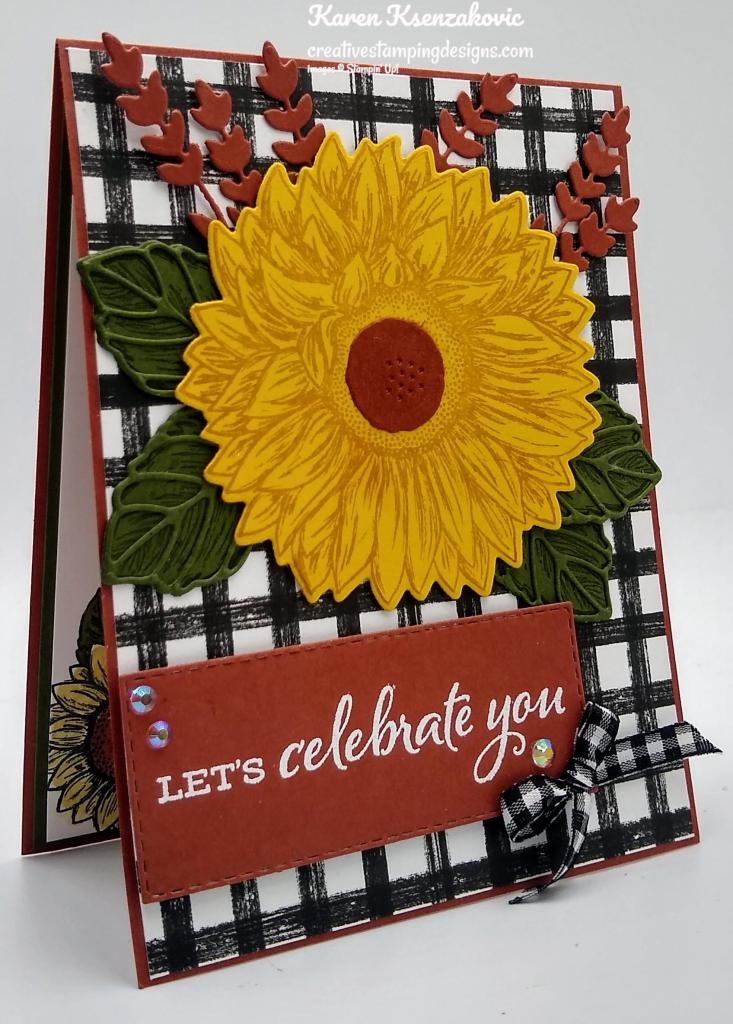
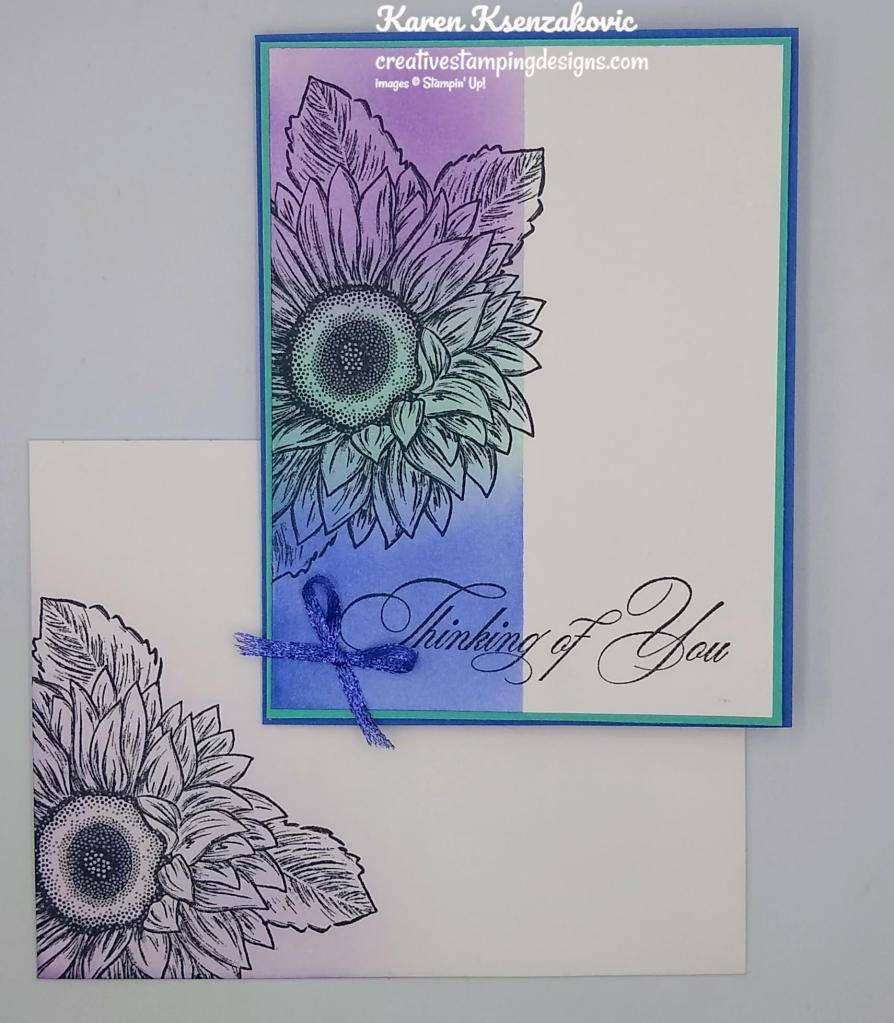
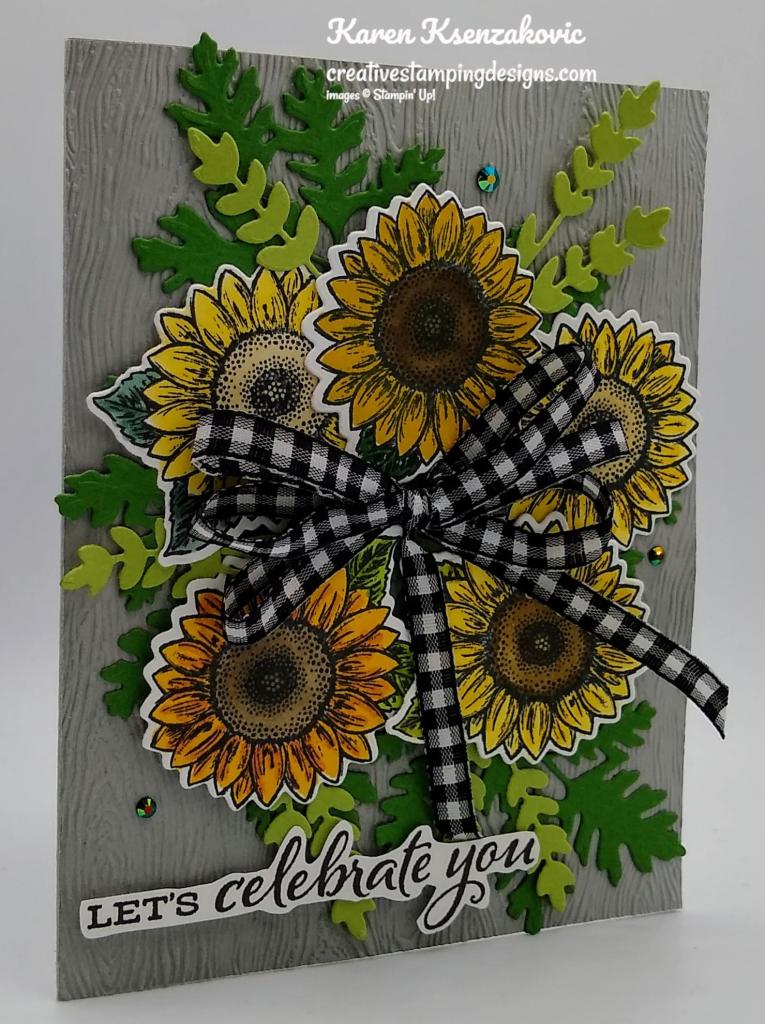
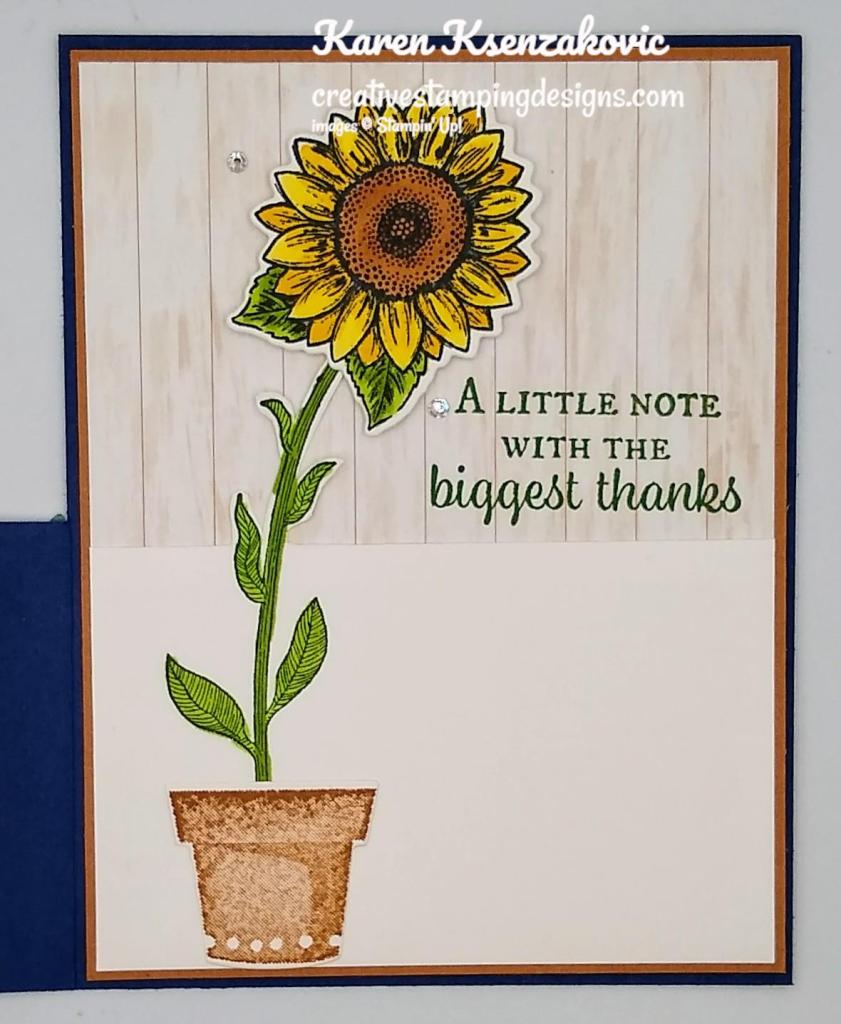
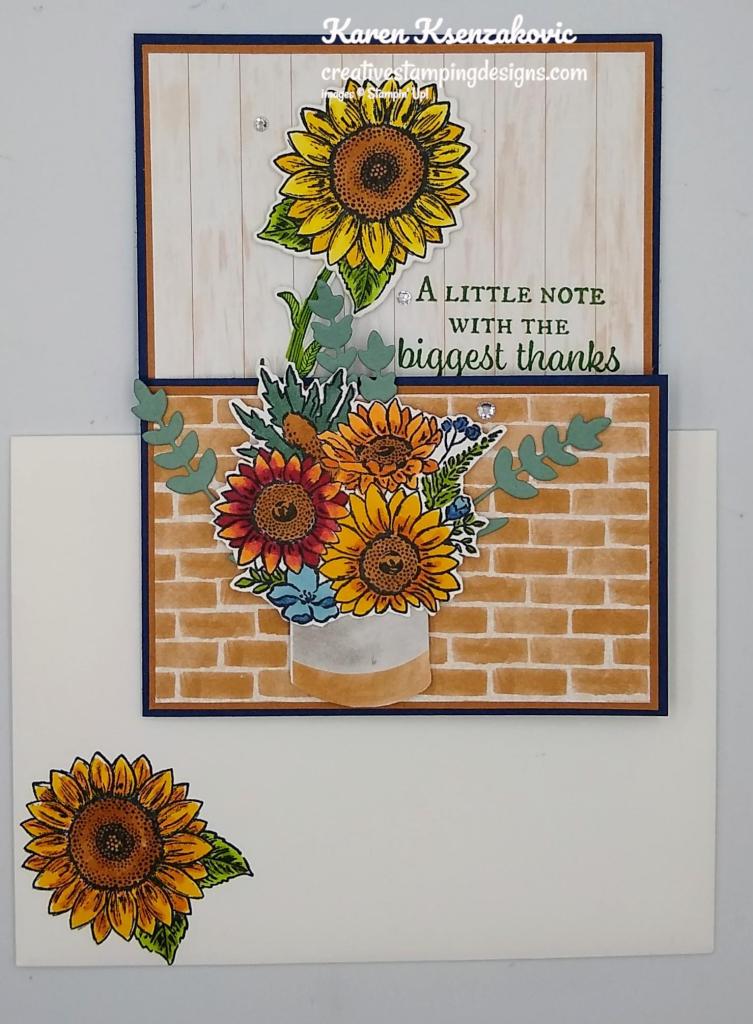
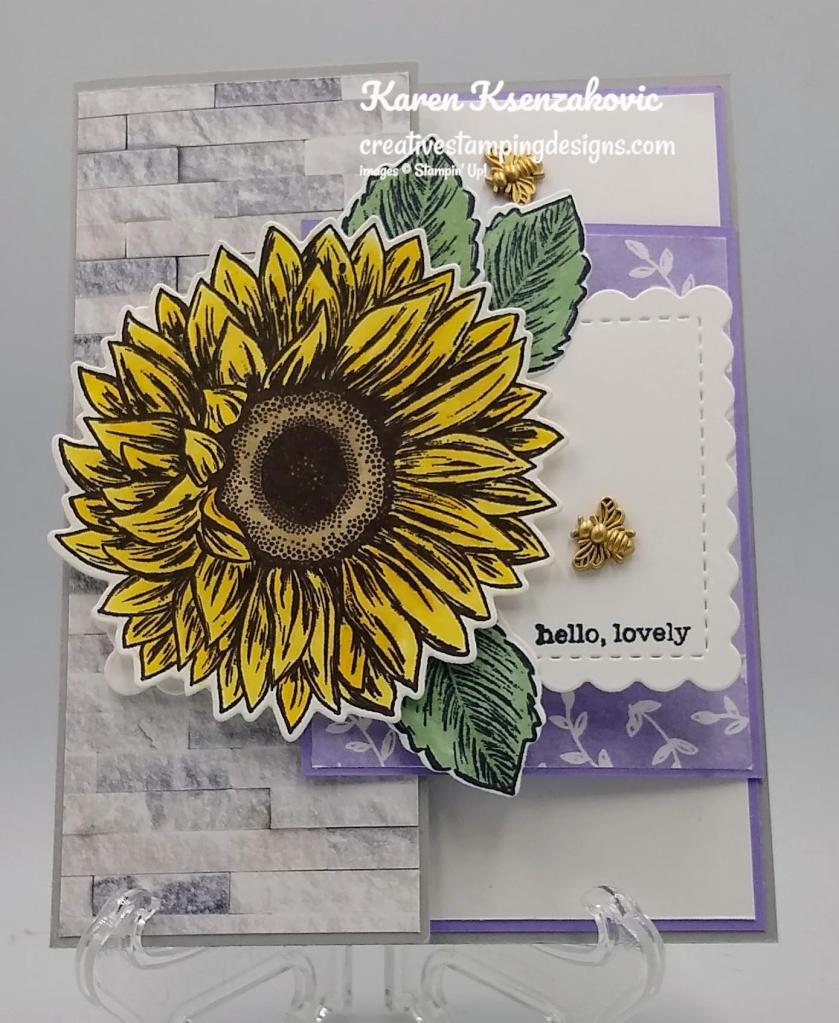
I started by lightly adhering the small panel of Basic White cardstock to the larger panel of Basic White cardstock. I stamped the large sunflower image from the Celebrate Sunflowers stamp set on the 2 corners of the panels in Soft Suede Ink.

Stampin' Up! Celebrate Sunflowers Spotlight 3 creativestampingdesigns.com

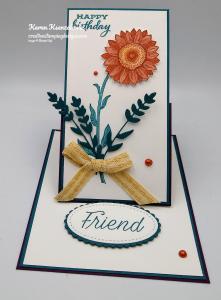
I took the panels apart and using my Daffodil Delight and Soft Suede Stampin’ Blends Markers, I colored just the images on the small panel. I stamped the sentiment from the Celebrate Sunflowers stamp set on the small panel in Soft Suede Ink.

Stampin' Up! Celebrate Sunflowers Spotlight 4 creativestampingdesigns.com

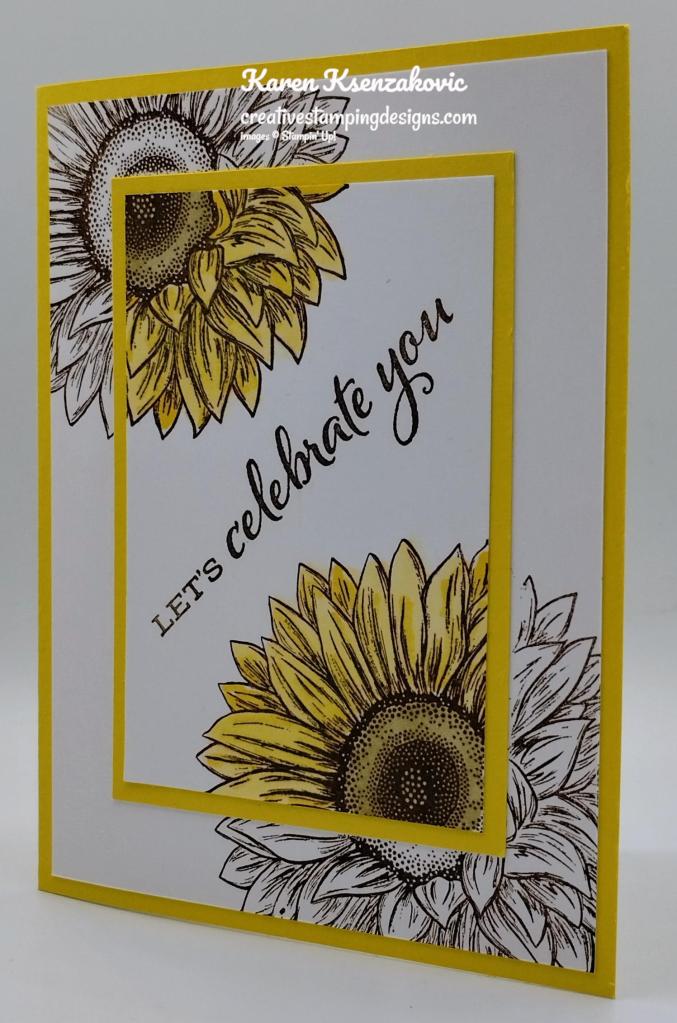
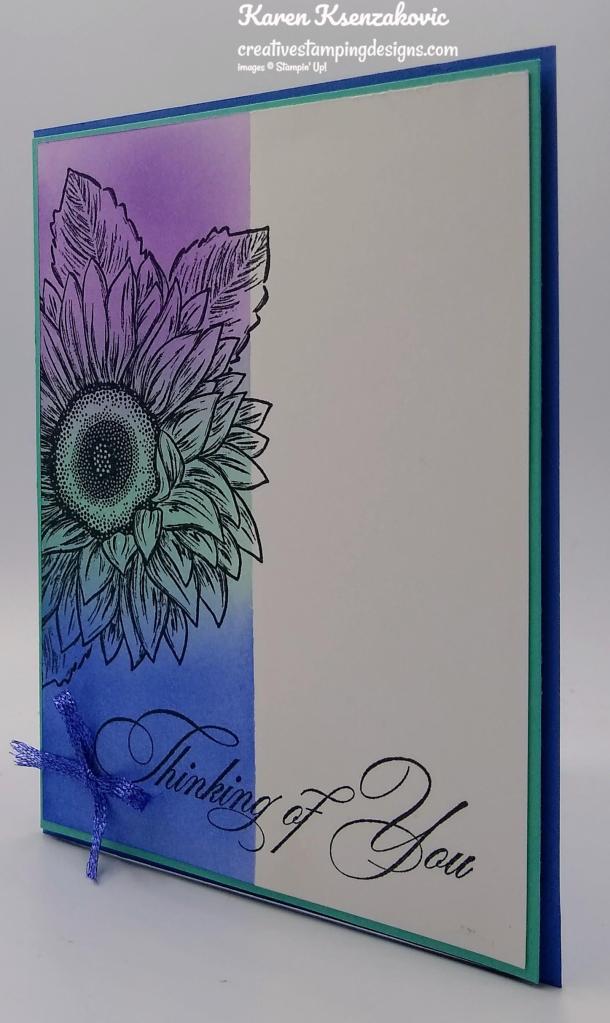
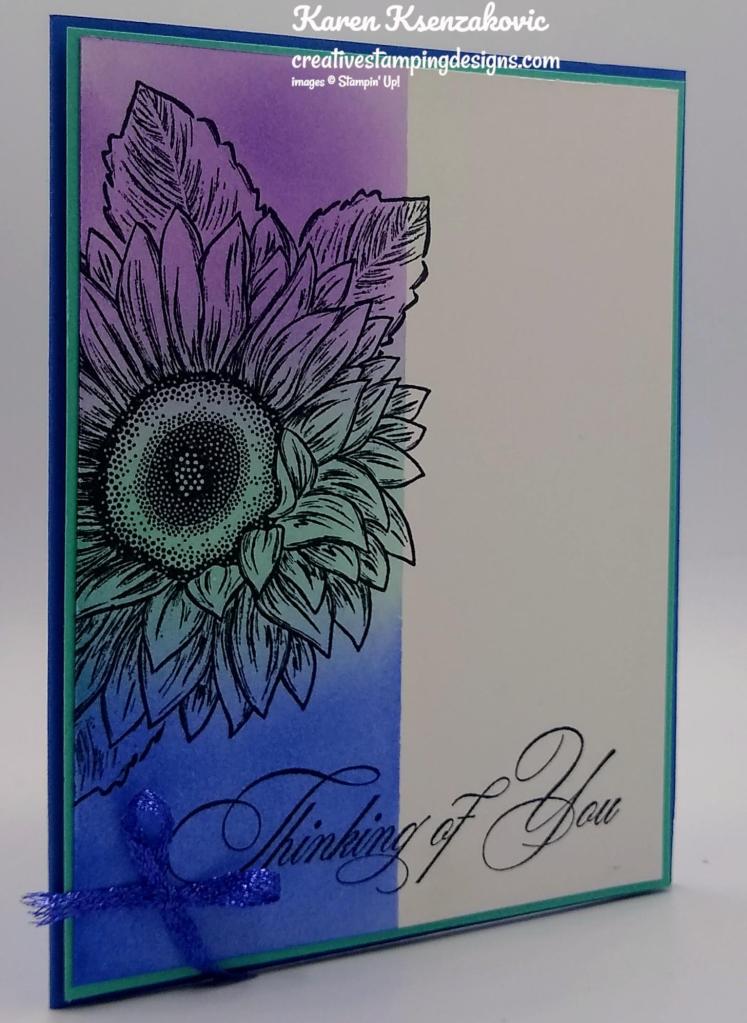
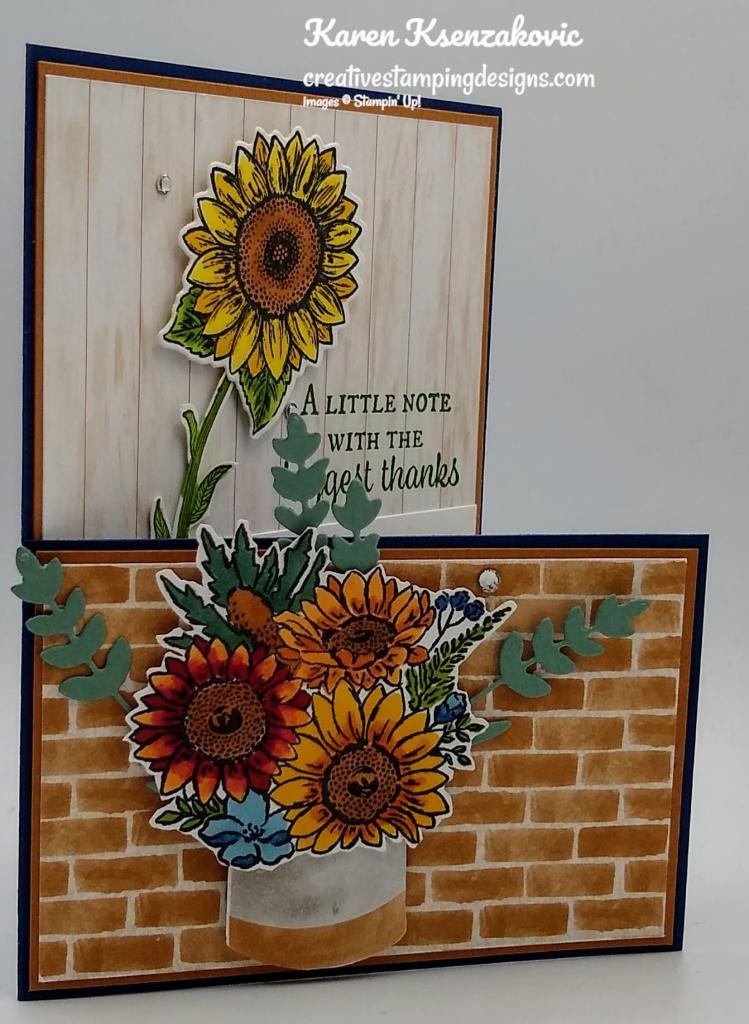
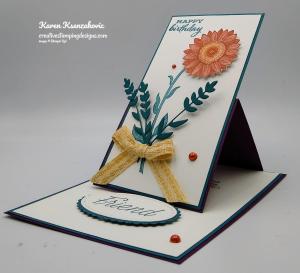
I adhered the small panel to the Daffodil Delight mat using Stampin’ Seal. I adhered the layered panel to the larger stamped panel using Multipurpose Liquid Glue lining up the flowers. I adhered the layered panel to the Daffodil Delight card base using Multipurpose Liquid Glue.

Stampin' Up! Celebrate Sunflowers Spotlight 5 creativestampingdesigns.com

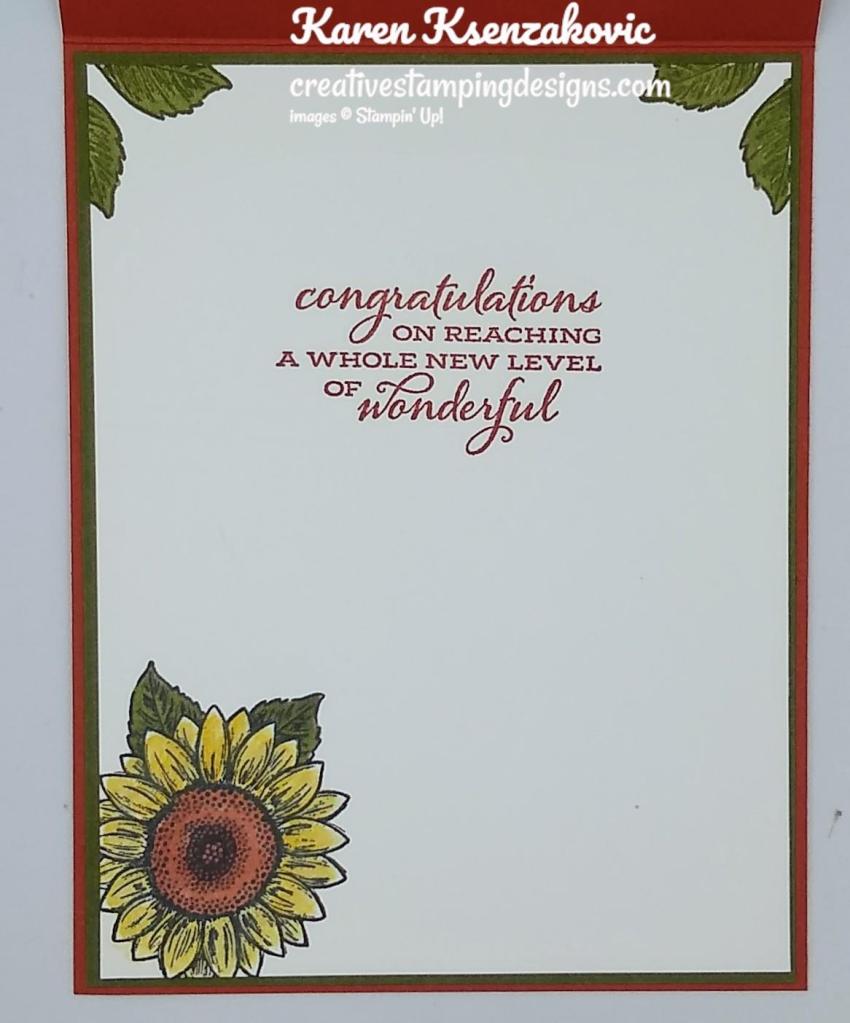
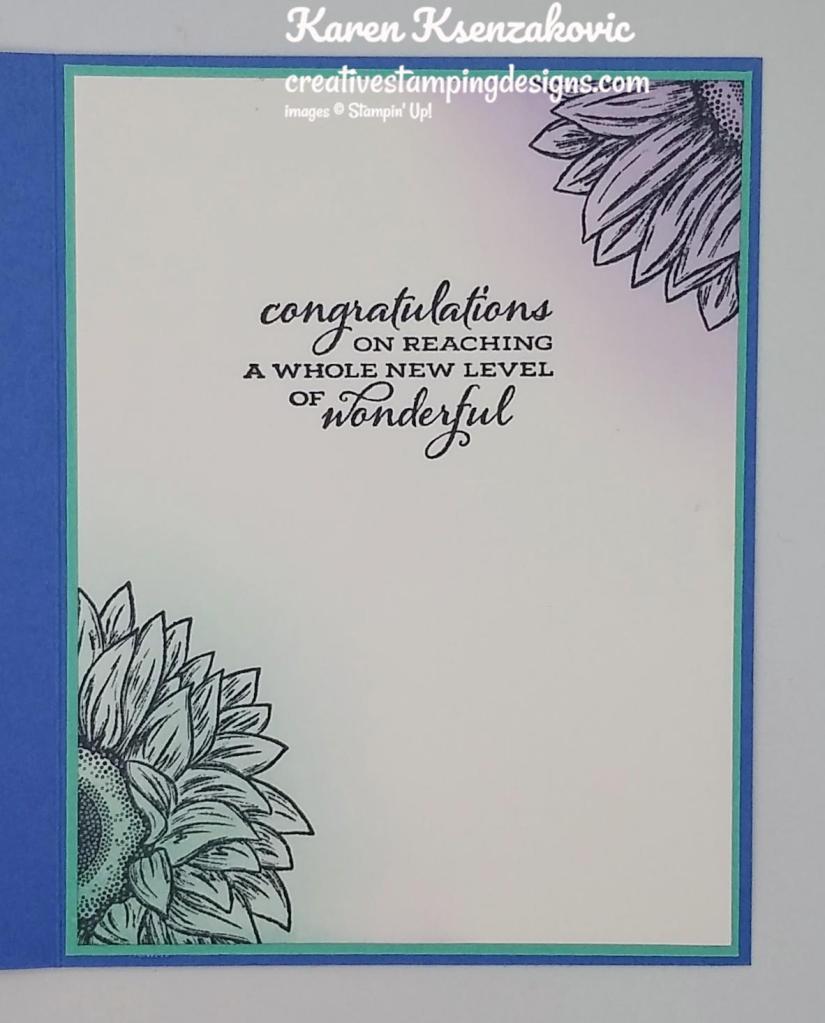
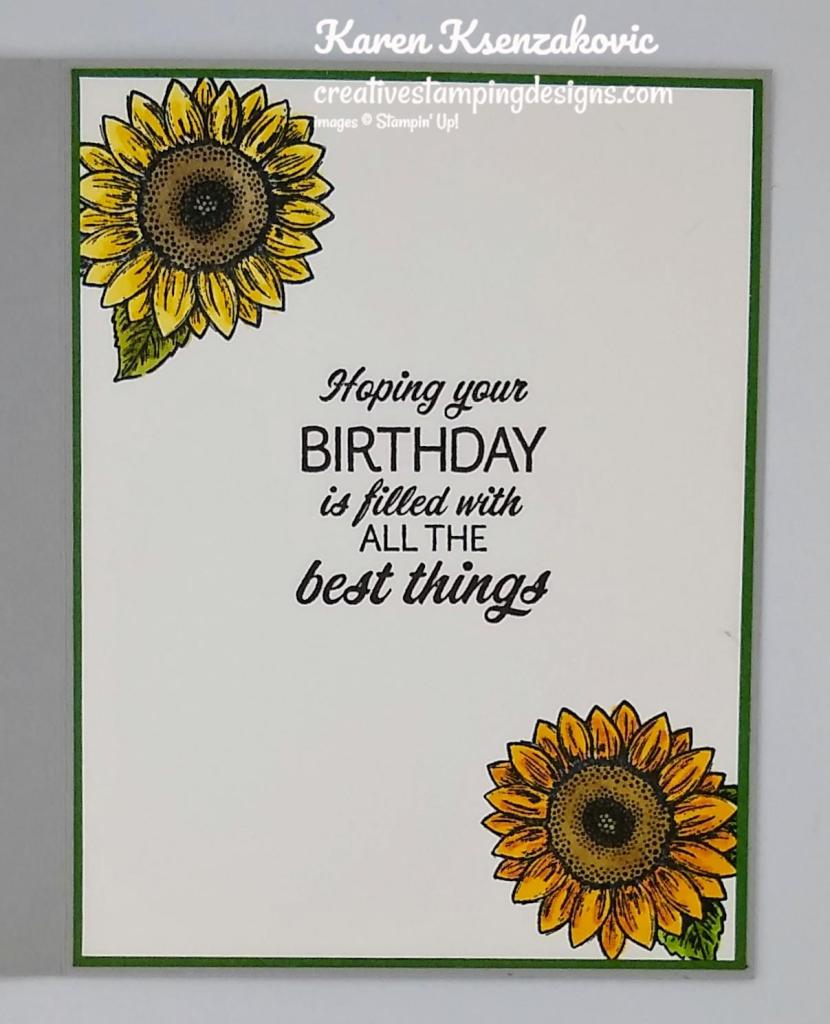
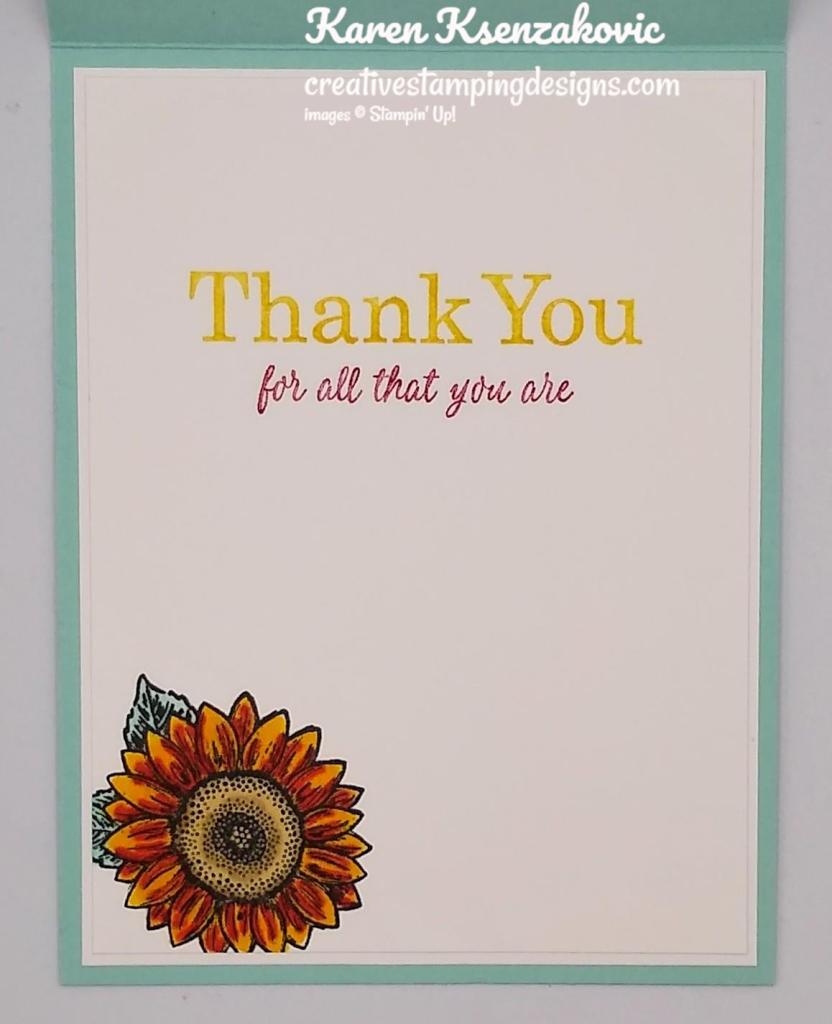
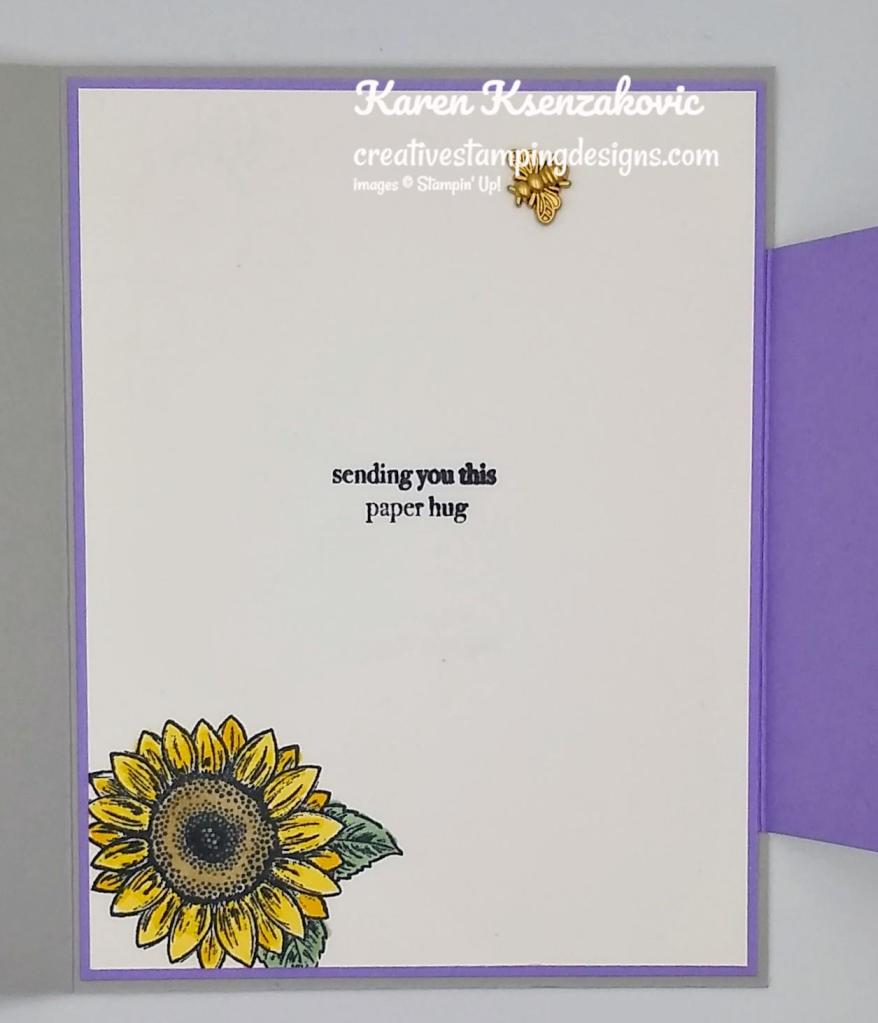
On the inside, I stamped the sentiment from the Celebrate Sunflowers stamp set in Soft Suede Ink on a Basic White panel. I stamped the sentiment from the Go To Greetings stamp set in Soft Suede Ink below the 1st sentiment. I stamped the large sunflower image from the Celebrate Sunflowers stamp set in Soft Suede Ink on the bottom of the panel. I colored the image using my Daffodil Delight and Soft Suede Stampin’ Blends Markers. I adhered the Basic White panel to a Soft Suede mat then to the inside of the Daffodil Delight card base.

Stampin' Up! Celebrate Sunflowers Spotlight 6 creativestampingdesigns.com

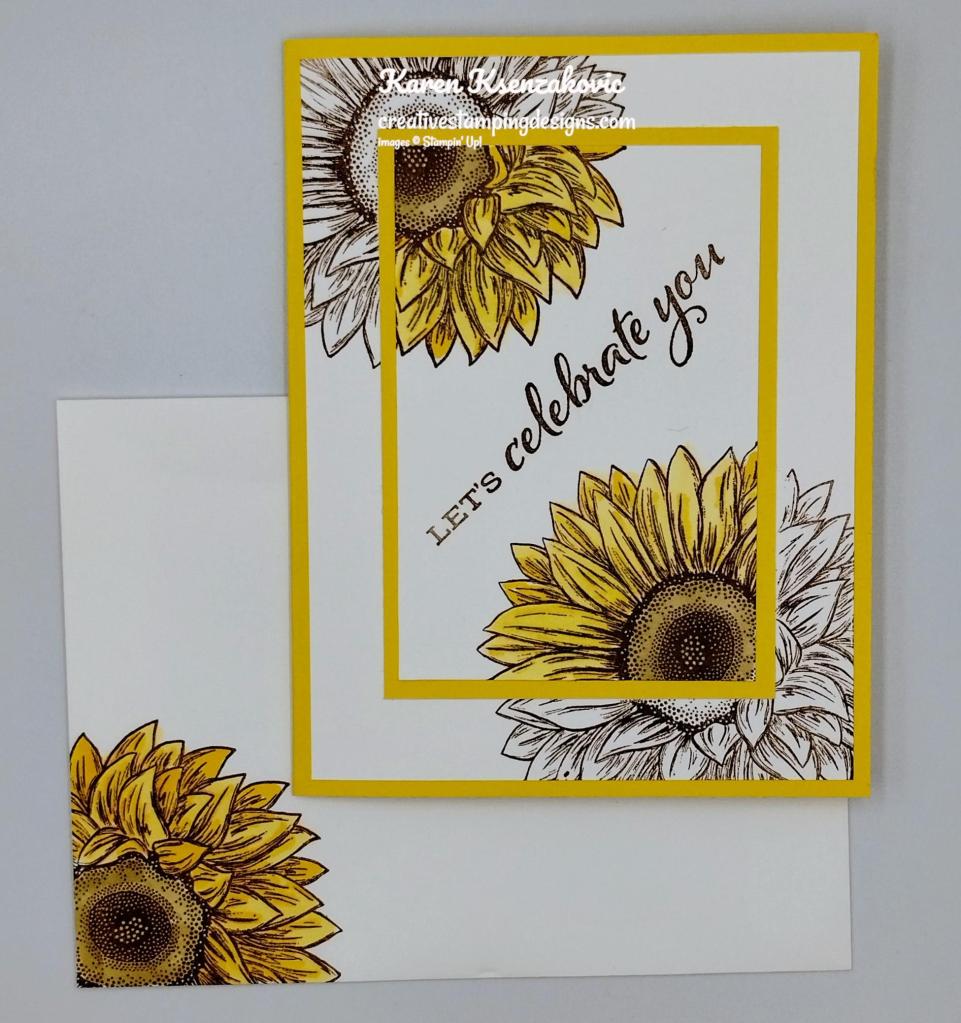
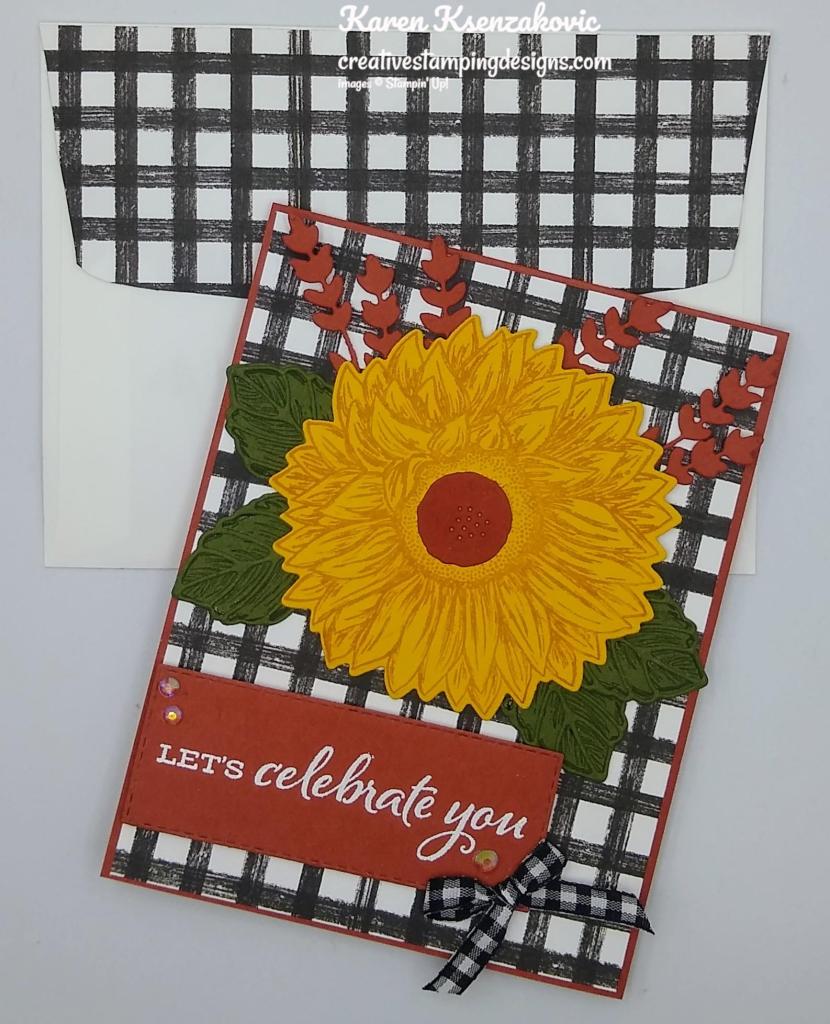
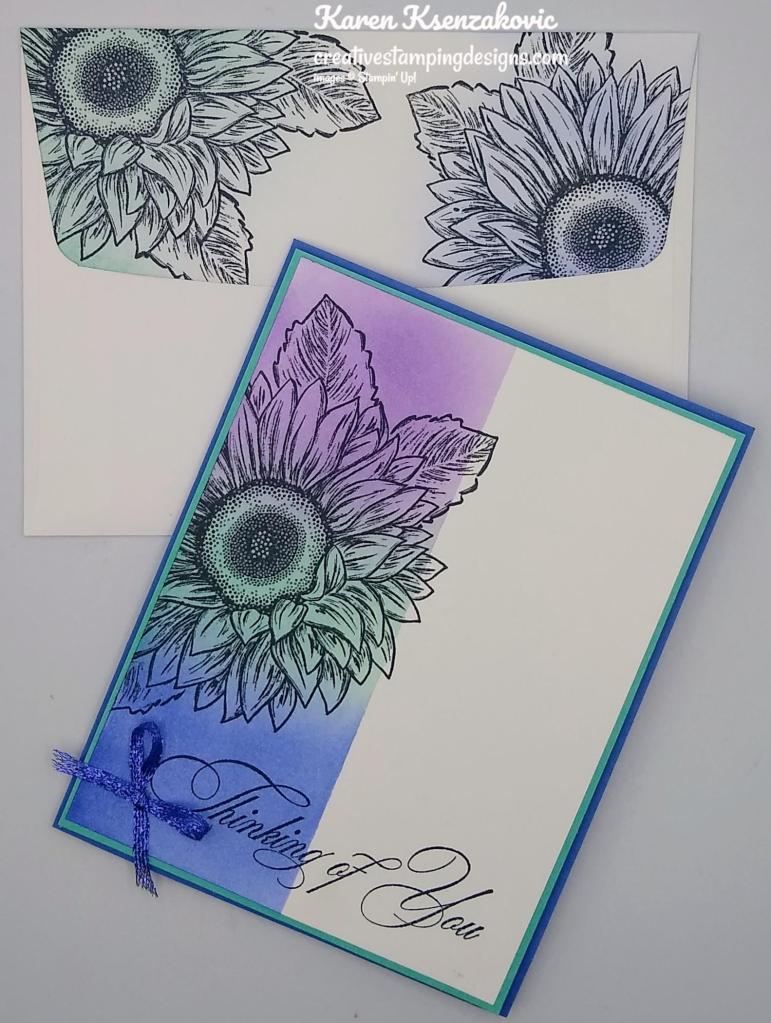
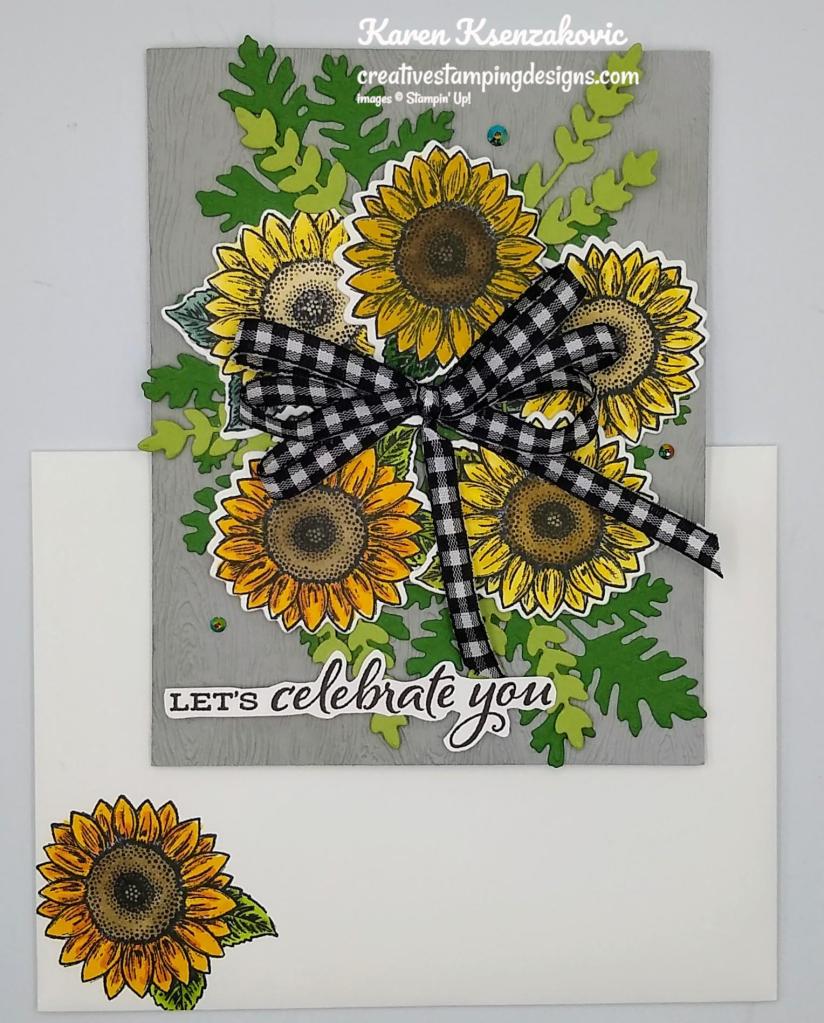
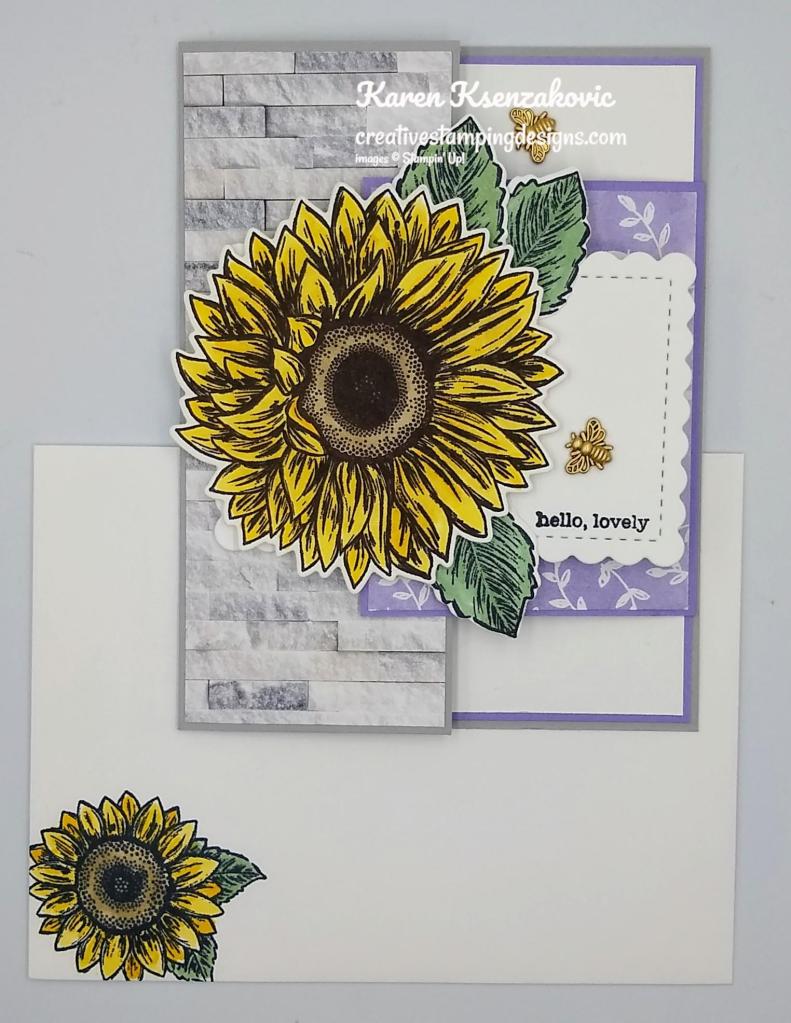
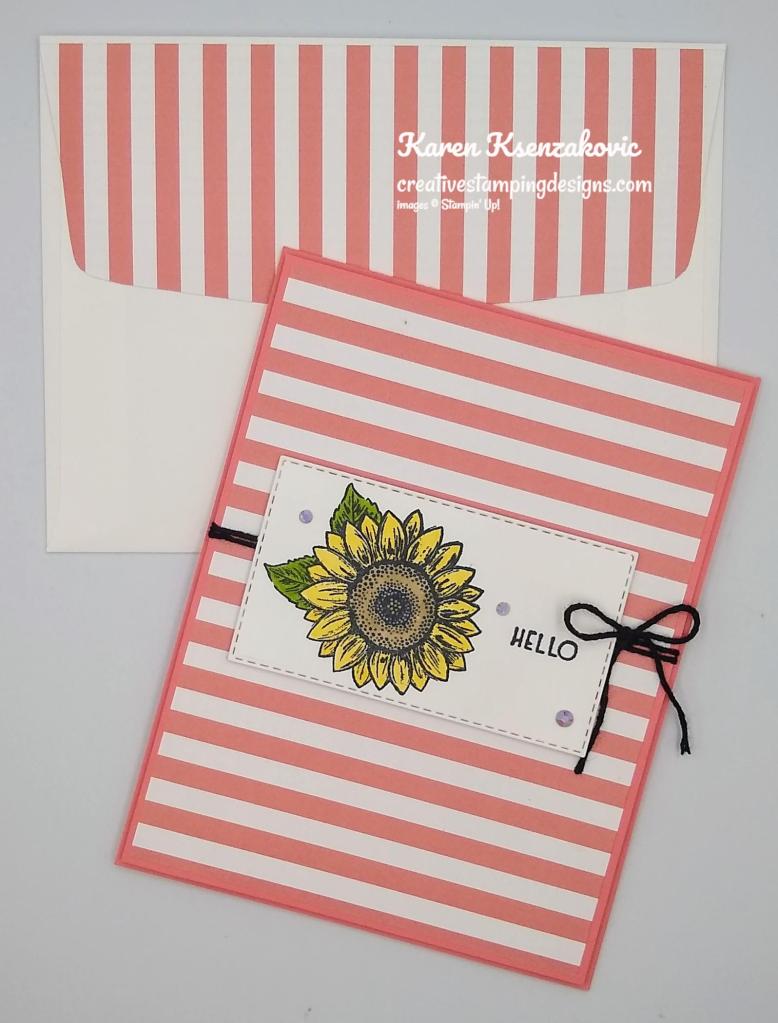
To finish my card, I decorated a Basic White Medium Envelope. I stamped the sunflower image from the Celebrate Sunflowers stamp set on the envelope front and flap in Soft Suede Ink. I colored the images using my Daffodil Delight and Soft Suede Stampin’ Blends Markers.

Stampin' Up! Celebrate Sunflowers Spotlight 7 creativestampingdesigns.com

Thank you for stopping by my blog today. I hope you liked the card and will give it a try. Happy Stamping!!

*********************************************************************************************************

If you need any stamping supplies, I’d love to be your Demonstrator. Just click HERE to go directly to my online store or drop me an email if you have any questions. 

MY CURRENT HOST CODE IS:    7KF3QB4G

Use this host code when placing an order with me. When you order $50 or greater you will receive a free gift from me! If your order is over $150, please do not use this code, but you’ll still get the free gift. The free gift is your choice of any 1 item valued up to $10.00 from the 2022-2023 Annual Catalog or the January-April 2023 Mini Catalog!  Unfortunately, packs of cardstock are no longer an option for a free gift. Shipping has become too expensive to ship and it’s costing me as much to ship as the cardstock costs. For any orders $50 or more I will also send you my monthly class tutorials.  Click HERE or go to my Customer Rewards for more details and to see what this month’s tutorials are.

Please remember to use my current Host Code and make sure that you can see my name on the final checkout page listed as your Demonstrator when you order so that you know that you’re ordering with me, and you’ll get my rewards! 

Happy Stamping, Karen

*********************************************************************************************************

In response to changing policies at Stampin’ Up – I’m adjusting my Ordering Gift policy as well.  I’m having to get a little more tough on the adding of Host codes when you place your order thru my Online Store.

Not to worry – you’re still going to get that $10 ordering gift for orders of $50 (before shipping & tax) or greater.  And the gift is still any 1 SU! product up to that $10 value – which includes some of our fun Host Sets!

But – if you DO NOT use the Host code for your orders of less than $150 (this is the RETAIL total before Shipping & Handling), then you’ll have two options:

  1. You’ll need to call Stampin’ Up! (1-800-Stamp-Up) and ask them to add it for you. They’re very helpful and will get it done quickly!  OR….
  2. If your order was over the $50 threshold but under $150, then…you’ll forfeit that $10 ordering gift and rewards – this is the Bummer Option – and I REALLY don’t want to do this, SO please remember to add my Current Host Code.

*********************************************************************************************************

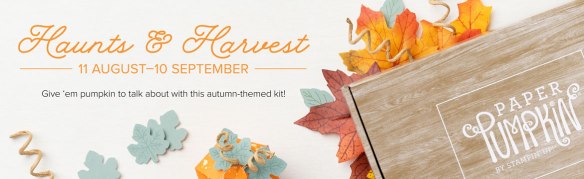
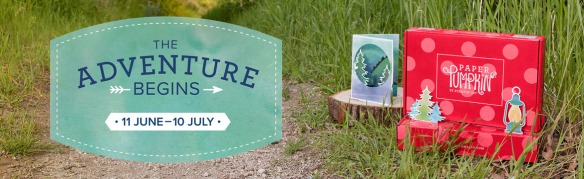
All The Little Things

Subscribe March 11 – April 10

Good things take time, but you can start creating them now with the All the Little Things Paper Pumpkin kit! This kit includes nine cards, three each of three designs, with elegant designs and bright colors. The iridescent foil is the shining detail to bring your crafts together. You can make a card for anyone and for any occasion!

And don’t wait, because anyone who subscribes to this month’s kit will get a FREE box organizer! This organizer fits perfectly inside your Paper Pumpkin box and is great for keeping your supplies from past kits organized, so you know right where everything is! 

This kit includes:

  • 9 cards, 3 each of 3 designs, and 9 coordinating envelopes.
  • 1 photopolymer stamp set with celebratory sentiments.
  • 1 Shaded Spruce Stampin’ Spot.
  • Precut cherry blossom paper pieces with iridescent foil.
  • Unique embellishments and twine.
  • Adhesives to complete the projects.
  • Final card size: 5-1/2” x 4-1/4” (14 x 10.8 cm). 
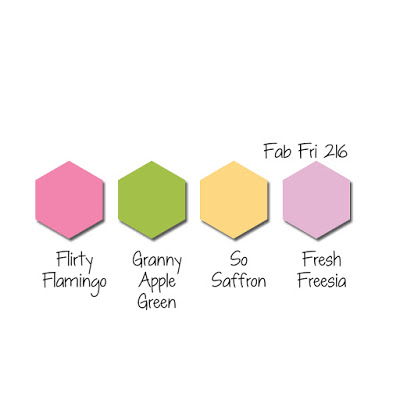
  • Coordinating Stampin’ Up! colors: Balmy Blue, Basic Black, Calypso Coral, Granny Apple Green, Petal Pink, Poppy Parade, Shaded Spruce.
  • FREE box organizer

Subscribe to the April Paper Pumpkin Kit between 11 March 2023 and 10 April 2023 by clicking here!

Note: Supplies may be limited toward the end of the subscription period.

*********************************************************************************************************

Card stock cuts for this project:

  • Basic White Cardstock 2 – 4″ X 5 1/4″ (card front panel & inner liner), 2 5/8″ X 3 7/8″ (card front panel)
  • Daffodil Delight Cardstock 8 1/2″ X 5 1/2″ (card base scored & folded at 4 1/4″), 2 7/8″ X 4 1/8″ (mat)
  • Soft Suede Cardstock 4 1/8″ X 5 3/8″ (inner liner mat)

*********************************************************************************************************

Product List

Stampin’ Up! Celebrate Sunflowers for The Happy Inkin’ Thursday Blog Hop

Good Thursday morning my stamping friends welcome to our Happy Inkin’ Thursday Blog Hop. I hope everyone is doing well today. If you are hopping over from Akiko’s blog, thank you for stopping by. This week we have a beautiful fall Color Challenge. Here is my card using this week’s Colors.

Stampin' Up! Celebrate Sunflowers 1 creativestampingdesigns.com

I used the Stampin’ Up! Celebrate Sunflowers Cling Stamp Set along with the Gingham Cottage Designer Series Paper for my card.

These are out colors for this week

Stampin' Up! Celebrate Sunflowers 2 creativestampingdesigns.com

I started by adhering a panel of Gingham Cottage DSP to a Cajun Craze card base using Multipurpose Liquid Glue.

Stampin' Up! Celebrate Sunflowers 3 creativestampingdesigns.com

Using the Celebrate Sunflowers stamp set, I stamped the large sunflower image in Crushed Curry Ink on a panel of Crushed Curry cardstock. I stamped the leaf image in Mossy Meadow Ink on a panel of Mossy Meadow cardstock. I cut the images out using the Sunflower Dies. I cut the detail leaf image from the panel of Mossy Meadow cardstock and the sprig and flower center dies from a panel of Cajun Craze cardstock.

Stampin' Up! Celebrate Sunflowers 4 creativestampingdesigns.com

I adhered the flower center using Multipurpose Liquid Glue. I adhered the flower to the card front using Stampin’ Dimensionals. I adhered the detailed leaves to the stamped leaves using Multipurpose Liquid Glue. I adhered the leaves and sprigs behind the sunflower using Multipurpose Liquid Glue. I stamped the sentiment from the Celebrate Sunflowers stamp set in Versamark Ink on a panel of Cajun Craze cardstock. I sprinkled it with my White Embossing Powder and set it using my Heat Tool. I cut the sentiment out using the Stitched Rectangle Dies. I adhered the sentiment to the card front using Stampin’ Dimensionals. I tied a small bow using the Black & White 1/4″ Gingham Ribbon and adhered it to the sentiment using a Glue Dot. I added a few Iridescent Rhinestone Basic Jewels to the card front.

Stampin' Up! Celebrate Sunflowers 5 creativestampingdesigns.com

On the inside, I stamped the sentiment from the Celebrate Sunflowers stamp set in Cajun Craze Ink on a Basic White panel. I stamped the small sunflower image from the Celebrate Sunflowers stamp set in Tuxedo Black Ink on the bottom of the panel. I colored the image using my Cajun Craze and Mossy Meadow Stampin’ Blends Markers. I colored the flower petals using my Crushed Curry Watercolor Pencil from the Watercolor Pencil Assortment #2. I adhered the Basic White panel to a Mossy Meadow mat and then to the inside of the Cajun Craze card base.

Stampin' Up! Celebrate Sunflowers 6 creativestampingdesigns.com

To complete my card, I decorated a Basic White Medium Envelope. I stamped the small sunflower image from the Celebrate Sunflowers stamp set in Tuxedo Black Ink on the envelope front. I colored the image the using my Cajun Craze and Mossy Meadow Stampin’ Blends Markers and Crushed Curry Watercolor Pencil. I adhered a panel of Gingham Cottage DSP to the envelope flap.

Stampin' Up! Celebrate Sunflowers 7 creativestampingdesigns.com

Thank you for stopping by my blog today. I hope you liked my card and will give it a try. Now that you’ve seen my card, take a minute to hop through and see everyone’s projects today. If you click on the Next Blog button, you’ll go to Tara’s page. Or you can just click on the names below to go directly to all their blogs! Happy Hopping!!

Amy Koenders:

Mary Deatherage:

Jaimie Babarczy:

Karen Finkle:

Akiko Sudano:

Karen Ksenzakovic: You Are Here

Tara Carpenter:

Terry Lynn Bright:

*********************************************************************************************************

If you need any stamping supplies, I’d love to be your Demonstrator. Just click HERE to go directly to my online store or drop me an email if you have any questions. 

MY CURRENT HOST CODE IS:   QY4S2TZX

Use this host code when placing an order with me. When you order $50 or greater you will receive a free gift from me! If your order is over $150, please do not use this code, but you’ll still get the free gift. The free gift is your choice of any 1 item valued up to $10.00 from the 2021-2022 Annual Catalog or the January – June 2022 Mini Catalog!   For any orders $50 or more I will also send you my monthly class tutorials.  Click HERE or go to my Customer Rewards for more details and to see what this month’s tutorials are.

Please remember to use my current Host Code and make sure that you can see my name on the final checkout page listed as your Demonstrator when you order so that you know that you’re ordering with me and you’ll get my rewards! 

Happy Stamping, Karen

*********************************************************************************************************

Coming Soon!!! Starting September 1, 2022

Some things are great on their own but become epic when they are paired with something else: cereal and milk, toast and butter, Fred Astaire and Ginger Rogers. We may be biased, but our favorite combo is our stamp sets and dies—and that’s what the Perfect Partners promotion is all about! 

We created six new dies that coordinate with stamp sets in the 2022–2023 Annual Catalog and the July–December 2022 Mini Catalog. These coordinating dies will only be available during this promotion and will not be offered in any catalog.  

These stamp sets and dies are available separately or as a bundle. By buying the bundle, you and your customers will save 10% off the retail price. 

Put these wonderful stamp sets and dies together for more papercrafting fun!

Interested in Being Able to Order Them Now? Join My Team!!

Being a demonstrator, you are able to order products ahead of customers. You get to attend the Stampin’ Up! events and be a part of an awesome team and community. There is no obligation to sell or blog, you can join as a Hobby Demonstrator just to enjoy the discount. For just $99 you get to pick $125 in product of your choice. Stampin’ Up! includes a past Paper Pumpkin Kit along with some business items in case you want to make it a business. This all ships for FREE. After that all your future orders you get to enjoy a 20% discount. Ask me how!!

If you join during Sale-a-bration you will receive this awesome Making Plans Collection absolutely free. It includes a July 2022-December 2023 Making Plans Planner including an 8″ X 9 1/2″ Faux Leather Carrying Case, 5 1/2″ X 8 1/2″ Planer Pages, Monthly Divider Pages and Sticker Sheets. It also includes 3 – Creative Journals that are 5 3/4″ X 8″ and a Making Plans Photopolymer Stamp Set. Contact me for more information at creativestampingdesigns@gmail.com. I’d love to have you on my team. You can join as a hobby demonstrator just to enjoy the discount for yourself. No obligations to sell, hold classes or have a blog.

*********************************************************************************************************

New Sale-a-bration Items Added

Stampin’ Up! has added some additional items that you can earn for FREE with orders beginning at $50 during Sale-a-bration!  You can see the new items Here. There are some really great new items to pick from!  You’ll see them added to the list of options that you can pick for free with orders of $50+ as you go through the checkout process.  Let me know if you have any questions.  Happy Shopping!

*********************************************************************************************************

The Back To School Sales Tax Holiday is going on until September. For those of you living in Massachusetts, yours is going on now. New Jersey is from August 27th – September 5th!! Be sure to check the list.

The good news is that some items in the Stampin’ Up! Catalogs qualify for the sales tax holidays!  The list of sales tax holidays by state and items in that state that qualify Here on a printable PDF. Check it out to see when your state has the Sales Tax Holiday.

*********************************************************************************************************

Spooky Treats

Subscribe August 11 – September 10

Get your Halloween crafting on with the Spooky Treats Paper Pumpkin Kit. This month’s kit includes everything you need to make 18 absolutely adorable (and just the right amount of spooky) treat boxes—that’s 6 each of 3 unique designs! No need to let the season creep up on you; subscribe and order your kit today.


Plus, we’re putting the TREAT in trick-or-treat with a special GIVEAWAY on social media starting 5 September at 9:00am (MT)! Simply follow @PaperPumpkin on Instagram or the Paper Pumpkin page on Facebook, like either post, and mention three friends in the comments for your chance to win one of two personalized JBL speakers. You’ll have to be quick because the giveaway closes 8 September at 4:00pm (MT). Don’t miss out on this fang-tastic opportunity!

This kit includes:

  • This month’s kit contains enough elements to create 18 treat boxes—6 each of 3 designs. This all-inclusive kit includes printed box bases and tops, die-cut paper pieces, adhesives, and more!
  • The Spooky Treats Paper Pumpkin Kit includes an Orchid Oasis Classic Stampin’ Spot!
  • This kit’s stamp set puts the TREAT in trick-or-treat with fun, Halloween-themed sentiments and designs. Embrace the spooky season with ghost, bat, spider, and star images.
  • This kit also includes a special peek-through box top on one of the box designs.

Finished box size: 2-1/2″ x 3″ x 1″ (6.4 x 7.6 x 2.5 cm)

Coordinating Stampin’ Up! colors: Basic Black, Gray Granite, Orchid Oasis, Fresh Freesia, Crushed Curry, Pumpkin Pie

Subscribe to the August Paper Pumpkin Kit between 11 August and 10 September at paperpumpkin.com!

Note: Supplies may be limited toward the end of the subscription period.

*********************************************************************************************************

Card stock cuts for this project:

  • Basic White Cardstock 4″ X 5 1/4″ (inner liner)
  • Cajun Craze Cardstock 4 1/4″ X 11″ (card base scored & folded at 5 1/2″), 1 1/2″ X 5 1/2″ (sprigs), 1 3/4″ X 5″ (sentiment & flower center)
  • Crushed Curry Cardstock 3 1/2″ X 4 1/4″ (flower)
  • Mossy Meadow Cardstock 3″ X 5″ (leaves), 4 1/8″ X 5 3/8″(inner liner mat)
  • Gingham Cottage Designer Series Paper 4 1/8″ X 5 3/8″ (card front), 2 1/4″ X 6″ (envelope)

*********************************************************************************************************

Product List

Stampin’ Up! Celebrate Sunflowers CAS

Good Saturday morning my stamping friends and welcome to the weekend. I hope you have something fun planned for the weekend.

Today I have a CAS card for you. I pulled out an older set to play with along with my Blending Brushes. Here’s my card for today.

I used the Stampin’ Up! Celebrate Sunflowers Cling Stamp Set along with the Stampin’ Up! Go To Greetings Cling Stamp Set for my card today.

My colors today are from Hand Stamped Sentiments Challenge #393.

I started by masking off half of a Basic White card front using Post-It Note Tape. Using my Blending Brushes, I added Highland Heather Ink to the top of the panel. I added Coastal Cabana Ink below the Highland Heather and Orchid Oasis on the bottom of the panel. Once I had the depth of color that I wanted I removed the Post-It Note Tape.

I stamped the large sunflower image from the Celebrate Sunflowers stamp set in Tuxedo Black Ink. I covered the sunflower with a sticky note mask I had cut out and stamped the leaf image from the Celebrate Sunflowers stamp set around the sunflower in Tuxedo Black Ink. I stamped the sentiment from the Go To Greetings stamp set on the bottom of the card front in Tuxedo Black Ink.

I adhered the card front to a Coastal Cabana mat using Stampin’ Seal. I adhered the layered panel to an Orchis Oasis card base using Stampin’ Dimensionals. I added a small bow using the Orchid Oasis 1/8″ Metallic Woven Ribbon using a Glue Dot.

On the inside I stamped the sentiment from the Celebrate Sunflowers stamp set in Tuxedo Black Ink on a Basic White panel. I stamped the large sunflower image from the Celebrate Sunflowers stamp set in Tuxedo Black Ink in 2 of the corners. I added some Highland Heather and Coastal Cabana ink using my Blending Brushes. I adhered the Basic White panel to a Coastal Cabana mat and then to the inside of the Orchid Oasis card base.

To finish my card, I decorated a Basic White Medium Envelope. I stamped the large sunflower image from the Celebrate Sunflowers stamp set in Tuxedo Black Ink on the envelope front and flap. Using my Blending Brushes, I added color to each of the sunflowers.

Thank you for stopping by my blog today. I hope you liked my card and will give it a try. Happy Stamping!!

*********************************************************************************************************

If you need any stamping supplies, I’d love to be your Demonstrator. Just click HERE to go directly to my online store or drop me an email if you have any questions. 

MY CURRENT HOST CODE IS:   RGVNBY93

Use this host code when placing an order with me. When you order $50 or greater you will receive a free gift from me! If your order is over $150, please do not use this code, but you’ll still get the free gift. The free gift is your choice of any 1 item valued up to $10.00 from the 2021-2022 Annual Catalog or the January – June 2022 Mini Catalog!   For any orders $50 or more I will also send you my monthly class tutorials.  Click HERE or go to my Customer Rewards for more details and to see what this month’s tutorials are.

Please remember to use my current Host Code and make sure that you can see my name on the final checkout page listed as your Demonstrator when you order so that you know that you’re ordering with me and you’ll get my rewards! 

Happy Stamping, Karen

*********************************************************************************************************

Sweet Sunflowers

Subscribe July 11 – August 10

Here comes the sun(flower) for a crafting experience you won’t forget! The Sweet Sunflowers Paper Pumpkin Kit has so much in store—elegant watercolor designs hand-crafted by our in-house artists, TWO Classic Stampin’ Spots for a Two-Step stamping experience, and the all-new twist technique to make your floral designs come alive with depth and detail! 
And the August Paper Pumpkin Kit includes the Gold Foil Honeycomb Sheets as a FREE gift that will add the perfect golden accent to any card or project. We can’t wait to see the bee-utiful projects you’ll create! 

Item Number: 161120

This kit includes:

  • All the supplies you need to create 9 cards: 3 each of 3 designs; and coordinating envelopes.
  • An all-occasion stamp set to express words of gratitude, friendship, greetings and beautiful wildflower designed images.
  • Specialty Vellum honeycomb shape pre-cut pieces.
  • 2 Classic Stampin’ Spots (Crushed Curry and Soft Suede) for a Two-Step stamping experience with a twist!
  • Paper pieces and embellishments with watercolor designs and images.
  • Mini Stampin’ Dimensionals.
  • FREE GIFT: 8 Gold Foil Honeycomb Sheets

Completed card size: 5-1/2″ x 4-1/4″ (14 x 10.8 cm)

Coordinating Stampin’ Up! colors: Blackberry Bliss, Crushed Curry, Evening Evergreen, Melon Mambo, Mossy Meadow, Night of Navy, Pumpkin Pie, Soft Suede

Subscribe to the July Paper Pumpkin Kit between 11 July and 10 August at paperpumpkin.com!

Note: Supplies may be limited toward the end of the subscription period.

*********************************************************************************************************

If you join during Sale-a-bration you will receive this awesome Making Plans Collection absolutely free. It includes a July 2022-December 2023 Making Plans Planner including an 8″ X 9 1/2″ Faux Leather Carrying Case, 5 1/2″ X 8 1/2″ Planer Pages, Monthly Divider Pages and Sticker Sheets. It also includes 3 – Creative Journals that are 5 3/4″ X 8″ and a Making Plans Photopolymer Stamp Set. Contact me for more information at creativestampingdesigns@gmail.com. I’d love to have you on my team. You can join as a hobby demonstrator just to enjoy the discount for yourself. No obligations to sell, hold classes or have a blog.

*********************************************************************************************************

Card stock cuts for this project:

  • Basic White Cardstock 2 – 4″ X 5 1/4″ (card front & inner liner)
  • Coastal Cabana Cardstock 2 – 4 1/8″ X 5 3/8″ (card front & inner liner mats)
  • Orchid Oasis Cardstock 8 1/2″ X 5 1/2″ (card base scored & folded at 4 1/4″)

*********************************************************************************************************

Product List

Stampin’ Up! Celebrate Sunflowers Birthday

Good Wednesday morning my stamping friends. How is everyone doing today? We’re halfway through the week and the weekend is right around the corner.

It’s time for another inspiration challenge for The Card Concepts. The inspiration photo is Sunny Sunflowers. Here is my card that was inspired from the challenge photo.

I used the Stampin’ Up! Celebrate Sunflowers Cling Stamp Set for my Free Style Collage Card. I was inspired by the beautiful sunflower bouquet and the colors.

I hope you will take a moment to visit The Card Concepts and join us for our challenge #160.  How are you inspired by this photo?

I started by embossing a Smoky Slate card front using the Timber 3D Embossing Folder. Using my Blending Brush, I brushed a little Smoky Slate Ink over the embossed panel to give it a little color. I adhered the card front to a Smoky Slate card base using Multipurpose Liquid Glue.

On a panel of Basic White cardstock I stamped the small sunflower image from the Celebrate Sunflowers stamp set in Tuxedo Black Ink. I colored the images in using my Crumb Cake, Daffodil Delight, Granny Apple Green, Just Jade, Old Olive, Pumpkin Pie, Soft Succulent, Soft Suede and So Saffron Stampn’ Blends Markers. I cut the images out using my Sunflower Dies. I cut 5 of the sprig dies using the Sunflower Dies from a panel of Pear Pizzazz cardstock. I cut the large leaf die from the Beautiful Leaves Dies from a panel of Garden Green cardstock.

I adhered the large Garden Green leaf to the card front using Multipurpose Liquid Glue. I arranged the sunflowers the way I wanted them and adhered them with Multipurpose Liquid Glue and Stampin’ Dimensionals. I adhered the sprigs under the sunflowers using Multipurpose Liquid Glue on the stems only. I made a triple loop bow using the Black & White 1/4″ Gingham Ribbon and adhered it to the center of the sunflowers using a Glue Dot. I stamped the sentiment from the Celebrate Sunflowers stamp set in Early Espresso Ink on a panel of Basic White cardstock and fussy cut it using my Paper Snips. I adhered it to the bottom of the card front using Stampin’ Dimensionals. I added a few 2021-2023 In-Color Jewels to the card front.

On the inside I stamped the sentiment from the Stampin’ Up! Sunny Sentiments Cling Stamp Set in Early Espresso Ink on a Basic White panel. I stamped the small sunflower image from the Celebrate Sunflowers stamp set in Tuxedo Black Ink in 2 of the corners of the panel and colored them in the same as I did for the card front. I adhered the Basic White panel to a Garden Green mat using Stampin’ Seal and then to the inside of the Smoky Slate card base using Multipurpose Liquid Glue.

To complete my card I decorated a Basic White Medium Envelope. I stamped the small sunflower image from the Celebrate Sunflowers stamp set on the envelope front and flap in Tuxedo Black Ink. I colored the sunflowers in the same as I did for the card.

Thank you for stopping by my blog today. I hope you liked my card and will give it a try. Happy Stamping!!

*********************************************************************************************************

If you need any stamping supplies, I’d love to be your Demonstrator. Just click HERE to go directly to my online store or drop me an email if you have any questions. 

MY CURRENT HOST CODE IS:   JAK446GF

Use this host code when you order $50 or greater and receive a free gift from me! If your order is over $150, please do not use this code, but you’ll still get the free gift. The free gift is your choice of any 1 item valued up to $10.00 from the 2020-2021 Annual Catalog or the January-June 2021 Mini Catalog!   For any orders $50 or more I will also send you my monthly class tutorials.  Click HERE or go to my Customer Rewards for more details and to see what this months tutorials are.

Please remember to use my current Host Code and make sure that you can see my name on the final checkout page listed as your Demonstrator when you order so that you know that you’re ordering with me and you’ll get my rewards! 

Happy Stamping, Karen!

*********************************************************************************************************

Awesome Joining Promotions Until September 30, 2021

This image has an empty alt attribute; its file name is CRw3UiG1VcNw0fLUGVJqZ-YwyPUUS6uG8wmP4PTx-IdrSjQTpH-NKMtihO-191VvLnyi4n_MrGC7EEfGuHnVm2X-oA9cb_oiKgAHZnJdAnlMVA66mu2wtYmqiqWygCR5dtYtoVNkHcCb9w7RzyU6p9P124S08o1A2FmIRA8VDYEA1jbiHaw=s0-d-e1-ft

There is an AWESOME joining promotion happening!  If you purchase the Starter Kit between August 3 and September 30, you’ll get to pick a FREE bundle from this list!

  • Frosted Gingerbread
  • Christmas Season
  • Christmas To Remember
  • Whimsical Trees
  • Peaceful Deer
  • Sweet Little Stockings
  • Penguin Place
  • Peaceful Cabin
  • Arctic Bears
  • Beauty Of Tomorrow
  • Gorgeous Leaves
  • Nature’s Harvest

When you purchase the Starter Kit for $99 + taxes (if applicable), the kit ships for FREE and YOU get to pick $125 in Stampin’ Up! merchandise OF YOUR CHOICE. If you purchase the kit during Sale-a-bration, you’ll get an additional FREE bundle from the select twelve listed above (with a value up to $60.25!!) with your kit!  A free bundle in addition to $125 in merchandise for $99, YES PLEASE!! You will also get a past Paper Pumpkin Kit and other supplies free in your kit.

If you are planning on placing an order of $100, you might really want to consider joining. This is such an awesome joining deal, you don’t want to pass it up. There is no obligation to sell, have workshops or do Facebook lives. You can join strictly to be a ‘hobby demonstrator’ and enjoy the 20% discount. I would love to have you on my team!!! You also get to enjoy all the demonstrator perks like early ordering, sneak peeks at what’s coming and best of all the events. Why wait, this is such a great sign up promotions, join now and be a part of our awesome Stampin’ Up! family!!!

If you have any questions about joining, please drop me a note at creativestampingdesigns@gmail.com, I’d love to talk with you about it! You can find more information about joining on my blog @ creativestampingdesigns.com

*********************************************************************************************************

Peaceful Christmas

Subscribe September 11 – October 10


When you picture a peaceful Christmas, what comes to mind? Do you see snow outside your window, softly swirling through the sky? A tree trimmed with tinsel, a fire crackling nearby? Maybe you’re dreaming of decorating a holly jolly gingerbread house. Can you catch a whiff of Christmas cookies wafting through the air?

Whatever it is you think about when Christmas comes to town, picture a peaceful Christmas with the Peaceful Christmas Paper Pumpkin Kit! This glimmering and gleaming kit is your creative kickstart to Christmas cardmaking. With sprinkles of snow, shimmering silver skies, and heartwarming holiday wishes, you’ll have enough elements and embellishments to create 10 Christmas cards and coordinating envelopes.

Speaking of coordination, make even more Christmas magic with Peaceful Place products! Our stunning Peaceful Place Suite Collection (item 156277) pairs perfectly with the kit’s components. Brew a cup of cocoa, snuggle up with a soft blanket, and prepare for a cozy craft night in!

Details:

  • The kit contains enough elements to create 10 Christmas cards—5 each of 2 designs—and coordinating envelopes. This all-inclusive kit includes printed card bases, die-cut paper pieces, embellishments, adhesive, and more!
  • October’s kit arrives in a cute collectible box covered with enchanting evergreen trees. Use this special, limited-edition box to store your holiday handicrafts, or transform it into a well-wrapped package for a present!
  • The kit’s contents pair perfectly with the Peaceful Place Suite Collection (item 156277). To continue your Christmas crafting, combine the kit’s components with the suite’s patterned paper, shimmery sequins, and more!
  • Card size: 4-1/4″ x 5-1/2″ (10.8 x 14 cm)
  • Envelope size: 4-1/2″ x 5-3/4″ (11.4 x 14.6 cm)
  • Coordinating colors: Basic Gray, Real Red, Shaded Spruce, silver foil

Subscribe to the October 2021 Paper Pumpkin Kit between 11 September and 10 October at paperpumpkin.com!

Note: Supplies may be limited toward the end of the subscription period.

*********************************************************************************************************

Card stock cuts for this project:

  • Basic White Cardstock 5 1/2″ x 4 1/2″ (artwork), 3 1/2″ X 1″ (sentiment), 4″ x 5 1/4″ (inner liner)
  • Garden Green Cardstock 5 1/2″ X 6″ (leaf die), 4 1/8″ x 5 3/8″ (inner liner mat)
  • Pear Pizzazz Cardstock 4 3/4″ x 3 1/2″ (sprigs)
  • Smoky Slate Cardstock 8 1/2″ X 5 1/2″ (card base scored & folded at 4 1/4″), 4 1/4″ X 5 1/2″ (card front)

*********************************************************************************************************

Product List

Paper Snips

[103579]
$10.00

Stamparatus

[146276]
$49.00

Stampin’ Up! Celebrate Sunflowers for Fun Fold Friday

Good Friday morning my stamping friends. Welcome to my Fun Fold Friday. How was everyone’s week? Does anyone have plans for the weekend? By the time you are reading this I will be in the air flying to Georgia for our retreat (hopefully). I can’t wait to get there to stamp, eat and laugh with friends all weekend long.

Today’s card I made on my Facebook Live video on Wednesday. If you were able to join me or watched the replay, thank you. If you’d like to watch my video and stamp along, the measurements are below along with the links to my Facebook page and my YouTube channel. A couple weeks ago I told you I was going to a Sunflower Maze. I did go and it was amazing. That is where some of my inspiration for my card today came from. I’ve shared a few pictures below of our day at the maze. Here’s my card for today.

I used the Stampin’ Up! Celebrate Sunflowers Cling Stamp Set, the Stampin’ Up! Jar of Flowers Photopolymer Stamp Set along with the Bloom Where You’re Planted Designer Series Paper for my card today.

I started by cutting my Night of Navy card base. I cut the front panel at the 2 3/4″ mark to the outside edge. I then cut on the 4 1/4″ score line up from the 2 3/4″ cut line. I adhered a panel of Bloom Where You’re Planted DSP to a Cinnamon Cider mat using Multipurpose Liquid Glue. I adhered the layered panel to the bottom of the card front using Multipurpose Liquid Glue.

On a panel of Basic White cardstock I stamped the small sunflower from the Celebrate Sunflowers stamp set and the bouquet from the Jar of Flowers stamp set in Tuxedo Black Ink. I stamped the flowerpot image from the Stampin’ Up! Plentiful Plants Photopolymer Stamp Set in Cinnamon Cider Ink on the Basic White panel. I colored the images in using my Balmy Blue, Cherry Cobbler, Cinnamon Cider, Daffodil Delight, Granny Apple Green, Night of Navy, Pumpkin Pie and Soft Succulent Stampin’ Blends Markers. I cut the small sunflower image out using my Sunflower Dies and the flowerpot image using my Perfect Plants Dies. I fussy cut the sunflower bouquet using my Paper Snips. I cut a few sprigs from the Sunflower Dies from a panel of Soft Succulent cardstock.

I fussy cut one of the flowerpot images from a panel of the Bloom Where You’re Planted DSP using my Paper Snips. I adhered the Soft Succulent sprigs to the back of the flowerpot using Stampin’ Seal. I adhered the sunflower bouquet to the front of the flowerpot using Glue Dots then adhered the arrangement to the card front using Stampin’ Dimensionals. I added a few Rhinestone Basic Jewels to the card front.

On the inside on a panel of Basic White cardstock I stamped the stem image from the Stampin’ Up! Daisy Lane Cling Stamp Set in Garden Green Ink. I cut the panel at 2 1/2″ and fussy cut around the stem using my Paper Snips. I adhered a panel of Bloom Where You’re Planted DSP to the top of a Cinnamon Cider mat using Multipurpose Liquid Glue. I adhered the Basic White panel with the stem to the bottom of the Cinnamon Cider mat using Multipurpose Liquid Glue. I stamped the sentiment from the Plentiful Plants stamp set in Garden Green Ink on the DSP panel. I adhered the small sunflower die to the top of the stem using Stampin’ Dimensionals. I adhered the die cut flowerpot to the bottom of the stem using Stampin’ Seal.

To finish my card I decorated a Basic White Medium Envelope. I stamped the small sunflower image from the Celebrate Sunflowers stamp set in Tuxedo Black Ink on the bottom front of the envelope and colored it in the same as I did for the card. I adhered a panel of Bloom Where You’re Planted DSP to the envelope flap.

Thank you for stopping by my blog today. I hope you liked my card and will give it a try. If you do CASE this card, please feel free to post it in the comments of my Facebook page under the post. I’d love to see your take on the card. The list of measurements are below if you’d like to stamp along while watching the video. You can watch my video on my Facebook page Here.

You can also view the video on my YouTube channel Here. Happy Stamping!!

*********************************************************************************************************

If you need any stamping supplies, I’d love to be your Demonstrator. Just click HERE to go directly to my online store or drop me an email if you have any questions. 

MY CURRENT HOST CODE IS:   JAK446GF

Use this host code when you order $50 or greater and receive a free gift from me! If your order is over $150, please do not use this code, but you’ll still get the free gift. The free gift is your choice of any 1 item valued up to $10.00 from the 2020-2021 Annual Catalog or the January-June 2021 Mini Catalog!   For any orders $50 or more I will also send you my monthly class tutorials.  Click HERE or go to my Customer Rewards for more details and to see what this months tutorials are.

Please remember to use my current Host Code and make sure that you can see my name on the final checkout page listed as your Demonstrator when you order so that you know that you’re ordering with me and you’ll get my rewards! 

Happy Stamping, Karen!

*********************************************************************************************************

Awesome Joining Promotions Until September 30, 2021

This image has an empty alt attribute; its file name is CRw3UiG1VcNw0fLUGVJqZ-YwyPUUS6uG8wmP4PTx-IdrSjQTpH-NKMtihO-191VvLnyi4n_MrGC7EEfGuHnVm2X-oA9cb_oiKgAHZnJdAnlMVA66mu2wtYmqiqWygCR5dtYtoVNkHcCb9w7RzyU6p9P124S08o1A2FmIRA8VDYEA1jbiHaw=s0-d-e1-ft

There is an AWESOME joining promotion happening!  If you purchase the Starter Kit between August 3 and September 30, you’ll get to pick a FREE bundle from this list!

  • Frosted Gingerbread
  • Christmas Season
  • Christmas To Remember
  • Whimsical Trees
  • Peaceful Deer
  • Sweet Little Stockings
  • Penguin Place
  • Peaceful Cabin
  • Arctic Bears
  • Beauty Of Tomorrow
  • Gorgeous Leaves
  • Nature’s Harvest

When you purchase the Starter Kit for $99 + taxes (if applicable), the kit ships for FREE and YOU get to pick $125 in Stampin’ Up! merchandise OF YOUR CHOICE. If you purchase the kit during Sale-a-bration, you’ll get an additional FREE bundle from the select twelve listed above (with a value up to $60.25!!) with your kit!  A free bundle in addition to $125 in merchandise for $99, YES PLEASE!! You will also get a past Paper Pumpkin Kit and other supplies free in your kit.

If you are planning on placing an order of $100, you might really want to consider joining. This is such an awesome joining deal, you don’t want to pass it up. There is no obligation to sell, have workshops or do Facebook lives. You can join strictly to be a ‘hobby demonstrator’ and enjoy the 20% discount. I would love to have you on my team!!! You also get to enjoy all the demonstrator perks like early ordering, sneak peeks at what’s coming and best of all the events. Why wait, this is such a great sign up promotions, join now and be a part of our awesome Stampin’ Up! family!!!

If you have any questions about joining, please drop me a note at creativestampingdesigns@gmail.com, I’d love to talk with you about it! You can find more information about joining on my blog @ creativestampingdesigns.com

*********************************************************************************************************

Peaceful Christmas

Subscribe September 11 – October 10

This image has an empty alt attribute; its file name is 09-11-21_header_peaceful_christmas.jpg


When you picture a peaceful Christmas, what comes to mind? Do you see snow outside your window, softly swirling through the sky? A tree trimmed with tinsel, a fire crackling nearby? Maybe you’re dreaming of decorating a holly jolly gingerbread house. Can you catch a whiff of Christmas cookies wafting through the air?

Whatever it is you think about when Christmas comes to town, picture a peaceful Christmas with the Peaceful Christmas Paper Pumpkin Kit! This glimmering and gleaming kit is your creative kickstart to Christmas cardmaking. With sprinkles of snow, shimmering silver skies, and heartwarming holiday wishes, you’ll have enough elements and embellishments to create 10 Christmas cards and coordinating envelopes.

Speaking of coordination, make even more Christmas magic with Peaceful Place products! Our stunning Peaceful Place Suite Collection (item 156277) pairs perfectly with the kit’s components. Brew a cup of cocoa, snuggle up with a soft blanket, and prepare for a cozy craft night in!

Details:

  • The kit contains enough elements to create 10 Christmas cards—5 each of 2 designs—and coordinating envelopes. This all-inclusive kit includes printed card bases, die-cut paper pieces, embellishments, adhesive, and more!
  • October’s kit arrives in a cute collectible box covered with enchanting evergreen trees. Use this special, limited-edition box to store your holiday handicrafts, or transform it into a well-wrapped package for a present!
  • The kit’s contents pair perfectly with the Peaceful Place Suite Collection (item 156277). To continue your Christmas crafting, combine the kit’s components with the suite’s patterned paper, shimmery sequins, and more!
  • Card size: 4-1/4″ x 5-1/2″ (10.8 x 14 cm)
  • Envelope size: 4-1/2″ x 5-3/4″ (11.4 x 14.6 cm)
  • Coordinating colors: Basic Gray, Real Red, Shaded Spruce, silver foil

Subscribe to the October 2021 Paper Pumpkin Kit between 11 September and 10 October at paperpumpkin.com!

Note: Supplies may be limited toward the end of the subscription period.

*********************************************************************************************************

Card stock cuts for this project:

  • Basic White Cardstock 4″ X 5 1/4″ (inner liner cut down to 2 1/2″), 2 1/2″ X 5″ (flowers & flower pot)
  • Cinnamon Cider Cardstock 2 5/8″ x 4 1/8″ (card front mat), 2 1/8″ x 5 3/8″ (inner liner mat)
  • Night of Navy Cardstock 8 1/2″ X 5 1/2″ (card base scored & folded at 4 1/4″)
  • Soft Succulent Cardstock 2″ X 3″ (sprigs)
  • Bloom Where You’re Planted Designer Series Paper 2 1/2″ X 4″ (card front), 3″ X 4″ (inner panel), 2 1/4″ X 6″ (envelope flap)

*********************************************************************************************************

Product List

Perfect Plants Dies


Sunflowers Dies


$33.00


Adhesive Sheets


$10.00


Stampin' Seal


$8.00


Bone Folder


$7.00


Paper Snips


$10.00


Paper Trimmer


$25.00


Stamparatus


$49.00
Clear Block Bundle


$71.50


Sunflowers seemed to go for ever. They were past the tree line.
My daughter Kara and I
This one was easily 12 feet high. I’m looking straight up
Lots of bees on all of them.
One of the smallest ones in the field with very large leaves.

I hope you enjoyed seeing some of the pictures I took at the Sunflower Maze. The first maze spelled out God Bless America. The 2nd maze was a peace sign.

Stampin’ Up! Celebrate Sunflowers CAS

Good Monday morning my stamping friends. How was everyone’s weekend? I hope everyone is safe and not under water or without power from Henri. I don’t think it stopped raining here once yesterday and we’re suppose to get more and thunder storms today. The good thing is I was able to spend time at my craft table for a while yesterday.

Today I have a CAS quick card for you using some product from the 2021-2022 Annual Catalog. Here’s my card for today.

I used the Stampin’ Up! Celebrate Sunflowers Cling Stamp Set along with the Stampin’ Up! Create With Friends Photopolymer Stamp Set and the Stampin’ Up! Best Year Cling Stamp Set for my card today.

My colors are from CAS Colours & Sketch Challenge #433.

My design is from Freshly Made Sketches Challenge #499.

My inspiration for my card is from Hand Stamped Sentiments Challenge #370. I went with the bottom sunflower image.

I started by stamping the small sunflower image from the Celebrate Sunflowers stamp set in Tuxedo Black Ink on 2 of the corners of a Basic White card front. I colored the images in using my Crumb Cake, Daffodil Delight, Pool Party and Real Red Stampin’ Blends Markers.

I stamped the larger sentiment from the Create With Friends stamp set in Daffodil Delight Ink in the center of the panel on and angle. I stamped the smaller sentiment from the Create With Friends stamp set in Real Red Ink partially over the larger sentiment.

I adhered the Basic White card front to a Basic White mat using Stampin’ Seal and then to a Pool Party card base using Stampin’ Dimensionals.

On the inside I stamped the small sunflower image from the Celebrate Sunflowers stamp set in Tuxedo Black Ink. I colored the image the same as I did for the card front. I stamped the sentiment from the Best Year stamp set in the center of the panel, coloring the top in with my Daffodil Delight and the bottom with my Real Red Stampin’ Write Markers

To finish my card I decorated a Basic White Medium Envelope. I stamped the small sunflower image from the Celebrate Sunflowers stamp set in Tuxedo Black Ink on the envelope front. I colored the image in the same as I did for the card front. I adhered a panel of the Subtle 6 X 6 Designer Series Paper to the envelope flap.

Thank you for stopping by my blog today. I hope you liked my CAS card and will give it a try. Happy Stamping!!

*********************************************************************************************************

If you need any stamping supplies, I’d love to be your Demonstrator. Just click HERE to go directly to my online store or drop me an email if you have any questions. 

MY CURRENT HOST CODE IS:   US3JFJ62

Use this host code when you order $50 or greater and receive a free gift from me! If your order is over $150, please do not use this code, but you’ll still get the free gift. The free gift is your choice of any 1 item valued up to $10.00 from the 2020-2021 Annual Catalog or the January-June 2021 Mini Catalog!   For any orders $50 or more I will also send you my monthly class tutorials.  Click HERE or go to my Customer Rewards for more details and to see what this months tutorials are.

Please remember to use my current Host Code and make sure that you can see my name on the final checkout page listed as your Demonstrator when you order so that you know that you’re ordering with me and you’ll get my rewards! 

Happy Stamping, Karen!

*********************************************************************************************************

Awesome Joining Promotions Until September 30, 2021

This image has an empty alt attribute; its file name is CRw3UiG1VcNw0fLUGVJqZ-YwyPUUS6uG8wmP4PTx-IdrSjQTpH-NKMtihO-191VvLnyi4n_MrGC7EEfGuHnVm2X-oA9cb_oiKgAHZnJdAnlMVA66mu2wtYmqiqWygCR5dtYtoVNkHcCb9w7RzyU6p9P124S08o1A2FmIRA8VDYEA1jbiHaw=s0-d-e1-ft

There is an AWESOME joining promotion happening!  If you purchase the Starter Kit between August 3 and September 30, you’ll get to pick a FREE bundle from this list!

  • Frosted Gingerbread
  • Christmas Season
  • Christmas To Remember
  • Whimsical Trees
  • Peaceful Deer
  • Sweet Little Stockings
  • Penguin Place
  • Peaceful Cabin
  • Arctic Bears
  • Beauty Of Tomorrow
  • Gorgeous Leaves
  • Nature’s Harvest

When you purchase the Starter Kit for $99 + taxes (if applicable), the kit ships for FREE and YOU get to pick $125 in Stampin’ Up! merchandise OF YOUR CHOICE. If you purchase the kit during Sale-a-bration, you’ll get an additional FREE bundle from the select twelve listed above (with a value up to $60.25!!) with your kit!  A free bundle in addition to $125 in merchandise for $99, YES PLEASE!! You will also get a past Paper Pumpkin Kit and other supplies free in your kit.

If you are planning on placing an order of $100, you might really want to consider joining. This is such an awesome joining deal, you don’t want to pass it up. There is no obligation to sell, have workshops or do Facebook lives. You can join strictly to be a ‘hobby demonstrator’ and enjoy the 20% discount. I would love to have you on my team!!! You also get to enjoy all the demonstrator perks like early ordering, sneak peeks at what’s coming and best of all the events. Why wait, this is such a great sign up promotions, join now and be a part of our awesome Stampin’ Up! family!!!

If you have any questions about joining, please drop me a note at creativestampingdesigns@gmail.com, I’d love to talk with you about it! You can find more information about joining on my blog @ creativestampingdesigns.com

*********************************************************************************************************

Haunts & Harvest

Subscribe August 11 – September 10

Hay, there! Experience everything the autumn season has to offer with the Haunts & Harvest Paper Pumpkin Kit! This month’s kit includes enough supplies to create 12 treat boxes—4 each of 3 designs. That means you can take your pick of apple, pumpkins, or jack-o-lantern treat boxes! Plus, the Paper Pumpkin box is designed to easily transform into a vintage wheelbarrow for you to display your harvest!

Whether you’re thinking about crisp red apples or you’re ready to carve some spooky jack-o-lanterns (or both!), the Haunts & Harvest Paper Pumpkin Kit—designed in a vivid fall palette—is a hands-on crafting experience for all autumn lovers!

Details:

  • Kit contains enough supplies to create 12 treat packages—4 each of 3 designs. The all-inclusive kit includes printed die-cut boxes, die-cut sheets, adhesive, and more!
  • Finished treat box size: 2-1/2″ x 2″ (6.4 x 5.1 cm)
  • Includes an exclusive stamp set and a Classic Stampin’ Spot
  •  Coordinating colors: Basic Black, Pale Papaya, Poppy Parade, Pumpkin Pie, Soft Succulent

Subscribe to the September 2021 Paper Pumpkin Kit between 11 August and 10 September at paperpumpkin.com!

Note: Supplies may be limited toward the end of the subscription period.

*********************************************************************************************************

Card stock cuts for this project:

  • Basic White Cardstock 2 – 3 7/8″ x 5 1/8″ (card front & inner liner), 2 – 4″ X 5 1/4″ (card front & inner liner mats)
  • Pool Party Cardstock 4 1/4″ X 11″ (card base scored & folded at 5 1/2″)
  • Subtle 6 X 6 Designer Series Paper 2 1/4″ X 6″ (envelope flap)

*********************************************************************************************************

Product List

Stampin’ Up! Celebrate Sunflowers for Fun Fold Friday

Good Friday morning my stamping friends and welcome to my Fun Fold Friday. How was everyone’s week? Does anyone have any plans for the weekend yet? I’ll be working all weekend between both jobs. Today I’m finally going to get to work in my garden. My yard has been sprayed for those annoying bugs, so hopefully I won’t get eaten alive again. I’m very excited about redoing my garden in case you can’t tell.

Today’s card I made on my Facebook Live video on Wednesday. If you were able to join me or watched the replay, thank you. If you’d like to watch my video and stamp along, the measurements are below along with the links to my Facebook page and my YouTube channel. Here’s my card for today.

I used the Stampin’ Up! Celebrate Sunflowers Cling Stamp Set along with In Good Taste and Hand-Penned Designer Series Papers for my card today.

My inspiration for today’s card came from my sunflower plants I have growing in my backyard.

I started by stamping the large sunflower image from the Celebrate Sunflowers stamp set in Tuxedo Black Ink on a panel of Basic White Cardstock. I colored the image in using my Crumb Cake, Daffodil Delight and So Saffron Stampin’ Blends Markers. I cut the image out using my Sunflower Dies. From a panel of Basic White cardstock I cut the middle Scalloped Contour Die. I stamped the sentiment from the Stampin’ Up! Through It Together Cling Stamp Set in Tuxedo Black Ink on the bottom corner of the die. I stamped the larger leaf image from the Celebrate Sunflowers stamp set in Tuxedo Black Ink 3 times. I colored the leaves in using my Mint Macaron Stampin’ Blends Markers and cut them out using my Sunflower Dies.

I adhered a panel of In Good Taste DSP to the front panel of the Smoky Slate card base using Multipurpose Liquid Glue. I adhered the sunflower to the scalloped die using Stampin’ Dimensionals. I adhered the layered panel to the card front using Stampin’ Dimensionals only on the left side of the panel. I adhered the leaves under the sunflower using Multipurpose Liquid Glue.

I scored and folded a smaller Highland Heather card base and adhered a panel of Hand-Penned DSP using Multipurpose Liquid Glue.

On the inside I stamped the sentiment from the Through It Together stamp set in Tuxedo Black Ink on a Basic White panel. I stamped the small sunflower image from the Celebrate Sunflowers stamp set in Tuxedo Black Ink. I colored the image in using my Crumb Cake, Daffodil Delight, Mint Macaron and So Saffron Stampin’ Blends Markers. I adhered the Basic White panel to a Highland Heather mat using Stampin’ Seal. I adhered the 3/4″ fold of the small card base behind the layered panel using Multipurpose Liquid Glue. I adhered the layered panel to the inside of the Smoky Slate card base using Multipurpose Liquid Glue. The Highland Heather will tuck behind the scalloped die to hold the card closed. I added a couple Bumblebee Trinkets to my card using Glue Dots.

To complete my card I decorated a Basic White Medium Envelope. I stamped the small sunflower image from the Celebrate Sunflowers stamp set in Tuxedo Black Ink on the envelope front. I colored the image in using my Crumb Cake, Daffodil Delight, Mint Macaron and So Saffron Stampin’ Blends Markers. I adhered a panel of Hand-Penned DSP to the envelope flap.

Thank you for stopping by my blog today. I hope you liked my card and will give it a try. If you do CASE this card, please feel free to post it in the comments of my Facebook page under this post. I’d love to see your take on the card. The list of measurements are below if you’d like to stamp along while watching the video. You can watch my video on my Facebook page Here.

You can also view the video on my YouTube channel Here. Happy Stamping!!

*********************************************************************************************************

If you need any stamping supplies, I’d love to be your Demonstrator. Just click HERE to go directly to my online store or drop me an email if you have any questions. 

MY CURRENT HOST CODE IS:   CEWAN9UD

Use this host code when you order $50 or greater and receive a free gift from me! If your order is over $150, please do not use this code, but you’ll still get the free gift. The free gift is your choice of any 1 item valued up to $10.00 from the 2020-2021 Annual Catalog or the January-June 2021 Mini Catalog!   For any orders $50 or more I will also send you my monthly class tutorials.  Click HERE or go to my Customer Rewards for more details and to see what this months tutorials are.

Please remember to use my current Host Code and make sure that you can see my name on the final checkout page listed as your Demonstrator when you order so that you know that you’re ordering with me and you’ll get my rewards! 

Happy Stamping, Karen!

*********************************************************************************************************

State Sales Tax Holidays

For those of you living in Alabama, Arkansas, Florida, Massachusetts, Missouri, Mississippi, New Mexico, Ohio, Puerto Rico, South Carolina, Tennessee, Texas and Virginia…you’ve got sales tax holidays coming up (or starting today if you’re in Alabama!)!!

The good news is that some items in the Stampin’ Up! Catalogs qualify for the sales tax holidays!  The list of sales tax holidays by state and items in that state that qualify are listed below (click on the image to open up a full-size printable document):

Please note that you must place your order with Stampin’ Up! during the tax holiday period in order to receive these items tax-free (which is midnight on the first day to midnight on the last day of the tax holiday).  Also, keep in mind that this is a state sales tax holiday; the state statute may not apply to county, city, and special jurisdiction taxes.

If you live in one of those states, YAY!  Have fun shopping tax free during your holiday!

*********************************************************************************************************

July-December 2021 Mini Catalog Designer Series Paper

I’m offering a Designer Series Paper share from the Stampin’ Up! July-December 2021 Mini Catalog and I’d love to have you join!!  I’m placing my share order early on August 3 and I’m going to use the expedited shipping option so I should be able to have the shares cut, bundled and back out to you during the week of August 9.

How my shares work:  I order full packs of all of the Designer Series Papers listed below, I cut them into 6″ x 6″ pieces (or 6″ x 12″ pieces for double shares) and give you one panel of each design from each pack on the list.  I pack up the paper in a cellophane bag and mail it back out to you just as quickly as I can!  Shares give you a good working sample of all of the papers so that you can decide which ones to order in full packs!

Here are the Designer Series Paper Shares that I am offering from the new Mini Catalog!

New Designer Series Paper Share – $25.00 plus $5.00 for 1st Class Mail shipping

You will receive one 6×6 sheet of each design from the following new DSP packs (the number behind the name indicates how many 6×6 sheets of that paper pack you will receive):

  • Gingerbread & Peppermint 6″ x 6″ – 12
  • Painted Christmas – 6
  • Whimsy & Wonder Specialty – 6
  • Sweet Stockings – 6
  • Peaceful Place Specialty – 6
  • Blackberry Beauty Specialty – 6
  • Cute Halloween 6″ x 6″ – 8
  • Harvest Meadow – 6
  • Heartwarming Hugs – 6 (returning)
  • Kraft 6″ x 6″ – 2
  • Brushed Metallic – 3 (returning)
  • Red & Green Foil Sheets – 2 (returning)
  • Silver Foil Specialty Pack – 3 (one of each)
  • Snowy White Velvet Sheets – 1
  • Gold Shimmer Vellum – 1
  • Cork Specialty Paper – 1 ***please note that Cork paper will be approximately 6″ x 6″ as the sizes of the original papers may vary slightly.

In all, you’ll receive 75 – 6” x 6” sheets of new designer or speciality paper!

Double DSP Share – $50 + $7.75 Shipping by Priority Mail – if you’d like double shares of the designer paper, that’s fine too.  I’ll cut the designer paper sheets into 6×12 so that you’ll be able to get 3 full A2 size card fronts from each sheet (except for the Gingerbread & Peppermint, Cute Halloween and Kraft 6″ × 6″, you’ll get double sheets of those since they’re already precut).

Anyone is welcome to join in my share (please note, I can only ship to addresses within the US).  If you’d like to join, either complete the form below or email the following information to creativestampingdesigns@gmail.com

  • Your first and last name
  • The email address that is connected to your PayPal account. I only accept PayPal for payment.  ***You do not need to have a PayPal account to pay the invoice, you can choose to pay by credit card without having a PayPal account.

FREE Gift From Me! – As a bonus for joining my share, you’ll also get a sampler of some of the Sale-a-bration Designer Series Paper Packs!

Deadline to sign up for my share is Sunday, August 1 at 5:00 PM ET.

Let me know if you have any questions.  Thanks!

*********************************************************************************************************

SAVE 15% ON DESIGNER SERIES PAPER JULY 1 – AUGUST 2!

We all love gorgeous Designer Series Paper, and during this incredible sale, you can enjoy a 15% discount on select papers from the 2021–2022 Annual Catalog! July is a great time to stock up and save on some of Stampin’ Up!’s most popular paper designs!

PROMOTION DETAILS:

  • Sales Period:  July 1 – August 2
  • All order types qualify for this promotion.
  • There is no limit to how many packages of Designer Series Paper may be purchased during this promotion.
  • Only select Designer Series Papers are available at a 15% discount during this promotion.
  • Orders must be placed—and closed—during the promotion period for the 15% discount to apply.
  • Designer Series Paper ordered as part of a Starter Kit or with Stampin’ Rewards qualify for the 15% discount.
  • Order Deadline:  August 2, 2021 at 11:59 PM (MT)

Click on image below for a printable PDF of the Sale Designer Series Papers

*********************************************************************************************************

Hope Box

Subscribe July 11 – August 10

Empower yourself and others with the Hope Box Paper Pumpkin Kit! Created from the heart and soul of Stampin’ Up! cofounder, Shelli, the Hope Box Paper Pumpkin Kit reminds us why life is precious. This month’s Paper Pumpkin kit includes supplies to create nine encouraging cards and coordinating envelopes in an inspiring color palette, and a specially designed Hope Box!

The Hope Box is designed to be a keepsake box—keep mementos of cherished memories or reminders of what’s yet to come. Collect treats and trinkets that represent what hope means to you in your Hope Box and look inside for inspiration or share it with a friends who could use some uplifting!

What will you put in your Hope Box? Letters, song lyrics, inspiring quotes, and photographs are powerful reminders of hope and connection—and great additions to a Hope Box.

  • Kit contains supplies to create nine cards and coordinating envelopes and comes in a special box!
  • The box is specially designed to turn into a Hope Box—a keepsake box full of cherished items to add hope to your life or in the lives of others.
  • Includes an exclusive stamp set and a Classic Stampin’ Spot
  • Card size: 4-1/4″ x 5-1/2″ (10.8 x 14 cm)
  • Envelope size: 4-1/2″ x 5-3/4″ (11.4 x 14.6 cm)
  • Coordinating colors: Bermuda Bay, Blackberry Bliss, Bumblebee, Melon Mambo, Petal Pink, Pool Party, Poppy Parade

Subscribe to the August 2021 Paper Pumpkin Kit between 11 July and 10 August at paperpumpkin.com!

Note: Supplies may be limited toward the end of the subscription period.

*********************************************************************************************************

Card stock cuts for this project:

  • Basic White Cardstock 3 1/2″ X 3 1/2″ (sunflower), 2 – 4″ X 5 1/4″ (scalloped frame/leaves & inner liner)
  • Highland Heather Cardstock 3 1/2″ X 3 1/2″ (small flap scored at 3/4″), 4 1/8″ x 5 3/8″ (inner liner mat)
  • Smoky Slate Cardstock 5 1/2″ X 6 1/2″ (card base scored and folded at 4 1/4″)
  • Hand-Penned Designer Series Paper 2 5/8″ X 3 3/8″ (card front panel), 2 1/2″ X 6″ (envelope flap)
  • In Good Taste Designer Series Paper 2 1/8″ X 5 3/8″ (card front panel)

*********************************************************************************************************

Product List

Stampin’ Up! Celebrate Sunflowers for The Happy Inkin’ Thursday Blog Hop

Good Thursday morning my stamping friends! Welcome to our Happy Inkin’ Thursday Blog Hop. I hope everyone is doing well today. If you are hopping over from Akiko Sudano’s blog, thank you for stopping by my blog. This week we have a Sketch Challenge. Be sure to take a moment to hop around to see everyone’s beautiful projects. Here is my card using this weeks Sketch.

I used the Stampin’ Up! Celebrate Sunflowers Cling Stamp Set and the Stampin’ Up! Inspired Thoughts Cling Stamp Set for today’s card.

My colors are from the Fab Friday Challenge #216.

I started by adhering a panel of the Pattern Party Host Designer Series Paper to a Flirty Flamingo mat using Stampin’ Seal.

I wrapped a piece of the black bakers twine from the Bakers Twine Essential Pack around the matted panel and tied a bow. I adhered the card front to a Flirty Flamingo card base using Stampin’ Dimensionals.

On a panel of Basic White cardstock I stamped the small sunflower image from the Celebrate Sunflowers stamp set in Tuxedo Black Ink. I colored the image in using my Crumb Cake, Granny Apple Green and So Saffron Stampin’ Blends Markers. I cut the image out using my Stitched Rectangle Dies. I stamped the sentiment from the Inspired Thoughts stamp set in Tuxedo Black Ink next to the sunflower. I adhered the artwork to the card front using Stampin’ Dimensionals. I added a few Fresh Freesia 2021-2023 In-Color Jewels to the card front.

On the inside I stamped the sentiment from the Inspired Thoughts stamp set in Tuxedo Black Ink in the center of a Basic White panel. I stamped the small sunflower image from the Celebrate Sunflowers stamp set in Tuxedo Black Ink on the top of the panel. I colored the image in using my Crumb Cake, Granny Apple Green and So Saffron Stampin’ Blends Markers. I adhered a strip of the Pattern Party Host DSP to the bottom of the panel using Stampin’ Seal. I adhered the Basic White panel to a Flirty Flamingo mat using Stampin’ Seal and then to the inside of the Flirty Flamingo card base using Multipurpose Liquid Glue.

To complete my card I decorated a Basic White Medium Envelope. I stamped the small sunflower image from the Celebrate Sunflowers stamp set in Tuxedo Black Ink on the envelope front and colored it in using my Crumb Cake, Granny Apple Green and So Saffron Stampin’ Blends Markers. I adhered a panel of the Pattern Party Host DSP to the envelope flap.

Thank you for visiting my blog today. I hope you liked my card and will give it a try. Now that you’ve seen my card, take a minute to hop through all our projects today. If you click on the Next Blog button, you’ll go to Amy’s page. Or you can just click on the names below to go directly to all their blogs! Happy Hopping!!

Amy Koenders:

Mary Deatherage:

Kristi Gray:

Jaimie Babarczy:

Sue Prather:

Karen Finkle:

Akiko Sudano:

Karen Ksenzakovic: You Are Here

*********************************************************************************************************

If you need any stamping supplies, I’d love to be your Demonstrator. Just click HERE to go directly to my online store or drop me an email if you have any questions. 

MY CURRENT HOST CODE IS:  FW2DDUZR

Use this host code when you order $50 or greater and receive a free gift from me! If your order is over $150, please do not use this code, but you’ll still get the free gift. The free gift is your choice of any 1 item valued up to $10.00 from the 2020-2021 Annual Catalog or the January-June 2021 Mini Catalog!   For any orders $50 or more I will also send you my monthly class tutorials.  Click HERE or go to my Customer Rewards for more details and to see what this months tutorials are.

 Click HERE to shop the clearance rack.

Please remember to use my current Host Code and make sure that you can see my name on the final checkout page listed as your Demonstrator when you order so that you know that you’re ordering with me and you’ll get my rewards! 

Happy Stamping, Karen!

*********************************************************************************************************

The Adventure Begins

Subscribe June 11 – July 10

This image has an empty alt attribute; its file name is 07-11-21_header_the_adventure_begins.jpg

Life is full of big adventures that are best experienced together! This month’s The Adventure Begins Paper Pumpkin Kit helps you celebrate those exciting new chapters in the most creative of ways with enough supplies to create twelve motivating cards—plus coordinating envelopes—all featuring the exciting colors of nature.

Like the still moments before a great adventure, the kit’s designs contain a quiet energy that hint at all the grand possibilities of what is yet to come. Share this kit with your family and friends about to embark on a new journey and make connections while you explore and discover new levels of your creativity!

Details

  • Contains enough supplies to create twelve cards and coordinating envelopes.
  • Card size: 4-1/4” x 5-1/2” (10.8 x 14cm)
  • Envelope size: 4-1/2” x 5-3/4” (11.4 x 14.6 cm)
  • Comes with a Stampin’ Spot plus an exclusive Stamp Set.
  • Includes inspirational sentiments and adventure-themed imagery featuring these nature-inspired coordinating colors: Basic Black, Basic White, Bermuda Bay, Crushed Curry, Early Espresso, Flirty Flamingo, Garden Green, Granny Apple Green, Mango Melody, Night of Navy.

Subscribe to the July 2021 Paper Pumpkin Kit between 11 June and 10 July at paperpumpkin.com!

Note: Supplies may be limited toward the end of the subscription period.

*********************************************************************************************************

This image has an empty alt attribute; its file name is 03-23-21_demo_header_jj_retired_na.jpg

The January–June 2021 Mini Catalog will be retiring soon! It’s always bittersweet to see a classic Stampin’ Up! catalog take a trip to retirement. But, we’re looking forward to all the new products on their way—and we hope you are, too!

Stock up on your favorite products before they’re gone for good! Save up to 50% on essential craft supplies. What are you waiting for? Start shopping! After all, this selection of Last Chance Products is only available while supplies last.

Click Here to view the PDF of the LAST CHANCE retiring items from the January -June 2021 Mini Catalog.

DETAILS

  • Each Last Chance Products promotion typically includes a Retiring List (products that will no longer be available once the catalog retires) and a Carryover List (products that will still be available once the catalog retires). For this catalog’s Last Chance Products promotion, a Carryover List will not be provided; carryover products can be viewed in the 2021–2022 Annual Catalog.
  • Discounts are not always available with the Retiring List. When they are, they will vary from one market to another depending on product performance.
  • All products are available while supplies last, and there are no purchase limits.

SALES PERIOD

  • Starts: 1 June 2021 at 1:00 PM (MT)
  • Ends: 30 June 2021 at 11:59 PM (MT)

DON’T MISS OUT ON THESE GREAT DEALS!! GET THOSE SHOPPING LISTS READY TO GO!! STOCK UP ON YOUR FAVORITE PRODUCTS BEFORE THEY’RE GONE!! Click Here and head over to my Online Store and Start Shopping!!Don’t forget, the last chance items are available while supplies last so shop early for the best selection! 

*********************************************************************************************************

Card stock cuts for this project:

  • Basic White Cardstock 2 1/4″ X 3 1/2″ (artwork), 4″ X 5 1/4″ (inner liner)
  • Flirty Flamingo Cardstock 4 1/4″ X 11″ (card base scored and folded at 5 1/2″), 2 – 4 1/8″ X 5 3/8″ (card front and inner liner mats)
  • Pattern Party Hose Designer Series Paper 4″ X 5 1/4″ (card front), 3/4″ X 4″ (inner liner strip), 2 1/2″ x 6″ (envelope flap)

*********************************************************************************************************

Product List

Stampin’ Up! Celebrate Sunflowers CAS Birthday

Good Monday morning my stamping friends. How was everyone’s weekend? Did anyone do anything for Valentine’s Day? I worked all day and came home to my daughter making dinner for us. She made Chicken Parmigiana with a side of Angel Hair and it was delicious.

I have a clean and simple birthday card for you today. Here’s my card.

I used the Stampin’ Up! Celebrate Sunflowers Cling Stamp Set for my birthday card.

I started by adhering a panel of Blushing Bride Subtle 6 X 6 Designer Series Paper to a Blushing Bride card base using Stampin’ Seal.

On a panel of Basic White cardstock I stamped the large sunflower image from the Celebrate Sunflowers stamp set in Tuxedo Black Ink. I masked the sunflower and stamped the leaf image from the Celebrate Sunflowers stamp set around it in Mossy Meadow Ink. To mask an image, you stamp the image on a sticky note and fussy cut it using your Paper Snips. Adhere the sticky note image over the stamped image and stamp the next image overlapping the sticky note. When you remove the sticky note it looks like the leaves are behind the flower. I colored the leave in using my Mossy Meadow Stampin’ Blends Markers. Since there isn’t a Bumblebee marker, I applied some ink to a Clear Acrylic Block and used my Water Painters filled with alcohol to color my sunflower. I adhered the artwork to the card front using Stampn’ Seal.

On a strip of Basic White cardstock I stamped the sentiment from the Celebrate Sunflowers stamp set in Mossy Meadow Ink. Using my Paper Snips I cut the ends of the strip on an angle. I adhered a strip of Bumblebee cardstock, which I cut one end on an angle using my Paper Snips, to the card front using Multipurpose Liquid Glue. I adhered the sentiment to the card front using Stampin’ Dimensionals.

On the inside I stamped the sentiment from the Stampin’ Up! Best Year Cling Stamp Set in Mossy Meadow Ink in the center of a Basic White panel. I stamped the small sunflower image from the Celebrate Sunflowers stamp set in Tuxedo Black Ink towards the bottom of the panel. I colored the image in the same as I did for the card front image. I adhered a strip of Subtle DSP to the bottom of the panel using Stampin’ Seal. I adhered the Basic White panel to a Mossy Meadow mat using Stampin’ Seal and then to the inside of the Blushing Bride card base using Multipurpose Liquid Glue.

To finish my card I decorated a Basic White Medium Envelope. I stamped the large sunflower image from the Celebrate Sunflowers stamp set in Tuxedo Black Ink on the envelope front and colored it in the same as I did for the card front. I adhered a panel of Subtle DSP to the envelope flap.

Thank you for stopping by my blog today. I hope you liked my CAS card and will give it a try. Happy Stamping!!

*********************************************************************************************************

If you need any stamping supplies, I’d love to be your Demonstrator. Just click HERE to go directly to my online store or drop me an email if you have any questions. 

MY CURRENT HOST CODE IS: 9BCVNW9D

Use this host code when you order $50 or greater and receive a free gift from me! If your order is over $150, please do not use this code, but you’ll still get the free gift. The free gift is your choice of any 1 item valued up to $10.00 from the 2020-2021 Annual Catalog or the January-June 2021 Mini Catalog!   For any orders $50 or more I will also send you my monthly class tutorials.  Click HERE or go to my Customer Rewards for more details and to see what this months tutorials are.

 Click HERE to shop the clearance rack.

Please remember to use my current Host Code and make sure that you can see my name on the final checkout page listed as your Demonstrator when you order so that you know that you’re ordering with me and you’ll get my rewards! 

Happy Stamping, Karen!

*********************************************************************************************************

Here’s To You

Subscribe February11th – March 10th

Three cheers for mountain air, a sky filled with sunshine, and finding joy in life’s journey! Adventure awaits inside this month’s majestic, mountain-themed kit. With enough elements and embellishments to create eight cards and coordinating envelopes, the Here’s to You Paper Pumpkin Kit is the perfect pick for celebrating life’s little moments and mountain-high milestones!

What makes March’s kit one-of-a-kind? The spectacular set of four free stencils—and a stamping sponge—that you’ll find inside! Pair this pack of stunning stencils with the kit’s contents to stamp a springtime scene, then store the set to stamp for any season in the future. Clean up your binoculars and dust off your hiking boots—the Here’s to You Paper Pumpkin Kit is ready to lead you on an excursion to explore your creativity!

ABOUT THE MARCH KIT

Details

  • Kit contains enough supplies to create 8 cards—4 each of 2 designs—and coordinating envelopes. The kit’s contents include printed card bases, die-cut paper pieces, embellishments, adhesive, and more!
  • Card size: 4-1/4″ x 5-1/2″ (10.8 x 14 cm)
  • Envelope size: 4-1/2″ x 5-3/4″ (11.4 x 14.6 cm)
  • Coordinating colors: Bumblebee, Calypso Coral, Old Olive, Petal Pink, Pretty Peacock, Seaside Spray
  • Includes four free stencils and a stamping sponge!
  • Arrives in a cute and collectible box.

Subscribe to the March 2021 Paper Pumpkin Kit between 11 February and 10 March at paperpumpkin.com!

Note: Supplies may be limited toward the end of the subscription period.

*********************************************************************************************************

Card stock cuts for this project:

  • Basic White Cardstock 3 1/2″ X 3 1/2″ (artwork), 3/4″ X 3 1/2″ (sentiment), 4″ X 5 1/4″ (inner liner)
  • Blushing Bride Cardstock 4 1/4″ X 11″ (card base scored and folded at 5 1/2″)
  • Bumblebee Cardstock 3/4″ X 3 3/4″ (sentiment mat)
  • Mossy Meadow Cardstock 4 1/8″ x 5 3/8″ (inner liner mat)
  • Subtle 6 X 6 Designer Series Paper 4 1/8″ x 5 3/8″ (card front), 1/2″ X 4″ (inner liner strip), 2 1/2″ X 6″ (piece for envelope flap)

*********************************************************************************************************

Product List

Stampin’ Up! Celebrate Sunflower Easel Birthday for Fun Fold Friday

Good Friday morning my fellow stampers and welcome to my Fun Fold Friday.  How was everyone’s week?  Are you ready for the weekend? It’s starting to feel like fall here.  It’s been really cool at night and in the mid to upper 70’s during the day, perfect walking or yard work weather.

I’ve made another easel card for you today.  Now I know why my team member Mary loves these so much.  They are so much fun to design.  Here’s my card for today.

My colors were inspired by Paper Players Challenge #508.  Here are their colors.

I started by scoring and folding a Blackberry Bliss easel at 2 3/4″ and 5 1/2″ and adhering the 2 3/4″ section to a Blackberry Bliss card base using Multipurpose Liquid Glue.  I stamped the stem image from the Stampin’ Up! Daisy Lane Cling Stamp Set in Pretty Peacock Ink on a panel of Whisper White cardstock.  I colored the leaves and the stem in using my Pretty Peacock Stampin’ Blends Markers.

I stamped the sentiment from the Stampin’ Up! Four Seasons Floral Photopolymer Stamp Set in Pretty Peacock Ink on the top of the Whisper White panel.  I adhered the Whisper White panel to a Pretty Peacock mat using Stampin’ Seal.

I stamped the small sunflower image from the Stampin’ Up! Celebrate Sunflowers Cling Stamp Set in Cajun Craze Ink on a small panel of Whisper White cardstock.  I colored the image in using my Cajun Craze Stampin’ Blends Markers.  I brushed some Clear Wink of Stella on the center of the sunflower go give it a little shimmer.  I fussy cut the sunflower out using my Paper Snips and adhered it to the stem using Stampin’ Dimensionals.

I cut a couple of the leafy stems out from the Sunflower Dies in Pretty Peacock cardstock and adhered them to the stem using Glue Dots.  I tied a small bow using the 3/8″ Embroidered Ribbon and adhered it to the stems using a Glue Dot.

I adhered the artwork to the easel, just adding Multipurpose Liquid Glue to the bottom section of the easel.  I colored a few Pearl Basic Jewels with my Cajun Craze Stampin’ Blends Marker and adhered them to the card front and the card base.

For the inside I stamped the sentiment from the Celebrate Sunflowers stamp set towards the top of a Whisper White panel in Pretty Peacock Ink.  I stamped the small sunflower image from the Celebrate Sunflowers stamp set in Cajun Craze Ink, stamping off twice, over the sentiment.  I added some Clear Wink of Stella to the flower center.  I adhered the Whisper White panel to a Pretty Peacock mat using Stampin’ Seal and then to the Blackberry Bliss card base using Multipurpose Liquid Glue.  I stamped the sentiment from the Daisy Lane stamp set in Pretty Peacock Ink on a small panel of Whisper White cardstock.  I cut the image out using my Stitched Shapes Dies.  I cut a scalloped oval out of a panel of Pretty Peacock cardstock using the Layering Ovals Dies.  I adhered the sentiment to the Pretty Peacock scallop oval using Stampin’ Seal.  I adhered the matted sentiment to the Whisper White panel, where I wanted the easel to set, using Stampin’ Dimensionals.

To finish my card I decorated a Medium Whisper White Envelope.  I stamped the small sunflower from the Celebrate Sunflowers stamp set in Cajun Craze Ink on the envelope front and colored it in using my Cajun Craze and Pretty Peacock Stampin’ Blends Markers.  I adhered a panel of Pretty Peacock 2019-2021 In-Color 6 X 6 Designer Series Paper to the envelope flap.

Thank you for stopping by my blog today.  I hope you liked my card and will give it a try. Happy Stamping!!

****************************************************************************************************

If you need any stamping supplies, I’d love to be your Demonstrator. Just click HERE to go directly to my online store or drop me an email if you have any questions. 

MY CURRENT HOST CODE IS: G39RYMEX

Use this host code when you order $50 or greater and receive a free gift from me! If your order is over $150, please do not use this code, but you’ll still get the free gift. The free gift is your choice of any 1 item valued up to $10.00 in the 2020-2021 Annual Catalog!   For any orders $50 or more I will also send you my monthly class tutorials.  Click HERE or go to my Customer Rewards for more details and to see what this months tutorials are.

 Click HERE to shop the clearance rack.

Happy Stamping, Karen!

****************************************************************************************************

World Card Making Day, Saturday October 3rd.  Our Inkin’ Krew Team will be doing videos all day, every hour.  I will actually be doing 2 Facebook Live videos that day.  I will post a schedule when we get closer.

****************************************************************************************************

Joy To The World 

Subscribe September 11 – October 10

This holiday season, share the joy of Paper Pumpkin! The Joy to the World Paper Pumpkin Kit is an exclusive holiday kit that provides a specially-designed box, enough supplies to create eight elegant cards, and an opportunity to connect with the Stampin’ Up! global community.

With October’s magical kit, not only will you get a head start on your holiday crafting—you’ll get to create Christmas cards, share project ideas, and spread holiday cheer with Stampin’ Up! customers and demonstrators around the world! After you receive your kit,  join the Joy of Paper Pumpkin Facebook group to make the most of this month’s kit.

  • Kit contains enough supplies to create eight cards—four each of two designs—and coordinating envelopes.
  • Kit includes die-cut pieces in English, French, and German. This will allow you to create cards you can use to connect with other customers and demonstrators around the world—in their language!
    • Card size: 4-1/4″ x 5-1/2″ (10.8 x 14 cm)
    • Envelope size: 4-1/2″ x 5-3/4″ (11.4 x 14.6 cm)
  • Coordinating Colors: Cherry Cobbler, Crumb Cake, Early Espresso, Just Jade, Soft Sea Foam

The Joy to the World Paper Pumpkin Kit has been thoughtfully released in preparation for the season of spreading joy. October’s Paper Pumpkin kit was designed to bring people together—connecting them with one another and spreading joy with each other around the world! With die-cut sentiments in English, French, and German, subscribers can send holiday cheer to their friends across the globe—in their language.

To connect and spread joy with international customers and demonstrators through the Joy to the World Paper Pumpkin Kit, join our Facebook group: Joy of Paper Pumpkin! When connecting with your new friends, don’t forget to share your experience with the #joyofpaperpumpkin hashtag.

Subscribe to the October 2020 Paper Pumpkin Kit from 11 September to 10 October at paperpumpkin.com.

Note: Supplies may be limited toward the end of the subscription period.

****************************************************************************************************

The Stampin’ Cut & Emboss Machine (Standard Size) is now available for you to order!!!
Here are the details:

The standard machine comes with all the plates you need to get started. The preorder will not include the replacement plates, but they will be available beginning with the customer launch on September 1.

Note that the Cutting Plates and Adhesive Sheets are already available to order. The optional Impression Mats are not be available; I’ll keep you updated on their availability.

So what sets our machines apart from the rest? Here are some of our favorite features:

  • Durable machines with high-quality results. The solid steel construction frame and rubber feet that securely grip the work surface produce crisp, clean, precise cutting and beautifully detailed embossing.
  • Easy to use. The machines and tools are designed for an intuitive die-cutting and embossing experience. For example, all plates are labeled with a number and are color coded for easy reference and use when building your sandwich. And just like the name suggests, our Magnetic Cutting Plates have fully-magnetic surfaces to make it easy to securely position your dies and keep them in place.
  • Simple to store. The platforms on both machines fold for space-saving storage and they look pretty too–the sleek, clean design suits any crafting space.
  • Portable. You can use both machines at home or on the go with their folding platforms and ergonomic carrying handles.

****************************************************************************************************

Stampin’ Up! Get & Go Starter Kit Promotion – Sept 1-30!

Have you thought about joining our Stampin’ Up! team?

Now is an awesome time to join.

The Get & Go Starter Kit promotion gives those who sign up to be a Stampin’ Up! demonstrator additional products to help get started right away!  In addition to the already great valued Starter Kit, you will receive precut paper, stamps, and embellishments!

Here are the details:

  • Promotion Dates: September 1–30, 2020
    Joining Deadline:  September 30, 2020; 11:50 PM (MT)
  • New demonstrators who submit their Independent Demonstrator Agreement (IDA) before 1 September or after 30 September will not be eligible for this promotion.
  • In addition to the regular starter kit (for $99 you choose $125 worth of products), if you join between September 1 and 30, you will also receive enough card stock pieces to make 16 cards, a pack of Rhinestone Basic Jewels, the So Much Love stamp set, and the Queen Anne’s Lace stamp set!!
    • 8 packs of precut card stock of the coastal cabana pack will be provided, and 8 packs of precut card stock of the Granny Apple Green pack, for a total of 16 cards (packs include envelopes).
  • Important note: Ink, adhesive, cutting tool, and clear block for stamping must be purchased separately. However, these products may be included as part of the Starter Kit product selection.

This is such a great deal!  For $99, you get to pick $125 merchandise of your choice for your Starter Kit plus you’ll get the Queen Annes’ Lace and So Much Love stamp sets, card kits to create 16 cards and a pack of Rhinestones for free!!

Drop me a note at creativestampingdesigns@gmail.com if you have questions about joining, I’m happy to talk to you about it.  You can also see more information about the benefits of becoming a Stampin’ Up! Demonstrator Here

****************************************************************************************************

Card stock cuts for this project:

  • Blackberry Bliss Cardstock 4 1/4″ X 5 1/2″ (card base), 3″ X 6 1/4″ (easel scored at 2 3/4″ & 5 1/2″)
  • Pretty Peacock Cardstock 4 1/8″ X 5 3/8″ (inner liner mat), 2 7/8″ X 5 3/8″ (artwork mat), 3″ x 3 1/3″ (flourishes and scallop oval)
  • Whisper White Cardstock 4″ X 5 1/4″ (inner liner), 2 3/4″ X 5 1/4″ (artwork), 1 1/2″ X 2 1/2″ (sentiment oval)
  • 2019-2021 In- Color 6 X 6 Designer Series Paper 2 1/4′ X 6″ (envelope flap)

****************************************************************************************************

Product List