
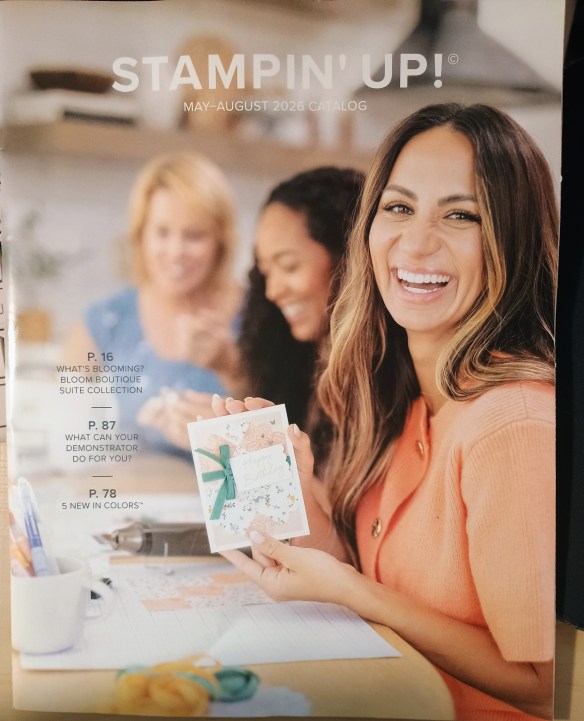
Good Wednesday morning stamping friends. I hope your week is going well. Today is a VERY exciting day for all of us demonstrators. We get to preview the new September -December 2026 Catalog. I can’t wait to see what’s coming. You can see it all to if you join the Stampin’ Up! community. Interested?? Contact me and we can talk about signing you up. I’d love to have you join my team. It’s a very relaxed team that loves to stamp & share. There’s never an obligation to sell, you can join to enjoy the discount for yourself along with all the other demonstrator perks. Contact me and we can talk about it.
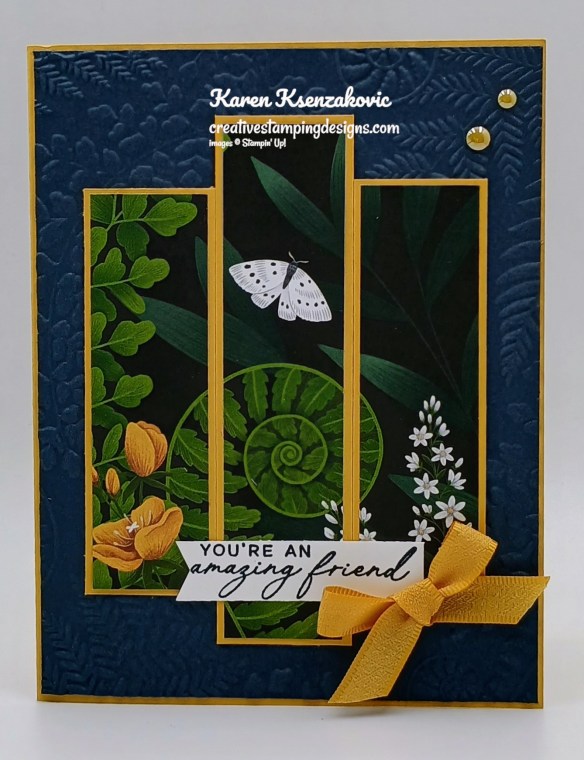
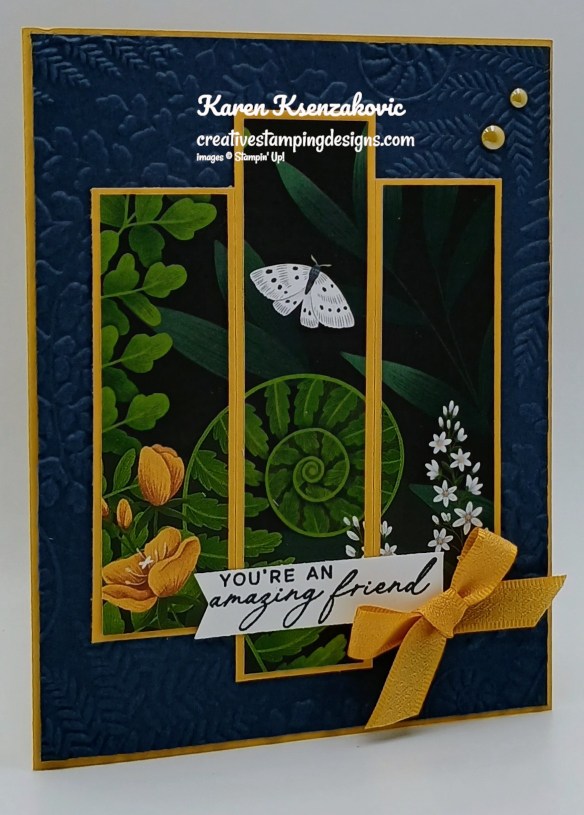
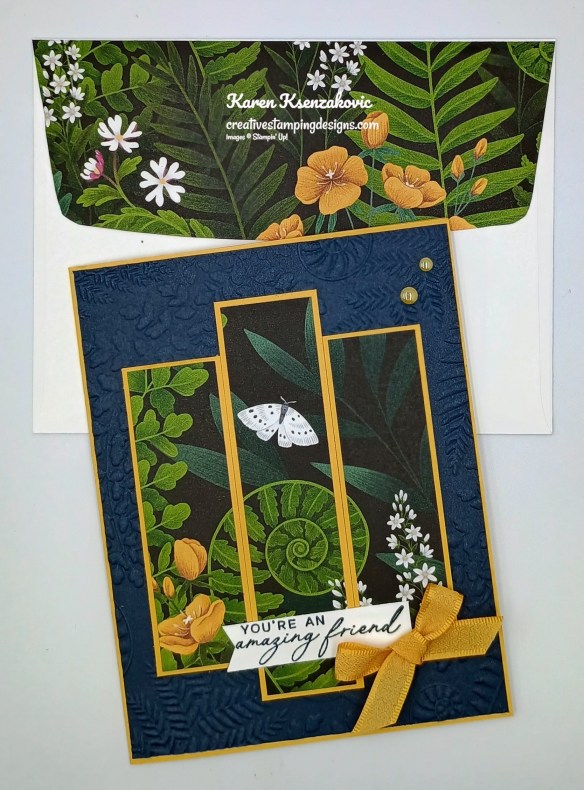
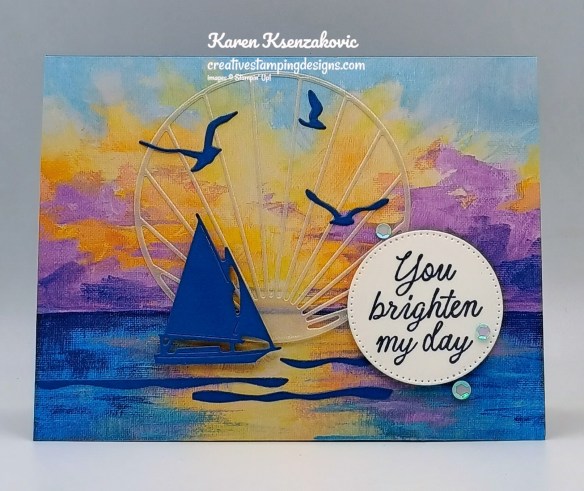
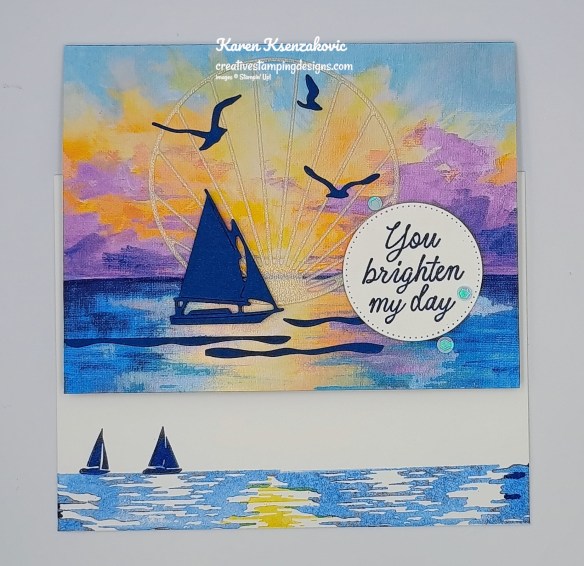
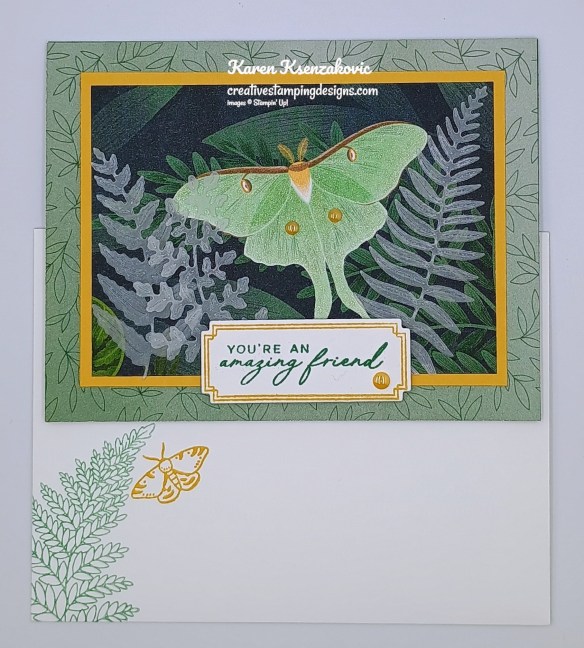
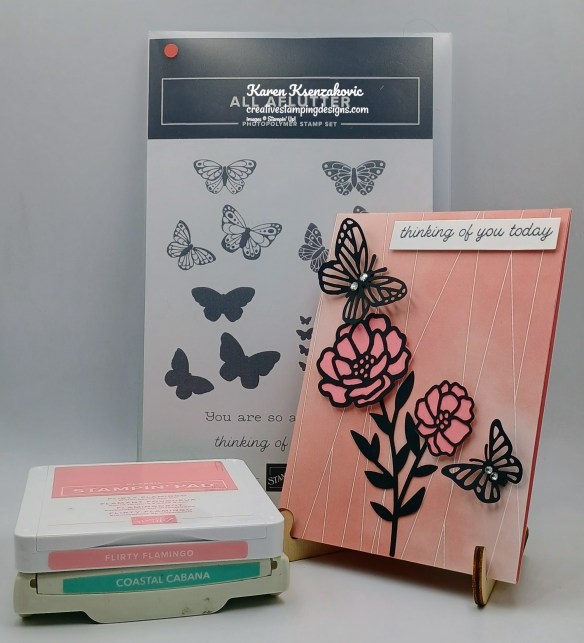
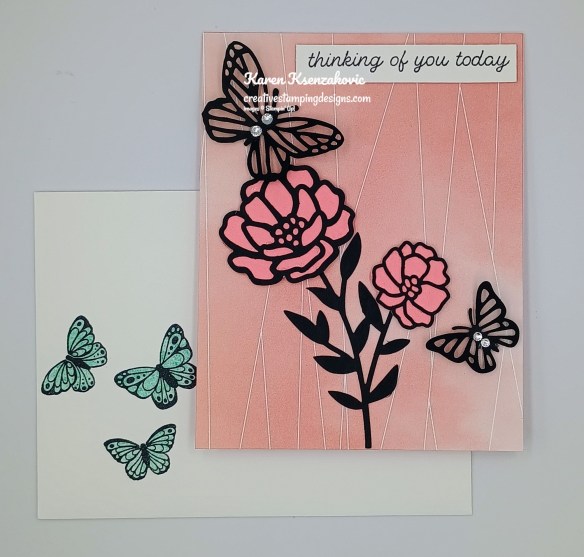
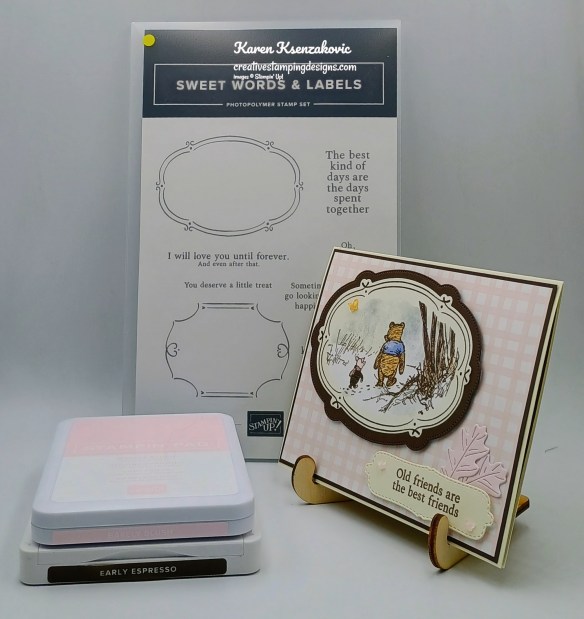
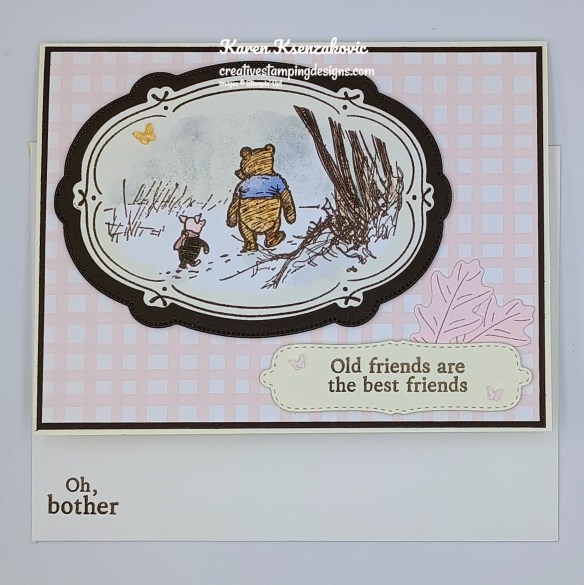
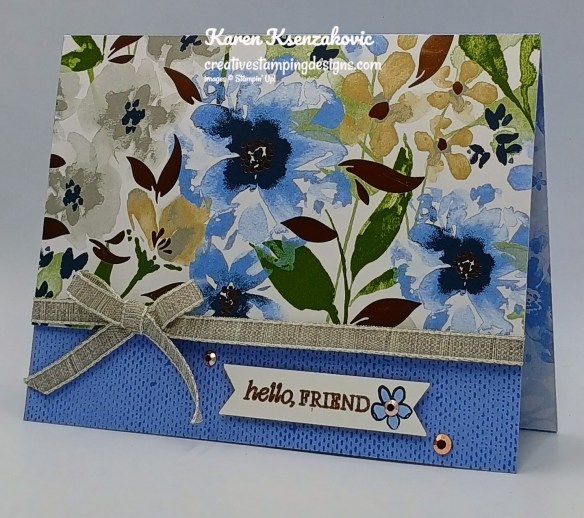
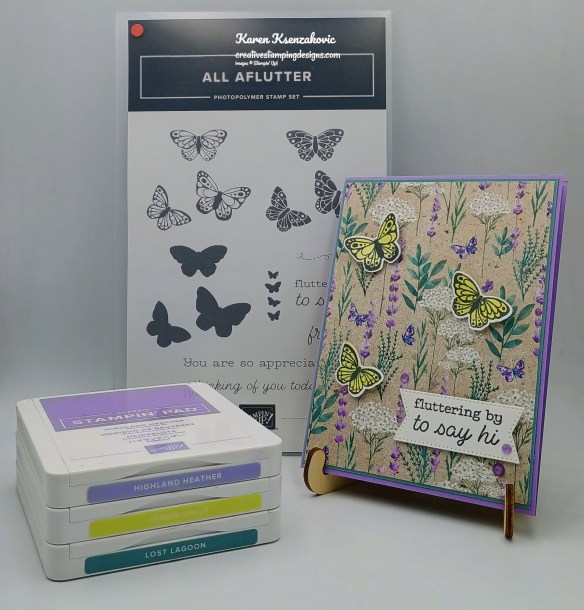
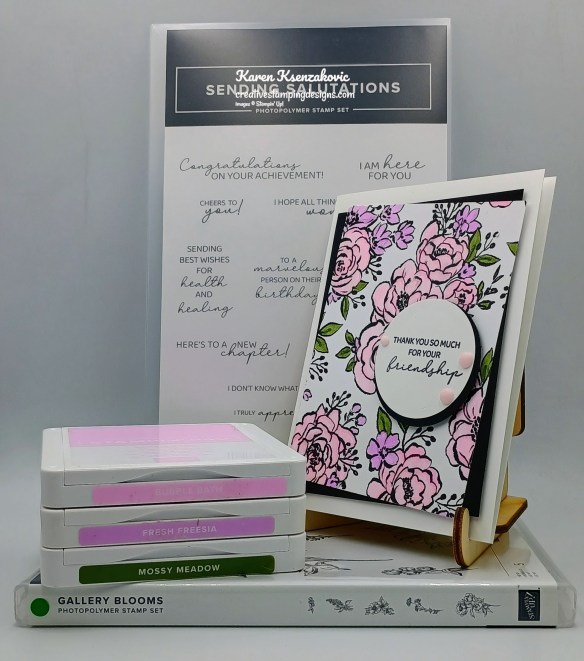
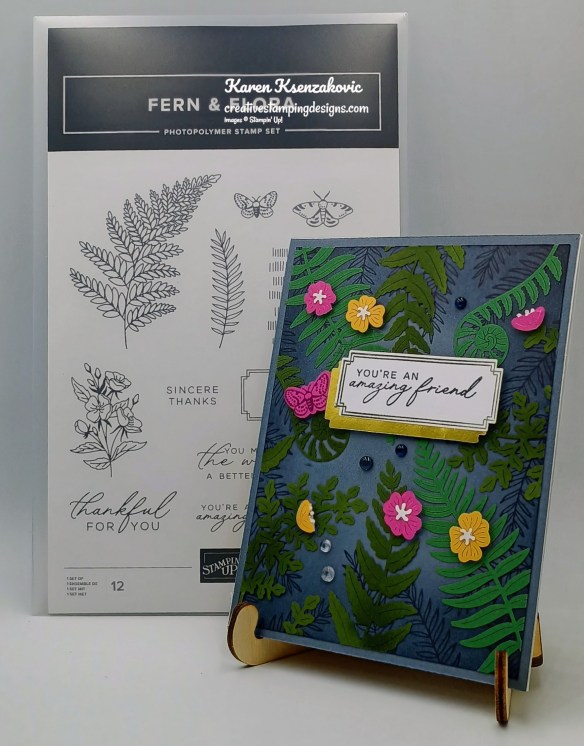
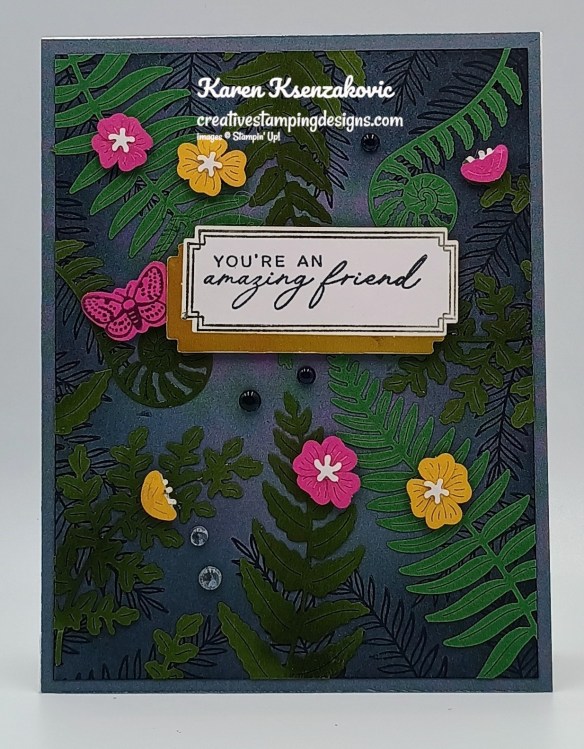
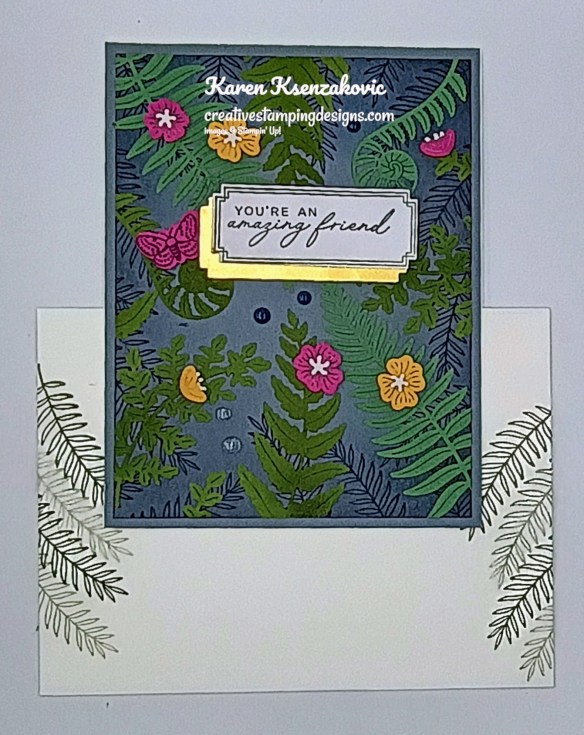
Today’s card we made last night with mystery stamping at our meeting. Jaimie sent us some measurements and then talked us through assembling the card together on zoom. Here’s my card for today.
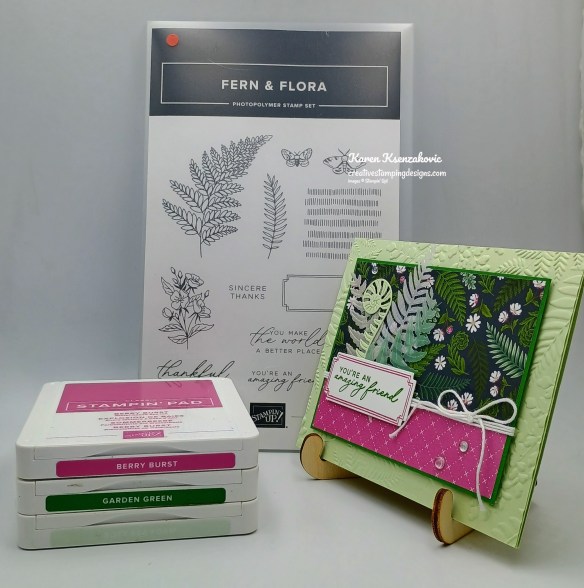
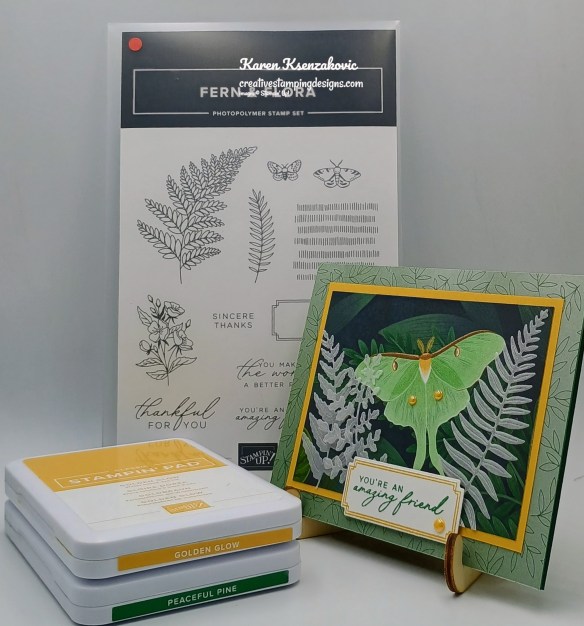
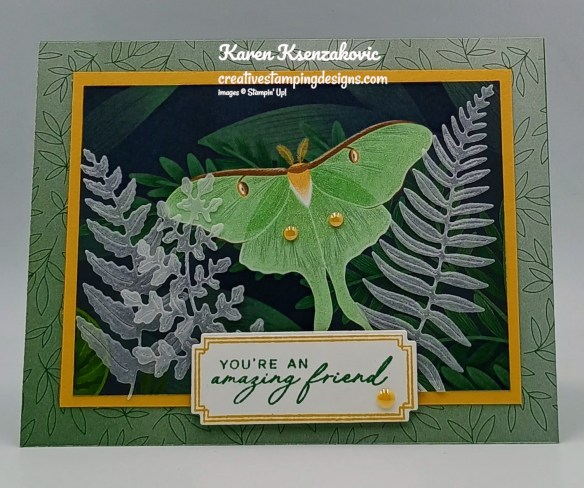
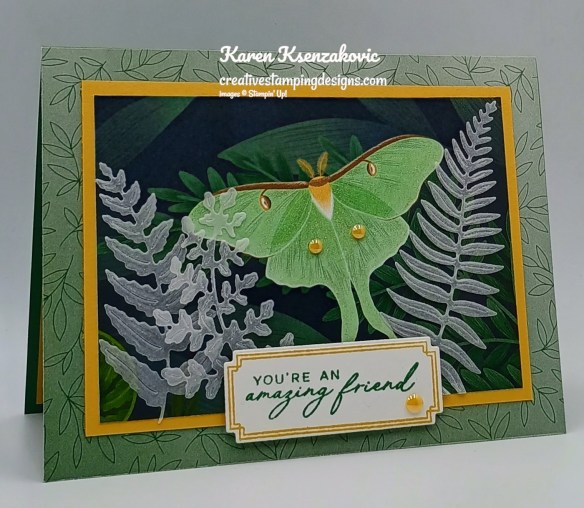
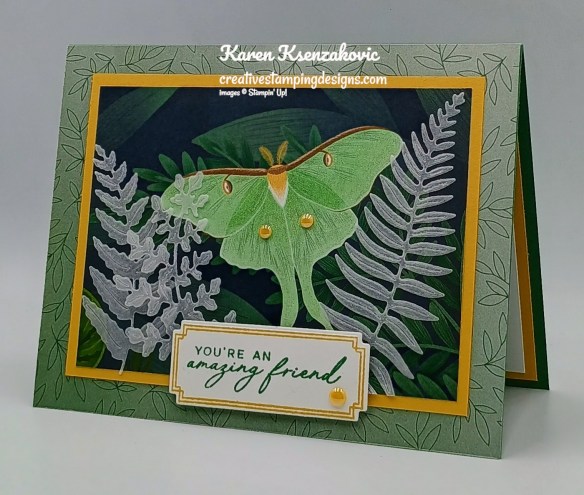
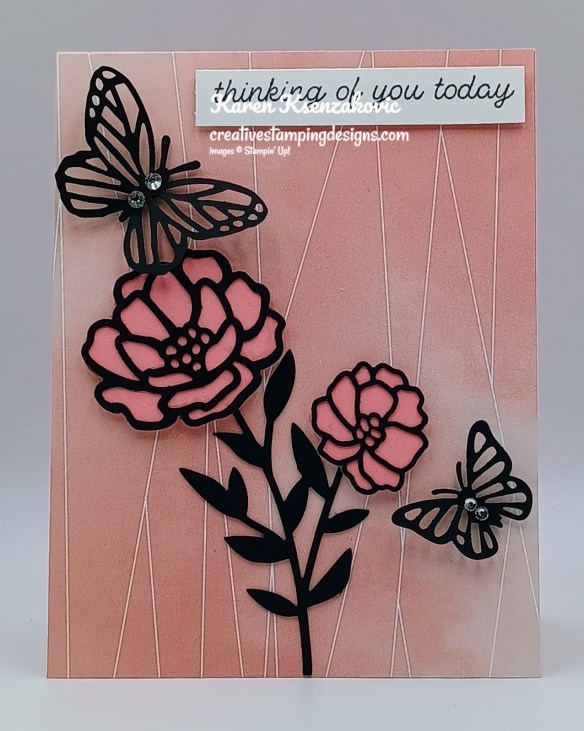
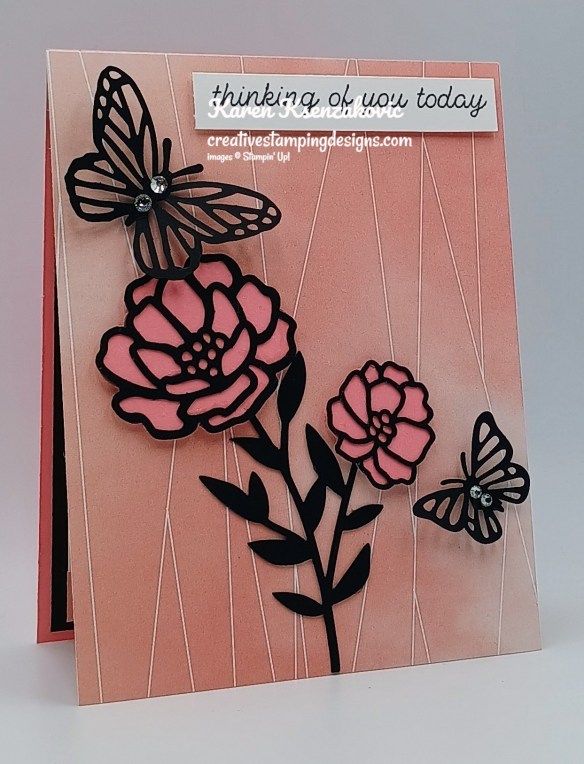
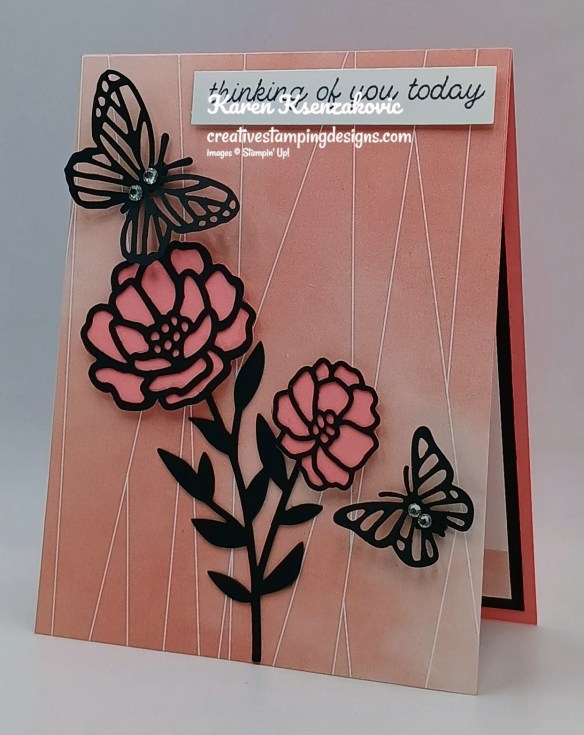
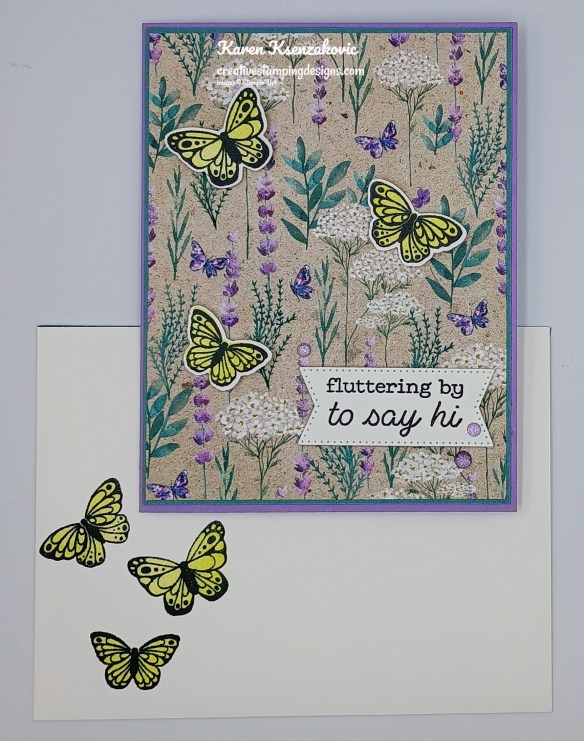
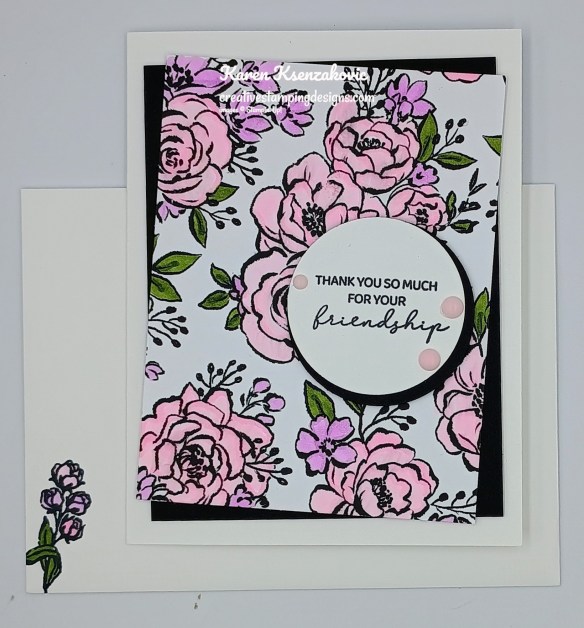
I used the Stampin’ Up! Fern & Flora Bundle, Fern & Flor 3D Embossing Folder and the Moonlit Flora Designer Series Paper for my card today.

Emboss a panel of Soft Sea Foam using the Fern & Flora EF. Adhere the embossed panel to the Soft Sea Foam card base.
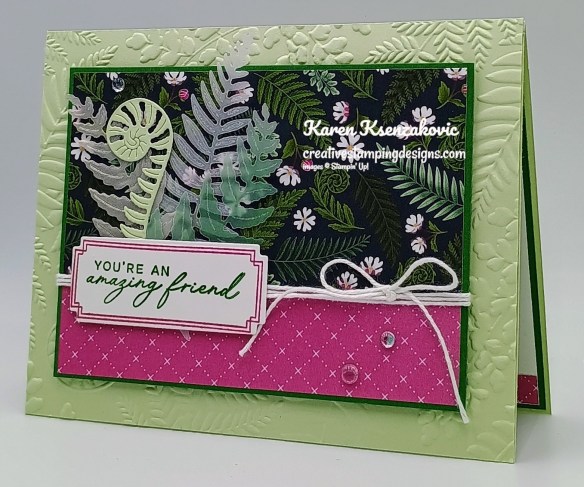
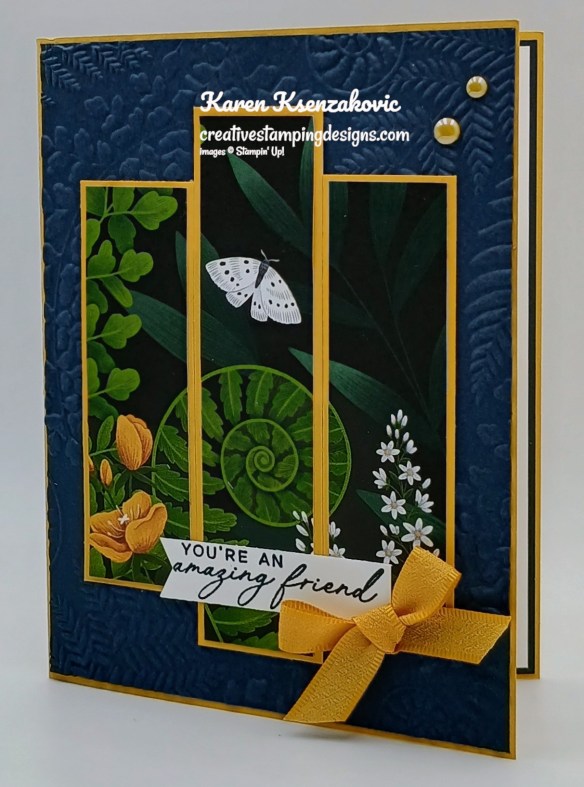
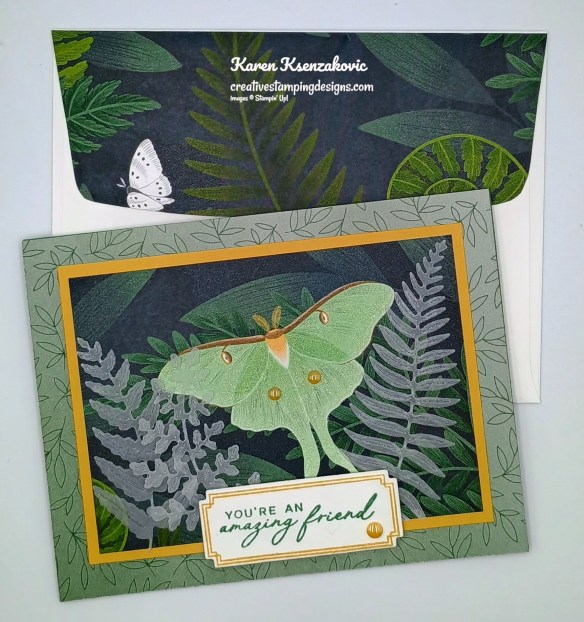
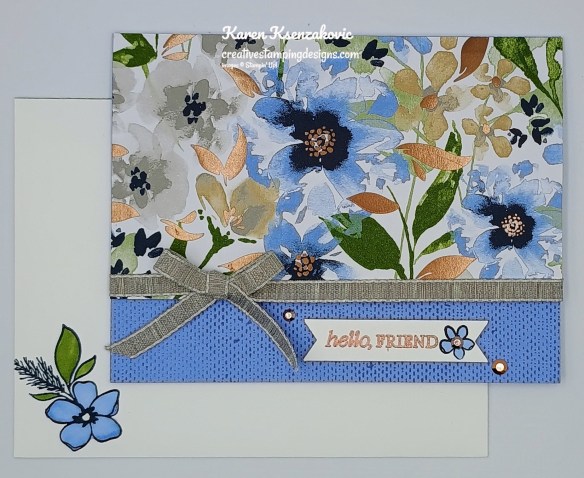
Adhere the 2 panels of Moonlit Flora DSP to the Garden Green mat. Warp a piece of White Baker’s Twine around the layered panel 3 times and tie a bow. Adhere the layered panel to the card front with Stampin’ Dimensionals. From scraps of Sunset Shimmer Vellum and Vellum Paper, cut the fern dies using the Fern & Flora Dies. Adhere the die cuts to the card front with Glue Dots.
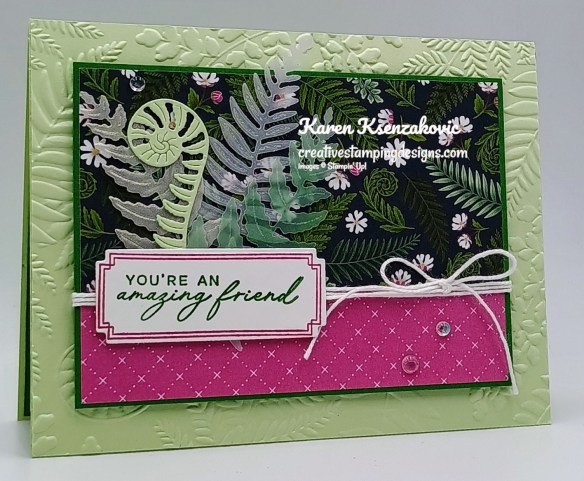
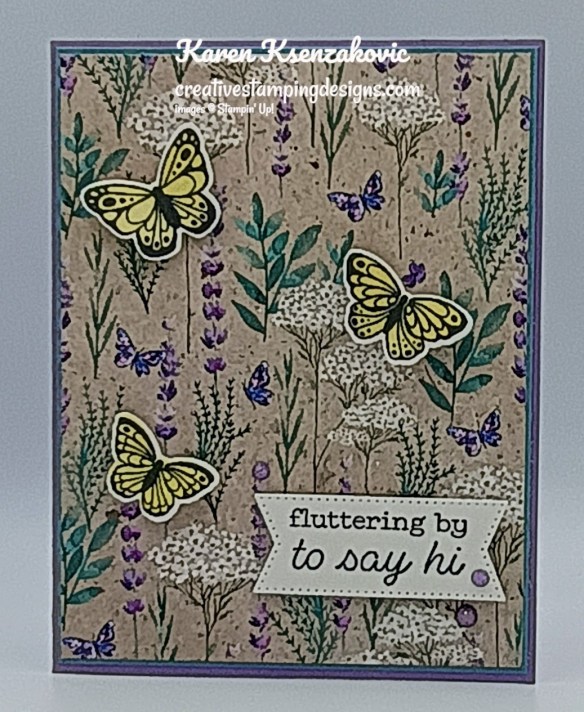
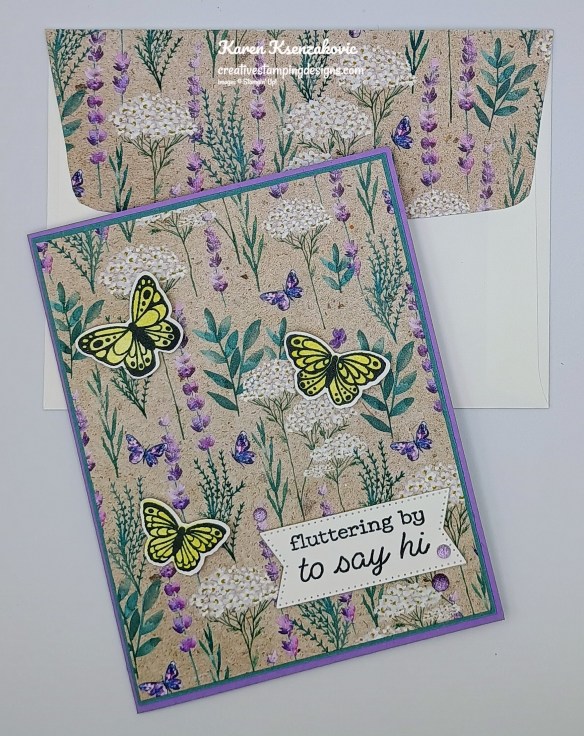
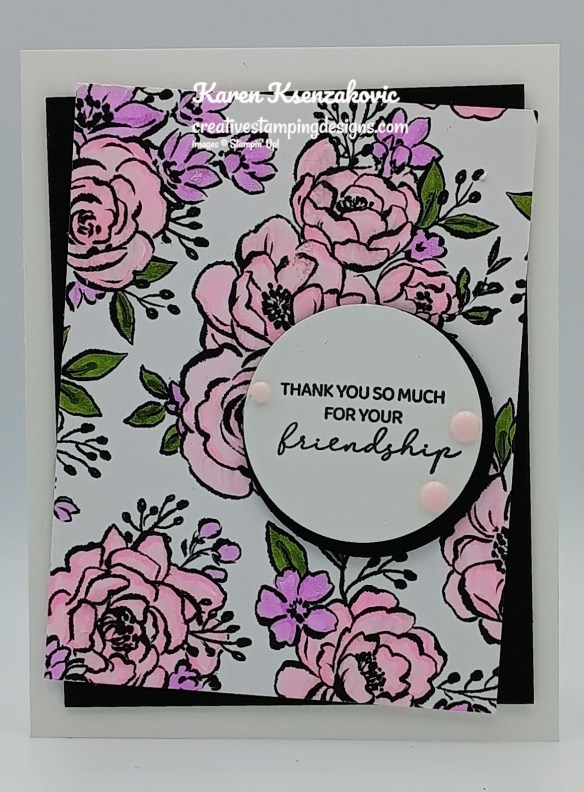
On a panel of Basic White, stamp the frame image from the Fern & Flora stamp set in Berry Burst Ink. Stamp the sentiment from the Fern & Flora stamp set in Garden Green Ink inside the frame. Using the Fern & Flora Dies, cut out the sentiment. Adhere the sentiment over the die cut fern & Baker’s Twine with Stampin’ Dimensionals. Add a few Dewdrop Embellishments to the card front.

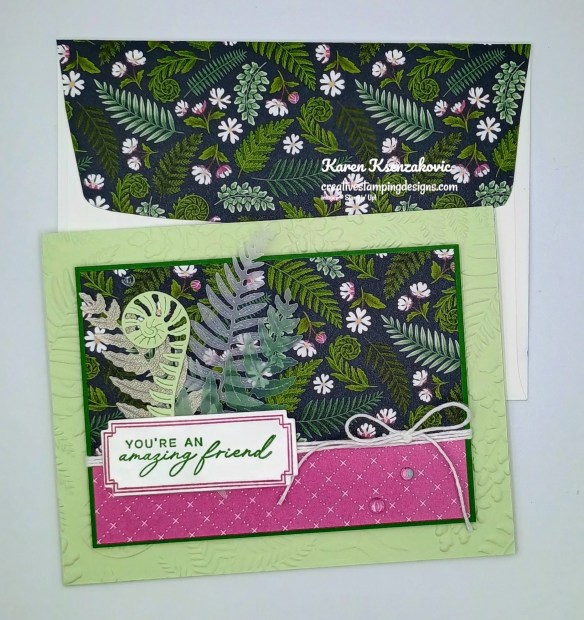
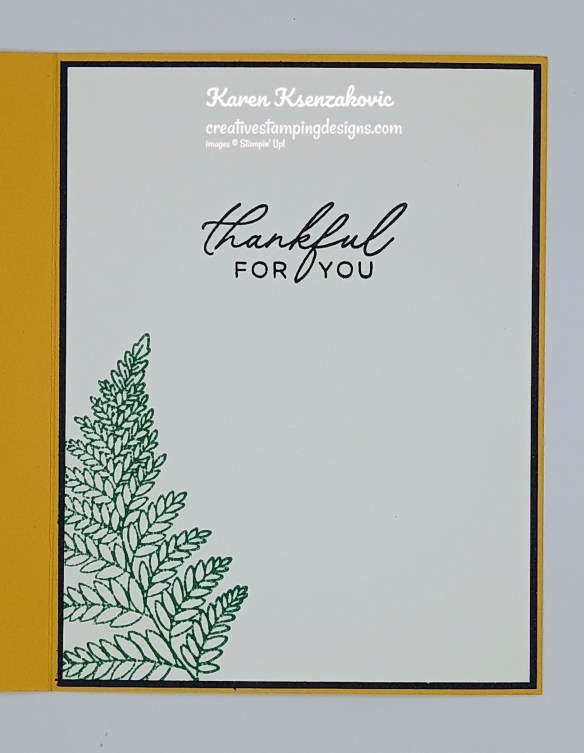
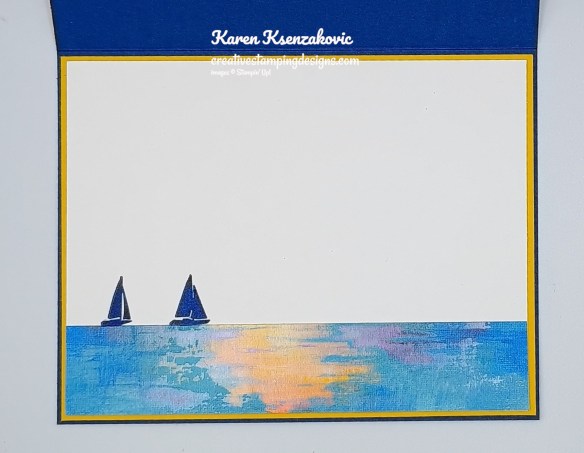
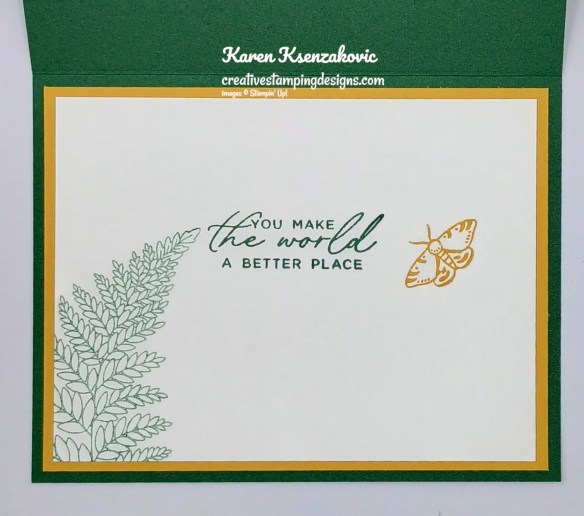
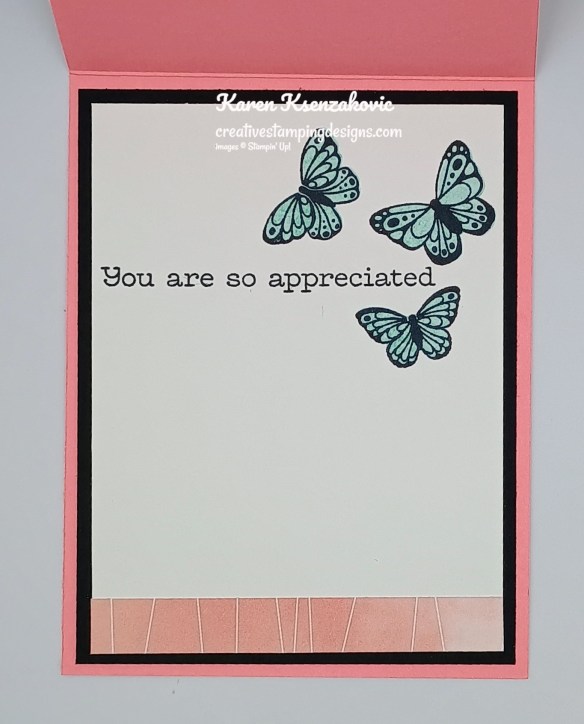
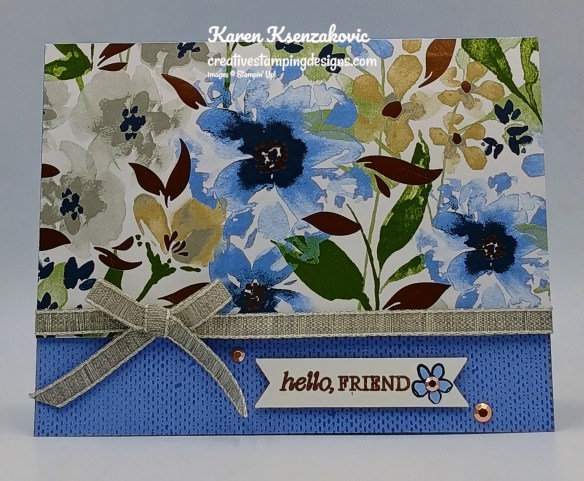
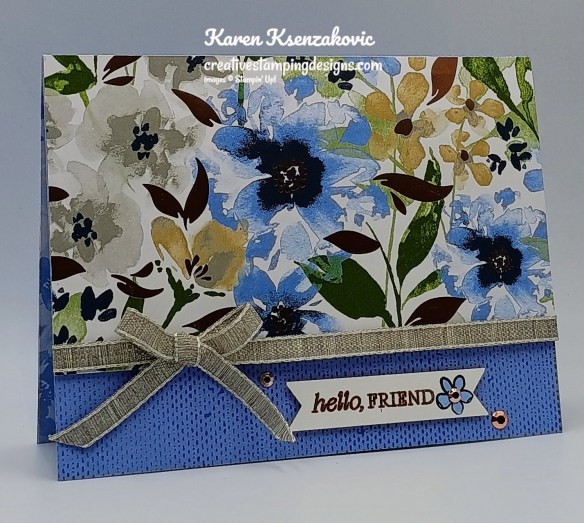
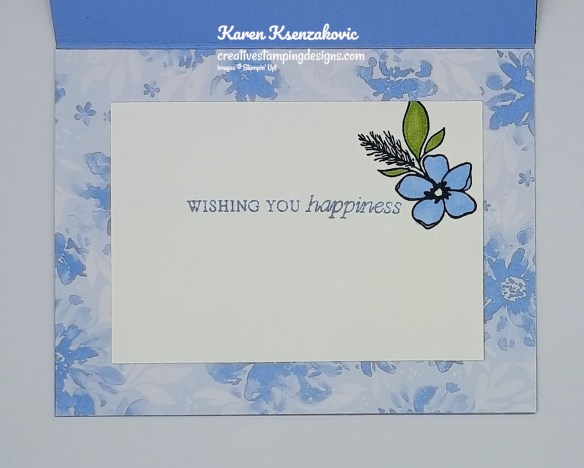
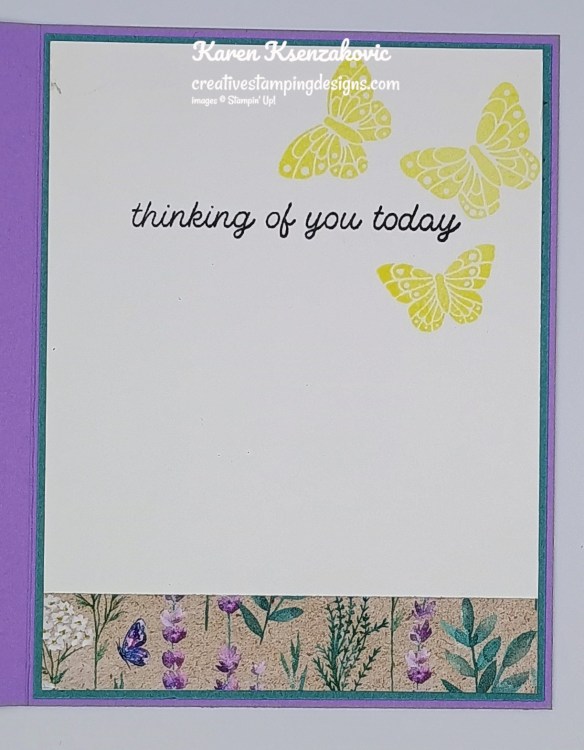
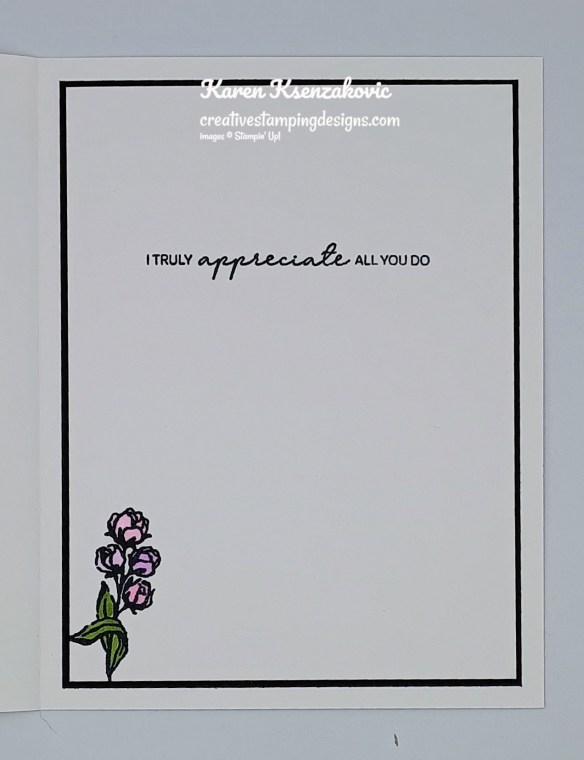
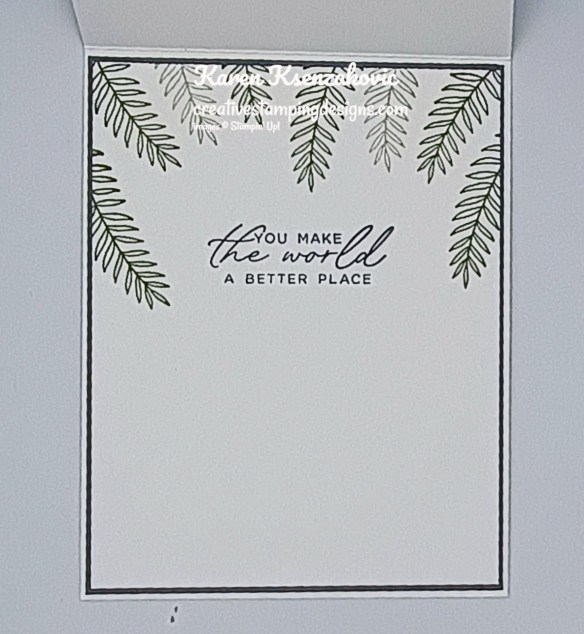
On a panel of Basic Whtie, stamp the floral image from the Fern & Flora stamp set in Black Ink on the bottom of the panel. Color the image with Berry Burst & Peaceful Pine Stampin’ Blends Markers. Adhere a strip of Moonlit Flora DSP to the bottom of the panel. Adhere the Basic White panel to a Garden Green mat then to the inside of the Soft Sea Foam card base.

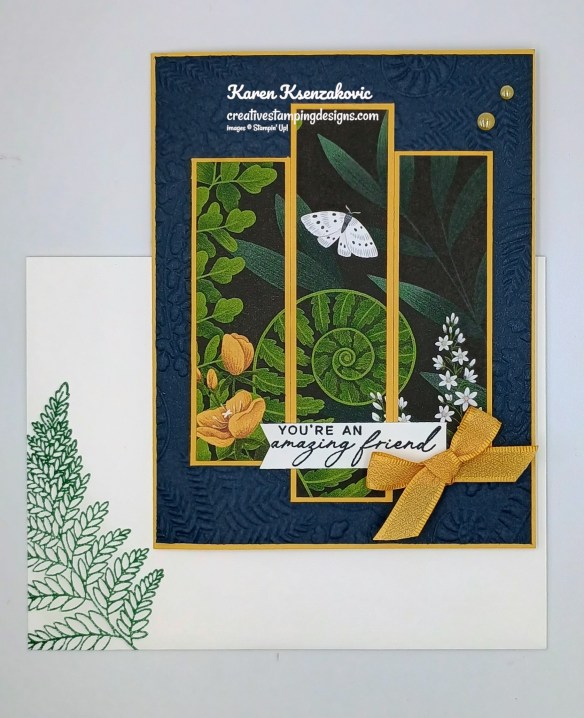
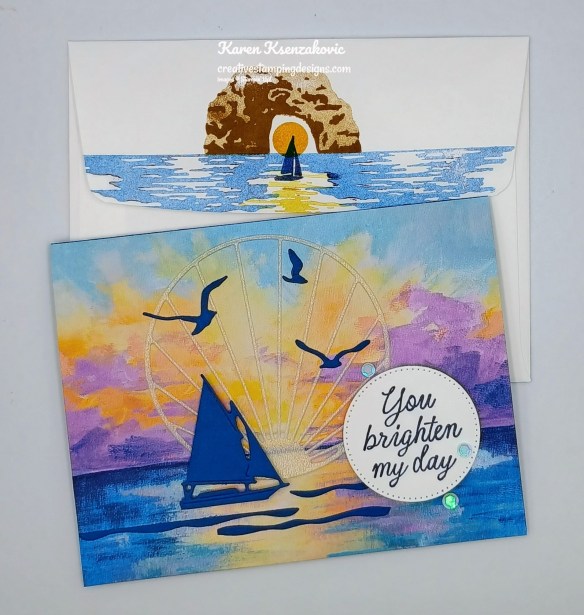
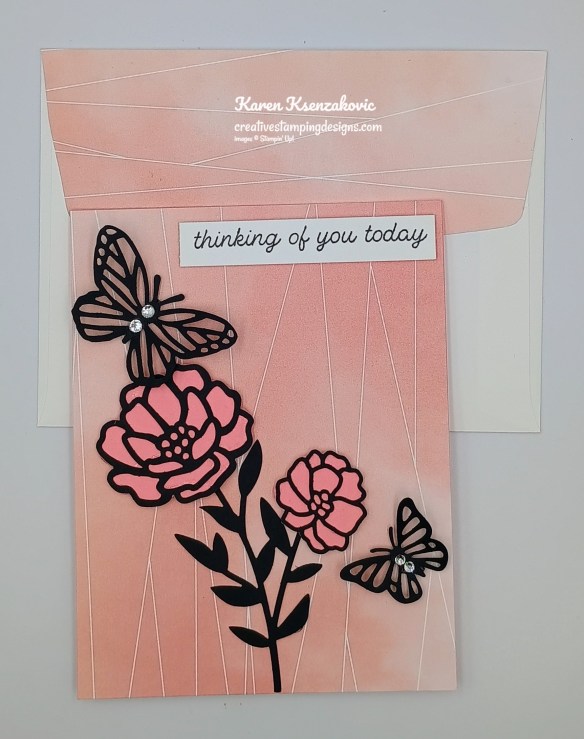
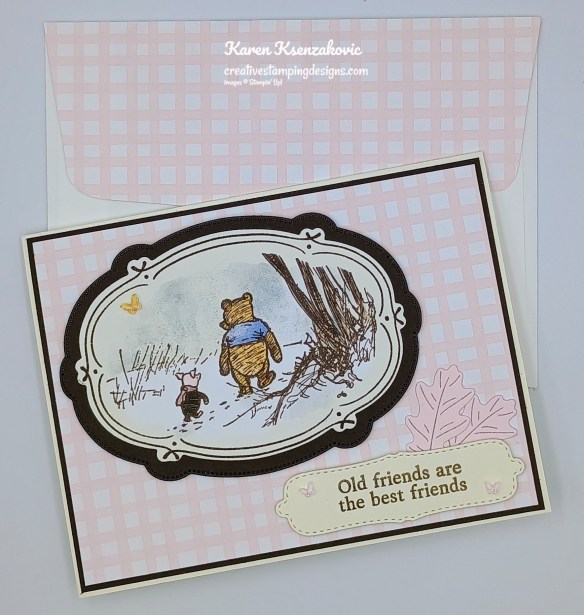
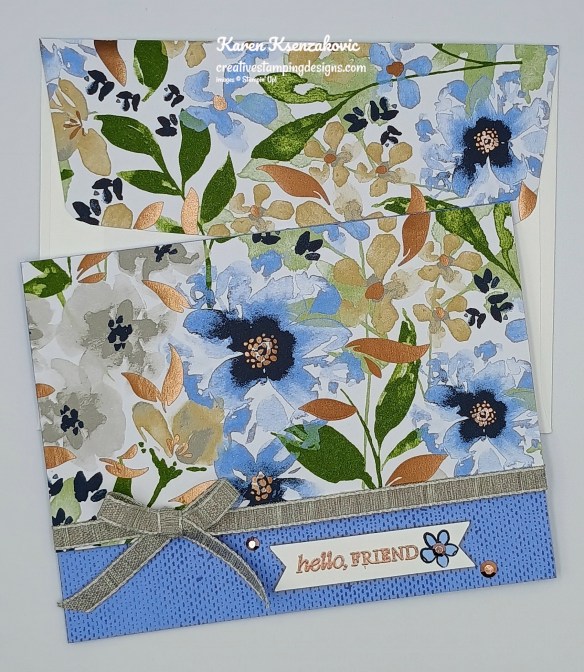
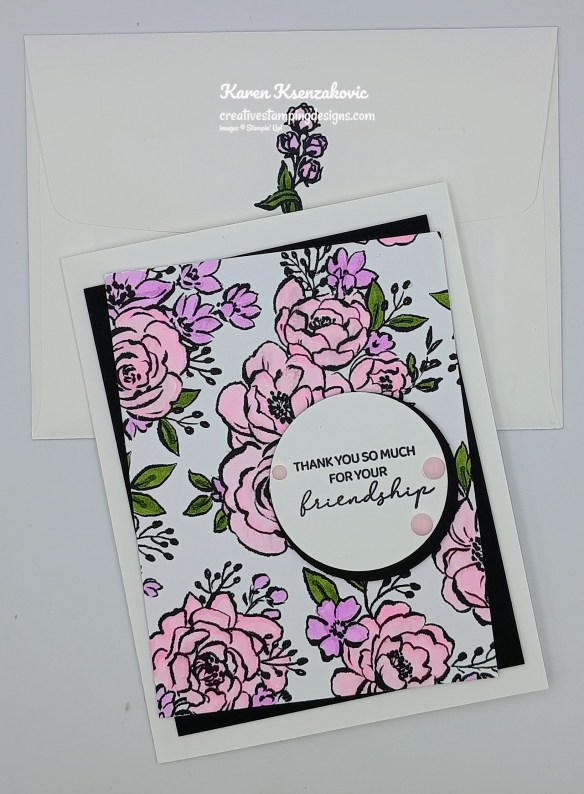
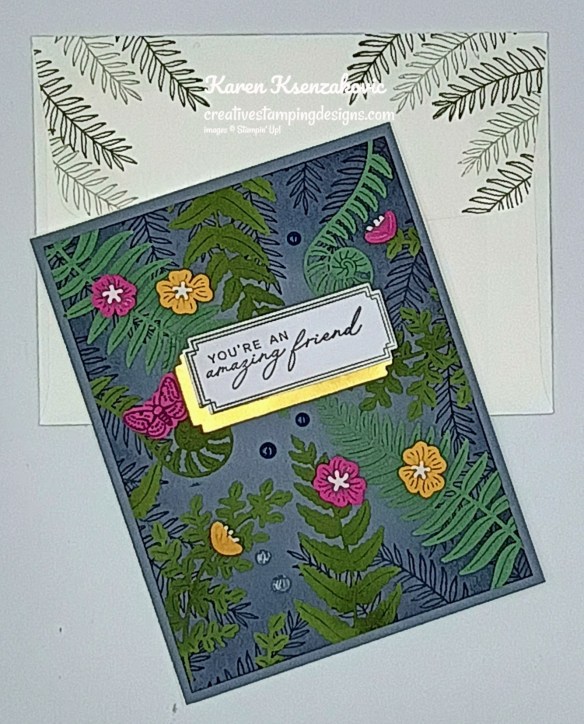
Decorate a Basic White Medium Envelope to finish your card. Stamp the floral image from the Fern & Flora stamp set in Black Ink on the envelope front. Color the image with Berry Burst & Peaceful Pine Stampin’ Blends Markers. Adhere a panel of Moonlit Flora DSP to the envelope flap.
Thank you for stopping by my blog today. I hope you like the card and will give it a try. Happy Stamping!!
*********************************************************************************************************
If you need any stamping supplies, I’d love to be your Demonstrator. Just click HERE to go directly to my online store or drop me an email if you have any questions.
*********************************************************************************************************
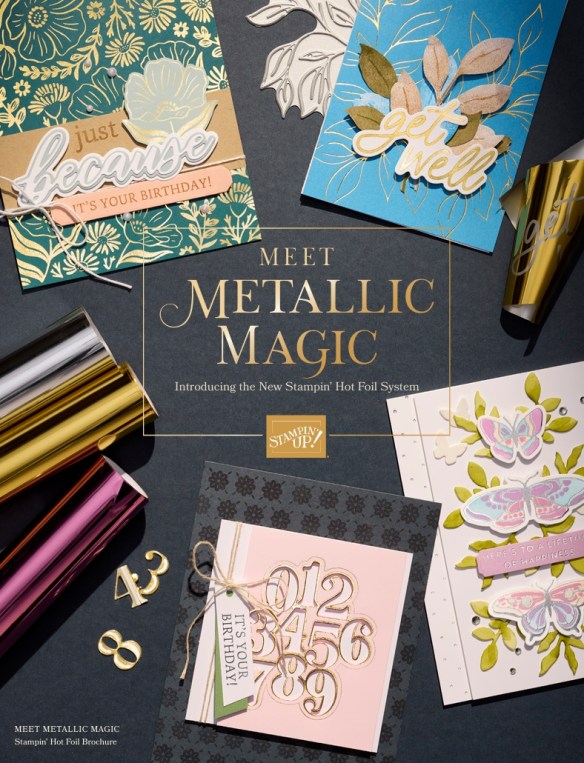
Introducing the hottest items in crafting—the new Stampin’ Hot Foil System!!

The metallic magic starts with Stampin’ Hot Foil Rolls, specially made Hot Foil dies, and the Stampin’ Hot Foil System that works with the Stampin’ Cut & Emboss Machine (sold separately). The heat of the platform transfers the foil using hot foil dies designed specifically for this system, allowing you to add dazzling details to paper and more.
WHAT IS INCLUDED WHEN YOU PURCHASE THE STAMPIN’ HOT FOIL SYSTEM?
This is everything included in the Stampin’ Hot Foil System & Craft Class:
- Metallic Magic Craft Class ($30 value—limited time only!)
- Stampin’ Hot Foil platform
- Stampin’ Hot Foil Shim & Spacer
- Stampin’ Hot Foil Magnetic Pick-Up Tool
- Silicone platform station
- Silicone cooling pad
- Power cord
- Instructions on how to use the system

The Stampin’ Cut & Emboss Machine, Stampin’ Hot Foil Rolls (the foil itself), and Hot Foil dies and bundles are sold separately.
CRAFT CLASS
As an added bonus, everyone who purchases this system before January 4, 2027, will automatically be able to access the upcoming Metallic Magic Craft Class, a technique-centric virtual class. Attendees will make unique projects and learn crafting tips intended to elevate their hot foil crafting experience. This class is a special limited-time offer exclusive to this system and is an amazing tool when it comes to increasing skills, learning techniques, and making the most of this new product line.
You can see more details about the system, find the bundles and foil that will be available to order beginning on Friday, July 10 in this brochure:
A few notes about the new system:
- Hot Foil results are best with either White Willow or Two-Tone Cardstock. Smoother card stocks like the Two-Tone Cardstock and White Willow will achieve the best results when using the system, but you can use the regular card stocks too.
- The Hot Foil System, foil rolls and new hot foil dies and bundles will be available Friday, July 10, 2026 in the online Stampin’ Up! store.
- A FREE Hot Foil Online Class from Stampin’ Up! is included with your hot foil system purchase (a $30 value!), do not add the class separately to your cart (you’ll be charged for it if you do!). You’ll automatically get a link to it after you purchase the Stampin’ Hot Foil System.
- The Stampin’ Hot Foil system is $160. Dies & foil are sold separately.
- Stampin’ Up! has let us know that if the Stampin’ Hot Foil system goes on backorder, it may take longer than normal to restock. So if you would like to order the system, order sooner rather than later!
- IMPORTANT NOTE: Cutting dies are not designed to be used with hot foiling. You cannot die cut using foiling dies. Doing so risks damaging the dies and the system.
I’m so excited for you all to be able to order this new system! Head over to my Stampin’ Up! online store beginning July 10 to see and order the new system!
*********************************************************************************************************
25% off your First Paper Pumpkin Kit for 1st Time Subscribers
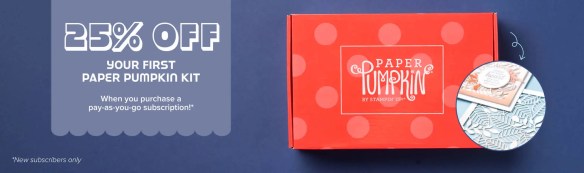
Have you been thinking of trying Paper Pumpkin? Now’s a perfect time to get started with our all-inclusive crafting kit subscription! Purchase a pay-as-you-go subscription from July 11–August 10 and get 25% off the first kit!
Not only will new subscribers receive the wonderful August Kindred Greetings Kit at a discount, but they’ll also gain access to exclusive add-ons, past kits, and refills as soon as they subscribe! It’s a great way to carve out a little creative “me time” each month while joining a global community of passionate crafters!
Promotion Details:
- Promotion Begins: July 11, 2026
- Promotion Ends: August 10, 2026
- Offer applies to new subscribers only (those who haven’t had an active Paper Pumpkin subscription in the past 18 months).
- Offer is valid for pay-as-you-go subscriptions only. Discount does not apply to prepaid subscriptions.
- The discounted first kit is the August Kindred Greetings Kit.
- This kit cannot be skipped.
Head over to my online store beginning July 11 to subscribe…and if you’re a new subscriber, you’ll get 25% off the August Kit!!
*********************************************************************************************************
Kindred Greetings – August Paper Pumpkin
Subscribe June 11 – July 10
Subscribe to Paper Pumpkin for a monthly, all-inclusive crafting kit that’s a fun surprise! Each kit includes a photopolymer stamp set, Classic Stampin’ Spot™, and step-by-step instructions to complete exclusive paper craft projects, including cards, tags, and gift packaging. Keep reading for a sneak peek of our upcoming kits. And don’t miss the special add-on that coordinates with all three months

Send timeless, understated cards with heartfelt messages of comfort and appreciation.
• Makes 9 cards: 3 each of 3 designs with 9 coordinating envelopes
• Precut paper pieces and intricate precut card fronts
• Gray and white twine
• Coordinating colors: Basic Gray, Calypso Coral, Gray Granite (Stampin’ Spot), Lost Lagoon, Petal Pink, Pool Party.
Subscribe to the July Paper Pumpkin Kit between 11 July and 10 August by clicking here!
Don’t miss the coordinating
Detailed Flora Dies Add-On!
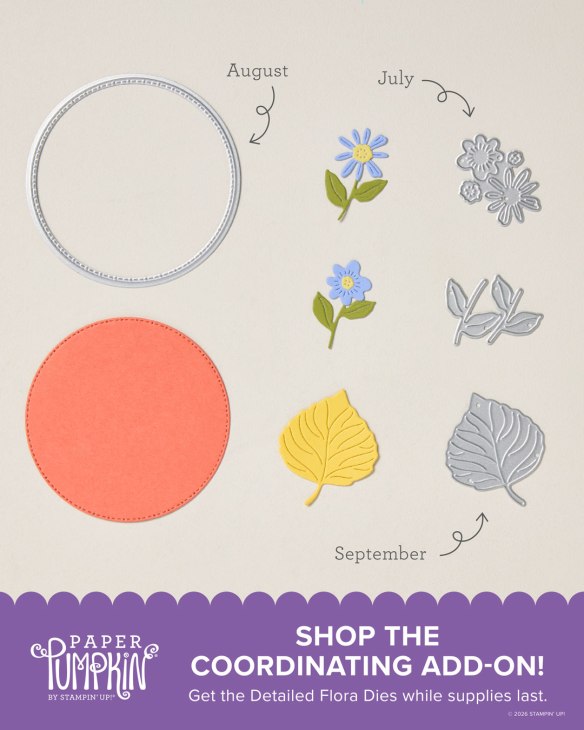
Make the most of your Paper Pumpkin kits with the Detailed Flora Dies add-on! Quickly and cleanly cut out a circular label, a cluster of flowers, or a detailed leaf to elevate your crafting projects. These additional dies are designed to work with THREE Paper Pumpkin Kits: the Hooray for Birthdays Paper Pumpkin Kit, the Kindred Greetings Paper Pumpkin Kit, and the Aspens of Gratitude Paper Pumpkin Kit. Pair these dies with other Stampin’ Up! products for even more creative options!
DETAILS
– 4 dies
– Largest die: 2-3/4″ x 2-3/4″ (7 x 7 cm)
– Use with a Stampin’ Cut & Emboss Machine (sold separately)
#168664
*********************************************************************************************************
Card stock cuts for this project:
- Basic White Cardstock1 1/2″ x 2 3/4″(sentiment), 4″ x 5 1/4″(inner liner)
- Garden Green Cardstock 3 3/8″ x 4 5/8″(mat), 4 1/8″ x 5 3/8″(mat)
- Soft Sea Foam Cardstock 5 1/2″ x 8 1/2″(card base scored & folded at 4 1/4″), 4 1/4″ x 5 1/2″(card front), scrap for die cut
- Moonlit Flora Designer Series Paper 1″ x 4 1/2″ (card front panel), 2 1/4″ x 4 1/2″(card front panel), 1/4″ x 5 1/4″(inner liner), 2 1/4″ x 6″(envelope)
- Sunset Shimmer Vellum scraps for die cuts
- Vellum Paper scraps for die cuts
*********************************************************************************************************
Product List
![Fern & Flora Bundle (English) [ 167745 ]](https://assets1.tamsnetwork.com/images/EC042017NF/167745s.jpg "Fern & Flora Bundle (English) [ 167745 ]")
![Fern & Flora Photopolymer Stamp Set (English) [ 167739 ]](https://assets1.tamsnetwork.com/images/EC042017NF/167739s.jpg "Fern & Flora Photopolymer Stamp Set (English) [ 167739 ]")
![Fern & Flora Dies [ 168991 ]](https://assets1.tamsnetwork.com/images/EC042017NF/168991s.jpg "Fern & Flora Dies [ 168991 ]")
![Basic White 8 1/2" X 11" Cardstock [ 166780 ]](https://assets1.tamsnetwork.com/images/EC042017NF/166780s.jpg "Basic White 8 1/2\" X 11\" Cardstock [ 166780 ]")
![Garden Green 8-1/2" X 11" Cardstock [ 102584 ]](https://assets1.tamsnetwork.com/images/EC042017NF/102584s.jpg "Garden Green 8-1/2\" X 11\" Cardstock [ 102584 ]")
![Soft Sea Foam 8-1/2" X 11" Cardstock [ 146988 ]](https://assets1.tamsnetwork.com/images/EC042017NF/146988s.jpg "Soft Sea Foam 8-1/2\" X 11\" Cardstock [ 146988 ]")
![Moonlit Flora 12" X 12" (30.5 X 30.5 Cm) Designer Series Paper [ 167737 ]](https://assets1.tamsnetwork.com/images/EC042017NF/167737s.jpg "Moonlit Flora 12\" X 12\" (30.5 X 30.5 Cm) Designer Series Paper [ 167737 ]")
![Berry Burst Classic Stampin' Pad [ 147143 ]](https://assets1.tamsnetwork.com/images/EC042017NF/147143s.jpg "Berry Burst Classic Stampin' Pad [ 147143 ]")
![Garden Green Classic Stampin' Pad [ 147089 ]](https://assets1.tamsnetwork.com/images/EC042017NF/147089s.jpg "Garden Green Classic Stampin' Pad [ 147089 ]")
![Berry Burst Stampin’ Blends Combo Pack [ 161681 ]](https://assets1.tamsnetwork.com/images/EC042017NF/161681s.jpg "Berry Burst Stampin’ Blends Combo Pack [ 161681 ]")
![Peaceful Pine Stampin’ Blends Combo Pack [ 167668 ]](https://assets1.tamsnetwork.com/images/EC042017NF/167668s.jpg "Peaceful Pine Stampin’ Blends Combo Pack [ 167668 ]")
![Fern & Flora 3 D Embossing Folder [ 167744 ]](https://assets1.tamsnetwork.com/images/EC042017NF/167744s.jpg "Fern & Flora 3 D Embossing Folder [ 167744 ]")
![Baker's Twine Essentials Pack [ 155475 ]](https://assets1.tamsnetwork.com/images/EC042017NF/155475s.jpg "Baker's Twine Essentials Pack [ 155475 ]")
![Dewdrops Embellishments [ 167748 ]](https://assets1.tamsnetwork.com/images/EC042017NF/167748s.jpg "Dewdrops Embellishments [ 167748 ]")
![Basic White Medium Envelopes [ 159236 ]](https://assets1.tamsnetwork.com/images/EC042017NF/159236s.jpg "Basic White Medium Envelopes [ 159236 ]")
![Stampin' Cut & Emboss Machine [ 149653 ]](https://assets1.tamsnetwork.com/images/EC042017NF/149653s.jpg "Stampin' Cut & Emboss Machine [ 149653 ]")
![Mini Glue Dots [ 103683 ]](https://assets1.tamsnetwork.com/images/EC042017NF/103683s.jpg "Mini Glue Dots [ 103683 ]")
![Multipurpose Liquid Glue [ 110755 ]](https://assets1.tamsnetwork.com/images/EC042017NF/110755s.jpg "Multipurpose Liquid Glue [ 110755 ]")
![Stampin' Dimensionals [ 104430 ]](https://assets1.tamsnetwork.com/images/EC042017NF/104430s.jpg "Stampin' Dimensionals [ 104430 ]")
![Stampin' Seal [ 152813 ]](https://assets1.tamsnetwork.com/images/EC042017NF/152813s.jpg "Stampin' Seal [ 152813 ]")
![Paper Trimmer [ 152392 ]](https://assets1.tamsnetwork.com/images/EC042017NF/152392s.jpg "Paper Trimmer [ 152392 ]")
![Bone Folder [ 102300 ]](https://assets1.tamsnetwork.com/images/EC042017NF/102300s.jpg "Bone Folder [ 102300 ]")
![Take Your Pick [ 144107 ]](https://assets1.tamsnetwork.com/images/EC042017NF/144107s.jpg "Take Your Pick [ 144107 ]")


![Golden Glow 8 1/2" X 11" Cardstock [ 167685 ]](https://assets1.tamsnetwork.com/images/EC042017NF/167685s.jpg "Golden Glow 8 1/2\" X 11\" Cardstock [ 167685 ]")
![Secret Sea 8 1/2" X 11" Cardstock [ 165624 ]](https://assets1.tamsnetwork.com/images/EC042017NF/165624s.jpg "Secret Sea 8 1/2\" X 11\" Cardstock [ 165624 ]")
![Peaceful Pine Classic Stampin Pad [ 167679 ]](https://assets1.tamsnetwork.com/images/EC042017NF/167679s.jpg "Peaceful Pine Classic Stampin Pad [ 167679 ]")
![Secret Sea Classic Stampin' Pad [ 165285 ]](https://assets1.tamsnetwork.com/images/EC042017NF/165285s.jpg "Secret Sea Classic Stampin' Pad [ 165285 ]")
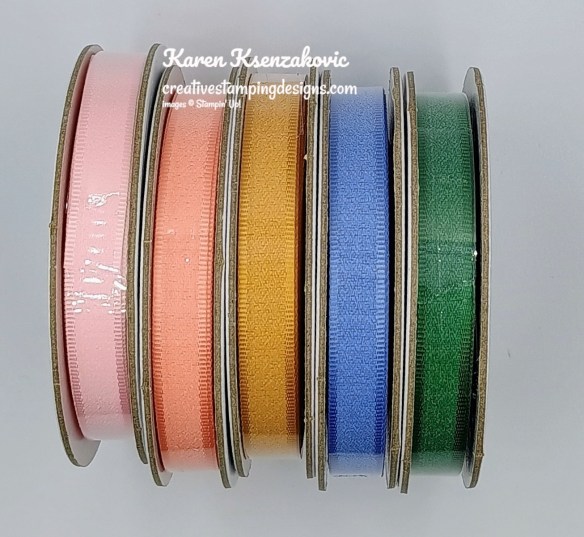
![Golden Glow 3/8" (1 Cm) Bordered Ribbon [ 167548 ]](https://assets1.tamsnetwork.com/images/EC042017NF/167548s.jpg "Golden Glow 3/8\" (1 Cm) Bordered Ribbon [ 167548 ]")
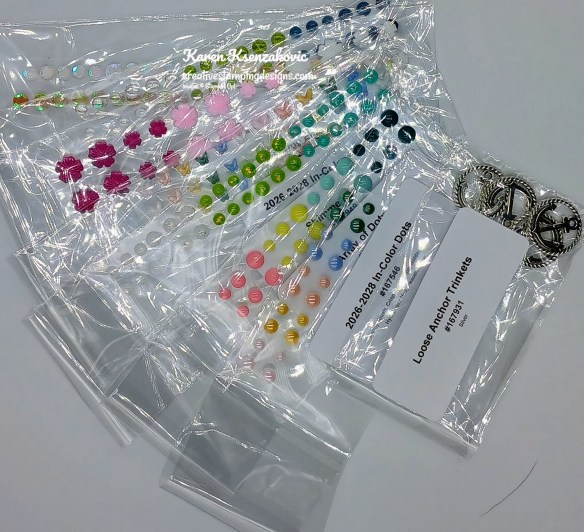
![2026–2028 In Color™ Dots [ 167546 ]](https://assets1.tamsnetwork.com/images/EC042017NF/167546s.jpg "2026–2028 In Color™ Dots [ 167546 ]")


![Sunset Coast Bundle (English) [ 167781 ]](https://assets1.tamsnetwork.com/images/EC042017NF/167781s.jpg "Sunset Coast Bundle (English) [ 167781 ]")
![Sunset Coast Photopolymer Stamp Set (English) [ 167775 ]](https://assets1.tamsnetwork.com/images/EC042017NF/167775s.jpg "Sunset Coast Photopolymer Stamp Set (English) [ 167775 ]")
![Sunset Coast Dies [ 167780 ]](https://assets1.tamsnetwork.com/images/EC042017NF/167780s.jpg "Sunset Coast Dies [ 167780 ]")
![Blueberry Bushel 8-1/2" X 11" Cardstock [ 146968 ]](https://assets1.tamsnetwork.com/images/EC042017NF/146968s.jpg "Blueberry Bushel 8-1/2\" X 11\" Cardstock [ 146968 ]")
![Crushed Curry 8-1/2" X 11" Cardstock [ 131199 ]](https://assets1.tamsnetwork.com/images/EC042017NF/131199s.jpg "Crushed Curry 8-1/2\" X 11\" Cardstock [ 131199 ]")
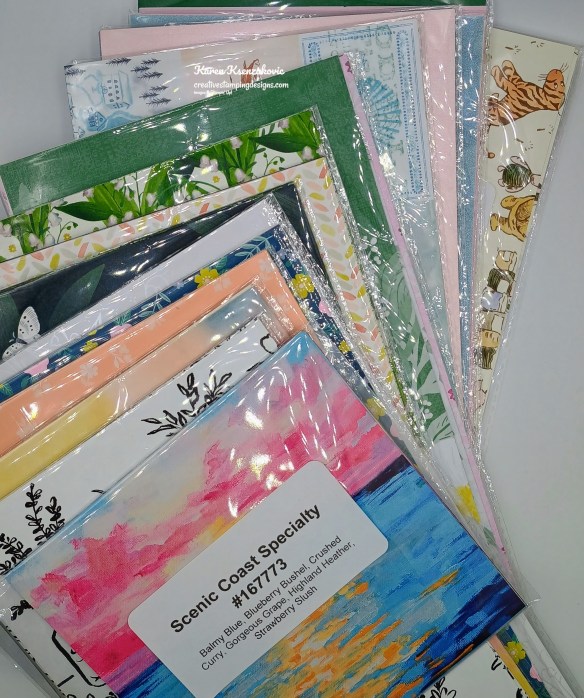
![Scenic Coast 6" X 6" (15.2 X 15.2 Cm) Specialty Designer Series Paper [ 167773 ]](https://assets1.tamsnetwork.com/images/EC042017NF/167773s.jpg "Scenic Coast 6\" X 6\" (15.2 X 15.2 Cm) Specialty Designer Series Paper [ 167773 ]")
![Sunset Shimmer Vellum 12" X 12" (30.5 X 30.5 Cm) Specialty Paper [ 167784 ]](https://assets1.tamsnetwork.com/images/EC042017NF/167784s.jpg "Sunset Shimmer Vellum 12\" X 12\" (30.5 X 30.5 Cm) Specialty Paper [ 167784 ]")
![Blueberry Bushel Classic Stampin' Pad [ 147138 ]](https://assets1.tamsnetwork.com/images/EC042017NF/147138s.jpg "Blueberry Bushel Classic Stampin' Pad [ 147138 ]")
![Crushed Curry Classic Stampin' Pad [ 147087 ]](https://assets1.tamsnetwork.com/images/EC042017NF/147087s.jpg "Crushed Curry Classic Stampin' Pad [ 147087 ]")
![Pecan Pie Classic Stampin' Pad [ 161665 ]](https://assets1.tamsnetwork.com/images/EC042017NF/161665s.jpg "Pecan Pie Classic Stampin' Pad [ 161665 ]")
![Stylish Shapes Dies [ 159183 ]](https://assets1.tamsnetwork.com/images/EC042017NF/159183s.jpg "Stylish Shapes Dies [ 159183 ]")
![Sunset Sparkle Sequins [ 167785 ]](https://assets1.tamsnetwork.com/images/EC042017NF/167785s.jpg "Sunset Sparkle Sequins [ 167785 ]")

![Vellum 12" X 12" (30.5 X 30.5 Cm) Specialty Paper [ 167099 ]](https://assets1.tamsnetwork.com/images/EC042017NF/167099s.jpg "Vellum 12\" X 12\" (30.5 X 30.5 Cm) Specialty Paper [ 167099 ]")
![Clear Wink Of Stella Glitter Brush [ 141897 ]](https://assets1.tamsnetwork.com/images/EC042017NF/141897s.jpg "Clear Wink Of Stella Glitter Brush [ 141897 ]")

![Basic Black 8-1/2" X 11" Cardstock [ 121045 ]](https://assets1.tamsnetwork.com/images/EC042017NF/121045s.jpg "Basic Black 8-1/2\" X 11\" Cardstock [ 121045 ]")
![Flirty Flamingo 8-1/2" X 11" Cardstock [ 141416 ]](https://assets1.tamsnetwork.com/images/EC042017NF/141416s.jpg "Flirty Flamingo 8-1/2\" X 11\" Cardstock [ 141416 ]")
![Coastal Cabana Classic Stampin' Pad [ 147097 ]](https://assets1.tamsnetwork.com/images/EC042017NF/147097s.jpg "Coastal Cabana Classic Stampin' Pad [ 147097 ]")
![Tuxedo Black Memento Ink Pad [ 132708 ]](https://assets1.tamsnetwork.com/images/EC042017NF/132708s.jpg "Tuxedo Black Memento Ink Pad [ 132708 ]")
![Rhinestone Basic Jewels [ 144220 ]](https://assets1.tamsnetwork.com/images/EC042017NF/144220s.jpg "Rhinestone Basic Jewels [ 144220 ]")


![Early Espresso 8-1/2" X 11" Cardstock [ 119686 ]](https://assets1.tamsnetwork.com/images/EC042017NF/119686s.jpg "Early Espresso 8-1/2\" X 11\" Cardstock [ 119686 ]")
![Very Vanilla 8 1/2" X 11" Cardstock [ 166784 ]](https://assets1.tamsnetwork.com/images/EC042017NF/166784s.jpg "Very Vanilla 8 1/2\" X 11\" Cardstock [ 166784 ]")
![Early Espresso Classic Stampin' Pad [ 147114 ]](https://assets1.tamsnetwork.com/images/EC042017NF/147114s.jpg "Early Espresso Classic Stampin' Pad [ 147114 ]")


![Delicate Whispers Photopolymer Stamp Set (English) [ 167500 ]](https://assets1.tamsnetwork.com/images/EC042017NF/167500s.jpg "Delicate Whispers Photopolymer Stamp Set (English) [ 167500 ]")
![Lasting Linen Photopolymer Stamp Set [ 167107 ]](https://assets1.tamsnetwork.com/images/EC042017NF/167107s.jpg "Lasting Linen Photopolymer Stamp Set [ 167107 ]")
![Delicate Dreams 12" X 12" (30.5 X 30.5 Cm) Specialty Designer Series Paper [ 167498 ]](https://assets1.tamsnetwork.com/images/EC042017NF/167498s.jpg "Delicate Dreams 12\" X 12\" (30.5 X 30.5 Cm) Specialty Designer Series Paper [ 167498 ]")
![Versamark Pad [ 102283 ]](https://assets1.tamsnetwork.com/images/EC042017NF/102283s.jpg "Versamark Pad [ 102283 ]")
![Metallics Wow! Embossing Powder [ 165678 ]](https://assets1.tamsnetwork.com/images/EC042017NF/165678s.jpg "Metallics Wow! Embossing Powder [ 165678 ]")
![Heat Tool (Us And Canada) [ 129053 ]](https://assets1.tamsnetwork.com/images/EC042017NF/129053s.jpg "Heat Tool (Us And Canada) [ 129053 ]")
![Mossy Meadow Stampin' Blends Combo Pack [ 154890 ]](https://assets1.tamsnetwork.com/images/EC042017NF/154890s.jpg "Mossy Meadow Stampin' Blends Combo Pack [ 154890 ]")
![Gray Granite 1/4" (6.4 Mm) Variegated Trim [ 167511 ]](https://assets1.tamsnetwork.com/images/EC042017NF/167511s.jpg "Gray Granite 1/4\" (6.4 Mm) Variegated Trim [ 167511 ]")
![Adhesive Backed Metallic Gems [ 163780 ]](https://assets1.tamsnetwork.com/images/EC042017NF/163780s.jpg "Adhesive Backed Metallic Gems [ 163780 ]")

![Highland Heather 8-1/2" X 11" Cardstock [ 146986 ]](https://assets1.tamsnetwork.com/images/EC042017NF/146986s.jpg "Highland Heather 8-1/2\" X 11\" Cardstock [ 146986 ]")
![Lost Lagoon 8-1/2" X 11" Cardstock [ 133679 ]](https://assets1.tamsnetwork.com/images/EC042017NF/133679s.jpg "Lost Lagoon 8-1/2\" X 11\" Cardstock [ 133679 ]")
![Perennial Lavender 12" X 12" (30.5 X 30.5 Cm) Designer Series Paper [ 162593 ]](https://assets1.tamsnetwork.com/images/EC042017NF/162593s.jpg "Perennial Lavender 12\" X 12\" (30.5 X 30.5 Cm) Designer Series Paper [ 162593 ]")
![Lemon Lolly Classic Stampin' Pad [ 161666 ]](https://assets1.tamsnetwork.com/images/EC042017NF/161666s.jpg "Lemon Lolly Classic Stampin' Pad [ 161666 ]")
![Purple Fine Shimmer Gems [ 162611 ]](https://assets1.tamsnetwork.com/images/EC042017NF/162611s.jpg "Purple Fine Shimmer Gems [ 162611 ]")


![Bubble Bath Stampin’ Blends Combo Pack [ 161675 ]](https://assets1.tamsnetwork.com/images/EC042017NF/161675s.jpg "Bubble Bath Stampin’ Blends Combo Pack [ 161675 ]")
![Fresh Freesia Stampin' Blends Combo Pack [ 155518 ]](https://assets1.tamsnetwork.com/images/EC042017NF/155518s.jpg "Fresh Freesia Stampin' Blends Combo Pack [ 155518 ]")
![1 7/8" (4.8 Cm) Circle Punch [ 165259 ]](https://assets1.tamsnetwork.com/images/EC042017NF/165259s.jpg "1 7/8\" (4.8 Cm) Circle Punch [ 165259 ]")
![2" (5.1 Cm) Circle Punch [ 133782 ]](https://assets1.tamsnetwork.com/images/EC042017NF/133782s.jpg "2\" (5.1 Cm) Circle Punch [ 133782 ]")
![Rainbow Adhesive Backed Dots [ 162758 ]](https://assets1.tamsnetwork.com/images/EC042017NF/162758s.jpg "Rainbow Adhesive Backed Dots [ 162758 ]")


![Berry Burst 8-1/2" X 11" Cardstock [ 144243 ]](https://assets1.tamsnetwork.com/images/EC042017NF/144243s.jpg "Berry Burst 8-1/2\" X 11\" Cardstock [ 144243 ]")
![Mossy Meadow 8-1/2" X 11" Cardstock [ 133676 ]](https://assets1.tamsnetwork.com/images/EC042017NF/133676s.jpg "Mossy Meadow 8-1/2\" X 11\" Cardstock [ 133676 ]")
![Secret Sea 12" X 12" (30.5 X 30.5 Cm) Two Tone Cardstock [ 166709 ]](https://assets1.tamsnetwork.com/images/EC042017NF/166709s.jpg "Secret Sea 12\" X 12\" (30.5 X 30.5 Cm) Two Tone Cardstock [ 166709 ]")
![Mossy Meadow Classic Stampin' Pad [ 147111 ]](https://assets1.tamsnetwork.com/images/EC042017NF/147111s.jpg "Mossy Meadow Classic Stampin' Pad [ 147111 ]")
![Gold Foil Sheets [ 132622 ]](https://assets1.tamsnetwork.com/images/EC042017NF/132622s.jpg "Gold Foil Sheets [ 132622 ]")
![Small Blending Brushes [ 160518 ]](https://assets1.tamsnetwork.com/images/EC042017NF/160518s.jpg "Small Blending Brushes [ 160518 ]")

