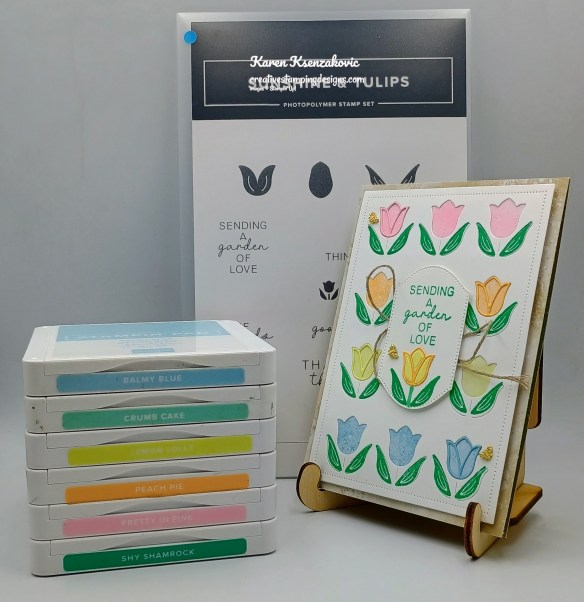
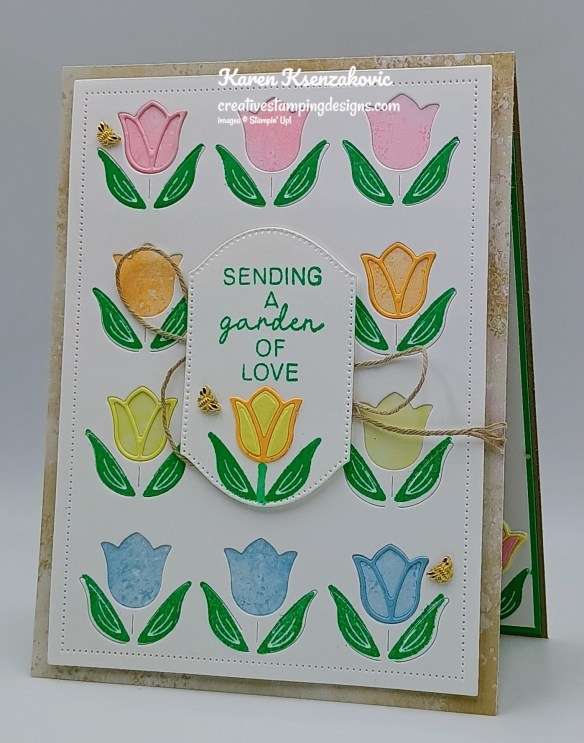
Good Thursday morning stamping friends welcome to our Happy Inkin’ Thursday Blog Hop. If you are starting with me, thank you, I hope you will stop by everyone’s blog to see what they have created this week. If you are hopping over from Mary’s blog, thank you for stopping by. This week we have beautiful Spring Color Challenge. If you’d like to see a quick video on how I made this card, Click Here to go to my Instagram Reels. Here is my card using this week’s colors.
I used the Stampin’ Up! sunshine & Tulips Bundle along with the Neutrals 6 x 6 Designer Series Paper, Subtles 6 x 6 Designer Series Paper & 2024-2026 In-Color 6 x 6 Designer Series Paper for my card today.
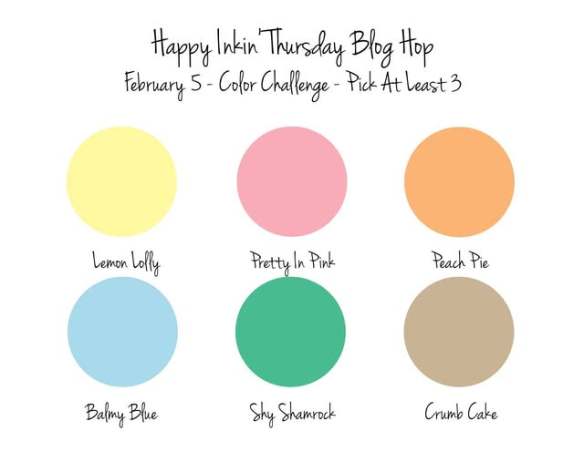
There are our colors for this week
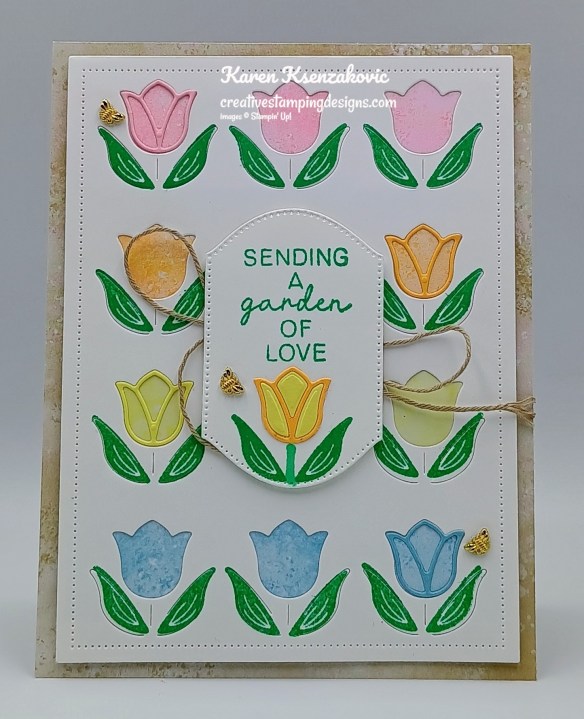
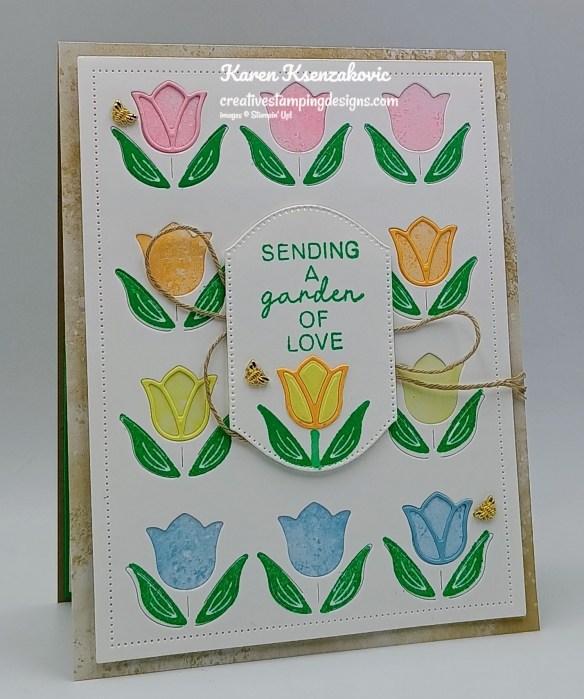
Adhere a panel of Neutrals DSP to a Crumb Cake card base. Using the large Sunshine & Tulips Die, cut a panel of Basic White. Stamp the leaf image from the Sunshine & Tulips stamp set in Shy Shamrock Ink on the Basic White die cut panel. Adhere a panel of Pretty in Pink and Peach Pie 2024-2026 In-Color DSP to the back of the Basic White die cut panel. Adhere a panel of Lemon Lolly and Balmy Blue Subtle DSP to the back of the die cut Basic Whit panel.
Using the Sunshine & Tulips Dies, cut panels of Balmy Blue, Lemon Lolly, Pech Pie and Pretty in Pink using the detailed tulip die 2 times each. Adhere the Balmy Blue, Lemon Lolly, Peach Pie and Pretty in Pink die cut tulips on the die cut panel, 1 on each row of tulips. Adhere the card front to the Crumb Cake card base with Stampin’ Dimensionals.
Stamp the sentiment from the Sunshine & Tulips stamp set in Shy Shamrock Ink on a panel of Basic White. Cut the sentiment out using the Sunshine & Tulips Dies. Stamp the leaf image from the Sunshine & Tulips stamp set in Shy Shamrock Ink on the bottom of the sentiment. Draw a stem using the Shy Shamrock Stampin’ Blends Marker. Adhere the detailed die cut tulip to the stem. Adhere the inside pieces from the detailed die cut tulip inside the outlined panel. Tie a large bow using the Crumb Cake Baker’s Twine and adhere it to the card front. Adhere the sentiment over the bow with Stampin’ Dimensionals. Add a few Tiny Bee Trinkets to the card front.
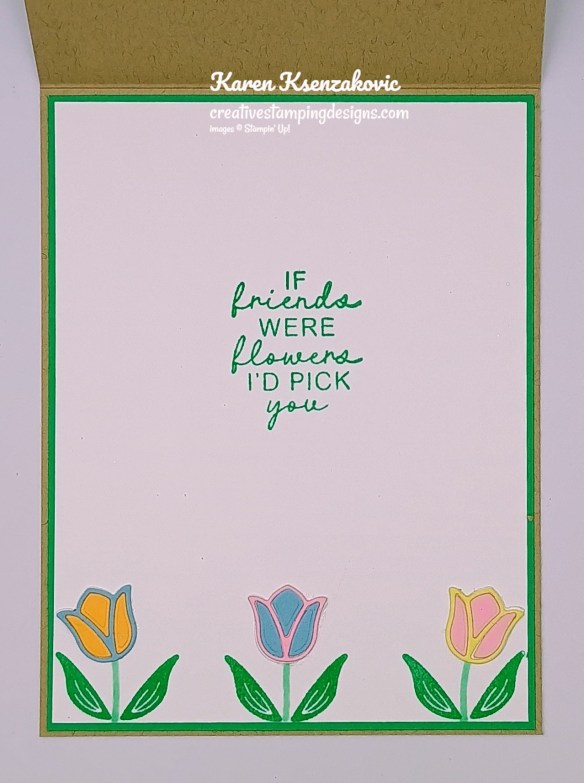
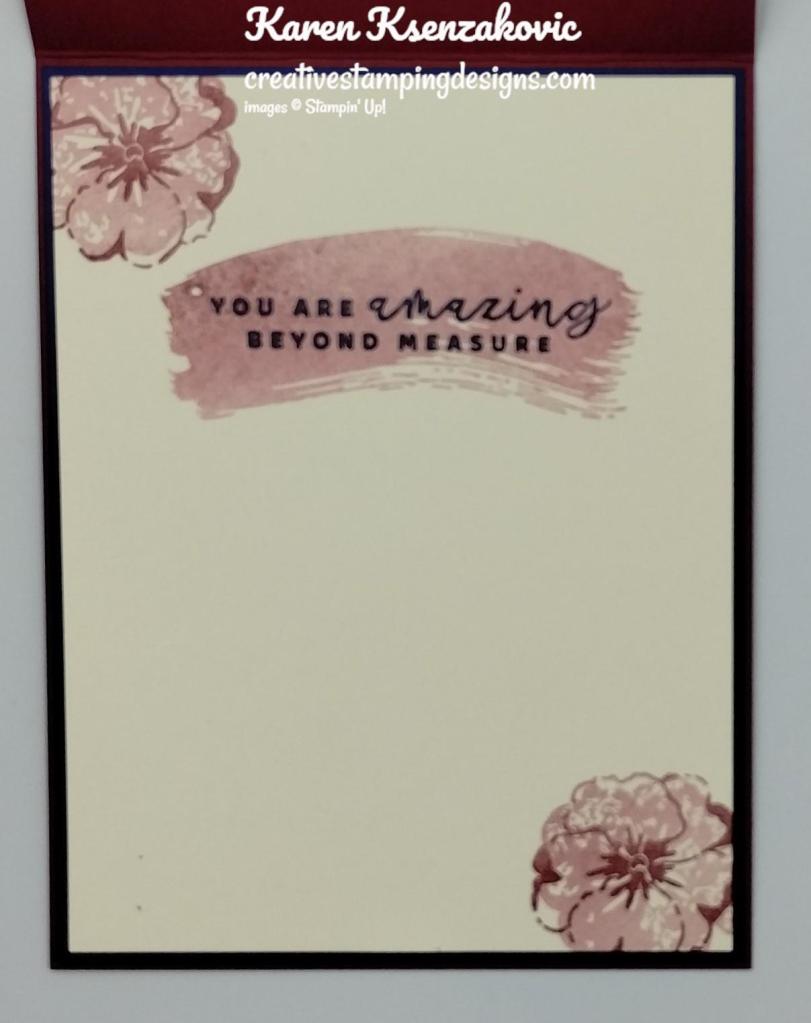
Stamp the sentiment from the Sunshine & Tulips stamp set in Shy Shamrock Ink on a panel of Basic White. Stamp the leaf image from the Sunshine & Tulips stamp set on the bottom of the panel 3 times. Draw stems using the Shy Shamrock Stampin’ Blends Marker. Adhere the other detailed outlined tulips on the stems and the detailed inside pieces. Adhere the Basic White panel to a Shy Shamrock mat then to the inside of the Crumb Cake card base.
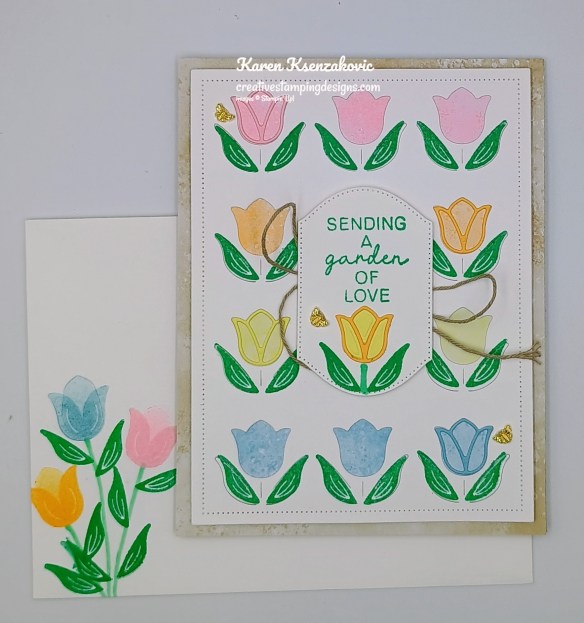
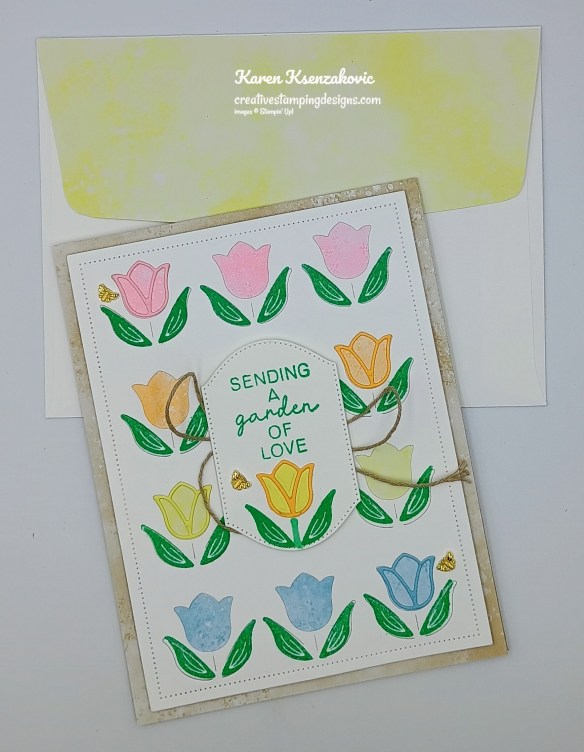
Stamp the tulip images from the Sunshine & Tulips stamp set in Balmy Blue, Peach Pie and Pretty in Pink Inks on the envelope front. Draw stems with the Shy Shamrock Stampin’ Blends Marker. Stamp the leaf image from the Sunshine & Tulips stamp set in Shy Shamrock Ink on the stems. Adhere a panel of Subtle DSP to the envelope flap.
Thank you for stopping by my blog today. Now that you’ve seen my card, let’s get on with the hop! Click the next button below to hop over to see what Tara has created. Happy Hopping
Just in case you get lost along the way, here is a list of the team members involved in the hop today.
If you need any stamping supplies, I’d love to be your Demonstrator. Just click HERE to go directly to my online store or drop me an email if you have any questions.
Good Sunday afternoon stamping friends. I hope you are all having a wonderful weekend. I’m running here, there and everywhere trying to get everything together for vacation. I’m always amazed how I think I have everything I need, they I read the restrictions on what size containers you can fly with and it’s off to writing a quick list and running to the store again. Today I’m sending my husband so I can get things done around the house and attend my monthly meeting this afternoon.
I played with a new Online Exclusive bundle coming November 5th. As soon as I saw this one, I just knew I had to have it. If you’d like to see a quick video of how I made this card, Click Here to go to my Instagram Reels. Here’s my card for today.
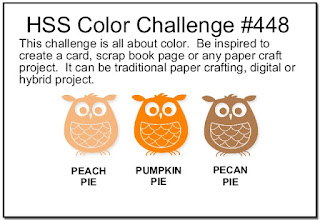
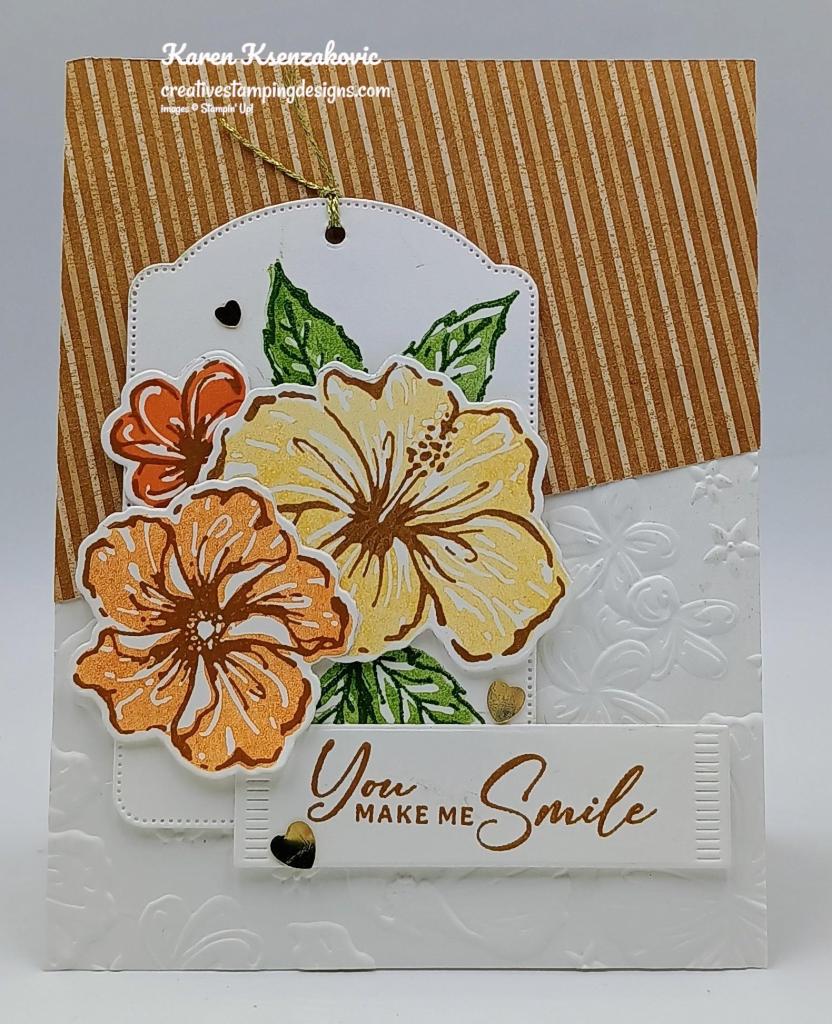
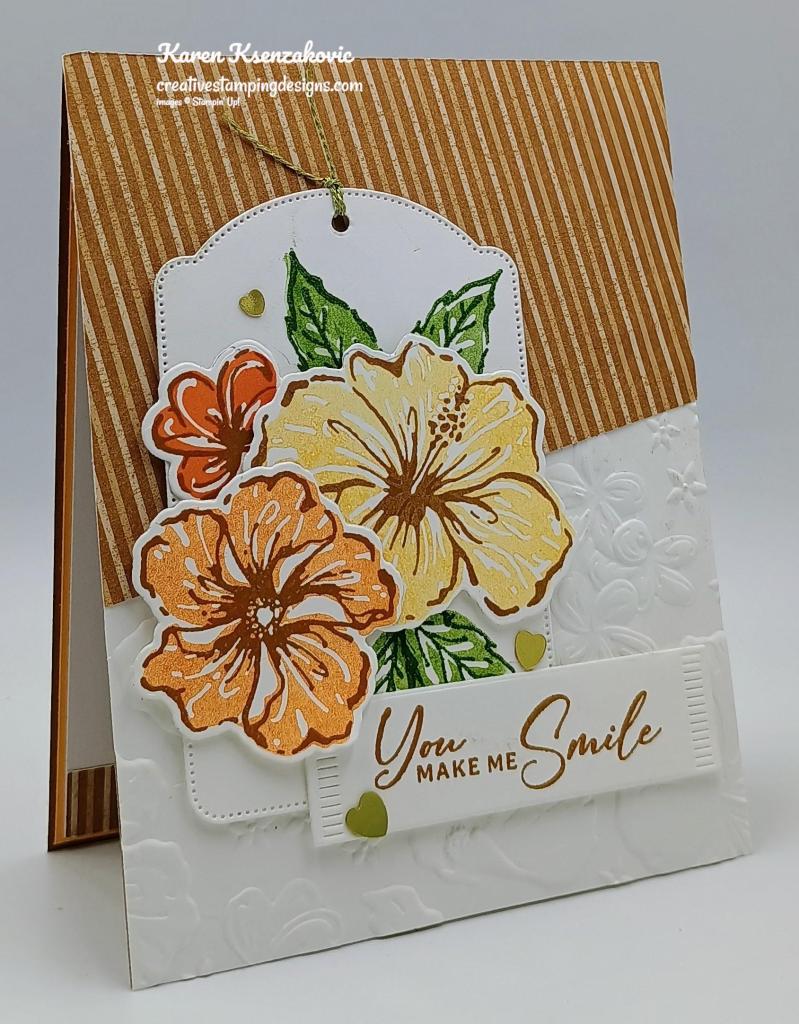
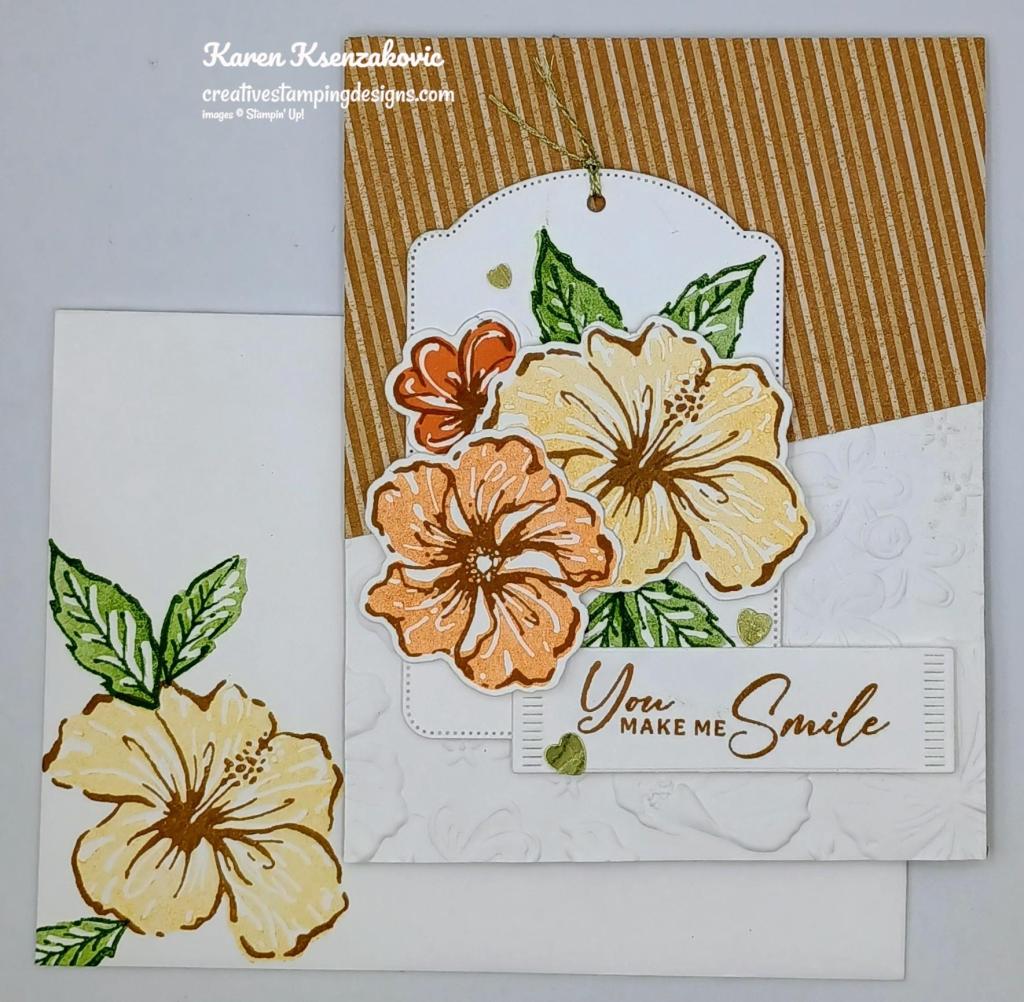
I used the new Stampin’ Up! Online Exclusive Bundle for my card today along with the Online Exclusive Greetings of the Season Dies and Neutrals 6 X 6 Designer Series Paper. When I took my dog for a walk this morning, on the way back up my driveway I saw that my Hibiscus flowers are still blooming and that was my inspiration to make this card today.
Start by embossing a Basic White card front using the Happy Hibiscus Hybrid Embossing Folder. Adhere a panel of Neutrals DSP on an angle across the top of the embossed panel using Liquid Glue. trim off excess using the Paper Trimmer. Adhere the card front panel to a Pecan Pie card base using Liquid Glue.
On a panel of Basic White, stamp the large outline 3 flower image from the Stampin’ Up! Happy Hibiscus Photopolymer Stamp Set in Pecan Pie Ink. Stamp the largest solid flower image from the Happy Hibiscus stamp set in Peach Pie Ink, stamping off once on scrap paper, over the outlined image. Stamp the medium solid flower image from the Happy Hibiscus stamp set in Pumpkin Pie Ink, stamping off once on scrap paper, over the outlined image. Stamp the smallest solid flower image from the Happy Hibiscus stamp set in Pumpkin Pie Ink over the outlined image. Cut the large image out using the Happy Hibiscus Dies. Using the Greetings of the Season Dies, cut the largest tag die from a panel of Basic White. Stamp the leaf images from the Happy Hibiscus stamp set a few times in Old Olive Ink on the tag. Stamp the outlined leaf image full strength and the solid leaf image in Old Olive Ink, stamping off once on scrap paper, over the outlined image. Adhere the hibiscus flowers to the tag using Stampin’ Dimensionals and Glue Dots.
Thread a piece of the new Online Exclusive Gold Twisted Thread (available Nov 5), through the top of the tag. Adhere the tag to the card front using Stampin’ Dimensionals. On the panel of Basic White, stamp the sentiment from the Happy Hibiscus stamp set in Pecan Pie Ink. Cut the sentiment out using the Happy Hibiscus Dies. Adhere the sentiment to the card front using Stampin’ Dimensionals and Glue Dots. Add a few of the new Online Exclusive Adhesive-Backed Heart Sequins to the card front.
For the inside, stamp the sentiment from the Happy Hibiscus stamp set in Pecan Pie Ink on a panel of Basic White. Stamp the larges solid flower image from the Happy Hibiscus stamp set in Peach Pie Ink, stamping off once on scrap paper, over the sentiment. Adhere a strip of the Neutrals DSP to the bottom of the panel. Adhere the Basic White panel to a Peach Pie mat then to the inside of the Pecan Pie card base.
Finish the card by decorating a Basic White Medium Envelope. Stamp the largest outlined flower image from the Happy Hibiscus stamp set in Pecan Pie Ink on the envelope front. Stamp the large solid flower image from the Happy Hibiscus stamp set in Peach Pie Ink, stamping off once on scrap paper, over the outlined flower image. Stamp the leaf images from the Happy Hibiscus stamp set in Old Olive Ink around the flower. Adhere a panel of Neutrals DSP to the envelope flap.
Thank you for stopping by my blog today. I hope you like the card, and you’ll give it a try. Happy Stamping!!
If you need any stamping supplies, I’d love to be your Demonstrator. Just click HERE to go directly to my online store or drop me an email if you have any questions.
MY CURRENT HOST CODE IS: EMDXSBC9
Use this host code when placing an order with me. When you order $50 or greater you will receive a free gift from me! If your order is over $150, please do not use this code, but you’ll still get the free gift. The free gift is your choice of any 1 item valued up to $10.00 from the 2024-2025Annual Catalog, or from the Online Exclusives! Unfortunately, packs of cardstock are no longer an option for a free gift. Shipping has become too expensive to ship and it’s costing me as much to ship as the cardstock costs. For any orders $50 or more I will also send you my monthly class tutorials. Click HERE or go to my Customer Rewards for more details and to see what this month’s tutorials are.
Please remember to use my current Host Code and make sure that you can see my name on the final checkout page listed as your Demonstrator when you order so that you know that you’re ordering with me, and you’ll get my rewards!
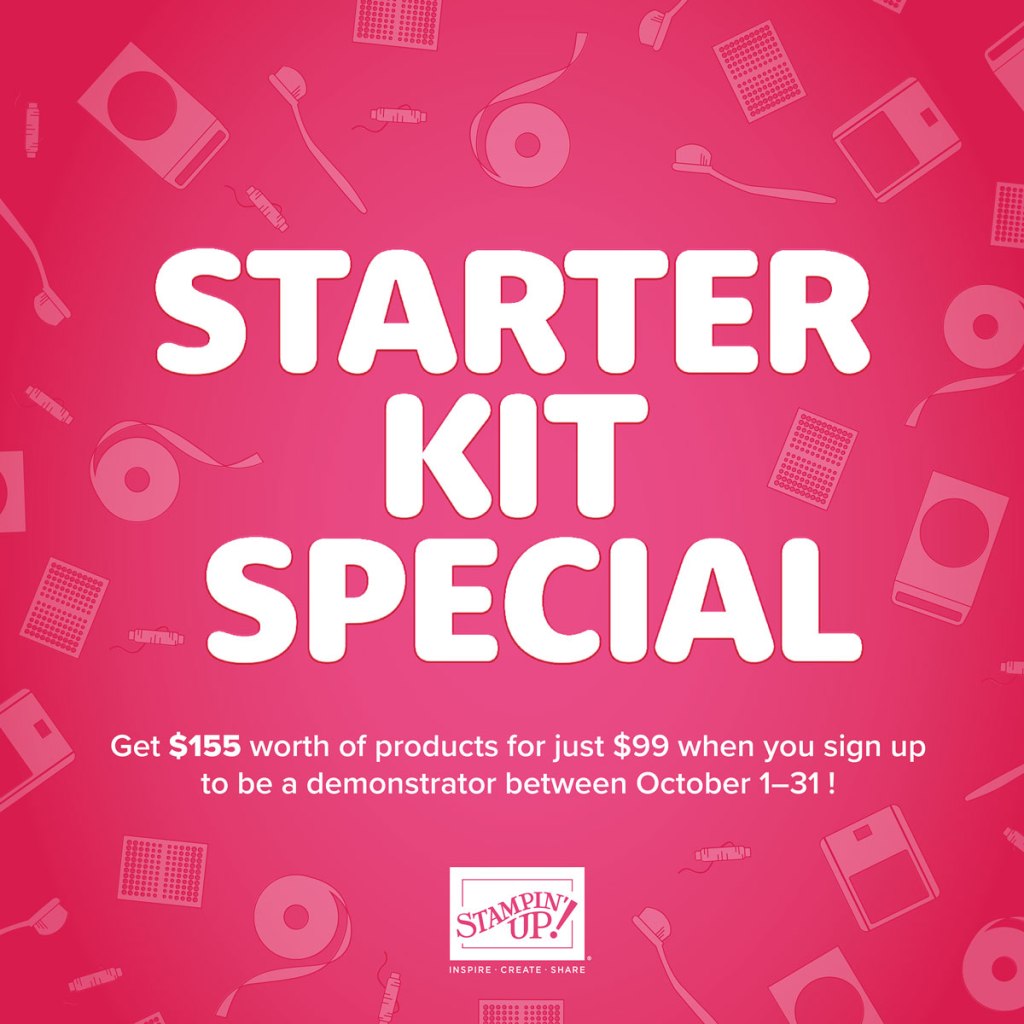
Starter Kit Special – Get an extra $30 Your Starter Kit October 1 – 31
Hey, friend! Stampin’ Up! has a fantastic offer for anyone who becomes a demonstrator! Join my team between October 1–31and you can choose $155 worth of product in your Starter Kit for only $99! Starter Kits normally include $125 worth of product for $99, so that’s an extra $30 worth of product at no additional cost. This offering also includes free shipping and free business supplies! That’s MORE product for EVEN MORE fun!Click Here for all the details.
Interested but you are not really sure about wanting to commit? Contact me and we can talk, and you can ask me any questions at creativestampingdesigns@gmail.com.
Read more information about becoming a demonstrator Here.
A new line of products for Online Exclusives are coming! You won’t find these items in any catalog. This is a great opportunity to spark creativity, expand a crafting collection, and discover new opportunities—all from the convenience of the online store. These products will be available starting in November, BUTyou can add these new items to your Starter Kit if you join in October. Here’s a little sneak peek of some of the items that you can add to your Starter kit and get them before customers and start to play. Click Here for a sneak peek of what’s coming.
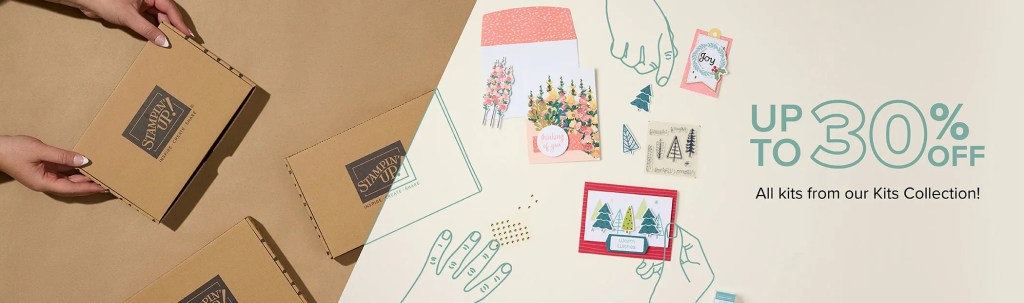
From October 1-31 All Kits from the Kits Collection will be on sale for up to 30% off
Did you know as a demonstrator you can get up to 30% off all the kits AND get your 20% demo discount on top of that. What a GREAT way to save!!!
Save up to 30% off on all your favorite kits October 1–31! Our kits come with everything you need to create a unique paper craft. We have crafting options for card kits, treat packaging, home decor, and so much more! Kits are only available while supplies last.
Here are the details for the sale:
Promotion Period: October 1-31!
ALL kits from the kits collection qualify for the discount.
There is no limit on how many kits you can order, as long as product is available.
Orders must be opened and placed during the promotion dates. Orders opened before October 1 will not qualify for the sale.
Kits on sale will NOT qualify for the Stampin’ Rewards 50% off.
Kits can be added to a Starter Kit at their discounted rate.
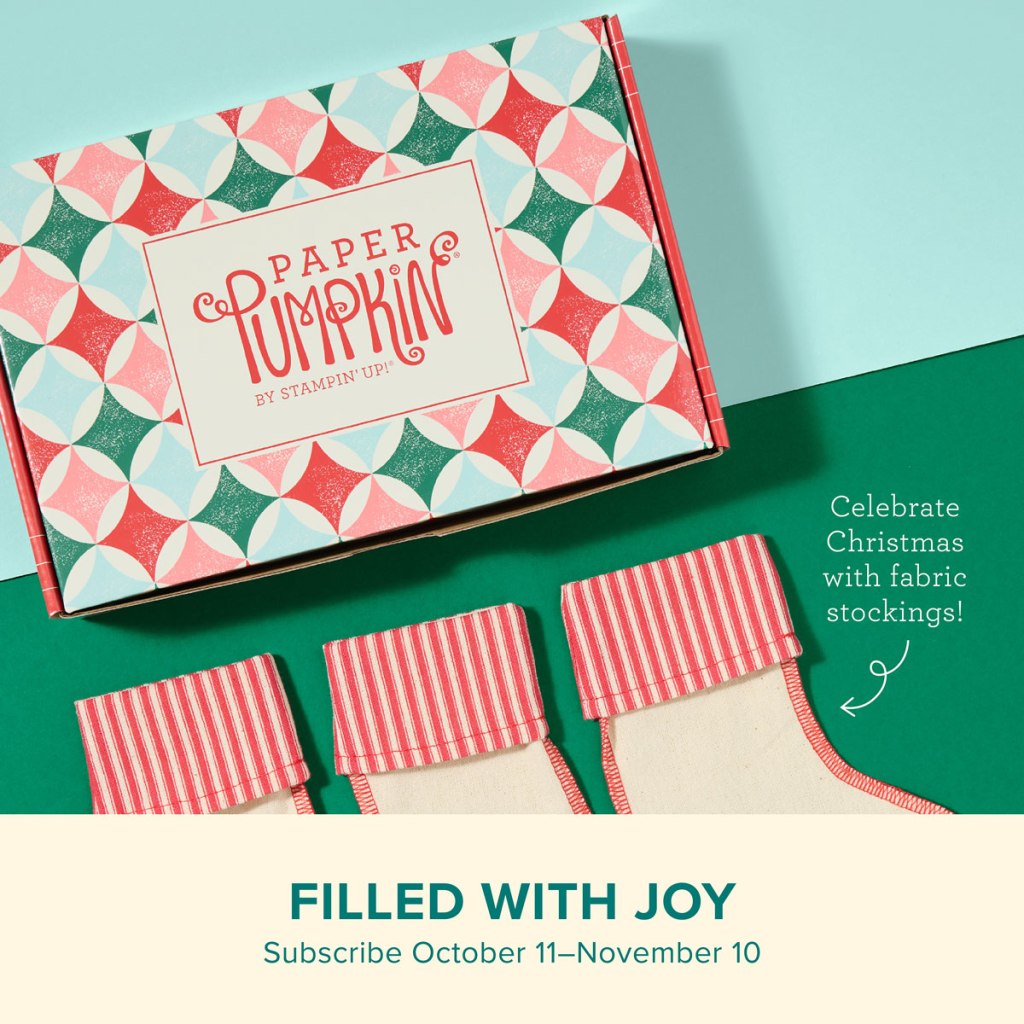
Celebrate Christmas with adorable stockings and gift tags!
Details: • Makes 8 projects: 8 stockings with 8 gift tags • Precut paper pieces • Safety pins and specialty gold foil • Coordinating colors: Flirty Flamingo, Pool Party, Poppy Parade (Classic Stampin’ Spot), Shaded Spruce, Very Vanilla
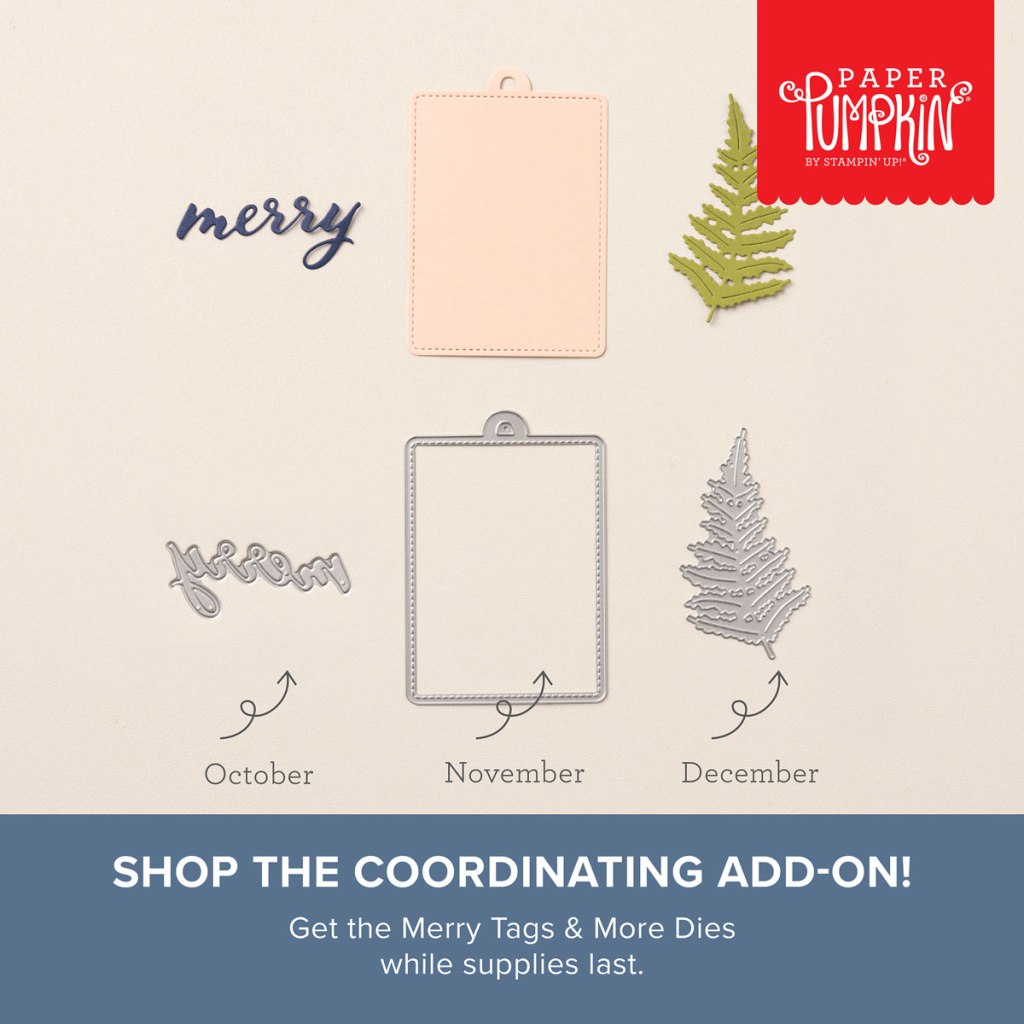
Subscribe to Paper Pumpkin for a monthly, all-inclusive crafting kit that’s a fun surprise! Each kit includes a photopolymer stamp set, Classic Stampin’ Spot, and step by step instructions to complete exclusive paper craft projects, including cards, tags, and gift packaging. And don’t miss the special add-on that coordinates with the next three months!
Subscribe to the November Paper Pumpkin Kit between 11 October and 10 November by clicking here!
Don’t miss the coordinating Merry Tags & More Dies Add-On!
Add dimension and detail to your cards, scrapbook pages, and gift tags with the Merry Tags & More Dies! With a leaf and tag shape and Merry sentiment, these dies are a great way to expand your crafting experience. They even coordinate with three Paper Pumpkin Kits: Nests of Christmas, Filled with Joy, and Notes from the Heart. Such easy coordination makes these dies a must-have for any paper craft. Paper Pumpkin subscribers can purchase it beginning 11 September. The add-on is available only while supplies last, so it’s best to shop early! Please note that the Stampin’ Cut and Emboss Machine is not included and can be purchased separately.
#165639 $12
Note: Supplies may be limited toward the end of the subscription period.
Good Wednesday morning my stamping friends. Here we are halfway through the week already. I hope your week is going well.
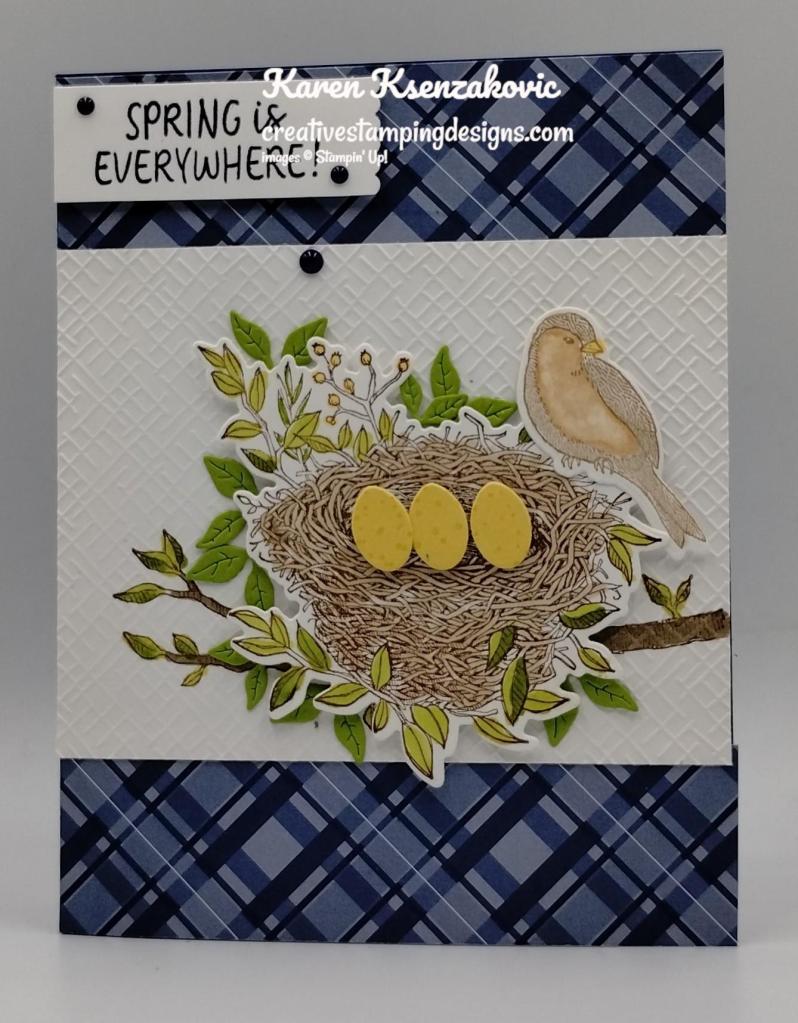
It’s time for an inspiration challenge from The Card Concepts. It’s the second challenge of the month, we are posting two challenge photos! You can choose whichever photo you prefer, or you could create two separate cards, one for each photo! The inspiration photo #191a is Signs of Spring and #191b is Butterfly Blues. Here is my card that was inspired from the challenge photo.
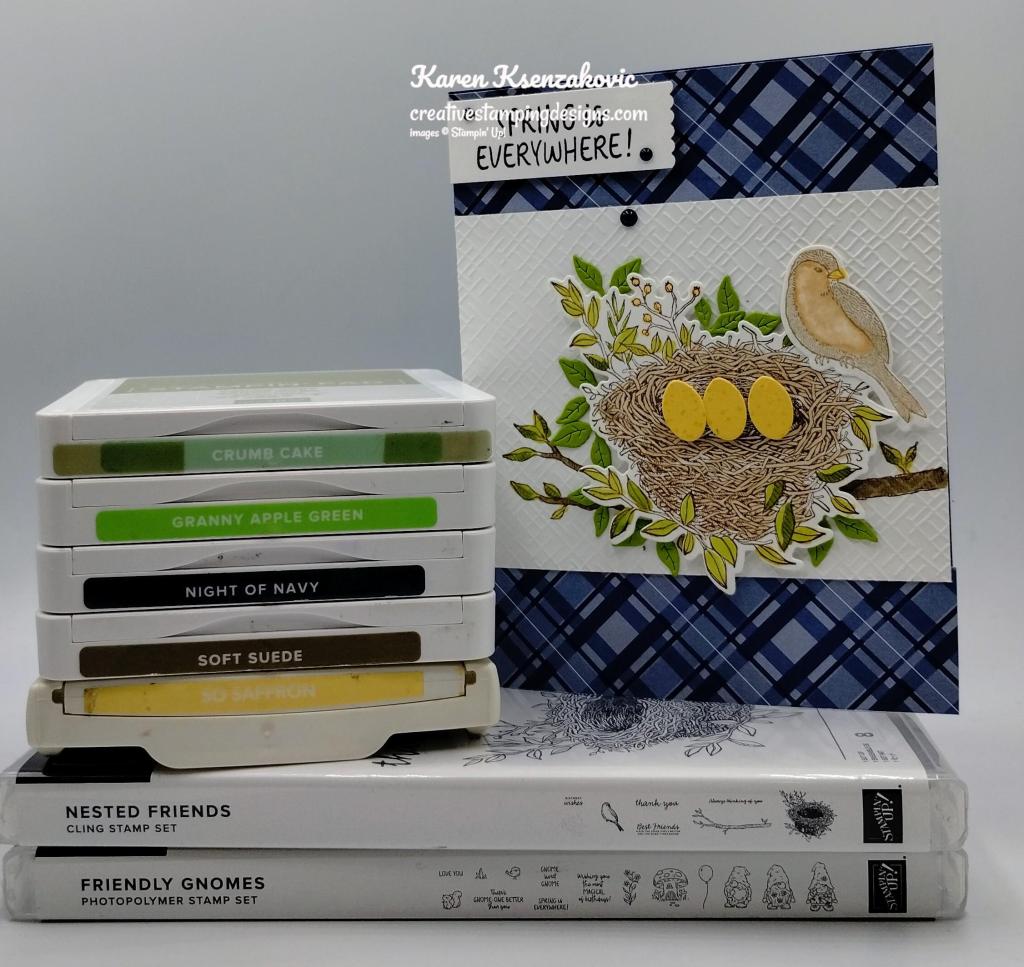
I used the Stampin’ Up! Nested Friends Bundle along with the Stampin’ Up! Friendly Gnomes Photopolymer Stamp Set, Basics 3D Embossing Folder and Neutrals 6 X 6 Designer Series Paper for my Clean and Layered Card. I was inspired by the inspiration photo #191a by the colors and the eggs in the photo.
I hope you will take a moment to visit The Card Concepts and join us for our challenge 191a or 191b. How are you inspired by the photos?
I started by adhering 2 strips of Neutrals DSP to the top and bottom of a Night of Navy card base using Multipurpose Liquid Glue. On a panel of Basic White cardstock, I stamped the branch image from the Stampin’ Up! Nested Friends Cling Stamp Set in Soft Suede Ink. I colored the image using my Crumb Cake and Granny Apple Green Stampin’ Blends Markers. I embossed the panel using the Basics 3D Embossing Folder. I adhered the embossed panel to the center of the card base using Multipurpose Liquid Glue.
On a panel of Basic White cardstock, I stamped the nest and bird from the Nested Friends stamp set in Soft Suede Ink. I colored the nest using Crumb Cake Stampin’ Blends Markers and the bird using Crumb Cake and Ivory Stampin’ Blends Markers. I cut the images out using the Nested Friends Dies. I stamped the splotch image from the Nested Friends stamp set in So Saffron Ink on a panel of So Saffron cardstock. Using the Nested Friends Dies, I cut the eggs from the panel of So Saffron and the leaves from a panel of Granny Apple Green cardstock. I adhered the nest to the branch using Stampin’ Dimensionals, the eggs and bird to the nest using Stampin’ Dimensionals.
On a strip of Basic White cardstock, I stamped the sentiment from the Friendly Gnomes stamp set in Night of Navy Ink. I cut the end of the strip using the Happy Label Pick A Punch. I adhered the sentiment to the top of the card front using Stampin’ Dimensionals. I added a few Enamel Dot Essentials to the card front.
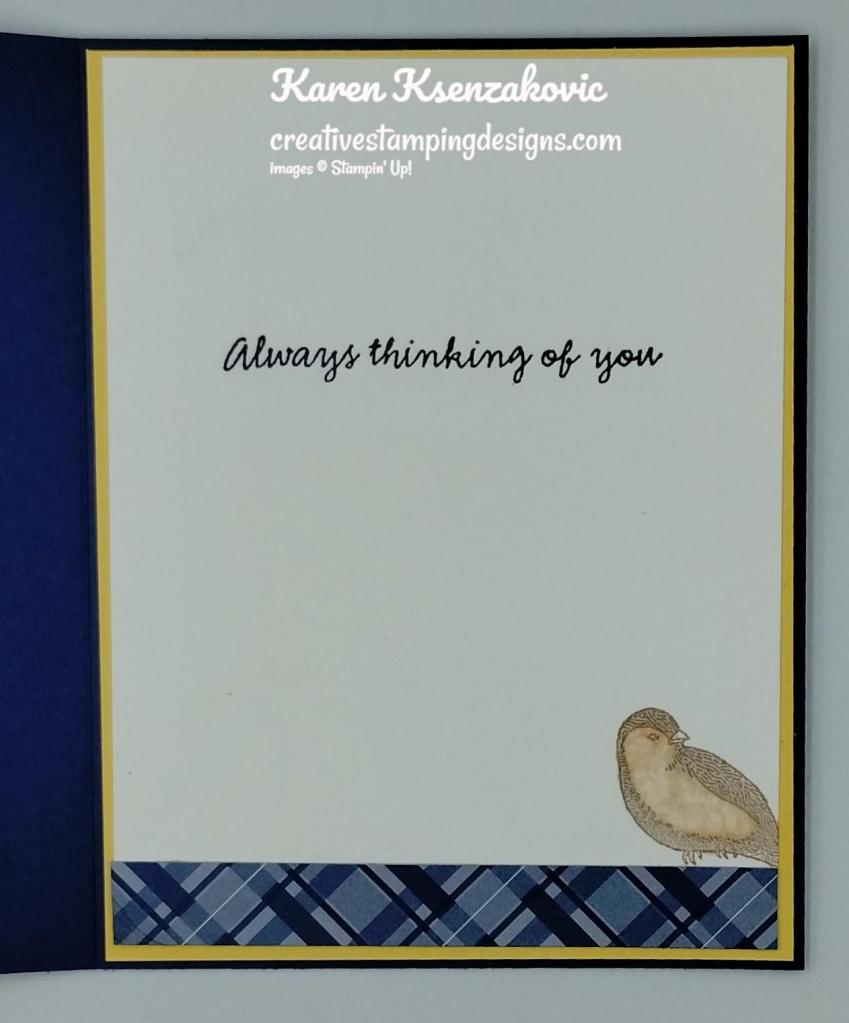
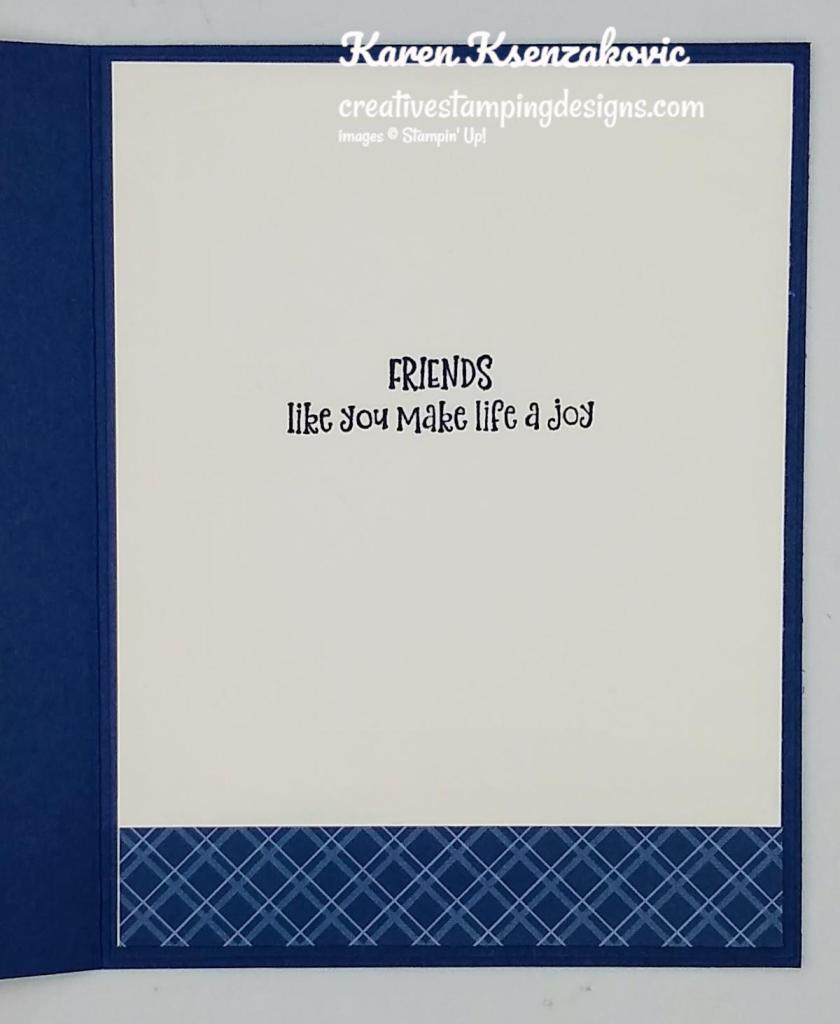
On the inside, I stamped the sentiment from the Nested Friends stamp set in Night of Navy Ink on a panel of Basic White. I adhered a strip of Neutrals DSP to the bottom of the panel. I stamped the bird from the Nested Friends stamp set in Soft Suede Ink on the bottom of the panel. I adhered the Basic White panel to a So Saffron mat then to the inside of the Night of Navy card base.
To complete my card, I decorated a Basic White Medium Envelope. I stamped the branch image from the Nested Friends stamp set on the envelope front in Soft Suede Ink. I colored the image with Crumb Cake and Granny Apple Green Stampin’ Blends Markers. I adhered a panel of Neutrals DSP to the envelope flap.
Thank you for stopping by my blog today. I hope you like my card and will give it a try. Happy Stamping!!
If you need any stamping supplies, I’d love to be your Demonstrator. Just click HERE to go directly to my online store or drop me an email if you have any questions.
MY CURRENT HOST CODE IS: 7KF3QB4G
Use this host code when placing an order with me. When you order $50 or greater you will receive a free gift from me! If your order is over $150, please do not use this code, but you’ll still get the free gift. The free gift is your choice of any 1 item valued up to $10.00 from the 2022-2023 Annual Catalog or the January-April 2023 Mini Catalog! Unfortunately, packs of cardstock are no longer an option for a free gift. Shipping has become too expensive to ship and it’s costing me as much to ship as the cardstock costs. For any orders $50 or more I will also send you my monthly class tutorials. Click HERE or go to my Customer Rewards for more details and to see what this month’s tutorials are.
Please remember to use my current Host Code and make sure that you can see my name on the final checkout page listed as your Demonstrator when you order so that you know that you’re ordering with me, and you’ll get my rewards!
In response to changing policies at Stampin’ Up – I’m adjusting my Ordering Gift policy as well. I’m having to get a little more tough on the adding of Host codes when you place your order thru my Online Store.
Not to worry – you’re still going to get that $10 ordering gift for orders of $50 (before shipping & tax) or greater. And the gift is still any 1 SU! product up to that $10 value – which includes some of our fun Host Sets!
But – if you DO NOT use the Host code for your orders of less than $150 (this is the RETAIL total before Shipping & Handling), then you’ll have two options:
You’ll need to call Stampin’ Up! (1-800-Stamp-Up) and ask them to add it for you. They’re very helpful and will get it done quickly! OR….
If your order was over the $50 threshold but under $150, then…you’ll forfeit that $10 ordering gift and rewards – this is the Bummer Option – and I REALLY don’t want to do this, SO please remember to add my Current Host Code.
Good things take time, but you can start creating them now with the All the Little Things Paper Pumpkin kit! This kit includes nine cards, three each of three designs, with elegant designs and bright colors. The iridescent foil is the shining detail to bring your crafts together. You can make a card for anyone and for any occasion!
And don’t wait, because anyone who subscribes to this month’s kit will get a FREE box organizer! This organizer fits perfectly inside your Paper Pumpkin box and is great for keeping your supplies from past kits organized, so you know right where everything is!
This kit includes:
9 cards, 3 each of 3 designs, and 9 coordinating envelopes.
1 photopolymer stamp set with celebratory sentiments.
1 Shaded Spruce Stampin’ Spot.
Precut cherry blossom paper pieces with iridescent foil.
Good Sunday morning my stamping friends. Hope your weekend is going well. Before I get going with my card, I just want to remind everyone that Sale-a-bration ends Tuesday, that’s just 2 more sleeps away. If you haven’t gotten everything that you wanted from Sale-a-bration now is a great time to get that order in. Also, I want to remind you that the 2021-2023 In-Colors will be retiring in April. Don’t wait to stock up on the Cardstock, Stampin’ Write Markers, Stampin’ Blends, Ribbons, Embellishments, etc. Stock up now and get some FREE items at the same time.
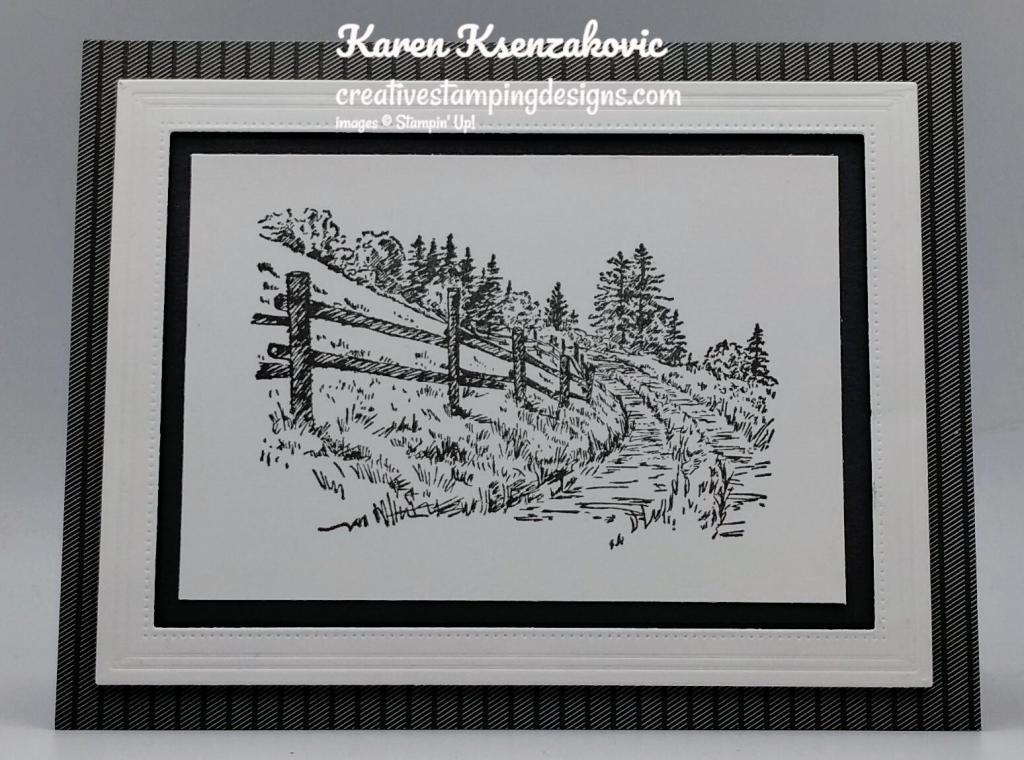
I have a super quick card for you today and it’s a masculine one. I don’t know about you, but I struggle with masculine cards all the time. I don’t have the need for many, and I avoid making them. This Sale-a-bration set, that will only be available until Tuesday February 28th makes a perfect masculine card. Here’s my card for today.
I used the Stampin’ Up! In The Country Cling Stamp Set and the Stampin’ Up! Inspired Thoughts Cling Stamp Set along with the Neutrals 6 X 6 Designer Series Paper for my card today.
I started by adhering a panel of Neutrals DSP to a Basic Gray card base using Multipurpose Liquid Glue. On a panel of Basic White cardstock I stamped the country road image from the In The Country stamp set in Basic Gray Ink.
Using the largest die from the Fabulous Frames Dies, I cut a panel of Basic White and Basic Gray cardstock. I only needed the inner piece from the Basic Gray die cut. I adhered the stamped image to the Basic Gray mat using Stampin’ Seal.
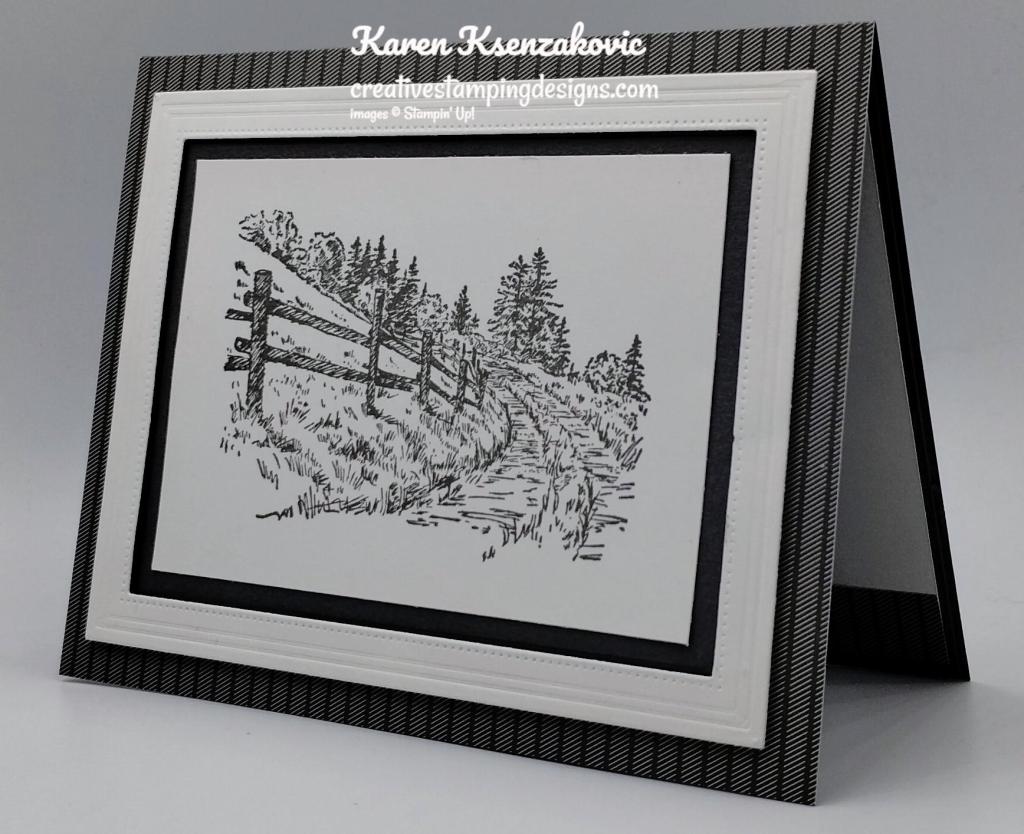
I adhered the Basic White frame to the card front using Stampin’ Dimensionals. I adhered the layered panel to the inside of the frame using Multipurpose Liquid Glue.
On the inside, I stamped the sentiment from the Inspired Thoughts stamp set in Basic Gray Ink on a panel of Basic White. I adhered a strip of the Neutrals DSP to the bottom of the panel using Stampin’ Seal. I adhered the Basic White panel to a Basic Gray mat then to the inside of the Basic Gray card base.
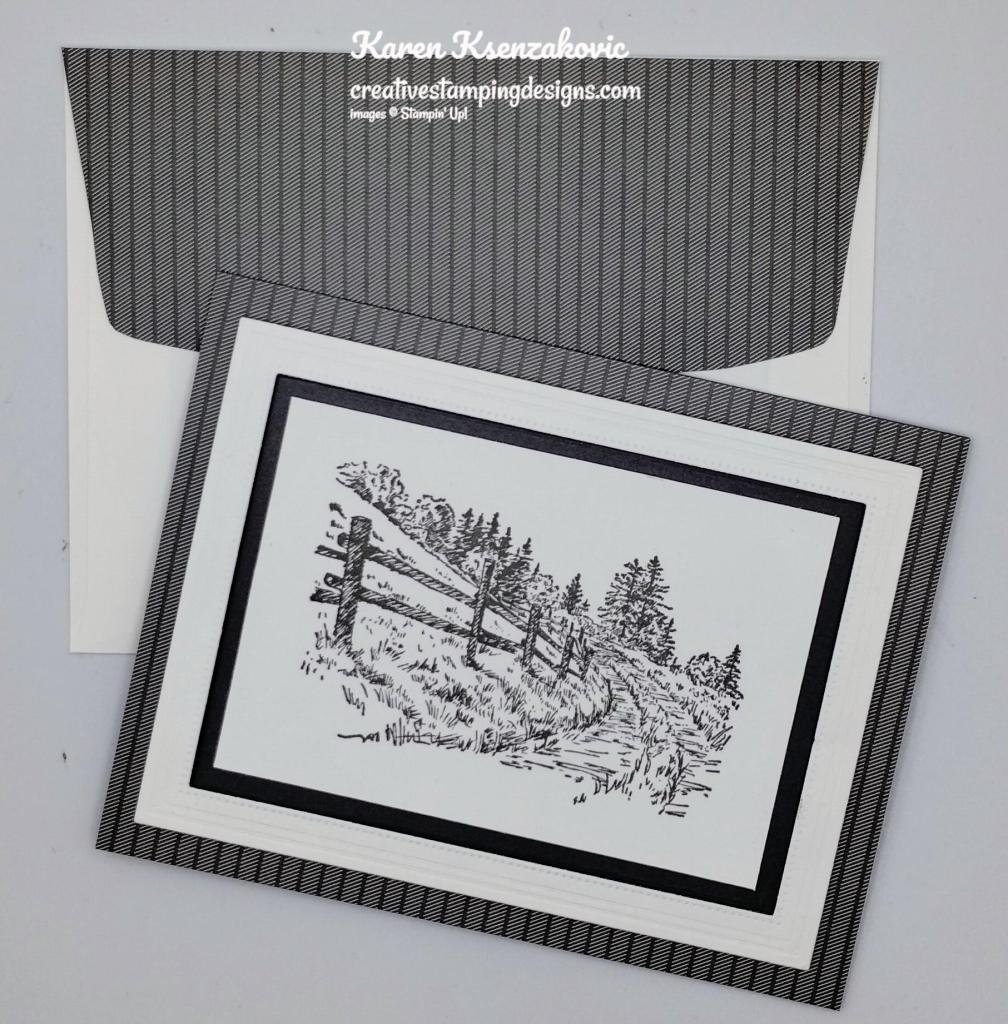
To finish my card, I decorated a Basic White Medium Envelope. I stamped the country road image from the In The Country stamp set in Basic Gray Ink on the envelope front. I adhered a panel of Neutrals DSP to the envelope flap.
Thank you for stopping by my blog today. I hope you like my card and will give it a try. Happy Stamping!!
If you need any stamping supplies, I’d love to be your Demonstrator. Just click HERE to go directly to my online store or drop me an email if you have any questions.
MY CURRENT HOST CODE IS: 7KF3QB4G
Use this host code when placing an order with me. When you order $50 or greater you will receive a free gift from me! If your order is over $150, please do not use this code, but you’ll still get the free gift. The free gift is your choice of any 1 item valued up to $10.00 from the 2022-2023 Annual Catalog or the January-April 2023 Mini Catalog! Unfortunately, packs of cardstock are no longer an option for a free gift. Shipping has become too expensive to ship and it’s costing me as much to ship as the cardstock costs. For any orders $50 or more I will also send you my monthly class tutorials. Click HERE or go to my Customer Rewards for more details and to see what this month’s tutorials are.
Please remember to use my current Host Code and make sure that you can see my name on the final checkout page listed as your Demonstrator when you order so that you know that you’re ordering with me, and you’ll get my rewards!
In response to changing policies at Stampin’ Up – I’m adjusting my Ordering Gift policy as well. I’m having to get a little more tough on the adding of Host codes when you place your order thru my Online Store.
Not to worry – you’re still going to get that $10 ordering gift for orders of $50 (before shipping & tax) or greater. And the gift is still any 1 SU! product up to that $10 value – which includes some of our fun Host Sets!
But – if you DO NOT use the Host code for your orders of less than $150 (this is the RETAIL total before Shipping & Handling), then you’ll have two options:
You’ll need to call Stampin’ Up! (1-800-Stamp-Up) and ask them to add it for you. They’re very helpful and will get it done quickly! OR….
If your order was over the $50 threshold but under $150, then…you’ll forfeit that $10 ordering gift and rewards – this is the Bummer Option – and I REALLY don’t want to do this, SO please remember to add my Current Host Code.
Coming on March 1, 2023, Stampin’ Up! is going to be having Online Exclusive Products and the first will be available starting March 1st. Click Here for a printable PDF flyer with the items that will be available. If you like what you see, there is a way you can get them NOW. If you join Stampin’ Up! before the end of February, you can either add the items to your starter kit, or you can pre-order them once you join. This is just one of the perks of being a demonstrator.
Final Days of Stampin’ Up!’s Amazing Joining Special – Ends February 28
Stampin’ Up! has an amazingly awesome joining special. You get to choose what you want. All the options ship for free and include a past Paper Pumpkin Kit along with some business supplies in case you want to make this a business. There is NoObligation to sell, you do NOT have to use this as a business, you can join just to enjoy the discount for yourself. I would LOVE to have you on my team. Join as a hobby demonstrator and enjoy all the benefits of a business demonstrator.
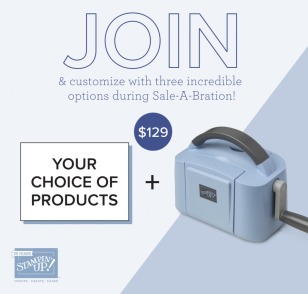
Option #1 This exclusive Boho Blue Mini Stampin’ Cut & Emboss Machine ($63 value) + Your choice of $175 of Stampin’ Up! products for only $129.00. The Boho Blue is one of the new In-Colors coming for 2023-2025.
Option #2 The original White Mini Stampin’ Cut & Emboss Machine (a $63 value), + Your choice of $175 of Stampin’ Up! products for only $129.00
Option #3. Your choice of $175 of Stampin’ Up! products for only $99.00.
If you have a LONG shopping list, this is a great way to get everything you always want at a discount. Enjoy at least a 20% discount on the products you purchase. Why wait, this is such an awesome deal, and it only sticks around until February 28th. Join now and start enjoying that discount right away!!! Contact me at creativestampingdesigns@gmail.com and we can talk about you joining. We have people on our team from all over the United States. We get together monthly via Zoom; we have team Facebook pages where we share what we make and ask questions. This was one of the best decisions I’ve ever made, I’ve made a lot of new friends from all over.
It’s Paper Pumpkin’s 10-year anniversary and we want to celebrate how much we’ve grown! This month’s kit is all about happy greetings, organic and botanical designs digitally painted by our in-house artists, along with all-occasion sentiments to celebrate the happy moments in life and recognize the people around you who help you grow!
And as part of our anniversary celebration, the March Paper Pumpkin Kit includes a FREE GIFT featuring a plant and pot builder to make all your projects plant-astic!
This kit includes:
All the supplies you need to create 9 cards: 3 each of 3 designs; and coordinating envelopes.
An all-occasion stamp set to recognize the people in your life who help you grow with greetings and beautiful botanical images.
1 Polished Pink Classic Stampin’ Spot
Paper pieces and embellishments with digitally-painted designs and images.
Mini Stampin’ Dimensionals.
1 FREE additional stamp set, which includes a plant and pot builder to make plant-astic projects!
Completed card size: 5-1/2″ x 4-1/4″ (14 x 10.8 cm)
Good Tuesday morning my stamping friends. I hope you are having a great start of the week.
Today’s card is one that we made at our quarterly meeting on Sunday. It was designed by one of my amazing team member Tara Carpenter. Here’s my card for today.
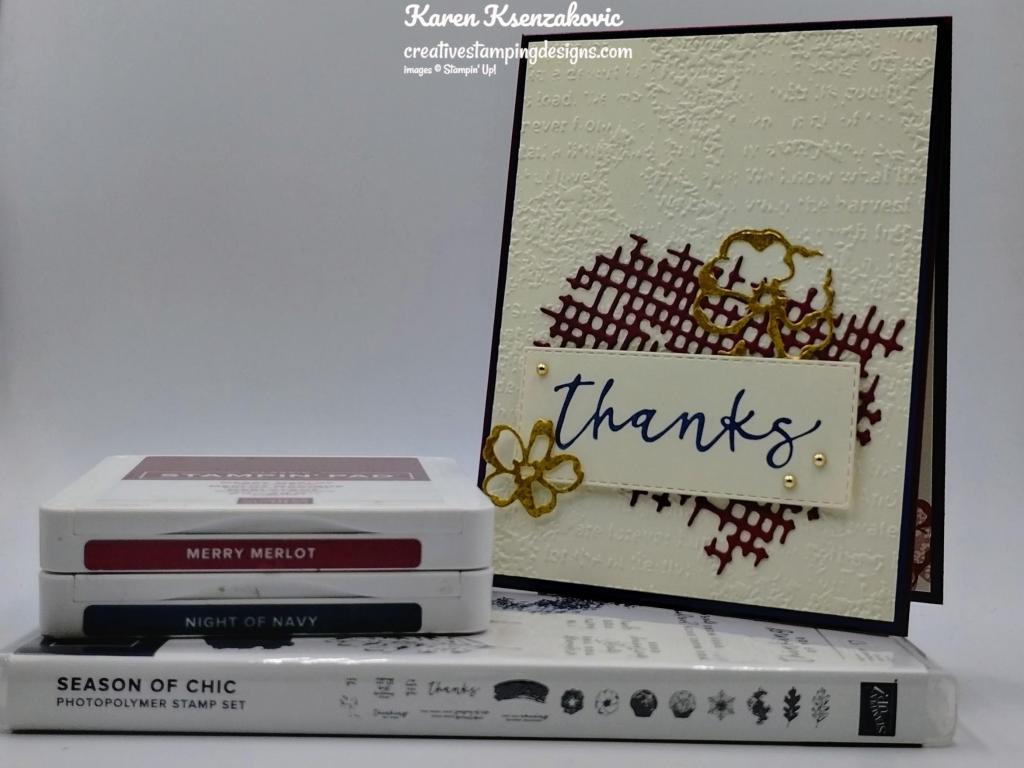
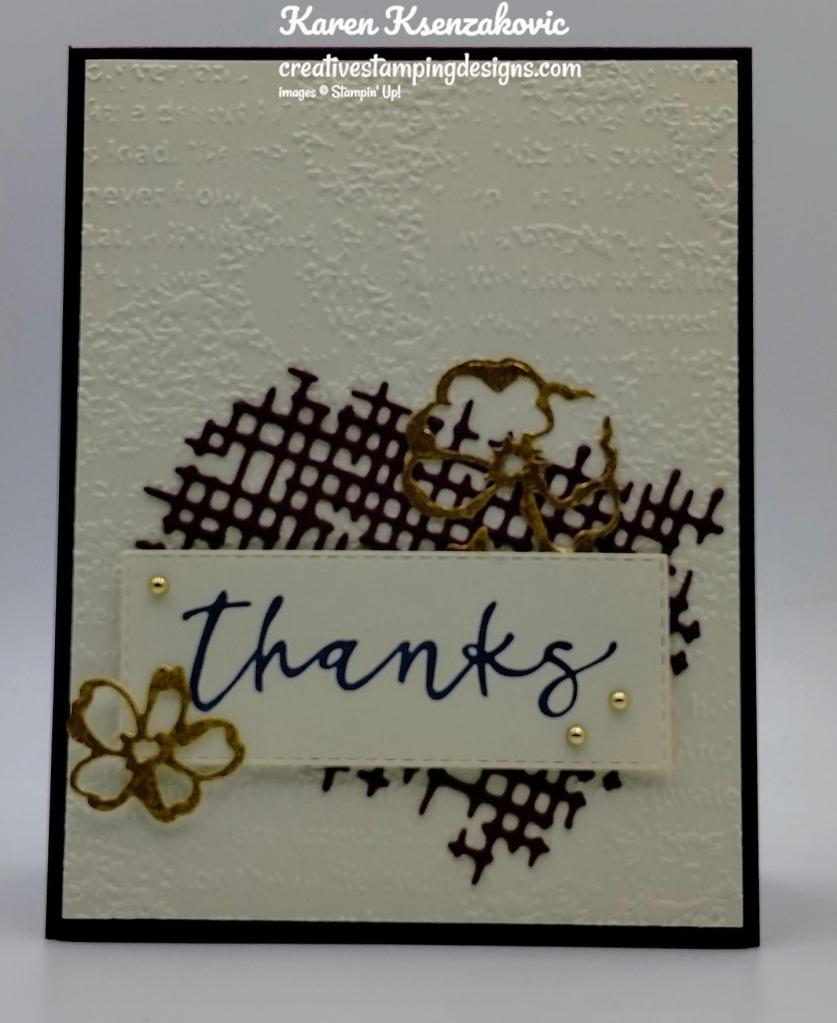
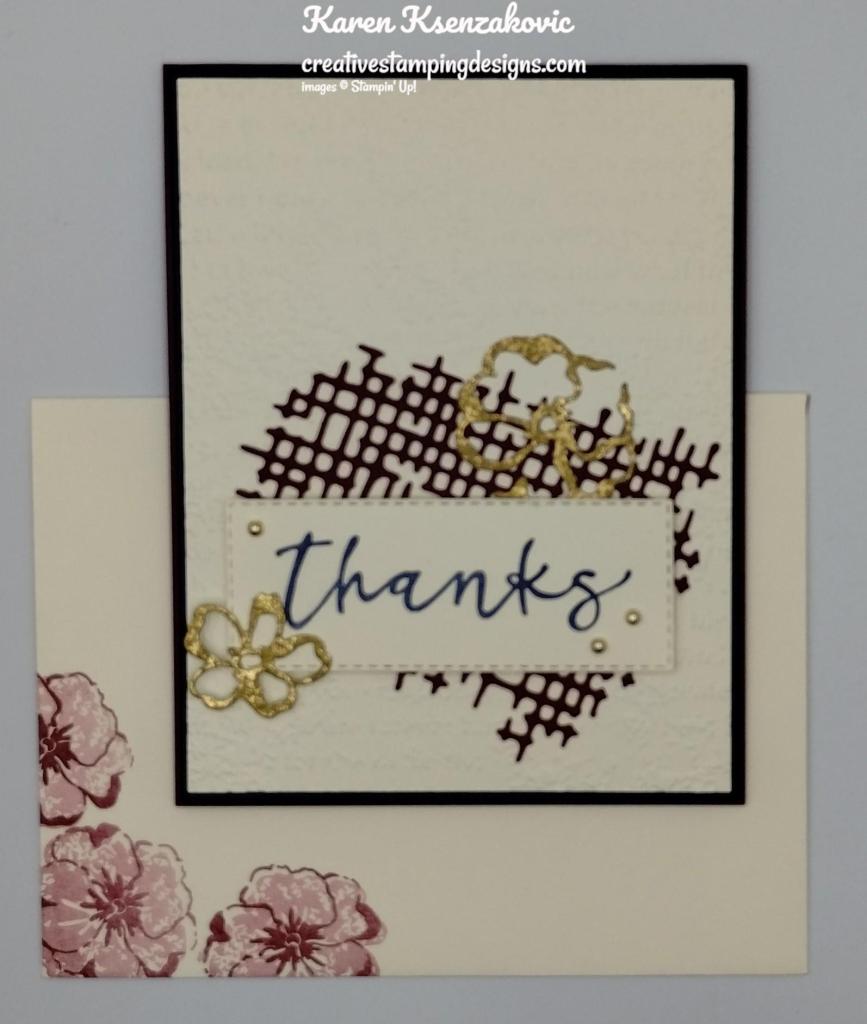
I used the Stampin’ Up! Season of Chic Bundle for my card today.
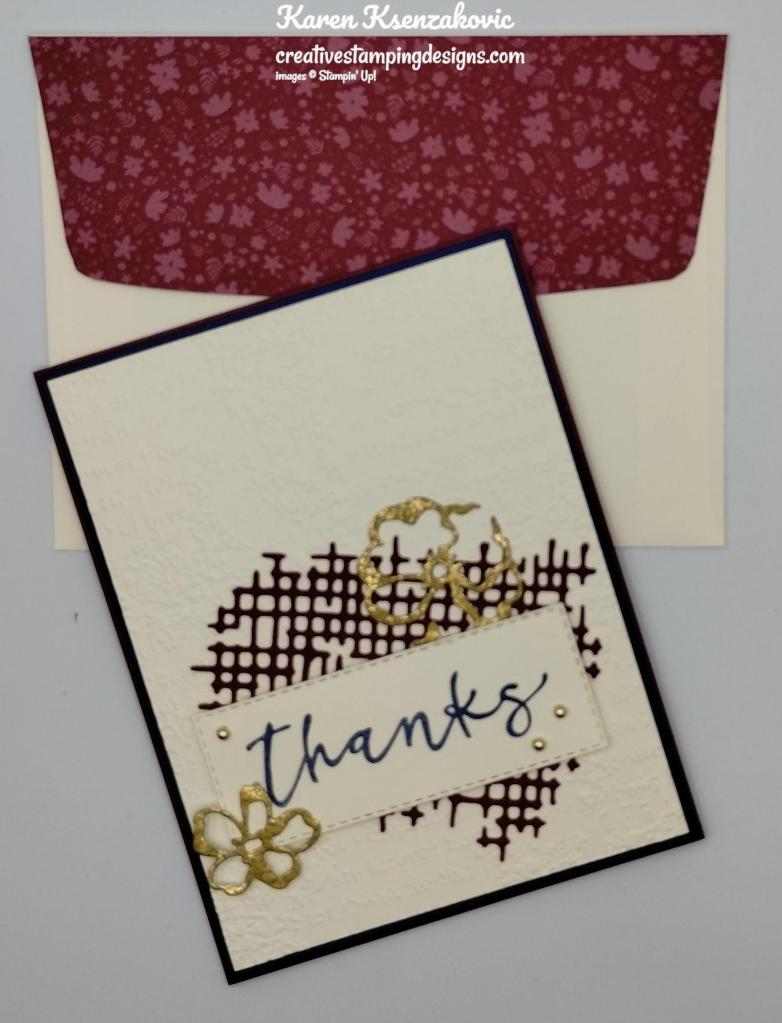
I started by embossing a Very Vanilla card front using the Timeworn Type 3D Embossing Folder. I adhered the embossed panel to a Night of Navy mat using Multipurpose Liquid Glue. I adhered the layered card front to a Merry Merlot card base using Stampin’ Dimensionals.
From a panel of Merry Merlot cardstock, I cut the mesh die from the Chic Dies. I adhered it to the card front using small amounts of Multipurpose Liquid Glue. Using the Chic Dies, I cut 2 of the detailed flowers dies from a panel of Distressed Gold Specialty Paper.
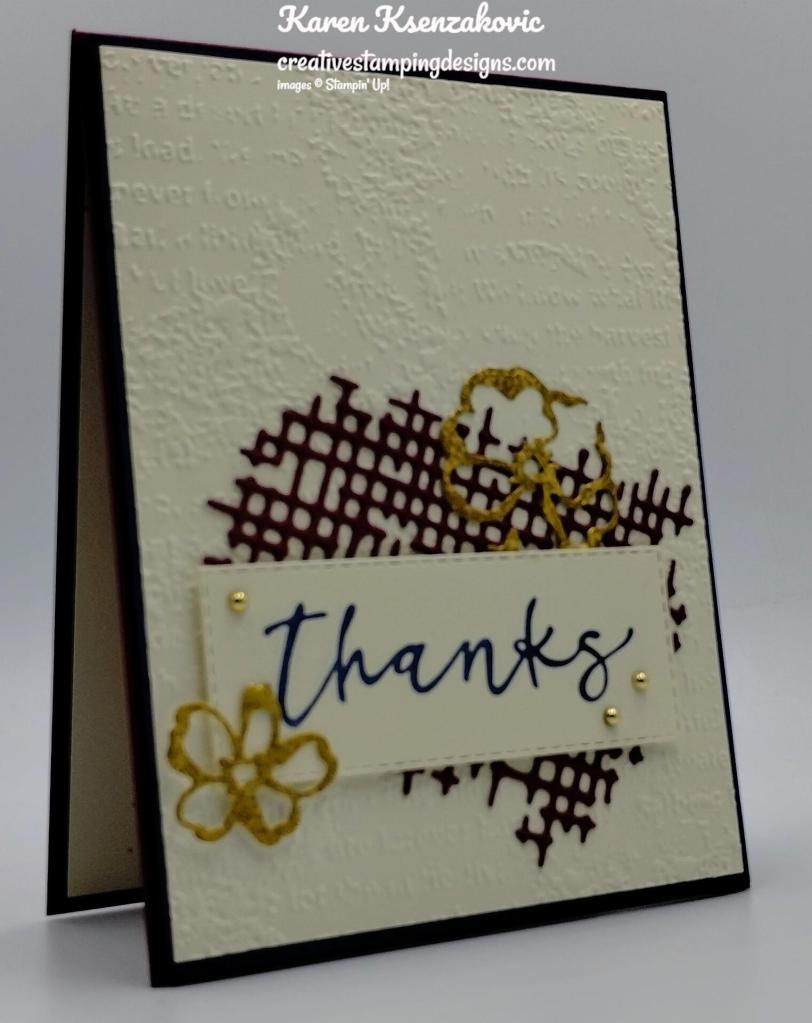
On a panel of Very Vanilla cardstock, I stamped the sentiment from the Season of Chic stamp set in Night of Navy Ink. I cut the sentiment out using the Stitched Rectangle Dies. I adhered the sentiment to the card front using Stampin’ Dimensionals. I adhered the Distressed Gold Flowers to the card front using Glue Dots. I added a few Festive Pearls to the card front.
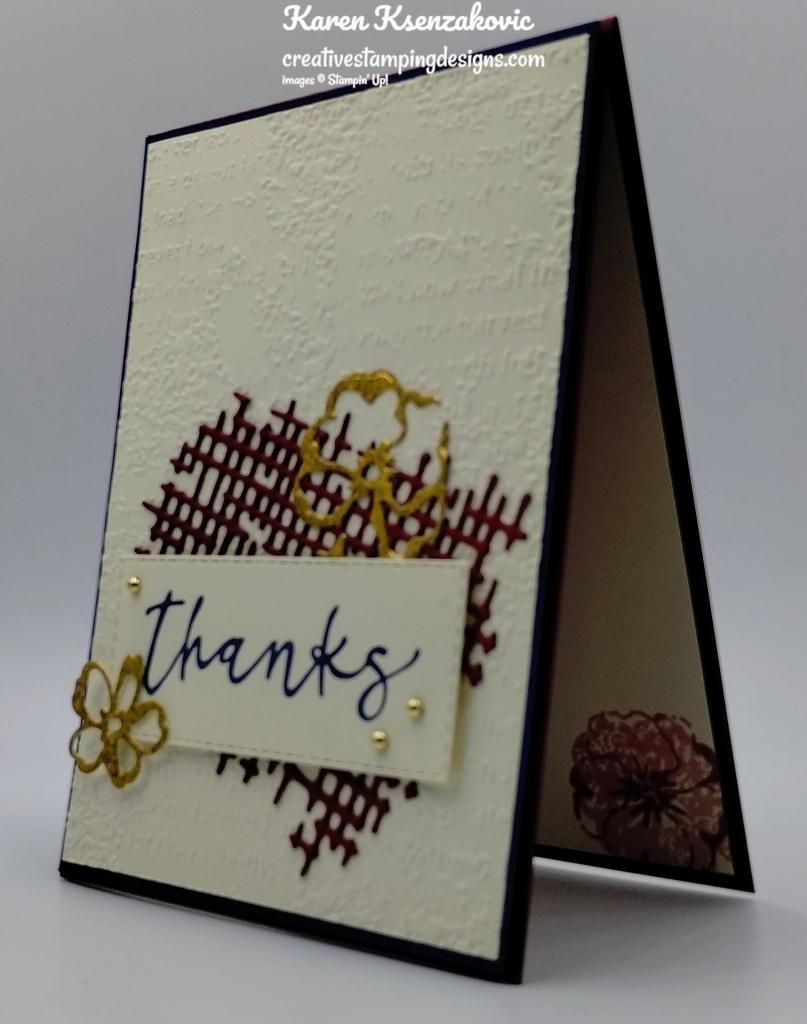
On the inside I stamped the swish image from the Season of Chic stamp set in Merry Merlot Ink, stamping off once, on a Very Vanilla panel. I stamped the sentiment from the Season of Chic stamp set in Night of Navy Ink over the swish image. I stamped the outline flower image from the Season of Chic stamp set in Merry Merlot Ink on the corners of the panel. I stamped the solid flower image in Merry Merlot Ink, stamping off once, inside the outline image. I adhered the Very Vanilla panel to a Night of Navy mat then to the inside of the Merry Merlot card base.
To finish my card, I decorated a Very Vanilla Medium Envelope. I stamped the outline flower image from the Season of Chic stamp set on the envelope front in Merry Merlot Ink. I stamped the solid flower image from the Season of Chic stamp set in Merry Merlot Ink, stamping off once, inside the outline image. I adhered a panel of Neutrals 6 X 6 Designer Series Paper to the envelope flap.
Thank you for stopping by my blog today. I hope you like my card and will give it a try. Happy Stamping!!
If you need any stamping supplies, I’d love to be your Demonstrator. Just click HERE to go directly to my online store or drop me an email if you have any questions.
MY CURRENT HOST CODE IS: 7PTW7A3H
Use this host code when placing an order with me. When you order $50 or greater you will receive a free gift from me! If your order is over $150, please do not use this code, but you’ll still get the free gift. The free gift is your choice of any 1 item valued up to $10.00 from the 2022-2023 Annual Catalog or the July – December 2022 Mini Catalog!Unfortunately packs of cardstock are no longer an option for a free gift. Shipping has become too expensive to ship and it’s costing me as much to ship as the cardstock costs.For any orders $50 or more I will also send you my monthly class tutorials. Click HERE or go to my Customer Rewards for more details and to see what this month’s tutorials are.
Please remember to use my current Host Code and make sure that you can see my name on the final checkout page listed as your Demonstrator when you order so that you know that you’re ordering with me and you’ll get my rewards!
In response to changing policies at Stampin’ Up – I’m adjusting my Ordering Gift policy as well. I’m having to get a little more tough on the adding of Host codes when you place your order thru my Online Store.
Not to worry – you’re still going to get that $10 ordering gift for orders of $50 (before shipping & tax) or greater. And the gift is still any 1 SU! product up to that $10 value (cardstock packs excluded) – which includes some of our fun Host Sets!
But – if you DO NOT use the Host code for your orders of less than $150 (this is the RETAIL total before Shipping & Handling), then you’ll have two options:
You’ll need to call Stampin’ Up! (1-800-Stamp-Up) and ask them to add it for you. They’re very helpful and will get it done quickly! OR….
If your order was over the $50 threshold but under $150, then…you’ll forfeit that $10 ordering gift and rewards – this is the Bummer Option – and I REALLY don’t want to do this, SO please remember to add my Current Host Code.
Last Chance Products available through January 4, 2023
The July–December 2022 Mini Catalog will be retiring soon! It’s always bittersweet to see a classic Stampin’ Up! catalog take a trip to retirement. But, we’re looking forward to all the new products on their way—and we hope you are, too!
Stock up on your favorite products before they’re gone for good! Save up to 60% on essential craft supplies. What are you waiting for? Start shopping! After all, this selection of Last Chance Products is only available while supplies last. Click Here for a printable PDF of the Last Chance List. Get those shopping lists ready for December 1st to shop early
This Last Chance Products promotion typically includes a Retiring List (products that will no longer be available once the catalog retires) and a Carryover List (products that will still be available once the catalog retires).
Discounts are not always available with the Retiring List. When they are, they will vary from one market to another depending on product performance.
All products are available while supplies last, and there are no purchase limits.
Discounted items can be added to a Starter Kit and redeemed as a 50% off item or with Stampin’ Rewards.
Stamp Sets are not guaranteed during this promotion and are while supplies last.
SALES PERIOD
Starts: 1 December 2022 at 12:00 AM (MT)
Ends: 4 January 2023 at 11:59 PM (MT)
Clearance Rack Has Been Refreshed!!
On 1 December Stampin’ Up! will be adding new items to our clearance rack, including dies offered during the Perfect Partners Promotion! With discounts up to 60% off, you can get the die sets that coordinate with the still-available stamp sets at a great price. This is a fantastic offer. Hurry the Perfect Partners dies and Clearance Rack products (available while supplies lasts)—don’t forget the coordinating stamps.
Create fun gift card holders to help you celebrate your special occasions all year long! Personalize each gift with these reversible boxes and paper bands for a unique design every time. This kit comes with enough supplies for you to make 16 different gift card holders—2 each of 8 designs. It also has an all-occasion stamp set and enough paper pieces to make your craft really pop! No matter what the occasion or who the recipient is, this is a coordinated paper craft that everyone will love and appreciate!
Plus, this month you can take your crafting even further with a special add-on! Give a gift card and a personalized card with the Good Things Cards & Envelopes add-on. You get 16 cards (4 each of 4 designs) and 16 coordinating envelopes. Add-ons are live during the subscription period but will only be available while supplies last, so don’t wait!
This kit includes:
Good Things Come in Small Packages Photopolymer Stamp Set
Garden Green Classic Stampin’ Spot
16 gift card holders: 2 each of 8 reversible designs
Precut paper pieces, twine, and belly bands to customize all your crafts.
Enough adhesive for each project!
Finished box size: 3-5/8″ x 2-1/2″ x 1/2″ (9.2 x 6.4 x 1.3 cm)
It’s almost time for me to order the new January – April 2023 Mini Catalog and the January-February 2023 Sale-a-bration brochure. If you are a customer of mine, I will be shipping them out to you just as soon as I receive them. If you are not a customer of mine yet but would like to be, send me an email to creativestampingdesigns@gmail.com requesting a catalog along with your name and address and I will gladly get one in the mail to you.
Once again with a new catalog comes my Designer Series Paper Shares. I’ll be posting the details soon about my Paper Shares. What is a Designer Series Paper Share? It’s a sampling of all the new DSP coming in the new mini catalog. You will receive a sample of each of the new DSP’s (6 X 6 sheets). It’s a great way to sample all the paper to see if you like it and want to purchase it. I’m hoping to post something with in the week, so stay tuned.
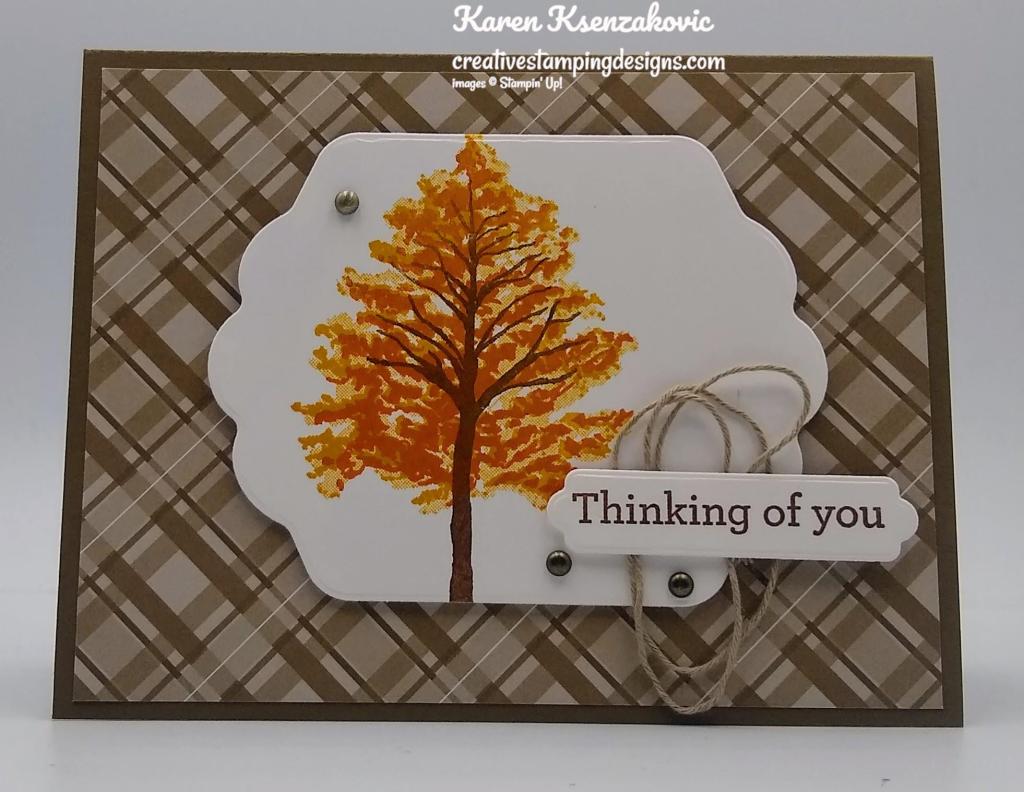
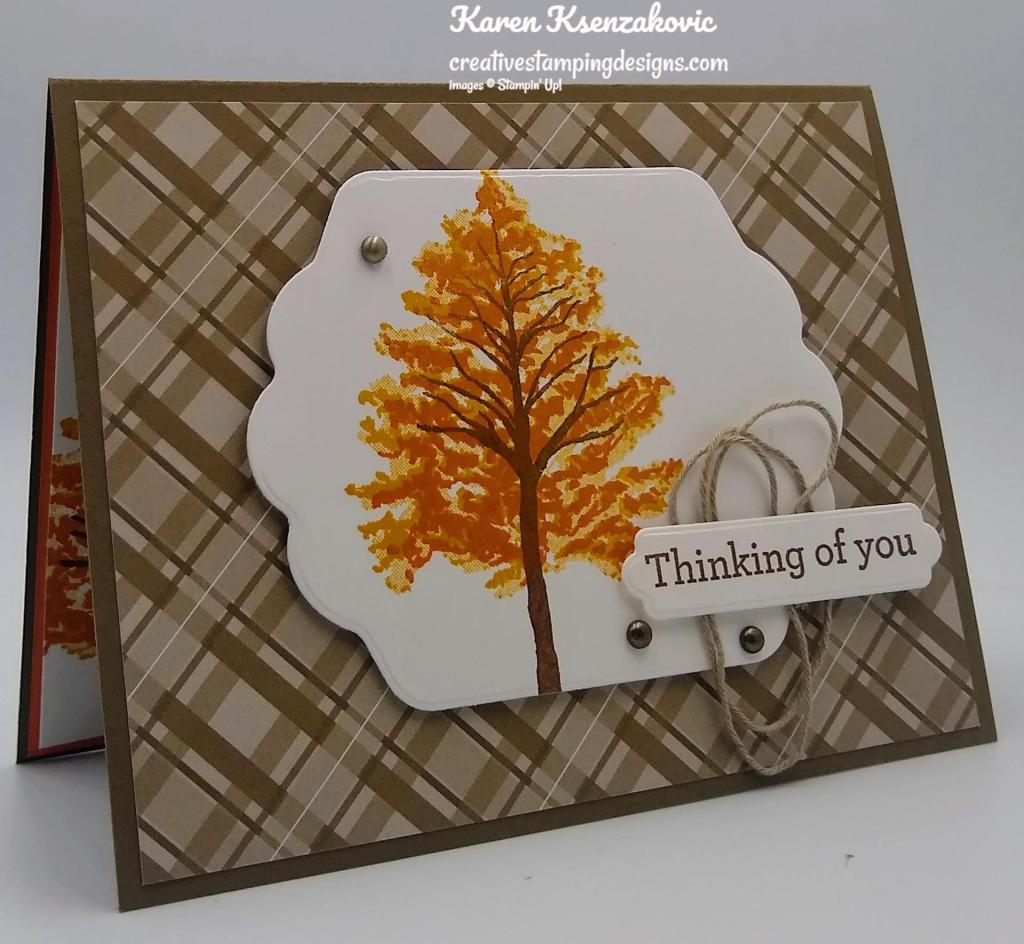
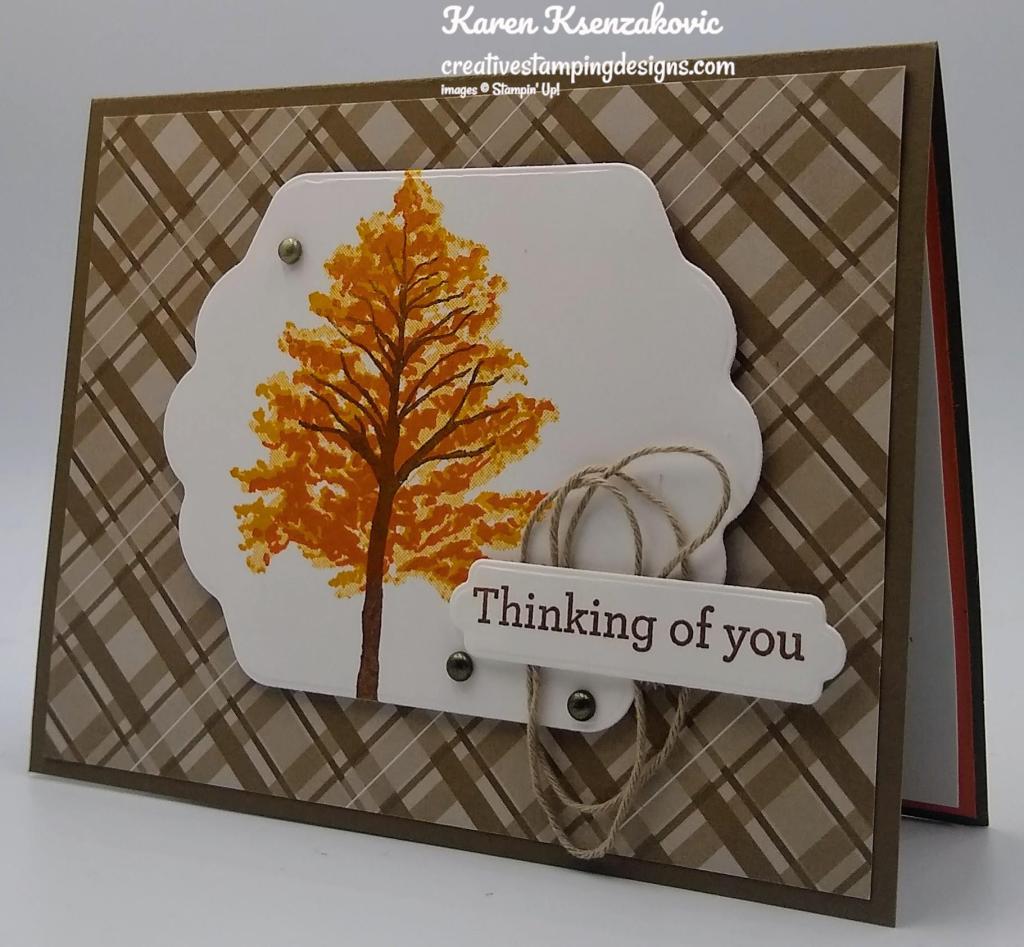
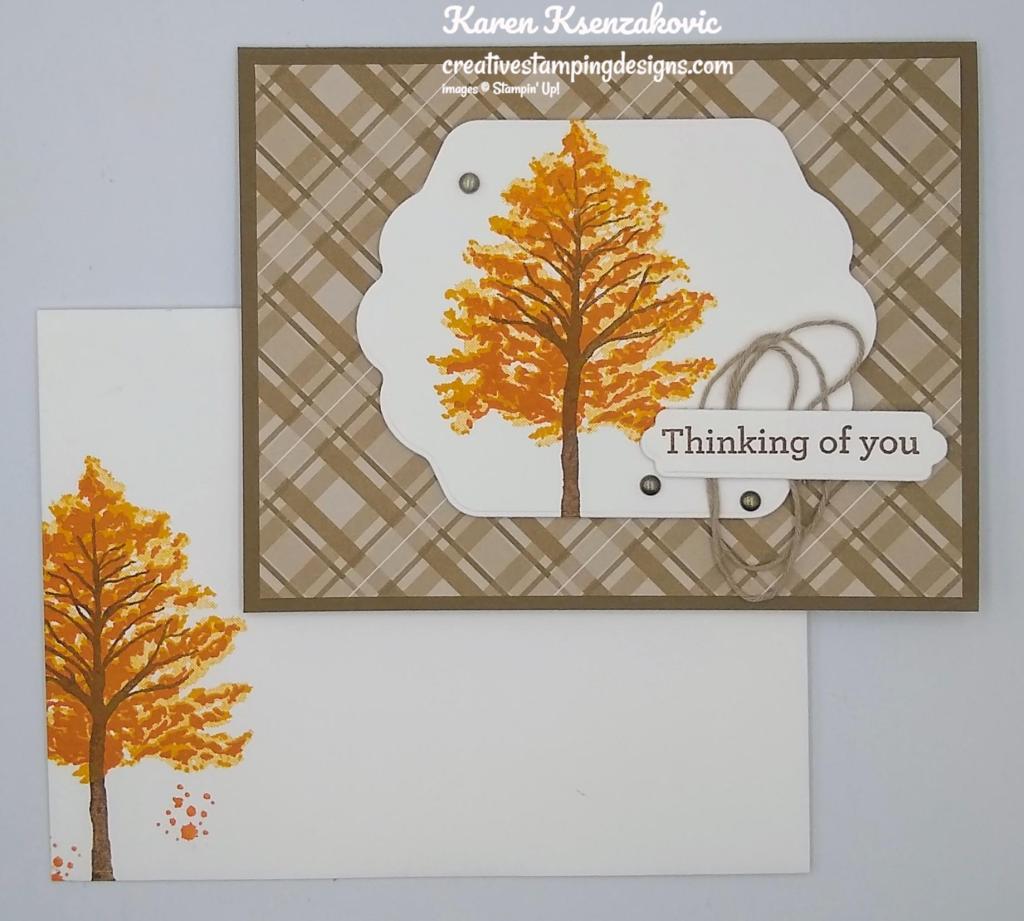
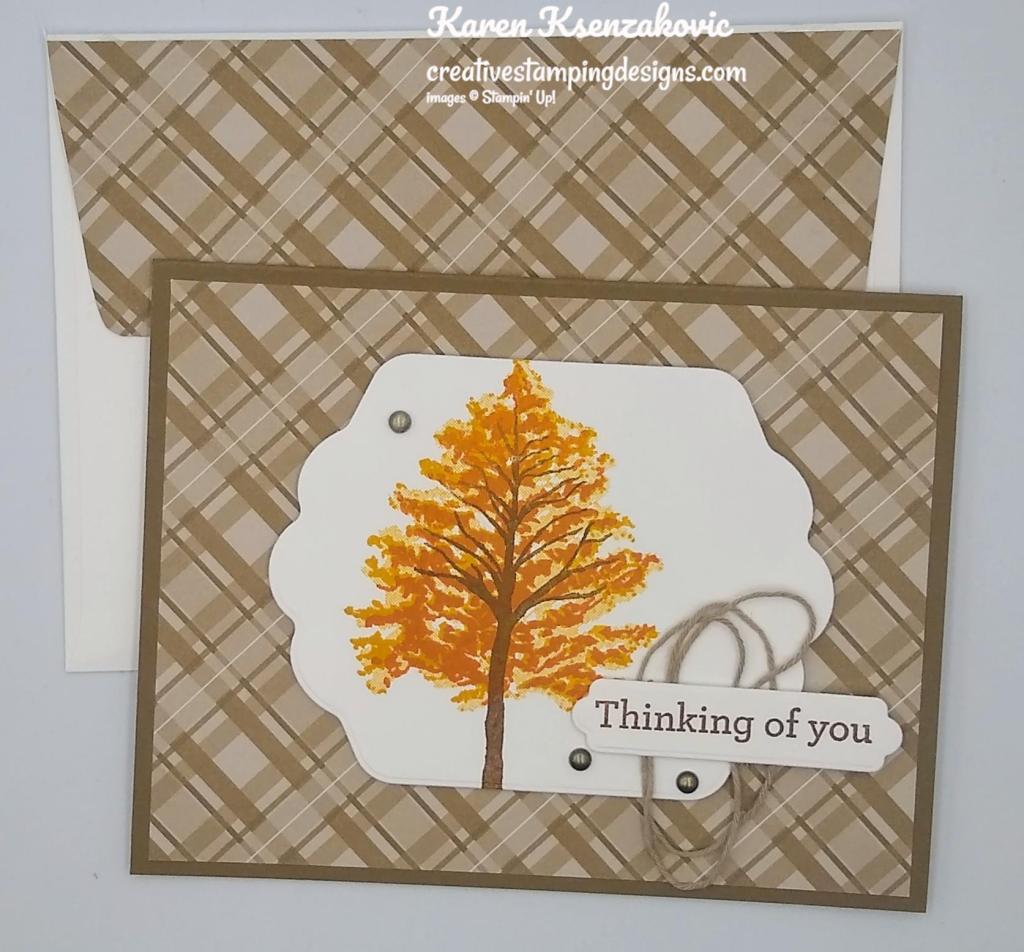
Good Thursday morning my stamping friends welcome to our Happy Inkin’ Thursday Blog Hop. I hope everyone is doing well today. If you are hopping over from Akiko’s blog, thank you for stopping by. This week we have Sketch Challenge. Here is my card using this week’s Sketch.
I used the Stampin’ Up! Beauty of Friendship Photopolymer Stamp Set along with the Neutrals 6 X 6 Designer Series Paper, Stampin’ Up! Charming Sentiments Photopolymer Stamp Set and the Seasonal Labels Dies for my card today.
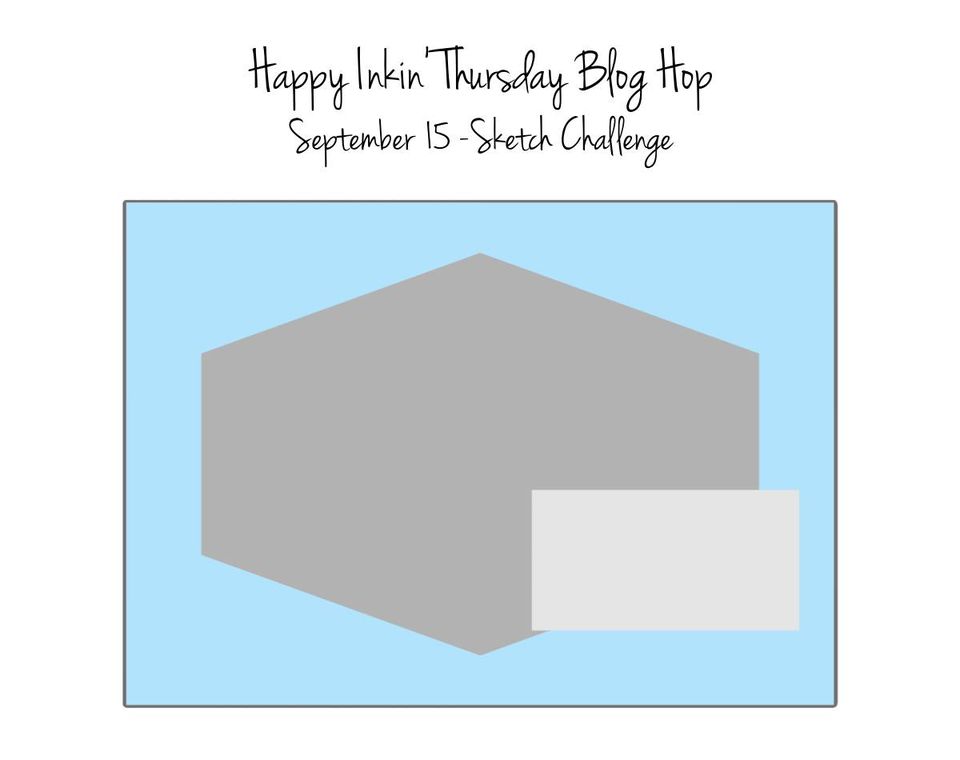
Here’s our sketch for this week.
I started by adhering a panel of the Neutrals DSP to a Soft Suede card base.
On a panel of Basic White cardstock, I stamped the tree trunk image from the Beauty of Friendship stamp set in Soft Suede Ink. I stamped the solid image of the treetop from the Beauty of Friendship stamp set in Crushed Curry Ink and the detailed treetop image in Pumpkin Pie Ink over the Crushed Curry image. I cut the image out using the largest die from the Seasonal Labels Dies.
I adhered the die cut image to the card front using Stampin’ Dimensionals. I stamped the sentiment from the Beauty of Friendship stamp set in Soft Suede Ink on a panel of Basic White cardstock. I cut the sentiment out using the smaller die from the Seasonal Labels Dies. I adhered a piece of Crumb Cake Bakers Twine from the Bakers Twine Essential Pack to the artwork using Stampin’ Seal. I adhered the sentiment over the twine using Stampin’ Dimensionals. I added a few Rustic Metallic Adhesive-Backed Dots to the card front.
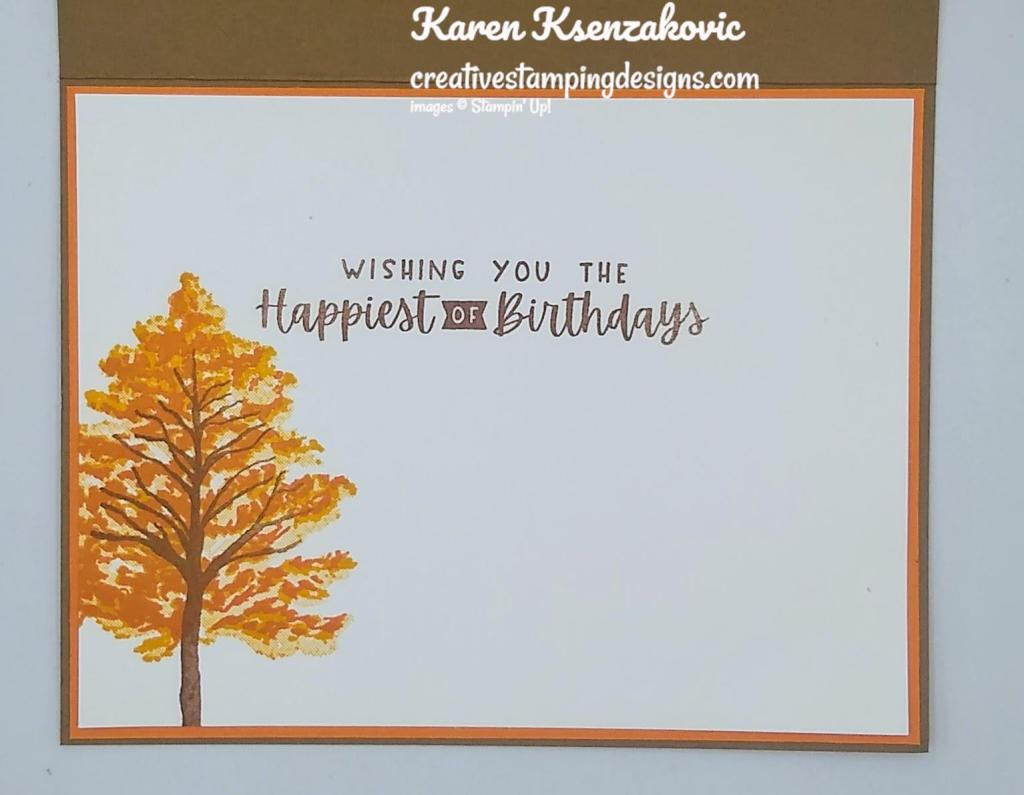
On the inside I stamped the sentiment from the Charming Sentiments stamp set in Soft Suede Ink on a Basic White panel. I stamped the tree trunk image from the Beauty of Friendship stamp set in Soft Suede Ink. I stamped the treetop images from the Beauty of Friendship stamp set in Crushed Curry and Pumpkin Pie Inks. I adhered the Basic White panel to a Pumpkin Pie mat and then to the inside of the Soft Suede card base.
To complete my card, I decorated a Basic White Medium Envelope. I stamped the tree images from the Beauty of Friendship stamp set in Soft Suede, Crushed Curry and Pumpkin Pie on the envelope front. I adhered a panel of the Neutrals DSP to the envelope flap.
Thank you for stopping by my blog today. I hope you liked my card and will give it a try. Now that you’ve seen my card, take a minute to hop through and see everyone’s projects today. If you click on the Next Blog button, you’ll go to Tara’s page. Or you can just click on the names below to go directly to all their blogs! Happy Hopping!!
If you need any stamping supplies, I’d love to be your Demonstrator. Just click HERE to go directly to my online store or drop me an email if you have any questions.
MY CURRENT HOST CODE IS: CD74ZSKH
Use this host code when placing an order with me. When you order $50 or greater you will receive a free gift from me! If your order is over $150, please do not use this code, but you’ll still get the free gift. The free gift is your choice of any 1 item valued up to $10.00 from the 2021-2022 Annual Catalog or the January – June 2022 Mini Catalog!For any orders $50 or more I will also send you my monthly class tutorials. Click HERE or go to my Customer Rewards for more details and to see what this month’s tutorials are.
Please remember to use my current Host Code and make sure that you can see my name on the final checkout page listed as your Demonstrator when you order so that you know that you’re ordering with me and you’ll get my rewards!
Every week in the month of September Stampin’ Up! will be offering a selection of discounted products. Discounts and product selection will vary from week to week.
Head over to my Online Store Here to see the Weekly Deals for this week.
New products added each week on 1, 8, 15, and 22 September.
Some things are great on their own but become epic when they are paired with something else: cereal and milk, toast and butter, Fred Astaire and Ginger Rogers. We may be biased, but our favorite combo is our stamp sets and dies—and that’s what the Perfect Partners promotion is all about!
We created six new dies that coordinate with stamp sets in the 2022–2023 Annual Catalog and the July–December 2022 Mini Catalog. These coordinating dies will only be available during this promotion and will not be offered in any catalog.
These stamp sets and dies are available separately or as a bundle. By buying the bundle, you and your customers will save 10% off the retail price.
Put these wonderful stamp sets and dies together for more papercrafting fun!
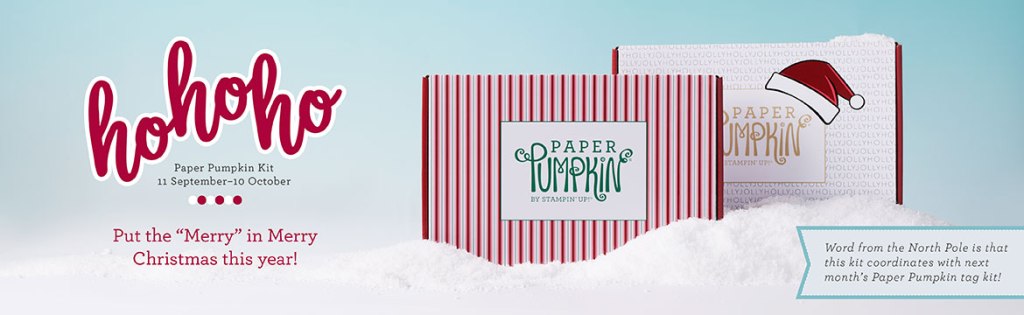
‘Tis the season to make your own Christmas cards with the Ho Ho Ho Paper Pumpkin Kit! This kit contains whimsical designs of Santa and his reindeer in a classic Christmas color palette which is sure to match various styles of holiday décor and look great on mantles everywhere. Each kit contains enough supplies to create 9 festive cards—3 each of 3 designs—and 9 coordinating envelopes. These cards are sure to bring the warm holiday spirit. And word from the North Pole is that this kit coordinates with next month’s Paper Pumpkin tag kit and the special add-on product! With so much coordination between products, you’ll have a breeze at creating a cohesive look for all your holiday gifting needs. Make this season the most wonderful time of the year for your loved ones—and for yourself!
This kit includes:
Ho Ho Ho Photopolymer Stamp Set
Early Espresso Classic Stampin’ Spot
Printed card bases
Printed envelopes
Printed die cuts
Die-cut labels
Iridescent foil die-cut snowflakes
Vellum
Vanilla expoy dots
Adhesive dots
Mini Dimensionals
Card size: 4-1/4″ x 5-1/2″ (10.8 x 14 cm)
Coordinating Stampin’ Up! colors: Bermuda Bay, Cherry Cobbler, Crumb Cake, Early Espresso, Shaded Spruce, Sweet Sorbet, Very Vanilla
Subscribe to the October Paper Pumpkin Kit between 11 September and 10 October at paperpumpkin.com!
Note: Supplies may be limited toward the end of the subscription period.
Good Wednesday morning my stamping friends. Happy June!! Here we go starting another month and I feel like I’ve missed most of May. We’re halfway through the week and on our way to the weekend. It’s supposed to cool off a little here over the next few days. When I got in my car yesterday to fun some errands, the temp said it was 101. That was with my card in the shade. I believe today is only supposed to hit 75 out.
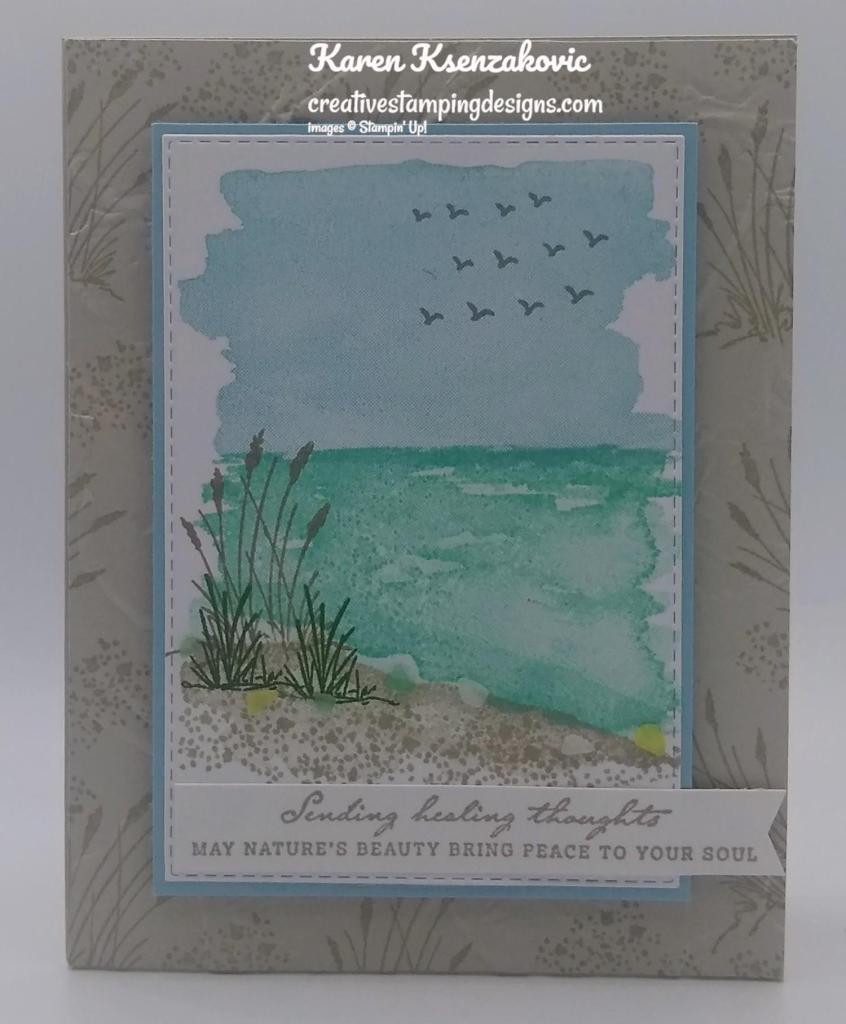
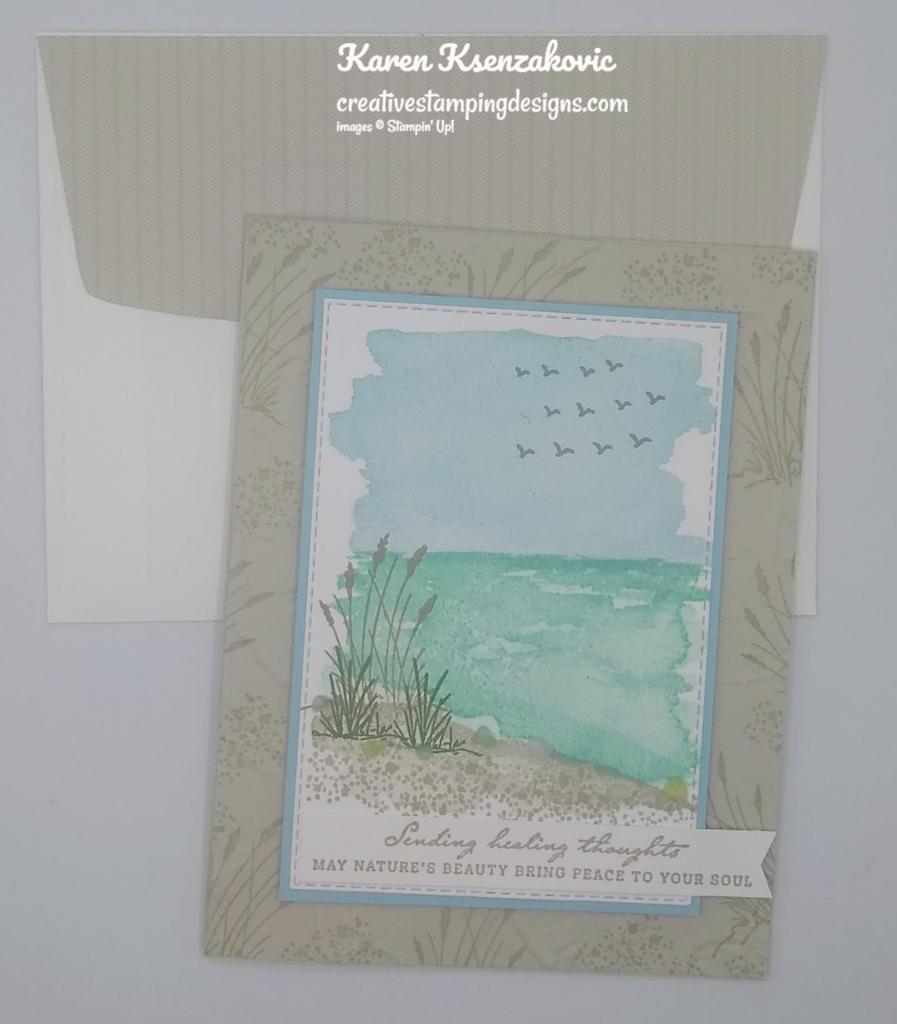
Today’s card is one of those cards you don’t really like to make, but at times have to. Someone very dear and close to me passed over the weekend. I have so many wonderful memories from my childhood. My uncle was a wonderful man, caring and generous. Our families used to go on vacation together every summer for 2-3weeks. We’d laugh till our sides hurt. He will be missed but will always be in my heart. Here’s my card for today.
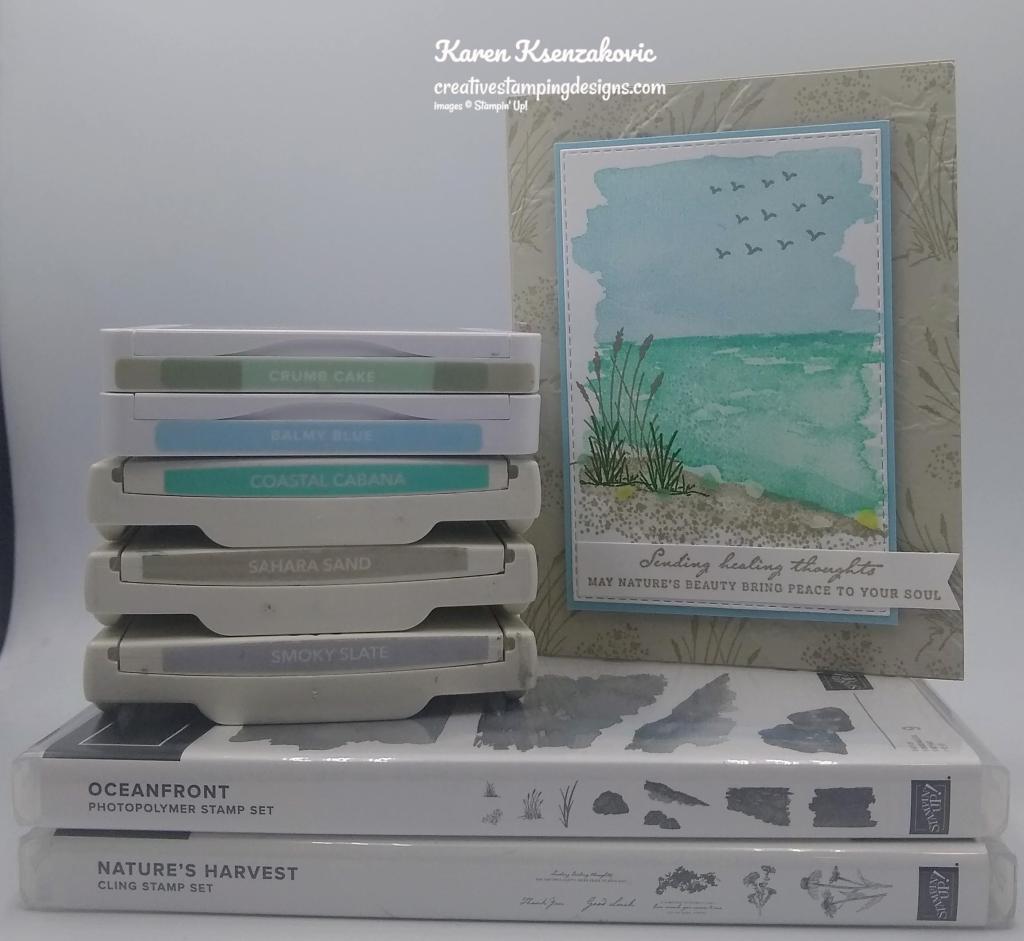
I used the Stampin’ Up! Oceanfront Photopolymer Stamp Set along with the Stampin’ Up! Nature’s Harvest Cling Stamp Set for my card today.
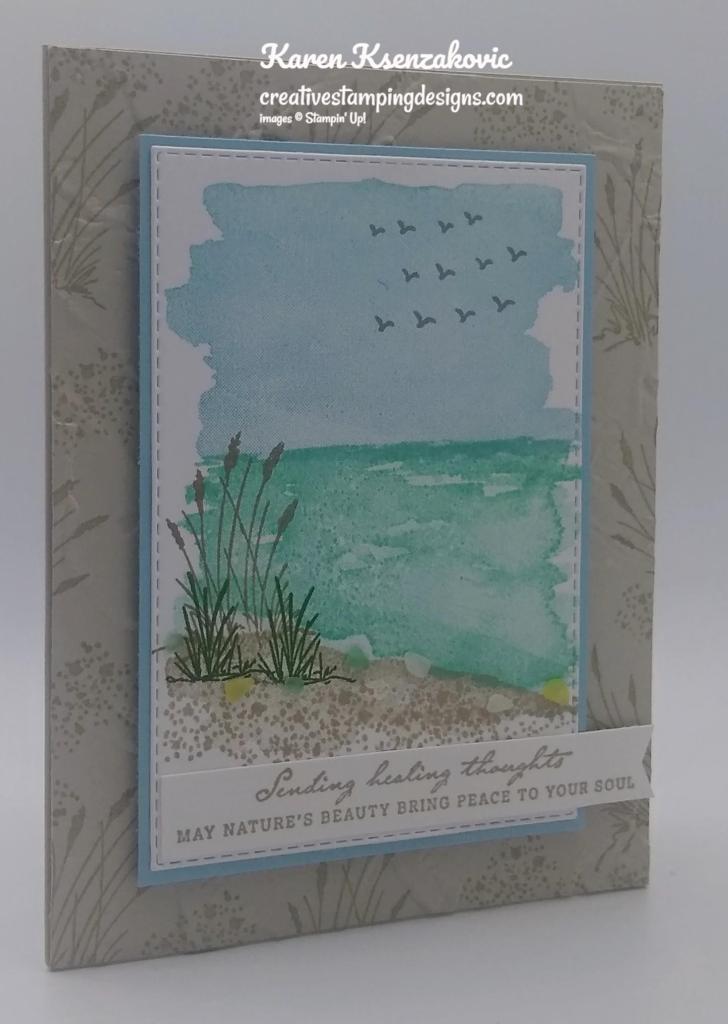
I started by stamping the wheat grass and sand images from the Oceanfront stamp set in Sahara Sand Ink on a Sahara Sand card front. I embossed the card front using the Painted Texture 3D Embossing Folder and adhered it to a Sahara Sand card base.
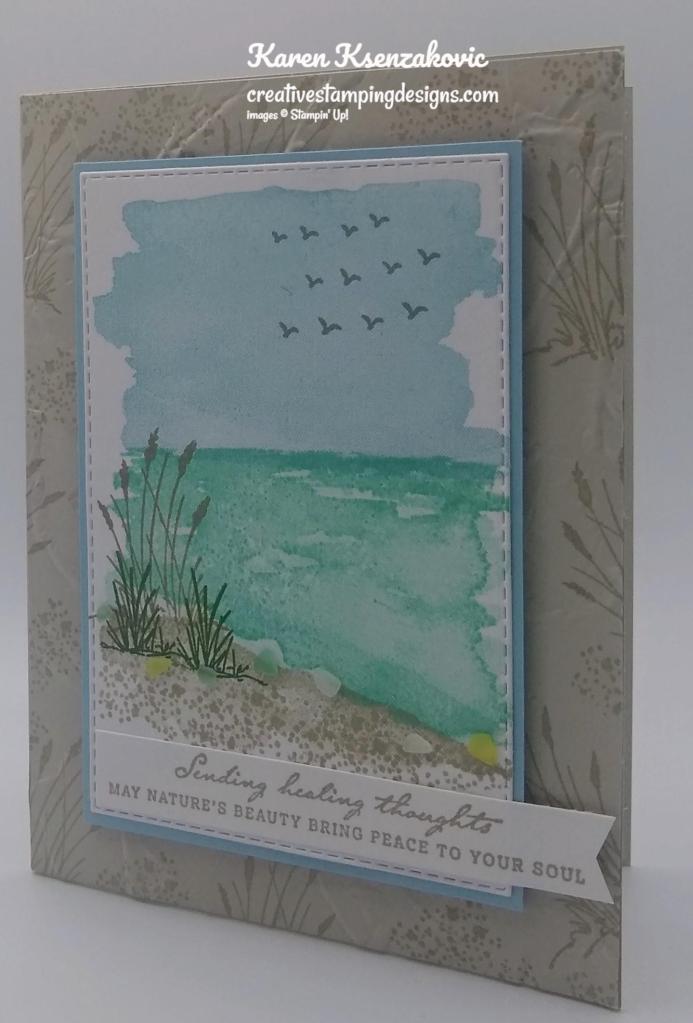
On a panel of Basic White cardstock, using the Oceanfront stamp set, I stamped the top of the panel with Balmy Blue Ink. I stamped the center image with Coastal Cabana Ink and the bottom image in Sahara Sand Ink. I stamped the sand image from the Oceanfront stamp set in Sahara Sand Ink. I stamped the wheat grass image from the Oceanfront stamp set in Crumb Cake Ink and the small grass image in Garden Green Ink. I stamped the bird image from the Stampin’ Up! Let’s Set Sail Photopolymer Stamp Set on the top of the panel in Smoky Slate Ink. I cut the panel using the 3rd largest Stitched Rectangle Die. I adhered the stamped panel to a Balmy Blue mat using Stampin’ Seal. I adhered the layered panel to the card front using Stampin’ Dimensionals.
On a strip of Basic White cardstock I stamped the sentiment from the Nature’s Harvest Stamp Set in Sahara Sand Ink. Using my Banner Pick A Punch I cut the end of the strip. I adhered the sentiment to the bottom of the panel using Stampin’ Seal and Stampin’ Dimensionals. I added a few Faux Sea Glass Shapes along the water edge.
On the inside I stamped the sentiments from the Stampin’ Up! Inspired Thoughts Cling Stamp Set in Sahara Sand Ink. I stamped the sand image from the Oceanfront stamp set in Sahara Sand Ink along the bottom of the panel. I stamped the wheat grass image from the Oceanfront stamp set in Crumb Cake Ink. I stamped the bird image from the Let’s Set Sail stamp set in Smoky Slate Ink on the top of the panel. I adhered the Basic White panel to a Balmy Blue mat and then to the inside of the Sahara Sand card base.
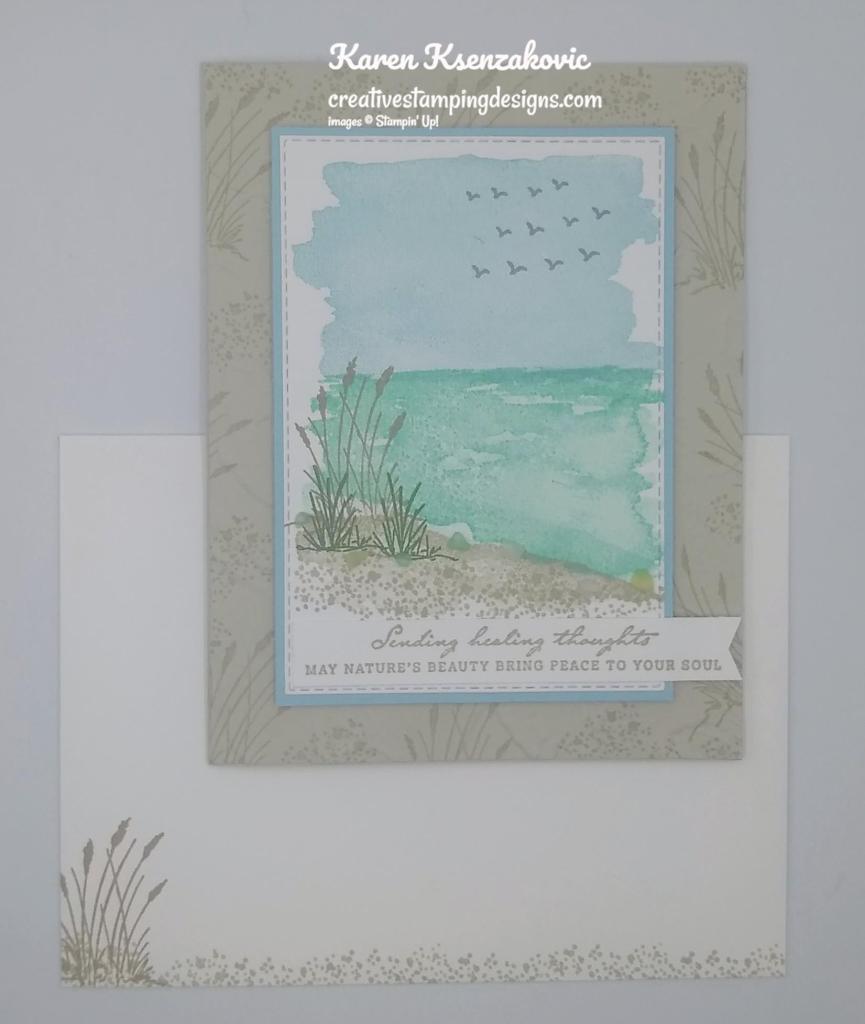
To finish my card, I decorated a Basic White Medium Envelope. I stamped the sand image from the Oceanfront stamp set in Sahara Sand Ink on the envelope front. I stamped the wheat grass image from the Oceanfront stamp set in Crumb Cake Ink on the bottom of the envelope front. I adhered a panel of Neutrals 6 X 6 Designer Series Paper to the envelope flap.
Thank you for stopping by my blog today. I hope you liked my card and will give it a try. Happy Stamping!!
If you need any stamping supplies, I’d love to be your Demonstrator. Just click HERE to go directly to my online store or drop me an email if you have any questions.
MY CURRENT HOST CODE IS: KNZ2Y4WT
Use this host code when placing an order with me. When you order $50 or greater you will receive a free gift from me! If your order is over $150, please do not use this code, but you’ll still get the free gift. The free gift is your choice of any 1 item valued up to $10.00 from the 2021-2022 Annual Catalog or the January – June 2022 Mini Catalog!For any orders $50 or more I will also send you my monthly class tutorials. Click HERE or go to my Customer Rewards for more details and to see what this month’s tutorials are.
Please remember to use my current Host Code and make sure that you can see my name on the final checkout page listed as your Demonstrator when you order so that you know that you’re ordering with me and you’ll get my rewards!
The January–June 2022 Mini Catalog will be retiring soon! It’s always bittersweet to see a classic Stampin’ Up! catalog take a trip to retirement. But, we’re looking forward to all the new products on their way—and we hope you are, too!
Stock up on your favorite products before they’re gone for good! Save up to 50% on essential craft supplies beginning on June 1.
For a PDF copy of the retiring items list Click Here, (note: sale prices start on June 1).
LAST CHANCE PRODUCTS DETAILS:
The sale prices begin on June 1, all items on the retiring list are available only while supplies last.
All products are available while supplies last, and there are no purchase limits.
Discounted items can be added to a Starter Kit and redeemed as a 50% off item or with Stampin’ Rewards.
Stamp Sets are not guaranteed during this promotion and are while supplies last
Discounted Prices Sales Period: June 1-30, 2022
Ordering Deadline: June 30, 2022 at 11:50 PM MT
Head over to my Online Store to pick up any of those items that you want to make sure that you don’t miss out on and then head back on June 1 to pick up any of the items on sale!
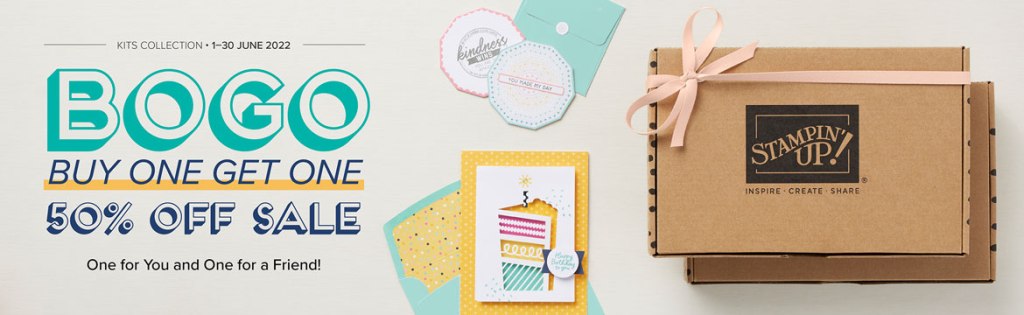
Stampin’ Up! Buy One Get One 50% off Kits Collection Sale June 1-June 30!
Share a Kit with a Friend with the Kits Collection BOGO 50% Off Promotion
Get ready—the Kits Collection is having a buy one, get one 50% off promotion. This is the perfect time to #ShareYourMoment and share a kit from the Kits Collection with a friend! As always, the kit selection is based on availability. You can see what’s available in the Kits Collection selection Here. Go to Shop Products and Kit Collections.
Ordering information:
Sale runs June 1-30, 2022.
All kits in the Kits Collection by Stampin’ Up! qualify for this sale.
Kit selection is based on availability.
You will need at least two kits in your cart for the discount to automatically apply to the more expensive kit (yes…the more expensive one!!) at checkout.
There are no order limits on this promotion.
Let me know if you have any questions. And get ready to pick up some BOGO kits in June!
Give your card collection a reFRESH with this month’s Paper Pumpkin Kit! We’re talking FRESH ideas, designs, cards, and crafts. Each month we strive to deliver a seasonal selection, and this month is no different. It’s time to express your love, gratitude, and style with summer’s hottest trends in crafting.
Plus, this month you can purchase additional mini canvas shopping bags for a fun twist on card packaging. Just our way of expanding one of our favorite kits of the season!
This kit includes:
This month’s kit contains enough elements to create 9 cards—3 each of 3 designs—and 9 coordinating envelopes. This all-inclusive kit includes printed card bases, die-cut paper pieces, adhesive, and more!
The Pick of the Crop Paper Pumpkin Kit includes a Calypso Coral Classic Stampin’ Spot!
This kit’s stamp set is perfect for expressing your love, gratitude, and style. With sentiments that say “Love you a whole bunch”, “You’re the pick of the crop”, “You are the sweetest,” and so many more, you’ll be able to use this photopolymer stamp set for all of your summer projects.
This kit also includes specialty vellum pieces to add a fresh touch to your cards.
And you’ll get a Mini Shopping Bag (5-3/8″ x 6″; 13.7 x 15.2 cm) which can be used to hold a couple cards for a unique craft element. (Additional bags available to purchase separately.)
Card size: 4-1/4″ x 5-1/2″ (10.8 x 14 cm)
Envelope size: 4-1/2″ x 5-3/4″ (11.4 x 14.6 cm)
Coordinating colors: Blackberry Bliss, Cajun Craze, Calypso Coral, Crushed Curry, Garden Green, Night of Navy, Soft Succulent
Available for purchase on stampinup.com starting 13 June 2022:
Mini Shopping Bags Add-On
Item Number: 161922
Add-on details:
Includes 4 mini canvas bags.
You can fit a couple cards in each bag. Perfect for a fun twist on card packaging!
Stamp or color on the bags for a personalized touch.
Mini Shopping Bag size: 5-3/8″ x 6″ (13.7 x 15.2 cm)
SUBSCRIPTION INFORMATION
Subscribe to the June Paper Pumpkin Kit between 11 May and 10 June at paperpumpkin.com!
Note: Supplies may be limited toward the end of the subscription period.
Stampin’ Up! has some new Branded Merchandise you can purchase in the Online Store. They have tumblers in all the new 2022-2024 In-Colors, a hoodie in the Stampin’ Up! Abigail Rose design. Some Abigail Rose File Folders, the 2022-2024 In-Colors Grid Paper and an Abigail Rose Poster. Click Here to go to my Online Store to see all the new merchandise.
I’ve updated my retirement list with items from the 2021-2022 Annual Catalog. You can see the list Here. If there are initials next to the item, they are being held for payment.
Good Friday morning my stamping friends. Welcome to my Fun Fold Friday. How was everyone’s week? Does anyone have plans for the weekend? I’m actually off on Saturday, but will be at work all day Sunday.
Today’s card I made on my Facebook Live video on Wednesday. If you were able to join me or watched the replay, thank you. If you’d like to watch my video and stamp along, the measurements are below along with the links to my Facebook page and my YouTube channel. Here’s my card for today.
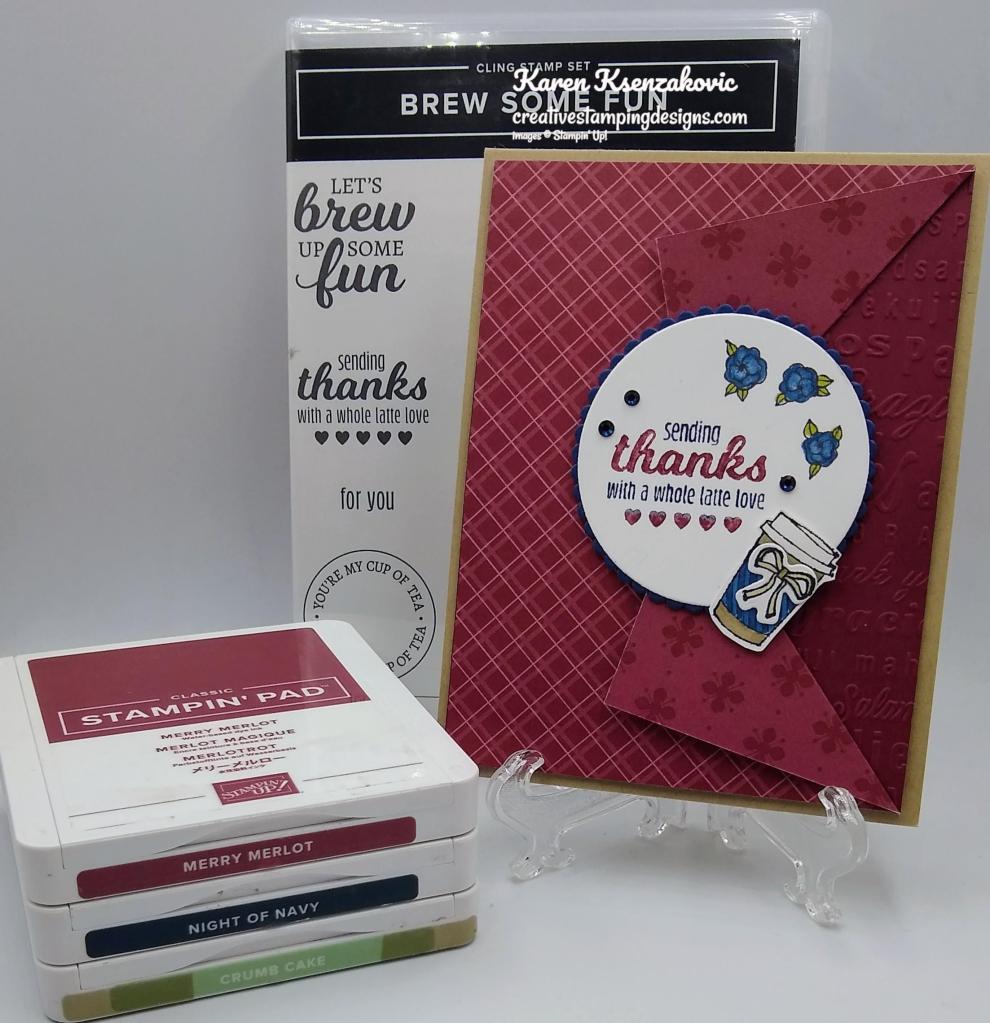
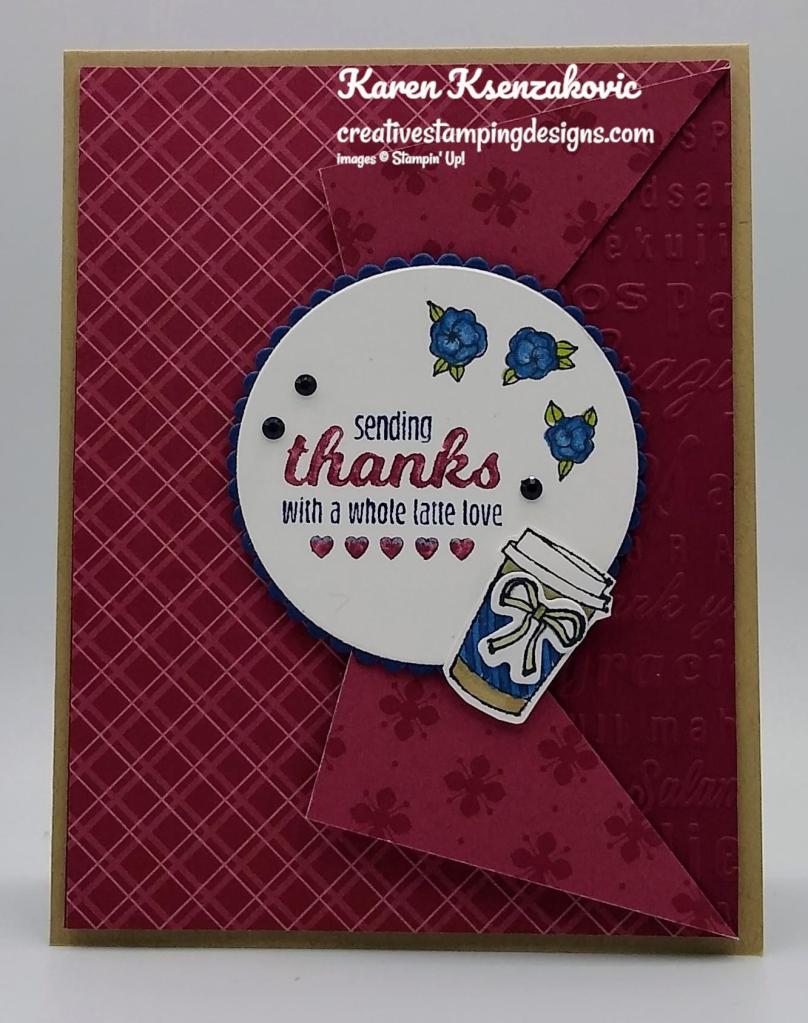
I used the Stampin’ Up! Brew Some Fun Cling Stamp Set along with the Neutrals 6 X 6 Designer Series Paper for my simple fun fold card today.
I started by embossing a panel of Merry Merlot using the Hello & Thanks Embossing Folder. I then cut a panel of Neutrals DSP from the center of the 5 1/4″ side I cut in 2″. I scored from the center cut line to the 2 corners and folded them out. I adhered the DSP to the Merry Merlot card front using Multipurpose Liquid Glue and adhered it to a Crumb Cake card base using Stampin’ Dimensionals.
I cut the 3rd largest circle from the Layering Circles Dies from a panel of Basic White cardstock. On the circle I stamped the trio of flowers image from the Brew Some Fun stamp set in Tuxedo Black Ink and colored them in using my Night of Navy and Old Olive Stampin’ Blends Markers. I colored the sentiment from the Brew Some Fun stamp set using my Merry Merlot and Night of Navy Stampin’ Write Markers and stamped it on the circle die. On the panel of Basic White cardstock I stamped the coffee cup and the small bow from the Brew Some Funstamp set in Tuxedo Black Ink. I colored the images in using my Crumb Cake and Night of Navy Stampin’ Blends Markers. I fussy cut the cup using my Paper Snips and cut the bow out using my Warm Wraps Dies. I adhered the bow to the cup using a Glue Dot and the cup to the bottom of the circle using a Stampin’ Dimensional.
I adhered the circle die to a scalloped circle which I cut from a panel of Night of Navy cardstock using the Layering Circle Dies. I adhered the layered dies to the card front using Stampin’ Dimensionals. I added a few Night of Navy Holiday Rhinestone Basic Jewels to the card front.
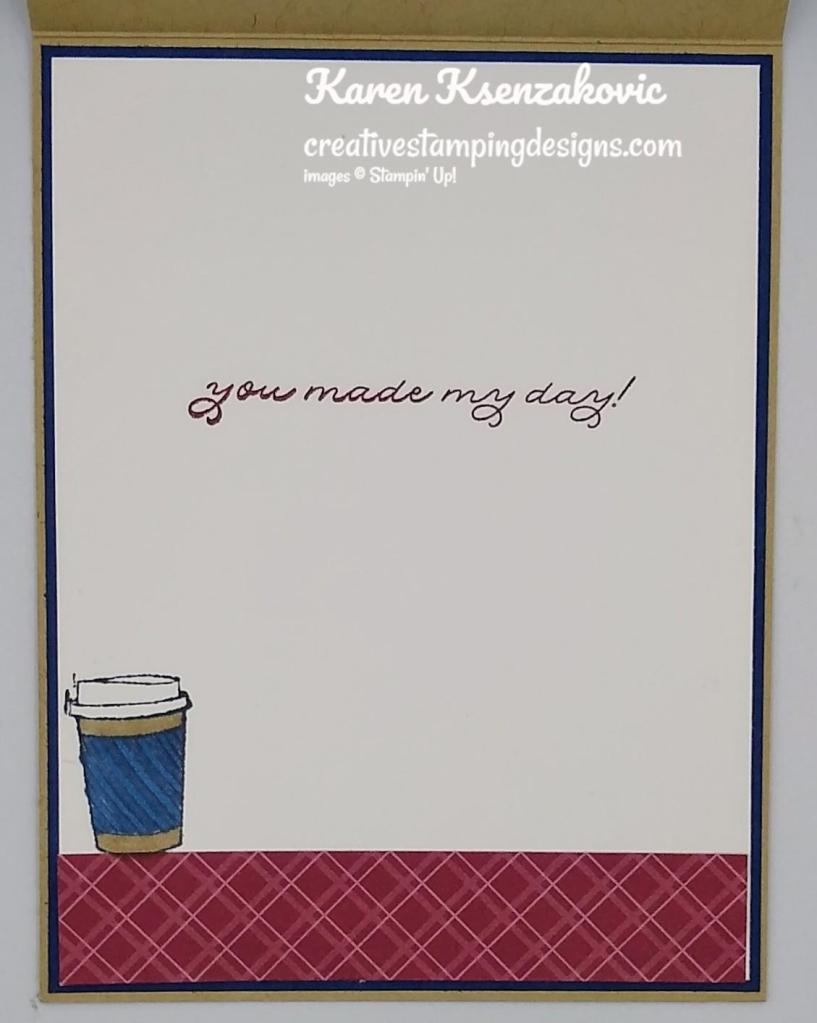
On the inside I stamped the sentiment from the Stampin’ Up! Ornate Thanks Photopolymer Stamp Set in Merry Merlot Ink on a Basic White panel. I adhered a strip of the Neutrals DSP to the bottom of the panel. I stamped the coffee cup on the bottom of the panel and colored it in using my Crumb Cake and Night of Navy Stampin’ Blends Markers. I adhered the Basic White panel to a Night of Navy mat and then to the inside of the Crumb Cake card base.
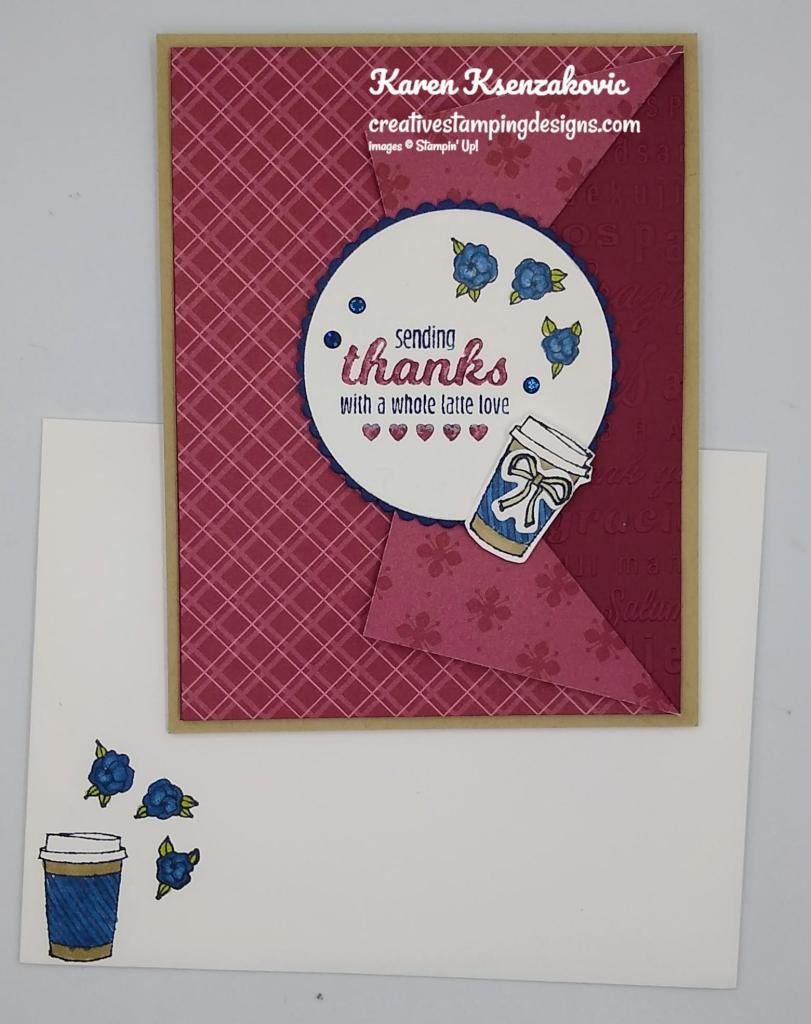
To finish my card I decorated a Basic White Medium Envelope. I stamped the coffee cup and trio of flowers images from the Brew Some Fun stamp set on the envelope front and colored them in the same as I did for the card. I adhered a panel of Neutrals DSP to the envelope flap.
Thank you for stopping by my blog today. I hope you liked my card and will give it a try. I hope you will CASE this card and please feel free to post it in the comments of my Facebook page under the post. I’d love to see your take on the card. The list of measurements are below if you’d like to stamp along while watching the video. You can watch my video on my Facebook page Here.
You can also view the video on my YouTube channel Here. Happy Stamping!!
If you need any stamping supplies, I’d love to be your Demonstrator. Just click HERE to go directly to my online store or drop me an email if you have any questions.
MY CURRENT HOST CODE IS: TGEATYYA
Use this host code when placing an order with me. When you order $50 or greater you will receive a free gift from me! If your order is over $150, please do not use this code, but you’ll still get the free gift. The free gift is your choice of any 1 item valued up to $10.00 from the 2020-2021 Annual Catalog or the July-December 2021 Mini Catalog!For any orders $50 or more I will also send you my monthly class tutorials. Click HERE or go to my Customer Rewards for more details and to see what this months tutorials are.
Please remember to use my current Host Code and make sure that you can see my name on the final checkout page listed as your Demonstrator when you order so that you know that you’re ordering with me and you’ll get my rewards!
Do you regularly restocks your craft collection, and always wants the latest and greatest Stampin’ Up! supplies? Would you enjoy the pile of perks that come with being a demonstrator? Would you like to join our incredible community of crafters?
If you answered “yes” to any of the questions above, the Start with Savings promotion will provide you with an excellent opportunity! Instead of the standard $99 Starter Kit—which is already a steal of a deal—you can snatch up a completely custom Starter Kit for only $75. What an absolutely unbeatable bargain for a box with a value of $125!
When you purchase the Starter Kit for $75 + taxes (if applicable), the kit ships for FREE and YOU get to pick $125 in Stampin’ Up! merchandise OF YOUR CHOICE. YES PLEASE!!You will also get a past Paper Pumpkin Kit, a box of current catalogs and other supplies free in your kit.
If you are planning on placing an order of $75, you might really want to consider joining. This is such an awesome joining deal, you don’t want to pass it up. There is no obligation to sell, have workshops or do Facebook lives. You can join strictly to be a ‘hobby demonstrator’ and enjoy the 20% discount. I would love to have you on my team!!!You also get to enjoy all the demonstrator perks like early ordering, sneak peeks at what’s coming and best of all the events. Why wait, this is such a great sign up promotions, join now and be a part of our awesome Stampin’ Up! family!!!
I’d be happy to talk to you more about this, just drop me an email at creativestampingdesigns@gmail.com and we can talk.
What’s not to “loaf” about a punny joke? It never hurts to have a little laughter, light-heartedness, and humor sprinkled into your schedule. If you’re a fan of fun, get a kick out of clever crafts, and can’t keep it together when you hear a classic knee-slapper, you’ll go bananas over this month’s cute ‘n’ quirky kit!
The Lots of Pun Paper Pumpkin Kit includes enough egg-citing elements to create nine cards and coordinating envelopes. From giddy gingham to splatters and stripes, this playful Paper Pumpkin kit features a fun and fresh look with one-of-a-kind patterns and designs! Egg-cellent for any occasion, reason, or season throughout the year, the kit’s pun-packed stamp set provides completely customizable characters for a very versatile crafting experience. Pair each stamp with its matching die-cut snack, then mix up the faces and accessories for an absolutely adorable accent!
Pick up your friends and family with pun-filled projects. December’s delightful kit is sure to make ‘em smile!
Details
The kit contains enough elements to create 9 cards—3 each of 3 designs—and 9 coordinating envelopes. This all-inclusive kit includes printed card bases, die-cut paper pieces, embellishments, adhesive, and more!
The Lots of Pun Stamp Set is a builder stamp set! This means the included images can be mixed and matched to build a variety of unique characters with different looks and features.
Card size: 4-1/4″ x 5-1/2″ (10.8 x 14 cm)
Envelope size: 4-1/2″ x 5-3/4″ (11.4 x 14.6 cm)
Coordinating colors: Crumb Cake, Daffodil Delight, Early Espresso, Granny Apple Green, Pool Party, Poppy Parade
Includes a Classic Stampin’ Spot
Subscribe to the December 2021 Paper Pumpkin Kit between 11 November and 10 December at paperpumpkin.com!
Note: Supplies may be limited toward the end of the subscription period.
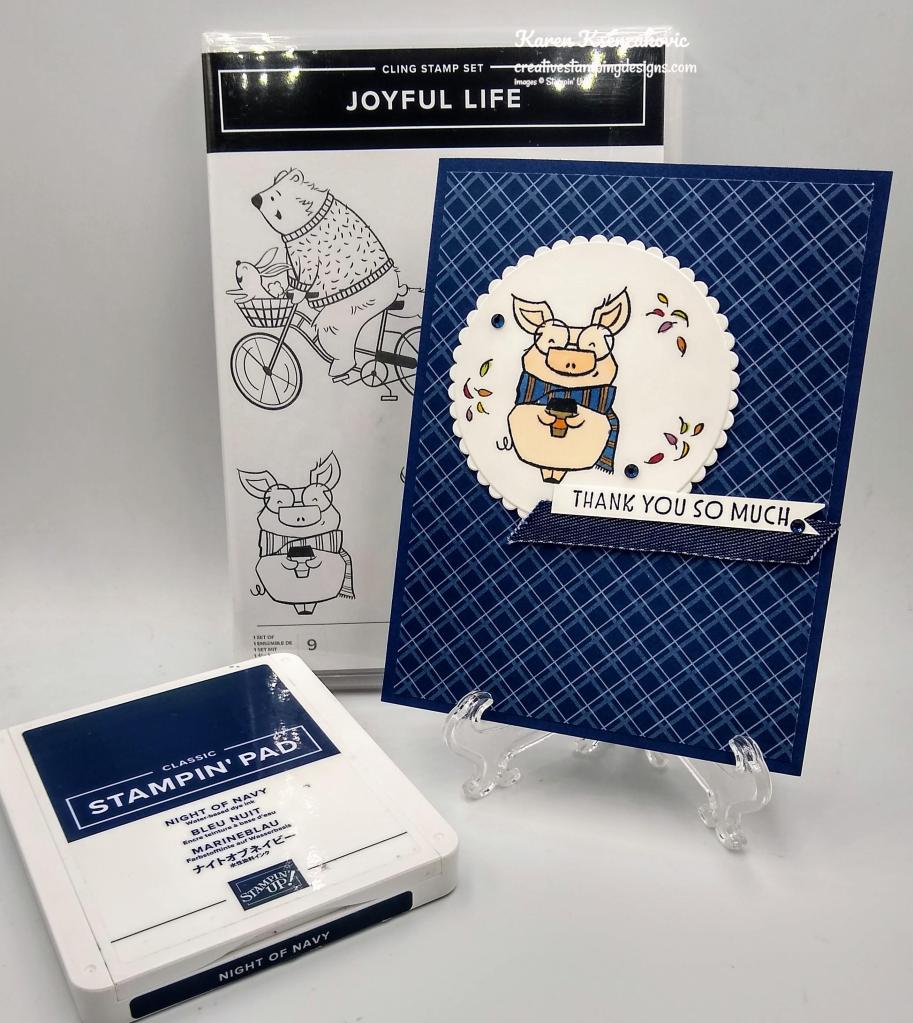
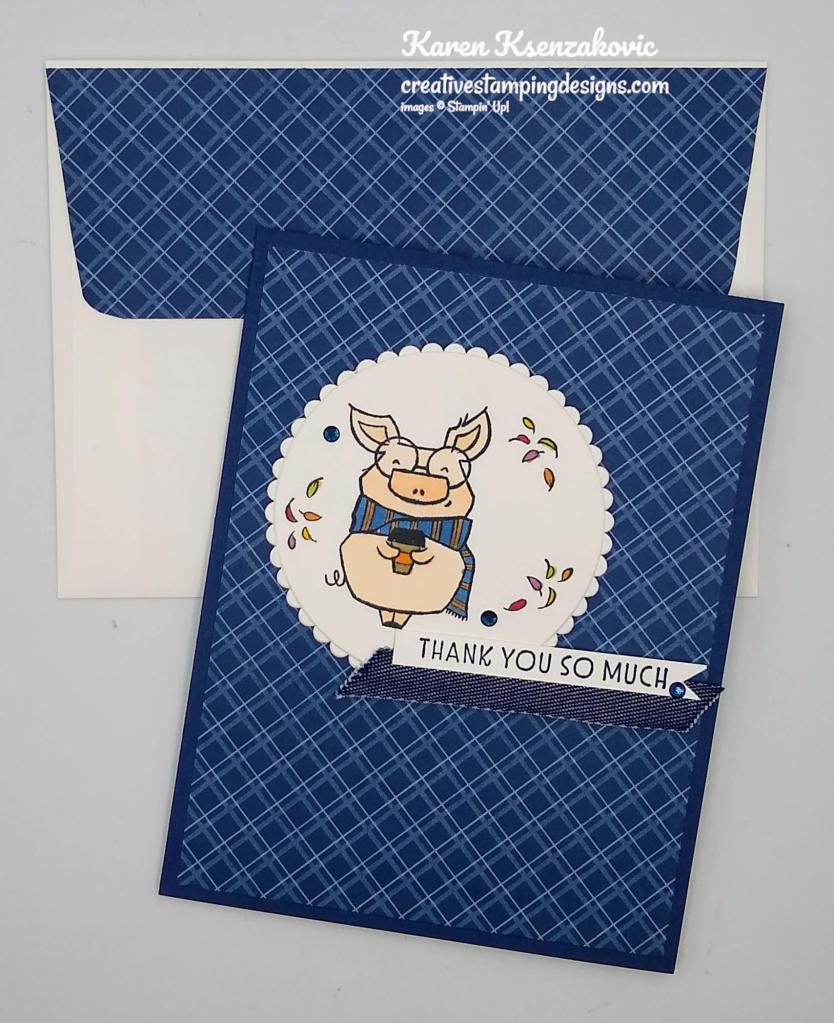
I started by adhering a panel of the Neutrals DSP to a Night of Navy card base using Multipurpose Liquid Glue.
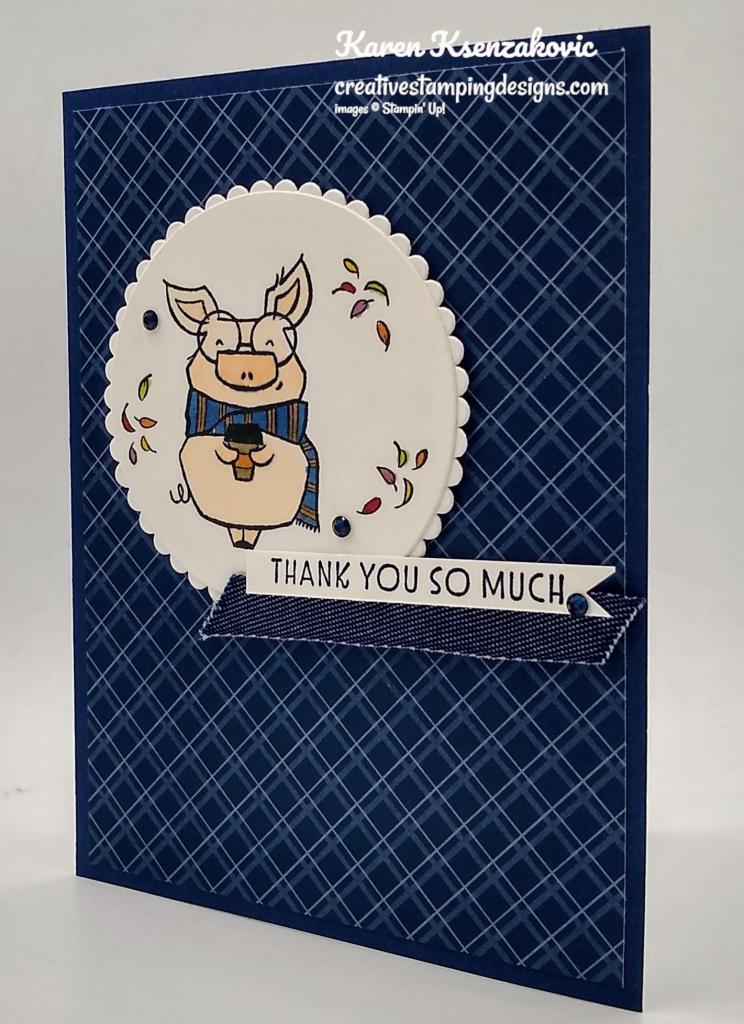
Using my Layering Circles Dies, I cut one of the solid circles and the coordinating scalloped circle from a panel of Basic White cardstock. On the solid circle I stamped the pig and leaf images from the Joyful Life stamp set in Tuxedo Black Ink to the left of the circle. I colored the images in using my Blackberry Bliss, Bronze, Crumb Cake, Daffodil Delight, Night of Navy, Old Olive, Petal Pink, Pumpkin Pie and Real Red Stampin’ Blends Markers. I adhered the solid circle to the scalloped circle using Stampin’ Seal and then to the card front using Stampin’ Dimensionals.
On a strip of Basic White cardstock I stamped the sentiment from the Stampin’ Up! Inspired Thoughts Cling Stamp Set in Night of Navy Ink. I cut the strip into a banner using my Paper Snips. I adhered a piece of the 3/8″ Denim Ribbon to the card front. I adhered the sentiment over the ribbon using Stampin’ Dimensionals. I added a few Night of Navy Holiday Rhinestone Basic Jewels to the card front.
On the inside I stamped the sentiment from the Joyful Life stamp set on a panel of Basic White cardstock. I adhered a strip of the Neutrals DSP to the bottom of the panel using Stampin’ Seal. I adhered the Basic White panel to a Night of Navy mat using Stampin’ Seal and then to the inside of the Night of Navy card base using Multipurpose Liquid Glue.
To finish my card I decorated a Basic White Medium Envelope. I stamped the pig and leaf images from the Joyful Life stamp set on the envelope front in Tuxedo Black Ink and colored it the same as I did for the card. I adhered a panel of the Neutrals DSP to the envelope flap.
Thank you for stopping by my blog today. I hope you like my card and will give it a try. Happy Stamping!!
If you need any stamping supplies, I’d love to be your Demonstrator. Just click HERE to go directly to my online store or drop me an email if you have any questions.
MY CURRENT HOST CODE IS: BM9R7DQX
Use this host code when you order $50 or greater and receive a free gift from me! If your order is over $150, please do not use this code, but you’ll still get the free gift. The free gift is your choice of any 1 item valued up to $10.00 from the 2020-2021 Annual Catalog or the January-June 2021 Mini Catalog!For any orders $50 or more I will also send you my monthly class tutorials. Click HERE or go to my Customer Rewards for more details and to see what this months tutorials are.
Please remember to use my current Host Code and make sure that you can see my name on the final checkout page listed as your Demonstrator when you order so that you know that you’re ordering with me and you’ll get my rewards!
Stampin’ Up! has added more items to their Clearance Rack. All items are **While Supplies Last**. So don’t wait if there is something you’ve been wanting, grab it while you can.
We all love to see piles of presents on Christmas morning. Make that your reality with the Gifts Galore Paper Pumpkin Kit! With classic Christmas sentiments, bright and festive colors, a sweet snowman, a tree with all the trimmings, or a playful pile of presents, you’ll have everything you need to make eye-catching treat packages that are sure to spread Christmas cheer. Each Gifts Galore box contains enough supplies to create nine treat packages—three each of three designs—and nine food-safe bags that are adorably styled for easy Christmas gifting. There’s plenty of joy to share with Gifts Galore!
Kit contains enough supplies to create nine treat packages—three each of three designs—and nine food-safe bags.
This all-inclusive kit includes printed die cuts, die-cut boxes, cellophane treat bags, adhesive, and more!
Includes an exclusive stamp set and a Classic Stampin’ Spot
Coordinating colors: Evening Evergreen, Flirty Flamingo, Old Olive, Pool Party, Poppy Parade
Subscribe to the November 2021 Paper Pumpkin Kit between 11 October and 10 November at paperpumpkin.com!
Note: Supplies may be limited toward the end of the subscription period.
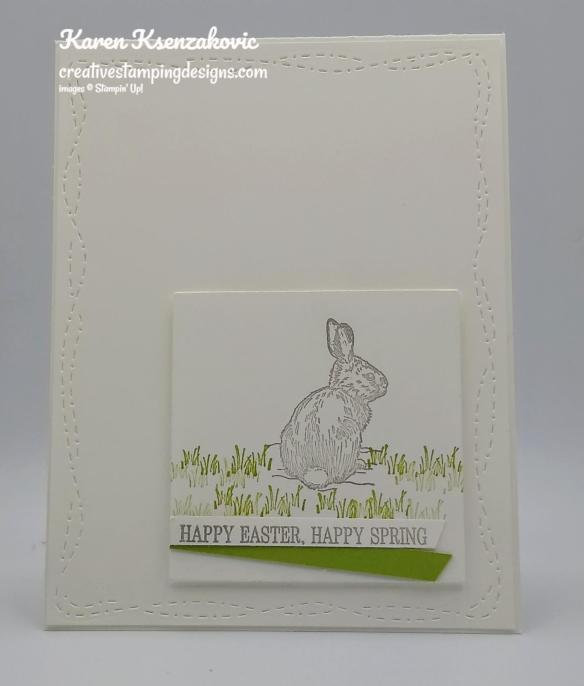
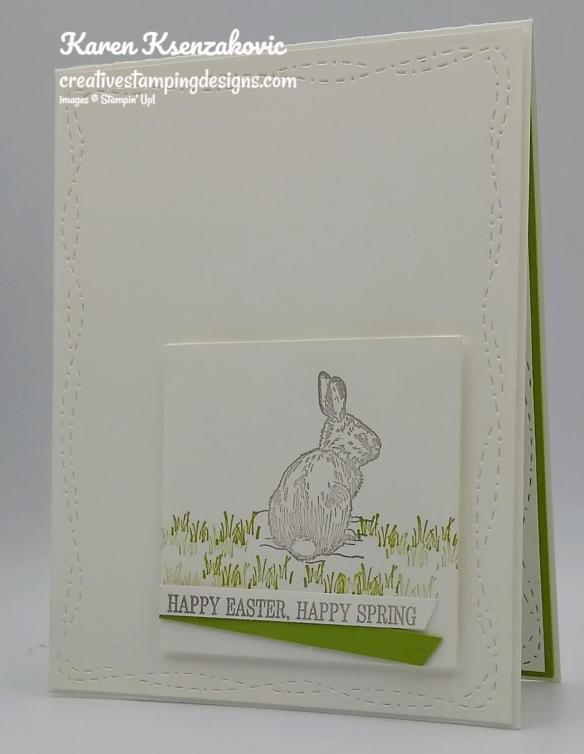
Good Monday morning my stamping friends. How was everyone’s weekend? It was beautiful here. Unfortunately I was inside both days working. Luckily it’s still light out when I get out of work so I was able to enjoy some of the beautiful sunshine.
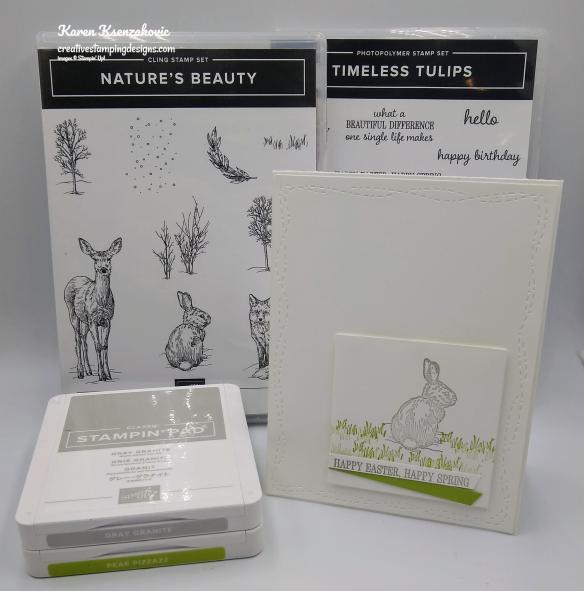
I have a Clean and Simple card for you today using the Stampin’ Up! Nature’s Beauty Cling Stamp Set and the Stampin’ Up! Timeless Tulips Photopolymer Stamp Set. Here’s my card for today.
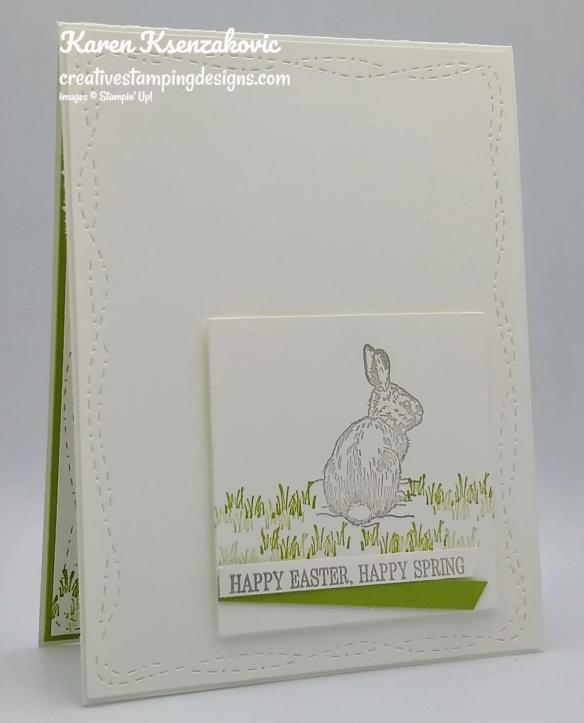
I started by embossing a Basic White card front using the Stitched With Whimsy Dies. I adhered the card front to a Basic White card base using Stampin’ Seal.
On a small panel of Basic White cardstock I stamped the bunny image from the Nature’s Beauty stamp set in Gray Granite Ink. I stamped the grass image from the Nature’s Beauty stamp set in Pear Pizzazz Ink, some in full strength and some stamped off. I adhered the artwork to the card front using Stampin’ Dimensionals.
On a thin strip of Basic White cardstock I stamped the sentiment from the Timeless Tulips stamp set in Gray Granite Ink. I adhered the sentiment to a strip of Pear Pizzazz cardstock using a Glue Dot and adhered it to the artwork using Glue Dots.
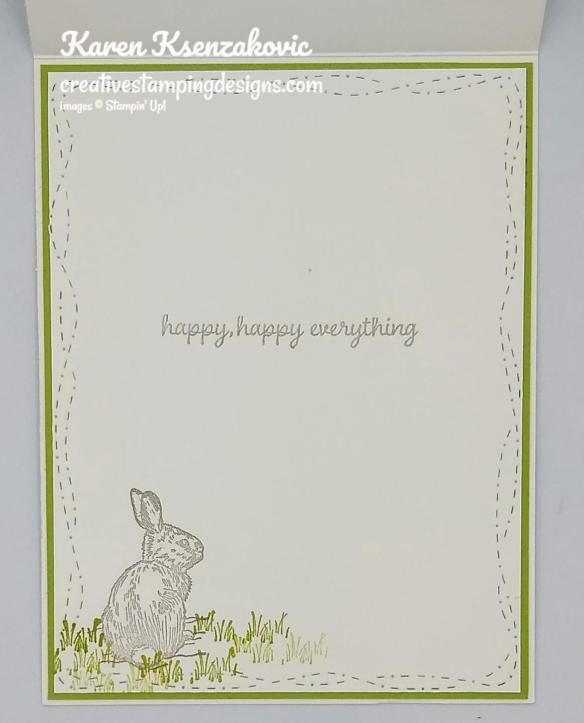
On the inside I stamped the sentiment from the Timeless Tulips in Gray Granite Ink in the center of a Basic White panel. I stamped the bunny image from the Nature’s Beauty stamp set in Gray Granite Ink on the bottom of the panel. I stamped the grass image from the Nature’s Beauty stamp set in Pear Pizzazz Ink, some full strength and some stamped off. I used the Stitched With Whimsy Dies and embossed the panel. I adhered the Basic White panel to a Pear Pizzazz mat using Stampin’ Seal and then to the inside of the Basic White card base using Stampin’ Seal.
To finish my card I decorated a Basic White Medium Envelope. I stamped the bunny and grass images from the Nature’s Garden stamp set on the envelope front. I adhered a panel of the Neutrals 6 X 6 Designer Series Paper to the envelope flap.
Thank you for stopping by my blog today. I hope you liked my card and will give it a try. Happy Stamping!!
If you need any stamping supplies, I’d love to be your Demonstrator. Just click HERE to go directly to my online store or drop me an email if you have any questions.
MY CURRENT HOST CODE IS: 2QRN664Q
Use this host code when you order $50 or greater and receive a free gift from me! If your order is over $150, please do not use this code, but you’ll still get the free gift. The free gift is your choice of any 1 item valued up to $10.00 from the 2020-2021 Annual Catalog or the January-June 2021 Mini Catalog!For any orders $50 or more I will also send you my monthly class tutorials. Click HERE or go to my Customer Rewards for more details and to see what this months tutorials are.
Please remember to use my current Host Code and make sure that you can see my name on the final checkout page listed as your Demonstrator when you order so that you know that you’re ordering with me and you’ll get my rewards!
The So Cool Paper Pumpkin Kit is a little taste of summer fun, with enough supplies to make 12 colorful, shaped cards with coordinating envelopes. Six card bases are popsicle shaped, the other six are semicircles: three watermelons and three rainbows. All of the cards are splashed with cheerful, vivid watercolor images. The kit also includes two full-size, matching sticker sheets, die-cut accents, fun embellishments, and more.
This kit was designed with kids in mind, as a way to spark their creative imagination and introduce them to papercrafting.
The So Cool Kit makes a great gift! It’s an even better way to enjoy some quality time with those special little ones in life.
Even though the So Cool Kit was designed with kids in mind, these fun-shaped cards, featuring vivid watercolors, are versatile enough to gift to kids of all ages—the young in years and the young at heart. They’re a great way to send some “sunshine in a card!” Who wouldn’t love that?
The kit’s exclusive So Cool Stamp Set is versatile, offering sentiments that can be used for multiple occasions such as birthdays, congrats, cheer, and more! It’s a great addition to any crafter’s collection.
Details
Kit includes enough supplies to make 12 fresh, fun-shaped cards—6 popsicles and 6 blank semicircles to color—and coordinating envelopes. Kit includes card bases, 2 full sticker sheets, decorative die-cut pieces, embellishments, and more.
Envelope size: 4-1/2″ x 5-3/4″ (11.4 x 14.6 cm)
Coordinating colors: Blackberry Bliss, Bermuda Bay, Bumblebee, Cinnamon Cider, Old Olive, Terracotta Tile
Coordinates with the Ice Cream Corner Suite from our January–June 2021 Mini Catalog.
Subscribe to the April Paper Pumpkin Kit between 11 March and 10 April at paperpumpkin.com!
Note: Supplies may be limited toward the end of the subscription period.
THERE’S MORE TO LOVE IN THE COORDINATING ICE CREAM CORNER SUITE!
154567 ICE CREAM CORNER DESIGNER SERIES PAPER
Keep the creative fun going by pairing the So Cool Kit with the Ice Cream Corner Designer Series Paper (154567) featured in our 2021 January–June Mini Catalog. It’s a great way to use the kit’s stamps, ink, stickers, and more to further indulge your craving for summer fun. Plus, the paper is part of the matching Ice Cream Corner Suite, so there’s virtually no end to the possibilities!
Coordinating colors: Bermuda Bay, Blackberry Bliss, Cinnamon Cider, Old Olive, Petal Pink, Pool Party, Purple Posy, So Saffron, Soft Sea Foam, Terracotta Tile
Click this link to view the suite and start shopping.
Basic White Cardstock 4 1/4″ X 11″ (card base scored and folded at 5 1/2″), 4 1/8″ X 5 3/8″ (card front), 2 5/8″ X 2 5/8″ (artwork), 4″ X 5 1/4″ (inner liner)


![Sunshine & Tulips Bundle (English) [ 166866 ]](https://assets1.tamsnetwork.com/images/EC042017NF/166866s.jpg "Sunshine & Tulips Bundle (English) [ 166866 ]")
![Sunshine & Tulips Photopolymer Stamp Set (English) [ 166859 ]](https://assets1.tamsnetwork.com/images/EC042017NF/166859s.jpg "Sunshine & Tulips Photopolymer Stamp Set (English) [ 166859 ]")
![Sunshine & Tulips Dies [ 166865 ]](https://assets1.tamsnetwork.com/images/EC042017NF/166865s.jpg "Sunshine & Tulips Dies [ 166865 ]")
![Balmy Blue 8-1/2" X 11" Cardstock [ 146982 ]](https://assets1.tamsnetwork.com/images/EC042017NF/146982s.jpg "Balmy Blue 8-1/2\" X 11\" Cardstock [ 146982 ]")
![Basic White 8 1/2" X 11" Cardstock [ 166780 ]](https://assets1.tamsnetwork.com/images/EC042017NF/166780s.jpg "Basic White 8 1/2\" X 11\" Cardstock [ 166780 ]")
![Crumb Cake 8-1/2" X 11" Cardstock [ 120953 ]](https://assets1.tamsnetwork.com/images/EC042017NF/120953s.jpg "Crumb Cake 8-1/2\" X 11\" Cardstock [ 120953 ]")
![Lemon Lolly 8 1/2" X 11" Cardstock [ 161720 ]](https://assets1.tamsnetwork.com/images/EC042017NF/161720s.jpg "Lemon Lolly 8 1/2\" X 11\" Cardstock [ 161720 ]")
![Peach Pie 8 1/2" X 11" Cardstock [ 163799 ]](https://assets1.tamsnetwork.com/images/EC042017NF/163799s.jpg "Peach Pie 8 1/2\" X 11\" Cardstock [ 163799 ]")
![Pretty In Pink 8 1/2" X 11" Cardstock [ 163793 ]](https://assets1.tamsnetwork.com/images/EC042017NF/163793s.jpg "Pretty In Pink 8 1/2\" X 11\" Cardstock [ 163793 ]")
![Shy Shamrock 8 1/2" X 11" Cardstock [ 163795 ]](https://assets1.tamsnetwork.com/images/EC042017NF/163795s.jpg "Shy Shamrock 8 1/2\" X 11\" Cardstock [ 163795 ]")
![Neutrals 6" X 6" (15.2 X 15.2 Cm) Designer Series Paper [ 165303 ]](https://assets1.tamsnetwork.com/images/EC042017NF/165303s.jpg "Neutrals 6\" X 6\" (15.2 X 15.2 Cm) Designer Series Paper [ 165303 ]")
![Subtles 6" X 6" (15.2 X 15.2 Cm) Designer Series Paper [ 165306 ]](https://assets1.tamsnetwork.com/images/EC042017NF/165306s.jpg "Subtles 6\" X 6\" (15.2 X 15.2 Cm) Designer Series Paper [ 165306 ]")
![2024–2026 In Color™ 6" X 6" (15.2 X 15.2 Cm) Designer Series Paper [ 165299 ]](https://assets1.tamsnetwork.com/images/EC042017NF/165299s.jpg "2024–2026 In Color™ 6\" X 6\" (15.2 X 15.2 Cm) Designer Series Paper [ 165299 ]")
![Balmy Blue Classic Stampin' Pad [ 147105 ]](https://assets1.tamsnetwork.com/images/EC042017NF/147105s.jpg "Balmy Blue Classic Stampin' Pad [ 147105 ]")
![Peach Pie Classic Stampin Pad [ 163810 ]](https://assets1.tamsnetwork.com/images/EC042017NF/163810s.jpg "Peach Pie Classic Stampin Pad [ 163810 ]")
![Pretty In Pink Classic Stampin Pad [ 163807 ]](https://assets1.tamsnetwork.com/images/EC042017NF/163807s.jpg "Pretty In Pink Classic Stampin Pad [ 163807 ]")
![Shy Shamrock Classic Stampin Pad [ 163808 ]](https://assets1.tamsnetwork.com/images/EC042017NF/163808s.jpg "Shy Shamrock Classic Stampin Pad [ 163808 ]")
![Shy Shamrock Stampin’ Blends Combo Pack [ 163825 ]](https://assets1.tamsnetwork.com/images/EC042017NF/163825s.jpg "Shy Shamrock Stampin’ Blends Combo Pack [ 163825 ]")
![Baker's Twine Essentials Pack [ 155475 ]](https://assets1.tamsnetwork.com/images/EC042017NF/155475s.jpg "Baker's Twine Essentials Pack [ 155475 ]")
![Tiny Bee Trinkets [ 164714 ]](https://assets1.tamsnetwork.com/images/EC042017NF/164714s.jpg "Tiny Bee Trinkets [ 164714 ]")
![Basic White Medium Envelopes [ 159236 ]](https://assets1.tamsnetwork.com/images/EC042017NF/159236s.jpg "Basic White Medium Envelopes [ 159236 ]")


![Tear & Tape Adhesive [ 154031 ]](https://assets1.tamsnetwork.com/images/EC042017NF/154031s.jpg "Tear & Tape Adhesive [ 154031 ]")

![Take Your Pick [ 144107 ]](https://assets1.tamsnetwork.com/images/EC042017NF/144107s.jpg "Take Your Pick [ 144107 ]")


 Designer Series Paper")


")
")

")


 Designer Series Paper")


")
")


 Specialty Paper")


")


")
")


")

 Designer Series Paper")


 Denim Ribbon")


")

 Designer Series Paper")


