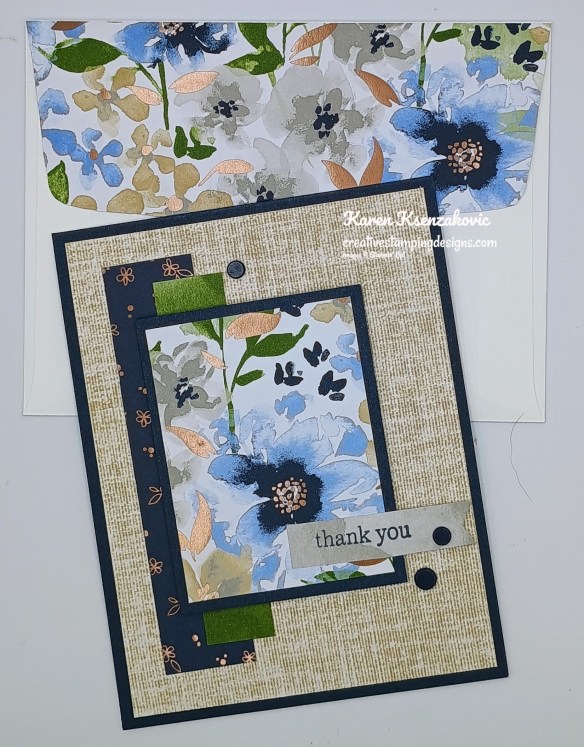
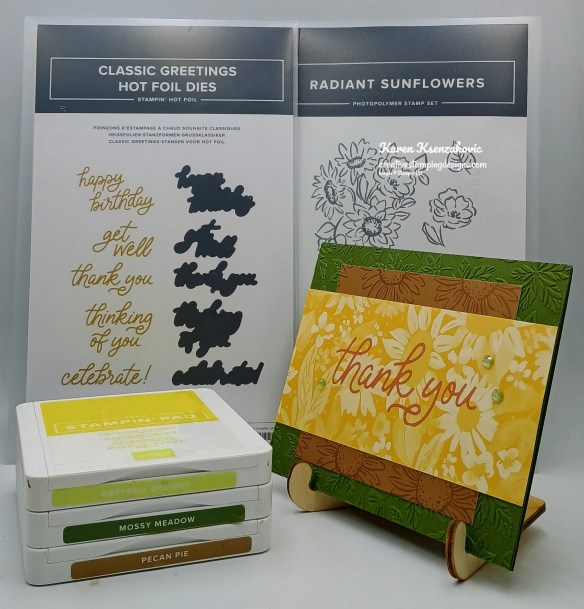
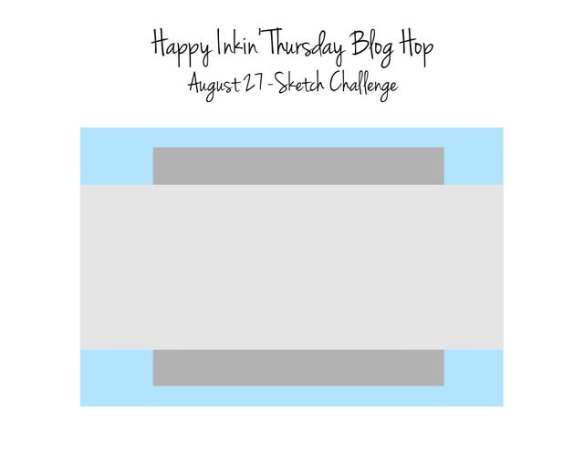
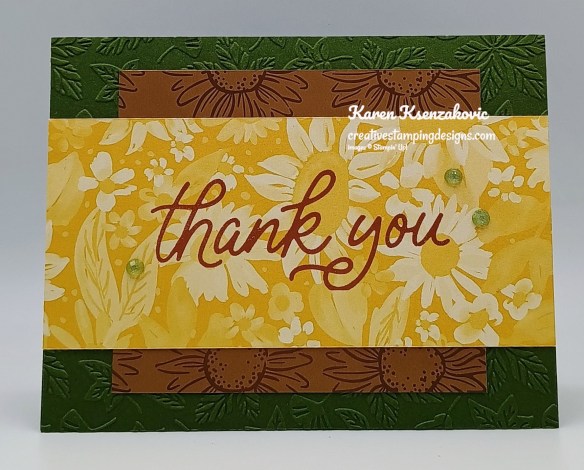
Stampin’ Up! Everlasting Thanks

Good Sunday morning stamping friends. I hope you are having a nice weekend. I’ve got the day off, so I’m just trying to figure out what to do first (I’ve got a long list of to do’s)

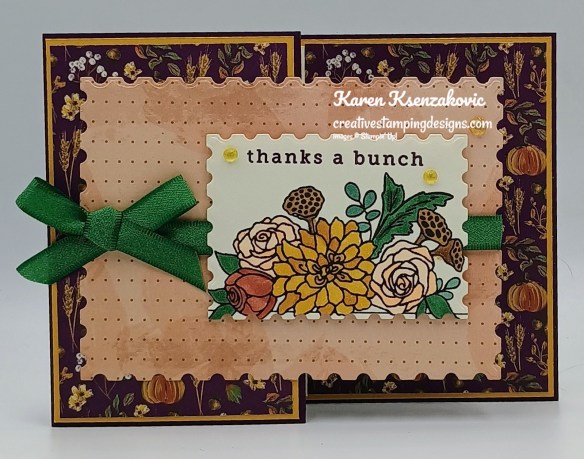
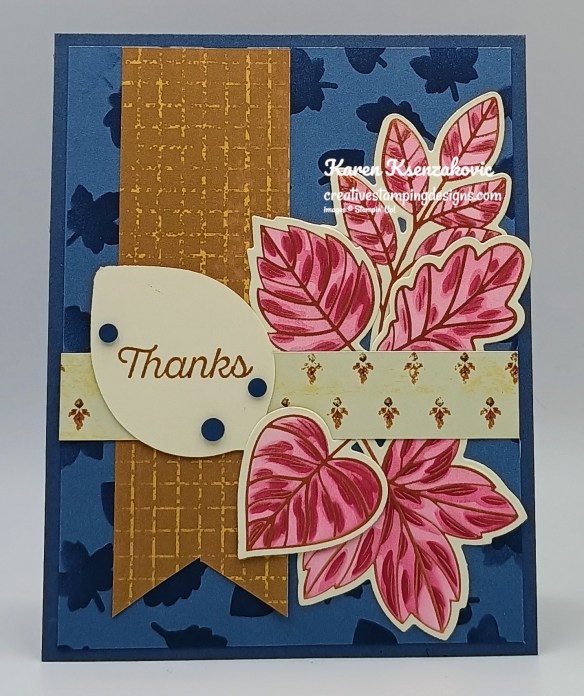
I played with some new products today that will be available starting September 1. Of course there’s always the option of getting them early by signing up to be a demonstrator, which I would love for you to join my team. Contact me if you are interested in getting your hands on these products early and we can talk about signing you up. If you’d like to see a quick video on how I made this card, Click Here to go to my Instagram Reels. Here’s my card for today.
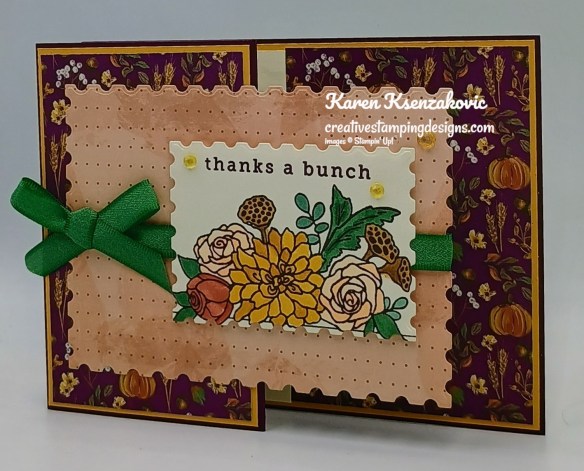
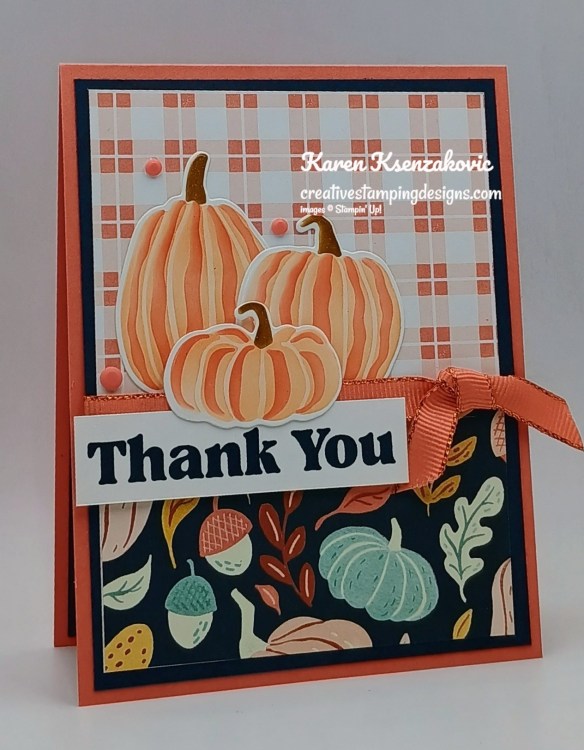
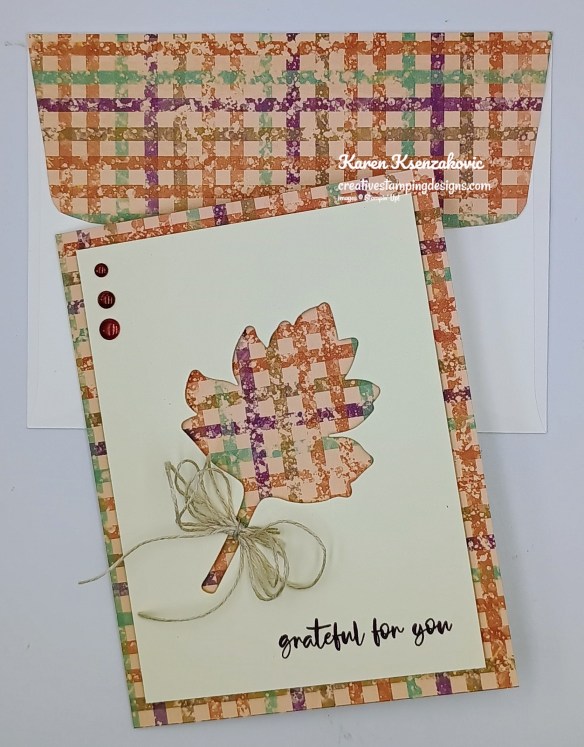
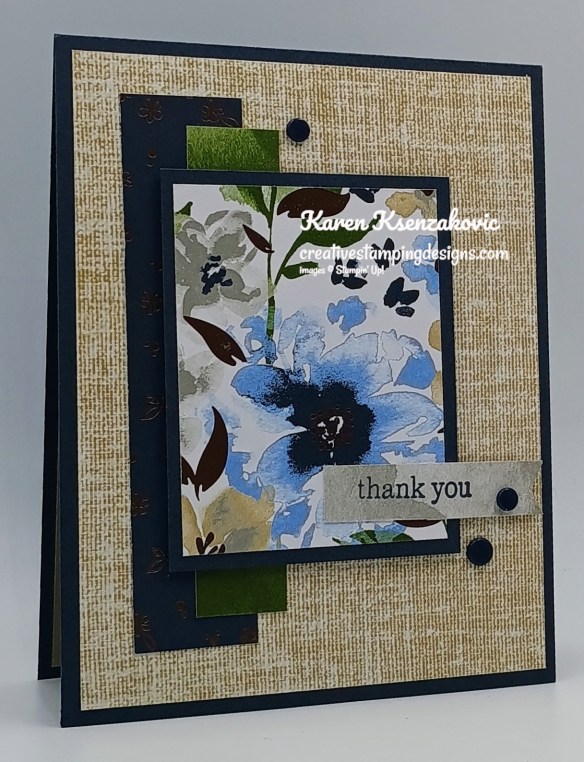
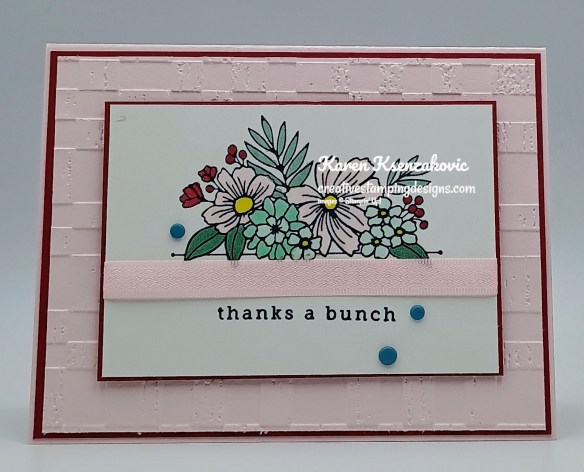
Stampin' Up! Everlasting Thanks CAS 1 creativestampingdesigns.com

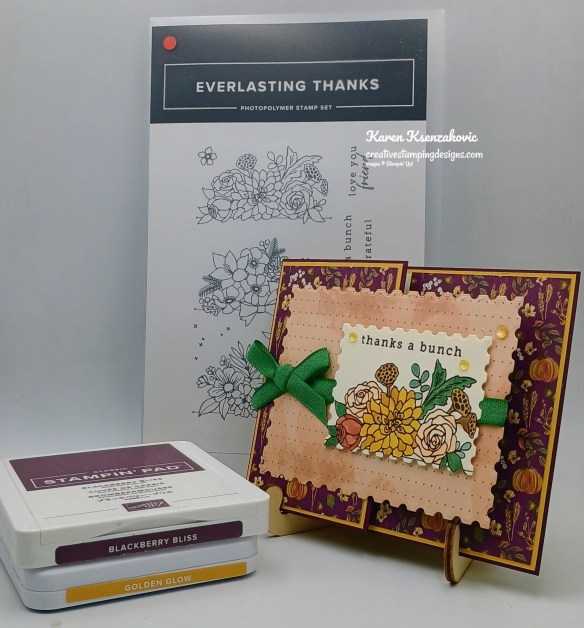
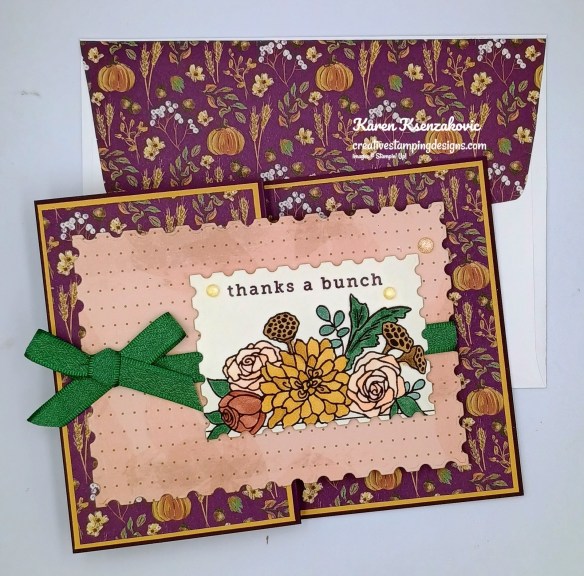
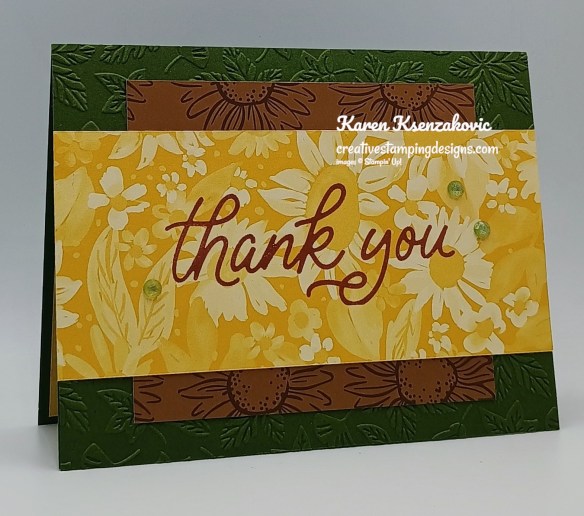
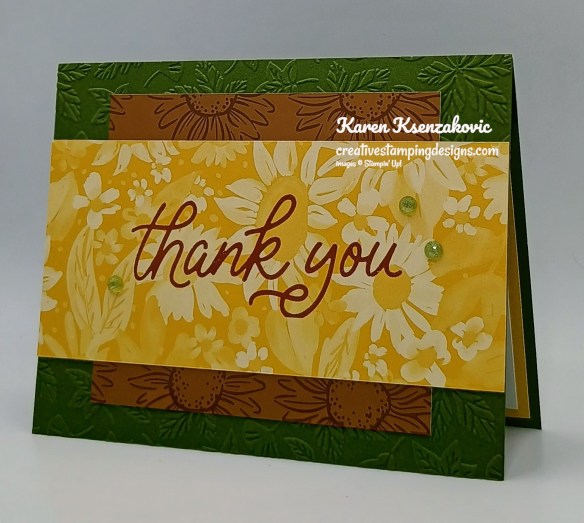
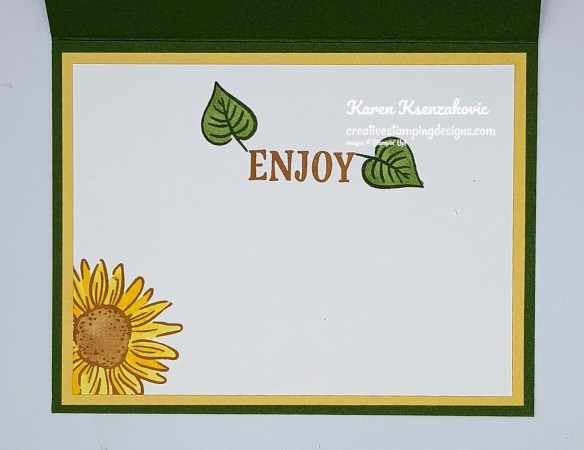
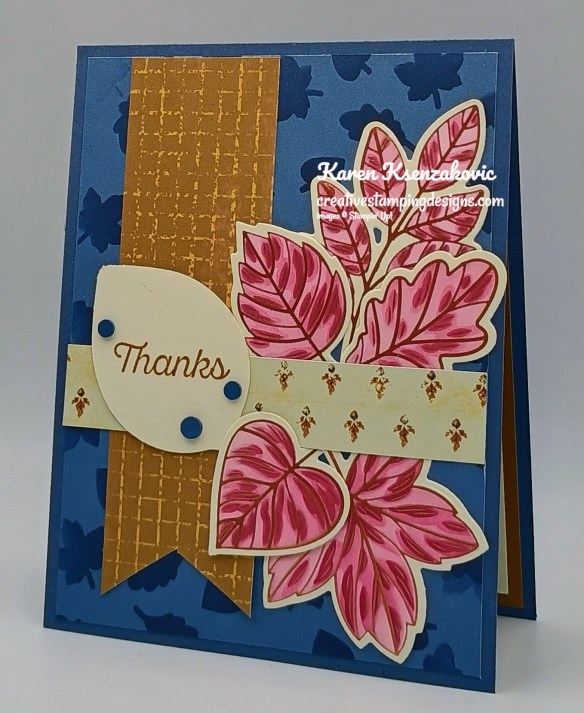
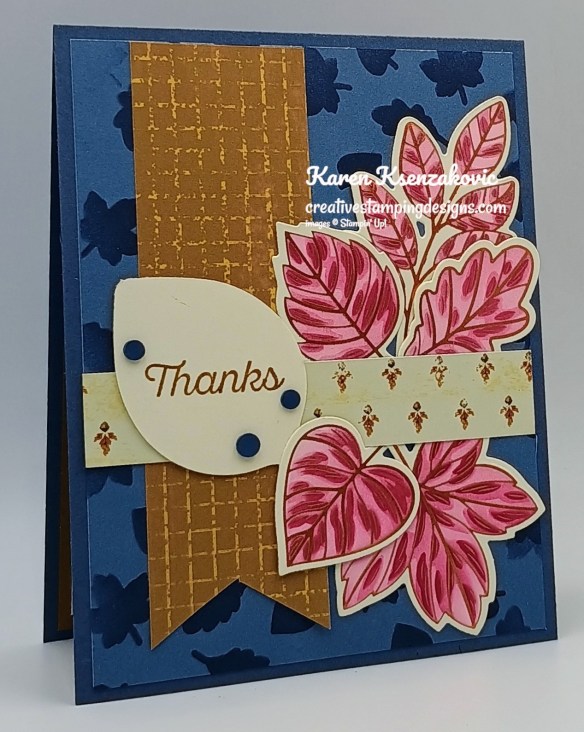
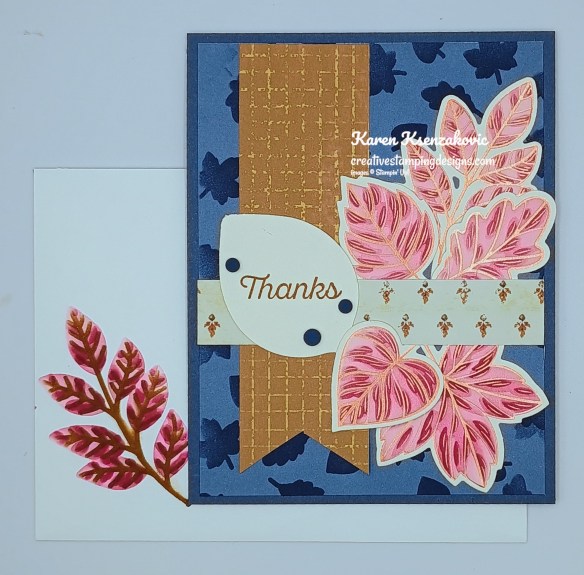
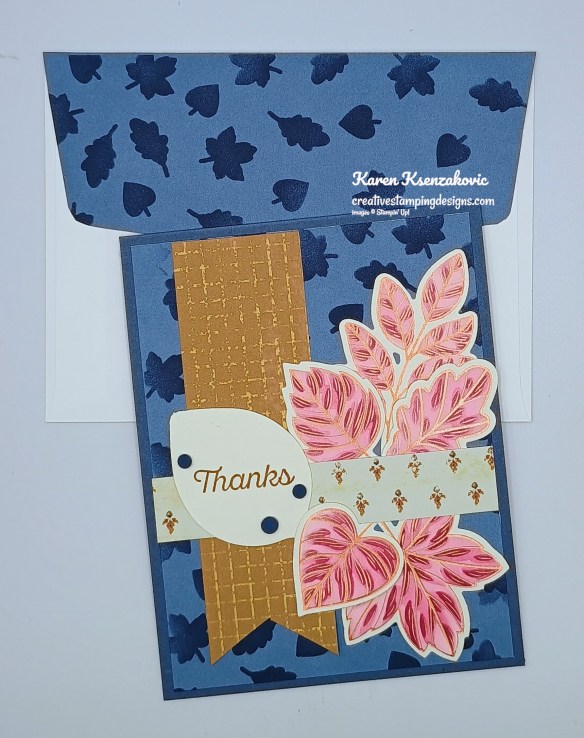
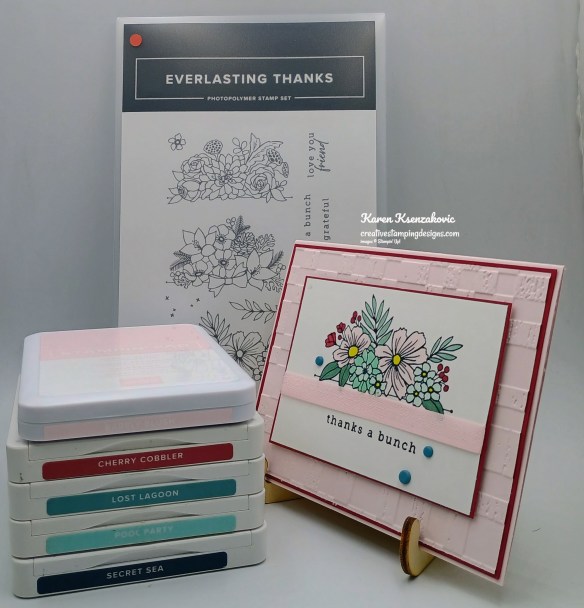
I used the new Stampin’ Up! Everlasting Thanks Stamp Set and Rustic Check 3D Embossing Folder for my card today. These products will be available September 1.

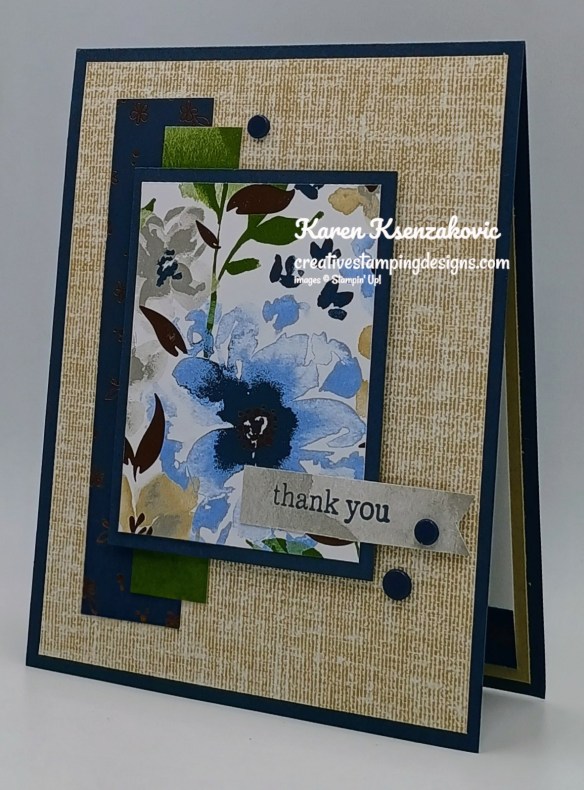
Stampin' Up! Everlasting Thanks CAS 2 creativestampingdesigns.com

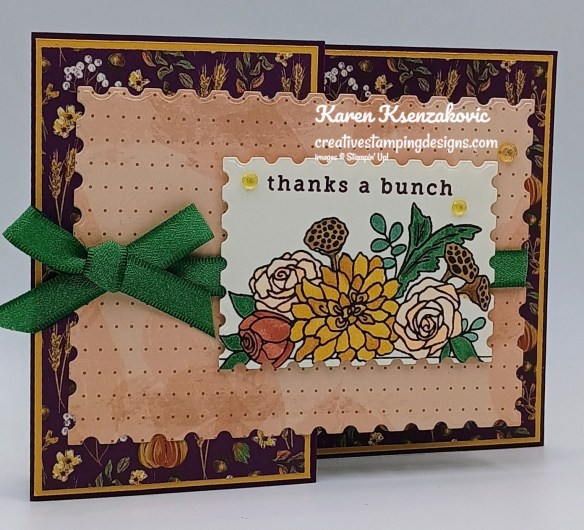
Emboss the panel of Barely Blush using the Rustic Check EF. Adhere the embossed panel to a Cherry Cobbler mat. Adhere the layered panel to a Barely Blush card base.

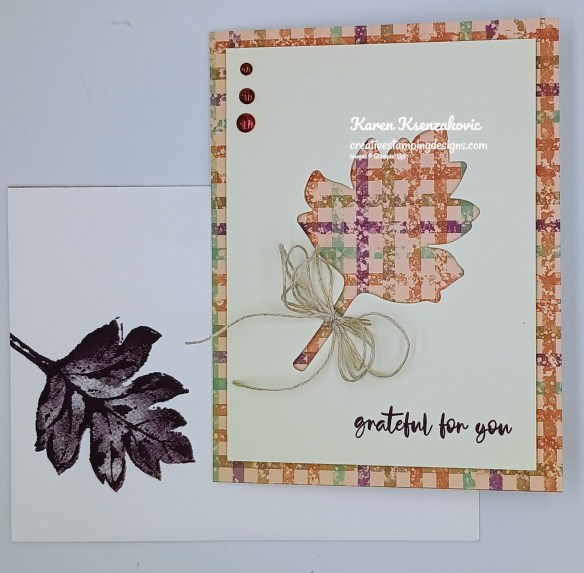
Stampin' Up! Everlasting Thanks CAS 3 creativestampingdesigns.com

Stamp the floral image from the Everlasting Thanks stamp set in Secret Sea Ink on a panel of Basic White. Color the image with Barely Blush, Cherry Cobbler, Lemon Lolly, Lost Lagoon and Pool Party Stampin’ Blends Markers.

Stampin' Up! Everlasting Thanks CAS 4 creativestampingdesigns.com

Wrap a piece of Barely Blush 3/8″ Bordered Ribbon around the panel and adhere it in the back. Stamp the sentiment from the Everlasting Thanks stamp set in Secret Sea Ink below the ribbon. Adhere the Basic White panel to a Cherry Cobbler mat. Adhere the layered panel to the card front with Stampin’ Dimensionals. Add a few Earthy Matte Dots to the card front.

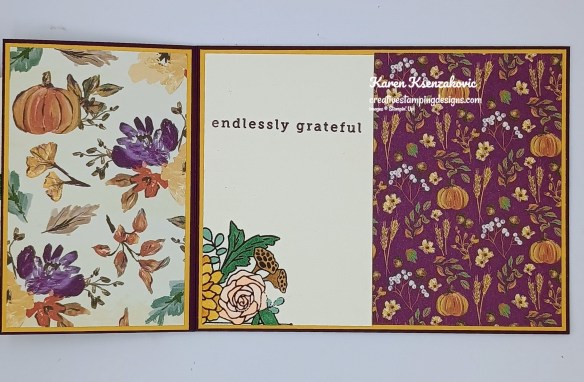
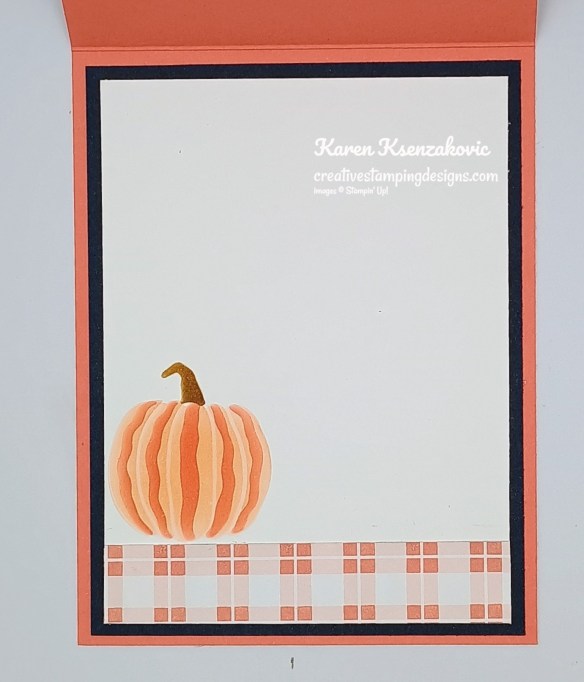
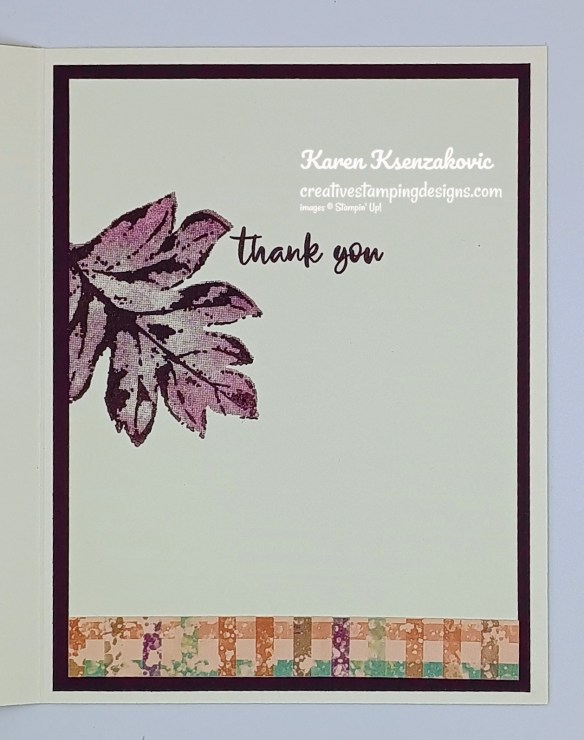
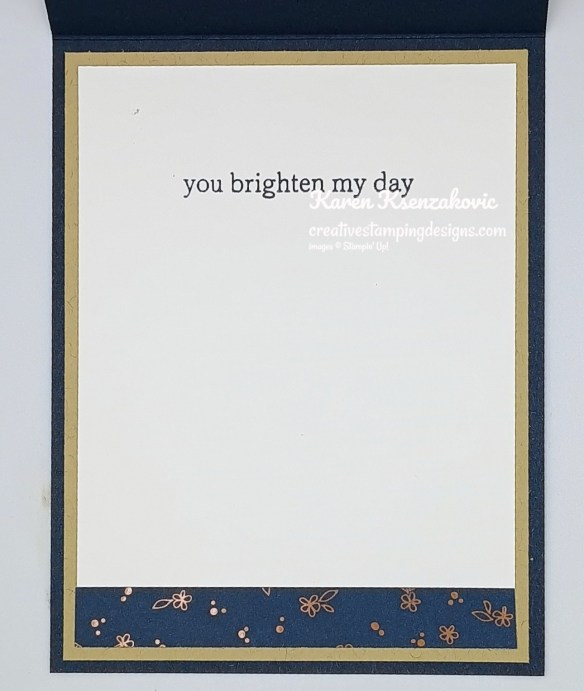
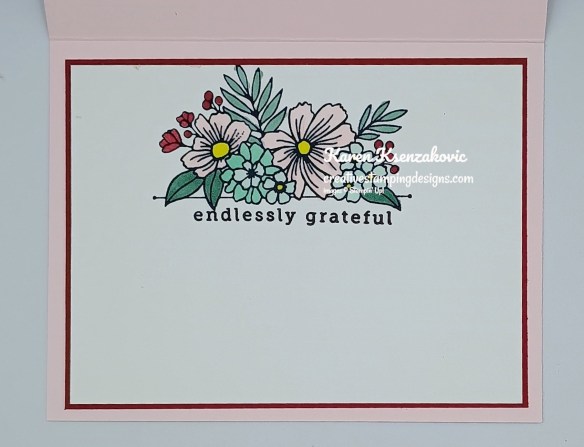
Stampin' Up! Everlasting Thanks CAS 5 creativestampingdesigns.com

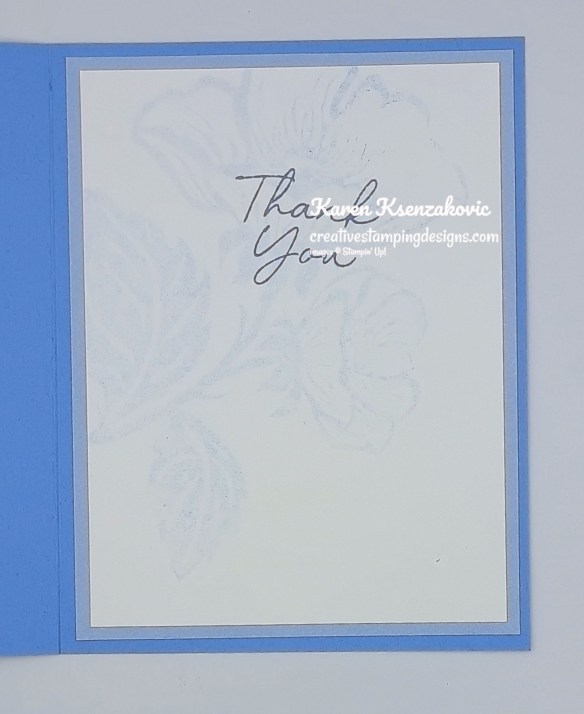
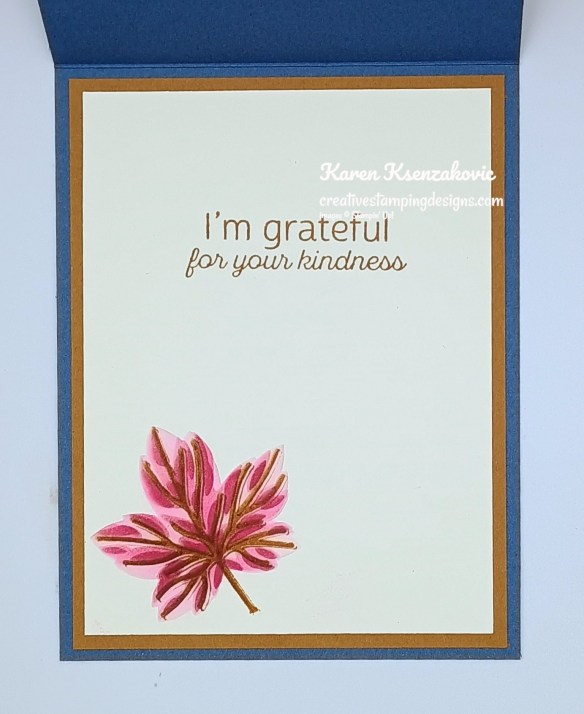
Stamp the sentiment and floral image from the Everlasting Thanks stamp set in Secret Sea Ink on a panel of Basic White. Color the image using Barely Blush, Cherry Cobbler, Lemon Lolly, Lost Lagoon and Pool Party Stampin’ Blends Markers. Adhere the Basic White panel to a Cherry Cobbler mat then to the inside of the Barely Blush card base.

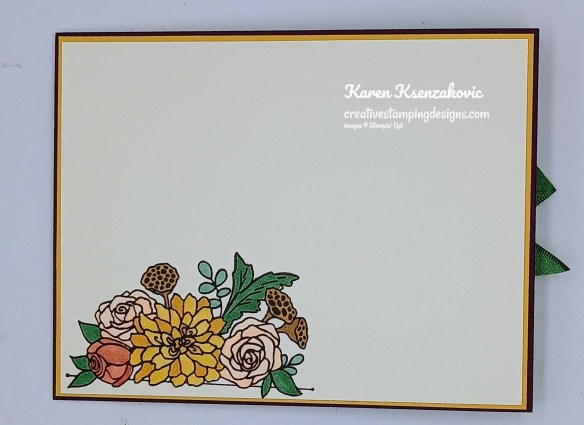
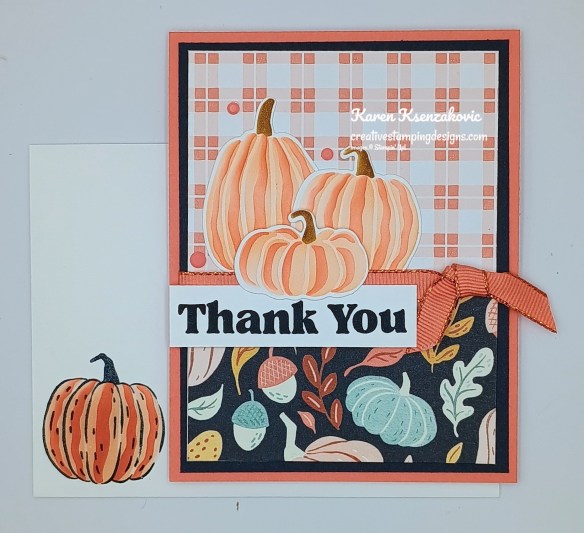
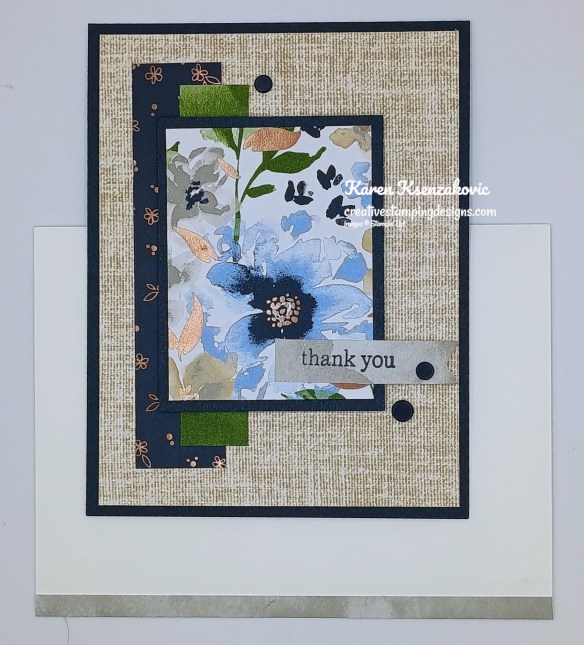
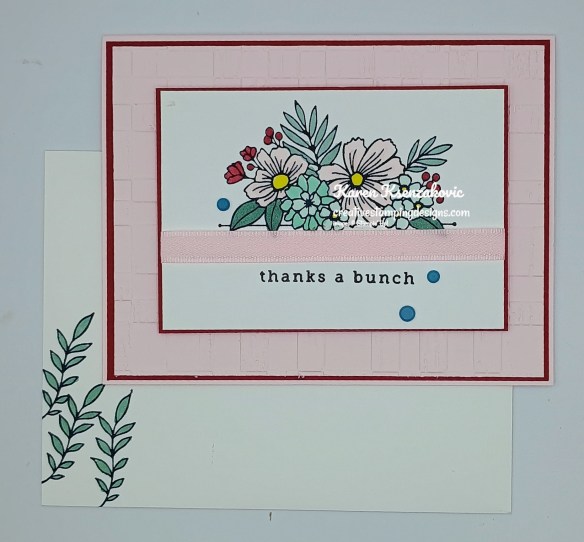
Stampin' Up! Everlasting Thanks CAS 6 creativestampingdesigns.com

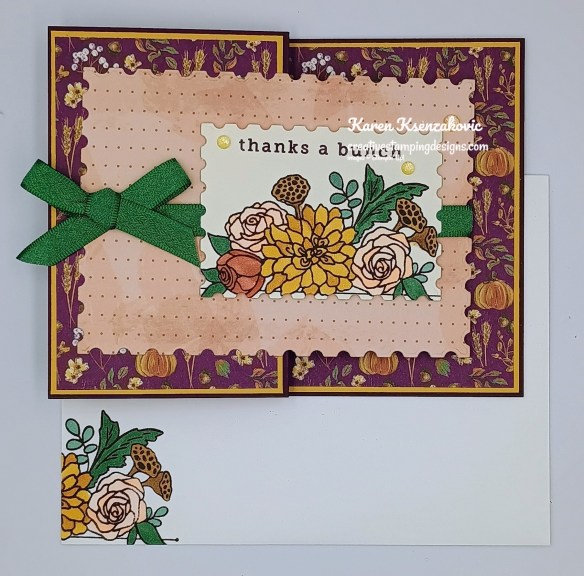
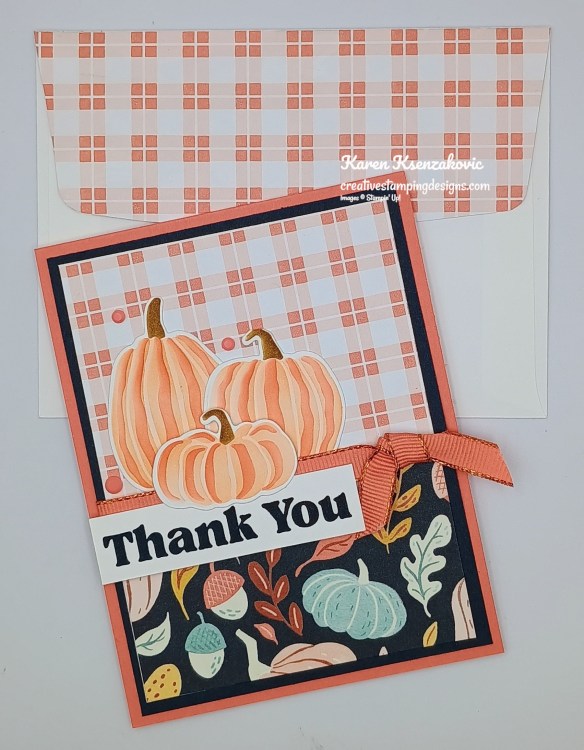
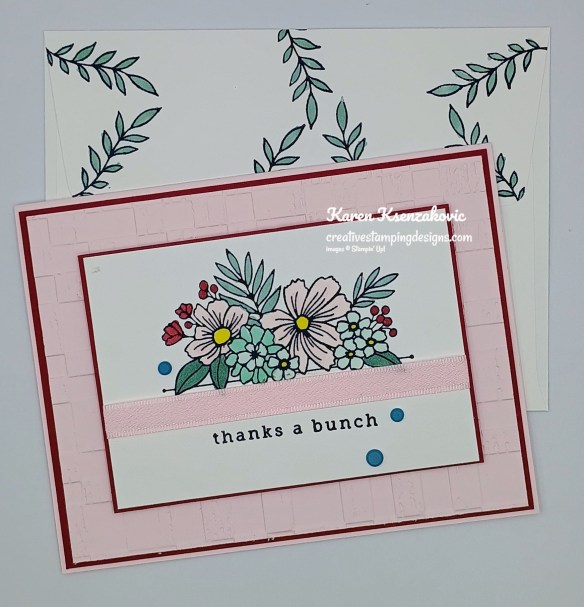
Decorate a Basic White Medium Envelope to finish the card. Stamp the leaf image from the Everlasting Thanks stamp set in Secret Sea Ink on the envelope front and flap. Color the images using Lost Lagoon Stampin’ Blends Markers.

Stampin' Up! Everlasting Thanks CAS 7 creativestampingdesigns.com

Thank you for stopping by my blog today. I hope you like the card and will give it a try. Happy Stamping!!

*********************************************************************************************************

If you need any stamping supplies, I’d love to be your Demonstrator. Just click HERE to go directly to my online store or drop me an email if you have any questions. 

*********************************************************************************************************

September-December Catalog & Online Exclusive Product Shares Open for Ordering!!

It’s time again. The new September – December 2026 Catalog will be arriving in your mailbox real soon and you’re going to want all that beautiful Designer Series Paper, Ribbon and/or Embellishments. My September – December 2026 Catalog and September Online Exclusive Product Shares are open for ordering. You can order just the DSP share, just the Two-Tone cardstock share, just the Ribbon share or just the Embellishment share, or you can have it all!! 

Order Here

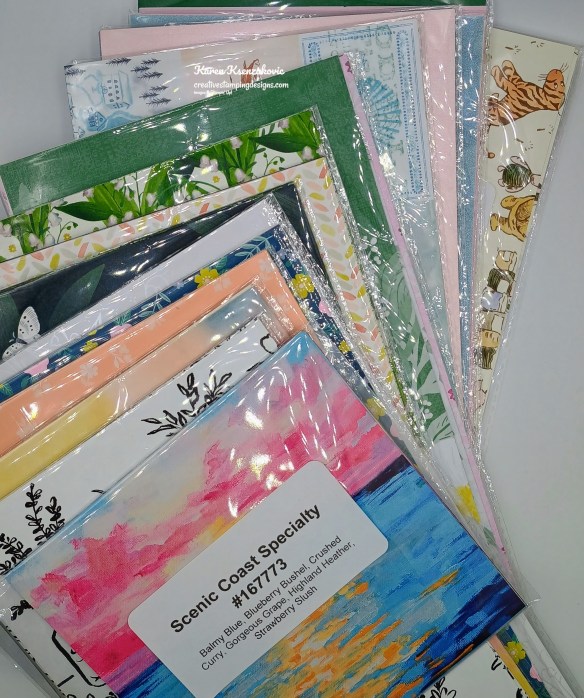
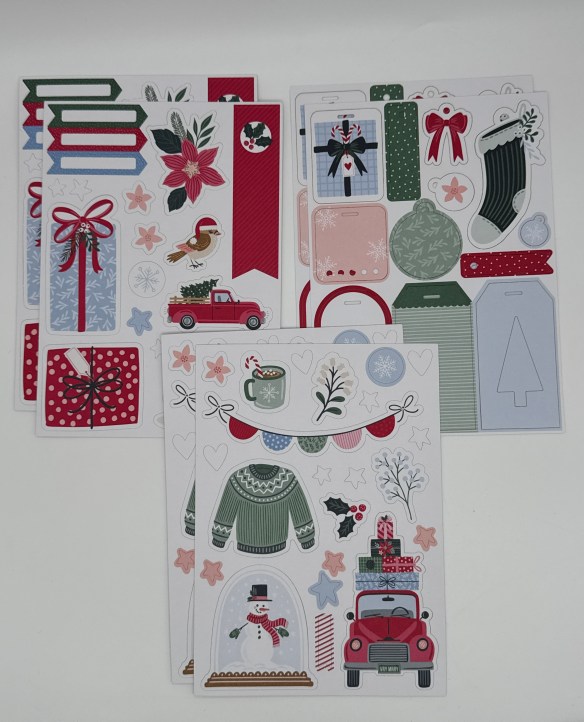
I’m offering a Designer Series Paper ShareTwo-Tone Cardstock Share, Ribbon Share & Embellishment Share from the September – December 2026 Catalog, along with the upcoming September 2026 Online Exclusives and I’d love to have you join!!  I’m placing my share order early on September 1st and I’m going to use the expedited shipping option so I should be able to have the shares cut, bundled and back out to you by the end of the week of September 7th. Wouldn’t you love to have all of the gorgeous new Designer Series Papers in the Stampin’ Up! Sept – Dec 2026 Catalog and the upcoming Sept 2026 Online Exclusives?  What is a Paper Share you ask? It’s a sample of each of the new Designer Series Papers from the Catalog and Online Exclusives. Shares give you a good working sample of all of the papers so that you can decide which ones to order in full packs!  If you were to purchase all of the DSP in the new Catalog and Online Exclusives, it would cost you over $250.00 plus shipping.

New Designer Series Paper Share – $30.00 plus $10.00 for Priority Mail Shipping

How my shares work:  I order full packs of all of the Designer Series Papers listed below, I cut them into 6″ X 6″ pieces (or 6″ X 12″ pieces for double shares) and give you one panel of each design from each pack on the list.  I pack up the paper in a cellophane bag with labels listing the NameItem # and Colors in the pack and mail it back out to you just as quickly as I can!  

New Designer Series Paper Share – $30.00 plus $10.00 for Priority Mail shipping

You will receive one 6×6 sheet of each design from the following DSP packs (the number after the name indicates how many 6×6 sheets of that paper pack you will receive):

  • A Little Christmas (6)
  • All Wrapped Up Specialty (6)
  • Alpine Winter (6)
  • Autumn Opulence Specialty (5)
  • Autum Woodland Glimmer Specialty (3)
  • Creative Celebrations 6 x 6 (4)
  • Hearth & Home (3)
  • Metal Effects Specialty (3)
  • Mosaic Garden (6)
  • Neutral Noel Specialty (6)
  • Painted Patch (6)
  • Radiant Foils Specialty (3)
  • Sunflower Fields (6)
  • Texture & Tone (3)
  • Timeless Christmas (3)
  • Timeless Metallic Specialty (3)
  • Whispering Woods (3)
  • Winter Dreams Specialty (3)
  • Yuletide Carold (3)

In all, you’ll receive 84 – 6” x 6” sheets of designer or specialty paper!

Double Designer Series Paper Share – $60.00 Plus $10.00 Shipping

As a gift from me for ordering a Double Share of Designer Series Paper, I will include a Happiest Season Tags Mix & Match Ephemera Pack #168493. This gift is only for ordering a Double DSP Share.

Two-Tone Cardstock Share

Do you like the Two-Tone Cardstock but don’t want to buy a whole pack? You can add a share of the 3 different Two-Tone Cardstock packs for an additional $4.00 or purchase them separately for $4.00 + $10 Shipping

You will receive one 6×6 sheet of each color from each of the packs (the number after the name indicates how many 6×6 sheets of that paper pack you will receive):

  • Autumn Fields (6)
  • Home For Christmas (4)
  • Memorable Garden (6)

In all, you’ll receive 16 – 6” x 6” sheets of cardstock!

Double Share of the Two-Tone Cardstock – $8.00 plus $10.00 Shipping

If you’d like double shares of the designer paper or cardstock, I’m offering those too!  I’ll cut the 12″ x 12″ sheets into 6″ × 12″ so that you’ll be able to get 3 full A2 size card fronts from each sheet and you’ll get double sheets of the 6″ x 6″ since they’re already precut.

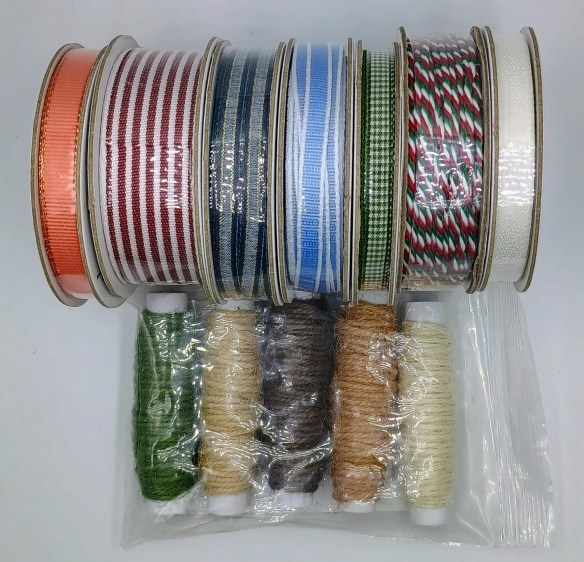
Ribbon Share – $21.25 plus $10.00 Shipping

All ribbons will come individually wrapped and labeled with the name and number of the product.

1/4 of a Roll of each:

  • Calypso Coral With Copper 3/8″ Bordered Ribbon
  • Cherry Cobbler & White 1″ Striped Grosgrain Ribbon
  • Hydrangea Hue 1/4″ Bordered Ribbon
  • Mossy Meadow & Very Vanilla 1/4″ Gingham Ribbon
  • Multicolored Christmas Baker’s Twine
  • Secret Sea & Gold 14″ Satin Ribbon
  • White 3/8″ Textured Ribbon

1/2 of each spool:

  • Neutrals Jute Combo Pack

Double Ribbon Share – $42.50 Plus $10.00 Shipping and you will be getting 1/2 of the roll or each ribbon.

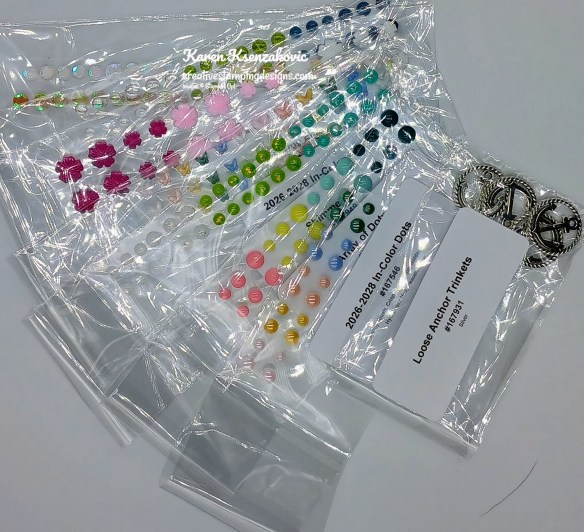
Embellishment Share – $16.50 plus $10.00 Shipping

I’m also offering an Embellishment Share. I will divide the embellishments up and package them in a cello bag with the name and number for easy ordering, just like I do with the paper and ribbon.

You will receive (approximate # listed):

  • Christmas Berries (5)
  • Christmas Epoxy Shapes (34)
  • Glossy Garden Dots (24)
  • Gold Adhesive-Back Dots (30)
  • Painted Patch Adhesive-Back Dots (40)
  • Radiant Gems (30)
  • Adhesive-Back Snowflakes (40)
  • Adhesive-Back Sparkle Sequins (40)

Double Share of the Embellishments – $33.00 plus $10.00 Shipping

Anyone is welcome to join in my shares (please note, I can only ship to addresses within the US).  To make ordering the shares a little easier, I have created a form for you to submit, that way you can order any combination of shares you want.  I will send out PayPal Invoices by August 29th and they will be due by August 30th.

Click Here for the form.

Deadline to sign up for my share is Saturday August 29th at 5:00 PM ET.

*********************************************************************************************************

15% Off Select Designer Series Paper & Cardstock – August 4-31

Are you looking for the perfect card stock or Designer Series Paper for your next project? Stampin’ Up! has got you covered! Starting August 4, enjoy 15% off select Designer Series Paper and card stock. Stock up on your favorites or explore new colors and patterns during this sale!

Here are the sale details:

  • Sales Period:  August 4–31
  • Ordering Deadline:   August 31, 2026, at 11:59 p.m. (MT)
  • While supplies last.
  • You’ll find all qualifying items in one convenient location once the sale begins on August 4—it will be located in the “Designer Series Paper and Cardstock Sale” page in the online store.

Head over to my Online Store beginning August 4 to shop the sale!!

*********************************************************************************************************

New Join Experience

If you’ve been thinking about joining the Stampin’ Up! community, wait until July 10th and you can use your $125 coupon code to order the Hot Foil system!!

Stampin’ Up! is introducing a simplified join process designed to make joining faster and easier than ever before!  The new process will create a more streamlined experience when you join!  

As part of the new join process, all first-time demonstrators will receive a surprise Welcome Box—a gesture of appreciation and a warm welcome into the global Stampin’ Up! creative community!

How the New Process Works

Step 1: Join

New demonstrators will:

  1. choose a team leader.
  2. accept required agreements.
  3. enter a few personal details.
  4. pay the $100 join fee.
  5. click submit.

Step 2: Shop

Once their information has been reviewed and approved (usually very quickly), their Welcome Box ships, and the new demonstrator receives an email with:

  • their demonstrator ID.
  • a coupon code to begin shopping.

About the Coupon Code

  • Valued at $125.
  • Coupon code can be applied to any demonstrator order.
  • Order CAN exceed the coupon code value (I know that many people wanted the option to be able to add more than $125 to their Starter Kit!).
  • Any amount above the coupon code value:
    • receives the demonstrator discount.
    • counts toward the quarterly sales minimum.
    • earns Stampin’ Rewards if it meets the qualifying purchase amount (as long as you’ve opted into the Stampin’ Rewards program).

Additional perk for new demonstrators

  • New demonstrators may add eight free catalogs to any order!

Let me know if you have any questions about the new joining process.  I’m so happy that you’ll now have the option to go over the $125 amount AND that it will automatically count toward your sales! 

Why not start thinking about joining the Stampin’ Up! community. I’d love to have you on my team and July is the perfect time to sign up. Contact me at: creativestampingdesigns@gmail.com and I’d be more than happy to answer any questions you might have. We’re a very relaxed team that loves to create and share.

*********************************************************************************************************

Card stock cuts for this project:

  • Barely Blush Cardstock 5 1/2″ x 8 1/2″(card base scored & folded at 4 1/4″), 4″ x 5 1/4″(card front)
  • Basic White Cardstock 2 7/8″ x 4 1/8″(artwork), 3 3/4″ x 5″ (inner liner)
  • Cherry Cobbler Cardstock 4 1/8″ x 5 3/8″ (mat), 3″ x 4 1/4″ (mat), 3 7/8″ x 5 1/8″(mat)

*********************************************************************************************************

Product List

Stampin’ Up! Words & Wishes Garden Silhouette

Hello stamping friends, welcome to the weekend! Happy August!!! I hope you have some fun plans. I had to be in work early this morning to get my bills done. They are finished and at the post office ready to go. Now I have the rest of the weekend to do what I want.

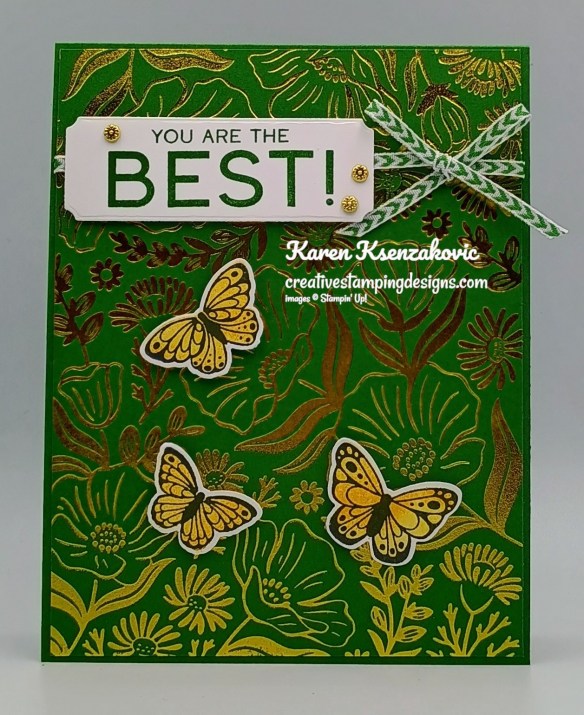
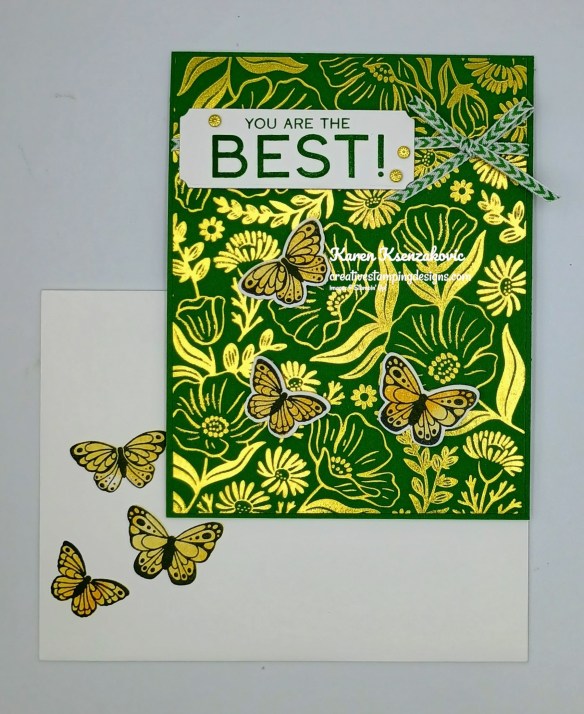
I used all different products for today’s card. I did some stamping, die cutting, hot foiling and punching. If you’d like to see a quick video on how I made this card, Click Here to go to my Instagram Reels. Here’s my card for today.

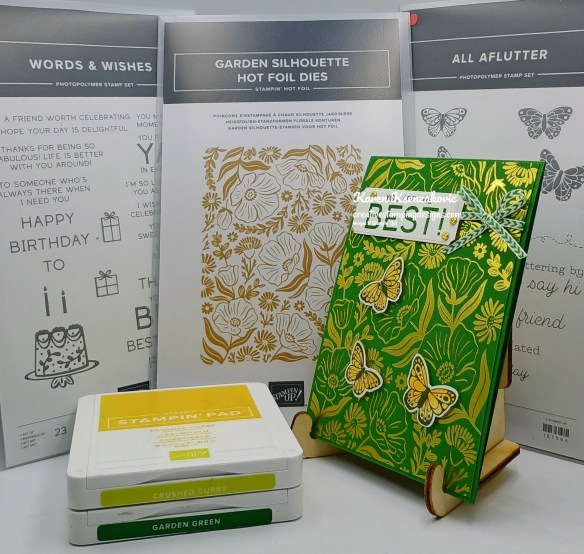
Stampin' Up! Words & Wishes Garden Silhouette 1 creativestampingdesigns.com

I used the Stampin’ Up! Words & Wishes Bundle, Stampin’ Up! Garden Silhouette Hot Foil Dies and Stampin’ Up! All Aflutter Bundle for my card today.

Stampin' Up! Words & Wishes Garden Silhouette 2 creativestampingdesigns.com

Using the Stampin’ Hot Foil System foil a panel of Garden Green using the Garden Silhouette Hot Foil Dies and Gold Foil.

Stampin' Up! Words & Wishes Garden Silhouette 3 creativestampingdesigns.com

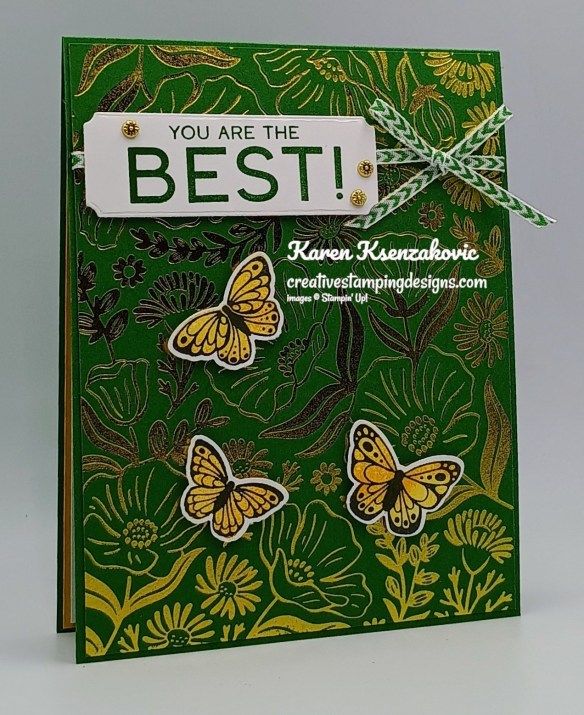
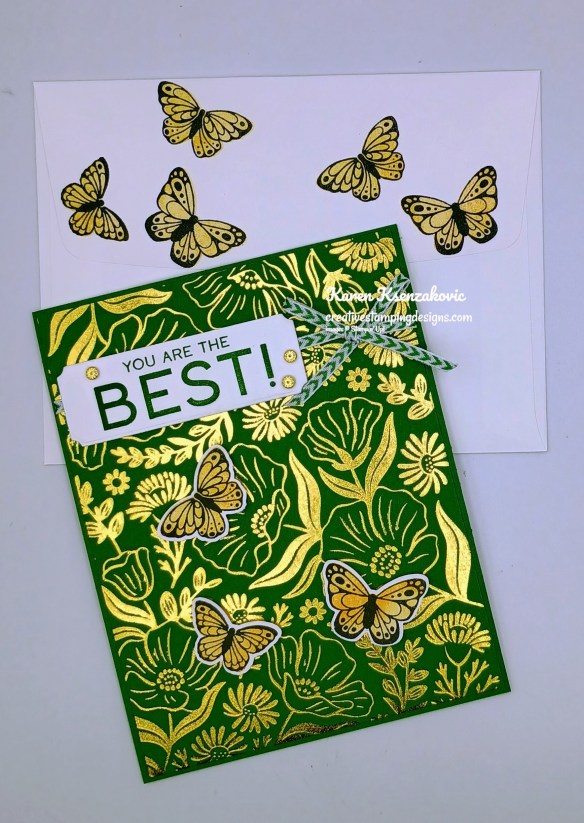
Wrap a piece of Garden Green & White 1/8″ Chevron Ribbon around the panel and tie a bow. Adhere the foiled card front panel to a Garden Green card base. Stamp the sentiment from Words & Wishes stamp set in Garden Green Ink on a panel of Basic White. Cut the sentiment out using the Words & Wishes Dies. Adhere the sentiment over the ribbon with Stampin’ Dimensionals.

Stampin' Up! Words & Wishes Garden Silhouette 4 creativestampingdesigns.com

On a panel of Basic White, stamp the outlined butterfly image from All Aflutter stamp set in Black Ink. Stamp the solid butterfly image from All Aflutter stamp set in Crushed Curry Ink, stamping off once on scrap paper, over the outlined image. Using the All Aflutter Punch, punch out the butterflies and adhere them to the card front with Stampin’ Dimensionals. Add a few Flower Accents to the card front.

Stampin' Up! Words & Wishes Garden Silhouette 5 creativestampingdesigns.com

Stamp the sentiment from Words & Wishes stamp set in Garden Green Ink on a panel of Basic White. Stamp the outlined butterfly image from All Aflutter stamp set in Black Ink next to the sentiment. Stamp the solid butterfly image from All Aflutter stamp set in Crushed Curry Ink, stamping off once on scrap paper, over the outlined image. Adhere the Basic White panel to a Crushed Curry mat then to the inside of the Garden Green card base.

Stampin' Up! Words & Wishes Garden Silhouette 6 creativestampingdesigns.com

Decorate a Basic White Medium Envelope to finish the card. Stamp the outlined butterfly image from All Aflutter stamp set in Black Ink on the envelope front and flap. Stamp the solid butterfly image from All Aflutter stamp set in Crushed Curry Ink, stamping off once on scrap paper, over the outlined image.

Stampin' Up! Words & Wishes Garden Silhouette 7 creativestampingdesigns.com

Thank you for stopping by my blog today. I hope you like the card and will give it a try. Happy Stamping!!

*********************************************************************************************************

If you need any stamping supplies, I’d love to be your Demonstrator. Just click HERE to go directly to my online store or drop me an email if you have any questions. 

*********************************************************************************************************

September-December Catalog & Online Exclusive Product Shares Open for Ordering!!

It’s time again. The new September – December 2026 Catalog will be arriving in your mailbox real soon and you’re going to want all that beautiful Designer Series Paper, Ribbon and/or Embellishments. My September – December 2026 Catalog and September Online Exclusive Product Shares are open for ordering. You can order just the DSP share, just the Two-Tone cardstock share, just the Ribbon share or just the Embellishment share, or you can have it all!! 

Order Here

I’m offering a Designer Series Paper ShareTwo-Tone Cardstock Share, Ribbon Share & Embellishment Share from the September – December 2026 Catalog, along with the upcoming September 2026 Online Exclusives and I’d love to have you join!!  I’m placing my share order early on September 1st and I’m going to use the expedited shipping option so I should be able to have the shares cut, bundled and back out to you by the end of the week of September 7th. Wouldn’t you love to have all of the gorgeous new Designer Series Papers in the Stampin’ Up! Sept – Dec 2026 Catalog and the upcoming Sept 2026 Online Exclusives?  What is a Paper Share you ask? It’s a sample of each of the new Designer Series Papers from the Catalog and Online Exclusives. Shares give you a good working sample of all of the papers so that you can decide which ones to order in full packs!  If you were to purchase all of the DSP in the new Catalog and Online Exclusives, it would cost you over $250.00 plus shipping.

New Designer Series Paper Share – $30.00 plus $10.00 for Priority Mail Shipping

How my shares work:  I order full packs of all of the Designer Series Papers listed below, I cut them into 6″ X 6″ pieces (or 6″ X 12″ pieces for double shares) and give you one panel of each design from each pack on the list.  I pack up the paper in a cellophane bag with labels listing the NameItem # and Colors in the pack and mail it back out to you just as quickly as I can!  

New Designer Series Paper Share – $30.00 plus $10.00 for Priority Mail shipping

You will receive one 6×6 sheet of each design from the following DSP packs (the number after the name indicates how many 6×6 sheets of that paper pack you will receive):

  • A Little Christmas (6)
  • All Wrapped Up Specialty (6)
  • Alpine Winter (6)
  • Autumn Opulence Specialty (5)
  • Autum Woodland Glimmer Specialty (3)
  • Creative Celebrations 6 x 6 (4)
  • Hearth & Home (3)
  • Metal Effects Specialty (3)
  • Mosaic Garden (6)
  • Neutral Noel Specialty (6)
  • Painted Patch (6)
  • Radiant Foils Specialty (3)
  • Sunflower Fields (6)
  • Texture & Tone (3)
  • Timeless Christmas (3)
  • Timeless Metallic Specialty (3)
  • Whispering Woods (3)
  • Winter Dreams Specialty (3)
  • Yuletide Carold (3)

In all, you’ll receive 84 – 6” x 6” sheets of designer or specialty paper!

Double Designer Series Paper Share – $60.00 Plus $10.00 Shipping

As a gift from me for ordering a Double Share of Designer Series Paper, I will include a Happiest Season Tags Mix & Match Ephemera Pack #168493. This gift is only for ordering a Double DSP Share.

Two-Tone Cardstock Share

Do you like the Two-Tone Cardstock but don’t want to buy a whole pack? You can add a share of the 3 different Two-Tone Cardstock packs for an additional $4.00 or purchase them separately for $4.00 + $10 Shipping

You will receive one 6×6 sheet of each color from each of the packs (the number after the name indicates how many 6×6 sheets of that paper pack you will receive):

  • Autumn Fields (6)
  • Home For Christmas (4)
  • Memorable Garden (6)

In all, you’ll receive 16 – 6” x 6” sheets of cardstock!

Double Share of the Two-Tone Cardstock – $8.00 plus $10.00 Shipping

If you’d like double shares of the designer paper or cardstock, I’m offering those too!  I’ll cut the 12″ x 12″ sheets into 6″ × 12″ so that you’ll be able to get 3 full A2 size card fronts from each sheet and you’ll get double sheets of the 6″ x 6″ since they’re already precut.

Ribbon Share – $21.25 plus $10.00 Shipping

All ribbons will come individually wrapped and labeled with the name and number of the product.

1/4 of a Roll of each:

  • Calypso Coral With Copper 3/8″ Bordered Ribbon
  • Cherry Cobbler & White 1″ Striped Grosgrain Ribbon
  • Hydrangea Hue 1/4″ Bordered Ribbon
  • Mossy Meadow & Very Vanilla 1/4″ Gingham Ribbon
  • Multicolored Christmas Baker’s Twine
  • Secret Sea & Gold 14″ Satin Ribbon
  • White 3/8″ Textured Ribbon

1/2 of each spool:

  • Neutrals Jute Combo Pack

Double Ribbon Share – $42.50 Plus $10.00 Shipping and you will be getting 1/2 of the roll or each ribbon.

Embellishment Share – $16.50 plus $10.00 Shipping

I’m also offering an Embellishment Share. I will divide the embellishments up and package them in a cello bag with the name and number for easy ordering, just like I do with the paper and ribbon.

You will receive (approximate # listed):

  • Christmas Berries (5)
  • Christmas Epoxy Shapes (34)
  • Glossy Garden Dots (24)
  • Gold Adhesive-Back Dots (30)
  • Painted Patch Adhesive-Back Dots (40)
  • Radiant Gems (30)
  • Adhesive-Back Snowflakes (40)
  • Adhesive-Back Sparkle Sequins (40)

Double Share of the Embellishments – $33.00 plus $10.00 Shipping

Anyone is welcome to join in my shares (please note, I can only ship to addresses within the US).  To make ordering the shares a little easier, I have created a form for you to submit, that way you can order any combination of shares you want.  I will send out PayPal Invoices by August 29th and they will be due by August 30th.

Click Here for the form.

Deadline to sign up for my share is Saturday August 29th at 5:00 PM ET.

*********************************************************************************************************

15% Off Select Designer Series Paper & Cardstock – August 4-31

Are you looking for the perfect card stock or Designer Series Paper for your next project? Stampin’ Up! has got you covered! Starting August 4, enjoy 15% off select Designer Series Paper and card stock. Stock up on your favorites or explore new colors and patterns during this sale!

Here are the sale details:

  • Sales Period:  August 4–31
  • Ordering Deadline:   August 31, 2026, at 11:59 p.m. (MT)
  • While supplies last.
  • You’ll find all qualifying items in one convenient location once the sale begins on August 4—it will be located in the “Designer Series Paper and Cardstock Sale” page in the online store.

Head over to my Online Store beginning August 4 to shop the sale!!

*********************************************************************************************************

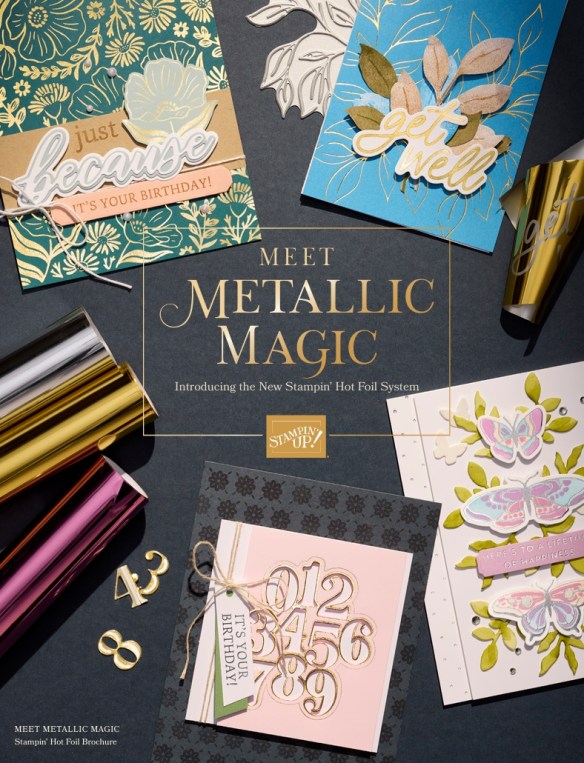
Introducing one of the hottest items in crafting—the new Stampin’ Hot Foil System!!

The metallic magic starts with Stampin’ Hot Foil Rolls, specially made Hot Foil dies, and the Stampin’ Hot Foil System that works with the Stampin’ Cut & Emboss Machine (sold separately). The heat of the platform transfers the foil using hot foil dies designed specifically for this system, allowing you to add dazzling details to paper and more.

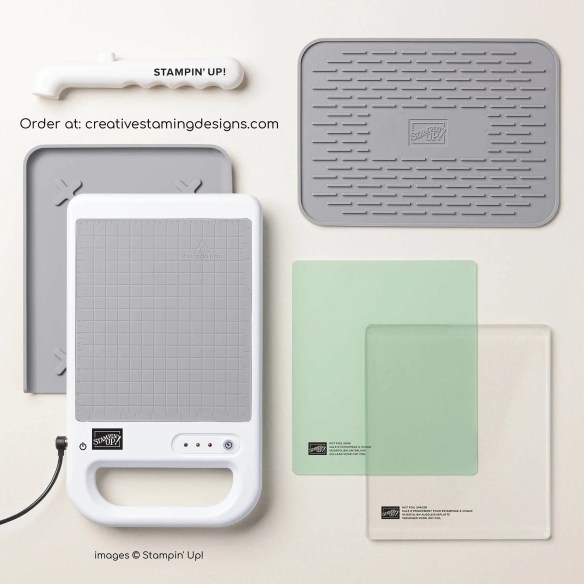
WHAT IS INCLUDED WHEN YOU PURCHASE THE STAMPIN’ HOT FOIL SYSTEM?

This is everything included in the Stampin’ Hot Foil System & Craft Class:

  • Metallic Magic Craft Class ($30 value—limited time only!)
  • Stampin’ Hot Foil platform
  • Stampin’ Hot Foil Shim & Spacer
  • Stampin’ Hot Foil Magnetic Pick-Up Tool
  • Silicone platform station
  • Silicone cooling pad
  • Power cord
  • Instructions on how to use the system

The Stampin’ Cut & Emboss Machine, Stampin’ Hot Foil Rolls (the foil itself), and Hot Foil dies and bundles are sold separately.

CRAFT CLASS

As an added bonus, everyone who purchases this system before January 4, 2027, will automatically be able to access the upcoming Metallic Magic Craft Class, a technique-centric virtual class. Attendees will make unique projects and learn crafting tips intended to elevate their hot foil crafting experience. This class is a special limited-time offer exclusive to this system and is an amazing tool when it comes to increasing skills, learning techniques, and making the most of this new product line.

You can see more details about the system, find the bundles and foil that will be available to order beginning on Friday, July 10 in this brochure:

A few notes about the new system:

  • Hot Foil results are best with either White Willow or Two-Tone Cardstock.  Smoother card stocks like the Two-Tone Cardstock and White Willow will achieve the best results when using the system, but you can use the regular card stocks too.
  • The Hot Foil System, foil rolls and new hot foil dies and bundles will be available Friday, July 10, 2026 in the online Stampin’ Up! store.
  • A FREE Hot Foil Online Class from Stampin’ Up! is included with your hot foil system purchase (a $30 value!), do not add the class separately to your cart (you’ll be charged for it if you do!).  You’ll automatically get a link to it after you purchase the Stampin’ Hot Foil System.
  • The Stampin’ Hot Foil system is $160. Dies & foil are sold separately.
  • Stampin’ Up! has let us know that if the Stampin’ Hot Foil system goes on backorder, it may take longer than normal to restock.  So if you would like to order the system, order sooner rather than later!
  • IMPORTANT NOTE: Cutting dies are not designed to be used with hot foiling.  You cannot die cut using foiling dies.  Doing so risks damaging the dies and the system.

I’m so excited for you all to be able to order this new system!  Head over to my Stampin’ Up! online store beginning July 10 to see and order the new system!

*********************************************************************************************************

Card stock cuts for this project:

  • Basic White Cardstock 1 1/2″ x 4″(sentiment), 2 1/2″ x 3 1/4″(butterflies), 4″ x 5 1/4″(inner liner)
  • Crushed Curry Cardstock 4 1/8″ x 5 3/8″(mat)
  • Garden Green Cardstock 4 1/4″ x 11″(card base scored & folded at 5 1/2″), 4 1/8″ x 5 3/8″(card front)

*********************************************************************************************************

Product List

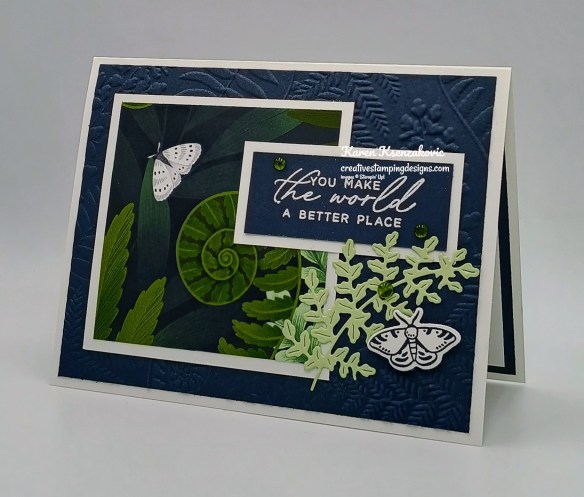
Stampin’ Up! Fern & Flora in Secret Sea & Sept-Dec Catalog & Sept Online Exclusive Product Shares Open for Ordering

Good Tuesday morning stamping friends. I hope your week has started off well. I’m hoping today will be a day to stay home and get things caught up. How about you, what will you be doing today?

I have a quick card today using some of my favorite products from the current catalog. I’m not seeing this in the new catalog and I’m afraid it’ll be going away.  If you’d like to see a quick video on how I made this card, Click Here to go to my Instagram Reels. 

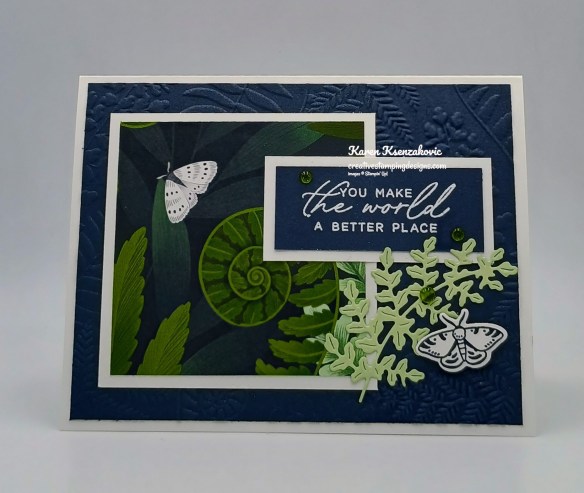
Stampin' Up! Fern & Flora in Secret Sea 1 creativestampingdesigns.com

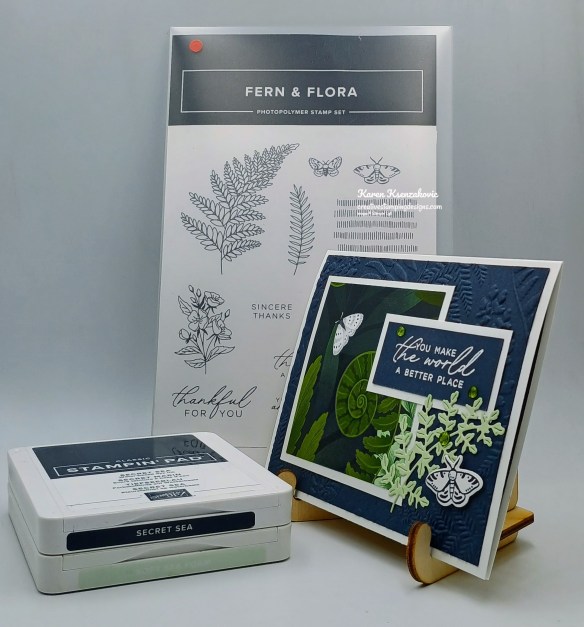
I used the Stampin’ Up! Fern & Flora Bundle, Fern & Flora 3D Embossing Folder and Moonlit Flora Designer Series Paper for my card today.

Stampin' Up! Fern & Flora in Secret Sea 2 creativestampingdesigns.com

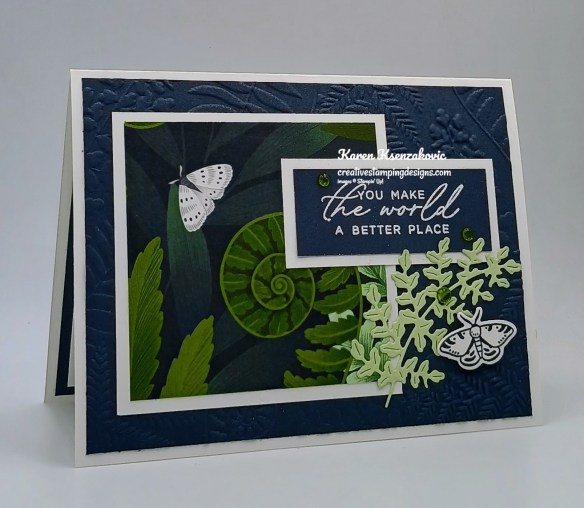
Emboss a panel of Secret Sea using the Fern & Flora EF. Adhere the embossed panel to the front of a Basic Whtie Thick card base.

Stampin' Up! Fern & Flora in Secret Sea 3 creativestampingdesigns.com

Adhere a panel of Moonlit Flora DSP to a Basic White mat. Adhere the layered panel to the left side of the card front. Stamp the moth image from the Fern & Flora stamp set in Secret Sea Ink on a panel of Basic White. Using the Fern & Flora Dies, cut the moth image out and the leaf die from a panel of Soft Sea Foam.

Stampin' Up! Fern & Flora in Secret Sea 4 creativestampingdesigns.com

On a pane of Secret Sea, stamp the sentiment from Fern & Flora stamp set in Versamark Ink. Sprinkle the sentiment with White Embossing Powder and set it using the Heat Tool. Adhere the sentiment to a Basic White mat. Adhere the sentiment to the right side of the card front. Adhere the die cut leaf below the sentiment and adhere the moth with Stampin’ Dimensionals. Add a few Dewdrop Embellishments to the card front.

Stampin' Up! Fern & Flora in Secret Sea 15creativestampingdesigns.com

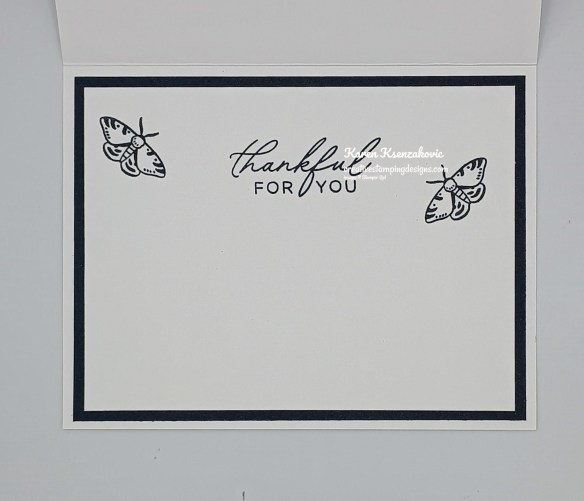
Stamp the sentiment from the Fern & Flora stamp set in Secret Sea Ink on a panel of Basic White. Stamp the moth image from the Fern & Flora stamp set on either side of the sentiment. Adhere the Basic White panel to a Secret Sea mat then to the inside of the Basic White Thick card base.

Stampin' Up! Fern & Flora in Secret Sea 6 creativestampingdesigns.com

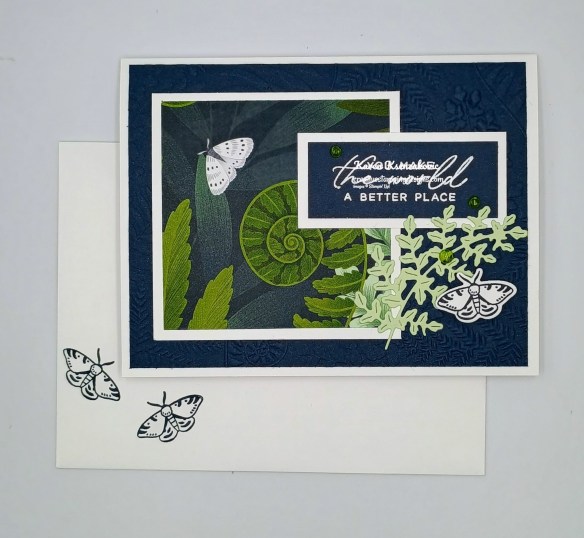
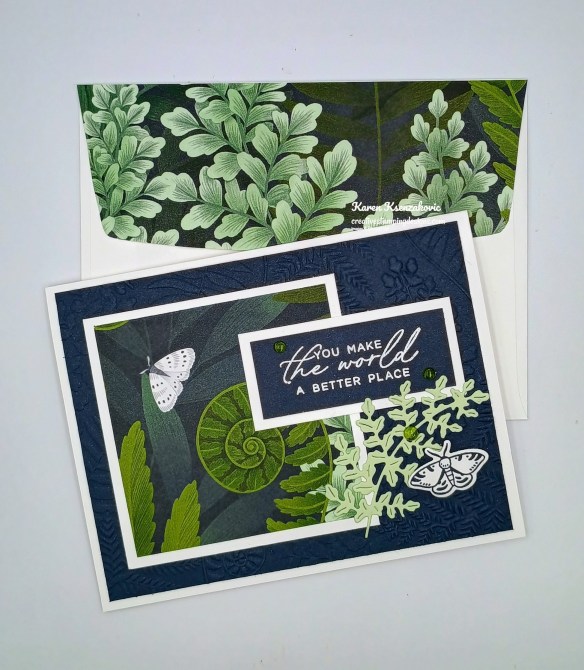
Decorate a Basic White Medium Envelope to finish your card. Stamp the larger moth image from the Fern & Flora stamp set in Secret Sea Ink on the envelope front. Adhere a panel of Moonlith Flora DSP to the envelope flap.

Stampin' Up! Fern & Flora in Secret Sea 7 creativestampingdesigns.com

Thank you for stopping by my blog today. I hope you like the card and will give it a try. Happy Stamping!!

*********************************************************************************************************

If you need any stamping supplies, I’d love to be your Demonstrator. Just click HERE to go directly to my online store or drop me an email if you have any questions. 

*********************************************************************************************************

September – December 2026 Catalog Coming Soon

I’ve received the September – December 2026 catalogs and mailed them to my customers, so be on the look out if you are a customer of mine.  It’s filled with holiday related items and I can’t wait for you all to see it! 

If you’ve ordered from me within the last year, you automatically are on my mailing list for the new catalogs.  If you are not a current customer of mine but would like to be and would like to get a copy of the upcoming catalog, simply place an order through my Online Store and I’ll mail you a copy of the catalog too!

*********************************************************************************************************

September-December Catalog & Online Exclusive Product Shares Open for Ordering!!

It’s time again. The new September – December 2026 Catalog will be arriving in your mailbox real soon and you’re going to want all that beautiful Designer Series Paper, Ribbon and/or Embellishments. My September – December 2026 Catalog and September Online Exclusive Product Shares are open for ordering. You can order just the DSP share, just the Two-Tone cardstock share, just the Ribbon share or just the Embellishment share, or you can have it all!! 

Order Here

I’m offering a Designer Series Paper ShareTwo-Tone Cardstock Share, Ribbon Share & Embellishment Share from the September – December 2026 Catalog, along with the upcoming September 2026 Online Exclusives and I’d love to have you join!!  I’m placing my share order early on September 1st and I’m going to use the expedited shipping option so I should be able to have the shares cut, bundled and back out to you by the end of the week of September 7th. Wouldn’t you love to have all of the gorgeous new Designer Series Papers in the Stampin’ Up! Sept – Dec 2026 Catalog and the upcoming Sept 2026 Online Exclusives?  What is a Paper Share you ask? It’s a sample of each of the new Designer Series Papers from the Catalog and Online Exclusives. Shares give you a good working sample of all of the papers so that you can decide which ones to order in full packs!  If you were to purchase all of the DSP in the new Catalog and Online Exclusives, it would cost you over $250.00 plus shipping.

New Designer Series Paper Share – $30.00 plus $10.00 for Priority Mail Shipping

How my shares work:  I order full packs of all of the Designer Series Papers listed below, I cut them into 6″ X 6″ pieces (or 6″ X 12″ pieces for double shares) and give you one panel of each design from each pack on the list.  I pack up the paper in a cellophane bag with labels listing the NameItem # and Colors in the pack and mail it back out to you just as quickly as I can!  

New Designer Series Paper Share – $30.00 plus $10.00 for Priority Mail shipping

You will receive one 6×6 sheet of each design from the following DSP packs (the number after the name indicates how many 6×6 sheets of that paper pack you will receive):

  • A Little Christmas (6)
  • All Wrapped Up Specialty (6)
  • Alpine Winter (6)
  • Autumn Opulence Specialty (5)
  • Autum Woodland Glimmer Specialty (3)
  • Creative Celebrations 6 x 6 (4)
  • Hearth & Home (3)
  • Metal Effects Specialty (3)
  • Mosaic Garden (6)
  • Neutral Noel Specialty (6)
  • Painted Patch (6)
  • Radiant Foils Specialty (3)
  • Sunflower Fields (6)
  • Texture & Tone (3)
  • Timeless Christmas (3)
  • Timeless Metallic Specialty (3)
  • Whispering Woods (3)
  • Winter Dreams Specialty (3)
  • Yuletide Carold (3)

In all, you’ll receive 84 – 6” x 6” sheets of designer or specialty paper!

Double Designer Series Paper Share – $60.00 Plus $10.00 Shipping

As a gift from me for ordering a Double Share of Designer Series Paper, I will include a Happiest Season Tags Mix & Match Ephemera Pack #168493. This gift is only for ordering a Double DSP Share.

Two-Tone Cardstock Share

Do you like the Two-Tone Cardstock but don’t want to buy a whole pack? You can add a share of the 3 different Two-Tone Cardstock packs for an additional $4.00 or purchase them separately for $4.00 + $10 Shipping

You will receive one 6×6 sheet of each color from each of the packs (the number after the name indicates how many 6×6 sheets of that paper pack you will receive):

  • Autumn Fields (6)
  • Home For Christmas (4)
  • Memorable Garden (6)

In all, you’ll receive 16 – 6” x 6” sheets of cardstock!

Double Share of the Two-Tone Cardstock – $8.00 plus $10.00 Shipping

If you’d like double shares of the designer paper or cardstock, I’m offering those too!  I’ll cut the 12″ x 12″ sheets into 6″ × 12″ so that you’ll be able to get 3 full A2 size card fronts from each sheet and you’ll get double sheets of the 6″ x 6″ since they’re already precut.

Ribbon Share – $21.25 plus $10.00 Shipping

All ribbons will come individually wrapped and labeled with the name and number of the product.

1/4 of a Roll of each:

  • Calypso Coral With Copper 3/8″ Bordered Ribbon
  • Cherry Cobbler & White 1″ Striped Grosgrain Ribbon
  • Hydrangea Hue 1/4″ Bordered Ribbon
  • Mossy Meadow & Very Vanilla 1/4″ Gingham Ribbon
  • Multicolored Christmas Baker’s Twine
  • Secret Sea & Gold 14″ Satin Ribbon
  • White 3/8″ Textured Ribbon

1/2 of each spool:

  • Neutrals Jute Combo Pack

Double Ribbon Share – $42.50 Plus $10.00 Shipping and you will be getting 1/2 of the roll or each ribbon.

Embellishment Share – $16.50 plus $10.00 Shipping

I’m also offering an Embellishment Share. I will divide the embellishments up and package them in a cello bag with the name and number for easy ordering, just like I do with the paper and ribbon.

You will receive (approximate # listed):

  • Christmas Berries (5)
  • Christmas Epoxy Shapes (34)
  • Glossy Garden Dots (24)
  • Gold Adhesive-Back Dots (30)
  • Painted Patch Adhesive-Back Dots (40)
  • Radiant Gems (30)
  • Adhesive-Back Snowflakes (40)
  • Adhesive-Back Sparkle Sequins (40)

Double Share of the Embellishments – $33.00 plus $10.00 Shipping

Anyone is welcome to join in my shares (please note, I can only ship to addresses within the US).  To make ordering the shares a little easier, I have created a form for you to submit, that way you can order any combination of shares you want.  I will send out PayPal Invoices by August 29th and they will be due by August 30th.

Click Here for the form.

Deadline to sign up for my share is Saturday August 29th at 5:00 PM ET.

*********************************************************************************************************

Card stock cuts for this project:

  • Basic White Cardstock 3 1/4″ x 3 1/4″(mat), 1 1/4″ x 2 3/4″ (mat), 3 3/4″ x 5″(inner liner)
  • Basic White Thick Cardstock 5 1/2″ x 8 1/2″(card base scored & folded at 4 1/4″)
  • Secret Sea Cardstock (2) – 4″ x 5 1/4″ (card front & inner liner), 1″ x 2 1/2″(sentiment)
  • Soft Sea Foam Cardstock 1 3/4″ x 2 3/4″(die cut)
  • Moonlit Flora Designer Series Paper 3″ x 3″(card front panel), 2 1/4″ x 6″(envelope)

*********************************************************************************************************

Product List

Stampin’ Up! All Aflutter Butterfly Flight & Sept-Dec Catalog & Sept Online Exclusive Product Shares Open for Ordering

Good Monday morning stamping friends, welcome to a new week and the last week of July. I can’t believe how fast summer is going. I’d like to back up a month since I don’t know where July went.

Today I played with the Hot Foil system again. If you haven’t tried it yet, you really need to. It’s so easy and I’m wowed by the results every time. Here’s my card for today.

Stampin' Up! All Aflutter Butterfly Flight 1 creativestampingdesigns.com

I used the Stampin’ Up! All Aflutter Stamp Set, Stampin’ Up! Butterfly Flight Bundle and Everyday Essentials Mix & Match Designer Series Paper for my card today.

My colors are from Colours & Sketches Colour Challenge #590

Stampin' Up! All Aflutter Butterfly Flight 2 creativestampingdesigns.com

Adhere a pane of Everyday Essentials DSP to a Lost Lagoon card base. Adhere a panel of Basic White to a Petal Pink mat. Adhere the layered panel to the center of the card front.

Stampin' Up! All Aflutter Butterfly Flight 3 creativestampingdesigns.com

Using the Hot Foil System and Silver Foil, foil the butterflies using the Butterfly Flight Hot Fil Dies to a panel of Basic White. Add Petal Pink and Calypso Coral Inks using Small Blending Brushes and the Butterfly Flight Decorative Masks. Cut the butterflies out using the Butterfly Flight Dies. Using the Butterfly Flight Dies, cut the butterfly bodies from a panel of Basic Black. From a panel of Lost Lagoon, cut 3 of the leaf die using the Delicate Whispers Dies. Adhere the leaf die cuts to the Basic White panel. Adhere the butterfly bodies to the butterflies. Adhere 3 of the butterflies to the card front, over the leaves, with Stampin’ Dimensionals.

Stampin' Up! All Aflutter Butterfly Flight 4 creativestampingdesigns.com

On a panel of Petal Pink, stamp the sentiment from All Aflutter stamp set in Versamark Ink. Sprinkle the sentiment with Silver Embossing Powder and set it with the Heat Tool. Adhere the sentiment to the card front with Stampin’ Dimensionals. Add a few Pearls of Beauty to the card front.

Stampin' Up! All Aflutter Butterfly Flight 5 creativestampingdesigns.com

On a panel of Basic White, adhere a strip of Everyday Essentials DSP to the bottom of the panel. Adhere the small butterfly from the Butterfly Flight on the top of the panel. Adhere the Basic Whtie panel to a Petal Pink mat then to the inside of the Lost Lagoon card base.

Stampin' Up! All Aflutter Butterfly Flight 6 creativestampingdesigns.com

Decorate a Basic White Medium Envelope to finish your card. Stamp the detailed butterfly trio image from the All Aflutter stamp set in Smoky Slate Ink on the envelope front. Stamp the solid butterfly trio image from the All Aflutter stamp set in Petal Pink Ink, stamping off once on scrap paper, over the detailed image. Adhere a panel of Everyday EssentialsDSP to the envelope flap.

Stampin' Up! All Aflutter Butterfly Flight 7 creativestampingdesigns.com

Thank you for stopping by my blog today. I hope you like the card and will give it a try. Happy Stamping!!

*********************************************************************************************************

If you need any stamping supplies, I’d love to be your Demonstrator. Just click HERE to go directly to my online store or drop me an email if you have any questions. 

*********************************************************************************************************

September – December 2026 Catalog Coming Soon

I’ve received the September – December 2026 catalogs and mailed them to my customers, so be on the look out if you are a customer of mine.  It’s filled with holiday related items and I can’t wait for you all to see it! 

If you’ve ordered from me within the last year, you automatically are on my mailing list for the new catalogs.  If you are not a current customer of mine but would like to be and would like to get a copy of the upcoming catalog, simply place an order through my Online Store and I’ll mail you a copy of the catalog too!

*********************************************************************************************************

September-December Catalog & Online Exclusive Product Shares Open for Ordering!!

It’s time again. The new September – December 2026 Catalog will be arriving in your mailbox real soon and you’re going to want all that beautiful Designer Series Paper, Ribbon and/or Embellishments. My September – December 2026 Catalog and September Online Exclusive Product Shares are open for ordering. You can order just the DSP share, just the Two-Tone cardstock share, just the Ribbon share or just the Embellishment share, or you can have it all!! 

Order Here

I’m offering a Designer Series Paper ShareTwo-Tone Cardstock Share, Ribbon Share & Embellishment Share from the September – December 2026 Catalog, along with the upcoming September 2026 Online Exclusives and I’d love to have you join!!  I’m placing my share order early on September 1st and I’m going to use the expedited shipping option so I should be able to have the shares cut, bundled and back out to you by the end of the week of September 7th. Wouldn’t you love to have all of the gorgeous new Designer Series Papers in the Stampin’ Up! Sept – Dec 2026 Catalog and the upcoming Sept 2026 Online Exclusives?  What is a Paper Share you ask? It’s a sample of each of the new Designer Series Papers from the Catalog and Online Exclusives. Shares give you a good working sample of all of the papers so that you can decide which ones to order in full packs!  If you were to purchase all of the DSP in the new Catalog and Online Exclusives, it would cost you over $250.00 plus shipping.

New Designer Series Paper Share – $30.00 plus $10.00 for Priority Mail Shipping

How my shares work:  I order full packs of all of the Designer Series Papers listed below, I cut them into 6″ X 6″ pieces (or 6″ X 12″ pieces for double shares) and give you one panel of each design from each pack on the list.  I pack up the paper in a cellophane bag with labels listing the NameItem # and Colors in the pack and mail it back out to you just as quickly as I can!  

New Designer Series Paper Share – $30.00 plus $10.00 for Priority Mail shipping

You will receive one 6×6 sheet of each design from the following DSP packs (the number after the name indicates how many 6×6 sheets of that paper pack you will receive):

  • A Little Christmas (6)
  • All Wrapped Up Specialty (6)
  • Alpine Winter (6)
  • Autumn Opulence Specialty (5)
  • Autum Woodland Glimmer Specialty (3)
  • Creative Celebrations 6 x 6 (4)
  • Hearth & Home (3)
  • Metal Effects Specialty (3)
  • Mosaic Garden (6)
  • Neutral Noel Specialty (6)
  • Painted Patch (6)
  • Radiant Foils Specialty (3)
  • Sunflower Fields (6)
  • Texture & Tone (3)
  • Timeless Christmas (3)
  • Timeless Metallic Specialty (3)
  • Whispering Woods (3)
  • Winter Dreams Specialty (3)
  • Yuletide Carold (3)

In all, you’ll receive 84 – 6” x 6” sheets of designer or specialty paper!

Double Designer Series Paper Share – $60.00 Plus $10.00 Shipping

As a gift from me for ordering a Double Share of Designer Series Paper, I will include a Happiest Season Tags Mix & Match Ephemera Pack #168493. This gift is only for ordering a Double DSP Share.

Two-Tone Cardstock Share

Do you like the Two-Tone Cardstock but don’t want to buy a whole pack? You can add a share of the 3 different Two-Tone Cardstock packs for an additional $4.00 or purchase them separately for $4.00 + $10 Shipping

You will receive one 6×6 sheet of each color from each of the packs (the number after the name indicates how many 6×6 sheets of that paper pack you will receive):

  • Autumn Fields (6)
  • Home For Christmas (4)
  • Memorable Garden (6)

In all, you’ll receive 16 – 6” x 6” sheets of cardstock!

Double Share of the Two-Tone Cardstock – $8.00 plus $10.00 Shipping

If you’d like double shares of the designer paper or cardstock, I’m offering those too!  I’ll cut the 12″ x 12″ sheets into 6″ × 12″ so that you’ll be able to get 3 full A2 size card fronts from each sheet and you’ll get double sheets of the 6″ x 6″ since they’re already precut.

Ribbon Share – $21.25 plus $10.00 Shipping

All ribbons will come individually wrapped and labeled with the name and number of the product.

1/4 of a Roll of each:

  • Calypso Coral With Copper 3/8″ Bordered Ribbon
  • Cherry Cobbler & White 1″ Striped Grosgrain Ribbon
  • Hydrangea Hue 1/4″ Bordered Ribbon
  • Mossy Meadow & Very Vanilla 1/4″ Gingham Ribbon
  • Multicolored Christmas Baker’s Twine
  • Secret Sea & Gold 14″ Satin Ribbon
  • White 3/8″ Textured Ribbon

1/2 of each spool:

  • Neutrals Jute Combo Pack

Double Ribbon Share – $42.50 Plus $10.00 Shipping and you will be getting 1/2 of the roll or each ribbon.

Embellishment Share – $16.50 plus $10.00 Shipping

I’m also offering an Embellishment Share. I will divide the embellishments up and package them in a cello bag with the name and number for easy ordering, just like I do with the paper and ribbon.

You will receive (approximate # listed):

  • Christmas Berries (5)
  • Christmas Epoxy Shapes (34)
  • Glossy Garden Dots (24)
  • Gold Adhesive-Back Dots (30)
  • Painted Patch Adhesive-Back Dots (40)
  • Radiant Gems (30)
  • Adhesive-Back Snowflakes (40)
  • Adhesive-Back Sparkle Sequins (40)

Double Share of the Embellishments – $33.00 plus $10.00 Shipping

Anyone is welcome to join in my shares (please note, I can only ship to addresses within the US).  To make ordering the shares a little easier, I have created a form for you to submit, that way you can order any combination of shares you want.  I will send out PayPal Invoices by August 29th and they will be due by August 30th.

Click Here for the form.

Deadline to sign up for my share is Saturday August 29th at 5:00 PM ET.

*********************************************************************************************************

Card stock cuts for this project:

  • Basic White Cardstock 3″ X 5 1/2″(artwork panel), 3 3/4″ x 5″(inner liner), 4″ x 5 1/2″(die cuts)
  • Lost Lagoon Cardstock 4 1/4″ x 11″(card base scored & folded at 5 1/2″), 3″ x 4 1/4″(die cuts)
  • Petal Pink Cardstock 3 1/6″ x 5 1/2″(artwork mat), 3/8″ x 3 5/8″(sentiment), 4″ x 5 1/4″(inner liner mat)
  • Everyday Essentials Designer Series Paper 4 1/4″ x 5 1/2″(card front), 1/2″ x 3 3/4″(inner liner), 2 1/4″ x 6″(envelope)

*********************************************************************************************************

Product List

Stampin’ Up! Classic Greetings for The Happy Inkin’ Thursday Blog Hop

Good Thursday morning stamping friends welcome to our Happy Inkin’ Thursday Blog Hop. If you are starting with me, thank you, I hope you will stop by everyone’s blog to see the beautiful projects they have created this week. If you are hopping over from Mary’s blog, thank you for stopping by. This week we have a Color Challenge to work with. If you’d like to see a quick video on how I made this card, Click Here to go to my Instagram Reels. Here is my card using this week’s colors.

Stampin' Up! Classic Greetings Thank You 1 creativestampingdesigns.com

I used the Stampin’ Up! Classic Greetings Hot Foil Dies, Velvet Meadow Specialty Designer Series Paper and the Stampin’ Up! Flowering Meadow Stamp Set for my card today.

These are our colors for this week.

Stampin' Up! Classic Greetings Thank You 2 creativestampingdesigns.com

Using the Hot Foil System, Pink Foil the Classic Greetings Foil Die and a panel of Cloud Cover, foil the sentiment following the Hot Foil System directions. Die cut the sentiment using the Classic Greetings Hot Foil Dies.

Stampin' Up! Classic Greetings Thank You 3 creativestampingdesigns.com

Adhere a panel of Velvet Meadow DSP to a Bubble Bath mat. Wrap a piece of the Bubble Bath 1/8″ Faux Linen Ribbon around the layered panel and tie a bow. Adhere the layered panel to a Cloud Cover card base with Stampin’ Dimensionals.

Stampin' Up! Classic Greetings Thank You 4 creativestampingdesigns.com

Adhere the die cut sentiment over the ribbon using Stampin’ Dimensionals. Add a few Dreamy Flowers to the card front.

Stampin' Up! Classic Greetings Thank You 5 creativestampingdesigns.com

Stamp the sentiment from the Flowering Meadow stamp set in Peaceful Pine Ink on a panel of Basic Beige. Adhere a panel of Velvet Meadow DSP to the bottom of the panel. Stamp the stem and leaf images from the Flowering Meadow stamp set in Peaceful Pine Ink on the bottom of the panel. Stamp the flower image from the Flowering Medow stamp set in Bubble Bath Ink on top of the stem image. Stamp the flower center image from the Flowering Meadow stamp set in Berry Burst Ink. Adhere the Basic Beige panel to a Bubble Bath mat then to the inside of the Cloud Cover card base.

Stampin' Up! Classic Greetings Thank You 6 creativestampingdesigns.com

Decorate a Basic White Medium Envelope to complete your card. Stamp the stem and leaf images from the Flowering Meadow stamp set in Peaceful Pine Ink on the envelope front. Stamp the flower image from the Flowering Meadow stamp set in Bubble Bath Ink on the stems. Stamp the flower center image from the Flowering Meadow stamp set in Berry Burst Ink inside the flowers. Adhere a panel of Velvet Meadow DSP to the envelope flap.

Stampin' Up! Classic Greetings Thank You 7 creativestampingdesigns.com

Thank you for stopping by my blog today. Now that you’ve seen my card, let’s get on with the hop! Click the next button below to hop over to see what Tara has created. Happy Hopping

Just in case you get lost along the way, here is a list of the team members involved in the hop today.

Amy Koenders

Mary Deatherage

Karen Ksenzakovic You Are Here

Tara Carpenter

Terry Lynn Bright

********************************************************************************************************

If you need any stamping supplies, I’d love to be your Demonstrator. Just click HERE to go directly to my online store or drop me an email if you have any questions. 

*********************************************************************************************************

Card stock cuts for this project:

  • Basic Beige Cardstock 4″ x 5 1/4″(inner liner)
  • Bubble Bath Cardstock (2) – 4 1/8″ x 5 3/8″(mats)
  • Cloud Cover Cardstock 5 1/2″ x 8 1/2″(card base scored & folded at 4 1/4″), 1 3/4″ x 4″(sentiment)
  • Velvet Meadow Specialty Designer Series Paper 4″ x 5 1/4″(card front), 3/4″ x 4″(inner liner), 2 1/4″ x 6″(envelope)

*********************************************************************************************************

Product List

Stampin’ Up! Moonlit Flora

Good Sunday morning stamping friends. I hope you are having a wonderful weekend. Our concert for last night got postponed because of the weather here. We had multiple server thunderstorms throughout the day and then we had a tornado watch. We’ll see when it gets rescheduled.

Today’s card is similar to a card front last week, but I rotated it in a different direction. Here’s my card for today.

Stampin' Up! Moonlit Flora CAS 1 creativestampingdesigns.com

I used the Stampin’ Up! Fern & Flora Stamp Set, Moonlit Flora Designer Series Paper and Fern & Flora 3D Embossing Folder for my card today.

Stampin' Up! Moonlit Flora CAS 2 creativestampingdesigns.com

Emboss a panel of Golden Glow using the Fern & Flora EF. Adhere the embossed panel to the Golden Glow card base.

Stampin' Up! Moonlit Flora CAS 3 creativestampingdesigns.com

Adhere the 2 panels of Moonlit Flora DSP to the panel of Basic White. Wrap a piece of Golden Glow 3/8″ Bordered Ribbon around the layered panel and tie a bow.

Stampin' Up! Moonlit Flora CAS 4 creativestampingdesigns.com

Adhere the layered panel to the card front with Stampin’ Dimensionals. Add a Dewdrop Embellishment to the card front.

Stampin' Up! Moonlit Flora CAS 5 creativestampingdesigns.com

Stamp the sentiment from the Fern & Flora stamp set in Peaceful Pine Ink on a panel of Basic White. Stamp the moth image from the Fern & Flora stamp set next to the sentiment and the floral mage on the bottom of the panel in Secret Sea Ink. Color the image using Golden Glow and Peaceful Pine Stampin’ Blends Markers. Adhere a strip of Moonlit Flora DSP to the bottom of the panel. Adhere the Basic White panel to a Peaceful Pine mat then to the inside of the Golden Glow card base.

Stampin' Up! Moonlit Flora CAS 6 creativestampingdesigns.com

Decorate a Basic White Medium Envelope to finish the card. Stamp the small flower image from the Fern & Flora stamp set in Secret Sea Ink on the envelope front. Color the image with Golden Glow & Peaceful Pine Stampin’ Blends Markers. Adhere a panel of Moonlit Flora DSP to the envelope flap.

Stampin' Up! Moonlit Flora CAS 7 creativestampingdesigns.com

Thank you for stopping by my blog today. I hope you like the card and will give it a try. Happy Stamping!!

*********************************************************************************************************

If you need any stamping supplies, I’d love to be your Demonstrator. Just click HERE to go directly to my online store or drop me an email if you have any questions. 

*********************************************************************************************************

Introducing the hottest items in crafting—the new Stampin’ Hot Foil System!!

The metallic magic starts with Stampin’ Hot Foil Rolls, specially made Hot Foil dies, and the Stampin’ Hot Foil System that works with the Stampin’ Cut & Emboss Machine (sold separately). The heat of the platform transfers the foil using hot foil dies designed specifically for this system, allowing you to add dazzling details to paper and more.

WHAT IS INCLUDED WHEN YOU PURCHASE THE STAMPIN’ HOT FOIL SYSTEM?

This is everything included in the Stampin’ Hot Foil System & Craft Class:

  • Metallic Magic Craft Class ($30 value—limited time only!)
  • Stampin’ Hot Foil platform
  • Stampin’ Hot Foil Shim & Spacer
  • Stampin’ Hot Foil Magnetic Pick-Up Tool
  • Silicone platform station
  • Silicone cooling pad
  • Power cord
  • Instructions on how to use the system

The Stampin’ Cut & Emboss Machine, Stampin’ Hot Foil Rolls (the foil itself), and Hot Foil dies and bundles are sold separately.

CRAFT CLASS

As an added bonus, everyone who purchases this system before January 4, 2027, will automatically be able to access the upcoming Metallic Magic Craft Class, a technique-centric virtual class. Attendees will make unique projects and learn crafting tips intended to elevate their hot foil crafting experience. This class is a special limited-time offer exclusive to this system and is an amazing tool when it comes to increasing skills, learning techniques, and making the most of this new product line.

You can see more details about the system, find the bundles and foil that will be available to order beginning on Friday, July 10 in this brochure:

A few notes about the new system:

  • Hot Foil results are best with either White Willow or Two-Tone Cardstock.  Smoother card stocks like the Two-Tone Cardstock and White Willow will achieve the best results when using the system, but you can use the regular card stocks too.
  • The Hot Foil System, foil rolls and new hot foil dies and bundles will be available Friday, July 10, 2026 in the online Stampin’ Up! store.
  • A FREE Hot Foil Online Class from Stampin’ Up! is included with your hot foil system purchase (a $30 value!), do not add the class separately to your cart (you’ll be charged for it if you do!).  You’ll automatically get a link to it after you purchase the Stampin’ Hot Foil System.
  • The Stampin’ Hot Foil system is $160. Dies & foil are sold separately.
  • Stampin’ Up! has let us know that if the Stampin’ Hot Foil system goes on backorder, it may take longer than normal to restock.  So if you would like to order the system, order sooner rather than later!
  • IMPORTANT NOTE:  Cutting dies are not designed to be used with hot foiling.  You cannot die cut using foiling dies.  Doing so risks damaging the dies and the system.

I’m so excited for you all to be able to order this new system!  Head over to my Stampin’ Up! online store beginning July 10 to see and order the new system!

*********************************************************************************************************

25% off your First Paper Pumpkin Kit for 1st Time Subscribers

Have you been thinking of trying Paper Pumpkin?  Now’s a perfect time to get started with our all-inclusive crafting kit subscription!  Purchase a pay-as-you-go subscription from July 11–August 10 and get 25% off the first kit!

Not only will new subscribers receive the wonderful August Kindred Greetings Kit at a discount, but they’ll also gain access to exclusive add-ons, past kits, and refills as soon as they subscribe!  It’s a great way to carve out a little creative “me time” each month while joining a global community of passionate crafters!

Promotion Details:

  • Promotion Begins: July 11, 2026
  • Promotion Ends: August 10, 2026
  • Offer applies to new subscribers only (those who haven’t had an active Paper Pumpkin subscription in the past 18 months).
  • Offer is valid for pay-as-you-go subscriptions only.  Discount does not apply to prepaid subscriptions.
  • The discounted first kit is the August Kindred Greetings Kit.
  • This kit cannot be skipped.

Head over to my online store beginning July 11 to subscribe…and if you’re a new subscriber, you’ll get 25% off the August Kit!!

*********************************************************************************************************

Card stock cuts for this project:

  • Basic White Cardstock 3 3/8″ x 4 5/8″ (card front mat), 4″ x 5 1/4″ (inner liner)
  • Golden Glow Cardstock 4 1/4″ x 11″(card base scored & folded at 5 1/2″), 4 1/4″ x 5 1/2″ (card front)
  • Peaceful Pine Cardstock 4 1/8″ x 5 3/8″(mat)
  • Moonlit Flora Designer Series Paper 1″ x 4 1/2″ & 2 1/4″ x 4 1/2″ (card front panels), 1/2″ x 4″(inner liner), 2 1/4″ x 6″ (envelope)

*********************************************************************************************************

Product List

Stampin’ Up! Banner Sayings in Black & White

Good Monday morning stamping friends, welcome to a new week. How was your weekend? Finally, Sunday we had a day without rain and it actually cooled off quite a bit with very low humidity. It’s supposed to be heading to the 90’s for the rest of the week though.

I have a quick black & white card for you today. If you’d like to see a quick video on how I made this card, Click Here to go to my Instagram Reels. Here’s my card for today.

Stampin' Up! Banner Sayings in Black & White 1 creativestampingdesigns.com

I used the Stampin’ Up! Banner Sayings Stamp Set, Stone & Vine 3D Embossing Folder and Artisan Sketched Garden Designer Series Paper for my card today.

My design is from Freshly Made Sketches Challenge #744

Stampin' Up! Banner Sayings in Black & White 2 creativestampingdesigns.com

Emboss a panel of Basic White using the Stone & Vine EF. Adhere the embossed panel to a Basic Black mat. Adhere the layered panel to a Basic White Thick card base.

Stampin' Up! Banner Sayings in Black & White 3 creativestampingdesigns.com

On the bottom of the panel of Basic White, stamp the sentiment from the Banner Sayings stamp set in Black Ink. Adhere a panel of Artisan Sketched Garden DSP to the top of the panel. Adhere the layered panel to a Basic Black mat. Adhere the strip of the Artisan Sketched Garden DSP to the card front.

Stampin' Up! Banner Sayings in Black & White 4 creativestampingdesigns.com

Adhere the layered panel over the DSP with Stampin’ Dimensionals. Fussy cut one of the vases of flowers images from the Artisan Sketched Garden DSP with Detailed Scissors. Adhere the fussy cut image to the layered panel with Stampin’ Dimensionals. Add a few Rhinestone Basic Jewels to the card front.

Stampin' Up! Banner Sayings in Black & White 5 creativestampingdesigns.com

On a panel of Basic White, stamp the sentiment from the Banner Sayings stamp set in Black Ink. Adhere a panel of Artisan Sketched Garden DSP to the bottom of the panel. Adhere the Basic White panel to a Basic Black mat then to the inside of the Basic White Thick card base.

Stampin' Up! Banner Sayings in Black & White 6 creativestampingdesigns.com

Finish the card by decorating a Basic White Medium Envelope. Stamp the sentiment from Banner Sayings stamp set in Black Ink on the envelope front. Adhere a panel of Artisan Sketched Garden DSP to the envelope flapl

Stampin' Up! Banner Sayings in Black & White 7 creativestampingdesigns.com

Thank you for stopping by my blog today. I hope you like the card and will give it a try. Happy Stamping!!

*********************************************************************************************************

If you need any stamping supplies, I’d love to be your Demonstrator. Just click HERE to go directly to my online store or drop me an email if you have any questions. 

*********************************************************************************************************

Introducing the hottest items in crafting—the new Stampin’ Hot Foil System!!

The metallic magic starts with Stampin’ Hot Foil Rolls, specially made Hot Foil dies, and the Stampin’ Hot Foil System that works with the Stampin’ Cut & Emboss Machine (sold separately). The heat of the platform transfers the foil using hot foil dies designed specifically for this system, allowing you to add dazzling details to paper and more.

WHAT IS INCLUDED WHEN YOU PURCHASE THE STAMPIN’ HOT FOIL SYSTEM?

This is everything included in the Stampin’ Hot Foil System & Craft Class:

  • Metallic Magic Craft Class ($30 value—limited time only!)
  • Stampin’ Hot Foil platform
  • Stampin’ Hot Foil Shim & Spacer
  • Stampin’ Hot Foil Magnetic Pick-Up Tool
  • Silicone platform station
  • Silicone cooling pad
  • Power cord
  • Instructions on how to use the system

The Stampin’ Cut & Emboss Machine, Stampin’ Hot Foil Rolls (the foil itself), and Hot Foil dies and bundles are sold separately.

CRAFT CLASS

As an added bonus, everyone who purchases this system before January 4, 2027, will automatically be able to access the upcoming Metallic Magic Craft Class, a technique-centric virtual class. Attendees will make unique projects and learn crafting tips intended to elevate their hot foil crafting experience. This class is a special limited-time offer exclusive to this system and is an amazing tool when it comes to increasing skills, learning techniques, and making the most of this new product line.

You can see more details about the system, find the bundles and foil that will be available to order beginning on Friday, July 10 in this brochure:

A few notes about the new system:

  • Hot Foil results are best with either White Willow or Two-Tone Cardstock.  Smoother card stocks like the Two-Tone Cardstock and White Willow will achieve the best results when using the system, but you can use the regular card stocks too.
  • The Hot Foil System, foil rolls and new hot foil dies and bundles will be available Friday, July 10, 2026 in the online Stampin’ Up! store.
  • A FREE Hot Foil Online Class from Stampin’ Up! is included with your hot foil system purchase (a $30 value!), do not add the class separately to your cart (you’ll be charged for it if you do!).  You’ll automatically get a link to it after you purchase the Stampin’ Hot Foil System.
  • The Stampin’ Hot Foil system is $160. Dies & foil are sold separately.
  • Stampin’ Up! has let us know that if the Stampin’ Hot Foil system goes on backorder, it may take longer than normal to restock.  So if you would like to order the system, order sooner rather than later!
  • IMPORTANT NOTE:  Cutting dies are not designed to be used with hot foiling.  You cannot die cut using foiling dies.  Doing so risks damaging the dies and the system.

I’m so excited for you all to be able to order this new system!  Head over to my Stampin’ Up! online store beginning July 10 to see and order the new system!

*********************************************************************************************************

LAST DAY for Double Creative Stamping Designs Rewards Extended

I’m offering Double Creative Stamping Designs Rewards. THAT’S 2X THE REWARDS FOR YOU FROM ME through Monday July 13 for all orders over $50 (before tax & shipping)!! How does this work? For a $50 you’ll earn 2 rewards, $100 you’ll earn 4 rewards, $150 you’ll earn 6 rewards, etc. Hurry over to my Online Store and get those orders in for those July Online Exclusives and the New Hot Foil System (available July 10) and earn those Double Rewards!

*********************************************************************************************************

New Join Experience

If you’ve been thinking about joining the Stampin’ Up! community, wait until July 10th and you can use your $125 coupon code to order the Hot Foil system!!

Stampin’ Up! is introducing a simplified join process designed to make joining faster and easier than ever before!  The new process will create a more streamlined experience when you join!  

As part of the new join process, all first-time demonstrators will receive a surprise Welcome Box—a gesture of appreciation and a warm welcome into the global Stampin’ Up! creative community!

How the New Process Works

Step 1: Join

New demonstrators will:

  1. choose a team leader.
  2. accept required agreements.
  3. enter a few personal details.
  4. pay the $100 join fee.
  5. click submit.

Step 2: Shop

Once their information has been reviewed and approved (usually very quickly), their Welcome Box ships, and the new demonstrator receives an email with:

  • their demonstrator ID.
  • a coupon code to begin shopping.

About the Coupon Code

  • Valued at $125.
  • Coupon code can be applied to any demonstrator order.
  • Order CAN exceed the coupon code value (I know that many people wanted the option to be able to add more than $125 to their Starter Kit!).
  • Any amount above the coupon code value:
    • receives the demonstrator discount.
    • counts toward the quarterly sales minimum.
    • earns Stampin’ Rewards if it meets the qualifying purchase amount (as long as you’ve opted into the Stampin’ Rewards program).

Additional perk for new demonstrators

  • New demonstrators may add eight free catalogs to any order!

Let me know if you have any questions about the new joining process.  I’m so happy that you’ll now have the option to go over the $125 amount AND that it will automatically count toward your sales! 

Why not start thinking about joining the Stampin’ Up! community. I’d love to have you on my team and July is the perfect time to sign up. Contact me at: creativestampingdesigns@gmail.com and I’d be more than happy to answer any questions you might have. We’re a very relaxed team that loves to create and share.

*********************************************************************************************************

Card stock cuts for this project:

  • Basic Black Cardstock (2) i 4 1/8″ x 5 3/8″(mats), 2 3/8″ x 4 1/8″(mat)
  • Basic White Cardstock (2) – 4″ x 5 1/4″(card front & inner liner), 2 1/4″ x 4″(sentiment)
  • Basic White Thick Cardstock 4 1/4″ x 11″(card base scored & folded at 5 1/2″)
  • Artisan Sketched Garden Designer Series Paper 2″ x 3 1/4″ (card front panel), 1/2″ x 3 1/2″ (card front panel), 1/2″ x 4″(inner liner), 2 1/4″ x 6″(envelope)

*********************************************************************************************************

Product List

Stampin’ Up! Flower Fair

Good Sunday morning stamping friends. I hope you are having a wonderful weekend.

I have a quick card for you today. If you like coloring, this set is a perfect one for that. Here’s my card for today.

Stampin' Up! Flower Fair CAS 1 cretivestampingdesigns.com

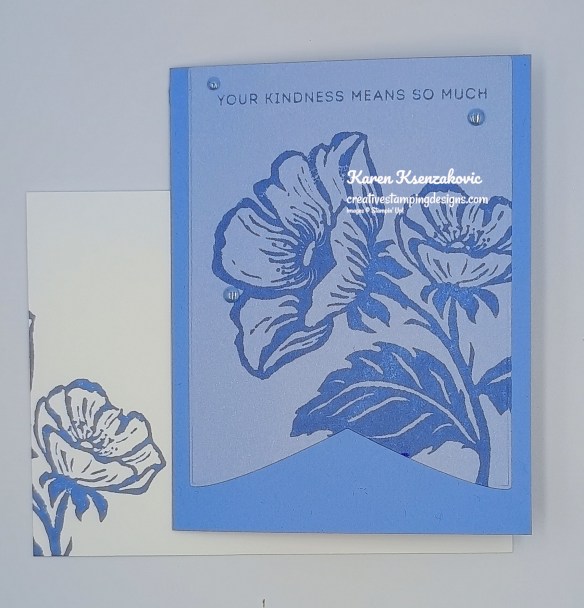
I used the Stampin’ Up! Flower Fair Stamp Set, Stampin’ Up! Framed Violets Stamp Set, Everyday Arches Dies and Bloom Boutique Specialty Designer Series Paper for my card today.

Stampin' Up! Flower Fair CAS 2 cretivestampingdesigns.com

Stamp the large floral image using the Flower Fair stamp set in Secret Sea Ink on a panel of Basic White. Color the image using Flirty Flamingo, Hydrangea Hue, Lemon Lime Twist and Lemon Lolly Stampin’ Blends Markers.

Stampin' Up! Flower Fair CAS 3 cretivestampingdesigns.com

Cut the stamped image using the Everyday Arches Dies. Cut a panel of Secret Sea using the next largest Everyday Arches Dies. Adhere the stamped die cut image to the Secret Sea mat. Adhere a panel of Bloom Boutique DSP to a Hydrangea Hue card base

Stampin' Up! Flower Fair CAS 4 cretivestampingdesigns.com

Adhere the layered die cut to the card front with Stampin’ Dimensionals. Stamp the sentiment from Framed Violets stamp set in Secret Sea Ink on a panel of Basic White. Adhere a piece of Hydrangea Hue 3/8″ Bordered Ribbon to the card front. Adhere the sentiment over the ribbon with Stampin’ Dimensionals. Add a few Array of Dots to the card front.

Stampin' Up! Flower Fair CAS 5 cretivestampingdesigns.com

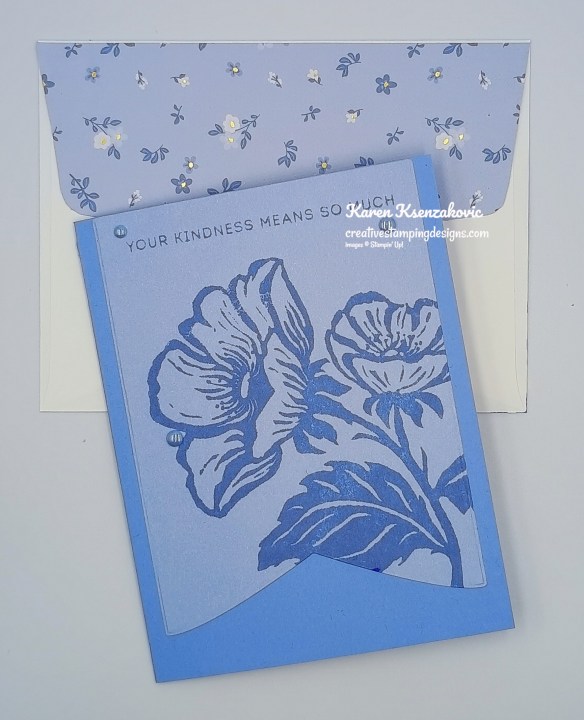
Adhere a strip of Bloom Boutique DSP to the bottom of a panel of Basic White. Adhere the Basic White panel to a Secret Sea mat then to the inside of the Hydrangea Hue card base.
Stampin' Up! Flower Fair CAS 6 cretivestampingdesigns.com

Decorate a Basic Whtie Medium Envelope to finish the card. Stamp the small flower image from the Framed Violets stamp set in Secret Sea Ink on the envelope front. Color the image using Hydrangea Hue, Lemon Lime Twist and Lemon Lolly Stampin’ Blends Markers. Adhere a panel of Bloom Boutique DSP to the envelope flap.
Stampin' Up! Flower Fair CAS 7 cretivestampingdesigns.com

Thank you for stopping by my blog today. I hope you like the card and will give it a try. Happy Stamping!!

*********************************************************************************************************

If you need any stamping supplies, I’d love to be your Demonstrator. Just click HERE to go directly to my online store or drop me an email if you have any questions. 

*********************************************************************************************************

Introducing the hottest items in crafting—the new Stampin’ Hot Foil System!!

The metallic magic starts with Stampin’ Hot Foil Rolls, specially made Hot Foil dies, and the Stampin’ Hot Foil System that works with the Stampin’ Cut & Emboss Machine (sold separately). The heat of the platform transfers the foil using hot foil dies designed specifically for this system, allowing you to add dazzling details to paper and more.

WHAT IS INCLUDED WHEN YOU PURCHASE THE STAMPIN’ HOT FOIL SYSTEM?

This is everything included in the Stampin’ Hot Foil System & Craft Class:

  • Metallic Magic Craft Class ($30 value—limited time only!)
  • Stampin’ Hot Foil platform
  • Stampin’ Hot Foil Shim & Spacer
  • Stampin’ Hot Foil Magnetic Pick-Up Tool
  • Silicone platform station
  • Silicone cooling pad
  • Power cord
  • Instructions on how to use the system

The Stampin’ Cut & Emboss Machine, Stampin’ Hot Foil Rolls (the foil itself), and Hot Foil dies and bundles are sold separately.

CRAFT CLASS

As an added bonus, everyone who purchases this system before January 4, 2027, will automatically be able to access the upcoming Metallic Magic Craft Class, a technique-centric virtual class. Attendees will make unique projects and learn crafting tips intended to elevate their hot foil crafting experience. This class is a special limited-time offer exclusive to this system and is an amazing tool when it comes to increasing skills, learning techniques, and making the most of this new product line.

You can see more details about the system, find the bundles and foil that will be available to order beginning on Friday, July 10 in this brochure:

A few notes about the new system:

  • Hot Foil results are best with either White Willow or Two-Tone Cardstock.  Smoother card stocks like the Two-Tone Cardstock and White Willow will achieve the best results when using the system, but you can use the regular card stocks too.
  • The Hot Foil System, foil rolls and new hot foil dies and bundles will be available Friday, July 10, 2026 in the online Stampin’ Up! store.
  • A FREE Hot Foil Online Class from Stampin’ Up! is included with your hot foil system purchase (a $30 value!), do not add the class separately to your cart (you’ll be charged for it if you do!).  You’ll automatically get a link to it after you purchase the Stampin’ Hot Foil System.
  • The Stampin’ Hot Foil system is $160. Dies & foil are sold separately.
  • Stampin’ Up! has let us know that if the Stampin’ Hot Foil system goes on backorder, it may take longer than normal to restock.  So if you would like to order the system, order sooner rather than later!
  • IMPORTANT NOTE:  Cutting dies are not designed to be used with hot foiling.  You cannot die cut using foiling dies.  Doing so risks damaging the dies and the system.

I’m so excited for you all to be able to order this new system!  Head over to my Stampin’ Up! online store beginning July 10 to see and order the new system!

*********************************************************************************************************

Double Creative Stamping Designs Rewards Extended to Monday July 13

I’m offering Double Creative Stamping Designs Rewards. THAT’S 2X THE REWARDS FOR YOU FROM ME through Monday July 13 for all orders over $50 (before tax & shipping)!! How does this work? For a $50 you’ll earn 2 rewards, $100 you’ll earn 4 rewards, $150 you’ll earn 6 rewards, etc. Hurry over to my Online Store and get those orders in for those July Online Exclusives and the New Hot Foil System (available July 10) and earn those Double Rewards!

*********************************************************************************************************

New Join Experience

If you’ve been thinking about joining the Stampin’ Up! community, wait until July 10th and you can use your $125 coupon code to order the Hot Foil system!!

Stampin’ Up! is introducing a simplified join process designed to make joining faster and easier than ever before!  The new process will create a more streamlined experience when you join!  

As part of the new join process, all first-time demonstrators will receive a surprise Welcome Box—a gesture of appreciation and a warm welcome into the global Stampin’ Up! creative community!

How the New Process Works

Step 1: Join

New demonstrators will:

  1. choose a team leader.
  2. accept required agreements.
  3. enter a few personal details.
  4. pay the $100 join fee.
  5. click submit.

Step 2: Shop

Once their information has been reviewed and approved (usually very quickly), their Welcome Box ships, and the new demonstrator receives an email with:

  • their demonstrator ID.
  • a coupon code to begin shopping.

About the Coupon Code

  • Valued at $125.
  • Coupon code can be applied to any demonstrator order.
  • Order CAN exceed the coupon code value (I know that many people wanted the option to be able to add more than $125 to their Starter Kit!).
  • Any amount above the coupon code value:
    • receives the demonstrator discount.
    • counts toward the quarterly sales minimum.
    • earns Stampin’ Rewards if it meets the qualifying purchase amount (as long as you’ve opted into the Stampin’ Rewards program).

Additional perk for new demonstrators

  • New demonstrators may add eight free catalogs to any order!

Let me know if you have any questions about the new joining process.  I’m so happy that you’ll now have the option to go over the $125 amount AND that it will automatically count toward your sales! 

Why not start thinking about joining the Stampin’ Up! community. I’d love to have you on my team and July is the perfect time to sign up. Contact me at: creativestampingdesigns@gmail.com and I’d be more than happy to answer any questions you might have. We’re a very relaxed team that loves to create and share.

*********************************************************************************************************

Card stock cuts for this project:

  • Basic White Cardstock (2) – 3 3/4″ x 5″(artwork & inner liner), 1/2″ x 2 1/2″(sentiment)
  • Hydrangea Hue Cardstock 4 1/4″ x 11″(card base scored & folded @ 5 1/2″)
  • Secret Sea Cardstock (2) – 4″ x 5 1/4″ (mats)
  • Bloom Boutique Specialty Designer series Paper 4 1/4″ x 5 1/2″(card front), 1/2″ x 3 3/4″(inner liner), 2 1/4″ x 6″(envelope)

*********************************************************************************************************

Product List

Stampin’ Up! Framed Violets Fun Fold

Good Saturday morning stamping friends, welcome to the weekend. I hope you’ve got some plans in the works. I’ll be working all day, but we’ll also be parting al day. Today is one of my favorite managers last weekend working. He’ll be moving to TN next week to be closer to his daughter and grandchildren. He’s going to be missed tramendously.

I have a fun fold card for you today, since I missed yesterday. I was working on a card and hoping to go live Thursday night when I got a call from my son. His car wouldn’t start and he was just getting off of work. If you’d like to see a quick video on how I made this card, Click Here to go to my Instagram Reels. Here’s my card for today.

Stampin' Up! Framed Violet Fun Fold 1 creativestampingdesigns.com

I used the Stampin’ Up! Framed Violets Bundle, Violet Blooms Specialty Designer Series Paper and Stone & Vine 3D Embossing Folder for my card today.

Stampin' Up! Framed Violet Fun Fold 2 creativestampingdesigns.com

Score and fold the Secret Sea card base at 1″, 2″, 3″ & 4″. Adhere the panels of Violet Dreams DSP to the coordinating Basic White Mats. Adhere the 3 layered panels to the center 3 sections. Do not adhere anything to the 1st section. Add Tear & Tape on the 1st scored section (see the image below).

Stampin' Up! Framed Violet Fun Fold 3 creativestampingdesigns.com

Adhere the larger layered panel of Voilet Dreams DSP to the right side of the card base. Adhere the first section to the card base making a cube. Using the Framed Violets Dies, cut the scalloped oval and smaller oval from a panel of Basic White. Emboss the smaller panel using the Stone & Vine EF. Adhere the embossed panel to the scalloped oval. Fold the cube flat and adhere scalloped oval.

Stampin' Up! Framed Violet Fun Fold 4 creativestampingdesigns.com

Punch out the large flower image and the coordinating small flowers and leaves from the Violet Dreams DSP. Adhere the small flowers and leaves to the large flower image with Stampin’ Dimensionals. Adhere the layered flower image to the oval with Stampin’ Dimensionals. tie a small bow using the Fresh Freesia 1/4″ Satin Ribbon and adhere it to the stems with a Glue Dot.

Stampin' Up! Framed Violet Fun Fold 5 creativestampingdesigns.com

Stamp the sentiment from Framed Violets stamp set in secret sea Ink on a panel of Basic White. Adhere a strip of Violet Dreams DSP to the bottom of the panel. Stamp the large flower image from Framed Violets stamp set in Secret Sea Ink on the bottom of the panel and color the image with Darling Duckling and Peaceful Pine Stampin’ Blends Markers. Adhere the Basic White panel to a Highland Heather mat then to the back of the Secret Sea card base.

Stampin' Up! Framed Violet Fun Fold 6 creativestampingdesigns.com

Decorate a Basic White Medium Envelope to finish your card. Stamp the larger flower image from the Framed Violets stamp set in Secret Sea Ink on the envelope front color the image with Darling Duckling and Peaceful Pine Stampin’ Blends Markers. Adhere a panel of Violet Dreams DSP to the envelope flap.

Stampin' Up! Framed Violet Fun Fold 7 creativestampingdesigns.com

Thank you for stopping by my blog today. I hope you like the card and will give it a try. Happy Stamping!!

*********************************************************************************************************

If you need any stamping supplies, I’d love to be your Demonstrator. Just click HERE to go directly to my online store or drop me an email if you have any questions. 

*********************************************************************************************************

Introducing the hottest items in crafting—the new Stampin’ Hot Foil System!!

The metallic magic starts with Stampin’ Hot Foil Rolls, specially made Hot Foil dies, and the Stampin’ Hot Foil System that works with the Stampin’ Cut & Emboss Machine (sold separately). The heat of the platform transfers the foil using hot foil dies designed specifically for this system, allowing you to add dazzling details to paper and more.

WHAT IS INCLUDED WHEN YOU PURCHASE THE STAMPIN’ HOT FOIL SYSTEM?

This is everything included in the Stampin’ Hot Foil System & Craft Class:

  • Metallic Magic Craft Class ($30 value—limited time only!)
  • Stampin’ Hot Foil platform
  • Stampin’ Hot Foil Shim & Spacer
  • Stampin’ Hot Foil Magnetic Pick-Up Tool
  • Silicone platform station
  • Silicone cooling pad
  • Power cord
  • Instructions on how to use the system

The Stampin’ Cut & Emboss Machine, Stampin’ Hot Foil Rolls (the foil itself), and Hot Foil dies and bundles are sold separately.

CRAFT CLASS

As an added bonus, everyone who purchases this system before January 4, 2027, will automatically be able to access the upcoming Metallic Magic Craft Class, a technique-centric virtual class. Attendees will make unique projects and learn crafting tips intended to elevate their hot foil crafting experience. This class is a special limited-time offer exclusive to this system and is an amazing tool when it comes to increasing skills, learning techniques, and making the most of this new product line.

You can see more details about the system, find the bundles and foil that will be available to order beginning on Friday, July 10 in this brochure:

A few notes about the new system:

  • Hot Foil results are best with either White Willow or Two-Tone Cardstock.  Smoother card stocks like the Two-Tone Cardstock and White Willow will achieve the best results when using the system, but you can use the regular card stocks too.
  • The Hot Foil System, foil rolls and new hot foil dies and bundles will be available Friday, July 10, 2026 in the online Stampin’ Up! store.
  • A FREE Hot Foil Online Class from Stampin’ Up! is included with your hot foil system purchase (a $30 value!), do not add the class separately to your cart (you’ll be charged for it if you do!).  You’ll automatically get a link to it after you purchase the Stampin’ Hot Foil System.
  • The Stampin’ Hot Foil system is $160. Dies & foil are sold separately.
  • Stampin’ Up! has let us know that if the Stampin’ Hot Foil system goes on backorder, it may take longer than normal to restock.  So if you would like to order the system, order sooner rather than later!
  • IMPORTANT NOTE:  Cutting dies are not designed to be used with hot foiling.  You cannot die cut using foiling dies.  Doing so risks damaging the dies and the system.

I’m so excited for you all to be able to order this new system!  Head over to my Stampin’ Up! online store beginning July 10 to see and order the new system!

*********************************************************************************************************

Double Creative Stamping Designs Rewards Extended to Monday July 13

I’m offering Double Creative Stamping Designs Rewards. THAT’S 2X THE REWARDS FOR YOU FROM ME through Monday July 13 for all orders over $50 (before tax & shipping)!! How does this work? For a $50 you’ll earn 2 rewards, $100 you’ll earn 4 rewards, $150 you’ll earn 6 rewards, etc. Hurry over to my Online Store and get those orders in for those July Online Exclusives and the New Hot Foil System (available July 10) and earn those Double Rewards!

*********************************************************************************************************

New Join Experience

If you’ve been thinking about joining the Stampin’ Up! community, wait until July 10th and you can use your $125 coupon code to order the Hot Foil system!!

Stampin’ Up! is introducing a simplified join process designed to make joining faster and easier than ever before!  The new process will create a more streamlined experience when you join!  

As part of the new join process, all first-time demonstrators will receive a surprise Welcome Box—a gesture of appreciation and a warm welcome into the global Stampin’ Up! creative community!

How the New Process Works

Step 1: Join

New demonstrators will:

  1. choose a team leader.
  2. accept required agreements.
  3. enter a few personal details.
  4. pay the $100 join fee.
  5. click submit.

Step 2: Shop

Once their information has been reviewed and approved (usually very quickly), their Welcome Box ships, and the new demonstrator receives an email with:

  • their demonstrator ID.
  • a coupon code to begin shopping.

About the Coupon Code

  • Valued at $125.
  • Coupon code can be applied to any demonstrator order.
  • Order CAN exceed the coupon code value (I know that many people wanted the option to be able to add more than $125 to their Starter Kit!).
  • Any amount above the coupon code value:
    • receives the demonstrator discount.
    • counts toward the quarterly sales minimum.
    • earns Stampin’ Rewards if it meets the qualifying purchase amount (as long as you’ve opted into the Stampin’ Rewards program).

Additional perk for new demonstrators

  • New demonstrators may add eight free catalogs to any order!

Let me know if you have any questions about the new joining process.  I’m so happy that you’ll now have the option to go over the $125 amount AND that it will automatically count toward your sales! 

Why not start thinking about joining the Stampin’ Up! community. I’d love to have you on my team and July is the perfect time to sign up. Contact me at: creativestampingdesigns@gmail.com and I’d be more than happy to answer any questions you might have. We’re a very relaxed team that loves to create and share.

*********************************************************************************************************

Card stock cuts for this project:

  • Basic White Cardstock (3) – 7/8″ x 5 3/8″ (mats), 3″ x 5 3/8″(mat), 4″ x 5 1/4″(back panel), 4 1/2″ x 5 1/2″(die cuts)
  • Highland Heather Cardstock 4 1/8″ x 5 3/8″(back nat)
  • Secret Sea Cardstock 5 1/2″ x 8 1/4″(card base scored & folded at 1″, 2″, 3″ & 4″)
  • Violet Dreams Specialty Designer Series Paper (3) – 3/4″ x 5 1/4″(front panels), 2 7/8″ x 5 1/4″(card front), 1/2″ x 4″(back panel), 2 1/4″ x 6″(envelope flap)

*********************************************************************************************************

Product List

Stampin’ Up! Words & Wishes Thank You

Good Wednesday morning stamping friends. How are you all doing today? It’s been a hectic week for some reason.

Today’s card I made with the ladies that come to my in person class last night. We had a technique class and we made 4 cards that were all different techniques. I stamped along with them since it was easier to show them what to do. Here’s my card for today.

Stampin' Up! Words & Wishes Thank You 1 creativestampingdesigns.com

I used the Stampin’ Up! Words & Wishes Bundle, Regals Painted Patterns Designer Series Paper and Fluid 100 Watercolor Paper for my card today.

Stampin' Up! Words & Wishes Thank You 2 creativestampingdesigns.com

Tear the bottom of the panel of Fluid 100 Watercolor Paper. Add about 32oz of water to a bowl and add 30-40 drops of Shaded Spruce Ink and stir. Dip paper in the water and hold it in for 30-60 seconds. Let dry. Add another 10-15 drops of Shaded Spruce Ink and stir. Dip paper in the colored water again not as far as the 1st time and hold if for 30-60 seconds. Let dry. Add another 10-15 drops of Shaded Spruce Ink and stir. Dip paper in colored water only a little and hold it for 30-60 seconds. Let dry.

Stampin' Up! Words & Wishes Thank You 3 creativestampingdesigns.com

Die cut the sentiment from the center of the panel of Regals Painted Patterns DSP using the Words & Wishes Dies. Adhere the panel of DSP to a Shaded Spruce card base. Adhere the sentiment to the dry panel of Fluid 100 Watercolor Paper.

Stampin' Up! Words & Wishes Thank You 4 creativestampingdesigns.com

Adhere the panel to the card front with Stampin’ Dimensionals. Die cut the leaves from the Words & Wishes Dies from panels of Shaded Spruce and Soft Sea Foam. Adhere the leaves around the watercolor panel.

Stampin' Up! Words & Wishes Thank You 5 creativestampingdesigns.com

Stamp the sentiments from the Words & Wishes stamp set in Shaded Spruce Ink on a panel of Basic White. Adhere a strip of Regals Painted Patterns DSP to the bottom of the panel. Adhere a few more of the die cut leaves around the panel. Adhere the Basic White panel to a Soft Sea Foam mat then to the inside of the Shaded Spruce card base.

Stampin' Up! Words & Wishes Thank You 6 creativestampingdesigns.com

Decorate a Basic White Medium Envelope to finish your card. Adhere a few of the die cut leaves to the top front of the envelope. Adhere a panel of Regals Painted Patterns DSP to the envelope flap.

Stampin' Up! Words & Wishes Thank You 7 creativestampingdesigns.com

Thank you for stopping by my blog today. I hope you like the card and will give it a try. Happy Stamping!!

*********************************************************************************************************

If you need any stamping supplies, I’d love to be your Demonstrator. Just click HERE to go directly to my online store or drop me an email if you have any questions. 

*********************************************************************************************************

Introducing one of the hottest items in crafting—the new Stampin’ Hot Foil System!!

The metallic magic starts with Stampin’ Hot Foil Rolls, specially made Hot Foil dies, and the Stampin’ Hot Foil System that works with the Stampin’ Cut & Emboss Machine (sold separately). The heat of the platform transfers the foil using hot foil dies designed specifically for this system, allowing you to add dazzling details to paper and more.

WHAT IS INCLUDED WHEN YOU PURCHASE THE STAMPIN’ HOT FOIL SYSTEM?

This is everything included in the Stampin’ Hot Foil System & Craft Class:

  • Metallic Magic Craft Class ($30 value—limited time only!)
  • Stampin’ Hot Foil platform
  • Stampin’ Hot Foil Shim & Spacer
  • Stampin’ Hot Foil Magnetic Pick-Up Tool
  • Silicone platform station
  • Silicone cooling pad
  • Power cord
  • Instructions on how to use the system

The Stampin’ Cut & Emboss Machine, Stampin’ Hot Foil Rolls (the foil itself), and Hot Foil dies and bundles are sold separately.

CRAFT CLASS

As an added bonus, everyone who purchases this system before January 4, 2027, will automatically be able to access the upcoming Metallic Magic Craft Class, a technique-centric virtual class. Attendees will make unique projects and learn crafting tips intended to elevate their hot foil crafting experience. This class is a special limited-time offer exclusive to this system and is an amazing tool when it comes to increasing skills, learning techniques, and making the most of this new product line.

You can see more details about the system, find the bundles and foil that will be available to order beginning on Friday, July 10 in this brochure:

A few notes about the new system:

  • Hot Foil results are best with either White Willow or Two-Tone Cardstock.  Smoother card stocks like the Two-Tone Cardstock and White Willow will achieve the best results when using the system, but you can use the regular card stocks too.
  • The Hot Foil System, foil rolls and new hot foil dies and bundles will be available Friday, July 10, 2026 in the online Stampin’ Up! store.
  • A FREE Hot Foil Online Class from Stampin’ Up! is included with your hot foil system purchase (a $30 value!), do not add the class separately to your cart (you’ll be charged for it if you do!).  You’ll automatically get a link to it after you purchase the Stampin’ Hot Foil System.
  • The Stampin’ Hot Foil system is $160. Dies & foil are sold separately.
  • Stampin’ Up! has let us know that if the Stampin’ Hot Foil system goes on backorder, it may take longer than normal to restock.  So if you would like to order the system, order sooner rather than later!
  • IMPORTANT NOTE:  Cutting dies are not designed to be used with hot foiling.  You cannot die cut using foiling dies.  Doing so risks damaging the dies and the system.

I’m so excited for you all to be able to order this new system!  Head over to my Stampin’ Up! online store beginning July 10 to see and order the new system!

*********************************************************************************************************

Double Creative Stamping Designs Rewards Extended to Monday July 13

I’m offering Double Creative Stamping Designs Rewards. THAT’S 2X THE REWARDS FOR YOU FROM ME through Monday July 13 for all orders over $50 (before tax & shipping)!! How does this work? For a $50 you’ll earn 2 rewards, $100 you’ll earn 4 rewards, $150 you’ll earn 6 rewards, etc. Hurry over to my Online Store and get those orders in for those July Online Exclusives and the New Hot Foil System (available July 10) and earn those Double Rewards!

*********************************************************************************************************

New Join Experience

If you’ve been thinking about joining the Stampin’ Up! community, wait until July 10th and you can use your $125 coupon code to order the Hot Foil system!!

Stampin’ Up! is introducing a simplified join process designed to make joining faster and easier than ever before!  The new process will create a more streamlined experience when you join!  

As part of the new join process, all first-time demonstrators will receive a surprise Welcome Box—a gesture of appreciation and a warm welcome into the global Stampin’ Up! creative community!

How the New Process Works

Step 1: Join

New demonstrators will:

  1. choose a team leader.
  2. accept required agreements.
  3. enter a few personal details.
  4. pay the $100 join fee.
  5. click submit.

Step 2: Shop

Once their information has been reviewed and approved (usually very quickly), their Welcome Box ships, and the new demonstrator receives an email with:

  • their demonstrator ID.
  • a coupon code to begin shopping.

About the Coupon Code

  • Valued at $125.
  • Coupon code can be applied to any demonstrator order.
  • Order CAN exceed the coupon code value (I know that many people wanted the option to be able to add more than $125 to their Starter Kit!).
  • Any amount above the coupon code value:
    • receives the demonstrator discount.
    • counts toward the quarterly sales minimum.
    • earns Stampin’ Rewards if it meets the qualifying purchase amount (as long as you’ve opted into the Stampin’ Rewards program).

Additional perk for new demonstrators

  • New demonstrators may add eight free catalogs to any order!

Let me know if you have any questions about the new joining process.  I’m so happy that you’ll now have the option to go over the $125 amount AND that it will automatically count toward your sales! 

Why not start thinking about joining the Stampin’ Up! community. I’d love to have you on my team and July is the perfect time to sign up. Contact me at: creativestampingdesigns@gmail.com and I’d be more than happy to answer any questions you might have. We’re a very relaxed team that loves to create and share.

*********************************************************************************************************

Register for Christmas in July Class featuring Pretty Poinsettia

Tara and I are teaming up to offer a Christmas in July Online Class featuring the Stampin’ Up! Pretty Poinsettia Bundle and 2026-2028 In-Color Gingham Gallery DSP. To ensure we can get the products for you the sign-up time is very short. We want to ensure that we are able to get the embossing folders for everyone and the bundle if you wish to order it. We are offering the bundle to you at an additional 10% discount (see price on form). We will be creating 6 different cards during the class including 2 Fun Fold cards. Click Here to register.

The class fee includes:

  • Stampin’ Up! Iridescent Pearls Basic Jewels (full pack)
  • Seasonal Cheer Mini Embossing Folder
  • Pre-cut card kits to complete each card
  • Zoom class with complete instructions to complete each card

During sign up you will have the option to add additional items to your order that you can take advantage of at no additional shipping cost.  These items are optional, however if you want to recreate the cards you will need them. If you’ve attended a previous class, you were given a discount code, there is a spot to put that code on the form and the discount only applies to the products that you check off that you wish to purchase, not the class.  Since the Pretty Poinsettia Bundle is already discounted, the discount does not apply to that.

The class will be held Sunday July 26th from 1 to 4 pm Eastern Time via Zoom.  This allows anyone in the United States to participate live!  Can’t join us live… no worries, we will record the session so it can be replayed at any time.

I will email written directions that will include directions, cardstock cuts as well as photos to help you create each card.

Class Cost $40 + $10 (Shipping) 

Additional purchased items will be included in the above shipping price.  I will invoice you through PayPal and invoices must be paid by July 10th to insure I can get the products.  Sign up by Clicking Here.

Deadline: Friday July 10th 

*********************************************************************************************************

Card stock cuts for this project:

  • Basic White Cardstock 3 3/4″ x 5″(inner liner)
  • Shaded Spruce Cardstock 4 1/4″ x 11″(card base scored & folded at 5 1/2″), 1 1/4″ x 5(die cuts)
  • Soft Sea Foam Cardstock 4″ x 5 1/4″(inner liner), 2″ x 2 1/2″(die cuts)
  • Regals Painted Patterns Designer Series Paper 4 1/4″ x 5 1/2″ (card front), 1/2″ x 3 3/4″ (inner liner), 2 1//4″ x 6″ (envelope Flap)
  • Fluid 100 Watercolor Paper 3 3/4″ x 5″ panel

*********************************************************************************************************

Product List