
Good Sunday morning stamping friends. I hope you are having a great weekend. Today I have our quarterly meeting, and this is the 1st time in a couple years that I can’t go in person. I always loved going in person, but unfortunately, it’s a little too far to travel right now. Hopefully I’ll be able to attend an in-person meeting in the next year.
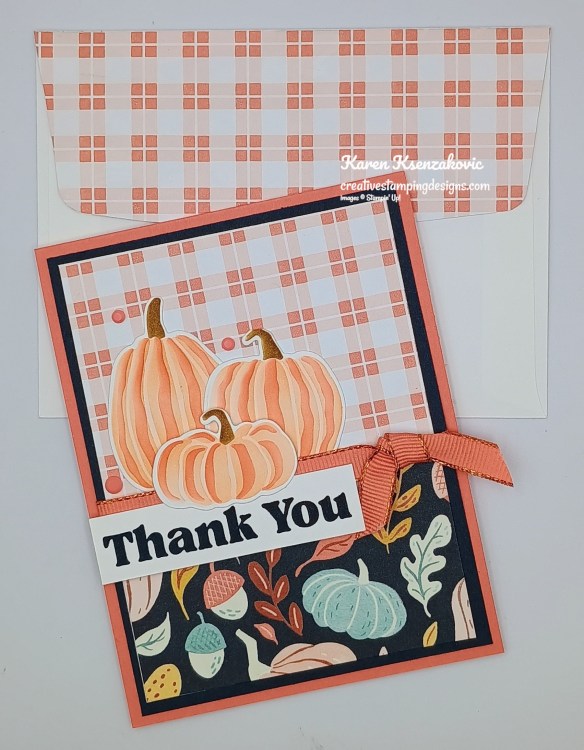
Today I played with some decorative masks for my card. I love playing with the masks since you can use any color combination you can think of. If you’d like to see a quick video of how I made this card, Click Here to go to my Instagram Reels. Here’s my card for today.
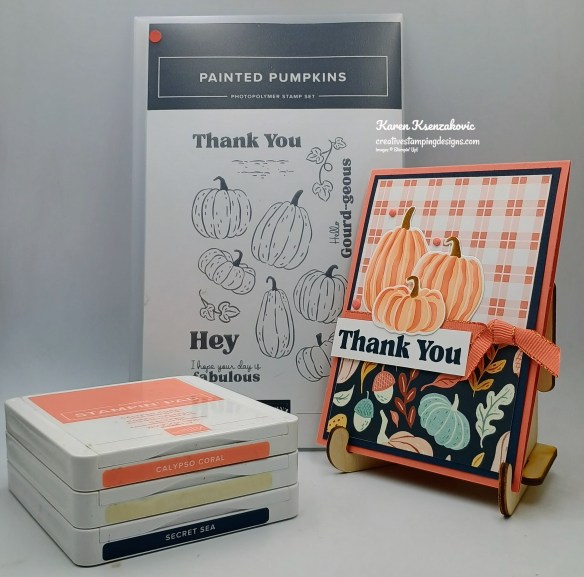
I used the Stampin’ Up! Painted Pumpkins Bundle and Painted Patch Designer Series Paper for my card today.
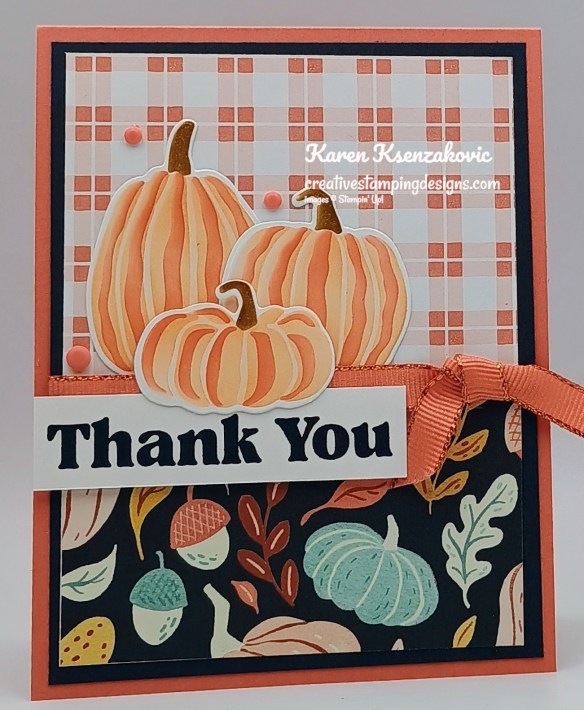
Adhere a panel of Painted Patch DSP to the bottom of another panel of Painted Patch DSP. Adhere the layered panel to a Secret Sea mat.
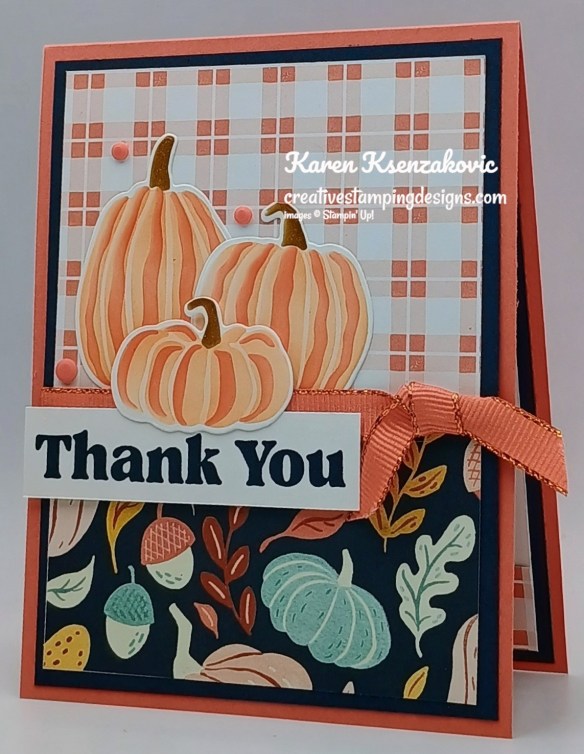
Wrap a piece of Calypso Coral/Copper 3/8″ Bordered Ribbon around the layered panel and tie a knot. Adhere the layered panel to a Calypso Coral card base. Using the Painted Pumpkins Decorative Masks, on a panel of Basic White, add Petal Pink Ink with a Small Blending Brush using Mask #1. Using Mask #2 add more Petal Pink Ink. Add Calypso Coral Ink using Mask # 3 and Pecan Pie Ink using Mask #4. Cut the pumpkins out using the Painted Pumpkins Dies.
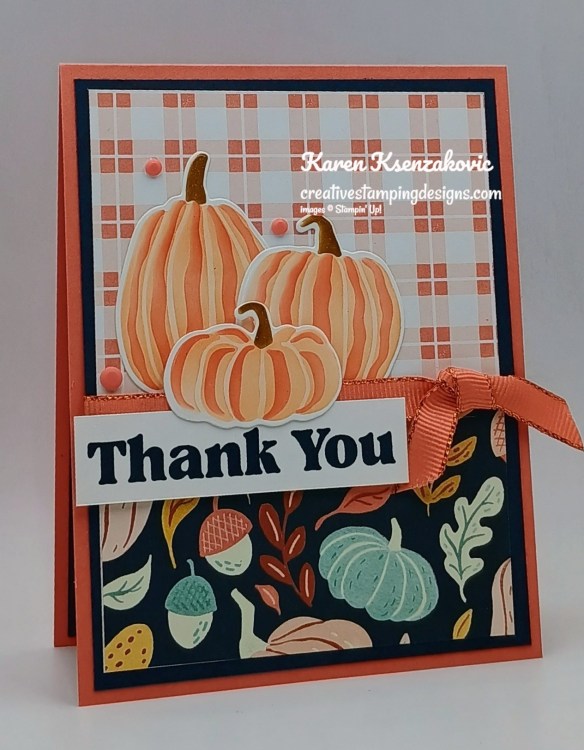
On a panel of Basic White, stamp the sentiment from Painted Pumpkins stamp set in Secret Sea Ink. Adhere the sentiment to the card front, over the ribbon, with Stampin’ Dimensionals. Adhere the die cut pumpkins to the card front. Add a few Painted Patch Adhesive-Backed Dots to the card front.
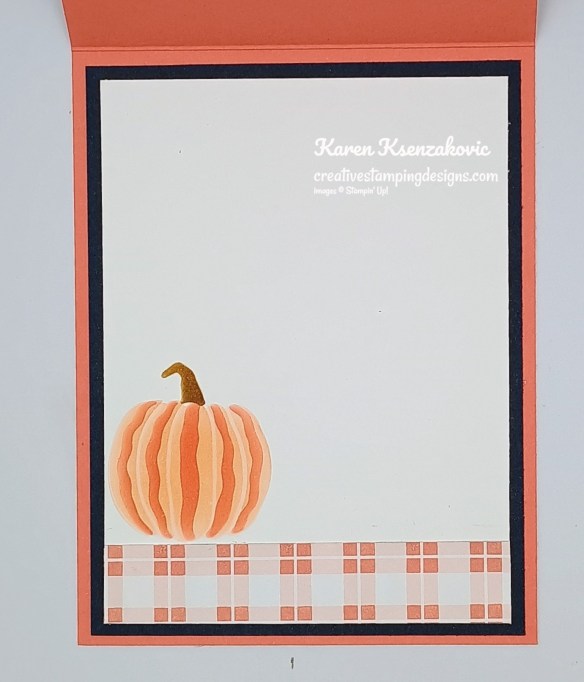
Adhere a panel of Painted Patch DSP to the bottom of a Basic White panel. Using the Painted Pumpkins Decorative Masks and Small Blending Brushes, add the color the same way as for the card front. Adhere the Basic White panel to a Secret Sea mat then to the inside of the Calypso Coral card base.
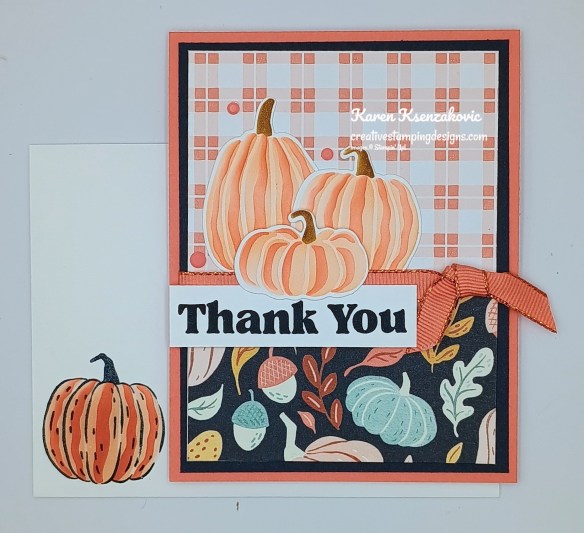
Decorate a Basic White Medium Envelope to finish the card. Stamp the pumpkin image from Painted Pumpkins stamp set on the envelope front in Secret Sea Ink. Using the Painted Pumpkins Decorative Masks and Small Blending Brushes, add color the same as for the card front. Adhere a panel of Painted Patch DSP to the enveloope flap.
Thank you for stopping by my blog today. I hope you like the card and will give it a try. Happy Stamping!!
*********************************************************************************************************
If you need any stamping supplies, I’d love to be your Demonstrator. Just click HERE to go directly to my online store or drop me an email if you have any questions.
*********************************************************************************************************
New Stampin’ Up! Product of The Month

Every month Stampin’ Up! will release a new item that is only available for purchase once per account. These items will be limited quantity and are likely to sell out quickly—once they’re sold out, they’re gone for good!
September Product of the Month – Luxe Foliate Specialty Designer Series Paper

Luxe Foliage 12″ x 12″ (30.5 x 30.5 cm) Specialty Designer Series Paper (168599)
With Halloween and Christmas fast approaching, don’t forget to spend some time celebrating Cardsgiving—one of our favorite unofficial holidays centered around making and gifting cards. The Luxe Foliage Designer Series Paper is perfect for all your holiday needs and beyond, with shimmering foil and beautifully-designed details perfect for creating glimmering layers or fussy cutting shining images. Whether you’re making cards for a friend or planning a Cardsgiving celebration, this paper is sure to be the star of the show.
*********************************************************************************************************
Card stock cuts for this project:
- Basic White Cardstock 3/4″ x 3″ (sentiment), 3 1/4″ x 3 3/4″ (pumpkins), 3 3/4″ x 5″ (inner liner)
- Calypso Coral Cardstock 4 1/4″ x 11″ (card base scored & folded at 5 1/2″)
- Secret Sea Cardstock (2) 4″ x 5 1/4″ (mats)
- Painted Patch Designer Series Paper 3 3/4″ x 5″ (card front), 2 1/4″ x 3 3/4″ (card front panel), 3/4″ x 3 3/4″ (inner liner), 2 1/4″ x 6″ (envelope)
*********************************************************************************************************
Product List
![Painted Pumpkins Bundle (English) [ 168439 ]](https://assets1.tamsnetwork.com/images/EC042017NF/168439s.jpg "Painted Pumpkins Bundle (English) [ 168439 ]")
![Painted Pumpkins Photopolymer Stamp Set (English) [ 168431 ]](https://assets1.tamsnetwork.com/images/EC042017NF/168431s.jpg "Painted Pumpkins Photopolymer Stamp Set (English) [ 168431 ]")
![Painted Pumpkins Dies [ 168437 ]](https://assets1.tamsnetwork.com/images/EC042017NF/168437s.jpg "Painted Pumpkins Dies [ 168437 ]")
![Painted Pumpkins Decorative Masks [ 168438 ]](https://assets1.tamsnetwork.com/images/EC042017NF/168438s.jpg "Painted Pumpkins Decorative Masks [ 168438 ]")
![Basic White 8 1/2" X 11" Cardstock [ 166780 ]](https://assets1.tamsnetwork.com/images/EC042017NF/166780s.jpg "Basic White 8 1/2\" X 11\" Cardstock [ 166780 ]")
![Calypso Coral 8-1/2" X 11" Cardstock [ 122925 ]](https://assets1.tamsnetwork.com/images/EC042017NF/122925s.jpg "Calypso Coral 8-1/2\" X 11\" Cardstock [ 122925 ]")
![Secret Sea 8 1/2" X 11" Cardstock [ 165624 ]](https://assets1.tamsnetwork.com/images/EC042017NF/165624s.jpg "Secret Sea 8 1/2\" X 11\" Cardstock [ 165624 ]")
![Painted Patch 12" X 12" (30.5 X 30.5 Cm) Designer Series Paper [ 168430 ]](https://assets1.tamsnetwork.com/images/EC042017NF/168430s.jpg "Painted Patch 12\" X 12\" (30.5 X 30.5 Cm) Designer Series Paper [ 168430 ]")
![Calypso Coral Classic Stampin' Pad [ 147101 ]](https://assets1.tamsnetwork.com/images/EC042017NF/147101s.jpg "Calypso Coral Classic Stampin' Pad [ 147101 ]")
![Pecan Pie Classic Stampin' Pad [ 161665 ]](https://assets1.tamsnetwork.com/images/EC042017NF/161665s.jpg "Pecan Pie Classic Stampin' Pad [ 161665 ]")
![Petal Pink Classic Stampin' Pad [ 147108 ]](https://assets1.tamsnetwork.com/images/EC042017NF/147108s.jpg "Petal Pink Classic Stampin' Pad [ 147108 ]")
![Secret Sea Classic Stampin' Pad [ 165285 ]](https://assets1.tamsnetwork.com/images/EC042017NF/165285s.jpg "Secret Sea Classic Stampin' Pad [ 165285 ]")
![Small Blending Brushes [ 160518 ]](https://assets1.tamsnetwork.com/images/EC042017NF/160518s.jpg "Small Blending Brushes [ 160518 ]")
![Calypso Coral With Copper Border 3/8" (1 Cm) Ribbon [ 168444 ]](https://assets1.tamsnetwork.com/images/EC042017NF/168444s.jpg "Calypso Coral With Copper Border 3/8\" (1 Cm) Ribbon [ 168444 ]")
![Painted Patch Adhesive Backed Dots [ 168443 ]](https://assets1.tamsnetwork.com/images/EC042017NF/168443s.jpg "Painted Patch Adhesive Backed Dots [ 168443 ]")
![Basic White Medium Envelopes [ 159236 ]](https://assets1.tamsnetwork.com/images/EC042017NF/159236s.jpg "Basic White Medium Envelopes [ 159236 ]")
![Stampin' Cut & Emboss Machine [ 149653 ]](https://assets1.tamsnetwork.com/images/EC042017NF/149653s.jpg "Stampin' Cut & Emboss Machine [ 149653 ]")
![Mini Glue Dots [ 103683 ]](https://assets1.tamsnetwork.com/images/EC042017NF/103683s.jpg "Mini Glue Dots [ 103683 ]")
![Stampin' Dimensionals [ 104430 ]](https://assets1.tamsnetwork.com/images/EC042017NF/104430s.jpg "Stampin' Dimensionals [ 104430 ]")
![Multipurpose Liquid Glue [ 110755 ]](https://assets1.tamsnetwork.com/images/EC042017NF/110755s.jpg "Multipurpose Liquid Glue [ 110755 ]")
![Stampin' Seal [ 152813 ]](https://assets1.tamsnetwork.com/images/EC042017NF/152813s.jpg "Stampin' Seal [ 152813 ]")
![Paper Trimmer [ 152392 ]](https://assets1.tamsnetwork.com/images/EC042017NF/152392s.jpg "Paper Trimmer [ 152392 ]")
![Bone Folder [ 102300 ]](https://assets1.tamsnetwork.com/images/EC042017NF/102300s.jpg "Bone Folder [ 102300 ]")
![Detail Scissors [ 170902 ]](https://assets1.tamsnetwork.com/images/EC042017NF/170902s.jpg "Detail Scissors [ 170902 ]")
![Take Your Pick [ 144107 ]](https://assets1.tamsnetwork.com/images/EC042017NF/144107s.jpg "Take Your Pick [ 144107 ]")

 Creative Stamping Designs