
Good Friday morning stamping friends, welcome to my Fun Fold Friday. I hope you all had a great week and are looking forward to the weekend.
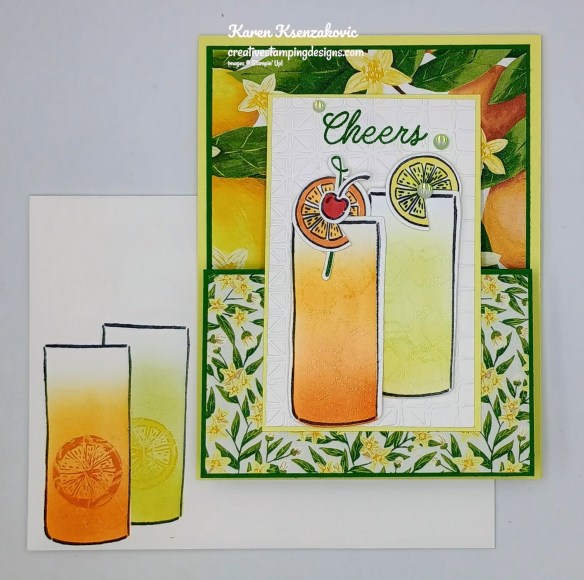
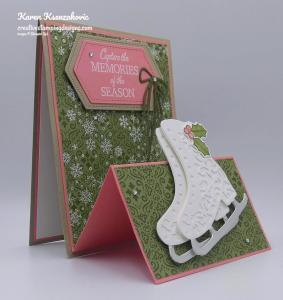
Today’s card is one that I did on my YouTube Live yesterday and it is for the inspiration challenge from The Card Concepts. The inspiration photo #226 is Patriotic Blooms. If you were able to join me for my live, thank you for hopping on. If you’d like to watch the replay and stamp along, the measurements are on the bottom of this post along with the link to my video. Here’s my card for today.
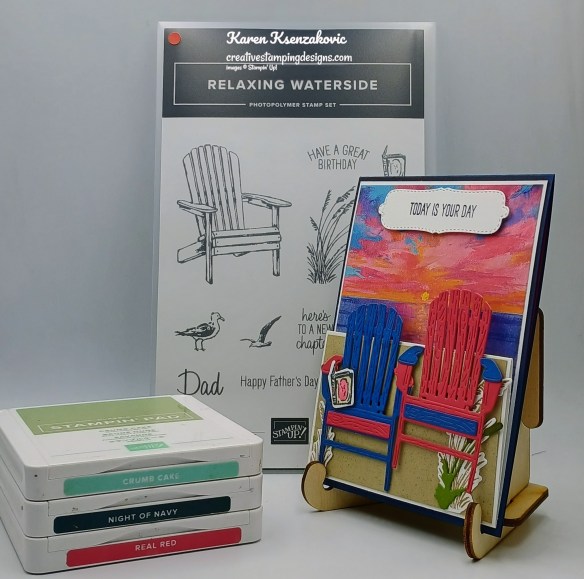
I used the Stampin’ Up! Relaxing Waterside Bundle along with the Scenic Coast 6 x 6 Specialty Designer Series Paper and Sweet Words & Labels Die for my card today. I was inspired by the colors for my Clean & Layered fun fold card.
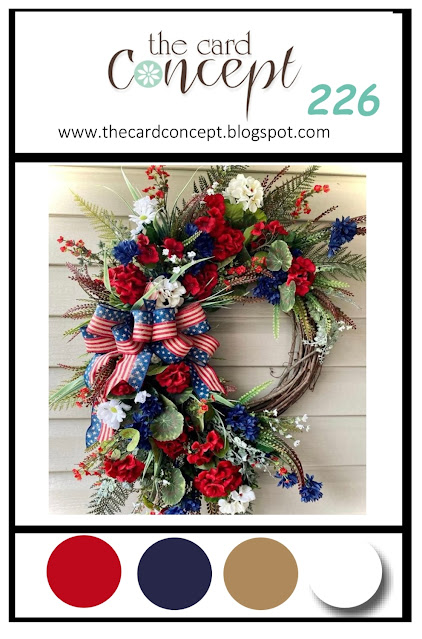
I hope you will take a moment to visit The Card Concepts and join us for our challenge 226. How are you inspired by the photos?
On the panel of Crumb Cake tap the Crumb Cake Stampin’ Blends Marker on the Bone Folder to give a splatter to look like sand. Adhere the Crumb Cake panel to the front of the Basic White easel panel.
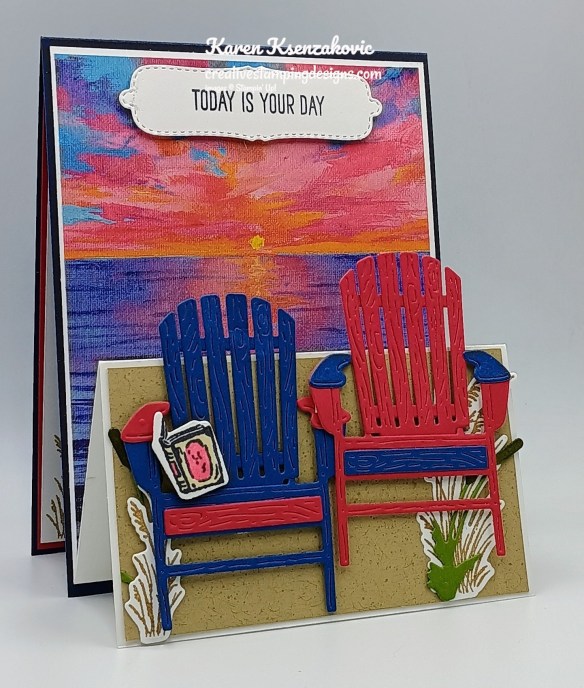
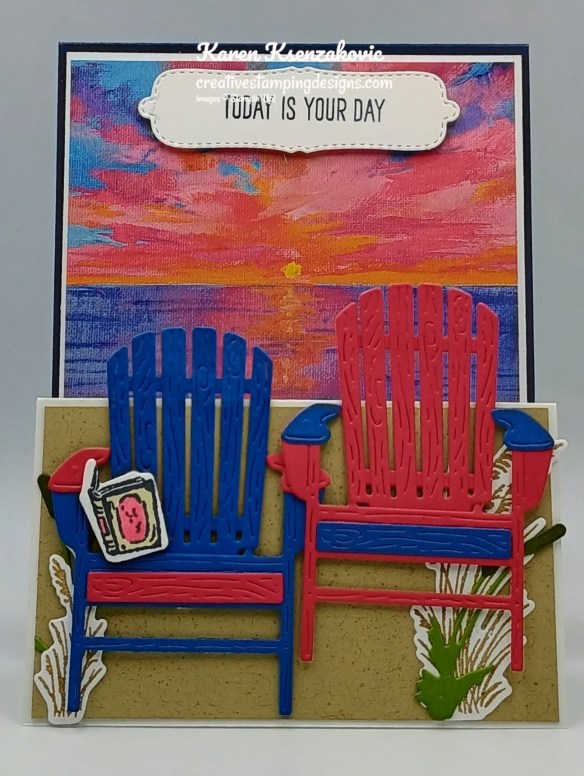
Adhere the panel of Scenic Coast DSP to the front of the Basic White easel panel. Adhere the easel panel to the front of the Night of Navy card base. On a panel of Basic White, stamp the 2 grass images from the Relaxing Waterside stamp set in Crumb Cake Ink, stamp the book image in Tuxedo Black Ink and the sentiment from the Relaxing Waterside stamp set in Night of Navy Ink. Cut the grass and book images out using the Relaxing Waterside Dies and the sentiment using the Sweet Words & Labels Dies. From a panel of Old Olive, cut the 2 cattail dies from the Relaxing Waterside Dies. Cut the dies to make the Adirondak chairs from panels of Blueberry Bushel and Real Red using the Relaxing Waterside Dies.
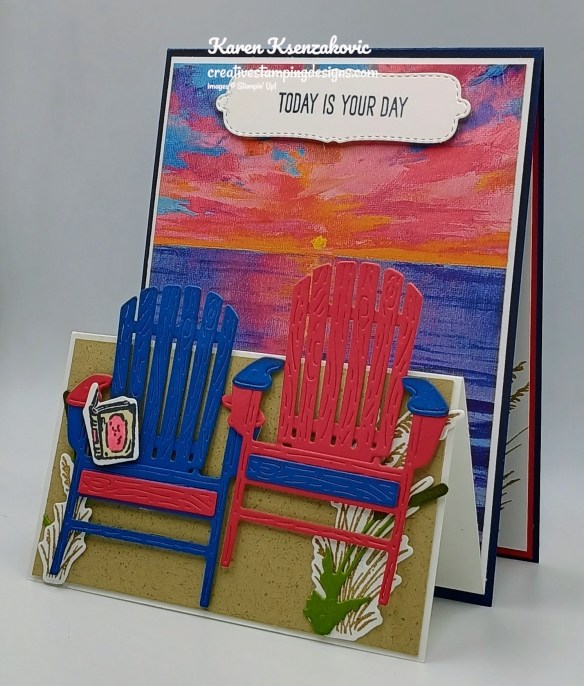
Adhere the grass and cattails die cuts to the card front with Glue Dots. Assemble the Adirondak chairs and adhere them to the card front with Stampin’ Dimensionals. Adhere the book to the chair with Stampin’ Dimensionals. Adhere the sentiment to the top of the card front with Stampin’ Dimensionals.
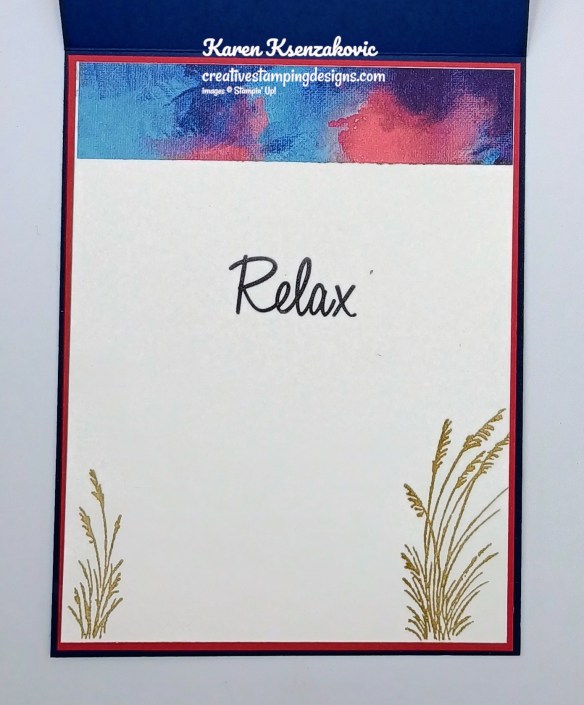
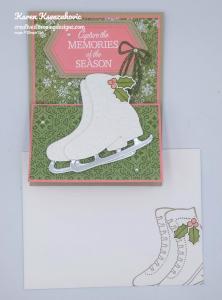
Stamp the sentiment from the Relaxing Waterside stamp set in Night of Navy Ink on a panel of Basic White. Stamp the grass images from the Relaxing Waterside stamp set in Crumb Cake Ink on the bottom of the panel. Adhere a panel of Scenic Coast DSP to the top of the panel. Adhere the Basic White panel to a Real Red mat then to the inside of the night of Navy card base.
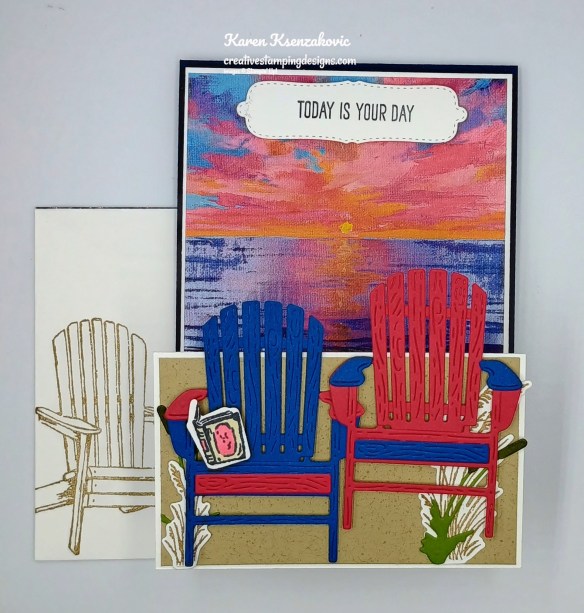
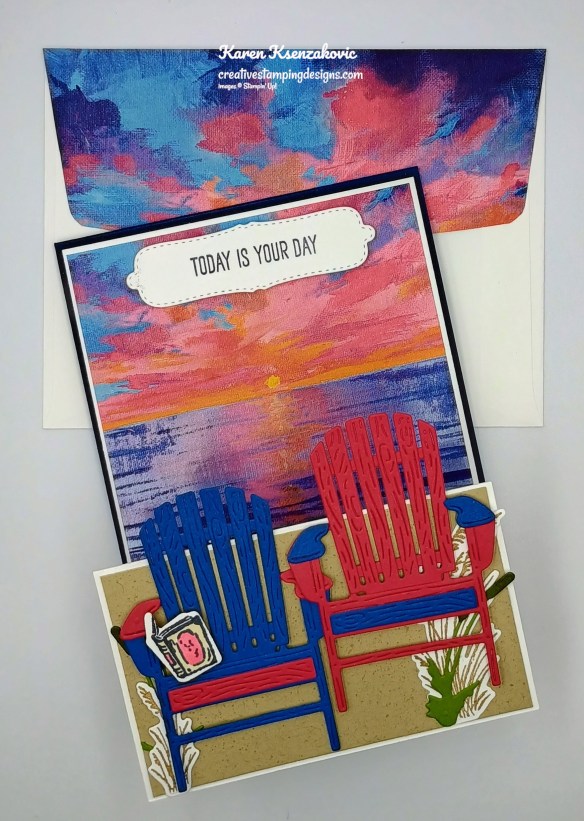
Decorate a Basic Whtie Medium Envelope to finish your card. Stamp the Adirondak chair image from the Relaxing Waterside stamp set in Crumb Cake Ink on the envelope front. Adhere a panel of Scenic Coast DSP to the envelope flap.
Thank you for stopping by my blog today. I hope you liked my card and will give it a try. I hope you will CASE this card and please feel free to post it in the comments of my Facebook page under my post. I’d love to see your take it. You can watch my video on my YouTube Channel Here.
If you watch this on my YouTube channel, please remember to subscribe so that you will get notified when a new video goes live. Thank you to those that have subscribed already. Happy Stamping!!
*********************************************************************************************************
If you need any stamping supplies, I’d love to be your Demonstrator. Just click HERE to go directly to my online store or drop me an email if you have any questions.
*********************************************************************************************************
Creative Stamping Designs BOGO Sale!!
Starting TODAY Monday April 6 – Monday April 13 you’ll get to pick some of my retired items for FREE with an order on my Online Store. There’s no limit to how much you can order or get for free.
Here’s How it Works:
- You place your order in my Online Store Here
- Once your order is placed and you get a confirmation you will need to visit my blog Here and click on Retirement Sale List
- You can pick Stamp Set Bundles, Stamp Sets, Dies, Embossing Folders or DSP that total the Sub Total or less of your order before tax and after any discounts.
- Fill out my Google Form with your full name and address and list the products you would like. The forms come to me in time order so it will be first come first serve. I will pull the products that you would like, and I’ll email you if something is gone. I’m going to try to remove them from the list as quickly as possible
- Once I pull everything, I will send you a PayPal invoice for $8 shipping fee for shipping of the free products. 8 or more products there will be a shipping charge of $13.
- I will try to get as much as possible shipped out by the weekend.
Feel free to contact me with any questions. Please note that the free items are gently used and may have stains. If you are not sure what the sets are, you can do a Google search or search my blog for cards that I made with them.
*********************************************************************************************************
May-August 2026 Catalog & May 2026 Online Exclusive Product Shares Open for Ordering
It’s that time again. The new May -August 2026 Catalog will be arriving in your mailbox real soon and you’re going to want all that beautiful Designer Series Paper, Ribbon and/or Embellishments. My May – August 2026 Catalog and May Online Exclusive Product Shares are open for ordering. You can order just the DSP share, just the Two-Tone cardstock share, just the Ribbon share or just the Embellishment share, or you can have it all!! Click Here to order.
I’m offering a Designer Series Paper Share, Two-Tone Cardstock Share, Ribbon Share & Embellishment Share from the May – August 2026 Catalog, along with the upcoming May 2026 Online Exclusives and I’d love to have you join!! I’m placing my share order early on May 5th and I’m going to use the expedited shipping option so I should be able to have the shares cut, bundled and back out to you during the week of May 11th. Wouldn’t you love to have all of the gorgeous new Designer Series Papers in the Stampin’ Up! May-August 2026 Catalog and the upcoming May 2026 Online Exclusives? What is a Paper Share you ask? It’s a sample of each of the new Designer Series Papers from the Catalog and Online Exclusives. Shares give you a good working sample of all of the papers so that you can decide which ones to order in full packs! If you were to purchase all of the DSP in the new Catalog and Online Exclusives, it would cost you over $300.00 plus shipping.
New Designer Series Paper Share – $50.00 plus $10.00 for Priority Mail Shipping
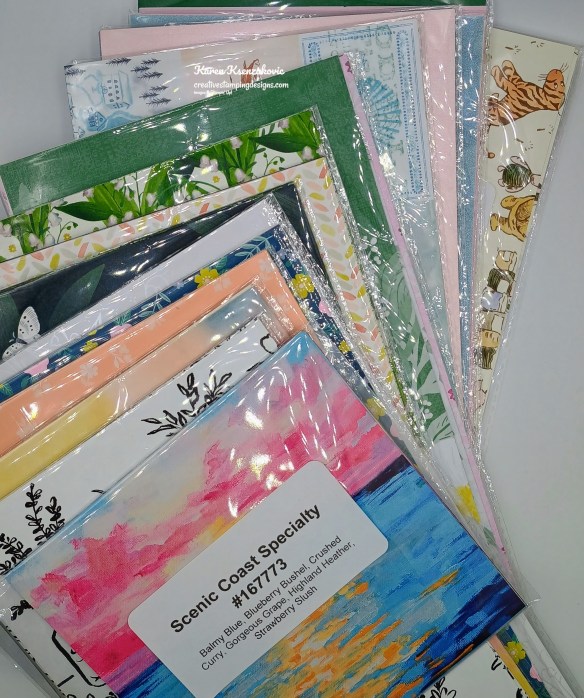
How my shares work: I order full packs of all of the Designer Series Papers listed below, I cut them into 6″ X 6″ pieces (or 6″ X 12″ pieces for double shares) and give you one panel of each design from each pack on the list. I pack up the paper in a cellophane bag with labels listing the Name, Item # and Colors in the pack and mail it back out to you just as quickly as I can!
New Designer Series Paper Share – $50.00 plus $10.00 for Priority Mail shipping
You will receive one 6×6 sheet of each design from the following DSP packs (the number after the name indicates how many 6×6 sheets of that paper pack you will receive):
- Artisan Sketched Garden (6)
- Basics Painted Patterns (6)
- Beautiful Ordinary Life (6)
- Bloom Boutique Specialty (6)
- Brights Painted patterns (20)
- Everyday Essentials Mix & Match (6)
- Luxe White Specialty (3)
- Moonlit Flora (6)
- Neutrals Painted Patterns (20)
- Paper Medley Mix Ins (6)
- Regals Painted Patterns (20)
- Scenic Coast 6×6 Specialty (8)
- Subtle Painted Patterns (20)
- Vally in Bloom (6)
- Velvet Meadow Specialty (6)
- Waterside Retreat (6)
- 2026-2028 In-Color Painted Patterns (10)
- 2026-2028 In-Color Pearlized (5)
- Sunset Shimmer Vellum (3)
- Velveteen Assortment (3)
- Silly Old Bear OLE (6)
In all, you’ll receive 178 – 6” x 6” sheets of designer or specialty paper!
Double Designer Series Paper Share – $100.00 Plus $10.00 Priority Mail Shipping
As a gift from me for ordering a Double Share of Designer Series Paper, I will include a Meant To Be Mix & Match Ephemera Pack #167700. This gift is only for ordering a Double DSP Share.
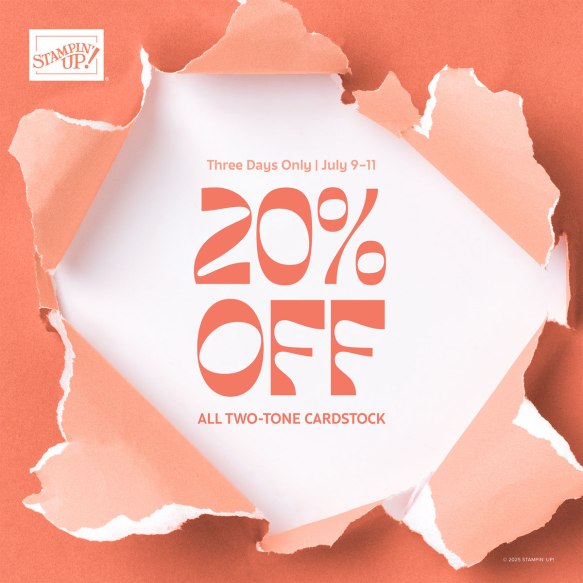
Two-Tone Cardstock Share
Do you likethe Two-Tone Cardstock but don’t want to buy a whole pack? You can add a share of the 3 different Two-Tone Cardstock packs for an additional $4.50 or purchase them separately for $4.50 + $10 Priority Shipping
You will receive one 6×6 sheet of each color from each of the packs (the number after the name indicates how many 6×6 sheets of that paper pack you will receive):
- Extraordinary Life (6)
- Heirloom Boutique (6)
- Life In Bloom (6)
In all, you’ll receive 18 – 6” x 6” sheets of cardstock!
Double Share of the Two-Tone Cardstock – $9.00 plus $10.00 Priority Mail Shipping
If you’d like double shares of the designer paper or cardstock, I’m offering those too! I’ll cut the 12″ x 12″ sheets into 6″ × 12″ so that you’ll be able to get 3 full A2 size card fronts from each sheet and you’ll get double sheets of the 6″ x 6″ since they’re already precut.
Ribbon Share – $11.25 plus $10.00 Priority Mail Shipping
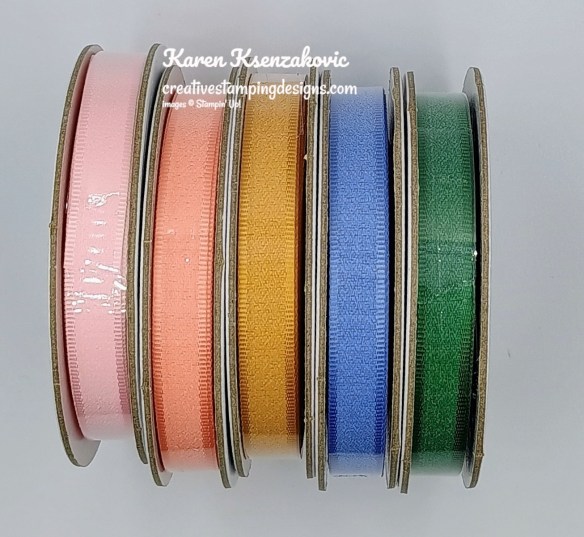
All ribbons will come individually wrapped and labeled with the name and number of the product.
One-Fourth of a Roll of each:
- Barely Blush 3/8″ Bordered Ribbon
- Crisp Cantaloupe 3/8″ Bordered Ribbon
- Golden Glow 3/8″ Bordered Ribbon
- Hydrangea Hue 3/8″ Bordered Ribbon
- Peaceful Pine 3/8″ Bordered Ribbon
Double Ribbon Share – $22.50 Plus $10.00 Priority Mail Shipping and you will be getting 1/2 of the roll or each ribbon.
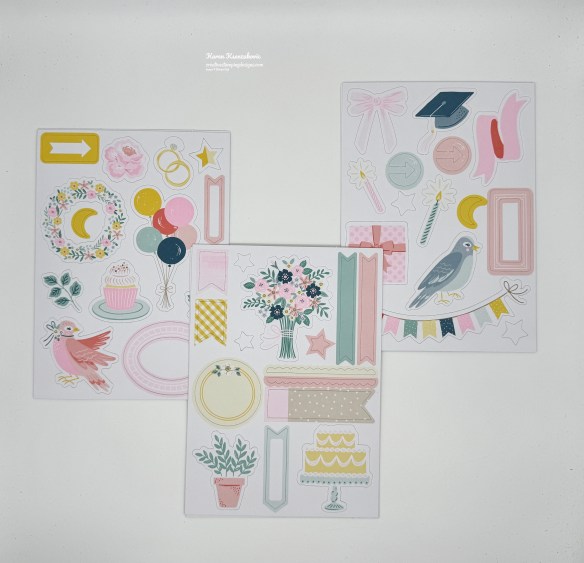
Embellishment Share – $14.00 plus $10.00 Priority Mail Shipping
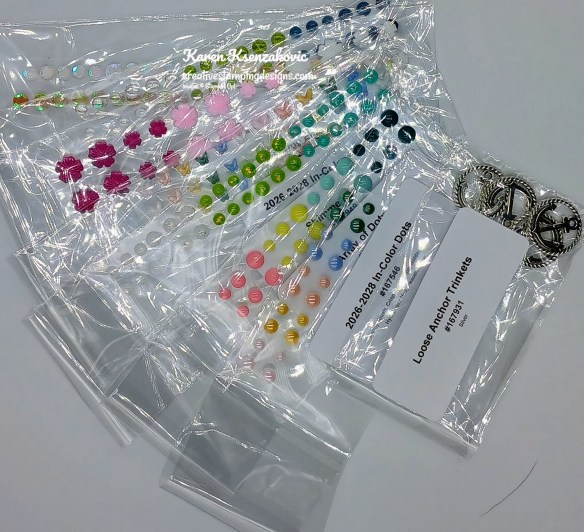
I’m also offering an Embellishment Share. I will divide the embellishments up and package them in a cello bag with the name and number for easy ordering, just like I do with the paper and ribbon.
You will receive (approximate # listed:
- Array of Dots (24)
- Dewdrops Embellishments (36)
- Dreamy Flowers (24)
- Loose Anchor Trinkets (4)
- Shimmer Dots (36)
- Sunset Sparkle Sequins (40)
- 2026-2028 In-Color Butterflies (36)
- 2026-2028 In-Color Dots (20)
Double Share of the Embellishments – $28.00 plus $10.00 Priority Mail Shipping
Anyone is welcome to join in my shares (please note, I can only ship to addresses within the US). To make ordering the shares a little easier, I have created a form for you to submit, that way you can order any combination of shares you want. Click Here for the form. I will send out PayPal Invoices by May 3rd.
Deadline to sign up for my share is Saturday May 3rd at 5:00 PM ET.
*********************************************************************************************************
Virtual Album Retreat – Happiness is Here – Now Available
The Virtual Album Retreat Happiness is Here is now available to order while supplies last. I’ve got a little special just for you. If you purchase the Album Retreat through me, I’m going to give you the Album of your choice absolutely FREE. *The numbers and a link to my Google Form are at the bottom of this post.
Join Stampin’ Up! this April for their Virtual Album Retreat, a three-day, virtual event where you’ll craft along with Stampin’ Up! staff as they go through the step-by-step process of creating a 10-spread scrapbook album using the 2026 Virtual Album Retreat Happiness is Here kit.
Mark your calendars now and join in April for this unique event!
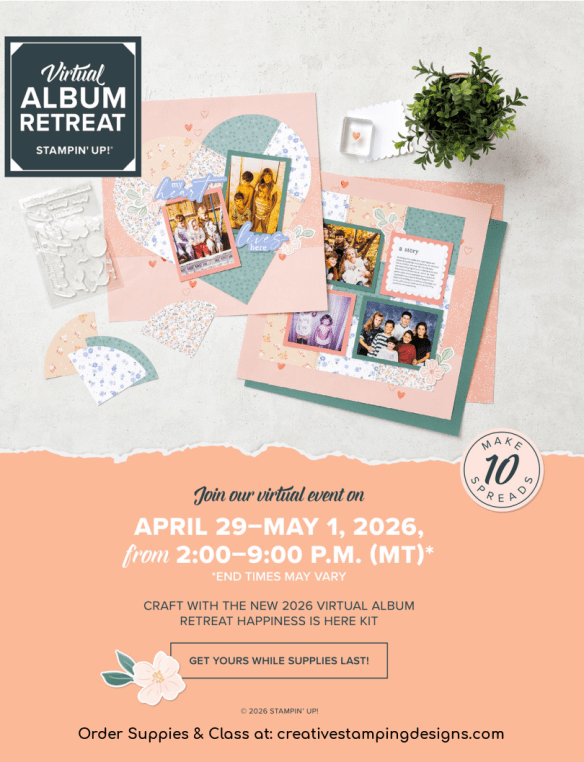
You can see the page layouts and more details about the retreat by clicking the image above.
Here are the details for this event:
Who: Crafters who love to scrapbook!
When: April 29–May 1, 2026, from about 2:00–9:00 p.m. (MT)
- Note: End times may vary.
Where: Private Facebook Group
Registration: There is no registration for this event! When you purchase the 2026 Virtual Album Retreat Happiness is Here kit, you’ll get access to an exclusive Facebook group where the live event will stream.
Price of 2026 Virtual Album Retreat Happiness is Here kit: $250
Language of Event: This event will be presented in English only.
After the Event: You can access the recorded event videos on the exclusive Facebook group. Videos with English, French, German, and Dutch captioning will be available through the Facebook group within two weeks after the live stream.
Here is what’s included in the kit:
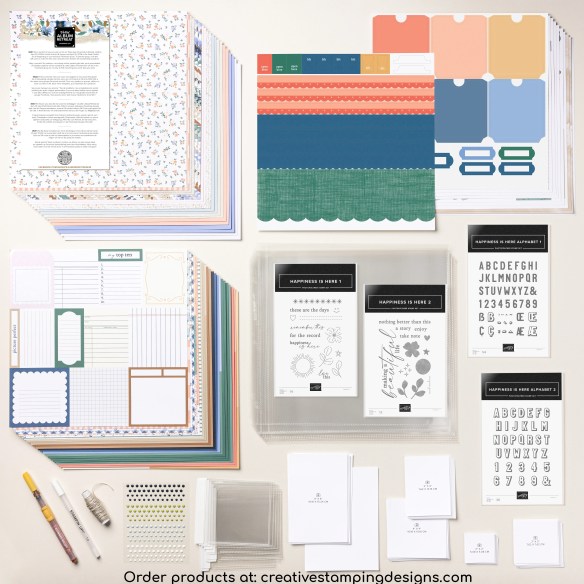
Item: 2026 Virtual Album Retreat Happiness is Here kit (168051)
Includes: Two stamp sets; Designer Series Paper and Two-Tone Cardstock with cut guidelines printed on the back; single-sided Designer Series Paper; printed precut images and stickers; embellishments; Linen Thread; Golden Glow Shimmer Brush; White Gel Pen; Memory Protectors™; Flip Flaps™; and photo placeholders.*
Price: $250
Language: The stamp set and all kit components are English only. The kit instructions will be translated into English, French, German, and Dutch.
Ordering Begins: March 18, 2026 (Order yours early to get it in time for the event!)
Head over to my Online Store and order yours today!!
*Albums sold separately. Consider purchasing the 1-1/2″ Post 12″ x 12″ (30.5 x 30.5 cm) Album (166515) or the D-Ring 12″ x 12″ (30.5 x 30.5 cm) Album (166516).There are some additional products that you’ll need to create the pages, you can find that list right here (click to open this as a full page, printable document):

Click Here to fill out the Google Form for your Free Album.
*********************************************************************************************************
Card stock cuts for this project:
- Basic White Cardstock 4 1/8″ x 10 1/4″ (easel card base scored & folded at 5 1/4″ & b7 3/4″), 2 3/4″ x 3 3/4″(die cuts), 4″ x 5 1/4″(inner liner)
- Blueberry Bushel Cardstock 3″ x 3 1/2″(die cuts)
- Crumb Cake Cardstock 2 3/8″ x 4″(card front panel)
- Night of Navy Cardstock 4 1/4″ x 11″(card base scored & folded at 5 1/2″)
- Old Olive Cardstock 1 1/2″ x 2″(die cuts)
- Real Red Cardstock 2 3/4″ x 3 3/4″(die cuts), 4 1/8″ x 5 3/8″(inner linermat)
- Scenic Coast 6 x 6 Designer Series Paper 4″ x 5 1/8″(card front panel), 7/8″ x 4″(inner liner), 2 1/4″ x 6″(envelope)
*********************************************************************************************************
Product List
![Basic White 8 1/2" X 11" Cardstock [ 166780 ]](https://assets1.tamsnetwork.com/images/EC042017NF/166780s.jpg "Basic White 8 1/2\" X 11\" Cardstock [ 166780 ]")
![Blueberry Bushel 8-1/2" X 11" Cardstock [ 146968 ]](https://assets1.tamsnetwork.com/images/EC042017NF/146968s.jpg "Blueberry Bushel 8-1/2\" X 11\" Cardstock [ 146968 ]")
![Crumb Cake 8-1/2" X 11" Cardstock [ 120953 ]](https://assets1.tamsnetwork.com/images/EC042017NF/120953s.jpg "Crumb Cake 8-1/2\" X 11\" Cardstock [ 120953 ]")
![Night Of Navy 8-1/2" X 11" Cardstock [ 100867 ]](https://assets1.tamsnetwork.com/images/EC042017NF/100867s.jpg "Night Of Navy 8-1/2\" X 11\" Cardstock [ 100867 ]")
![Old Olive 8-1/2" X 11" Cardstock [ 100702 ]](https://assets1.tamsnetwork.com/images/EC042017NF/100702s.jpg "Old Olive 8-1/2\" X 11\" Cardstock [ 100702 ]")
![Real Red 8-1/2" X 11" Cardstock [ 102482 ]](https://assets1.tamsnetwork.com/images/EC042017NF/102482s.jpg "Real Red 8-1/2\" X 11\" Cardstock [ 102482 ]")
![Crumb Cake Classic Stampin' Pad [ 147116 ]](https://assets1.tamsnetwork.com/images/EC042017NF/147116s.jpg "Crumb Cake Classic Stampin' Pad [ 147116 ]")
![Night Of Navy Classic Stampin' Pad [ 147110 ]](https://assets1.tamsnetwork.com/images/EC042017NF/147110s.jpg "Night Of Navy Classic Stampin' Pad [ 147110 ]")
![Tuxedo Black Memento Ink Pad [ 132708 ]](https://assets1.tamsnetwork.com/images/EC042017NF/132708s.jpg "Tuxedo Black Memento Ink Pad [ 132708 ]")
![Crumb Cake Stampin' Blends Combo Pack [ 154882 ]](https://assets1.tamsnetwork.com/images/EC042017NF/154882s.jpg "Crumb Cake Stampin' Blends Combo Pack [ 154882 ]")
![Real Red Stampin' Blends Combo Pack [ 154899 ]](https://assets1.tamsnetwork.com/images/EC042017NF/154899s.jpg "Real Red Stampin' Blends Combo Pack [ 154899 ]")
![Basic White Medium Envelopes [ 159236 ]](https://assets1.tamsnetwork.com/images/EC042017NF/159236s.jpg "Basic White Medium Envelopes [ 159236 ]")
![Stampin' Cut & Emboss Machine [ 149653 ]](https://assets1.tamsnetwork.com/images/EC042017NF/149653s.jpg "Stampin' Cut & Emboss Machine [ 149653 ]")
![Mini Glue Dots [ 103683 ]](https://assets1.tamsnetwork.com/images/EC042017NF/103683s.jpg "Mini Glue Dots [ 103683 ]")
![Multipurpose Liquid Glue [ 110755 ]](https://assets1.tamsnetwork.com/images/EC042017NF/110755s.jpg "Multipurpose Liquid Glue [ 110755 ]")
![Stampin' Dimensionals [ 104430 ]](https://assets1.tamsnetwork.com/images/EC042017NF/104430s.jpg "Stampin' Dimensionals [ 104430 ]")
![Stampin' Seal [ 152813 ]](https://assets1.tamsnetwork.com/images/EC042017NF/152813s.jpg "Stampin' Seal [ 152813 ]")
![Bone Folder [ 102300 ]](https://assets1.tamsnetwork.com/images/EC042017NF/102300s.jpg "Bone Folder [ 102300 ]")
![Take Your Pick [ 144107 ]](https://assets1.tamsnetwork.com/images/EC042017NF/144107s.jpg "Take Your Pick [ 144107 ]")
![Paper Trimmer [ 152392 ]](https://assets1.tamsnetwork.com/images/EC042017NF/152392s.jpg "Paper Trimmer [ 152392 ]")


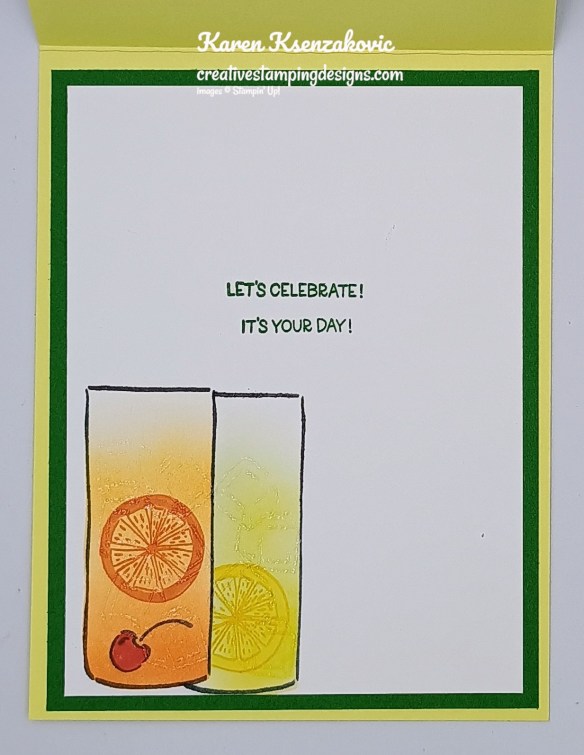


![Cheers & Sips Bundle (English) [ 165594 ]](https://assets1.tamsnetwork.com/images/EC042017NF/165594s.jpg "Cheers & Sips Bundle (English) [ 165594 ]")
![Cheers & Sips Photopolymer Stamp Set (English) [ 165588 ]](https://assets1.tamsnetwork.com/images/EC042017NF/165588s.jpg "Cheers & Sips Photopolymer Stamp Set (English) [ 165588 ]")
![Cheers & Sips Dies [ 165593 ]](https://assets1.tamsnetwork.com/images/EC042017NF/165593s.jpg "Cheers & Sips Dies [ 165593 ]")
![Garden Green 8-1/2" X 11" Cardstock [ 102584 ]](https://assets1.tamsnetwork.com/images/EC042017NF/102584s.jpg "Garden Green 8-1/2\" X 11\" Cardstock [ 102584 ]")
![Lemon Lolly 8 1/2" X 11" Cardstock [ 161720 ]](https://assets1.tamsnetwork.com/images/EC042017NF/161720s.jpg "Lemon Lolly 8 1/2\" X 11\" Cardstock [ 161720 ]")
![Mediterranean Blooms 12" X 12" (30.5 X 30.5 Cm) Designer Series Paper [ 163284 ]](https://assets1.tamsnetwork.com/images/EC042017NF/163284s.jpg "Mediterranean Blooms 12\" X 12\" (30.5 X 30.5 Cm) Designer Series Paper [ 163284 ]")
![Garden Green Classic Stampin' Pad [ 147089 ]](https://assets1.tamsnetwork.com/images/EC042017NF/147089s.jpg "Garden Green Classic Stampin' Pad [ 147089 ]")
![Lemon Lolly Classic Stampin' Pad [ 161666 ]](https://assets1.tamsnetwork.com/images/EC042017NF/161666s.jpg "Lemon Lolly Classic Stampin' Pad [ 161666 ]")
![Pumpkin Pie Classic Stampin' Pad [ 147086 ]](https://assets1.tamsnetwork.com/images/EC042017NF/147086s.jpg "Pumpkin Pie Classic Stampin' Pad [ 147086 ]")
![Peach Pie Classic Stampin Pad [ 163810 ]](https://assets1.tamsnetwork.com/images/EC042017NF/163810s.jpg "Peach Pie Classic Stampin Pad [ 163810 ]")
![Blending Brushes [ 153611 ]](https://assets1.tamsnetwork.com/images/EC042017NF/153611s.jpg "Blending Brushes [ 153611 ]")
![Daffodil Delight Stampin' Blends Combo Pack [ 154883 ]](https://assets1.tamsnetwork.com/images/EC042017NF/154883s.jpg "Daffodil Delight Stampin' Blends Combo Pack [ 154883 ]")
![Lemon Lolly Stampin’ Blends Combo Pack [ 161673 ]](https://assets1.tamsnetwork.com/images/EC042017NF/161673s.jpg "Lemon Lolly Stampin’ Blends Combo Pack [ 161673 ]")
![Peach Pie Stampin’ Blends Combo Pack [ 163827 ]](https://assets1.tamsnetwork.com/images/EC042017NF/163827s.jpg "Peach Pie Stampin’ Blends Combo Pack [ 163827 ]")
![Poppy Parade Stampin' Blends Combo Pack [ 154958 ]](https://assets1.tamsnetwork.com/images/EC042017NF/154958s.jpg "Poppy Parade Stampin' Blends Combo Pack [ 154958 ]")
![Pumpkin Pie Stampin' Blends Combo Pack [ 154897 ]](https://assets1.tamsnetwork.com/images/EC042017NF/154897s.jpg "Pumpkin Pie Stampin' Blends Combo Pack [ 154897 ]")
![Versamark Pad [ 102283 ]](https://assets1.tamsnetwork.com/images/EC042017NF/102283s.jpg "Versamark Pad [ 102283 ]")
![Basics Wow! Embossing Powder [ 165679 ]](https://assets1.tamsnetwork.com/images/EC042017NF/165679s.jpg "Basics Wow! Embossing Powder [ 165679 ]")
![Heat Tool (Us And Canada) [ 129053 ]](https://assets1.tamsnetwork.com/images/EC042017NF/129053s.jpg "Heat Tool (Us And Canada) [ 129053 ]")
![Glass & Gardens Embossing Folders [ 165597 ]](https://assets1.tamsnetwork.com/images/EC042017NF/165597s.jpg "Glass & Gardens Embossing Folders [ 165597 ]")
![Holographic Resin Dots [ 165598 ]](https://assets1.tamsnetwork.com/images/EC042017NF/165598s.jpg "Holographic Resin Dots [ 165598 ]")


")


")


