
Good Friday morning stamping friends. I hope you all had a great week and are looking forward to the weekend. It’s been another cray week here. I always thought when your kids go off on their own, life would get easier. I guess you really never stop parenting and helping them. I spent 5 hours driving around yesterday helping my son going from one place to another, the good thing was it wasn’t raining. That was not on my list of what I needed/wanted to get done yesterday, but it’s my son and I’ll do anything I can to help both him and my daughter even if it means not doing what I planned to do.
September-December Catalog & Online Exclusive Product Shares Open for Ordering!!
It’s time again. The new September – December 2026 Catalog will be arriving in your mailbox real soon and you’re going to want all that beautiful Designer Series Paper, Ribbon and/or Embellishments. My September – December 2026 Catalog and September Online Exclusive Product Shares are open for ordering. You can order just the DSP share, just the Two-Tone cardstock share, just the Ribbon share or just the Embellishment share, or you can have it all!!
I’m offering a Designer Series Paper Share, Two-Tone Cardstock Share, Ribbon Share & Embellishment Share from the September – December 2026 Catalog, along with the upcoming September 2026 Online Exclusives and I’d love to have you join!! I’m placing my share order early on September 1st and I’m going to use the expedited shipping option so I should be able to have the shares cut, bundled and back out to you by the end of the week of September 7th. Wouldn’t you love to have all of the gorgeous new Designer Series Papers in the Stampin’ Up! Sept – Dec 2026 Catalog and the upcoming Sept 2026 Online Exclusives? What is a Paper Share you ask? It’s a sample of each of the new Designer Series Papers from the Catalog and Online Exclusives. Shares give you a good working sample of all of the papers so that you can decide which ones to order in full packs! If you were to purchase all of the DSP in the new Catalog and Online Exclusives, it would cost you over $250.00 plus shipping.
New Designer Series Paper Share – $30.00 plus $10.00 for Priority Mail Shipping
How my shares work: I order full packs of all of the Designer Series Papers listed below, I cut them into 6″ X 6″ pieces (or 6″ X 12″ pieces for double shares) and give you one panel of each design from each pack on the list. I pack up the paper in a cellophane bag with labels listing the Name, Item # and Colors in the pack and mail it back out to you just as quickly as I can!
New Designer Series Paper Share – $30.00 plus $10.00 for Priority Mail shipping
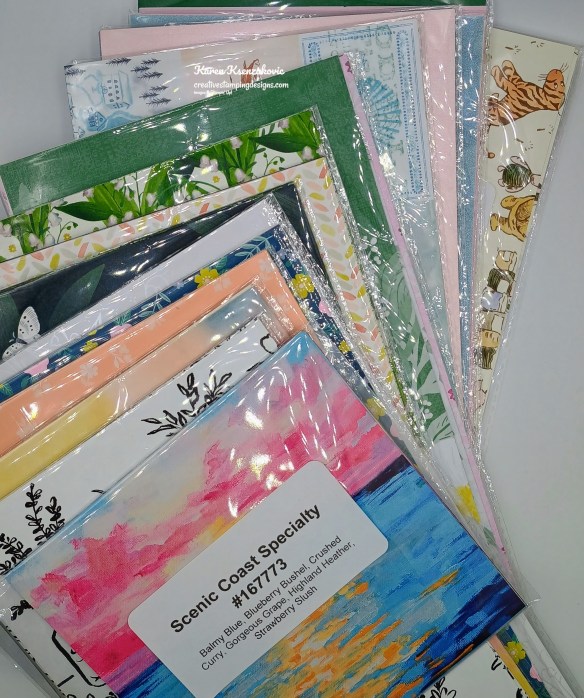
You will receive one 6×6 sheet of each design from the following DSP packs (the number after the name indicates how many 6×6 sheets of that paper pack you will receive):
- A Little Christmas (6)
- All Wrapped Up Specialty (6)
- Alpine Winter (6)
- Autumn Opulence Specialty (5)
- Autum Woodland Glimmer Specialty (3)
- Creative Celebrations 6 x 6 (4)
- Hearth & Home (3)
- Metal Effects Specialty (3)
- Mosaic Garden (6)
- Neutral Noel Specialty (6)
- Painted Patch (6)
- Radiant Foils Specialty (3)
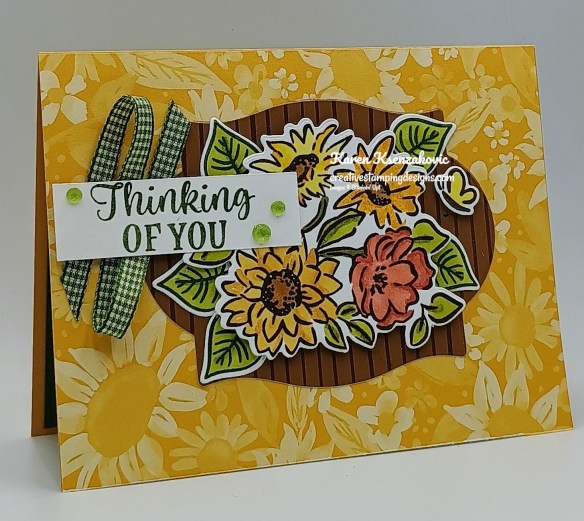
- Sunflower Fields (6)
- Texture & Tone (3)
- Timeless Christmas (3)
- Timeless Metallic Specialty (3)
- Whispering Woods (3)
- Winter Dreams Specialty (3)
- Yuletide Carold (3)
In all, you’ll receive 84 – 6” x 6” sheets of designer or specialty paper!
Double Designer Series Paper Share – $60.00 Plus $10.00 Shipping
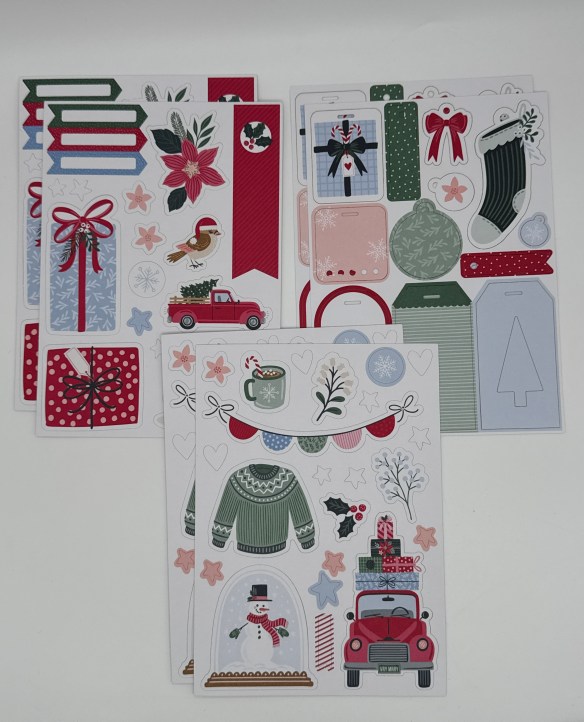
As a gift from me for ordering a Double Share of Designer Series Paper, I will include a Happiest Season Tags Mix & Match Ephemera Pack #168493. This gift is only for ordering a Double DSP Share.
Two-Tone Cardstock Share
Do you like the Two-Tone Cardstock but don’t want to buy a whole pack? You can add a share of the 3 different Two-Tone Cardstock packs for an additional $4.00 or purchase them separately for $4.00 + $10 Shipping
You will receive one 6×6 sheet of each color from each of the packs (the number after the name indicates how many 6×6 sheets of that paper pack you will receive):
- Autumn Fields (6)
- Home For Christmas (4)
- Memorable Garden (6)
In all, you’ll receive 16 – 6” x 6” sheets of cardstock!
Double Share of the Two-Tone Cardstock – $8.00 plus $10.00 Shipping
If you’d like double shares of the designer paper or cardstock, I’m offering those too! I’ll cut the 12″ x 12″ sheets into 6″ × 12″ so that you’ll be able to get 3 full A2 size card fronts from each sheet and you’ll get double sheets of the 6″ x 6″ since they’re already precut.
Ribbon Share – $21.25 plus $10.00 Shipping
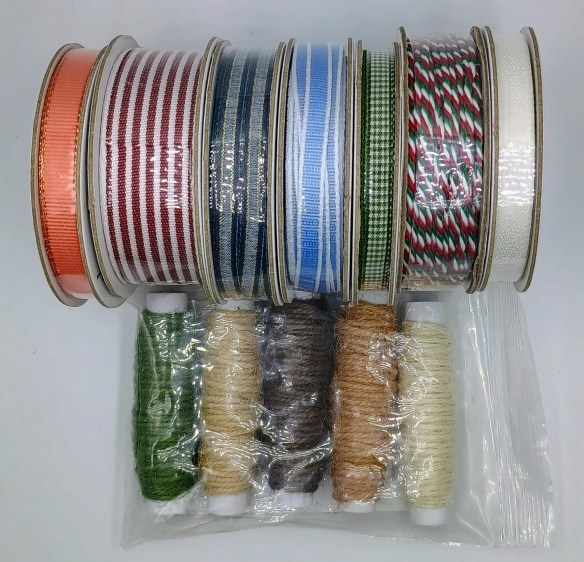
All ribbons will come individually wrapped and labeled with the name and number of the product.
1/4 of a Roll of each:
- Calypso Coral With Copper 3/8″ Bordered Ribbon
- Cherry Cobbler & White 1″ Striped Grosgrain Ribbon
- Hydrangea Hue 1/4″ Bordered Ribbon
- Mossy Meadow & Very Vanilla 1/4″ Gingham Ribbon
- Multicolored Christmas Baker’s Twine
- Secret Sea & Gold 14″ Satin Ribbon
- White 3/8″ Textured Ribbon
1/2 of each spool:
- Neutrals Jute Combo Pack
Double Ribbon Share – $42.50 Plus $10.00 Shipping and you will be getting 1/2 of the roll or each ribbon.
Embellishment Share – $16.50 plus $10.00 Shipping
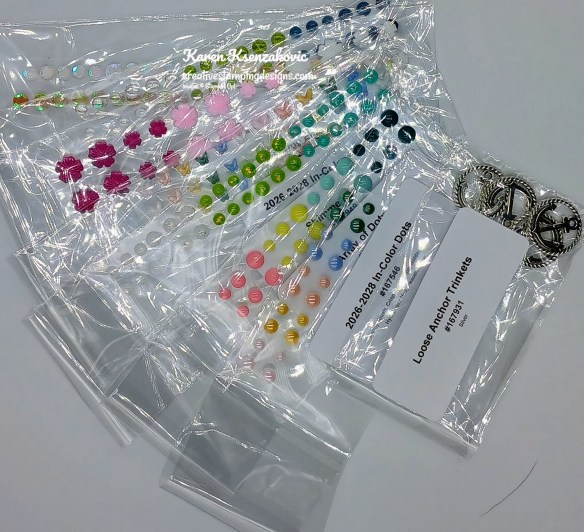
I’m also offering an Embellishment Share. I will divide the embellishments up and package them in a cello bag with the name and number for easy ordering, just like I do with the paper and ribbon.
You will receive (approximate # listed):
- Christmas Berries (5)
- Christmas Epoxy Shapes (34)
- Glossy Garden Dots (24)
- Gold Adhesive-Back Dots (30)
- Painted Patch Adhesive-Back Dots (40)
- Radiant Gems (30)
- Adhesive-Back Snowflakes (40)
- Adhesive-Back Sparkle Sequins (40)
Double Share of the Embellishments – $33.00 plus $10.00 Shipping
Anyone is welcome to join in my shares (please note, I can only ship to addresses within the US). To make ordering the shares a little easier, I have created a form for you to submit, that way you can order any combination of shares you want. I will send out PayPal Invoices by August 29th and they will be due by August 30th.
Click Here for the form.
Deadline to sign up for my share is Saturday August 29th at 5:00 PM ET.
*********************************************************************************************************
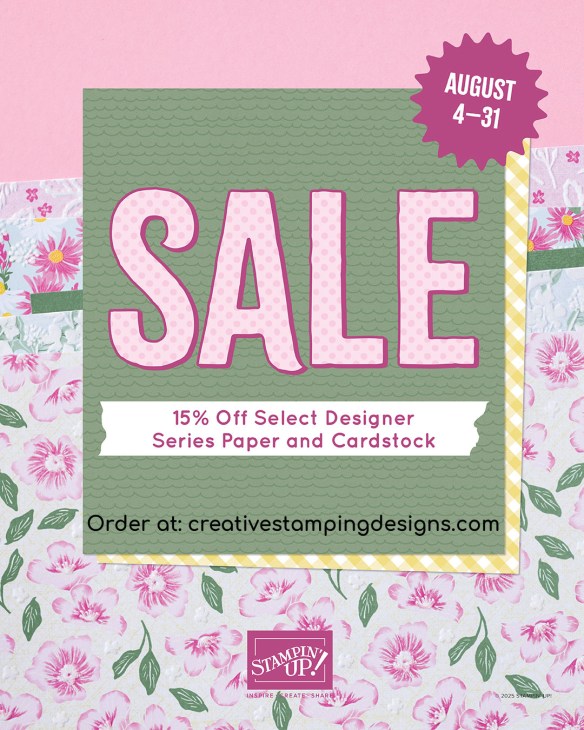
15% Off Select Designer Series Paper & Cardstock – August 4-31
Are you looking for the perfect card stock or Designer Series Paper for your next project? Stampin’ Up! has got you covered! Starting August 4, enjoy 15% off select Designer Series Paper and card stock. Stock up on your favorites or explore new colors and patterns during this sale!
Here are the sale details:
- Sales Period: August 4–31
- Ordering Deadline: August 31, 2026, at 11:59 p.m. (MT)
- While supplies last.
- You’ll find all qualifying items in one convenient location once the sale begins on August 4—it will be located in the “Designer Series Paper and Cardstock Sale” page in the online store.
Head over to my Online Store beginning August 4 to shop the sale!!
*********************************************************************************************************
September – December 2026 Catalog Coming Soon
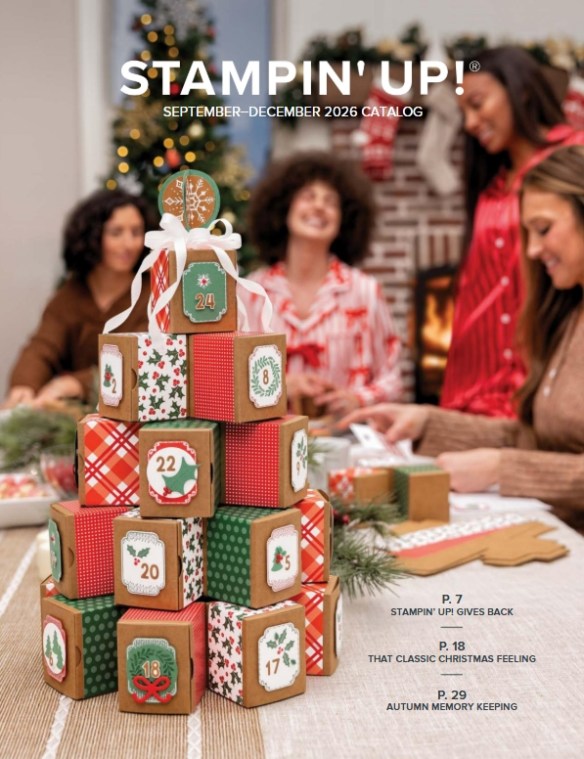
I’ve received the September – December 2026 catalogs and mailed them to my customers, so be on the look out if you are a customer of mine. It’s filled with holiday related items and I can’t wait for you all to see it!
If you’ve ordered from me within the last year, you automatically are on my mailing list for the new catalogs. If you are not a current customer of mine but would like to be and would like to get a copy of the upcoming catalog, simply place an order through my Online Store and I’ll mail you a copy of the catalog too!
*********************************************************************************************************
New Online Exclusives Now Available!!

Stampin’ Up! has some awesome Online Exclusives that are available to order now!! Stampin’ Up! has created a printable flyer to make it MUCH easier to shop the upcoming products! You can get to the flyer showing the new products by clicking the image above or by clicking right Here. You won’t find the Online Exclusive products in any catalog; they’ll only be listed in the online store. Just head over to my Online Store to order them and while you’re there, check out the new Kits too. The Online Exclusive product releases will continue throughout the year so there will be new products to shop from, in addition to new catalogs!
There are some new Online Exclusives coming on September 1 too! You can find the flyer for the upcoming items by clicking on the image below or right here:

*********************************************************************************************************
New Stampin’ Up! Product of The Month

Every month Stampin’ Up! will release a new item that is only available for purchase once per account. These items will be limited quantity and are likely to sell out quickly—once they’re sold out, they’re gone for good!
There will be a new Product of the Month is available to order beginning August 4 for $5 when you place an order of $75+ and it will be available while supplies last!! The Product of the Month for August will be the Glow Of Harvest Specialty Designer Series Paper! You’re not going to want to miss this one!!!

Celebrate abundance with this beautiful Designer Series Paper. This paper is photo safe, meaning you can add all the pictures you want to your scrapbook projects. But don’t use too many because then you’ll cover the pearlized finish, which adds a lovely shimmer to every page and can enhance the look of all your handmade projects. And this paper offers different patterns for multiple uses: the tighter patterns make great backgrounds while the looser patterns can be fussy cut for detailed centerpieces.
Get yours now for $5 with your order of $75+ beginning August 4!
Every month Stampin’ Up! will release a new item that is only available for purchase once per account. These items will be limited quantity and are likely to sell out quickly—once they’re sold out, they’re gone for good!
*********************************************************************************************************
25% off your First Paper Pumpkin Kit for 1st Time Subscribers
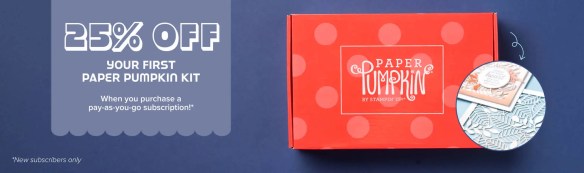
Have you been thinking of trying Paper Pumpkin? Now’s a perfect time to get started with our all-inclusive crafting kit subscription! Purchase a pay-as-you-go subscription from July 11–August 10 and get 25% off the first kit!
Not only will new subscribers receive the wonderful August Kindred Greetings Kit at a discount, but they’ll also gain access to exclusive add-ons, past kits, and refills as soon as they subscribe! It’s a great way to carve out a little creative “me time” each month while joining a global community of passionate crafters!
Promotion Details:
- Promotion Begins: July 11, 2026
- Promotion Ends: August 10, 2026
- Offer applies to new subscribers only (those who haven’t had an active Paper Pumpkin subscription in the past 18 months).
- Offer is valid for pay-as-you-go subscriptions only. Discount does not apply to prepaid subscriptions.
- The discounted first kit is the August Kindred Greetings Kit.
- This kit cannot be skipped.
Head over to my online store beginning July 11 to subscribe…and if you’re a new subscriber, you’ll get 25% off the August Kit!!
*********************************************************************************************************
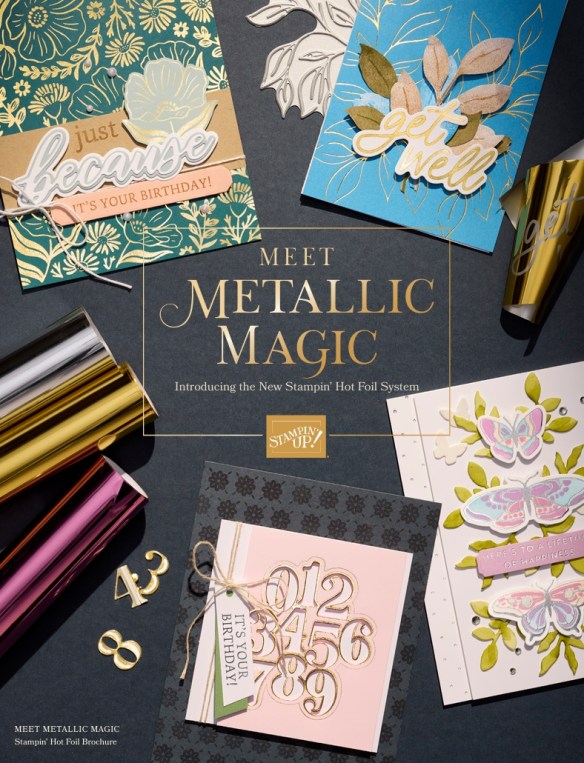
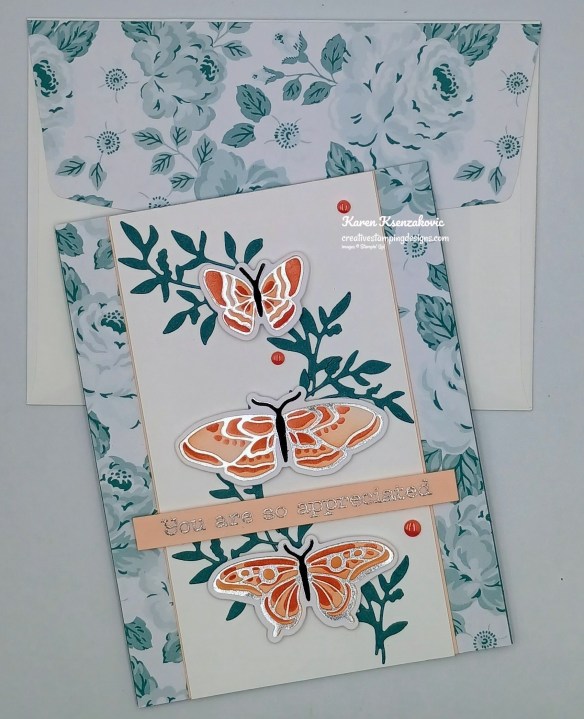
Introducing one of the hottest items in crafting—the new Stampin’ Hot Foil System!!
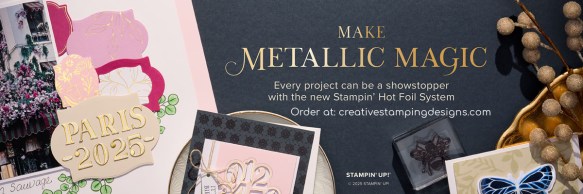
The metallic magic starts with Stampin’ Hot Foil Rolls, specially made Hot Foil dies, and the Stampin’ Hot Foil System that works with the Stampin’ Cut & Emboss Machine (sold separately). The heat of the platform transfers the foil using hot foil dies designed specifically for this system, allowing you to add dazzling details to paper and more.
WHAT IS INCLUDED WHEN YOU PURCHASE THE STAMPIN’ HOT FOIL SYSTEM?
This is everything included in the Stampin’ Hot Foil System & Craft Class:
- Metallic Magic Craft Class ($30 value—limited time only!)
- Stampin’ Hot Foil platform
- Stampin’ Hot Foil Shim & Spacer
- Stampin’ Hot Foil Magnetic Pick-Up Tool
- Silicone platform station
- Silicone cooling pad
- Power cord
- Instructions on how to use the system

The Stampin’ Cut & Emboss Machine, Stampin’ Hot Foil Rolls (the foil itself), and Hot Foil dies and bundles are sold separately.
CRAFT CLASS
As an added bonus, everyone who purchases this system before January 4, 2027, will automatically be able to access the upcoming Metallic Magic Craft Class, a technique-centric virtual class. Attendees will make unique projects and learn crafting tips intended to elevate their hot foil crafting experience. This class is a special limited-time offer exclusive to this system and is an amazing tool when it comes to increasing skills, learning techniques, and making the most of this new product line.
You can see more details about the system, find the bundles and foil that will be available to order beginning on Friday, July 10 in this brochure:
A few notes about the new system:
- Hot Foil results are best with either White Willow or Two-Tone Cardstock. Smoother card stocks like the Two-Tone Cardstock and White Willow will achieve the best results when using the system, but you can use the regular card stocks too.
- The Hot Foil System, foil rolls and new hot foil dies and bundles will be available Friday, July 10, 2026 in the online Stampin’ Up! store.
- A FREE Hot Foil Online Class from Stampin’ Up! is included with your hot foil system purchase (a $30 value!), do not add the class separately to your cart (you’ll be charged for it if you do!). You’ll automatically get a link to it after you purchase the Stampin’ Hot Foil System.
- The Stampin’ Hot Foil system is $160. Dies & foil are sold separately.
- Stampin’ Up! has let us know that if the Stampin’ Hot Foil system goes on backorder, it may take longer than normal to restock. So if you would like to order the system, order sooner rather than later!
- IMPORTANT NOTE: Cutting dies are not designed to be used with hot foiling. You cannot die cut using foiling dies. Doing so risks damaging the dies and the system.
I’m so excited for you all to be able to order this new system! Head over to my Stampin’ Up! online store beginning July 10 to see and order the new system!
*********************************************************************************************************
If you need any stamping supplies, I’d love to be your Demonstrator. Just click HERE to go directly to my online store or drop me an email if you have any questions.


![Springtime Scenes Photopolymer Stamp Set (English) [ 167457 ]](https://assets1.tamsnetwork.com/images/EC042017NF/167457s.jpg "Springtime Scenes Photopolymer Stamp Set (English) [ 167457 ]")
![Basic White 8 1/2" X 11" Cardstock [ 166780 ]](https://assets1.tamsnetwork.com/images/EC042017NF/166780s.jpg "Basic White 8 1/2\" X 11\" Cardstock [ 166780 ]")
![Golden Glow 8 1/2" X 11" Cardstock [ 167685 ]](https://assets1.tamsnetwork.com/images/EC042017NF/167685s.jpg "Golden Glow 8 1/2\" X 11\" Cardstock [ 167685 ]")
![Mossy Meadow 8-1/2" X 11" Cardstock [ 133676 ]](https://assets1.tamsnetwork.com/images/EC042017NF/133676s.jpg "Mossy Meadow 8-1/2\" X 11\" Cardstock [ 133676 ]")
![Early Espresso Classic Stampin' Pad [ 147114 ]](https://assets1.tamsnetwork.com/images/EC042017NF/147114s.jpg "Early Espresso Classic Stampin' Pad [ 147114 ]")
![Mossy Meadow Classic Stampin' Pad [ 147111 ]](https://assets1.tamsnetwork.com/images/EC042017NF/147111s.jpg "Mossy Meadow Classic Stampin' Pad [ 147111 ]")
![Cajun Craze Stampin' Blends Combo Pack [ 154879 ]](https://assets1.tamsnetwork.com/images/EC042017NF/154879s.jpg "Cajun Craze Stampin' Blends Combo Pack [ 154879 ]")
![Daffodil Delight Stampin' Blends Combo Pack [ 154883 ]](https://assets1.tamsnetwork.com/images/EC042017NF/154883s.jpg "Daffodil Delight Stampin' Blends Combo Pack [ 154883 ]")
![Golden Glow Stampin’ Blends Combo Pack [ 167682 ]](https://assets1.tamsnetwork.com/images/EC042017NF/167682s.jpg "Golden Glow Stampin’ Blends Combo Pack [ 167682 ]")
![Old Olive Stampin' Blends Combo Pack [ 154892 ]](https://assets1.tamsnetwork.com/images/EC042017NF/154892s.jpg "Old Olive Stampin' Blends Combo Pack [ 154892 ]")
![Pecan Pie Stampin’ Blends Combo Pack [ 161674 ]](https://assets1.tamsnetwork.com/images/EC042017NF/161674s.jpg "Pecan Pie Stampin’ Blends Combo Pack [ 161674 ]")
![Golden Glow Shimmer Brush [ 167662 ]](https://assets1.tamsnetwork.com/images/EC042017NF/167662s.jpg "Golden Glow Shimmer Brush [ 167662 ]")
![Flourish & Frames Hot Foil Dies [ 170064 ]](https://assets1.tamsnetwork.com/images/EC042017NF/170064s.jpg "Flourish & Frames Hot Foil Dies [ 170064 ]")
![Basic White Medium Envelopes [ 159236 ]](https://assets1.tamsnetwork.com/images/EC042017NF/159236s.jpg "Basic White Medium Envelopes [ 159236 ]")
![Stampin' Cut & Emboss Machine [ 149653 ]](https://assets1.tamsnetwork.com/images/EC042017NF/149653s.jpg "Stampin' Cut & Emboss Machine [ 149653 ]")
![Stampin' Hot Foil System Na & Craft Class [ 170009 ]](https://assets1.tamsnetwork.com/images/EC042017NF/170009s.jpg "Stampin' Hot Foil System Na & Craft Class [ 170009 ]")
![Silver Stampin' Hot Foil Rolls [ 170067 ]](https://assets1.tamsnetwork.com/images/EC042017NF/170067s.jpg "Silver Stampin' Hot Foil Rolls [ 170067 ]")
![Mini Glue Dots [ 103683 ]](https://assets1.tamsnetwork.com/images/EC042017NF/103683s.jpg "Mini Glue Dots [ 103683 ]")
![Multipurpose Liquid Glue [ 110755 ]](https://assets1.tamsnetwork.com/images/EC042017NF/110755s.jpg "Multipurpose Liquid Glue [ 110755 ]")
![Stampin' Dimensionals [ 104430 ]](https://assets1.tamsnetwork.com/images/EC042017NF/104430s.jpg "Stampin' Dimensionals [ 104430 ]")
![Stampin' Seal [ 152813 ]](https://assets1.tamsnetwork.com/images/EC042017NF/152813s.jpg "Stampin' Seal [ 152813 ]")
![Paper Trimmer [ 152392 ]](https://assets1.tamsnetwork.com/images/EC042017NF/152392s.jpg "Paper Trimmer [ 152392 ]")
![Bone Folder [ 102300 ]](https://assets1.tamsnetwork.com/images/EC042017NF/102300s.jpg "Bone Folder [ 102300 ]")
![Detail Scissors [ 170902 ]](https://assets1.tamsnetwork.com/images/EC042017NF/170902s.jpg "Detail Scissors [ 170902 ]")
![Take Your Pick [ 144107 ]](https://assets1.tamsnetwork.com/images/EC042017NF/144107s.jpg "Take Your Pick [ 144107 ]")

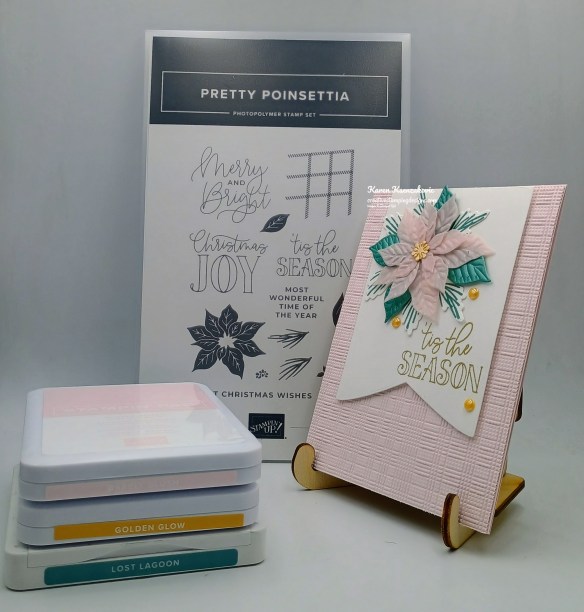
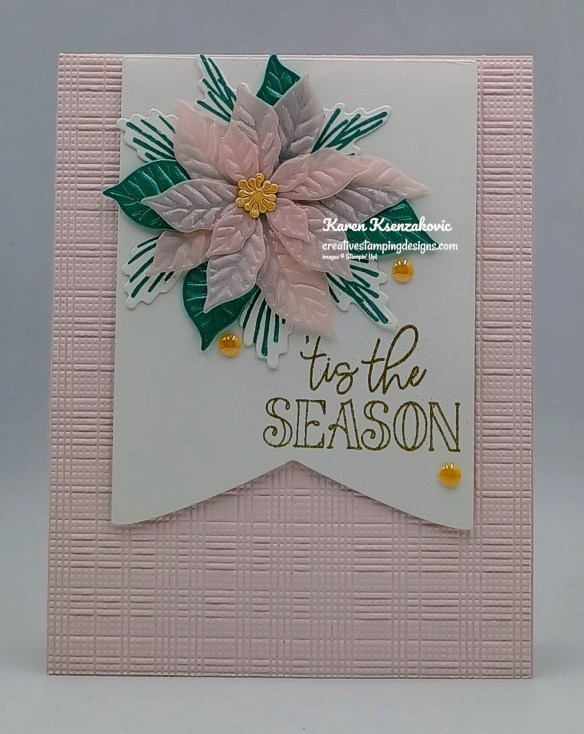
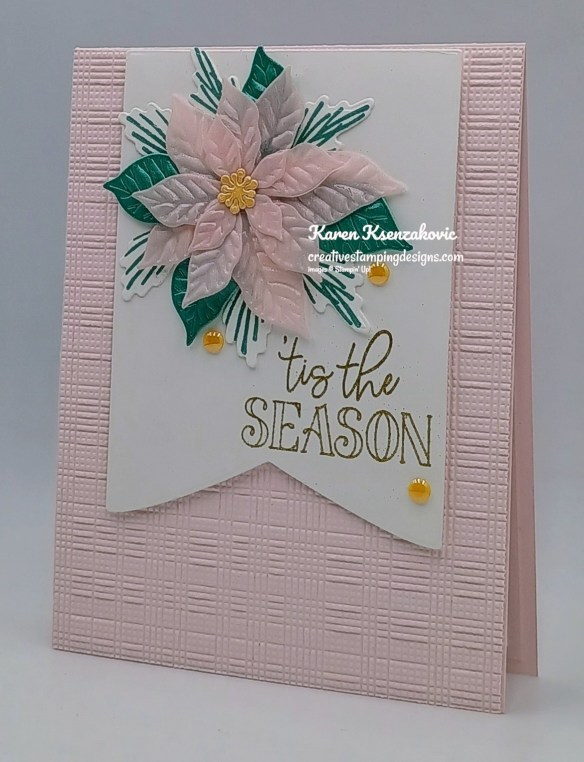
![Pretty Poinsettia Bundle (English) [ 168147 ]](https://assets1.tamsnetwork.com/images/EC042017NF/168147s.jpg "Pretty Poinsettia Bundle (English) [ 168147 ]")
![Pretty Poinsettia Photopolymer Stamp Set (English) [ 168140 ]](https://assets1.tamsnetwork.com/images/EC042017NF/168140s.jpg "Pretty Poinsettia Photopolymer Stamp Set (English) [ 168140 ]")
![Pretty Poinsettia Dies [ 168146 ]](https://assets1.tamsnetwork.com/images/EC042017NF/168146s.jpg "Pretty Poinsettia Dies [ 168146 ]")
![Barely Blush 8 1/2" X 11" Cardstock [ 167689 ]](https://assets1.tamsnetwork.com/images/EC042017NF/167689s.jpg "Barely Blush 8 1/2\" X 11\" Cardstock [ 167689 ]")
![Pastels Shimmer 12" X 12" (30.5 X 30.5 Cm) Specialty Paper [ 167198 ]](https://assets1.tamsnetwork.com/images/EC042017NF/167198s.jpg "Pastels Shimmer 12\" X 12\" (30.5 X 30.5 Cm) Specialty Paper [ 167198 ]")
![Sunset Shimmer Vellum 12" X 12" (30.5 X 30.5 Cm) Specialty Paper [ 167784 ]](https://assets1.tamsnetwork.com/images/EC042017NF/167784s.jpg "Sunset Shimmer Vellum 12\" X 12\" (30.5 X 30.5 Cm) Specialty Paper [ 167784 ]")
![2026–2028 In Color™ 12" X 12" (30.5 X 30.5 Cm) Pearlized Specialty Paper [ 167766 ]](https://assets1.tamsnetwork.com/images/EC042017NF/167766s.jpg "2026–2028 In Color™ 12\" X 12\" (30.5 X 30.5 Cm) Pearlized Specialty Paper [ 167766 ]")
![Barely Blush Classic Stampin Pad [ 167678 ]](https://assets1.tamsnetwork.com/images/EC042017NF/167678s.jpg "Barely Blush Classic Stampin Pad [ 167678 ]")
![Golden Glow Classic Stampin' Pad [ 167676 ]](https://assets1.tamsnetwork.com/images/EC042017NF/167676s.jpg "Golden Glow Classic Stampin' Pad [ 167676 ]")
![Lost Lagoon Classic Stampin' Pad [ 161678 ]](https://assets1.tamsnetwork.com/images/EC042017NF/161678s.jpg "Lost Lagoon Classic Stampin' Pad [ 161678 ]")
![Small Blending Brushes [ 160518 ]](https://assets1.tamsnetwork.com/images/EC042017NF/160518s.jpg "Small Blending Brushes [ 160518 ]")
![Versamark Pad [ 102283 ]](https://assets1.tamsnetwork.com/images/EC042017NF/102283s.jpg "Versamark Pad [ 102283 ]")
![Metallics Wow! Embossing Powder [ 165678 ]](https://assets1.tamsnetwork.com/images/EC042017NF/165678s.jpg "Metallics Wow! Embossing Powder [ 165678 ]")
![Heat Tool (Us And Canada) [ 129053 ]](https://assets1.tamsnetwork.com/images/EC042017NF/129053s.jpg "Heat Tool (Us And Canada) [ 129053 ]")
![Party Banners Dies [ 165264 ]](https://assets1.tamsnetwork.com/images/EC042017NF/165264s.jpg "Party Banners Dies [ 165264 ]")
![2026–2028 In Color™ Dots [ 167546 ]](https://assets1.tamsnetwork.com/images/EC042017NF/167546s.jpg "2026–2028 In Color™ Dots [ 167546 ]")


![Fern & Flora Bundle (English) [ 167745 ]](https://assets1.tamsnetwork.com/images/EC042017NF/167745s.jpg "Fern & Flora Bundle (English) [ 167745 ]")
![Fern & Flora Photopolymer Stamp Set (English) [ 167739 ]](https://assets1.tamsnetwork.com/images/EC042017NF/167739s.jpg "Fern & Flora Photopolymer Stamp Set (English) [ 167739 ]")
![Fern & Flora Dies [ 168991 ]](https://assets1.tamsnetwork.com/images/EC042017NF/168991s.jpg "Fern & Flora Dies [ 168991 ]")
![Basic White 8 1/2" X 11" Thick Cardstock [ 159229 ]](https://assets1.tamsnetwork.com/images/EC042017NF/159229s.jpg "Basic White 8 1/2\" X 11\" Thick Cardstock [ 159229 ]")
![Secret Sea 8 1/2" X 11" Cardstock [ 165624 ]](https://assets1.tamsnetwork.com/images/EC042017NF/165624s.jpg "Secret Sea 8 1/2\" X 11\" Cardstock [ 165624 ]")
![Soft Sea Foam 8-1/2" X 11" Cardstock [ 146988 ]](https://assets1.tamsnetwork.com/images/EC042017NF/146988s.jpg "Soft Sea Foam 8-1/2\" X 11\" Cardstock [ 146988 ]")
![Moonlit Flora 12" X 12" (30.5 X 30.5 Cm) Designer Series Paper [ 167737 ]](https://assets1.tamsnetwork.com/images/EC042017NF/167737s.jpg "Moonlit Flora 12\" X 12\" (30.5 X 30.5 Cm) Designer Series Paper [ 167737 ]")
![Secret Sea Classic Stampin' Pad [ 165285 ]](https://assets1.tamsnetwork.com/images/EC042017NF/165285s.jpg "Secret Sea Classic Stampin' Pad [ 165285 ]")
![Basics Wow! Embossing Powder [ 165679 ]](https://assets1.tamsnetwork.com/images/EC042017NF/165679s.jpg "Basics Wow! Embossing Powder [ 165679 ]")
![Fern & Flora 3 D Embossing Folder [ 167744 ]](https://assets1.tamsnetwork.com/images/EC042017NF/167744s.jpg "Fern & Flora 3 D Embossing Folder [ 167744 ]")
![Dewdrops Embellishments [ 167748 ]](https://assets1.tamsnetwork.com/images/EC042017NF/167748s.jpg "Dewdrops Embellishments [ 167748 ]")


![All Aflutter Photopolymer Stamp Set (English) [ 167564 ]](https://assets1.tamsnetwork.com/images/EC042017NF/167564s.jpg "All Aflutter Photopolymer Stamp Set (English) [ 167564 ]")
![Butterfly Flight Bundle [ 170065 ]](https://assets1.tamsnetwork.com/images/EC042017NF/170065s.jpg "Butterfly Flight Bundle [ 170065 ]")
![Butterfly Flight Hot Foil Dies [ 170045 ]](https://assets1.tamsnetwork.com/images/EC042017NF/170045s.jpg "Butterfly Flight Hot Foil Dies [ 170045 ]")
![Butterfly Flight Decorative Masks [ 170076 ]](https://assets1.tamsnetwork.com/images/EC042017NF/170076s.jpg "Butterfly Flight Decorative Masks [ 170076 ]")
![Lost Lagoon 8-1/2" X 11" Cardstock [ 133679 ]](https://assets1.tamsnetwork.com/images/EC042017NF/133679s.jpg "Lost Lagoon 8-1/2\" X 11\" Cardstock [ 133679 ]")
![Petal Pink 8-1/2" X 11" Cardstock [ 146985 ]](https://assets1.tamsnetwork.com/images/EC042017NF/146985s.jpg "Petal Pink 8-1/2\" X 11\" Cardstock [ 146985 ]")
![Everyday Essentials Mix & Match 12" X 12" (30.5 X 30.5 Cm) Designer Series Paper [ 167702 ]](https://assets1.tamsnetwork.com/images/EC042017NF/167702s.jpg "Everyday Essentials Mix & Match 12\" X 12\" (30.5 X 30.5 Cm) Designer Series Paper [ 167702 ]")
![Calypso Coral Classic Stampin' Pad [ 147101 ]](https://assets1.tamsnetwork.com/images/EC042017NF/147101s.jpg "Calypso Coral Classic Stampin' Pad [ 147101 ]")
![Petal Pink Classic Stampin' Pad [ 147108 ]](https://assets1.tamsnetwork.com/images/EC042017NF/147108s.jpg "Petal Pink Classic Stampin' Pad [ 147108 ]")
![Delicate Whispers Dies [ 167505 ]](https://assets1.tamsnetwork.com/images/EC042017NF/167505s.jpg "Delicate Whispers Dies [ 167505 ]")
![Pearls Of Beauty [ 167098 ]](https://assets1.tamsnetwork.com/images/EC042017NF/167098s.jpg "Pearls Of Beauty [ 167098 ]")


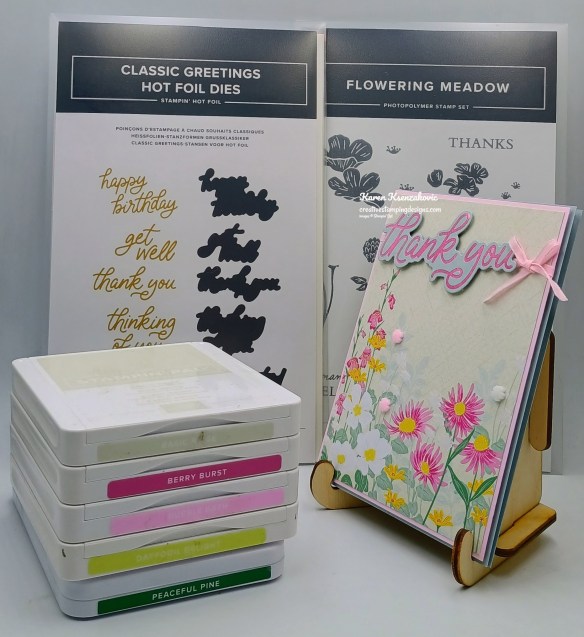

![Classic Greetings Hot Foil Dies [ 170042 ]](https://assets1.tamsnetwork.com/images/EC042017NF/170042s.jpg "Classic Greetings Hot Foil Dies [ 170042 ]")
![Flowering Meadow Photopolymer Stamp Set (English) [ 167906 ]](https://assets1.tamsnetwork.com/images/EC042017NF/167906s.jpg "Flowering Meadow Photopolymer Stamp Set (English) [ 167906 ]")
![Basic Beige 8 1/2" X 11" Cardstock [ 164511 ]](https://assets1.tamsnetwork.com/images/EC042017NF/164511s.jpg "Basic Beige 8 1/2\" X 11\" Cardstock [ 164511 ]")
![Bubble Bath 8 1/2" X 11" Cardstock [ 161718 ]](https://assets1.tamsnetwork.com/images/EC042017NF/161718s.jpg "Bubble Bath 8 1/2\" X 11\" Cardstock [ 161718 ]")
![Cloud Cover 8 1/2" X 11" Cardstock [ 165621 ]](https://assets1.tamsnetwork.com/images/EC042017NF/165621s.jpg "Cloud Cover 8 1/2\" X 11\" Cardstock [ 165621 ]")
![Velvet Meadow 12" X 12" (30.5 X 30.5 Cm) Specialty Designer Series Paper [ 167904 ]](https://assets1.tamsnetwork.com/images/EC042017NF/167904s.jpg "Velvet Meadow 12\" X 12\" (30.5 X 30.5 Cm) Specialty Designer Series Paper [ 167904 ]")
![Berry Burst Classic Stampin' Pad [ 147143 ]](https://assets1.tamsnetwork.com/images/EC042017NF/147143s.jpg "Berry Burst Classic Stampin' Pad [ 147143 ]")
![Bubble Bath Classic Stampin' Pad [ 161664 ]](https://assets1.tamsnetwork.com/images/EC042017NF/161664s.jpg "Bubble Bath Classic Stampin' Pad [ 161664 ]")
![Peaceful Pine Classic Stampin Pad [ 167679 ]](https://assets1.tamsnetwork.com/images/EC042017NF/167679s.jpg "Peaceful Pine Classic Stampin Pad [ 167679 ]")
![Bubble Bath 1/8" (3.2 Mm) Faux Linen Ribbon [ 167075 ]](https://assets1.tamsnetwork.com/images/EC042017NF/167075s.jpg "Bubble Bath 1/8\" (3.2 Mm) Faux Linen Ribbon [ 167075 ]")
![Dreamy Flowers [ 167916 ]](https://assets1.tamsnetwork.com/images/EC042017NF/167916s.jpg "Dreamy Flowers [ 167916 ]")
![Light Pink Stampin' Hot Foil Rolls [ 170068 ]](https://assets1.tamsnetwork.com/images/EC042017NF/170068s.jpg "Light Pink Stampin' Hot Foil Rolls [ 170068 ]")

![Flourish & Frames Photopolymer Stamp Set [ 170062 ]](https://assets1.tamsnetwork.com/images/EC042017NF/170062s.jpg "Flourish & Frames Photopolymer Stamp Set [ 170062 ]")
![Scalloped Blooms Photopolymer Stamp Set (English) [ 167639 ]](https://assets1.tamsnetwork.com/images/EC042017NF/167639s.jpg "Scalloped Blooms Photopolymer Stamp Set (English) [ 167639 ]")
![Early Espresso 8-1/2" X 11" Cardstock [ 119686 ]](https://assets1.tamsnetwork.com/images/EC042017NF/119686s.jpg "Early Espresso 8-1/2\" X 11\" Cardstock [ 119686 ]")
![Garden Green Classic Stampin' Pad [ 147089 ]](https://assets1.tamsnetwork.com/images/EC042017NF/147089s.jpg "Garden Green Classic Stampin' Pad [ 147089 ]")
![Bubble Bath Stampin’ Blends Combo Pack [ 161675 ]](https://assets1.tamsnetwork.com/images/EC042017NF/161675s.jpg "Bubble Bath Stampin’ Blends Combo Pack [ 161675 ]")
![Granny Apple Green Stampin' Blends Combo Pack [ 154885 ]](https://assets1.tamsnetwork.com/images/EC042017NF/154885s.jpg "Granny Apple Green Stampin' Blends Combo Pack [ 154885 ]")
![Shimmering Dots [ 167949 ]](https://assets1.tamsnetwork.com/images/EC042017NF/167949s.jpg "Shimmering Dots [ 167949 ]")


![Peaceful Pine 8 1/2" X 11" Cardstock [ 167691 ]](https://assets1.tamsnetwork.com/images/EC042017NF/167691s.jpg "Peaceful Pine 8 1/2\" X 11\" Cardstock [ 167691 ]")
![Peaceful Pine Stampin’ Blends Combo Pack [ 167668 ]](https://assets1.tamsnetwork.com/images/EC042017NF/167668s.jpg "Peaceful Pine Stampin’ Blends Combo Pack [ 167668 ]")
![Golden Glow 3/8" (1 Cm) Bordered Ribbon [ 167548 ]](https://assets1.tamsnetwork.com/images/EC042017NF/167548s.jpg "Golden Glow 3/8\" (1 Cm) Bordered Ribbon [ 167548 ]")

