Good Thursday morning stamping friends welcome to our Happy Inkin’ Thursday Blog Hop. By the time you read this I’ll be flying across the states to OnStage in Long Beach CA (my 1st time heading west). I’m so excited to be able to see the new catalog and products coming out in May along with the new In-Colors and Stamp Pads. I can’t wait to share everything with you.
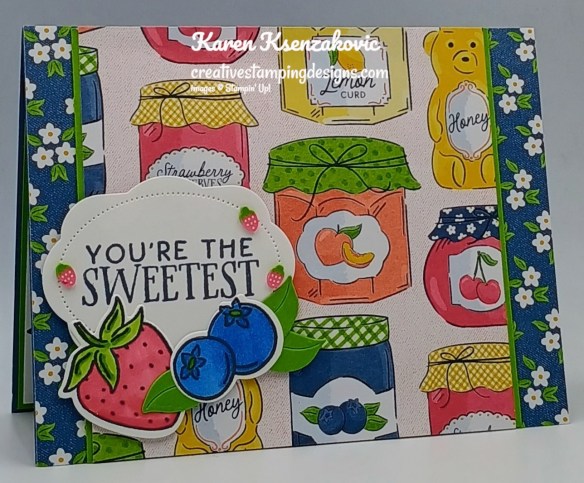
If you are starting with me, thank you, I hope you will stop by everyone’s blog to see the awesome projects they have created this week. If you are hopping over from Mary’s blog, thank you for stopping by. This week we have a Sketch Challenge to work with. If you’d like to see a quick video on how I made this card, Click Here to go to my Instagram Reels. Here is my card using this week’s Sketch.
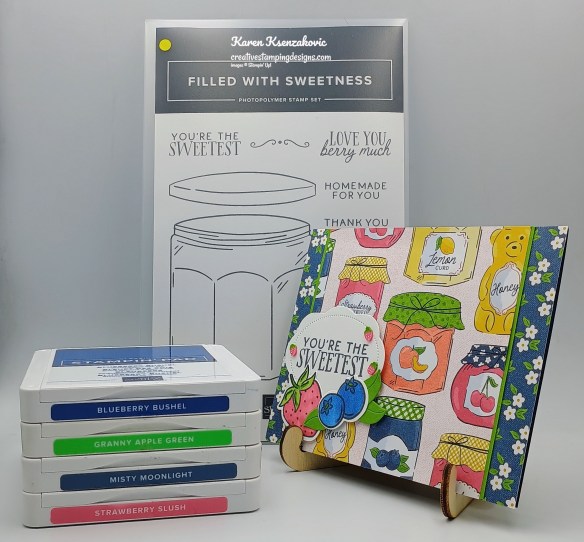
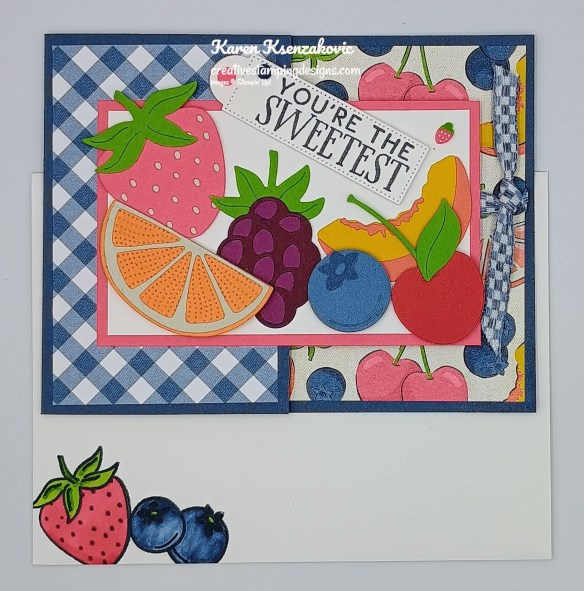
I used the Stampin’ Up! Filled With Sweetness Bundle along with the Homemade Sweetness Designer Series Paper for my card today.
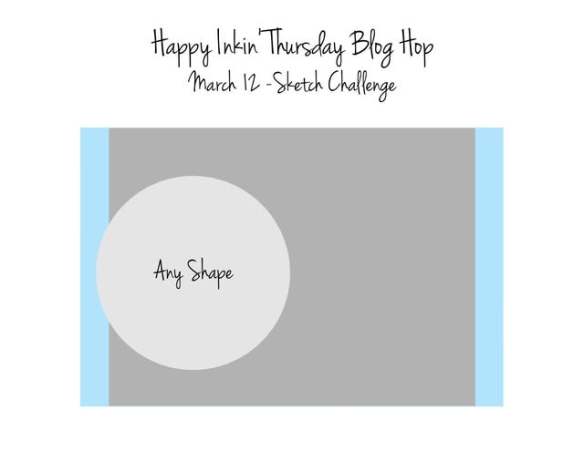
This is our sketch for this week.
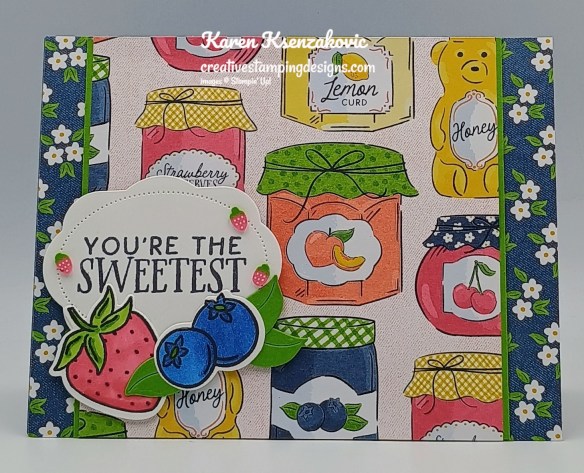
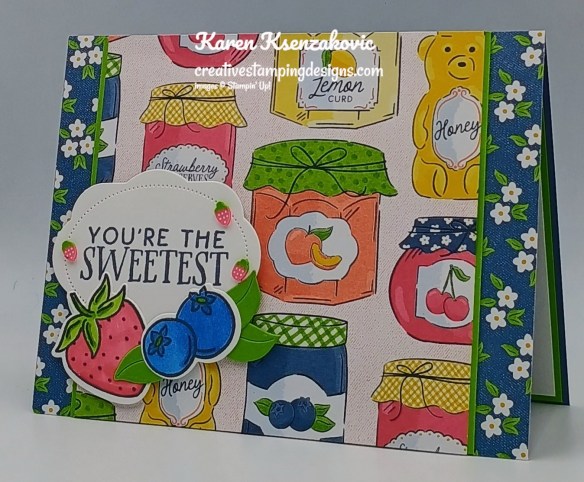
Adhere a panel of Homemade Sweetness DSP to a Misty Moonlight card base.
Adhere a smaller panel of Homemade Sweetness DSP to a Granny Apple Green mat. Adhere the layered panel to the card front.
On a panel of Basic White, stamp the sentiment from Filled With Sweetness stamp set in Misty Moonlight Ink. Cut the sentiment out using the Filled With Sweetness Dies. Adhere the sentiment with Stampin’ Dimensionals to the card front. On a panel of Basic White, stamp the strawberry and blueberry images from the Filled With Sweetness stamp set in Tuxedo Black Ink. Color the images with Blueberry Bushel, Granny Apple Green and Strawberry Slush Stampin’ Blends Markers. Cut the images out with Filled With Sweetness Dies. Adhere the strawberry and blueberries to the sentiment. Add a few Strawberry & Dots. to the card front.
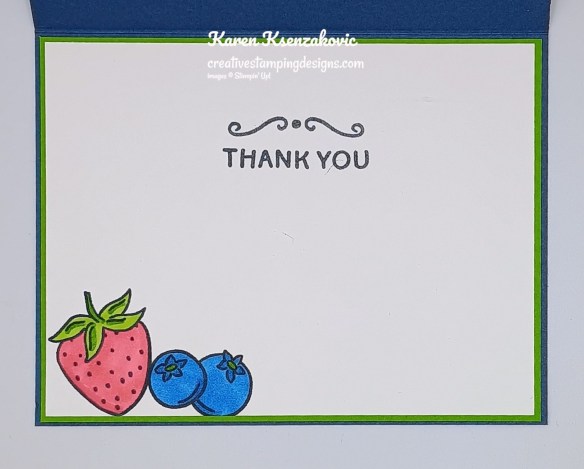
Stamp the sentiment and scroll image from the Filled With Sweetness stamp set in Misty Moonlight Ink on a panel of Basic White. Stamp the strawberry and blueberry images from the Filled With Sweetness stamp set in Tuxedo Black Ink on the bottom of the panel. Color the images with Blueberry Bushel, Granny Apple Green and Strawberry Slush Stampin’ Blends Markers. Adhere the Basic White panel to a Granny Apple Green mat then to the inside of the Misty Moonlight card base.
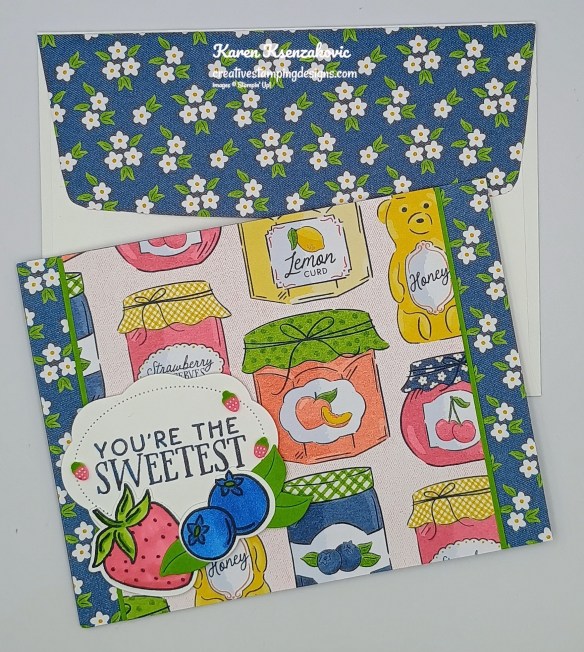
Decorate a Basic White Medium Envelope to complete your card. Stamp the strawberry and blueberry images from the Filled With Sweetness stamp set in Tuxedo Black Ink on the envelope front. Color the images with Blueberry Bushel, Granny Apple Green and Strawberry Slush Stampin’ Blends Markers. Adhere a panel of Homemade Sweetness DSP to the envelope flap.
Thank you for stopping by my blog today. Now that you’ve seen my card, let’s get on with the hop! Click the next button below to hop over to see what Tara has created. Happy Hopping
Just in case you get lost along the way, here is a list of the team members involved in the hop today.
If you need any stamping supplies, I’d love to be your Demonstrator. Just click HERE to go directly to my online store or drop me an email if you have any questions.
Good Friday morning stamping friends, welcome to my fun fold Friday. I hope you all had a great week and are looking forward to the weekend. We went from one extreme to another here in NJ. We’re getting ready to float away with all the rain we’re having, yet we still have snow on the ground. I was hoping that March would come in really windy to dry up the ground a little.
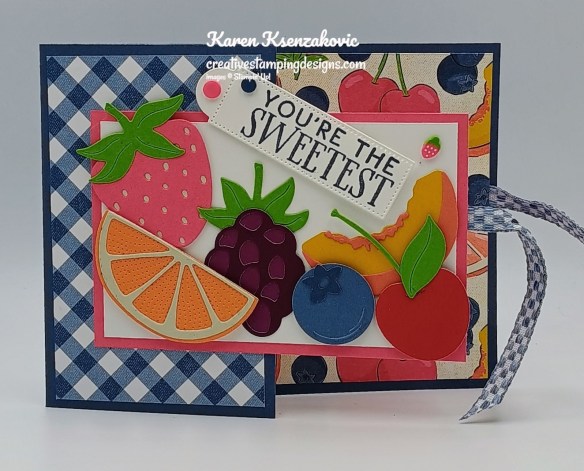
Today’s card is one that I did on my YouTube Live yesterday. If you were able to join me, thank you for hopping on. If you’d like to watch the replay and stamp along, the measurements are on the bottom of this post along with the link to my video. Here’s my card for today.
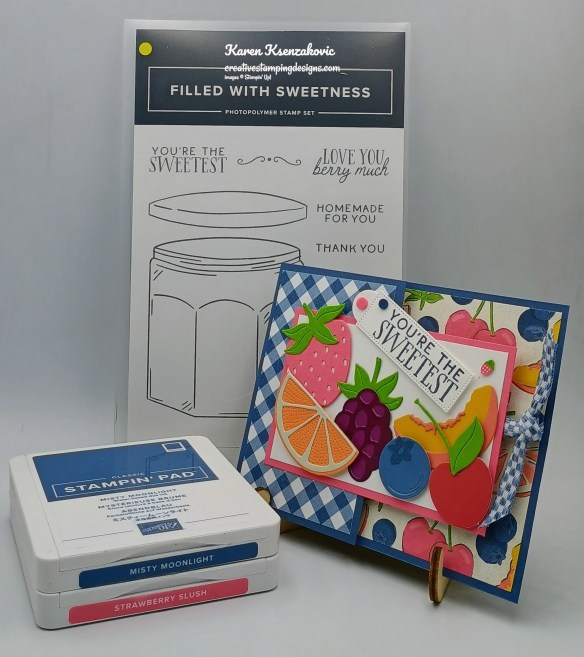
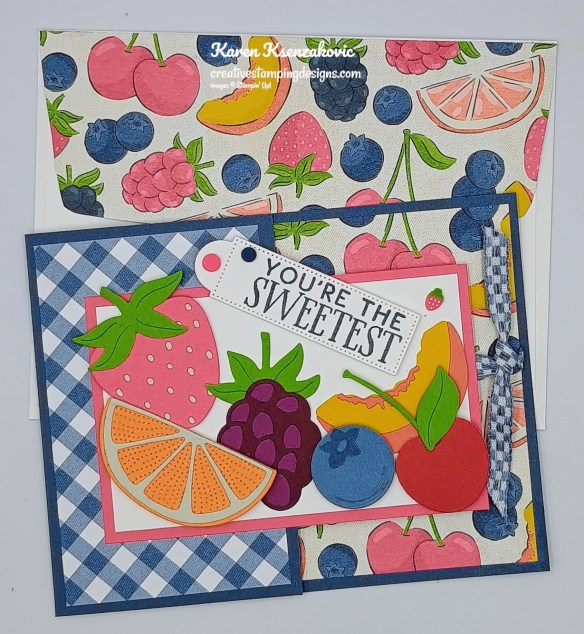
I used the Stampin’ Up! Filled With Sweetness Bundle along with the Homemade Sweetness Designer Series Paper and Made With Sweetness Dies for my card today.
Stamp the sentiment from Filled With Sweetness stamp set in Misty Moonlight Ink on a panel of Basic White. Cut the sentiment out using the Filled With Sweetness Dies. Adhere a panel of Homemade Sweetness DSP to the front of the card base.
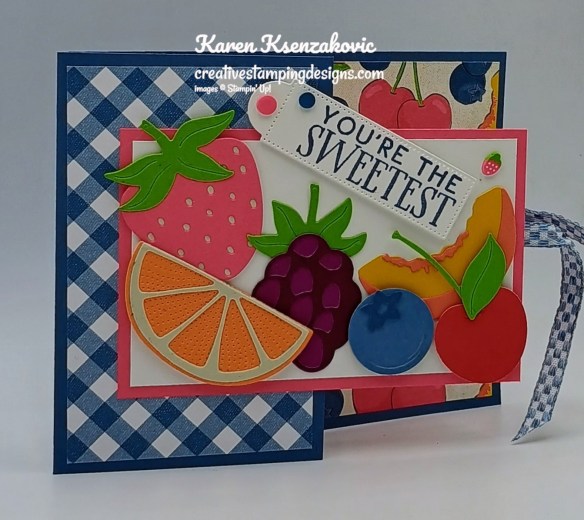
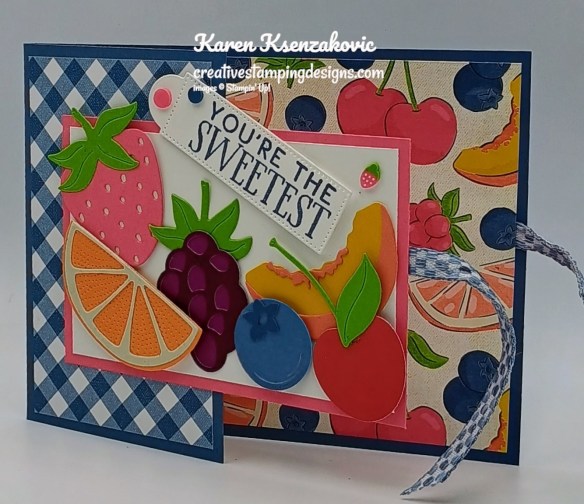
Using the Made With Sweetness Dies cut all the fruit images. Stems and leaves from Granny Apple Green. Strawberry from Strawberry Slush and Basic Beige. Peach from Crushed Curry and Calypso Coral. Cherry from Real Red. Blackberry from Blackberry Bliss Two-Tone cardstock. Blueberry from Misty Moonlight Two-Tone cardstock. Adhere the pieces together. Arrange the fruit pieces on a panel of Basic White the way you like them. Adhere the Basic White panel to a Strawberry Slush mat.
Adhere a piece of Misty Moonlight 1/4″ Checkered Trim to the card front, adhering it with Tear & Tape. Adhere the artwork panel to the card front, adding adhesive only to the back left half of the panel. Adhere the sentiment to the card front with Stampin’ Dimensionals. Add a few Strawberries and Dots to the card front.
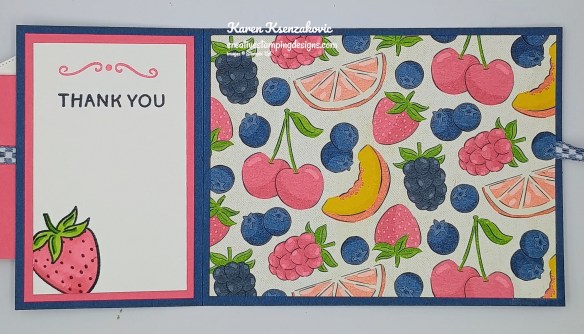
Adhere a piece of Misty Moonlight 1/4″ Checkered Trim to the inside back panel of the Misty Moonlight card base securing it with Tear & Tape. Adhere a panel of Homemade Sweetness DSP to the back panel. Stamp the sentiment from Filled With Sweetness stamp set in Misty Moonlight Ink on a panel of Basic White. Stamp the scroll image from the Filled With Sweetness stamp set in Strawberry Slush Ink above the sentiment. Stamp the strawberry image from the Filled With Sweetness stamp set in Tuxedo Black Ink on the bottom of the panel. Color the image with Granny Apple Green and Strawberry Slush Stampin’ Blends Markers. Adhere the Basic White panel to a Strawberry Slush mat then to the inside of the Misty Moonlight card base.
Decorate a Basic Whtie Medium Envelope to finish your card. Stamp the strawberry and blueberry images from the Filled With Sweetness stamp set in Tuxedo Black Ink on the envelope front. Color the images with Granny Apple Green, Misty Moonlight and Strawberry Slush Stampin’ Blends Markers. Adhere a panel of Homemade Sweetness DSP to the envelope flap.
Thank you for stopping by my blog today. I hope you liked my card and will give it a try. I hope you will CASE this card and please feel free to post it in the comments of my Facebook page under my post. I’d love to see your take it. You can watch my video on my YouTube Channel Here.
If you watch this on my YouTube channel, please remember to subscribe so that you will get notified when a new video goes live. Thank you to those that have subscribed already. Happy Stamping!!
If you need any stamping supplies, I’d love to be your Demonstrator. Just click HERE to go directly to my online store or drop me an email if you have any questions.
The new March Online Exclusives are now available to order. I’m offering Double Creative Stamping Designs Rewards. THAT’S 2X THE REWARDS FOR YOU FROM ME!!! March 3 – Monday March 9 for all orders over $50 (before tax & shipping)!! How does this work? For a $50 you’ll earn 2 rewards, $100 you’ll earn 4 rewards, $150 you’ll earn 6 rewards, etc. Head over to my Online Store and get those orders in early and earn those Double Rewards!!
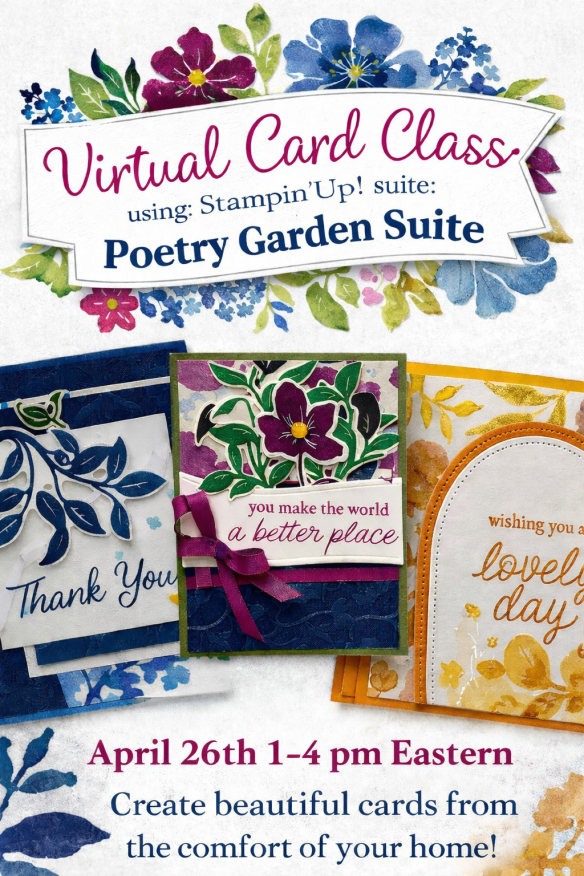
Tara Carpenter and I are teaming up to offer a fun online class using Stampin’ Up! March Online Exclusive Poetry Garden Suite. We will be creating 6 different cards during the class including 2 Fun Fold Cards. Sign Up now by Clicking Here to reserve your spot.
Zoom class with complete instructions to complete each card
PDF with detailed directions
During sign up you will have the option to add additional items to your order that you can take advantage of at no additional shipping cost. These items are optional, however if you want to recreate the cards you will need them. If you’ve attended a previous class, you were given a discount code, there is a spot to put that code on the form and the discount only applies to the products that you check off that you wish to purchase, not the class. Since the Bundles are already discounted, the discount does not apply to them either.
The class will be held Sunday April 26th from 1 to 4 pm Eastern Time via Zoom. This allows anyone in the United States to participate live! Can’t join us live… no worries, we will record the session so it can be replayed at any time.
I will email written directions that will include directions, cardstock cuts as well as photos to help you create each card.
The bundles are not included in the price of the class. You can purchase the bundle through me at an additional 10% discount of the Online Exclusive price (see below).
Class Cost $40 + $10 (Shipping)
Additional purchased items will be included in the above shipping price. I will invoice you through PayPal and invoices must be paid by April 5th to insure I can get the products delivered, packaged up and out to you with enough time.
Deadline: Sunday April 5th
Click Here to register for the class now!! Let me know if you have any questions.
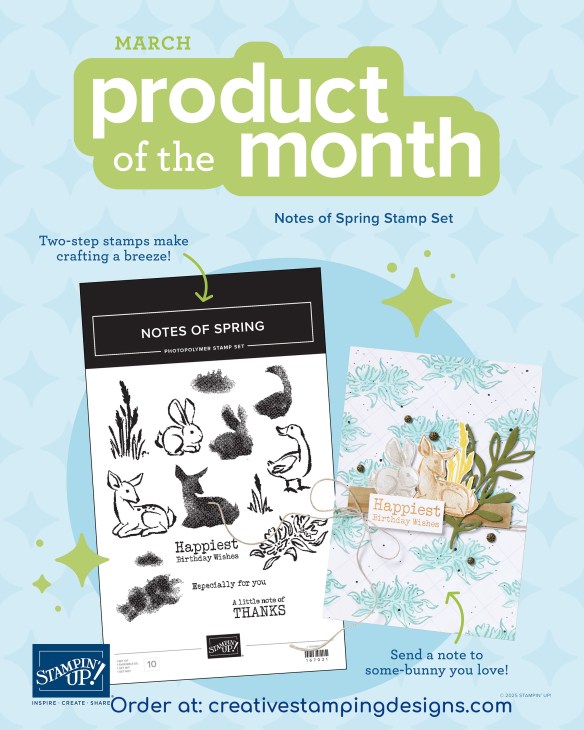
Spring into stamping with the Notes of Spring Stamp Set! Featuring adorable springtime animals like a deer, bunny, and duck, plus some delicate river plants, this stamp set makes it easy to create layered, watercolor-style images. Includes a few all-occasion sentiments to complete your handmade cards for birthdays, thank-you’s, and more.
The Notes of Spring Stamp Set is the exclusive Product of the Month for March 2026! Only available until stocks run out—don’t wait to get yours! This is a Two-Step Stampin’ set; it allows you to layer two or more images to create one final image with extra texture and dimension in the colors you want. This is a Distinktive stamp set; it has a special texture that gives added depth and dimension in a single step, creating photo-realistic images. DETAILS – March 2026 Product of the Month – 15 photopolymer stamps – Suggested clear blocks (sold separately): b, c – Two-Step – Distinktive PHOTOPOLYMER STAMPS – Are clear stamps that make image placement easy. – Have just enough give to create a perfectly stamped image every time. – Cling to clear blocks without slipping. – Are repositionable—temporarily mount on clear blocks to stamp, then remove to store. – Save space—one set of blocks (sold separately) works for all your stamps. – Are packed in a slim, durable envelope for easy storage and lasting protection.


![Basic White 8 1/2" X 11" Cardstock [ 166780 ]](https://assets1.tamsnetwork.com/images/EC042017NF/166780s.jpg "Basic White 8 1/2\" X 11\" Cardstock [ 166780 ]")
![Granny Apple Green 8-1/2" X 11" Cardstock [ 146990 ]](https://assets1.tamsnetwork.com/images/EC042017NF/146990s.jpg "Granny Apple Green 8-1/2\" X 11\" Cardstock [ 146990 ]")
![Misty Moonlight 8-1/2" X 11" Cardstock [ 153081 ]](https://assets1.tamsnetwork.com/images/EC042017NF/153081s.jpg "Misty Moonlight 8-1/2\" X 11\" Cardstock [ 153081 ]")
![Misty Moonlight Classic Stampin' Pad [ 153118 ]](https://assets1.tamsnetwork.com/images/EC042017NF/153118s.jpg "Misty Moonlight Classic Stampin' Pad [ 153118 ]")
![Tuxedo Black Memento Ink Pad [ 132708 ]](https://assets1.tamsnetwork.com/images/EC042017NF/132708s.jpg "Tuxedo Black Memento Ink Pad [ 132708 ]")
![Blueberry Bushel Stampin’ Blends Combo Pack [ 161679 ]](https://assets1.tamsnetwork.com/images/EC042017NF/161679s.jpg "Blueberry Bushel Stampin’ Blends Combo Pack [ 161679 ]")
![Granny Apple Green Stampin' Blends Combo Pack [ 154885 ]](https://assets1.tamsnetwork.com/images/EC042017NF/154885s.jpg "Granny Apple Green Stampin' Blends Combo Pack [ 154885 ]")
![Strawberry Slush Stampin’ Blends Combo Pack [ 165290 ]](https://assets1.tamsnetwork.com/images/EC042017NF/165290s.jpg "Strawberry Slush Stampin’ Blends Combo Pack [ 165290 ]")
![Basic White Medium Envelopes [ 159236 ]](https://assets1.tamsnetwork.com/images/EC042017NF/159236s.jpg "Basic White Medium Envelopes [ 159236 ]")
![Stampin' Cut & Emboss Machine [ 149653 ]](https://assets1.tamsnetwork.com/images/EC042017NF/149653s.jpg "Stampin' Cut & Emboss Machine [ 149653 ]")
![Mini Glue Dots [ 103683 ]](https://assets1.tamsnetwork.com/images/EC042017NF/103683s.jpg "Mini Glue Dots [ 103683 ]")
![Multipurpose Liquid Glue [ 110755 ]](https://assets1.tamsnetwork.com/images/EC042017NF/110755s.jpg "Multipurpose Liquid Glue [ 110755 ]")
![Stampin' Dimensionals [ 104430 ]](https://assets1.tamsnetwork.com/images/EC042017NF/104430s.jpg "Stampin' Dimensionals [ 104430 ]")
![Stampin' Seal [ 152813 ]](https://assets1.tamsnetwork.com/images/EC042017NF/152813s.jpg "Stampin' Seal [ 152813 ]")
![Bone Folder [ 102300 ]](https://assets1.tamsnetwork.com/images/EC042017NF/102300s.jpg "Bone Folder [ 102300 ]")
![Take Your Pick [ 144107 ]](https://assets1.tamsnetwork.com/images/EC042017NF/144107s.jpg "Take Your Pick [ 144107 ]")
![Paper Trimmer [ 152392 ]](https://assets1.tamsnetwork.com/images/EC042017NF/152392s.jpg "Paper Trimmer [ 152392 ]")


![Basic Beige 8 1/2" X 11" Cardstock [ 164511 ]](https://assets1.tamsnetwork.com/images/EC042017NF/164511s.jpg "Basic Beige 8 1/2\" X 11\" Cardstock [ 164511 ]")
![Calypso Coral 8-1/2" X 11" Cardstock [ 122925 ]](https://assets1.tamsnetwork.com/images/EC042017NF/122925s.jpg "Calypso Coral 8-1/2\" X 11\" Cardstock [ 122925 ]")
![Crushed Curry 8-1/2" X 11" Cardstock [ 131199 ]](https://assets1.tamsnetwork.com/images/EC042017NF/131199s.jpg "Crushed Curry 8-1/2\" X 11\" Cardstock [ 131199 ]")
![Real Red 8-1/2" X 11" Cardstock [ 102482 ]](https://assets1.tamsnetwork.com/images/EC042017NF/102482s.jpg "Real Red 8-1/2\" X 11\" Cardstock [ 102482 ]")
![Strawberry Slush 8 1/2" X 11" Cardstock [ 165625 ]](https://assets1.tamsnetwork.com/images/EC042017NF/165625s.jpg "Strawberry Slush 8 1/2\" X 11\" Cardstock [ 165625 ]")
![Timid Tiger 8 1/2" X 11" Cardstock [ 165626 ]](https://assets1.tamsnetwork.com/images/EC042017NF/165626s.jpg "Timid Tiger 8 1/2\" X 11\" Cardstock [ 165626 ]")
![Blackberry Bliss 12" X 12" (30.5 X 30.5 Cm) Two Tone Cardstock [ 166678 ]](https://assets1.tamsnetwork.com/images/EC042017NF/166678s.jpg "Blackberry Bliss 12\" X 12\" (30.5 X 30.5 Cm) Two Tone Cardstock [ 166678 ]")
![Misty Moonlight 12" X 12" (30.5 X 30.5 Cm) Two Tone Cardstock [ 166686 ]](https://assets1.tamsnetwork.com/images/EC042017NF/166686s.jpg "Misty Moonlight 12\" X 12\" (30.5 X 30.5 Cm) Two Tone Cardstock [ 166686 ]")
![Strawberry Slush Classic Stampin' Pad [ 165286 ]](https://assets1.tamsnetwork.com/images/EC042017NF/165286s.jpg "Strawberry Slush Classic Stampin' Pad [ 165286 ]")
![Misty Moonlight Stampin' Blends Combo Pack [ 153108 ]](https://assets1.tamsnetwork.com/images/EC042017NF/153108s.jpg "Misty Moonlight Stampin' Blends Combo Pack [ 153108 ]")

