
Good Saturday morning stamping friends, welcome to the Holiday Weekend. I hope you have some fun plans in the works. I do have to work all day today, but I’m really hoping to get outside to get some planting done before I go away. I picked up 14 plants so far including all kinds of herbs, tomatoes, peppers and eggplant.
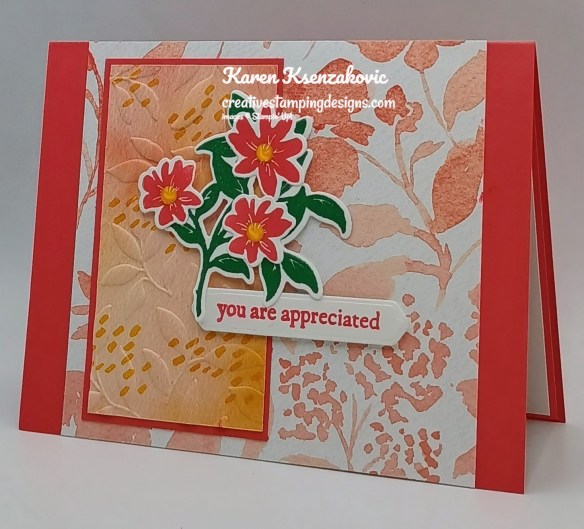
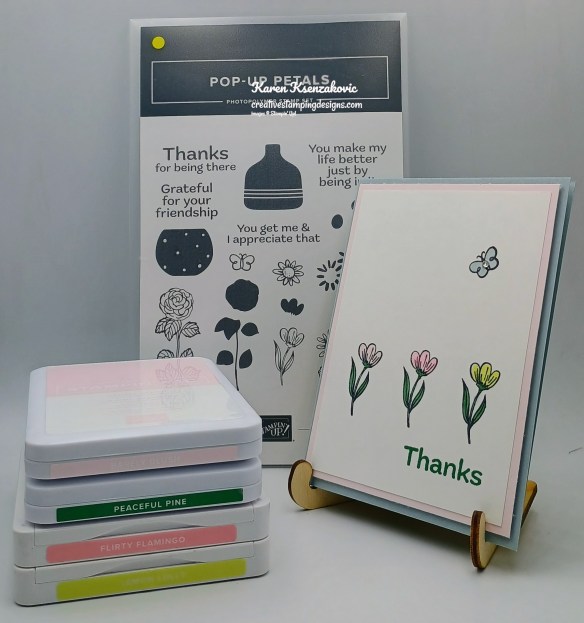
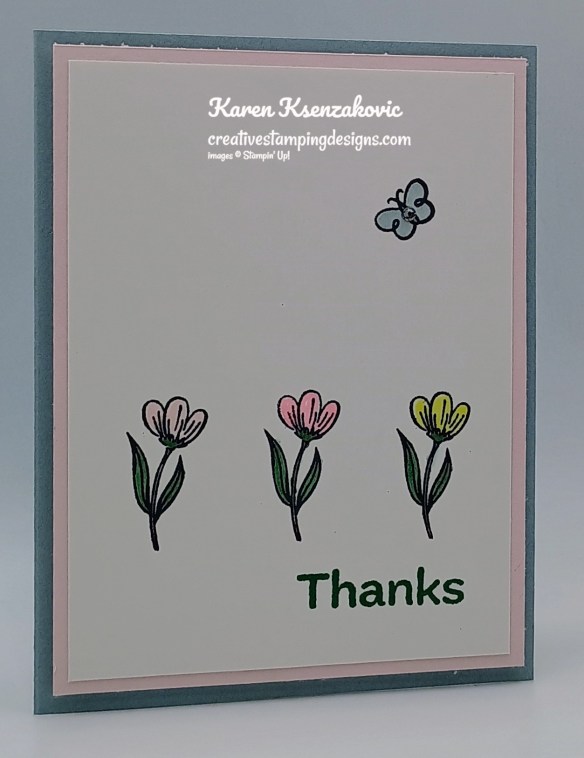
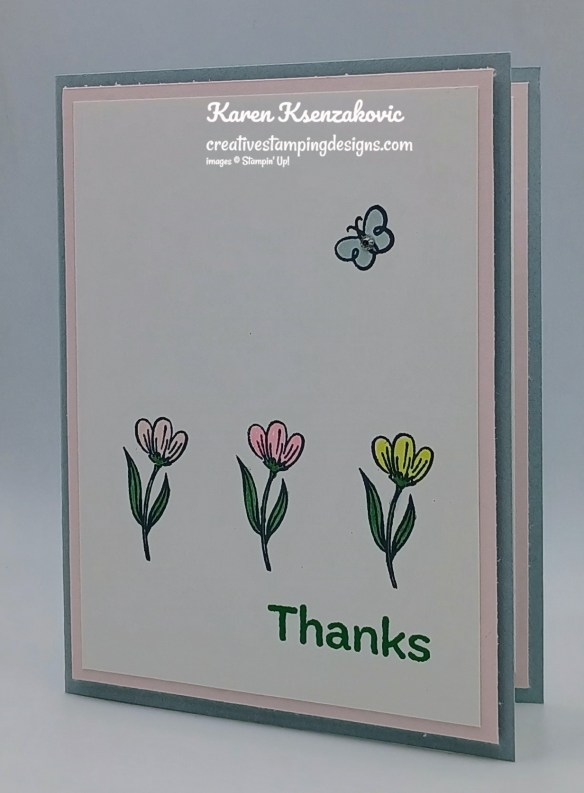
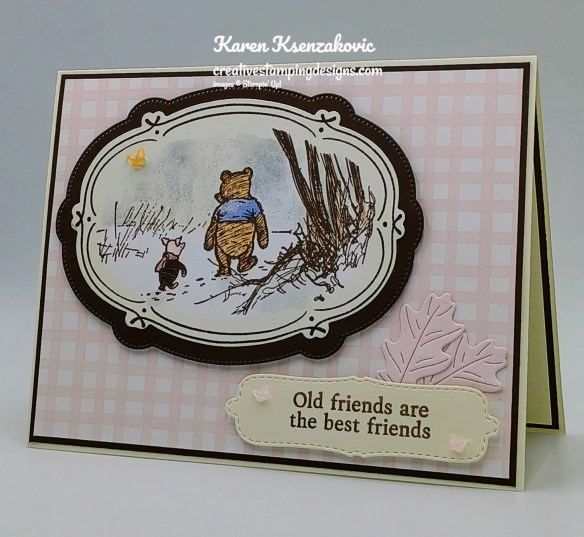
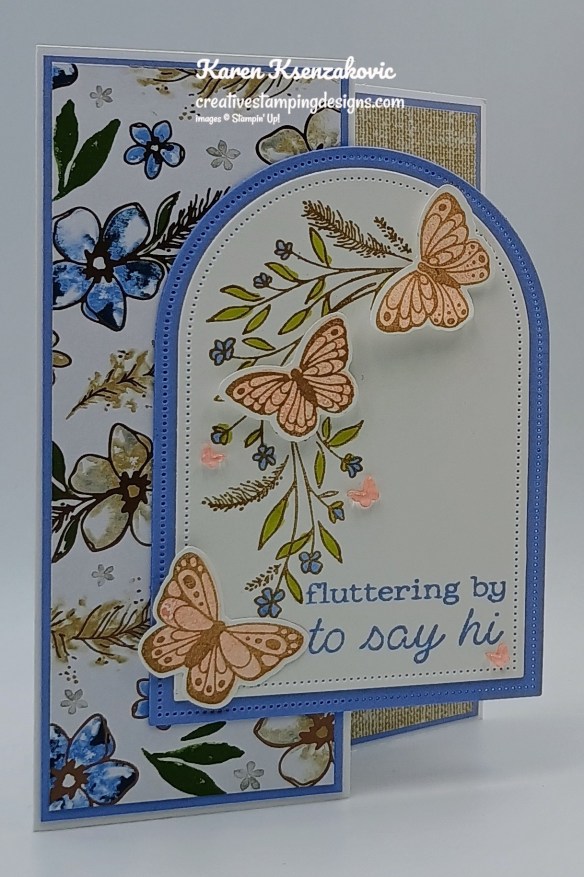
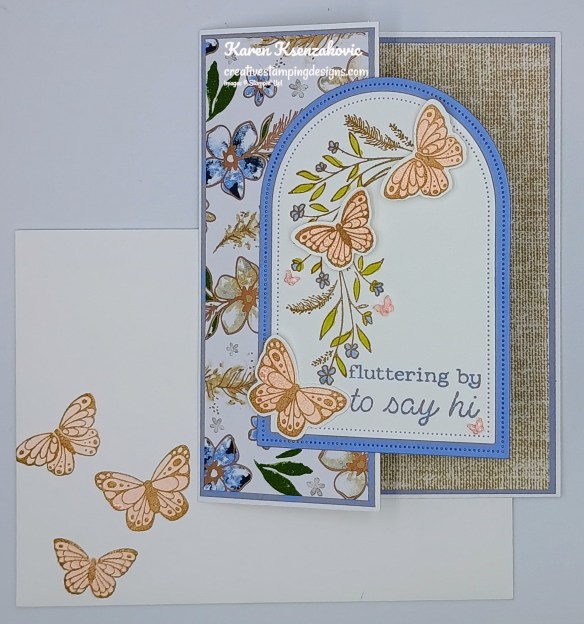
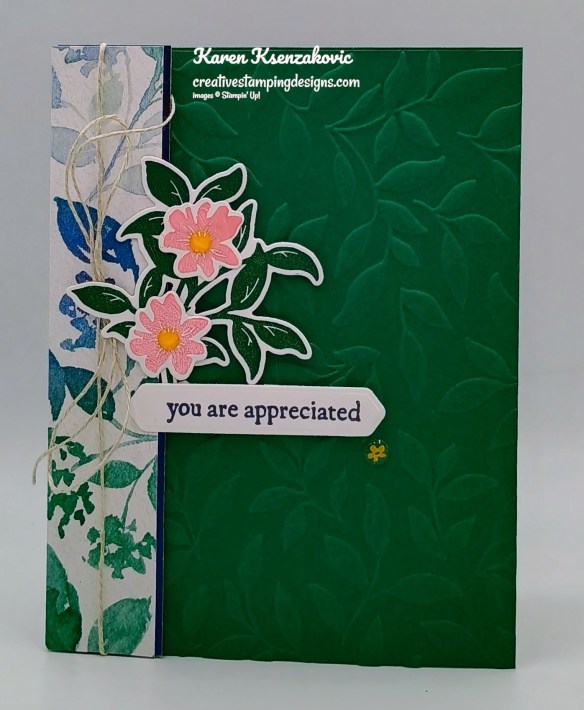
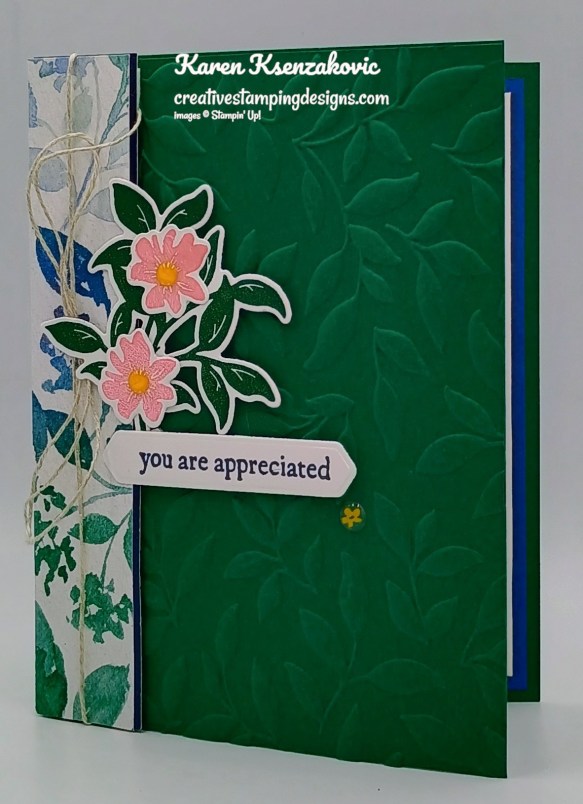
I have a sneak peek for you or a stamp set coming in July with the new Online Exclusives. We got to place out preorder on Tuesday, and I felt like a kid at Christmas when mine arrived. I dug right in and the first stamp set I grabbed I decided to make a card with. If you’d like to see a quick video on how I made this card, Click Here to go to my Instagram Reels. Here’s my card for today.
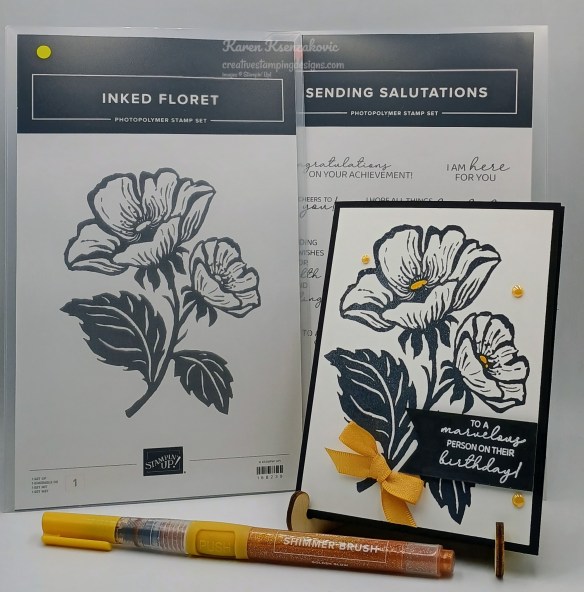
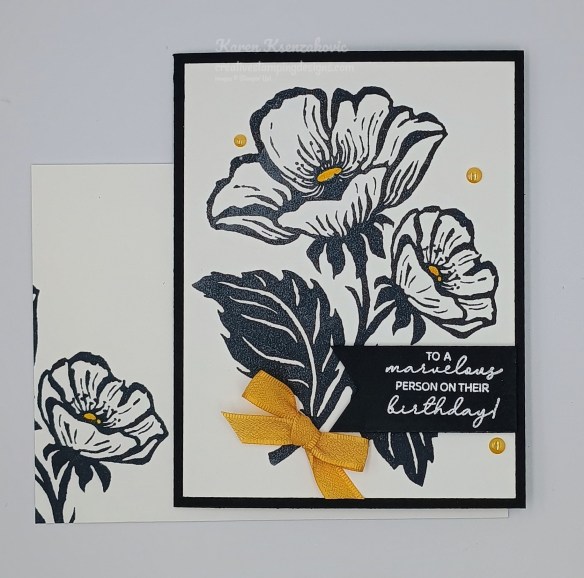
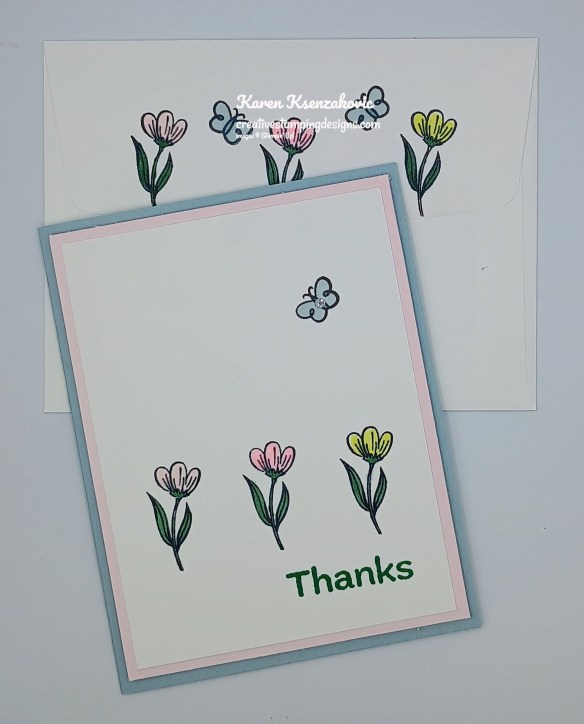
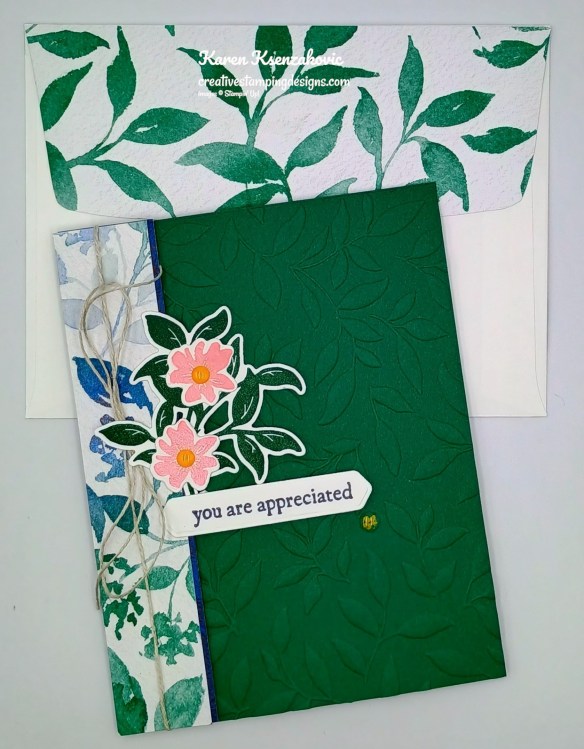
I used the new Stampin’ Up! Inked Floret Stamp Set and the Stampin’ Up! Sending Salutations Stamp Set for my card today. I decided to do it in Black & White with a touch of color.
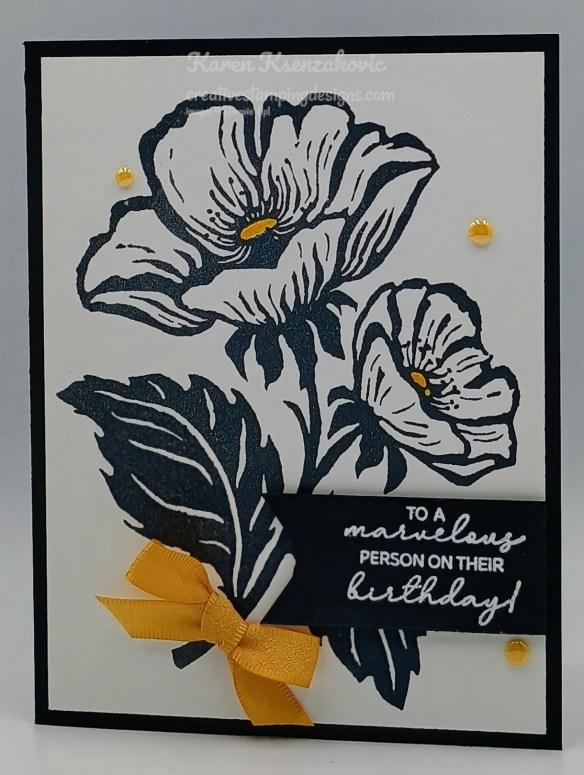
Stamp the large flower image from the Inked Floret stamp set in tuxedo Black Ink on a panel of Basic White. Color the flower centers using the Golden Glow Shimmer Brush.
Adhere the stamped Basic White panel to a Basic Black card base. Tie a small bow using the Golden Glow 3/8″ Bordered Ribbon and adhere it to the flower stem.
Stamp the sentiment from Sending Salutations stamp set in Versamark Ink on a panel of Basic Black. Sprinkle the sentiment with White Embossing Powder and set it using the Heat Tool. Cut the sentiment into a banner using the New Detailed Scissors that will be available July 1. Adhere the sentiment to the card front with Stampin Dimensionals. Add a few 2026-2028 In-Color Dots to the card front.
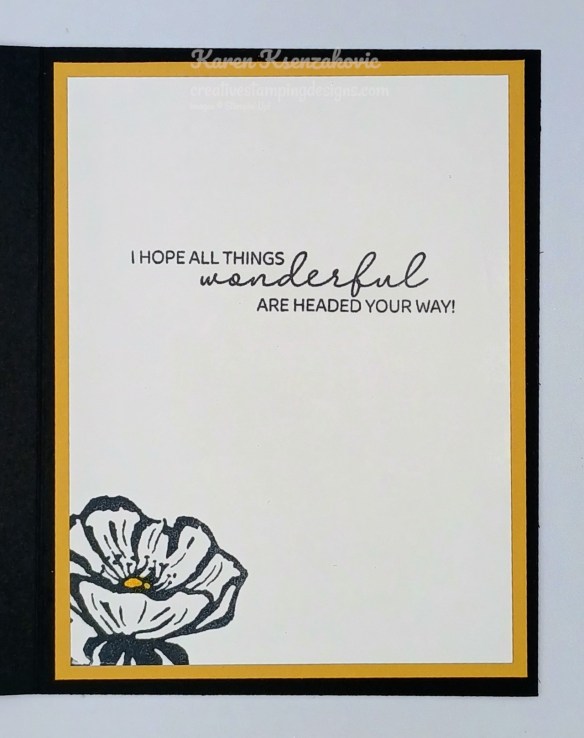
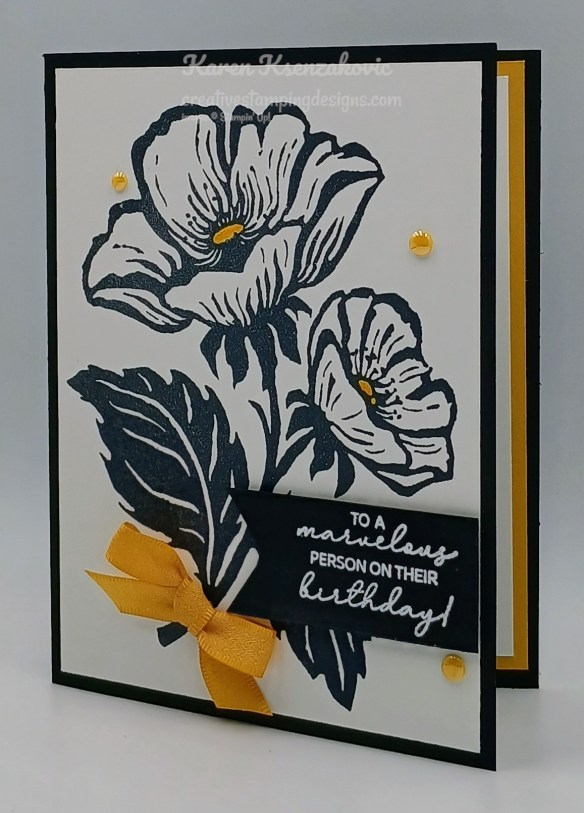
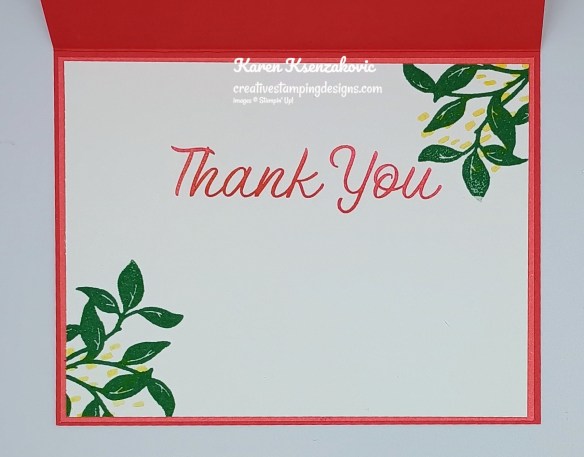
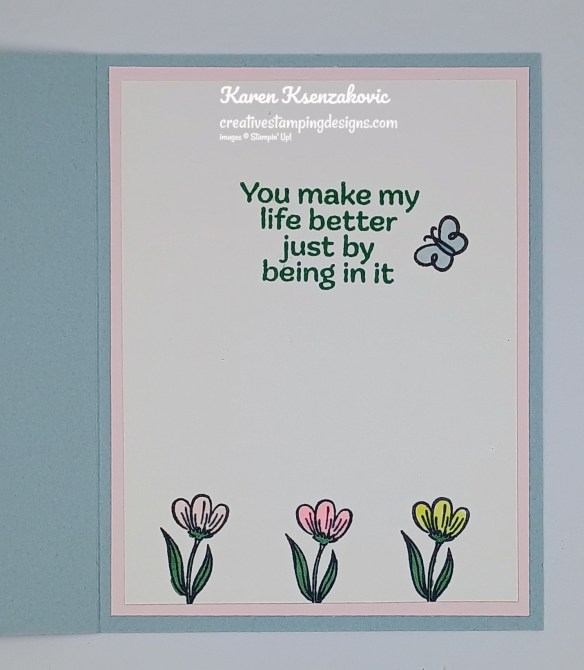
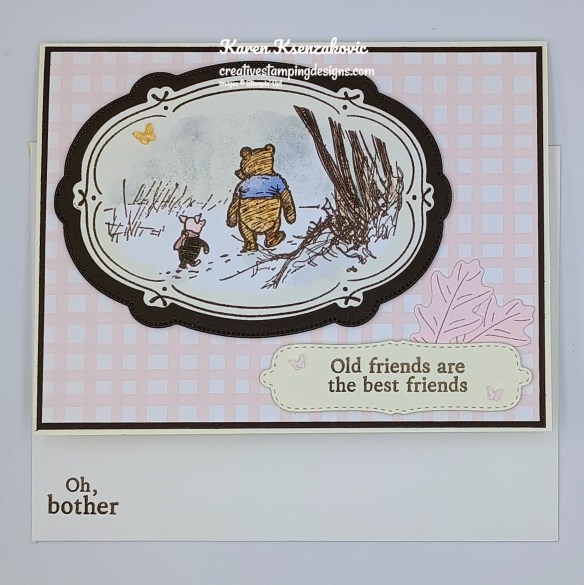
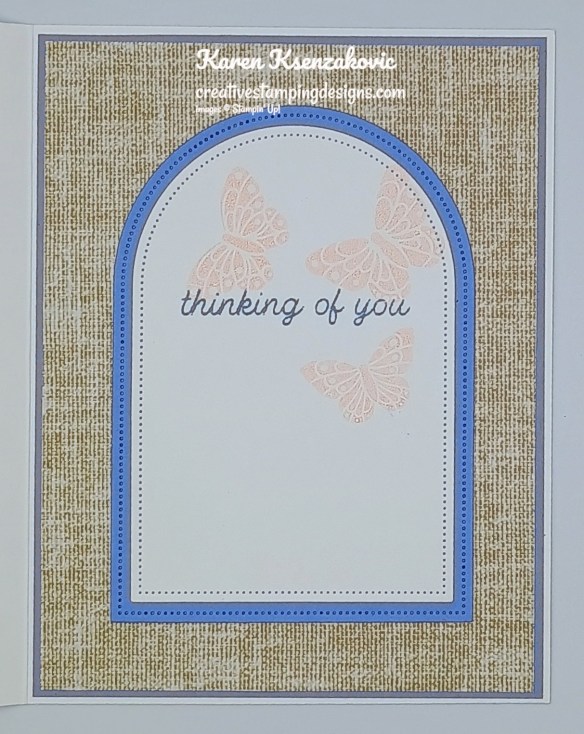
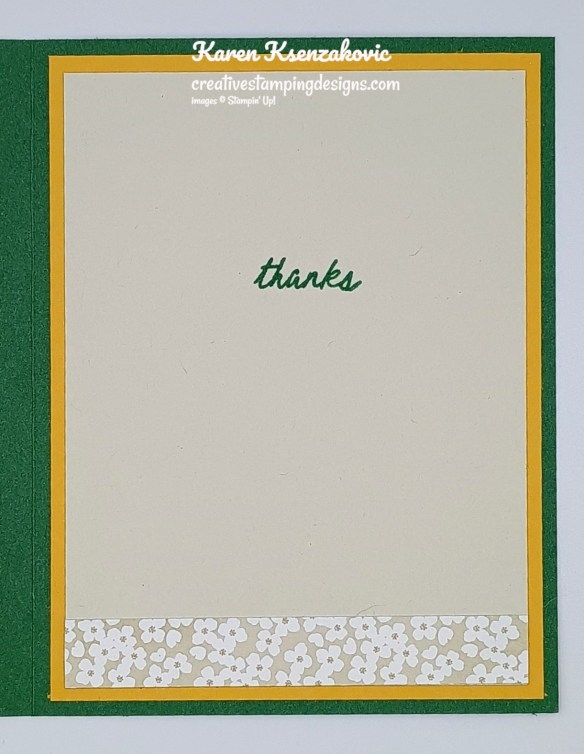
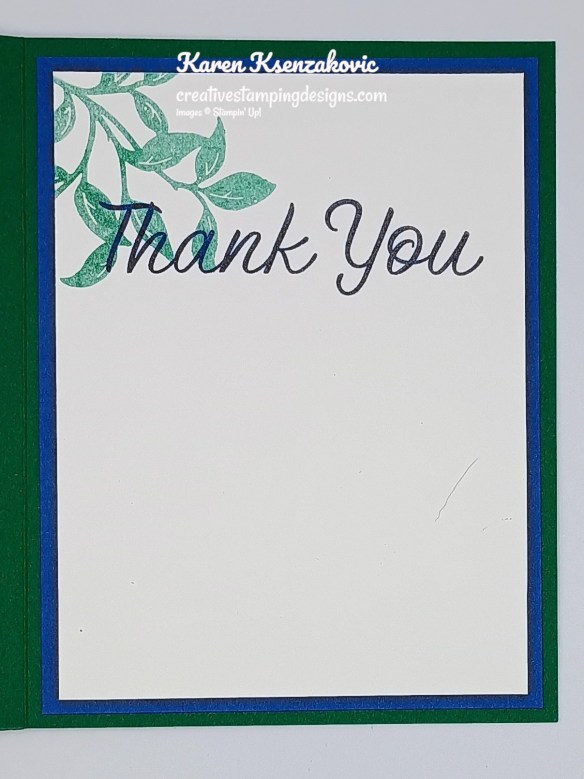
Stamp the sentiment from the Sending Salutations stamp set in Tuxedo Black Ink on a panel of Basic White. Stamp the flower image from the Inked Floret stamp set in Tuxedo Black Ink on the bottom of the panel. Color the flower center using the Golden Glow Shimmer Brush. Adhere the Basic White panel to a Golden Glow mat then to the inside of the Basic Black card base.
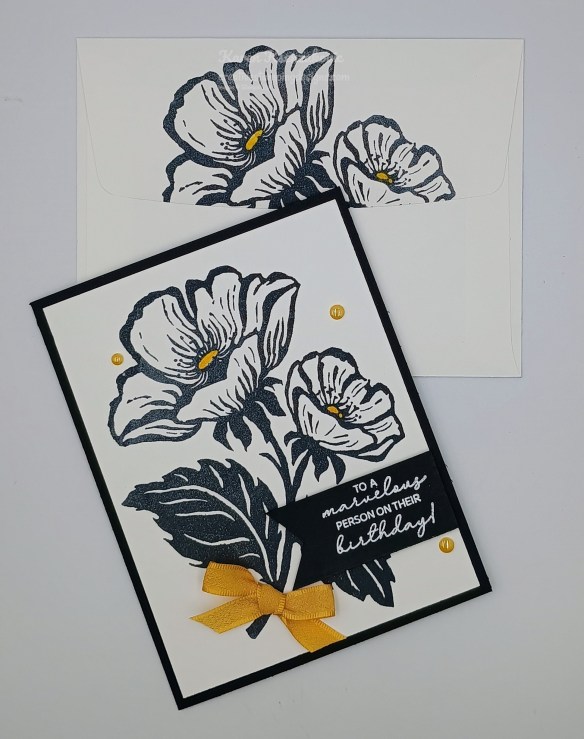
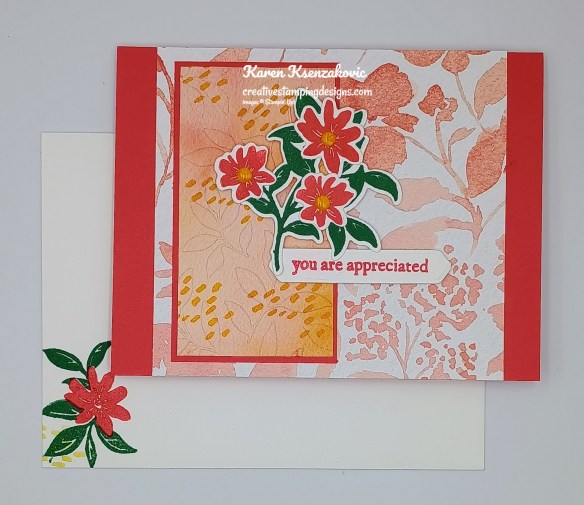
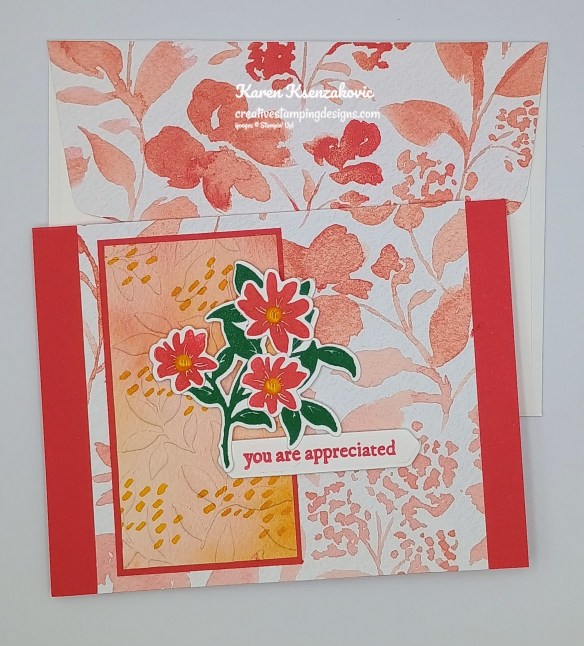
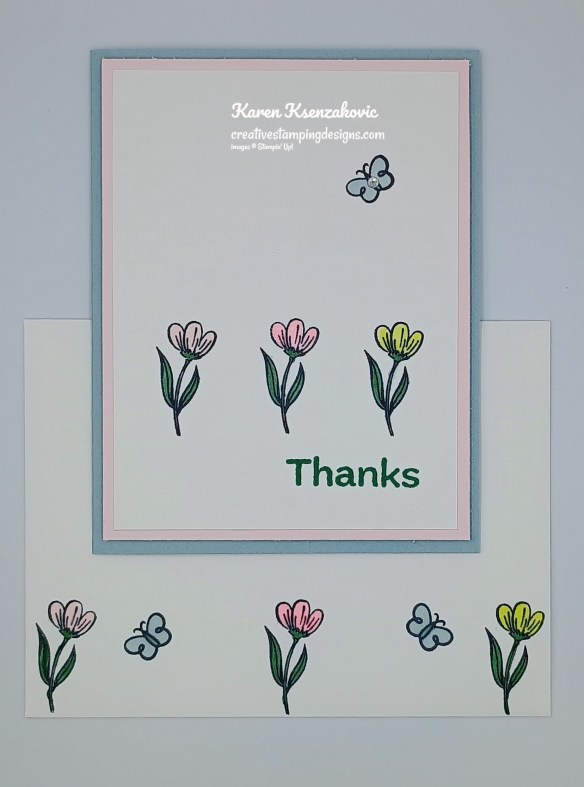
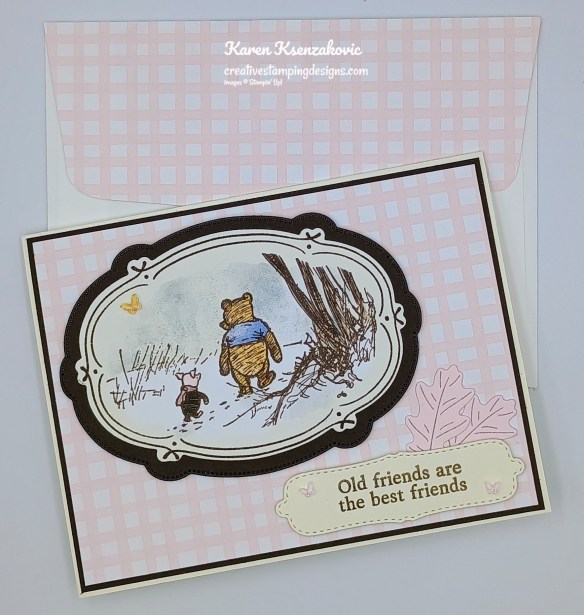
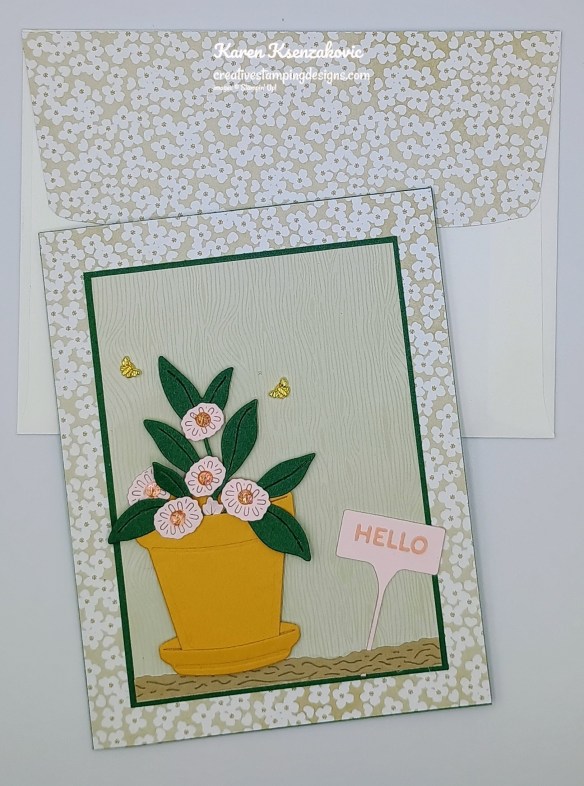
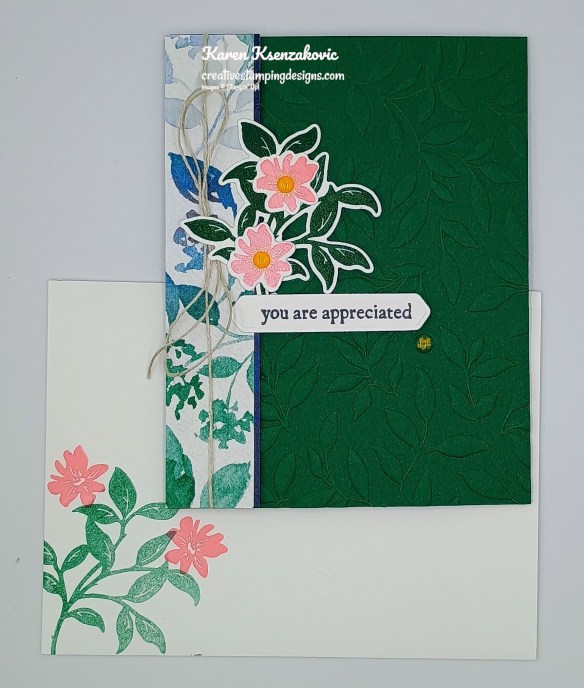
Decorate a Basic White Medium Envelope to finish your card. Stamp the flower image from the Inked Floret stamp set in Tuxedo Black Ink on the envelope front and flap.
Thank you for stopping by my blog today. I hope you like my card and will give it a try. Happy Stamping!!
*********************************************************************************************************
If you need any stamping supplies, I’d love to be your Demonstrator. Just click HERE to go directly to my online store or drop me an email if you have any questions.
*********************************************************************************************************
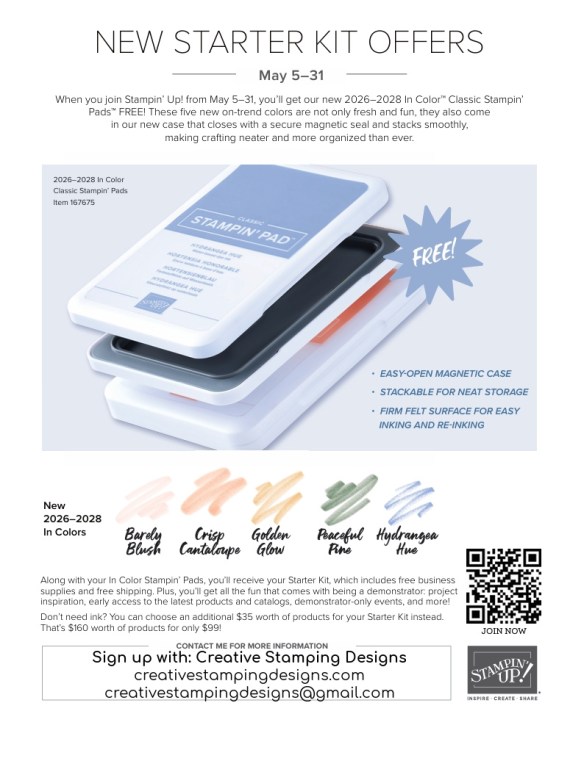
Final Week for Starter Kit Special – FREE In Color Ink Pads OR $35 Additional FREE Products In Your Starter Kit

Demonstrators are able to preview and preorder the new July Online Exclusives now. Did you know that you can put the July Online Exclusives in your Starter Kit? How would you like to get them at a discount too? I don’t know about you, but I LOVE discounts!!! When you purchase the Stampin’ Up! Starter Kit between May 5-31, you’ll get the new 2026–2028 In Color Stampin’ Pads FREE (that’s a $63 value) along with your Starter Kit! Or, if you’d rather have different products instead of ink pads, you can add an extra $35 worth of products to your Starter Kit!
Once you purchase the kit, but wait until May 5, you’ll enjoy all the perks that come with being a demonstrator, like a 20–25% product discount, early access to the latest products and catalogs, the chance to attend incredible training and crafting events, and so much more! Did you know that if Stampin’ Up! is having a sale, as a Demonstrator you get the additional discount on top of your 20-25% off? Also, as an extra little bonus for joining my team, you can attend all my Monthly Online Classes for FREE. There’s never an obligation to sell, you can join to enjoy the discount for yourself. Are you unsure and have questions? Contact me and we can talk. I’ll tell you exactly what to expect when you join.
Click the image below to open this flyer in full size.
Details:
- Promotion Period: May 5–31
- Promotion Ends: May 31 at 11:59 p.m. (MT)
- When you purchase the Starter Kit from May 5–31 you will be able to choose between these two offers:
- Free 2026–2028 In Color Stampin’ Pads plus the regular Starer Kit products (your choice of $125 in Stampin’ Up! merchandise) for just $99
- $160 worth of products in their Starter Kit for just $99 (that’s an extra $35 value!)
- New demonstrators who submit their Independent Demonstrator Agreement (IDA) before May 5 or after May 31 will not be eligible for these offers.
2 great joining offers…you can either choose to get the new In Color Ink Pads for free with your Starter Kit OR additional $35 in free merchandise with your Stater Kit!
Click Here to Sign Up!
*********************************************************************************************************
Card stock cuts for this project:
- Basic Black Cardstock 5 1/2″ x 8 1/2″(card base scored & folded at 4 1/4″), 1″ x 2 1/4″(sentiment)
- Basic White Cardstock 4″ x 5 1/4″(card front), 3 3/4″ x 5″(inner liner)
- Golden Glow Cardstock 4″ x 5 1/4″(mat)
*********************************************************************************************************
Product List
![Sending Salutations Photopolymer Stamp Set (English) [ 167857 ]](https://assets1.tamsnetwork.com/images/EC042017NF/167857s.jpg "Sending Salutations Photopolymer Stamp Set (English) [ 167857 ]")
![Basic Black 8-1/2" X 11" Cardstock [ 121045 ]](https://assets1.tamsnetwork.com/images/EC042017NF/121045s.jpg "Basic Black 8-1/2\" X 11\" Cardstock [ 121045 ]")
![Basic White 8 1/2" X 11" Cardstock [ 166780 ]](https://assets1.tamsnetwork.com/images/EC042017NF/166780s.jpg "Basic White 8 1/2\" X 11\" Cardstock [ 166780 ]")
![Golden Glow 8 1/2" X 11" Cardstock [ 167685 ]](https://assets1.tamsnetwork.com/images/EC042017NF/167685s.jpg "Golden Glow 8 1/2\" X 11\" Cardstock [ 167685 ]")
![Tuxedo Black Memento Ink Pad [ 132708 ]](https://assets1.tamsnetwork.com/images/EC042017NF/132708s.jpg "Tuxedo Black Memento Ink Pad [ 132708 ]")
![Versamark Pad [ 102283 ]](https://assets1.tamsnetwork.com/images/EC042017NF/102283s.jpg "Versamark Pad [ 102283 ]")
![Basics Wow! Embossing Powder [ 165679 ]](https://assets1.tamsnetwork.com/images/EC042017NF/165679s.jpg "Basics Wow! Embossing Powder [ 165679 ]")
![Heat Tool (Us And Canada) [ 129053 ]](https://assets1.tamsnetwork.com/images/EC042017NF/129053s.jpg "Heat Tool (Us And Canada) [ 129053 ]")
![Golden Glow Shimmer Brush [ 167662 ]](https://assets1.tamsnetwork.com/images/EC042017NF/167662s.jpg "Golden Glow Shimmer Brush [ 167662 ]")
![Golden Glow 3/8" (1 Cm) Bordered Ribbon [ 167548 ]](https://assets1.tamsnetwork.com/images/EC042017NF/167548s.jpg "Golden Glow 3/8\" (1 Cm) Bordered Ribbon [ 167548 ]")
![2026–2028 In Color™ Dots [ 167546 ]](https://assets1.tamsnetwork.com/images/EC042017NF/167546s.jpg "2026–2028 In Color™ Dots [ 167546 ]")
![Basic White Medium Envelopes [ 159236 ]](https://assets1.tamsnetwork.com/images/EC042017NF/159236s.jpg "Basic White Medium Envelopes [ 159236 ]")
![Stampin' Cut & Emboss Machine [ 149653 ]](https://assets1.tamsnetwork.com/images/EC042017NF/149653s.jpg "Stampin' Cut & Emboss Machine [ 149653 ]")
![Mini Glue Dots [ 103683 ]](https://assets1.tamsnetwork.com/images/EC042017NF/103683s.jpg "Mini Glue Dots [ 103683 ]")
![Multipurpose Liquid Glue [ 110755 ]](https://assets1.tamsnetwork.com/images/EC042017NF/110755s.jpg "Multipurpose Liquid Glue [ 110755 ]")
![Stampin' Dimensionals [ 104430 ]](https://assets1.tamsnetwork.com/images/EC042017NF/104430s.jpg "Stampin' Dimensionals [ 104430 ]")
![Stampin' Seal [ 152813 ]](https://assets1.tamsnetwork.com/images/EC042017NF/152813s.jpg "Stampin' Seal [ 152813 ]")
![Bone Folder [ 102300 ]](https://assets1.tamsnetwork.com/images/EC042017NF/102300s.jpg "Bone Folder [ 102300 ]")
![Take Your Pick [ 144107 ]](https://assets1.tamsnetwork.com/images/EC042017NF/144107s.jpg "Take Your Pick [ 144107 ]")
![Paper Trimmer [ 152392 ]](https://assets1.tamsnetwork.com/images/EC042017NF/152392s.jpg "Paper Trimmer [ 152392 ]")


![Early Espresso 8-1/2" X 11" Cardstock [ 119686 ]](https://assets1.tamsnetwork.com/images/EC042017NF/119686s.jpg "Early Espresso 8-1/2\" X 11\" Cardstock [ 119686 ]")
![Old Olive 12" X 12" (30.5 X 30.5 Cm) Two Tone Cardstock [ 166683 ]](https://assets1.tamsnetwork.com/images/EC042017NF/166683s.jpg "Old Olive 12\" X 12\" (30.5 X 30.5 Cm) Two Tone Cardstock [ 166683 ]")
![Early Espresso Classic Stampin' Pad [ 147114 ]](https://assets1.tamsnetwork.com/images/EC042017NF/147114s.jpg "Early Espresso Classic Stampin' Pad [ 147114 ]")
![Earthy Matte Dots [ 167213 ]](https://assets1.tamsnetwork.com/images/EC042017NF/167213s.jpg "Earthy Matte Dots [ 167213 ]")


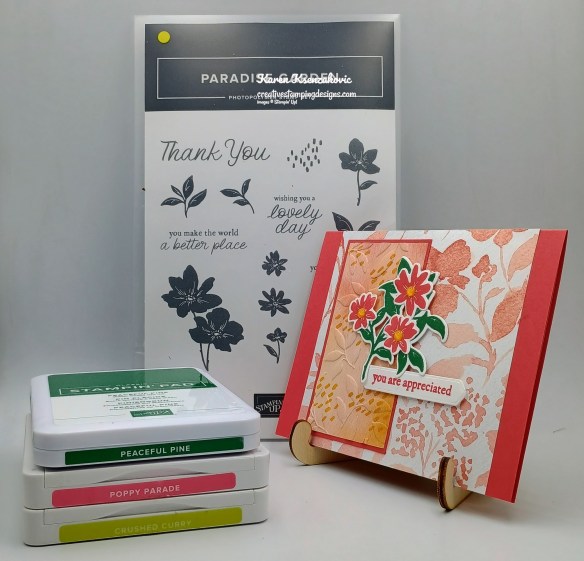
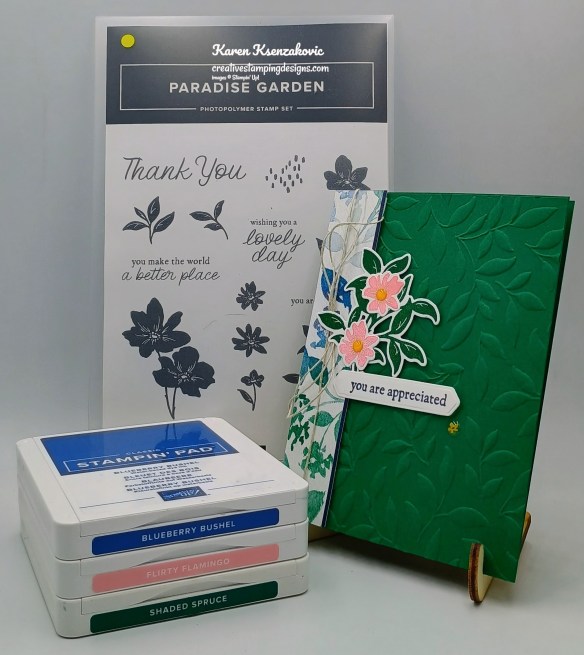
![Paradise Garden Bundle (English) [ 167121 ]](https://assets1.tamsnetwork.com/images/EC042017NF/167121s.jpg "Paradise Garden Bundle (English) [ 167121 ]")
![Paradise Garden Photopolymer Stamp Set (English) [ 167114 ]](https://assets1.tamsnetwork.com/images/EC042017NF/167114s.jpg "Paradise Garden Photopolymer Stamp Set (English) [ 167114 ]")
![Paradise Garden Hybrid Embossing Folder [ 167120 ]](https://assets1.tamsnetwork.com/images/EC042017NF/167120s.jpg "Paradise Garden Hybrid Embossing Folder [ 167120 ]")
![Poppy Parade 8-1/2" X 11" Cardstock [ 119793 ]](https://assets1.tamsnetwork.com/images/EC042017NF/119793s.jpg "Poppy Parade 8-1/2\" X 11\" Cardstock [ 119793 ]")
![Garden Poetry 12" X 12" (30.5 X 30.5 Cm) Designer Series Paper [ 167113 ]](https://assets1.tamsnetwork.com/images/EC042017NF/167113s.jpg "Garden Poetry 12\" X 12\" (30.5 X 30.5 Cm) Designer Series Paper [ 167113 ]")
![Poppy Parade 12" X 12" (30.5 X 30.5 Cm) Two Tone Cardstock [ 166692 ]](https://assets1.tamsnetwork.com/images/EC042017NF/166692s.jpg "Poppy Parade 12\" X 12\" (30.5 X 30.5 Cm) Two Tone Cardstock [ 166692 ]")
![Crushed Curry Classic Stampin' Pad [ 147087 ]](https://assets1.tamsnetwork.com/images/EC042017NF/147087s.jpg "Crushed Curry Classic Stampin' Pad [ 147087 ]")
![Poppy Parade Classic Stampin' Pad [ 119782 ] (Retired)](https://assets1.tamsnetwork.com/images/EC042017NF/119782s.jpg "Poppy Parade Classic Stampin' Pad [ 119782 ] (Retired)")
![Garden Epoxy Dots [ 167124 ]](https://assets1.tamsnetwork.com/images/EC042017NF/167124s.jpg "Garden Epoxy Dots [ 167124 ]")

![Pop Up Petals Photopolymer Stamp Set (English) [ 167041 ]](https://assets1.tamsnetwork.com/images/EC042017NF/167041s.jpg "Pop Up Petals Photopolymer Stamp Set (English) [ 167041 ]")
![Cloud Cover 8 1/2" X 11" Cardstock [ 165621 ]](https://assets1.tamsnetwork.com/images/EC042017NF/165621s.jpg "Cloud Cover 8 1/2\" X 11\" Cardstock [ 165621 ]")
![Cloud Cover Stampin’ Blends Combo Pack [ 165287 ]](https://assets1.tamsnetwork.com/images/EC042017NF/165287s.jpg "Cloud Cover Stampin’ Blends Combo Pack [ 165287 ]")
![Flirty Flamingo Stampin' Blends Combo Pack [ 154884 ]](https://assets1.tamsnetwork.com/images/EC042017NF/154884s.jpg "Flirty Flamingo Stampin' Blends Combo Pack [ 154884 ]")
![Lemon Lolly Stampin’ Blends Combo Pack [ 161673 ]](https://assets1.tamsnetwork.com/images/EC042017NF/161673s.jpg "Lemon Lolly Stampin’ Blends Combo Pack [ 161673 ]")
![Rhinestone Basic Jewels [ 144220 ]](https://assets1.tamsnetwork.com/images/EC042017NF/144220s.jpg "Rhinestone Basic Jewels [ 144220 ]")


![Very Vanilla 8 1/2" X 11" Cardstock [ 166784 ]](https://assets1.tamsnetwork.com/images/EC042017NF/166784s.jpg "Very Vanilla 8 1/2\" X 11\" Cardstock [ 166784 ]")


![Delicate Whispers Photopolymer Stamp Set (English) [ 167500 ]](https://assets1.tamsnetwork.com/images/EC042017NF/167500s.jpg "Delicate Whispers Photopolymer Stamp Set (English) [ 167500 ]")
![Basic White 8 1/2" X 11" Thick Cardstock [ 159229 ]](https://assets1.tamsnetwork.com/images/EC042017NF/159229s.jpg "Basic White 8 1/2\" X 11\" Thick Cardstock [ 159229 ]")
![Delicate Dreams 12" X 12" (30.5 X 30.5 Cm) Specialty Designer Series Paper [ 167498 ]](https://assets1.tamsnetwork.com/images/EC042017NF/167498s.jpg "Delicate Dreams 12\" X 12\" (30.5 X 30.5 Cm) Specialty Designer Series Paper [ 167498 ]")
![Crumb Cake Classic Stampin' Pad [ 147116 ]](https://assets1.tamsnetwork.com/images/EC042017NF/147116s.jpg "Crumb Cake Classic Stampin' Pad [ 147116 ]")
![Old Olive Stampin' Blends Combo Pack [ 154892 ]](https://assets1.tamsnetwork.com/images/EC042017NF/154892s.jpg "Old Olive Stampin' Blends Combo Pack [ 154892 ]")
![Everyday Arches Dies [ 164629 ]](https://assets1.tamsnetwork.com/images/EC042017NF/164629s.jpg "Everyday Arches Dies [ 164629 ]")


![Help Me Grow Bundle (English) [ 167167 ]](https://assets1.tamsnetwork.com/images/EC042017NF/167167s.jpg "Help Me Grow Bundle (English) [ 167167 ]")
![Help Me Grow Photopolymer Stamp Set (English) [ 167164 ]](https://assets1.tamsnetwork.com/images/EC042017NF/167164s.jpg "Help Me Grow Photopolymer Stamp Set (English) [ 167164 ]")
![Help Me Grow Dies [ 167166 ]](https://assets1.tamsnetwork.com/images/EC042017NF/167166s.jpg "Help Me Grow Dies [ 167166 ]")
![Basic Beige 8 1/2" X 11" Cardstock [ 164511 ]](https://assets1.tamsnetwork.com/images/EC042017NF/164511s.jpg "Basic Beige 8 1/2\" X 11\" Cardstock [ 164511 ]")
![Crumb Cake 8-1/2" X 11" Cardstock [ 120953 ]](https://assets1.tamsnetwork.com/images/EC042017NF/120953s.jpg "Crumb Cake 8-1/2\" X 11\" Cardstock [ 120953 ]")
![Lovely Blossoms 12" X 12" (30.5 X 30.5 Cm) Designer Series Paper [ 167168 ]](https://assets1.tamsnetwork.com/images/EC042017NF/167168s.jpg "Lovely Blossoms 12\" X 12\" (30.5 X 30.5 Cm) Designer Series Paper [ 167168 ]")
![Wood Grain Wonders 12" X 12" (30.5 X 30.5 Cm) Designer Series Paper [ 167428 ]](https://assets1.tamsnetwork.com/images/EC042017NF/167428s.jpg "Wood Grain Wonders 12\" X 12\" (30.5 X 30.5 Cm) Designer Series Paper [ 167428 ]")
![Tiny Bee Trinkets [ 164714 ]](https://assets1.tamsnetwork.com/images/EC042017NF/164714s.jpg "Tiny Bee Trinkets [ 164714 ]")


![Blueberry Bushel 8-1/2" X 11" Cardstock [ 146968 ]](https://assets1.tamsnetwork.com/images/EC042017NF/146968s.jpg "Blueberry Bushel 8-1/2\" X 11\" Cardstock [ 146968 ]")
![Shaded Spruce 8-1/2" X 11" Cardstock [ 146981 ]](https://assets1.tamsnetwork.com/images/EC042017NF/146981s.jpg "Shaded Spruce 8-1/2\" X 11\" Cardstock [ 146981 ]")
![Blueberry Bushel Classic Stampin' Pad [ 147138 ]](https://assets1.tamsnetwork.com/images/EC042017NF/147138s.jpg "Blueberry Bushel Classic Stampin' Pad [ 147138 ]")
![Flirty Flamingo Classic Stampin' Pad [ 147052 ]](https://assets1.tamsnetwork.com/images/EC042017NF/147052s.jpg "Flirty Flamingo Classic Stampin' Pad [ 147052 ]")
![Shaded Spruce Classic Stampin' Pad [ 147088 ]](https://assets1.tamsnetwork.com/images/EC042017NF/147088s.jpg "Shaded Spruce Classic Stampin' Pad [ 147088 ]")
![Linen Thread [ 104199 ]](https://assets1.tamsnetwork.com/images/EC042017NF/104199s.jpg "Linen Thread [ 104199 ]")

