Stmpin’ Up! Botanical Expressions & LAST DAY to Register for Class by Mail

Good Sunday morning stamping friends. I hope your weekend is going well. Yesterday ws a good day at work, not slow and not too busy. Today I have my monthly online class with Tara. We always have so much fun stamping with those that sign up.

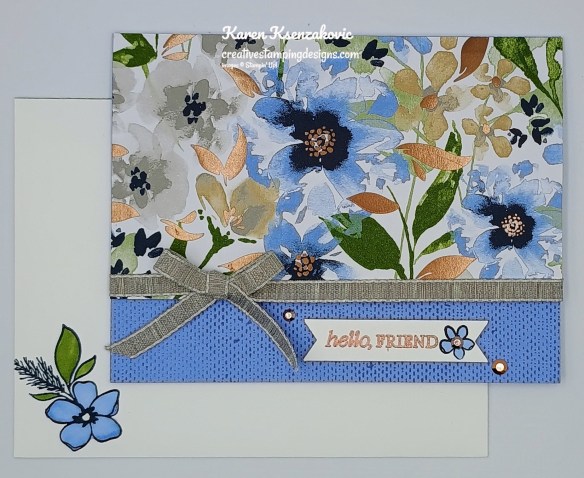
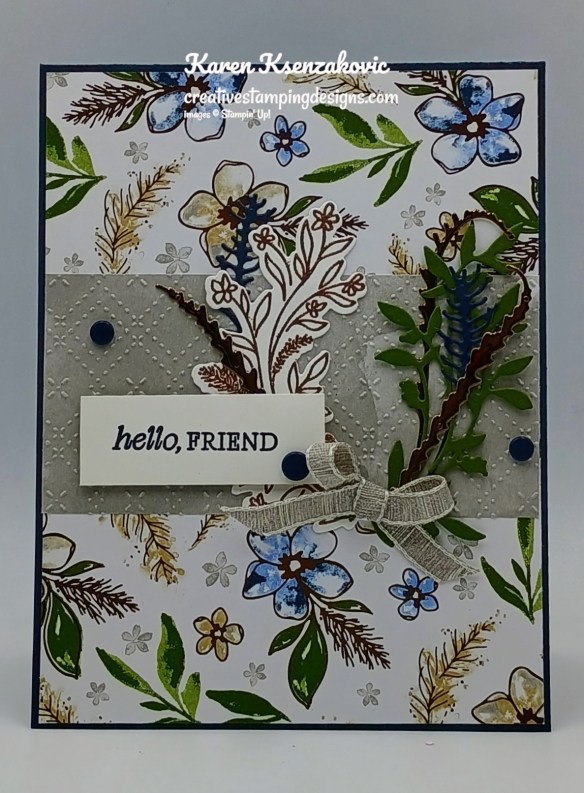
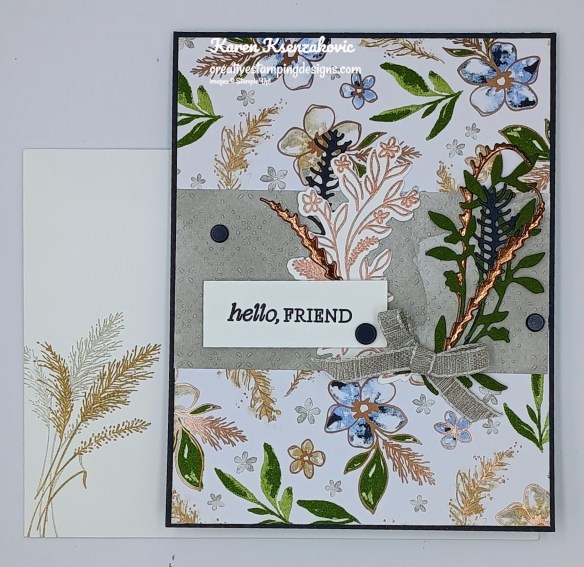
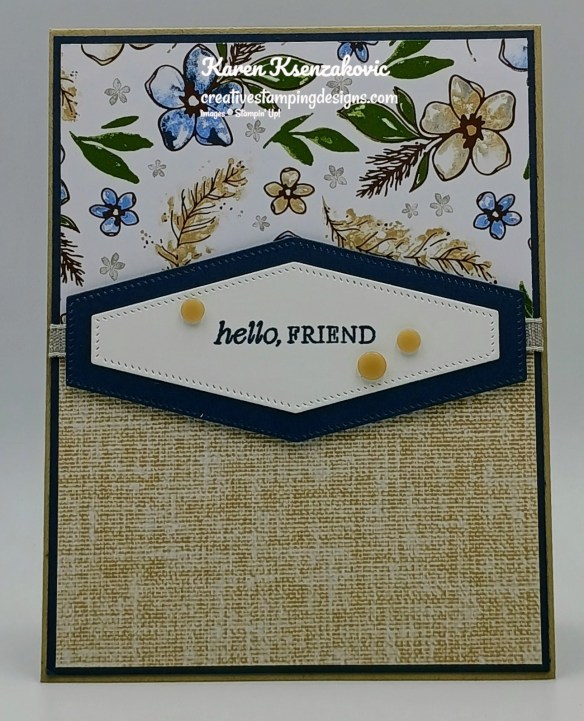
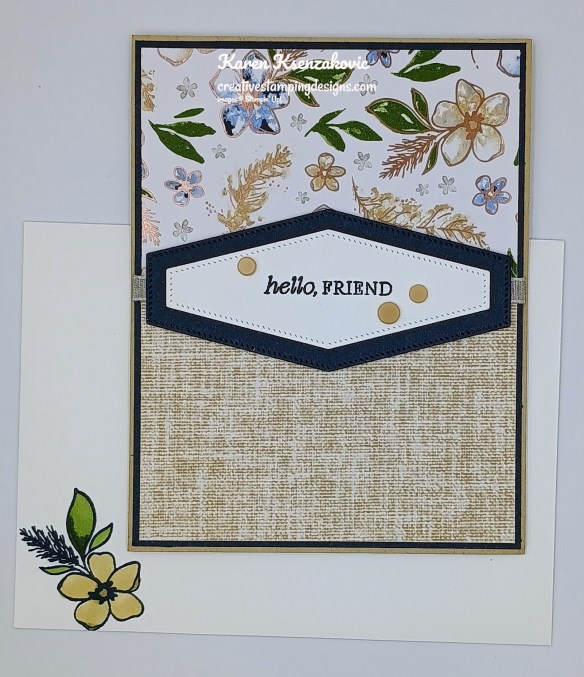
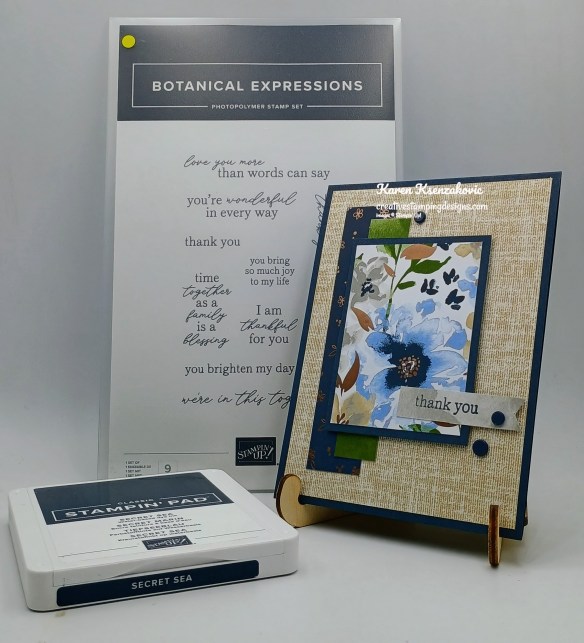
I pulled out some older DSP for today’s card and made that the focal point of my whole card. Here’s my card for today.
Stampin' Up! botanical Expressions 1 creativestampingdesigns.com

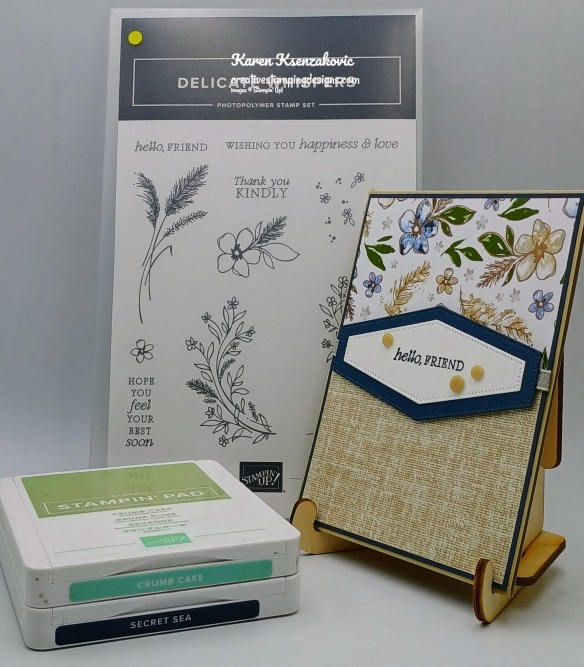
I used the Stampin’ Up! Botanical Expressions Stamp Set and Delicate Dreams Specialty Designer Series Paper for my card today.
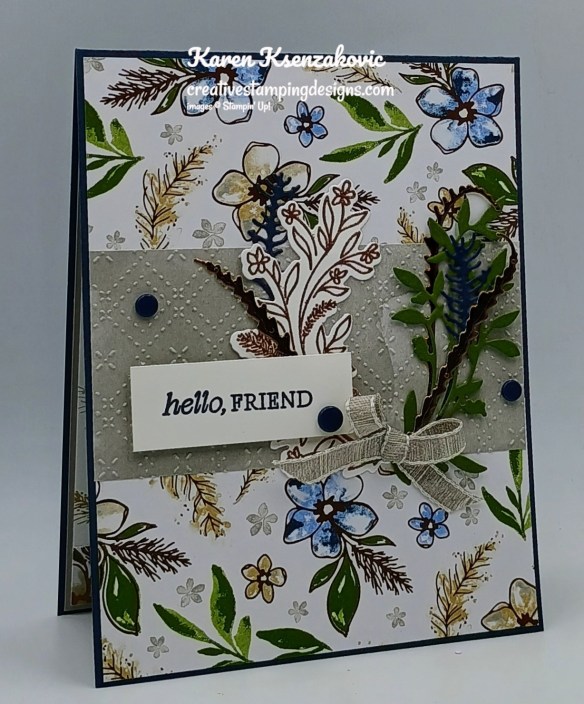
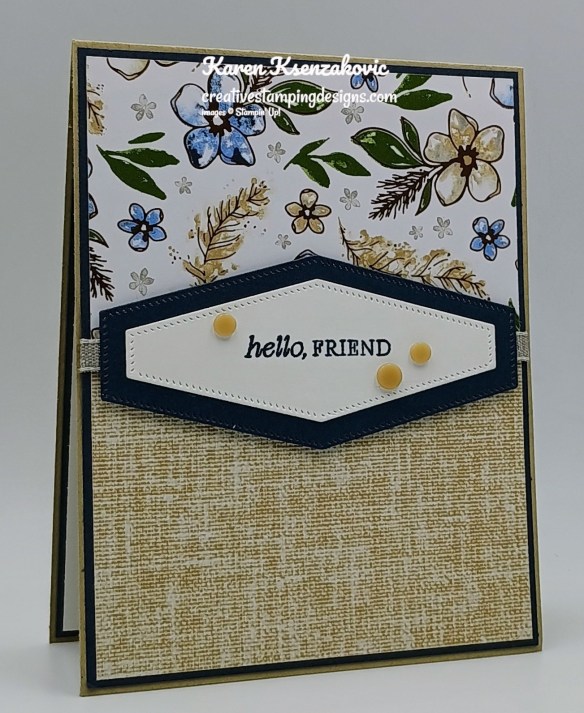
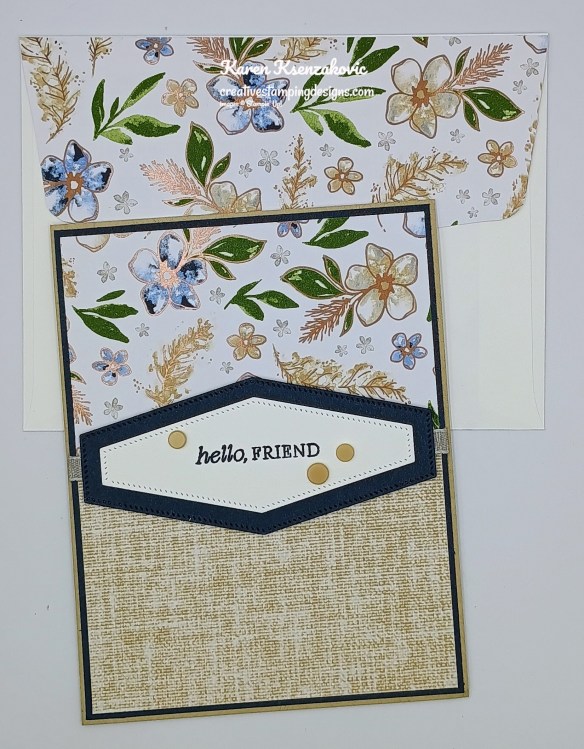
Stampin' Up! botanical Expressions 2 creativestampingdesigns.com

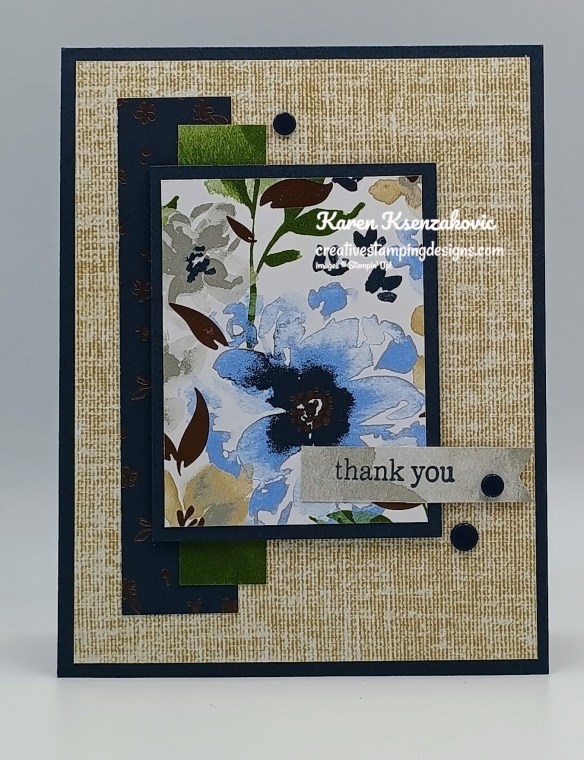
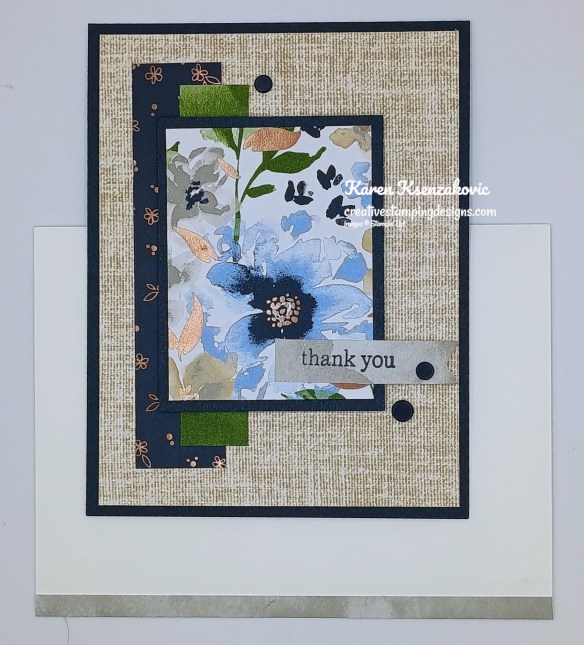
Adhere a panel of Delicate Dreams DSP to a Secret Sea card base. Adhere 2 more strips of Delicate Dreams DSP to the card front panel.
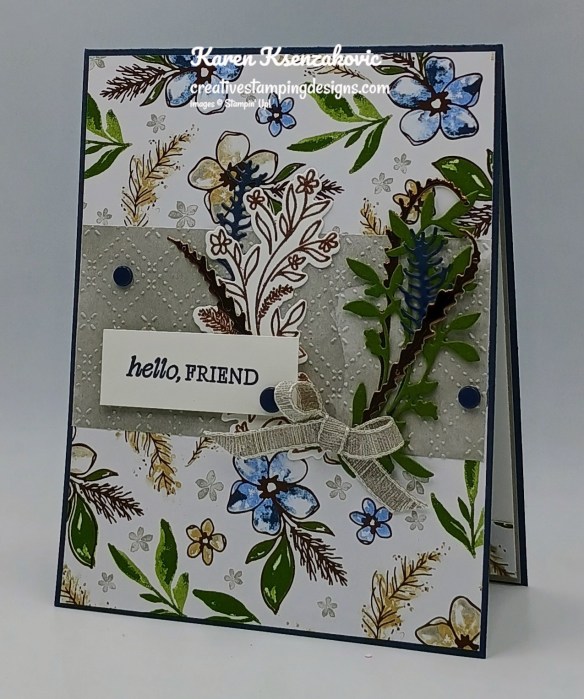
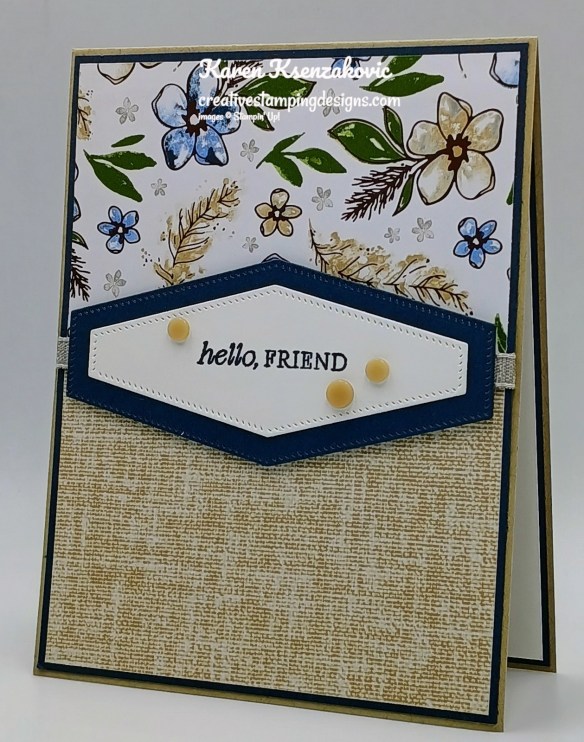
Stampin' Up! botanical Expressions 3 creativestampingdesigns.com

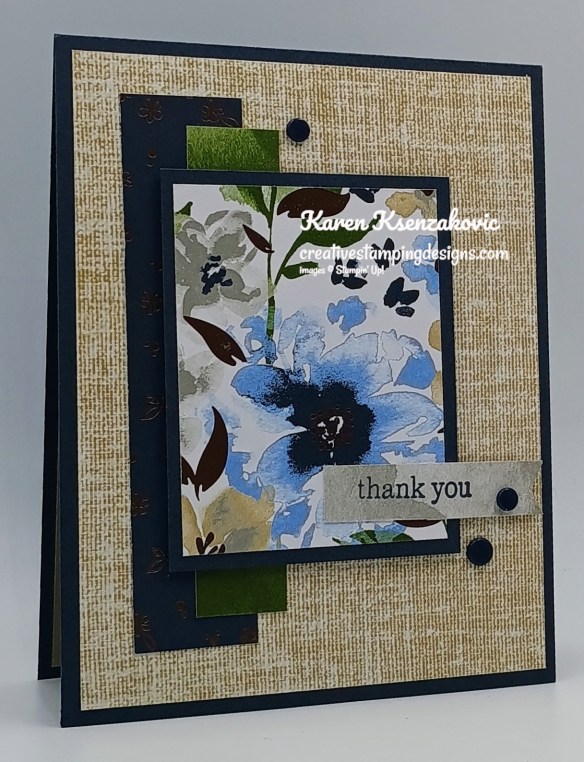
Adhere another panel of Delicate Dreams DSP to a Secret Sea mat. Adhere the layered panel to the card front with Stampin’ Dimensionals.
Stampin' Up! botanical Expressions 4 creativestampingdesigns.com

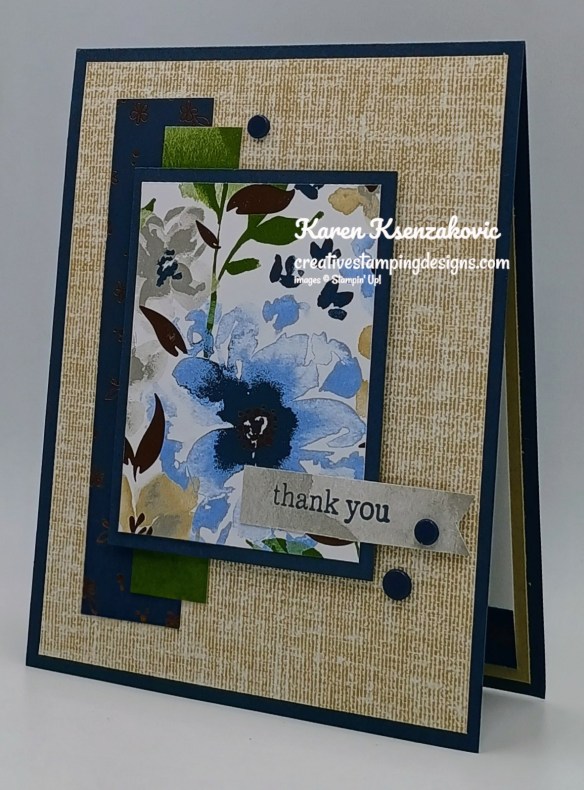
On a panel of Delicate Dreams DSP, stamp the sentiment from Botanical Expressions stamp set in Secret Sea Ink. Using the Details Scissors, cut the end into a banner. Adhere the sentiment to the card front with Stampin’ Dimensionals. Add a few Natural Matte Dots to the card front.
Stampin' Up! botanical Expressions 5
 creativestampingdesigns.com

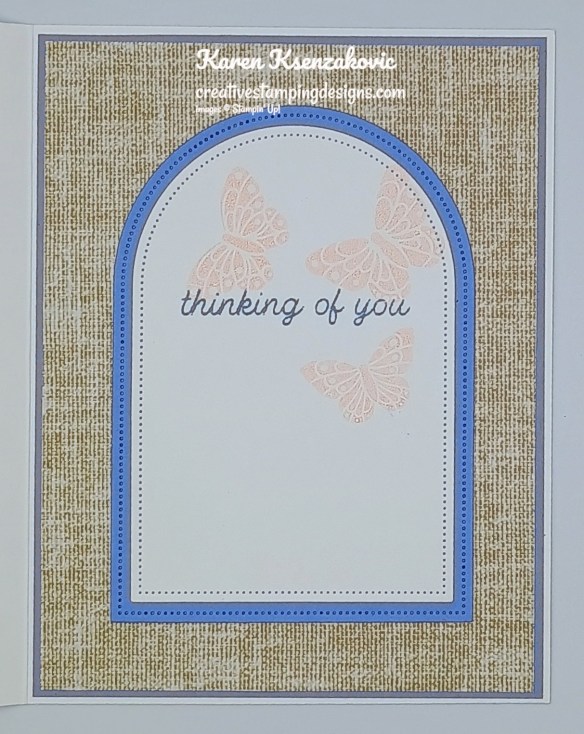
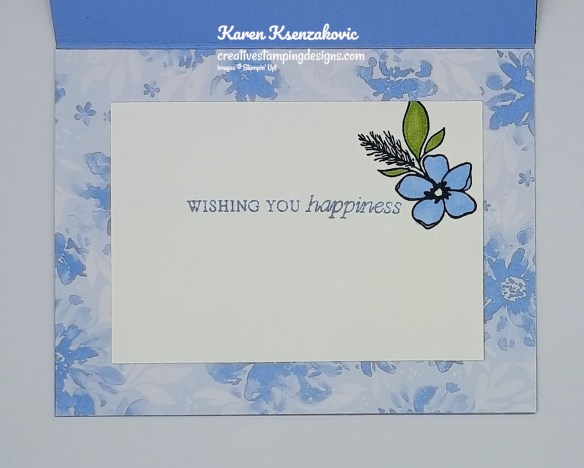
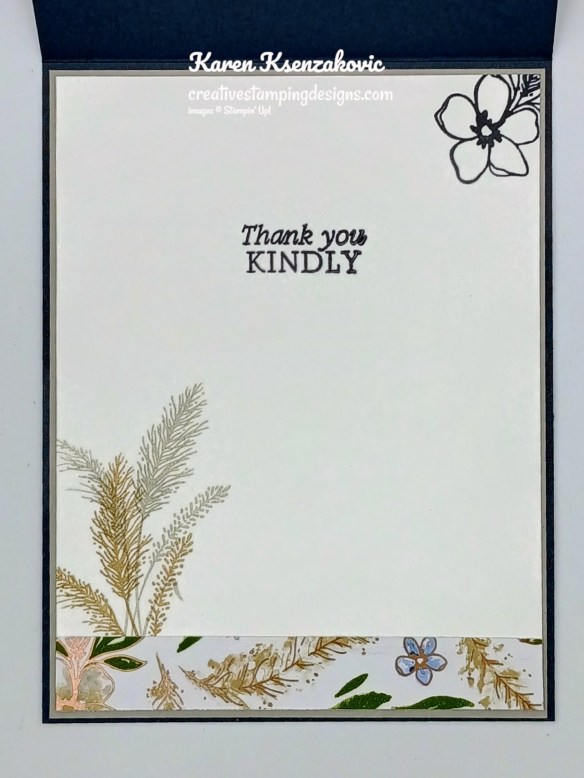
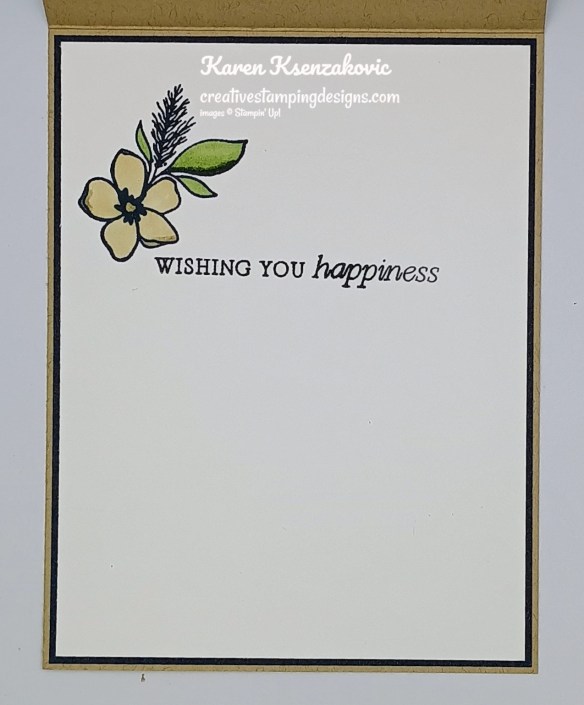
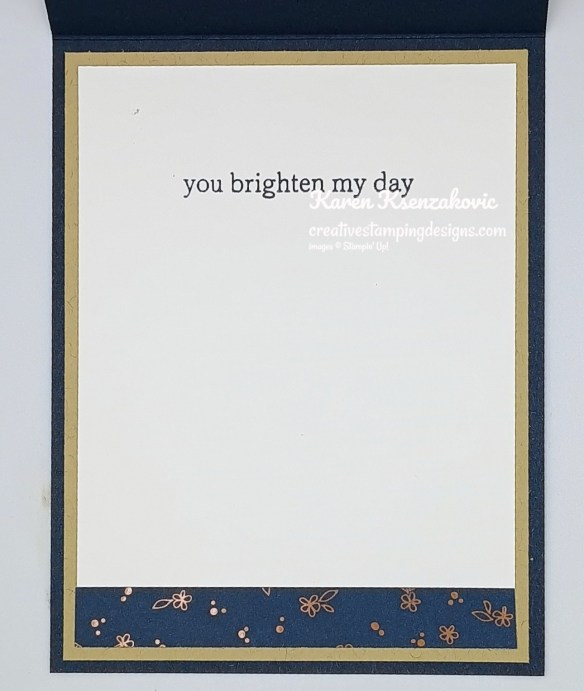
Stamp the sentiment from Botanical Expressions stamp set in Secret Sea Ink on a panel of Basic White. Adhere a panel of Delicate Dreams DSP to the bottom of the panel. Adhere the Basic White panel to a Crumb Cake mat then to the inside of the Secret Sea card base.
Stampin' Up! botanical Expressions 6 creativestampingdesigns.com

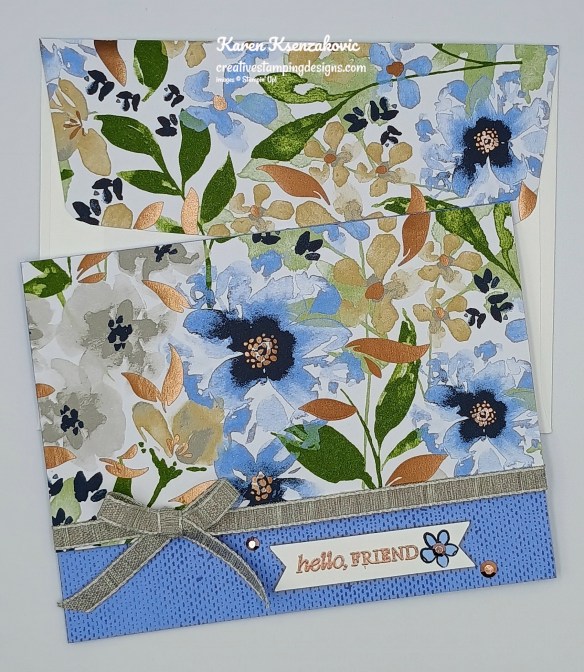
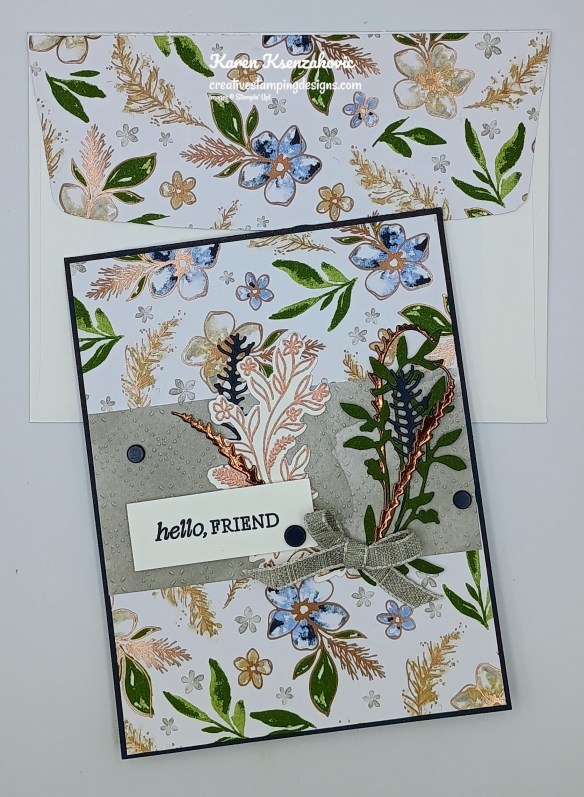
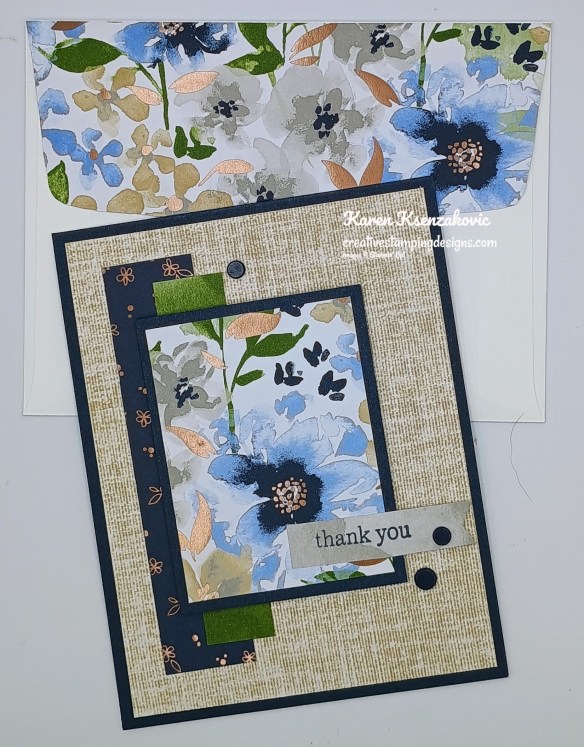
Decorate a Basic White Medium Envelope to finish the card. Adhere a strip of Delicate Dreams DSP to the envelope front and a panel to the envelope flap.
Stampin' Up! botanical Expressions 7 creativestampingdesigns.com

Thank you for stopping by my blog today. I hope you like the card and will give it a try. Happy Stamping!!

*********************************************************************************************************

If you need any stamping supplies, I’d love to be your Demonstrator. Just click HERE to go directly to my online store or drop me an email if you have any questions. 

********************************************************************************************************

LAST DAY to Register for my Creative Stamping Designs Class by Mail

Introducing a Creative Stamping Designs Class by Mail. As a lot of you know I love my Sunflowers and when they came out with the Sunflower Fields Suite I knew I wanted it immediately. I’ve decided to offer a Class by Mail and I’d love for you to join in. I spent all day Sunday designing cards just for this class and I hope you love them!! I created 10 different cards featuring products from the suite along with a couple other products. I will be putting together videos walking you through cutting the DSP for your cards and creating them. I will also have a color, step-by-step printable PDF for you.

Here’s what you will be getting from me:

  • Full pack of Sunflower Fields Designer Series Paper
  • Full roll of the Mossy Meadow/Very Vanilla 1/4″ Gingham Ribbon
  • Full pack of Radiant Gems
  • Cardstock kits cut up for 8-10 different cards (you will choose the DSP you want to use)
  • Link to class Video so you can make the cards at your leisure
  • Printable PDF of the cards with pictures and instructions
  • Pillow Gifts from me as a Thank You for joining my class

The Stampin’ Up! Radiant Sunflowers Bundle and Stampin’ Up! Poetry Petals Bundle are not included in the class price but, you will have the option to purchase them at a 10% discounted price along with other products that will be used for the class. You must order the bundle through the Google Form in order to get the discount. There is no substitution of products, and the price includes everything listed above. I will be purchasing everything the 1st week of September. I will cut up all the kits and label them, record the video and plan on shipping everything out by the last week of September. If I’m able to ship them sooner I will, but I’m giving myself enough time for the products to arrive, sort them and to get everything cut up for you.

Click Here for my Google Form to sign up

Deadline to Register is August 30th

*********************************************************************************************************

15% Off Select Designer Series Paper & Cardstock – Ends Tomorrow

Are you looking for the perfect card stock or Designer Series Paper for your next project? Stampin’ Up! has got you covered! Starting August 4-31, enjoy 15% off select Designer Series Paper and card stock. Stock up on your favorites or explore new colors and patterns during this sale! Here are the sale details:

  • Sales Period:  August 4–31
  • Ordering Deadline:   August 31, 2026, at 11:59 p.m. (MT)
  • While supplies last.
  • You’ll find all qualifying items in one convenient location once the sale begins on August 4—it will be located in the “Designer Series Paper and Cardstock Sale” page in the online store.

Head over to my Online Store beginning August 4 – 31 to shop the sale!!

*********************************************************************************************************

Card stock cuts for this project:

  • Basic White Cardstock 3 3/4″ x 5″ (inner liner)
  • Crumb Cake Cardstock 4″ x 5 1/4″ (mat)
  • Secret Sea Cardstock 4 1/4″ x 11″ (card base scored & folded at 5 1/2″), 2 1/2″ x 3 1/4″ (mat)
  • Delicate Dreams Specialty Designer Series Paper 4″ x 5 1/4″ (card front), 1″ x 4 1/2″, 3/4″ x 4″ & 2 1/4″ x 3″ (card front panels), 1/2″ x 3 3/4″ (inner liner), 1/2″ x 2″ (sentiment), 1/4″ x 6″ & 2 1/4″ x 6″ (envelope)

*********************************************************************************************************

Product List

Stampin’ Up! All Aflutter Delicate Whispers

Good Friday afternoon stamping friends. I hope you are all having a great day and looking forward to the weekend.

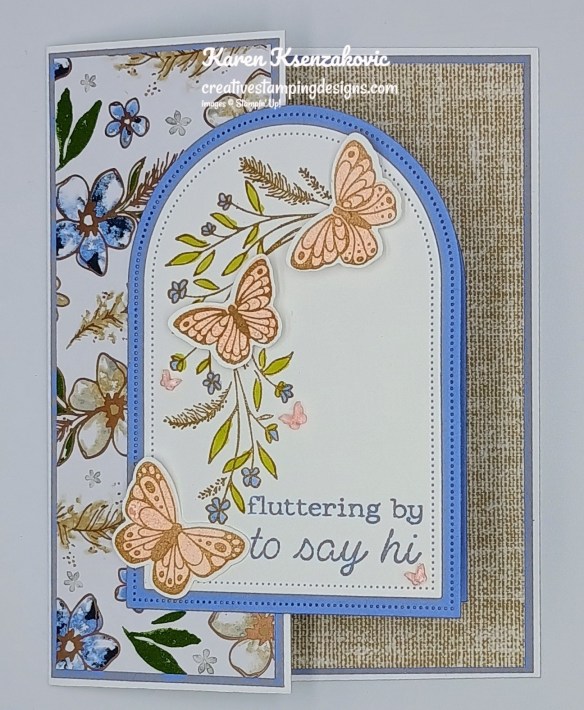
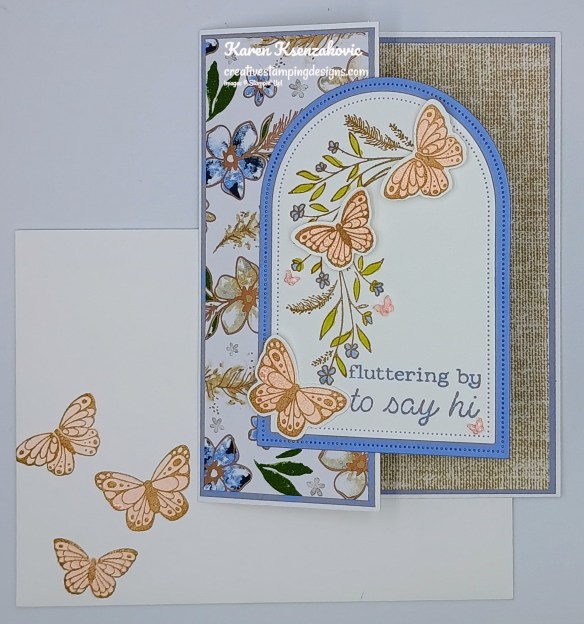
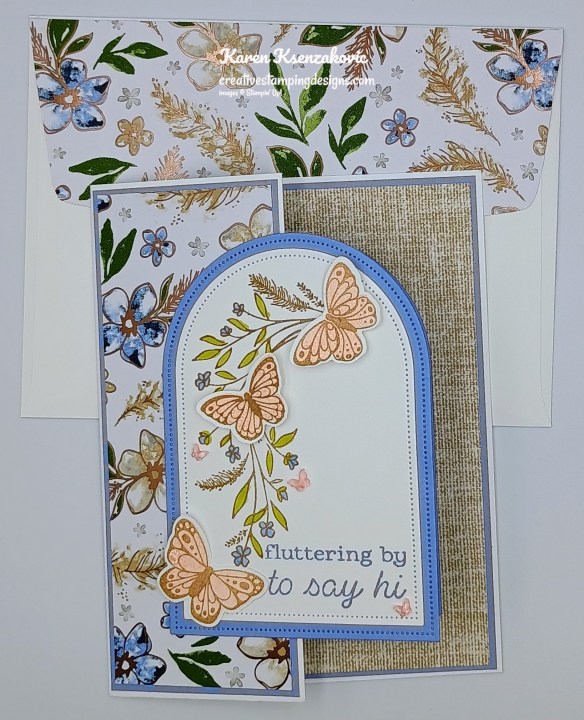
I have a quick card for you today mixing up products coming in May and products available now. That’s one of the great things about Stampin’ Up! products, you can mix and match almost everything. If you’d like to see a quick video on how I made this card, Click Here to go to my Instagram Reels. Here’s my card for today.

Stampin' Up! All Aflutter Delicate Whispers Fun Fold 1 creativestampingdesigns.com

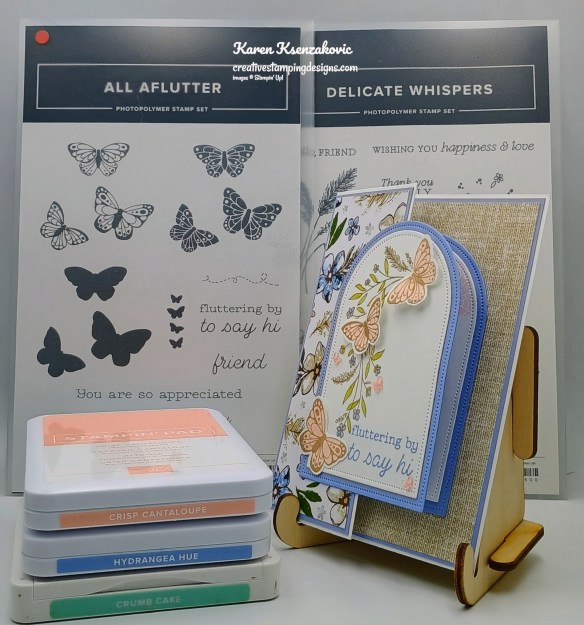
I used the Stampin’ Up! All Aflutter Bundle along with the Delicate Dreams Specialty Designer Series Paper, Stampin’ Up! Delicate Whispers Stampp Set and the Everyday Arches Dies for my card today.

Stampin' Up! All Aflutter Delicate Whispers Fun Fold 2 creativestampingdesigns.com

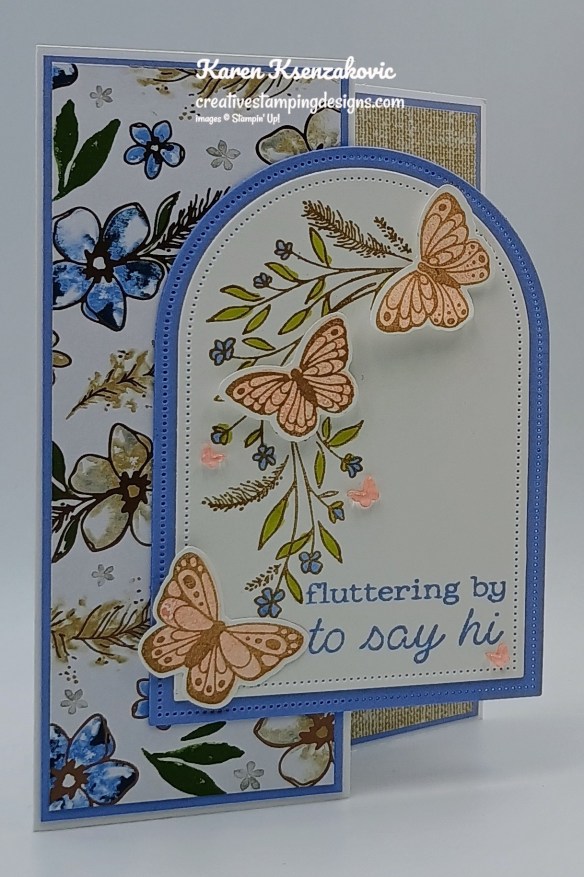
Adhere a panel of Delicate Dreams DSP to a Hydrangea Hue mat. Adhere the layered panel to the front of a Basic White Thick card base. Cut a panel of Basic White and Hydrangea Hue using the Everyday Arches Dies.

Stampin' Up! All Aflutter Delicate Whispers Fun Fold 3 creativestampingdesigns.com

On the die cut panel of Basic White, stamp the floral image from the Delicate Whispers stamp set in Crumb Cake Ink. Color the image using Hydrangea Hue and Old Olive Stampin’ Blends Markers. Stamp the sentiment from the All Aflutter stamp set in Hydrangea Hue Ink on the bottom of the panel. Adhere the Basic White panel to the Hydrangea Hue mat. Stamp the detailed butterfly image from the All Aflutter stamp set on a panel of Basic White in Crumb Cake Ink. Stamp the solid butterfly image from All Aflutter stamp set in Crisp Cantaloupe Ink, stamping off once on scrap paper, over the detailed image. Cut the butterflies out using the All Aflutter Punch.

Stampin' Up! All Aflutter Delicate Whispers Fun Fold 4 creativestampingdesigns.com

Adhere the punched butterflies to the die cut panel with Stampin’ Dimensionals and Glue Dots on the cascading floral image. Adhere the layered die cut panel to the card front. Add a few 2026-2028 In-Color Butterflies (available May 5) to the card front.

Stampin' Up! All Aflutter Delicate Whispers Fun Fold 5 creativestampingdesigns.com

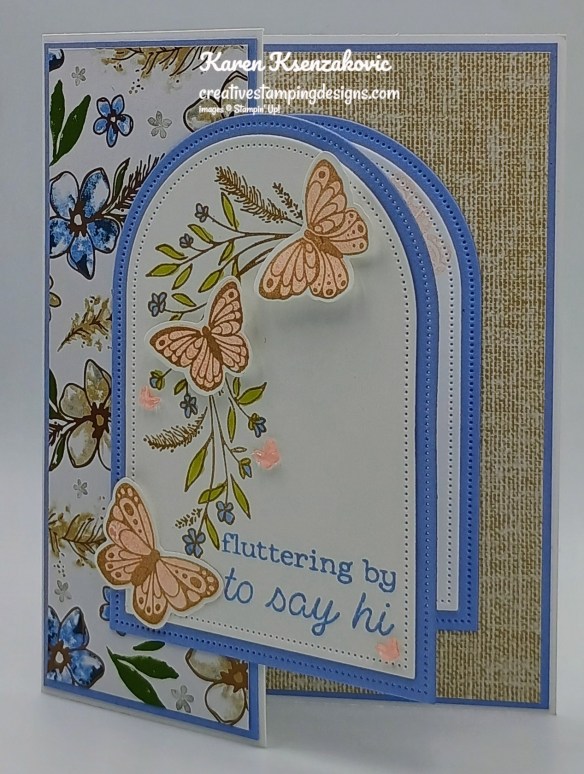
Adhere a panel of Delicate Dreams DSP to a Hydrangea Hue mat. Adhere the layered panel to the inside of the Basic White Thick card base. Using the Everyday Arches Dies, cut a panel of Basic White and Hydrangea Hue. Stamp the sentient from All Aflutter stamp set in Hydrangea Hue Ink on the Basic White die cut. Stamp the butterfly image from the All Aflutter stamp set in Crisp Cantaloupe Ink, stamping off once on scrap paper, on the panel next to the sentiment. Adhere the Basic White die cut to the Hydrangea Hue die cut. Adhere the layered panel to the inside of the Basic White Thick card base, making sure to line it up behind the front panel.

Stampin' Up! All Aflutter Delicate Whispers Fun Fold 6 creativestampingdesigns.com

Decorate a Basic White Medium Envelope to finish your card. Stamp the outlined butterfly image from the All Aflutter stamp set in Crumb Cake Ink on the envelope front. Stamp the solid butterfly image from All Aflutter stamp set in Crisp Cantaloupe Ink, stamping off once on scrap paper, over the detailed image. Adhere a panel of Delicate Dreams DSP to the envelope flap.

Stampin' Up! All Aflutter Delicate Whispers Fun Fold 7 creativestampingdesigns.com

Thank you for stopping by my blog today. I hope you like my card and will give it a try. Happy Stamping!!

*********************************************************************************************************

If you need any stamping supplies, I’d love to be your Demonstrator. Just click HERE to go directly to my online store or drop me an email if you have any questions. 

*********************************************************************************************************

May-August 2026 Catalog & May 2026 Online Exclusive Product Shares Open for Ordering

It’s that time again. The new May -August 2026 Catalog will be arriving in your mailbox real soon and you’re going to want all that beautiful Designer Series Paper, Ribbon and/or Embellishments. My May – August 2026 Catalog and May Online Exclusive Product Shares are open for ordering. You can order just the DSP share, just the Two-Tone cardstock share, just the Ribbon share or just the Embellishment share, or you can have it all!! Click Here to order.

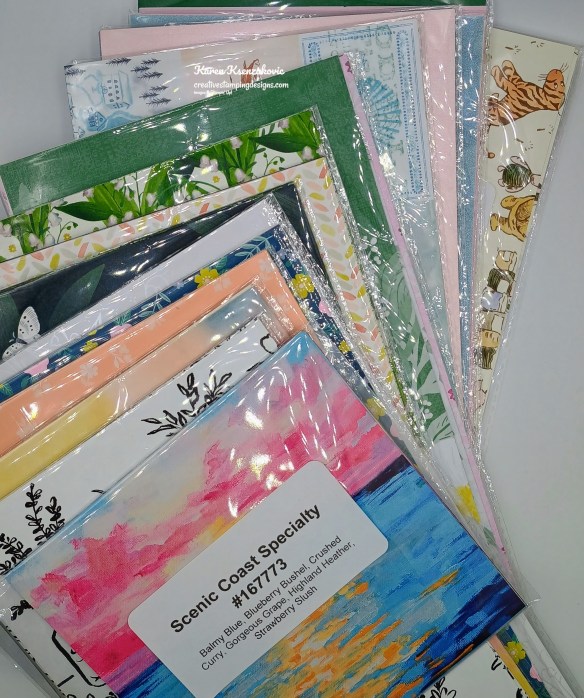
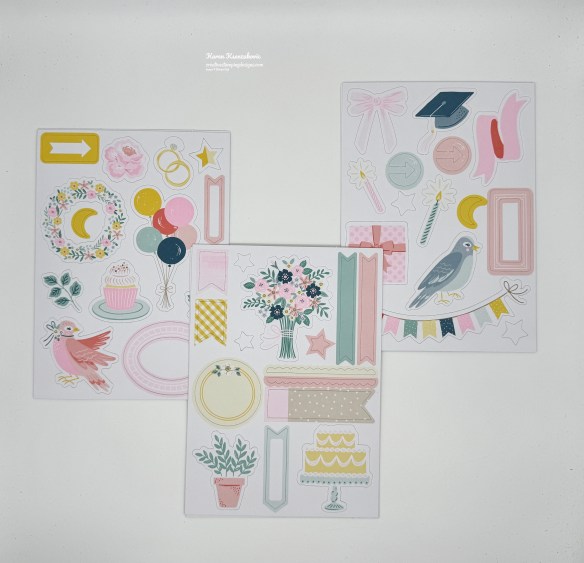
I’m offering a Designer Series Paper Share, Two-Tone Cardstock Share, Ribbon Share & Embellishment Share from the May – August 2026 Catalog, along with the upcoming May 2026 Online Exclusives and I’d love to have you join!!  I’m placing my share order early on May 5th and I’m going to use the expedited shipping option so I should be able to have the shares cut, bundled and back out to you during the week of May 11th. Wouldn’t you love to have all of the gorgeous new Designer Series Papers in the Stampin’ Up! May-August 2026 Catalog and the upcoming May 2026 Online Exclusives?  What is a Paper Share you ask? It’s a sample of each of the new Designer Series Papers from the Catalog and Online Exclusives. Shares give you a good working sample of all of the papers so that you can decide which ones to order in full packs!  If you were to purchase all of the DSP in the new Catalog and Online Exclusives, it would cost you over $300.00 plus shipping.

New Designer Series Paper Share – $50.00 plus $10.00 for Priority Mail Shipping

How my shares work:  I order full packs of all of the Designer Series Papers listed below, I cut them into 6″ X 6″ pieces (or 6″ X 12″ pieces for double shares) and give you one panel of each design from each pack on the list.  I pack up the paper in a cellophane bag with labels listing the Name, Item # and Colors in the pack and mail it back out to you just as quickly as I can!  

New Designer Series Paper Share – $50.00 plus $10.00 for Priority Mail shipping

You will receive one 6×6 sheet of each design from the following DSP packs (the number after the name indicates how many 6×6 sheets of that paper pack you will receive):

  • Artisan Sketched Garden (6)
  • Basics Painted Patterns (6)
  • Beautiful Ordinary Life (6)
  • Bloom Boutique Specialty (6)
  • Brights Painted patterns (20)
  • Everyday Essentials Mix & Match (6)
  • Luxe White Specialty (3)
  • Moonlit Flora (6)
  • Neutrals Painted Patterns (20)
  • Paper Medley Mix Ins (6)
  • Regals Painted Patterns (20)
  • Scenic Coast 6×6 Specialty (8)
  • Subtle Painted Patterns (20)
  • Vally in Bloom (6)
  • Velvet Meadow Specialty (6)
  • Waterside Retreat (6)
  • 2026-2028 In-Color Painted Patterns (10)
  • 2026-2028 In-Color Pearlized (5)
  • Sunset Shimmer Vellum (3)
  • Velveteen Assortment (3)
  • Silly Old Bear OLE (6)

In all, you’ll receive 178 – 6” x 6” sheets of designer or specialty paper!

Double Designer Series Paper Share – $100.00 Plus $10.00 Priority Mail Shipping

As a gift from me for ordering a Double Share of Designer Series Paper, I will include a Meant To Be Mix & Match Ephemera Pack #167700. This gift is only for ordering a Double DSP Share.

Two-Tone Cardstock Share

Do you likethe Two-Tone Cardstock but don’t want to buy a whole pack? You can add a share of the 3 different Two-Tone Cardstock packs for an additional $4.50 or purchase them separately for $4.50 + $10 Priority Shipping

You will receive one 6×6 sheet of each color from each of the packs (the number after the name indicates how many 6×6 sheets of that paper pack you will receive):

  • Extraordinary Life (6)
  • Heirloom Boutique (6)
  • Life In Bloom (6)

In all, you’ll receive 18 – 6” x 6” sheets of cardstock!

Double Share of the Two-Tone Cardstock – $9.00 plus $10.00 Priority Mail Shipping

If you’d like double shares of the designer paper or cardstock, I’m offering those too!  I’ll cut the 12″ x 12″ sheets into 6″ × 12″ so that you’ll be able to get 3 full A2 size card fronts from each sheet and you’ll get double sheets of the 6″ x 6″ since they’re already precut.

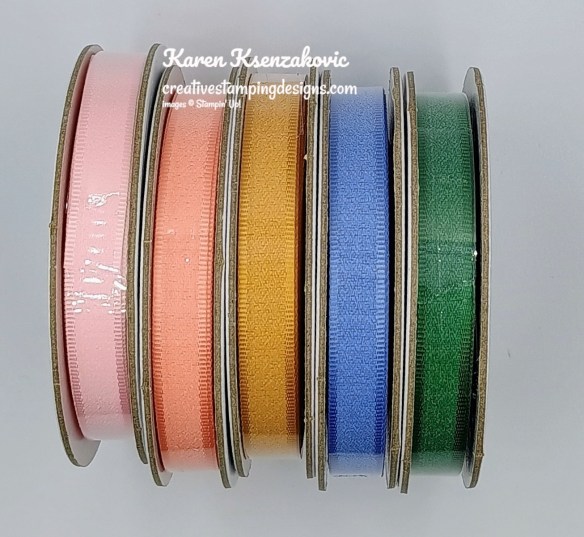
Ribbon Share – $11.25 plus $10.00 Priority Mail Shipping

All ribbons will come individually wrapped and labeled with the name and number of the product.

One-Fourth of a Roll of each:

  • Barely Blush 3/8″ Bordered Ribbon
  • Crisp Cantaloupe 3/8″ Bordered Ribbon
  • Golden Glow 3/8″ Bordered Ribbon
  • Hydrangea Hue 3/8″ Bordered Ribbon
  • Peaceful Pine 3/8″ Bordered Ribbon

Double Ribbon Share – $22.50 Plus $10.00 Priority Mail Shipping and you will be getting 1/2 of the roll or each ribbon.

Embellishment Share – $14.00 plus $10.00 Priority Mail Shipping

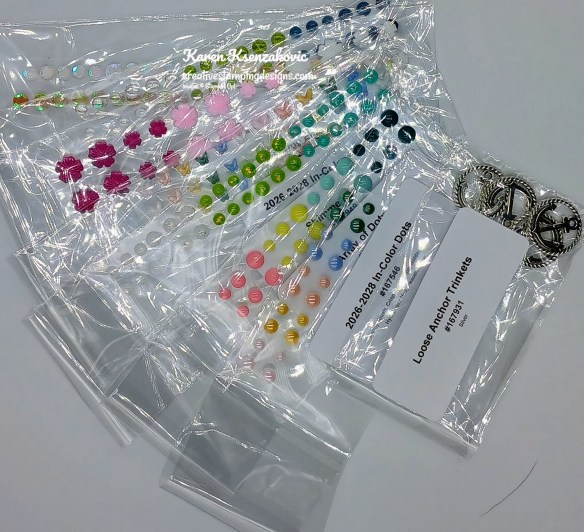
I’m also offering an Embellishment Share. I will divide the embellishments up and package them in a cello bag with the name and number for easy ordering, just like I do with the paper and ribbon.

You will receive (approximate # listed:

  • Array of Dots (24)
  • Dewdrops Embellishments (36)
  • Dreamy Flowers (24)
  • Loose Anchor Trinkets (4)
  • Shimmer Dots (36)
  • Sunset Sparkle Sequins (40)
  • 2026-2028 In-Color Butterflies (36)
  • 2026-2028 In-Color Dots (20)

Double Share of the Embellishments – $28.00 plus $10.00 Priority Mail Shipping

Anyone is welcome to join in my shares (please note, I can only ship to addresses within the US).  To make ordering the shares a little easier, I have created a form for you to submit, that way you can order any combination of shares you want. Click Here for the form. I will send out PayPal Invoices by May 3rd.

Deadline to sign up for my share is Saturday May 3rd at 5:00 PM ET.

*********************************************************************************************************

Card stock cuts for this project:

  • Basic White Cardstock 2 3/4″ x 8 1/2″(die cuts), 2 3/4″ x 3″ (butterflies)
  • Basic White Thick Cardstock 5 1/2″ x 6 1/2″(card base scored & folded at 4 1/4″)
  • Hydrangea Hue Cardstock 2 1/8″ x 5 3/8″(card front mat), 4 1/8″ x 5 3/8″(inner liner mat), 3 1/4″ x 8 1/2″(die cuts)
  • Delicate Dreams Specialty Designer Series Paper 2″ x 5 1/4″(card front), 4″ x 5 1/4″(inner liner), 2 1/4″ x 6″(envelope flap)

*********************************************************************************************************

Product List

Stampin’ Up! Delicate Whispers for The Happy Inkin’ Thursday Blog Hop

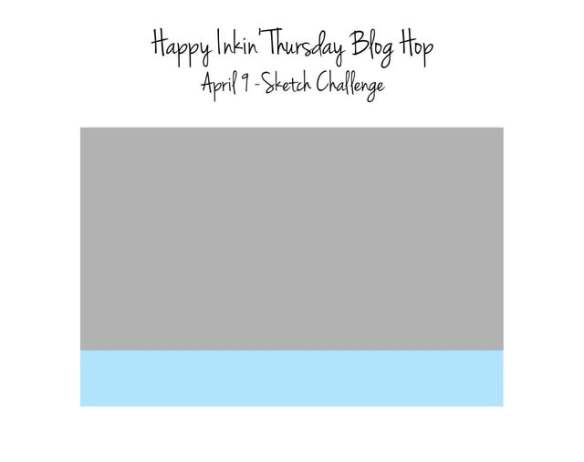
Good Thursday morning stamping friends welcome to our Happy Inkin’ Thursday Blog Hop. If you are starting with me, thank you, I hope you will stop by everyone’s blog to see the awesome projects they have created this week. If you are hopping over from Mary’s blog, thank you for stopping by. This week we have a Sketch Challenge to work with. If you’d like to see a quick video on how I made this card, Click Here to go to my Instagram Reels. Here is my card using this week’s sketch.

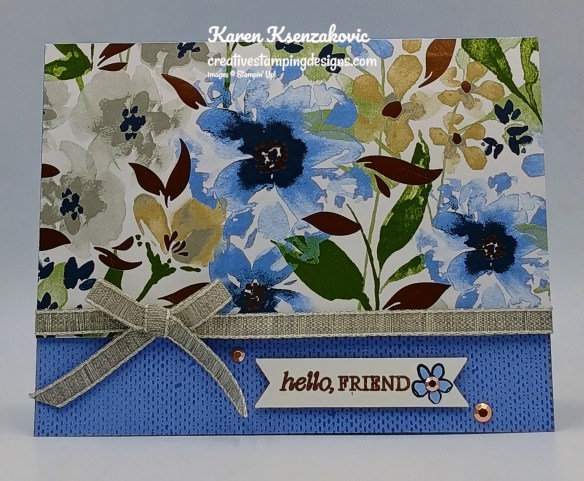
Stampin' Up! Delicate Whispers Friendship 1 creativestampingdesigns.com

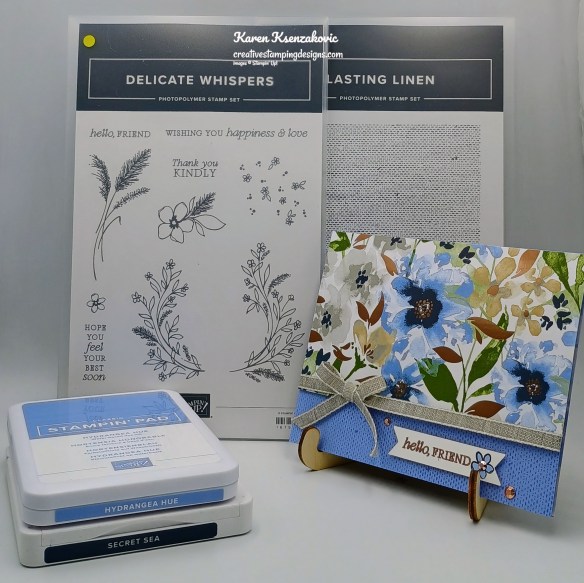
I used the Stampin’ Up! Delicate Whispers Stamp Set along with the Delicate Dreams Specialty Designer Series Paper (expected back in stock the week of April 27), Stampin’ Up! Lasting Linen Stamp Set and Stylish Shapes Dies for my card today.

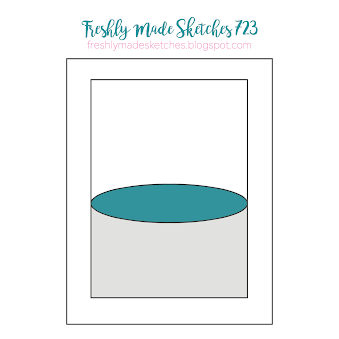
This is our sketch for this week.

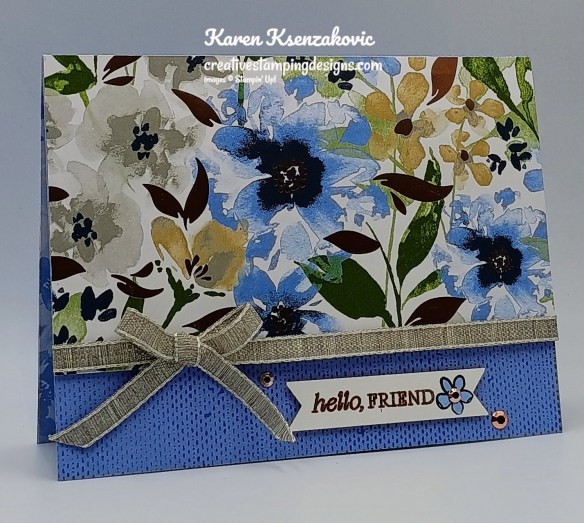
Stampin' Up! Delicate Whispers Friendship 2 creativestampingdesigns.com

Stamp the front of a Hydrangea Hue card base using the Lasting Linen stamp set with Hydrangea Hue Ink.

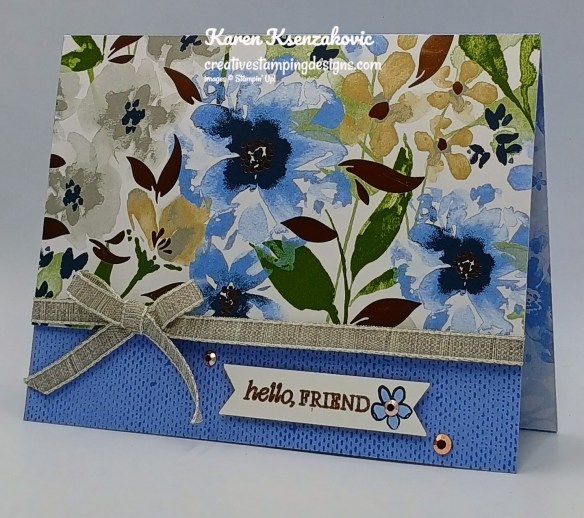
Stampin' Up! Delicate Whispers Friendship 3 creativestampingdesigns.com

Wrap a piece of Gray Granite 1/4″ Variegated Trim around the bottom of a panel of Delicate Dreams DSP and tie a bow. Adhere the panel of Delicate Dreams DSP to the front of the Hydrangea Hue card base.

Stampin' Up! Delicate Whispers Friendship 4 creativestampingdesigns.com

Stamp the sentiment from the Delicate Whispers stamp set in Versamark Ink on a panel of Basic White. Sprinkle the sentiment with Copper Embossing Powder and set it using the Heat Tool. Cut the sentiment out using the narrow banner die from the Stylish Shapes Dies. Adhere the sentiment to the bottom of the card front with Stampin’ Dimensionals. Add a few Adhesive-Backed Metallic Gems to the card front.

Stampin' Up! Delicate Whispers Friendship 5 creativestampingdesigns.com

Adhere a panel of Delicate Dreams DSP to the inside of the Hydrangea Hue card base. On a panel of Basic White, stamp the sentiment from the Delicate Whispers stamp set in Hydrangea Hue Ink. Stamp the flower image from the Delicate Whispers stamp set in Secret Sea Ink next to the sentiment. Color the image using Hydrangea Hue and Mossy Meadow Stampin’ Blends Markers. Adhere the Basic White panel to the inside of the Hydrangea Hue card base over the Delicate Dreams DSP.

Stampin' Up! Delicate Whispers Friendship 6 creativestampingdesigns.com

Decorate a Basic White Medium Envelope to complete your card. Stamp the flower image from the Delicate Whispers stamp set in Secret Sea Ink on the envelope front. Color the image with Hydrangea Hue and Mossy Meadow Stampin’ Blends Markers. Adhere a panel of Delicate Dreams DSP to the envelope flap.

Stampin' Up! Delicate Whispers Friendship 7 creativestampingdesigns.com

Thank you for stopping by my blog today. Now that you’ve seen my card, let’s get on with the hop! Click the next button below to hop over to see what Tara has created. Happy Hopping

Just in case you get lost along the way, here is a list of the team members involved in the hop today.

Amy Koenders

Mary Deatherage

Karen Ksenzakovic You Are Here

Tara Carpenter

Terry Lynn Bright

Nicole Bloxom

********************************************************************************************************

If you need any stamping supplies, I’d love to be your Demonstrator. Just click HERE to go directly to my online store or drop me an email if you have any questions. 

*********************************************************************************************************

Card stock cuts for this project:

  • Basic White Cardstock1″ x 3″(sentiment), 3″ x 4 1/4″(inner liner)
  • Hydrangea Hue Cardstock 5 1/2″ x 8 1/2″(card base scored & folded at 4 1/4″)
  • Delicate Dreams Specialty Designer Series Paper 3 1/4″ x 5 1/2″(card front), 4 1/4″ x 5 1/2″(inner liner mat), 2 1/4″ x 6″(envelope flap)

*********************************************************************************************************

Product List

Stampin’ Up! Delicate Wishes Thank You

Good Monday morning stamping friends and welcome to a new week. How was your weekend? It has warmed up here in NJ, we’re supposed to be in the 70’s this week and dropping back down for the weekend.

Today’s card is one that we made yesterday at our quarterly meeting. This card was designed by Tara Carpenter. I changed mine up a little so it wasn’t identical. Here’s my card for today.

Stampin' Up! Delicate Whispers Thank You 1 creativestampingdesigns.com

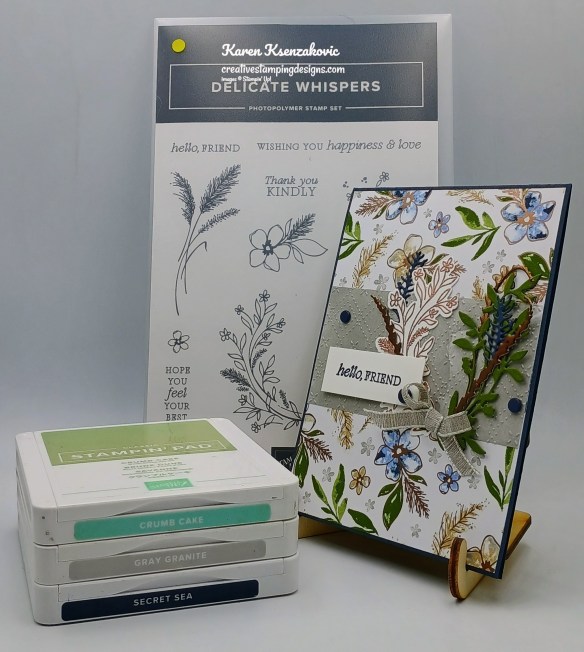
I used the Stampin’ Up! Delicate Whispers Bundle along with the Forever Plaid 3D Embossing Folder, Delicate Dreams Specialty Designer Series Paper, Spotlight on Nature Dies and 2 3/8″ Circle Punch for my card today.

Stampin' Up! Delicate Whispers Thank You 2 creativestampingdesigns.com

Emboss a panel of Secret Sea using the Forever Plaid EF. Adhere the embossed panel to a Crumb Cake mat. Adhere the layered panel to a Secret Sea card bae with Stampin’ Dimensionals.

Stampin' Up! Delicate Whispers Thank You 3 creativestampingdesigns.com

Adhere a panel of Delicate Dreams DSP to the card front. Stamp the sentiment from Delicate Whispers stamp set in Secret Sea Ink on a panel of Crumb Cake. Punch the sentiment out using the 2 3/8″ Circle Punch. Cut a panel of Earthen Toned Metallic Paper using the Spotlight on Nature Dies. Adhere the sentiment to the die cut metallic panel

Stampin' Up! Delicate Whispers Thank You 4 creativestampingdesigns.com

Stamp the sprig images from the Delicate Whispers stamp set in Secret Sea Ink on a panel of Basic Beige. Cut the images out using the Delicate Whispers Dies. Adhere the 2 die cut panels to the sentiment panel. Adhere the layered sentiment to the card front with Stampin’ Dimensionals. Tie a bow using the Secret Sea Bordered Open Weave Ribbon and adhere it to the card front with a Glue Dot. Add a few Natural Matte Dots to the card front.

Stampin' Up! Delicate Whispers Thank You 5 creativestampingdesigns.com

On a panel of Basic Beige, stamp the plume image from the Delicate Whispers stamp set in Secret Sea and Crumb Cake on the bottom of the panel. Adhere the Basic Beige panel to a Crumb Cake mat then to the inside of the Secret Sea card base.

Stampin' Up! Delicate Whispers Thank You 6 creativestampingdesigns.com

Decorate a Basic White Medium Envelope to finish your card. Stamp the sprig image from the Delicate Whispers stamp set in Secret Sea Ink on the envelope front. Adhere a panel of Delicate Dreams DSP to the envelope flap.

Stampin' Up! Delicate Whispers Thank You 7 creativestampingdesigns.com

Thank you for stopping by my blog today. I hope you like the card and will give it a try. Happy Stamping!!

*********************************************************************************************************

If you need any stamping supplies, I’d love to be your Demonstrator. Just click HERE to go directly to my online store or drop me an email if you have any questions. 

*********************************************************************************************************

Double Creative Stamping Designs Rewards

The new March Online Exclusives are now available to order.  I’m offering Double Creative Stamping Designs Rewards. THAT’S 2X THE REWARDS FOR YOU FROM ME!!!  March 3 – Monday March 9 for all orders over $50 (before tax & shipping)!! How does this work? For a $50 you’ll earn 2 rewards, $100 you’ll earn 4 rewards, $150 you’ll earn 6 rewards, etc. Head over to my Online Store and get those orders in early and earn those Double Rewards!!

*********************************************************************************************************

Poetry Garden Online Class Registration Open

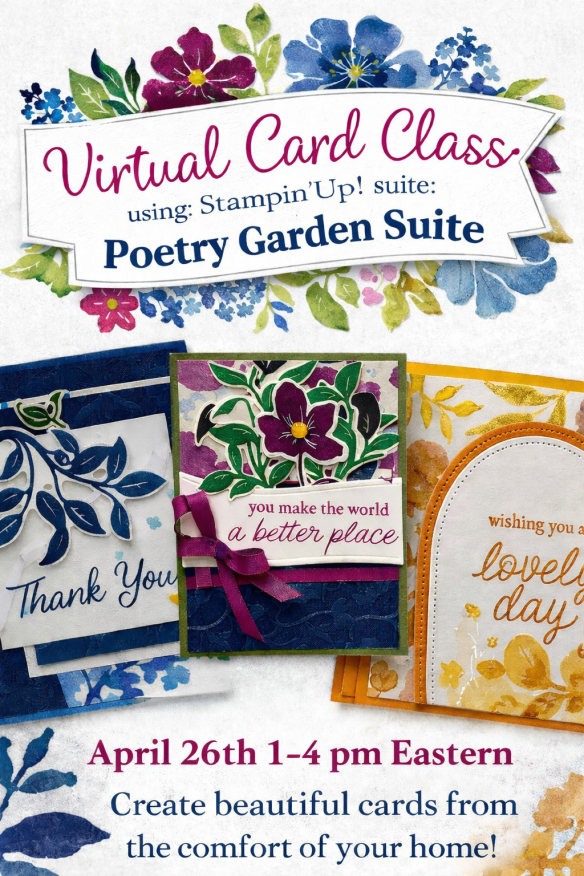
Tara Carpenter and I are teaming up to offer a fun online class using Stampin’ Up! March Online Exclusive Poetry Garden Suite.  We will be creating 6 different cards during the class including 2 Fun Fold Cards.  Sign Up now by Clicking Here to reserve your spot.

The class fee includes:

  • Stampin’ Up! Garden Epoxy Dots (full pack)
  • Stampin’ Up! Berry Burst 1/4″ Shiny Ribbon (full pack)
  • Pre-cut card kits to complete each card
  • Zoom class with complete instructions to complete each card
  • PDF with detailed directions

During sign up you will have the option to add additional items to your order that you can take advantage of at no additional shipping cost.  These items are optional, however if you want to recreate the cards you will need them. If you’ve attended a previous class, you were given a discount code, there is a spot to put that code on the form and the discount only applies to the products that you check off that you wish to purchase, not the class.  Since the Bundles are already discounted, the discount does not apply to them either.

The class will be held Sunday April 26th from 1 to 4 pm Eastern Time via Zoom.  This allows anyone in the United States to participate live!  Can’t join us live… no worries, we will record the session so it can be replayed at any time.

I will email written directions that will include directions, cardstock cuts as well as photos to help you create each card.

The bundles are not included in the price of the class.  You can purchase the bundle through me at an additional 10% discount of the Online Exclusive price (see below).

Class Cost $40 + $10 (Shipping) 

Additional purchased items will be included in the above shipping price.  I will invoice you through PayPal and invoices must be paid by April 5th to insure I can get the products delivered, packaged up and out to you with enough time.  

Deadline: Sunday April 5th 

Click Here to register for the class now!! Let me know if you have any questions.

*********************************************************************************************************

I’ve updated my Retired List. I’ve added a LOT more items that have been retired by Stampin’ Up! at a discounted price. Check out my list, there might be something that you missed out on and really wanted. You can find it by Clicking Here.

*********************************************************************************************************

Card stock cuts for this project:

  • Basic Beige Cardstock 4″ x 5 1/4″(inner liner), 3″ x 4 1/4″(die cuts)
  • Crumb Cake Cardstock (2) – 4 1/8″ x 5 3/8″(card front & inner liner mats), 2 1/2″ x 2 1/2″(sentiment)
  • Secret Sea Cardstock 4 1/4″ x 11″(card base scored & folded at 5 1/2″), 4″ x 5 1/4″(card front)
  • Delicate Dreams Specialty Designer Series Paper 1 3/4″ x 4 3/4″(card front panel), 2 1/4″ x 6″(envelope)
  • Earthen Toned Metallic Specialty Paper 3″ x 3″ (sentiment mat)’

*********************************************************************************************************

Product List

Stampin’ Up! Delicate Whispers for The Happy Inkin’ Thursday Blog Hop

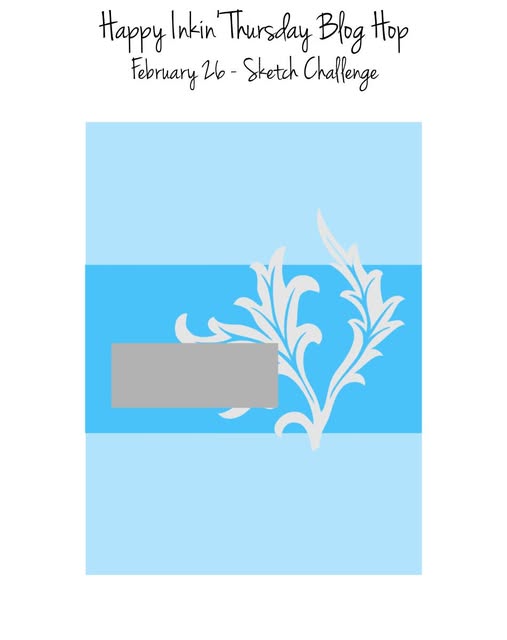
Good Thursday morning stamping friends welcome to our Happy Inkin’ Thursday Blog Hop. If you are starting with me, thank you, I hope you will stop by everyone’s blog to see the awesome projects they have created this week. If you are hopping over from Mary’s blog, thank you for stopping by. This week we have a Sketch Challenge to work with. If you’d like to see a quick video on how I made this card, Click Here to go to my Instagram Reels. Here is my card using this week’s Sketch.

Stampin' Up! Delicate Whispers Friend 1 creativestampingdesigns.com

I used the Stampin’ Up! Delicate Whispers Bundle along with the Delicate Dreams Specialty Designer Series Paper (both available March 3) and the Beautiful Patterns 3D Embossing Folder for my card today.

This is our sketch for this week.

Stampin' Up! Delicate Whispers Friend 2 creativestampingdesigns.com

Adhere a panel of Delicate Dreams DSP to a Secret Sea card base. Emboss a smaller panel of Delicate Dreams DSP using the Beautiful Patters EF. Adhere the embossed panel to the card front

Stampin' Up! Delicate Whispers Friend 3 creativestampingdesigns.com

Stamp the sentiment from the Delicate Whispers stamp set in Secret Sea Ink on a panel of Basic White. Adhere the sentiment to the card front with Stampin’ Dimensionals. On a panel of Basic White, stamp the floral image from Delicate Whispers stamp set in Versamark Ink. Sprinkle the image with Copper Embossing Powder and set it using the Heat Tool. Cut the image out using the Delicate Whispers Dies.

Stampin' Up! Delicate Whispers Friend 4 creativestampingdesigns.com

Using the Delicate Whispers Dies, cut the leaf die from a panel of Mossy Meadow, the feathery die from a panel of Secret Sea and the sprig die from a panel of Earthen Toned Metallic Paper. Arrange all the die cuts next to the sentiment. tie a small bow using the Gray Granite 1/4″ Variegated Trim. Adhere the bow to the bottom of the collage. Add a few Natural Matte Dots to the card front.

Stampin' Up! Delicate Whispers Friend 5 creativestampingdesigns.com

Stamp the sentiment from the Delicate Whispers stamp set in Secret Sea Ink on a panel of Basic White. Stamp the small flower image from the Delicate Whispers stamp set on the top corner of the panel. Stamp the feathery image from the Delicate Whispers stamp set in Crumb Cake and Gray Granite Inks on the bottom of the panel. Adhere a panel of Delicate Dreams DSP to the bottom of the panel. Adhere the Basic White panel to a Gray Granite mat then to the inside of the Secret Sea card base.

Stampin' Up! Delicate Whispers Friend 6 creativestampingdesigns.com

Decorate a Basic White Medium Envelope to complete your card. Stamp the feathery image from the Delicate Whispers stamp set in Crumb Cake and Gray Granite Inks on the envelope front. Adhere a panel of Delicate Dreams DSP to the envelope flap.

Stampin' Up! Delicate Whispers Friend 7 creativestampingdesigns.com

Thank you for stopping by my blog today. Now that you’ve seen my card, let’s get on with the hop! Click the next button below to hop over to see what Tara has created. Happy Hopping

Just in case you get lost along the way, here is a list of the team members involved in the hop today.

Amy Koenders

Mary Deatherage

Karen Ksenzakovic You Are Here

Tara Carpenter

Terry Lynn Bright

Nicole Bloxom

********************************************************************************************************

If you need any stamping supplies, I’d love to be your Demonstrator. Just click HERE to go directly to my online store or drop me an email if you have any questions. 

*********************************************************************************************************

Card stock cuts for this project:

  • Basic White Cardstock3/4″ x 2″(sentiment), 2″ x 3 1/4″(die cut), 4″ x 5 1/4″(inner linr)
  • Gray Granite Cardstock 4 1/8″ x 5 3/8″(inner liner mat)
  • Mossy Meadow Cardstock 2 1/2″ x 2 1/2″(die cut)
  • Secret Sea Cardstock 4 1/4″ x 11″(card base scored & folded at 5 1/2″)
  • Delicate Dreams specialty Designer Series Paper 4 1/8″ x 5 3/8″(card front), 2″ x 4 1/8″(card front panel, 1/2″ x 4″(inner liner), 2 1/4″ x 6″(envelope)
  • Earthen Toned Metallic Specialty Paper 1″ x 4″(die cuts)

*********************************************************************************************************

Product List

Stampin’ Up! Delicate Whispers

Good Monday morning stamping friends and welcome to a new week. Is anyone lucky enough to have the day off for Presidents’ Day? I don’t, so I’ll be in the office this morning.

I have a very quick CAS card for you today featuring a new set and DSP coming March 3. If you’d like to see a quick video on how I made this card, Click Here to go to my Instagram Reels. Here is my card for today.

Stampin' Up! Delicate Whispers Hello 1 creativestampingdesigns.com

I used the New Stampin’ Up! Delicate Whispers Stamp Set along with the Delicate Dreams Specialty Designer Series Paper (both avail Mar 3) and the Nested Essentials Dies for my card today.

My design today is from Freshly Made Sketches #723

Stampin' Up! Delicate Whispers Hello 2 creativestampingdesigns.com

Adhere the 2 panels of Delicate Dreams DSP to a Secret Sea mat, overlapping in the center a tiny bit. Wrap a piece of the Gray Granite 1/4″ Variegated Trim (avail Mar 3) around the center and adhere on the back.

Stampin' Up! Delicate Whispers Hello 3 creativestampingdesigns.com

Adhere the layered panel to a Crumb Cake card base. Cut a panel of Basic White using the Nested Essentials Dies. Cut a panel of Secret Sea using the next largest Nested Essentials Dies. Stamp the sentiment from the Delicate Whispers stamp set in Secret Sea Ink on the die cut Basic White panel.

Stampin' Up! Delicate Whispers Hello 4 creativestampingdesigns.com

Adhere the Basic White die cut to the Secret Sea die cut. Adhere the layered sentiment to the card front with Stampin’ Dimensionals over the ribbon. Add a few Natural Matte Dots to the card front

Stampin' Up! Delicate Whispers Hello 5 creativestampingdesigns.com

On a panel of Basic White, stamp the sentiment from the Delicate Whispers stamp set in Secret Sea Ink. Stamp the flower image from the Delicate Whispers stamp set in Secret Sea Ink net to the sentiment. Color the flower image with Crumb Cake and Mossy Meadow Stampin’ Blends Markers. Adhere the Basic Whtie panel to a Secret Sea mat then to the inside of the Crumb Cake card base.

Stampin' Up! Delicate Whispers Hello 6 creativestampingdesigns.com

Decorate a Basic White Medium Envelope to finish your card. Stamp the flower image from the Delicate Whispers stamp set in Secret Sea Ink on the envelope front. Color the image using Crumb Cake and Mossy Meadow Stampin’ Blends Markers. Adhere a panel of Delicate Dreams DSP to the envelope flap.

Stampin' Up! Delicate Whispers Hello 7 creativestampingdesigns.com

Thank you for stopping by my blog today. I hope you like the card and will give it a try. Happy Stamping!!

*********************************************************************************************************

If you need any stamping supplies, I’d love to be your Demonstrator. Just click HERE to go directly to my online store or drop me an email if you have any questions. 

*********************************************************************************************************

February 3 – March 2 – Stampin’ Up! Joining Special – Free Positioning Tool

Stampin’ Up! has an amazing new tool that will be available for FREE with the purchase of a Starter Kit between February 3-March 2!!  Anyone that purchases the Starter Kit during the promotion will get the awesome new Stampin’ Positioner with their Starter Kit absolutely FREE!! As a bonus for joining my team, you get to attend all my monthly Online Classes absolutely FREE. Contact me today and we can talk about getting you signed up.

Here are the Starter Kit promotion details:

  • Promotion Period: February 3–March 2
  • New team members who purchase their Starter Kit February 3–March 2 will also receive our new Stampin’ Positioner*.
  • New demonstrators who submit their Independent Demonstrator Agreement (IDA) before February 3 or after March 2 will not be eligible for this offer.
  • Joining deadline:  March 2, 2026, at 11:59 p.m. (MT)

*What’s the Stampin’ Positioner?

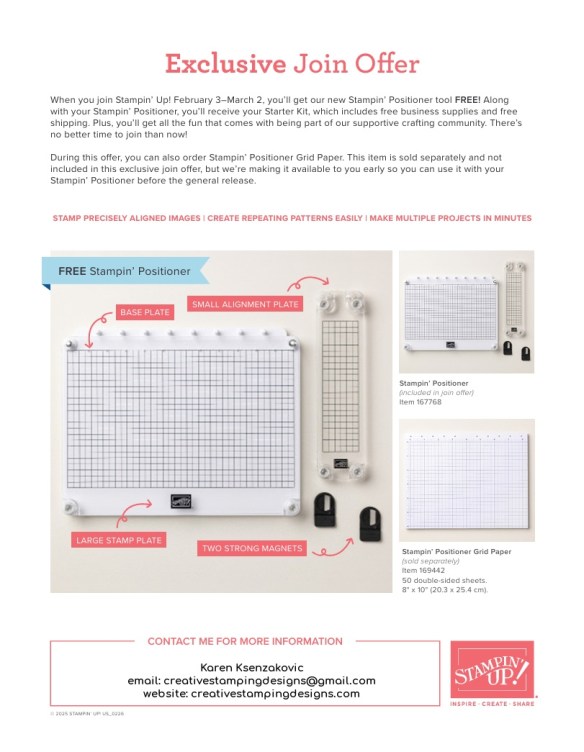
It’s Stampin’ Up!’s new stamping alignment tool that makes stamping easier and more accurate. It allows you to stamp precisely aligned images, create repeating patterns and Two-Step Stampin’ images easily, and make multiple projects in minutes.

Stampin’ Positioner Grid Paper will also be available for to order but it is not included as part of this exclusive join offer.

A few other things to know:

  • The Stampin’ Positioner WILL be available for purchase by everyone at a later date.  We have not been given any details on when that will be.
  • The Stampin’ Positioner is available for a limited time for current Demonstrators to purchase.

You can read more details about the joining offer on this PDF (click the image to open a full-size printable PDF):

We’d love to have you join our team!!  Once you join, you get at least a 20% discount on all of your Stampin’ Up! purchases and you get to preorder from the upcoming catalogs and promotions!! You can attend the Stampin’ Up! events too. There’s never an obligation to sell, you can join to enjoy the discount for yourself. Contact me if you have any questions and we can talk. I’d love to have you on my team. I’d be more than happy to answer any of your questions, contact me at creativestampingdesigns@gmail.com

You can read a bit more information about the benefits of being a Demonstrator and a part of our team here.  When you’re ready to join, you can get started here.  Let me know if you have any questions.

*********************************************************************************************************

Redeem Those Bonus Days Coupons February 3 – 28

  • Redemption Period: February 3–28, 2026
    • There is no limit to the number of coupon codes you can redeem on an order during the redemption period. If you’re redeeming multiple codes, you must put a space between each code.
    • You may only redeem coupon codes one time. You cannot redeem them after February 28.
    • You can redeem Bonus Days coupon codes for month-to-month Paper Pumpkin subscriptions and new prepaid subscriptions.
    • Some restrictions apply. Coupons can’t be redeemed towards Starter Kits and you cannot use them on exchanges.
    • Redemption period ends:  February 28, 2026, at 11:59 p.m. (MT)

*********************************************************************************************************

Card stock cuts for this project:

  • Basic White Cardstock 1 1/2″ x 4″(sentiment), 4″ x 5 1/4″(inner liner)
  • Crumb Cake Cardstock 4 1/4″ x 11″(card base scored & folded at 5 1/2″)
  • Secret Sea Cardstock (2) – 4 1/8″ x 5 3/8″(card front & inner liner mats), 2″ x 4″ (sentiment mat)
  • Delicate Dreams Specialty Designer Series Paper (2) – 2 3/4″ x 4″(card front panels), 2 1/4″ x 6″(envelope)

*********************************************************************************************************

Product List