
Good Sunday morning stamping friends. I hope your weekend is going well. by the time you read this I’ll be flying high in the sky to Seattle Washington for the Stampin’ Up! Incentive Trip. I want to start by thanking all my wonderful customers and team for helping me earn this trip. I couldn’t have done it without you and your support. I will have my computer with me, but I may take a little longer to reply, but I will just as soon as I’m able to. I’m required by Stampin’ Up! to add: Typically, only the top 1% of demonstrators earn the trip. These achievements represent my individual accomplishments, and do not reflect those of the typical Stampin’ Up! demonstrator. Please be aware that fewer than 1% of Stampin’ Up! demonstrators earn the incentive trip and there is no guarantee of similar results.
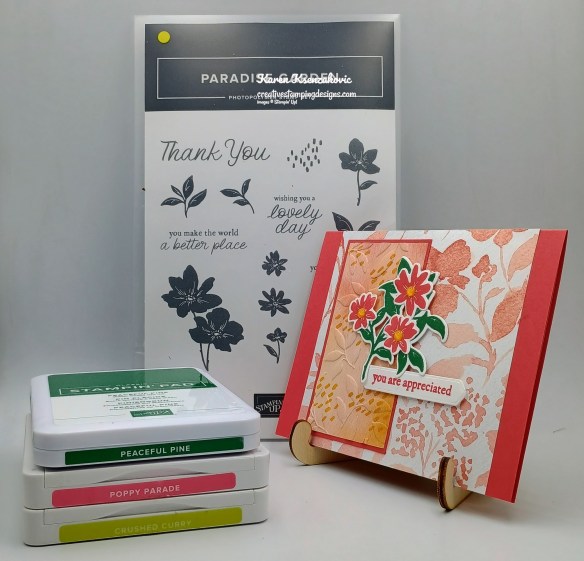
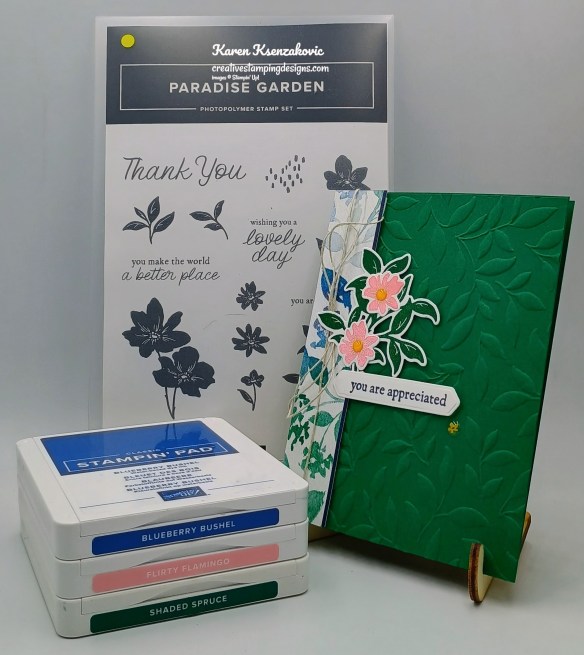
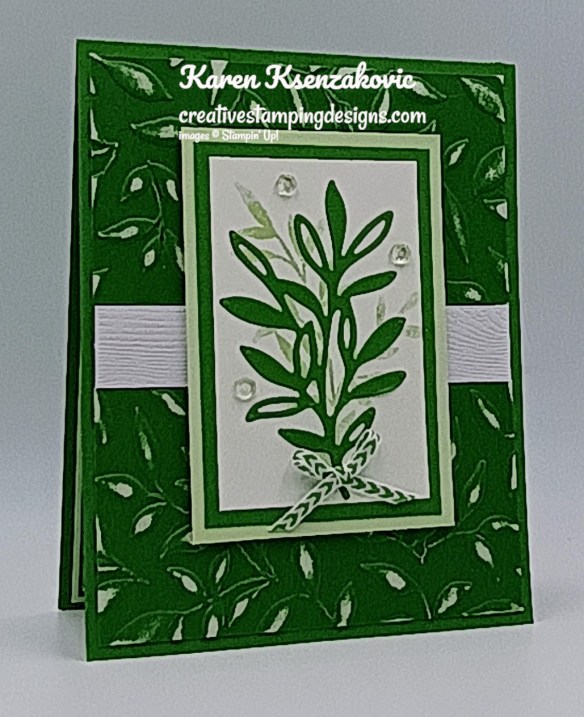
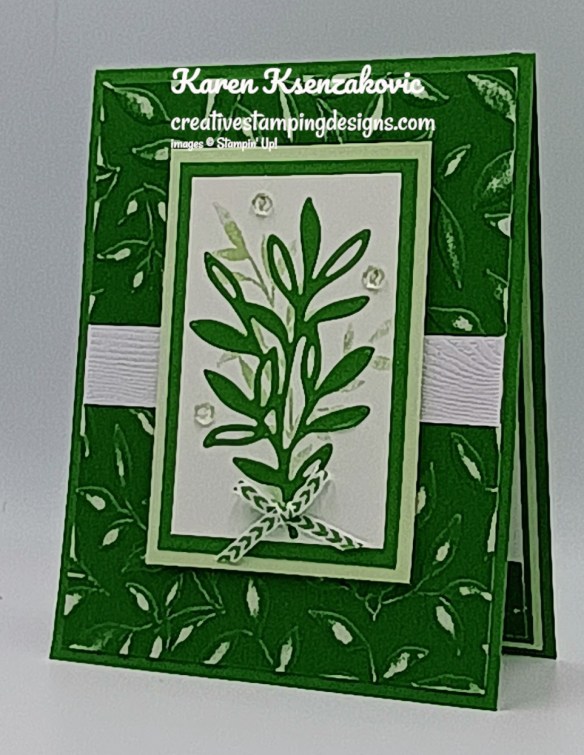
My cards throughout the week will be a part of a One Sheet Wonder series. I’ve made 5 cards with 1- 6 x 6 panel of Designer Series Paper. You may have seen some of these designs in the past couple of weeks featuring different DSP. Here’s my 1st card for the week.
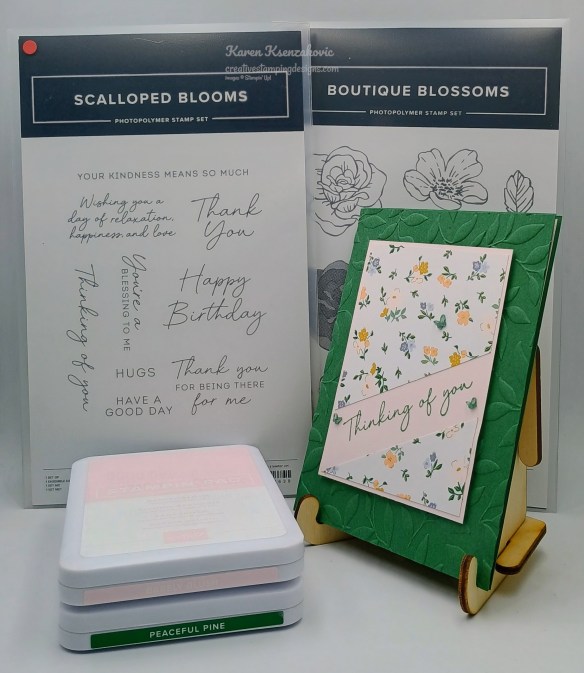
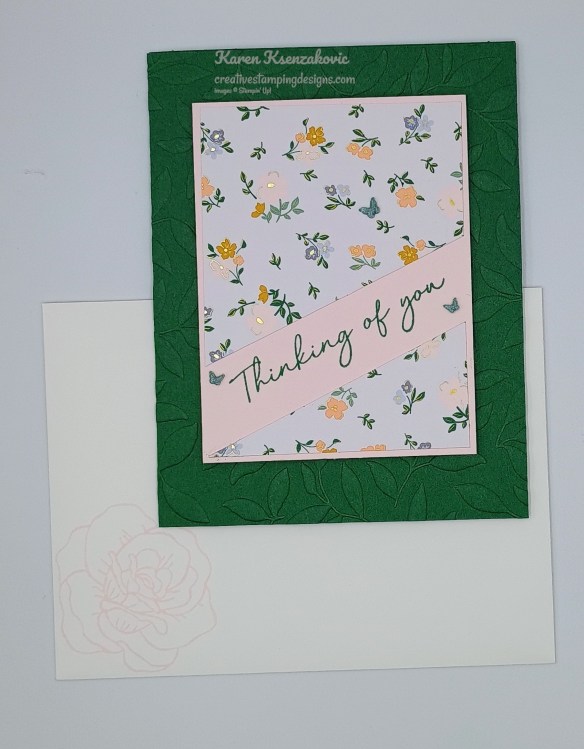
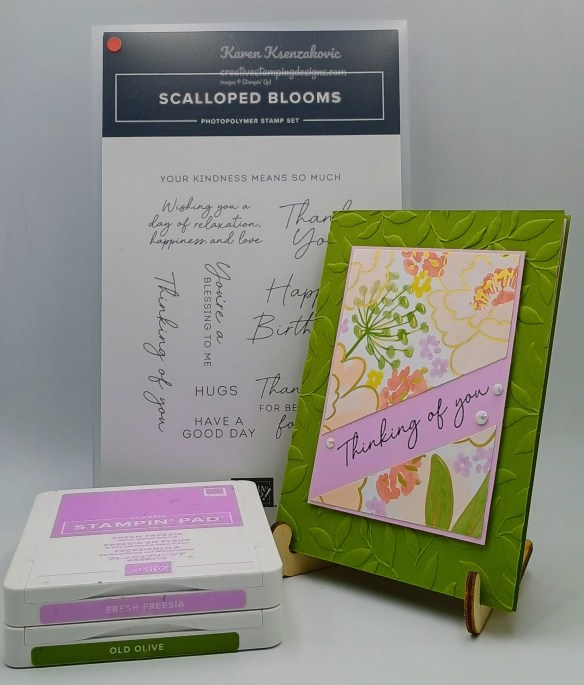
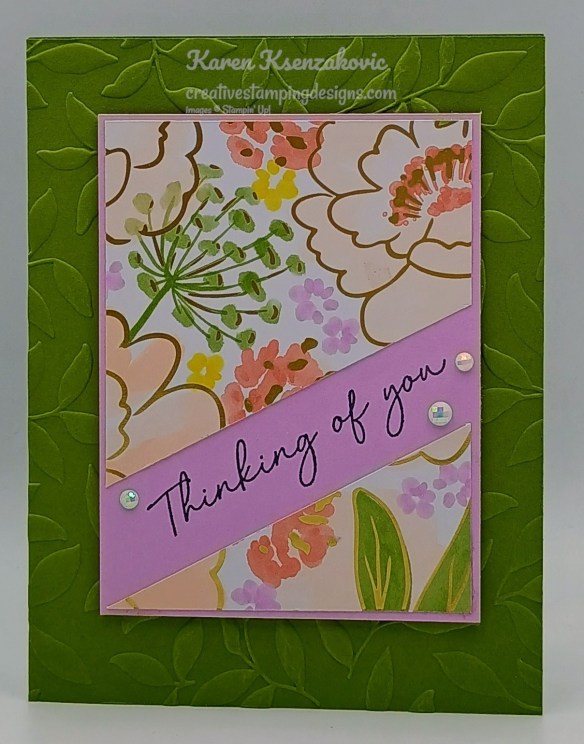
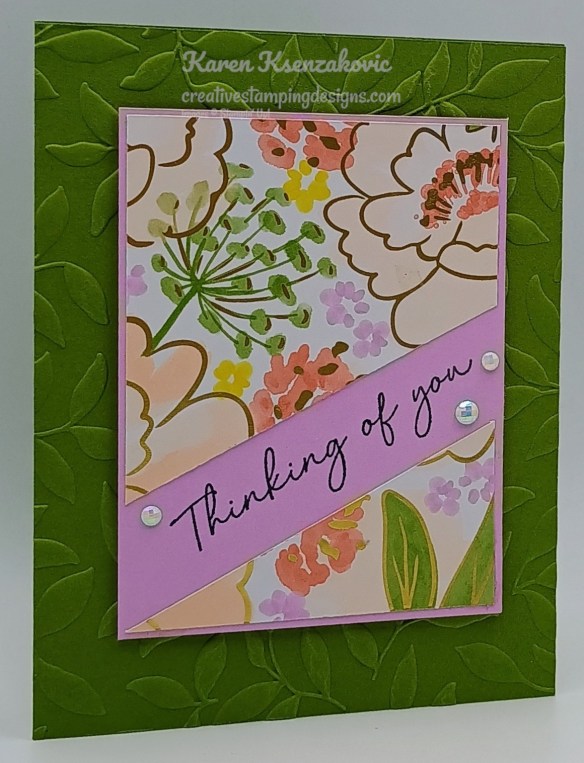
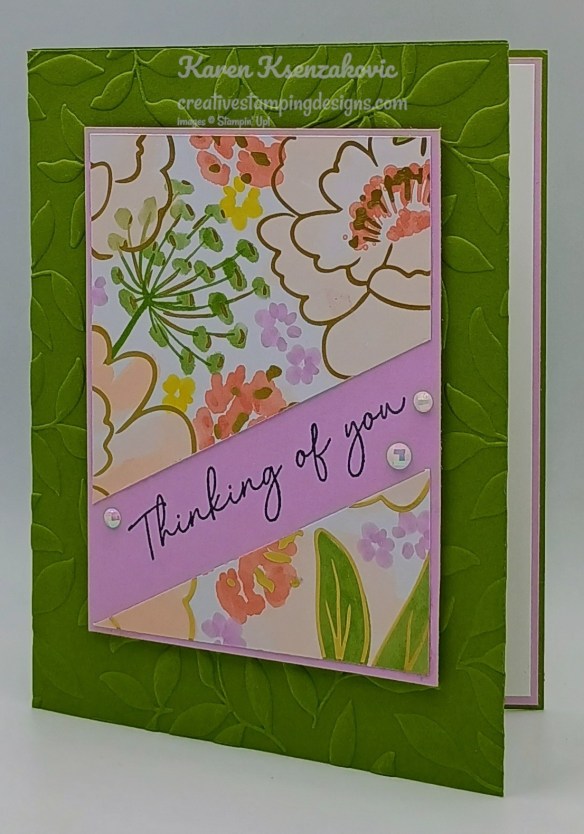
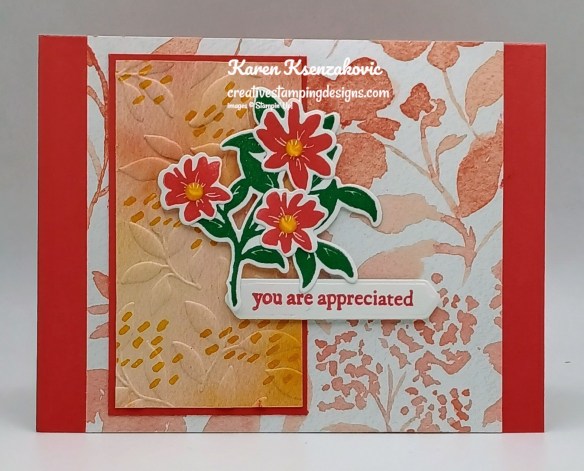
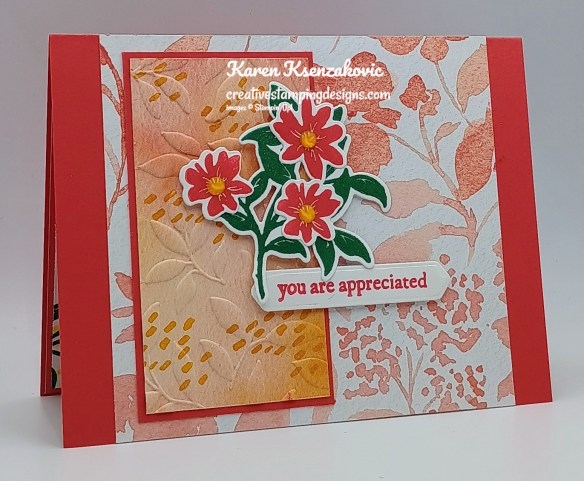
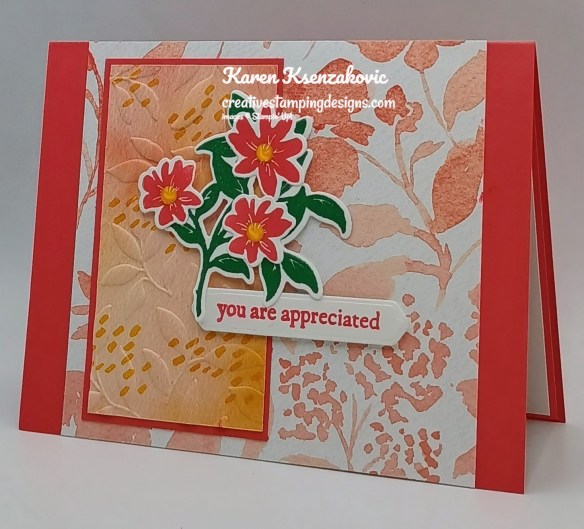
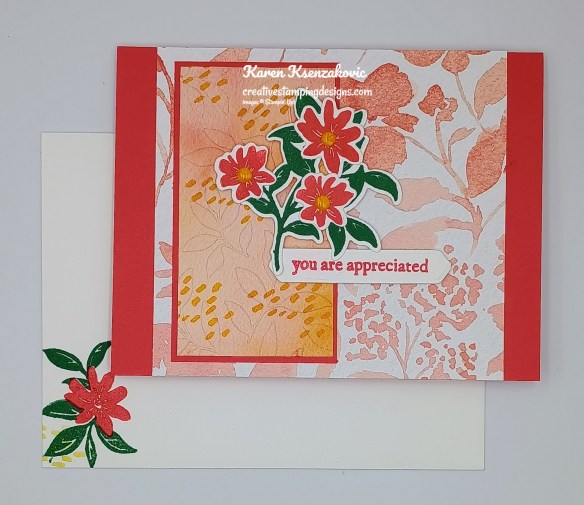
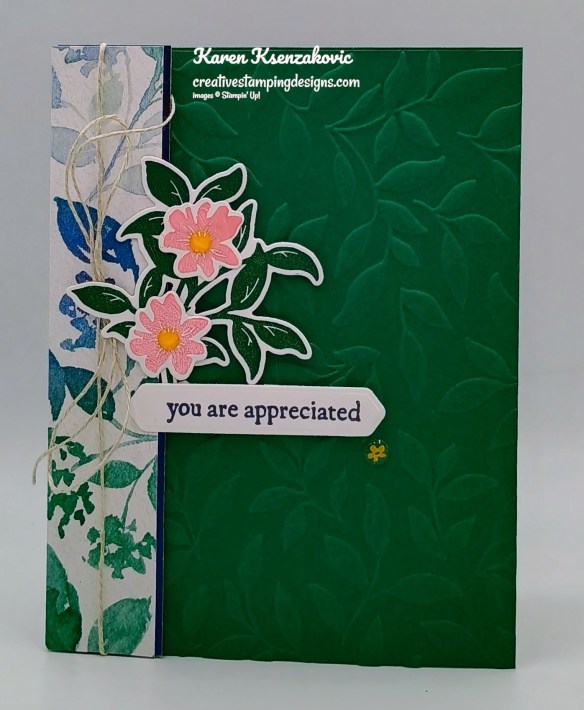
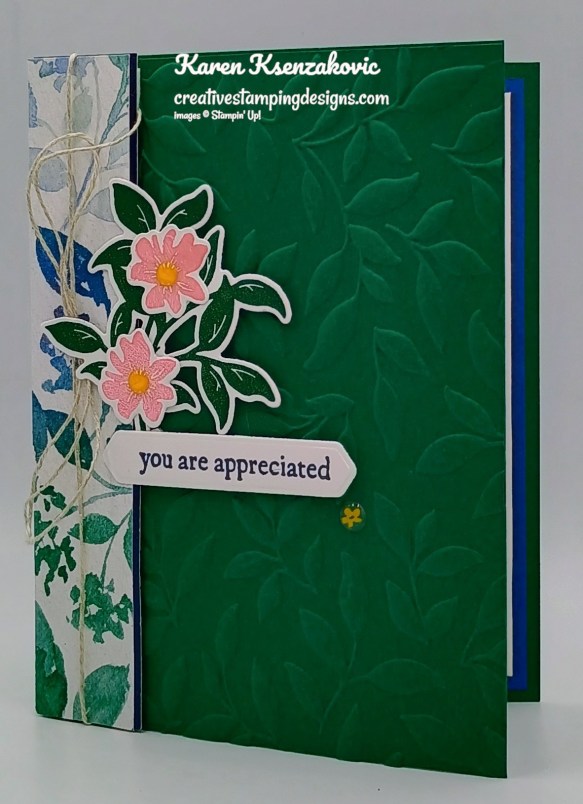
I used the Stampin’ Up! Scalloped Blooms Stamp Set, Stampin’ Up! Boutique Blossoms Stamp Set, Paradise Garden Hybrid Embossing Folder and Bloom Boutique Specialty Designer Series Paper for my card today.
Emboss a panel of Peaceful Pine using the Paradise Garden EF. Adhere the embossed panel to a Peaceful Pine card base.
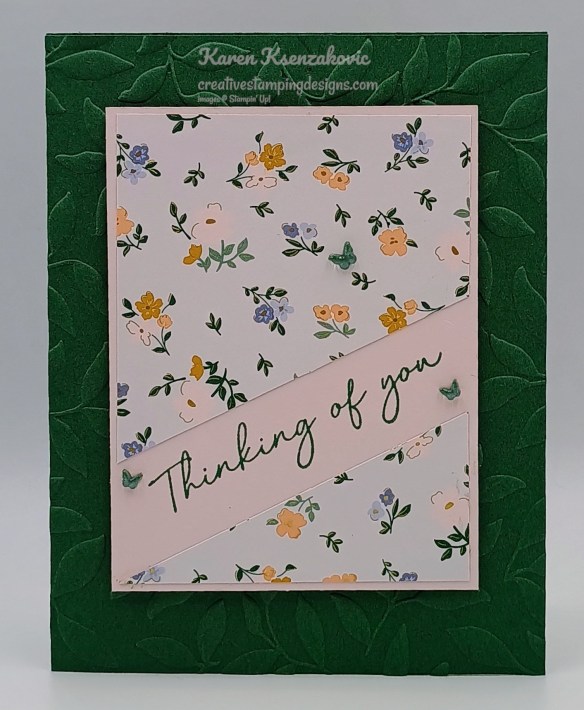
Cut a panel of Bloom Boutique DSP on an angle. Adhere the 2 cut panels of DSP to the Barely Blush mat. Stamp the sentiment from the Scalloped Blooms stamp set in Peaceful Pine Ink on an angle between the 2 panels of DSP.
Adhere the layered panel to the card front with Stampin’ Dimensionals. Add a few 2026-2028 In-Color Butterflies to the card front.
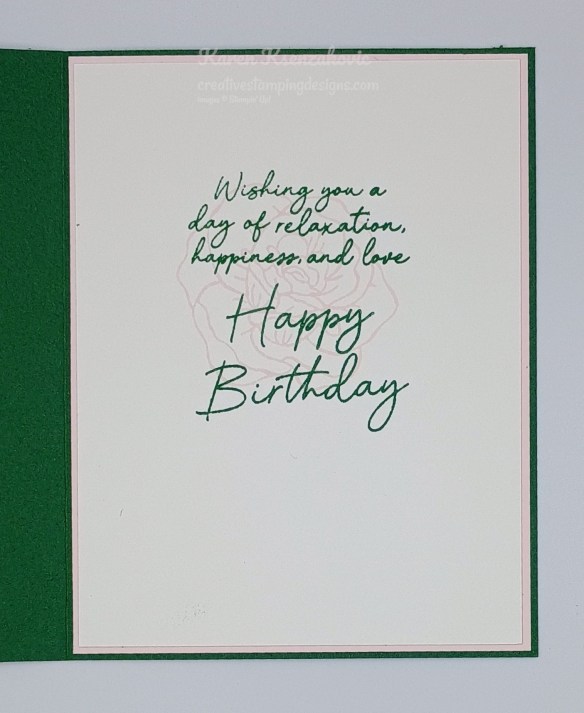
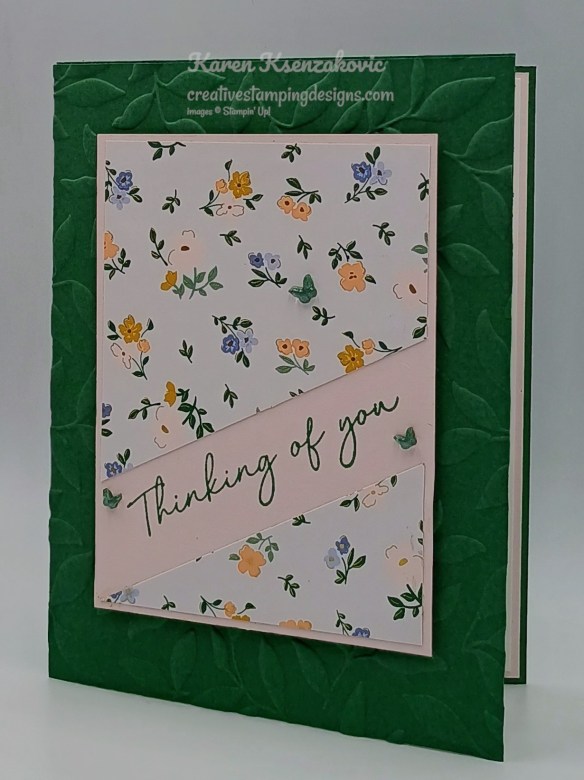
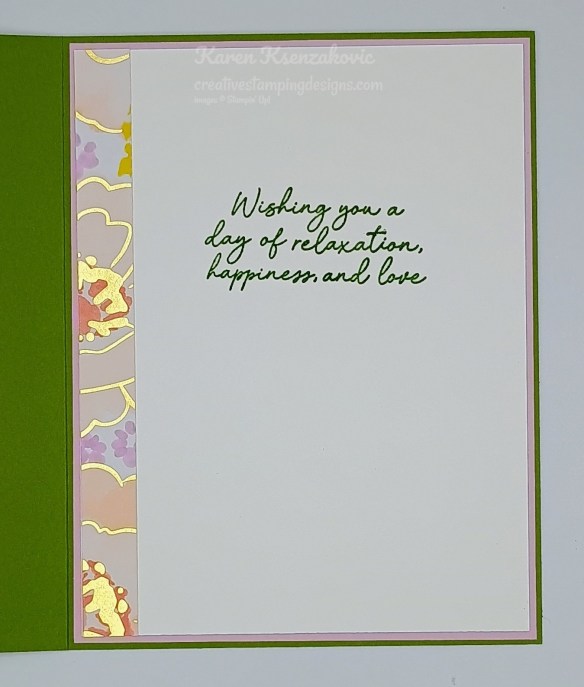
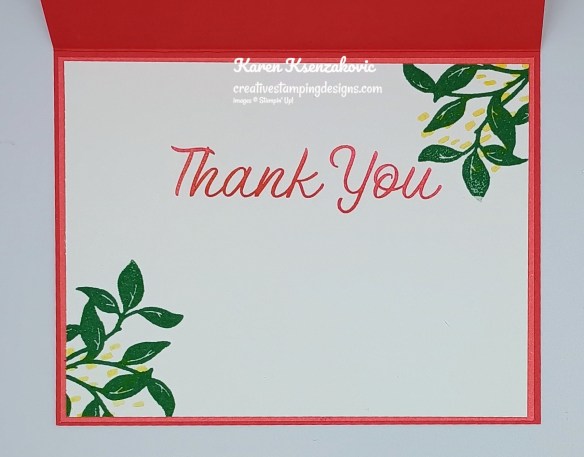
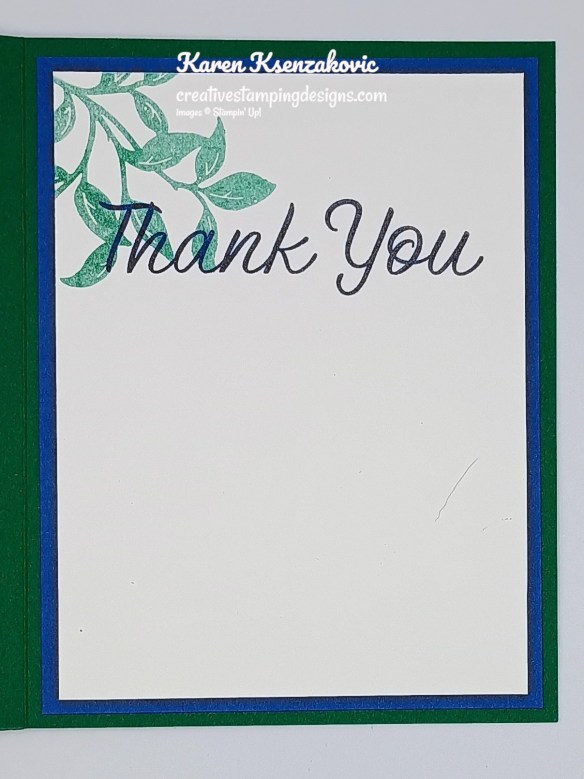
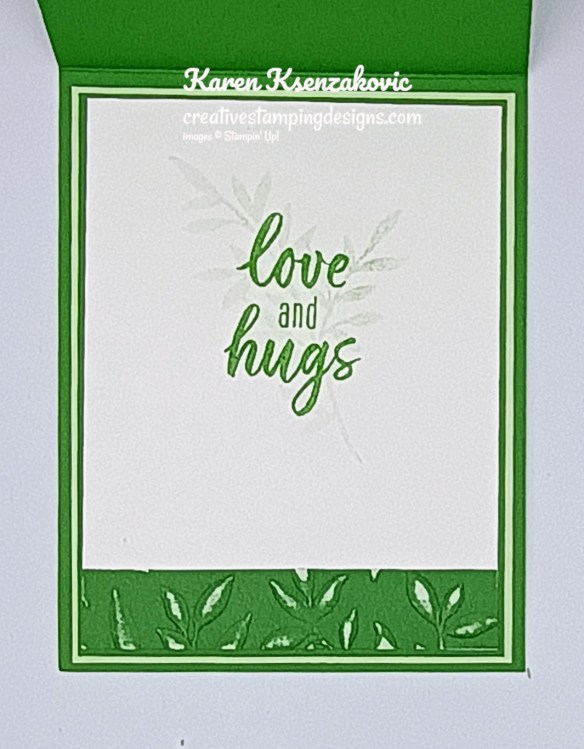
Stamp the sentiments from the Scalloped Blooms stamp set in Peaceful Pine Ink on a panel of Basic White. Stamp the large outline flower image from the Boutique Blossoms stamp set in Barely Blush Ink over the sentiments. Adhere the Basic White panel to a Barely Blush mat then to the inside of the Peaceful Pine card base.
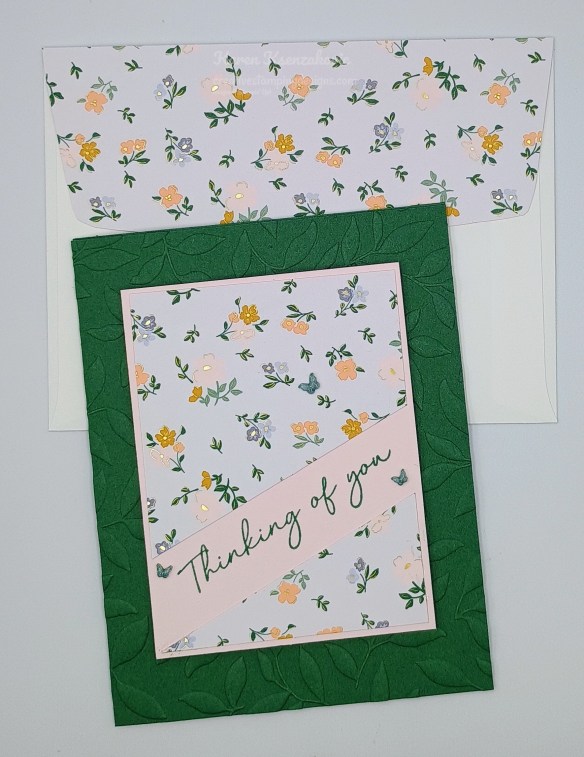
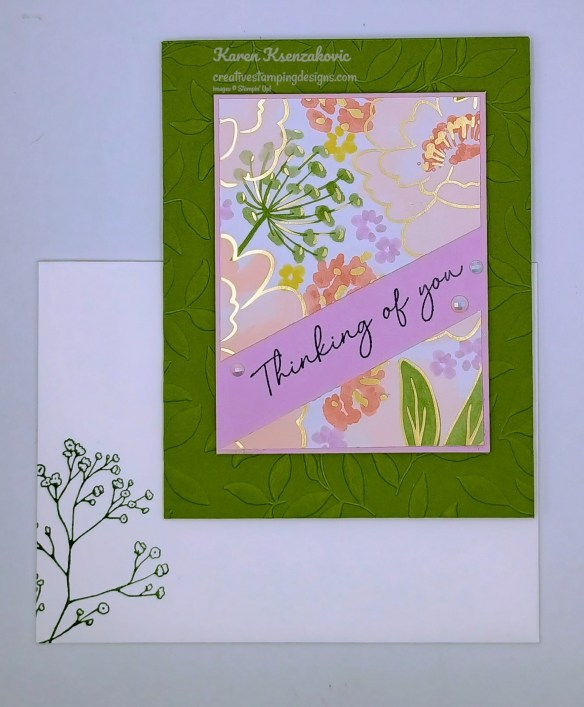
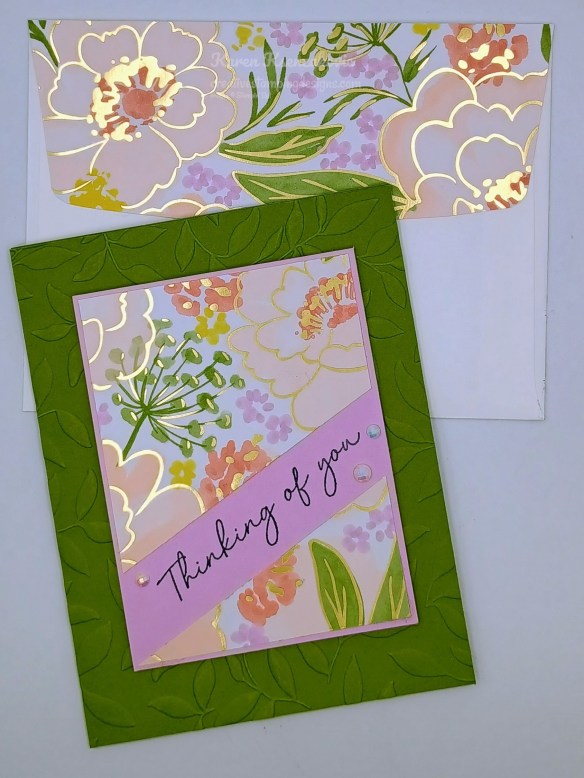
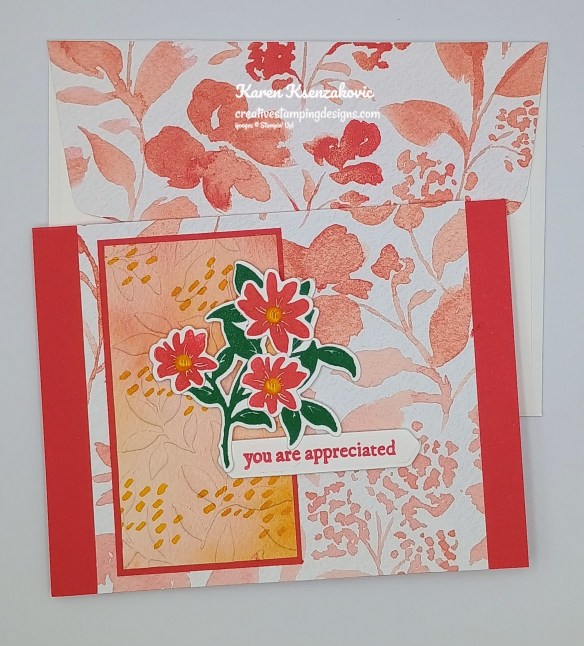
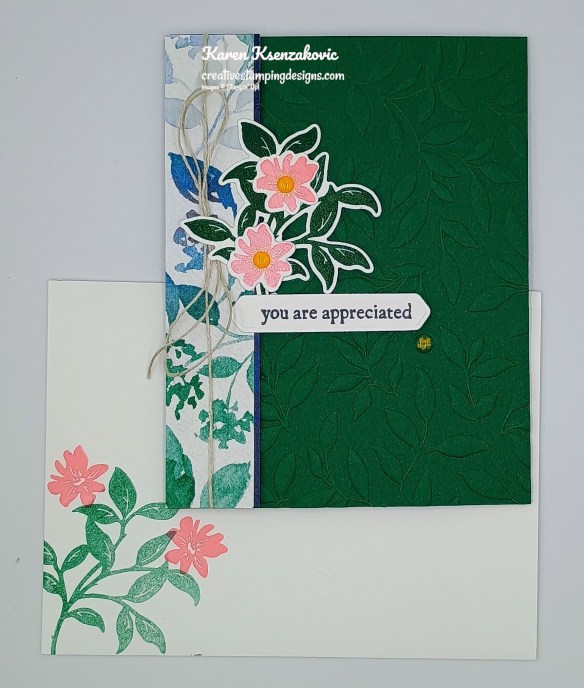
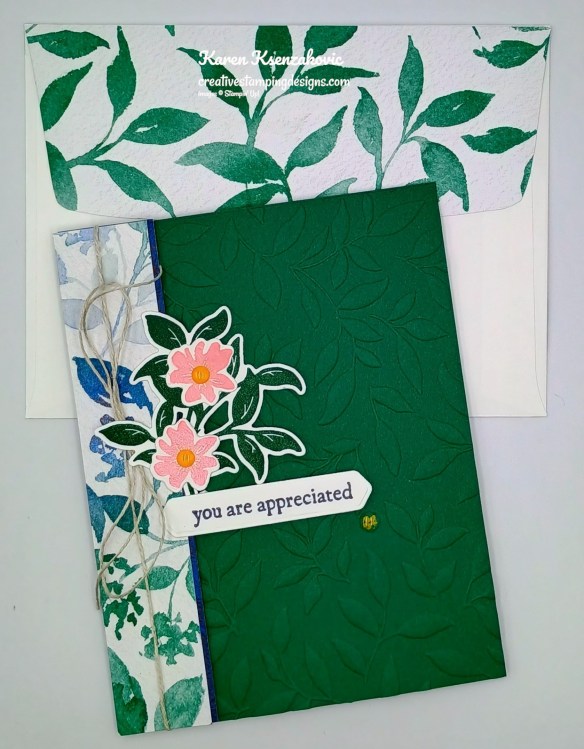
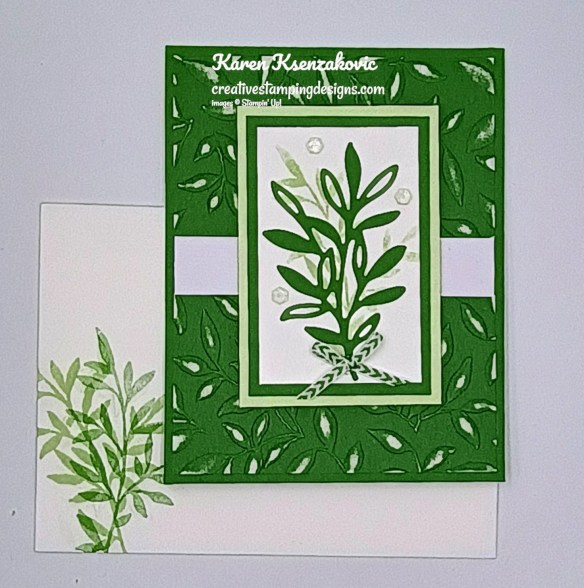
Decorate a Basic White Medium Envelope to finish your card. Stamp the large flower outline image from the Boutique Blossoms samp set in Barely Blush Ink on the envelope front. Adhere a panel of Bloom Boutique DSP to the envelope flap.
Thank you for stopping by my blog today. I hope you like my card and will give it a try. Happy Stamping!!
*********************************************************************************************************
If you need any stamping supplies, I’d love to be your Demonstrator. Just click HERE to go directly to my online store or drop me an email if you have any questions.
*********************************************************************************************************
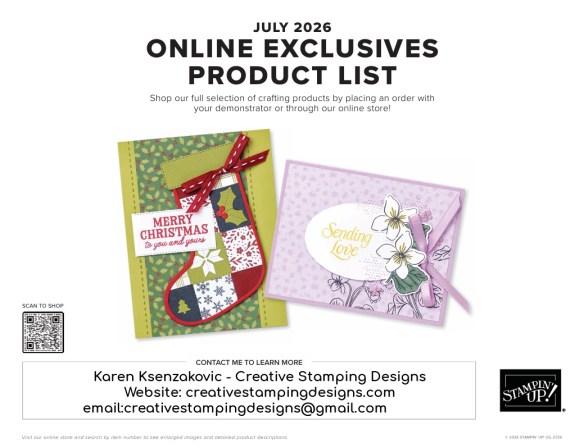
July Online Exclusive Product Share
I’m offering a small product share from the upcoming July Online Exclusives. I’m offering a Paper Share and/or an Embellishment & Ribbon Share. If you click on the image below you can open the flyer with the products coming in July. Once you view the products coming and you don’t want to wait for them, consider joining my team and get a discount on everything. You can even add the July Online Exclusives to your starter kit. See more information about joining below.
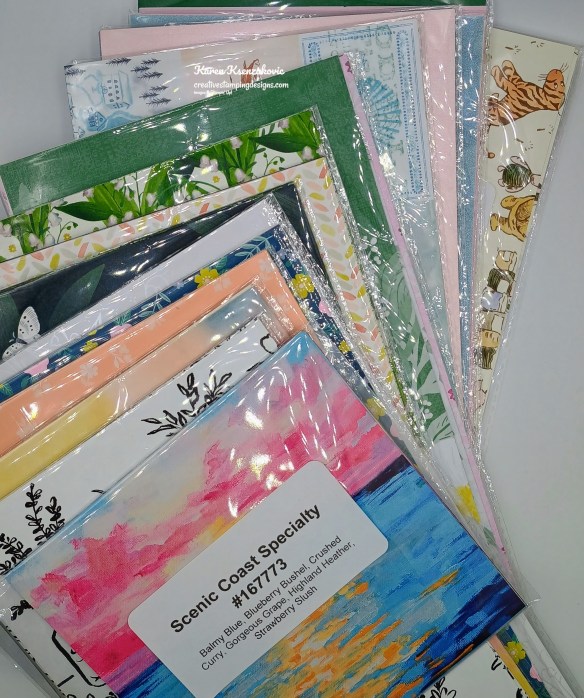
I’m offering a Paper Share and a Ribbon & Embellishment Share from the July 2026 Online Exclusives, and I’d love to have you join!! I’m placing my share order early on July 1st and I’m going to use the expedited shipping option so I should be able to have the shares cut, bundled and back out to you during the week of July 6th. Wouldn’t you love to have all of the gorgeous and fun new Papers in the upcoming July 2026 Online Exclusives? What is a Paper Share you ask? It’s a sample of each of the new Papers from the Online Exclusives. Shares give you a good working sample of all of the papers so that you can decide which ones to order in full packs! If you were to purchase all of the papers from the Online Exclusives, it would cost you over $90.00 plus shipping.
How my shares work: I order full packs of all of the Papers listed below, I cut them into 6″ X 6″ pieces (or 6″ X 12″ pieces for double shares) and give you one panel of each design from each pack on the list. I pack up the paper in a cellophane bag with labels listing the Name, Item # and Colors in the pack and mail it back out to you just as quickly as I can!
New Designer Series Paper Share – $10.50 plus $7.00 for shipping
You will receive one 6×6 sheet of each design from the following DSP packs (the number after the name indicates how many 6×6 sheets of that paper pack you will receive):
- Frightfully Fun (6)
- Frightfully Fun Two-Tone Cardstock (6)
- Spooktacular (6×6) (4)
- 2026-2028 In-Color Gingham (5)
- A Stitched Season (6)
- Violet Dreams Specialty (5)
If you’d like double shares of the paper, I’m offering those too! I’ll cut the 12″ x 12″ sheets into 6″ × 12″ so that you’ll be able to get 3 full A2 size card fronts from each sheet and you’ll get double sheets of the 6″ x 6″ since they’re already precut.
Double Paper Share – $21.00 Plus $7.00 Shipping
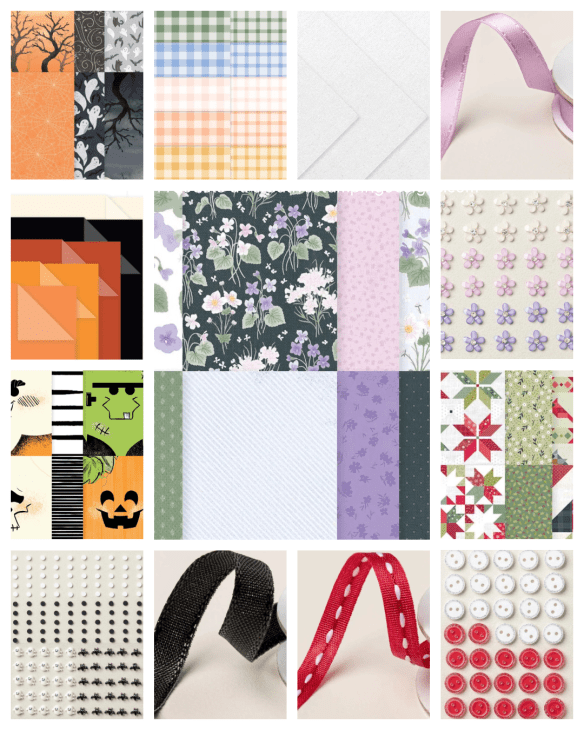
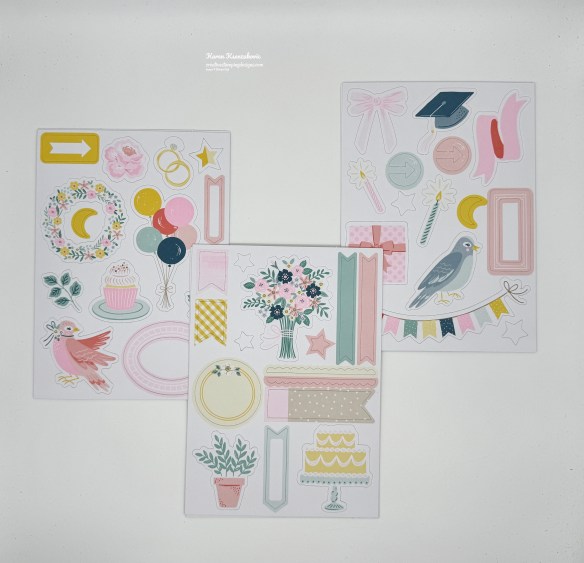
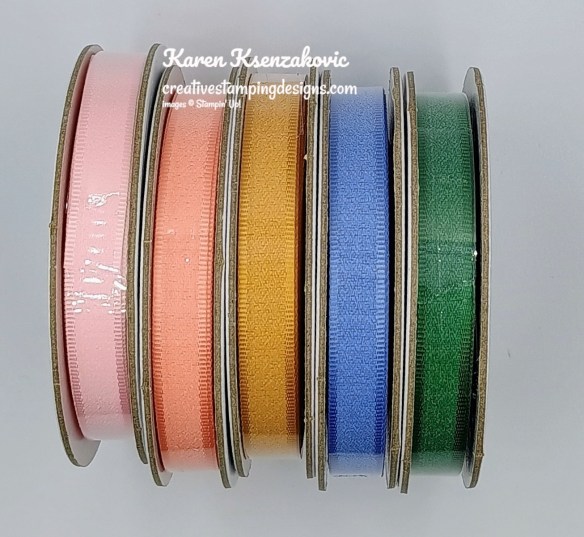
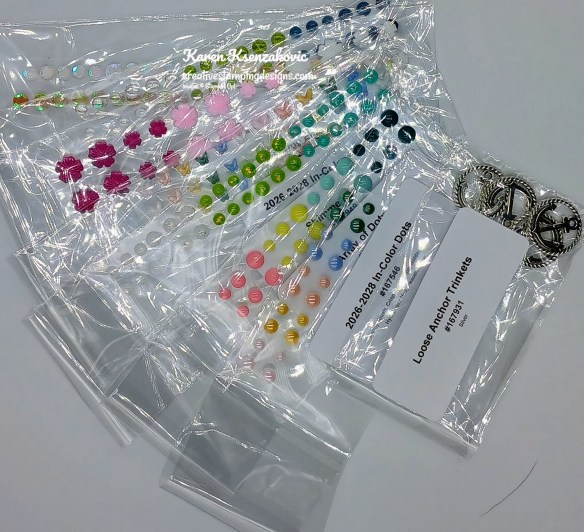
Ribbon/Embellishment Share – $12.50 plus $7.00 Shipping
All ribbons and Embellishments will come individually wrapped and labeled with the name and number of the product.
One-Fourth of a Roll of each:
- Black 3/8″ Iridescent Ribbon
- Fresh Freesia 1/4″ Satin Ribbon
- Real Red 1/4″ Stitched Ribbon
- Adhesive-Backed Bats Ghosts & Dots (30)
- Adhesive-Backed Blooms (15)
- Adhesive-Backed Mini Christmas Buttons (10)
Double Ribbon & Embellishment Share – $25.00 Plus $7.00 Shipping and you will be getting 1/2 of the roll of each ribbon.
Anyone is welcome to join in my shares (please note, I can only ship to addresses within the US). To make ordering the shares a little easier, I have created a form for you to submit, that way you can order any combination of shares you want. Click Here for the form. I will send out PayPal Invoices on or around June 27th with a due date by June 30th.
Deadline to sign up for my share is Saturday June 27th at 5:00 PM ET.
*********************************************************************************************************
2026-2028 In-Color Extras Bundles
I LOVE the new Stampin’ Up! 2026-2028 In Colors so much and I wanted to offer you a little extra discount to help pick up the In-Color extras and save a little too! The prices include shipping and taxes, so what you see is what you’ll pay!!
The Stampin’ Blends Bundle – $59
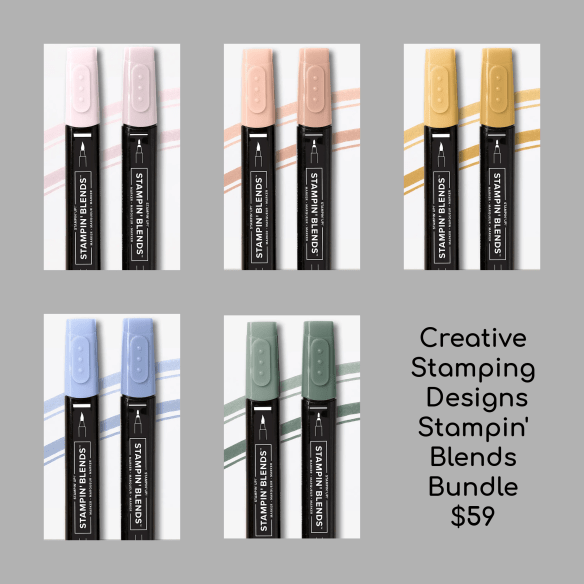
The Stampin’ Blends Bundle Includes:
- Barely Blush Stampin’ Blends Combo Pack
- Crisp Cantaloupe Stampin’ Blends Combo Pack
- Golden Glow Stampin’ Blends Combo Pack
- Hydrangea Hue Stampin’ Blends Combo Pack
- Peaceful Pine Stampin’ Blends Combo Pack
If you ordered these items yourself, you’d pay $60 + shipping and tax. You’ll get all of these items for just $59 and that includes shipping and taxes!!
Shimmer Bursh Bundle – $49
The Shimmer Bursh Bundle Includes:
- Barely Blush Shimmer Brush
- Crisp Cantaloupe Shimmer Brush
- Golden Glow Shimmer Brush
- Hydrangea Hue Shimmer Brush
- Peaceful Pine Shimmer Brush
If you ordered these items yourself, you’d pay $50 + shipping and tax. You’ll get all of these items for just $49 and that includes shipping and taxes!!
The Ribbon Bundle
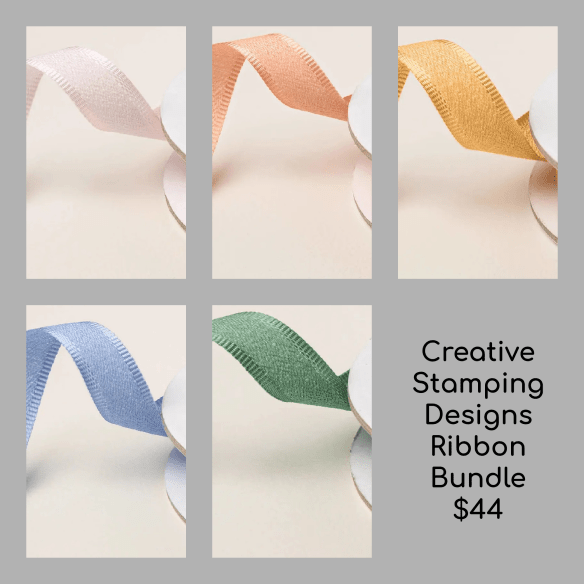
The Ribbon Bundle Includes:
- Barely Blush 3/8″ Bordered Ribbon
- Crisp Cantaloupe 3/8″ Bordered Ribbon
- Golden Glow 3/8″ Bordered Ribbon
- Hydrangea Hue 3/8″ Bordered Ribbon
- Peaceful Pine 3/8″ Bordered Ribbon
If you ordered these items yourself, you’d pay $45 + shipping and tax. You’ll get all of these items for just $44 and that includes shipping and taxes!!
You are welcome to pick one, two or all three of my bundles! Signups for my bundles ends at 10 PM ET on Wednesday, June 10. Invoices are due upon receipt. I’ll be ordering the bundles you pick, and they will be shipped directly to you from Stampin’ Up!
If you’d like to purchase one, two or all three of my bundles, please fill out this form.
Let me know if you have any questions. Thanks for checking out my bundles!
*********************************************************************************************************
TODAY is the LAST DAY for the Starter Kit Special – FREE In Color Ink Pads OR $35 Additional FREE Products In Your Starter Kit
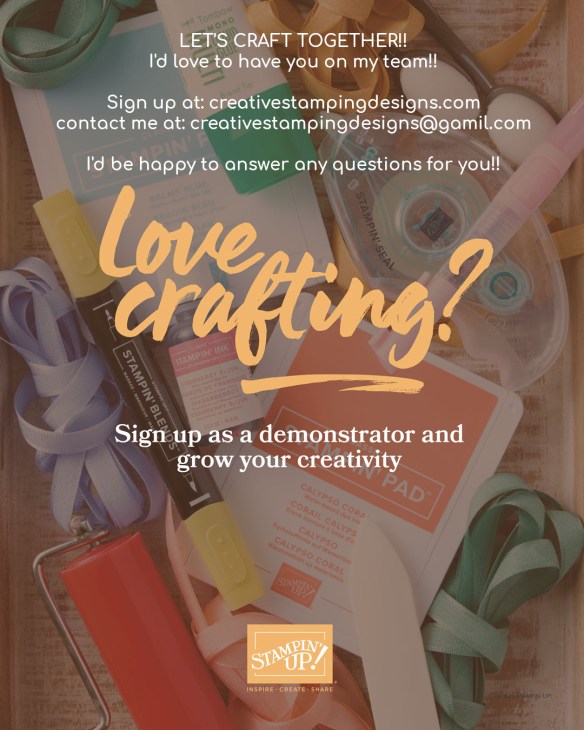
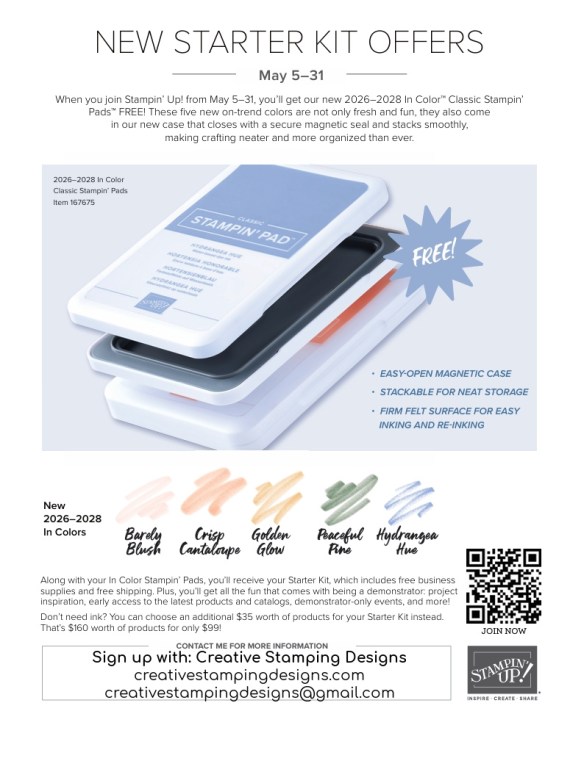
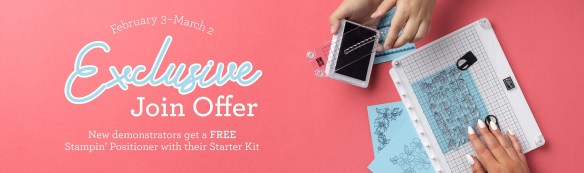
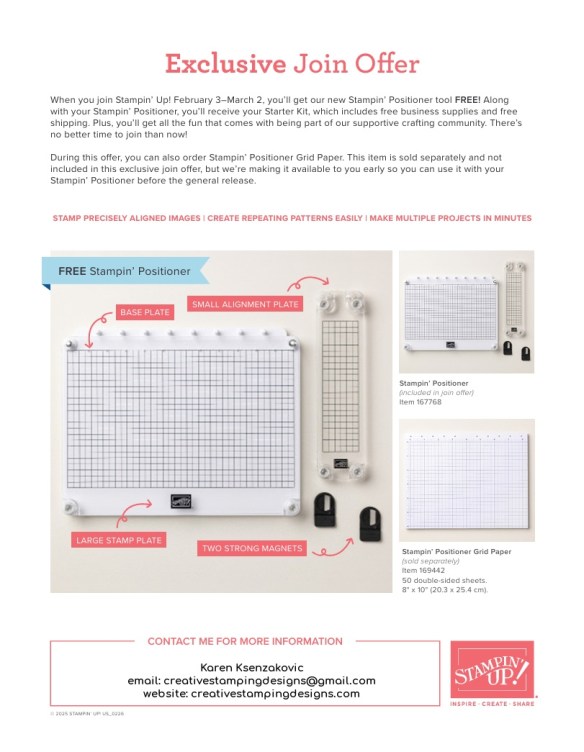
Today is the last day to join this amazing community and join my team. Demonstrators are able to preview and preorder the new July Online Exclusives now. Did you know that you can put the July Online Exclusives in your Starter Kit? How would you like to get them at a discount too? I don’t know about you, but I LOVE discounts!!! When you purchase the Stampin’ Up! Starter Kit between May 5-31, you’ll get the new 2026–2028 In Color Stampin’ Pads FREE (that’s a $63 value) along with your Starter Kit! Or, if you’d rather have different products instead of ink pads, you can add an extra $35 worth of products to your Starter Kit!
Once you purchase the kit, but wait until May 5, you’ll enjoy all the perks that come with being a demonstrator, like a 20–25% product discount, early access to the latest products and catalogs, the chance to attend incredible training and crafting events, and so much more! Did you know that if Stampin’ Up! is having a sale, as a Demonstrator you get the additional discount on top of your 20-25% off? Also, as an extra little bonus for joining my team, you can attend all my Monthly Online Classes for FREE. There’s never an obligation to sell, you can join to enjoy the discount for yourself. Are you unsure and have questions? Contact me and we can talk. I’ll tell you exactly what to expect when you join.
Click the image below to open this flyer in full size.
Details:
- Promotion Period: May 5–31
- Promotion Ends: May 31 at 11:59 p.m. (MT)
- When you purchase the Starter Kit from May 5–31 you will be able to choose between these two offers:
- Free 2026–2028 In Color Stampin’ Pads plus the regular Starer Kit products (your choice of $125 in Stampin’ Up! merchandise) for just $99
- $160 worth of products in their Starter Kit for just $99 (that’s an extra $35 value!)
- New demonstrators who submit their Independent Demonstrator Agreement (IDA) before May 5 or after May 31 will not be eligible for these offers.
2 great joining offers…you can either choose to get the new In Color Ink Pads for free with your Starter Kit OR additional $35 in free merchandise with your Stater Kit!
Click Here to Sign Up!
*********************************************************************************************************
Card stock cuts for this project:
- Basic White Cardstock 4″ x 5 1/4″(inner linr)
- Barely Blush Cardstock 3 1/8″ x 4 1/8″(mat), 4 1/8″ x 5 3/8″(mat)
- Peaceful Pine Cardstock 5 1/2″ x 8 1/2″(card base scored & folded at 4 1/4″), 4 1/4″ x 5 1/2″(card front)
- Bloom Boutique Specialty Designer Series Paper 3″ x 3″(card front panel), 2 1/4″ x 6″(envelope flap)
*********************************************************************************************************
Product List
![Scalloped Blooms Photopolymer Stamp Set (English) [ 167639 ]](https://assets1.tamsnetwork.com/images/EC042017NF/167639s.jpg "Scalloped Blooms Photopolymer Stamp Set (English) [ 167639 ]")
![Boutique Blossoms Photopolymer Stamp Set [ 167652 ]](https://assets1.tamsnetwork.com/images/EC042017NF/167652s.jpg "Boutique Blossoms Photopolymer Stamp Set [ 167652 ]")
![Barely Blush 8 1/2" X 11" Cardstock [ 167689 ]](https://assets1.tamsnetwork.com/images/EC042017NF/167689s.jpg "Barely Blush 8 1/2\" X 11\" Cardstock [ 167689 ]")
![Basic White 8 1/2" X 11" Cardstock [ 166780 ]](https://assets1.tamsnetwork.com/images/EC042017NF/166780s.jpg "Basic White 8 1/2\" X 11\" Cardstock [ 166780 ]")
![Peaceful Pine 8 1/2" X 11" Cardstock [ 167691 ]](https://assets1.tamsnetwork.com/images/EC042017NF/167691s.jpg "Peaceful Pine 8 1/2\" X 11\" Cardstock [ 167691 ]")
![Bloom Boutique 12" X 12" (30.5 X 30.5 Cm) Specialty Designer Series Paper [ 167637 ]](https://assets1.tamsnetwork.com/images/EC042017NF/167637s.jpg "Bloom Boutique 12\" X 12\" (30.5 X 30.5 Cm) Specialty Designer Series Paper [ 167637 ]")
![Barely Blush Classic Stampin Pad [ 167678 ]](https://assets1.tamsnetwork.com/images/EC042017NF/167678s.jpg "Barely Blush Classic Stampin Pad [ 167678 ]")
![Peaceful Pine Classic Stampin Pad [ 167679 ]](https://assets1.tamsnetwork.com/images/EC042017NF/167679s.jpg "Peaceful Pine Classic Stampin Pad [ 167679 ]")
![Paradise Garden Hybrid Embossing Folder [ 167120 ]](https://assets1.tamsnetwork.com/images/EC042017NF/167120s.jpg "Paradise Garden Hybrid Embossing Folder [ 167120 ]")
![2026–2028 In Color™ Butterflies [ 167656 ]](https://assets1.tamsnetwork.com/images/EC042017NF/167656s.jpg "2026–2028 In Color™ Butterflies [ 167656 ]")
![Basic White Medium Envelopes [ 159236 ]](https://assets1.tamsnetwork.com/images/EC042017NF/159236s.jpg "Basic White Medium Envelopes [ 159236 ]")
![Stampin' Cut & Emboss Machine [ 149653 ]](https://assets1.tamsnetwork.com/images/EC042017NF/149653s.jpg "Stampin' Cut & Emboss Machine [ 149653 ]")
![Mini Glue Dots [ 103683 ]](https://assets1.tamsnetwork.com/images/EC042017NF/103683s.jpg "Mini Glue Dots [ 103683 ]")
![Multipurpose Liquid Glue [ 110755 ]](https://assets1.tamsnetwork.com/images/EC042017NF/110755s.jpg "Multipurpose Liquid Glue [ 110755 ]")
![Stampin' Dimensionals [ 104430 ]](https://assets1.tamsnetwork.com/images/EC042017NF/104430s.jpg "Stampin' Dimensionals [ 104430 ]")
![Stampin' Seal [ 152813 ]](https://assets1.tamsnetwork.com/images/EC042017NF/152813s.jpg "Stampin' Seal [ 152813 ]")
![Bone Folder [ 102300 ]](https://assets1.tamsnetwork.com/images/EC042017NF/102300s.jpg "Bone Folder [ 102300 ]")
![Take Your Pick [ 144107 ]](https://assets1.tamsnetwork.com/images/EC042017NF/144107s.jpg "Take Your Pick [ 144107 ]")
![Paper Trimmer [ 152392 ]](https://assets1.tamsnetwork.com/images/EC042017NF/152392s.jpg "Paper Trimmer [ 152392 ]")

![Beautifully Celebrated Photopolymer Stamp Set (English) [ 166968 ]](https://assets1.tamsnetwork.com/images/EC042017NF/166968s.jpg "Beautifully Celebrated Photopolymer Stamp Set (English) [ 166968 ]")
![Fresh Freesia 8 1/2" X 11" Cardstock [ 155613 ]](https://assets1.tamsnetwork.com/images/EC042017NF/155613s.jpg "Fresh Freesia 8 1/2\" X 11\" Cardstock [ 155613 ]")
![Old Olive 8-1/2" X 11" Cardstock [ 100702 ]](https://assets1.tamsnetwork.com/images/EC042017NF/100702s.jpg "Old Olive 8-1/2\" X 11\" Cardstock [ 100702 ]")
![Lovely & Beautiful 12" X 12" (30.5 X 30.5 Cm) Specialty Designer Series Paper [ 166957 ]](https://assets1.tamsnetwork.com/images/EC042017NF/166957s.jpg "Lovely & Beautiful 12\" X 12\" (30.5 X 30.5 Cm) Specialty Designer Series Paper [ 166957 ]")
![Old Olive Classic Stampin' Pad [ 147090 ]](https://assets1.tamsnetwork.com/images/EC042017NF/147090s.jpg "Old Olive Classic Stampin' Pad [ 147090 ]")
![Tuxedo Black Memento Ink Pad [ 132708 ]](https://assets1.tamsnetwork.com/images/EC042017NF/132708s.jpg "Tuxedo Black Memento Ink Pad [ 132708 ]")
![Pearlized Faceted Circles [ 166978 ]](https://assets1.tamsnetwork.com/images/EC042017NF/166978s.jpg "Pearlized Faceted Circles [ 166978 ]")

![Paradise Garden Bundle (English) [ 167121 ]](https://assets1.tamsnetwork.com/images/EC042017NF/167121s.jpg "Paradise Garden Bundle (English) [ 167121 ]")
![Paradise Garden Photopolymer Stamp Set (English) [ 167114 ]](https://assets1.tamsnetwork.com/images/EC042017NF/167114s.jpg "Paradise Garden Photopolymer Stamp Set (English) [ 167114 ]")
![Poppy Parade 8-1/2" X 11" Cardstock [ 119793 ]](https://assets1.tamsnetwork.com/images/EC042017NF/119793s.jpg "Poppy Parade 8-1/2\" X 11\" Cardstock [ 119793 ]")
![Garden Poetry 12" X 12" (30.5 X 30.5 Cm) Designer Series Paper [ 167113 ]](https://assets1.tamsnetwork.com/images/EC042017NF/167113s.jpg "Garden Poetry 12\" X 12\" (30.5 X 30.5 Cm) Designer Series Paper [ 167113 ]")
![Poppy Parade 12" X 12" (30.5 X 30.5 Cm) Two Tone Cardstock [ 166692 ]](https://assets1.tamsnetwork.com/images/EC042017NF/166692s.jpg "Poppy Parade 12\" X 12\" (30.5 X 30.5 Cm) Two Tone Cardstock [ 166692 ]")
![Crushed Curry Classic Stampin' Pad [ 147087 ]](https://assets1.tamsnetwork.com/images/EC042017NF/147087s.jpg "Crushed Curry Classic Stampin' Pad [ 147087 ]")
![Poppy Parade Classic Stampin' Pad [ 119782 ] (Retired)](https://assets1.tamsnetwork.com/images/EC042017NF/119782s.jpg "Poppy Parade Classic Stampin' Pad [ 119782 ] (Retired)")
![Garden Epoxy Dots [ 167124 ]](https://assets1.tamsnetwork.com/images/EC042017NF/167124s.jpg "Garden Epoxy Dots [ 167124 ]")


![Blueberry Bushel 8-1/2" X 11" Cardstock [ 146968 ]](https://assets1.tamsnetwork.com/images/EC042017NF/146968s.jpg "Blueberry Bushel 8-1/2\" X 11\" Cardstock [ 146968 ]")
![Shaded Spruce 8-1/2" X 11" Cardstock [ 146981 ]](https://assets1.tamsnetwork.com/images/EC042017NF/146981s.jpg "Shaded Spruce 8-1/2\" X 11\" Cardstock [ 146981 ]")
![Blueberry Bushel Classic Stampin' Pad [ 147138 ]](https://assets1.tamsnetwork.com/images/EC042017NF/147138s.jpg "Blueberry Bushel Classic Stampin' Pad [ 147138 ]")
![Flirty Flamingo Classic Stampin' Pad [ 147052 ]](https://assets1.tamsnetwork.com/images/EC042017NF/147052s.jpg "Flirty Flamingo Classic Stampin' Pad [ 147052 ]")
![Shaded Spruce Classic Stampin' Pad [ 147088 ]](https://assets1.tamsnetwork.com/images/EC042017NF/147088s.jpg "Shaded Spruce Classic Stampin' Pad [ 147088 ]")
![Linen Thread [ 104199 ]](https://assets1.tamsnetwork.com/images/EC042017NF/104199s.jpg "Linen Thread [ 104199 ]")


![Greenery Lane Bundle (English) [ 166877 ]](https://assets1.tamsnetwork.com/images/EC042017NF/166877s.jpg "Greenery Lane Bundle (English) [ 166877 ]")
![Greenery Lane Photopolymer Stamp Set (English) [ 166870 ]](https://assets1.tamsnetwork.com/images/EC042017NF/166870s.jpg "Greenery Lane Photopolymer Stamp Set (English) [ 166870 ]")
![Greenery Lane Dies [ 166876 ]](https://assets1.tamsnetwork.com/images/EC042017NF/166876s.jpg "Greenery Lane Dies [ 166876 ]")
![Garden Green 8-1/2" X 11" Cardstock [ 102584 ]](https://assets1.tamsnetwork.com/images/EC042017NF/102584s.jpg "Garden Green 8-1/2\" X 11\" Cardstock [ 102584 ]")
![Soft Sea Foam 8-1/2" X 11" Cardstock [ 146988 ]](https://assets1.tamsnetwork.com/images/EC042017NF/146988s.jpg "Soft Sea Foam 8-1/2\" X 11\" Cardstock [ 146988 ]")
![Garden Green 12" X 12" (30.5 X 30.5 Cm) Two Tone Cardstock [ 166665 ]](https://assets1.tamsnetwork.com/images/EC042017NF/166665s.jpg "Garden Green 12\" X 12\" (30.5 X 30.5 Cm) Two Tone Cardstock [ 166665 ]")
![Wood Textured 12" X 12" (30.5 X 30.5 Cm) Specialty Paper [ 163770 ]](https://assets1.tamsnetwork.com/images/EC042017NF/163770s.jpg "Wood Textured 12\" X 12\" (30.5 X 30.5 Cm) Specialty Paper [ 163770 ]")
![Garden Green Classic Stampin' Pad [ 147089 ]](https://assets1.tamsnetwork.com/images/EC042017NF/147089s.jpg "Garden Green Classic Stampin' Pad [ 147089 ]")
![Soft Sea Foam Classic Stampin' Pad [ 147102 ]](https://assets1.tamsnetwork.com/images/EC042017NF/147102s.jpg "Soft Sea Foam Classic Stampin' Pad [ 147102 ]")
![Small Blending Brushes [ 160518 ]](https://assets1.tamsnetwork.com/images/EC042017NF/160518s.jpg "Small Blending Brushes [ 160518 ]")
![Garden Green 1/8" (3.2 Mm) Chevron Ribbon [ 167212 ]](https://assets1.tamsnetwork.com/images/EC042017NF/167212s.jpg "Garden Green 1/8\" (3.2 Mm) Chevron Ribbon [ 167212 ]")
![Shades Of Green Hexagons [ 165233 ]](https://assets1.tamsnetwork.com/images/EC042017NF/165233s.jpg "Shades Of Green Hexagons [ 165233 ]")

![Tear & Tape Adhesive [ 154031 ]](https://assets1.tamsnetwork.com/images/EC042017NF/154031s.jpg "Tear & Tape Adhesive [ 154031 ]")

