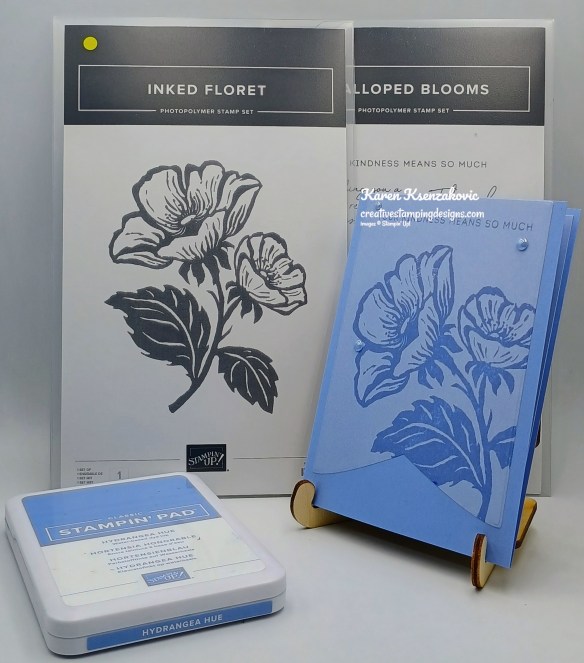
Stampin’ Up! Inked Floret Scalloped Blooms

Good Wednesday morning stamping friends. We’re halfway through the week and I’ll be on my way to TN in a couple short hours and then heading to our annual retreat in GA. I’m excited to see everyone again in person.

Today starts the Flash Sale!!!
 Stampin’ Up! just announced that they’re doing a 15% off select stamp sets from September 16-18!!  We weren’t given a list of the stamp sets that will be on sale, so we’ll need to check the online store when the sale begins to find out the specific sets! And did you know that if you are a demonstrator, you get your 20% discount on top of the 15% discount. Interested in joining? Information below and contact me and we can talk.

Here are the details for the sale:

  • Sales Period: September 16–18
  • Ordering Deadline: September 18, 2026, at 11:59 p.m. (MT)
  • The 15% discount will apply to select stamp sets, which are only available while supplies last. See and shop all qualifying stamp sets in my Online Store starting Wednesday September 16

*********************************************************************************************************

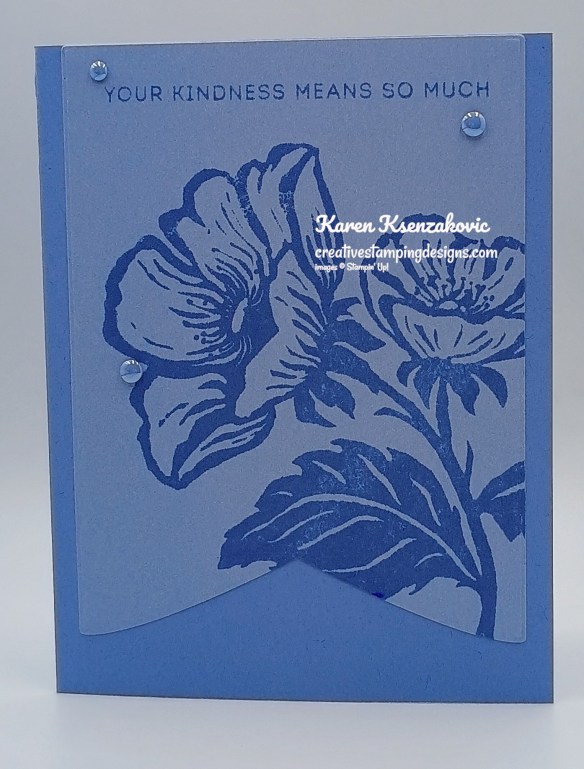
I have a CAS card for you today that you can make in less than half hour from start to finish. If you’d like to see a quick video of how I made this card, Click Here to go to my Instagram Reels. Here’s my card for today.
Stampin' Up! Inked Floret Blooms 1 creativestampingdesigns.com

I used the Stampin’ Up! Inked Floret Stamp Set, Stampin’ Up! Scalloped Blooms Stamp Set and Party Banner Dies for my card today. This just happens to be one of the Stamp Sets on SALE right now too!!!
Stampin' Up! Inked Floret Blooms 2 creativestampingdesigns.com

Cut a panel of Hydrangea Hye Two-Tone cardstock using the 6th from largest Party Banner Die.
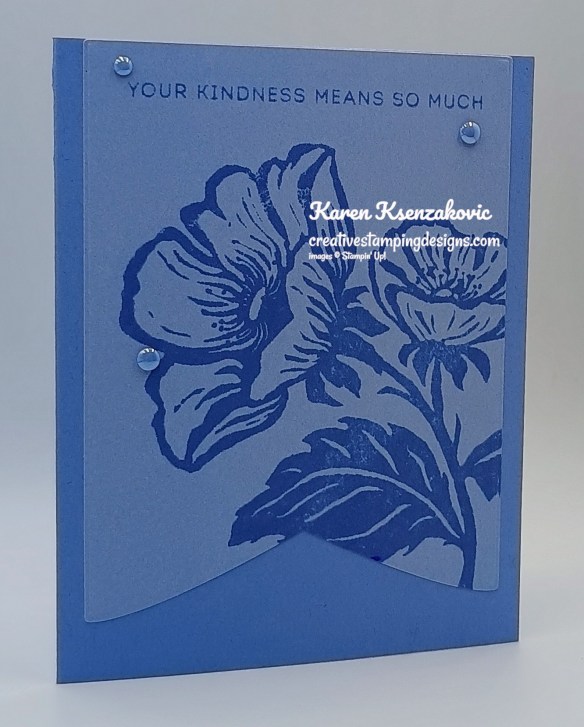
Stampin' Up! Inked Floret Blooms 3 creativestampingdesigns.com

Stamp the floral image from Inked Floret stamp set in Hydrangea Hue Ink on the side of the die cut banne.
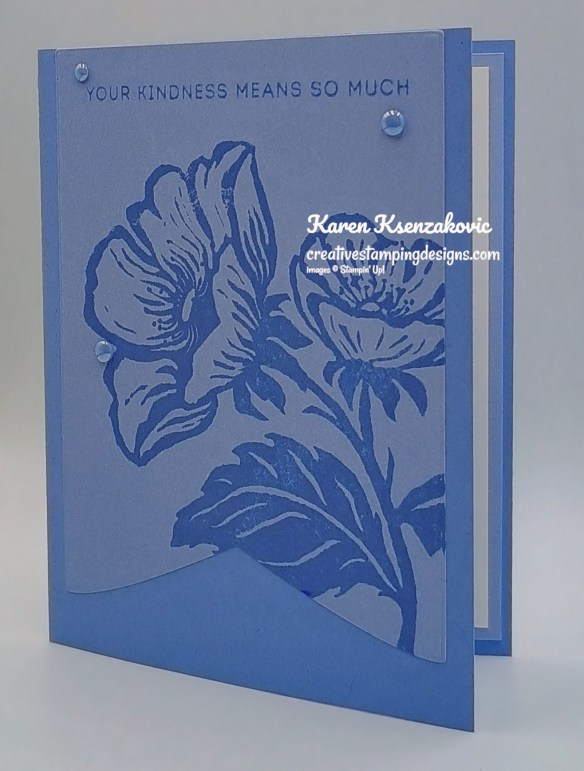
Stampin' Up! Inked Floret Blooms 4 creativestampingdesigns.com

Stamp the sentiment from the Scalloped Blooms stamp set in Hydrangea Hue Ink on the top of the banner. Adhere the banner to a Hydrangea Hue card base. Add a few 2026-2028 In-Color Dots to the card front.
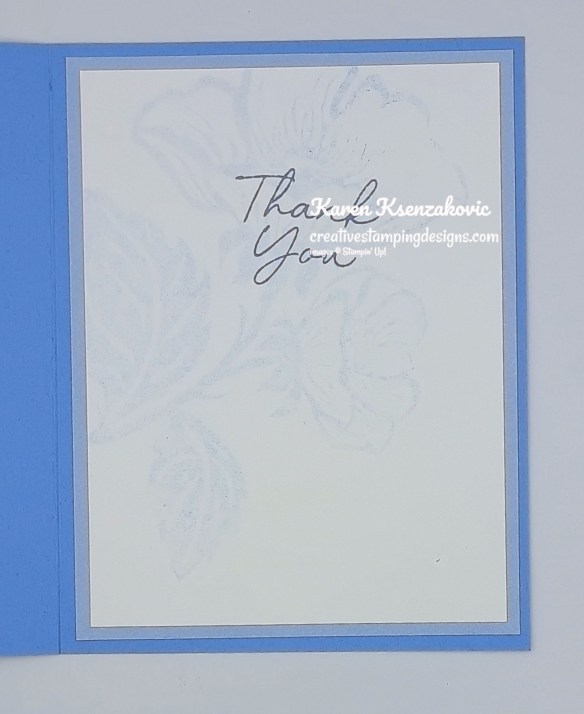
Stampin' Up! Inked Floret Blooms 5 creativestampingdesigns.com

Stamp the sentiment from the Scalloped Blooms stamp set in Hydrangea Hue Ink on a panel of Basic White. Stamp the floral image from Inked Floret stamp set in Hydrangea Hue Ink, stamping off once on scrap paper, over the sentiment. Adhere the Basic White panel to a Hydrangea Hue Two-Tone cardstock mat then to the inside of the Hydrangea Hue card base.
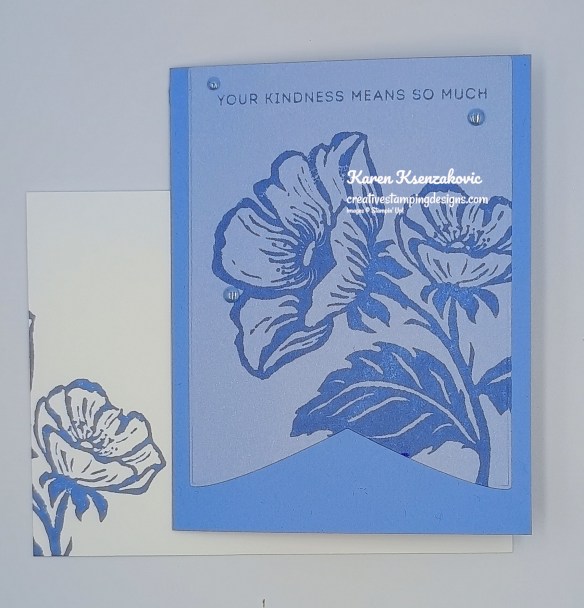
Stampin' Up! Inked Floret Blooms 6 creativestampingdesigns.com

Decorate a Basic White Medium Envelope to finish your card. Stamp part of the floral image from Inked Floret stamp set in Hydrangea Hue Ink on the envelope front. Adhere a panel of Bloom Boutique DSP to the envelope flap.
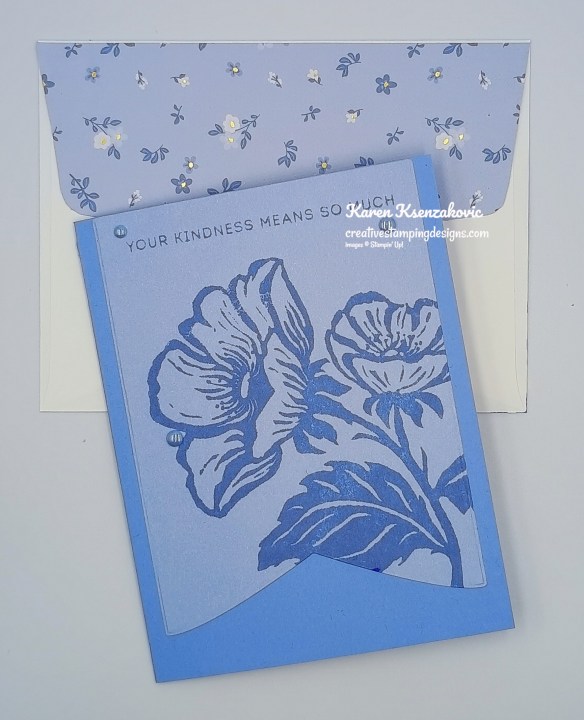
Stampin' Up! Inked Floret Blooms 7 creativestampingdesigns.com

Thank you for stopping by my blog today. I hope you like the card and will give it a try. Happy Stamping!!

*********************************************************************************************************

If you need any stamping supplies, I’d love to be your Demonstrator. Just click HERE to go directly to my online store or drop me an email if you have any questions. 

*********************************************************************************************************

Join Experience

Stampin’ Up! is introduced a simplified join process designed to make joining faster and easier than ever before!  The new process will create a more streamlined experience when you join!  

As part of the new join process, all first-time demonstrators (beginning June 30, 2026 at 4:00 PM MT) will receive a surprise Welcome Box—a gesture of appreciation and a warm welcome into the global Stampin’ Up! creative community!

How the New Process Works

Step 1: Join

New demonstrators will:

  1. choose a team leader.
  2. accept required agreements.
  3. enter a few personal details.
  4. pay the $100 join fee.
  5. click submit.

Step 2: Shop

Once their information has been reviewed and approved (usually very quickly), their Welcome Box ships, and the new demonstrator receives an email with:

  • their demonstrator ID.
  • a coupon code to begin shopping.

About the Coupon Code

  • Valued at $125.
  • Coupon code can be applied to any demonstrator order.
  • Order CAN exceed the coupon code value (I know that many people wanted the option to be able to add more than $125 to their Starter Kit!).
  • Any amount above the coupon code value:
    • receives the demonstrator discount.
    • counts toward the quarterly sales minimum.
    • earns Stampin’ Rewards if it meets the qualifying purchase amount (as long as you’ve opted into the Stampin’ Rewards program).

Additional perk for new demonstrators

  • New demonstrators may add eight free catalogs to any order!

Let me know if you have any questions about the new joining process.  I’m so happy that you’ll now have the option to go over the $125 amount AND that it will automatically count toward your sales! 

Why not start thinking about joining the Stampin’ Up! community, I’d love to have you on my team. It will be 8 years in July that I signed up and I couldn’t be happier with my decision. From all the friends I’ve made, the discount on everything I purchase, early access to seeing the new products coming and being able to order them before customers and of course going to OnStage and meeting up with my team and other demos. Contact me at: creativestampingdesigns@gmail.com and I’d be more than happy to answer any questions you might have. We’re a very relaxed team that loves to create and share.

Click Here and join my team. 

*********************************************************************************************************

New Stampin’ Up! Product of The Month

Every month Stampin’ Up! will release a new item that is only available for purchase once per account. These items will be limited quantity and are likely to sell out quickly—once they’re sold out, they’re gone for good!

September Product of the Month – Luxe Foliate Specialty Designer Series Paper

Luxe Foliage 12″ x 12″ (30.5 x 30.5 cm) Specialty Designer Series Paper (168599)

With Halloween and Christmas fast approaching, don’t forget to spend some time celebrating Cardsgiving—one of our favorite unofficial holidays centered around making and gifting cards. The Luxe Foliage Designer Series Paper is perfect for all your holiday needs and beyond, with shimmering foil and beautifully-designed details perfect for creating glimmering layers or fussy cutting shining images. Whether you’re making cards for a friend or planning a Cardsgiving celebration, this paper is sure to be the star of the show.

*********************************************************************************************************

Card stock cuts for this project:

  • Basic White Cardstock 3 3/4″ x 5″ (inner liner)
  • Hydrangea Hue Cardstock 5 1/12″ x 8 1/2″ (card base scored & folded at 4 1/4″)
  • Hydrangea Hue Two-Tone Cardstock (2) 4″ x 5 1/4″ (die cut & mat)
  • Bloom Boutique Specialty Designer Series Paper 2 1/4″ x 6″ (enveloope)

*********************************************************************************************************

Product List

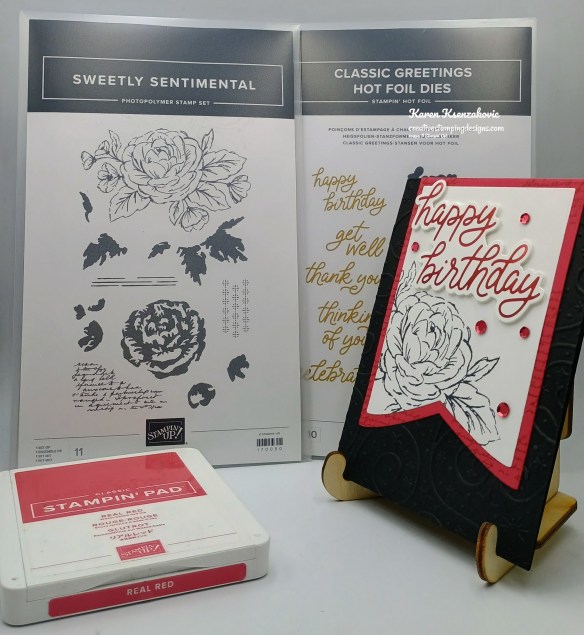
Stampin’ Up! Sweetly Sentimental Classic Greetings for The Happy Inkin’ Thursday Blog Hop

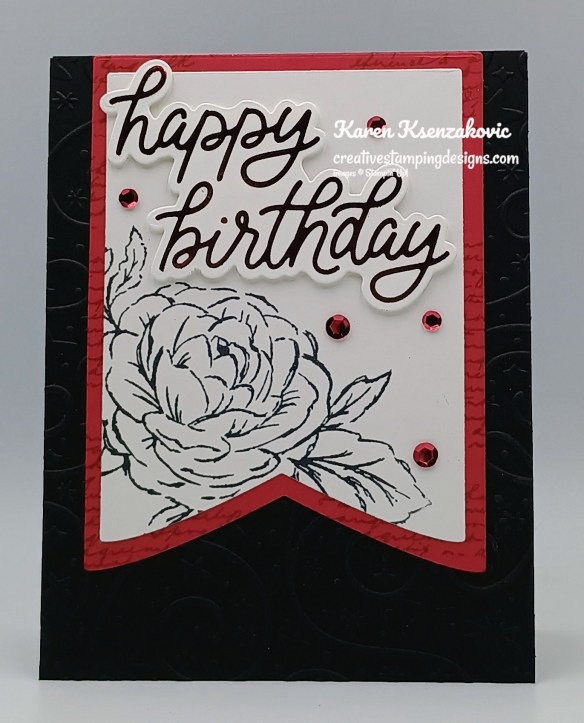
Good Thursday morning stamping friends welcome to our Happy Inkin’ Thursday Blog Hop. If you are starting with me, thank you, I hope you will stop by everyone’s blog to see the beautiful projects they have created this week. If you are hopping over from Mary’s blog, thank you for stopping by. This week we have a Color Challenge to work with. If you’d like to see a quick video on how I made this card, Click Here to go to my Instagram Reels. Here is my card using this week’s color.

Stampin' Up! Sweetly Sentimental Birthday 1 creativestampingdesigns.com

I used the Stampin’ Up! Sweetly Sentimental Stamp Set, Stampin’ Up! Classic Greetings Hot Foil Dies, Party Banner Dies and Swirls of Magic Embossing Folder for my card today.

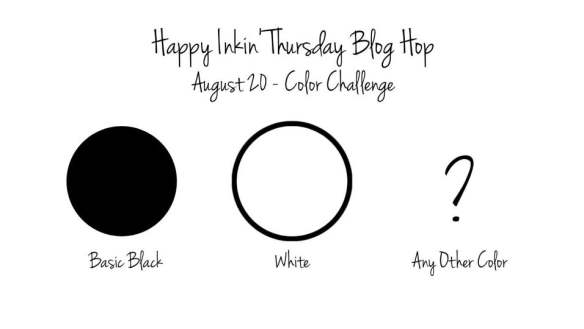
These are our colors for this week.

Stampin' Up! Sweetly Sentimental Birthday 2 creativestampingdesigns.com

Emboss a panel of Basic Black using the Swirls of Magic EF. Adhere the embossed panel to a Basic Black card base,

Stampin' Up! Sweetly Sentimental Birthday 3 creativestampingdesigns.com

Using the 7th & 8th from largest Party Banner Dies, cut panels of Real Red and Basic White. On the Real Red banner, stamp the script image from the Sweetly Sentimental stamp set in Real Red Ink. On the bottom of the Basic White banner, stamp the large floral image from the Sweetly Sentimental stamp set in Black Ink. Adhere the Basic White banner to the Real Red banner. Adhere the layered banner to the Basic Black card base.

Stampin' Up! Sweetly Sentimental Birthday 4 creativestampingdesigns.com

Following the directions from the Stampin’ Hot Foil System, using the new Red Foil (available Sept 1), foil the sentiment using the Classic Greetings Hot Foil Dies. Cut the sentiment out using the Classic Greetings Hot Foil Dies. Adhere the sentiment to the top of the banner using Stampin’ Dimensionals. Add a few Adhesive-Backed Sparkle Sequins (available Sept 1) to the card front.

Stampin' Up! Sweetly Sentimental Birthday 5 creativestampingdesigns.com

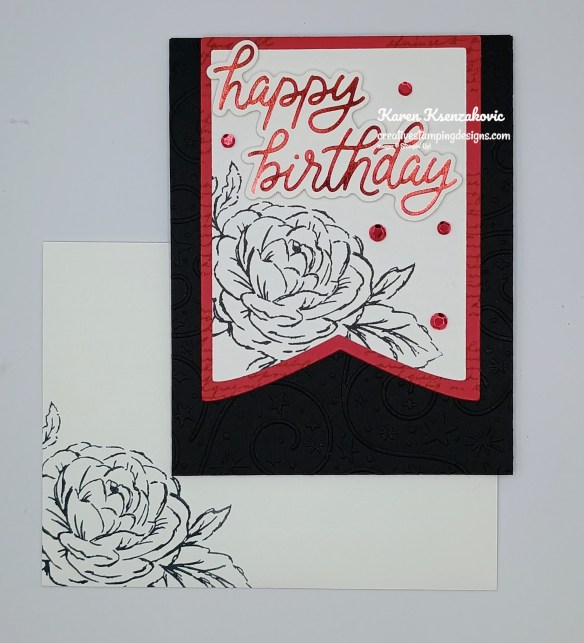
Emboss the top of a panel of Basic White using the Swirls of Magic EF. Following the Stampin’ Hot Foil System, foil the sentiment from Classic Greetings Hot Foil Dies using the Red Foil. Cut the sentiment out using the Classic Greetings Hot Foil Dies. Adhere the sentiment at the bottom of the embossed portion of the Basic White panel. Stamp the floral image from the Sweetly Sentimental stamp set in Black Ink on the bottom of the panel. Adhere the Basic White panel to a Real Red mat then to the inside of the Basic Black card base.

Stampin' Up! Sweetly Sentimental Birthday 6 creativestampingdesigns.com

Decorate a Basic White Medium Envelope to complete the card. Stamp the floral image from the Sweetly Sentimental stamp set in Black Ink on the envelope front and flap.

Stampin' Up! Sweetly Sentimental Birthday 7 creativestampingdesigns.com

Thank you for stopping by my blog today. Now that you’ve seen my card, let’s get on with the hop! Click the next button below to hop over to see what Tara has created. Happy Hopping

Just in case you get lost along the way, here is a list of the team members involved in the hop today.

Amy Koenders

Mary Deatherage

Karen Ksenzakovic You Are Here

Tara Carpenter

Terry Lynn Bright

Charlene Tackvic

********************************************************************************************************

If you need any stamping supplies, I’d love to be your Demonstrator. Just click HERE to go directly to my online store or drop me an email if you have any questions. 

*********************************************************************************************************

Double Stampin’ Rewards from Stampin’ Up! on all orders of $20+ Aug 19-21

Stampin’ Up! announced that they’re offering DOUBLE Stampin’ Rewards on all orders of $20+ placed between August 19-21!!

Here are the details:

  • Sales Period: August 19–21
  • Ordering Deadline:  August 21, 2026, at 11:59 p.m. (MT)
  • Earn double Stampin’ Rewards (2x Rewards) for 3 days only, starting August 19 and ending August 21.  That means 20% instead of the standard 10%!  All orders qualify once the Stampin’ Rewards threshold of $20 is met.  Some exclusions apply (see the next bullet point).
  • This offer applies to ALL products except for existing Paper Pumpkin subscriptions.
  • To participate, you must have a Stampin’ Up! account and be opted in to the Stampin’ Rewards program.

Head over to the online store from August 19-21 and get DOUBLE Stampin’ Rewards from Stampin’ Up! on your order of $20+!!

*********************************************************************************************************

15% Off Select Designer Series Paper & Cardstock – August 4-31

Are you looking for the perfect card stock or Designer Series Paper for your next project? Stampin’ Up! has got you covered! Starting August 4, enjoy 15% off select Designer Series Paper and card stock. Stock up on your favorites or explore new colors and patterns during this sale!

Here are the sale details:

  • Sales Period:  August 4–31
  • Ordering Deadline:   August 31, 2026, at 11:59 p.m. (MT)
  • While supplies last.
  • You’ll find all qualifying items in one convenient location once the sale begins on August 4—it will be located in the “Designer Series Paper and Cardstock Sale” page in the online store.

Head over to my Online Store beginning August 4 to shop the sale!!

*********************************************************************************************************

Card stock cuts for this project:

  • Basic Black Cardstock 4 1/4″ x 11″ (card base scored & folded at 5 1/2″), 4 1/4″ x 5 1/2″ (card front)
  • Basic White Cardstock 3 1/2″ x 4″ (banner), 4″ x 5″ (sentiments), 3 3/4″ x 5″ (liner liner)
  • Real Red Cardstock 4″ x 5″ (banner), 4″ x 5 1/4″ (mat)

*********************************************************************************************************

Product List

Stampin’ Up! Elegant Leaves for Amy’s Inkin’ Krew Team Blog Hop

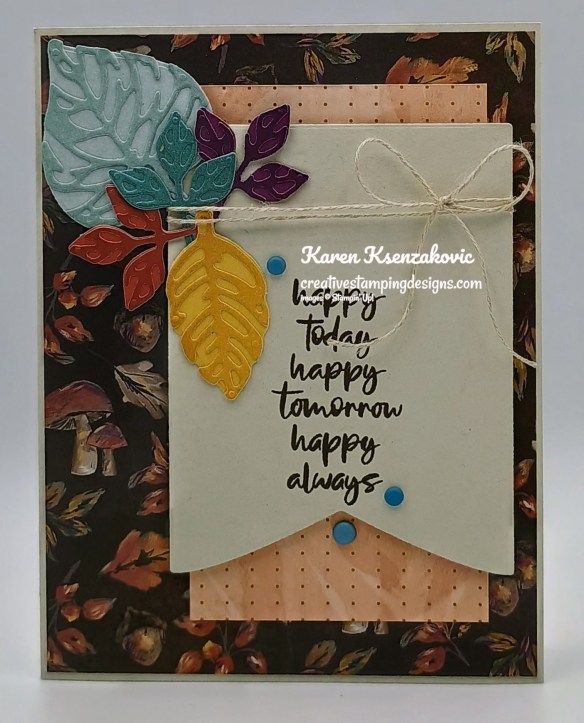
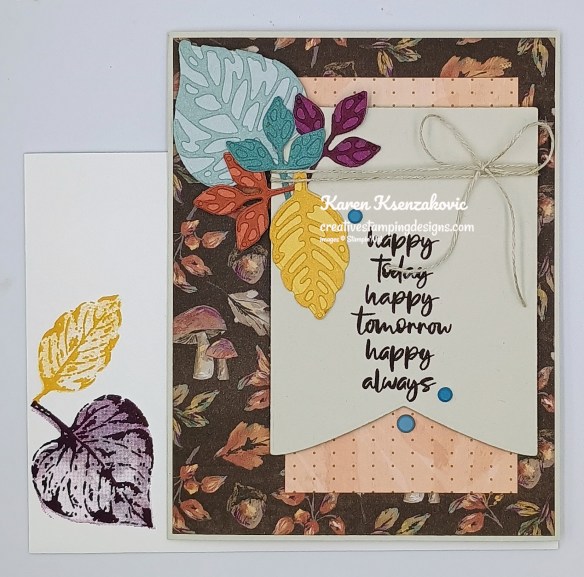
Good Tuesday morning my stamping friends welcome to Amy’s Inkin’ Krew Team Blog Hop. It’s the 2nd Tuesday of the month so that means Blog Hop Day!! If you are starting with me, be sure to hop around to see everyone’s projects. If you’ve hopped over from Terry Lynn’s blog, welcome to my blog and thank you for stopping by. The theme this month is “Fall Frenzy”. If you’d like to see a quick video on how I made this card, Click Here to go to my Instagram Reels.  Here’s my card for today.

Stampin' Up! Elegant Leaves 1 creativestampingdesigns.com

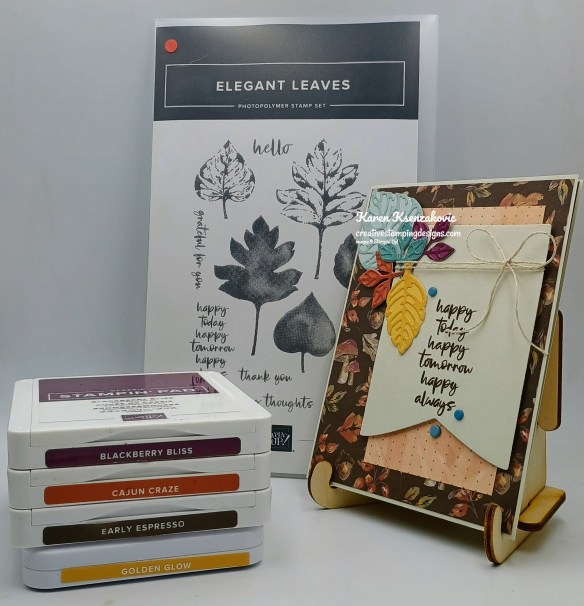
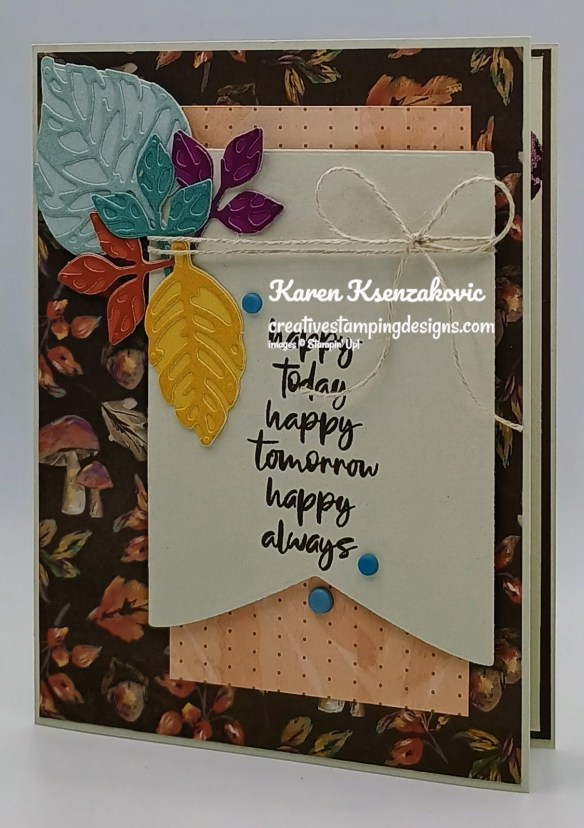
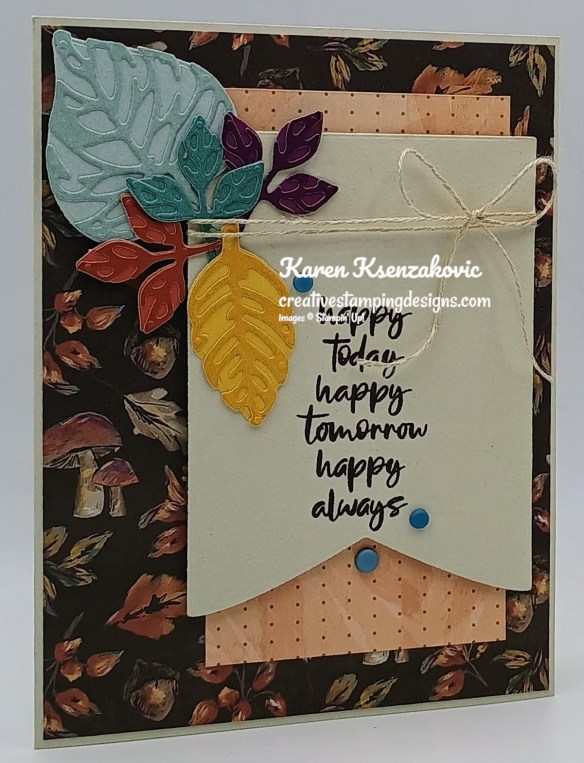
I used the new Stampin’ Up! Elegant Leaves Bundle, Autumn Opulence Specialty Designer Series Paper and the Party Banner Dies for my card today. The bundle and DSP will be available Sept 1.

Stampin' Up! Elegant Leaves 2 creativestampingdesigns.com

Adhere a panel of Autumn Opulence DSP to a Basic Beige card base. Adhere a smaller panel or Autumn Opulence DSP to the right side of the card front.

Stampin' Up! Elegant Leaves 3 creativestampingdesigns.com

Cut a panel of Basic Beige using the 6th from the smallest Party Banner Die. Stamp the sentiment from the Elegant Leaves stamp set in Early Espresso Ink on the banner. Wrap a piece of Linen Thread around the top of the banner 2 times and tie a bow. Adhere the banner to the card front with Stampin’ Dimensionals.

Stampin' Up! Elegant Leaves 4 creativestampingdesigns.com

From panels of Blackberry Bliss, Cajun Craze, Cloud Cover, Golden Glow and Lost Lagoon Two-Tone cardstock cut the leaf dies using the Elegant Leaves Dies. Cut the solid die from the light side of the cardstock and the detailed die from the dark side of the cardstock. Adhere the detailed dies to the solid dies. Arrange the die cut leaves at the top of the banner using Stampin’ Dimensionals and Glue Dots. Add a few Earthy Matte Dots to the card front.

Stampin' Up! Elegant Leaves 5 creativestampingdesigns.com

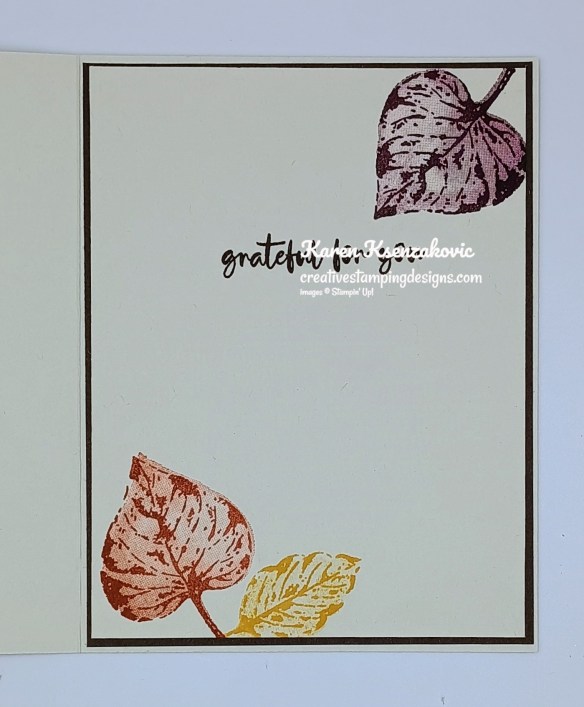
Stamp the sentiment from the Elegant Leaves stamp set in Early Espresso Ink on a panel of Basic Beige. Stamp the leaf images from the Elegant Leaves on the top and bottom of the panel in Blackberry Bliss, Cajun Craze and Golden Glow Inks. Stamp the detailed images full strength Ink and the solid images stamped off once on scrap paper. Adhere the Basic Beige panel to an Early Espresso mat then to the inside of the Basic Beige card base.

Stampin' Up! Elegant Leaves 6 creativestampingdesigns.com

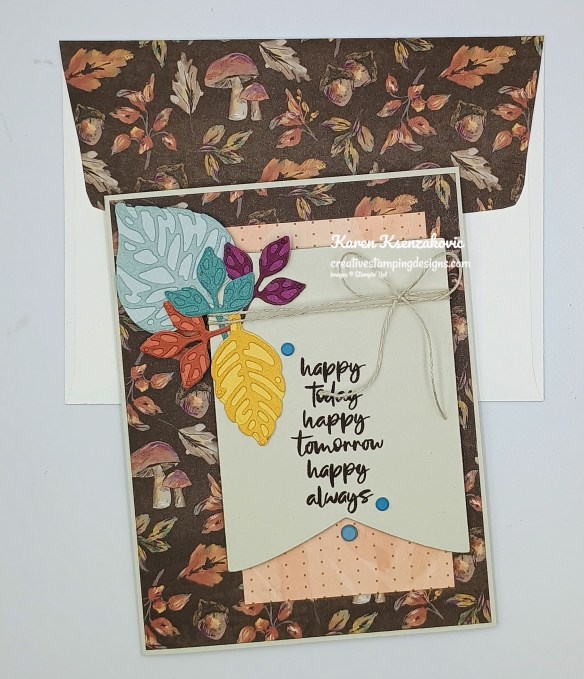
Decorate a Basic Whtie Medium Envelope to complete your card. Stamp the leaf images from the Elegant Leaves stamp set in Blackberry Bliss and Golden Glow Inks on the envelope front. Adhere a panel of Autumn Opulence DSP to the envelope flap.

Stampin' Up! Elegant Leaves 7 creativestampingdesigns.com

Thank you for stopping by my blog today.  Now that you’ve seen my card, let’s get on with the hop!  Click on the Next Blog button to move on to Nicole’s project. Happy Hopping.

Just in case you get lost along the way, here is a list of the team members involved in the hop today.

  1. Terry Lynn Bright
  2. Karen Ksenzakovic You Are Here
  3. Nicole Bloxom
  4. Ann Louise Fodgaard
  5. Karen Finkle
  6. Christie King
  7. Tara Carpenter
  8. Mary Deatherage
  9. Charlene Tackvic
  10. Amy Koenders

*********************************************************************************************************

If you need any stamping supplies, I’d love to be your Demonstrator. Just click HERE to go directly to my online store or drop me an email if you have any questions. 

*********************************************************************************************************

Card stock cuts for this project:

  • Basic Beige Cardstock 5 1/2″ x 8 1/2″ (card base scored & folded at 4 1/4″), 3 1/4″ x 4 1/2″ (banner), 4″ x 5 1/4″ (inner liner)
  • Early Espresso Cardstock 4 1/8″ x 5 3/8″ (mat)
  • Autumn Opulence Specialty Designer Series Paper 4 1/8″ x 5 3/8″ (card front), 2 1/2″ x 4 1/2″ (card front panel), 2 1/4″ x 6″ (envelope)
  • Blackberry Bliss Two-Tone Cardstock 1 1/4″ x 2″ (die cut)
  • Cajun Craze Two-Tone Cardstock 1 1/4″ x 2″ (die cut)
  • Cloud Cover Two-Tone Cardstock 2″ x 43 1/2″(die cut)
  • Golden Glow Two-Tone Cardstock 1 1/4″ x 2 3/4″(die cut)
  • Lost Lagoon Two-Tone Cardstock 1 1/4″ x 2″ (die cut)

*********************************************************************************************************

Product List

Stampin’ Up! Pretty Poinsettia in Barely Blush & Product Shares Open for Ordering

Good Wednesday morning stamping friends. We’ve made it halfway through the week and we’re on our way to the weekend. We had some pretty bad thunderstorms here yesterday and we’re expecting more today.

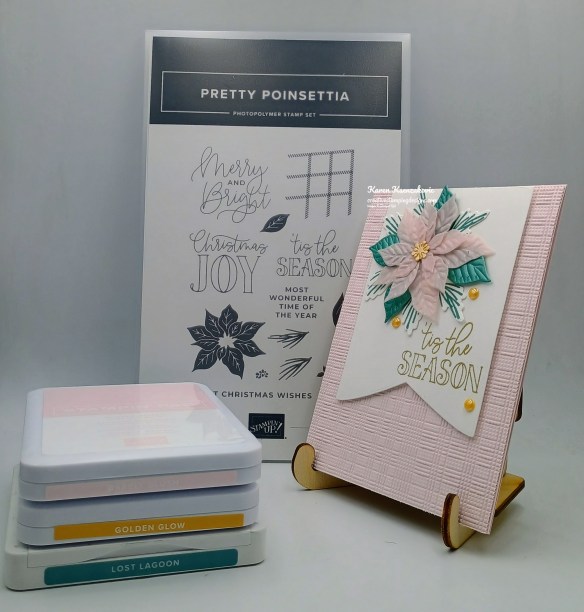
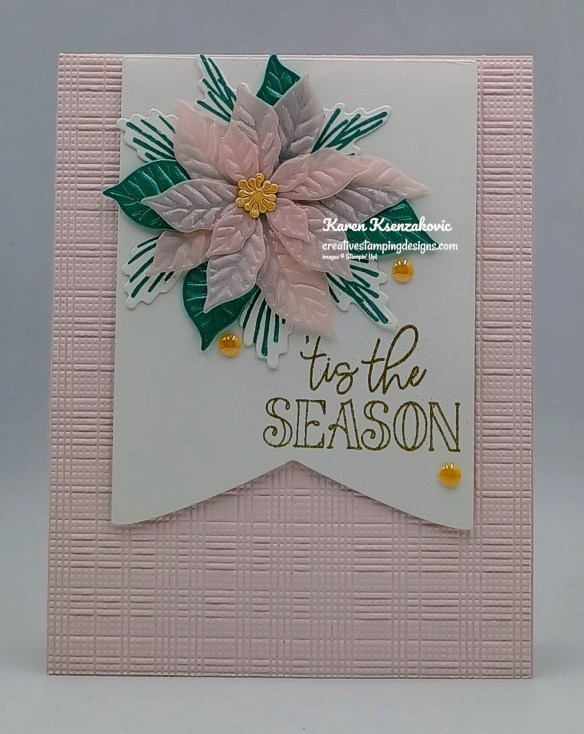
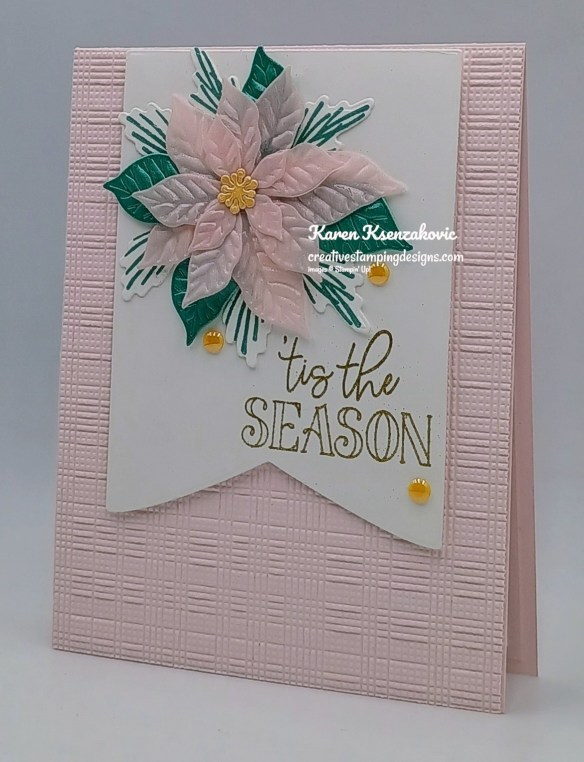
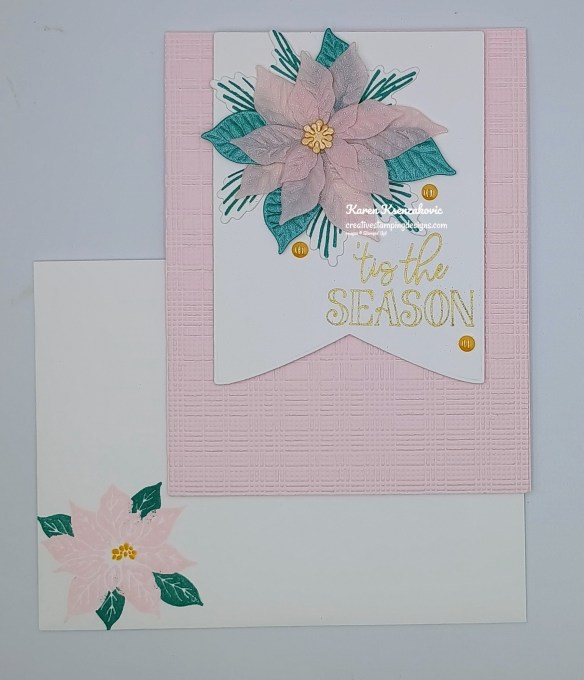
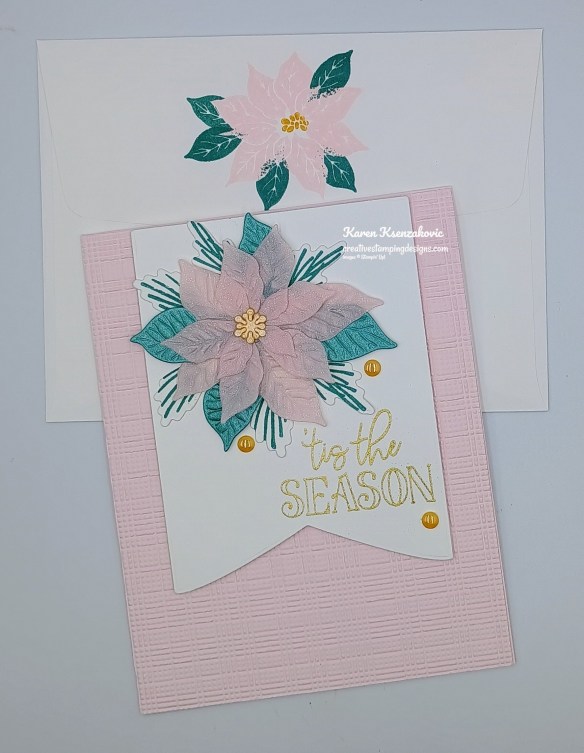
This past weekend Tara and I had our monthly class Christmas in July. It got me in the mood to make another Christmas card, this one I added a sneak peek of something coming in September. Here’s my card for today.

Stampin' Up! Pretty Poinsettia in Barely Blush 1 creativestampingdesigns.com

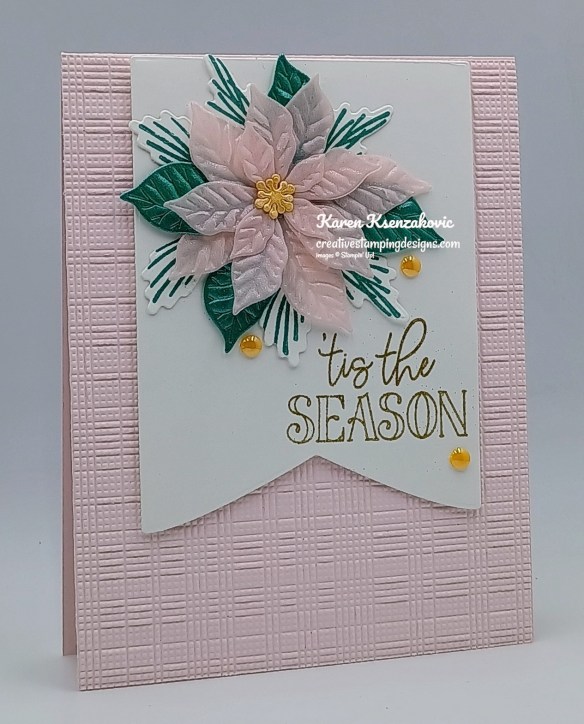
I used the Stampin’ Up! Pretty Poinsettia Bundle, Party Banner Dies and the new Softly Woven 3D Embossing Folder, that will be available September 1, for my card today.

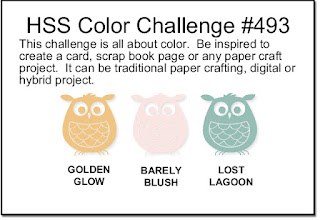
My colors came from Hand Stamped Sentiments Color Challenge #493.

Stampin' Up! Pretty Poinsettia in Barely Blush 2 creativestampingdesigns.com

Emboss a panel of Barly Blush using the Softly Woven EF. Adhere the embossed panel to a Barely Blush card base.

Stampin' Up! Pretty Poinsettia in Barely Blush 3 creativestampingdesigns.com

Using the Party Banner Dies, cut the 7th from the smallest die from a panel of Basic White. Stamp the sentiment from the Pretty Poinsettia on the bottom of the banner in Versamark Ink. Sprinkle the sentiment with Gold Embossing Folder and set it with the Heat Tool. Adhere the banner to the card front with Stampin’ Dimensionals.

Stampin' Up! Pretty Poinsettia in Barely Blush 4 creativestampingdesigns.com

Using the Small Blending Brush, add Lost Lagoon Ink to a Pool Party panel of the Pastel Shimmer paper. Using the Pretty Poinsettia Dies, cut the largest flower die from the blended panel, cut the other 3 flowers from a panel of Sunset Shimmer Vellum. Adhere the flower petals together with Glue Dots. On a panel of Basic White, stamp the pine bough image from the Pretty Poinsettia stamp set in Lost Lagoon Ink. Cut the images out using the Pretty Poinsettia Dies. Cut the flower center from a scrap of Golden Glow Pearlized paper and adhere them to the center of the flower with a Glue Dot. Adhere the poinsettia to the top of the banner with Stampin’ Dimensionals. Adhere the pine boughs under the flower. Add a few 2026-2028 In-Color Dots to the card front

Stampin' Up! Pretty Poinsettia in Barely Blush 5 creativestampingdesigns.com

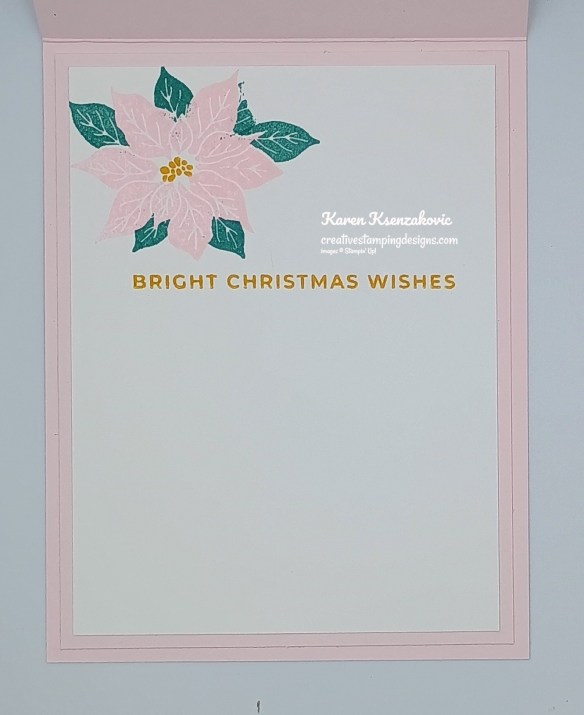
Stamp the sentiment from the Pretty Poinsettia stamp set in Golden Glow Ink on a panel of Basic White. Stamp the poinsettia image from the Pretty Poinsettia stamp set in Barely Blush Ink on the top of the panel. Stamp the flower center in Golden Glow Ink. Stamp the leaf image from the Pretty Poinsettia stamp set in Lost Lagoon Ink around the flower. Adhere the Basic White panel to a Barely Blush mat then to the inside of the Barely Blush card base.

Stampin' Up! Pretty Poinsettia in Barely Blush 6 creativestampingdesigns.com

Decorate a Basic White Medium Envelope to finish your card. Stamp the poinsettia image from the Pretty Poinsettia stamp set in Barely Blush Ink on the envelope front and flap. Stamp the flower center in Golden Glow Ink and the leaves around the flower in Lost Lagoon Ink.

Stampin' Up! Pretty Poinsettia in Barely Blush 7 creativestampingdesigns.com

Thank you for stopping by my blog today. I hope you like the card and will give it a try. Happy Stamping!!

*********************************************************************************************************

If you need any stamping supplies, I’d love to be your Demonstrator. Just click HERE to go directly to my online store or drop me an email if you have any questions. 

*********************************************************************************************************

September – December 2026 Catalog Coming Soon

I’ve received the September – December 2026 catalogs and mailed them to my customers, so be on the look out if you are a customer of mine.  It’s filled with holiday related items and I can’t wait for you all to see it! 

If you’ve ordered from me within the last year, you automatically are on my mailing list for the new catalogs.  If you are not a current customer of mine but would like to be and would like to get a copy of the upcoming catalog, simply place an order through my Online Store and I’ll mail you a copy of the catalog too!

*********************************************************************************************************

September-December Catalog & Online Exclusive Product Shares Open for Ordering!!

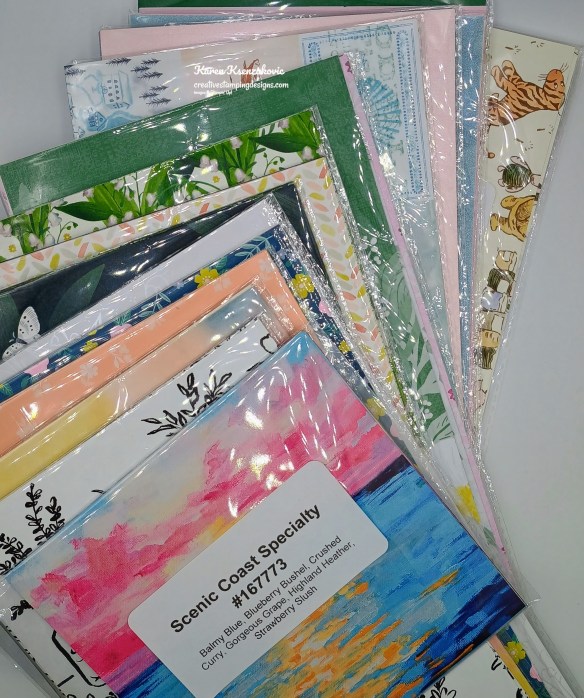
It’s time again. The new September – December 2026 Catalog will be arriving in your mailbox real soon and you’re going to want all that beautiful Designer Series Paper, Ribbon and/or Embellishments. My September – December 2026 Catalog and September Online Exclusive Product Shares are open for ordering. You can order just the DSP share, just the Two-Tone cardstock share, just the Ribbon share or just the Embellishment share, or you can have it all!! 

Order Here

I’m offering a Designer Series Paper ShareTwo-Tone Cardstock Share, Ribbon Share & Embellishment Share from the September – December 2026 Catalog, along with the upcoming September 2026 Online Exclusives and I’d love to have you join!!  I’m placing my share order early on September 1st and I’m going to use the expedited shipping option so I should be able to have the shares cut, bundled and back out to you by the end of the week of September 7th. Wouldn’t you love to have all of the gorgeous new Designer Series Papers in the Stampin’ Up! Sept – Dec 2026 Catalog and the upcoming Sept 2026 Online Exclusives?  What is a Paper Share you ask? It’s a sample of each of the new Designer Series Papers from the Catalog and Online Exclusives. Shares give you a good working sample of all of the papers so that you can decide which ones to order in full packs!  If you were to purchase all of the DSP in the new Catalog and Online Exclusives, it would cost you over $250.00 plus shipping.

New Designer Series Paper Share – $30.00 plus $10.00 for Priority Mail Shipping

How my shares work:  I order full packs of all of the Designer Series Papers listed below, I cut them into 6″ X 6″ pieces (or 6″ X 12″ pieces for double shares) and give you one panel of each design from each pack on the list.  I pack up the paper in a cellophane bag with labels listing the NameItem # and Colors in the pack and mail it back out to you just as quickly as I can!  

New Designer Series Paper Share – $30.00 plus $10.00 for Priority Mail shipping

You will receive one 6×6 sheet of each design from the following DSP packs (the number after the name indicates how many 6×6 sheets of that paper pack you will receive):

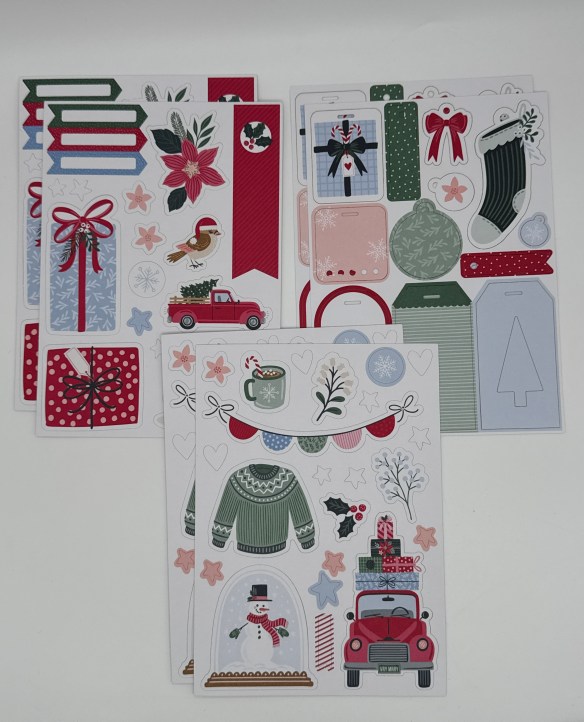
  • A Little Christmas (6)
  • All Wrapped Up Specialty (6)
  • Alpine Winter (6)
  • Autumn Opulence Specialty (5)
  • Autum Woodland Glimmer Specialty (3)
  • Creative Celebrations 6 x 6 (4)
  • Hearth & Home (3)
  • Metal Effects Specialty (3)
  • Mosaic Garden (6)
  • Neutral Noel Specialty (6)
  • Painted Patch (6)
  • Radiant Foils Specialty (3)
  • Sunflower Fields (6)
  • Texture & Tone (3)
  • Timeless Christmas (3)
  • Timeless Metallic Specialty (3)
  • Whispering Woods (3)
  • Winter Dreams Specialty (3)
  • Yuletide Carold (3)

In all, you’ll receive 84 – 6” x 6” sheets of designer or specialty paper!

Double Designer Series Paper Share – $60.00 Plus $10.00 Shipping

As a gift from me for ordering a Double Share of Designer Series Paper, I will include a Happiest Season Tags Mix & Match Ephemera Pack #168493. This gift is only for ordering a Double DSP Share.

Two-Tone Cardstock Share

Do you like the Two-Tone Cardstock but don’t want to buy a whole pack? You can add a share of the 3 different Two-Tone Cardstock packs for an additional $4.00 or purchase them separately for $4.00 + $10 Shipping

You will receive one 6×6 sheet of each color from each of the packs (the number after the name indicates how many 6×6 sheets of that paper pack you will receive):

  • Autumn Fields (6)
  • Home For Christmas (4)
  • Memorable Garden (6)

In all, you’ll receive 16 – 6” x 6” sheets of cardstock!

Double Share of the Two-Tone Cardstock – $8.00 plus $10.00 Shipping

If you’d like double shares of the designer paper or cardstock, I’m offering those too!  I’ll cut the 12″ x 12″ sheets into 6″ × 12″ so that you’ll be able to get 3 full A2 size card fronts from each sheet and you’ll get double sheets of the 6″ x 6″ since they’re already precut.

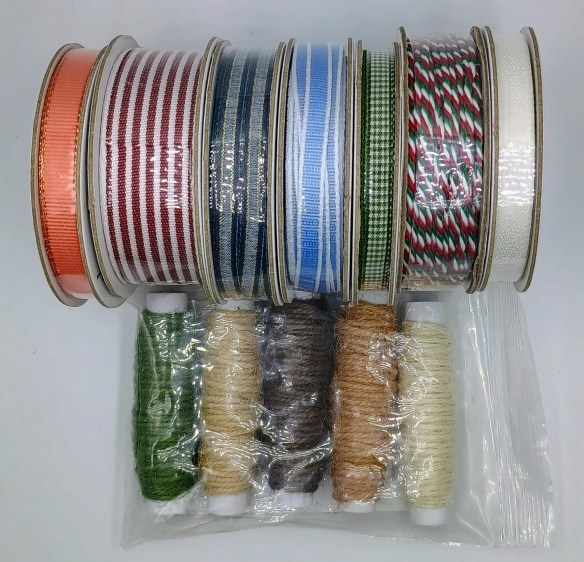
Ribbon Share – $21.25 plus $10.00 Shipping

All ribbons will come individually wrapped and labeled with the name and number of the product.

1/4 of a Roll of each:

  • Calypso Coral With Copper 3/8″ Bordered Ribbon
  • Cherry Cobbler & White 1″ Striped Grosgrain Ribbon
  • Hydrangea Hue 1/4″ Bordered Ribbon
  • Mossy Meadow & Very Vanilla 1/4″ Gingham Ribbon
  • Multicolored Christmas Baker’s Twine
  • Secret Sea & Gold 14″ Satin Ribbon
  • White 3/8″ Textured Ribbon

1/2 of each spool:

  • Neutrals Jute Combo Pack

Double Ribbon Share – $42.50 Plus $10.00 Shipping and you will be getting 1/2 of the roll or each ribbon.

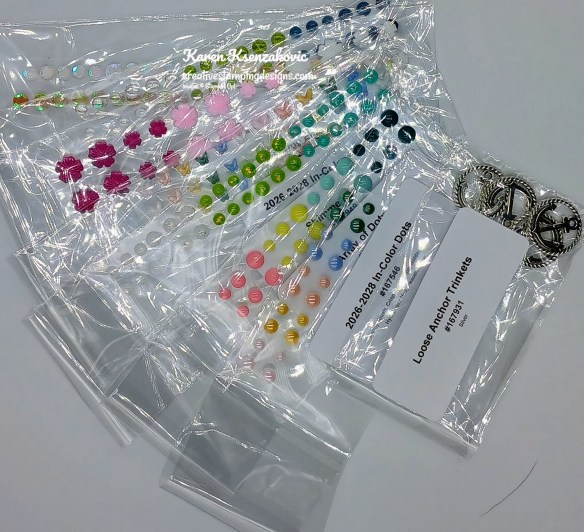
Embellishment Share – $16.50 plus $10.00 Shipping

I’m also offering an Embellishment Share. I will divide the embellishments up and package them in a cello bag with the name and number for easy ordering, just like I do with the paper and ribbon.

You will receive (approximate # listed):

  • Christmas Berries (5)
  • Christmas Epoxy Shapes (34)
  • Glossy Garden Dots (24)
  • Gold Adhesive-Back Dots (30)
  • Painted Patch Adhesive-Back Dots (40)
  • Radiant Gems (30)
  • Adhesive-Back Snowflakes (40)
  • Adhesive-Back Sparkle Sequins (40)

Double Share of the Embellishments – $33.00 plus $10.00 Shipping

Anyone is welcome to join in my shares (please note, I can only ship to addresses within the US).  To make ordering the shares a little easier, I have created a form for you to submit, that way you can order any combination of shares you want.  I will send out PayPal Invoices by August 29th and they will be due by August 30th.

Click Here for the form.

Deadline to sign up for my share is Saturday August 29th at 5:00 PM ET.

*********************************************************************************************************

15% Off Select Designer Series Paper & Cardstock – August 4-31

Are you looking for the perfect card stock or Designer Series Paper for your next project? Stampin’ Up! has got you covered! Starting August 4, enjoy 15% off select Designer Series Paper and card stock. Stock up on your favorites or explore new colors and patterns during this sale!

Here are the sale details:

  • Sales Period:  August 4–31
  • Ordering Deadline:   August 31, 2026, at 11:59 p.m. (MT)
  • While supplies last.
  • You’ll find all qualifying items in one convenient location once the sale begins on August 4—it will be located in the “Designer Series Paper and Cardstock Sale” page in the online store.

Head over to my Online Store beginning August 4 to shop the sale!!

*********************************************************************************************************

Card stock cuts for this project:

  • Barley Blush Cardstock 4 1/4″ x 11″(card base scored & folded at 5 1/2″), 4 1/4″ x 5 1/2″(card front), 4″ x 5 1/4″(inner liner mat)
  • Basic White Cardstock (2) – 3 3/4″ x 5″(die cut & inner liner), 1 1/4″ x 4 1/2 (die cuts)
  • Pastel Shimmer Specialty Paper 2 1/2″ x 2 3/4″(die cut)
  • Sunset Shimmer Vellum 3 1/4″ x 4″(die cuts)
  • 2026-2028 In-Color Pearlized Paper scrap doe flower center

*********************************************************************************************************

Product List

Stampin’ Up! Winter Scenes for The Card Concepts

Good Wednesday morning my stamping friends. How is everyone doing today? We’re halfway through the week and on our way to the weekend already. I’ve been busy getting my product shares cut up and packaged. I’m hoping to head over to the post office after work today to get them sent out to everyone.

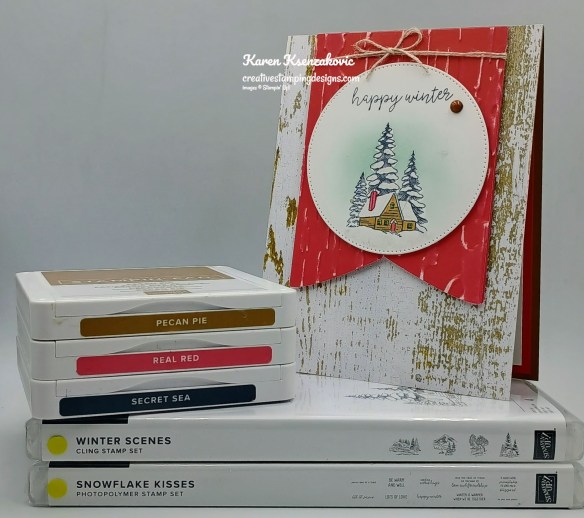
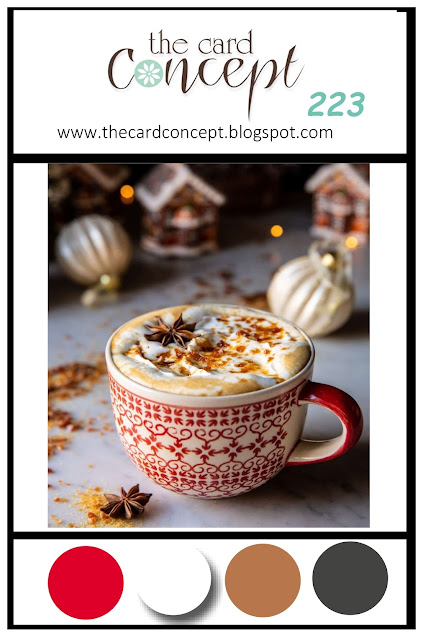
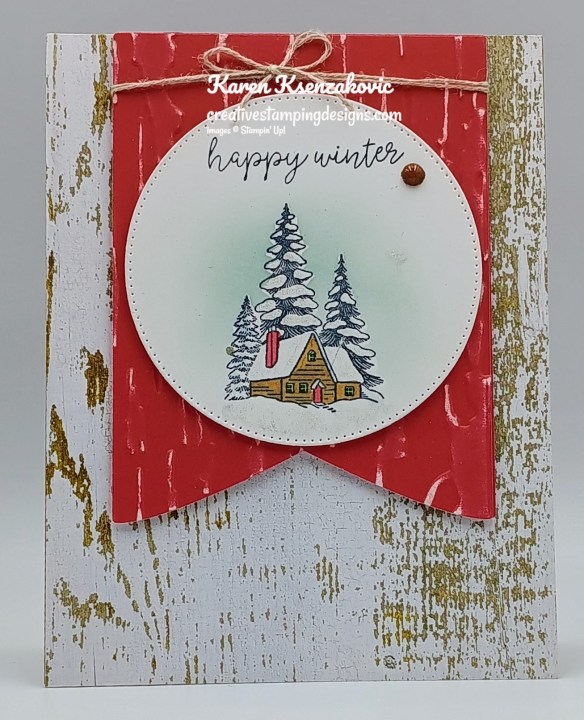
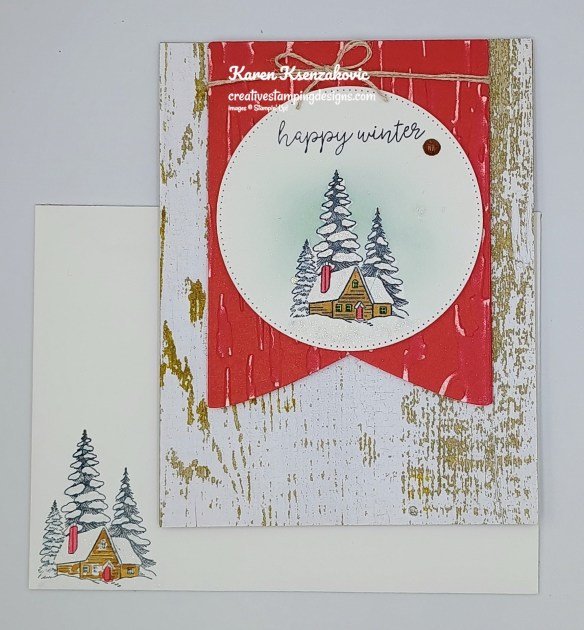
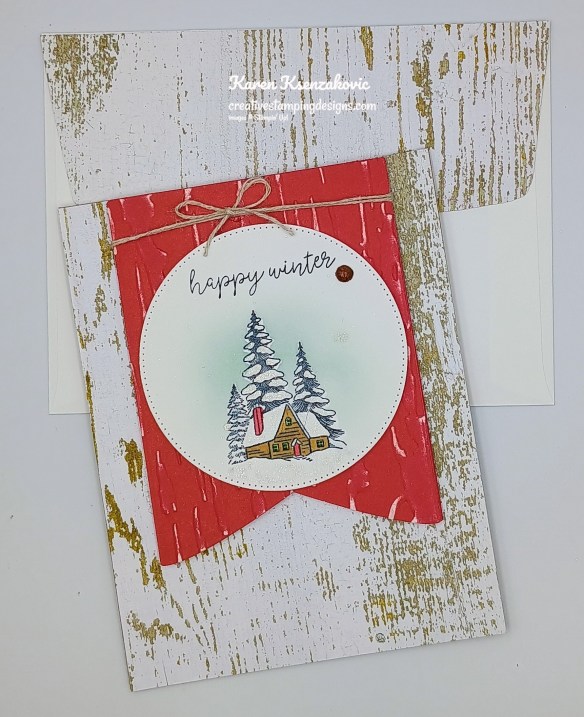
Today’s card is for the inspiration challenge from The Card Concepts. The inspiration photo #223 is Cozy New Year. I used lots of layered on my card, since that is one of my favorite kinds of cards to make. If you’d like to see a quick video of how I made this card, Click Here to go to my Instagram Reels. Here’s my card for today.

Stampin' Up! Winter Scenes Banner 1 creativestampingdesigns.com

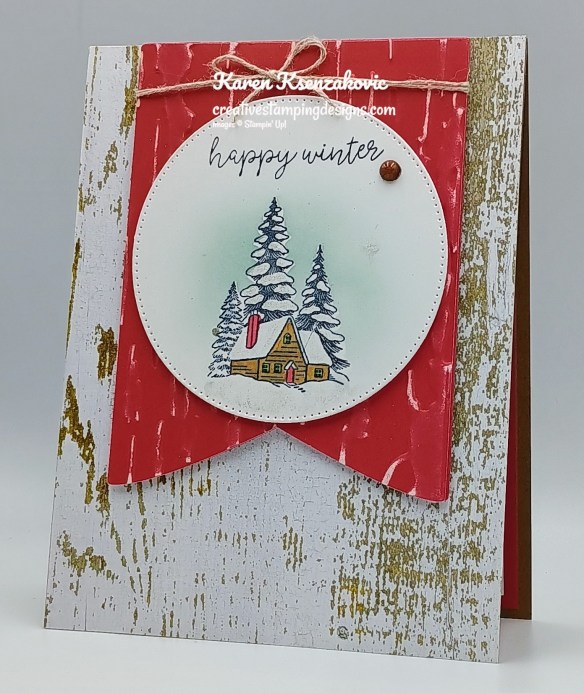
I used the Stampin’ Up! Winter Scenes Stamp Set along with the Stampin’ Up! Snowflake Kisses Stamp Set, Country Woods Designer Series Paper, Birch Wood 3D Embossing Folder, Party Banner Dies and Stylish Shapes Dies for my card today. I was inspired by the colors for my clean and layered card today.

I hope you will take a moment to visit The Card Concepts and join us for our challenge 223.  How are you inspired by the photos?

Stampin' Up! Winter Scenes Banner 2 creativestampingdesigns.com

Adhere a panel of Country Woods DSP to a Pecan Pie card base. Using the Party Banners Dies, cut the panel of Real Red Two-Tone cardstock. Emboss the banner using the Birch Wood EF, use a sanding block on the banner.

Stampin' Up! Winter Scenes Banner 3 creativestampingdesigns.com

Wrap a piece of Linen Thread around the top of the banner and tie a bow. Adhere the banner to the card front with Stampin’ Dimensionals. Using the largest circle from the Stylish Shapes Dies, cut the panel of Basic White. Stamp the cabin image form the Winter Scenes stamp set in Secret Sea Ink on the die cut circle. Stamp the sentiment from the Snowflake Kisses stamp set in Secret Sea Ink on the top of the die cut circle. Mask the image with a sticky note and add Pool Party Ink using the Small Blending Brush.

Stampin' Up! Winter Scenes Banner 4 creativestampingdesigns.com

Color the image using Pecan Pie and Real Red Stampin’ Blends Markers. Go over the snowy areas using the Wink of Stella Brush. Adhere the artwork to the banner using Stampin’ Dimensionals. Add a Streaked Dot to the card front.

Stampin' Up! Winter Scenes Banner 5 creativestampingdesigns.com

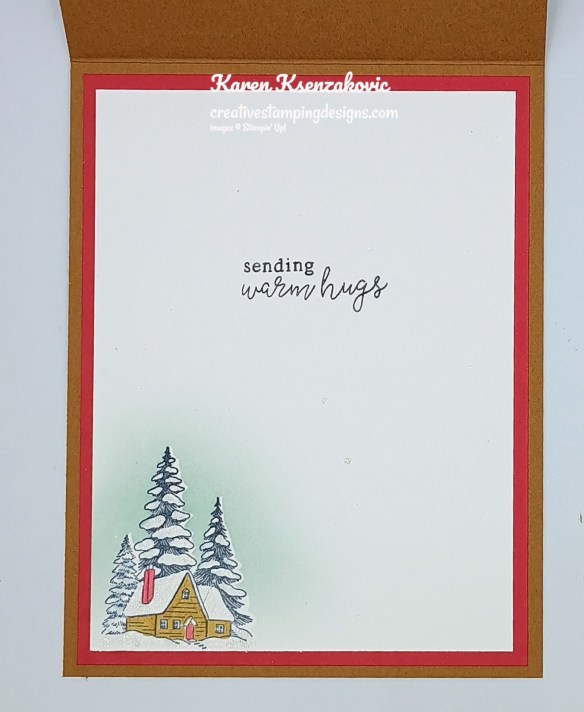
Stamp the sentiment form the Snowflake Kisses stamp set in Secret Sea Ink on the panel of Basic White. Stamp the cabin image from the Winter Scenes stamp set in Secret Sea Ink on the bottom of the panel. Mask and color the image the same as for the card front. Adhere the Basic White panel to a Real Red mat then to the inside of the Pecan Pie card base.

Stampin' Up! Winter Scenes Banner 6 creativestampingdesigns.com

Decorate a Basic White Medium Envelope to complete your card. Stamp the cabin image from the Winter Scenes stamp set in Secret Sea Ink on the envelope front. Mask and color the image the same as for the card front. Adhere a panel of Country Woods DSP to the envelope flap.

Stampin' Up! Winter Scenes Banner 7 creativestampingdesigns.com

Thank you for stopping by my blog today. I hope you like the card and will give it a try. Happy Stamping!!

*********************************************************************************************************

If you need any stamping supplies, I’d love to be your Demonstrator. Just click HERE to go directly to my online store or drop me an email if you have any questions. 

*********************************************************************************************************

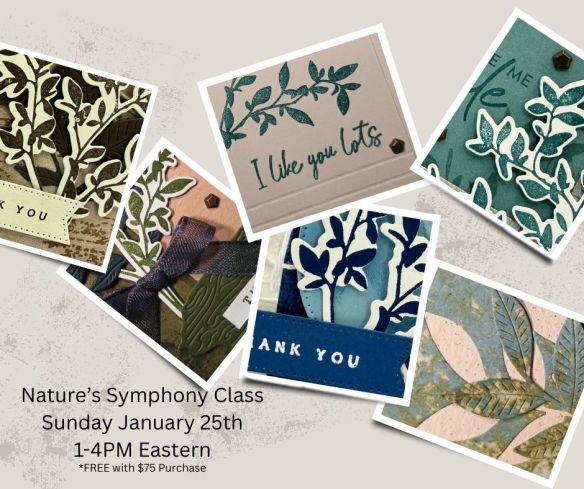
Registration Open for January Nature’s Symphony Online Class

Tara Carpenter and I are teaming up to offer a fun Online Zoom Class featuring the new Stampin’ Up! Nature Walk Suite Collection.  We will be creating 6 different cards 2 of which will be fun folds.  This class is free with a $75 purchase from my Online Store.  As an extra bonus if you make your purchase starting on Tuesday January 6, you will earn Bonus Coupons, and you’ll be eligible for the new Product of the Month.

The class requirements and what you will receive:

  • Visit my Online Store and place a $75 or more order before tax and shipping.
  • Once you have made the purchase, fill out this form and submit Click Here For Google Form
  • Zoom class with complete step by step instructions to complete each card as we go.
  • PDF with detailed directions and photos
  • A Link to the recorded class after we are done so you can watch it again and make more cards.

A week before the class I will send you the complete PDF of the cards so you can cut all your cardstock gather your supplies, so you are ready to go.  We will NOT be cutting cardstock live.  Everyone’s cards will be unique since you will pick which color cardstock and ink you want to use for each card.

The class will be held on Sunday January 25th from 1pm – 4pm Eastern Time via Zoom.  This will allow everyone all over the United States to participate live!  

I will email you the Zoom link to the class a few days before the event.

Click Here to Register

Deadline to sign up is Sunday January 18th at 5pm ET  

*********************************************************************************************************

Bonus Days Going On!!!

It’s almost time for BONUS DAYS! Because do you know what’s a great deal? Getting rewarded for all the crafting supplies you’re already going to buy! When you shop between January 6 and February 2 and spend $50 USD, you will earn a $5 USD coupon! Make sure you save all your coupons because you can redeem them (and we mean ALL of them) between February 3 and 28. And don’t forget—each purchase earns you Stampin’ Rewards, so that’s even more bang for your buck! There’s no limit to how many coupons you can earn!

Details:

  • Earn a $5 USD coupon for every $50 USD spent (before shipping and tax).
  • All coupon codes will be emailed right after a qualifying purchase has been made. You must have a customer account with a valid email address to earn coupons when you shop.
  • If you earn multiple codes from a single order, you will receive one email with multiple codes. If you earn multiple codes from multiple orders, you will receive separate emails for each code earned.
  • All order types qualify for this promotion.
  • Orders started before the promotion begins will not count toward earning coupon codes. You must add items to your cart and complete your purchase during the earning period.
  • There is no limit to the number of coupon codes participants can earn per order or throughout the duration of the earning period.

*********************************************************************************************************

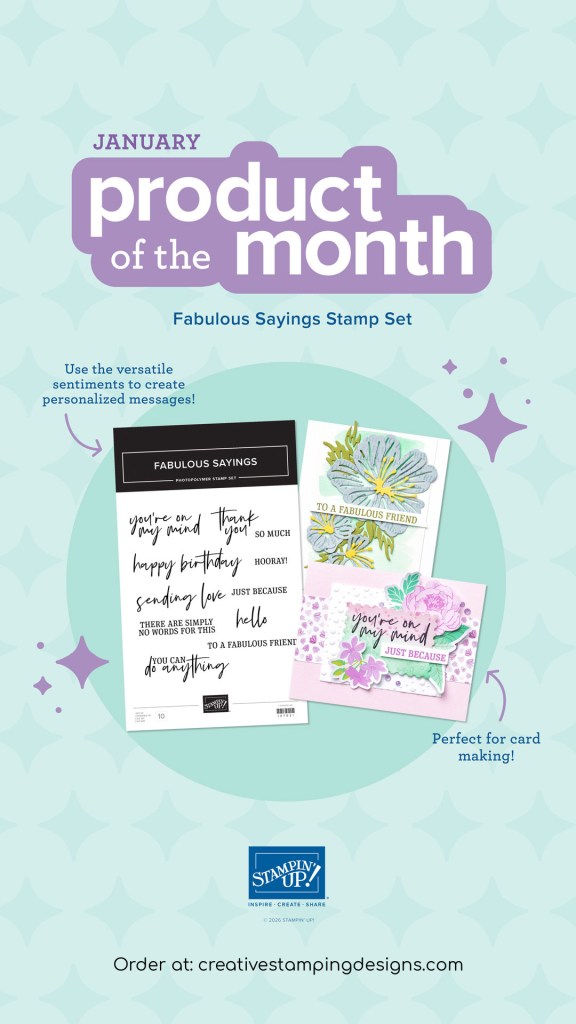
New Stampin’ Up! Product of The Month

Send thoughtful messages with style using the Fabulous Sayings Stamp Set! This versatile stamp set features all-occasion sentiment stamps for birthdays, thank-you notes, love, friendship, and support cards. The mix of a handwritten script with a classic serif font pair beautifully with a wide range of card making and paper crafting styles. The Fabulous Sayings Stamp Set is the exclusive Product of the Month for January 2026! Only available until stocks run out—don’t wait to get yours! This is a Two-Step Stampin’ set; it allows you to layer two or more images to create one final image with extra texture and dimension in the colors you want.

DETAILS
– January 2026 Product of the Month
– 11 photopolymer stamps
– Suggested clear blocks (sold separately): c, h
– Two-Step

PRODUCT OF THE MONTH
– Is a new exclusive product released each month!
– Can be unlocked for just $5 with orders over $75 (after discounts and rewards).
– Is only available while supplies last—they can sell out quickly!
– Is limited to one per customer (including language versions).

*********************************************************************************************************

Card stock cuts for this project:

  • Basic White Cardstock 3 1/4″ x 3 1/4″ (artwork), 3 3/4″ x 5″(inner liner)
  • Pecan Pie Cardstock 4 1/4″ x 11″(card base scored & folded at 5 1/2″)
  • Real Red Cardstock 4″ x 5 1/4″(inner liner mat)
  • Real Red Two-Tone Cardstock 3 1/2″ x 4 1/2″(banner)
  • Country Wood Designer Series Paper 4 1/4″ x 5 1/2″(card front), 2 1/4″ x 6″(envelope)

*********************************************************************************************************

Product List

Stampin’ Up! Gathering Moments Banners

Good Tuesday morning stamping friends. I hope your week has started off well. We have switched to beautiful weather here in NJ. We went from the 90’s last week down to the 70’s this week. It’s a fall tease before the temps go back up.

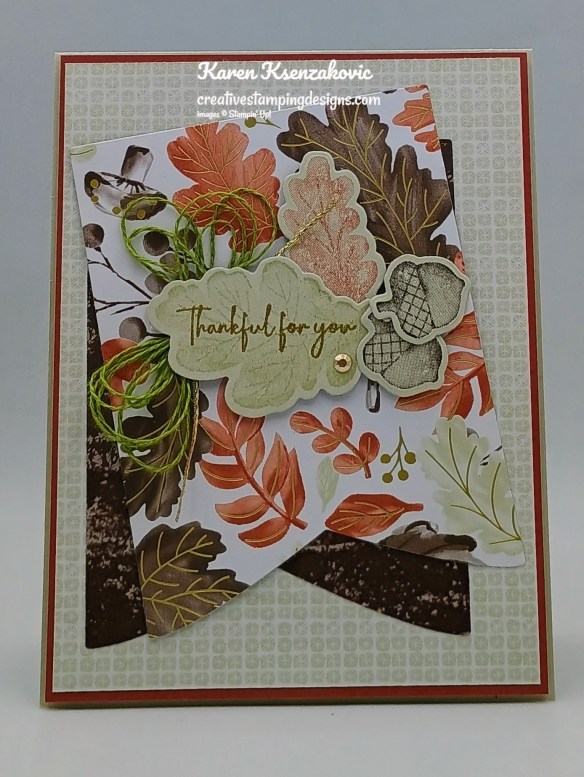
I played with the new bundle from the Online Exclusives coming in September today. I am loving all these new products so much already and I haven’t gotten everything yet. If you’d like to see a quick video of how I made this card, Click Here to go to my Instagram Reels. Here’s my card for today.

Stampin' Up! Gathering Moments Banners 1 creativestampingdesigns.com

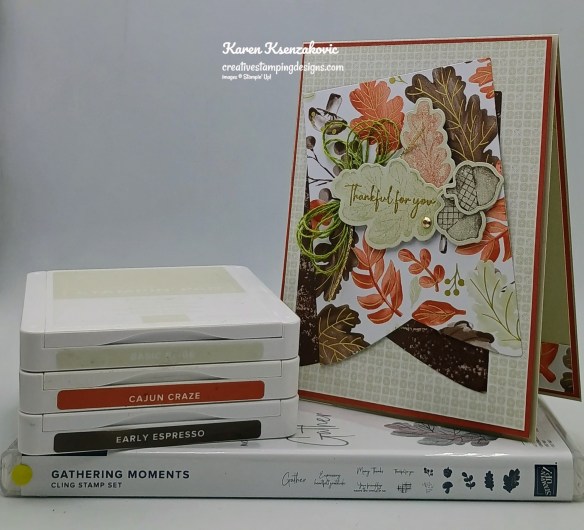
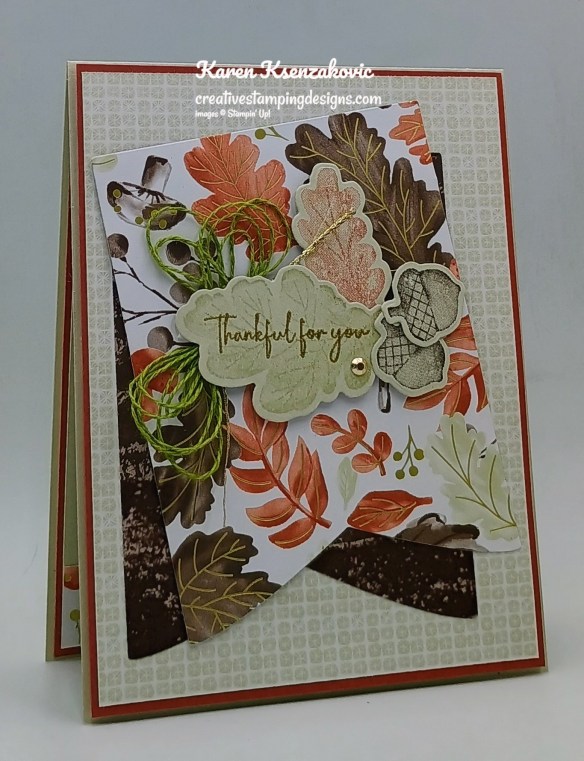
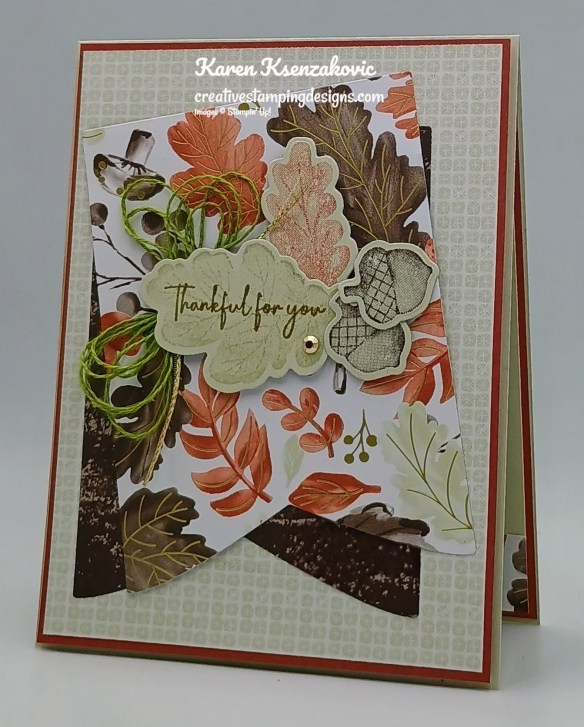
I used the new Stampin’ Up! Online Exclusives Gathering Moments Bundle and Gathering Together Specialty Designer Series Paper (both available Sept 3rd), along with the Party Banner Dies for my card today.

Stampin' Up! Gathering Moments Banners 2 creativestampingdesigns.com

Adhere a panel of Gathering Together DSP to a Cajun Craze mat with Stampin’ Seal. Adhere the layered panel to a Basic Beige card base with Stampin’ Dimensionals.

Stampin' Up! Gathering Moments Banners 3 creativestampingdesigns.com

Using the 8th largest Party Banners Dies, cut 2 panels of Gathering Together DSP. Adhere the banners together using Glue Dots. Adhere the banners to the card front with Liquid Glue.

Stampin' Up! Gathering Moments Banners 4 creativestampingdesigns.com

On a panel of Basic Beige, stamp the larger leaf image from the Stampin’ Up! Gathering Moments Cling Stamp Set in Basic Beige Ink. Stamp the smaller leaf image from the Gathering Moments stamp set in Cajun Craze Ink on the panel. Stamp the acorn image from the Gathering Moments stamp set in Early Espresso Ink 2 times on the same panel. Stamp the sentiment from the Gathering Moments stamp set in Versamark Ink on the larger leaf image. Sprinkle the sentiment with Gold Embossing Powder and set it using the Heat Tool. Cut the images out using the Gathering Moments Dies. Make a multi-loop bow using the Old Olive Linen Thread from the Early Espresso & Old Olive Linen Thread Pack (available Sept 3rd). Cut a piece of 3/8″ Gold Striped Mesh Ribbon so you have the gold edge to tie off the bow to give it a gold touch. Adhere the bow to the card front with a Glue Dot. Adhere the leaves and acorn to the card front over the bow, with Stampin’ Dimensionals. Add an Adhesive-Backed Metallic Gem to the sentiment.

Stampin' Up! Gathering Moments Banners 5 creativestampingdesigns.com

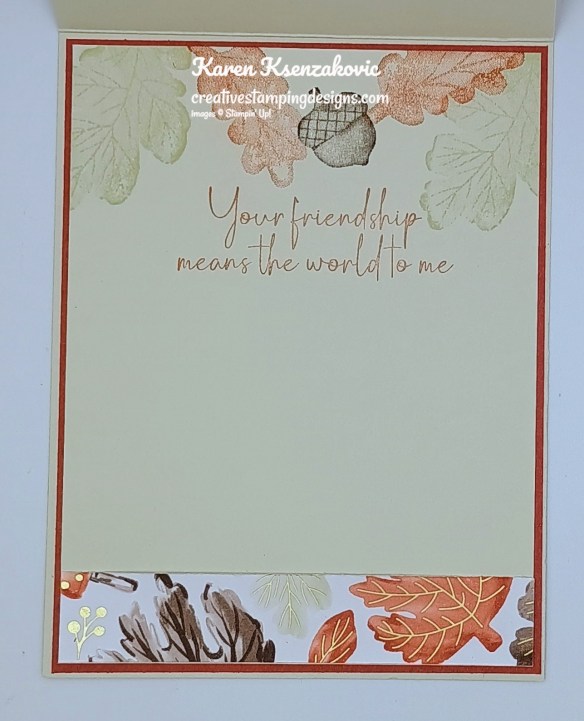
Stamp the sentiment from the Gathering Moments stamp set in Cajun Craze Ink on a panel of Basic Beige. Stamp the larger leaf image from the Gathering Moments stamp set in Basic Beige Ink on the top of the panel. Stamp the smaller leaf image from the Gathering Moments stamp set in Cajun Craze Ink on the top of the panel and the acorn image in early Espresso Ink. Adhere a panel of Gathering Together DSP to the bottom of the panel. Adhere the Basic Beige panel to a Cajun Craze mat then to the inside of the Basic Beige card base.

Stampin' Up! Gathering Moments Banners 6 creativestampingdesigns.com

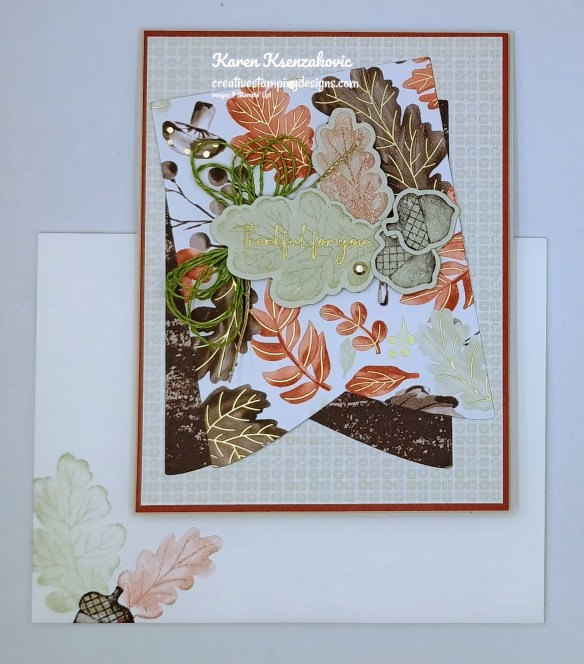
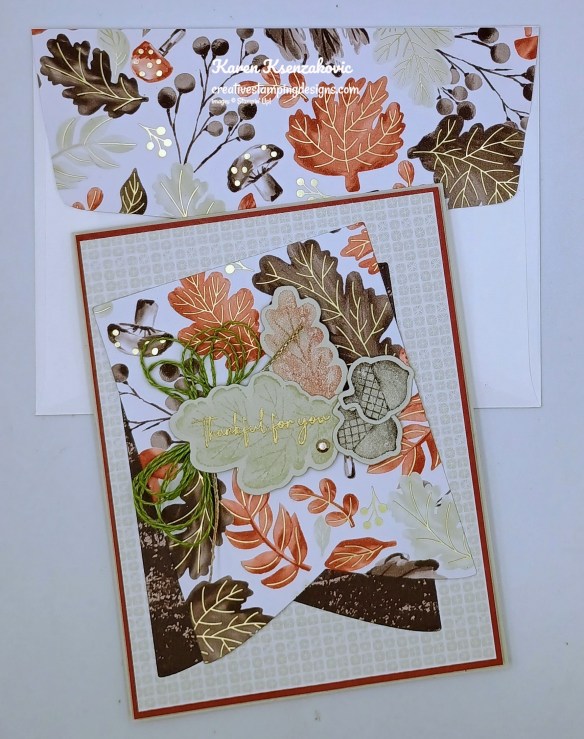
Finish your card by decorating a Basic White Medium Envelope. Stamp the large leaf image from the Gathering Moments stamp set in Basic Beige Ink on the envelope front. Stamp the smaller leaf image from the Gathering Moments stamp set in Cajun Craze Ink and the adorn in Early Espresso Ink. Adhere a panel of Gathering Together DSP to the envelope flap.

Stampin' Up! Gathering Moments Banners 7 creativestampingdesigns.com

Thank you for stopping by my blog today. I hope you like the card and will give it a try. Happy Stamping!!

*********************************************************************************************************

If you need any stamping supplies, I’d love to be your Demonstrator. Just click HERE to go directly to my online store or drop me an email if you have any questions. 

*********************************************************************************************************

My September – December 2025 Mini Catalog and September Online Exclusive Designer Series Paper, Ribbon and Embellishment Shares are open for ordering. You can order just the DSP share, just the Two-Tone cardstock share, just the Ribbon share or just the Embellishment share, or you can it all!!

I’m offering a Designer Series Paper ShareTwo-Tone Cardstock Share, Ribbon Share & Embellishment Share from the September-December 2025 Mini Catalog, along with the upcoming September Online Exclusives and I’d love to have you join!!  I’m placing my share order early on September 3rd and I’m going to use the expedited shipping option so I should be able to have the shares cut, bundled and back out to you during the week of September 8th. Wouldn’t you love to have all of the gorgeous new Designer Series Papers in the Stampin’ Up! September – December 2025 Mini Catalog and the upcoming September Online Exclusives?  What is a Paper Share you ask? It’s a sample of each of the new Designer Series Papers from the Catalog and Online Exclusives. Shares give you a good working sample of all of the papers so that you can decide which ones to order in full packs!  If you were to purchase all of the DSP in the new Catalog and Online Exclusives, it would cost you over $165.00 plus shipping and if you were to purchase all the ribbon it would cost you over $75.00.

New Designer Series Paper Share – $21.00 plus $9.00 for Priority Mail Shipping

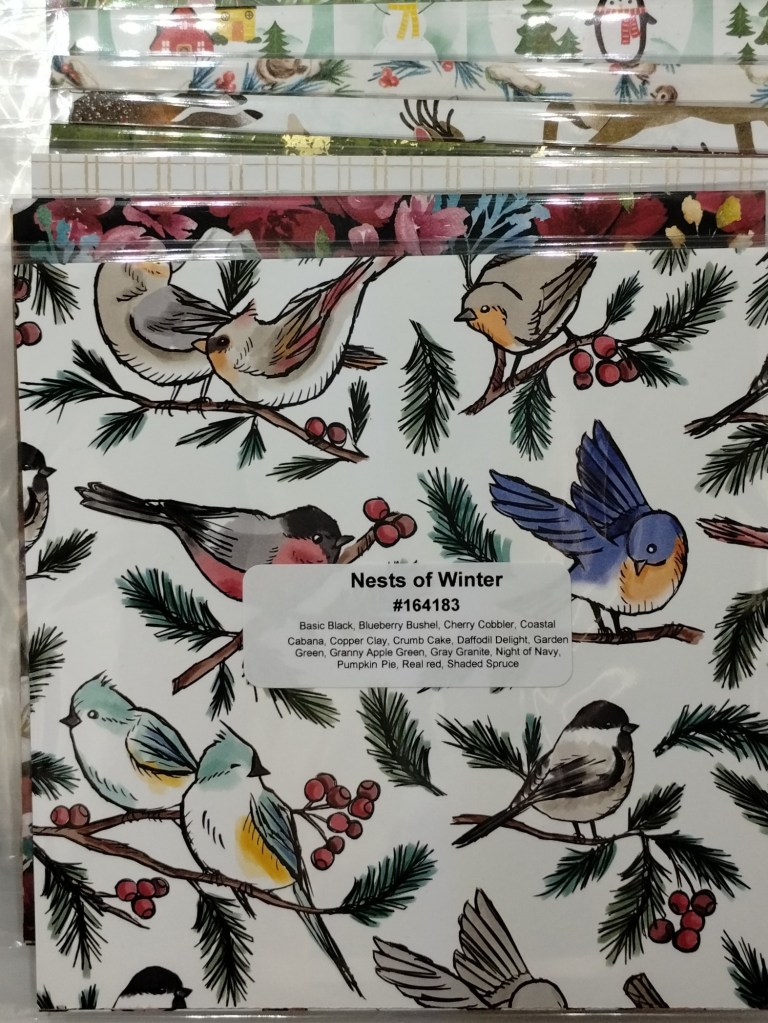
How my shares work:  I order full packs of all of the Designer Series Papers listed below, I cut them into 6″ X 6″ pieces (or 6″ X 12″ pieces for double shares) and give you one panel of each design from each pack on the list.  I pack up the paper in a cellophane bag with labels listing the NameItem # and Colors in the pack and mail it back out to you just as quickly as I can!  

New Designer Series Paper Share – $21.00 plus $9.00 for Priority Mail shipping

You will receive one 6×6 sheet of each design from the following DSP packs (the number after the name indicates how many 6×6 sheets of that paper pack you will receive):

  • All Season Velvet (3)
  • Autumn Toil (4)
  • Christmas Tags & More (8)
  • Earthen Toned Metallic (1)
  • Elegant Pine Snowflakes (6)
  • Gathering Together (6)
  • Lights of Aurora (6)
  • Modern Christmas (6)
  • North Pole Delivery (5)
  • Peaceful Garden (6)
  • Peaceful Garden Glimmer (3)
  • Traditions of Christmas (6)
  • Silent Snowflake (1)

In all, you’ll receive 61 – 6” x 6” sheets of designer or specialty paper!

Double Designer Series Paper Share – $42.00 Plus $9.00 Priority Mail Shipping

As a gift from me for ordering a Double Share of Designer Series Paper, I will include a Greetings For You Mix & Match Ephemera Pack. This gift is only for ordering a Double DSP Share.

Two-Tone Cardstock Share

Have you been wanting to try the Two-Tone Cardstock but didn’t want to buy a whole pack? You can add a share of the 4 different Two-Tone Cardstock packs for an additional $6 or purchase them separately for $6 + $9 Priority Shipping

You will receive one 6×6 sheet of each color from each of the packs (the number after the name indicates how many 6×6 sheets of that paper pack you will receive):

  • Keeping Traditions (6)
  • Peaceful Days (6)
  • Lovely Florals (6)
  • Sweet Halloween (6)

In all, you’ll receive 24 – 6” x 6” sheets of cardstock!

If you’d like double shares of the designer paper or cardstock, I’m offering those too!  I’ll cut the 12″ x 12″ sheets into 6″ × 12″ so that you’ll be able to get 3 full A2 size card fronts from each sheet and you’ll get double sheets of the 6″ x 6″ since they’re already precut.

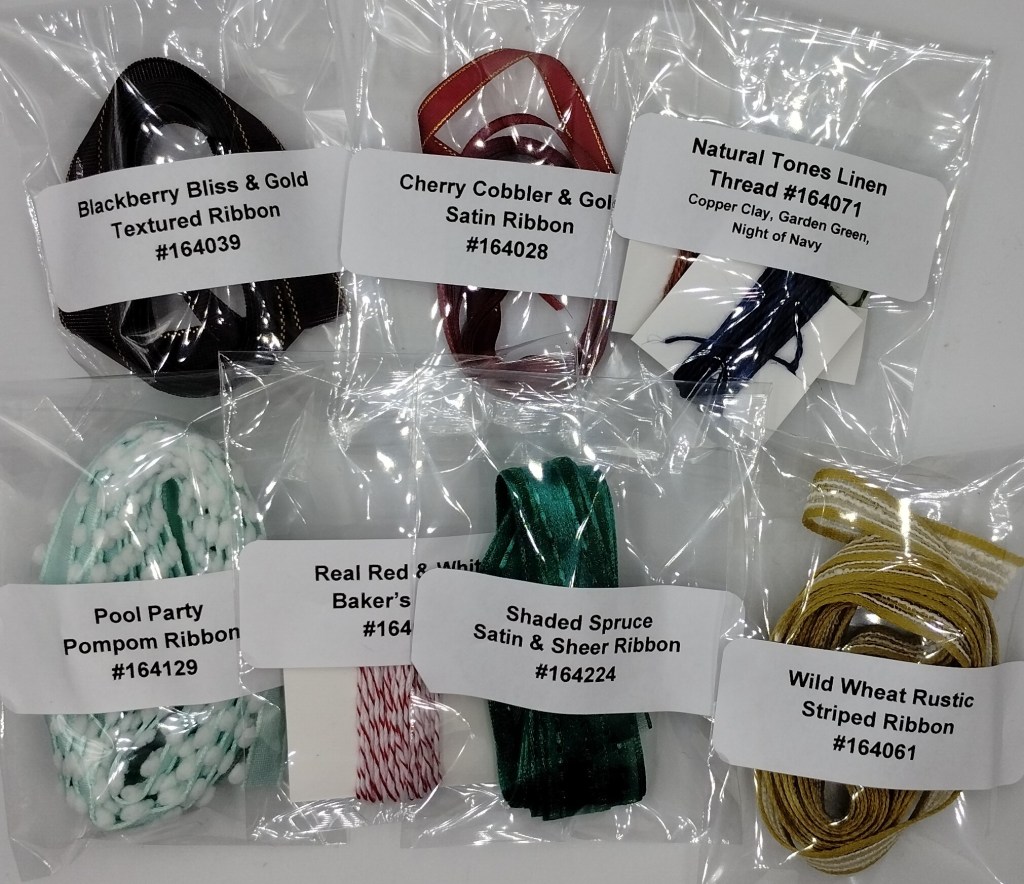
Ribbon Share – $20.00 plus $9.00 Priority Mail Shipping

All ribbons will come individually wrapped and labeled with the name and number of the product.

One-Fourth of a Roll of each:

  • Balmy Blue 1/2″ Sheer Ribbon
  • Black & White & Gold Baker’s Twine
  • Early Espresso & Old Olive Linen Thread
  • Irregular Weave 3/8″ Trim
  • Misty Moonlight & Silver Edged 1/2″ Ribbon
  • Real Red 1/2″ Shiny Ribbon
  • Shaded Spruce 7/8″ Ribbon
  • White 3/8″ Fluffy Trim

Double Ribbon Share – $40.00 Plus $9.00 Priority Mail Shipping and you will be getting 1/2 of the roll or each ribbon.

Embellishment Share – $16.00 plus $9.00 Priority Mail Shipping

I’m also offering an Embellishment Share. I will divide the embellishments up and package them in a cello bag with the name and number for easy ordering, just like I do with the paper and ribbon.

You will receive (approximate # listed:

  • Cajun Craze & Gold Dots (30)
  • Dear Dots (40)
  • Delightful Decorative Dots (36)
  • Faceted Snowflakes (42)
  • Frosted Iridescent Dots (40)
  • Hues of Blue Flowers (32)
  • Large Gold Hoops (2)
  • Streaked Dots (32)
  • Traditional Sparkling Sequins (48)

Double Share of the Embellishments – $32.00 plus $9.00 Priority Mail Shipping

Anyone is welcome to join in my shares (please note, I can only ship to addresses within the US).  To make ordering the shares a little easier, I have created a form for you to submit, that way you can order any combination of shares you want. Click Here for the form. I will send out PayPal Invoices by September 1st.

Deadline to sign up for my share is Sunday August 31st at 5:00 PM ET.

I put together a video showing you everything included in my shares Here.

Let me know if you have any questions, I’m more than happy to help you. Thank you for joining in my Shares!!

*********************************************************************************************************

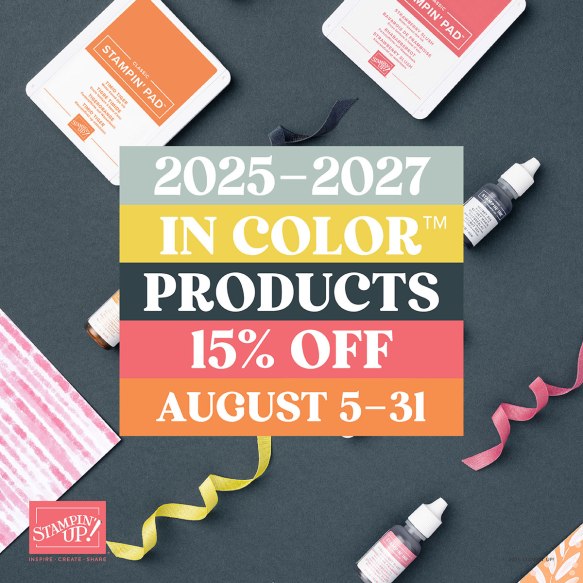
2025-2027 In-Color Products Sale Going On

Starting August 5, select products that feature the new 2025–2027 In Colors™ are 15% off! This is a great opportunity to purchase new In Color products at a discount, so grab products you love—like ink, two-tone cardstock, and Designer Series Paper—and get everything you need to create projects that showcase Stampin’ Up!’s amazing color coordination!

Promotion Details:

  • Sales Period: August 5–31
  • Ordering Deadline: August 31, 2025, at 11:59 p.m. (MT)
  • Sale includes select inks, cardstock, Designer Series Paper, embellishments, and other products that include these new In Colors. Only products featured on the 2025–2027 In Colors page are included in this promotion.
  • Products are available only while supplies last.

You can find the 2025-2027 In Color sale items that will be on sale beginning August 5 right here!  Get your list ready and shop early for the best selection!

*********************************************************************************************************

Card stock cuts for this project:

  • Basic Beige Cardstock 4 1/4″ x 11″(card base scored & folded at 5 1/2″), 2: x 4 1/2″(die cuts), 4″ x 5 1/4″(inner liner)
  • Cajun Craze Cardstock (2) – 4 1/8″ x 5 3/8″(card front & inner liner mats)
  • Gathering Together Specialty Designer Series Paper 4″ x 5 1/4″(card front), (2) 3 1/2″ x 4 1/2″ (banners),3/4″ x 4″(inner liner), 2 1/4″ x 6″(envelope flap)

*********************************************************************************************************

Product List

Stampin’ Up! Lifetime of Love

Good Saturday morning stamping friends and welcome to the weekend. I hope you have some plans for the weekend in the work. I actually have off today. I’ll be spending the day celebrating my son and his fiancé at their engagement party. They are making a whole day of it at this quaint brewery. They wanted to keep it simple since that’s who they are. It will be a whole day of everyone coming and going and just getting together to celebrate and meet each other. We took care of ordering A LOT of pizzas. My daughter made about 80 cupcakes yesterday and they came out beautiful. I made caprese appetizer bites using my home-grown tomatoes and basil with a balsamic glaze. I’m looking forward to a fun day meeting everyone and it looks like the weather is going to cooperate with us.

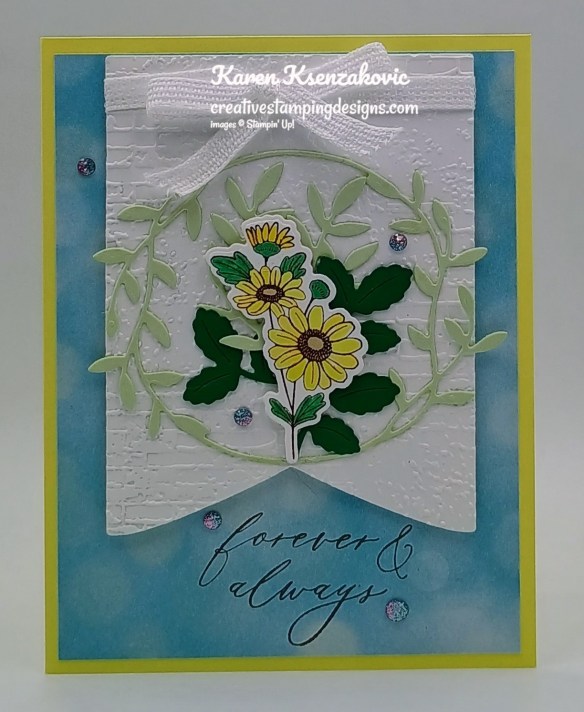
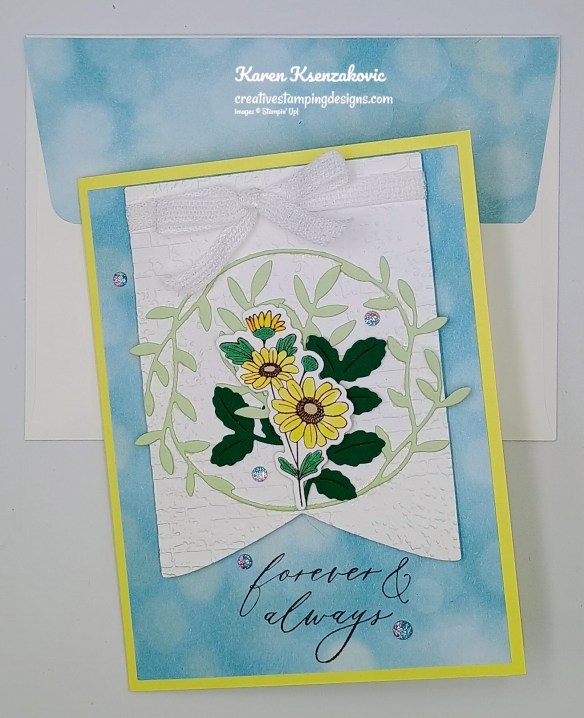
So, since we have an engagement party, my daughter asked me if I would make a card for her to give them. That’s today’s card in the theme colors of the party. If you’d like to see a quick video of how I made this card, Click Here to go to my Instagram Reels. Here is my card for today.

Stampin' Up! Lifetime of Love Engagement 1 creativestampingdesigns.com

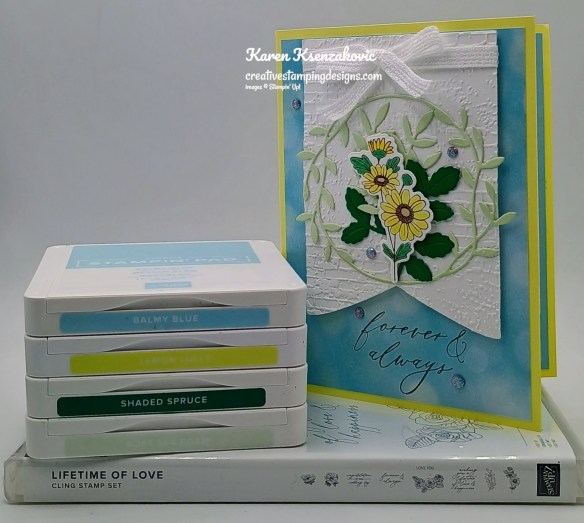
I used the Stampin’ Up! Lifetime of Love Cling Stamp Set along with the Lifetime of Love Dies, Party Banner Dies, Exposed Brick 3D Embossing Folder and Beautiful Bokeh 6 x 6 Designer Series Paper for my card today.

Stampin' Up! Lifetime of Love Engagement 2 creativestampingdesigns.com

Adhere a panel of Beautiful Bokeh DSP to a Lemon Lolly card base. Stamp the sentiment from Lifetime of Love stamp set in Early Espresso Ink on the bottom center of the panel.

Stampin' Up! Lifetime of Love Engagement 3 creativestampingdesigns.com

From a panel of Basic White, cut the Party Banner Die and emboss it using the Exposed Brick EF. Wrap a piece of 1/4″ White Ribbon around the top and tie a bow. Adhere the banner to the card front with Stampin’ Dimensionals. On the panel of Basic White, stamp the small flower image from Lifetime of Love stamp set in early Espresso Ink. Color the image with Crumb Cake, Daffodil Delight, Lemon Lolly and Shaded Spruce Stampin’ Blends Markers.

Stampin' Up! Lifetime of Love Engagement 4 creativestampingdesigns.com

Using the Lifetime of Love Dies, cut the flower image, the small leaf die from a panel of Shaded Spruce and the circle leaf die and tall leaf die from a panel of Soft Sea Foam. Adhere the circle leaf die cut to the banner. Adhere the flower die cut inside the circle with Stampin’ Dimensionals. Adhere the tall leaf and small leaf die cuts under the flower with Glue Dots. Add a few Two-Tone Sparkle Gems to the card front.

Stampin' Up! Lifetime of Love Engagement 5 creativestampingdesigns.com

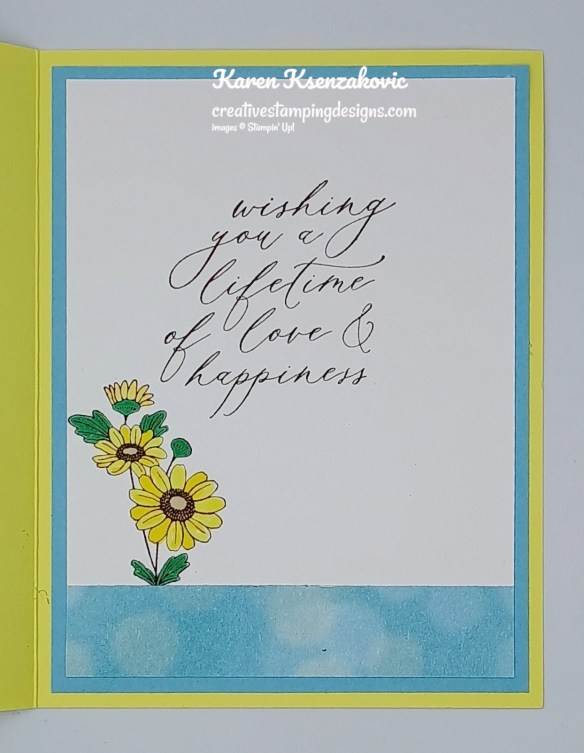
Stamp the sentiment from Lifetime of Love stamp set in Early Espresso Ink on a panel of Basic White. Stamp the flower image from the Lifetime of Love stamp set towards the bottom of the panel in early Espresso Ink. Color the image with Crumb Cake, Daffodil Delight, Lemon Lolly and Shaded Spruce Stampin’ Blends Markers. Adhere a panel of Beautiful Bokeh DSP to the bottom of the panel. Adhere the Basic White panel to a Balmy Blue mat then to the inside of the Lemon Lolly card base.

Stampin' Up! Lifetime of Love Engagement 6 creativestampingdesigns.com

Decorate a Basic White Medium Envelope to finish your card. Stamp the small flower image from the Lifetime of Love stamp set in Early Espresso Ink on the envelope front. Color the image the same as for the card. Adhere a panel of Beautiful Bokeh DSP to the envelope flap.

Stampin' Up! Lifetime of Love Engagement 7 creativestampingdesigns.com

Thank you for stopping by my blog today. I hope you like the card and will give it a try. Happy Stamping!!

*********************************************************************************************************

If you need any stamping supplies, I’d love to be your Demonstrator. Just click HERE to go directly to my online store or drop me an email if you have any questions. 

*********************************************************************************************************

Together Let’s Raise Some Money for the Floods in Texas from July 4th

As of last night, July 18th, we’re at $180 of the $500 to be donated. We can Do this!!!

We’ve all been watching – and crying – as we’ve watched the devastation caused by the flooding of the Guadalupe River in Texas on July 4th.  It’s beyond horrible.  Since there’s really nothing most of us can do that is hands-on – I try to help financially.  I’m coming to you for HELP! So…I’m going to do a fundraiser that’ll start right now.  I’ve selected Mercury One as the recipient of our donation. 

Mercury One is a 501(c)(3) charity that was founded in 2011 by media personality, entrepreneur, and New York Times best-selling author Glenn Beck. It was created to inspire the world in the same way the United States’ space program shaped America’s national destiny by setting a goal and committing to reach it against all odds. The only limitations to achievement are those we place on ourselves, and we believe in the goodness and power of the individual to overcome any obstacle.

How can you help me help them??

Place a Stampin’ Up! Order Thru Me OR Donate Directly!

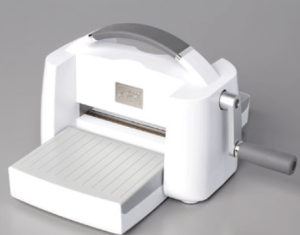
And – as an added incentive – if we hit our donation goal – $500– I’ll be giving away a new Stampin’ Cut and Emboss Machine to one winner!

I’m setting a goal of donating a total of $500 – and here’s how you can help me (and be entered to win a new Stampin’ Cut and Emboss Machine!).

1. – Shop Online:

  • For any orders placed through my Online Store between now and Saturday July 19,2025, I’ll be making a targeted donation of 20% of your merchandise total to Mercury One for Texas Hill County Flood Victims.
    • You’ll earn your Creative Stamping Designs Rewards with all order of $50 or more (before tax & shipping).
    • Anyone ordering $50+ (before tax & shipping) will be entered to win a new Stampin’ Cut & Emboss Machine from me to give away on July 20th.

OR…

2. – Make a Donation of $50+ directly to Mercury One at this LINK

  • For those in the US, send me a screenshot (to creativestampingdesigns@gmail.com) of the receipt for your donation of $50+ to Mercury One and you’ll be entered to win a new Stampin’ Cut & Emboss Machine from me to be give away on July 20th.

OR…

3. – Do Both!!

  • If you order $50+ through my Stampin’ Up! Online Store AND donate at least $50 directly to Mercury One, then your name will be entered TWICE to win the Stampin’ Cut & Emboss Machine!

Please note: Per Stampin’ Up! rules, I’m only allowed to ship the Stampin’ Cut & Emboss Machine to addresses in the United States or military APO addresses.  Only those with US/APO shipping addresses will be eligible to win the Stampin’ Cut & Emboss Machine. Anyone outside the US is welcome to donate but will not be eligible to win the machine.

NOTE: Orders and/or Donations must be placed by midnight Eastern Time on Saturday July 19 to be entered to win the machine.  One winner of the Stampin’ Cut & Emboss Machine will be randomly chosen on Sunday July 20th from all of the entries received.

Any questions, please send me an email to creativestampingdesigns@gmail.com. I appreciate your help more than I can express.

*********************************************************************************************************

Sales Tax Holiday

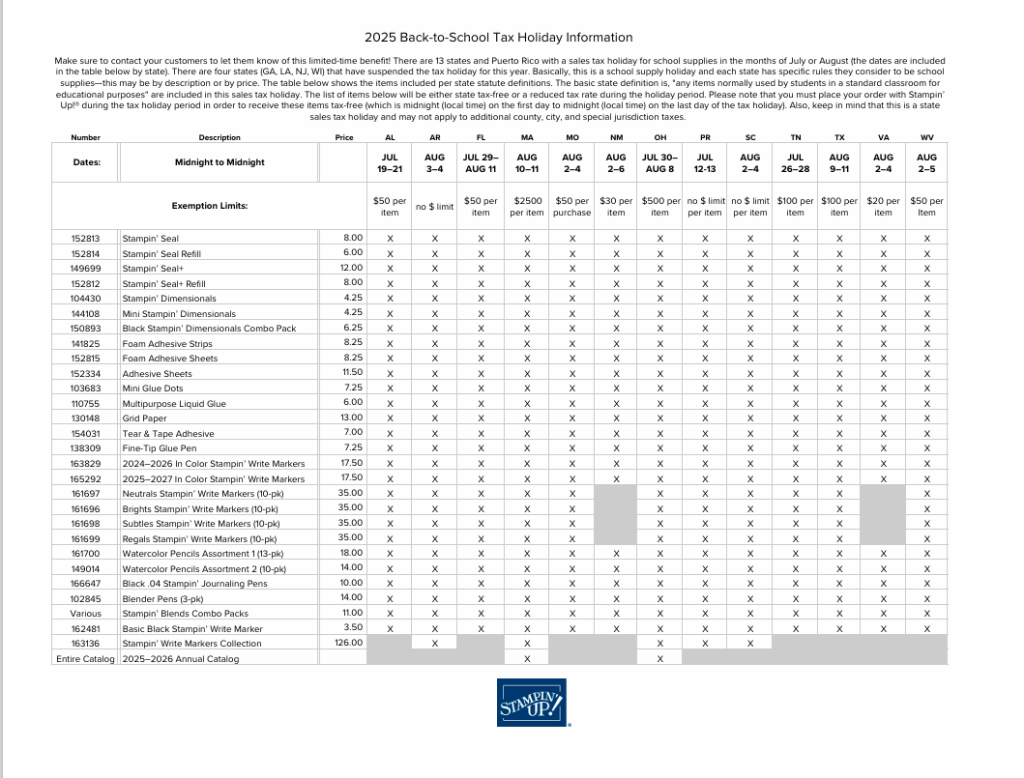
Twelve states and Puerto Rico are having Back-to-School Sales Tax Holidays this year and some Stampin’ Up! items qualify for the tax break in those states!

The states with upcoming tax holidays are:  Alabama, Arkansas, Florida, Massachusetts, Missouri, New Mexico, Ohio, South Carolina, Tennessee, Texas, Virginia and West Virginia.  So if you live in one of those states or Puerto Rico, take a second to download the spreadsheet below and mark your calendar!

Here is the list of states having sales tax holidays, what the dates are and what supplies will be tax free during the holiday (click on the image to download a full-size printable page):

Please note that you must place your order with Stampin’ Up! during the tax holiday period in your state in order to receive these items tax-free (which is midnight on the first day to midnight on the last day of the tax holiday).  Also, keep in mind that this is a state sales tax holiday; the state statute may not apply to county, city, and special jurisdiction taxes.

For those wondering about Georgia, Illinois, Louisiana, New Jersey, and Wisconsin, those states have suspended the sales tax holiday this year.

*********************************************************************************************************

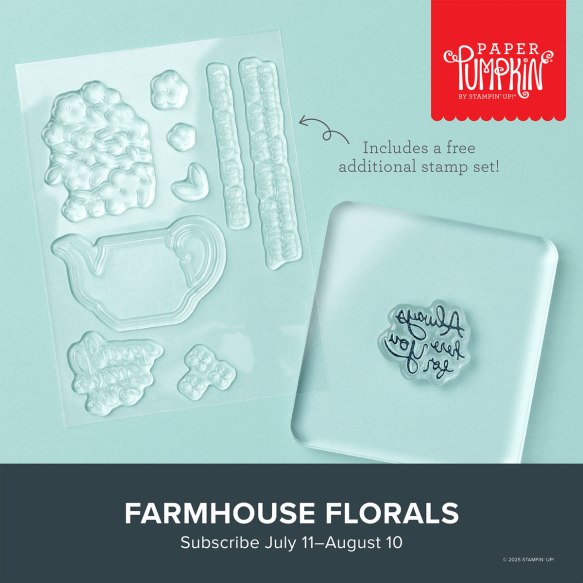
Farmhouse Florals

Subscribe July 11 – August 10

Send whimsical cards featuring flowers nestled in delightfully unexpected places.    

  •  Makes 9 cards: 3 each of 3 designs with 9 coordinating envelopes  
  •  Precut paper pieces and linen thread    
  •  Sentiment stamps for the outside and inside of the cards    
  •  Coordinating colors: Calypso Coral, Darling Duckling, Gray Granite, Lost Lagoon, Pecan Pie, Secret Sea (Classic Stampin’ Spot)

Subscribe to the August Paper Pumpkin Kit between 11 July and 10 August by clicking here!

*********************************************************************************************************

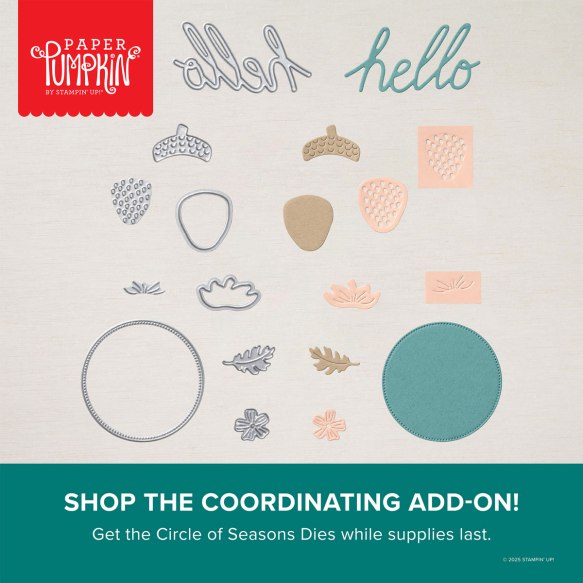
Don’t miss the coordinating
Circle of Seasons Dies Add-On!

Make the most of your Paper Pumpkin kits with the Circle of Seasons Dies add-on! Quickly and cleanly cut out a strawberry with a blossom, a circle, a leaf, or an acorn to elevate your crafting projects. These additional dies are designed to work with THREE Paper Pumpkin Kits: the Sweeter with You Paper Pumpkin Kit, the Farmhouse Florals Paper Pumpkin Kit, and the Fall for Toile Paper Pumpkin Kit. Pair these dies with other Stampin’ Up! products for even more creative options! This exclusive add-on (item 167277) coordinates with the three upcoming kits! Paper Pumpkin subscribers can purchase it beginning June 11. Add-on is available only while supplies last, so it’s best to shop early!

DETAILS
– 4 dies
– Largest die: 2-1/2″ x 1-1/4″ (6.4 x 3.2 cm)
– Use with a Stampin’ Cut & Emboss Machine (sold separately)

You must be a current Paper Pumpkin subscriber to purchase this item. To become a subscriber, visit www.stampinup.com/paperpumpkin.

Note: Supplies may be limited toward the end of the subscription period.

#167277 $12

*********************************************************************************************************

Card stock cuts for this project:

  • Balmy Blue Cardstock 4″ x 5 1/4″(inner liner mat)
  • Basic White Cardstock 4″ x 5 1/4″(banner & artwork), 3 3/4″ x 5″(inner liner)
  • Lemon Lolly Cardstock 5 1/2″ x 8 1/2″(card base scored & folded at 4 1;/4″)
  • Shaded Spruce Cardstock 2″ x 2″(die cuts)
  • Soft Sea Foam Cardstock 3 1/4″ x 4″(die cuts)
  • Beautiful Bokeh 6 x 6 Designer Series Paper 4″ x 5 1/4″(card front), 3/4″ x 4″(inner liner),2 1/4″ x 6″ (envelope flap)

*********************************************************************************************************

Product List