
Goos Saturday morning stamping friends, welcome to the holiday weekend. I hope you are making some fun plans. I’ll be working all day today, then Sunday & Monday are dedicated to cutting, sorting & packaging my product shares so I can get them out in the mail by Wednesday.
Today I have another fun Halloween card for you. I have a series of cards to give you some ideas of different designs to make. If you’d like to see a quick video on how I made this card, Click Here to go to my Instagram Reels. Here’s my card for today.
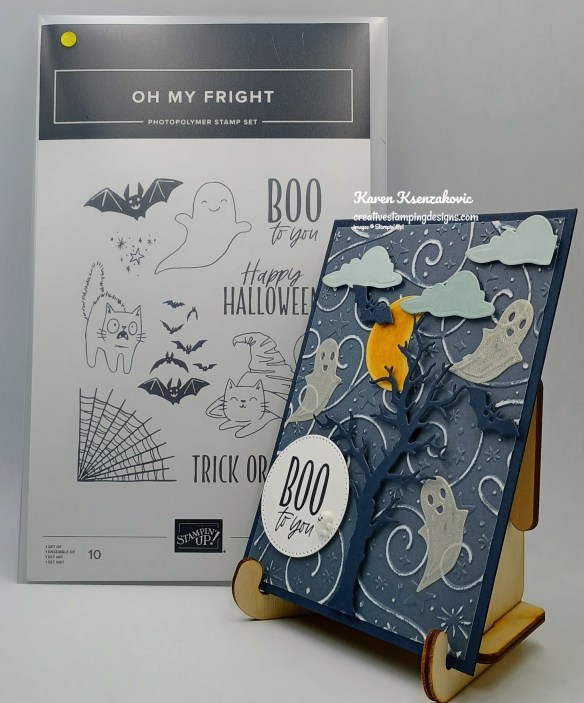
I used the Stampin’ Up! Oh My Fright Bundle along with Swirls of Magic Embossing Folder, Stylish Shapes Dies and Sunset Shimmer Vellum Specialty Paper for my card today.
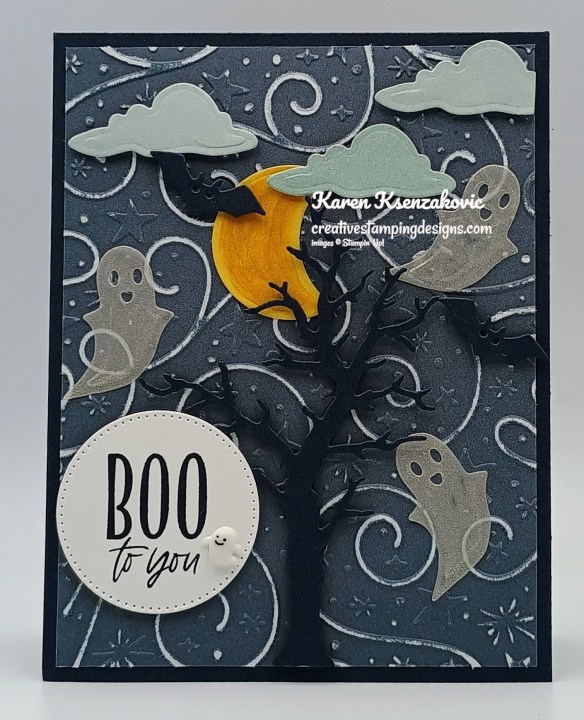
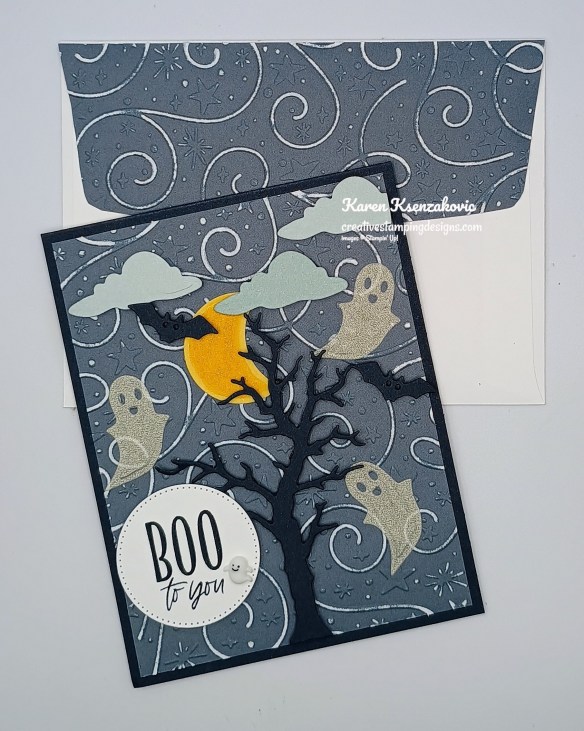
Emboss a panel of Secret Sea Two-Tone using the Swirls of Magic EF. Using the Sanding Block, lightly brush over the embossed panel to bring out the white core of the paper. Adhere the embossed panel to the Secret Sea card base.
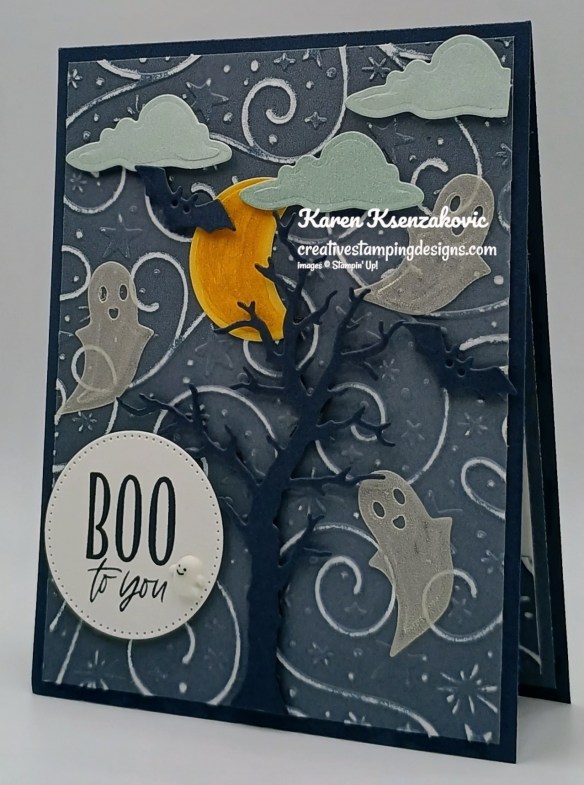
using the Oh My Fright Dies, cut the tree & bats from a panel of Secret Sea, the clouds from a panel of Cloud Cover Two-Tone, the moon from a panel of Golden Glow Two-Tone and the ghosts from a panel of Sunset Shimmer Vellum. Using the Golden Glow Shimmer Brush, bush the moon die cut. Adhere the die cuts to the card front.
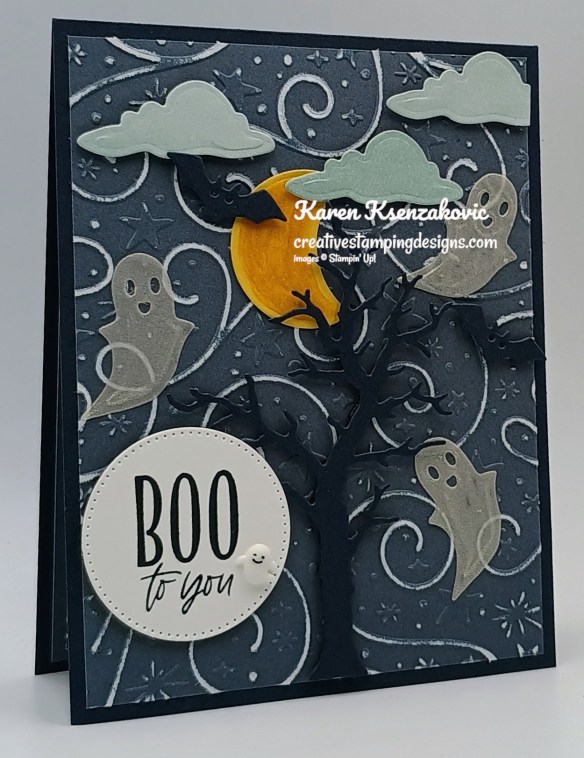
Stamp the sentiment from the Oh My Fright stamp set in Secret Sea Ink. Cut the sentiment out using the Stylish Shapes Dies. Adhere the sentiment to the card front. Add a ghost from the Adhesive-Backed Bats, Ghosts & Dots.
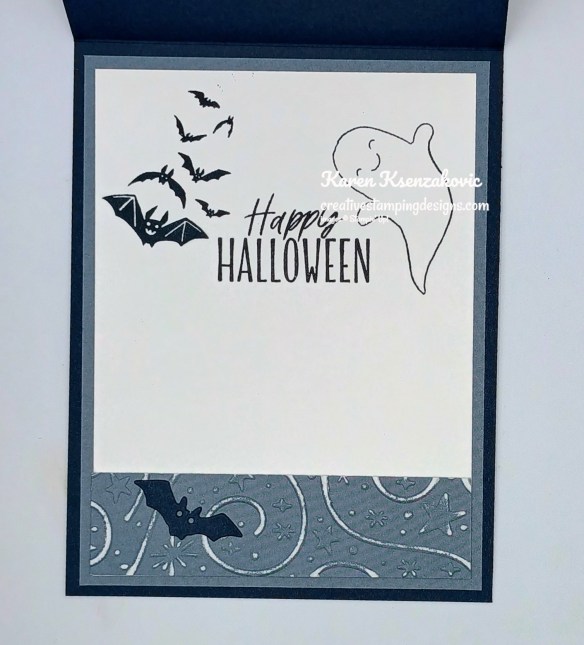
Stamp the sentient from the Oh My Fright stamp set in Secret Sea Ink on a panel of Basic White. Stamp the bat & ghost images from the Oh MY Fright stamp set on either side of the sentiment. Adhere an embossed & sanded panel of Secret Sea Two-Tone to the bottom of the panel and adhere a die cut bat to it. Adhere the Basic White panel to a Secret Sea Two-Tone mat then to the inside of the Secret Sea card base.
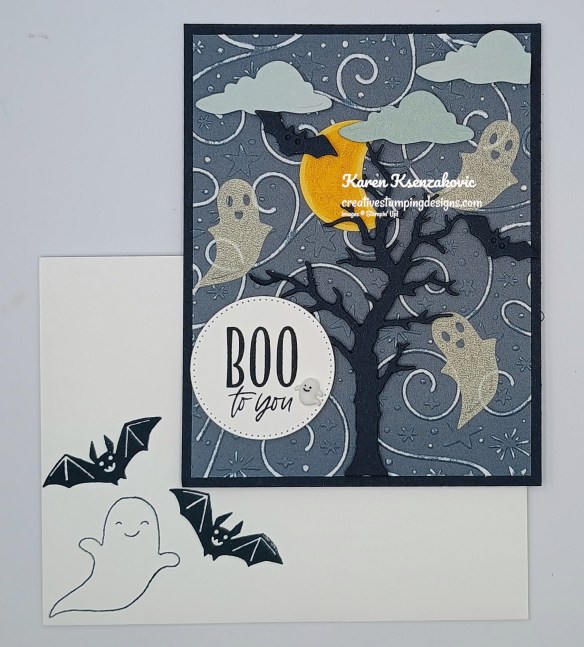
Decorate a Basic White Medium Envelope to finish your card. Stamp the ghost & bat images from the Oh My Fright stamp set in Secret Sea Ink on the envelope front. Emboss a panel of Secret Sea Two-Tone using the Swirls of Magic EF. Use the Sanding Block over the embossed panel. Adhere the embossed panel to the envelope flap.
Thank you for stopping by my blog today. I hope you like the card and will give it a try. Happy Stamping!!
*********************************************************************************************************
If you need any stamping supplies, I’d love to be your Demonstrator. Just click HERE to go directly to my online store or drop me an email if you have any questions.
*********************************************************************************************************
Double Creative Stamping Designs Rewards – September 1 – 8
To kick off everything going on in September, I’m offering Double Creative Stamping Designs Rewards. THAT’S 2X THE REWARDS FOR YOU FROM ME Starting September 1 – 8 for all orders over $50 (before tax & shipping)!! How does this work? For a $50 you’ll earn 2 rewards, $100 you’ll earn 4 rewards, $150 you’ll earn 6 rewards, etc. Hurry over to my Online Store and get those orders in for those September-December Catalog, September Online Exclusives and the New Hot Foil System Products and earn those Double Rewards! This is a GREAT time to grab those Fall & Christmas products you’ve been waiting for.
*********************************************************************************************************
Advent-ures In Christmas Craft Class Now Available!!
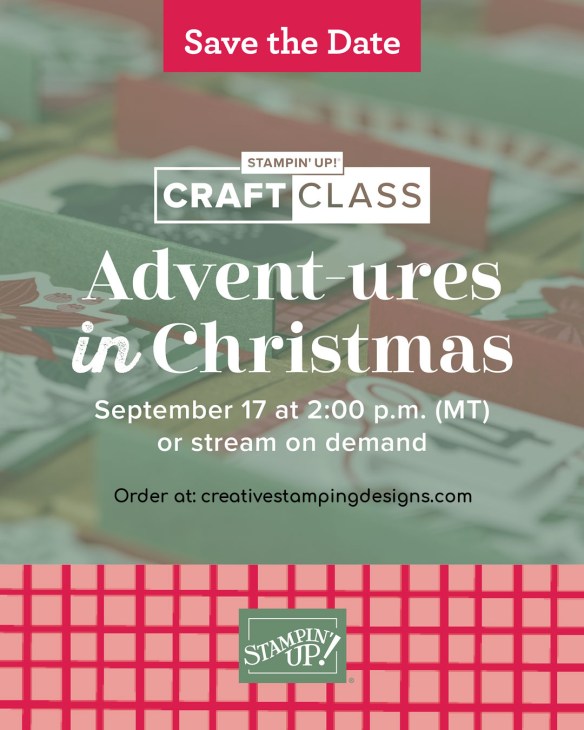
Stampin’ Up! is offering another Craft Class on September 1 (with replay available afterward if that date doesn’t work for your schedule!). This class will be an Advent Calendar Craft Class!
Here are the details:
- Class: Advent-ures in Christmas Craft Class (171481)
- Class Price: $30 (Advent Treat Boxes not included)
- Class Purpose: Decorate a 24-box advent calendar and assemble it to fit your space and style
- Product: Advent Treat Boxes (168534) – available September 1
- Who: Everyone!
- Available for Purchase: September 1
- Available for Streaming: September 17 at 2:00 p.m. (MT)
- The class will be available for purchase before and after it streams on September 17
- Where: An exclusive Facebook group
- Language: The class will be presented in English and will be available as a video on demand with captions in English, French, German, and Dutch shortly after the event.
You can download the flyer with the Craft Class details by clicking the image below:
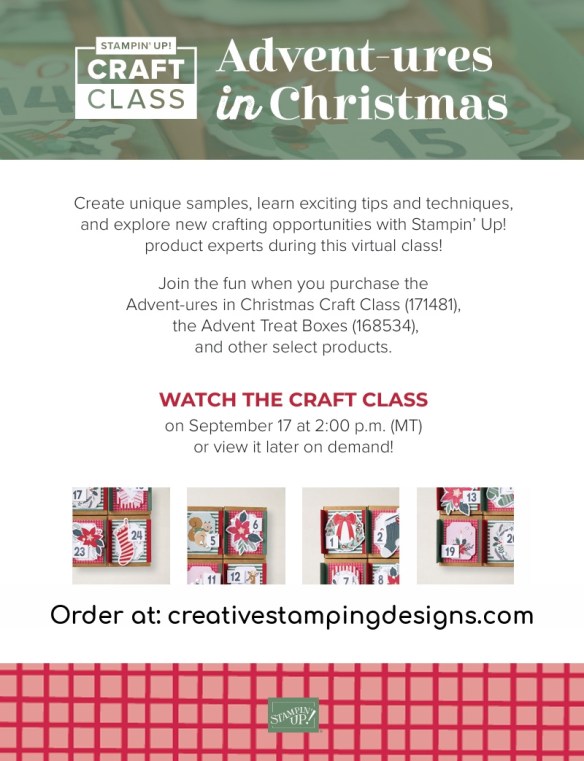
You can download the list of additional products needed to create the projects by clicking the image below:
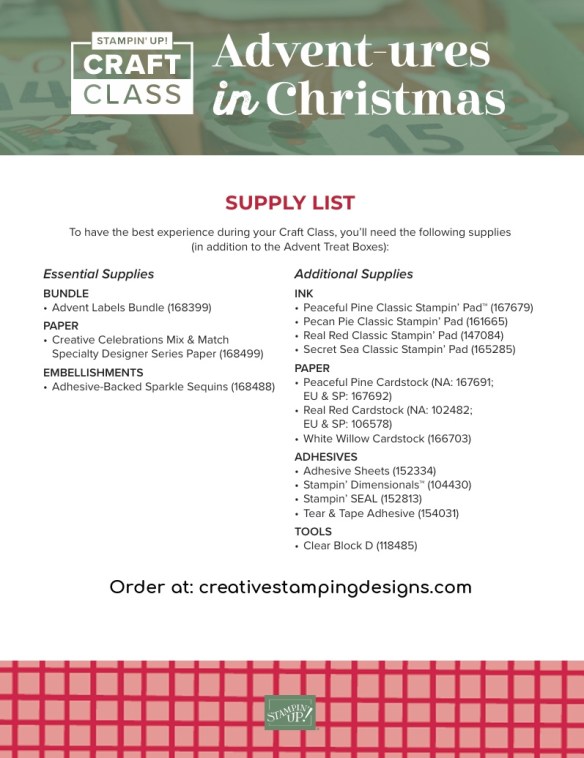
The Advent Labels stamp set bundle will also be available to purchase as an Online Exclusive item beginning September 1, so keep an eye out for the bundle and Craft Class in the Online Store then!
*********************************************************************************************************
Card stock cuts for this project:
- Basic White Cardstock 2″ x 2″ (sentiment), 3 3/4″ x 5″ (inner liner)
- Secret Sea Cardstock 4 1/4″ x 11″ (card base scored & folded at 5 1/2″), 3″ x 4 1/4″ (die cuts)
- Cloud Cover Two-Tone Cardstock 1″ x 4″ (die cuts)
- Golden Glow Two-Tone Cardstock (die cut)
- Secret Sea Two-Tone Cardstock (2) 4″ x 5 1/4″ (card front & mat), 1″ x 3 3/4″ (inner liner), 2 1/4″ x 6″ (envelope flap)
- Sunset Shimmer Vellum Specialty Paper 1 3/4″ x 1 1/2″ (die cuts)
*********************************************************************************************************
Product List
![Oh My Fright Bundle (English) [ 168176 ]](https://assets1.tamsnetwork.com/images/EC042017NF/168176s.jpg "Oh My Fright Bundle (English) [ 168176 ]")
![Oh My Fright Photopolymer Stamp Set (English) [ 168169 ]](https://assets1.tamsnetwork.com/images/EC042017NF/168169s.jpg "Oh My Fright Photopolymer Stamp Set (English) [ 168169 ]")
![Oh My Fright Dies [ 168175 ]](https://assets1.tamsnetwork.com/images/EC042017NF/168175s.jpg "Oh My Fright Dies [ 168175 ]")
![Basic White 8 1/2" X 11" Cardstock [ 166780 ]](https://assets1.tamsnetwork.com/images/EC042017NF/166780s.jpg "Basic White 8 1/2\" X 11\" Cardstock [ 166780 ]")
![Secret Sea 8 1/2" X 11" Cardstock [ 165624 ]](https://assets1.tamsnetwork.com/images/EC042017NF/165624s.jpg "Secret Sea 8 1/2\" X 11\" Cardstock [ 165624 ]")
![Cloud Cover 12" X 12" (30.5 X 30.5 Cm) Two Tone Cardstock [ 166708 ]](https://assets1.tamsnetwork.com/images/EC042017NF/166708s.jpg "Cloud Cover 12\" X 12\" (30.5 X 30.5 Cm) Two Tone Cardstock [ 166708 ]")
![Golden Glow 12" X 12" (30.5 X 30.5 Cm) Two Tone Cardstock [ 167695 ]](https://assets1.tamsnetwork.com/images/EC042017NF/167695s.jpg "Golden Glow 12\" X 12\" (30.5 X 30.5 Cm) Two Tone Cardstock [ 167695 ]")
![Secret Sea 12" X 12" (30.5 X 30.5 Cm) Two Tone Cardstock [ 166709 ]](https://assets1.tamsnetwork.com/images/EC042017NF/166709s.jpg "Secret Sea 12\" X 12\" (30.5 X 30.5 Cm) Two Tone Cardstock [ 166709 ]")
![Sunset Shimmer Vellum 12" X 12" (30.5 X 30.5 Cm) Specialty Paper [ 167784 ]](https://assets1.tamsnetwork.com/images/EC042017NF/167784s.jpg "Sunset Shimmer Vellum 12\" X 12\" (30.5 X 30.5 Cm) Specialty Paper [ 167784 ]")
![Secret Sea Classic Stampin' Pad [ 165285 ]](https://assets1.tamsnetwork.com/images/EC042017NF/165285s.jpg "Secret Sea Classic Stampin' Pad [ 165285 ]")
![Golden Glow Shimmer Brush [ 167662 ]](https://assets1.tamsnetwork.com/images/EC042017NF/167662s.jpg "Golden Glow Shimmer Brush [ 167662 ]")
![Swirls Of Magic Embossing Folder [ 168179 ]](https://assets1.tamsnetwork.com/images/EC042017NF/168179s.jpg "Swirls Of Magic Embossing Folder [ 168179 ]")
![Stylish Shapes Dies [ 159183 ]](https://assets1.tamsnetwork.com/images/EC042017NF/159183s.jpg "Stylish Shapes Dies [ 159183 ]")
![Sanding Blocks [ 168533 ]](https://assets1.tamsnetwork.com/images/EC042017NF/168533s.jpg "Sanding Blocks [ 168533 ]")
![Adhesive Backed Bats Ghosts & Dots [ 168180 ]](https://assets1.tamsnetwork.com/images/EC042017NF/168180s.jpg "Adhesive Backed Bats Ghosts & Dots [ 168180 ]")
![Basic White Medium Envelopes [ 159236 ]](https://assets1.tamsnetwork.com/images/EC042017NF/159236s.jpg "Basic White Medium Envelopes [ 159236 ]")
![Stampin' Cut & Emboss Machine [ 149653 ]](https://assets1.tamsnetwork.com/images/EC042017NF/149653s.jpg "Stampin' Cut & Emboss Machine [ 149653 ]")
![Mini Glue Dots [ 103683 ]](https://assets1.tamsnetwork.com/images/EC042017NF/103683s.jpg "Mini Glue Dots [ 103683 ]")
![Multipurpose Liquid Glue [ 110755 ]](https://assets1.tamsnetwork.com/images/EC042017NF/110755s.jpg "Multipurpose Liquid Glue [ 110755 ]")
![Stampin' Dimensionals [ 104430 ]](https://assets1.tamsnetwork.com/images/EC042017NF/104430s.jpg "Stampin' Dimensionals [ 104430 ]")
![Stampin' Seal [ 152813 ]](https://assets1.tamsnetwork.com/images/EC042017NF/152813s.jpg "Stampin' Seal [ 152813 ]")
![Paper Trimmer [ 152392 ]](https://assets1.tamsnetwork.com/images/EC042017NF/152392s.jpg "Paper Trimmer [ 152392 ]")
![Bone Folder [ 102300 ]](https://assets1.tamsnetwork.com/images/EC042017NF/102300s.jpg "Bone Folder [ 102300 ]")
![Detail Scissors [ 170902 ]](https://assets1.tamsnetwork.com/images/EC042017NF/170902s.jpg "Detail Scissors [ 170902 ]")
![Take Your Pick [ 144107 ]](https://assets1.tamsnetwork.com/images/EC042017NF/144107s.jpg "Take Your Pick [ 144107 ]")


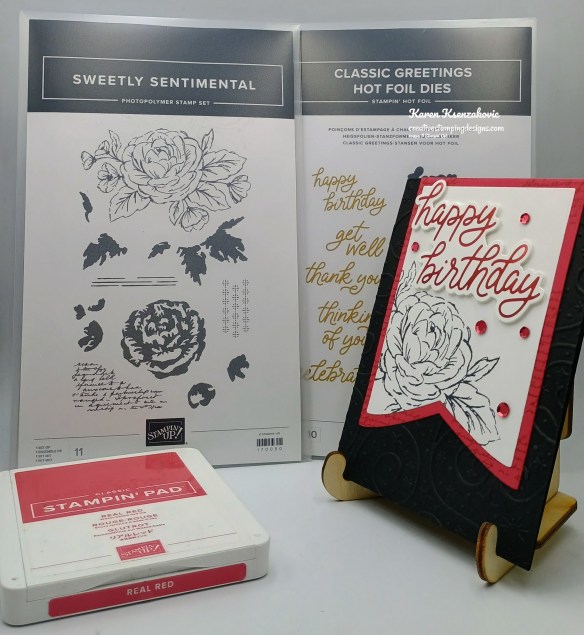




![Sweetly Sentimental Photopolymer Stamp Set [ 170050 ]](https://assets1.tamsnetwork.com/images/EC042017NF/170050s.jpg "Sweetly Sentimental Photopolymer Stamp Set [ 170050 ]")
![Classic Greetings Hot Foil Dies [ 170042 ]](https://assets1.tamsnetwork.com/images/EC042017NF/170042s.jpg "Classic Greetings Hot Foil Dies [ 170042 ]")
![Basic Black 8-1/2" X 11" Cardstock [ 121045 ]](https://assets1.tamsnetwork.com/images/EC042017NF/121045s.jpg "Basic Black 8-1/2\" X 11\" Cardstock [ 121045 ]")
![Real Red 8-1/2" X 11" Cardstock [ 102482 ]](https://assets1.tamsnetwork.com/images/EC042017NF/102482s.jpg "Real Red 8-1/2\" X 11\" Cardstock [ 102482 ]")
![Real Red Classic Stampin' Pad [ 147084 ]](https://assets1.tamsnetwork.com/images/EC042017NF/147084s.jpg "Real Red Classic Stampin' Pad [ 147084 ]")
![Party Banners Dies [ 165264 ]](https://assets1.tamsnetwork.com/images/EC042017NF/165264s.jpg "Party Banners Dies [ 165264 ]")
![Stampin' Hot Foil System Na & Craft Class [ 170009 ]](https://assets1.tamsnetwork.com/images/EC042017NF/170009s.jpg "Stampin' Hot Foil System Na & Craft Class [ 170009 ]")


![All Aflutter Bundle (English) [ 167570 ]](https://assets1.tamsnetwork.com/images/EC042017NF/167570s.jpg "All Aflutter Bundle (English) [ 167570 ]")
![All Aflutter Photopolymer Stamp Set (English) [ 167564 ]](https://assets1.tamsnetwork.com/images/EC042017NF/167564s.jpg "All Aflutter Photopolymer Stamp Set (English) [ 167564 ]")
![All Aflutter Punch [ 167569 ]](https://assets1.tamsnetwork.com/images/EC042017NF/167569s.jpg "All Aflutter Punch [ 167569 ]")
![Barely Blush 8 1/2" X 11" Cardstock [ 167689 ]](https://assets1.tamsnetwork.com/images/EC042017NF/167689s.jpg "Barely Blush 8 1/2\" X 11\" Cardstock [ 167689 ]")
![Crisp Cantaloupe 8 1/2" X 11" Cardstock [ 167693 ]](https://assets1.tamsnetwork.com/images/EC042017NF/167693s.jpg "Crisp Cantaloupe 8 1/2\" X 11\" Cardstock [ 167693 ]")
![Peaceful Pine 8 1/2" X 11" Cardstock [ 167691 ]](https://assets1.tamsnetwork.com/images/EC042017NF/167691s.jpg "Peaceful Pine 8 1/2\" X 11\" Cardstock [ 167691 ]")
![Bloom Boutique 12" X 12" (30.5 X 30.5 Cm) Specialty Designer Series Paper [ 167637 ]](https://assets1.tamsnetwork.com/images/EC042017NF/167637s.jpg "Bloom Boutique 12\" X 12\" (30.5 X 30.5 Cm) Specialty Designer Series Paper [ 167637 ]")
![Barely Blush Classic Stampin Pad [ 167678 ]](https://assets1.tamsnetwork.com/images/EC042017NF/167678s.jpg "Barely Blush Classic Stampin Pad [ 167678 ]")
![Crisp Cantaloupe Classic Stampin Pad [ 167680 ]](https://assets1.tamsnetwork.com/images/EC042017NF/167680s.jpg "Crisp Cantaloupe Classic Stampin Pad [ 167680 ]")
![Golden Glow Classic Stampin' Pad [ 167676 ]](https://assets1.tamsnetwork.com/images/EC042017NF/167676s.jpg "Golden Glow Classic Stampin' Pad [ 167676 ]")
![Peaceful Pine Classic Stampin Pad [ 167679 ]](https://assets1.tamsnetwork.com/images/EC042017NF/167679s.jpg "Peaceful Pine Classic Stampin Pad [ 167679 ]")
![Versamark Pad [ 102283 ]](https://assets1.tamsnetwork.com/images/EC042017NF/102283s.jpg "Versamark Pad [ 102283 ]")
![Basics Wow! Embossing Powder [ 165679 ]](https://assets1.tamsnetwork.com/images/EC042017NF/165679s.jpg "Basics Wow! Embossing Powder [ 165679 ]")
![Heat Tool (Us And Canada) [ 129053 ]](https://assets1.tamsnetwork.com/images/EC042017NF/129053s.jpg "Heat Tool (Us And Canada) [ 129053 ]")
![Clear Wink Of Stella Glitter Brush [ 141897 ]](https://assets1.tamsnetwork.com/images/EC042017NF/141897s.jpg "Clear Wink Of Stella Glitter Brush [ 141897 ]")
![2026–2028 In Color™ Dots [ 167546 ]](https://assets1.tamsnetwork.com/images/EC042017NF/167546s.jpg "2026–2028 In Color™ Dots [ 167546 ]")


