
Good Saturday morning my stamping friends. Welcome to the weekend!! Hope you have some fun plans. I’m working today, but tomorrow is my team meeting via zoom. I always look forward to my meetings. 1- I get to take the day off from both jobs and 2- I get to see a lot of my team members in person and always have a lot of fun ‘getting together’ with them.
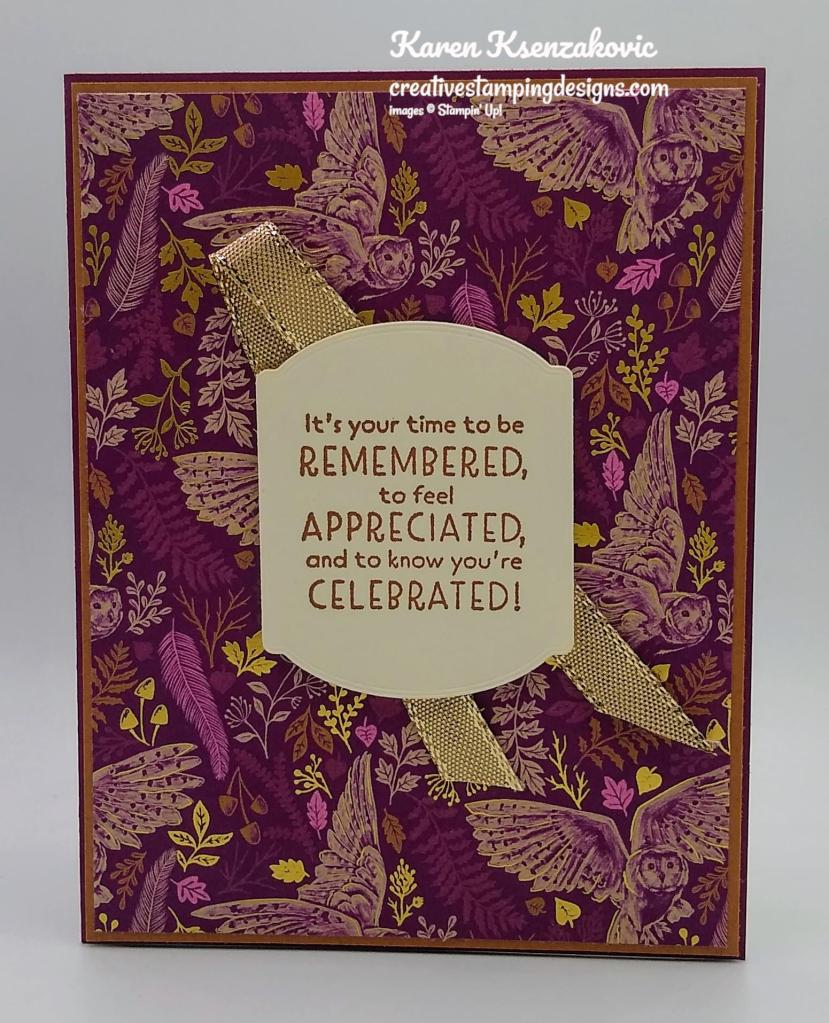
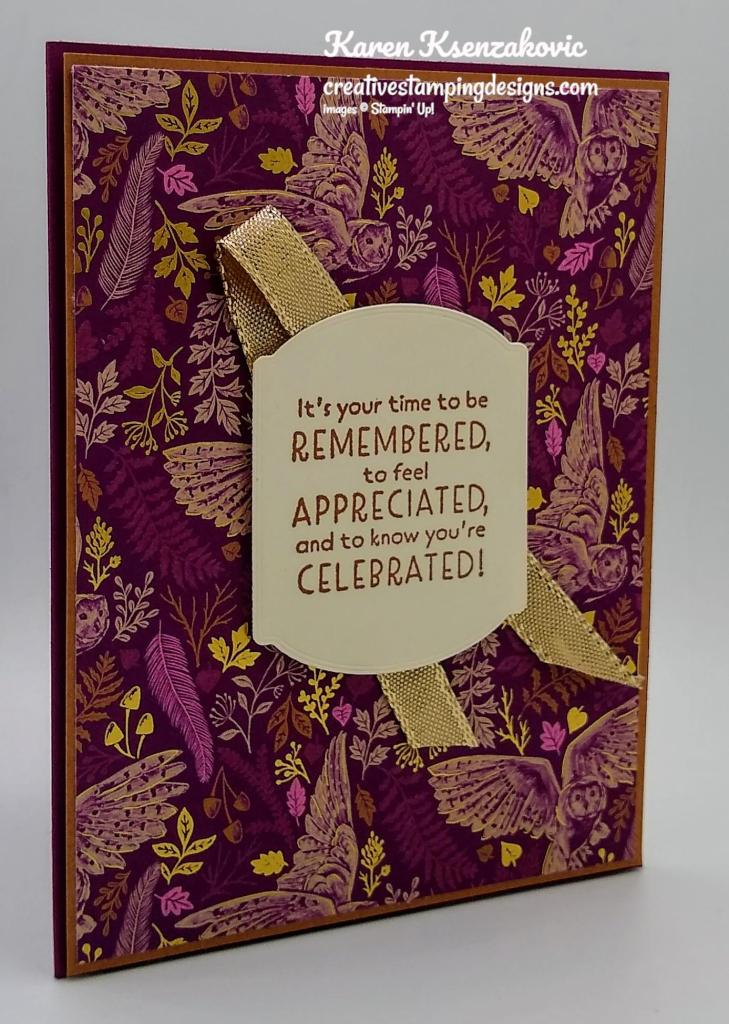
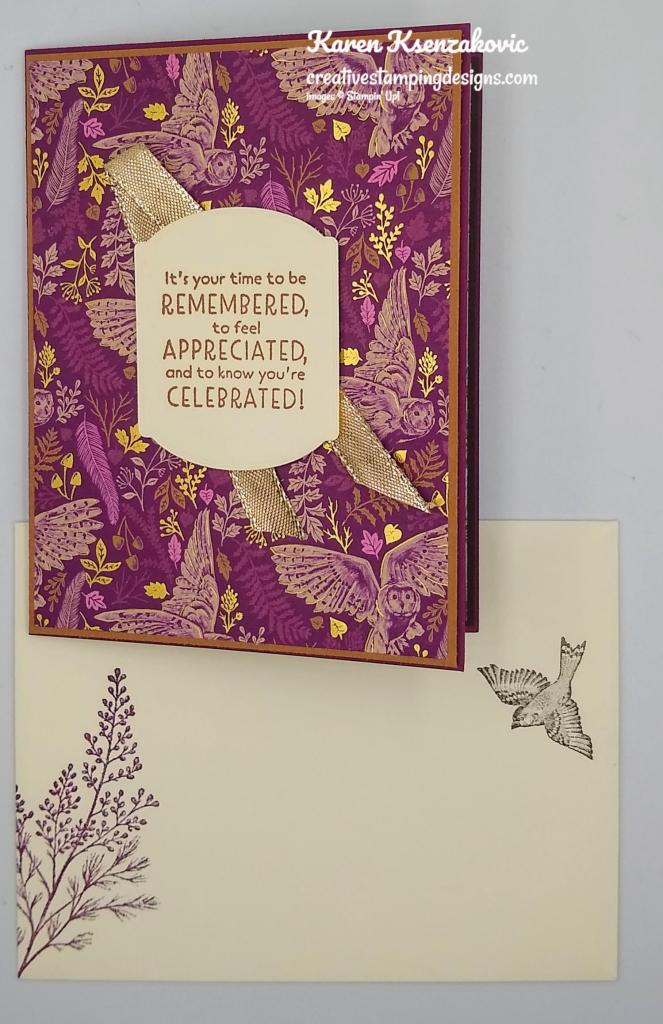
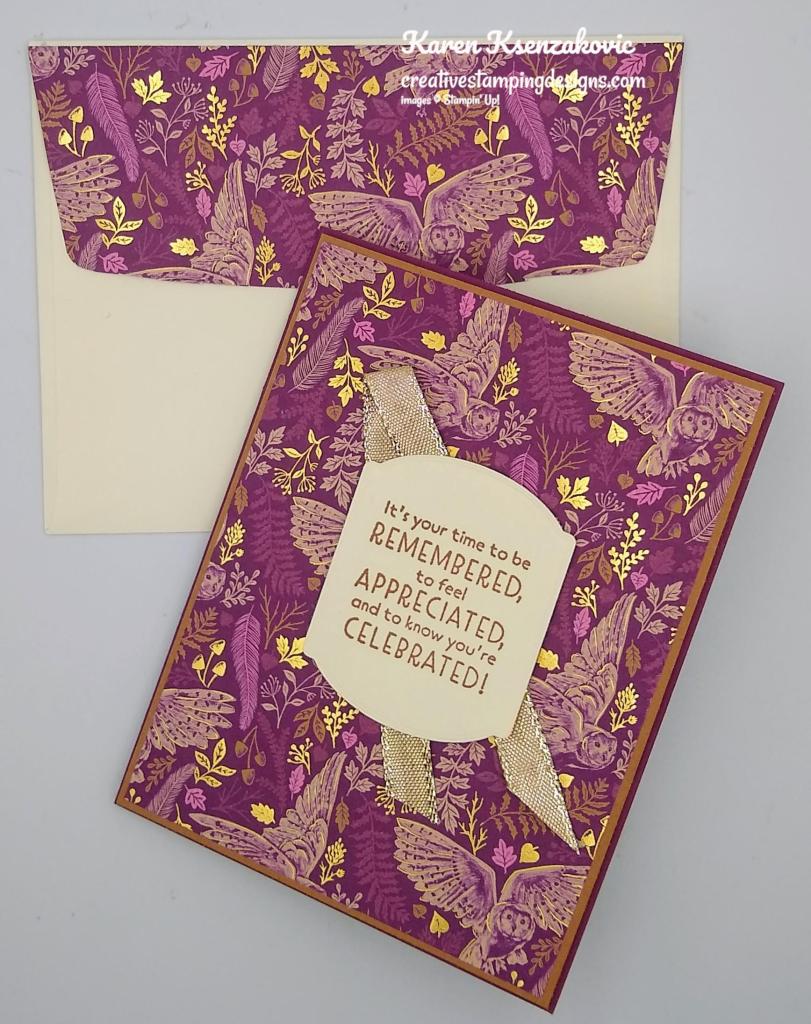
I have a CAS card for you today that we made at my class on Tuesday night. I thought this would be a great way to show the ladies how to use some of our beautiful Designer Series Paper. Here’s my card for today.

I used the Stampin’ Up! Beauty of Tomorrow Bundle along with the Blackberry Beauty Specialty Designer Series Paper for my card today.

I started by adhering a panel of the Blackberry Beauty DSP to a Cinnamon Cider card base. I adhered a smaller panel of the Blackberry Beauty DSP to a Cinnamon Cider mat and adhered the layered panel to the card front.
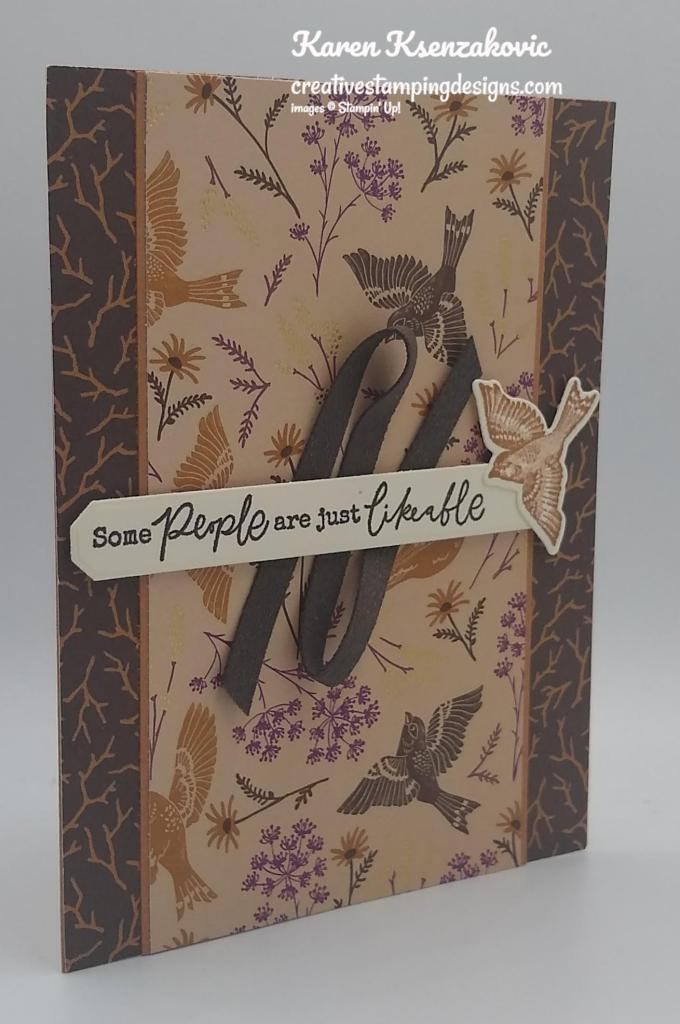
On a strip of Very Vanilla cardstock I stamped the sentiment from the Stampin’ Up! Beauty of Tomorrow Cling Stamp Set in Early Espresso Ink. I cut the sentiment out using the Harvest Dies I adhered a piece of the Early Espresso 1/4″ Faux Suede Trim to the card front and adhered the sentiment over the top of the trim using Stampin’ Dimensionals.
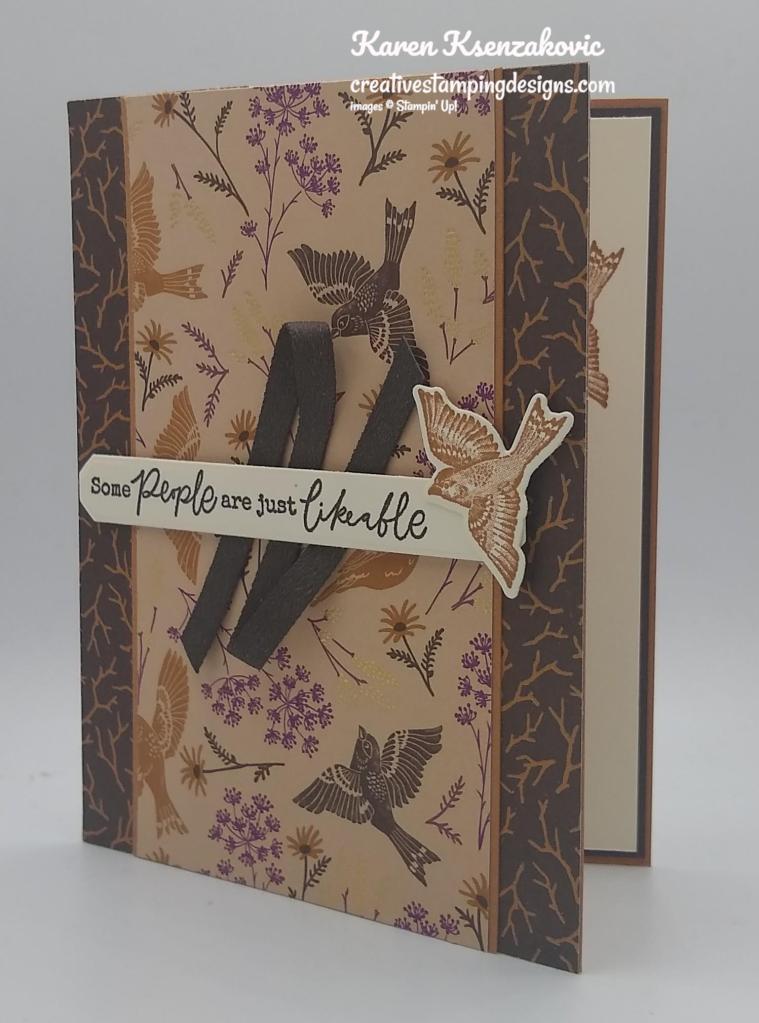
On a small panel of Very Vanilla cardstock I stamped the bird image from the Beauty of Tomorrow stamp set in Cinnamon Cider Ink, stamping off once, and cut the image out using my Beautiful Leaves Dies. I adhered the bird to the end of the sentiment using a Glue Dot and a Stampin’ Dimensional.
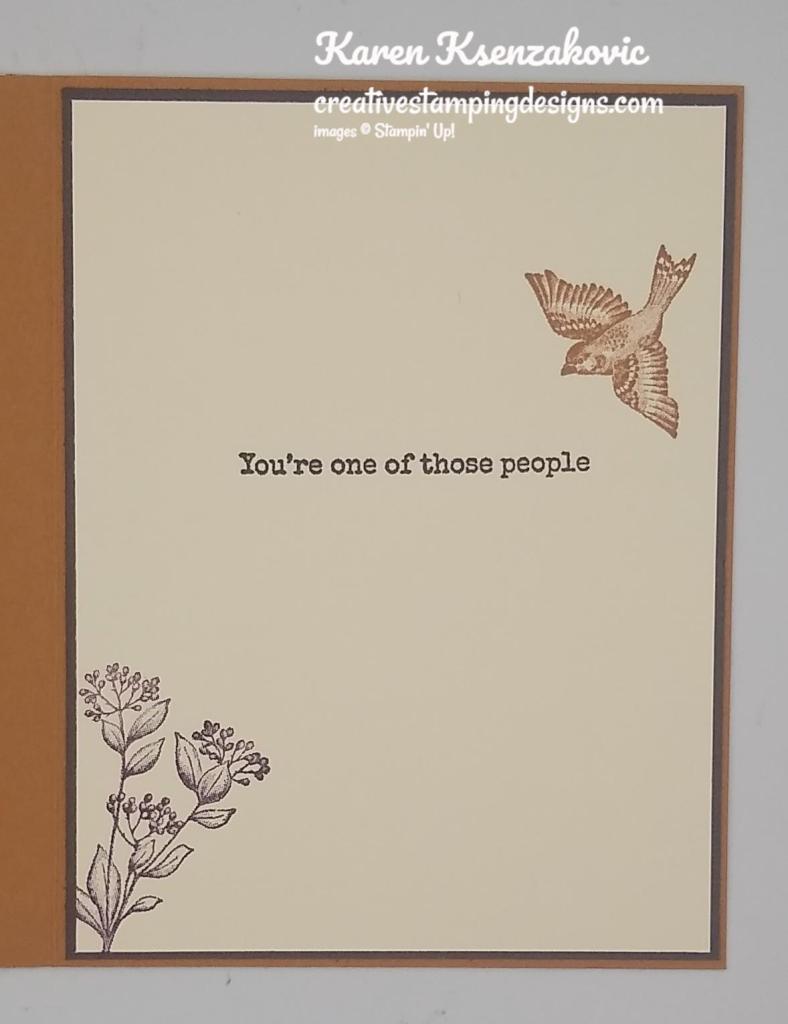
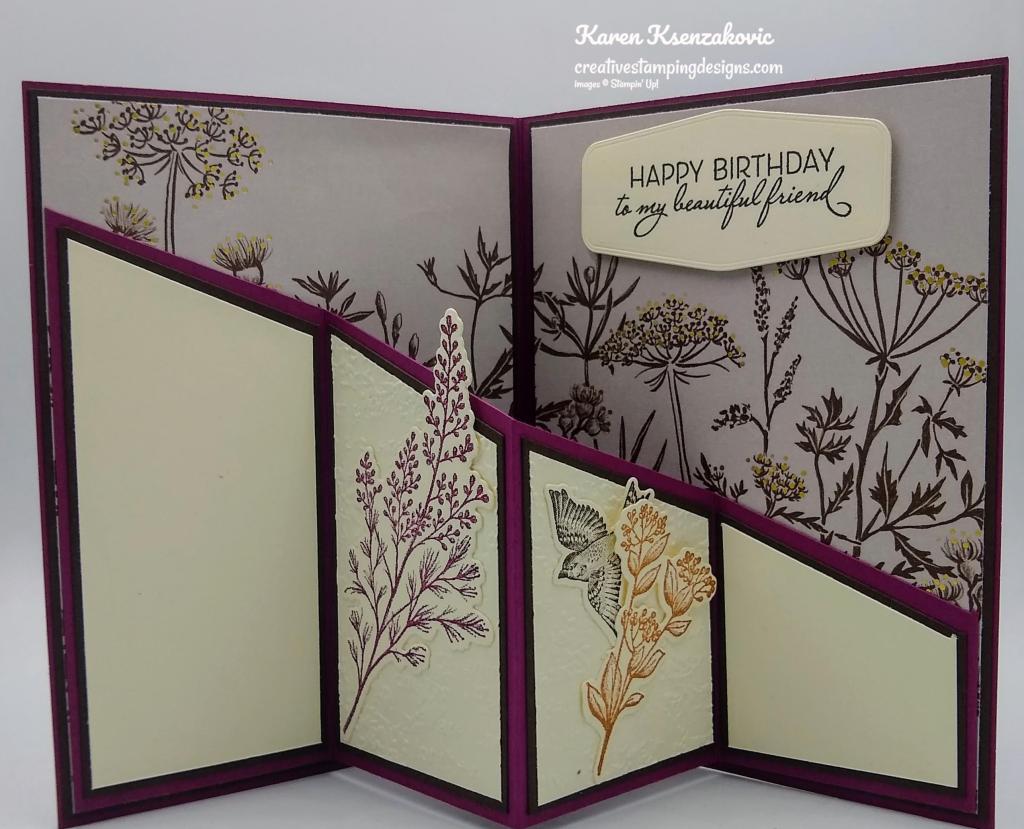
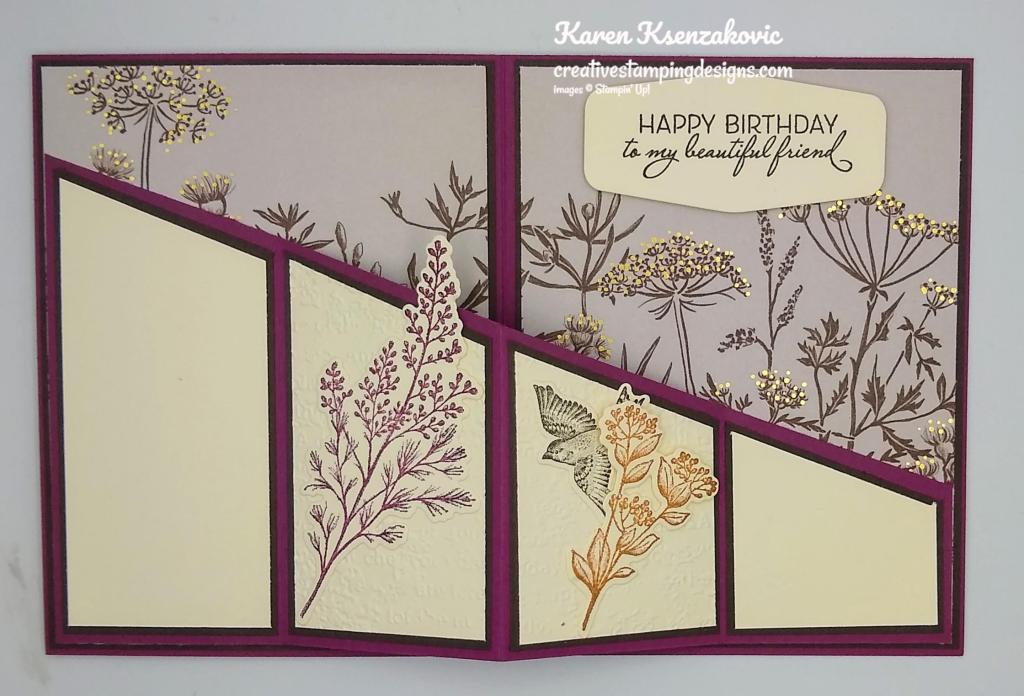
On the inside I stamped the sentiment from the Beauty of Tomorrow stamp set in Early Espresso Ink on a Very Vanilla panel. I stamped the bird image from the Beauty of Tomorrow stamp set in Cinnamon Cider Ink, stamping off once, above the sentiment. I stamped the floral image from the Beauty of Tomorrow stamp set in Blackberry Bliss Ink, stamping off once, on the bottom of the panel. I adhered the Very Vanilla panel to an Early Espresso mat and then to the inside of the Cinnamon Cider card base.

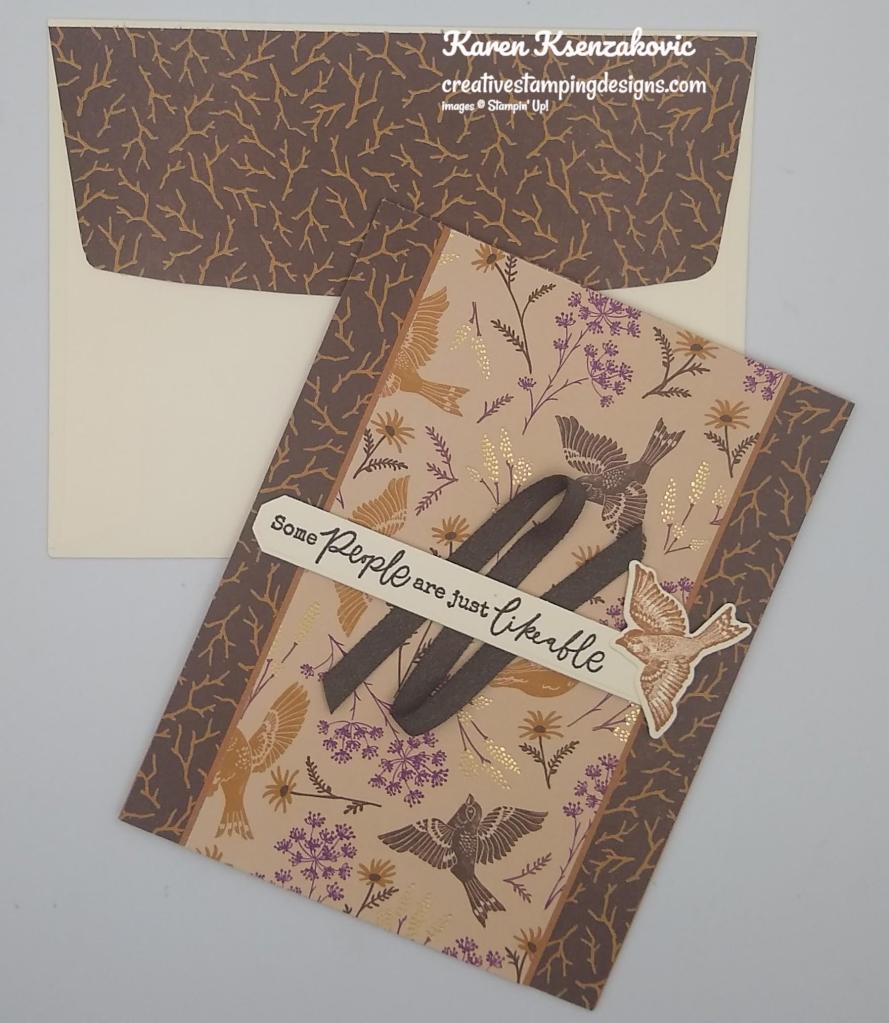
To finish my card I decorated a Very Vanilla Medium Envelope. I stamped the bird image from the Beauty of Tomorrow stamp set in Cinnamon Cider Ink, stamping off once, on the envelope front. I stamped the floral image from the Beauty of Tomorrow stamp set in Blackberry Bliss Ink on the bottom front of the envelope. I adhered a panel of the Blackberry Beauty DSP to the envelope flap.
Thank you for stopping by my blog today. I hope you liked my CAS care and will give it a try. Happy Stamping!!
*********************************************************************************************************
If you need any stamping supplies, I’d love to be your Demonstrator. Just click HERE to go directly to my online store or drop me an email if you have any questions.
MY CURRENT HOST CODE IS: TGEATYYA
Use this host code when you order $50 or greater and receive a free gift from me! If your order is over $150, please do not use this code, but you’ll still get the free gift. The free gift is your choice of any 1 item valued up to $10.00 from the 2020-2021 Annual Catalog or the January-June 2021 Mini Catalog! For any orders $50 or more I will also send you my monthly class tutorials. Click HERE or go to my Customer Rewards for more details and to see what this months tutorials are.
Please remember to use my current Host Code and make sure that you can see my name on the final checkout page listed as your Demonstrator when you order so that you know that you’re ordering with me and you’ll get my rewards!
Stampin’ Up! has added more items to their Clearance Rack. All items are **While Supplies Last**. So don’t wait if there is something you’ve been wanting, grab it while you can.
Happy Stamping, Karen!
*********************************************************************************************************
Gifts Galore
Subscribe October 11 – November 10
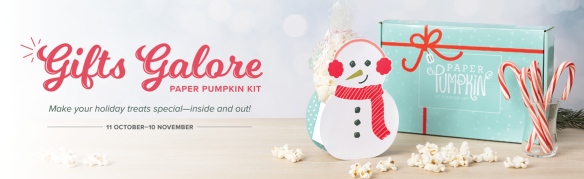
We all love to see piles of presents on Christmas morning. Make that your reality with the Gifts Galore Paper Pumpkin Kit! With classic Christmas sentiments, bright and festive colors, a sweet snowman, a tree with all the trimmings, or a playful pile of presents, you’ll have everything you need to make eye-catching treat packages that are sure to spread Christmas cheer. Each Gifts Galore box contains enough supplies to create nine treat packages—three each of three designs—and nine food-safe bags that are adorably styled for easy Christmas gifting. There’s plenty of joy to share with Gifts Galore!
- Kit contains enough supplies to create nine treat packages—three each of three designs—and nine food-safe bags.
- This all-inclusive kit includes printed die cuts, die-cut boxes, cellophane treat bags, adhesive, and more!
- Includes an exclusive stamp set and a Classic Stampin’ Spot
- Coordinating colors: Evening Evergreen, Flirty Flamingo, Old Olive, Pool Party, Poppy Parade
Subscribe to the November 2021 Paper Pumpkin Kit between 11 October and 10 November at paperpumpkin.com!
Note: Supplies may be limited toward the end of the subscription period.
*********************************************************************************************************
The new Stampin’ Up! Eden’s Garden Suite is now available for purchase. Click on the image below for a flyer of all the items available now.
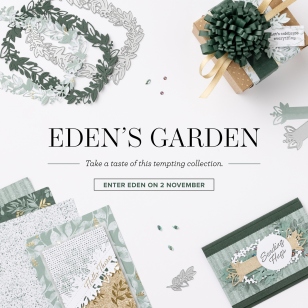
The tale of the Garden of Eden transcends the boundaries of a single belief system. Numerous accounts and adaptations of Eden’s events have appeared in Christianity, Judaism, Islam, legends and lore, ancient mythology, and more! No matter how the story is shared, the essence of Eden remains the same: it’s a place of paradise. Filled with fruitful and flourishing foliage, stillness and serenity, and an air of mystery, Eden is an ethereal utopia!
Enter and explore Eden with the Eden’s Garden Collection! This delightful and desirable collection includes early-release products from the January–June 2022 Mini Catalog—a bundle of stamps and dies that’s blooming with beauty and bounty. Plus, exclusive products you can’t uncover anywhere else—a pack of paper patterned with green and gold, a set of specialty sheets for gift-giving and textured touches, and a sparkling set of gleaming gems!
Just as the timeless tale can be told in a variety of versions, these paradisical products can be used to create projects for any occasion—and they make the perfect papercrafting companion.
*********************************************************************************************************
START WITH SAVINGS JOINING SPECIAL
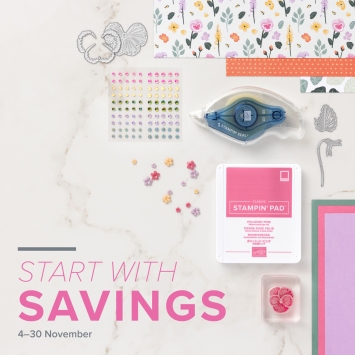
Do you regularly restocks your craft collection, and always wants the latest and greatest Stampin’ Up! supplies? Would you enjoy the pile of perks that come with being a demonstrator? Would you like to join our incredible community of crafters?
If you answered “yes” to any of the questions above, the Start with Savings promotion will provide you with an excellent opportunity! Instead of the standard $99 Starter Kit—which is already a steal of a deal—you can snatch up a completely custom Starter Kit for only $75. What an absolutely unbeatable bargain for a box with a value of $125!
When you purchase the Starter Kit for $75 + taxes (if applicable), the kit ships for FREE and YOU get to pick $125 in Stampin’ Up! merchandise OF YOUR CHOICE. YES PLEASE!! You will also get a past Paper Pumpkin Kit, a box of current catalogs and other supplies free in your kit.
If you are planning on placing an order of $75, you might really want to consider joining. This is such an awesome joining deal, you don’t want to pass it up. There is no obligation to sell, have workshops or do Facebook lives. You can join strictly to be a ‘hobby demonstrator’ and enjoy the 20% discount. I would love to have you on my team!!! You also get to enjoy all the demonstrator perks like early ordering, sneak peeks at what’s coming and best of all the events. Why wait, this is such a great sign up promotions, join now and be a part of our awesome Stampin’ Up! family!!!
I’d be happy to talk to you more about this, just drop me an email at creativestampingdesigns@gmail.com and we can talk.
*********************************************************************************************************
Card stock cuts for this project:
- Cinnamon Cider Cardstock 8 1/2″ X 5 1/2″ (card base scored & folded at 4 1/4″), 3 1/8″ X 5 1/2″ (dsp mat)
- Early Espresso Cardstock 4 1/8″ X 5 3/8″ (inner liner mat)
- Very Vanilla Cardstock 1″ X 4 1/4″ (sentiment), 1 1/2″ X 1 1/2″ (bird), 4″: X 5 1/4″ (inner liner)
- Blackberry Beauty Specialty Designer Series Paper 4 1/4″ x 5 1/2″ (card front), 3″ X 5 1/2″ (card front panel), 2 1/4″ X 6″ (envelope flap)
*********************************************************************************************************
Product List
")
")


 Specialty Designer Series Paper")


 Faux Suede Trim")


 Shimmer Ribbon")


")
")


 Gingham Ribbon")


