Stampin’ Up! Posted For You Love CAS

Good Sunday morning my stamping friends. Is everyone having a good weekend? I’m going into work today. It seemed very odd having yesterday off, I’m definitely not complaining. I usually work every Saturday so it was nice not having to get up and out of the house early.

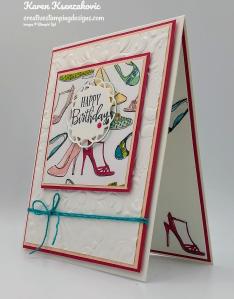
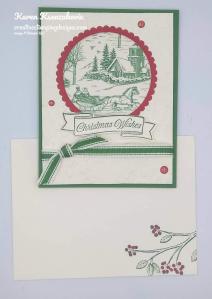
I have a pretty Clean and Simple card for you today, at least I think it is. I used the Stampin’ Up! Posted For You Bundle along with the Peony Garden Designer Series Paper. Here’s my card for today.

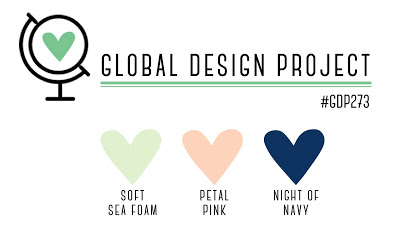
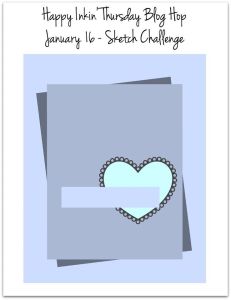
My colors are from the Global Design Project #273.

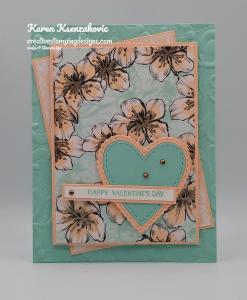
I started by stamping the sentiment from the Stampin’ Up! Posted For You Cling Stamp Set on the bottom of a panel of the Peony Garden DSP in Night of Navy Ink. I adhered the panel to a Night of Navy card base using Stampin’ Seal.

I embossed a strip of Soft Seafoam cardstock using the Parisian Flourish 3D Embossing Folder and adhered it to the card front using Multipurpose Liquid Glue.

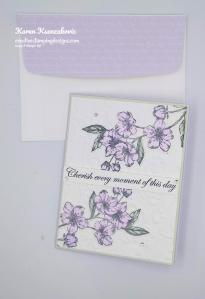
On a panel of Basic White cardstock I stamped the image from the Posted For You stamp set in Tuxedo Black Ink and colored it in using my Petal Pink and Soft Seafoam Stampin’ Blends Markers. I punched the image out using the Rectangle Postage Stamp Punch and adhered it to a Night of Navy mat using Stampin’ Seal. I adhered the artwork to the card front using Stampin’ Dimensionals. I added a few Night of Navy Holiday Rhinestone Basic Jewels to the card front.

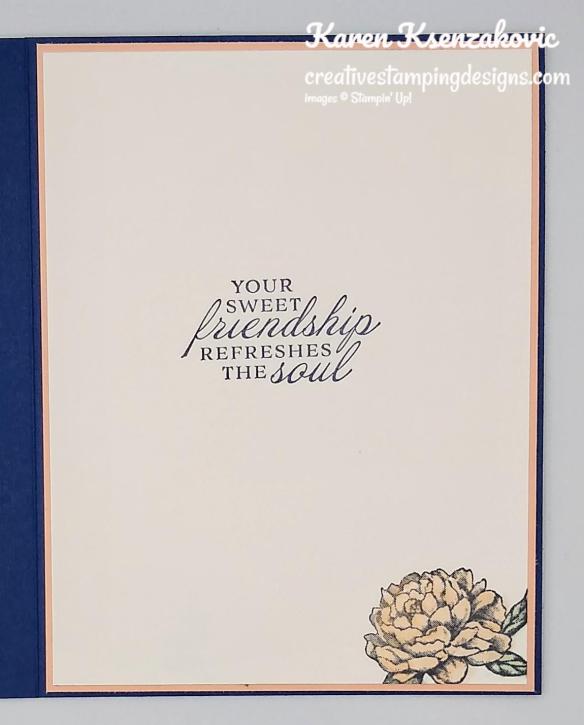
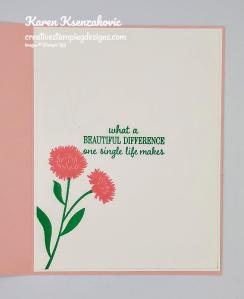
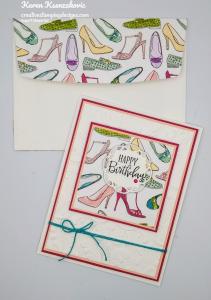
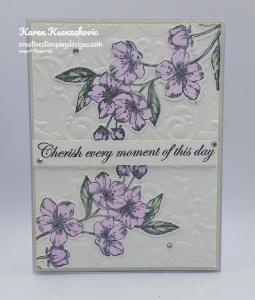
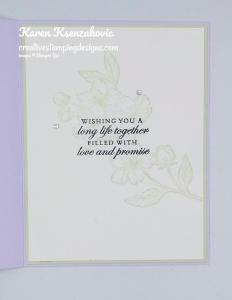
On the inside I stamped the sentiment from the Stampin’ Up! Prized Peony Cling Stamp Set in Night of Navy Ink in the center of a Basic White panel. I stamped the small flower from the Prized Peony stamp set on the bottom of the panel in Tuxedo Black Ink and colored it in using my Petal Pink and Soft Seafoam Stampin’ Blends Markers. I adhered the Basic White panel to a Petal Pink mat using Stampin’ Seal and then to the inside of the Night of Navy card base using Multipurpose Liquid Glue.

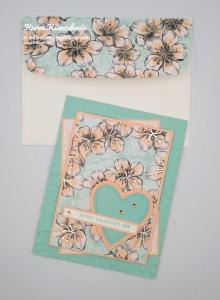
To finish my card I decorated a Basic White Medium Envelope. I stamped the small flower from the Prized Peony stamp set in Tuxedo Black Ink on the bottom front of the envelope and colored them in using my Petal Pink and Soft Seafoam Stampin’ Blends Markers. I adhered a panel of Peony Garden DSP to the envelope flap.

Thank you for stopping by my blog today. I hope you liked my card and will give it a try. Happy Stamping!!

*********************************************************************************************************

If you need any stamping supplies, I’d love to be your Demonstrator. Just click HERE to go directly to my online store or drop me an email if you have any questions. 

MY CURRENT HOST CODE IS: C4XDWQT6

Use this host code when you order $50 or greater and receive a free gift from me! If your order is over $150, please do not use this code, but you’ll still get the free gift. The free gift is your choice of any 1 item valued up to $10.00 from the 2020-2021 Annual Catalog or the January-June 2021 Mini Catalog!   For any orders $50 or more I will also send you my monthly class tutorials.  Click HERE or go to my Customer Rewards for more details and to see what this months tutorials are.

 Click HERE to shop the clearance rack.

Please remember to use my current Host Code and make sure that you can see my name on the final checkout page listed as your Demonstrator when you order so that you know that you’re ordering with me and you’ll get my rewards! 

Happy Stamping, Karen!

*********************************************************************************************************

Tomorrow is the Last Day for Double Creative Stamping Designs Rewards

To kick off the ordering, I’m offering a double Creative Stamping Reward point ordering special!!

You’ll get DOUBLE Creative Stamping Reward points for every order of $50 or greater (before shipping and taxes) through, Monday, January 11!!  Plus you’ll earn a free Sale-A-Bration goody from Stampin’ Up! for every $50 in merchandise that you order too! 

Don’t forget to add the Host Code above if your order is under $150 to get your free thank you gift.  Please don’t add the host code to orders over $150, you automatically get the free thank you gift and Stampin’ Rewards/Host Cash from Stampin’ Up!  For more information about my Creative Stamping Reward points (my buyer reward program), Click Here.

Click Here to head over to my online store to start shopping now!

*********************************************************************************************************

Sending Hearts

TODAY IS THE LAST DAY TO SUBSCRIBE!!

Love is in the air! Send a little love to someone special with the Sending Hearts Paper Pumpkin Kit. From heaps of heart-shaped elements to paper pieces in red and pink, this month’s kit has everything you need to create eight adorable cards—with coordinating envelopes—for Valentine’s Day, anniversaries, and every celebration of love in between!

With the add-on to January’s sweet and sentimental kit, there’s even more love to share! The add-on—called Little Love Boxes—includes 20 tiny, printed boxes and 24 die-cut, heart-shelled snails and sentiment labels. When combined with the remaining components from the Sending Hearts kit, you can create treat packaging, additional cards, and so much more!

ABOUT THE JANUARY KIT

Details

  • Kit contains enough supplies to create eight cards—four each of two designs—and coordinating envelopes.
  • Card size: 4-1/4″ x 5-1/2″ (10.8 x 14 cm)
  • Envelope size: 4-1/2″ x 5-3/4″ (11.4 x 14.6 cm)
  • Coordinating colors: Basic Black, gold, Petal Pink, Poppy Parade, Smoky Slate, white

ABOUT THE ADD-ON

Name Little Love Boxes

Details

  • Add-on contains 20 printed mini boxes and 24 die-cut decorative pieces and sentiment labels.
  • Item number: 156842
  • Price: $8 USD/$11 CAD 
  • Available 1 January, while supplies last!

Subscribe to the January 2021 Paper Pumpkin Kit between 11 December and 10 January at paperpumpkin.com!

ADD-ON ORDERING INFORMATION

Purchase the Little Love Boxes add-on to the Sending Hearts Paper Pumpkin Kit on stampinup.com, or by placing an order through my online store. The add-on will be available starting 1 January, while supplies last. You must be a Paper Pumpkin subscriber to order the add-on.

  • Little Love Boxes (156842)
  • $8 USD | $11 CAD

Note: Add-on is not included in January’s Paper Pumpkin subscription. It must be purchased through a separate order. 

Note: Supplies may be limited toward the end of the subscription period.

*********************************************************************************************************

Card stock cuts for this project:

  • Night of Navy Cardstock 8 1/2″ X 5 1/2″ (card base scored and folded at 4 1/4″), 2 1/8″ X 1 1/2″ (artwork mat)
  • Petal Pink Cardstock 4 1/8″ X 5 3/8″(inner liner mat)
  • Soft Seafoam Cardstock 4 1/4″ X 1 5/8″ (card front strip)
  • Peony Garden Designer Series Paper 4 1/8″ X 5 3/8″ (card front), 2 1/2″ X 6″ (envelope flap)

*********************************************************************************************************

Product List

Stampin’ Up! Hello Field Flowers

Good Wednesday morning my stamping friends.  How is everyone doing today?  We’re already halfway through the week.  I just love these short weeks.

For today, I kind of have a triple time card, but not really if that makes sense.    I used some new items coming in the 2020-2021 Annual Catalog, some retiring colors and some items carrying over.  Here’s my card for today.

My colors were inspired by Fab Friday Color Challenge #190.  Here are their colors.

I started by embossing a Whisper White panel using the Parisian Flourish 3D Embossing Folder.  I adhered the panel to a Blushing Bride card base using Multipurpose Liquid Glue.  I adhered a panel of the gorgeous new In Good Taste Designer Series Paper to a panel of Blushing Bride cardstock using Snail.  This DSP is just so pretty and looks so real.  Every time I pull it out I have to touch it because it looks almost 3D.  I adhered the matted DSP to the card front using Stampin’ Dimensionals.

On a small panel of Whisper White cardstock I stamped the stem image from the Stampin’ Up! Field of Flowers Photopolymer Stamp Set, (available June 3rd), in Call Me Clover Ink (retiring June 2nd).  I stamped the flower image from the Field of Flowers stamp set in Flirty Flamingo Ink on top of the stems.  I stamped the sentiment from the Stampin’ Up! Timeless Tulips Photopolymer Stamp Set in Call Me Clover Ink on the bottom of the panel.  I adhered the artwork to a Blushing Bride mat using Snail.  I adhered the matted artwork to the DSP panel using Stampin’ Dimensionals.

On a scrap of Whisper White cardstock I stamped the small butterfly from the Stampin’ Up! Butterfly Gala Photopolymer Stamp Set in Tuxedo Black Memento Ink twice.  I stamped the fill color image from the Butterfly Gala stamp set in Pineapple Punch Ink on top of the outlined butterfly image.  I punched the butterflies out using the Butterfly Duet Punch, bent the wings forward and adhered them to the artwork using Glue Dots.  I added a few Melon Mambo Rhinestones from the Noble Peacock Rhinestones pack to my artwork.

On the inside I stamped the sentiment from the Timeless Tulips stamp set in Call Me Clover Ink in the center of a Whisper White panel.  I stamped the stem image from the Field of Flowers stamp set in Call Me Clover Ink on the bottom of the panel.  I stamped the flower image from the Field of Flowers stamp set in Flirty Flamingo Ink on top of the stems.  I adhered the Whisper White panel to a Whisper White mat using Snail and then to the inside of the Blushing Bride card base using Multipurpose Liquid Glue.

To finish my card I decorated a Medium Whisper White Envelope.  I stamped the stem image from the Field of Flowers stamp set in Call Me Clover Ink on the envelope front.  I stamped the flower image from the Field of Flowers stamp set in Flirty Flamingo Ink on top of the stems.   I adhered a panel of In Good Taste DSP to the envelope flap.

Thank you for stopping by my blog today. I hope you liked my card and will give it a try. Happy Stamping!!

****************************************************************************************************

If you need any stamping supplies, I’d love to be your Demonstrator. Just click HERE to go directly to my online store or drop me an email if you have any questions. 

MY CURRENT HOST CODE IS: KBMV24AJ

Use this host code when you order $50 or greater and receive a free gift from me! If your order is over $150, please do not use this code, but you’ll still get the free gift. The free gift is your choice of any item valued up to $10.00 in either the 2019-2020 Annual Catalog or the 2020 January-June Mini Catalog!   For any orders $50 or more I will also send you my monthly class tutorials.  Click HERE or go to my Customer Rewards for more details and to see what this months tutorials are.

 Click HERE to shop the clearance rack.

Happy Stamping, Karen!

****************************************************************************************************

2020-2021 Annual Catalog Designer Series Paper Share.

Deadline to sign up for my share is Tuesday, June 2 at 1:00 PM ET

Do you want all the great new Designer Series Paper from the 2020-2021 Annual Catalog, but can’t afford everything? I’m offering a Designer Series Paper share from the Stampin’ Up! 2020-2021 Annual Catalog and I’d love to have you join!!  I’m placing my share order early on June 3 and I’m going to use the expedited shipping option so I should be able to have the shares cut, bundled and back out to you during the week of June 8.  Click here for more information.

****************************************************************************************************

JUNE 2020 PAPER PUMPKIN BOX OF SUNSHINE

Subscribe May 11 – June 10

This exclusive Sara-inspired Paper Pumpkin kit is here to help you #sharesunshine. It includes supplies for eight handmade cards and is specially designed to help you create a box full of cheer. Once you’ve made all the cards, use any leftover pieces to decorate the box. Fill it with yellow goodies, add the included adhesive label, address it to someone special, and brighten their life with a little sunshine!

It’s a one-of-a-kind kit, inspired by Sara and her #sharesunshine passion.  It provides a unique crafting experience with the added Box of Sunshine element.

  • Kit contains supplies for 8 cards and envelopes (2 cards of 4 designs)
    • Card size: 4-1/4″ x 5-1/2″ (10.8 x 14 cm)
    • Envelope size: 4-1/2″ x 5-3/4″ (11.4 x 14.6 cm)

Coordinating Colors: Basic Black, Bumblebee, Crushed Curry, Poppy Parade, Shaded Spruce, White, and Gold

This kit includes extra pieces and stickers (including a sticker label) to help you create cards AND a Box of Sunshine filled with treats and goodies to send to a friend. (Treats not included.)

  • Subscribe for the June kit from 11 May–10 June at paperpumpkin.com.
  • Supplies may be limited toward the end of each subscription period.

****************************************************************************************************

2019-2020 Annual Catalog and Mini Catalog Retiring List

Let me know if you have any questions about the retiring lists!  You can also download copies of the full retiring lists in PDF Form here:

  • Click here to get a copy of the full retiring list from the 2019-20 Annual Catalog.  The font is super tiny, so you’ll need to zoom out to read it!
  • Click here to get a copy of the full retiring list from the January-June 2020 Mini Catalog.  The font is super tiny, so you’ll need to zoom out to read it!

Have fun shopping!  Don’t forget, everything except for the stamp sets are only available while supplies last!!

One quick FYI, the Stampin’ Blends are NOT retiring, they’re being repackaged and sold as Combo Packs starting with the new catalog. So don’t panic! They’re still going to be available.

****************************************************************************************************

The Ornate Garden Suite available NOW.  Click HERE or on the image below to see a printable PDF of all the fabulous items available in the suite.

****************************************************************************************************

MAKING A DIFFERENCE: COVID-19 PRODUCT GIVEBACK

Stampin’ Up! is committed to making a difference in our global communities and caring about people first. As part of our Making a Difference program we’re offering a product giveback opportunity to support organizations that are helping COVID-19 frontline responders and communities vulnerable to the pandemic.

You can purchase the Share Sunshine PDF Download and we will donate 100% of the proceeds to COVID-19 efforts.

The Share Sunshine PDF Download is a digital stamp set that’s packed with both lighthearted and heartfelt sentiments and imagery relevant to the unique COVID-19 and social distancing situation we’re currently experiencing–including many ideas that came from you!  You can use the download in your cardmaking and papercrafting projects. Simply print the imagery on cardstock and cut it out using our Paper Trimmer, punches, or dies. Since we are physically distanced from each other, now is a perfect time to share sunshine with our friends and family by sending cards!

  • Product: Share Sunshine PDF Download. Buy it here!
  • Price: $12.00 USD
  • Dates: April 28 – June 2, 2020 or later; if the offer period extends beyond June 2, we’ll let you know

****************************************************************************************************

Card stock cuts for this project:

  • Blushing Bride Cardstock 8 1/2″ X 5 1/2″ (card base scored and folded at 4 1/4″), 4 1/4″ X 3″ (DSP mat), 3 1/2″ X 2 1/4″ (artwork mat)
  • Whisper White Cardstock 2 – 4″ X 5 1/4″ (card front and inner liner), 3 1/4″ X 2″ (artwork), 2 1/4″ X 1″ (butterflies), 4 1/8″ X 5 3/8″ (inner liner mat)
  • In Good Taste Designer Series Paper 4″ X 2 3/4″ (card front panel), 2 1/4″ X 6″ (piece for envelope flap)

****************************************************************************************************

Product List

Stampin’ Up! Best Dressed Peaceful Moments

Good Monday morning my stamping friends.  How was everyone’s weekend?  Did anyone do anything fun?  We had a little bit of snow here, but by Sunday afternoon it was gone.  Every winter I ask for one big snow storm, not these little ones that the snow disappears in a day.  I like to get one storm with about 1-2 feet of snow, enough that I just have to stay in for a day and craft.  Last year we never got one, just extremely cold.

For today’s card I used some of the new Designer Series Paper from the 2020 January-June Mini Catalog and an embellishment from the Sale-A-Bration Catalog.  Here’s my card.

I joined in with TGIF Challenge #247.  Here is their theme.

I started by adhering a panel of the Best Dressed 6X6 Designer Series Paper to a Petal Pink mat using Snail.  I then adhered it to a Lovely Lipstick mat using Snail.

I embossed a panel of Whisper White cardstock using the Parisian Flourish 3D Embossing Folder.  I adhered the embossed panel to a Petal Pink mat using Multipurpose Liquid Glue.  I then adhered it to a Lovely Lipstick mat using Snail.  I wrapped a piece of Bermuda Bay Bakers Twine from the Sale-A-Bration Metallic Baker’s Twine & Sequins Combo Pack around the matted card front twice and tied a bow.  I adhered the card front to a Whisper White card base using Stampin’ Dimensionals.

On a small panel of Whisper White cardstock I stamped the sentiment from the Stampin’ Up! Peaceful Moments Cling Stamp Set in Tuxedo Black Memento Ink.  I cut the sentiment out using the Painted Labels Dies.  I edged the die cut sentiment using my Bermuda Bay Stampin’ Write Marker.  I adhered the sentiment to the artwork using Mini Stampin’ Dimensionals.  I adhered the artwork to the card front using Stampin’ Dimensionals and added a Lovely Lipstick Happiness Blooms Enamel Dot to the sentiment.

On the inside I stamped the sentiment from the Peaceful Moments stamp set in Tuxedo Black Memento Ink in the center of a Whisper White panel.  I fussy cut some of the shoes from the Best Dressed 6 X 6 DSP and adhered them to the panel using Multipurpose Liquid Glue.  I adhered the Whisper White panel to a Lovely Lipstick mat using Snail and then to the inside of the Whisper White card base using Multipurpose Liquid Glue.

To finish my card I decorated a Medium Whisper White Envelope.  I adhered a strip of the Best Dressed 6 X 6 DSP to the bottom of the envelope front and a panel to the envelope flap.

Thank you for stopping by my blog today.  I hope you liked my card and will give it a try. Happy Stamping!!

****************************************************************************************************

1 WEEK ORDERING BONUS SPECIAL FROM THE

2020 JANUARY TO JUNE MINI CATALOG, FROM ME!!

I will send you FREE the Peaceful Poppies Elements with the purchase of the Stampin’ Up! Painted Poppies Cling Stamp Set or Painted Poppies Bundle.  This is only available from me starting today, Friday January 17, 2020 through Friday January 24, 2020.  This is in addition to my other rewards you can find here.  If you purchase the Painted Poppies Bundle you not only receive the free gifts from me, you also get 10% off the bundle and qualify for a Sale-A-Bration item.   You might not want to pass this offer up!!

****************************************************************************************************

If you need any stamping supplies, I’d love to be your Demonstrator. Just click HERE to go directly to my online store or drop me an email if you have any questions. 

MY CURRENT HOST CODE IS: U7DEP9F9

Use this host code when you order $50 or greater and receive a free gift from me! If your order is over $150, please do not use this code, but you’ll still get the free gift. The free gift is your choice of any item valued up to $10.00 in either the 2019-2020 Annual Catalog or the 2020 January-June Mini Catalog!   For any orders $50 or more I will also send you my monthly class tutorials.  Click HERE or go to my Customer Rewards for more details and to see what this months tutorials are.

Click HERE to shop the clearance rack.

Happy Stamping, Karen!

****************************************************************************************************

CELEBRATE A LOVELY DAY WITH FEBRUARY’S PAPER PUMPKIN KIT

February’s Paper Pumpkin kit is coming, and love is in the air! The Lovely Day kit is versatile, elegant, and the perfect way to help you celebrate birthdays and other grand occasions.

The Lovely Day Paper Pumpkin kit coordinates perfectly with the Happy Birthday to You Stamp Set (item 152308), which is available as part of Stampin’ Up!’s Sale-A-Bration promotion. You can get it for FREE by reaching the qualifying purchase amount of $50 usd/$60 cad by March 31, 2020.

About the February Kit:

  1. Kit details: Makes nine cards and envelopes
  2. Card size: 4-1/4” x 5-1/2” (10.8 x 14 cm)
  3. Envelope size: 4-1/2” x 5-3/4” (11.4 x 14.6 cm)
  4. Coordinating Stampin’ Up! colors: Petal Pink, Pool Party, Pretty Peacock, Rich Razzleberry, Rococo Rose, and Old Olive

Subscribe for the February kit at paperpumpkin.com from January 11 to February 10, 2020.
Supplies may be limited toward the end of each subscription period.

****************************************************************************************************

Card stock cuts for this project:

  • Lovely Lipstick Cardstock 3″ X 3″ (artwork mat), 4″ X 5 1/4″ (card front mat), 4 1/8″ X 5 3/8″ (inner liner mat)
  • Petal Pink Cardstock 2 7/8″ X 2 7/8″ (artwork mat), 3 7/8″ X 5 1/8″ (card front mat)
  • Whisper White Cardstock 3 3/4″ X 5″ (card front), 4″ X 5 1/4″ (inner liner), 2″ X 2″ (sentiment)
  • Best Dressed 6 X 6 Designer Series Paper 2 3/4″ X 2 3/4″ (artwork), 2 1/4″ X 6″ (envelope flap)

****************************************************************************************************

Product List

Stampin’ Up! Forever Lovely Blossoms for Happy Inkin’ Thursday Blog Hop

Good Thursday morning my stamping friends. Welcome to the Happy Inkin’ Thursday Blog Hop. If you are hopping over from Akiko, thank you for stopping by. This week we had a Sketch Challenge. Be sure to hop around to see everyone’s beautiful projects.

Here is the sketch we had to work from.

Here’s what I came up with for the sketch.

I started by embossing a Pool Party card front using the Parisian Flourish 3D Embossing Folder.  I adhered the embossed panel to a Pool Party  card base using Multipurpose Liquid Glue.

I adhered 2 panels of Parisian Blossoms Specialty Designer Series Paper to Petal Pink mats using Snail.  I adhered the bottom panel to the card front on an angle using Multipurpose Liquid Glue.  I adhered the top panel straight on the card front using Stampin’ Dimensionals.

I cut a stitched heart using the Stitched Be Mine Dies out of a Pool Party panel.  I cut the Petal Pink scallop heart out of the Stitched Be Mine Dies.  I put the hearts together and flipped them over.  I added Stampin’ Dimensionals between the seams to hold the hearts together and adhered it to the card front.  I stamped the sentiment from the Stampin’ Up! Forever Lovely Photopolymer Stamp Set in Pool Party Ink on a thin strip of Whisper White cardstock.  I adhered the sentiment strip on a Petal Pink mat using Snail and then to the card front overlapping the heart using Mini Stampin’ Dimensionals.  I added a few Champagne Rhinestone Basic Jewels to the heart and sentiment.

On the inside I stamped the sentiment from the Forever Lovely stamp set in the center of a Whisper White panel.  I stamped the small flower image from the Stampin’ Up! Forever Blossoms Cling Stamp Set around the sentiment in Petal Pink Ink.  I adhered the Whisper White panel to a Petal Pink mat using Snail and then to the inside of the Pool Party card base using Multipurpose Liquid Glue.

To finish my card I decorated a Medium Whisper White Envelope.  I stamped a cluster of the small flower image from the Forever Blossoms stamp set in Petal Pink Ink on the envelope front.  I adhered a panel of the Parisian Blossoms Specialty DSP to the envelope flap.

Thank you for visiting my blog today. I hope you liked my card and will give it a try. Now that you’ve seen my card, take a minute to hop through all our projects today. If you click on the Next Blog button, you’ll go to Amy’s page. Or you can just click on the names below to go directly to all the blogs! Happy Hopping!!

Mary Deatherage:
Sue Prather:
Karen Finkle: Sitting out this week
Eva Dobilas:
Akiko Sudano:
Karen Ksenzakovic:  You Are Here

****************************************************************************************************

If you need any stamping supplies, I’d love to be your Demonstrator. Just click HERE to go directly to my online store or drop me an email if you have any questions. 

MY CURRENT HOST CODE IS: U7DEP9F9

Use this host code when you order $50 or greater and receive a free gift from me! If your order is over $150, please do not use this code, but you’ll still get the free gift. The free gift is your choice of any item valued up to $10.00 in either the 2019-2020 Annual Catalog or the 2020 January-June Mini Catalog!   For any orders $50 or more I will also send you my monthly class tutorials.  Click HERE or go to my Customer Rewards for more details and to see what this months tutorials are.

Click HERE to shop the clearance rack.

Happy Stamping, Karen!

****************************************************************************************************

CELEBRATE A LOVELY DAY WITH FEBRUARY’S PAPER PUMPKIN KIT

February’s Paper Pumpkin kit is coming, and love is in the air! The Lovely Day kit is versatile, elegant, and the perfect way to help you celebrate birthdays and other grand occasions.

The Lovely Day Paper Pumpkin kit coordinates perfectly with the Happy Birthday to You Stamp Set (item 152308), which is available as part of Stampin’ Up!’s Sale-A-Bration promotion. You can get it for FREE by reaching the qualifying purchase amount of $50 usd/$60 cad by March 31, 2020.

About the February Kit:

  1. Kit details: Makes nine cards and envelopes
  2. Card size: 4-1/4” x 5-1/2” (10.8 x 14 cm)
  3. Envelope size: 4-1/2” x 5-3/4” (11.4 x 14.6 cm)
  4. Coordinating Stampin’ Up! colors: Petal Pink, Pool Party, Pretty Peacock, Rich Razzleberry, Rococo Rose, and Old Olive

Subscribe for the February kit at paperpumpkin.com from January 11 to February 10, 2020.
Supplies may be limited toward the end of each subscription period.

****************************************************************************************************

Card stock cuts for this project:

  • Petal Pink Cardstock 2 – 3 3/8″ X 4 5/8″ (card front DSP mats), 2 1/2″ X 2 1/2″ (scalloped heart), 2 5/8″ X 3/8″ (sentiment mat), 4 1/8″ X 5 3/8″ (inner liner mat)
  • Pool Party Cardstock 8 1/2″ X 5 1/2″ (card base scored and folded at 4 1/4″), 4 1/4″ X 5 1/2″ (card front), 2 1/2″ X 2 1/2″ (stitched heart)
  • Whisper White Cardstock 4″ X 5 1/4″ (inner liner), 1/4″ X 2 1/2″ (sentiment strip)
  • Parisian Blossoms Specialty Designer Series Paper 2 – 3 1/4″ X 4 1/2″ (card front pieces), 2 1/2″ X 6″ (piece for envelope flap)

****************************************************************************************************

Product List

Stampin’ Up! Forever Blossoms Wedding Sneak Peek

Good Tuesday morning my fellow stampers.  How has everyone’s week started off?  One week from today is Christmas Eve, yikes!!  Have you gotten you shopping done, baking done, cards mailed.  You all know I got my baking done.  My cards just went in the mail (here’s hoping they get to everyone on time).  Shopping??? Well, I haven’t really gotten any done.  I’ve sent my husband out to pick things up, guess that’s next on my list of things to do.  I’m really running out of time here.

For today I have another sneak peek for you using the Stampin’ Up! Forever Blossoms Bundle.  When I saw this set in the New 2020 Mini Catalog, I just knew I had to have it.  My son needs a wedding card for New Years Day, so I thought I’d play around with this bundle.  Here’s my card.

I started by embossing a Whisper White card front using the new Parisian Flourish 3D Embossing Folder.  I stamped the large floral image from the Stampin’ Up! Forever Blossoms Cling Stamp Set in Tuxedo Black Memento Ink twice on a panel of Whisper White cardstock.  I colored the image in using my Purple Posy and Soft Seafoam Stampin’ Blends Markers.  I cut the images out using the Cherry Blossoms Dies.

I adhered the cut images to the embossed Whisper White panel using Multipurpose Liquid Glue letting them hang off on either side.  I cut the pieces that were hanging off the card front to make them even.  I adhered the card front to a Soft Seafoam mat using Multipurpose Liquid Glue.  I stamped the sentiment from the Forever Blossoms stamp set in Tuxedo Black Memento Ink on a thin strip of Whisper White cardstock.  I adhered the sentiment to the card front using Stampin’ Dimensionals.

I adhered the matted card front to a Purple Posy card base using Stampin’ Dimensional.  I added a few Rhinestone Basic Jewels to the card front.

On the inside I stamped the large floral image from the Forever Blossoms stamp set in Soft Seafoam Ink on a panel of Whisper White.  I stamped the sentiment from the Forever Blossoms stamp set in Tuxedo Black Memento Ink over the floral image in the center of the panel.  I adhered the Whisper White panel to a Soft Seafoam mat using Snail and then to the inside of the Purple Posy card base using Multipurpose Liquid Glue.  I added a couple more Rhinestone Basic Jewels to the inside.

To finish my card I decorated a Medium Whisper White Envelope.  I stamped the large floral image from the Forever Blossoms stamp set in Soft Seafoam Ink on the envelope front.  I adhered a panel of Purple Posy 2019-2021 In-Color 6″ X 6″ Designer Series Paper to the envelope flap.

Thank you for stopping by my blog today.  I hope you liked my card.  Stamp Set, Dies and Embossing Folder used for today’s card will be available in just 2 1/2 short weeks. Happy Stamping!!

****************************************************************************************************

If you need any stamping supplies, I’d be very happy to be your Demonstrator. Just click HERE to go directly to my online store or drop me an email if you have any questions. 

MY CURRENT HOST CODE IS: NVSKQ72X

For any orders $50 or more I will send you my monthly class tutorials.  Click HERE or go to my Customer Rewards to see what this months tutorials are.

Click HERE to shop the clearance rack.

Happy Stamping, Karen!

****************************************************************************************************

I’LL BEE YOURS PAPER PUMPKIN

SUBSCRIBE TO PAPER PUMPKIN DECEMBER 11, 2019 – JANUARY 10, 2020

Paper Pumpkin’s first kit of 2020 is all about L-O-V-E. Whether you want handmade favors for Valentine’s Day, a bridal shower, or a remarkably romantic wedding, this month’s kit has everything you need to help you celebrate your favorite friendships and love stories. So make it a “LOVE”-ly year with Paper Pumpkin.

About the January Kit
Kit details: Makes 20 treat bags + 10 mini cards and envelopes
Card size: 3″ x 3″ (7.5 x 7.5 cm)
Envelope size: 3-1/8″ x 3-1/8″ (7.8 x 7.8 cm)
Bag size: 3-1/4″ x 4″ (8.2 x 10 cm)
Coordinating Stampin’ Up! colors: Crushed Curry, Highland Heather, Mint Macaron, and Rococo Rose

Coordinating Product
It’s “BEE”-yond question: You can get more from the I’ll Bee Yours kit when they buy the Heart Punch Pack (item 151292) from the 2020 January–June Mini Catalog. Both punches coordinate with the heart stamp in the kit so you can craft for love-filled occasions now . . . and later! Think: weddings, showers, birthdays, and more! See additional details about the punch pack below.
Heart Punch Pack (item 151292), $34.00 usd/$46.00 cad

Subscribe for the January kit at paperpumpkin.com from December 11–January 10.
Supplies may be limited toward the end of each subscription period.

****************************************************************************************************

Stampin’ Up!’s Year-End Closeout is here while supplies last!!  You can save on a selection of retiring and surplus items including holiday catalog items, stamp sets, and Paper Pumpkin past kits! Shop early to avoid missing out as items on the sale are only available while supplies last! Supplies are limited and popular items will sell out quickly. This amazing sale ends on January 2.

Head over to my Online store to see all the Discounted Items and Retiring Favorites Items.  You don’t want to miss out on these savings because when they are gone THEY ARE GONE!

****************************************************************************************************

Card stock cuts for this project:

  • Purple Posy Cardstock 8 1/2″ X 5 1/2″ (card base scored and folded at 4 1/4″)
  • Soft Seafoam Cardstock 2 – 4 1/8″ X 5 3/8″ (card front and inner liner mat)
  • Whisper White Cardstock 2 – 4″ X 5 1/4″ (card front and inner liner), 1/2″ X 4″ (sentiment), 4″ X 5″ (flowers)
  • 2019-2021 In-Color 6 X 6 Designer Series Paper 2 1/4″ X 6″ (envelope flap)

****************************************************************************************************

Product List

Stampin’ Up! Christmas Tidings With a Sneak Peek

Good Tuesday morning my stamping friends.  How has everyone’s week started?  I hope everyone is doing well and finishing up all your cards to get in the mail early.  I’m having a class tonight and the ladies will be making a few more Christmas cards to add to their stash.  They may even be making this one.  Before my class though I will be gong in for surgery.  I’ve had trigger finger in both of my hands and I just couldn’t stand the pain anymore or the locking of my fingers.  I am having both hands operated on at the same time, I must be nuts.  I was told that I am to use my hands immediately, so I figured why not have a class.  The first thing my daughter said when I told her I was having surgery was ” so you’ll be ok to bake cookies this year then right?”.  You can see where her priorities are, lol.

So today I have a card that looks more involved than it really is.  Once you get the couple pieces cut out, it goes together really quick.  I was very hesitant about getting the Toile Tiding Designer Series Paper, I wasn’t sure I was going to like it.  It’s only 2 colors + Very Vanilla, Garden Green on one side and Real Red on the other.  I’m so happy I bought it, I really love the designs on this paper.  Once again I was inspired by one of my team members, Akiko, who made this card for our weekly blog hop a couple weeks ago.  Here is her card.  Here’s my take on it.

I started by cutting a circle in a Very Vanilla card front using the 2nd largest circle from the Layering Circles Dies.  As in my description, I have a little sneak peek of something coming January 3, 2020 in the new Mini Catalog (formally known as the occasions catalog).  I embossed the Very Vanilla panel using the new Parisian Flourish 3D Embossing Folder, isn’t it just gorgeous.  Using the largest scallop circle from the Layering Circles Dies, I cut a piece of Real Red cardstock.  I used the 2nd largest circle die from the Layering Circles Dies to cut the inside of the scallop circle to make a frame.  I adhered the scallop frame to the Very Vanilla card front using Multipurpose Liquid Glue.  I cut a panel of Toile Tidings DSP using the largest circle die from the Layering Circles Dies making sure to get the image I wanted in the circle.  I adhered the Toile Tidings DSP circle behind the Very Vanilla panel using Stampin’ Dimensionals.

I wrapped a piece of Garden Green 3/8″ Double-Stitched Ribbon around the panel and tied a knot.  I adhered the Very Vanilla panel to a Garden Green card base using Stampin’ Dimensionals.

On a scrap of Very Vanilla cardstock I stamped the sentiment from the Stampin’ Up! Toile Christmas Cling Stamp Set in Garden Green Ink. I cut the sentiment out using the Christmas Cardinal Dies. I adhered the cut sentiment to the card front using Stampin’ Dimensionals.  I added a few Real Red Toile Tidings Glitter Enamel Dots to the card front.

On the inside I stamped the sentiment from the Toile Christmas stamp set in Garden Green Ink in the center of a Very Vanilla panel.  I stamped the branch image from the Toile Christmas stamp set on either side of the panel in Garden Green Ink.  I colored the berries on the branches in using my Real Red Stampin’ Blends Markers.  I adhered the Very Vanilla panel to a Real Red mat using Snail and then to the inside of the Garden Green card base using Multipurpose Liquid Glue.

To finish my card I decorated a Medium Very Vanilla Envelope.  I stamped the branch image from the Toile Christmas stamp set in Garden Green Ink on the envelope front.  I colored the berries on the branch in using my Real Red Stampin’ Blends Marker.  I adhered a panel of the Toile Tidings DSP to the envelope flap.

Thank you for visiting my blog today.  I hope you liked my card and will give it a try. Happy Stamping!!

****************************************************************************************************

If you need any stamping supplies, I’d be very happy to be your Demonstrator. Just click HERE to go directly to my online store or drop me an email if you have any questions. 

MY CURRENT HOST CODE IS: NVSKQ72X

For any orders $50 or more I will send you my monthly class tutorials.  Click HERE or go to my Customer Rewards to see what this months tutorials are.

Click HERE to shop the clearance rack.

Happy Stamping, Karen!

****************************************************************************************************

SOMETHING FOR EVERYTHING PAPER PUMPKIN 
SUBSCRIBE TO PAPER PUMPKIN BY DECEMBER 10, 2019

December’s Something for Everything kit includes a super-versatile stamp set complete with 13 sentiments that can be used for occasions ranging from wedding, to get well, birthdays, and more! Plus, the three full-sized card designs (four of each) are gorgeous AND multiuse.  Paper Pumpkin’s December kit makes it easier than ever to give a handmade card to a friend—no matter what the occasion!

This is an all-card kit, with 13 sentiments to cover tons of occasions from weddings, get well, birthday, and more, this set does it all.

Kit details: Makes 12 cards and envelopes

Card size: 4 1/4″ x 5-1/2″ (10.8 x 14 cm)

Envelope size: 4-1/2″ x 5-3/4″ (11.4 x 14.6 cm)

Coordinating colors: Crushed Curry, Grapefruit Grove, Old Olive, Shaded Spruce, Terracotta Tile

  • Subscribe for the December kit at paperpumpkin.com from November 11–December 10.
  • Supplies may be limited toward the end of each subscription period.

Interested in subscribing to Paper Pumpkin?  You can either sign up for a subscription where you are billed monthly for your kit or you can purchase a prepaid subscription in my online store. To see more information and to sign up for the monthly subscription,  Click Here. To see the options for prepaid subscriptions in my online store, Click Here.

****************************************************************************************************

Card stock cuts for this project:

  • Garden Green Cardstock 4 1/4″ X 11″ (card base scored and folded at 5 1/2″)
  • Real Red Cardstock 4″ X 5 1/4″ (inner liner mat), 3 1/2″ X 3 1/2″ (scallop frame)
  • Very Vanilla Cardstock 4″ X 5 1/4″ (card front), 3 3/4″ X 5″ (inner liner)
  • Toile Tidings Designer Series Paper

****************************************************************************************************

Product List