Stampin’ Up! Poppy Moments Valentine for Happy Inkin’ Thursday Blog Hop

Good Thursday morning my stamping friends. Welcome to the Happy Inkin’ Thursday Blog Hop. If you are hopping over from Akiko, thank you for stopping by. This week we had a Sketch Challenge. Be sure to hop around to see everyone’s beautiful projects.
Here is the sketch we had to work from.

Here’s what I came up with for the sketch.

My colors were inspired by Global Design Project Challenge #225.  Here are their colors.

I also played along with TGIF Challenge #248.  Here is their theme.

I joined in with the Watercooler Wednesday Challenge #256.  Here is their theme.

I started by embossing a Whisper White card front using the Pinewood Planks 3D Embossing Folder.  I adhered the card front to a Whisper White card base using Multipurpose Liquid Glue.

Using my Poppy Moments Dies, I cut a solid flower from the Real Red cardstock.  I cut the outline flower and the scallop trim from the Flirty Flamingo cardstock.  I cut the flower center from the Basic Black cardstock.  Using the Painted Labels Dies I cut the swirly circle from the Basic Black Cardstock.  I adhered the flower outline to the solid flower using Multipurpose Liquid Glue.  I adhered the larger flower center to the flower center using Snail and the smaller flower center using a Mini Stampin’ Dimensional.  I adhered the Basic Black swirly circle to the card front using Multipurpose Liquid Glue.  I adhered the flower on top of the swirl using Stampin’ Dimensionals.

On a thin strip of Whisper White cardstock, I stamped the sentiment from the Stampin’ Up! A Wish For Everything Cling Stamp Set in Real Red Ink.  I adhered the Flirty Flamingo scallop trim below the sentiment using Snail.  I adhered the sentiment to the card front using Stampin’ Dimensionals.  I added a couple Rhinestone Basic Jewels which I colored using my Dark Real Red Stampin’ Blends Marker.

On the inside I stamped the sentiment from the Stampin’ Up! Forever Lovely Photopolymer Stamp Set in Real Red Ink in the center of a Whisper White panel.  I stamped the poppy images from the Stampin’ Up! Painted Poppies Cling Stamp Set on the top and bottom corners of the panel in Tuxedo Black Memento Ink.  Using the color fill stamp from the Painted Poppies stamp set, I stamped over the poppy images using Flirty Flamingo Ink stamping off once.  I stamped the splatter image from the Painted Poppies stamp set in Flirty Flamingo Ink inside the flowers.  I adhered the Whisper White panel to a Flirty Flamingo mat using Snail and then to the inside of the Whisper White card base using Multipurpose Liquid Glue.

To finish my card I decorated a Medium Whisper White Envelope.  I stamped the poppy image from the Painted Poppies stamp set on the envelope front in Tuxedo Black Memento Ink.  I stamped the fill image from the Painted Poppies stamp set in Flirty Flamingo Ink, stamping off once, inside the flowers.  I stamped the splatter image from the Painted Poppies stamp set in Flirty Flamingo Ink inside the flowers.  I adhered a panel of the Peaceful Poppies Designer Series Paper to the envelope flap.

Thank you for visiting my blog today. I hope you liked my card and will give it a try. Now that you’ve seen my card, take a minute to hop through all our projects today. If you click on the Next Blog button, you’ll go to Amy’s page. Or you can just click on the names below to go directly to all the blogs! Happy Hopping!!

Amy Koenders:
Mary Deatherage:
Kristi Gray:
Jaimie Babarczy:
Sue Prather: I need to skip this week
Karen Finkle:
Eva Dobilas:
Akiko Sudano:
Karen Ksenzakovic: You Are Here

****************************************************************************************************

If you need any stamping supplies, I’d love to be your Demonstrator. Just click HERE to go directly to my online store or drop me an email if you have any questions. 

MY CURRENT HOST CODE IS: U7DEP9F9

Use this host code when you order $50 or greater and receive a free gift from me! If your order is over $150, please do not use this code, but you’ll still get the free gift. The free gift is your choice of any item valued up to $10.00 in either the 2019-2020 Annual Catalog or the 2020 January-June Mini Catalog!   For any orders $50 or more I will also send you my monthly class tutorials.  Click HERE or go to my Customer Rewards for more details and to see what this months tutorials are.

Click HERE to shop the clearance rack.

Happy Stamping, Karen!

****************************************************************************************************

CELEBRATE A LOVELY DAY WITH FEBRUARY’S PAPER PUMPKIN KIT

February’s Paper Pumpkin kit is coming, and love is in the air! The Lovely Day kit is versatile, elegant, and the perfect way to help you celebrate birthdays and other grand occasions.

The Lovely Day Paper Pumpkin kit coordinates perfectly with the Happy Birthday to You Stamp Set (item 152308), which is available as part of Stampin’ Up!’s Sale-A-Bration promotion. You can get it for FREE by reaching the qualifying purchase amount of $50 usd/$60 cad by March 31, 2020.

About the February Kit:

  1. Kit details: Makes nine cards and envelopes
  2. Card size: 4-1/4” x 5-1/2” (10.8 x 14 cm)
  3. Envelope size: 4-1/2” x 5-3/4” (11.4 x 14.6 cm)
  4. Coordinating Stampin’ Up! colors: Petal Pink, Pool Party, Pretty Peacock, Rich Razzleberry, Rococo Rose, and Old Olive

Subscribe for the February kit at paperpumpkin.com from January 11 to February 10, 2020.
Supplies may be limited toward the end of each subscription period.

****************************************************************************************************

Card stock cuts for this project:

  • Basic Black Cardstock 3′ X 4″ (swirl on card front and flower center)
  • Flirty Flamingo Cardstock 4 1/8″ X 5 3/8″ (inner liner mat), 3′ X 3 1/2″ (flower and scallop trim)
  • Real Red Cardstock 3″ X 3″ (flower)
  • Whisper White Cardstock 8 1/2″ X 5 1/2″ (card base scored and folded at 4 1/4″), 4 1/8″ X 5 3/8″ (card front), 2 3/4′ X 3/8″ (sentiment strip), 4″ X 5 1/4″ (inner liner)
  • Peaceful Poppies Designer Series Paper 2 1/2″ X 6″ (piece for envelope flap)

****************************************************************************************************

Product List

Stampin’ Up! Forever Lovely Blossoms for Happy Inkin’ Thursday Blog Hop

Good Thursday morning my stamping friends. Welcome to the Happy Inkin’ Thursday Blog Hop. If you are hopping over from Akiko, thank you for stopping by. This week we had a Sketch Challenge. Be sure to hop around to see everyone’s beautiful projects.

Here is the sketch we had to work from.

Here’s what I came up with for the sketch.

I started by embossing a Pool Party card front using the Parisian Flourish 3D Embossing Folder.  I adhered the embossed panel to a Pool Party  card base using Multipurpose Liquid Glue.

I adhered 2 panels of Parisian Blossoms Specialty Designer Series Paper to Petal Pink mats using Snail.  I adhered the bottom panel to the card front on an angle using Multipurpose Liquid Glue.  I adhered the top panel straight on the card front using Stampin’ Dimensionals.

I cut a stitched heart using the Stitched Be Mine Dies out of a Pool Party panel.  I cut the Petal Pink scallop heart out of the Stitched Be Mine Dies.  I put the hearts together and flipped them over.  I added Stampin’ Dimensionals between the seams to hold the hearts together and adhered it to the card front.  I stamped the sentiment from the Stampin’ Up! Forever Lovely Photopolymer Stamp Set in Pool Party Ink on a thin strip of Whisper White cardstock.  I adhered the sentiment strip on a Petal Pink mat using Snail and then to the card front overlapping the heart using Mini Stampin’ Dimensionals.  I added a few Champagne Rhinestone Basic Jewels to the heart and sentiment.

On the inside I stamped the sentiment from the Forever Lovely stamp set in the center of a Whisper White panel.  I stamped the small flower image from the Stampin’ Up! Forever Blossoms Cling Stamp Set around the sentiment in Petal Pink Ink.  I adhered the Whisper White panel to a Petal Pink mat using Snail and then to the inside of the Pool Party card base using Multipurpose Liquid Glue.

To finish my card I decorated a Medium Whisper White Envelope.  I stamped a cluster of the small flower image from the Forever Blossoms stamp set in Petal Pink Ink on the envelope front.  I adhered a panel of the Parisian Blossoms Specialty DSP to the envelope flap.

Thank you for visiting my blog today. I hope you liked my card and will give it a try. Now that you’ve seen my card, take a minute to hop through all our projects today. If you click on the Next Blog button, you’ll go to Amy’s page. Or you can just click on the names below to go directly to all the blogs! Happy Hopping!!

Mary Deatherage:
Sue Prather:
Karen Finkle: Sitting out this week
Eva Dobilas:
Akiko Sudano:
Karen Ksenzakovic:  You Are Here

****************************************************************************************************

If you need any stamping supplies, I’d love to be your Demonstrator. Just click HERE to go directly to my online store or drop me an email if you have any questions. 

MY CURRENT HOST CODE IS: U7DEP9F9

Use this host code when you order $50 or greater and receive a free gift from me! If your order is over $150, please do not use this code, but you’ll still get the free gift. The free gift is your choice of any item valued up to $10.00 in either the 2019-2020 Annual Catalog or the 2020 January-June Mini Catalog!   For any orders $50 or more I will also send you my monthly class tutorials.  Click HERE or go to my Customer Rewards for more details and to see what this months tutorials are.

Click HERE to shop the clearance rack.

Happy Stamping, Karen!

****************************************************************************************************

CELEBRATE A LOVELY DAY WITH FEBRUARY’S PAPER PUMPKIN KIT

February’s Paper Pumpkin kit is coming, and love is in the air! The Lovely Day kit is versatile, elegant, and the perfect way to help you celebrate birthdays and other grand occasions.

The Lovely Day Paper Pumpkin kit coordinates perfectly with the Happy Birthday to You Stamp Set (item 152308), which is available as part of Stampin’ Up!’s Sale-A-Bration promotion. You can get it for FREE by reaching the qualifying purchase amount of $50 usd/$60 cad by March 31, 2020.

About the February Kit:

  1. Kit details: Makes nine cards and envelopes
  2. Card size: 4-1/4” x 5-1/2” (10.8 x 14 cm)
  3. Envelope size: 4-1/2” x 5-3/4” (11.4 x 14.6 cm)
  4. Coordinating Stampin’ Up! colors: Petal Pink, Pool Party, Pretty Peacock, Rich Razzleberry, Rococo Rose, and Old Olive

Subscribe for the February kit at paperpumpkin.com from January 11 to February 10, 2020.
Supplies may be limited toward the end of each subscription period.

****************************************************************************************************

Card stock cuts for this project:

  • Petal Pink Cardstock 2 – 3 3/8″ X 4 5/8″ (card front DSP mats), 2 1/2″ X 2 1/2″ (scalloped heart), 2 5/8″ X 3/8″ (sentiment mat), 4 1/8″ X 5 3/8″ (inner liner mat)
  • Pool Party Cardstock 8 1/2″ X 5 1/2″ (card base scored and folded at 4 1/4″), 4 1/4″ X 5 1/2″ (card front), 2 1/2″ X 2 1/2″ (stitched heart)
  • Whisper White Cardstock 4″ X 5 1/4″ (inner liner), 1/4″ X 2 1/2″ (sentiment strip)
  • Parisian Blossoms Specialty Designer Series Paper 2 – 3 1/4″ X 4 1/2″ (card front pieces), 2 1/2″ X 6″ (piece for envelope flap)

****************************************************************************************************

Product List

Stampin’ Up Peaceful Painted Poppies

Good Tuesday morning my fellow stampers.  By the time you read this I will probably have landed in Orlando, Florida starting my vacation in Disney World.  My husband so nicely booked us on a 5am flight so that we would get a full day in our first day here.  I’m sure we will all be exhausted by tonight since we had to leave our house at 2am, so we didn’t even bother going to sleep last night.  Since I am away, I may not respond as quickly as normal to you, but I will be signing in before we leave for the parks in the morning and when we get back in the afternoon/evening.

For today’s card I have a very quick and easy card for you letting the Designer Series Paper do all the work for me.  Here’s my card.

I started by adhering a panel of the new Peaceful Poppies Designer Series Paper to a Blackberry Bliss mat using Snail.

I wrapped a piece of the 3/8″ Old Olive/Pretty Peacock Reversible Ribbon around the panel and tied a bow having the Old Olive side out.  I stamped the sentiment from the Stampin’ Up! Little Ladybug Cling Host Stamp Set in Old Olive Ink on a small panel of Whisper White cardstock.  I cut the sentiment out using the Mini Curvy Keepsakes Box Dies.  I tied a small piece of the Blackberry Bliss Natures Twine through the cut out sentiment and tied it around the Old Olive bow.

I added an Old Olive Noble Peacock Rhinestone Basic Jewel to the sentiment.  I adhered the card front to an Old Olive card base using Stampin’ Dimensionals.

On the inside I stamped the sentiment from the Stampin’ Up! Forever Lovely Photopolymer Stamp Set in Old Olive Ink in the center of a Whisper White panel.  I stamped the poppy image from the Stampin’ Up! Painted Poppies Cling Stamp Set in Tuxedo Black Memento Ink 3 times on the bottom of the panel.  I adhered the Whisper White panel to a Blackberry Bliss mat using Snail and then to the inside of the Old Olive card base using Multipurpose Liquid Glue.

To finish my card I decorated a Medium Whisper White Envelope.  I stamped the poppy image from the Painted Poppies stamp set in Tuxedo Black Memento Ink on the front of the envelope.  I adhered a panel of the Peaceful Poppies DSP to the envelope flap.

Thank you for stopping by my blog today.  I hope you liked my card and will give it a try. Happy Stamping!!

****************************************************************************************************

If you need any stamping supplies, I’d love to be your Demonstrator. Just click HERE to go directly to my online store or drop me an email if you have any questions. 

MY CURRENT HOST CODE IS: U7DEP9F9

Use this host code when you order $50 or greater and receive a free gift from me! If your order is over $150, please do not use this code, but you’ll still get the free gift. The free gift is your choice of any item valued up to $10.00 in either the 2019-2020 Annual Catalog or the 2020 January-June Mini Catalog!   For any orders $50 or more I will also send you my monthly class tutorials.  Click HERE or go to my Customer Rewards for more details and to see what this months tutorials are.

Click HERE to shop the clearance rack.

Happy Stamping, Karen!

****************************************************************************************************

ONLY 3 DAYS LEFT TO SUBSCRIBE

I’LL BEE YOURS PAPER PUMPKIN

SUBSCRIBE TO PAPER PUMPKIN DECEMBER 11, 2019 – JANUARY 10, 2020

Paper Pumpkin’s first kit of 2020 is all about L-O-V-E. Whether you want handmade favors for Valentine’s Day, a bridal shower, or a remarkably romantic wedding, this month’s kit has everything you need to help you celebrate your favorite friendships and love stories. So make it a “LOVE”-ly year with Paper Pumpkin.

About the January Kit
Kit details: Makes 20 treat bags + 10 mini cards and envelopes
Card size: 3″ x 3″ (7.5 x 7.5 cm)
Envelope size: 3-1/8″ x 3-1/8″ (7.8 x 7.8 cm)
Bag size: 3-1/4″ x 4″ (8.2 x 10 cm)
Coordinating Stampin’ Up! colors: Crushed Curry, Highland Heather, Mint Macaron, and Rococo Rose

Coordinating Product
It’s “BEE”-yond question: You can get more from the I’ll Bee Yours kit when they buy the Heart Punch Pack (item 151292) from the 2020 January–June Mini Catalog. Both punches coordinate with the heart stamp in the kit so you can craft for love-filled occasions now . . . and later! Think: weddings, showers, birthdays, and more! See additional details about the punch pack below.
Heart Punch Pack (item 151292), $34.00 usd/$46.00 cad

Subscribe for the January kit at paperpumpkin.com from December 11–January 10.
Supplies may be limited toward the end of each subscription period.

****************************************************************************************************

Card stock cuts for this project:

  • Blackberry Bliss Cardstock 2 – 4 1/8″ X 5 3/8″ (card front and inner liner mats)
  • Old Olive Cardstock 8 1/2′ X 5 1/2″ (card base scored and folded at 4 1/4″)
  • Whisper White Cardstock 4″ X 5 1/4″ (inner liner), 2″ X 1 1/2″ (sentiment)
  • Peaceful Poppies Designer Series Paper 4″ X 5 1/4″ (card front), 2 1/2″ X 6″ (envelope flap)

****************************************************************************************************

Product List

Stampin’ Up! Well Written Wedding Card

Good Thursday morning my fellow stampers.  How has everyone’s week been going?  The weekend is right around the corner again and that means only 2 day’s till World Card Making Day.  Our team will be doing Facebook Live videos all day on Saturday starting at 9am and going until 9pm.  I hope you can join us, the link is listed below.  I will be doing my live video at 4pm, this will be my 1st Facebook Live.

For today’s card a friend asked me to make her a wedding card for this weekend.  I’ve seen cards made with the Puzzle Pieces Dies and I thought I’d put my own spin on it.  Here’s my card.

I played along with the Fab Friday Sketch Challenge #173.  Here is their sketch.

I started by embossing a Whisper White panel using the Scripty 3D Embossing Folder and adhered it to a Thick Whisper White card base using Multipurpose Liquid Glue.  I cut out 2 of the puzzle pieces using the Puzzle Pieces Die from a scrap of Thick Whisper White cardstock.  I wanted to make sure the puzzle pieces were a little sturdier, that’s why I used the thick cardstock.  I colored one of the pieces in using my Dark Basic Black Stampin’ Blends Marker.  I colored 3 Rhinestone Basic Jewels using my Dark Basic Black Stampin’ Blends Marker and added them to the puzzle piece, so it looked like buttons.  The other puzzle piece I left white and added Rhinestone Basic Jewels to the top to look like a necklace.

I cut the heart out of Sparkle Glimmer Paper using the Stitched Be Mine Dies.  I cut the ‘bride and groom’ sentiments out of Silver Foil Sheets using the Well Written Dies.  I adhered the puzzle pieces to the center of the heart using Stampin’ Dimensionals.  I adhered the bride on the top of the heart and groom on the bottom of the heart using Multipurpose Liquid Glue.

I adhered a piece of Silver 3/8″ Metallic-Edge Ribbon to the back of the heart using a Glue Dot.  I adhered the heart to the card front using Stampin’ Dimensionals.

On the inside I stamped the sentiment from the Stampin’ Up! Dandelion Wishes Cling Stamp Set in Tuxedo Black Memento Ink in the center of a Whisper White panel.  I stamped the heart image from the Stampin’ Up! Forever Lovely Photopolymer Stamp Set in Petal Pink Ink on either side of the sentiment.  I adhered the Whisper White panel to a Basic Black mat using Snail and then to the inside of the Thick Whisper White card base using Multipurpose Liquid Glue.

To finish my card I decorated a Medium Whisper White Envelope.  I stamped the heart image from the Forever Lovely stamp set on the envelope front and envelope flap in Petal Pink Ink.

Thank you for stopping by my blog today.  I hope you liked my card and will give it a try. Happy Stamping!!

****************************************************************************************************

If you need any stamping supplies, I’d be very happy to be your Demonstrator. Just click HERE to go directly to my online store or drop me an email if you have any questions. 

MY CURRENT HOST CODE IS: 3F496G6J

For any orders $50 or more I will send you my monthly class tutorials.  Click HERE or go to my Customer Rewards to see what this months tutorials are.

Click HERE to shop the clearance rack.

Happy Stamping, Karen!

****************************************************************************************************

INKIN’ KREW WORLD CARD MAKING DAY FACEBOOK EVENT 

SATURDAY OCTOBER 5TH

Save the date!!  You’re invited to attend a fun Facebook event on Saturday, October 5 to celebrate World Card Making Day!

Our team will be hosting a Facebook event that will run from about 9:00 AM ET until 9:00 PM ET with card making presentations and giveaways going all day long!!

I will be doing my live video at 4pm.

****************************************************************************************************

CHRISTMAS IS COMING EARLY THIS YEAR

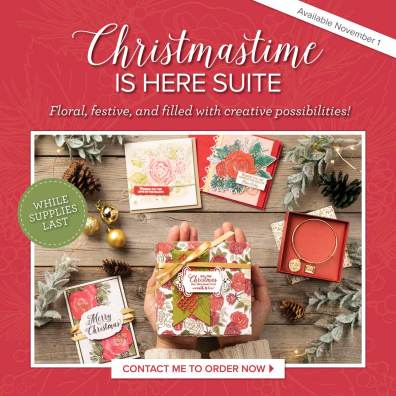
AVAILABLE NOVEMBER 1ST, THE NEW CHRISTMASTIME IS HERE SUITE

We hope you’re ready to make this holiday season magical, because the Christmastime Is Here Suite is! This exclusive, limited-time collection of festive, floral coordinating products has everything you need to share love, joy, and creativity this holiday season.

Products from the Christmastime Is Here Suite will be available while supplies last only starting November 1st, 2019

Here’s a sneak peek video of what’s included in the suite.

****************************************************************************************************

WINTER WONDERS PAPER PUMPKIN

SUBSCRIBE TO PAPER PUMPKIN BY OCTOBER 10, 2019

Paper Pumpkin wants to help you share love and joy this Christmas with a duo of delightful, special-edition kits. October’s kit includes 10 traditional cards, while November’s kit features 24 can’t-miss tags. Put them together and you have everything you need to make the season bright.

There’s something about the holidays that brings out the crafter in all of us. Even non-crafters like making simple and fun projects to celebrate the season. And since “simple and fun” is Paper Pumpkin’s middle name, we have the perfect kits for you!

In October and November we are offering back-to-back coordinating kits, one with Christmas cards, the other with Christmas tags. Both kits make it easy for you to add a handmade, personal touch to your holiday giving—without a lot of fuss. It’s Christmas made easy with Paper Pumpkin!

October Kit

Coordinating colors: Early Espresso, Pool Party, Poppy Parade, and Shaded Spruce

November Kit

Coordinating colors: Early Espresso, Pool Party, Poppy Parade, and Shaded Spruce

The October and November kits coordinate; however, each kit is all-inclusive and can stand alone.

Click Here for more information and to subscribe to Paper Pumpkin.

****************************************************************************************************

I have gathered up a lot of retired Stamp Sets, Embossing Folders & Dies  and put a list together for anyone interested.  I have single Stamp Sets along with Stamp Sets bundled with Dies or Punches.  Take a look and see if there is anything that you missed out on getting and would still like.  Click Here to go to my list.

****************************************************************************************************

Card stock cuts for this project:

  • Basid Black Cardstock 4″ X 5 1/4″ (inner liner mat)
  • Whisper White Cardstock 4 1/4″ X 5 1/2″ (card front), 3 7/8″ X 5 1/8″ (inner liner)
  • Thick Whisper White Cardstock 4 1/4″ X 11″ (card base scored and folded at 5 1/2″), scrap for puzzle pieces
  • Sparkle Glimmer Paper 4″ X 4″ (heart on card front)
  • Silver Foil Sheet 1″ X 5″ (cut out sentiment)

****************************************************************************************************

Product List

Stampin’ Up Tea Together Mother’s Day

Good Tuesday morning my fellow stampers.  How has everyone’s week started off?

For today’s card I made another Mother’s Day card for you, trying to focus on clean and simple (well as simple as I get).  I tried to let the Designer Series Paper do most of the work for me.  Here’s my card.

I was able to join in with 2 challenges with my card today also.  I’ve said before that I love doing challenges.  They give me a starting point when I’m having crafters block. First is the Festive Friday Challenge #0032.  I was able to do both, Mother’s Day and Pink.  Here is their challenge.

Next is The Flower Challenge #31  Here is their sketch.

I started by adhering a panel of Petal Promenade Designer Series Paper to a Powder Pink card base using Multipurpose Liquid Glue.

I then adhered a panel of Petal Pink cardstock and a smaller panel of Petal Promenade DSP to the left side of the card using Multipurpose Liquid Glue.  I stamped the sentiment from the Stampin’ Up Tea Together Stamp Set in Fresh Fig Ink on the panel of DSP.

On a scrap of Whisper White cardstock I stamped 3 of the flower images from the Stampin’ Up Forever Lovely Stamp Set in Powder Pink Ink.  I stamped the leaves from the same stamp set in Tranquil Tide Ink.  I fussy cut all the images using my Paper Snips.  I adhered the flowers and leaves to the card front using Glue Dots and Stampin’ Dimensionals.

On the inside I stamped the sentiment from Forever Lovely stamp set in Fresh Fig Ink in the center of a Whisper White panel.  I stamped the flowers and leaves from the same stamp set multiple times in Powder Pink and Tranquil Tide Inks.  I adhered the Whisper White panel to the inside of the Powder Pink card base using Multipurpose Liquid Glue.

To finish my card I decorated a Medium Whisper White Envelope.  I stamped the flower and leaves from the Forever Lovely stamp set in Powder Pink and Tranquil Tide Inks on the envelope front.  I adhered a piece of the Petal Promenade DSP to the envelope flap.

Thank you for stopping by my blog today.  I hope you liked my card and will give it a try.  Don’t miss out on these 2017-2019 In-Colors.  Once they are gone they’re gone.  I used 3 of the retiring In-Colors for my card today.  This beautiful Petal Promenade DSP will be retiring in June too.  Happy Stamping!!

****************************************************************************************************

If you need any stamping supplies, I’d be very happy to be your Demonstrator.  Just click here to go directly to my online store or drop me an email if you have any questions.

The Clearance Rack has been updated with lots of new deals! So check it out.

Click here to shop the clearance rack.

MY CURRENT HOST CODE IS: 7923DX9M

Happy Stamping, Karen!

****************************************************************************************************

If you are interested in joining my team click here for details or email me.  I’d love to have you on my team.

****************************************************************************************************

If you’re on my mailing list I will be sending you a catalog as soon as I get them the beginning of May. If you want to be on my mailing list, you must have placed an order of $50 or more before May 1st 2019.

****************************************************************************************************

Stampin’ Up! has posted their retiring lists for the 2018-19 Annual Catalog and 2019 Occasions Catalog.  Head over to my online store to pick up those retiring items now!  They’re only available while supplies last from now through June 3!

A few notes about the lists:

  • Due to high demand for retiring stamp sets, these items will have guaranteed availability until May 24; all other products are not guaranteed and are available while supplies last only.
  • Order deadline to get the retiring products:  June 3, 2019; 11:50 PM (MT)

Click the images below to head over to shop the specific retiring items:

Please note, some of the bundle items may be carrying over into the new 2019-2020 Annual Catalog.  However, the bundle pricing will go away, so get them while you can at the discounted price!!

Stampin’ Up! Retirement List Clarification

It looks like every single stamp set from the 2018-19 Annual Catalog is being retired and that isn’t the case, the carryover sets are being transitioned to Cling Mount.

The stamp sets offered in clear-mount or wood-mount in the 2018–2019 annual catalog that are carrying over into the 2019–2020 annual catalog will be offered in clear-mount and/or wood-mount until existing inventory has been depleted or until June 4, 2019 (whichever comes first).

If the inventory is depleted, you will be notified of the automatic switch to cling when placing an order for that stamp set. This means that you may end up purchasing select cling stamp sets (in carryover artwork) before they can be ordered from the catalog!  All carryover rubber stamp sets will be available in cling medium only (with the exception of background stamps in North America) beginning June 4, 2019.

Here is the list of stamp sets that WILL be in the 2019-2020 Annual Catalog.  The stamp sets on this list will not be retiring, they will simply be transitioned to Cling Mount moving forward:

  • Accented Blooms
  • Animal Outing
  • Artisan Textures
  • Barn Door
  • Beautiful Day
  • Beautiful You
  • Bee Thankful
  • Birthday Backgrounds
  • Bokeh Dots
  • Botanical Bliss
  • Country Road
  • Crafting Forever
  • Dandelion Wishes
  • Dashing Deer
  • First Frost
  • Flourishing Phrases
  • Gallery Grunge
  • Healing Hugs
  • Heartland
  • Hold on to Hope
  • Itty Bitty Greetings
  • Kindness & Compassion
  • Label Me Pretty
  • Lilypad Lake
  • Little Elephant
  • Little Twinkle
  • Love You to Pieces
  • Magical Mermaid
  • Painted Glass
  • Peaceful Place
  • Perennial Birthday
  • Pop of Petals
  • Rooted in Nature
  • Sea of Textures
  • Sorry for Everything
  • Special Celebrations
  • Stitched All Around
  • This Little Piggy
  • Tropical Chic
  • Winter Woods

Any other stamp sets in the 2018-19 Annual Catalog that are NOT on this list will be retired.  Sorry again for the confusion!  Stampin’ Up! is aware of the confusion and hopefully will be posting an updated list for us.

You can download copies of the full retiring lists in PDF Form here:

  • Click here to get a copy of the full retiring list from the Occasions Catalog.
  • Click here to get a copy of the full retiring list from the 2018-19 Annual Catalog.

****************************************************************************************************

About the “Shelli” Kit

Shelli Gardner worked closely with designers and concept artists to create a Paper Pumpkin kit that is uniquely hers. It includes an exclusive photopolymer stamp set, paper and crafting materials to create 12 mailable cards (3 cards of 4 unique designs), 12 exclusive, coordinating envelopes, and a Classic Stampin’ Spot.

Coordinating colors: Crumb Cake, Early Espresso, Old Olive, Petal Pink, Pool Party, Pretty Peacock, Soft Suede, and Very Vanilla

  • In order to receive the Hugs from Shelli kit, the subscriber must have an active subscription by May 10 at 11:50 PM (MT).
  • Supplies may be limited toward the end of the subscription period.

Don’t miss out on the May Paper Pumpkin.  Click HERE to subscribe.

****************************************************************************************************

Card stock cuts for this project:

  • Powder Pink Cardstock 8 1/2″ X 5 1/2″ (card base scored and folded at 4 1/4″),    1 1/2″ X 5″ (panel on card front)
  • Whisper White Cardstock 4″ X 5 1/4″ (inner liner) scraps for flowers and leaves
  • Petal Promenade Designer Series Paper 4 1/4″ X 5 1/2″ (card front), 1 1/2″ X 3 5/8″ (panel on card front) piece for envelope flap

****************************************************************************************************

Product List

Stampin’ Up Meant To Be

Good Wednesday morning my fellow stampers.  Happy 1st Day Of Spring!!!

There are less than 2 weeks left for Sale-A-Bration, yikes!  If there are still items you wanted to get, don’t wait.  Things are selling out.  They’ve added a 3rd release, you can see it below.

For today’s card I have a real quick and easy card for you.  Take a look.

I started by cutting the rectangles.  I used the 3 middle Rectangle Stitched Framelits Dies along with my Big Shot and cut the largest in Lovely Lipstick cardstock, the middle one in Flirty Flamingo cardstock and the smallest one in All My Love Designer Series Paper.  Once I cut them out I layered them inside one another.

As you can see, this is a very flat card since they are inside and not layered on top of one another.  I adhered the rectangles to a Whisper White card front using Multipurpose Liquid Glue.  I just love how the stitching looks on all the rectangles.

On a scrap piece of Whisper White cardstock I stamped the sentiment from the Stampin’ Up Meant To Be Stamp Set in Versamark Ink and immediately sprinkled it with my Lovely Lipstick Embossing Powder.  I heat set it using my Heat Tool then cut the circle out using my Big Shot and the Stitched Shapes Framelits Dies.  I also cut a scalloped circle from the Layering Circles Framelits Dies and adhered the stitched circle to it using Snail.  I adhered the circle to the card front using Stampin’ Dimensionals and adhered a small Flirty Flamingo bow made from the All My Love Ribbon Combo Pack.  I adhered the card front to a Thick Whisper White card base.

On the inside I stamped the single flower from Stampin’ Up Forever Lovely Stamp Set in Flirty Flamingo Ink.  I stamped the sentiment from the same stamp set in Lovely Lipstick Ink in the center.  I adhered the Whisper White panel to the inside of the Thick Whisper White card base using Multipurpose Liquid Glue.

To finish my card I decorated a Medium Whisper White Envelope.  I stamped the flower from the Forever Lovely stamp set on the envelope front.  I adhered a piece of All My Love DSP to the envelope flap.

Thank you for stopping by my blog today.  I hope you liked my quick and easy card and will give it a try.  Happy Stamping!!

****************************************************************************************************

If you need any stamping supplies, I’d be very happy to be your Demonstrator.  Just click here to go directly to my online store or drop me an email if you have any questions.

MY CURRENT HOST CODE IS: EDKNVWRP

Happy Stamping, Karen!

****************************************************************************************************

SALE-A-BRATION COORDINATION ITEMS ARE AVAILABLE NOW THROUGH MARCH 31, 2019 OR WHILE SUPPLIES LAST.

LIMITED-TIME PRODUCTS THAT COORDINATE PERFECTLY WITH SELECT SALE-A-BRATION PRODUCTS.  VISIT MY ONLINE STORE HERE FOR MORE DETAILS.

****************************************************************************************************

Third release of SALE-A-BRATION  items available.  Click HERE to see items.

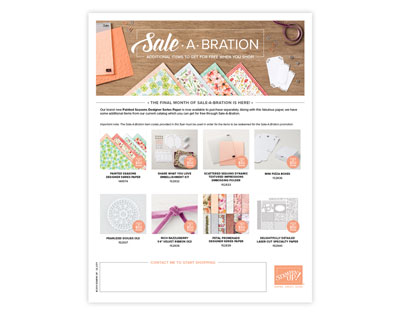
Delightfully Detailed Laser-Cut Specialty Paper, Mini Pizza Boxes, Pearlized Doilies, Petal Promenade Designer Series Paper, Rich Razzleberry 1/4″ (6.4 Mm) Velvet Ribbon, Scattered Sequins Dynamic Textured Impressions Embossing & Share What You Love Embellishment Kit.

****************************************************************************************************

Here at Paper Pumpkin, we love providing easy, fast, and fun creative experiences for our subscribers. We do this in a cost-saving and time-efficient way: by delivering a cute package filled with fun papercrafting goodies . . . right to your door.
In addition to providing everything you need to make a pre-designed, all-inclusive project, we also have another goal in mind: to help you unlock and explore your creativity by introducing you to exciting and innovative products from Stampin’ Up!
In April’s Paper Pumpkin kit, we’re pleased to announce that we’ll be treating you to something extra-special: Stampin’ Up!’s brand new Distinktive® stamp images.

About Distinktive Stamps
Distinktive stamps give you photo-realistic images with just one stamp. They have a special texture that gives added depth and dimension in a single step.
These stamps are available only from Stampin’ Up! and are made using a patent-pending process.
Distinktive stamps are available in red rubber and photopolymer; Paper Pumpkin’s April kit includes photopolymer stamps.
Shop Distinktive stamps in the online store by searching “Distinktive,” or look for the Distinktive icon in Stampin’ Up! catalogs.

Click HERE to go to my store to subscribe to April’s Paper Pumpkin before April 10th.

****************************************************************************************************

April I will be starting my Online Host Club and I have a couple of spots open.  If you have a long wish list and you want to purchase Stampin’ Up supplies a little at a time, this might just be the perfect solution for you.  For more information click HERE.  If you are interested in joining in, please email me at creativestampingdesigns@gmail.com.

****************************************************************************************************

Card stock cuts for this project:

  • Flirty Flamingo Cardstock 4 1/2″ X 3″ (middle stitched rectangle)
  • Lovely Lipstick Cardstock 4 1/2″ X 3″ (largest stitched rectangle)
  • Whisper White Cardstock 2 – 4″ X 5 1/4″ (card front and inner liner)
  • Thick Whisper White Cardstock 8 1/2″ X 5 1/2″(card base scored and folded at     4 1/4″)
  • All My Love Designer Series Paper 4 1/2″ X 3″(smallest stitched rectangle), piece for envelope flap

****************************************************************************************************

Product List

Stampin’ Up Beautiful Detailed Anniversary Card for Fab Friday

Good Friday morning my fellow stampers.  Well the weekend is upon us already.  Have you made any plans?  Don’t forget to move your clocks ahead Saturday before you go to bed or Sunday morning as soon as you get up.

For today’s card I used the absolutely gorgeous Beautiful Detailed Laser-Cut Specialty Paper.  This paper has a Petal Pink side and a Whisper White side.  I chose to use the Petal Pink side for my card.  Take a look.

I played along with the Fab Friday color challenge #158 for my card today.  Their colors are just beautiful together.  Here’s their color challenge.

I started with a panel of Calypso Coral cardstock and adhered a panel of the Beautiful Detailed Laser-Cut Specialty Paper using Multipurpose Liquid Glue to it.  I adhered the card front to a Mossy Meadow card base using Stampin’ Dimensionals.

Using my Big Shot I cut out 2 hearts from the Be Mine Stitched Framelits Dies.  I cut one in Petal Pink card stock and one in Calypso Coral cardstock.  On the Petal Pink heart I stamped the Happy Anniversary from the Stampin’ Up Itty Bitty Greetings Stamp Set in Mossy Meadow Ink.  I connected the Petal Pink heart to the scalloped Calypso Coral heart using Stampin’ Dimensionals then adhered it to the card front.  I cut out a few embellishments from the Lovely Flowers Edgelits Dies in Mossy Meadow cardstock.  I adhered them under the hearts using Stampin’ Dimensionals or Glue Dots.  I added a couple Rhinestone Basic Jewels to the embellishments.  I colored a Heart Epoxy Droplet using my Dark Calypso Coral Stampin’ Blend Marker and adhered it to the Petal Pink heart.

On the inside I stamped the sentiment from the Stampin’ Up Well Said Stamp Set in Mossy Meadow Ink in the center of a Whisper White panel.  I stamped the heart cluster from the Stampin’ Up Forever Lovely Stamp Set in Calypso Coral Ink on either side of the sentiment.  I adhered the Whisper White panel to a Petal Pink mat using Snail then adhered it to the inside of the Mossy Meadow card base using Multipurpose Liquid Glue.

To finish my card I decorated a Medium Whisper White Envelope.  I stamped the heart cluster image from the Forever Lovely stamp set in Calypso Coral Ink on both sides of the envelope front and around the envelope flap.

Thank you for visiting my blog today.  I hope you liked my card and will give it a try.  I love when I can let the paper do most of the work for me.  Hope you all have a wonderful weekend.  Happy Stamping!!

****************************************************************************************************

If you need any stamping supplies, I’d be very happy to be your Demonstrator.  Just click here to go directly to my online store or drop me an email if you have any questions.

MY CURRENT HOST CODE IS: EDKNVWRP

Happy Stamping, Karen!

****************************************************************************************************

SALE-A-BRATION COORDINATION ITEMS ARE AVAILABLE NOW THROUGH MARCH 31, 2019 OR WHILE SUPPLIES LAST.

LIMITED-TIME PRODUCTS THAT COORDINATE PERFECTLY WITH SELECT SALE-A-BRATION PRODUCTS.  VISIT MY ONLINE STORE HERE FOR MORE DETAILS.

****************************************************************************************************

Third release of SALE-A-BRATION  items available.  Click HERE to see items.

Delightfully Detailed Laser-Cut Specialty Paper, Mini Pizza Boxes, Pearlized Doilies, Petal Promenade Designer Series Paper, Rich Razzleberry 1/4″ (6.4 Mm) Velvet Ribbon, Scattered Sequins Dynamic Textured Impressions Embossing & Share What You Love Embellishment Kit.

****************************************************************************************************

ONLY 2 DAYS LEFT TO SUBSCRIBE!! DON’T MISS OUT ON THE FREE STAMP SET

Paper Pumpkin is turning six and we want to celebrate with you! After all, we could not have shared all these years of creativity if it weren’t for our subscribers.
To celebrate this fun occasion and to thank everyone who supports Paper Pumpkin month after month, we’re offering a specially-designed March kit and a FREE STAMP SET. Oh, yes. You read that right. In March, you will receive TWO stamp sets with your Paper Pumpkin kit.

There has never been a better time to give Paper Pumpkin a try. And because it’s our sixth birthday celebration, we’ll be pulling out all the stops. You’ll get an adorable kit, a special box, and most importantly, you’ll get TWO stamp sets instead of one.
$20 for a Paper Pumpkin kit is always a steal, but in March the deal is even better! There has never been a better time for you to join Paper Pumpkin.

Because it’s our birthday, we decided to create a kit that is perfect for making birthday cards!
The March kit features eight full-sized, mailable cards
Coordinating colors are Basic Black, Bermuda Bay, Daffodil Delight, Flirty Flamingo, and Poppy Parade
This kit has an element that is sure to “pop”!
The FREE stamp set is even bigger and better than your typical Paper Pumpkin stamp set and can be used on a variety of crafting projects.

A subscriber must have an active subscription by March 10, 2019 in order to receive the March kit.
The FREE stamp set coordinates with the March kit but it is not needed to complete the projects.
Supplies may be limited toward the end of the subscription period, so DON’T WAIT.

Click HERE to go to my store and subscribe.

****************************************************************************************************

April I will be starting my Online Host Club and I have a couple of spots open.  If you have a long wish list and you want to purchase Stampin’ Up supplies a little at a time, this might just be the perfect solution for you.  For more information click HERE.  If you are interested in joining in, please email me at creativestampingdesigns@gmail.com.
****************************************************************************************************

Card stock cuts for this project:

  • Calypso Coral Cardstock 3 1/3″ X 5″ (card front)
  • Mossy Meadow Cardstock 8 1/2″ X 5 1/2″ (card base scored and folded at 4 1/4″)
  • Petal Pink Cardstock 4″ X 5 1/4″ (inner liner mat)
  • Whisper White Cardstock 3 3/4″ X 5″ (inner liner)
  • Beautiful Detailed Laser-Cut Specialty Paper

****************************************************************************************************

Product List