Stampin’ Up Floral Essence Sneak Peek

Good Friday morning my fellow stampers.  Well the weekend is here ready or not.  Has anyone made any fun plans?  I’m really hoping, in between working, to supervise getting some of my flowers in the ground.  I’m still with 1 arm and can’t seem to get the digging down properly yet.  I’ve mastered quite a bit 1 handed, most importantly card making.

So I have a little sneak peek for you today.  I’ve used a new stamp set coming in the 2019-2020 Annual Catalog.  If you don’t have a demonstrator and would like a catalog, drop me a line and I’d be happy to send one out to you.  Here’s my card for today.

I’ve used a tiny bit of old and a whole lot of new on my card.  I’ve also played along with Hand Stamped Sentiments challenge #314.  Here’s their sketch.

I started with a panel of the soon to retire Petal Promenade Designer Series Paper and adhered it to a Blueberry Bushel card base using Multipurpose Liquid Glue.

I adhered a panel of the gorgeous new Perennial Essence Designer Series Paper to a mat of Blueberry Bushel using Multipurpose Liquid Glue.  I adhered the matted DSP to the card front using Multipurpose Liquid Glue.  I stamped the sentiment from the Stampin’ Up Itty Bitty Birthdays Cling Stamp Set in Blueberry Bushel Ink to the left of the matted DSP.

On a scrap piece of Whisper White cardstock I stamped the flower from the new Stampin’ Up Floral Essence Photopolymer Stamp Set in Blueberry Bushel Ink.  I stamped the inside of the flowers in Crushed Curry Ink.  I stamped the leaf images from the same stamp set in Mossy Meadow and Old Olive Inks.  I colored the flowers in using my Balmy Blue Stampin’ Blends Markers.  I colored the leaf image in using my Old Olive Stampin’ Blends Markers.  I fussy cut the flowers and the smaller leaf image out using my Paper Snips.  I punched the larger leaf image out using my Leaf Punch.  I arranged the flowers and leaves how I liked them on the card front and adhered them with Glue Dots and Stampin’ Dimensionals.

On the inside I stamped a couple flowers from the Floral Essence stamp set on the bottom corner of a Whisper White panel in Blueberry Bushel Ink using the masking technique.  I stamped the leaves from the same stamp set in Old Olive Ink and the flower centers in Crushed Curry Ink.  I colored the flowers in using my Balmy Blue Stampin’ Blends Markers and the leaves in using my Old Olive Stampin’ Blends Markers.  I stamped the sentiment from the same stamp set in Blueberry Bushel Ink in the center of the panel.  I adhered the Whisper White panel to the inside of the Blueberry Bushel card base using Multipurpose Liquid Glue.

To finish my card I decorated a Medium Whisper White Envelope.  I stamped the flowers from the Floral Essence stamp set on the envelope front and colored them in the same as I did for the card.  I adhered a panel of the Perennial Essence DSP to the envelope flap.

Thank you for stopping by my blog today.  I hope you liked my card.  These products will be available on June 4th if you are interested in them.  It’s truly a beautiful suite.  Happy Stamping!!

****************************************************************************************************

If you need any stamping supplies, I’d be very happy to be your Demonstrator.  Just click here to go directly to my online store or drop me an email if you have any questions.

The Clearance Rack has been updated with lots of new deals! So check it out

Click here to shop the clearance rack.

MY CURRENT HOST CODE IS: 4WY7GYTC

Happy Stamping, Karen!

****************************************************************************************************

If you are interested in joining my team click here for details or email me.  I’d love to have you on my team.

****************************************************************************************************

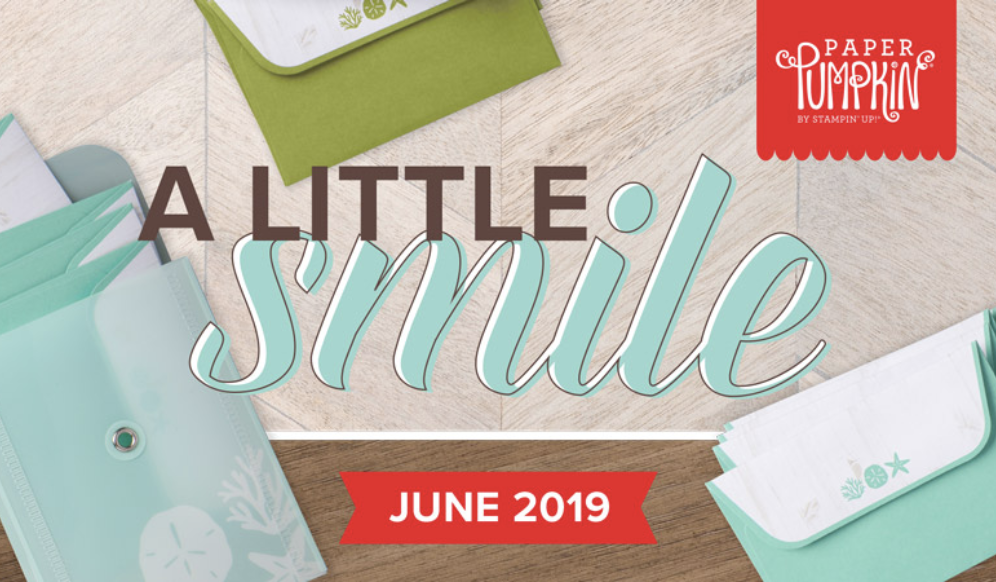
Share A Little Love – June Paper Pumpkin Kit!

Care about someone? Why not tell them?

The Paper Pumpkin June kit makes it easy for you to scatter sunshine this summer—whenever, with whomever. Not only do we give you 16 fun-sized, beach-themed cards and envelopes, but the kit also includes an exclusive carrying case so you’ll always have your cards on hand to share wherever you go. And don’t forget the exclusive stamp set and ink spot that completes every Paper Pumpkin kit!!

More about the June Kit:

  • In order to receive the June Paper Pumpkin Kit, you must have an active subscription by June 10 at 11:50 PM (MT).
  • The kit creates 16 fun-sized, beach-themed cards and envelopes.
  • Coordinating colors: Coastal Cabana, Crumb Cake, and Old Olive

Check out the quick video created by Stampin’ Up! with some sneak peaks of the June kit!
If you’re interested in subscribing to Paper Pumpkin yourself, you can either sign up for a subscription where you are billed monthly for your kit or you can purchase a prepaid subscription in my online store.  To see more information and to sign up for the monthly subscription, click here.  To see the options for prepaid subscriptions in my online store, click here.  Let me know if you have any questions.

****************************************************************************************************

Stampin’ Up! has posted their retiring lists for the 2018-19 Annual Catalog and 2019 Occasions Catalog.  Head over to my online store to pick up those retiring items now!  They’re only available while supplies last from now through June 3!

A few notes about the lists:

  • Due to high demand for retiring stamp sets, these items will have guaranteed availability until May 24; all other products are not guaranteed and are available while supplies last only.
  • Order deadline to get the retiring products:  June 3, 2019; 11:50 PM (MT)

Please note, some of the bundle items may be carrying over into the new 2019-2020 Annual Catalog.  However, the bundle pricing will go away, so get them while you can at the discounted price!!

Stampin’ Up! Retirement List Clarification

It looks like every single stamp set from the 2018-19 Annual Catalog is being retired and that isn’t the case, the carryover sets are being transitioned to Cling Mount.

The stamp sets offered in clear-mount or wood-mount in the 2018–2019 annual catalog that are carrying over into the 2019–2020 annual catalog will be offered in clear-mount and/or wood-mount until existing inventory has been depleted or until June 4, 2019 (whichever comes first).

If the inventory is depleted, you will be notified of the automatic switch to cling when placing an order for that stamp set. This means that you may end up purchasing select cling stamp sets (in carryover artwork) before they can be ordered from the catalog!  All carryover rubber stamp sets will be available in cling medium only (with the exception of background stamps in North America) beginning June 4, 2019.

You can download copies of the full retiring lists in PDF Form here:

  • Click here to get a copy of the full retiring list from the Occasions Catalog.
  • Click here to get a copy of the full retiring list from the 2018-19 Annual Catalog.

****************************************************************************************************

EVERYTHING IS ROSY PRODUCE MEDLEY – AVAILABLE NOW!!

WHAT IS A PRODUCT MEDLEY?

Product medleys are new to Stampin’ Up!. In addition to being filled to the brim with cute, coordinating products, we’ve designed our product medleys to provide you with endless creative possibilities.

The Everything Is Rosy Product Medley includes these exclusive products:

  • Everything Is Rosy Photopolymer Stamp Set—18 stamps
  • Everything Is Rosy Dies—10 dies; largest die 2-7/8″ x 1″
  • 6″ x 6″ Designer Series Paper Stack—48 sheets; 8 each of 6 double-sided designs
  • 6″ x 6″ rose gold foil paper—8 sheets
  • Printed die cuts—2 sheets
  • Rose gold die cuts—4 sheets; 2 each of 2 designs
  • Rose gold adhesive backed mirror embellishments—60 embellishments; 1/4″
  • Melon Mambo 1/4″ Ruched Ribbon—10 yards
  • Night of Navy/Rose Gold 3/8″ Metallic –Edge Ribbon—10 yards
  • Rose Gold Shimmer Paint—1/2 oz.

Sales Period: May 1–31, 2019 while supplies last!

Click the image below to head over to my online store to get yours now!

Everything is Rosy Product Medely  [150059] $80.00

****************************************************************************************************

Card stock cuts for this project:

  • Blueberry Bushel Cardstock 4 1/4″ X 11″ (card base scored and folded at 5 1/2″), 2 1/4″ X 5″ (card front panel mat)
  • Whisper White Cardstock 4″ X 5 1/4″ (inner liner) scraps for flowers and leaves.
  • Perennial Essence Designer Series Paper 2 1/8″ X 4 7/8″ (front panel), piece for envelope flap
  • Petal Promenade Designer Series Paper 4 1/4″ X 5 1/2″ (card front)

****************************************************************************************************

Product List

Stampin’ Up Well Written for CAS On Friday Challenge

Good Monday morning my fellow stampers.  How was everyone’s weekend?  Were all  mothers treated like queens?

For today’s card I’ve made a wedding card. I joined in with a challenge that was a real challenge for me.  I think this was one of the hardest ones for me to do, but I was determined to come up with a design that would work.  Here’s my card.

The challenge was from CAS On Friday challenge #157.  Their challenge was White on White.  I don’t usually do cards like this, but I was pretty happy with the results.  I started with a panel of Shimmery White cardstock and ran it through my Big Shot using the Pinewood Planks Dynamic Textured Impressions Embossing Folder.  From another piece of Shimmer White cardstock I cut out the butterflies, floral design and words using the Well Written Framelits Dies.

I started by adhering the words to the card front using Multipurpose Liquid Glue.  I adhered the 2 butterflies on the top right and the floral cut out on the bottom all using Multipurpose Liquid Glue.  I added some Pearl Basic Jewels to the butterflies and the flowers.

I adhered the card front to a Shimmery White card base using Stampin’ Dimensionals.

On the inside I stamped the large floral image from the Stampin’ Up Wonderful Romance Stamp Set, (which will be retiring as of June 3rd), in Soft Sea Foam Ink stamping off twice to get a real light image.  I stamped the sentiment from the Stampin’ Up Well Said Stamp Set in Tuxedo Black Memento Ink over the floral image in the center of the Shimmery White panel.  I adhered the Shimmer White panel to the inside of the Shimmery White card base using Multipurpose Liquid Glue.

To finish my card I decorated a Medium Whisper White Envelope.  I stamped the floral image from the Wonderful Romance stamp set in Soft Sea Foam Ink on the envelope front.  I adhered a piece of Petal Promenade Designer Series Paper to the envelope flap.

The Well Said Bundle has so many great sayings and dies.  If you are considering getting this set, purchase it before June 3rd to receive the 10% discount.  It will be carried over to the 2019-2020 Annual Catalog, but will have to be purchased individually and you will not receive the discount.  The Wonderful Romance stamp set used and the Petal Promenade Designer Series Paper used will be retired as of June 3rd, so if these are something you have been wanting, get them while you still can.

Thank you for stopping by my blog today.  I hope you liked my card and will give it a try. Happy Stamping!!

****************************************************************************************************

If you need any stamping supplies, I’d be very happy to be your Demonstrator.  Just click here to go directly to my online store or drop me an email if you have any questions.

The Clearance Rack has been updated with lots of new deals! So check it out

Click here to shop the clearance rack.

MY CURRENT HOST CODE IS: 4WY7GYTC

Happy Stamping, Karen!

****************************************************************************************************

If you are interested in joining my team click here for details or email me.  I’d love to have you on my team.

****************************************************************************************************

Stampin’ Up! has posted their retiring lists for the 2018-19 Annual Catalog and 2019 Occasions Catalog.  Head over to my online store to pick up those retiring items now!  They’re only available while supplies last from now through June 3!

A few notes about the lists:

  • Due to high demand for retiring stamp sets, these items will have guaranteed availability until May 24; all other products are not guaranteed and are available while supplies last only.
  • Order deadline to get the retiring products:  June 3, 2019; 11:50 PM (MT)

Please note, some of the bundle items may be carrying over into the new 2019-2020 Annual Catalog.  However, the bundle pricing will go away, so get them while you can at the discounted price!!

Stampin’ Up! Retirement List Clarification

It looks like every single stamp set from the 2018-19 Annual Catalog is being retired and that isn’t the case, the carryover sets are being transitioned to Cling Mount.

The stamp sets offered in clear-mount or wood-mount in the 2018–2019 annual catalog that are carrying over into the 2019–2020 annual catalog will be offered in clear-mount and/or wood-mount until existing inventory has been depleted or until June 4, 2019 (whichever comes first).

If the inventory is depleted, you will be notified of the automatic switch to cling when placing an order for that stamp set. This means that you may end up purchasing select cling stamp sets (in carryover artwork) before they can be ordered from the catalog!  All carryover rubber stamp sets will be available in cling medium only (with the exception of background stamps in North America) beginning June 4, 2019.

You can download copies of the full retiring lists in PDF Form here:

  • Click here to get a copy of the full retiring list from the Occasions Catalog.
  • Click here to get a copy of the full retiring list from the 2018-19 Annual Catalog.

****************************************************************************************************

EVERYTHING IS ROSY PRODUCE MEDLEY – AVAILABLE NOW!!

WHAT IS A PRODUCT MEDLEY?

Product medleys are new to Stampin’ Up!. In addition to being filled to the brim with cute, coordinating products, we’ve designed our product medleys to provide you with endless creative possibilities.

The Everything Is Rosy Product Medley includes these exclusive products:

  • Everything Is Rosy Photopolymer Stamp Set—18 stamps
  • Everything Is Rosy Dies—10 dies; largest die 2-7/8″ x 1″
  • 6″ x 6″ Designer Series Paper Stack—48 sheets; 8 each of 6 double-sided designs
  • 6″ x 6″ rose gold foil paper—8 sheets
  • Printed die cuts—2 sheets
  • Rose gold die cuts—4 sheets; 2 each of 2 designs
  • Rose gold adhesive backed mirror embellishments—60 embellishments; 1/4″
  • Melon Mambo 1/4″ Ruched Ribbon—10 yards
  • Night of Navy/Rose Gold 3/8″ Metallic –Edge Ribbon—10 yards
  • Rose Gold Shimmer Paint—1/2 oz.

Sales Period: May 1–31, 2019 while supplies last!

Click the image below to head over to my online store to get yours now!

Everything is Rosy Product Medely  [150059] $80.00

****************************************************************************************************

Card stock cuts for this project:

  • Shimmery White Cardstock 8 1/2″ X 5 1/2″ (card base scored and folded at 4 1/4″), 2 – 4″ X 5 1/4″ (card front and inner liner)
  • Petal Promenade Designer Series Paper – piece for envelope flap.

****************************************************************************************************

Product List

Stampin’ Up Tea Together Easel Stand Up Card

Good Thursday morning my fellow stampers.  How has your week been?  The weekend is right around the bend, are you making any plans?

For today I have a fun fold card for you.  I got the idea from Rachael Rife @ rachthestamper,  but it looks as if the original idea came from Pootles Papercraft aka Sam Hammond.  This was the last of 4 cards we made at my Stamp Camp Tuesday night.  It looks a lot harder than it is.  I had a brand new stamper there and she made it no problem.  Here’s my card.

I started with an 8″ X 8″ panel of Petal Pink cardstock for my card base.  I scored it at 4″ then turned it and scored at 4″ again.  I then cut from the center down one side only.  On the top portion that was not cut I scored from the outside edge to the center top edge for the angle fold.  Using my Bone Folder I gave it a good crease on all the score lines.  The 2 straight ones I folded in and the 2 angle ones I folded out.

I cut 2 pieces of Petal Promenade Designer Series Paper into 3 3/4″ squares.  One of the pieces of DSP I cut in half to make 2 triangles for the outside folds.  I adhered the marbled piece of DSP to the bottom part where the easel was going to sit using Multipurpose Liquid Glue.  I adhered the 2 triangle pieces of DSP to the outside folded pieces using Multipurpose Liquid Glue.

I took a 3″ X 6″ piece of Petal Pink cardstock and folded it in half.  Using the 3rd largest scalloped circle from the Layering Circle Framelits Dies, I cut it out not putting the full circle on my paper, letting it hang over the folded edge about 1/4″ so that it would open up like a card.  I folded the top of the scallop circle up and in half meeting the little scallops to make the easel.  I cut another of the same size scallop circle from a piece of the Petal Promenade DSP and adhered it to the top section of the scallop circle.  Using the 2nd smallest scallop circle from the Layering Circle Framelits Dies I cut a piece of Mossy Meadow cardstock to make the easel stopper.  On a panel of Whisper White cardstock I stamped the teacup image, the sentiment in the teacup and the large rose image from the Stampin’ Up Tea Together Stamp Set in Smoky Slate Ink.  I colored them in using the Petal Pink and Light Mossy Meadow Stampin’ Blends Markers.  I cut the images using the Tea Time Framelits Dies and my Big Shot.  I adhered the teacup to the scalloped circle using Stampin’ Dimensionals.  I adhered the rose to the small Mossy Meadow scalloped circle using Multipurpose Liquid Glue.  I adhered the Mossy Meadow scalloped circle to the Petal Pink scalloped circle using Stampin’ Dimensionals placing it where I wanted the easel to stand open.  I adhered the easel piece to the center of the card base using Multipurpose Liquid Glue.

On a panel of Whisper White cardstock I stamped the teacup image from the Tea Together stamp set in Smoky Slate Ink stamping off once.  I stamped the sentiment from the same stamp set in the center of the teacup in Smoky Slate Ink.  I colored the teacup in using my Petal Pink Stampin’ Blends Markers.  I adhered the Whisper White panel to the card base, under the easel panel, using Multipurpose Liquid Glue.

To finish my card I decorated a Medium Whisper White Envelope.  I stamped the teacup and the rosebud from the Tea Together stamp set in Smoky Slate Ink on the envelope front and colored it in using my Petal Pink and Light Mossy Meadow Stampin’ Blends Markers.  I adhered a piece of the Petal Promenade DSP to the envelope flap.

Here you can see that the card folds up nicely to fit into the Medium Envelopes, but it will need extra postage.

Thank you for stopping by my blog today.  I hope you liked my card and will give it a try.  If you have any questions on how to make this card, please feel free to email me and I will try to explain it better.  I didn’t realize until I started typing how difficult it is to explain step by step what I did.  Happy Stamping!!

****************************************************************************************************

If you need any stamping supplies, I’d be very happy to be your Demonstrator.  Just click here to go directly to my online store or drop me an email if you have any questions.

The Clearance Rack has been updated with lots of new deals! So check it out

Click here to shop the clearance rack.

MY CURRENT HOST CODE IS: 4WY7GYTC

Happy Stamping, Karen!

****************************************************************************************************

If you are interested in joining my team click here for details or email me.  I’d love to have you on my team.

****************************************************************************************************

If you’re on my mailing list I will be sending you a catalog as soon as I get them the beginning of May. If you want to be on my mailing list, you must have placed an order of $50 or more before May 1st 2019.

****************************************************************************************************

Stampin’ Up! has posted their retiring lists for the 2018-19 Annual Catalog and 2019 Occasions Catalog.  Head over to my online store to pick up those retiring items now!  They’re only available while supplies last from now through June 3!

A few notes about the lists:

  • Due to high demand for retiring stamp sets, these items will have guaranteed availability until May 24; all other products are not guaranteed and are available while supplies last only.
  • Order deadline to get the retiring products:  June 3, 2019; 11:50 PM (MT)

Please note, some of the bundle items may be carrying over into the new 2019-2020 Annual Catalog.  However, the bundle pricing will go away, so get them while you can at the discounted price!!

Stampin’ Up! Retirement List Clarification

It looks like every single stamp set from the 2018-19 Annual Catalog is being retired and that isn’t the case, the carryover sets are being transitioned to Cling Mount.

The stamp sets offered in clear-mount or wood-mount in the 2018–2019 annual catalog that are carrying over into the 2019–2020 annual catalog will be offered in clear-mount and/or wood-mount until existing inventory has been depleted or until June 4, 2019 (whichever comes first).

If the inventory is depleted, you will be notified of the automatic switch to cling when placing an order for that stamp set. This means that you may end up purchasing select cling stamp sets (in carryover artwork) before they can be ordered from the catalog!  All carryover rubber stamp sets will be available in cling medium only (with the exception of background stamps in North America) beginning June 4, 2019.

You can download copies of the full retiring lists in PDF Form here:

  • Click here to get a copy of the full retiring list from the Occasions Catalog.
  • Click here to get a copy of the full retiring list from the 2018-19 Annual Catalog.

****************************************************************************************************

About the “Shelli” Kit

Shelli Gardner worked closely with designers and concept artists to create a Paper Pumpkin kit that is uniquely hers. It includes an exclusive photopolymer stamp set, paper and crafting materials to create 12 mailable cards (3 cards of 4 unique designs), 12 exclusive, coordinating envelopes, and a Classic Stampin’ Spot.

Coordinating colors: Crumb Cake, Early Espresso, Old Olive, Petal Pink, Pool Party, Pretty Peacock, Soft Suede, and Very Vanilla

  • In order to receive the Hugs from Shelli kit, the subscriber must have an active subscription by May 10 at 11:50 PM (MT).
  • Supplies may be limited toward the end of the subscription period.

Don’t miss out on the May Paper Pumpkin.  Click HERE to subscribe.

****************************************************************************************************

Card stock cuts for this project:

  • Mossy Meadow Cardstock 3″ X 3″ (scallop circle easel stopper)
  • Petal Pink Cardstock 8″ X 8″ (card base), 3″ X 6″ (folded at 3″ for the easel base and cut with scalloped circle)
  • Whisper White Cardstock 3 3/4″ X 3 3/4″ (inner liner), scrap for teacup and rose
  • Petal Promenade Designer Series Paper 2 – 3 3/4″ X 3 3/4″ (folded triangles and card front) 4″ X 4″ (scallop circle for easel)

****************************************************************************************************

Product List

Stampin’ Up Tea Together Mother’s Day

Good Tuesday morning my fellow stampers.  How has everyone’s week started off?

For today’s card I made another Mother’s Day card for you, trying to focus on clean and simple (well as simple as I get).  I tried to let the Designer Series Paper do most of the work for me.  Here’s my card.

I was able to join in with 2 challenges with my card today also.  I’ve said before that I love doing challenges.  They give me a starting point when I’m having crafters block. First is the Festive Friday Challenge #0032.  I was able to do both, Mother’s Day and Pink.  Here is their challenge.

Next is The Flower Challenge #31  Here is their sketch.

I started by adhering a panel of Petal Promenade Designer Series Paper to a Powder Pink card base using Multipurpose Liquid Glue.

I then adhered a panel of Petal Pink cardstock and a smaller panel of Petal Promenade DSP to the left side of the card using Multipurpose Liquid Glue.  I stamped the sentiment from the Stampin’ Up Tea Together Stamp Set in Fresh Fig Ink on the panel of DSP.

On a scrap of Whisper White cardstock I stamped 3 of the flower images from the Stampin’ Up Forever Lovely Stamp Set in Powder Pink Ink.  I stamped the leaves from the same stamp set in Tranquil Tide Ink.  I fussy cut all the images using my Paper Snips.  I adhered the flowers and leaves to the card front using Glue Dots and Stampin’ Dimensionals.

On the inside I stamped the sentiment from Forever Lovely stamp set in Fresh Fig Ink in the center of a Whisper White panel.  I stamped the flowers and leaves from the same stamp set multiple times in Powder Pink and Tranquil Tide Inks.  I adhered the Whisper White panel to the inside of the Powder Pink card base using Multipurpose Liquid Glue.

To finish my card I decorated a Medium Whisper White Envelope.  I stamped the flower and leaves from the Forever Lovely stamp set in Powder Pink and Tranquil Tide Inks on the envelope front.  I adhered a piece of the Petal Promenade DSP to the envelope flap.

Thank you for stopping by my blog today.  I hope you liked my card and will give it a try.  Don’t miss out on these 2017-2019 In-Colors.  Once they are gone they’re gone.  I used 3 of the retiring In-Colors for my card today.  This beautiful Petal Promenade DSP will be retiring in June too.  Happy Stamping!!

****************************************************************************************************

If you need any stamping supplies, I’d be very happy to be your Demonstrator.  Just click here to go directly to my online store or drop me an email if you have any questions.

The Clearance Rack has been updated with lots of new deals! So check it out.

Click here to shop the clearance rack.

MY CURRENT HOST CODE IS: 7923DX9M

Happy Stamping, Karen!

****************************************************************************************************

If you are interested in joining my team click here for details or email me.  I’d love to have you on my team.

****************************************************************************************************

If you’re on my mailing list I will be sending you a catalog as soon as I get them the beginning of May. If you want to be on my mailing list, you must have placed an order of $50 or more before May 1st 2019.

****************************************************************************************************

Stampin’ Up! has posted their retiring lists for the 2018-19 Annual Catalog and 2019 Occasions Catalog.  Head over to my online store to pick up those retiring items now!  They’re only available while supplies last from now through June 3!

A few notes about the lists:

  • Due to high demand for retiring stamp sets, these items will have guaranteed availability until May 24; all other products are not guaranteed and are available while supplies last only.
  • Order deadline to get the retiring products:  June 3, 2019; 11:50 PM (MT)

Click the images below to head over to shop the specific retiring items:

Please note, some of the bundle items may be carrying over into the new 2019-2020 Annual Catalog.  However, the bundle pricing will go away, so get them while you can at the discounted price!!

Stampin’ Up! Retirement List Clarification

It looks like every single stamp set from the 2018-19 Annual Catalog is being retired and that isn’t the case, the carryover sets are being transitioned to Cling Mount.

The stamp sets offered in clear-mount or wood-mount in the 2018–2019 annual catalog that are carrying over into the 2019–2020 annual catalog will be offered in clear-mount and/or wood-mount until existing inventory has been depleted or until June 4, 2019 (whichever comes first).

If the inventory is depleted, you will be notified of the automatic switch to cling when placing an order for that stamp set. This means that you may end up purchasing select cling stamp sets (in carryover artwork) before they can be ordered from the catalog!  All carryover rubber stamp sets will be available in cling medium only (with the exception of background stamps in North America) beginning June 4, 2019.

Here is the list of stamp sets that WILL be in the 2019-2020 Annual Catalog.  The stamp sets on this list will not be retiring, they will simply be transitioned to Cling Mount moving forward:

  • Accented Blooms
  • Animal Outing
  • Artisan Textures
  • Barn Door
  • Beautiful Day
  • Beautiful You
  • Bee Thankful
  • Birthday Backgrounds
  • Bokeh Dots
  • Botanical Bliss
  • Country Road
  • Crafting Forever
  • Dandelion Wishes
  • Dashing Deer
  • First Frost
  • Flourishing Phrases
  • Gallery Grunge
  • Healing Hugs
  • Heartland
  • Hold on to Hope
  • Itty Bitty Greetings
  • Kindness & Compassion
  • Label Me Pretty
  • Lilypad Lake
  • Little Elephant
  • Little Twinkle
  • Love You to Pieces
  • Magical Mermaid
  • Painted Glass
  • Peaceful Place
  • Perennial Birthday
  • Pop of Petals
  • Rooted in Nature
  • Sea of Textures
  • Sorry for Everything
  • Special Celebrations
  • Stitched All Around
  • This Little Piggy
  • Tropical Chic
  • Winter Woods

Any other stamp sets in the 2018-19 Annual Catalog that are NOT on this list will be retired.  Sorry again for the confusion!  Stampin’ Up! is aware of the confusion and hopefully will be posting an updated list for us.

You can download copies of the full retiring lists in PDF Form here:

  • Click here to get a copy of the full retiring list from the Occasions Catalog.
  • Click here to get a copy of the full retiring list from the 2018-19 Annual Catalog.

****************************************************************************************************

About the “Shelli” Kit

Shelli Gardner worked closely with designers and concept artists to create a Paper Pumpkin kit that is uniquely hers. It includes an exclusive photopolymer stamp set, paper and crafting materials to create 12 mailable cards (3 cards of 4 unique designs), 12 exclusive, coordinating envelopes, and a Classic Stampin’ Spot.

Coordinating colors: Crumb Cake, Early Espresso, Old Olive, Petal Pink, Pool Party, Pretty Peacock, Soft Suede, and Very Vanilla

  • In order to receive the Hugs from Shelli kit, the subscriber must have an active subscription by May 10 at 11:50 PM (MT).
  • Supplies may be limited toward the end of the subscription period.

Don’t miss out on the May Paper Pumpkin.  Click HERE to subscribe.

****************************************************************************************************

Card stock cuts for this project:

  • Powder Pink Cardstock 8 1/2″ X 5 1/2″ (card base scored and folded at 4 1/4″),    1 1/2″ X 5″ (panel on card front)
  • Whisper White Cardstock 4″ X 5 1/4″ (inner liner) scraps for flowers and leaves
  • Petal Promenade Designer Series Paper 4 1/4″ X 5 1/2″ (card front), 1 1/2″ X 3 5/8″ (panel on card front) piece for envelope flap

****************************************************************************************************

Product List

Stampin’ Up Petal Promenade Tea Together Quick and Easy Card

Good Thursday morning my fellow stampers.  Another week almost gone and only 1 day till I leave for OnStage and get to see the new 2019-2020 Annual Catalog.  I can’t wait to share some of the new goodies with you.

If you want that new catalog then you need to be sure you’re on my mailing list! How do you do that? If you’ve placed an order in the last year (from June 2018 – May 2019), you’re on it!  If you haven’t ordered from me and you aren’t working with another demonstrator, you can get on my mailing list by heading over to my Online Store and getting an order in for $50 or over.  You need to get your order in by May 1st to be in my 1st mailing of the catalogs.

Now for today’s card, which is why I think you are here,  I have a Super Simple Quick and Easy card for you.  This is a perfect card for beginners.  Take a look.

I wanted to focus on some RETIRING items on my card. The retired list will be coming out next week so be sure to stay tuned. If there is something you like that will be retiring you best to grab it while you can. The first things to sell out are usually the In-Color Paper, Ink and Refills.

I started with a piece of the beautiful Petal Promenade Designer Series Paper and stamped the sentiment from the Stampin’ Up Tea Together Stamp Set in the center.  I adhered it to a Berry Burst mat using Snail.

I then adhered it to a Powder Pink card base using Multipurpose Liquid Glue.

On the inside I stamped the image from the Stampin’ Up Beautiful You Stamp Set in Powder Pink Ink on a panel of Whisper White Cardstock.  I stamped the sentiment from the same stamp set in Tranquil Tide Ink over the image.  I adhered the Whisper White panel to a Berry Burst mat using Snail.  I then adhered it to the inside of the Powder Pink card base using Multipurpose Liquid Glue.

To finish my card I decorated a Medium Whisper White Envelope. I stamped the image from the Beautiful You stamp set in Powder Pink Ink on the envelope front.  I adhered a piece of the Petal Promenade DSP to the envelope flap.

Now wasn’t that a super quick and easy card?  I took me all of 5 minutes to put this together.  I hope you liked this and will give it a try.  This is a perfect design if you like to make multiple cards to sent out and don’t have a lot of time.  I did use all paper and inks that will be retiring in June.  Berry Burst, Fresh Fig, Lemon Lime Twist, Powder Pink and Tranquil Tide will be retiring as of June 3rd.  If you really like any of these colors, grab them now before it’s too late.  This includes the paper, inks, ink refills, ribbons and DSP.  Thank you for stopping by my blog today.  Happy Stamping!!

****************************************************************************************************

If you need any stamping supplies, I’d be very happy to be your Demonstrator.  Just click here to go directly to my online store or drop me an email if you have any questions.  Click here to shop the clearance rack.

MY CURRENT HOST CODE IS: 7923DX9M

Happy Stamping, Karen!

****************************************************************************************************

YOUR SPACE. YOUR WAY.

Whether you have an entire room or a small corner in your home for stamping, your creative space should be tailored to you. Stampin’ Up!’s new product line, Storage by Stampin’ Up!, provides you with modular storage solutions that let you organize—and customize—your space your way!

PRODUCT DETAILS

Product Launch: April 1, 2019

  • Can be added to any type of order beginning April 1, 2019.
  • No order limits apply.
  • Storage by Stampin’ Up! will be featured in the 2019–2020 annual catalog.

FEATURES AND BENEFITS

Storage by Stampin’ Up! is designed to store and showcase your Stampin’ Pads, Stampin’ Ink Refills, Stampin’ Blends, Stampin’ Write Markers, Watercolor Pencils, and other accessories. Here are some other features and benefits of Storage by Stampin’ Up!:

  • Keeps products organized, tidy, visible, and trackable at all times.
  • Ensures that your Stampin’ Pads, Stampin’ Write Markers, and Stampin’ Blends are all stored horizontally, as recommended.
  • Designed to be stylish, durable, compact, stackable, and modular.
  • Blends in naturally with most home decor with its white neutral color.
  • Stacks vertically and can be arranged to fit practically any flat workspace.
  • Easily assembled and disassembled for rearrangement and/or cleaning.

Click the image below to open the flyer with full details:

Click this image for some example ways to configure the storage pieces:

****************************************************************************************************

Stampin’ Up! Die Cutting & Embossing Product Line Changes

Big News!!  Stampin’ Up! has just announced that they’ll be transitioning to a new manufacturer for their dies and embossing folders moving forward!

Stampin’ Up! is moving to a direct-to-manufacturer relationship. This means that they will work directly with the factories who manufacture their dies and folders instead of working with another company who then works with different factories. This gives them greater control and potential in the manufacturing process. Yay!

TRANSITION TO NEW DIE-CUTTING AND EMBOSSING LINE

Here’s a look at how this transition will unfold:

Through June 3, 2019 Die and Folder Supply: While Supplies Last and Interruptions·  Inventory on some retiring dies may be depleted before the end of the 2019 occasions and 2018–2019 annual catalog sales period; Stampin’ Up! will not replenish inventory on any retiring dies and folders that sell out.

·  Inventory on some dies and folders carrying over into the 2019–2020 catalog may be depleted; if this happens, they may go on backorder or may not be available to order until they have replenished the inventory.

April 15–June 3, 2019 Retiring List·  The old-style die-cutting & embossing machine will be on the retiring list while supplies last. This also includes related products such as plates and platforms.

·  Dies and embossing folders included on the retiring list will not be offered in the new catalog in any format.

·  Dies and standard embossing folders NOT included on the retiring list will be carried over into the 2019–2020 annual catalog. Stampin’ Up! will use up their current inventory before starting to ship new-style dies, so even if you place an order in 2020, you might receive an old-style die or folder.

Beginning June 4, 2019 2019–2020 Annual Catalog·  All new dies and embossing folders (denoted with a “New” icon in the catalog) will be produced by their new supplier and made in the new style with a different and high-quality product design.

·  For carryover dies and non-3D embossing folders, Stampin’ Up! will use up their current inventory before starting to ship new-style dies, so even if you place an order in 2020, you might receive an old-style die or folder.

·  All new and carryover 3D embossing folders will be produced by their new supplier and made in the new style with a different and high-quality product design.

·  Carryover 3D embossing folders (previously named Dynamic) will not be available to order beginning with the catalog launch but they are in process on getting these ready to go and they’ll be available as soon as possible. Stampin’ Up! will let you know when they are ready.

·  No die-cutting & embossing machine will be available for purchase from Stampin’ Up! in the 2019–2020 annual catalog.

HIGHLIGHTS: NEW-STYLE DIES AND EMBOSSING FOLDERS

Since Stampin’ Up! is using a new supplier for their dies and embossing folders, they’ll be manufactured differently, which means the way you use them will be a little different. A few of the changes between the old-style and new-style products are listed below. In the future, Stampin’ Up! will also provide videos to show how to craft with the new-style dies and embossing folders and better showcase the features described below.

Here are some of the changes you’ll notice with our new-style dies and embossing folders:

  • The new-style open dies (those that coordinate with stamps) use a high quality metal that’s thinner than before but still as strong and durable.
  • The new-style dies have an added lip to the inside of the blades.
  • On old-style dies, when you place an open die (dies that coordinate with stamps) over a stamped image, a small border of cardstock is visible around the stamped image. With new-style dies, the die hugs the edge of the stamped image. Instead of aligning the die to the space around the stamped image, you will align it to the edges of the stamped image. When the image is cut, there will still be a cardstock border around the image.

OLD STYLE ALIGNMENT

2019_DIE_COMPARISON__1
2019_DIE_COMPARISON__3

NEW STYLE ALIGNMENT

2019_DIE_COMPARISON__2
2019_DIE_COMPARISON__4
  • They’ve improved the adhesive that secures the dies to the insert sheet in the package so that it’s not too sticky. It’s easier to remove dies from the insert sheet, and the adhesive won’t cling to the dies.  (1,000 Yay’s for this update!!)
  • They’ve standardized the size of the die inserts for easier storage. There are now only two insert sizes: 5″ x 7″ (12.7 x 17.8 cm), which coordinate in size with the stamp cases, and 6″ x 6″ (15.2 x 15.2 cm). The standard sizes will allow uniform storage in whatever system you use. The envelopes that the dies come in will be slightly larger.
  • With old-style Dynamic folders, they recommended that you spritz cardstock before embossing to soften the fibers so you got a better impression. Now, that extra step will not be necessary because the new-style folders usually create a crisp impression without spritzing. The way the new folders are manufactured also gives options for more detailed and intricate designs in the future.
  • 3D folders are thinner than the old-style Dynamic folders. Because they are thinner, you will need to use a shim, depending on the die-cutting & embossing machine you use.

I’m really excited about the new product line and can’t wait to get my hands on them this weekend!  I’ll be sharing photos and details just as soon as I can!


Stampin’ Trimmer Discontinuation

Stampin’ Up! will be retiring the Stampin’ Trimmer as of June 3, 2019, including all accessories—replacement cutting blades, scoring blades, and cutting mats. As most of you know, they’ve experienced challenges with their supplier and are taking the opportunity to research and explore a replacement option for this product, which will not be the same as the current Stampin’ Trimmer. There will be a gap in time between when the current Stampin’ Trimmer retires and when a new product becomes available, but they do not currently have an estimated timeframe.

While the replacement cutting blades will also retire with the trimmer and will not be featured in the annual catalog, Stampin’ Up! has ordered what would normally be six months of inventory based on recent historical patterns to help customers during this transition away from their current trimmer. But please know that this news could cause faster inventory depletion.

  • When the retiring list goes live on April 15, the order limit for the blades will increase from three to six (and the limit will remain at six until they’re no longer available).
  • From now until September, intermittent shipments of blades will be received from the supplier. Throughout these months, Stampin’ Up! anticipates times when the blades will not be orderable (and not offered as a backorder). During those downtimes, you will have the option to enter an email address to receive notification when the blades are available again.

Click the images below to head right over to my online store to start shopping for the Stampin’ Trimmer and the replacement pieces:

Price Increases in the 2019-2020 Stampin’ Up! Annual Catalog

Stampin’ Up! will also be doing so pricing changes in the 2019-2020 Annual Catalog. Here is the note that they’ve posted and you can find a link to the new price list below:

We regularly review our pricing, taking into account the cost of doing business, global exchange rates, increased supplier costs, and market comparisons. When it comes to making changes, we are conservative and put off price increases for as long as we can because we know they impact demonstrators and their customers.

Click here for a complete list of individual product price increases in the 2019–2020 annual catalog.

Lots of updates today!!  Let me know if you have questions.  I’m thrilled that we’re going to have some new products coming our way soon!!

****************************************************************************************************

Card stock cuts for this project:

  • Berry Burst Cardstock 3 1/4″ X 3 1/4″ (artwork mat), 4″ X 5 1/4″ (inner liner mat)
  • Powder Pink Cardstock 8 1/2″ X 5 1/2″ (card base scored and folded at 4 1/4″)
  • Whisper White Cardstock 3 3/4″ X 5″ (inner liner)
  • Petal Promenade Designer Series Paper 3″ X 3″ (artwork), piece for envelope flap

****************************************************************************************************

Product List

Stampin’ Up Hold On To Hope Easter Card

Good Wednesday morning my fellow stampers.  How is your week going?  Was everyone able to hop around our Blog Hop yesterday?  There were some pretty amazing projects there.

For today’s card I made one last Easter card.  I really need to get these in the mail.  I used the Stampin’ Up Hold On To Hope Stamp Set and the Cross Of Hope Framelit Dies.  Take a look.

I started by adhereing a panel of the Petal Promenade Designer Series Paper to a Fresh Fig mat using Snail.  –  Just a little side note.  The annual catalog will be coming to an end the beginning of June.  The 2017-2019 In-Colors will be leaving.  These include Berry Burst, Fresh Fig, Lemon Lime Twist, Powder Pink and Tranquil Tide.  If you are wanting any of these colors in the cardstock, inks, Stampin’ write markers or ink refills get them fast.  These are the first items to usually sell out.

I adhered the matted DSP to a Sahara Sand card base using Multipurpose Liquid Glue.  Using my Big Shot, I cut a solid cross from the Cross Of Hope Framelits Dies out of Wood Textures Designer Series Paper.  I then cut the detailed cross from the same die set out of the Champagne Foil Sheet.  I adhered the detailed cross to the solid cross using Multipurpose Liquid Glue.  I adhered the cross to the card front using Stampin’ Dimensionals.

On a small piece of Whisper White cardstock I stamped the sentiment from the Hold On To Hope stamp set in Fresh Fig Ink.  I cut the banner out  using my Cross of Hope Framelit Dies.  I adhered the banner over the cross using Stampin’ Dimensionals.

On the inside I stamped the solid cross from the Hold On To Hope stamp set in Sahara Sand Ink stamping off once in the center of a Whisper White panel.  I stamped the foliage from the same stamp set around the corners in Tranquil Tide Ink.  I stamped the butterfly by the cross in Fresh Fig Ink stamping off once.  I stamped the sentiment from the  Stampin’ Up Itty Bitty Greetings Stamp Set in Fresh Fig Ink.  I adhered the Whisper White panel to a Fresh Fig mat using Snail and then to the inside of the Sahara Sand card base using Multipurpose Liquid Glue.

To finish my card I decorated a Medium Whisper White Envelope.  I stamped the foliage from the Hold On To Hope stamp set in Tranquil Tide Ink on the envelope front.  I adhered a piece of Wood Textures DSP to the envelope flap.

Thank you for stopping by my blog today.  I hope you liked my card and will give it a try. Happy Stamping!!

****************************************************************************************************

If you need any stamping supplies, I’d be very happy to be your Demonstrator.  Just click here to go directly to my online store or drop me an email if you have any questions.

MY CURRENT HOST CODE IS: 7923DX9M

Happy Stamping, Karen!

****************************************************************************************************

AVAILABLE NOW!!

YOUR SPACE. YOUR WAY.

Whether you have an entire room or a small corner in your home for stamping, your creative space should be tailored to you. Stampin’ Up!’s new product line, Storage by Stampin’ Up!, provides you with modular storage solutions that let you organize—and customize—your space your way!

PRODUCT DETAILS

Product Launch: April 1, 2019

  • Can be added to any type of order beginning April 1, 2019.
  • No order limits apply.
  • Storage by Stampin’ Up! will be featured in the 2019–2020 annual catalog.

FEATURES AND BENEFITS

Storage by Stampin’ Up! is designed to store and showcase your Stampin’ Pads, Stampin’ Ink Refills, Stampin’ Blends, Stampin’ Write Markers, Watercolor Pencils, and other accessories. Here are some other features and benefits of Storage by Stampin’ Up!:

  • Keeps products organized, tidy, visible, and trackable at all times.
  • Ensures that your Stampin’ Pads, Stampin’ Write Markers, and Stampin’ Blends are all stored horizontally, as recommended.
  • Designed to be stylish, durable, compact, stackable, and modular.
  • Blends in naturally with most home decor with its white neutral color.
  • Stacks vertically and can be arranged to fit practically any flat workspace.
  • Easily assembled and disassembled for rearrangement and/or cleaning.

Click the image below to open the flyer with full details:

Click this image for some example ways to configure the storage pieces:

****************************************************************************************************

Here at Paper Pumpkin, we love providing easy, fast, and fun creative experiences for our subscribers. We do this in a cost-saving and time-efficient way: by delivering a cute package filled with fun paper-crafting goodies . . . right to your door.
In addition to providing everything you need to make a pre-designed, all-inclusive project, we also have another goal in mind: to help you unlock and explore your creativity by introducing you to exciting and innovative products from Stampin’ Up!
In April’s Paper Pumpkin kit, we’re pleased to announce that we’ll be treating you to something extra-special: Stampin’ Up!’s brand new Distinktive® stamp images.

About Distinktive Stamps
Distinktive stamps give you photo-realistic images with just one stamp. They have a special texture that gives added depth and dimension in a single step.
These stamps are available only from Stampin’ Up! and are made using a patent-pending process.
Distinktive stamps are available in red rubber and photopolymer; Paper Pumpkin’s April kit includes photopolymer stamps.
Shop Distinktive stamps in the online store by searching “Distinktive,” or look for the Distinktive icon in Stampin’ Up! catalogs.

Click HERE to go to my store to subscribe to April’s Paper Pumpkin before April 10th.

TODAY IS THE LAST DAY TO SUBSCRIBE TO GET THE APRIL KIT.

****************************************************************************************************

Card stock cuts for this project:

  • Fresh Fig Cardstock 3 7/17″ X 4 11/16″ (card front mat), 4″ X 5 1/4″ (inner liner mat)
  • Sahara Sand Cardstock 4 1/4″ X 11″ (card base scored and folded at 5 1/2″)
  • Whisper White Cardstock 3 3/4″ X 5″ (inner liner)
  • Champagne Foil Sheets piece for detailed cross
  • Petal Promenade Designer Series Paper 3 1/4″ X 4 1/2″ (card front)
  • Wood Textures Designer Series Paper piece for solid cross and for envelope flap

****************************************************************************************************

Product List

Stampin’ Up Apron Of Love Fun Fold

Good Tuesday morning my fellow stampers.  How has your week started off?

For today I have a Fun Fold card for you that is very easy.  I was asked to make a Birthday card for a Hair Dresser.  I had to think a little about that one and then I thought Stampin’ Up Apron Of Love Stamp Set.  I had a lot of fun making this card.

Here’s my card, take a look.

I do have to admit, I don’t own this set.  I had to borrow it from my best friends ever.  The advantage of having a friend that stamps and lives close to you is that you can share your Stampin’ Up Stamp Sets along with other Stampin’ Up products.

I started by taking a  Petal Pink card base and scoring it at 2 1/8″ and 6 3/8″ to make the Gate Fold card base.  I then took 2 pieces of Smoky Slate cardstock and 2 pieces of the beautiful Petal Promenade Designer Series Paper.  I adhered the DSP to each of the Smoky Slate mats using Snail.  I ran them both through my Big Shot using the Subtle Dynamic Textured Impressions Embossing Folder.  I adhered them to both sides of the card front using Multipurpose Liquid Glue.  I love all kinds of textures on a card.  It’s something you don’t always get with store-bought cards.

I then moved on to the really fun part of designing my card.  I knew I wanted an oval on the front of my card so using my Layering Ovals Framelits Dies I cut out a larger oval from the Petal Promenade DSP and a scalloped oval one size larger in Smoky Slate using my Big Shot.  I adhered the DSP oval to the scalloped oval and ran it through my Big Shot again with the Subtle DTIEF and set it aside.

I cut the apron, bow, neck piece and strings out from a piece of Petal Pink cardstock, the pockets out from a scrap of Petal Promenade DSP and the scissors out of Silver Foil Sheet using the Apron Builder Framelits and my Big Shot.  Before putting everything together, I ran the apron through my Big Shot using the Tufted Dynamic Textured Impressions Embossing Folder so that it had a quilted look. I assembled the apron using Multipurpose Liquid Glue for the neck piece and strings, a Glue Dot for the bow and Stampin’ Dimensionals for the pockets and scissors.  I added a couple of Rhinestone Basic Jewels on the pockets and scissors.  I adhered the assembled apron to the embossed oval using Stampin’ Dimensionals and then the oval to the right card front using Stampin’ Dimensionals.

On the inside I stamped the apron, neck piece and strings from the Apron Of Love stamp set in Petal Pink Ink in the center of a Whisper White panel.  I stamped the scissors from the same stamp set in Smoky Slate Ink in each of the corners.  I stamped the sentiment from the Stampin’ Up Bright Wishes Stamp Set in Smoky Slate Ink in the top part of the apron.  I stamped the Happy Birthday from the Stampin’ Up Well Said Stamp Set in Smoky Slate Ink under the sentiment.  I adhered the Whisper White panel to a Smoky Slate mat using Snail and then to the inside of the Petal Pink card base using Multipurpose Liquid Glue.

To finish my card I decorated a Medium Whisper White Envelope.  I stamped the apron, pocket, scissors and strings on the envelope front in Petal Pink and Smoky Slate Inks.  I adhered a piece of the Petal Promenade DSP to the envelope flap.

Thank you for stopping by my blog today.  I hope you liked my card and will give it a try. Happy Stamping!!

****************************************************************************************************

If you need any stamping supplies, I’d be very happy to be your Demonstrator.  Just click here to go directly to my online store or drop me an email if you have any questions.

MY CURRENT HOST CODE IS: 7923DX9M

Happy Stamping, Karen!

****************************************************************************************************

AVAILABLE NOW!!

YOUR SPACE. YOUR WAY.

Whether you have an entire room or a small corner in your home for stamping, your creative space should be tailored to you. Stampin’ Up!’s new product line, Storage by Stampin’ Up!, provides you with modular storage solutions that let you organize—and customize—your space your way!

PRODUCT DETAILS

Product Launch: April 1, 2019

  • Can be added to any type of order beginning April 1, 2019.
  • No order limits apply.
  • Storage by Stampin’ Up! will be featured in the 2019–2020 annual catalog.

FEATURES AND BENEFITS

Storage by Stampin’ Up! is designed to store and showcase your Stampin’ Pads, Stampin’ Ink Refills, Stampin’ Blends, Stampin’ Write Markers, Watercolor Pencils, and other accessories. Here are some other features and benefits of Storage by Stampin’ Up!:

  • Keeps products organized, tidy, visible, and trackable at all times.
  • Ensures that your Stampin’ Pads, Stampin’ Write Markers, and Stampin’ Blends are all stored horizontally, as recommended.
  • Designed to be stylish, durable, compact, stackable, and modular.
  • Blends in naturally with most home decor with its white neutral color.
  • Stacks vertically and can be arranged to fit practically any flat workspace.
  • Easily assembled and disassembled for rearrangement and/or cleaning.

Click the image below to open the flyer with full details:

Click this image for some example ways to configure the storage pieces:

****************************************************************************************************

Here at Paper Pumpkin, we love providing easy, fast, and fun creative experiences for our subscribers. We do this in a cost-saving and time-efficient way: by delivering a cute package filled with fun paper-crafting goodies . . . right to your door.
In addition to providing everything you need to make a pre-designed, all-inclusive project, we also have another goal in mind: to help you unlock and explore your creativity by introducing you to exciting and innovative products from Stampin’ Up!
In April’s Paper Pumpkin kit, we’re pleased to announce that we’ll be treating you to something extra-special: Stampin’ Up!’s brand new Distinktive® stamp images.

About Distinktive Stamps
Distinktive stamps give you photo-realistic images with just one stamp. They have a special texture that gives added depth and dimension in a single step.
These stamps are available only from Stampin’ Up! and are made using a patent-pending process.
Distinktive stamps are available in red rubber and photopolymer; Paper Pumpkin’s April kit includes photopolymer stamps.
Shop Distinktive stamps in the online store by searching “Distinktive,” or look for the Distinktive icon in Stampin’ Up! catalogs.

Click HERE to go to my store to subscribe to April’s Paper Pumpkin before April 10th.

****************************************************************************************************

Card stock cuts for this project:

  • Petal Pink Cardstock 8 1/2″ X 5 1/2″ (card base scored and folded at 2 1/8″ and 6 3/8″) scraps for apron, bow, neck piece and strings
  • Smoky Slate Cardstock 2 – 2″ X 5 3/8″ (card front mats), 4 1/8″ X 5 3/8″ (inner liner mat), 3″ X 4″ (scalloped oval)
  • Whisper White Cardstock 4″ X 5 1/4″ (inner liner)
  • Petal Promenade Designer Series Paper 2 – 1 7/8″ X 5 1/4″ (card fronts), 3″ X 4″ (artwork oval) scraps for pockets
  • Silver Foil Sheet scrap for scissors

****************************************************************************************************

Product List

Stampin’ Up Strong and Beautiful

Good Friday morning my fellow stampers.  The weekend is upon us.  Has anyone made any plans?  I’m hoping to get some craft time in after work tonight and tomorrow, but we’ll see what happens.

For today’s card I have a super quick and easy one for you.  My house is a bit under construction so I had to whip something up quick when I was done packing things up.  Here’s my card.

I started with a card front of the, FREE from Sale-A-Bration with a $50 order, Petal Promenade Designer Series Paper.  I stamped the sentiment from the Stampin’ Up Strong & Beautiful Stamp Set in the soon to be retired, Tranquil Tide Ink.   I adhered the DSP to a Tranquil Tide mat using Snail.

Using my Big Shot, I ran the matted card front through using the .Subtle Dynamic Textured Impressions Embossing Folder.  Since the card was so simple I wanted it to have a little texture.  I then adhered the embossed card front to a Blushing Bride card base using Multipurpose Liquid Glue.

I added a few Tranquil Tide Share What You Love Artisan Pearls to the card front.

On the inside I stamped the sentiment from the Strong & Beautiful stamp set in Tranquil Tide Ink on a Whisper White panel.  I adhered a strip of the Petal Promenade DSP to the bottom of the panel using Snail.  I adhered the Whisper White panel to a Tranquil Tide mat using Snail then to the inside of the Blushing Bride card base using Multipurpose Liquid Glue.

To finish my card I decorated a Medium Whisper White Envelope.  I adhered Petal Promenade DSP to the envelope front and  the envelope flap.

Thank you for stopping by my blog today.  I hope you liked my card and will give it a try. This has to be one of the quickest cards I’ve ever made.  I let the Designer Series Paper do most of the work for me.  Happy Stamping!!

****************************************************************************************************

If you need any stamping supplies, I’d be very happy to be your Demonstrator.  Just click here to go directly to my online store or drop me an email if you have any questions.

MY CURRENT HOST CODE IS: EDKNVWRP

Happy Stamping, Karen!

****************************************************************************************************

SALE-A-BRATION COORDINATION ITEMS ARE AVAILABLE NOW THROUGH MARCH 31, 2019 OR WHILE SUPPLIES LAST.

LIMITED-TIME PRODUCTS THAT COORDINATE PERFECTLY WITH SELECT SALE-A-BRATION PRODUCTS.  VISIT MY ONLINE STORE HERE FOR MORE DETAILS.

****************************************************************************************************

Third release of SALE-A-BRATION  items available.  Click HERE to see items.

Delightfully Detailed Laser-Cut Specialty Paper, Mini Pizza Boxes, Pearlized Doilies, Petal Promenade Designer Series Paper, Rich Razzleberry 1/4″ (6.4 Mm) Velvet Ribbon, Scattered Sequins Dynamic Textured Impressions Embossing & Share What You Love Embellishment Kit.

****************************************************************************************************

Here at Paper Pumpkin, we love providing easy, fast, and fun creative experiences for our subscribers. We do this in a cost-saving and time-efficient way: by delivering a cute package filled with fun papercrafting goodies . . . right to your door.
In addition to providing everything you need to make a pre-designed, all-inclusive project, we also have another goal in mind: to help you unlock and explore your creativity by introducing you to exciting and innovative products from Stampin’ Up!
In April’s Paper Pumpkin kit, we’re pleased to announce that we’ll be treating you to something extra-special: Stampin’ Up!’s brand new Distinktive® stamp images.

About Distinktive Stamps
Distinktive stamps give you photo-realistic images with just one stamp. They have a special texture that gives added depth and dimension in a single step.
These stamps are available only from Stampin’ Up! and are made using a patent-pending process.
Distinktive stamps are available in red rubber and photopolymer; Paper Pumpkin’s April kit includes photopolymer stamps.
Shop Distinktive stamps in the online store by searching “Distinktive,” or look for the Distinktive icon in Stampin’ Up! catalogs.

Click HERE to go to my store to subscribe to April’s Paper Pumpkin before April 10th.

****************************************************************************************************

April I will be starting my Online Host Club and I have a couple of spots open.  If you have a long wish list and you want to purchase Stampin’ Up supplies a little at a time, this might just be the perfect solution for you.  For more information click HERE.  If you are interested in joining in, please email me at creativestampingdesigns@gmail.com.

****************************************************************************************************

Card stock cuts for this project:

  • Blushing Bride Cardstock 8 1/2″ X 5 1/2″ (card base scored and folded at 4 1/4″)
  • Tranquil Tide Cardstock 5″ X 3 3/4″ (artwork mat), 5 1/4″ X 4″ (inner liner mat)
  • Whisper White Cardstock 5″ X 3 3/4″ (inner liner)
  • Petal Promenade Designer Series Paper

****************************************************************************************************

Product List