Stampin’ Up! Hold On To Hope Christening Card

Good Wednesday morning my fellow stampers.  Were you able to  hop around yesterday and see all the beautiful projects made by my team members?  Well, we’re at the half way mark through the week already.  Is it me of do the day’s seem to go even faster as we get closer to the holidays.  I feel like I am running out of time already.

For today’s card I was asked to make a Christening card for a baby girl.  Here’s my card.

I started by lining up my Shimmer White card front with my Shimmer White card base.  I cut the oval out using my Layering Ovals Dies through both pieces of cardstock so that everything would be lined up.  I embossed the card front using the Eyelet Lace Embossing Folder and adhered it to the front of the card base using Multipurpose Liquid Glue.  I then cut out the 2 pieces of the cross from a panel of Shimmer White cardstock and adhered them together using Multipurpose Liquid Glue.  I stamped the sentiment from the Stampin’ Up Hold On To Hope Cling Stamp Set in Soft Suede Ink on a panel of Shimmer White cardstock and I cut it out using the Cross of Hope Dies.

I stamped the foliage image from the Hold On To Hope stamp set in Soft Sea Foam Ink on a panel of Soft Sea Foam cardstock.  I cut the images out using the Cross of Hope Dies.  I adhered the foliage to the card front using Glue Dots.  I adhered the sentiment banner to the card front using Stampin’ Dimensionals.

On scraps of Petal Pink and So Saffron cardstock I stamped 3 small butterflies from the Stampin’ Up! Butterfly Gala Photopolymer Stamp Set in Soft Suede Ink and punched them out using my Butterfly Duet Punch.  I adhered them to the card front using Stampin’ Dimensionals.  I added a few Pearl Basic Jewels to the cross and card front, which I colored in using my Dark Petal Pink Stampin’ Blends Marker.

On the inside I stamped the foliage image from the Hold On To Hope stamp set in Soft Sea Foam Ink in the center of a Whisper White panel.  I stamped the sentiment from the Hold On To Hope stamp set in Soft Suede Ink on the bottom left of the panel.  I adhered the Petal Pink oval which I cut out using the Layering Ovals Dies, to the center of the Whisper White panel.  I adhered the cross to the center of the oval using Stampin’ Dimensionals.

To finish my card I decorated a Medium Whisper White Envelope.  I stamped the foliage image from the Hold On To Hope stamp set in Soft Sea Foam Ink on the envelope front and envelope flap.

Thank you for stopping by my blog today.  I hope you liked my card and will give it a try. Happy Stamping!!

****************************************************************************************************

If you need any stamping supplies, I’d be very happy to be your Demonstrator. Just click HERE to go directly to my online store or drop me an email if you have any questions. 

MY CURRENT HOST CODE IS: 3F496G6J

For any orders $50 or more I will send you my monthly class tutorials.  Click HERE or go to my Customer Rewards to see what this months tutorials are.

Click HERE to shop the clearance rack.

Happy Stamping, Karen!

****************************************************************************************************

CHRISTMAS IS COMING EARLY THIS YEAR

AVAILABLE NOVEMBER 1ST, THE NEW CHRISTMASTIME IS HERE SUITE

We hope you’re ready to make this holiday season magical, because the Christmastime Is Here Suite is! This exclusive, limited-time collection of festive, floral coordinating products has everything you need to share love, joy, and creativity this holiday season.

Products from the Christmastime Is Here Suite will be available while supplies last only starting November 1st, 2019

Here’s a sneak peek video of what’s included in the suite.

****************************************************************************************************

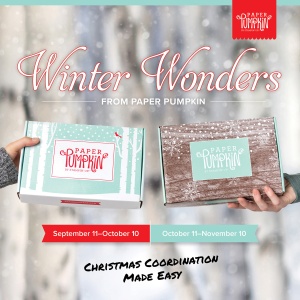
WINTER WONDERS PAPER PUMPKIN

SUBSCRIBE TO PAPER PUMPKIN BY OCTOBER 10, 2019

ONLY 2 DAYS LEFT TO SUBSCRIBE!!

Paper Pumpkin wants to help you share love and joy this Christmas with a duo of delightful, special-edition kits. October’s kit includes 10 traditional cards, while November’s kit features 24 can’t-miss tags. Put them together and you have everything you need to make the season bright.

There’s something about the holidays that brings out the crafter in all of us. Even non-crafters like making simple and fun projects to celebrate the season. And since “simple and fun” is Paper Pumpkin’s middle name, we have the perfect kits for you!

In October and November we are offering back-to-back coordinating kits, one with Christmas cards, the other with Christmas tags. Both kits make it easy for you to add a handmade, personal touch to your holiday giving—without a lot of fuss. It’s Christmas made easy with Paper Pumpkin!

October Kit

Coordinating colors: Early Espresso, Pool Party, Poppy Parade, and Shaded Spruce

November Kit

Coordinating colors: Early Espresso, Pool Party, Poppy Parade, and Shaded Spruce

The October and November kits coordinate; however, each kit is all-inclusive and can stand alone.

Click Here for more information and to subscribe to Paper Pumpkin.

****************************************************************************************************

I have gathered up a lot of retired Stamp Sets, Embossing Folders & Dies  and put a list together for anyone interested.  I have single Stamp Sets along with Stamp Sets bundled with Dies or Punches.  Take a look and see if there is anything that you missed out on getting and would still like.  Click Here to go to my list.

****************************************************************************************************

Card stock cuts for this project:

  • Petal Pink Cardstock 3 1/2″ X 2 1/2″ (inner oval)
  • Shimmer White Cardstock 4 1/4″ X 11″ (card base scored and folded at 5 1/2″), 4 1/4″ X 5 1/2″ (card front), 3 1/2″ X 4 1/2″ (crosses and sentiment banner)
  • Soft Sea Foam Cardstock 3 1/2″ X 4″ (greens on card fron)
  • Whisper White Cardstock 4 3/16″ X 5 7/16″ (inner liner)

****************************************************************************************************

Product List

Stampin’ Up Hold On To Hope Easter Card

Good Wednesday morning my fellow stampers.  How is your week going?  Was everyone able to hop around our Blog Hop yesterday?  There were some pretty amazing projects there.

For today’s card I made one last Easter card.  I really need to get these in the mail.  I used the Stampin’ Up Hold On To Hope Stamp Set and the Cross Of Hope Framelit Dies.  Take a look.

I started by adhereing a panel of the Petal Promenade Designer Series Paper to a Fresh Fig mat using Snail.  –  Just a little side note.  The annual catalog will be coming to an end the beginning of June.  The 2017-2019 In-Colors will be leaving.  These include Berry Burst, Fresh Fig, Lemon Lime Twist, Powder Pink and Tranquil Tide.  If you are wanting any of these colors in the cardstock, inks, Stampin’ write markers or ink refills get them fast.  These are the first items to usually sell out.

I adhered the matted DSP to a Sahara Sand card base using Multipurpose Liquid Glue.  Using my Big Shot, I cut a solid cross from the Cross Of Hope Framelits Dies out of Wood Textures Designer Series Paper.  I then cut the detailed cross from the same die set out of the Champagne Foil Sheet.  I adhered the detailed cross to the solid cross using Multipurpose Liquid Glue.  I adhered the cross to the card front using Stampin’ Dimensionals.

On a small piece of Whisper White cardstock I stamped the sentiment from the Hold On To Hope stamp set in Fresh Fig Ink.  I cut the banner out  using my Cross of Hope Framelit Dies.  I adhered the banner over the cross using Stampin’ Dimensionals.

On the inside I stamped the solid cross from the Hold On To Hope stamp set in Sahara Sand Ink stamping off once in the center of a Whisper White panel.  I stamped the foliage from the same stamp set around the corners in Tranquil Tide Ink.  I stamped the butterfly by the cross in Fresh Fig Ink stamping off once.  I stamped the sentiment from the  Stampin’ Up Itty Bitty Greetings Stamp Set in Fresh Fig Ink.  I adhered the Whisper White panel to a Fresh Fig mat using Snail and then to the inside of the Sahara Sand card base using Multipurpose Liquid Glue.

To finish my card I decorated a Medium Whisper White Envelope.  I stamped the foliage from the Hold On To Hope stamp set in Tranquil Tide Ink on the envelope front.  I adhered a piece of Wood Textures DSP to the envelope flap.

Thank you for stopping by my blog today.  I hope you liked my card and will give it a try. Happy Stamping!!

****************************************************************************************************

If you need any stamping supplies, I’d be very happy to be your Demonstrator.  Just click here to go directly to my online store or drop me an email if you have any questions.

MY CURRENT HOST CODE IS: 7923DX9M

Happy Stamping, Karen!

****************************************************************************************************

AVAILABLE NOW!!

YOUR SPACE. YOUR WAY.

Whether you have an entire room or a small corner in your home for stamping, your creative space should be tailored to you. Stampin’ Up!’s new product line, Storage by Stampin’ Up!, provides you with modular storage solutions that let you organize—and customize—your space your way!

PRODUCT DETAILS

Product Launch: April 1, 2019

  • Can be added to any type of order beginning April 1, 2019.
  • No order limits apply.
  • Storage by Stampin’ Up! will be featured in the 2019–2020 annual catalog.

FEATURES AND BENEFITS

Storage by Stampin’ Up! is designed to store and showcase your Stampin’ Pads, Stampin’ Ink Refills, Stampin’ Blends, Stampin’ Write Markers, Watercolor Pencils, and other accessories. Here are some other features and benefits of Storage by Stampin’ Up!:

  • Keeps products organized, tidy, visible, and trackable at all times.
  • Ensures that your Stampin’ Pads, Stampin’ Write Markers, and Stampin’ Blends are all stored horizontally, as recommended.
  • Designed to be stylish, durable, compact, stackable, and modular.
  • Blends in naturally with most home decor with its white neutral color.
  • Stacks vertically and can be arranged to fit practically any flat workspace.
  • Easily assembled and disassembled for rearrangement and/or cleaning.

Click the image below to open the flyer with full details:

Click this image for some example ways to configure the storage pieces:

****************************************************************************************************

Here at Paper Pumpkin, we love providing easy, fast, and fun creative experiences for our subscribers. We do this in a cost-saving and time-efficient way: by delivering a cute package filled with fun paper-crafting goodies . . . right to your door.
In addition to providing everything you need to make a pre-designed, all-inclusive project, we also have another goal in mind: to help you unlock and explore your creativity by introducing you to exciting and innovative products from Stampin’ Up!
In April’s Paper Pumpkin kit, we’re pleased to announce that we’ll be treating you to something extra-special: Stampin’ Up!’s brand new Distinktive® stamp images.

About Distinktive Stamps
Distinktive stamps give you photo-realistic images with just one stamp. They have a special texture that gives added depth and dimension in a single step.
These stamps are available only from Stampin’ Up! and are made using a patent-pending process.
Distinktive stamps are available in red rubber and photopolymer; Paper Pumpkin’s April kit includes photopolymer stamps.
Shop Distinktive stamps in the online store by searching “Distinktive,” or look for the Distinktive icon in Stampin’ Up! catalogs.

Click HERE to go to my store to subscribe to April’s Paper Pumpkin before April 10th.

TODAY IS THE LAST DAY TO SUBSCRIBE TO GET THE APRIL KIT.

****************************************************************************************************

Card stock cuts for this project:

  • Fresh Fig Cardstock 3 7/17″ X 4 11/16″ (card front mat), 4″ X 5 1/4″ (inner liner mat)
  • Sahara Sand Cardstock 4 1/4″ X 11″ (card base scored and folded at 5 1/2″)
  • Whisper White Cardstock 3 3/4″ X 5″ (inner liner)
  • Champagne Foil Sheets piece for detailed cross
  • Petal Promenade Designer Series Paper 3 1/4″ X 4 1/2″ (card front)
  • Wood Textures Designer Series Paper piece for solid cross and for envelope flap

****************************************************************************************************

Product List

Stampin’ Up Hold On To Hope

Good Thursday morning my fellow stampers.  How is your week going?   Today’s our first full day of spring.  I’ve got a lot of crocus and daffodils blooming at my house, so that’s a sure sign of warmer weather coming.

For today’s card I made another quick and easy card for you using the Painted Seasons Bundle which is a FREE Sale-A-Bration item with a $100 order.  Only 10 days left to get your Sale-A-Bration items!!   Here’s my card.

I started with a Whisper White card front and adhered it to a Petal Pink mat and then to a Poppy Parade mat using Multipurpose Liquid Glue.  I wrapped a piece of the beautiful Petal Pink/Whisper White 5/8″ Variegated Ribbon around it and tied a knot.  I adhered the matted card front to a Thick Whisper White card base using Stampin’ Dimensionals.

I took a piece of the gorgeous Painted Seasons Designer Series Paper and adhered it to a Petal Pink mat and then to a Poppy Parade mat using Snail.  I adhered the matted DSP to the card front using Stampin’ Dimensionals.

On a scrap piece of Whisper White cardstock I stamped the ‘God Is Love’ sentiment from the Stampin’ Up Hold On To Hope Stamp Set in Poppy Parade Ink.  I cut the sentiment out using my Big Shot and the Cross Of Hope Framelits Dies.  I adhered the sentiment to the center of the DSP using Stampin’ Dimensionals.

On the inside I stamped the flower image from the Stampin’ Up Painted Seasons Stamp Set in Petal Pink Ink on the corners of a Whisper White panel.  I stamped the leaf image from the same stamp set in Call Me Clover Ink by the flowers and I stamped the center of the flowers in Early Espresso Ink.  I stamped the sentiment from the Stampin’ Up You’re Inspiring Stamp Set in Poppy Parade Ink in the center of the Whisper White panel.  I adhered the Whisper White panel to the inside of the Thick Whisper White card base using Multipurpose Liquid Glue.

To finish my card I decorated a Medium Whisper White Envelope.  I stamped the flower image from the Painted Seasons stamp set in Petal Pink Ink on the envelope front.  I adhered a piece of Painted Seasons DSP to the envelope flap.

Thank you so much for stopping by my blog today.  I hope you liked my card and will give it a try.  We made this card at my last workshop and everyone was able to put it together really quick.

Don’t forget Sale-A-Bration is only here for another 10 days.  So don’t wait any longer if there is something you’ve had your eye on.  Get it while it’s still available because after the 31st Sale-A-Bration items will be gone for good.  

Happy Stamping!!

****************************************************************************************************

If you need any stamping supplies, I’d be very happy to be your Demonstrator.  Just click here to go directly to my online store or drop me an email if you have any questions.

MY CURRENT HOST CODE IS: EDKNVWRP

Happy Stamping, Karen!

****************************************************************************************************

SALE-A-BRATION COORDINATION ITEMS ARE AVAILABLE NOW THROUGH MARCH 31, 2019 OR WHILE SUPPLIES LAST.

LIMITED-TIME PRODUCTS THAT COORDINATE PERFECTLY WITH SELECT SALE-A-BRATION PRODUCTS.  VISIT MY ONLINE STORE HERE FOR MORE DETAILS.

****************************************************************************************************

Third release of SALE-A-BRATION  items available.  Click HERE to see items.

Delightfully Detailed Laser-Cut Specialty Paper, Mini Pizza Boxes, Pearlized Doilies, Petal Promenade Designer Series Paper, Rich Razzleberry 1/4″ (6.4 Mm) Velvet Ribbon, Scattered Sequins Dynamic Textured Impressions Embossing & Share What You Love Embellishment Kit.

****************************************************************************************************

Here at Paper Pumpkin, we love providing easy, fast, and fun creative experiences for our subscribers. We do this in a cost-saving and time-efficient way: by delivering a cute package filled with fun papercrafting goodies . . . right to your door.
In addition to providing everything you need to make a pre-designed, all-inclusive project, we also have another goal in mind: to help you unlock and explore your creativity by introducing you to exciting and innovative products from Stampin’ Up!
In April’s Paper Pumpkin kit, we’re pleased to announce that we’ll be treating you to something extra-special: Stampin’ Up!’s brand new Distinktive® stamp images.

About Distinktive Stamps
Distinktive stamps give you photo-realistic images with just one stamp. They have a special texture that gives added depth and dimension in a single step.
These stamps are available only from Stampin’ Up! and are made using a patent-pending process.
Distinktive stamps are available in red rubber and photopolymer; Paper Pumpkin’s April kit includes photopolymer stamps.
Shop Distinktive stamps in the online store by searching “Distinktive,” or look for the Distinktive icon in Stampin’ Up! catalogs.

Click HERE to go to my store to subscribe to April’s Paper Pumpkin before April 10th.

****************************************************************************************************

April I will be starting my Online Host Club and I have a couple of spots open.  If you have a long wish list and you want to purchase Stampin’ Up supplies a little at a time, this might just be the perfect solution for you.  For more information click HERE.  If you are interested in joining in, please email me at creativestampingdesigns@gmail.com.

****************************************************************************************************

Card stock cuts for this project:

  • Petal Pink Cardstock 2 7/8″ X 2 7/8″ (artwork mat), 3 7/8″ X 5 1/8″ (card front mat)
  • Poppy Parade Cardstock 3″ X 3″ (2nd artwork mat), 4″ X 5 1/4″(2nd card front mat)
  • Whisper White Cardstock 3 3/4″ X 5″ (card front), 4″ X 5 1/4″ (inner liner)
  • Thick Whisper White Cardstock 4 1/4″ X 11″ (card base scored and folded at        5 1/2″)
  • Painted Seasons Designer Series Paper 2 3/4″ X 2 3/4″ (artwork), piece for envelope flap

****************************************************************************************************

Product List

Stampin’ Up All That You Are for Sunday Stamps

Good Tuesday morning my fellow stampers.  How has your week started off?  Spring officially starts tomorrow, now we just need the temperatures to go with it.

For today’s card I used the Stampin’ Up All That You Are Stamp Set.  This is another beautiful set that is great for coloring with your favorite coloring instrument. I decided to use a few of the soon to retire colors for my card.   Here’s my card.

My design was inspired by Sunday Stamps Sketch Challenge #200.  Be sure to stop by and play along with their challenge.  Here is their sketch.

I started with a Powder Pink card front and ran it through my Big Shot using the Pinewood Planks Dynamic Textured Impressions Embossing Folder.  I adhered the card front to a Sahara Sand card base using Multipurpose Liquid Glue.

On a panel of the Floral Romance Specialty Designer Series Paper I stamped the floral image from the All That You Are stamp set in Tuxedo Black Memento Ink.  I colored the leaves of the image in using my Daffodil Delight, Mossy Meadow and Old Olive Stampin’ Blends Markers.  I colored the flowers in using my Aqua Painter, filled with alcohol, and my Berry Burst, Fresh Fig and Powder Pink Inks.  I adhered the artwork to a Fresh Fig mat using Snail.  I added some Rose Metallic Thread to the back of the matted artwork then adhered it to the card front using Stampin’ Dimensionals.

I stamped the ‘God Is Love’ sentiment from the Stampin’ Up Hold On To Hope Stamp Set in Fresh Fig Ink on a scrap piece of Powder Pink cardstock and cut it out using my Big Shot and the Cross Of Hope Framelits Dies.  I adhered the banner to the card front using Stampin’ Dimensionals and a Glue Dot.  I added a few Pearl Basic Jewels to the artwork.

On the inside I stamped the floral image from the All That You Are stamp set in Powder Pink Ink on a panel of Whisper White cardstock.  I stamped the ‘Easter Blessings’ sentiment from the Stampin’ Up Itty Bitty Greetings Stamp Set in Fresh Fig Ink on top of the floral image.  I adhered the Whisper White panel to a Fresh Fig mat using Snail and then to the inside of the Sahara Sand card base using Multipurpose Liquid Glue.

To finish my card I decorated a Medium Whisper White Envelope.  I stamped the floral image from the All That You Are stamp set in Tuxedo Black Memento Ink on the envelope front and colored it in using my Stampin’ Write Markers.  I adhered a piece of the Floral Romance Specialty DSP to the envelope flap.

Thank you for stopping by my blog today.  I hope you like my card and will give it a try.  If you really like any of the soon to retire 2017-2019 In-Colors, now is the time to get them.  Get them before the hit the retired list and sell out.  Happy Stamping!!

****************************************************************************************************

If you need any stamping supplies, I’d be very happy to be your Demonstrator.  Just click here to go directly to my online store or drop me an email if you have any questions.

MY CURRENT HOST CODE IS: EDKNVWRP

Happy Stamping, Karen!

****************************************************************************************************

SALE-A-BRATION COORDINATION ITEMS ARE AVAILABLE NOW THROUGH MARCH 31, 2019 OR WHILE SUPPLIES LAST.

LIMITED-TIME PRODUCTS THAT COORDINATE PERFECTLY WITH SELECT SALE-A-BRATION PRODUCTS.  VISIT MY ONLINE STORE HERE FOR MORE DETAILS.

****************************************************************************************************

Third release of SALE-A-BRATION  items available.  Click HERE to see items.

Delightfully Detailed Laser-Cut Specialty Paper, Mini Pizza Boxes, Pearlized Doilies, Petal Promenade Designer Series Paper, Rich Razzleberry 1/4″ (6.4 Mm) Velvet Ribbon, Scattered Sequins Dynamic Textured Impressions Embossing & Share What You Love Embellishment Kit.

****************************************************************************************************

Here at Paper Pumpkin, we love providing easy, fast, and fun creative experiences for our subscribers. We do this in a cost-saving and time-efficient way: by delivering a cute package filled with fun papercrafting goodies . . . right to your door.
In addition to providing everything you need to make a pre-designed, all-inclusive project, we also have another goal in mind: to help you unlock and explore your creativity by introducing you to exciting and innovative products from Stampin’ Up!
In April’s Paper Pumpkin kit, we’re pleased to announce that we’ll be treating you to something extra-special: Stampin’ Up!’s brand new Distinktive® stamp images.

About Distinktive Stamps
Distinktive stamps give you photo-realistic images with just one stamp. They have a special texture that gives added depth and dimension in a single step.
These stamps are available only from Stampin’ Up! and are made using a patent-pending process.
Distinktive stamps are available in red rubber and photopolymer; Paper Pumpkin’s April kit includes photopolymer stamps.
Shop Distinktive stamps in the online store by searching “Distinktive,” or look for the Distinktive icon in Stampin’ Up! catalogs.

Click HERE to go to my store to subscribe to April’s Paper Pumpkin before April 10th.

****************************************************************************************************

April I will be starting my Online Host Club and I have a couple of spots open.  If you have a long wish list and you want to purchase Stampin’ Up supplies a little at a time, this might just be the perfect solution for you.  For more information click HERE.  If you are interested in joining in, please email me at creativestampingdesigns@gmail.com.

****************************************************************************************************

Card stock cuts for this project:

  • Fresh Fig Cardstock 2 3/4″ X 5 1/4″ (artwork mat), 4′ X 5 1/4″ (inner liner mat)
  • Powder Pink Cardstock 4 1/8″ X 5 3/8″ (card front)
  • Sahara Sand Cardstock 4 1/4″ X 11″ (card base scored and folded at 5 1/2″)
  • Floral Romance Specialty Designer Series Paper 2 5/8″ X 5 1/8″ (artwork)
  • Whisper White Cardstock 3 3/4″ X 5″ (inner liner)

****************************************************************************************************

Product List

Big Shot

$110.00

Glue Dots

$5.25

Stamparatus

$49.00