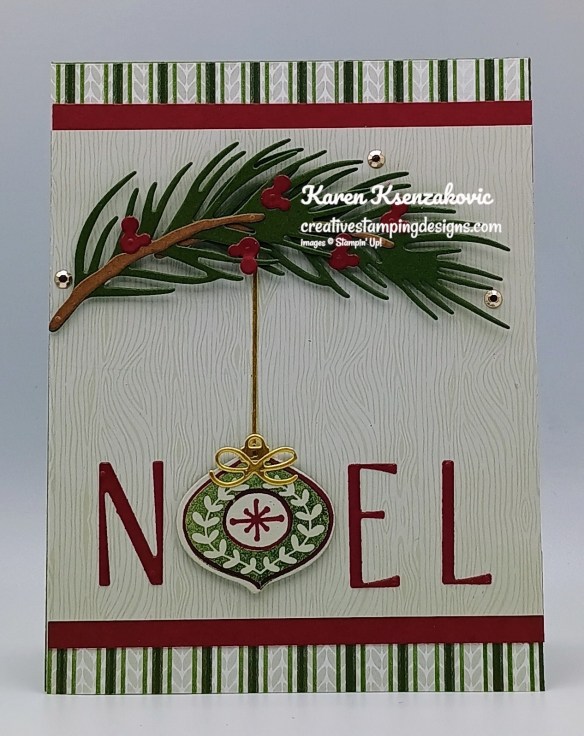
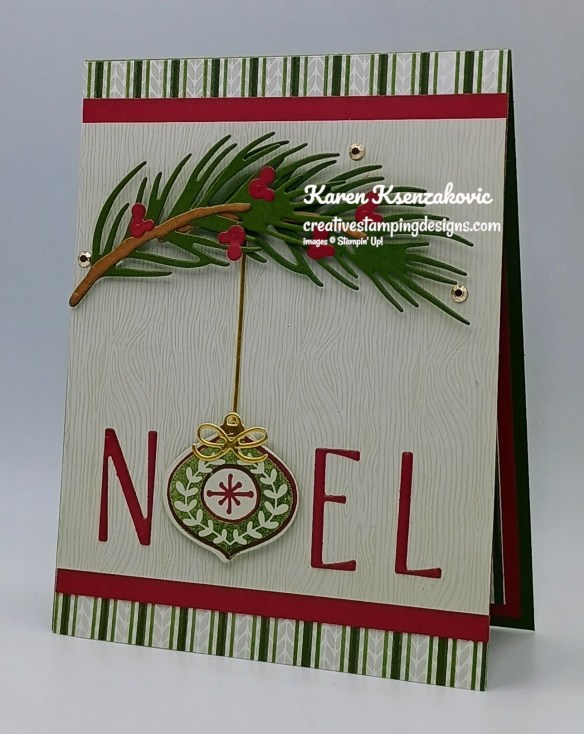
Good Thursday morning stamping friends welcome to our Happy Inkin’ Thursday Blog Hop. If you are starting with me, thank you, I hope you will stop by everyone’s blog to see the beautiful projects they have created this week. If you are hopping over from Mary’s blog, thank you for stopping by. This week we have a Sketch Challenge to work with. If you’d like to see a quick video on how I made this card, Click Here to go to my Instagram Reels. Here is my card using this week’s sketch.
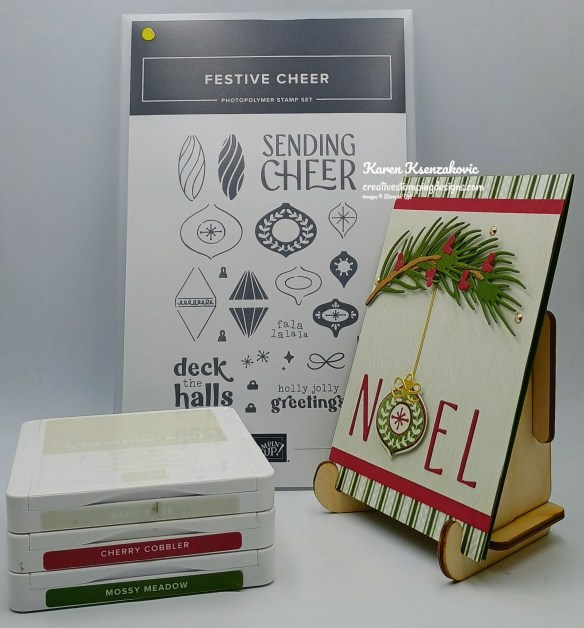
I used the Stampin’ Up! Festive Cheer Bundle, A Little Christmas Designer Series Paper and Wood grain Wonders Designer Series Paper for my card today.
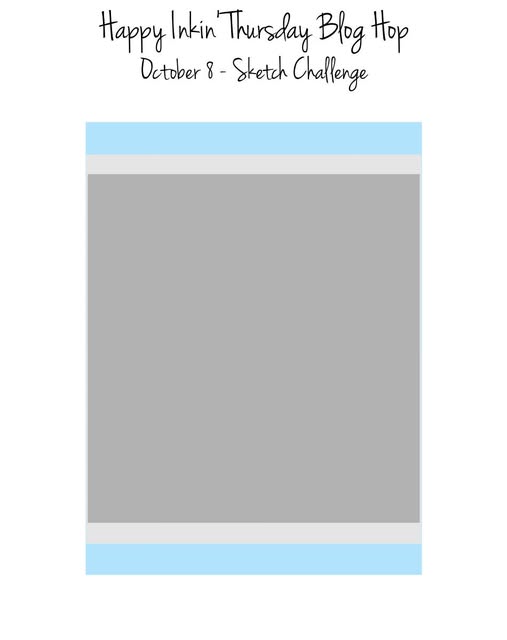
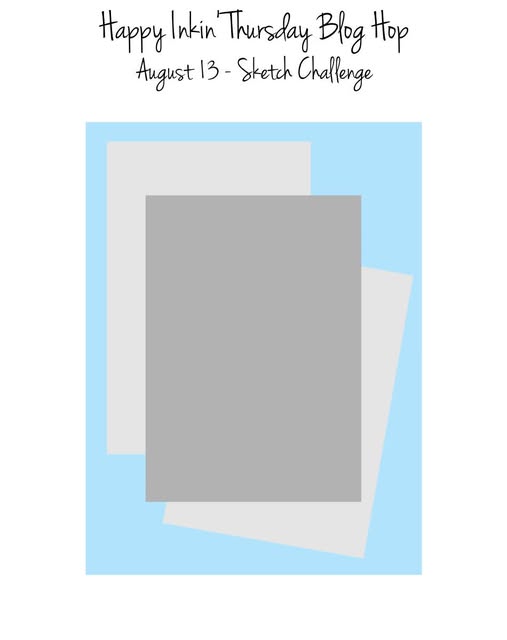
This is our sketch for this week.
Adhere a panel of A Little Christmas DSP to a Mossy Meadow card base. Adhere 2 strips of Cherry Cobbler to the topo and bottom of a Wood Grain Wonders DSP panel. Adhere the layered panel to the card front.
Stamp the outline ornament image from Festive Cheer stamp set in Cherry Cobbler Ink on a panel of Basic Beige. Stamp the solid ornament image from Festive Cheer stamp set in Mossy Meadow Ink, stamping off once on scrap paper, over the outlined image. Using the Festive Cheer Dies, cut the ornament, cut 2 pine boughs from a panel of Mossy Meadow, 2 branches from a panel of Pecan Pie, the sentiment and berries from a panel of Cherry Cobbler, the ornament hanger, bow and string from a panel of Gold Foil.
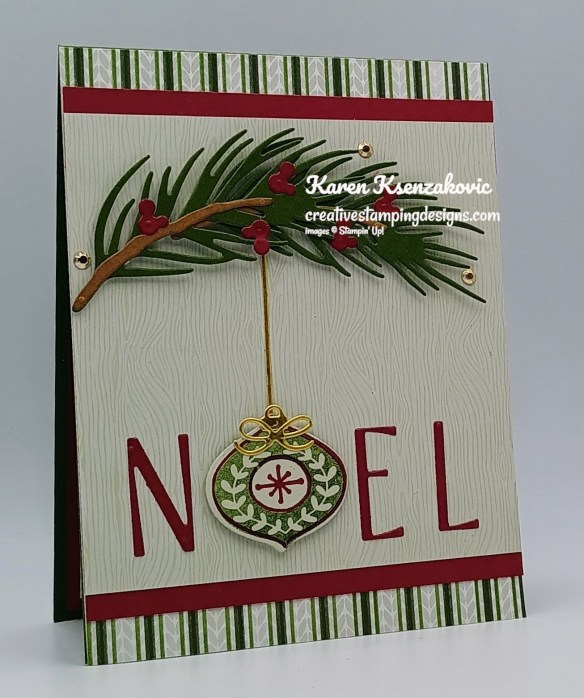
Adhere the branches and berries to the pine boughs, then adhere the pine boughs to the card front with Stampin’ Dimensionals. Adhere the sentient to the card front. Adhere the ornament hanger and bow to the ornament. Adhere the ornament between the sentiment with Stampin’ Dimensionals. Adhere the string from the pine bough to the ornament. Add a few Adhesive-Backed Metallic Gems to the card front.
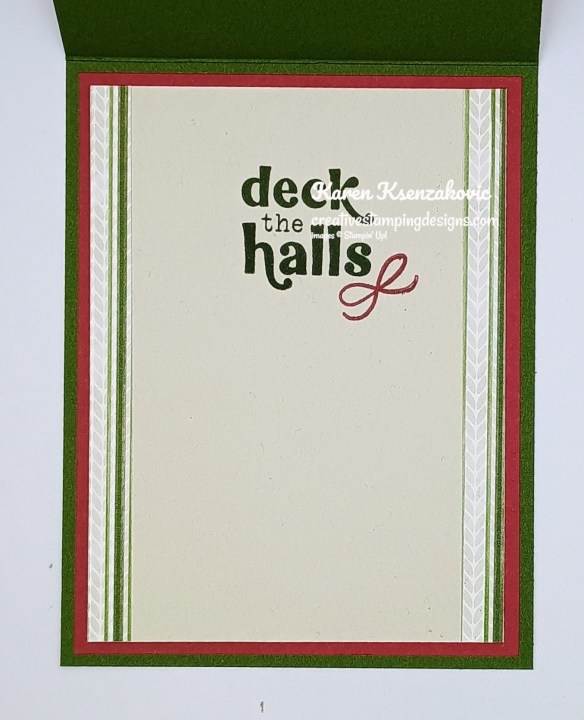
Stamp the sentiment from Festive Cheer stamp set in Mossy Meadow Ink to a panel of Basic Beige. Stamp the bow image from Festive Cheer stamp set by the sentiment n Cherry Cobbler Ink. Adhere 2 panels of A Little Christmas DSP to either side of the Basic Beige panel. Adhere the Basic Beige panel to a Cherry Cobbler mat then to the inside of the Mossy Meadow card base.
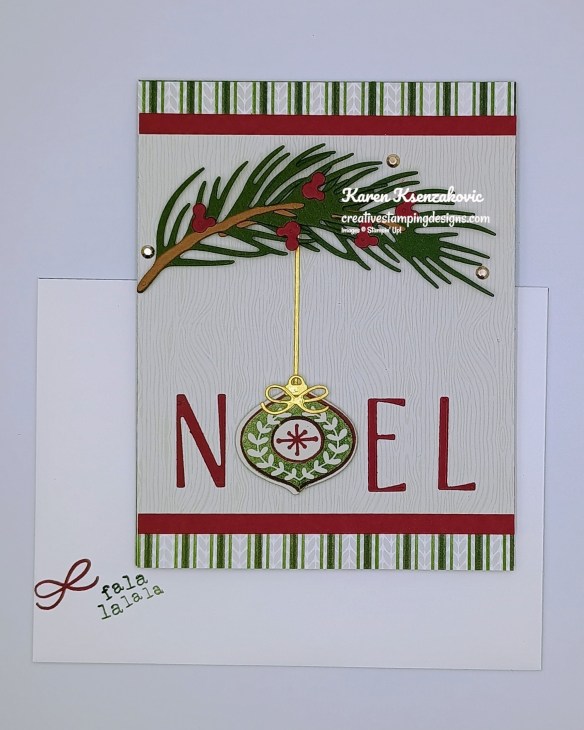
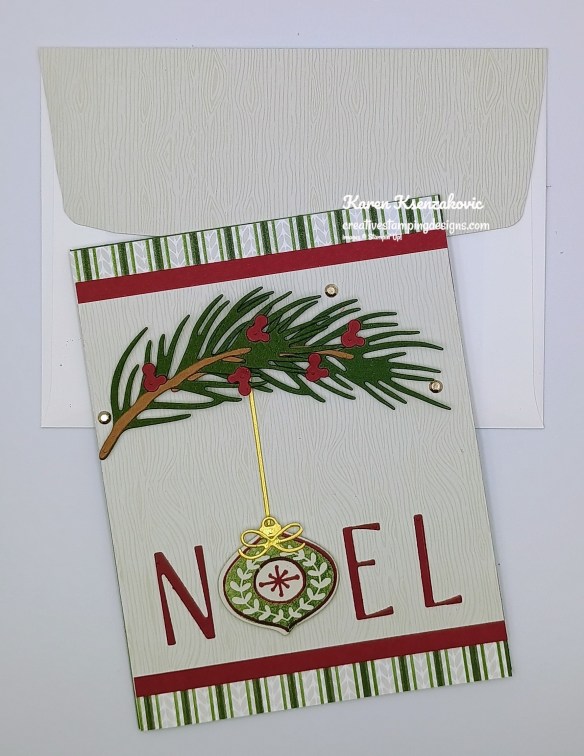
Decorate a Basic White Medium Envelope to complete your card. Stamp the bow image from Festive Cheer stamp set in Cherry Cobbler Ink on the envelope front. Stamp the sentiment from Festive Cheer stamp set in Mossy Meadow Ink on the envelope front. Adhere a panel of Wood Grain Wonders DSP to the envelope flap.
Thank you for stopping by my blog today. Now that you’ve seen my card, let’s get on with the hop! Click the next button below to hop over to see what Tara has created. Happy Hopping
Just in case you get lost along the way, here is a list of the team members involved in the hop today.
If you need any stamping supplies, I’d love to be your Demonstrator. Just click HERE to go directly to my online store or drop me an email if you have any questions.
Good Wednesday morning stamping friends. I hope you are all having a wonderful week. We’re halfway through and on our way to the weekend.
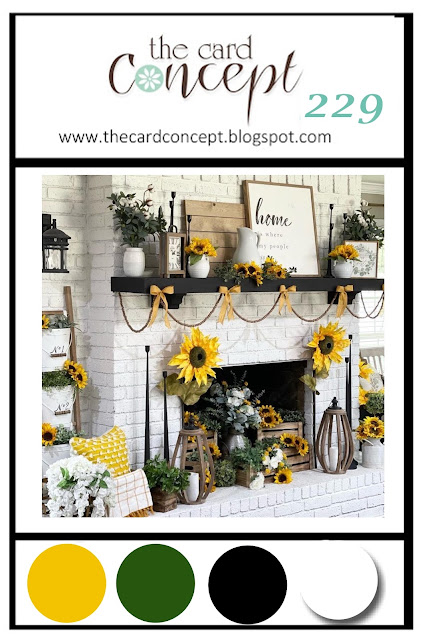
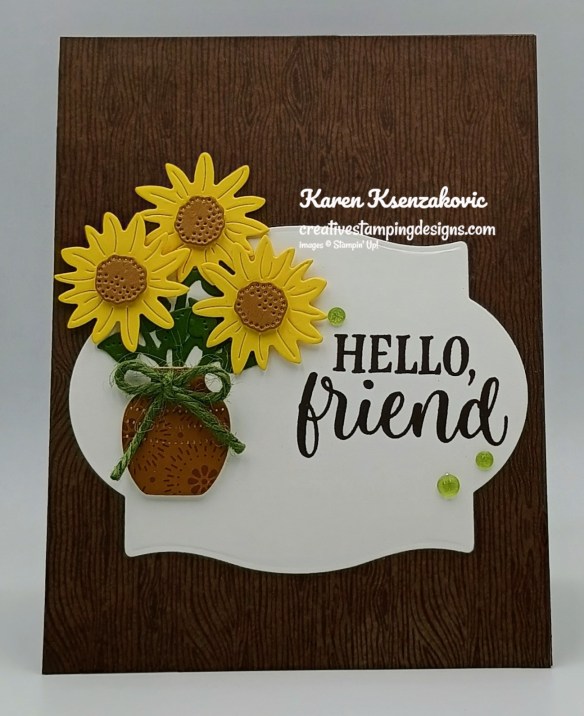
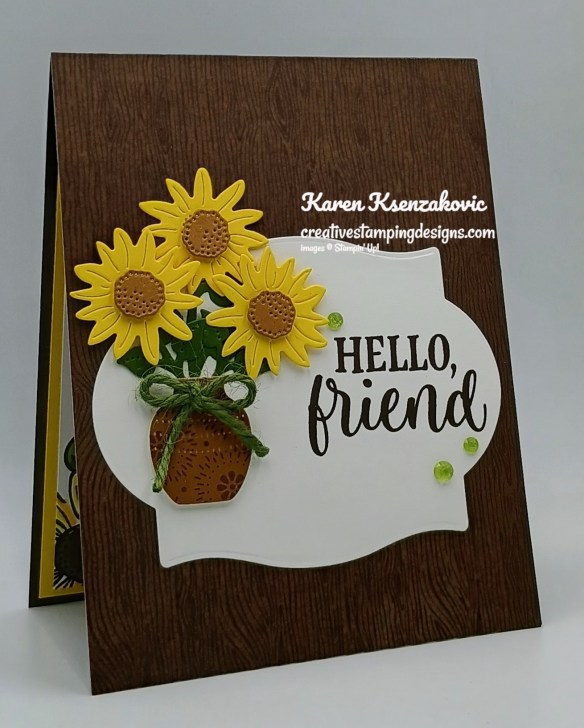
The Card Concepts is back with their Inspiration/Color Challenges and I hope you will join in. The inspiration photo #229 is Sunflower Delight. If you’d like to see a quick video of how I made this card, Click Here to go to my Instagram Reels. Here’s my card for today.
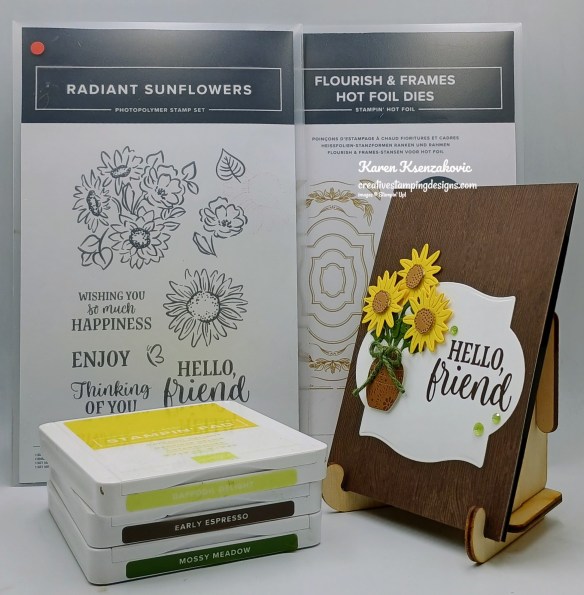
I used the Stampin’ Up! Radiant Sunflowers Bundle, the Wood Grain wonders Designer Series Paper and the Stampin’ Up! Flourish & Frames Dies for my card today. As a lot of you know I LOVE Sunflowers, and I was inspired by the overall theme along with the colors in the photo for my Clean & Layered Card.
I hope you will take a moment to visit The Card Concepts and join us for our challenge #229. How are you inspired by the photos?
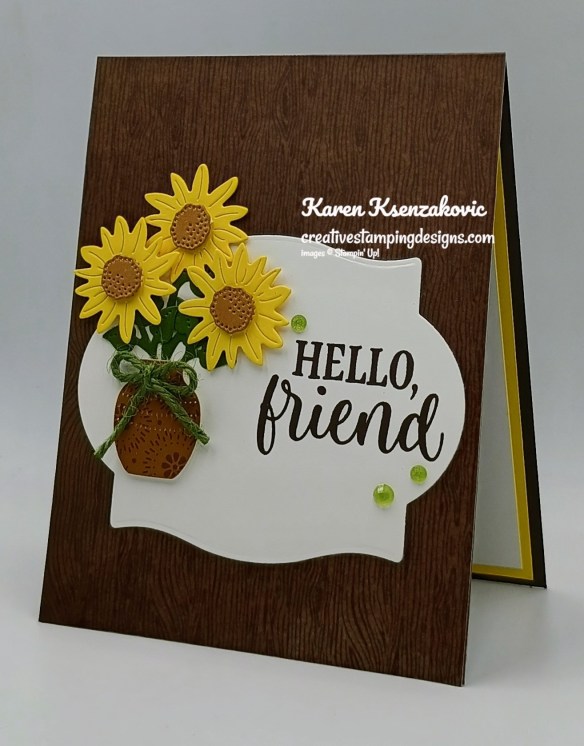
Adhere a panel of Wood Grain Wonders DSP to an Early Espresso card base. Cut a panel of Basic White using the largest frame die from the Flourish & Frames Hot Foil Dies.
On the die cut frame, stamp the sentiment from Radiant Sunflowers stamp set in Early Espresso Ink on the right side. Adhere the die cut, stamped panel to the card front.
Using the Radiant Sunflowers Dies, cut the sunflowers from a panel of Daffodil Delight, stem/leaves from a panel of Mossy Meadow, flower centers from a panel of Pecan Pie and the vase from a panel of Radiant Foil. Adhere the vase to the sentiment panel wit Stampin’ Dimensionals. Adhere the stems inside the vase. Adhere the flower centers in the sunflowers with Stampin’ Dimensionals. Adhere the sunflowers to the stems. Tie a small bow with a piece of Mossy Meadow Neutral Jute and adhere it to the vase with a Glue Dot. Add a few Radiant Gems to the card front.
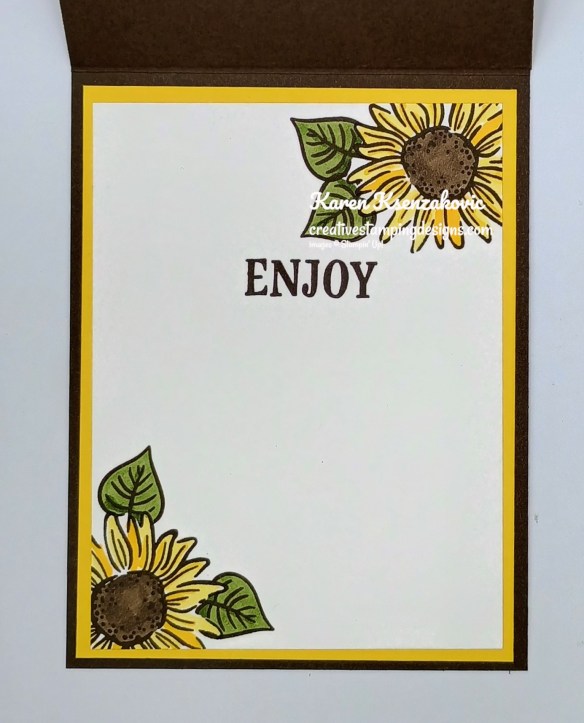
Stamp the sentiment from Radiant Sunflowers stamp set in Early Espresso Ink on a panel of Basic White. Stamp the sunflower & leaf images from Radiant Sunflowers stamp set in Early Espresso Ink on the corners of the panel. Color the images with Daffodil Delight, Mossy Meadow & Deep Stampin’ Blends Markers. Adhere the Basic Whtie panel to a Daffodil Delight mat then to the inside of the Early Espresso card base.
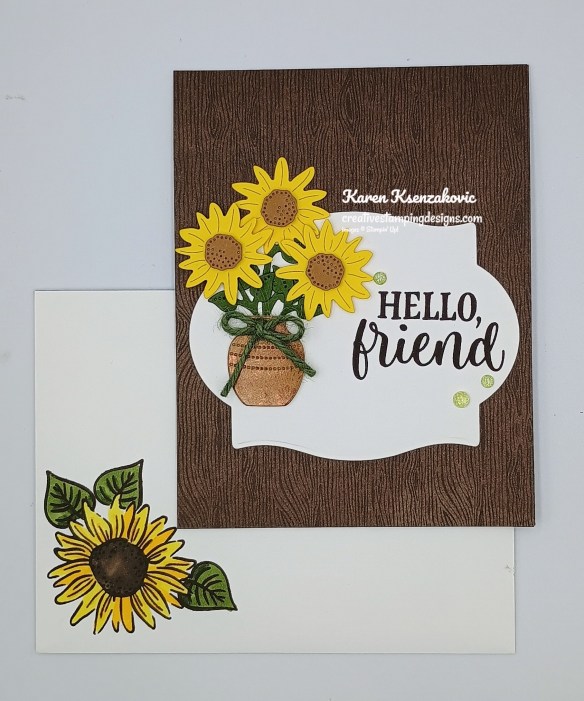
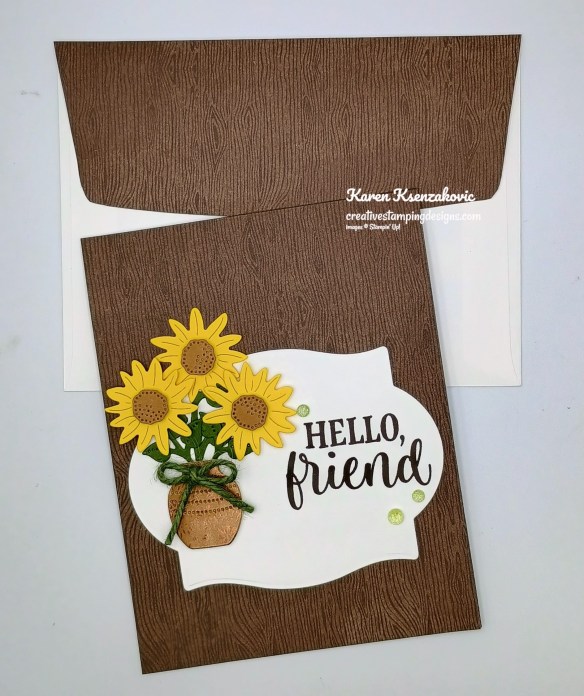
Decorate a Basic White Medium Envelope to complete the card. Stamp the sunflower and leaf images from the Radiant Sunflowers stamp set in Early Espresso Ink on the envelope front. Color the images with Daffodil Delight, Mossy Meadow and Deep Stampin’ Blends Markers. Adhere a panel of Wood Grain Wonders DSP to the envelope flap.
Thank you for stopping by my blog today. I hope you like the card and will give it a try. Happy Stamping!!
If you need any stamping supplies, I’d love to be your Demonstrator. Just click HERE to go directly to my online store or drop me an email if you have any questions.
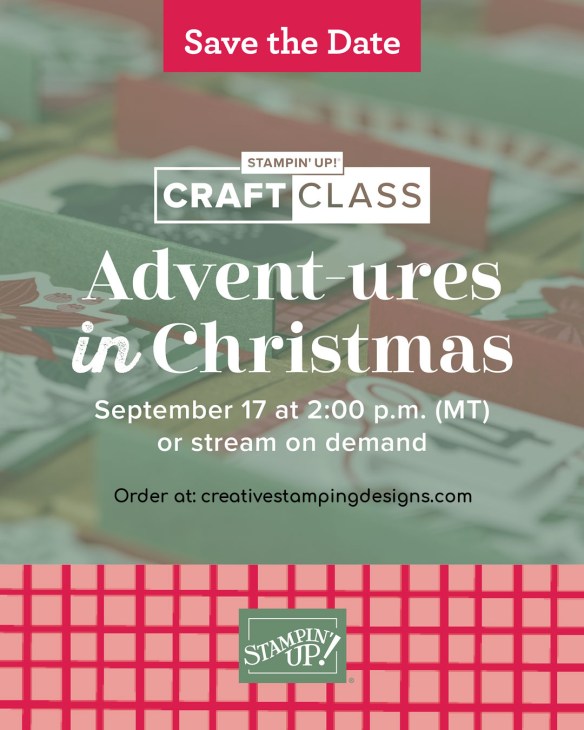
Advent-ures In Christmas Craft Class Now Available!!
Stampin’ Up! is offering another Craft Class on September 1 (with replay available afterward if that date doesn’t work for your schedule!). This class will be an Advent Calendar Craft Class!
Here are the details:
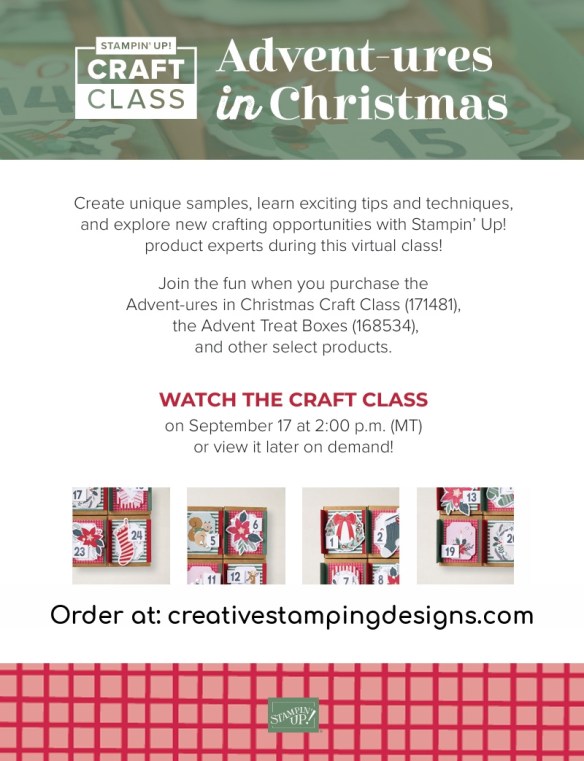
Class: Advent-ures in Christmas Craft Class (171481)
Class Price: $30 (Advent Treat Boxes not included)
Class Purpose: Decorate a 24-box advent calendar and assemble it to fit your space and style
Product: Advent Treat Boxes (168534) – available September 1
Who: Everyone!
Available for Purchase: September 1
Available for Streaming: September 17 at 2:00 p.m. (MT)
The class will be available for purchase before and after it streams on September 17
Where: An exclusive Facebook group
Language: The class will be presented in English and will be available as a video on demand with captions in English, French, German, and Dutch shortly after the event.
You can download the flyer with the Craft Class details by clicking the image below:
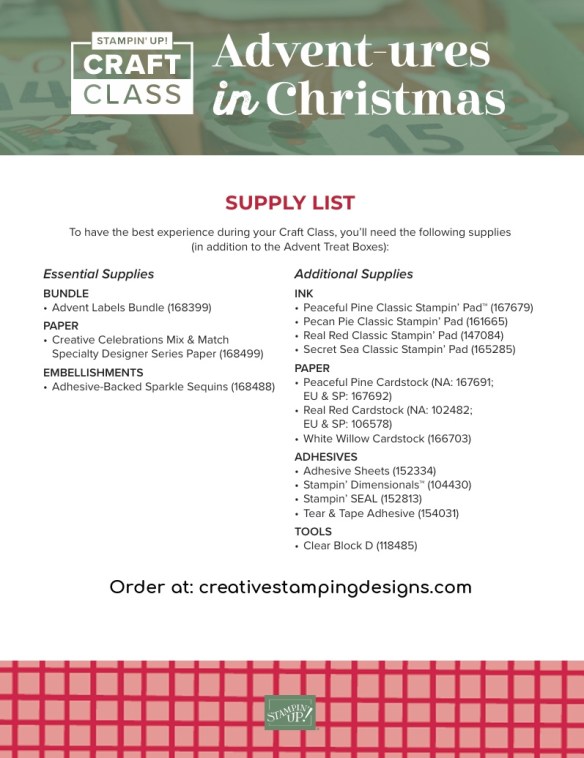
You can download the list of additional products needed to create the projects by clicking the image below:
The Advent Labels stamp set bundle will also be available to purchase as an Online Exclusive item beginning September 1, so keep an eye out for the bundle and Craft Class in the Online Store then!
Every month Stampin’ Up! will release a new item that is only available for purchase once per account. These items will be limited quantity and are likely to sell out quickly—once they’re sold out, they’re gone for good!
September Product of the Month – Luxe Foliate Specialty Designer Series Paper
Luxe Foliage 12″ x 12″ (30.5 x 30.5 cm) Specialty Designer Series Paper (168599)
With Halloween and Christmas fast approaching, don’t forget to spend some time celebrating Cardsgiving—one of our favorite unofficial holidays centered around making and gifting cards. The Luxe Foliage Designer Series Paper is perfect for all your holiday needs and beyond, with shimmering foil and beautifully-designed details perfect for creating glimmering layers or fussy cutting shining images. Whether you’re making cards for a friend or planning a Cardsgiving celebration, this paper is sure to be the star of the show.
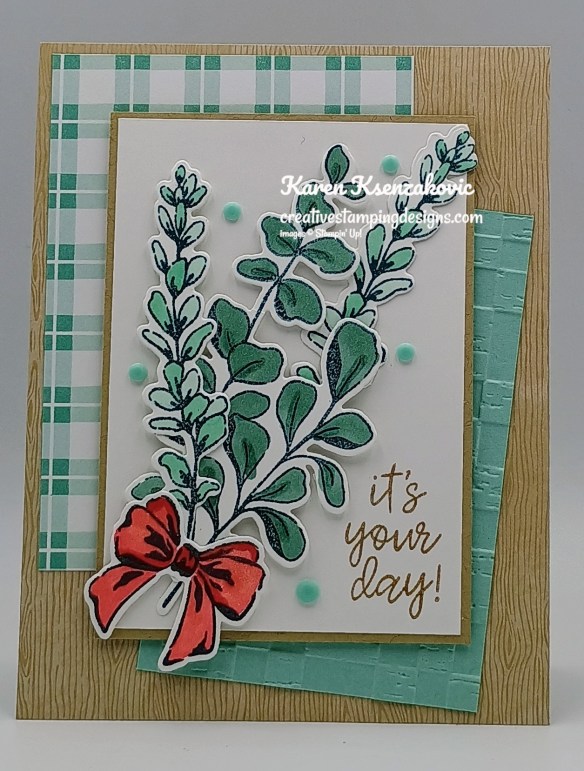
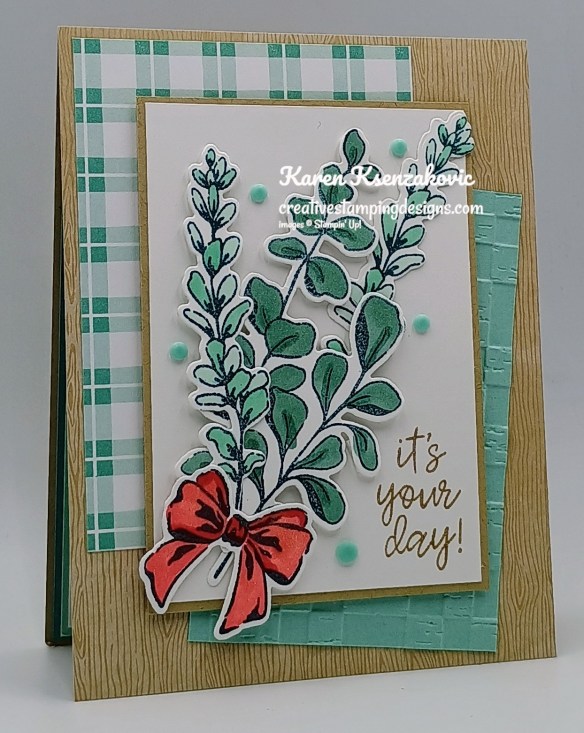
Good Thursday morning stamping friends welcome to our Happy Inkin’ Thursday Blog Hop. Let’s start off by welcoming our new hopper Charlene Tackvic, so excited that she’s joined us!! Can’t wait to see what she has to share with us each week. If you are starting with me, thank you, I hope you will stop by everyone’s blog to see the beautiful projects they have created this week. If you are hopping over from Mary’s blog, thank you for stopping by. This week we have a Sketch Challenge to work with. If you’d like to see a quick video on how I made this card, Click Here to go to my Instagram Reels. Here is my card using this week’s sketch.
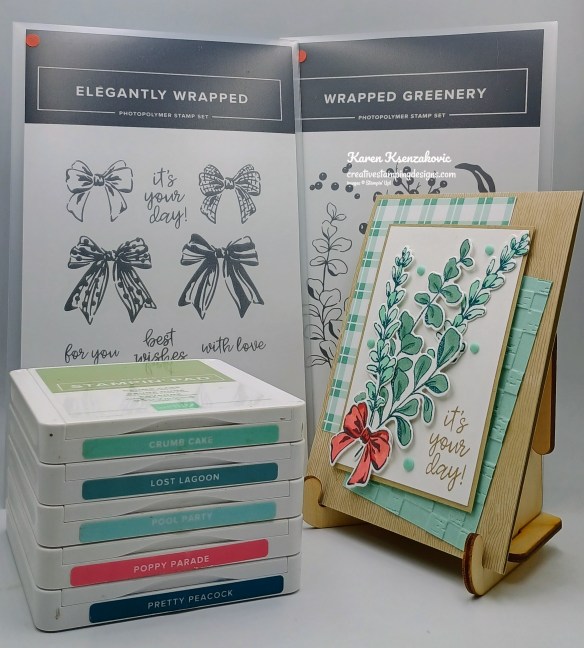
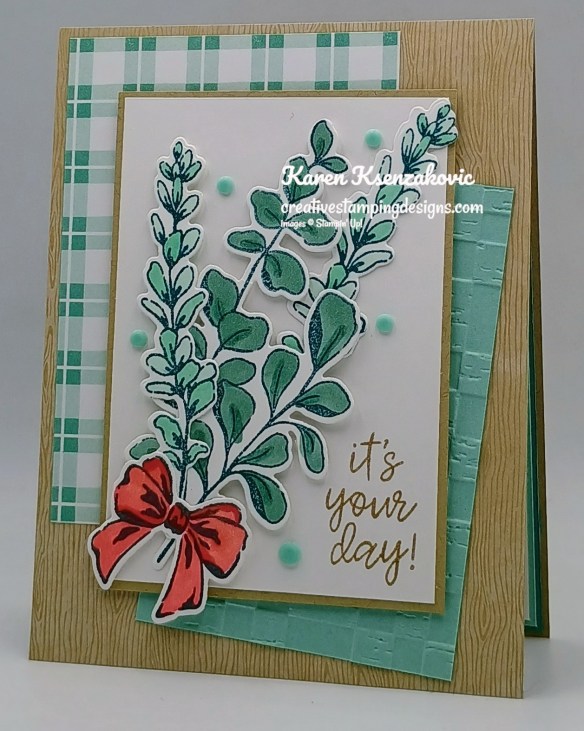
I used the Stampin’ Up! Elegantly Wrapped Bundle,Stampin’ Up! Wrapped Greenery Bundle, Rustic Check 3D Embossing Folder, Painted Patch Designer Series Paper (all available Sept 1) and the Wood Grain Wonders Designer Series Paper for my card today.
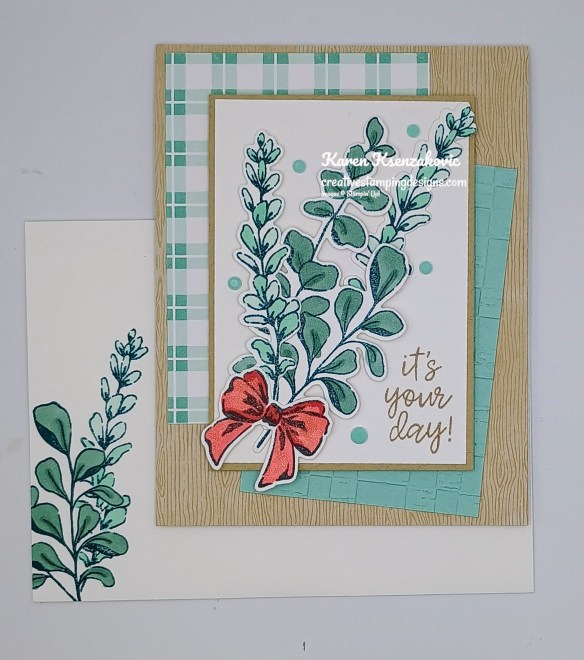
This is our sketch for this week. Although I don’t like crooked panels, I really liked this sketch.
Adhere a panel of Wood Grain Wonder DSP to a Crumb Cake card base. Adhere a panel of Painted Patch DSP to the card front.
Emboss a panel of Pool Party with the new Rustic Check EF. Adhere the embossed panel to the card front on an angle. Stamp the sentiment from the Elegantly Wrapped stamp set in Crumb Cake Ink on the bottom of a Basic White panel. Adhere the Basic White panel to a Crumb Cake mat. Adhere the layered panel to the card front with Stampin’ Dimensionals.
On a panel of Basic White, stamp the greenery images from the Wrapped Greenery stamp set in Pretty Peacock Ink. Stamp the bow image from the Elegantly Wrapped stamp set in Black Ink on the panel. Color the images with Lost Lagoon, Pool Party and Poppy Parade Stampin’ Blends Markers. Cut the images out using the Elegantly Wrapped Dies and Wrapped Greenery Dies. Adhere the die cut images to the Basic White panel with Stampin’ Dimensionals. Adhere the bow to the stems with a Glue Dot. Add a few Painted Patch Adhesive-Backed Dots to the card front.
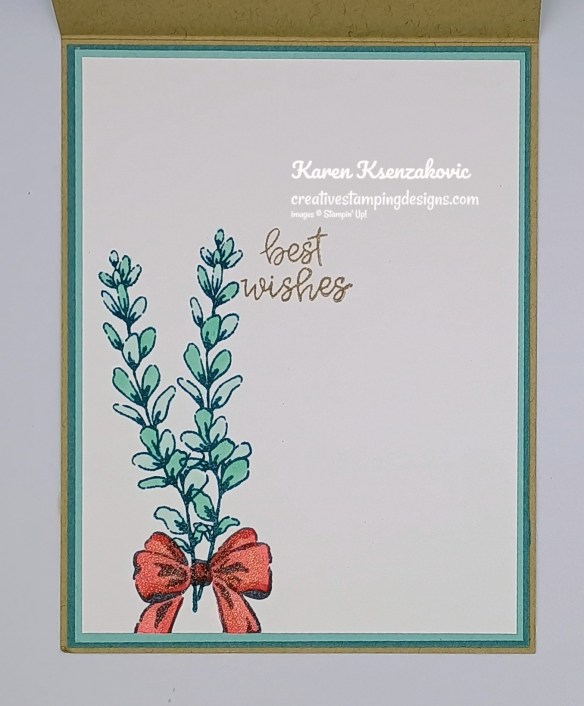
Stamp the sentiment from the Elegantly Wrapped stamp set in Crumb Cake Ink on a panel of Basic White. Stamp the greenery images from the Wrapped Greenery stamp set in Pretty Peacock Ink on the side of the panel. Color the images with Pool Party Stampin’ Blends Markers. Stamp the bow image from the Elegantly Wrapped stamp set in Black Ink over the stems and color the image with Poppy Parade Stampin’ Blends Markers. Adhere the Basic White panel to a Pool Party mat and Lost Lagoon mat then to the inside of the Crumb Cake card base.
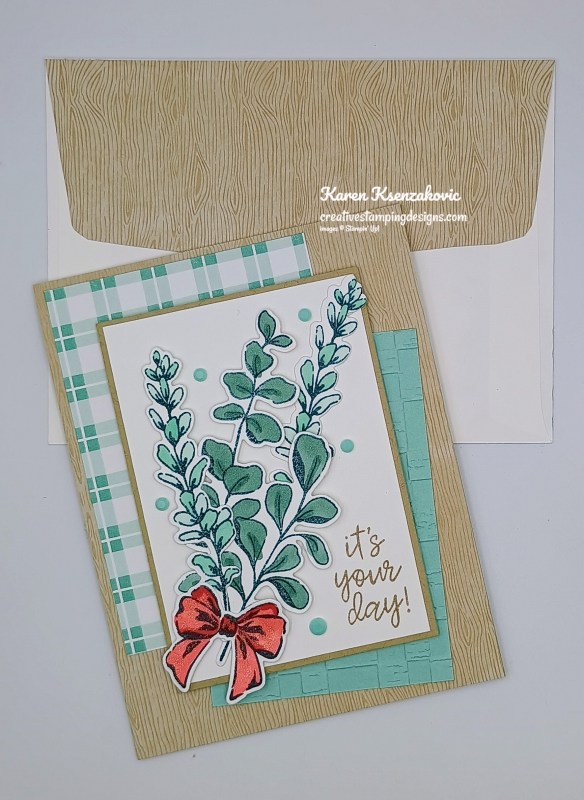
Decorate a Basic White Medium Envelope to complete the card. Stamp the greenery images from the Wrapped Greenery stamp set in Pretty Peacock Ink on the envelope front. Color the images with Lost Lagoon & Pool Party Stampin’ Blends Markers. Adhere a panel of Wood Grain Wonder DSP to the envelope flap.
Thank you for stopping by my blog today. Now that you’ve seen my card, let’s get on with the hop! Click the next button below to hop over to see what Tarahas created. Happy Hopping
Just in case you get lost along the way, here is a list of the team members involved in the hop today.
If you need any stamping supplies, I’d love to be your Demonstrator. Just click HERE to go directly to my online store or drop me an email if you have any questions.
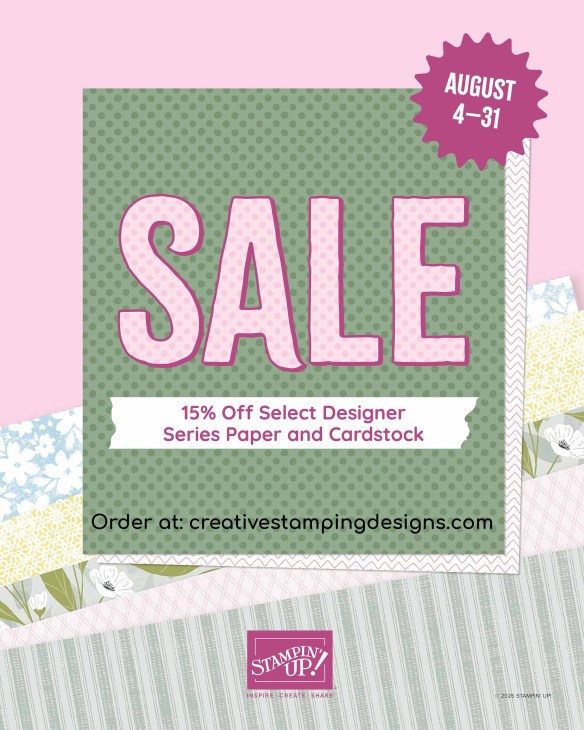
15% Off Select Designer Series Paper & Cardstock – August 4-31
Are you looking for the perfect card stock or Designer Series Paper for your next project? Stampin’ Up! has got you covered! Starting August 4, enjoy 15% off select Designer Series Paper and card stock. Stock up on your favorites or explore new colors and patterns during this sale!
Here are the sale details:
Sales Period: August 4–31
Ordering Deadline: August 31, 2026, at 11:59 p.m. (MT)
While supplies last.
You’ll find all qualifying items in one convenient location once the sale begins on August 4—it will be located in the “Designer Series Paper and Cardstock Sale” page in the online store.
Head over to my Online Store beginning August 4 to shop the sale!!
Good Monday morning stamping friends. Welcome to a new week. How was everyone’s weekend? I hope those that celebrate had a nice Easter.
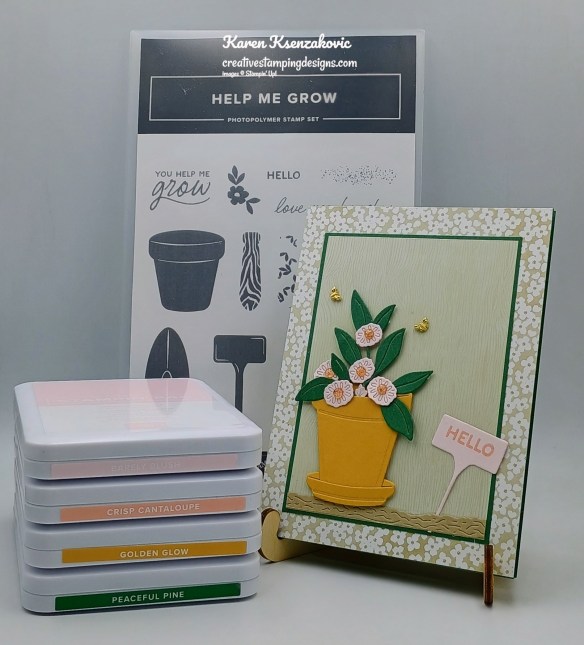
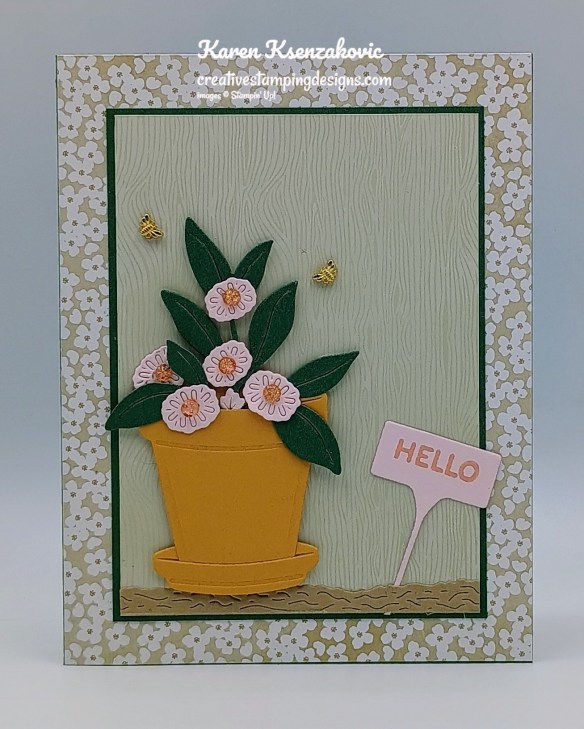
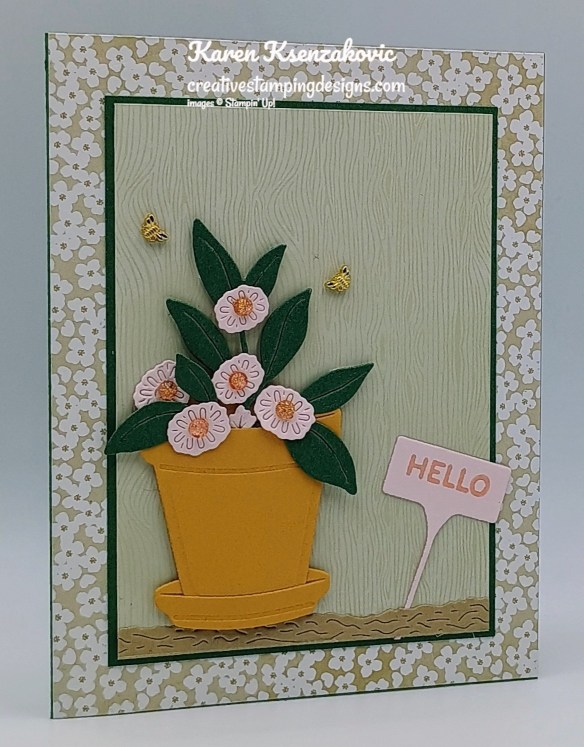
I played with one of my favorite bundles today from the Online Exclusives. I’m also featuring some of the new 2026-2028 In-Colors on my card. If you’d like to see a quick video on how I made this card, Click Here to go to my Instagram Reels. Here’s my card for today.
I used the Stampin’ Up! Online Exclusive Help Me Grow Bundle along with the Lovely Blossoms Designer Series Paper and Wood Grain Wonders Designer Series Paper for my card today.
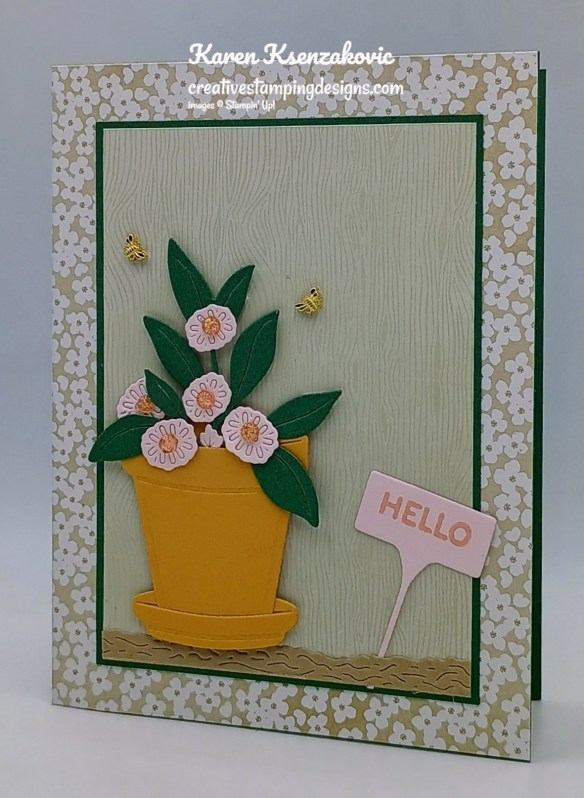
Adhere a panel of Lovely Blossoms DSP to a Peaceful Pine card base. Cut a panel of Crumb Cake using the dirt die from the Help Me Grow Dies and cut the sign die from a panel of Barely Blush.
Stamp the sentiment from the Help Me Grow stamp set in Crisp Cantaloupe Ink on the sign. Adhere the sign to the panel of Wood Grain Wonders DSP. Adhere the dirt die cut to the bottom of the panel and trim to size with paper Snips. Adhere the panel of Wood Grain Wonders DSP to a Peaceful Pine mat. Adhere the layered panel to the card front.
Using the Help Me Grow Dies, cut the flowerpot and dish from a panel of Golden Glow, cut the plant from a panel of Peaceful Pine and cut the flowers from a panel of Barely Blush. Adhere the flowerpot to the dish and the plant in the flowerpot. Adhere the assembled piece to the Wood Grain Wonders DSP panel with Stampin’ Dimensionals. Adhere the flowers to the plant with Glue Dots. Color a few Iridescent Foil Gems using the Crisp Cantaloupe Stampin’ Blends Marker. Adhere the colored gems to the flowers. Add a couple Tiny Bee Trinkets to the card front.
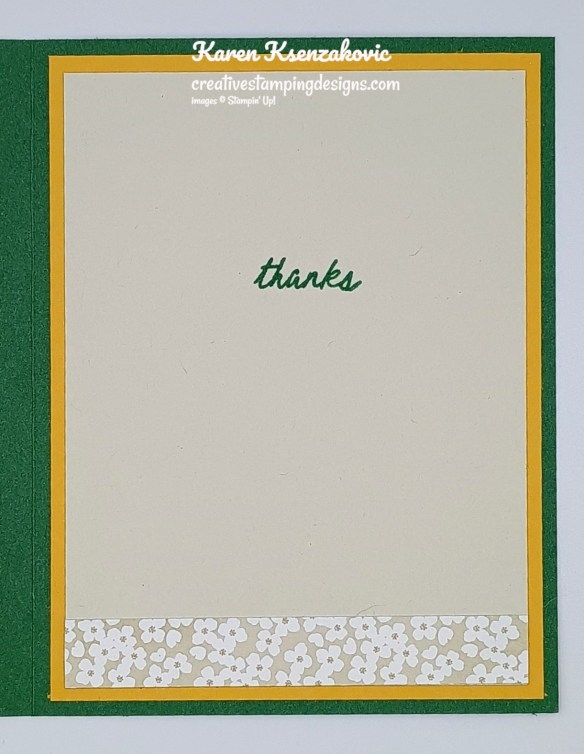
Stamp the sentiment from the Help Me Grow stamp set in Peaceful Pine Ink on a panel of Basic Beige. Adhere a panel of Lovely Blossoms DSP to the bottom of the panel. Adhere the Basic Beige panel to a Golden Glow mat then to the inside of the Peaceful Pine card base.
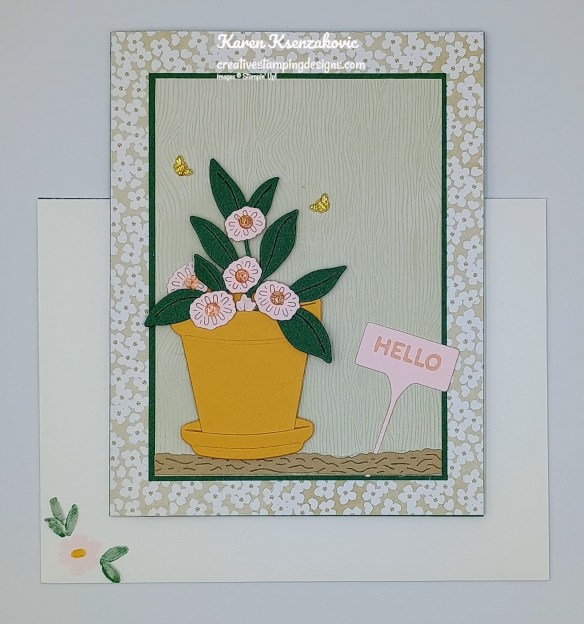
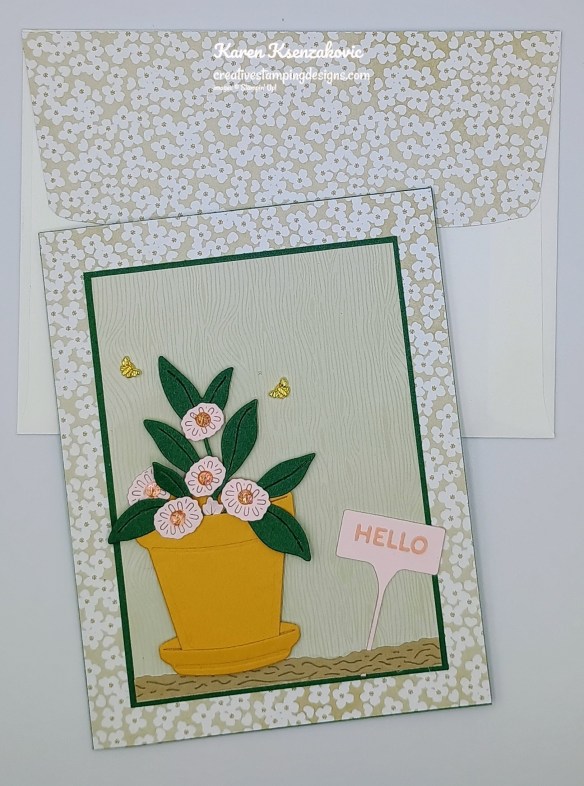
Decorate a Basic White Medium Envelope to finish your card. Stamp the small flower image from the Help Me Grow stamp set in Barely Blush Ink on the envelope front. Color the leaves using Peaceful Pine Stampin’ Blends Marker and the flower center with Crisp Cantaloupe Stampin’ Blends Markers. Adhere a panel of Lovely Blossoms DSP to the envelope flap.
Thank you for stopping by my blog today. I hope you like my card and will give it a try. Happy Stamping!!
If you need any stamping supplies, I’d love to be your Demonstrator. Just click HERE to go directly to my online store or drop me an email if you have any questions.
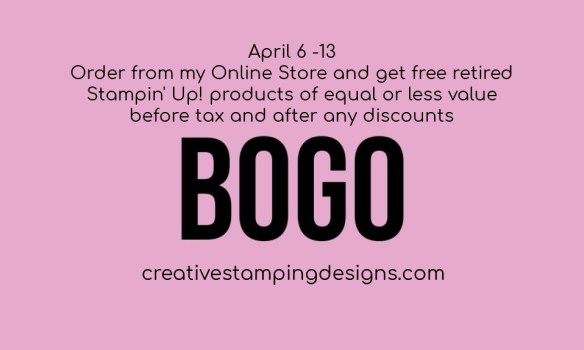
Starting TODAY Monday April 6 – Monday April 13 you’ll get to pick some of my retired items for FREE with an order on my Online Store. There’s no limit to how much you can order or get for free.
Once your order is placed and you get a confirmation you will need to visit my blog Here and click on Retirement Sale List
You can pick Stamp Set Bundles, Stamp Sets, Dies, Embossing Folders or DSP that total the Sub Total or less of your order before tax and after any discounts.
Fill out my Google Form with your full name and address and list the products you would like. The forms come to me in time order so it will be first come first serve. I will pull the products that you would like, and I’ll email you if something is gone. I’m going to try to remove them from the list as quickly as possible
Once I pull everything, I will send you a PayPal invoice for $8 shipping fee for shipping of the free products. 8 or more products there will be a shipping charge of $13.
I will try to get as much as possible shipped out by the weekend.
Feel free to contact me with any questions. Please note that the free items are gently used and may have stains. If you are not sure what the sets are, you can do a Google search or search my blog for cards that I made with them.
May-August 2026 Catalog & May 2026 Online Exclusive Product Shares Open for Ordering
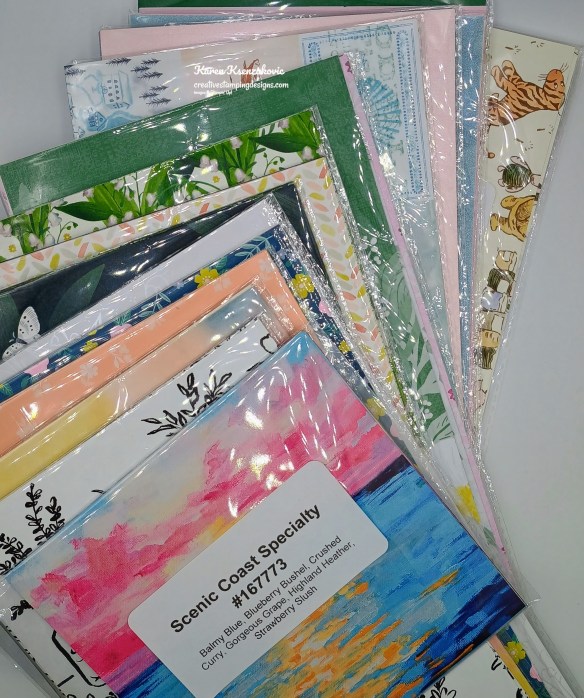
It’s that time again. The new May -August 2026 Catalog will be arriving in your mailbox real soon and you’re going to want all that beautiful Designer Series Paper, Ribbon and/or Embellishments. My May – August 2026 Catalog and May Online Exclusive Product Shares are open for ordering. You can order just the DSP share, just the Two-Tone cardstock share, just the Ribbon share or just the Embellishment share, or you can have it all!! Click Here to order.
I’m offering a Designer Series PaperShare, Two-Tone Cardstock Share, Ribbon Share & Embellishment Share from the May – August 2026 Catalog, along with the upcoming May 2026 Online Exclusives and I’d love to have you join!! I’m placing my share order early on May 5th and I’m going to use the expedited shipping option so I should be able to have the shares cut, bundled and back out to you during the week of May 11th. Wouldn’t you love to have all of the gorgeous new Designer Series Papers in the Stampin’ Up! May-August 2026 Catalog and the upcoming May 2026 Online Exclusives? What is a Paper Share you ask? It’s a sample of each of the new Designer Series Papers from the Catalog and Online Exclusives. Shares give you a good working sample of all of the papers so that you can decide which ones to order in full packs! If you were to purchase all of the DSP in the new Catalog and Online Exclusives, it would cost you over $300.00 plus shipping.
New Designer Series Paper Share – $50.00 plus $10.00 for Priority Mail Shipping
How my shares work: I order full packs of all of the Designer Series Papers listed below, I cut them into 6″ X 6″ pieces (or 6″ X 12″ pieces for double shares) and give you one panel of each design from each pack on the list. I pack up the paper in a cellophane bag with labels listing the Name, Item # and Colors in the pack and mail it back out to you just as quickly as I can!
New Designer Series Paper Share – $50.00 plus $10.00 for Priority Mail shipping
You will receive one 6×6 sheet of each design from the following DSP packs (the number after the name indicates how many 6×6 sheets of that paper pack you will receive):
Artisan Sketched Garden (6)
Basics Painted Patterns (6)
Beautiful Ordinary Life (6)
Bloom Boutique Specialty (6)
Brights Painted patterns (20)
Everyday Essentials Mix & Match (6)
Luxe White Specialty (3)
Moonlit Flora (6)
Neutrals Painted Patterns (20)
Paper Medley Mix Ins (6)
Regals Painted Patterns (20)
Scenic Coast 6×6 Specialty (8)
Subtle Painted Patterns (20)
Vally in Bloom (6)
Velvet Meadow Specialty (6)
Waterside Retreat (6)
2026-2028 In-Color Painted Patterns (10)
2026-2028 In-Color Pearlized (5)
Sunset Shimmer Vellum (3)
Velveteen Assortment (3)
Silly Old Bear OLE (6)
In all, you’ll receive 178 – 6” x 6” sheets of designer or specialty paper!
Double Designer Series Paper Share – $100.00 Plus $10.00 Priority Mail Shipping
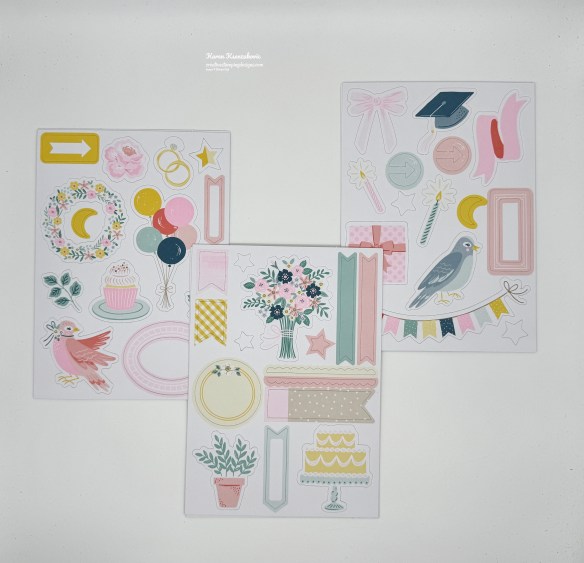
As a gift from me for ordering a Double Share of Designer Series Paper, I will include a Meant To Be Mix & Match Ephemera Pack #167700. This gift is only for ordering a Double DSP Share.
Two-Tone Cardstock Share
Do you likethe Two-Tone Cardstock but don’t want to buy a whole pack? You can add a share of the 3 different Two-Tone Cardstock packs for an additional $4.50 or purchase them separately for $4.50 + $10 Priority Shipping
You will receive one 6×6 sheet of each color from each of the packs (the number after the name indicates how many 6×6 sheets of that paper pack you will receive):
Extraordinary Life (6)
Heirloom Boutique (6)
Life In Bloom (6)
In all, you’ll receive 18 – 6” x 6” sheets of cardstock!
Double Share of the Two-Tone Cardstock – $9.00 plus $10.00 Priority Mail Shipping
If you’d like double shares of the designer paper or cardstock, I’m offering those too! I’ll cut the 12″ x 12″ sheets into 6″ × 12″ so that you’ll be able to get 3 full A2 size card fronts from each sheet and you’ll get double sheets of the 6″ x 6″ since they’re already precut.
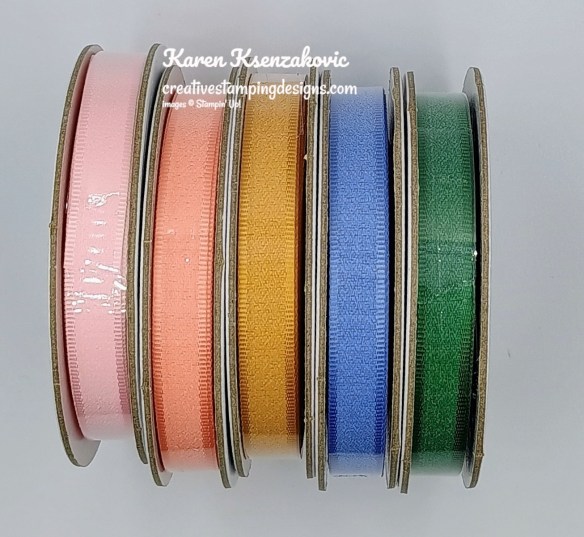
Ribbon Share – $11.25 plus $10.00 Priority Mail Shipping
All ribbons will come individually wrapped and labeled with the name and number of the product.
One-Fourth of a Roll of each:
Barely Blush 3/8″ Bordered Ribbon
Crisp Cantaloupe 3/8″ Bordered Ribbon
Golden Glow 3/8″ Bordered Ribbon
Hydrangea Hue 3/8″ Bordered Ribbon
Peaceful Pine 3/8″ Bordered Ribbon
Double Ribbon Share – $22.50 Plus $10.00 Priority Mail Shipping and you will be getting 1/2 of the roll or each ribbon.
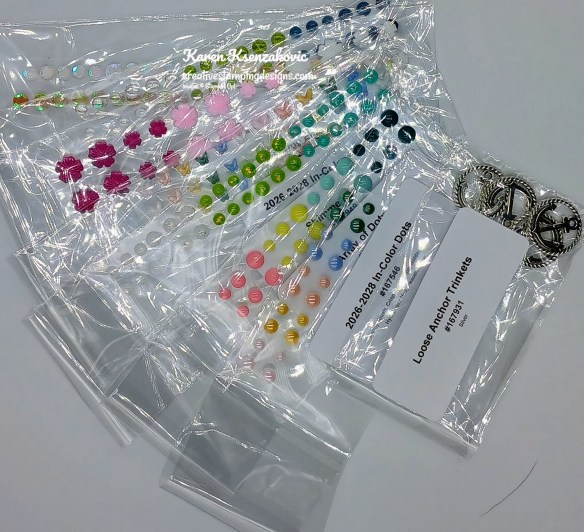
Embellishment Share – $14.00 plus $10.00 Priority Mail Shipping
I’m also offering an Embellishment Share. I will divide the embellishments up and package them in a cello bag with the name and number for easy ordering, just like I do with the paper and ribbon.
You will receive (approximate # listed:
Array of Dots (24)
Dewdrops Embellishments (36)
Dreamy Flowers (24)
Loose Anchor Trinkets (4)
Shimmer Dots (36)
Sunset Sparkle Sequins (40)
2026-2028 In-Color Butterflies (36)
2026-2028 In-Color Dots (20)
Double Share of the Embellishments – $28.00 plus $10.00 Priority Mail Shipping
Anyone is welcome to join in my shares (please note, I can only ship to addresses within the US). To make ordering the shares a little easier, I have created a form for you to submit, that way you can order any combination of shares you want. Click Here for the form. I will send out PayPal Invoices by May 3rd.
Deadline to sign up for my share is Saturday May 3rd at 5:00 PM ET.



![Festive Cheer Bundle (English) [ 168133 ]](https://assets1.tamsnetwork.com/images/EC042017NF/168133s.jpg "Festive Cheer Bundle (English) [ 168133 ]")
![Festive Cheer Photopolymer Stamp Set (English) [ 168126 ]](https://assets1.tamsnetwork.com/images/EC042017NF/168126s.jpg "Festive Cheer Photopolymer Stamp Set (English) [ 168126 ]")
![Festive Cheer Dies [ 168132 ]](https://assets1.tamsnetwork.com/images/EC042017NF/168132s.jpg "Festive Cheer Dies [ 168132 ]")
![Basic Beige 8 1/2" X 11" Cardstock [ 164511 ]](https://assets1.tamsnetwork.com/images/EC042017NF/164511s.jpg "Basic Beige 8 1/2\" X 11\" Cardstock [ 164511 ]")
![Cherry Cobbler 8-1/2" X 11" Cardstock [ 119685 ]](https://assets1.tamsnetwork.com/images/EC042017NF/119685s.jpg "Cherry Cobbler 8-1/2\" X 11\" Cardstock [ 119685 ]")
![Mossy Meadow 8-1/2" X 11" Cardstock [ 133676 ]](https://assets1.tamsnetwork.com/images/EC042017NF/133676s.jpg "Mossy Meadow 8-1/2\" X 11\" Cardstock [ 133676 ]")
![Pecan Pie 8 1/2" X 11" Cardstock [ 161717 ]](https://assets1.tamsnetwork.com/images/EC042017NF/161717s.jpg "Pecan Pie 8 1/2\" X 11\" Cardstock [ 161717 ]")
![A Little Christmas 12" X 12" (30.5 X 30.5 Cm) Designer Series Paper [ 168414 ]](https://assets1.tamsnetwork.com/images/EC042017NF/168414s.jpg "A Little Christmas 12\" X 12\" (30.5 X 30.5 Cm) Designer Series Paper [ 168414 ]")
![Wood Grain Wonders 12" X 12" (30.5 X 30.5 Cm) Designer Series Paper [ 167428 ]](https://assets1.tamsnetwork.com/images/EC042017NF/167428s.jpg "Wood Grain Wonders 12\" X 12\" (30.5 X 30.5 Cm) Designer Series Paper [ 167428 ]")
![Gold Foil Sheets [ 132622 ]](https://assets1.tamsnetwork.com/images/EC042017NF/132622s.jpg "Gold Foil Sheets [ 132622 ]")
![Cherry Cobbler Classic Stampin' Pad [ 147083 ]](https://assets1.tamsnetwork.com/images/EC042017NF/147083s.jpg "Cherry Cobbler Classic Stampin' Pad [ 147083 ]")
![Mossy Meadow Classic Stampin' Pad [ 147111 ]](https://assets1.tamsnetwork.com/images/EC042017NF/147111s.jpg "Mossy Meadow Classic Stampin' Pad [ 147111 ]")
![Adhesive Backed Metallic Gems [ 163780 ]](https://assets1.tamsnetwork.com/images/EC042017NF/163780s.jpg "Adhesive Backed Metallic Gems [ 163780 ]")
![Basic White Medium Envelopes [ 159236 ]](https://assets1.tamsnetwork.com/images/EC042017NF/159236s.jpg "Basic White Medium Envelopes [ 159236 ]")
![Stampin' Cut & Emboss Machine [ 149653 ]](https://assets1.tamsnetwork.com/images/EC042017NF/149653s.jpg "Stampin' Cut & Emboss Machine [ 149653 ]")
![Simply Scored [ 122334 ]](https://assets1.tamsnetwork.com/images/EC042017NF/122334s.jpg "Simply Scored [ 122334 ]")
![Mini Glue Dots [ 103683 ]](https://assets1.tamsnetwork.com/images/EC042017NF/103683s.jpg "Mini Glue Dots [ 103683 ]")
![Multipurpose Liquid Glue [ 110755 ]](https://assets1.tamsnetwork.com/images/EC042017NF/110755s.jpg "Multipurpose Liquid Glue [ 110755 ]")
![Stampin' Dimensionals [ 104430 ]](https://assets1.tamsnetwork.com/images/EC042017NF/104430s.jpg "Stampin' Dimensionals [ 104430 ]")
![Stampin' Seal [ 152813 ]](https://assets1.tamsnetwork.com/images/EC042017NF/152813s.jpg "Stampin' Seal [ 152813 ]")
![Paper Trimmer [ 152392 ]](https://assets1.tamsnetwork.com/images/EC042017NF/152392s.jpg "Paper Trimmer [ 152392 ]")
![Bone Folder [ 102300 ]](https://assets1.tamsnetwork.com/images/EC042017NF/102300s.jpg "Bone Folder [ 102300 ]")
![Detail Scissors [ 170902 ]](https://assets1.tamsnetwork.com/images/EC042017NF/170902s.jpg "Detail Scissors [ 170902 ]")
![Take Your Pick [ 144107 ]](https://assets1.tamsnetwork.com/images/EC042017NF/144107s.jpg "Take Your Pick [ 144107 ]")



![Radiant Sunflowers Bundle (English) [ 168359 ]](https://assets1.tamsnetwork.com/images/EC042017NF/168359s.jpg "Radiant Sunflowers Bundle (English) [ 168359 ]")
![Radiant Sunflowers Photopolymer Stamp Set (English) [ 168352 ]](https://assets1.tamsnetwork.com/images/EC042017NF/168352s.jpg "Radiant Sunflowers Photopolymer Stamp Set (English) [ 168352 ]")
![Radiant Sunflowers Dies [ 168358 ]](https://assets1.tamsnetwork.com/images/EC042017NF/168358s.jpg "Radiant Sunflowers Dies [ 168358 ]")
![Basic White 8 1/2" X 11" Cardstock [ 166780 ]](https://assets1.tamsnetwork.com/images/EC042017NF/166780s.jpg "Basic White 8 1/2\" X 11\" Cardstock [ 166780 ]")
![Daffodil Delight 8-1/2" X 11" Cardstock [ 119683 ]](https://assets1.tamsnetwork.com/images/EC042017NF/119683s.jpg "Daffodil Delight 8-1/2\" X 11\" Cardstock [ 119683 ]")
![Early Espresso 8-1/2" X 11" Cardstock [ 119686 ]](https://assets1.tamsnetwork.com/images/EC042017NF/119686s.jpg "Early Espresso 8-1/2\" X 11\" Cardstock [ 119686 ]")
![Radiant Foils 12" X 12" (30.5 X 30.5 Cm) Specialty Designer Series Paper [ 168362 ]](https://assets1.tamsnetwork.com/images/EC042017NF/168362s.jpg "Radiant Foils 12\" X 12\" (30.5 X 30.5 Cm) Specialty Designer Series Paper [ 168362 ]")
![Early Espresso Classic Stampin' Pad [ 147114 ]](https://assets1.tamsnetwork.com/images/EC042017NF/147114s.jpg "Early Espresso Classic Stampin' Pad [ 147114 ]")
![Daffodil Delight Stampin' Blends Combo Pack [ 154883 ]](https://assets1.tamsnetwork.com/images/EC042017NF/154883s.jpg "Daffodil Delight Stampin' Blends Combo Pack [ 154883 ]")
![Mossy Meadow Stampin' Blends Combo Pack [ 154890 ]](https://assets1.tamsnetwork.com/images/EC042017NF/154890s.jpg "Mossy Meadow Stampin' Blends Combo Pack [ 154890 ]")
![Stampin’ Blends Deep Combo Pack [ 158152 ]](https://assets1.tamsnetwork.com/images/EC042017NF/158152s.jpg "Stampin’ Blends Deep Combo Pack [ 158152 ]")
![Flourish & Frames Hot Foil Dies [ 170064 ]](https://assets1.tamsnetwork.com/images/EC042017NF/170064s.jpg "Flourish & Frames Hot Foil Dies [ 170064 ]")
![Neutrals Jute Combo Pack [ 168468 ]](https://assets1.tamsnetwork.com/images/EC042017NF/168468s.jpg "Neutrals Jute Combo Pack [ 168468 ]")
![Radiant Gems [ 168363 ]](https://assets1.tamsnetwork.com/images/EC042017NF/168363s.jpg "Radiant Gems [ 168363 ]")

![Crumb Cake 8-1/2" X 11" Cardstock [ 120953 ]](https://assets1.tamsnetwork.com/images/EC042017NF/120953s.jpg "Crumb Cake 8-1/2\" X 11\" Cardstock [ 120953 ]")
![Pool Party 8-1/2" X 11" Cardstock [ 122924 ]](https://assets1.tamsnetwork.com/images/EC042017NF/122924s.jpg "Pool Party 8-1/2\" X 11\" Cardstock [ 122924 ]")
![Crumb Cake Classic Stampin' Pad [ 147116 ]](https://assets1.tamsnetwork.com/images/EC042017NF/147116s.jpg "Crumb Cake Classic Stampin' Pad [ 147116 ]")
![Pretty Peacock Classic Stampin’ Pad [ 150083 ]](https://assets1.tamsnetwork.com/images/EC042017NF/150083s.jpg "Pretty Peacock Classic Stampin’ Pad [ 150083 ]")
![Lost Lagoon Stampin’ Blends Combo Pack [ 161680 ]](https://assets1.tamsnetwork.com/images/EC042017NF/161680s.jpg "Lost Lagoon Stampin’ Blends Combo Pack [ 161680 ]")
![Pool Party Stampin' Blends Combo Pack [ 154894 ]](https://assets1.tamsnetwork.com/images/EC042017NF/154894s.jpg "Pool Party Stampin' Blends Combo Pack [ 154894 ]")
![Poppy Parade Stampin' Blends Combo Pack [ 154958 ]](https://assets1.tamsnetwork.com/images/EC042017NF/154958s.jpg "Poppy Parade Stampin' Blends Combo Pack [ 154958 ]")

![Help Me Grow Bundle (English) [ 167167 ]](https://assets1.tamsnetwork.com/images/EC042017NF/167167s.jpg "Help Me Grow Bundle (English) [ 167167 ]")
![Help Me Grow Photopolymer Stamp Set (English) [ 167164 ]](https://assets1.tamsnetwork.com/images/EC042017NF/167164s.jpg "Help Me Grow Photopolymer Stamp Set (English) [ 167164 ]")
![Help Me Grow Dies [ 167166 ]](https://assets1.tamsnetwork.com/images/EC042017NF/167166s.jpg "Help Me Grow Dies [ 167166 ]")
![Lovely Blossoms 12" X 12" (30.5 X 30.5 Cm) Designer Series Paper [ 167168 ]](https://assets1.tamsnetwork.com/images/EC042017NF/167168s.jpg "Lovely Blossoms 12\" X 12\" (30.5 X 30.5 Cm) Designer Series Paper [ 167168 ]")
![Tiny Bee Trinkets [ 164714 ]](https://assets1.tamsnetwork.com/images/EC042017NF/164714s.jpg "Tiny Bee Trinkets [ 164714 ]")


