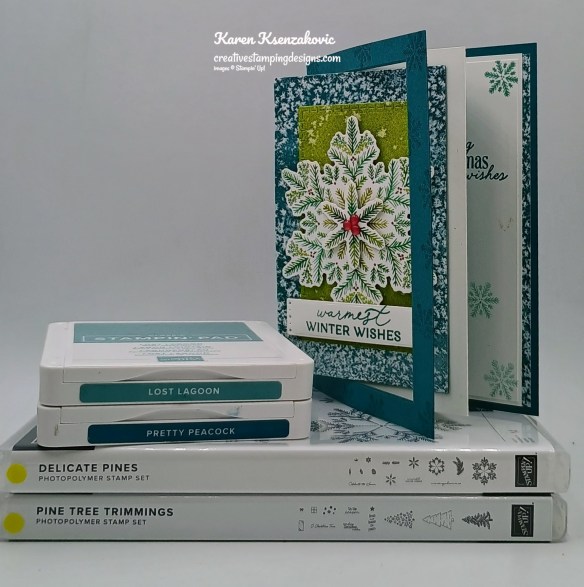
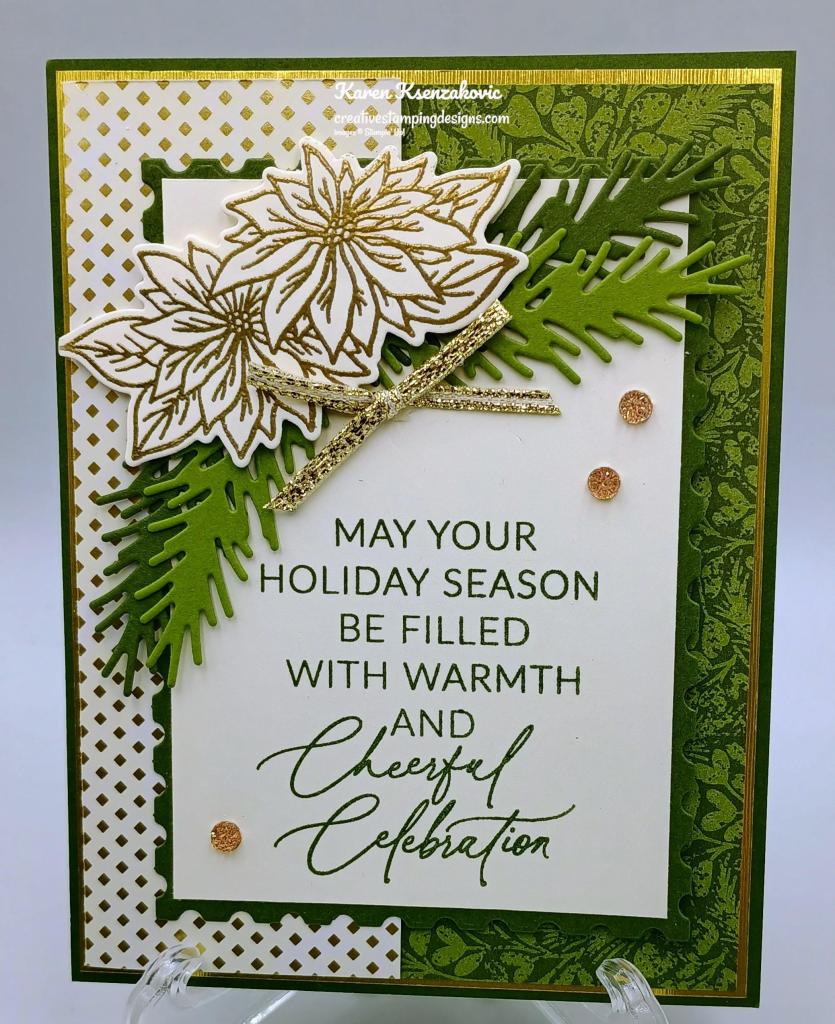
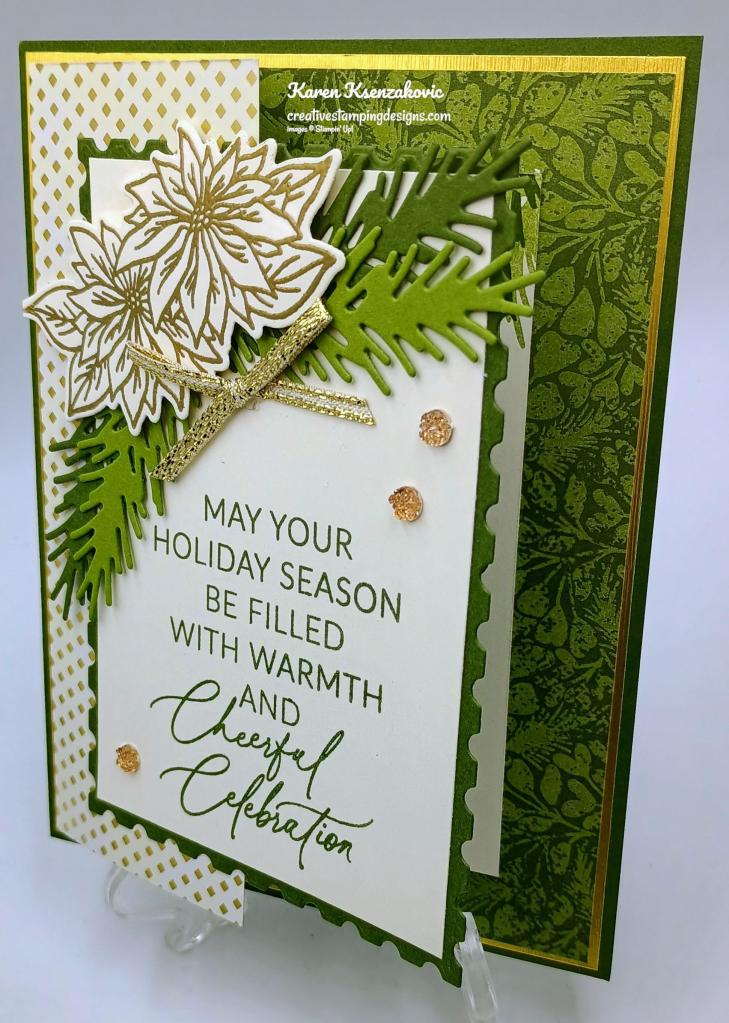
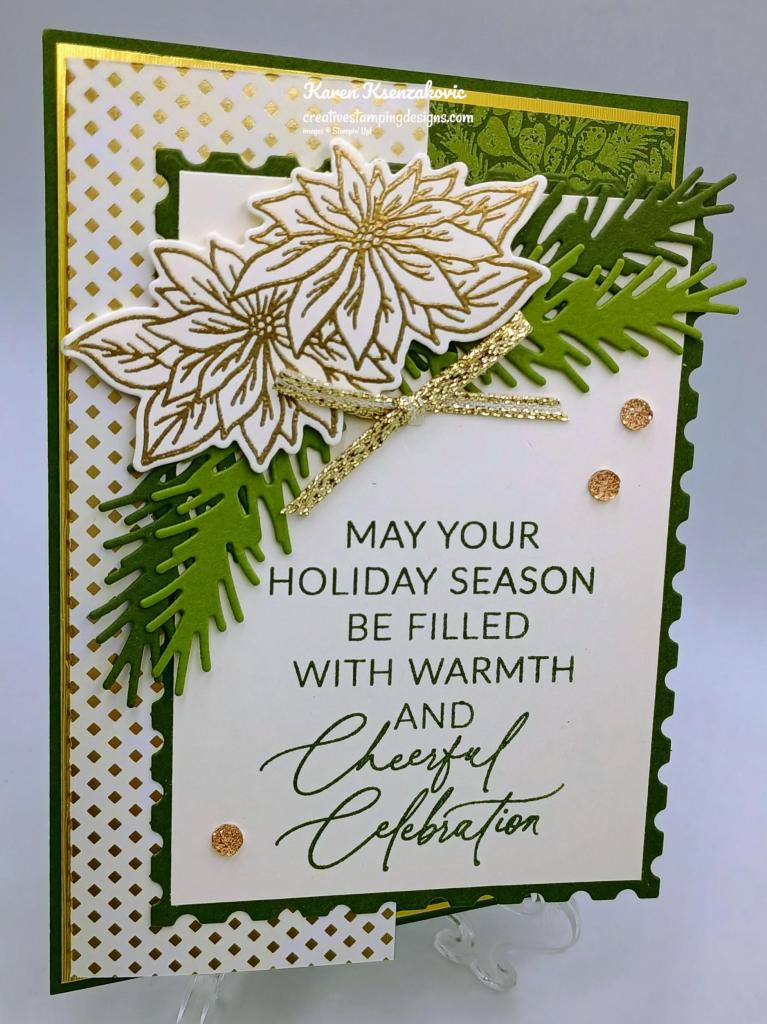
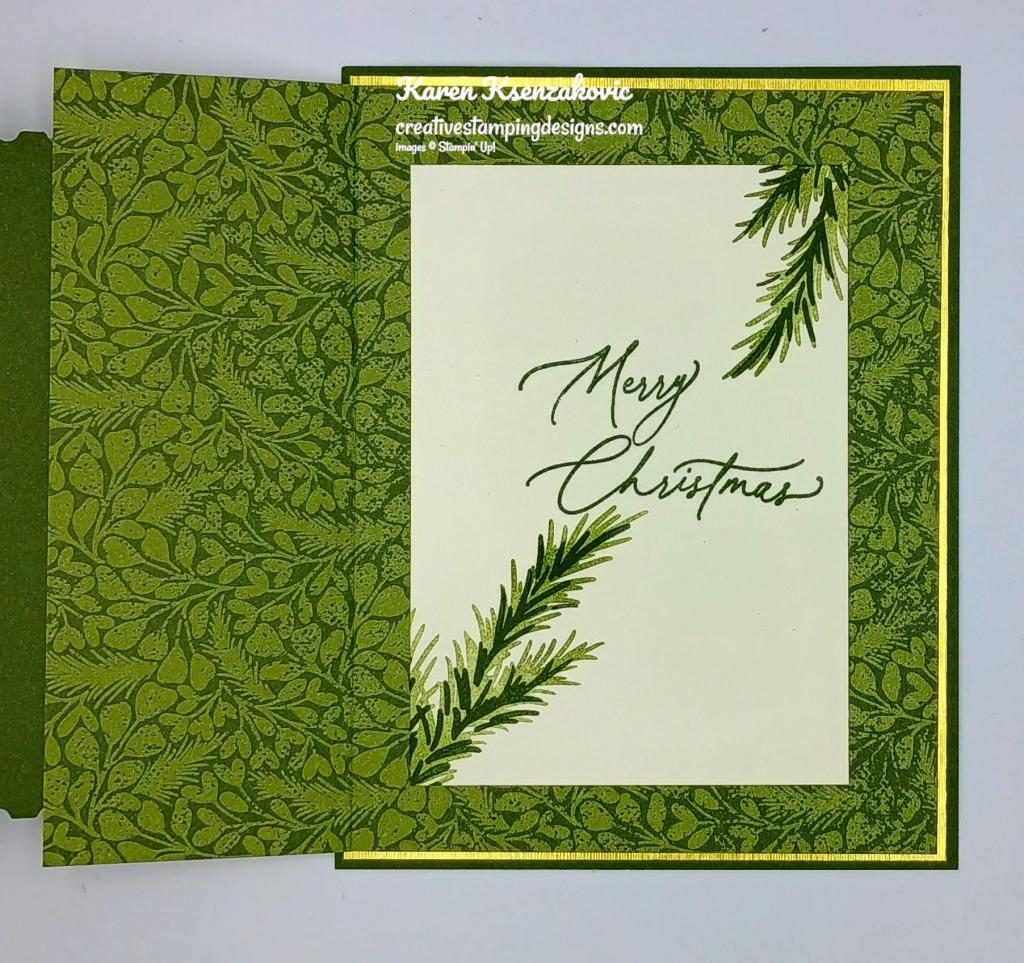
Stampin’ Up! Magic & Hope for Fun Fold Friday

Good Friday morning stamping friends and welcome to my fun fold Friday. Are you getting ready for the weekend? I’ve got a full weekend coming up.

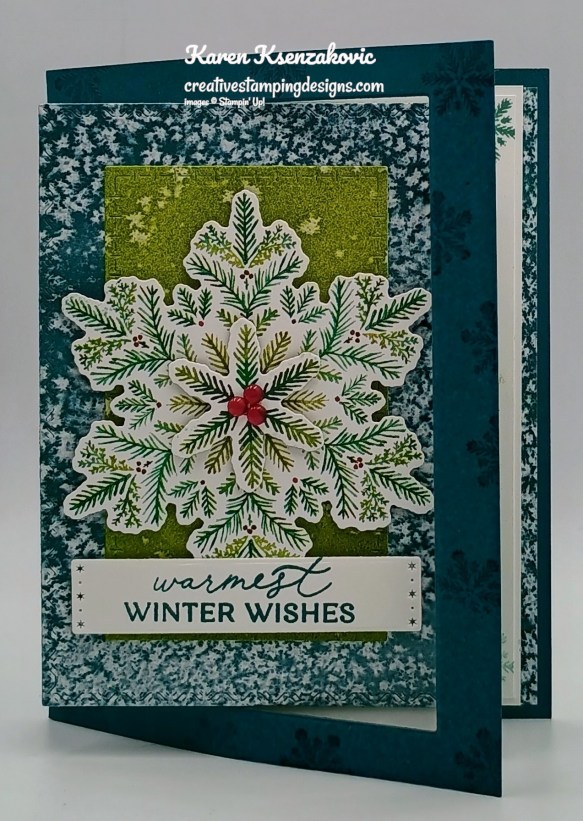
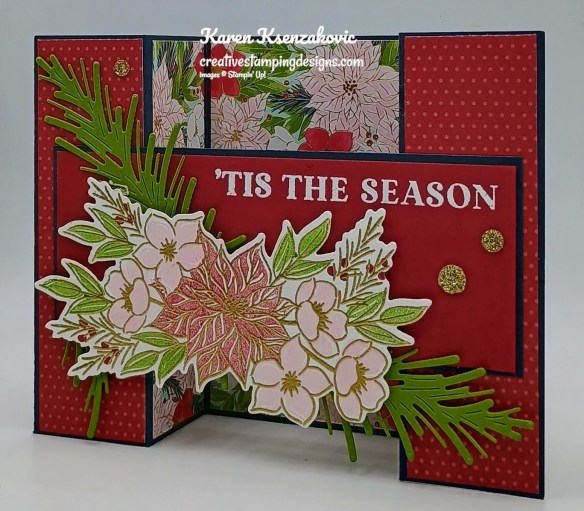
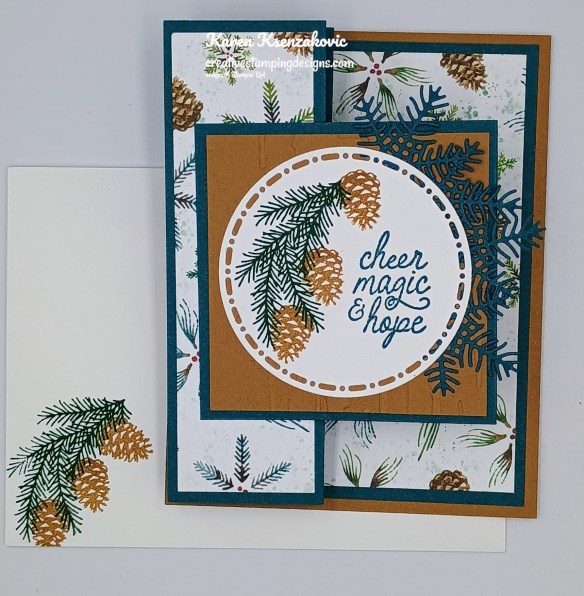
Today’s card was the last one we made at our quarterly meeting, and it was designed and presented by my team member Theresa Austin from MI. I did make a couple changes to mine from her original, but it’s very similar. Here’s my card for today.
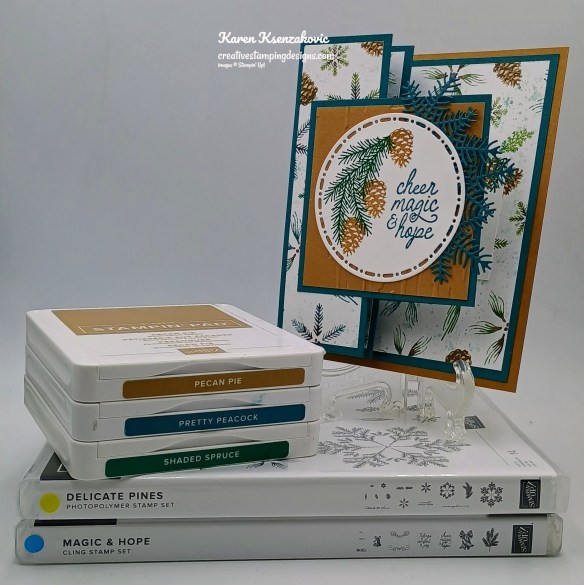
Stampin' Up! Magic & Hope Fun Fold 1 creativestampingdesigns.com

I used the Stampin’ Up! Delicate Pines Bundle along with the Stampin’ Up! Magic & Hope Cling Stamp Set, Elegant Pines Designer Series Paper and Birch Wood 3D Embossing Folder for my card.
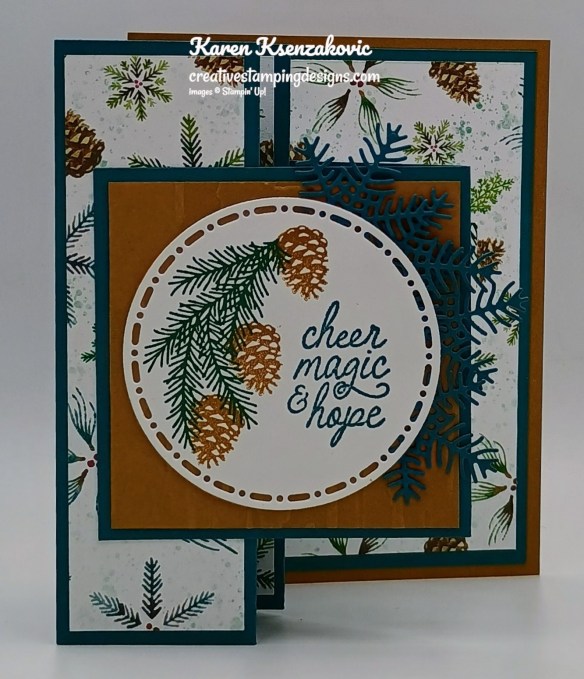
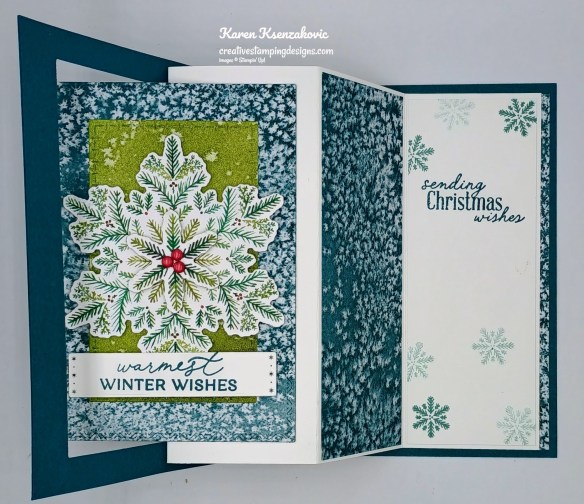
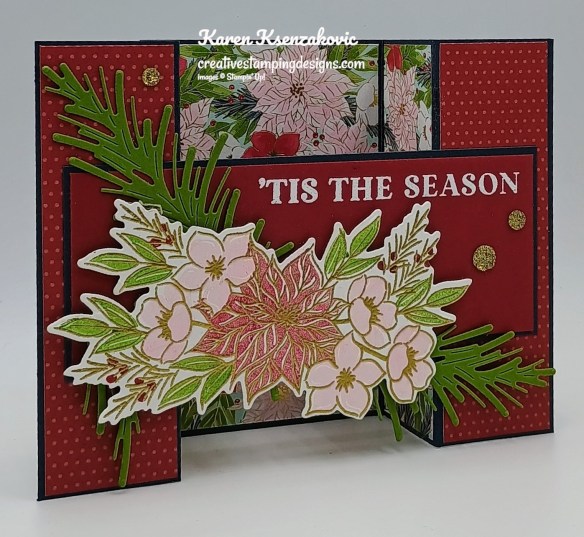
Stampin' Up! Magic & Hope Fun Fold 2 creativestampingdesigns.com

Adhere the scored & folded Pretty Peacock card base to the panel of Pecan Pie with Liquid glue. Adhere one of the panels of Elegant Pines DSP to the front of the card base with Stampin’ Seal. Adhere the other panel of Elegant Pines DSP to the 3rd section of the accordion fold with Stampin’ Seal.
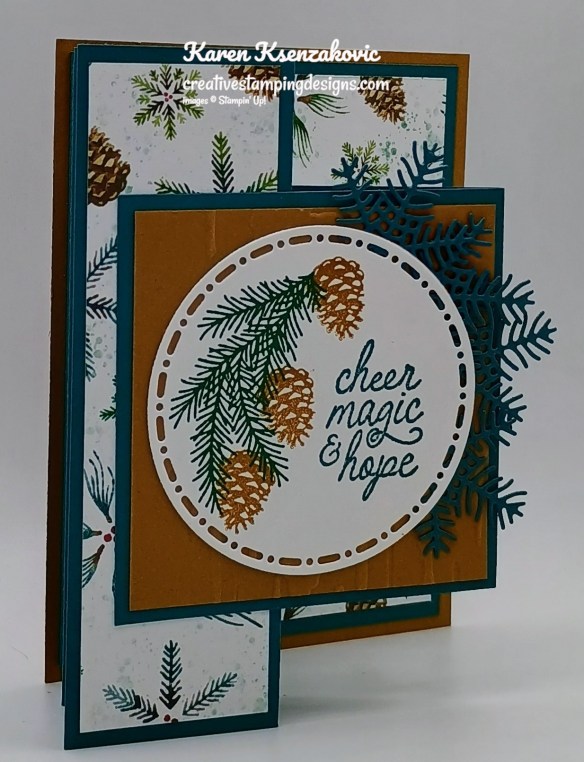
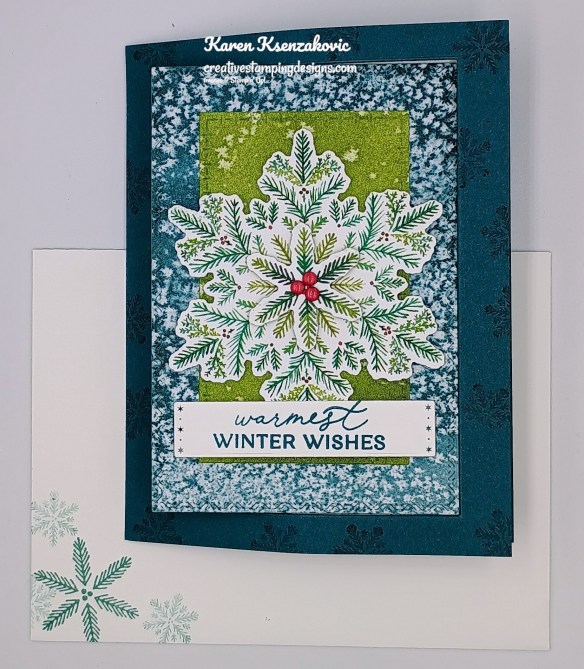
Stampin' Up! Magic & Hope Fun Fold 3 creativestampingdesigns.com

Cut the panel of Basic White using the Spotlight on Nature Dies. Stamp the sentiment from the Magic & Hope stamp set in Pretty Peacock Ink on the right side of the panel. Stamp the pine bough image from the Stampin’ Up! Delicate Pines Photopolymer Stamp Set in Shaded Spruce Ink on the left side of the die cut. Stamp the pinecones image from the Delicate Pines stamp set in Pecan Pie Ink on the boughs. Emboss the panel of Pecan Pie using the Birch Wood EF. Adhere the embossed panel to the front of the small Pretty Peacock card front.
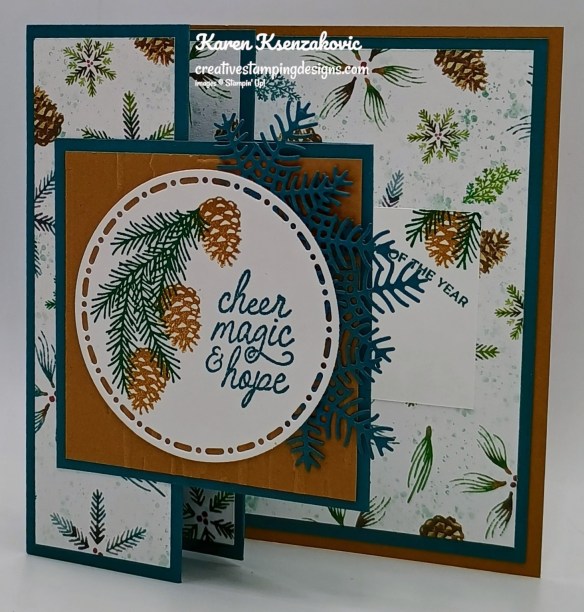
Stampin' Up! Magic & Hope Fun Fold 4 creativestampingdesigns.com

From the panel of Pretty Peacock cut 2 or 3 of the large pine boughs using the Delicate Pines Dies. Cut the boughs in half using snips. Adhere the sentiment to the front of the small card base with Stampin’ Dimensionals. Insert the pine boughs under the sentiment using Glue Dots.
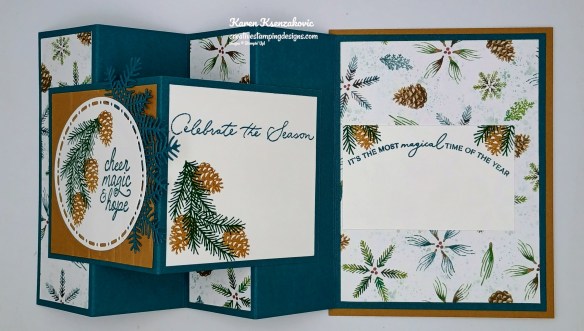
Stampin' Up! Magic & Hope Fun Fold 5 creativestampingdesigns.com

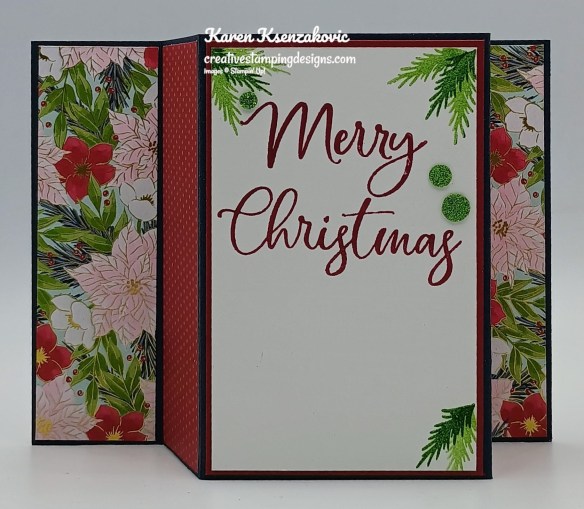
Stamp the sentiment from the Delicate Pines stamp set in pretty Peacock Ink on the panel of Basic White. Stamp the bough image from the Delicate Pines stamp set in Shaded Spruce Ink on the side of the panel. Stamp the pinecones image from the Delicate Pines stamp set in Pecan Pie Ink on the boughs. Adhere the Basic White panel to the back of the small card base with Stampin’ Seal. Adhere the small card base to the large card base with Tear & Tape by adhering the front first, closing the 2 card bases together and adhere the back. Adhere the panel of Elegant Pines DSP to the back of the Pretty Peacock card base with Stampin’ Seal. Curve the sentiments stamp from the Delicate Pines stamp set on the block and stamp it on the Basic White panel in Pretty Peacock Ink. Stamp the bough and pine images in the top corners of the panel. Adhere the Basic White panel to the back panel, making sure it is behind the small card base when closed.
Stampin' Up! Magic & Hope Fun Fold 6 creativestampingdesigns.com

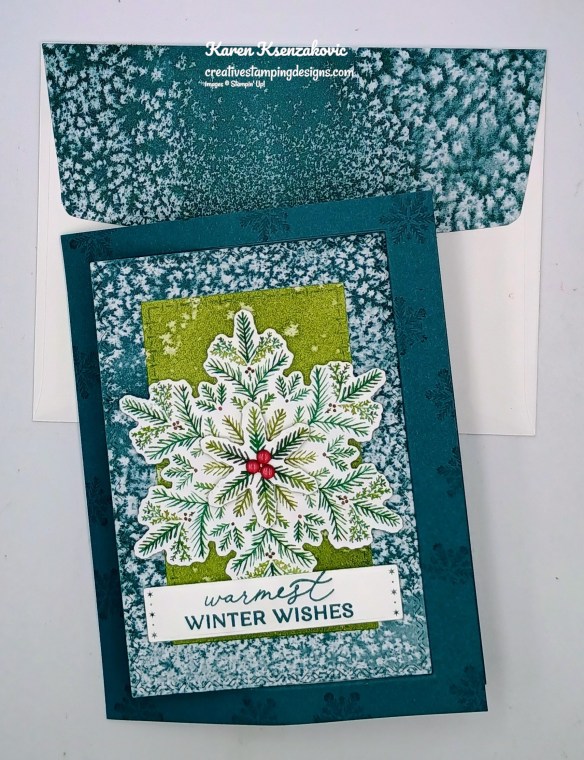
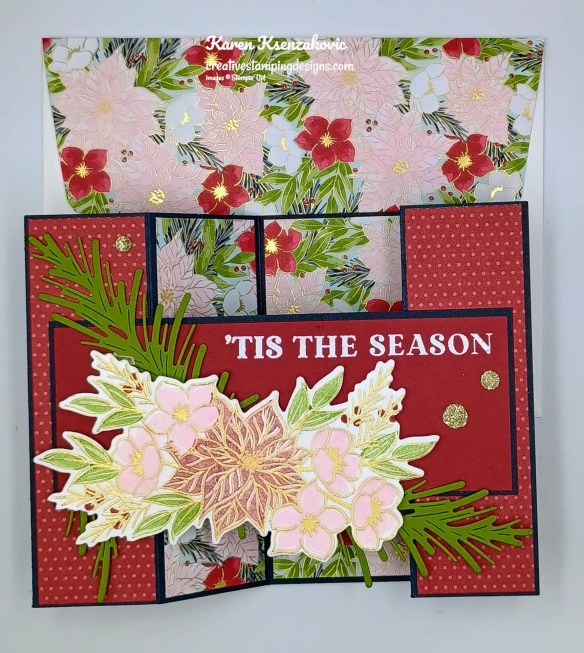
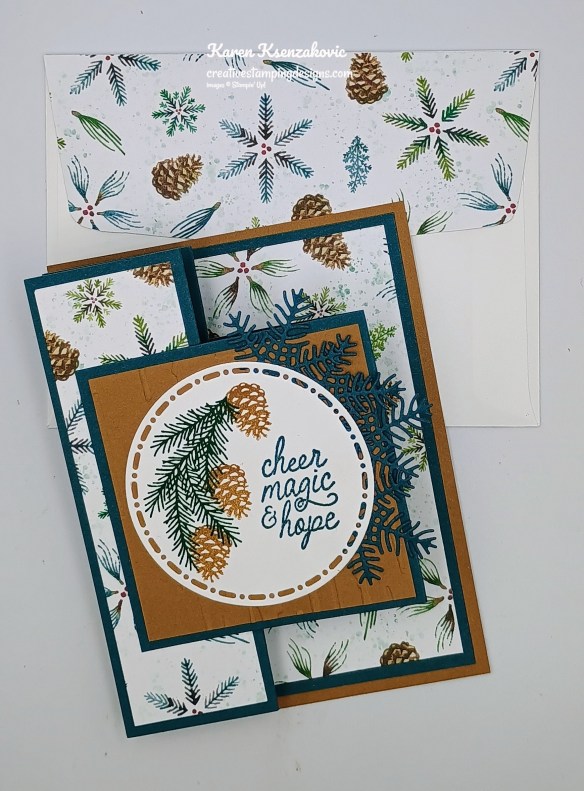
Decorate a Basic White Medium Envelope to finish the card. Stamp the pine bough image from the Delicate Pines stamp set in Shaded Spruce Ink on the envelope front and the pinecones image in Pecan Pie. Adhere a panel of Elegant Pines DSP to the envelope flap.
Stampin' Up! Magic & Hope Fun Fold 7 creativestampingdesigns.com

Thank you for stopping by my blog today. I hope you like the card and will give it a try. Happy Stamping!!

*********************************************************************************************************

Stampin’ Up! BEST JOINING SPECIAL EVER coming soon – October 1 – 31

Crafting is even more fun with community, and there’s never been a better time to join. Become a demonstrator and enjoy all the perks that come with that, like a 20–25% product discount, exclusive early access to the latest releases and catalogs, the opportunity to earn a modest supplemental income, the chance to attend incredible training and crafting events, and so much more! Have you ever thought about joining the Stampin’ Up! community? Are you into scrapbooking and have you seen all the new scrapbook products Stampin’ Up! has? Is your wish/want list pretty long and do you order often? Wouldn’t you love to get all these products at a discount? If you answer was yes to any or all of these questions, why not consider joining the Stampin’ Up! community between Octobr 1-31, and save on everything you buy? Are you new to stamping and don’t know where to start, but would like to join to save? Ask me for help, I’m here to help and assist you anyway that I can. OCTOBER is the best time ever to join!! The best part is you can put November Online Exclusive preorder items in the Starter Kit. Contact me and we can talk about signing you up. There’s never an obligation to sell, you can join to enjoy the discount for yourself.

From October 1 to 31, anyone who purchases the Starter Kit can choose between two amazing offers.  In addition to FREE shipping, FREE business supplies, and a FREE Paper Pumpkin kit, you can either get $125 worth of products for just $35 OR $189 worth of products for just $99!  
Promotion Period: October 1–31

Ordering Deadlines

  • Online: October 31, 2025, at 11:59 p.m. (MT)

*********************************************************************************************************

Now Available – 12 Days of Crafting Advent Calendar

Introducing the 12 Days of Crafting Advent Calendar, a brand-new calendar full of products you can craft with all year long!  Every day of this calendar contains never-before-seen dies, paper, embellishments, and even more items you won’t find in any of our catalogs or in the online store, so make sure to buy one before they’re all gone!

And did I mention that these make the perfect gifts for that friend in your life who loves to craft? After all, there’s nothing better than giving the gift of crafting!  Stampin’ Up! only has a limited number of calendars in store, so don’t wait—order yours beginning September 23!

Advent Calendar Details:

  • Item: 12 Days of Crafting Advent Calendar (167335)
  • Price: $99
  • Includes: Exclusive dies, paper, embellishments, and more
  • Ordering Begins: September 23, 2025
  • Available only while supplies last.

Here is a quick video from Stampin’ Up! giving you a few more details about the calendar:

Put a note on your calendar to get your 12 Days Of Crafting Advent Calendars beginning on September 23…and you’ll have your holiday shopping done early!

*********************************************************************************************************

If you need any stamping supplies, I’d love to be your Demonstrator. Just click HERE to go directly to my online store or drop me an email if you have any questions. 

*********************************************************************************************************

Card stock cuts for this project:

  • Basic White Cardstock 3″ x 3″ (sentiment), 3″ x 3″ (inner liner), 2″ x 3 1/4″(inner liner)
  • Pecan Pie Cardstock 3″ x 3″ (embossed panel), 4 1/4″ x 5 1/2″(back panel)
  • Pretty Peacock Cardstock 5 1/4″ x 11″(card base scored & folded at 12 3/4″, 3 1/2″, 5 1/4″ & 7″), 3 1/4″ x 6 1/2″(small card base scored & folded at 3 1/4″), 4 1/2″ x 4 1/2″(boughs)
  • Elegant Pines Designer Series Paper (2) – 1 1/2″ x 5″ (card front & inside panel), 4″ x 5 1/4″(back panel), 2 1/4″ x 6″ (envelope flap)

*********************************************************************************************************

Product List

Stampin’ Up! Festive Friends

Good Wednesday morning stamping friends. How is your week going? We’re halfway through and on our way to the weekend.

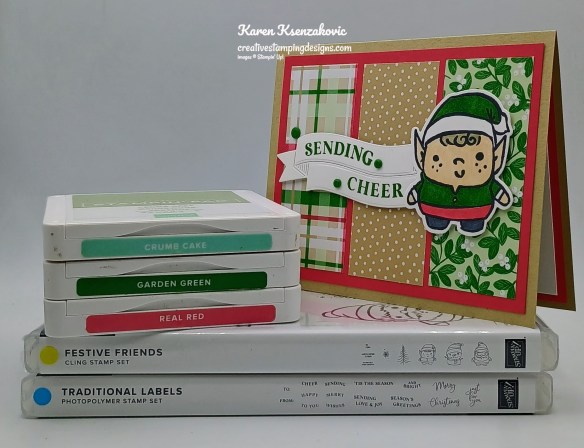
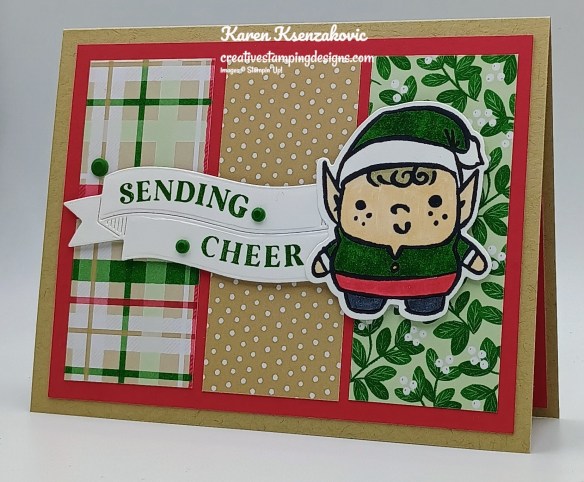
I have a fun Christmas card for you today that is really very easy. I am loving the new products from the September-December Mini Catalog and the September Online Exclusives. How about you, what’s your favorite?  If you’d like to see a quick video on how I made this card, Click Here to go to my Instagram Reels. Here’s my card for today.

Stampin' Up! Festive Friends Elf 1 creativestampingdesigns.com

I used the adorable Stampin’ Up! Festive Friends Bundle along with the Stampin’ Up! Traditional Labels Bundle and Christmas Tags & More Mix & Match 6 x 6 Specialty Designer Series Paper for my card today.

Stampin' Up! Festive Friends Elf 2 creativestampingdesigns.com

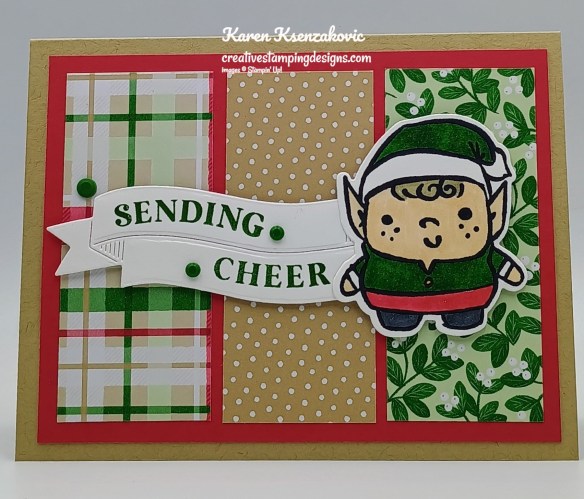
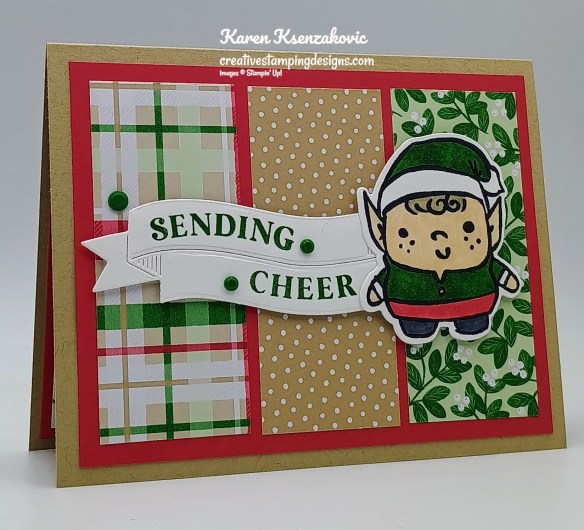
Adhere 3 panels of Christmas Tags & More DSP to a Real Red mat with Liquid Glue. Adhere the layered panel to a Crumb Cake card base with Stampin’ Seal.

Stampin' Up! Festive Friends Elf 3 creativestampingdesigns.com

Using the Traditional Labels Dies, cut the banner die from a panel of Basic White. Stamp the sentiments from the Stampin’ Up! Traditional Labels Photopolymer Stamp Set in Garden Green Ink. Adhere the sentiment to the card front with Stampin’ Dimensionals.

Stampin' Up! Festive Friends Elf 4 creativestampingdesigns.com

On a panel of Basic White stamp, the elf image from the Stampin’ Up! Festive Friends Cling Stamp Set in Tuxedo Black Ink. Color the image with Basic Black, Crumb Cake, Ivory, Granny Apple Green, Real Red and Shaded Spruce Stampin’ Blends Markers. To get the elves outfit Garden Green, first color it with Dark Shaded Spruce Stampin’ Blends Marker then go over it with Dark Granny Apple Green Stampin’ Blends Marker. I got this tip from a post the Patty Bennet from Patty Stamps posted with the missing colors Stampin’ Blends Markers. Cut the image using the Festive Friends Dies. Adhere the elf to the card front with Stampin’ Dimensionals. Add a few Dear Dots to the card front.

Stampin' Up! Festive Friends Elf 5 creativestampingdesigns.com

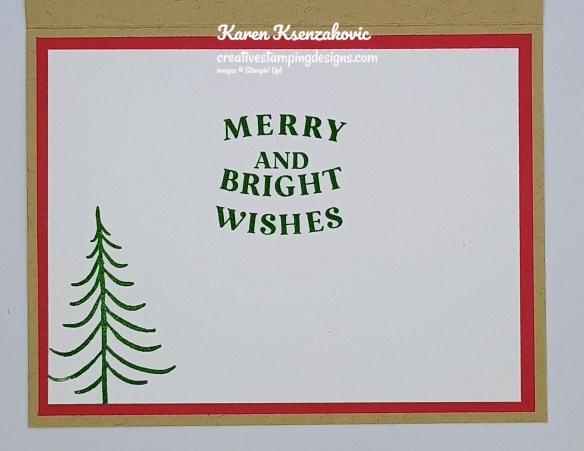
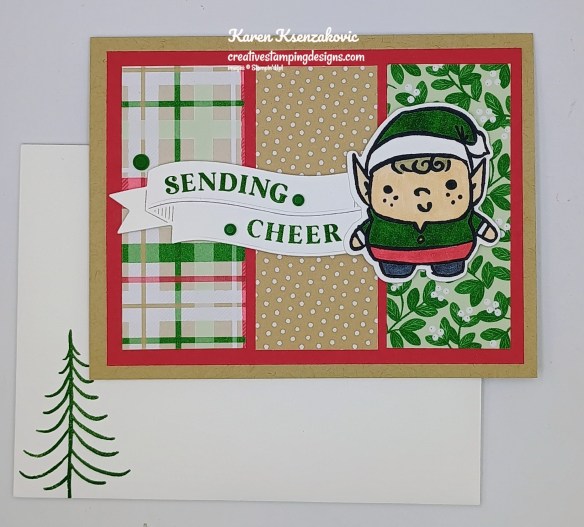
Stamp the sentiments from the Traditional Labels stamp set in garden Green Ink on a panel of Basic White. Stamp the tree image from the Festive Friends stamp set in Garden Green Ink on the bottom of the panel. Adhere the Basic White panel to a Real Red mat then to the inside of the Crumb Cake card base.

Stampin' Up! Festive Friends Elf 6 creativestampingdesigns.com

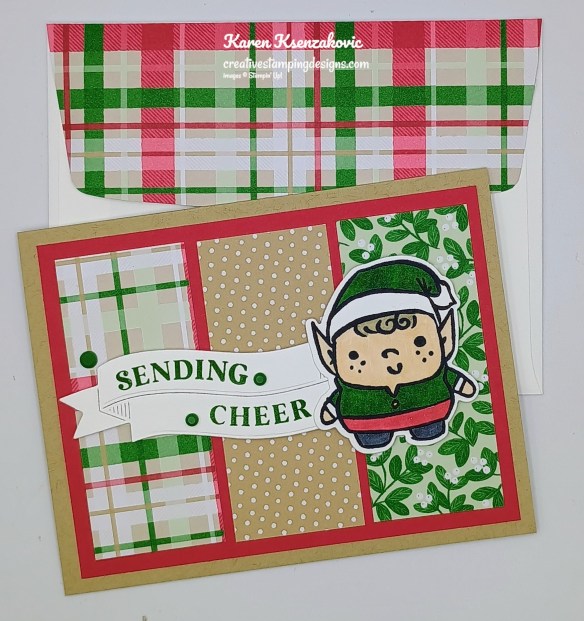
Decorate a Basic White Medium Envelope for finish your card. Stamp the tree image from the Festive Friends stamp set in Garden Green Ink on the envelope front. Adhere a panel of Christmas Tags & More DSP to the envelope flap.

Stampin' Up! Festive Friends Elf 7 creativestampingdesigns.com

Thank you for stopping by my blog today. I hope you like the card and will give it a try. Happy Stamping!!

*********************************************************************************************************

Stampin’ Up! BEST JOINING SPECIAL EVER coming soon – October 1 – 31

Crafting is even more fun with community, and there’s never been a better time to join. Become a demonstrator and enjoy all the perks that come with that, like a 20–25% product discount, exclusive early access to the latest releases and catalogs, the opportunity to earn a modest supplemental income, the chance to attend incredible training and crafting events, and so much more! Have you thought about joining Stampin’ Up!, but just weren’t sure? OCTOBER is the best time ever to join!! The best part is you can put November Online Exclusive preorder items in the Starter Kit. Contact me and we can talk about signing you up. There’s never an obligation to sell, you can join to enjoy the discount for yourself.

From October 1 to 31, anyone who purchases the Starter Kit can choose between two amazing offers.  In addition to FREE shipping, FREE business supplies, and a FREE Paper Pumpkin kit, you can either get $125 worth of products for just $35 OR $189 worth of products for just $99!  
Promotion Period: October 1–31

Ordering Deadlines

  • Online: October 31, 2025, at 11:59 p.m. (MT)

*********************************************************************************************************

Now Available – 12 Days of Crafting Advent Calendar
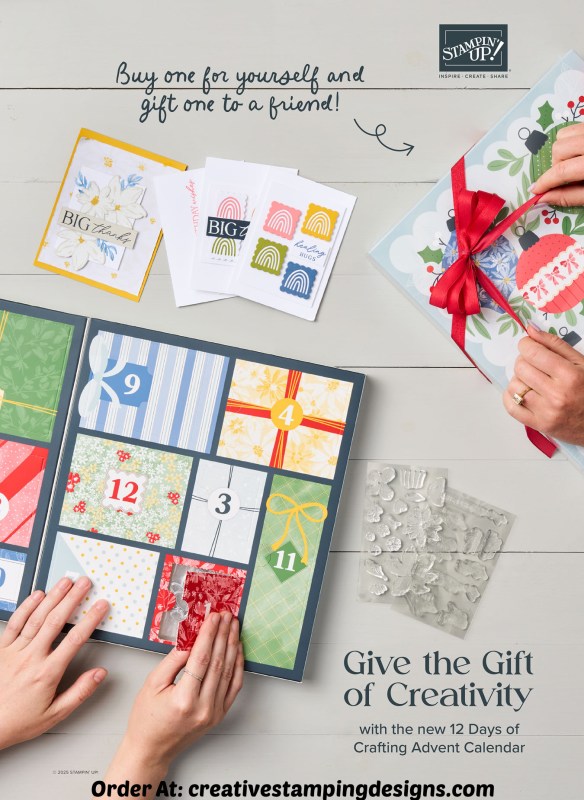
Introducing the 12 Days of Crafting Advent Calendar, a brand-new calendar full of products you can craft with all year long!  Every day of this calendar contains never-before-seen dies, paper, embellishments, and even more items you won’t find in any of our catalogs or in the online store, so make sure to buy one before they’re all gone!

And did I mention that these make the perfect gifts for that friend in your life who loves to craft? After all, there’s nothing better than giving the gift of crafting!  Stampin’ Up! only has a limited number of calendars in store, so don’t wait—order yours beginning September 23!

Advent Calendar Details:

  • Item: 12 Days of Crafting Advent Calendar (167335)
  • Price: $99
  • Includes: Exclusive dies, paper, embellishments, and more
  • Ordering Begins: September 23, 2025
  • Available only while supplies last.

Here is a quick video from Stampin’ Up! giving you a few more details about the calendar:

Put a note on your calendar to get your 12 Days Of Crafting Advent Calendars beginning on September 23…and you’ll have your holiday shopping done early!

*********************************************************************************************************

If you need any stamping supplies, I’d love to be your Demonstrator. Just click HERE to go directly to my online store or drop me an email if you have any questions. 

*********************************************************************************************************

Card stock cuts for this project:

  • Basic White Cardstock 1 1/2″ x 5″(sentiment), 2 1/2″ x 3″(artwork), 3 3/4″ x 5″(inner liner)
  • Crumb Cake Cardstock 5 1/2″ x 8 1/2″(card base scored & folded at 4 1/4″)
  • Real Red Cardstock 3 7/8″ x 5 1/8″(card front mat), 4″ x 5 1/4″(inner liner mat)
  • Christmas Tags & More Mix & Match 6 x 6 Specialty Designer Series Paper (3) – 1 1/2″ x 3 1/2″(card front panels), 2 1/4″ x 6″(envelope flap)

*********************************************************************************************************

Product List

Stampin’ Up! Delicate Pines for Fun Fold Friday

Good Friday morning stamping friends and welcome to my fun fold Friday. I hope you all had a great week and are looking forward to the weekend ahead.

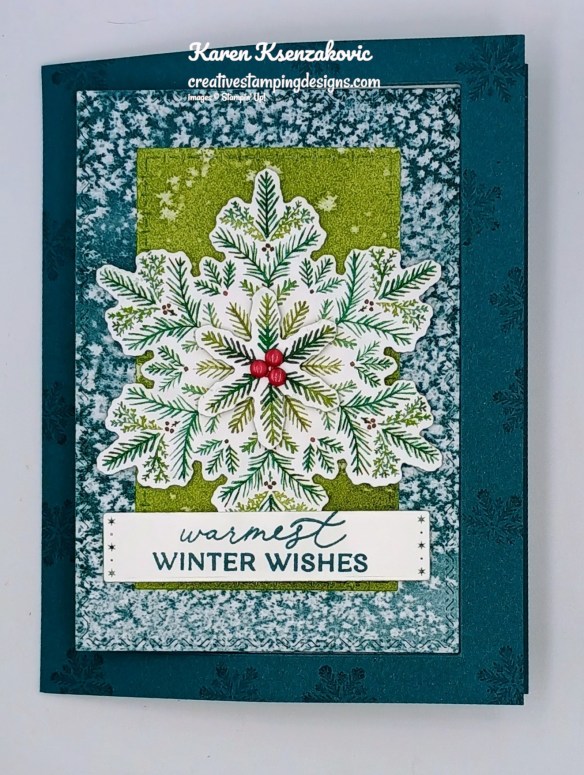
Today’s card is one that we made at our quarterly in person team meeting on Sunday. This beauty was designed by one of my team members Terry Lynn Bright. Here’s my card for today.

Stampin' Up! Delicate Pines Interlocking Z Fold 1 creativestampingdesigns.com

I used the Stampin’ Up! Delicate Pines Bundle along with the Elegant Pines Designer Series Paper, Textured Notes Dies and Stampin’ Up! Pine Tree Trimmings Photopolymer Stamp Set for my card today.

Stampin' Up! Delicate Pines Interlocking Z Fold 2 creativestampingdesigns.com

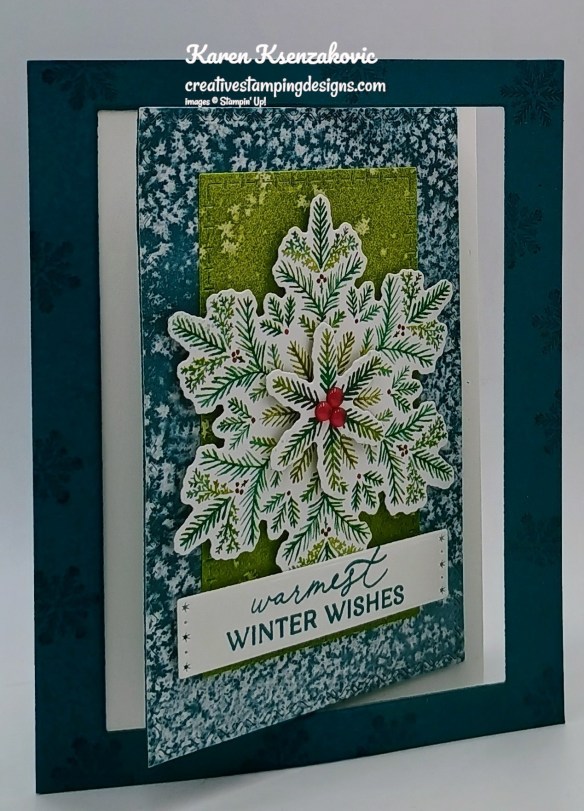
Randomly stamp the small snowflake image from the Stampin’ Up! Delicate Pines Photopolymer Stamp Set in Pretty Peacock Ink around the edges of the panel of Pretty Peacock. Adhere panel of Pretty Peacock to card front of the Pretty Peacock card base w/ adhesive on outer edges only. Die cut using Textured Notes Dies in center of card front, remove both panels. Die cut a panel of Elegant Pines DSP using the same Textured Notes Dies. Adhere the die cut DSP to one of the die cut panels of Pretty Peacock with Stampin’ Seal.

Stampin' Up! Delicate Pines Interlocking Z Fold 3 creativestampingdesigns.com

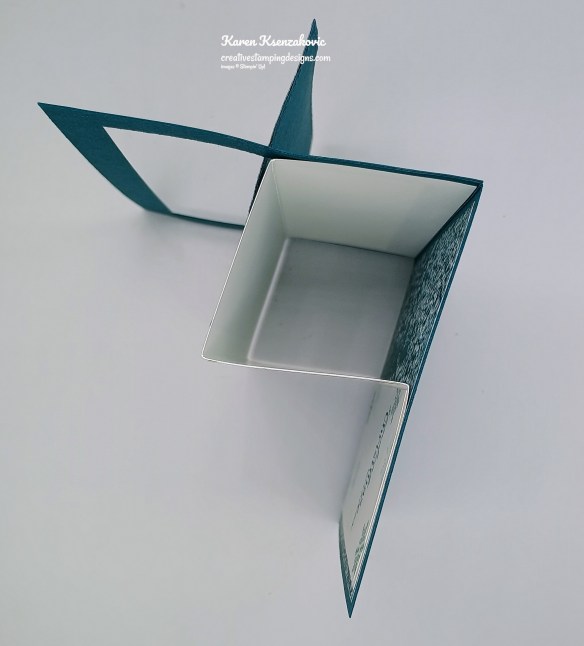
Fold the Basic White panel that has been scored. Fold in mountain, mountain, valley folds. Adhere the panel of Elegant Pines DSP to the back of the inside of the Pretty Peacock card base. Adhere the Basic white panel first to the inside front of the Pretty Peacock card base being sure to put a small amount of adhesive just along the outside edges of the first folded section. Adhere the back section of the Basic White panel to the back inside of the card base, opening the card base and laying the panel flat.

Stampin' Up! Delicate Pines Interlocking Z Fold 4 creativestampingdesigns.com

Close the card base and adhere the layered DSP panel to the 2nd section of the Basic White panel, being sure to only add adhesive to only the back left of the layered panel. Center this panel inside the front of the card base. Using a smaller Textured Notes Dies, cut a panel of Elegant Pines DSP. Adhere the die cut panel to the center of the card front with Stampin’ Seal.

Stampin' Up! Delicate Pines Interlocking Z Fold 5 creativestampingdesigns.com

Using the Delicate Pines Dies, cut a large and medium snowflake from a panel of Elegant Pines DSP. Adhere the snowflakes together with a Stampin’ Dimensional. Adhere the layered snowflake to the center of the card front, making sure the snowflake is not in the way of opening the card. Stamp the sentiment from the Delicate Pines stamp set in Pretty Peacock Ink on a panel of Basic White. Cut the sentiment out using the Snowflake Kisses Dies. Adhere the sentiment to the card front with Stampin’ Dimensionals. Add a Cherry Cobbler & Pearl Adhesive-Backed Berries to the center of the snowflake.

Stampin' Up! Delicate Pines Interlocking Z Fold 6 creativestampingdesigns.com

Adhere the panel of Elegant Pines DSP to the 3rd panel of the Basic White panel on the inside of the card base. On a panel of Basic White, stamp the sentiment from the Pine Tree Trimmings stamp set in Pretty Peacock Ink. Stamp the small snowflake image from the Delicate Pines stamp set in Lost Lagoon Ink on the Basic White panel. Adhere the Basic White panel to the 4th section of the Basic White panel on the inside of the card base.

Stampin' Up! Delicate Pines Interlocking Z Fold 7 creativestampingdesigns.com

Decorate a Basic White Medium Envelope to finish the card. Stamp the medium & small snowflakes from the Delicate Pines stamp set on the envelope front in Pretty Peacock and Lost Lagoon Inks. Adhere a panel of Elegant Pines DSP to the envelope flap.

Stampin' Up! Delicate Pines Interlocking Z Fold 8 creativestampingdesigns.com

Thank you for stopping by my blog today. I hope you like the card and will give it a try. Happy Stamping!!

*********************************************************************************************************

If you need any stamping supplies, I’d love to be your Demonstrator. Just click HERE to go directly to my online store or drop me an email if you have any questions. 

*********************************************************************************************************

Card stock cuts for this project:

  • Basic White Cardstock 5 1/4″ x 8″(mechanism scored & folded at 2″, 4″ & 6″), 1 7/8″ x 5 1/8″(inner liner), 1″ x 3 1/3″ (sentiment)
  • Pretty Peacock Cardstock 5 1/2″ x 8 1/2″(card base scored & folded at 4 1/4″, 4 1/4″ x 5 1/2″(card front panel)
  • Elegant Pines Designer Series Paper 3 1/2″ x 5″(interlocking panel), 4″ x 5 1/4″(back panel), 1 7/8″ x 5 1/8″(inside panel), 2 1/2″ x 4″(card front panel), 2 1/4″ x 6″(envelope flap)

*********************************************************************************************************

Product List

Stampin’ Up! Delicate Pines in Night of Navy

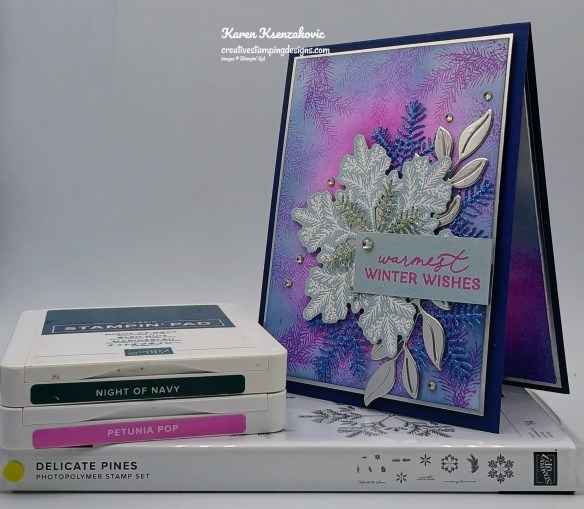
Good Tuesday morning stamping friends. How is everyone doing today? Did you ever have one of those days that start out great and slowly everything goes wrong? Sunday, we had out in person quarterly team meeting, and it was wonderful. We all got to stamp some beautiful cards together. I came home to finish up some finishing touches on the cards. I took all my pictures, like always, and emailed them to myself so they would be on my laptop. Well, the pictures wouldn’t send for some reason. I figured I would type my blog without them and add them in the morning if they went through. When I went to type my blog, I couldn’t get my computer to work either. By 10pm I gave up and said leave it for another day since I was so tired of fighting with it. Yesterday, after I got home from work, everything finally started to work and I didn’t do anything different. Sometimes me and technology just don’t get along.

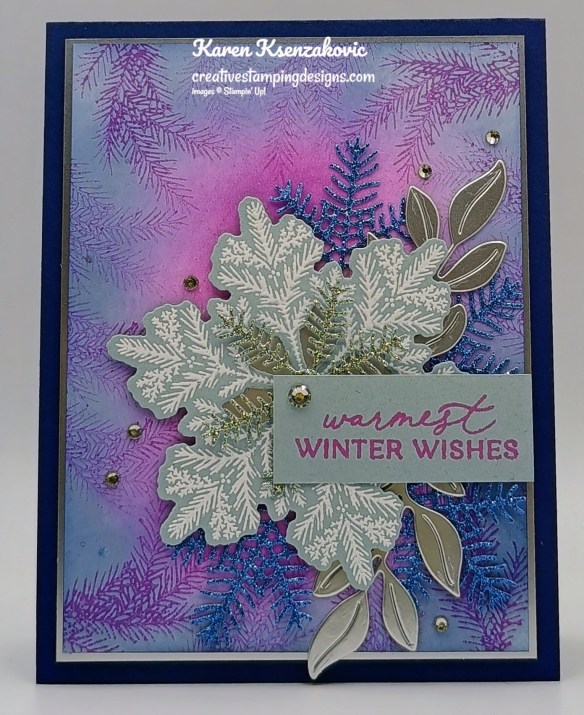
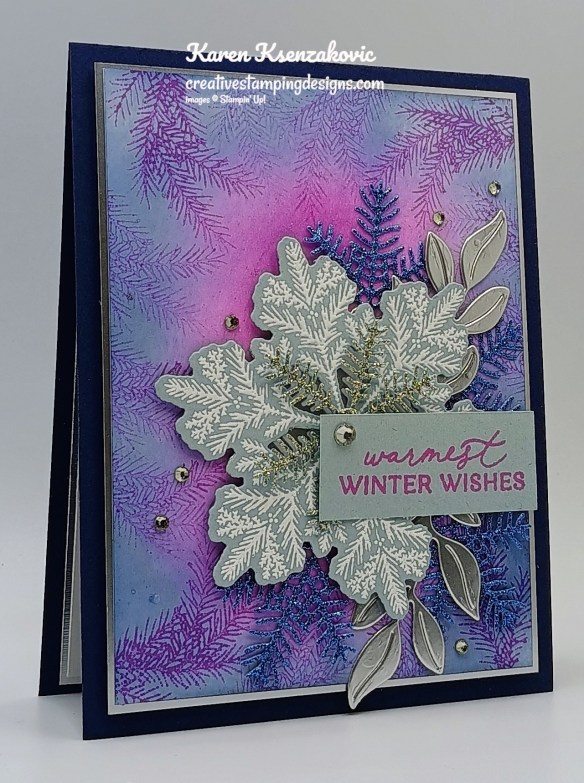
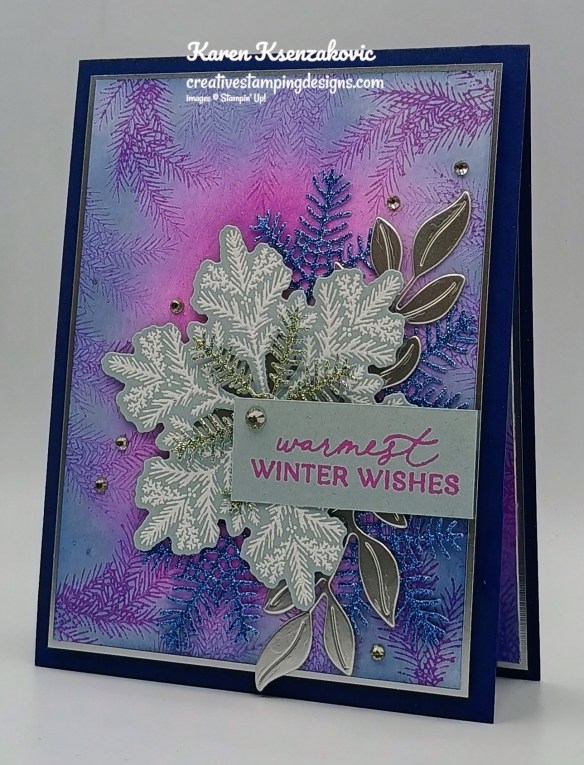
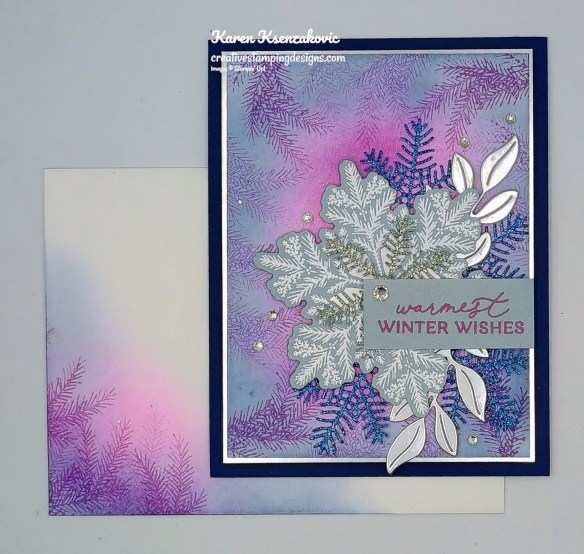
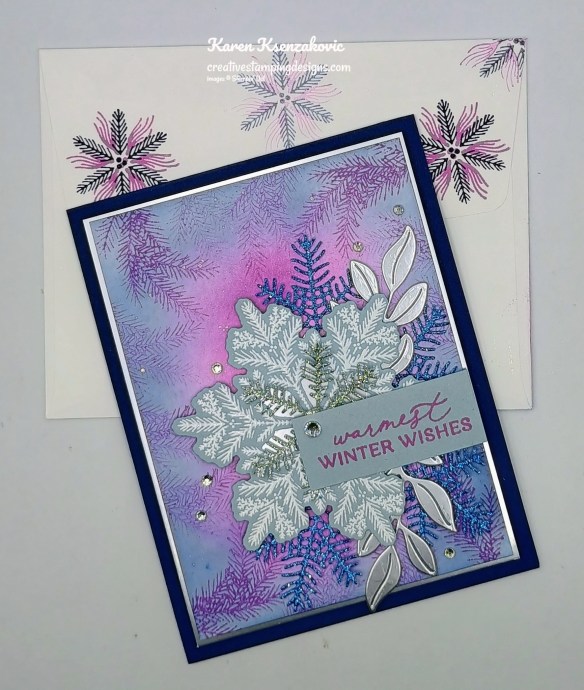
Today’s card, which was going to be yesterday’s card, was one that we made at out meeting on Sunday. This stunning card was designed by Mary Deatherage and was a lot easier to make than it looks. Here’s my card for today.

Stampin' Up! Delicate Pines In Night of Navy 1 creativestampingdesigns.com

I used the Stampin’ Up! Delicate Pines Bundle for my card today.

Stampin' Up! Delicate Pines In Night of Navy 2 creativestampingdesigns.com

Using Blending Brushes, on a panel of Basic White add Petunia Pop Ink to the center of the panel. Once you have the color you like add Night of Navy Ink around the outside of the Petunia Pop area. Stamp the bough image from the Stampin’ Up! Delicate Pines Photopolymer Stamp Set in Petunia Pop Ink, stamping off once on scrap paper, around the edges of the panel. Add Clear Wink of Stella by tapping the brush on your Bone Folder.

Stampin' Up! Delicate Pines In Night of Navy 3 creativestampingdesigns.com

Stamp the large snowflake image from the Delicate Pines stamp set in Versamark Ink on the panel of Cloud Cover. Sprinkle the image with White Embossing Powder and set is using the Heat Tool. Using the Delicate Pines Dies cut the large snowflake stamped image, the large bough 2 times from a panel of Blue Peaceful Gardens Glimmer Paper, the small bough 3 times from a panel of Silver Peaceful Garden Glimmer Paper and the leaf die 2 times from the center of the Silver Foil panel. Snip the large Blue Glimmer Paper bough die cuts in half and adhere them to the blended panel with Glue Dots. Adhere the 2 Silver Foil leaf die cuts with Glue Dots to the panel. Adhere the snowflake to the top of the die cuts with Stampin’ Dimensionals.

Stampin' Up! Delicate Pines In Night of Navy 4 creativestampingdesigns.com

Adhere the 3 small Silver Glimmer Paper boughs together using Glue Dots. Adhere the silver Glimmer Paper snowflake you created to the center of the stamped snowflake using a Glue Dot. On the panel of Cloud Cover stamp the sentiment from the Delicate Pines stamp set in Petunia Pop Ink. Adhere the sentiment to the card front with Stampin’ Dimensionals and Glue Dots. Add Rhinestones Basic Jewels to the card front.

Stampin' Up! Delicate Pines In Night of Navy 5 creativestampingdesigns.com

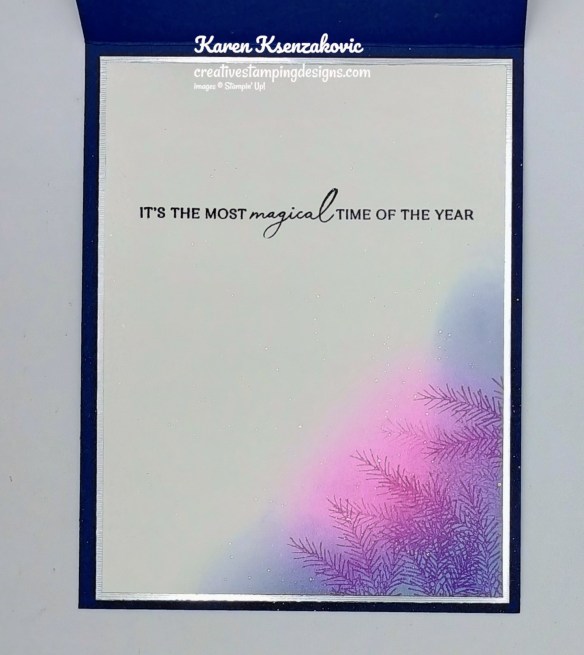
Stamp the sentiment from the Delicate Pines stamp set in Night of Navy Ink on a panel of Basic White. Using the Blending Brushes, add Petunia Pop and Night of Navy Inks on the bottom of the panel. Stamp the bough image from the Delicate Pines stamp set in Petunia Pop Ink, stamping off once on scrap paper, over the blended area. Adhere the Basic White panel to a Silver Foil mat then to the inside of the Night of Navy card base.

Stampin' Up! Delicate Pines In Night of Navy 6 creativestampingdesigns.com

Decorate a Basic White Medium Envelope to finish your card. Using the Blending Brushes add Petunia Pop and Night of Navy Ink on the front corner of the envelope. Stamp the bough image from the Delicate Pines stamp set in Petunia Pop Ink, stamping off once on scrap paper, over the blended area. Stamp the snowflake images from the Delicate Pines stamp set in Night of Navy and Petunia Pop Inks on the envelope flap.

Stampin' Up! Delicate Pines In Night of Navy 7 creativestampingdesigns.com

Thank you for stopping by my blog today. I hope you like the card and will give it a try. Happy Stamping!!

*********************************************************************************************************

If you need any stamping supplies, I’d love to be your Demonstrator. Just click HERE to go directly to my online store or drop me an email if you have any questions. 

*********************************************************************************************************

Card stock cuts for this project:

  • Basic White Cardstock (2) – 3 3/4″ x 5″(card front & inner liner)
  • Cloud Cover Cardstock 4 1/2″ x 4 1/2″(die cut), 7/8″ x 2 1/8″(sentiment)
  • Night of Navy Cardstock 4 1/4″ x 11″(card base scored & folded at 5 1/2″)
  • Peaceful Garden Glimmer Paper 4 1/2″ x 4 1/2″(blue for large pine boughs), 3 1/2″ x 3 1/12″(silver for small pine boughs)
  • Silver Foil Paper (2) – 3 8/8″ x 5 1/8″(card front & inner liner mats)

*********************************************************************************************************

Product List

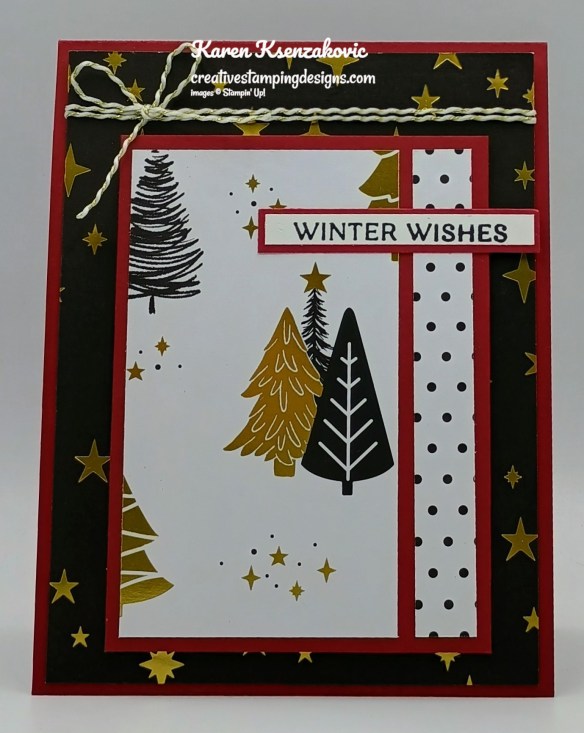
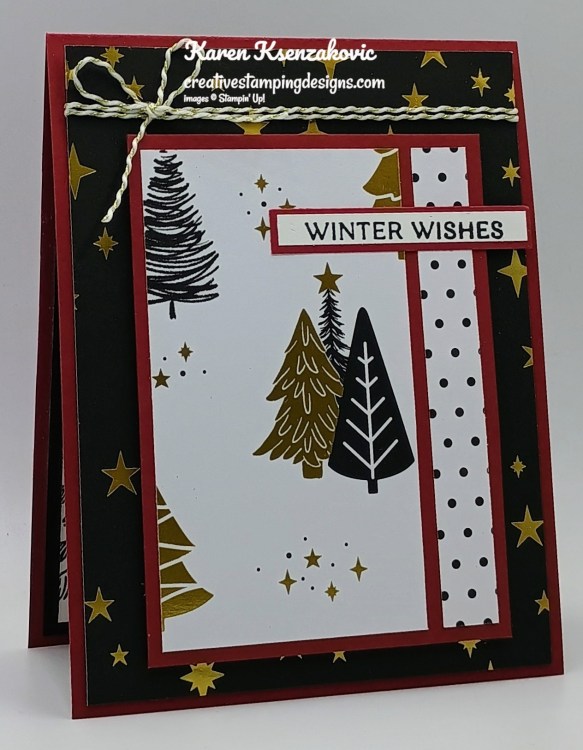
Stampin’ Up! Delicate Pines Modern Christmas

Good Sunday morning stamping friends. I hope your weekend is going well. I’ll be heading to our quarterly in person meeting today to do some stamping with friends. I’m looking forward to it since we’ll be playing with a new bundle from the Online Exclusives.

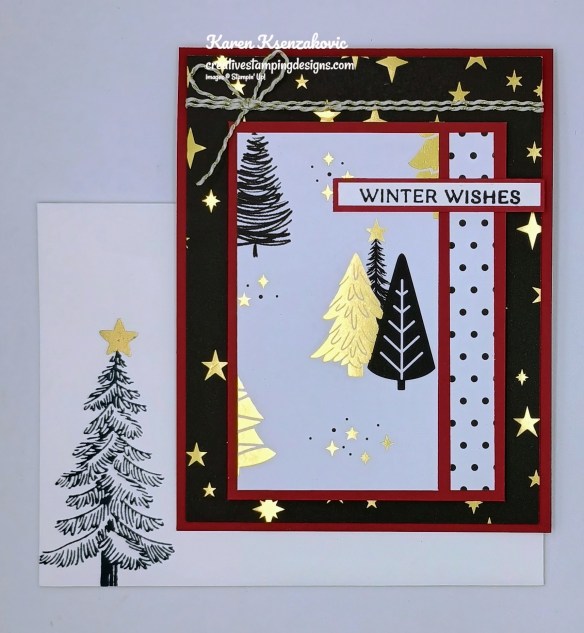
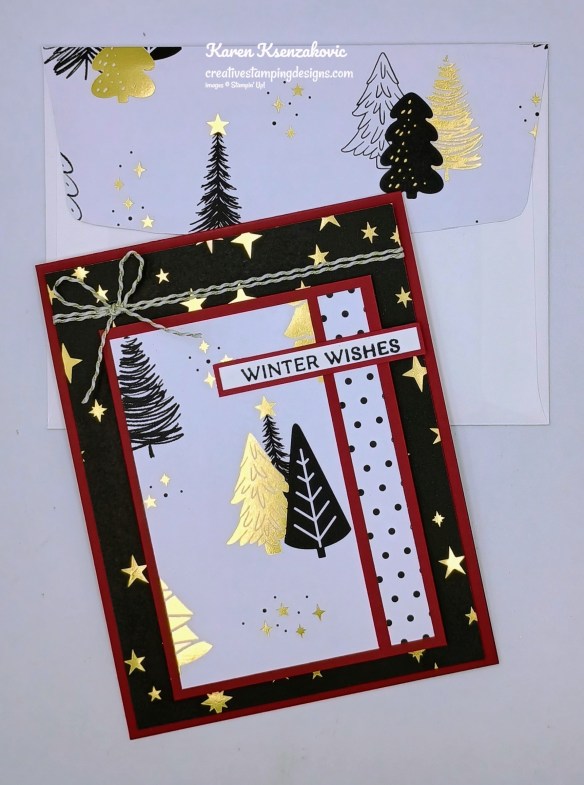
My card today mainly features one of the new Online Exclusive DSP’s. If you’d like to see a quick video of how I made this card, Click Here to go to my Instagram Reels. Here’s my card for today.

Stampin' Up! Delicate Pines Modern Christmas 1 creativestampingdesigns.com

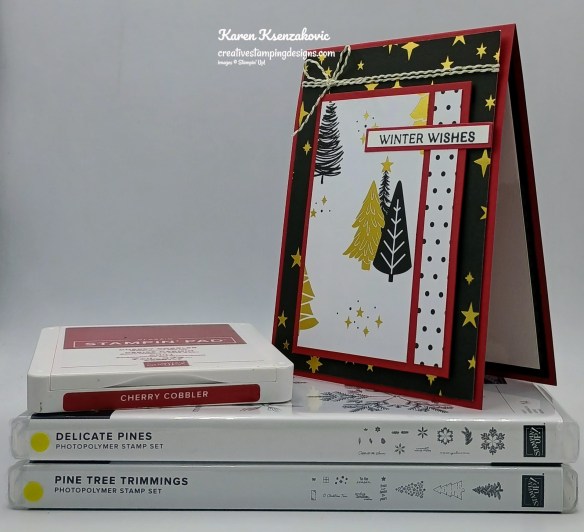
I used the Stampin’ Up! Delicate Pines Photopolymer Stamp Set along with the Modern Christmas Specialty Designer Series Paper and Stampin’ Up! Pine Tree trimmings Photopolymer Stamp Set for my card today.

Stampin' Up! Delicate Pines Modern Christmas 2 creativestampingdesigns.com

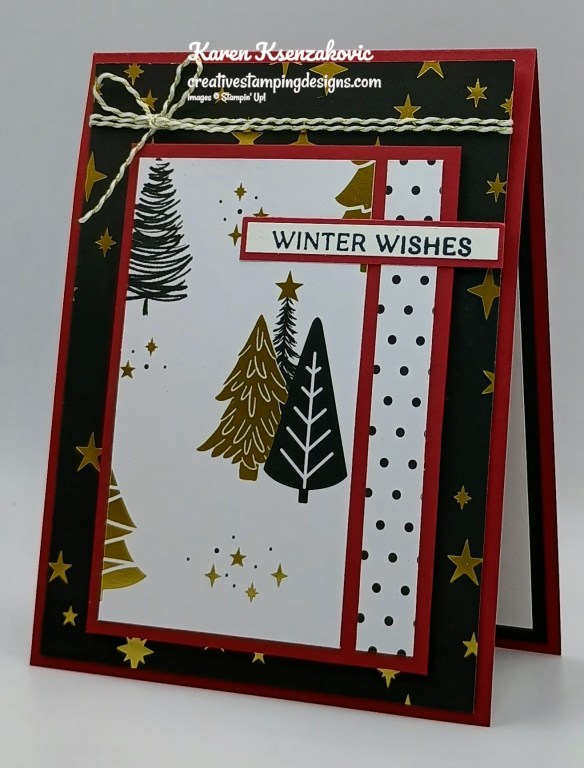
Wrap a piece of the White & Gold Baker’s Twine around the top of a Modern Christmas DSP card front and tie a bow. Adhere the DSP to a Cherry Cobbler card base with Liquid Glue.

Stampin' Up! Delicate Pines Modern Christmas 3 creativestampingdesigns.com

Adhere the 2 panels of Modern Christmas DSP to a Cherry Cobbler mat, leaving equal border around both pieces. Adhere the layered panel to the card front with Stampin’ Dimensionals.

Stampin' Up! Delicate Pines Modern Christmas 4 creativestampingdesigns.com

On a strip of Basic White, stamp the sentiment from the Delicate Pines stamp set in Tuxedo Black Ink. Adhere the sentiment to a Cherry Cobbler mat then to the card front with Stampin’ Dimensionals.

Stampin' Up! Delicate Pines Modern Christmas 5 creativestampingdesigns.com

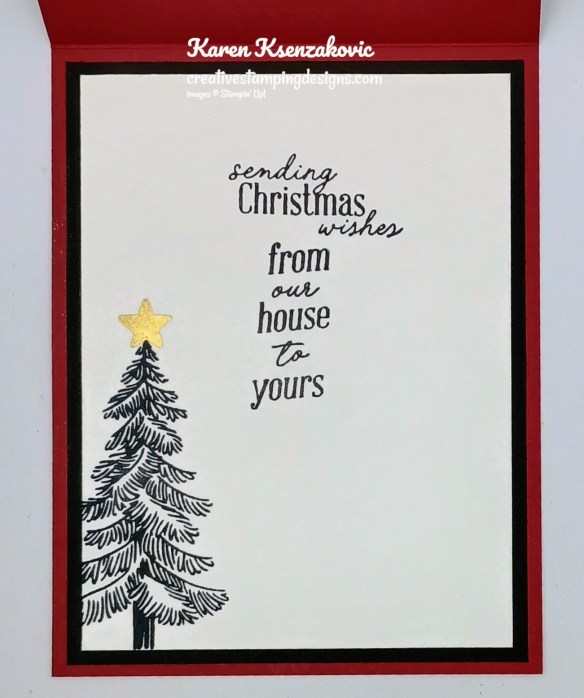
Stamp the sentiments from the Pine Tree Trimmings stamp set in Tuxedo Black Ink on a panel of Basic White. Stamp the tree image from the Pine Tree Trimmings stamp set in Tuxedo Black Ink on the panel. Stamp the star image from the Pine Tree Trimmings stamp set in Versamark Ink on top of the tree. Sprinkle the image with Gold Embossing Powder and set it using the Heat Tool. Adhere the Basic White panel to a Basic Black mat then to the inside of the Cherry Cobbler card base.

Stampin' Up! Delicate Pines Modern Christmas 6 creativestampingdesigns.com

Decorate a Basic White Medium Envelope to finish your card. Stamp the tree image from the Pine Tree Trimmings stamp set in Tuxedo Black Ink on the envelope front. Stamp the star image from the Pine Tree Trimmings stamp set in Versamark Ink on top of the tree. Sprinkle the image with Gold Embossing Powder and set it using the Heat Tool. Adhere a panel of Modern Christmas DSP to the envelope flap.

Stampin' Up! Delicate Pines Modern Christmas 7 creativestampingdesigns.com

Thank you for stopping by my blog today. I hope you like the card and will give it a try. Happy Stamping!!

*********************************************************************************************************

If you need any stamping supplies, I’d love to be your Demonstrator. Just click HERE to go directly to my online store or drop me an email if you have any questions. 

*********************************************************************************************************

TODAY is the LAST DAY to Register for our September Online Class

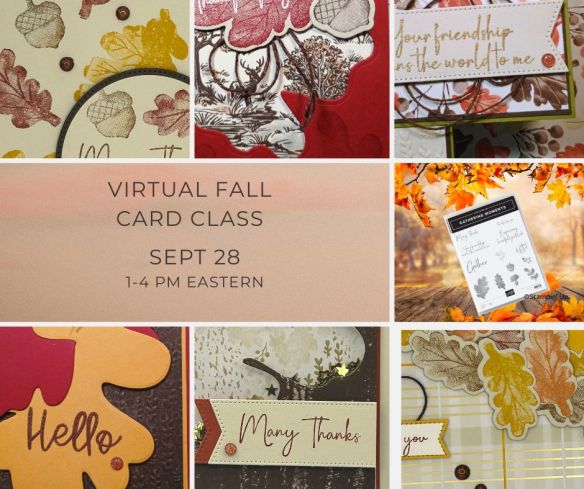
Tara Carpenter and I are teaming up to offer an online Fall card class using Stampin’ Up! Online Exclusive Gathering Together Suite.  We will be creating 6 different cards during the class including 2 Beginner Stamper cards, 2 Casual Stamper Cards and 2 Advanced Stamper Cards. Sign Up now by Clicking Here to reserve your spot.

The class fee includes:

  • Stampin’ Up! Cajun Craze & Gold Dots (full pack)
  • Stampin’ Up! Early Espresso & Old Olive Linen Thread Pack (full pack)
  • Pre-cut card kits to complete each card
  • Zoom class with complete instructions to complete each card
  • PDF with detailed directions

During sign up you will have the option to add additional items to your order that you can take advantage of at no additional shipping cost.  These items are optional, however if you want to recreate the cards you will need them. If you’ve attended a previous class, you were given a discount code, there is a spot to put that code on the form and the discount only applies to the products that you check off that you wish to purchase, not the class.

The class will be held Sunday September 28th from 1 to 5 pm Eastern Time via Zoom.  This allows anyone in the United States to participate live!  Can’t join us live… no worries, we will record the session so it can be replayed at any time.

I will email written directions that will include directions, cardstock cuts as well as photos to help you create each card.

I am not including the bundle or stamp set in the price of the class.  You can purchase the bundle through me at an additional 10% discount of the Online Exclusive price (see below).

Class Cost $35 + $10 (Priority Shipping) 

Additional purchased items will be included in the above shipping price.  I will invoice you through PayPal and invoices must be paid by September 14th to insure I can get the products delivered, packaged up and out to you with enough time.  

Deadline: Sunday September 14th (this is so I have time to order all the products being used)

Click Here to register for the class now!! Let me know if you have any questions.

********************************************************************************************************

Cozy Christmas October Paper Pumpkin
Subscribe September 11 – October 10

Create heartfelt Christmas cards with classic charm and flocked accents.
• Makes 9 cards: 3 each of 3 designs with 9 coordinating envelopes
• Precut paper pieces with soft, stitched-look flocking
• Shiny red sequin embellishments
• Coordinating colors: Basic Beige, Cherry Cobbler, Garden Green, Pecan Pie
(Classic Stampin’ Spot), Real Red
Coordinating box delivers even more holiday magic!

Subscribe to the October Paper Pumpkin Kit between 11 September and 10 October by clicking here!

Don’t miss the coordinating
Abundant Joy Dies Add-On!

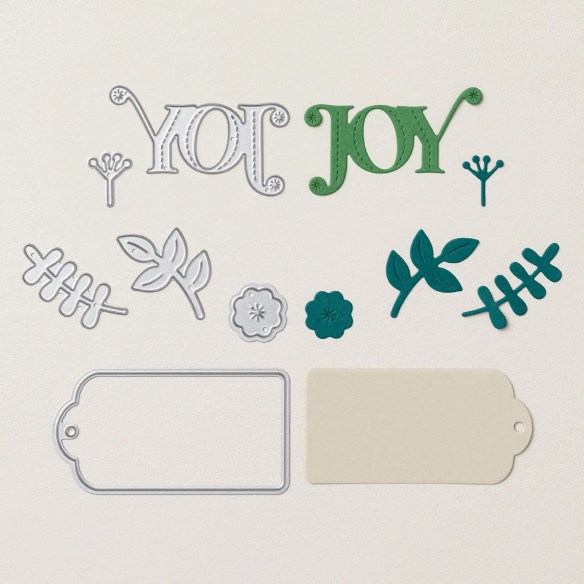
Make the most of your Paper Pumpkin kits with the Abundant Joy Dies add-on! Quickly and cleanly cut out a gift tag, a flower, sprigs of greenery, or the word Joy to elevate your crafting projects. These additional dies are designed to work with THREE Paper Pumpkin Kits: the Cozy Christmas Paper Pumpkin Kit, the Wrapped in Cheer Paper Pumpkin Kit, and the Watercolor in Bloom Paper Pumpkin Kit. Pair these dies with other Stampin’ Up! products for even more creative options!

DETAILS
– 6 dies
– Largest die: 2-7/8″ x 1-1/2″

#167855 $12.00

*********************************************************************************************************

Card stock cuts for this project:

  • Basic Black Cardstock 4″ x 5 1/4″(inner liner mat)
  • Basic White Cardstock 1/4″ x 2 1/4″(sentiment), 3 3/4″ x 5″(inner liner)
  • Cherry Cobbler Cardstock 4 1/4″ x 11″(card base scored & folded at 5 1/2″), 3 1/8″ x 4 1/4″(card front panel mat), 3/8″ x 2 3/8″(sentiment mat)
  • Modern Christmas Specialty Designer Series Paper 4″ x 5 1/4″(card front), 2 1/4″ x 4″ & 1/2″ x 4″(card front panels), 2 1/4″ x 6″(envelope flap)

*********************************************************************************************************

Product List

Stampin’ Up! Merry Christmas CAS

Good Saturday morning stamping friends and welcome to the weekend. I hope you have some fun plans in the works. I’ll be at work all day today.

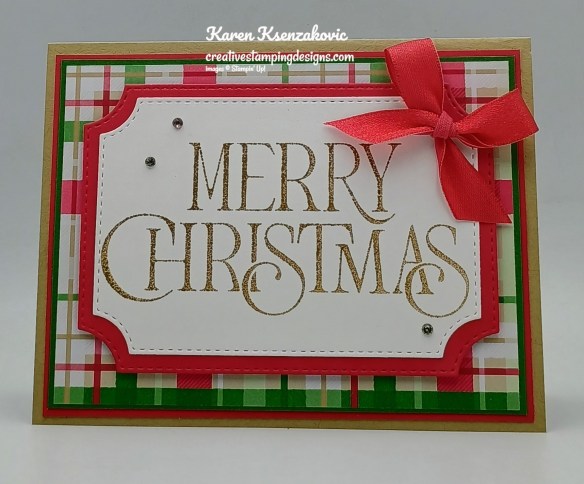
I have an easy Christmas card for you today that goes together super quick.  If you’d like to see a quick video of how I made this card, Click Here to go to my Instagram Reels. Here’s my card for today.

Stampin' Up! Merry Christmas CAS 1 creativestampingdesigns.com

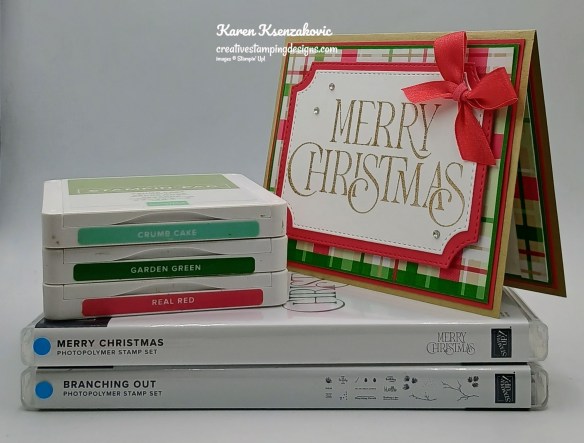
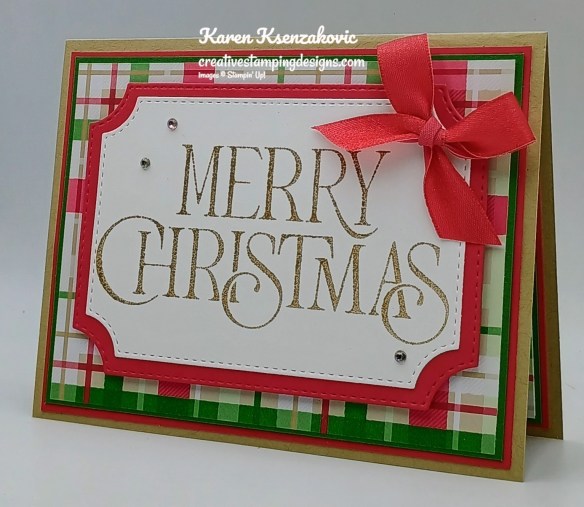
I used the new Stampin’ Up! Merry Christmas Photopolymer Stamp Set along with the Stampin’ Up! Branching Out Bundle and the Christmas Tags & More Mix & Match 6 x 6 Specialty Designer Series Paper for my card today.

Stampin' Up! Merry Christmas CAS 2 creativestampingdesigns.com

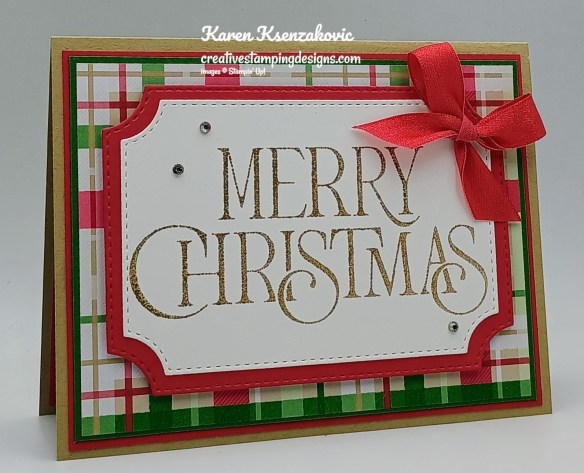
Stamp the sentiment from the Merry Christmas stamp set in Crumb Cake Ink on a panel of Basic White. Using the Branching Out Dies, cut the sentiment and a panel of Real Red with one size larger die. Adhere the sentiment to the Real Red mat with Stampin’ Seal.

Stampin' Up! Merry Christmas CAS 3 creativestampingdesigns.com

Adhere a panel of Christmas Tags & More DSP to a Garden Green mat with Stampin’ Seal. Adhere the layered panel to a Real Red mat with Stampin’ Seal. Adhere the layered panel to a Crumb Cake card base with Liquid Glue.

Stampin' Up! Merry Christmas CAS 4 creativestampingdesigns.com

Adhere the layered sentiment to the card front with Stampin’ Dimensionals. Tie a small bow using the Real Red 1/2″ Shiny Ribbon and adhere it to the sentiment with a Glue Dot. Add a few Rhinestones Basic Jewels to the card front.

Stampin' Up! Merry Christmas CAS 5 creativestampingdesigns.com

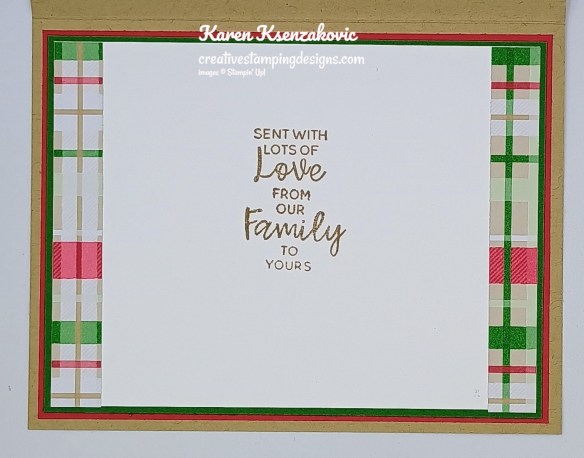
Stamp the sentiments from the Stampin’ Up Branching Out Photopolymer Stamp Set in Crumb Cake Ink on a panel of Basic White. Adhere 2 panels of Christmas Tags & More DSP to the sides of the panel. Adhere the Basic White panel to a Garden Green mat and then to a Real Red mat. Adhere the layered panel to the inside of the Crumb Cake card base.

Stampin' Up! Merry Christmas CAS 6 creativestampingdesigns.com

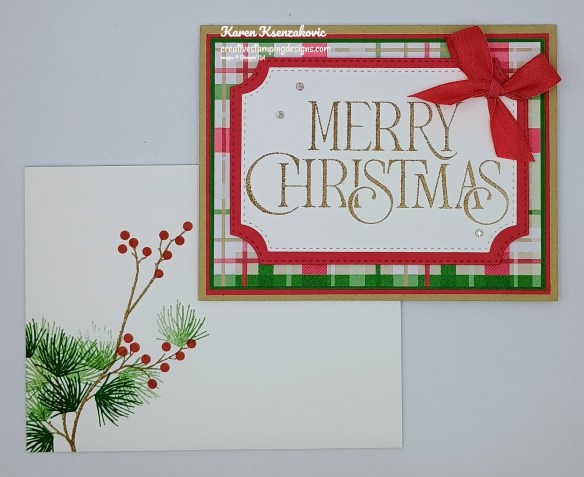
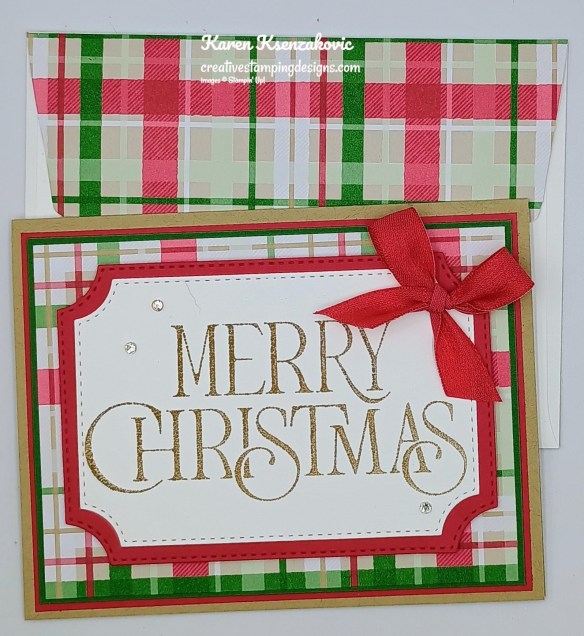
Decorate a Basic White Medium Envelope to finish your care. Stamp the branch image from the Branching Out stamp set in Crumb Cake Ink on the envelope front. Stamp the boughs image from the Branching Out stamp set in Garden Green Ink on the branch. Stamp the berry image from the Branching Out stamp set in Real Red Ink on the branch. Adhere a panel of Christmas Tags & More DSP to the envelope flap.

Stampin' Up! Merry Christmas CAS 7 creativestampingdesigns.com

Thank you for stopping by my blog today. I hope you like the card and will give it a try. Happy Stamping!!

*********************************************************************************************************

If you need any stamping supplies, I’d love to be your Demonstrator. Just click HERE to go directly to my online store or drop me an email if you have any questions. 

*********************************************************************************************************

Final Days to sign up for our September Online Class

Tara Carpenter and I are teaming up to offer an online Fall card class using Stampin’ Up! Online Exclusive Gathering Together Suite.  We will be creating 6 different cards during the class including 2 Beginner Stamper cards, 2 Casual Stamper Cards and 2 Advanced Stamper Cards. Sign Up now by Clicking Here to reserve your spot.

The class fee includes:

  • Stampin’ Up! Cajun Craze & Gold Dots (full pack)
  • Stampin’ Up! Early Espresso & Old Olive Linen Thread Pack (full pack)
  • Pre-cut card kits to complete each card
  • Zoom class with complete instructions to complete each card
  • PDF with detailed directions

During sign up you will have the option to add additional items to your order that you can take advantage of at no additional shipping cost.  These items are optional, however if you want to recreate the cards you will need them. If you’ve attended a previous class, you were given a discount code, there is a spot to put that code on the form and the discount only applies to the products that you check off that you wish to purchase, not the class.

The class will be held Sunday September 28th from 1 to 5 pm Eastern Time via Zoom.  This allows anyone in the United States to participate live!  Can’t join us live… no worries, we will record the session so it can be replayed at any time.

I will email written directions that will include directions, cardstock cuts as well as photos to help you create each card.

I am not including the bundle or stamp set in the price of the class.  You can purchase the bundle through me at an additional 10% discount of the Online Exclusive price (see below).

Class Cost $35 + $10 (Priority Shipping) 

Additional purchased items will be included in the above shipping price.  I will invoice you through PayPal and invoices must be paid by September 14th to insure I can get the products delivered, packaged up and out to you with enough time.  

Deadline: Sunday September 14th (this is so I have time to order all the products being used)

Click Here to register for the class now!! Let me know if you have any questions.

********************************************************************************************************

Cozy Christmas October Paper Pumpkin
Subscribe September 11 – October 10

Create heartfelt Christmas cards with classic charm and flocked accents.
• Makes 9 cards: 3 each of 3 designs with 9 coordinating envelopes
• Precut paper pieces with soft, stitched-look flocking
• Shiny red sequin embellishments
• Coordinating colors: Basic Beige, Cherry Cobbler, Garden Green, Pecan Pie
(Classic Stampin’ Spot), Real Red
Coordinating box delivers even more holiday magic!

Subscribe to the October Paper Pumpkin Kit between 11 September and 10 October by clicking here!

Don’t miss the coordinating
Abundant Joy Dies Add-On!

Make the most of your Paper Pumpkin kits with the Abundant Joy Dies add-on! Quickly and cleanly cut out a gift tag, a flower, sprigs of greenery, or the word Joy to elevate your crafting projects. These additional dies are designed to work with THREE Paper Pumpkin Kits: the Cozy Christmas Paper Pumpkin Kit, the Wrapped in Cheer Paper Pumpkin Kit, and the Watercolor in Bloom Paper Pumpkin Kit. Pair these dies with other Stampin’ Up! products for even more creative options!

DETAILS
– 6 dies
– Largest die: 2-7/8″ x 1-1/2″

#167855 $12.00

*********************************************************************************************************

Card stock cuts for this project:

  • Basic White Cardstock 3 1/2″ x 4 3/4″(sentiment), 3 3/4″ x 5″(inner liner)
  • Crumb Cake Cardstock 5 1/2″ x 8 1/2″(card base scored & folded at 4 1/4″)
  • Garden Green Cardstock (2) – 3 7/8″ x 5 1/8″(card front & inner liner mats)
  • Real red Cardstock (2) – 4″ x 5 1/4″(card front & inner liner mats), 3 1/2″ x 4 3/4″(sentiment mat)
  • Christmas Tags & More Mix & Match 6 x 6 Specialty Designer Series Paper 3 3/4″ x 5″(card front), (2) – 1/2″ x 3 3/4″(inner liner), 2 1/4″ x 6″(envelope)

*********************************************************************************************************

Product List

Stampin’ Up! Christmas Greenery for Fun Fold Friday

Good Friday afternoon stamping friends. We made it to the end of the week and the weekend is right around the corner. I hope you are starting to make some fun plans.

I decided it was time to start making some Christmas cards and what better way to start then with a quick fund fold featuring some new products from the Sept-Dec Mini Catalog.  If you’d like to see a quick video of how I made this card, Click Here to go to my Instagram Reels. Here’s my card for today.

Stampin' Up! Christmas Greenery Fun Fold 1 creativestampingdesigns.com

I used the Stampin’ Up! Christmas Greenery Bundle along with the Stampin’ Up! Traditional Labels Photopolymer Stamp set and Traditions of Christmas Specialty Designer Series Paper for my card today.

Stampin' Up! Christmas Greenery Fun Fold 2 creativestampingdesigns.com

Score & fold the Secret Sea card base as listed below. Adhere the smaller panels of the Traditions of Christmas DSP to the front sides of the Secret Sea card base. Adhere the larger panel of the Traditions of Christmas DSP to the center front of the Secret Sea card base.

Stampin' Up! Christmas Greenery Fun Fold 3 creativestampingdesigns.com

Stamp the sentiment from the Traditional Labels stamp set in Versamark Ink on the top of the Cherry Cobbler panel. Sprinkle the sentiment with White Embossing Powder and set it with the Heat Tool. Adhere the Cherry Cobbler panel to the Secret Sea mat. Adhere the layered panel to the card base.

Stampin' Up! Christmas Greenery Fun Fold 4 creativestampingdesigns.com

On a Basic White panel, stamp the large floral image from the Stampin’ Up! Christmas Greenery Photopolymer Stamp Set in Versamark Ink. Sprinkle the image with Gold Embossing Powder and set it with the Heat Tool. Stamp the center poinsettia image from the Christmas Greenery stamp set in Cherry Cobbler Ink, stamping off once on scrap paper, over the gold outlined image. Stamp the small flower images from the Christmas Greenery stamp set in Bubble Bath Ink over the gold outlined image. Stamp the leaf image from the Christmas Greenery stamp set in Old Olive Ink, stamping off once on scrap paper, over the gold outlined image. Stamp the berry image from the Christmas Greenery stamp set in Cherry Cobbler Ink on the boughs. Using the Christmas Greenery Dies, cut the image out and the boughs from a panel of Old Olive. Adhere the bough die cuts to the sentiment panel. Adhere the floral image over the boughs with Stampin’ Dimensionals. Add a few Traditional Sparkling Sequins to the card front.

Stampin' Up! Christmas Greenery Fun Fold 5 creativestampingdesigns.com

On a panel of Basic White, stamp the sentiments from the Traditional Labels stamp set in Cherry Cobbler Ink. Stamp the bough image from the Christmas Greenery stamp set in Olive Ink on the corners of the panel. Adhere panels of Traditional of Christmas DSP to the sides of the Secret Sea card base. Adhere the Basic White panel to a Cherry Cobbler mat then to the back of the Secret Sea card base. Add a few Traditional Sparkling Sequins to the Basic White panel.

Stampin' Up! Christmas Greenery Fun Fold 6 creativestampingdesigns.com

Decorate a Basic White Medium Envelope to finish your card. Stamp the bouquet image from the Christmas Greenery stamp set in Versamark Ink on the envelope front. Sprinkle the image with Gold Embossing Powder and set it with the Heat Tool. Stamp the small flower image from the Christmas Greenery stamp set in Bubble Bath Ink over the outlined bouquet image. Stamp the leaf image in Old Olive Ink, stamping off once on scrap paper, over the outlined image. Stamp the bow image from the Christmas Greenery stamp set in Cherry Cobbler Ink, stamping off once on scrap paper, over the outlined image. Adhere a panel of Traditions of Christmas DSP to the envelope flap.

Stampin' Up! Christmas Greenery Fun Fold 7 creativestampingdesigns.com

Thank you for stopping by my blog today. I hope you like the card and will give it a try. Happy Stamping!!

*********************************************************************************************************

If you need any stamping supplies, I’d love to be your Demonstrator. Just click HERE to go directly to my online store or drop me an email if you have any questions. 

*********************************************************************************************************

Final Days to sign up for our September Online Class

Tara Carpenter and I are teaming up to offer an online Fall card class using Stampin’ Up! Online Exclusive Gathering Together Suite.  We will be creating 6 different cards during the class including 2 Beginner Stamper cards, 2 Casual Stamper Cards and 2 Advanced Stamper Cards. Sign Up now by Clicking Here to reserve your spot.

The class fee includes:

  • Stampin’ Up! Cajun Craze & Gold Dots (full pack)
  • Stampin’ Up! Early Espresso & Old Olive Linen Thread Pack (full pack)
  • Pre-cut card kits to complete each card
  • Zoom class with complete instructions to complete each card
  • PDF with detailed directions

During sign up you will have the option to add additional items to your order that you can take advantage of at no additional shipping cost.  These items are optional, however if you want to recreate the cards you will need them. If you’ve attended a previous class, you were given a discount code, there is a spot to put that code on the form and the discount only applies to the products that you check off that you wish to purchase, not the class.

The class will be held Sunday September 28th from 1 to 5 pm Eastern Time via Zoom.  This allows anyone in the United States to participate live!  Can’t join us live… no worries, we will record the session so it can be replayed at any time.

I will email written directions that will include directions, cardstock cuts as well as photos to help you create each card.

I am not including the bundle or stamp set in the price of the class.  You can purchase the bundle through me at an additional 10% discount of the Online Exclusive price (see below).

Class Cost $35 + $10 (Priority Shipping) 

Additional purchased items will be included in the above shipping price.  I will invoice you through PayPal and invoices must be paid by September 14th to insure I can get the products delivered, packaged up and out to you with enough time.  

Deadline: Sunday September 14th (this is so I have time to order all the products being used)

Click Here to register for the class now!! Let me know if you have any questions.

********************************************************************************************************

Cozy Christmas October Paper Pumpkin
Subscribe September 11 – October 10

Create heartfelt Christmas cards with classic charm and flocked accents.
• Makes 9 cards: 3 each of 3 designs with 9 coordinating envelopes
• Precut paper pieces with soft, stitched-look flocking
• Shiny red sequin embellishments
• Coordinating colors: Basic Beige, Cherry Cobbler, Garden Green, Pecan Pie
(Classic Stampin’ Spot), Real Red
Coordinating box delivers even more holiday magic!

Subscribe to the October Paper Pumpkin Kit between 11 September and 10 October by clicking here!

*********************************************************************************************************

Card stock cuts for this project:

  • Basic White Cardstock 2 1/2″ x 4″(back panel), 2 1/2″ x 5 1/4″(artwork)
  • Cherry Cobbler Cardstock 1 7/8″ x 4 7/8″ (sentiment), 2 5/8″ x 4 1/8″ (back panel mat)
  • Old Olive Cardstock 4″ x 5 1/4″(boughs)
  • Secret Sea Cardstock 4 1/4″ x 8 1/4″(card base scored & folded at 1 3/8″, 2 3/4″, 5 1/2″ & 6 7/8″), 2″ x 5″(sentiment mat)
  • Traditions of Christmas Specialty Designer Series Paper (8) – 1 1/4″ x 4 1/8″ (side panels), 2 5/8″ x 4 1/8″(center panel), 2 1/4″ x 6″(envelope)

*********************************************************************************************************

Product List

Stampin’ Up! Peaceful Seasons for The Card Concepts

Good Wednesday morning my stamping friends. How is everyone doing today? We’re halfway through the week and on our way to the weekend already. I’ll be starting my baking on Thursday early morning and continue until I’m done, hopefully by Saturday. This year for the first time in quite a few years, my daughter will be able to bake with me. In the past she’s always had finals and would be studying, or when she was in high school, she would have a fencing event. I’m looking forward to having her by my side helping.

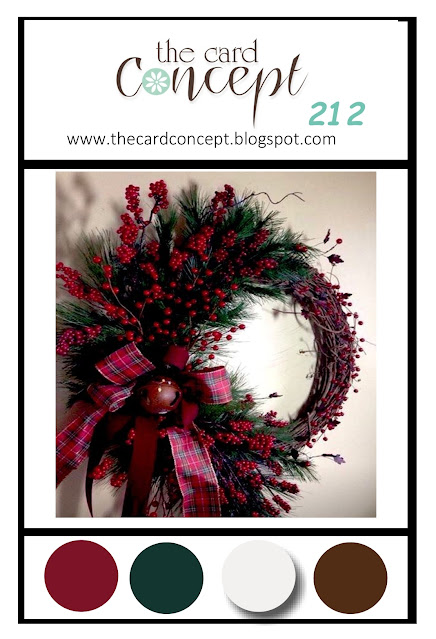
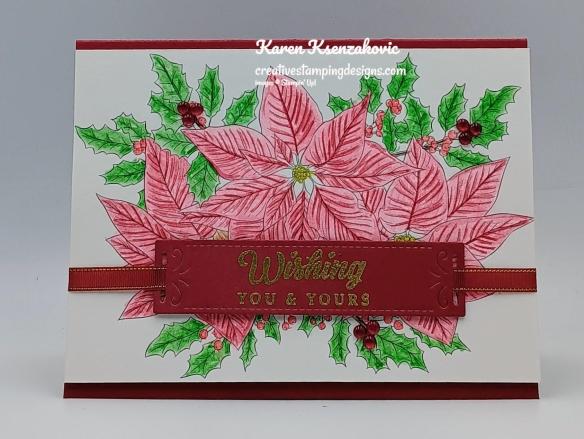
Today’s card is for the inspiration challenge from The Card Concepts. We do a month-long challenge, so you have all month to enter multiple times.  The inspiration photo #212 is Christmas Wreath. If you’d like to see a quick video on how I made this card, Click Here for my Instagram Reels. Here is my card that was inspired from the challenge photo.

Stampin' Up! Peaceful Season 1 creativestampingdesigns.com

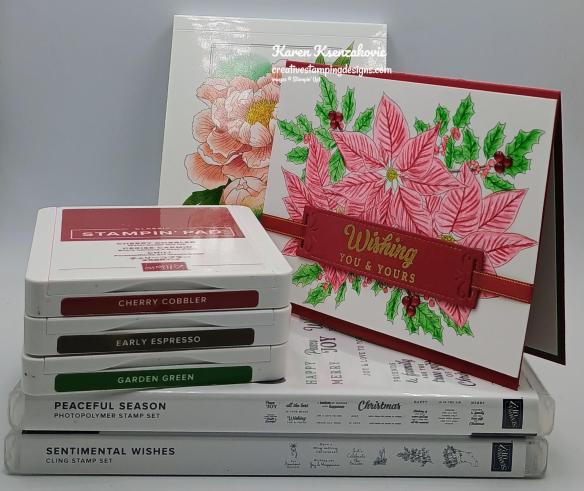
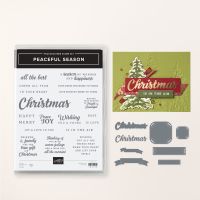
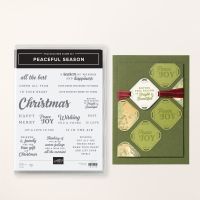
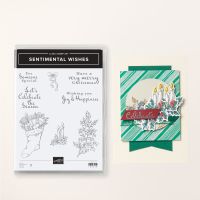
I used the Stampin’ Up! Peaceful Season Bundle, which is a Last Chance item, along with the Nature’s Paintings Kit and the Stampin’ Up! Sentimental Wishes Cling Stamp Set for my Clean & Layered card today.

I hope you will take a moment to visit The Card Concepts and join us for our challenge 212.  How are you inspired by the photos?

Stampin' Up! Peaceful Season 2 creativestampingdesigns.com

Cut down the panel from the Nature’s Paintings Kit to a 4″ X 5 1/2″ panel. Color the image using the Watercolor Pencils that come in the kit. Use the Water Painter that comes in the kit to blend the color and spread it around.

Stampin' Up! Peaceful Season 3 creativestampingdesigns.com

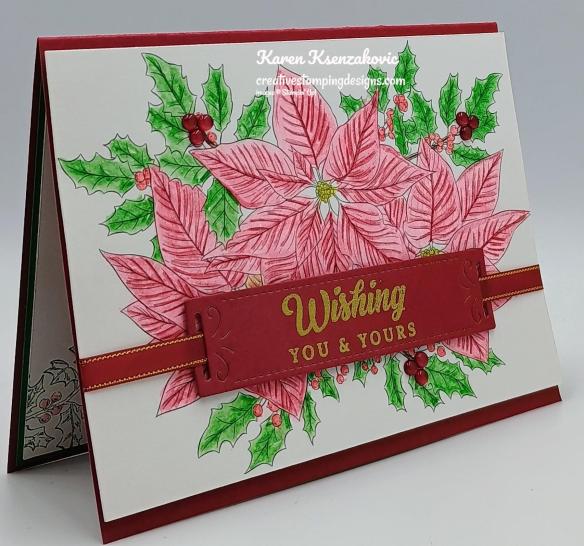
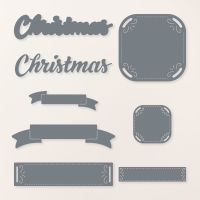
On a panel of Cherry Cobbler, stamp the sentiment from the Stampin’ Up! Peaceful Season Photopolymer Stamp Set in Versamark Ink. Sprinkle the sentiment with Gold Embossing Powder and set it using the Heat Tool. Cut the sentiment out using the Peaceful Season Dies.

Stampin' Up! Peaceful Season 4 creativestampingdesigns.com

Thread a piece of Cherry Cobbler & Gold 1/4″ Satin Ribbon through the die cut sentiment. Adhere the sentiment to the card front using Stampin’ Dimensionals. Adhere the ribbon to the back of the Nature’s Paintings panel using Stampin’ Seal. Adhere the card front panel to a Cherry Cobbler card base using Stampin’ Dimensionals. Add a few Cherry Cobbler & Pearl Adhesive-Backed Berries to the card front.

Stampin' Up! Peaceful Season 5 creativestampingdesigns.com

On a panel of Basic White, stamp the sentiment from the Peaceful Season stamp set in Cherry Cobbler Ink. Stamp the holly image from the Sentimental Wishes stamp set in Garden Green Ink in the corners of the panel. Color the berries on the holly using the red watercolor pencil. Adhere the Basic White panel to a Garden Green mat then to the inside of the Cherry Cobbler card base.

Stampin' Up! Peaceful Season 6 creativestampingdesigns.com

To finish the card, decorate a Basic White Medium Envelope. Stamp the holly image from the Sentimental Wishes stamp set in Garden Green Ink on the envelope front and flap. Color the berries on the image using the red watercolor pencil.

Stampin' Up! Peaceful Season 7 creativestampingdesigns.com

Thank you for stopping by my blog today. I hope you like my card and will give it a try. Happy Stamping!!

*********************************************************************************************************

If you need any stamping supplies, I’d love to be your Demonstrator. Just click HERE to go directly to my online store or drop me an email if you have any questions. 

MY CURRENT HOST CODE IS:   VNGF49FJ

Use this host code when placing an order with me. When you order $50 or greater you will receive a free gift from me! If your order is over $150, please do not use this code, but you’ll still get the free gift. The free gift is your choice of any 1 item valued up to $10.00 from the 2024 – 2025 Annual Catalog, September – December 2024 Mini Catalog or from the Online Exclusives!  For any orders $50 or more I will also send you my monthly class tutorials.  Click HERE or go to my Customer Rewards for more details and to see what this month’s tutorials are.

Please remember to use my current Host Code and make sure that you can see my name on the final checkout page listed as your Demonstrator when you order so that you know that you’re ordering with me, and you’ll get my rewards! 

Happy Stamping, Karen

*********************************************************************************************************

In response to changing policies at Stampin’ Up – I’m adjusting my Ordering Gift policy as well.  I’m having to get a little more tough on the adding of Host codes when you place your order thru my Online Store.

Not to worry – you’re still going to get that $10 ordering gift for orders of $50 (before shipping & tax) or greater.  And the gift is still any 1 SU! product up to that $10 value.

But – if you DO NOT use the Host code for your orders of less than $150 (this is the RETAIL total before Shipping & Handling), then you’ll have two options:

  1. You’ll need to call Stampin’ Up! (1-800-Stamp-Up) and ask them to add it for you. They’re very helpful and will get it done quickly!  OR….
  2. If your order was over the $50 threshold but under $150, then…you’ll forfeit that $10 ordering gift and rewards – this is the Bummer Option – and I REALLY don’t want to do this, SO please remember to add my Current Host Code.

*********************************************************************************************************

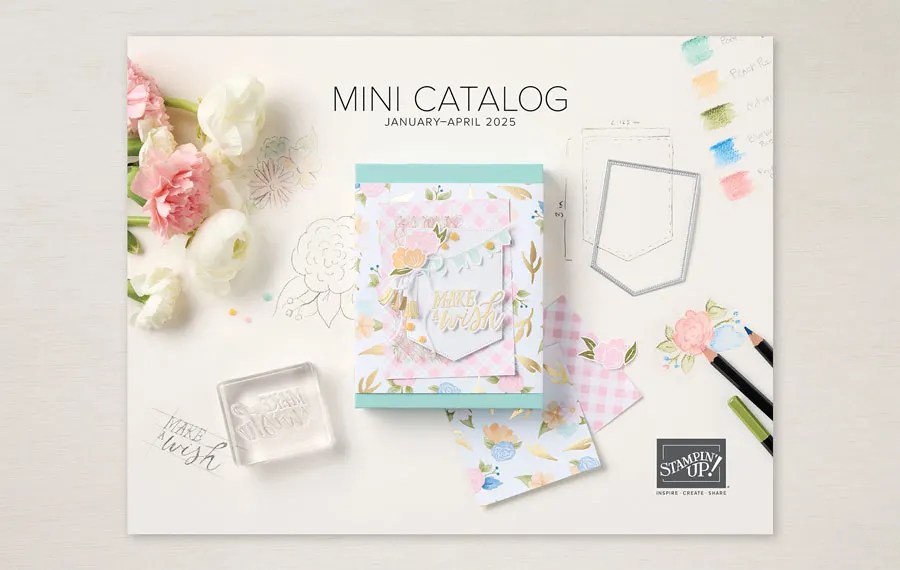
My January-April 2025 Mini Catalog and January Online Exclusive Designer Series Paper and Ribbon Shares are open for ordering. You can order just the DSP share, just the ribbon share or you can order both.

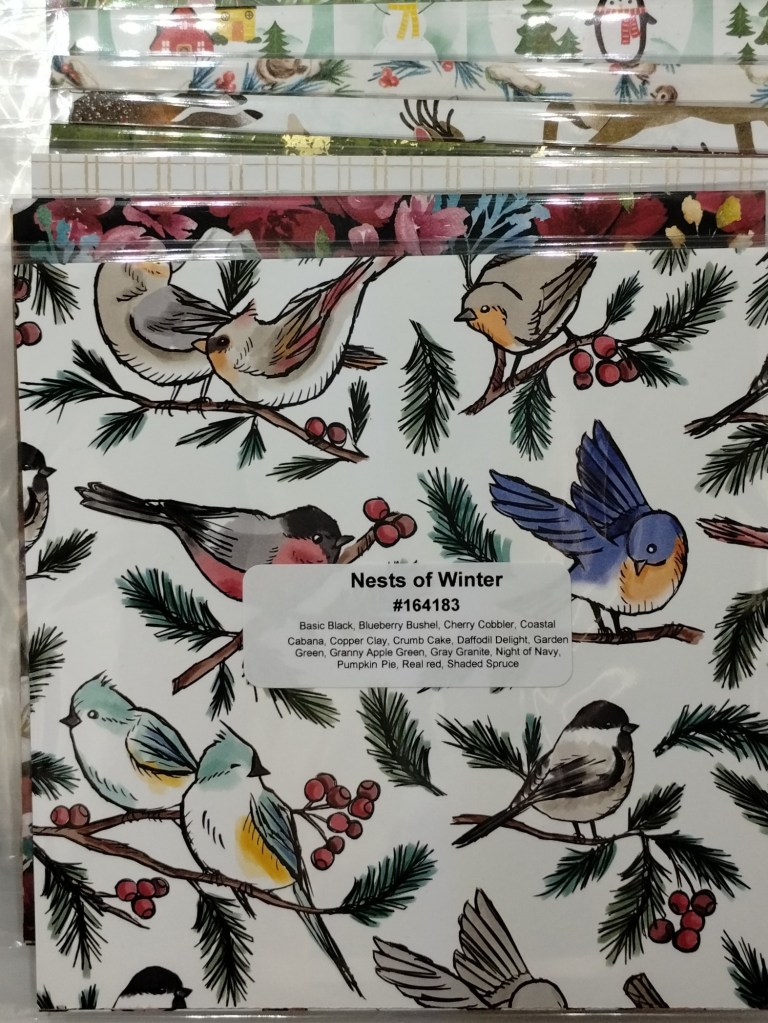
I’m offering a Designer Series Paper share from the January-April 2025 Mini Catalog along with the upcoming January Online Exclusives and I’d love to have you join!!  I’m placing my share order early on January 7th and I’m going to use the expedited shipping option so I should be able to have the shares cut, bundled and back out to you during the week of January 12th. Wouldn’t you love to have all of the gorgeous new Designer Series Papers in the Stampin’ Up! January-April 2025 Mini Catalog and the upcoming Online Exclusives?  What is a Paper Share you ask? It’s a sample of each of the new Designer Series Papers from the January-April 2025 Mini Catalog and the January Online Exclusives. Shares give you a good working sample of all of the papers so that you can decide which ones to order in full packs!  If you were to purchase all of the DSP in the new Catalog and Online Exclusives, it would cost you over $130.00 plus shipping and if you were to purchase all the ribbon it would cost you over $38.00.

New Designer Series Paper Share – $21.00 plus $9.00 for Priority Mail Shipping

How my shares work:  I order full packs of all of the Designer Series Papers listed below, I cut them into 6″ X 6″ pieces (or 6″ X 12″ pieces for double shares) and give you one panel of each design from each pack on the list.  I pack up the paper in a cellophane bag with labels listing the Name, Item # and Colors in the pack and mail it back out to you just as quickly as I can!  

New Designer Series Paper Share – $21.00 plus $9.00 for Priority Mail shipping

You will receive one 6X6 sheet of each design from the following DSP packs (the number after the name indicates how many 6×6 sheets of that paper pack you will receive):

  • Beautiful Bokeh (6)
  • Floral Delight (6)
  • Floral Gingham Vellum (3)
  • Friends of the Ocean (6)
  • Storybook Moments (6)
  • Timeless Plaid (12)
  • Wildflower Birthday (5)
  • Everyday Skies (12) Online Exclusive
  • Mixed Media Florals (6) Online Exclusive
  • Pastel Ombre Glimmer (3) Online Exclusive

In all, you’ll receive 65 – 6” X 6” sheets of designer or specialty paper!

Double DSP Share – $42.00 + $9.00 Shipping by Priority Mail – if you’d like double shares of the designer paper, I’m offering those too!  I’ll cut the 12″ X 12″ designer paper sheets into 6″ X 12″ so that you’ll be able to get 3 full A2 size card fronts from each sheet and you’ll get double sheets of the 6″ X 6″ since they’re already precut.

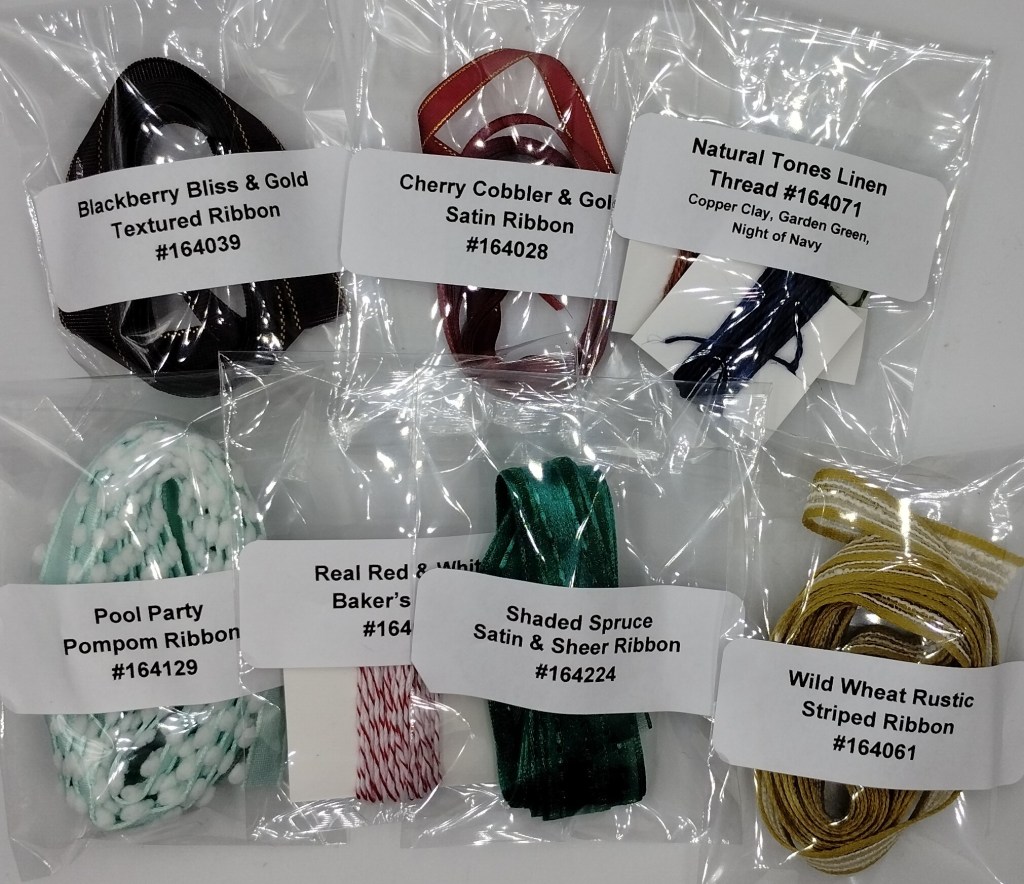
New Ribbon Share – $11.00 plus $9.00 Priority Mail Shipping

All ribbons will come individually wrapped and labeled with the name and number of the product. Please note that ribbons are being divided differently, you will be getting one fourth of a roll of each of the Ribbons.

One-Fourth of a Roll of each:

  • Daffodil Delight 1/8″ Satin Ribbon
  • Gold 1 1/2″ Open Weave Trim
  • Petal Pink 3/8″ Scalloped Ribbon
  • White 1/2″ Woven Ribbon Online Exclusive

Double Ribbon Share – $22.00 + $9.00 Priority Mail Shipping – If you’d like double shares of the Ribbon, you will be getting 1/2 of the roll or each ribbon.

If you would like the Designer Series Paper Share & the Ribbon Share the cost will be:

$32.00 for a single share + $9.00 shipping

$64.00 for a double share + $9.00 shipping.

As a Thank You for joining in with my Shares, I’ll be adding a sampling of the Sale-a-bration Designer Series Paper. I’m not sure which ones you’ll be getting yet, but there are 3 different one’s that will be available. Which one(s) you get will be a surprise.

Anyone is welcome to join in my share (please note, I can only ship to addresses within the US).  If you’d like to join, email the following information to creativestampingdesigns@gmail.com

  • Your first and last name
  • Your mailing address for paper to be shipped to.
  • The email address that is connected to your PayPal account or let me know if you’d like to use Zelle. I will accept Zelle or PayPal for payment.  ***You do not need to have a PayPal account to pay the invoice, you can choose to pay by credit card without having a PayPal account. If you’d like to use Zelle, email me and I’ll give you the number associated with my account.

Deadline to sign up for my share is Sunday January 5th at 5:00 PM ET.

Let me know if you have any questions.  Thanks!

*********************************************************************************************************

Hearts for You

Subscribe December 11 – January 10

Create heartfelt cards for Valentine’s Day, Galentine’s Day, and beyond!
• Makes 9 cards: 3 each of 3 designs with 9 envelopes
• Heart-shaped precut pieces and stickers
• Twine and heart gem embellishments
• Coordinating colors: Flirty Flamingo, Petal Pink, Real Red (Classic Stampin’ Spot)

Subscribe to Paper Pumpkin for a monthly, all-inclusive crafting kit that’s a fun surprise! Each kit includes a photopolymer stamp set, Classic Stampin’ Spot, and step by step instructions to complete exclusive paper craft projects, including cards, tags, and gift
packaging. And don’t miss the special add-on that coordinates with the next three months!

Subscribe to the January Paper Pumpkin Kit between 11 December and 10 January by clicking here!

*********************************************************************************************************

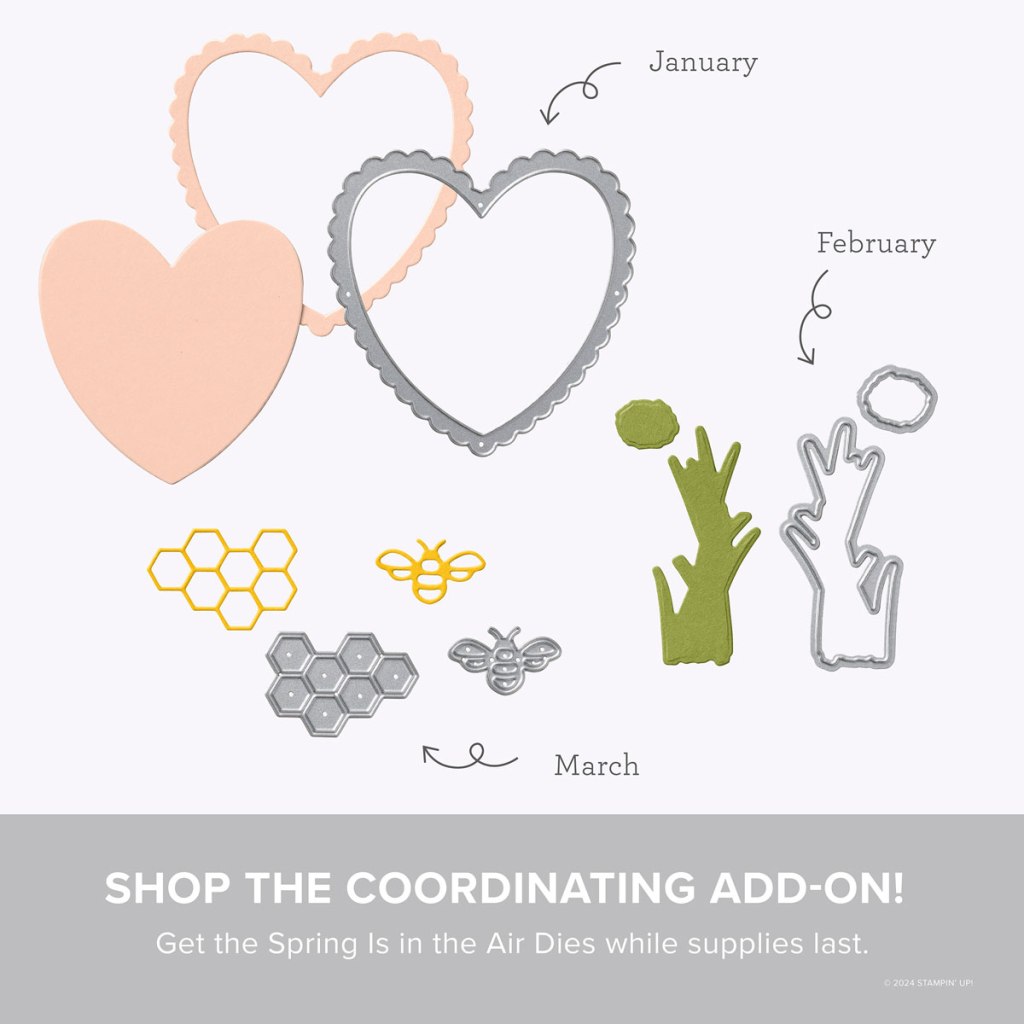
Don’t miss the coordinating
Spring is in The Air Dies Add-On!

Make the most of your Paper Pumpkin kits with the Spring Is in the Air Dies add-on! Quickly and cleanly cut out a heart frame, flowering chive, honeycomb, or tiny bumblebee to elevate your crafting projects. These additional dies are designed to work with THREE Paper Pumpkin Kits: the Hearts for You Paper Pumpkin Kit, the Spring Is in the Air Paper Pumpkin Kit, and the Daisy Daydream Paper Pumpkin Kit. Pair these dies with other Stampin’ Up! products for even more creative options!

DETAILS
– 5 dies
– Largest die: 3″ x 3″ (7.6 x 7.6 cm)
– Use with a Stampin’ Cut & Emboss Machine (sold separately)

You must be a current Paper Pumpkin subscriber to purchase this item. To become a subscriber, visit paperpumpkin.com.

#166237 $12

Note: Supplies may be limited toward the end of the subscription period.

*********************************************************************************************************

Card stock cuts for this project:

  • Basic White Cardstock 4″ X 5 1/4″(inner liner)
  • Cherry Cobbler Cardstock 5 1/2″ X 8 1/2″(card base scored & folded at 4 1/4″), 1 1/2″ X 4 1/4″ (sentiment)
  • Garden Green Cardstock 4 1/8″ X 5 3/8″(inner liner mat)

*********************************************************************************************************

Product List

Stampin’ Up! Greetings of the Season Rustic Crate Fancy Fold

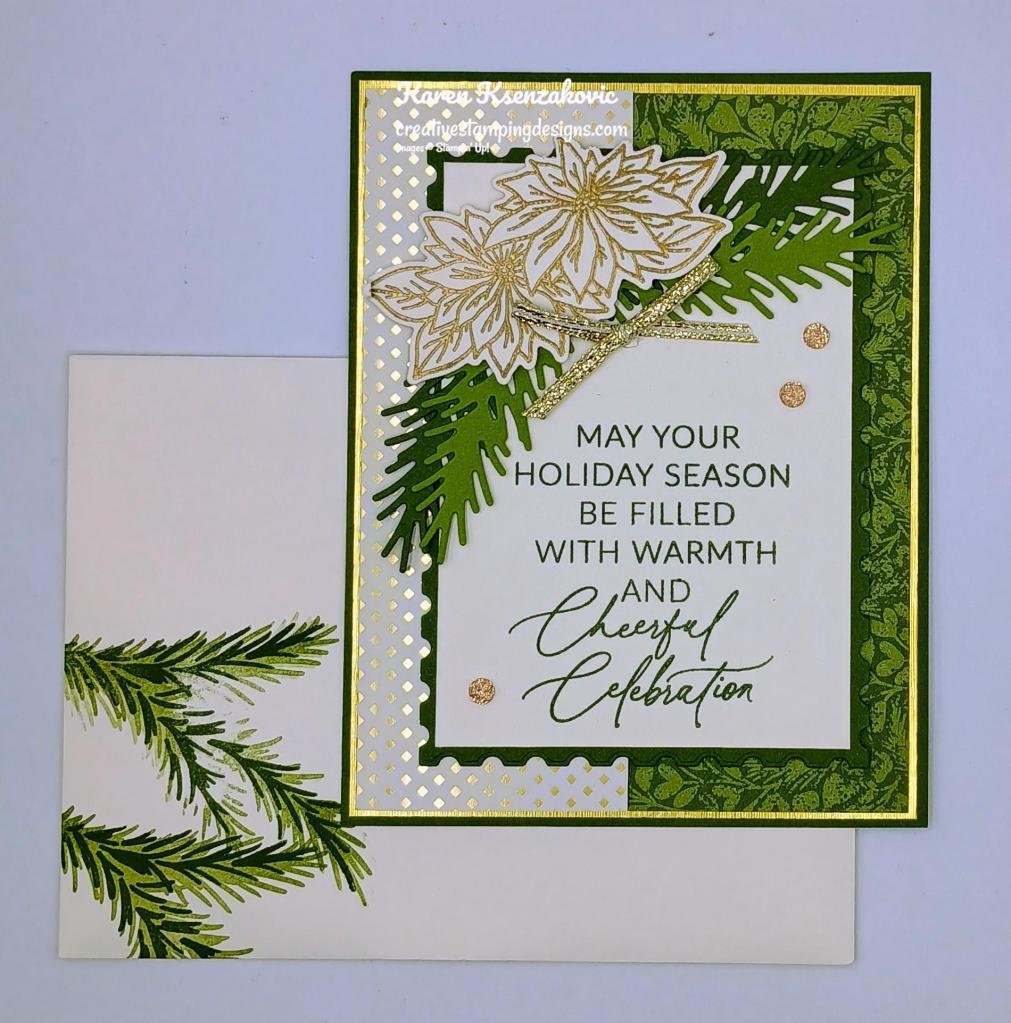
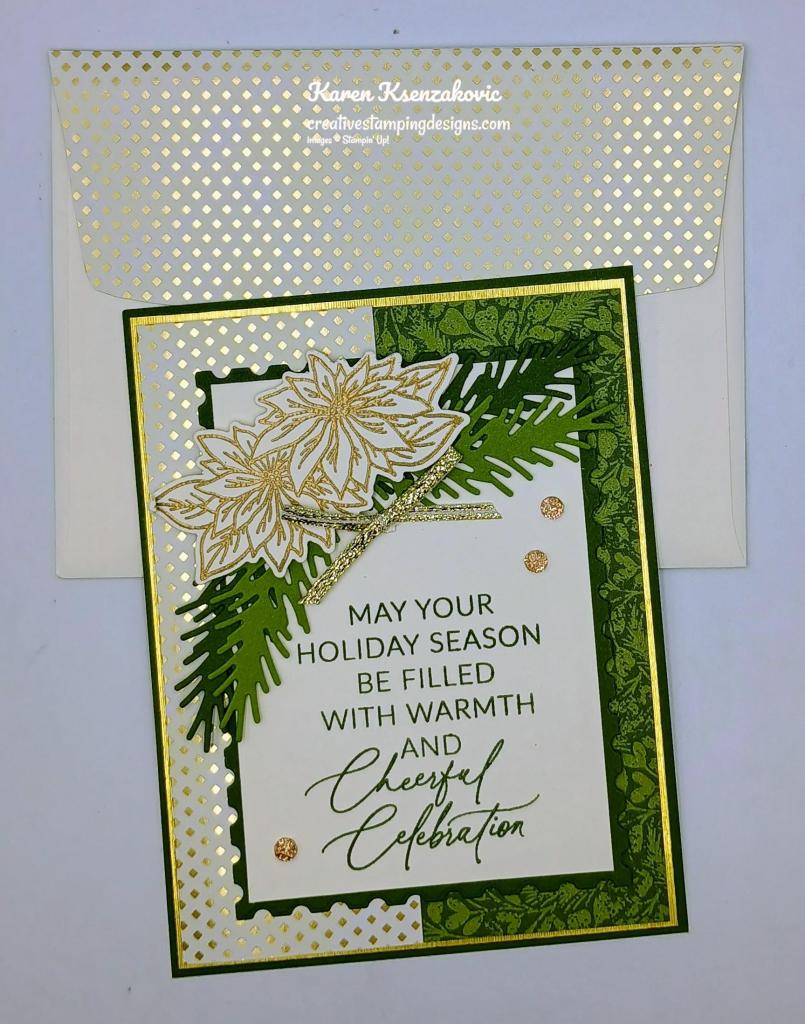
Good Monday morning stamping friends and welcome to the last week of November. WOW!! Can you believe that we’re at the end of November already. The weather here in NJ is telling me we are, it’s getting chilly outside and dark way too early for me.

Today’s card was designed by my team member Tara Carpenter for us to make at our retreat. Here’s my card for today.

Stampin' Up! Greetings of the Season Fancy fold 1 creativestampingdesigns.com

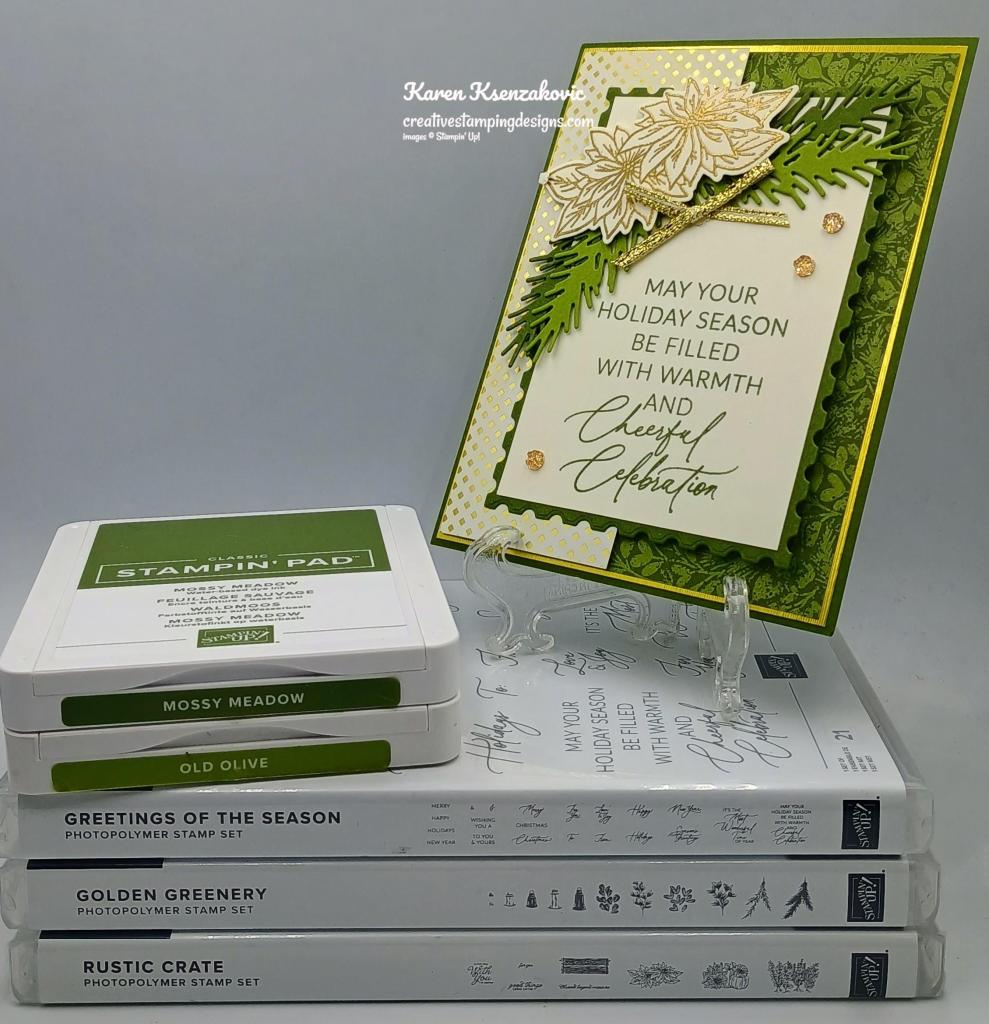
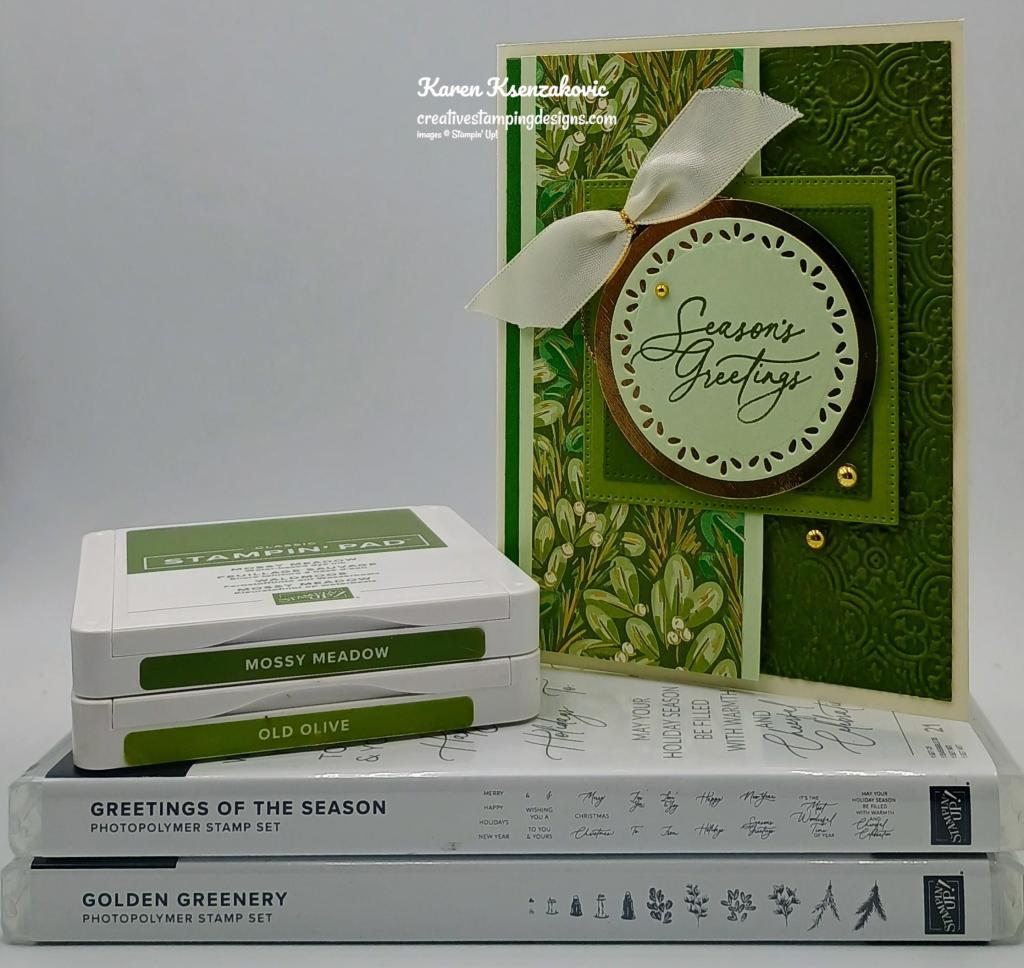
I used the Stampin’ Up! Greetings of the Season Photopolymer Stamp Set along with the Stampin’ Up! Golden Greenery Bundle, Stampin’ Up! Rustic Crate Photopolymer Stamp Set, Season of Green & Gold Specialty Designer Series Paper, Perennial Postage Dies and Rustic Crate Dies for my card today.

Stampin' Up! Greetings of the Season Fancy fold 2 creativestampingdesigns.com

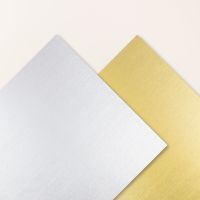
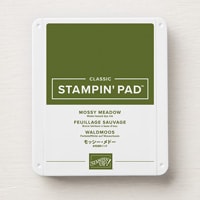
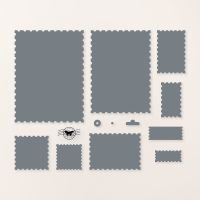
Adhere the Season of Green & Gold DSP card front to a Brushed Gold mat using Stampin’ Seal. Adhere the layered panel to a Mossy Meadow card base using Liquid Glue. Cut a panel of Mossy Meadow using the 2nd largest Perennial Postage Dies.

Stampin' Up! Greetings of the Season Fancy fold 3 creativestampingdesigns.com

On a panel of Very Vanilla, stamp set sentiment from the Greetings of the Season stamp set in Mossy Meadow Ink. Adhere the sentiment to the Mossy Meadow die cut using Stampin’ Seal. Adhere the layered sentiment to the folded Season of Green & Gold DSP card front using Stampin’ Seal only on the back of the left side.

Stampin' Up! Greetings of the Season Fancy fold 4 creativestampingdesigns.com

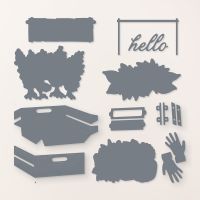
On a panel of Very Vanilla, stamp the poinsettia image from the Rustic Crate stamp set in Versamark Ink. Sprinkle the image with Gold Embossing Powder and set it using the Heat Tool. Cut the poinsettia out using the Rustic Crate Dies. Using the Golden Greenery Dies, cut 2 each of the single bough die from panels of Mossy Meadow and Old Olive. Adhere the boughs to the top of the layered sentiment using Glue Dots. Adhere the die cut poinsettia over the boughs using Stampin’ Dimensionals. Tie a small bow using the Gold 1/8″ Trim and adhere it below the poinsettia using a Glue dot. Add a few Drusy Adhesive-Backed Embellishments to the card front.

Stampin' Up! Greetings of the Season Fancy fold 5 creativestampingdesigns.com

On a panel of Very Vanilla, stamp the sentiments from the Greetings of the Season stamp set in Mossy Meadow Ink. Stamp the bough images from the Stampin’ Up! Golden Greenery Photopolymer Stamp Set in Mossy Meadow and Old Olive Inks on the corners of the panel. Adhere the Very Vanilla panel to the inside of the card base, making sure to stay within the outside framed area.

Stampin' Up! Greetings of the Season Fancy fold 6 creativestampingdesigns.com

Finish the card by decorating a Basic White Medium Envelope. Stamp the bough images from the Golden Greenery stamp set on the envelope front in Mossy Meadow and Old Olive Inks. Adhere a panel of Season of Green & Gold DSP to the envelope flap.

Stampin' Up! Greetings of the Season Fancy fold 7 creativestampingdesigns.com

Thank you for stopping by my blog today. I hope you like the card and will give it a try. Happy Stamping!!

*********************************************************************************************************

If you need any stamping supplies, I’d love to be your Demonstrator. Just click HERE to go directly to my online store or drop me an email if you have any questions. 

MY CURRENT HOST CODE IS:   4RTJCBH2

Use this host code when placing an order with me. When you order $50 or greater you will receive a free gift from me! If your order is over $150, please do not use this code, but you’ll still get the free gift. The free gift is your choice of any 1 item valued up to $10.00 from the 2024 – 2025 Annual Catalog, September – December 2024 Mini Catalog or from the Online Exclusives!  For any orders $50 or more I will also send you my monthly class tutorials.  Click HERE or go to my Customer Rewards for more details and to see what this month’s tutorials are.

Please remember to use my current Host Code and make sure that you can see my name on the final checkout page listed as your Demonstrator when you order so that you know that you’re ordering with me, and you’ll get my rewards! 

Happy Stamping, Karen

*********************************************************************************************************

January – April 2025 Mini Catalog and Sale-A-bration 2025 Brochure Coming Soon!!

WooHoo!!! The new January-April 2025 Mini Catalog and Sale-a-bration 2025 Brochure arrived yesterday!  I’ll be packing them up and mailing them out to my current customers just as soon as I can!

If you’ve ordered from me within the last year, you’ll automatically be on my mailing list for the new catalogs.  If you are not a current customer of mine but would like to be and would like to get a copy of the upcoming catalog, simply place an order through my online store and I’ll mail you a copy of the catalog too!

*********************************************************************************************************

New Online Exclusive Products Now Available

Don’t forget to check out the Online Exclusive page in my Online Store. A new line of products for Online Exclusives are now available! You won’t find these items in any catalog. This is a great opportunity to spark creativity, expand a crafting collection, and discover new opportunities—all from the convenience of the online store.

*********************************************************************************************************

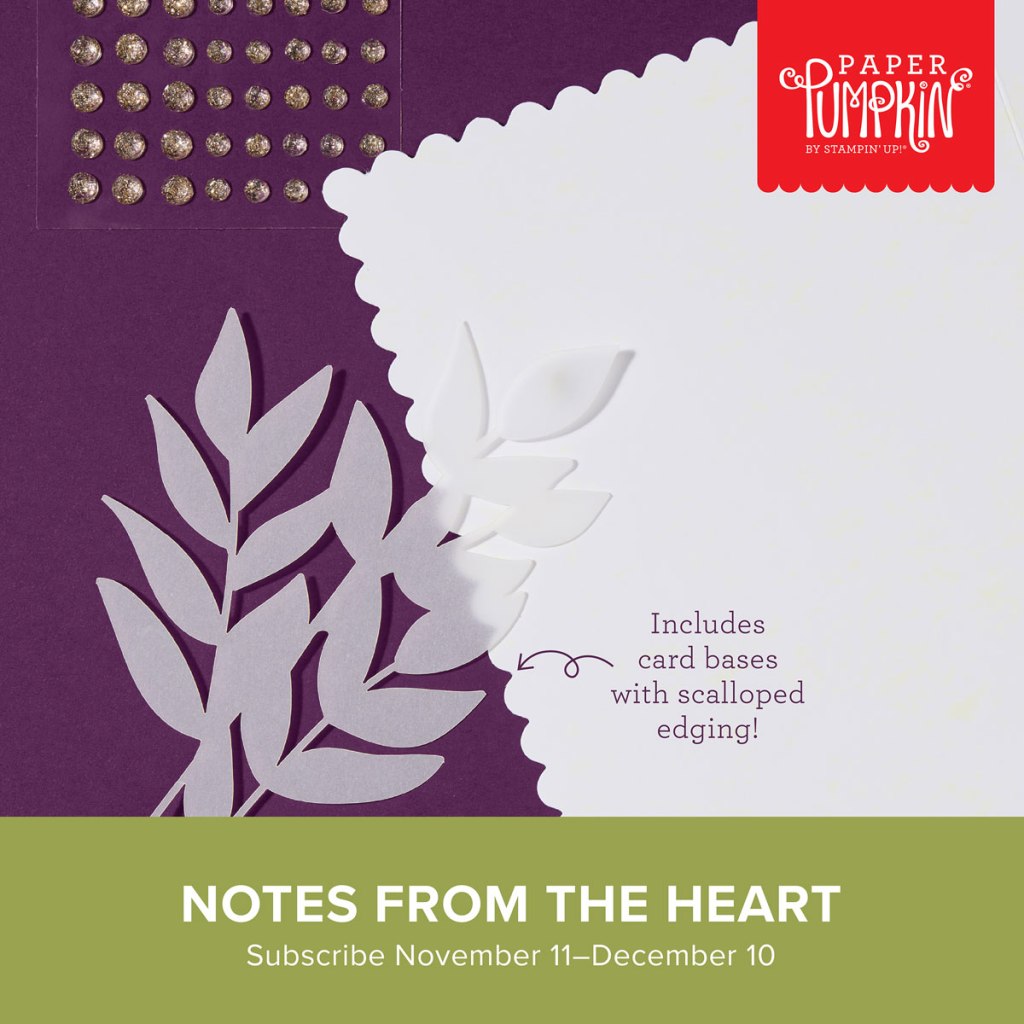
Notes From The Heart

Subscribe November 11 – December 10

Create cards with hand-sketched botanical designs.
• Makes 9 projects: 3 each of 3 designs
• Precut vellum pieces and sparkling gems
• Scalloped card bases and coordinating envelopes
• Coordinating colors: Blackberry Bliss (Classic Stampin’ Spot), Flirty Flamingo,
Old Olive, Pecan Pie, Pretty in Pink, Very Vanilla

Subscribe to Paper Pumpkin for a monthly, all-inclusive crafting kit that’s a fun surprise! Each kit includes a photopolymer stamp set, Classic Stampin’ Spot, and step by step instructions to complete exclusive paper craft projects, including cards, tags, and gift
packaging. And don’t miss the special add-on that coordinates with the next three months!

Subscribe to the December Paper Pumpkin Kit between 11 November and 10 December by clicking here!

*********************************************************************************************************

Don’t miss the coordinating
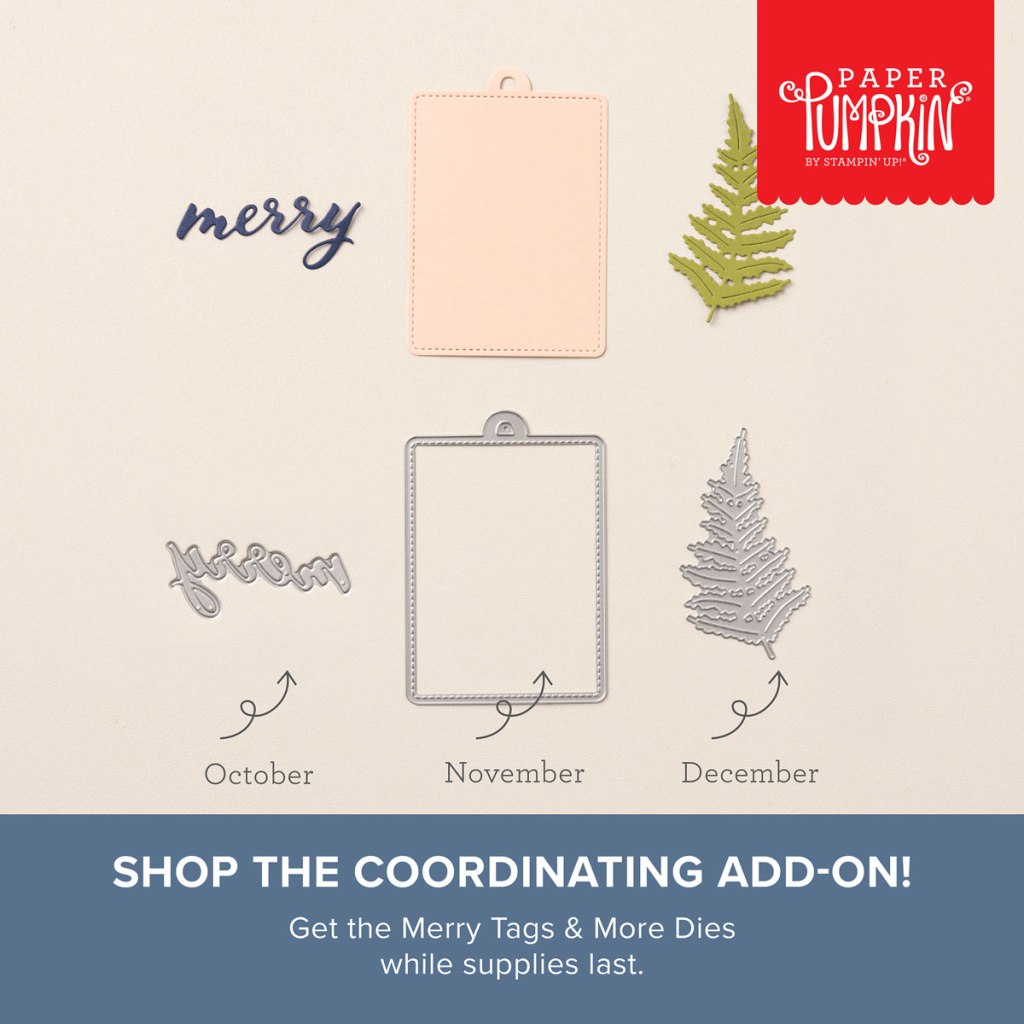
Merry Tags & More Dies Add-On!

Add dimension and detail to your cards, scrapbook pages, and gift tags with the Merry Tags & More Dies! With a leaf and tag shape and Merry sentiment, these dies are a great way to expand your crafting experience. They even coordinate with three Paper Pumpkin Kits: Nests of Christmas, Filled with Joy, and Notes from the Heart. Such easy coordination makes these dies a must-have for any paper craft. Paper Pumpkin subscribers can purchase it beginning 11 September. The add-on is available only while supplies last, so it’s best to shop early! Please note that the Stampin’ Cut and Emboss Machine is not included and can be purchased separately.

#165639 $12

Note: Supplies may be limited toward the end of the subscription period.

*********************************************************************************************************

Card stock cuts for this project:

  • Mossy Meadow Cardstock 41/4″ X 5 1/2″(card base), 3 1/2″ X 5″(sentiment mat), 2″ X 3″(boughs)
  • Old Olive Cardstock 2″ X 3″ (boughs)
  • Very Vanilla Cardstock 2 – 3″ X 4 1/4″(sentiment & inner liner), 2″ X 3 1/2″(poinsettia)
  • Season of Green & Gold Specialty Designer Series Paper 5 1/4″ X 6″(card front scored & folded at 4″), 2 1/4″ X 6″(envelope flap)
  • Brushed Silver & Gold Specialty Paper 4 1/8″ X 5 3/8″ (card front mat)

*********************************************************************************************************

Product List

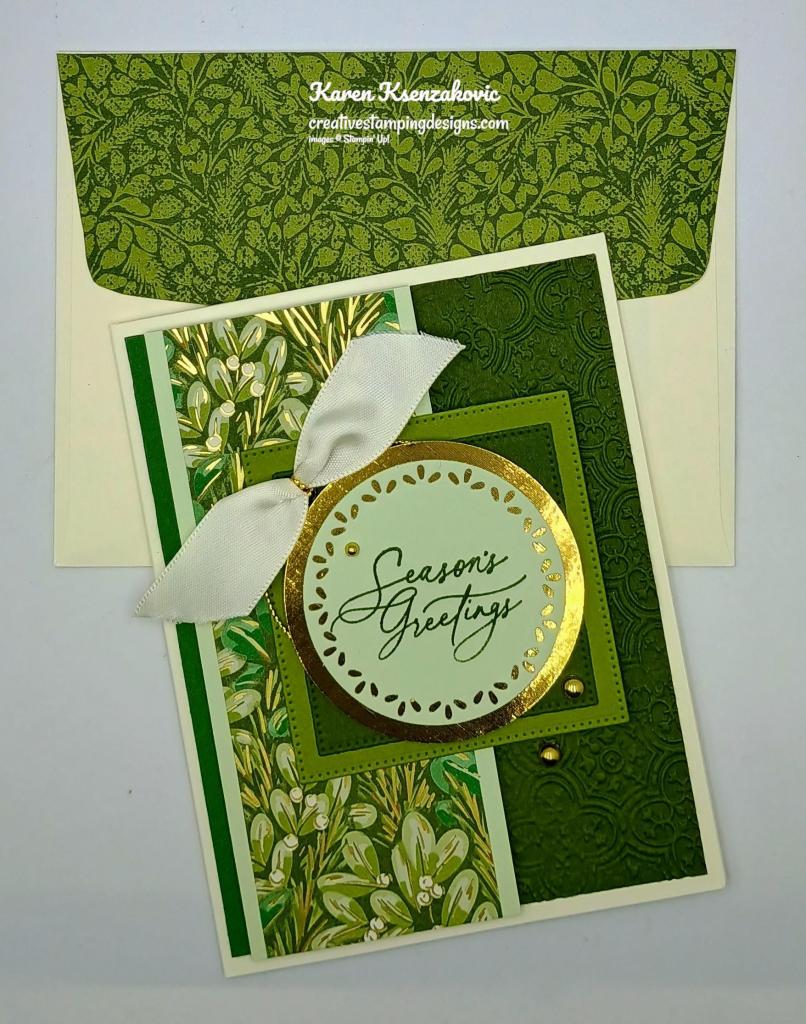
Stampin’ Up! Greetings of The Season

Good Saturday morning stamping friends and welcome to the weekend. I hope you are all have some plans in the works. I’ll be working all day today and I’m hoping to start the Christmas decorating process a little tomorrow. Yesterday and last night I was able to completely un-decorate my house. Those of you that know me, know that I pack everything away for the holidays from Knick Knacks to pictures and pillows. I rearrange furniture and move some out of the room to fit my Christmas decorations and tree. My house is like walking into Christmas land.

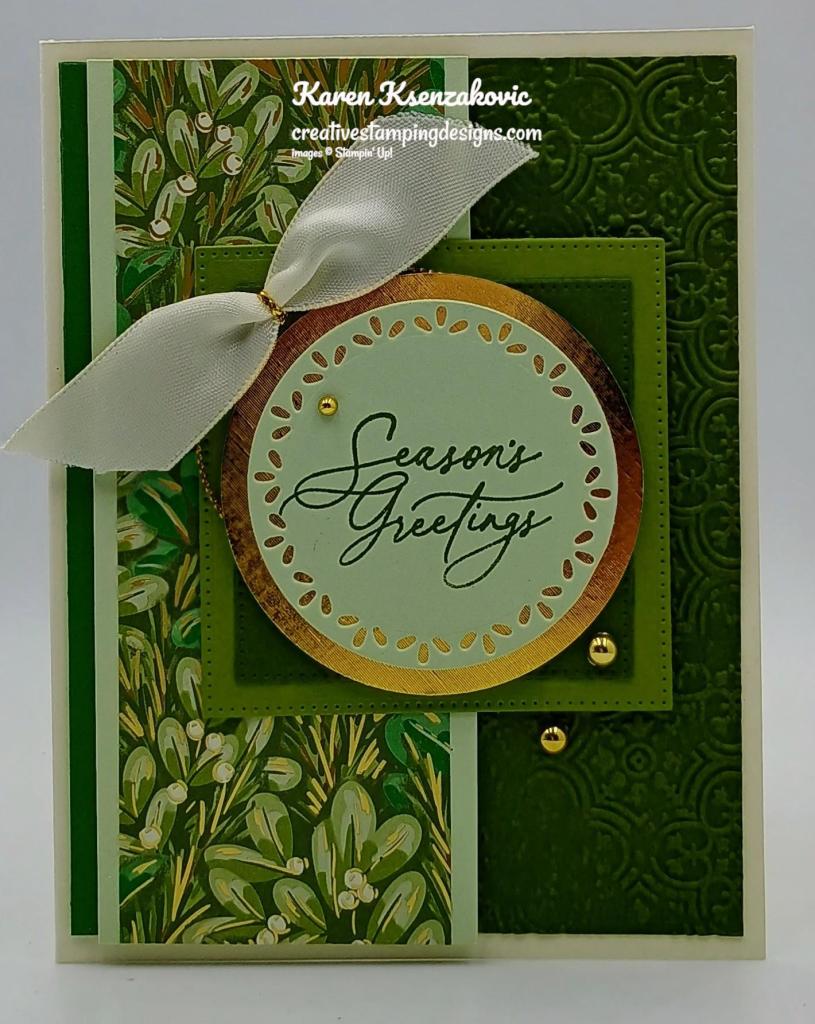
Today’s card was designed by Karen Ilsley for our retreat last weekend. It’s such a beautiful Christmas card and I couldn’t wait to make it. Here’s my card for today.

Stampin' Up! Greetings Of The Season 1 creativestampingdesigns.com

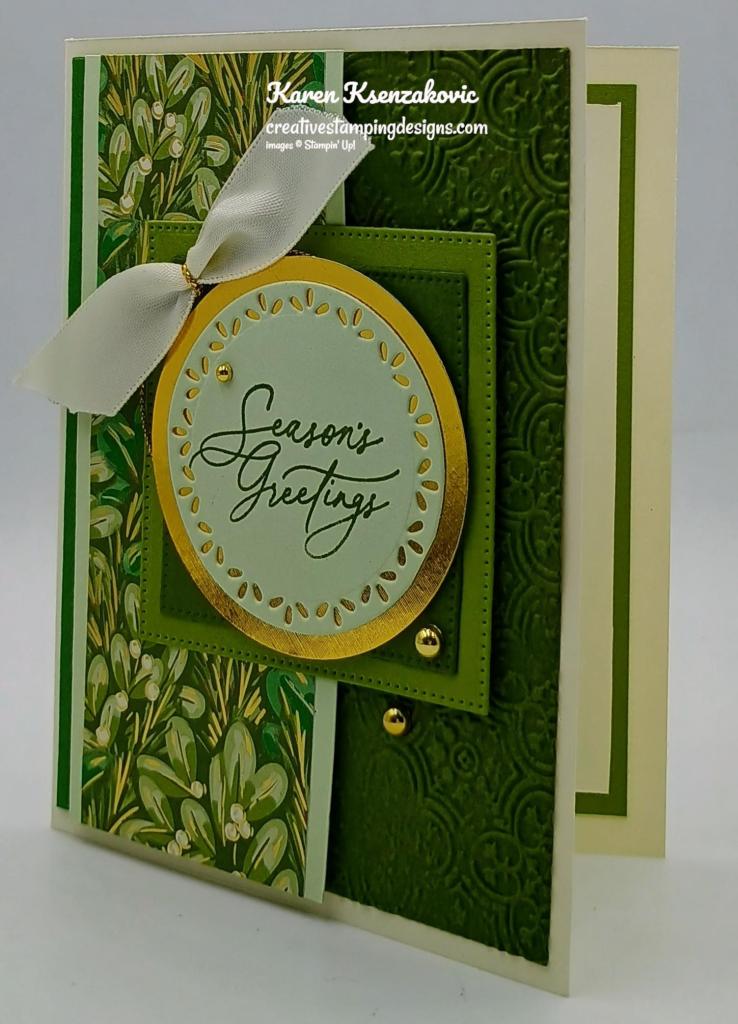
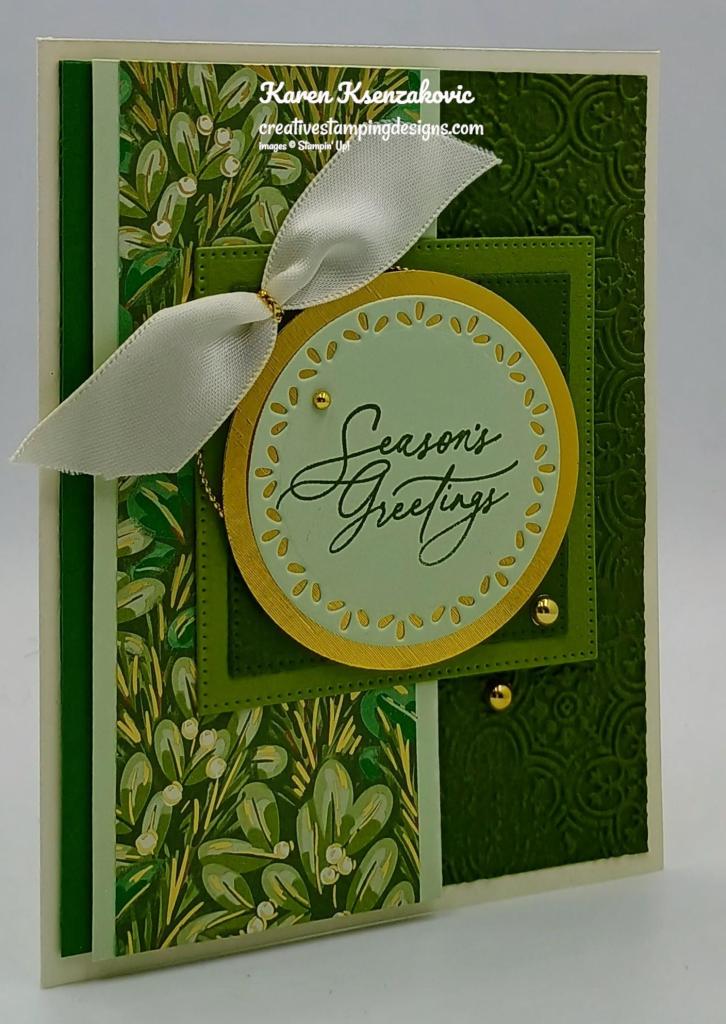
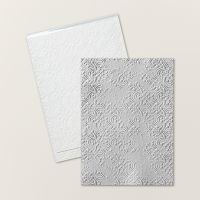
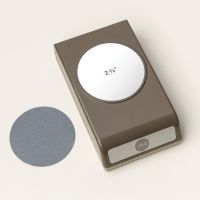
I used the Stampin’ Up! Online Exclusive Greetings of the Season Photopolymer Stamp Set along with the Stampin’ Up! Golden Greenery Photopolymer Stamp Set, Season of Green &Gold Specialty Designer Series Paper, Spotlight on Nature Dies, Distressed Tile 3D Embossing Folder, Brushed Silver & Gold Specialty Paper, Stylish Shapes Dies and 2 3/8″ Circle Punch for my card today.

Stampin' Up! Greetings Of The Season 2 creativestampingdesigns.com

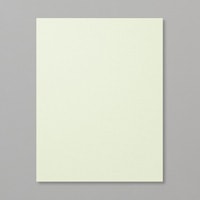
Emboss a panel of Mossy Meadow using the Distressed Tile EF. Adhere the embossed panel to a Very Vanilla card base using Liquid Glue. Adhere a strip of Garden Green to the side of the embossed panel using Liquid Glue. Adhere a panel of Season of Green & Gold DSP to a Soft Sea Foam mat using Stampin’ Seal. Adhere the layered panel to the card front using Stampin’ Dimensionals.

Stampin' Up! Greetings Of The Season 3 creativestampingdesigns.com

Using the Stylish Shapes Dies, cut panels of Old Olive and Mossy Meadow with the square dies. Adhere them together using Stampin’ Seal. Adhere them to the card front using Liquid Glue on the left side and Stampin’ Dimensionals on the right side. On a panel of Soft Sea Foam, stamp the sentiment from the Greetings of the Season stamp set in Mossy Meadow Ink. Cut the sentiment out using the Spotlight on Nature Dies. Using the 2 3/8″ Punch, cut a circle from a panel of Brushed Gold paper. Adhere the sentiment to the gold mat using Liquid Glue. Adhere the layered sentiment to the die cut squares using Stampin’ Dimensionals.

Stampin' Up! Greetings Of The Season 4 creativestampingdesigns.com

Tie a piece of the Very Vanilla 3/4″ Satin Ribbon using Gold Twisted Thread. Adhere it to the card front using a Glue Dot. Add a few gold Blooming Pearls to the card front.

Stampin' Up! Greetings Of The Season 5 creativestampingdesigns.com

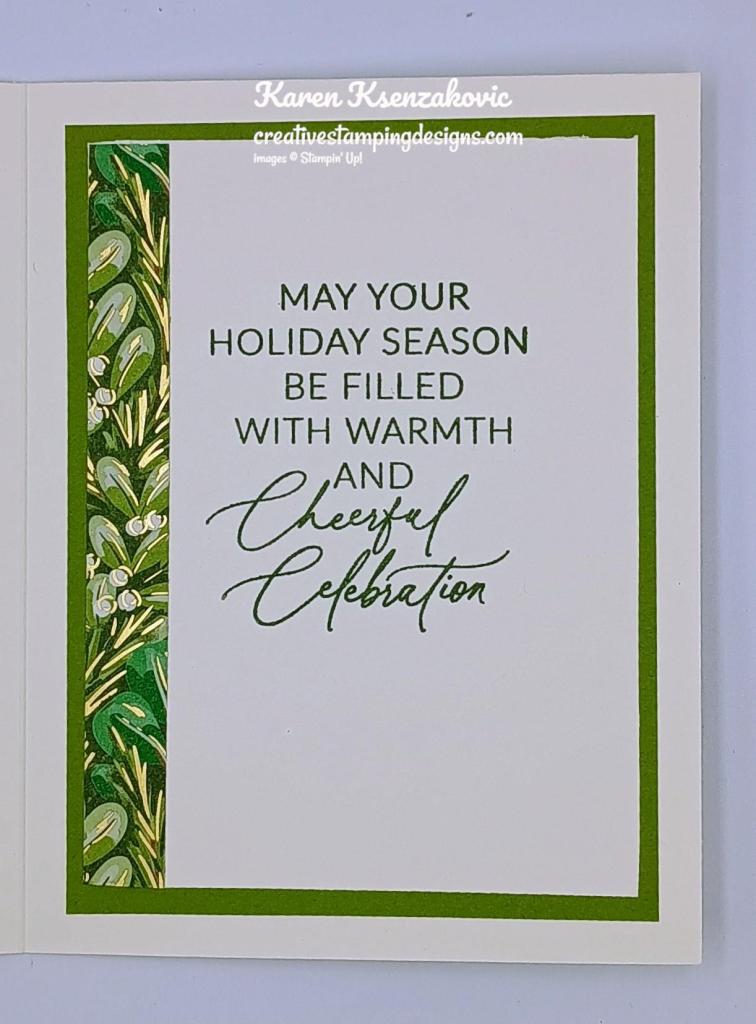
On a panel of Very Vanilla, stamp the sentiment from the Greetings of the Season stamp set in Mossy Meadow Ink. Adhere a strip of Season of Green & Gold DSP to the side of the panel. Adhere the Very Vanilla panel to an Old Olive mat then to the inside of the Very Vanilla card base.

Stampin' Up! Greetings Of The Season 6 creativestampingdesigns.com

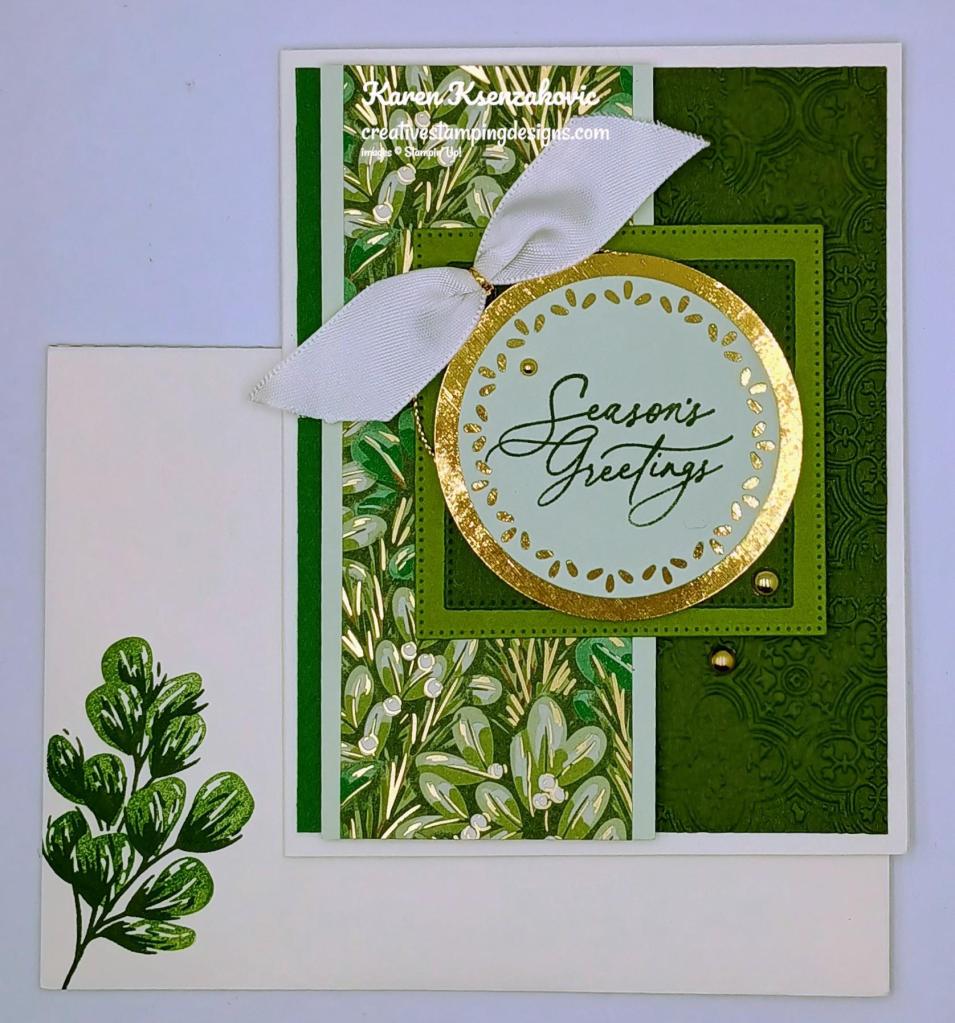
Finish the card by decorating a Basic White Medium Envelope. Stamp the detailed leaf image from the Golden Greenery stamp set in Mossy Meadow Ink on the envelope front. Stamp the solid leaf image from the Golden Greenery stamp set in Old Olive Ink over the detailed image. Adhere a panel of Season of Green & Gold DSP to the envelope flap.

Stampin' Up! Greetings Of The Season 7 creativestampingdesigns.com

Thank you for stopping by my blog today. I hope you like the card and will give it a try. Happy Stamping!!

*********************************************************************************************************

If you need any stamping supplies, I’d love to be your Demonstrator. Just click HERE to go directly to my online store or drop me an email if you have any questions. 

MY CURRENT HOST CODE IS:   4RTJCBH2

Use this host code when placing an order with me. When you order $50 or greater you will receive a free gift from me! If your order is over $150, please do not use this code, but you’ll still get the free gift. The free gift is your choice of any 1 item valued up to $10.00 from the 2024 – 2025 Annual Catalog, September – December 2024 Mini Catalog or from the Online Exclusives!  For any orders $50 or more I will also send you my monthly class tutorials.  Click HERE or go to my Customer Rewards for more details and to see what this month’s tutorials are.

Please remember to use my current Host Code and make sure that you can see my name on the final checkout page listed as your Demonstrator when you order so that you know that you’re ordering with me, and you’ll get my rewards! 

Happy Stamping, Karen

*********************************************************************************************************

January – April 2025 Mini Catalog and Sale-A-bration 2025 Brochure Coming Soon!!

WooHoo!!! The new January-April 2025 Mini Catalog and Sale-a-bration 2025 Brochure arrived yesterday!  I’ll be packing them up and mailing them out to my current customers just as soon as I can!

If you’ve ordered from me within the last year, you’ll automatically be on my mailing list for the new catalogs.  If you are not a current customer of mine but would like to be and would like to get a copy of the upcoming catalog, simply place an order through my online store and I’ll mail you a copy of the catalog too!

*********************************************************************************************************

New Online Exclusive Products Now Available

Don’t forget to check out the Online Exclusive page in my Online Store. A new line of products for Online Exclusives are now available! You won’t find these items in any catalog. This is a great opportunity to spark creativity, expand a crafting collection, and discover new opportunities—all from the convenience of the online store.

*********************************************************************************************************

Notes From The Heart

Subscribe November 11 – December 10

Create cards with hand-sketched botanical designs.
• Makes 9 projects: 3 each of 3 designs
• Precut vellum pieces and sparkling gems
• Scalloped card bases and coordinating envelopes
• Coordinating colors: Blackberry Bliss (Classic Stampin’ Spot), Flirty Flamingo,
Old Olive, Pecan Pie, Pretty in Pink, Very Vanilla

Subscribe to Paper Pumpkin for a monthly, all-inclusive crafting kit that’s a fun surprise! Each kit includes a photopolymer stamp set, Classic Stampin’ Spot, and step by step instructions to complete exclusive paper craft projects, including cards, tags, and gift
packaging. And don’t miss the special add-on that coordinates with the next three months!

Subscribe to the December Paper Pumpkin Kit between 11 November and 10 December by clicking here!

*********************************************************************************************************

Don’t miss the coordinating
Merry Tags & More Dies Add-On!

Add dimension and detail to your cards, scrapbook pages, and gift tags with the Merry Tags & More Dies! With a leaf and tag shape and Merry sentiment, these dies are a great way to expand your crafting experience. They even coordinate with three Paper Pumpkin Kits: Nests of Christmas, Filled with Joy, and Notes from the Heart. Such easy coordination makes these dies a must-have for any paper craft. Paper Pumpkin subscribers can purchase it beginning 11 September. The add-on is available only while supplies last, so it’s best to shop early! Please note that the Stampin’ Cut and Emboss Machine is not included and can be purchased separately.

#165639 $12

Note: Supplies may be limited toward the end of the subscription period.

*********************************************************************************************************

Card stock cuts for this project:

  • Garden Green Cardstock 1″ X 5 1/4″ (card front panel)
  • Mossy Meadow Cardstock 4″ X 5 1/4″(card front), 2 1/2″ X 2 1/2″(die cut square)
  • Old Olive Cardstock 3″ X 3″(die cut square), 3 5/8″ X 5″(inner liner mat)
  • Soft Sea Foam Cardstock 2 1/4″ X 5 1/4″(dsp mat), 2 1/2″ X 2 1/.2″(sentiment)
  • Very Vanilla Cardstock 5 1/2″ X 8 1/2″(card base scored & folded at 4 1/4″), 3 1/2″ X 4 5/8″(inner liner)
  • Season of Green & Gold Specialty Designer Series Paper 2″ X 5 1/4″(card front panel), 1/2″ X 4 5/8″ (inner liner), 2 1/4″ X 6″(envelope flap)
  • Brushed Silver & Gold Specialty Paper 2 3/4″ X 2 3/4″(sentiment mat)

*********************************************************************************************************

Product List