Good Wednesday morning my stamping friends. How is everyone doing today? We’re halfway through the week and on our way to the weekend.
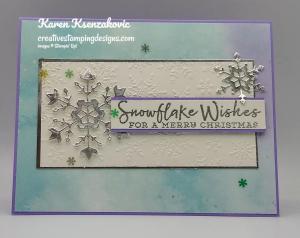
I’m very excited today to be a part of the Design Team for The Card Concepts. I was so honored when they asked me to join their team. The Card Concepts is a 2 week Inspirational Challenge. Here is my card for today.
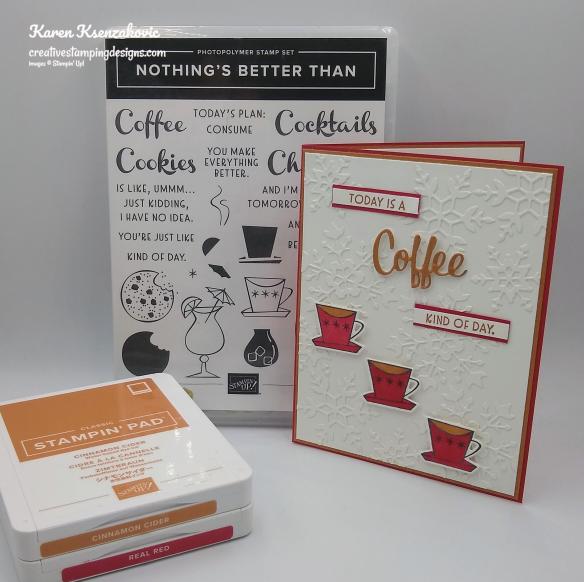
This challenge is Winter Warmth.
I hope you will take a moment to visit The Card Concept to join us and play along.

I was inspired by the entire photo from the cappuccino, colors and the snowflakes.
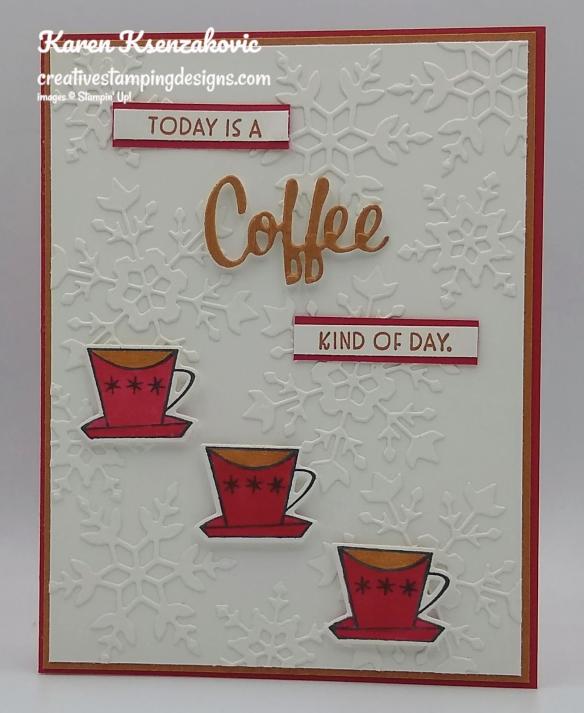
I started by adhering a panel of Whisper White cardstock to an Adhesive Sheet and cut multiple snowflakes out using my So Many Snowflakes Dies. I adhered the snowflakes to a 4 1/4″ X 5 1/2″ panel of Whisper White cardstock then cut it down to a 4″ X 5 1/4″ panel.
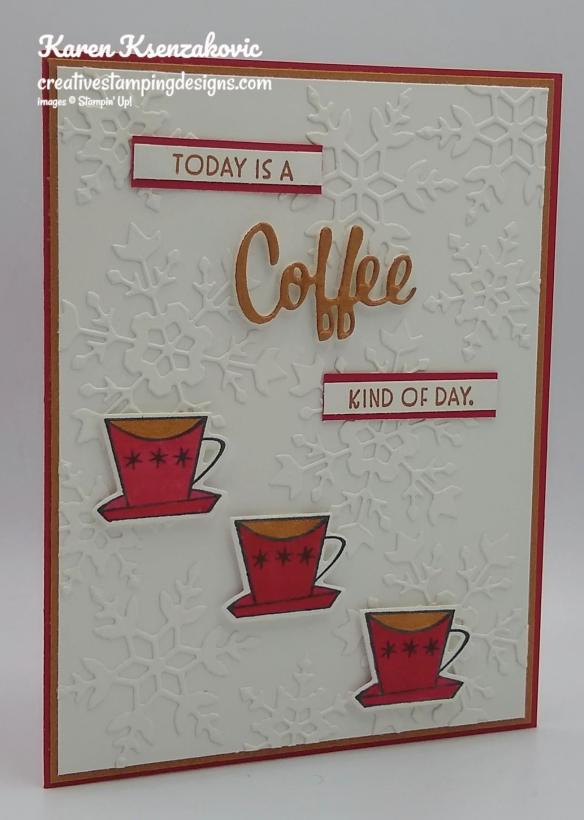
On thin stirps of Whisper White cardstock I stamped the sentiments from the Stampin’ Up! Nothing’s Better Than Photopolymer Stamp Set in Cinnamon Cider Ink. On another panel of Whisper White cardstock I stamped the coffee cup image from the Nothing’s Better Than stamp set in Tuxedo Black Ink 3 times and colored them in using my Cinnamon Cider and Real Red Stampin’ Blends Markers. I cut the images out using my Love You More Than Dies. I cut the ‘coffee’ sentiment out of a panel of Cinnamon Cider cardstock that I had adhered to a Foam Adhesive Sheet using my Love You More Than Dies.
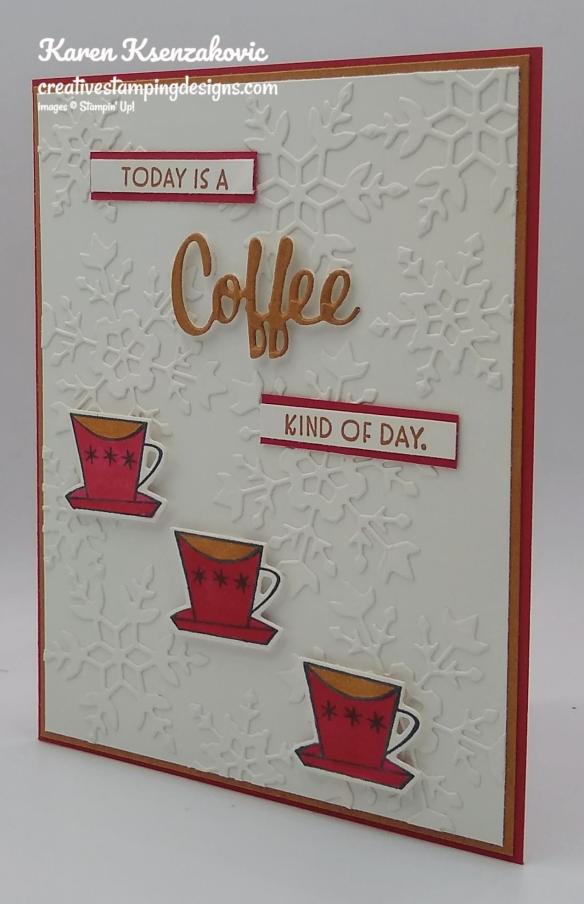
I adhered the thin sentiment strips to Real Red mats using Stampin’ Seal and then to the card front using Multipurpose Liquid Glue. I adhered the ‘coffee’ sentiment to the card front. I adhered the 3 cups of coffee to the card front using Stampin’ Dimensionals. I adhered the card front to a Cinnamon Cider mat using Stampin’ Seal and then to the card front using Multipurpose Liquid Glue.

On the inside I stamped the sentiment from the Nothing’s Better Than stamp set in Cinnamon Cider Ink in the center of a Whisper White panel. I stamped the coffee cum image from the Nothing’s Better Than stamp set in Tuxedo Black Ink on the bottom of the panel and colored them in using my Cinnamon Cider and Real Red Stampin’ Blends Markers. I adhered 2 of the smallest snowflakes I cut from the So Many Snowflakes Dies on either side of the sentiment. I adhered the Whisper White panel to a Cinnamon Cider mat using Stampin’ Seal and then to the inside of the Real Red card base using Multipurpose Liquid Glue.

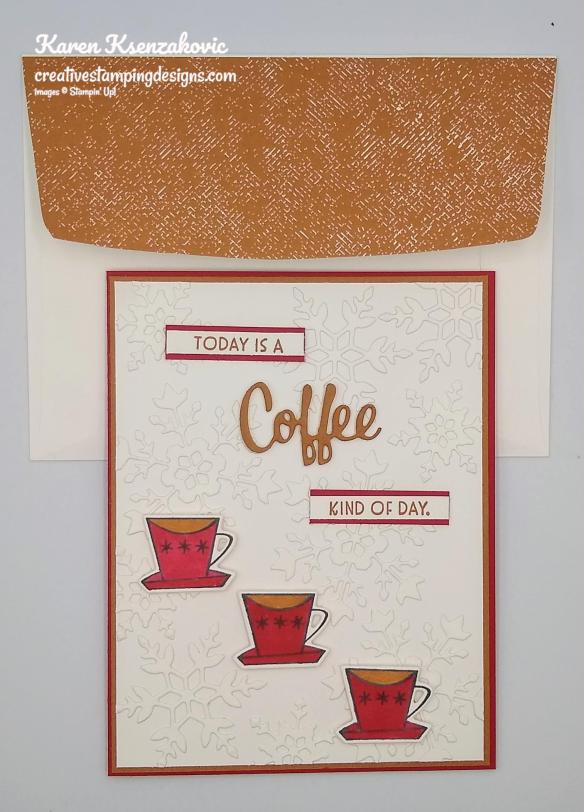
To finish my card I decorated a Medium Whisper White Envelope. I stamped the coffee cup image from the Nothing’s Better Than stamp set 3 times across the bottom of the envelope front and colored the images in using my Cinnamon Cider and Real Red Stampin’ Blends Markers. I adhered a panel of the Cinnamon Cider 2020-2022 In-Color Designer Series Paper to the envelope flap.
Thank you for stopping by my blog today. I hope you liked my card and will give it a try. Happy Stamping!!
****************************************************************************************************
Join me today at 4pm on my Facebook Live.
I’m planning to go live on my Facebook page with a project today at 4:00pm ET. Stop by my Facebook page at 4pm ET to see what card I will be making today.
*********************************************************************************************************
If you need any stamping supplies, I’d love to be your Demonstrator. Just click HERE to go directly to my online store or drop me an email if you have any questions.
MY CURRENT HOST CODE IS: C4XDWQT6
Use this host code when you order $50 or greater and receive a free gift from me! If your order is over $150, please do not use this code, but you’ll still get the free gift. The free gift is your choice of any 1 item valued up to $10.00 in the 2020-2021 Annual Catalog! For any orders $50 or more I will also send you my monthly class tutorials. Click HERE or go to my Customer Rewards for more details and to see what this months tutorials are.
Click HERE to shop the clearance rack.
Please remember to use my current Host Code and make sure that you can see my name on the final checkout page listed as your Demonstrator when you order so that you know that you’re ordering with me and you’ll get my rewards!
Happy Stamping, Karen!
*********************************************************************************************************
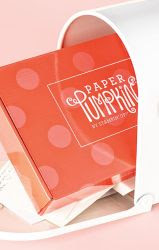
Sending Hearts
Subscribe December 11-January 10

Love is in the air! Send a little love to someone special with the Sending Hearts Paper Pumpkin Kit. From heaps of heart-shaped elements to paper pieces in red and pink, this month’s kit has everything you need to create eight adorable cards—with coordinating envelopes—for Valentine’s Day, anniversaries, and every celebration of love in between!
With the add-on to January’s sweet and sentimental kit, there’s even more love to share! The add-on—called Little Love Boxes—includes 20 tiny, printed boxes and 24 die-cut, heart-shelled snails and sentiment labels. When combined with the remaining components from the Sending Hearts kit, you can create treat packaging, additional cards, and so much more!
ABOUT THE JANUARY KIT
Details
- Kit contains enough supplies to create eight cards—four each of two designs—and coordinating envelopes.
- Card size: 4-1/4″ x 5-1/2″ (10.8 x 14 cm)
- Envelope size: 4-1/2″ x 5-3/4″ (11.4 x 14.6 cm)
- Coordinating colors: Basic Black, gold, Petal Pink, Poppy Parade, Smoky Slate, white
ABOUT THE ADD-ON
Name Little Love Boxes
Details
- Add-on contains 20 printed mini boxes and 24 die-cut decorative pieces and sentiment labels.
- Item number: 156842
- Price: $8 USD/$11 CAD
- Available 1 January, while supplies last!
Subscribe to the January 2021 Paper Pumpkin Kit between 11 December and 10 January at paperpumpkin.com!
ADD-ON ORDERING INFORMATION
Purchase the Little Love Boxes add-on to the Sending Hearts Paper Pumpkin Kit on stampinup.com, or by placing an order through my online store. The add-on will be available starting 1 January, while supplies last. You must be a Paper Pumpkin subscriber to order the add-on.
- Little Love Boxes (156842)
- $8 USD | $11 CAD
Note: Add-on is not included in January’s Paper Pumpkin subscription. It must be purchased through a separate order.
Note: Supplies may be limited toward the end of the subscription period.
*********************************************************************************************************
Card stock cuts for this project:
- Cinnamon Cider Cardstock 2 – 4 1/8″ X 5 3/8″ (card front and inner liner mats), 1 1/2″ X 2″ (sentiment)
- Real Red Cardstock 8 1/2″ X 5 1/2″(card base scored and folded at 4 1/4″), 2 – 3/8″ X 1 1/2″ (sentiment mats)
- Basic White Cardstock 2 – 4 1/4″ X 5 1/2″ (snowflakes & card front), 1″ X 5″ (coffee cups), 2 – 1/4″ X 1 1/2″ (sentiments), 4″ X 5 1/4″ (inner liner)
*********************************************************************************************************
Product List

")


")


 Ribbon")


")