
Good Saturday morning my stamping friends. How has everyone’s weekend started off? I’ll be at work all day today and tomorrow. Last I heard, we will not be getting snow this weekend, but it’s still early to tell.
Today I have something a little different for you. I don’t have step by step instructions for you since I made a pack of cards. This would make a great gift for someone tied up with some ribbon or put in one of our Acetate Card Boxes and decorated. If you have any questions about any of the cards, please message me and I will explain how I made them. Here are the cards.
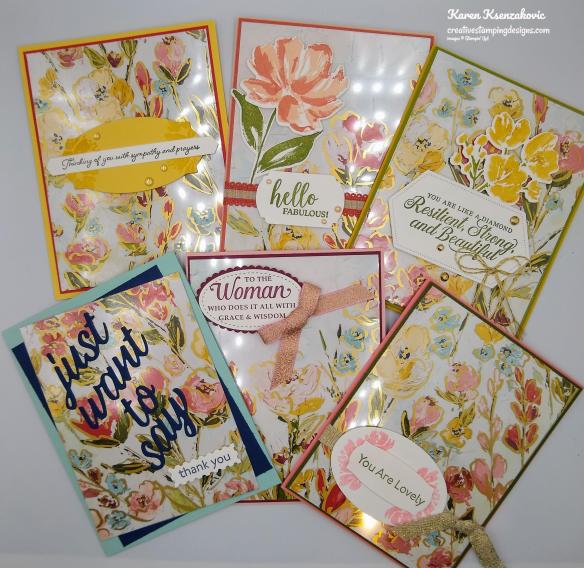
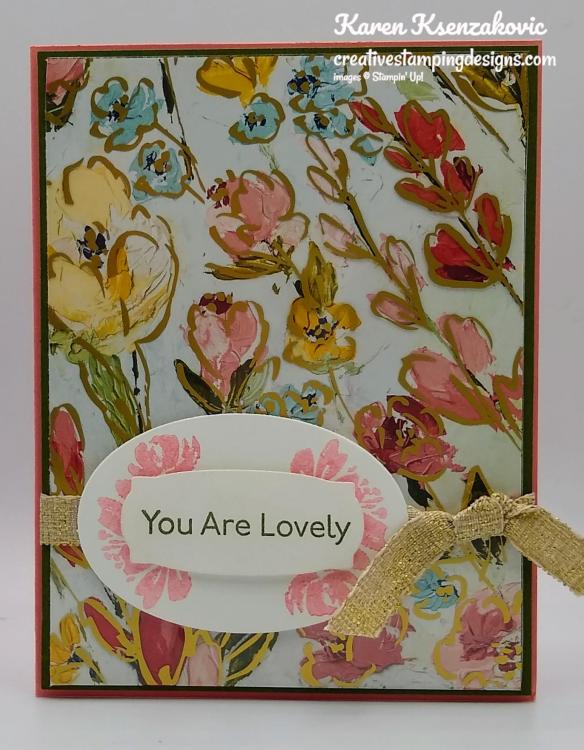
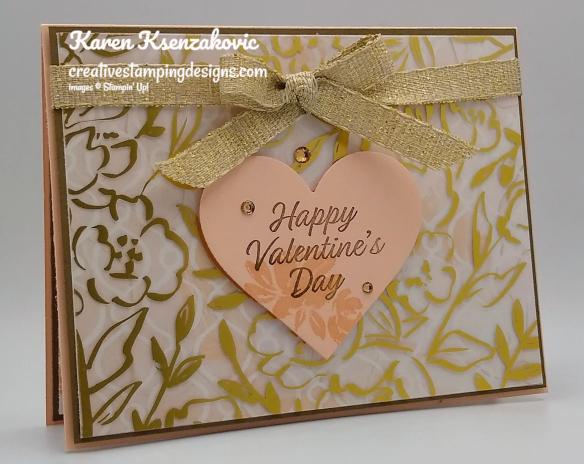
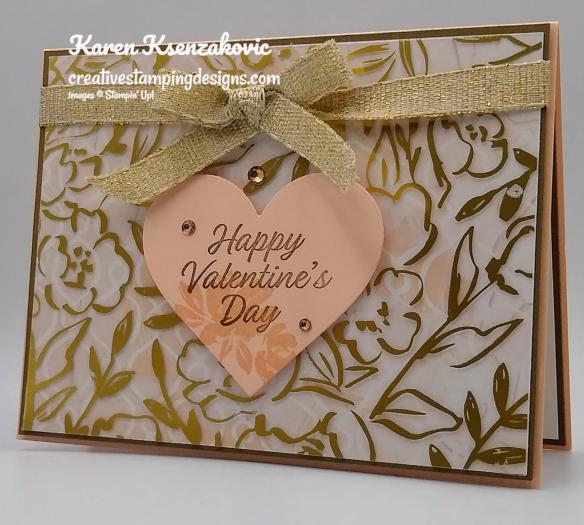
I used 1 sheet of the Fine Art Floral Designer Series Paper and 1 sheet of the Golden Garden Designer Series Acetate to make all 6 cards. I placed the acetate over the DSP, tacked it in a couple places using Glue Dots and cut 4″ X 5 1/4″ panels.

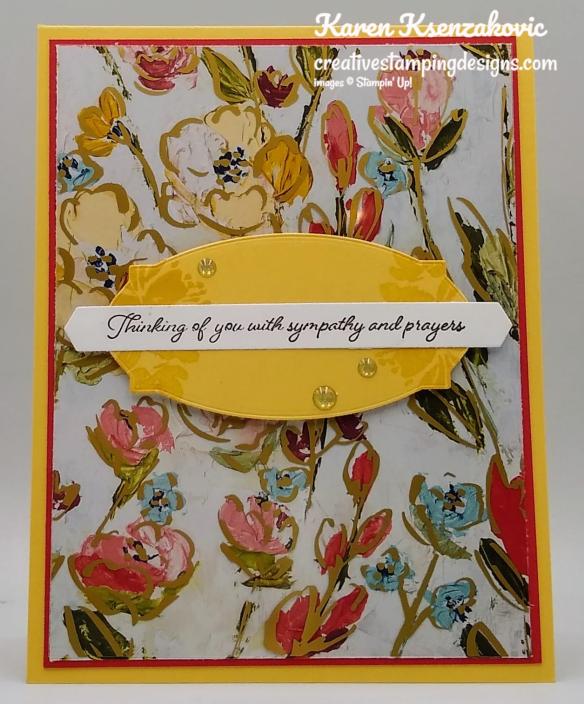
This card I used So Saffron and Poppy Parade cardstock and just did a simple layering. I stamped the sentiment from Stampin’ Up! Many Messages Cling Stamp Set in Soft Suede Ink and cut it our with the Messages Dies. Adhered it to Hippo and Friends die cut mat and adhered it to the card front.

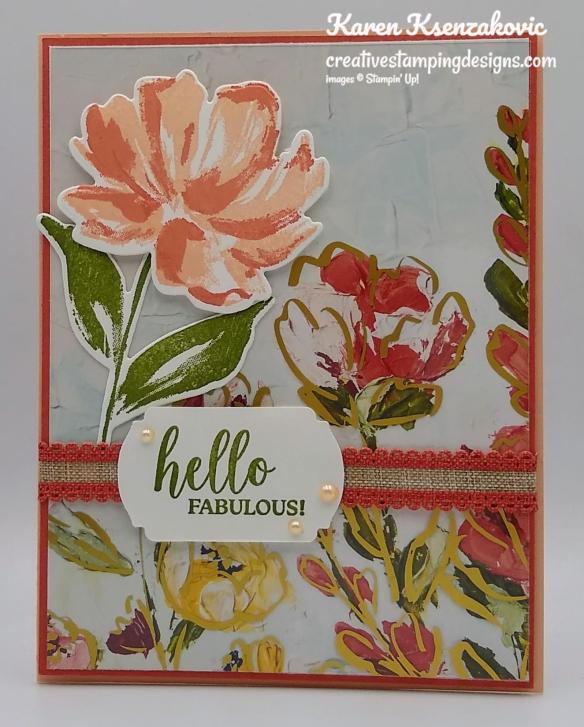
This card I used Petal Pink and Terracotta Tile cardstock and just did a simple layering. I stamped the sentiment from Stampin’ Up! Dressed To Impress Photopolymer Stamp Set in Old Olive Ink and cut it our with the Label Me Fancy Punch and adhered it to the card front. Stamped the large flower from the Stampin’ Up! Art Gallery Photopolymer Stamp Set in Petal Pink & Terracotta Tile, stem in Old Olive and cut images out with Floral Gallery Dies.

This card I used Bumblebee and Old Olive cardstock and just did a simple layering. I stamped the sentiment from Stampin’ Up! Strong & Beautiful Cling Stamp Set in Old Olive Ink, cut it our with the Stitched Nested Labels Dies and adhered it to the card front. Stamped the flower from the Stampin’ Up! Art Gallery Photopolymer Stamp Set using my Bumblebee and Old Olive Stampin’ Write Markers and cut image out with Floral Gallery Dies.

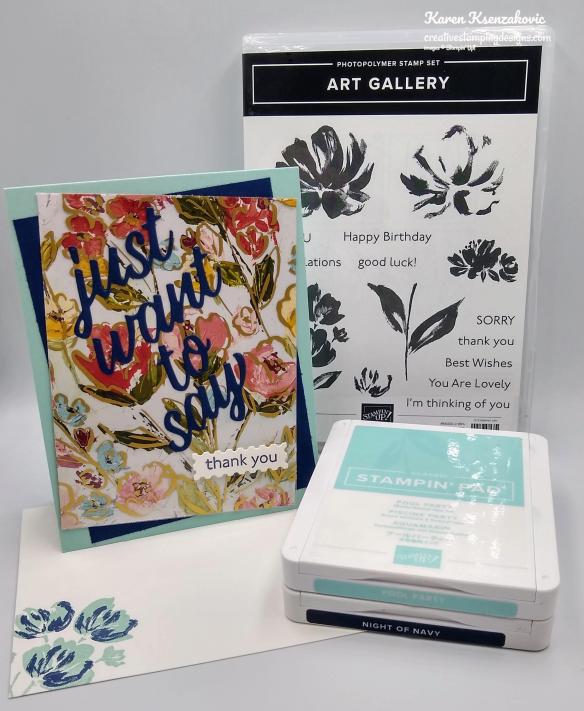
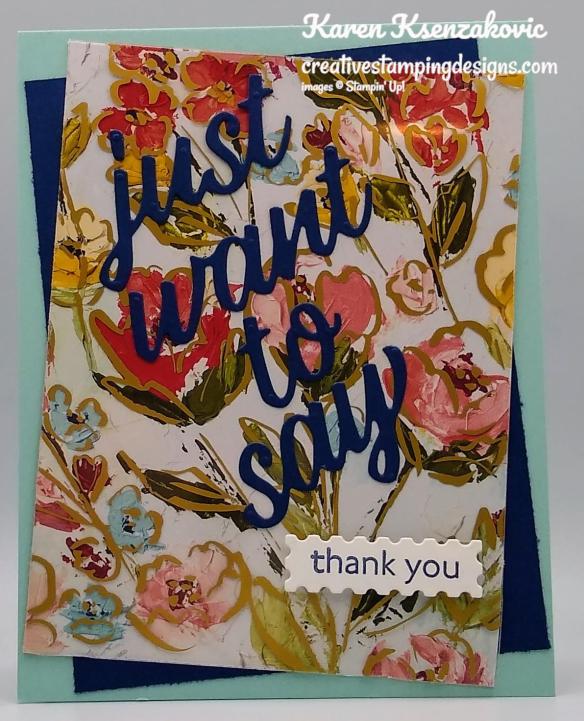
This card I used Pool Party and Night of Navy cardstock and just did an angle layering. I stamped the sentiment from Stampin’ Up! Art Gallery Stamp Set in Night of Navy Ink, cut it out with the Floral Gallery Dies and the large sentiment out of Night of Navy cardstock and adhered them to the card front.
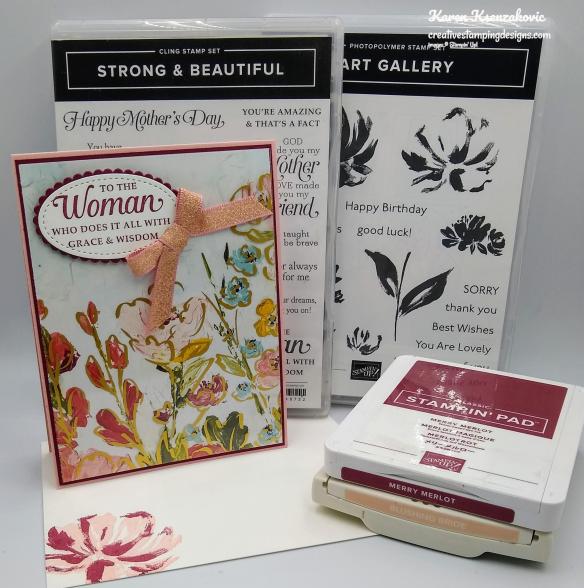
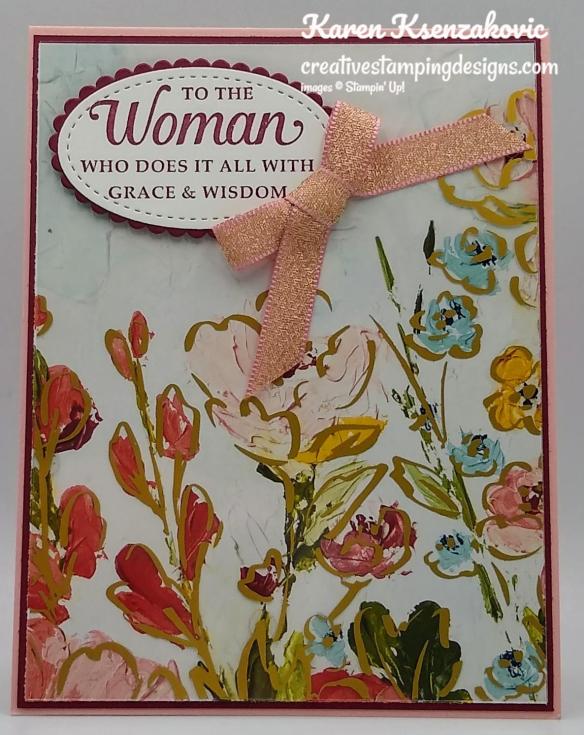
This card I used Blushing Bride and Merry Merlot cardstock and just did a simple layering. I stamped the sentiment from Stampin’ Up! Strong & Beautiful Cling Stamp Set in Merry Merlot Ink, cut it our with the Stitched Shapes Dies. I cut a scalloped mat from Merry Merlot cardstock using the Layering Ovals Dies, adhered the sentiment and adhered it to the card front.
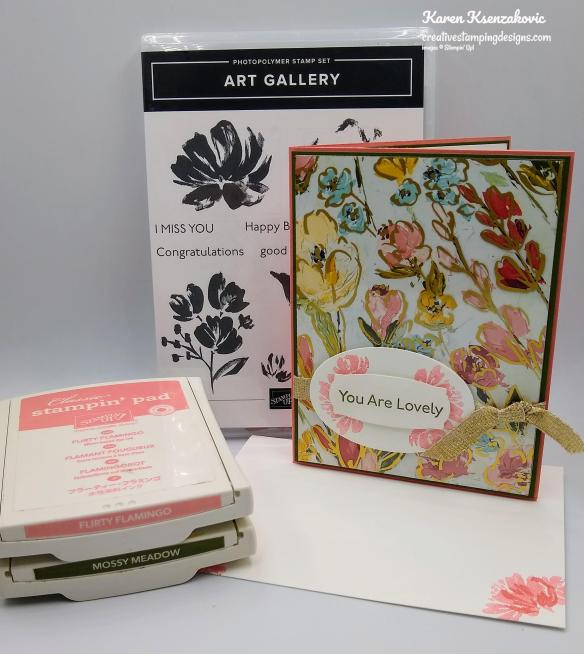
This card I used Flirty Flamingo and Mossy Meadow cardstock and just did a simple layering. I stamped the sentiment from Stampin’ Up! Art Gallery Photopolymer Stamp Set in Mossy Meadow Ink, cut it our with the Messages Dies. I cut an oval mat using the Layering Ovals Dies, adhered the sentiment and adhered it to the card front.
Thank you for stopping by my blog today. I hope you liked my card pack and will try it. Happy Stamping!!
*********************************************************************************************************
If you need any stamping supplies, I’d love to be your Demonstrator. Just click HERE to go directly to my online store or drop me an email if you have any questions.
MY CURRENT HOST CODE IS: 9BCVNW9D
Use this host code when you order $50 or greater and receive a free gift from me! If your order is over $150, please do not use this code, but you’ll still get the free gift. The free gift is your choice of any 1 item valued up to $10.00 from the 2020-2021 Annual Catalog or the January-June 2021 Mini Catalog! For any orders $50 or more I will also send you my monthly class tutorials. Click HERE or go to my Customer Rewards for more details and to see what this months tutorials are.
Click HERE to shop the clearance rack.
Please remember to use my current Host Code and make sure that you can see my name on the final checkout page listed as your Demonstrator when you order so that you know that you’re ordering with me and you’ll get my rewards!
Happy Stamping, Karen!
*********************************************************************************************************
Here’s To You
Subscribe February11th – March 10th

Three cheers for mountain air, a sky filled with sunshine, and finding joy in life’s journey! Adventure awaits inside this month’s majestic, mountain-themed kit. With enough elements and embellishments to create eight cards and coordinating envelopes, the Here’s to You Paper Pumpkin Kit is the perfect pick for celebrating life’s little moments and mountain-high milestones!
What makes March’s kit one-of-a-kind? The spectacular set of four free stencils—and a stamping sponge—that you’ll find inside! Pair this pack of stunning stencils with the kit’s contents to stamp a springtime scene, then store the set to stamp for any season in the future. Clean up your binoculars and dust off your hiking boots—the Here’s to You Paper Pumpkin Kit is ready to lead you on an excursion to explore your creativity!
ABOUT THE MARCH KIT
Details
- Kit contains enough supplies to create 8 cards—4 each of 2 designs—and coordinating envelopes. The kit’s contents include printed card bases, die-cut paper pieces, embellishments, adhesive, and more!
- Card size: 4-1/4″ x 5-1/2″ (10.8 x 14 cm)
- Envelope size: 4-1/2″ x 5-3/4″ (11.4 x 14.6 cm)
- Coordinating colors: Bumblebee, Calypso Coral, Old Olive, Petal Pink, Pretty Peacock, Seaside Spray
- Includes four free stencils and a stamping sponge!
- Arrives in a cute and collectible box.
Subscribe to the March 2021 Paper Pumpkin Kit between 11 February and 10 March at paperpumpkin.com!
Note: Supplies may be limited toward the end of the subscription period.
*********************************************************************************************************
Product List


")


 Blushing Bride Metallic Ribbon")
 Fine Art Ribbon")

 Scalloped Linen Ribbon")


")

 Designer Series Paper")


