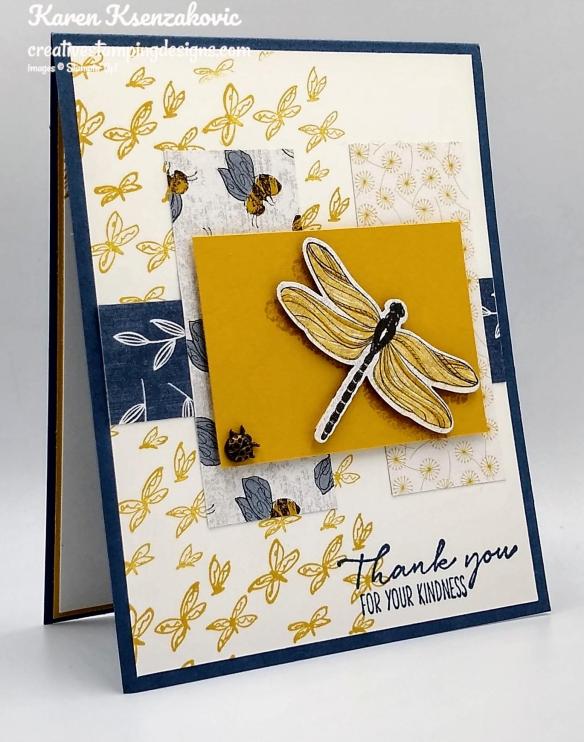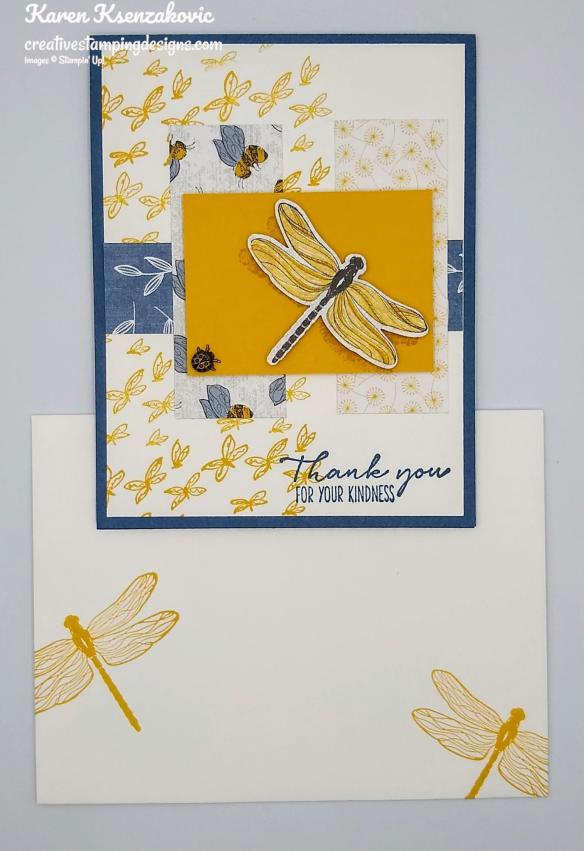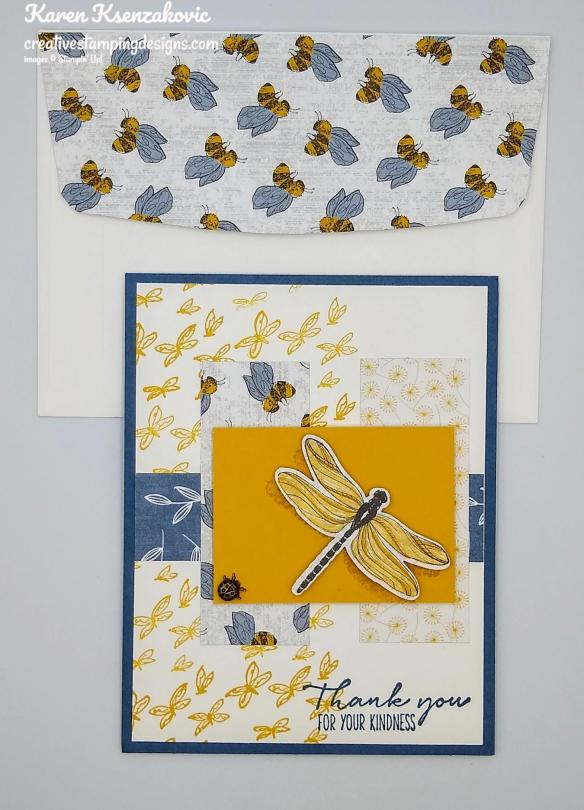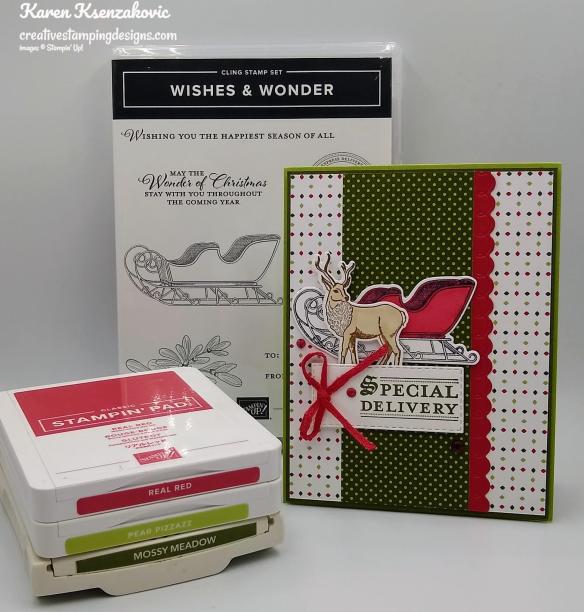
Stampin’ Up! Plaid Gnome For The Holidays for Happy Inkin’ Thursday Blog Hop

Good Thursday morning my stamping friends and welcome to our Happy Inkin’ Thursday Blog Hop.  Hope you are all doing well.  If you are hopping over from Akiko, thank you for stopping by my blog. This week we have a color challenge. Be sure to take a moment to hop around to see everyone’s awesome projects.
Here are our colors for this week.

Here’s my card using these colors.

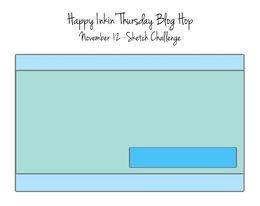
I used the Stampin’ Up! Gnome For The Holidays Cling Stamp Set for today’s card. Can you tell this is my favorite set in the catalog? My design is from TGIF Challenge #290. Here is their sketch.

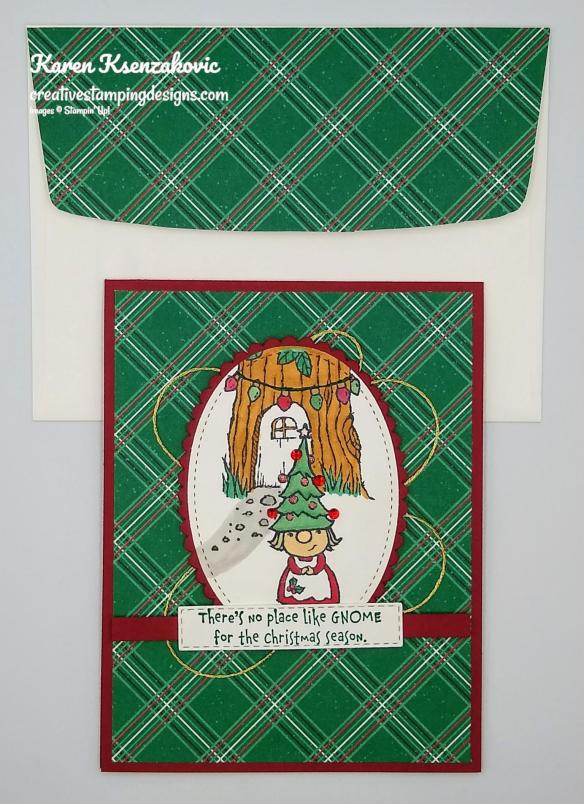
I started by adhering a panel of ‘Tis The Season 6 X 6 Designer Series Paper to a Cherry Cobbler card base using Multipurpose Liquid Glue

On a panel of Whisper White cardstock I stamped the gnome image from the Gnome For The Holidays stamp set in Tuxedo Black Memento Ink. I masked the gnome image with a Post-It Note and stamped the tree house image from the Gnome For The Holidays stamp set behind the gnome in Tuxedo Black Memento Ink. To do the masking, you stamp an image on a Post-It Note and fussy cut it using your Paper Snips. You place the cut image over the stamped image and stamp the next image you want and it will appear to be behind the 1st image. I colored the images in using my Bronze, Cherry Cobbler, Cinnamon Cider, Crumb Cake, Gray Granite, Ivory, Just Jade, Petal Pink, Real Red and Shaded Spruce Stampin’ Blends Markers. One of the colors in the color challenge is Garden Green, but they haven’t made a Garden Green Blends Marker yet, so I used Just Jade. I cut the image out using the largest oval from the Stitched Shapes Dies. I cut a scalloped oval from the Layering Ovals Dies from a panel of Cherry Cobbler cardstock and adhered the artwork to it using Stampin’ Seal.

I stamped the sentiment from Gnome For The Holidays stamp set in Shaded Spruce Ink on a panel of Whisper White cardstock and cut it out using the smallest rectangle from the Stitched Rectangle Dies. I adhered the sentiment to a strip of Cherry Cobbler cardstock using Stampin’ Seal. On the back of the matted artwork I added some of the Gold Trim from the Forever Greenery Trim Combo Pack using Glue Dots then adhered it to the card front using Stampin’ Dimensionals. I adhered the sentiment over the artwork using Stampin’ Dimensionals and Glue Dots. I added some Red Rhinestone Basic Jewels to the Christmas Tree. On the ornaments/lights that I didn’t add rhinestones and the star I used Clear Wink of Stella.

On the inside I stamped the sentiment from the Gnome For The Holidays stamp set in Shaded Spruce Ink in the center of a Whisper White panel. I stamped another one of the gnome images from Gnome For The Holidays stamp set in Tuxedo Black Memento Ink on the bottom of the panel. I colored the image in using my Cherry Cobbler, Gray Granite, Ivory, Just Jade and Petal Pink Stampin’ Blends Markers. I adhered thin strips of the ‘Tis The Season DSP on the bottom and top of the panel using Stampin’ Seal. I adhered the Whisper White panel to a Cherry Cobbler mat using Stampin’ Seal and then to the inside of the Cherry Cobbler card base using Multipurpose Liquid Glue.

To complete my card I decorated a Medium Whisper White Envelope. I stamped the 2 gnome images from the Gnome For The Holidays stamp set in Tuxedo Black Memento Ink on the envelope front. I colored the images in using my Cherry Cobbler, Crumb Cake, Gray Granite, Ivory, Just Jade, Petal Pink, Real Red and Shaded Spruce Stampin’ Blends Markers. I adhered a panel of ‘Tis The Season DSP to the envelope flap.
Thank you for visiting my blog today. I hope you liked my card and will give it a try. Now that you’ve seen my card, take a minute to hop through all our projects today. If you click on the Next Blog button, you’ll go to Julie’s page. Or you can just click on the names below to go directly to all their blogs! Happy Hopping!!

Amy Koenders:

Mary Deatherage:

Kristi Gray:

Jaimie Babarczy: Skipping this week.

Sue Prather:

Karen Finkle:

Akiko Sudano:

Karen Ksenzakovic: You Are Here

Julie Johnston:

*********************************************************************************************************

If you need any stamping supplies, I’d love to be your Demonstrator. Just click HERE to go directly to my online store or drop me an email if you have any questions. 

MY CURRENT HOST CODE IS: 9XYYG2ZU

Use this host code when you order $50 or greater and receive a free gift from me! If your order is over $150, please do not use this code, but you’ll still get the free gift. The free gift is your choice of any 1 item valued up to $10.00 in the 2020-2021 Annual Catalog!   For any orders $50 or more I will also send you my monthly class tutorials.  Click HERE or go to my Customer Rewards for more details and to see what this months tutorials are.

 Click HERE to shop the clearance rack.

Please remember to use my current Host Code and make sure that you can see my name on the final checkout page listed as your Demonstrator when you order so that you know that you’re ordering with me and you’ll get my rewards! 

Happy Stamping, Karen!

*********************************************************************************************************

Beary Comforting

Subscribe November 11-December 10
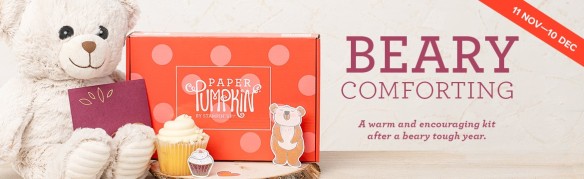
If you haven’t heard already, Paper Pumpkin is our monthly One-Stop Box™ that offers a wide variety of unique papercrafting projects for subscribers of any skill level! These themed, all-inclusive craft kits encourage customers to explore their creativity, try new techniques, and discover their potential in papercrafting.

December’s cute and cuddly Paper Pumpkin kit—called “Beary Comforting”—is designed to uplift your loved ones as this beary tough year finally comes to a close. After a year like 2020, we all could use a big bear hug! With the help of this bear-themed kit, you can create 12 unbearably cute cards featuring warm and fuzzy friends, sweet stamps, and meaningful messages. Near or far, send your friends and family the extra comfort, love, and encouragement they need with this month’s Paper Pumpkin kit!

ABOUT THE DECEMBER KIT

Details

  • Kit contains enough supplies to create 12 cards and coordinating envelopes.
  • Card size: 4-1/4″ x 5-1/2″ (10.8 x 14 cm)
  • Envelope size: 4-1/2″ x 5-3/4″ (11.4 x 14.6 cm)
  • Coordinating colors: Basic Gray, Calypso Coral, Cinnamon Cider, Daffodil Delight, Rich Razzleberry, Soft Sea Foam, Whisper White

SUBSCRIPTION INFORMATION

Subscribe to the December 2020 Paper Pumpkin Kit between 11 November and 10 December at paperpumpkin.com!

Note: Supplies may be limited toward the end of the subscription period.

*********************************************************************************************************

Card stock cuts for this project:

  • Cherry Cobbler Cardstock 4 1/4″ X 11″ (card base scored and folded at 5 1/2″), 4 1/4″ X 3″ (scalloped oval), 1/4″ X 4″ (strip under sentiment), 4 1/8″ X 5 3/8″ (inner liner mat)
  • Whisper White Cardstock 3 1/2″ X 3″ (artwork), 3/4″ X 3″ (sentiment), 4″ X 5 1/4″ (inner liner)
  • ‘Tis The Season 6 X 6 Designer Series Paper 4″ X 5 1/4″ (card front), 2 1/4″ X 6″ (piece for envelope flap)

*********************************************************************************************************

Product List


Layering Ovals Dies


Stitched Rectangles Dies


Stitched Shapes Dies


Multipurpose Liquid Glue


Mini Glue Dots


$5.25


Stampin' Dimensionals


Stampin' Seal


$8.00


Bone Folder


$7.00


Paper Snips


$10.00


Paper Trimmer


$25.00


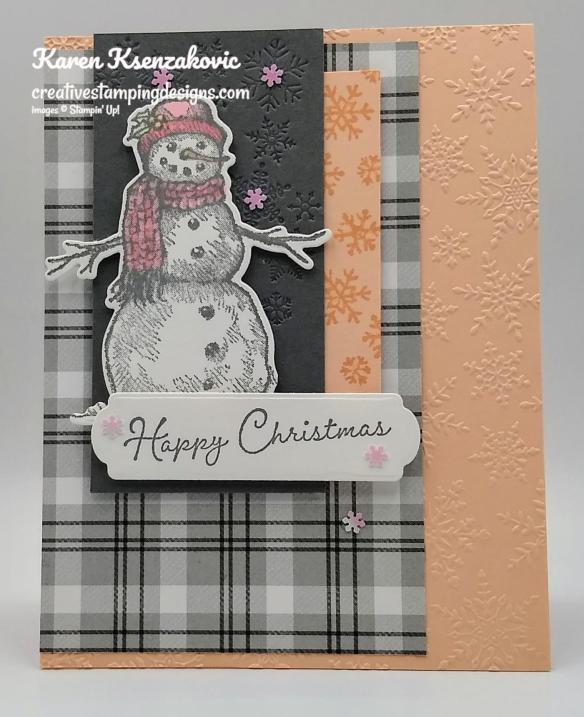
Stampin’ Up! Snow Wonder Christmas

Good Wednesday morning my fellow stampers. Happy midweek! We’re on the down hill to the weekend already. Yesterday was one very loud day at my house. I knew it was going to be loud, I just didn’t know how loud. On the bright side, my floors are starting to look amazing. They were able to sand the stains out with no problems. We have 3 more days of staying off them, then we can walk with socks only.

I have a Christmas card for you today using non-traditional colors. Here’s my card for today.

I used the Stampin’ Up! Snow Wonder Bundle for my card along with the Plaid Tidings 6 X 6 Designer Series Paper. My Colors were inspired by As You Like It Challenge #238. Here are their colors.

My design is from Fab Friday Challenge #201. Here is their sketch.

I also played along with Hand Stamped Sentiments Challenge #352. Here is their theme.

I started by embossing a panel of Petal Pink cardstock using the Winter Snow Embossing Folder. I adhered the embossed panel to a Petal Pink card base using Multipurpose Liquid Glue. I adhered a panel of the Plaid Tidings DSP to the card front using Multipurpose Liquid Glue.

I stamped the snowman image from the Stampin’ Up! Snow Wonder Cling Stamp Set in Basic Gray Ink on a panel of Whisper White cardstock. I colored the hat and scarf in using my Flirty Flamingo and Petal Pink Stampin’ Blends Markers. I cut the image out using my Snow Time Dies. Using the Snow Time Dies I embossed the top of a Basic Gray panel with the snow flake die. I adhered the snowman image to the Basic Gray panel using Stampin’ Dimensionals. I stamped the sentiment from the Snow Wonder stamp set in Basic Gray Ink on a small Whisper White panel and cut it out using the Snow Time Dies.

I stamped a small panel of Petal Pink cardstock using the snowflake image from the Snow Wonder stamp set in Petal Pink Ink. I adhered the panel behind the Basic Gray panel using Stampin’ Seal and then adhered the artwork to the card front using Stampin’ Dimensionals. I adhered the sentiment to the card front using Stampin’ Dimensionals. I added a few Adhesive-Backed Snowflakes to the card front.

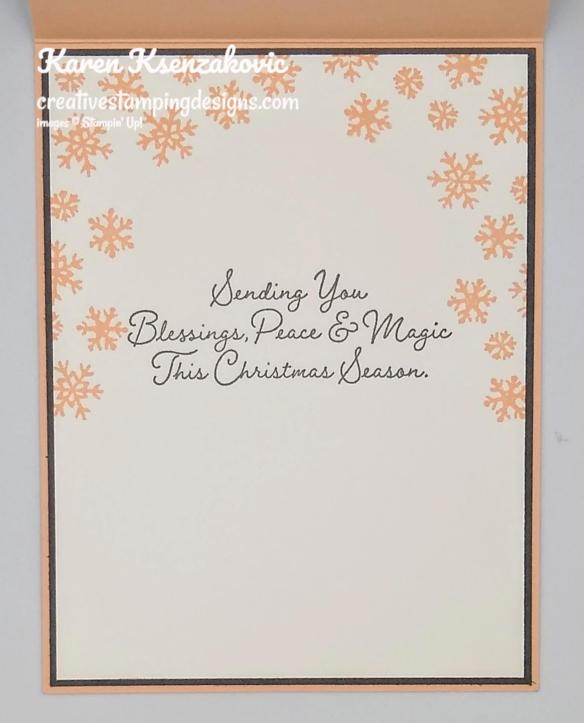
On the inside I stamped the sentiment from the Snow Wonder stamp set in Basic Gray Ink in the center of a Whisper White panel. I stamped the snowflake image from the Snow Wonder stamp set in Petal Pink Ink around the top of the panel. I adhered the Whisper White panel to a Basic Gray mat using Stampin’ Seal and then to the inside of the Petal Pink card base using Multipurpose Liquid Glue.

To complete my card I decorated a Medium Whisper White Envelope. I stamped the snowman image from the Snow Wonder stamp set in Basic Gray Ink on the envelope front. I stamped the snowflake image from the Snow Wonder stamp set in Petal Pink Ink around the snowman. I adhered a panel of Plaid Tidings DSP to the envelope flap.

Thank you for stopping by my blog today. I hope you liked my card and will give it a try. Happy Stamping!!

*********************************************************************************************************

If you need any stamping supplies, I’d love to be your Demonstrator. Just click HERE to go directly to my online store or drop me an email if you have any questions. 

MY CURRENT HOST CODE IS: 9XYYG2ZU

Use this host code when you order $50 or greater and receive a free gift from me! If your order is over $150, please do not use this code, but you’ll still get the free gift. The free gift is your choice of any 1 item valued up to $10.00 in the 2020-2021 Annual Catalog!   For any orders $50 or more I will also send you my monthly class tutorials.  Click HERE or go to my Customer Rewards for more details and to see what this months tutorials are.

 Click HERE to shop the clearance rack.

Please remember to use my current Host Code and make sure that you can see my name on the final checkout page listed as your Demonstrator when you order so that you know that you’re ordering with me and you’ll get my rewards! 

Happy Stamping, Karen!

*********************************************************************************************************

Beary Comforting

Subscribe November 11-December 10

If you haven’t heard already, Paper Pumpkin is our monthly One-Stop Box™ that offers a wide variety of unique papercrafting projects for subscribers of any skill level! These themed, all-inclusive craft kits encourage customers to explore their creativity, try new techniques, and discover their potential in papercrafting.

December’s cute and cuddly Paper Pumpkin kit—called “Beary Comforting”—is designed to uplift your loved ones as this beary tough year finally comes to a close. After a year like 2020, we all could use a big bear hug! With the help of this bear-themed kit, you can create 12 unbearably cute cards featuring warm and fuzzy friends, sweet stamps, and meaningful messages. Near or far, send your friends and family the extra comfort, love, and encouragement they need with this month’s Paper Pumpkin kit!

ABOUT THE DECEMBER KIT

Details

  • Kit contains enough supplies to create 12 cards and coordinating envelopes.
  • Card size: 4-1/4″ x 5-1/2″ (10.8 x 14 cm)
  • Envelope size: 4-1/2″ x 5-3/4″ (11.4 x 14.6 cm)
  • Coordinating colors: Basic Gray, Calypso Coral, Cinnamon Cider, Daffodil Delight, Rich Razzleberry, Soft Sea Foam, Whisper White

SUBSCRIPTION INFORMATION

Subscribe to the December 2020 Paper Pumpkin Kit between 11 November and 10 December at paperpumpkin.com!

Note: Supplies may be limited toward the end of the subscription period.

*********************************************************************************************************

FREE Bonus Quite Curvy and Curvy Christmas Project Tutorials With Videos When You Purchase The Bundle From Me!!

A group of us worked together to create five awesome tutorials using the Stampin’ Up! Curvy Celebrations special release products with video tutorials!  You can get this set of exclusive tutorials when you purchase either the Quite Curvy Variety Bundle (item 158396) or the Quite Curvy Bundle (item 156228) from me between now and January 4!

If your order is $50 or greater and includes either of these bundles, you will get this set of tutorials in addition to the monthly online class tutorials AND your $10 thank you gift!  And you’ll also earn my Creative Stamping Designs Reward Points!

*********************************************************************************************************

Card stock cuts for this project:

  • Basic Gray Cardstock 2″ X 4″ (card front panel), 4 1/8″ X 5 3/8″ (inner liner mat)
  • Petal Pink Cardstock 4 1/4″ X 11″ (card base scored and folded at 5 1/2″), 4 1/4″ X 5 1/2″ (card front), 3 1/2″ X 1″ (card front panel)
  • Whisper White Cardstock 3″ X 4 1/2″ (artwork), 4″ X 5 1/4″ (inner liner)
  • Plaid Tidings 6 X 6 Designer Series Paper 3 1/4″ X 5 1/4′ (card front panel), 2 1/4″ X 6″ (piece for envelope flap)

*********************************************************************************************************

Product List


Snow Time Dies


$33.00


Basic Gray Classic Stampin' Pad


Basic Gray Classic Stampin’ Pad
[126981]
$5.95


Multipurpose Liquid Glue


Mini Glue Dots


$5.25


Stampin' Dimensionals


Stampin' Seal


$8.00


Bone Folder


$7.00


Paper Snips


$10.00


Paper Trimmer


$25.00


Stampin’ Up! Perfectly Plaid Christmas CAS

Good Tuesday morning my stamping friends. How has everyone’s week started off? By the time you read this my house will be full of workers and lots of noise being made. I wasn’t expecting them to come this early today, but I guess they want to get a jump on things. Last night we were running around getting the last of anything left around put away and we had to pack our suitcases and laptops to be out of the way first thing. I have my bag packed up with my Paper Pumpkin kits to work on in the hotel room at night. My kitchen is now full of furniture along with the POD outside and we borrowed my neighbors garage too. I’m sure it will all be worth it in the end, but after working later than usual yesterday and coming home and finding out how early they were showing up I’m ready for a nap already. The good news it I will have all brand new floors for the holidays.

With that being said, I have a really quick and easy card for you today. I couldn’t fuss too much with this one. Here’s my card.

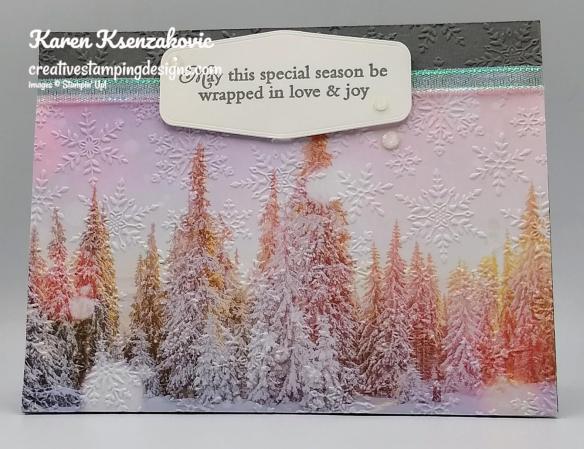
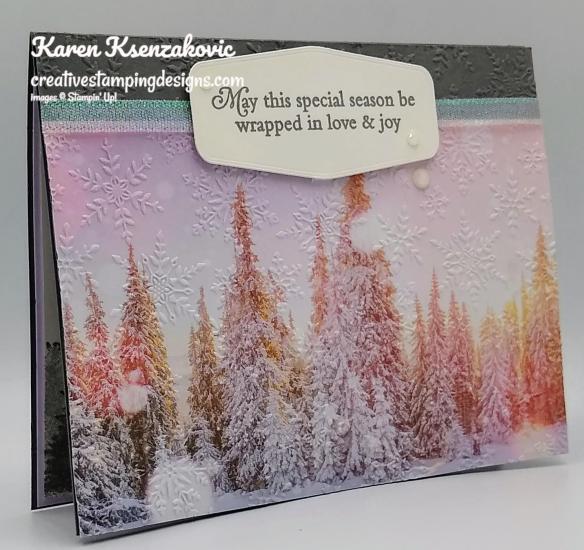
I let the Feels Like Frost 6 X 6 Specialty Designer Series Paper do most of the work for me along with the Stampin’ Up! Perfectly Plaid Photopolymer Stamp Set.

I started by adhering a panel of the Feels Like Frost DSP to a Basic Gray mat using Stampin’ Seal and embossed it using the Winter Snow Embossing Folder.

I wrapped a piece of the 1/4″ Snowflake Splendor Ribbon around the card front, adhering it in the back with some Stampin’ Seal, then adhering it to a Basic Gray card base using Stampin’ Dimensionals. I stamped the sentiment from the Perfectly Plaid stamp set in Basic Gray Ink on a small panel of Whisper White cardstock and cut it out using the Tasteful Labels Dies.

I adhered the sentiment over the ribbon using Stampin’ Dimensionals and added a few Elegant Faceted Gems to the card front.

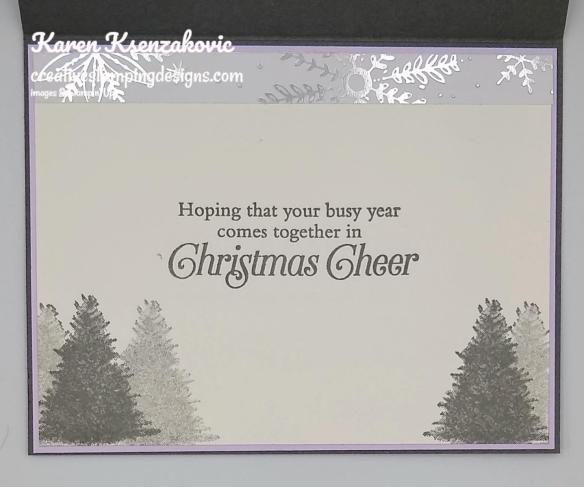
On the inside I stamped the sentiment from the Perfectly Plaid stamp set in Basic Gray Ink in the center of a Whisper White panel. I stamped the tree image from the Perfectly Plaid stamp set in Basic Gray Ink on the bottom of the panel, some stamped in full strength and some stamped off once. I adhered a strip of the Feels Like Frost DSP to the top of the panel using Stampin’ Seal. I adhered the Whisper White panel to a Purple Posy mat using Stampin’ Seal and then to the inside of the Basic Gray card base using Multipurpose Liquid Glue.

To finish my card I decorated a Medium Whisper White Envelope. I stamped the tree image from the Perfectly Plaid stamp set in Basic Gray Ink on the envelope front, some stamped full strength and some stamped off. I adhered a panel of the Feels Like Frost DSP to the envelope flap.

Thank you for stopping by my blog today. I hope you liked my quick and easy card and will give it a try. This Feels Like Frost DSP has beautiful life like images that do all the work. Happy Stamping!!

*********************************************************************************************************

If you need any stamping supplies, I’d love to be your Demonstrator. Just click HERE to go directly to my online store or drop me an email if you have any questions. 

MY CURRENT HOST CODE IS: 9XYYG2ZU

Use this host code when you order $50 or greater and receive a free gift from me! If your order is over $150, please do not use this code, but you’ll still get the free gift. The free gift is your choice of any 1 item valued up to $10.00 in the 2020-2021 Annual Catalog!   For any orders $50 or more I will also send you my monthly class tutorials.  Click HERE or go to my Customer Rewards for more details and to see what this months tutorials are.

 Click HERE to shop the clearance rack.

Please remember to use my current Host Code and make sure that you can see my name on the final checkout page listed as your Demonstrator when you order so that you know that you’re ordering with me and you’ll get my rewards! 

Happy Stamping, Karen!

*********************************************************************************************************

Beary Comforting

Subscribe November 11-December 10

If you haven’t heard already, Paper Pumpkin is our monthly One-Stop Box™ that offers a wide variety of unique papercrafting projects for subscribers of any skill level! These themed, all-inclusive craft kits encourage customers to explore their creativity, try new techniques, and discover their potential in papercrafting.

December’s cute and cuddly Paper Pumpkin kit—called “Beary Comforting”—is designed to uplift your loved ones as this beary tough year finally comes to a close. After a year like 2020, we all could use a big bear hug! With the help of this bear-themed kit, you can create 12 unbearably cute cards featuring warm and fuzzy friends, sweet stamps, and meaningful messages. Near or far, send your friends and family the extra comfort, love, and encouragement they need with this month’s Paper Pumpkin kit!

ABOUT THE DECEMBER KIT

Details

  • Kit contains enough supplies to create 12 cards and coordinating envelopes.
  • Card size: 4-1/4″ x 5-1/2″ (10.8 x 14 cm)
  • Envelope size: 4-1/2″ x 5-3/4″ (11.4 x 14.6 cm)
  • Coordinating colors: Basic Gray, Calypso Coral, Cinnamon Cider, Daffodil Delight, Rich Razzleberry, Soft Sea Foam, Whisper White

SUBSCRIPTION INFORMATION

Subscribe to the December 2020 Paper Pumpkin Kit between 11 November and 10 December at paperpumpkin.com!

Note: Supplies may be limited toward the end of the subscription period.

*********************************************************************************************************

FREE Bonus Quite Curvy and Curvy Christmas Project Tutorials With Videos When You Purchase The Bundle From Me!!

A group of us worked together to create five awesome tutorials using the Stampin’ Up! Curvy Celebrations special release products with video tutorials!  You can get this set of exclusive tutorials when you purchase either the Quite Curvy Variety Bundle (item 158396) or the Quite Curvy Bundle (item 156228) from me between now and January 4!

If your order is $50 or greater and includes either of these bundles, you will get this set of tutorials in addition to the monthly online class tutorials AND your $10 thank you gift!  And you’ll also earn my Creative Stamping Designs Reward Points!

*********************************************************************************************************

Card stock cuts for this project:

  • Basic Gray Cardstock 8 1/2″ X 5 1/2″ (card base scored and folded at 4 1/4″), 4 1/4″ X 5 1/2″ (card front)
  • Purple Posy Cardstock 4 1/8″ X 5 3/8″ (inner liner mat)
  • Whisper White Cardstock 1 1/2″ X 3″ (sentiment), 4″ X 5 1/4″ (inner liner)
  • Feels Like Frost 6 X 6 Specialty Designer Series Paper 3 1/2″ X 5 1/2″ (card front), 1/2″ X 5 1/4″ (strip on inner liner), 2 1/4″ X 6″ (piece for envelope flap)

*********************************************************************************************************

Product List

Basic Gray Classic Stampin' Pad


Basic Gray Classic Stampin’ Pad
[126981]
$5.95


Elegant Faceted Gems


Tasteful Labels Dies


Multipurpose Liquid Glue


Mini Glue Dots


$5.25


Stampin' Dimensionals


Stampin' Seal


$8.00


Bone Folder


$7.00


Paper Snips


$10.00


Paper Trimmer


$25.00


Stampin’ Up! Simply Succulents Sneak Peek

Good Monday morning my fellow stampers. How was everyone’s weekend? Did anyone do anything fun. Other than working, I packed up my living room and took all my pictures down from the hallways and staircases. All my furniture got moved into a POD for a couple weeks now. We’re having our floors refinished, so that means everything had to get packed and we’re moving out for a couple days. I’ll actually be coming home in the mornings to let the workers in and I’ll be staying in my basement for the day with my dog. She gets to come to the hotel to stay with us at night, I just don’t want to leave her there by herself during the day.

For today I have another sneak peek for you of a bundle coming in the January-June 2021 Mini Catalog. Here’s my card for today.

I used the new Stampin’ Up! Simply Succulents Bundle for my card. My son’s girlfriends birthday is tomorrow and she love her succulents, so when I saw this set I knew I had to buy it to make her a card. I used quite a few colors for my card along with a sneak peek of a Sale-A-Bration item coming soon.

I started by adhering a panel of In Good Taste Designer Series Paper to a Just Jade card base using Stampin’ Seal. I embossed a panel of the Oh So Ombre 6 X 6 Designer Series Paper using the Scripty 3D Embossing Folder. The Oh So Ombre DSP will be a Sale-A-Bration item available in January/February 2021. I adhered the panel to the Just Jade card base using Multipurpose Liquid Glue.

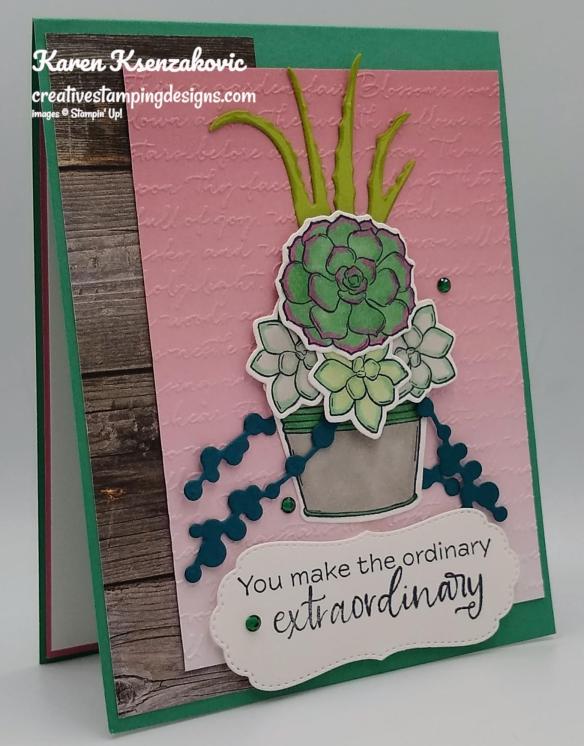
On a panel of Whisper White Cardstock I stamped 3 of the small succulent images, 1 of the larger succulent image, the flower pot image and the sentiment from the Simply Succulents stamp set (available January 5,2021) in Tuxedo Black Memento Ink. I colored the images in using my Gray Granite, Just Jade, Rococo Rose and Soft Seafoam Stampin’ Blends Markers. I cut the images out using the Potted Succulents Dies (available January 5, 2021). Using the Potted Succulents Dies, I cut one die from a panel of Pear Pizzazz cardstock and two from a panel of Pretty Peacock cardstock.

I adhered the flower pot to the card front using Multipurpose Liquid Glue. I arranged the succulents the way I wanted them and adhered them using Glue Dots and Stampin’ Dimensionals. I adhered the sentiment below the flowerpot using Stampin’ Dimensionals. I added a few of the Holiday Rhinestone Basic Jewels to my card front.

On the inside I stamped the sentiments from the Stampin’ Up! Best Year Cling Stamp Set in Tuxedo Black Memento Ink in the center of a Whisper White panel. I stamped the largest succulent image from the Simply Succulents stamp set in Just Jade Ink, stamping off twice, over the sentiment. I adhered the Whisper White panel to a Rococo Rose mat using Stampin’ Seal and then to the inside of the Just Jade card base using Multipurpose Liquid Glue.

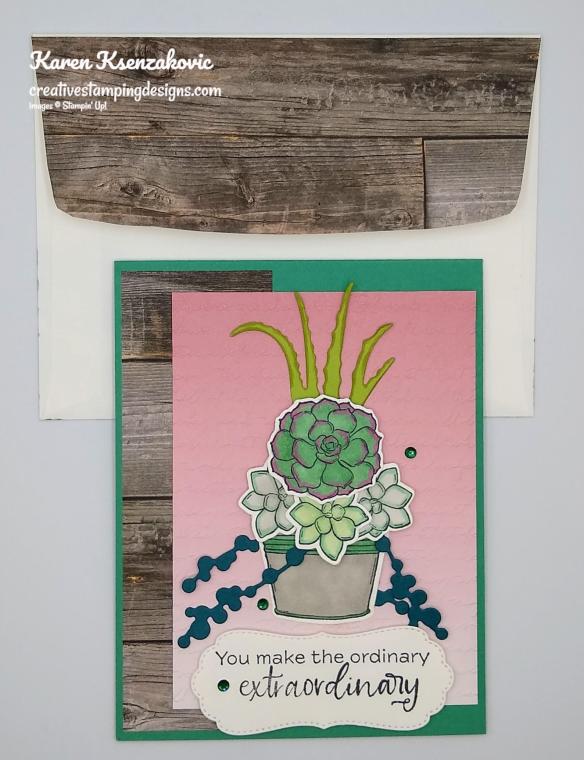
To finish my card I decorated a Medium Whisper White Envelope. I stamped the succulent image from the Simply Succulents stamp set in Tuxedo Black Memento Ink on the envelope front and colored them in using my Just Jade and Rococo Rose Stampin’ Blends Markers. I adhered a panel of In Good Taste DSP to the envelope flap.

Thank you for stopping by my blog today, I hope you liked my card. The Simply Succulent Bundle and Oh So Ombre DSP will be available for you to purchase January 5, 2021 from the January-June 2021 Mini Catalog and the Sale-A-Bration Catalog. If you are one of my customers and have made a purchase this year, I will be sending a catalog out to you as soon as they become available. Happy Stamping!!

*********************************************************************************************************

If you need any stamping supplies, I’d love to be your Demonstrator. Just click HERE to go directly to my online store or drop me an email if you have any questions. 

MY CURRENT HOST CODE IS: 9XYYG2ZU

Use this host code when you order $50 or greater and receive a free gift from me! If your order is over $150, please do not use this code, but you’ll still get the free gift. The free gift is your choice of any 1 item valued up to $10.00 in the 2020-2021 Annual Catalog!   For any orders $50 or more I will also send you my monthly class tutorials.  Click HERE or go to my Customer Rewards for more details and to see what this months tutorials are.

 Click HERE to shop the clearance rack.

Please remember to use my current Host Code and make sure that you can see my name on the final checkout page listed as your Demonstrator when you order so that you know that you’re ordering with me and you’ll get my rewards! 

Happy Stamping, Karen!

*********************************************************************************************************

Beary Comforting

Subscribe November 11-December 10

If you haven’t heard already, Paper Pumpkin is our monthly One-Stop Box™ that offers a wide variety of unique papercrafting projects for subscribers of any skill level! These themed, all-inclusive craft kits encourage customers to explore their creativity, try new techniques, and discover their potential in papercrafting.

December’s cute and cuddly Paper Pumpkin kit—called “Beary Comforting”—is designed to uplift your loved ones as this beary tough year finally comes to a close. After a year like 2020, we all could use a big bear hug! With the help of this bear-themed kit, you can create 12 unbearably cute cards featuring warm and fuzzy friends, sweet stamps, and meaningful messages. Near or far, send your friends and family the extra comfort, love, and encouragement they need with this month’s Paper Pumpkin kit!

ABOUT THE DECEMBER KIT

Details

  • Kit contains enough supplies to create 12 cards and coordinating envelopes.
  • Card size: 4-1/4″ x 5-1/2″ (10.8 x 14 cm)
  • Envelope size: 4-1/2″ x 5-3/4″ (11.4 x 14.6 cm)
  • Coordinating colors: Basic Gray, Calypso Coral, Cinnamon Cider, Daffodil Delight, Rich Razzleberry, Soft Sea Foam, Whisper White

SUBSCRIPTION INFORMATION

Subscribe to the December 2020 Paper Pumpkin Kit between 11 November and 10 December at paperpumpkin.com!

Note: Supplies may be limited toward the end of the subscription period.

*********************************************************************************************************

FREE Bonus Quite Curvy and Curvy Christmas Project Tutorials With Videos When You Purchase The Bundle From Me!!

A group of us worked together to create five awesome tutorials using the Stampin’ Up! Curvy Celebrations special release products with video tutorials!  You can get this set of exclusive tutorials when you purchase either the Quite Curvy Variety Bundle (item 158396) or the Quite Curvy Bundle (item 156228) from me between now and January 4!

If your order is $50 or greater and includes either of these bundles, you will get this set of tutorials in addition to the monthly online class tutorials AND your $10 thank you gift!  And you’ll also earn my Creative Stamping Designs Reward Points!

*********************************************************************************************************

Card stock cuts for this project:

  • Just Jade Cardstock 4 1/4″ X 11″ (card base scored and folded at 5 1/2″)
  • Pear Pizzazz Cardstock 2 1/2″ X 2 1/2″ (succulent)
  • Pretty Peacock Cardstock 2 1/4″ X 2 1/4″ (succulents)
  • Rococo Rose Cardstock 4 1/8″ X 5 3/8″ (inner liner mat)
  • Whisper White Cardstock 3 1/2″ X 3 1/2″ (artwork), 4″ X 5 1/4″ (inner liner)
  • In Good Taste Designer Series Paper 1 3/4″ X 5 1/4″ (card front panel), 2 1/4″ X 6″ (piece for envelope flap)
  • Oh So Ombre 6 X 6 Designer Series Paper 4 3/4″ X 3 1/2″ (card front panel)

*********************************************************************************************************

Product List

Stampin’ Up! Zany Zebras Birthday

Good Sunday morning my stamping friends. How is everyone’s weekend going? I’m heading into work again today. I was hoping to have the day off, but they put me on the schedule. It’s a short day at the dog bakery though, I don’t go in until noon and I’m done by 5pm.

For today’s card a co-worker asked me to make her nieces daughter a 1st birthday card. It took me a bit to come up with something, since I thought I didn’t have anything appropriate for a 1 year old. Then I remembered and here’s what I came up with.

I used the Stampin’ Up! Zany Zebras Cling Stamp Set for my card along with a sneak peek inside of a new set coming in the January-June 2021 Mini Catalog.

I started by cutting a panel of Whisper White cardstock using the largest Stitched Triangle Dies. I stamped the adorable little zebra image from the Zany Zebras stamp set in Magenta Madness Ink on the bottom of the triangle. I added a little color to her stripes, mane and tail using my Mango Melody Stampin’ Blends Markers. I then embossed the triangle using the Subtle 3D Embossing Folder. From that same panel of Whisper White cardstock I stamped the zebra image again in Magenta Madness Ink and I stamped the sentiment from the Zany Zebras stamp set in Magenta Madness Ink. I used some washi tape to cover the happy part of the sentiment so I would just get the birthday. I cut the sentiment out using the smallest die from the Stitched So Sweetly Dies and I fussy cut the zebra using my Paper Snips, not cutting the mane or the tail. I added some color to her stripes using my Mango Melody Stampin’ Blends Markers.

I adhered the fussy cut zebra on top of the stamped zebra on the triangle using Stampin’ Dimensionals. I adhered the triangle to a Whisper White card front using Stampin’ Dimensionals. I cut all the letters and the #1 from a panel of Rainbow Glimmer Paper, which I adhered to a Foam Adhesive Sheet, using the Playful Alphabets Dies.

I cut 3 of the small balloons out using the Happy Dies one in Granny Apple Green, one in Highland Heather and one in Mango Melody. I embossed the Granny Apple Green and Highland Heather balloons using the Wrapped In Texture Embossing Folder. I cut the 3 strings and 3 bows from a panel of Magenta Madness cardstock using the Happy Dies. I adhered the strings to the back of the balloons using Glue Dots and the bows to the bottom of the balloons using a tiny amount of Multipurpose Liquid Glue. I adhered the balloons to the card front using Stampin’ Dimensionals. I adhered the #1 to the Mango Melody balloon. I adhered the letters to the card front the way I wanted them and adhered the die cut birthday under the happy using Stampin’ Dimensionals. I added some Artistry Blooms Adhesive-Backed Sequins to the card front. I adhered the card front to a Granny Apple Green mat using Stampin’ Seal and then to a Magenta Madness card base using Stampin’ Dimensionals.

On the inside I stamped a sentiment from a new set coming in the January-June 2021 Mini Catalog, the Stampin’ Up! Many Messages Cling Stamp Set. This is 1 large stamp with 19 sentiments on it. I used my Stamparatus to get just the one sentiment centered on a panel of Whisper White Cardstock. I used my Granny Apple Green Stampin’ Write Marker to ink up just the sentiment I wanted to use. I stamped the zebra image from the Zany Zebras stamp set to the side of the sentiment in Magenta Madness Ink and I stamped the party hat from the Zany Zebras stamp set in Magenta Madness Ink on the opposite side. I added color to the strips on the zebra and the pom-pom on the hat using my Mango Melody Stampin’ Blends Markers. I colored the dots on the hat in using my Granny Apple Green Stampin’ Write Marker. I stamped the grass image from the Zany Zebras stamp set under the zebra in Granny Apple Green Ink. I adhered the Whisper White panel to a Granny Apple Green mat using Stampin’ Seal and then to the inside of the Magenta Madness card base using Multipurpose Liquid Glue.

To finish my card I decorated a Medium Whisper White Envelope. I stamped the zebra image from the Zany Zebras stamp set in Magenta Madness Ink on the envelope front. I stamped the grass image from the Zany Zebras stamp set in Granny Apple Green Ink below the zebra. I added some color to the zebras stripes, mane and tail using my Mango Melody Stampin’ Blends Markers. I adhered a panel of Artistry Blooms Designer Series Paper to the envelope flap.

Thank you for stopping by my blog today. I hope you liked my card and will give it a try. Happy Stamping!!

*********************************************************************************************************

If you need any stamping supplies, I’d love to be your Demonstrator. Just click HERE to go directly to my online store or drop me an email if you have any questions. 

MY CURRENT HOST CODE IS: 9XYYG2ZU

Use this host code when you order $50 or greater and receive a free gift from me! If your order is over $150, please do not use this code, but you’ll still get the free gift. The free gift is your choice of any 1 item valued up to $10.00 in the 2020-2021 Annual Catalog!   For any orders $50 or more I will also send you my monthly class tutorials.  Click HERE or go to my Customer Rewards for more details and to see what this months tutorials are.

 Click HERE to shop the clearance rack.

Please remember to use my current Host Code and make sure that you can see my name on the final checkout page listed as your Demonstrator when you order so that you know that you’re ordering with me and you’ll get my rewards! 

Happy Stamping, Karen!

*********************************************************************************************************

Beary Comforting

Subscribe November 11-December 10

If you haven’t heard already, Paper Pumpkin is our monthly One-Stop Box™ that offers a wide variety of unique papercrafting projects for subscribers of any skill level! These themed, all-inclusive craft kits encourage customers to explore their creativity, try new techniques, and discover their potential in papercrafting.

December’s cute and cuddly Paper Pumpkin kit—called “Beary Comforting”—is designed to uplift your loved ones as this beary tough year finally comes to a close. After a year like 2020, we all could use a big bear hug! With the help of this bear-themed kit, you can create 12 unbearably cute cards featuring warm and fuzzy friends, sweet stamps, and meaningful messages. Near or far, send your friends and family the extra comfort, love, and encouragement they need with this month’s Paper Pumpkin kit!

ABOUT THE DECEMBER KIT

Details

  • Kit contains enough supplies to create 12 cards and coordinating envelopes.
  • Card size: 4-1/4″ x 5-1/2″ (10.8 x 14 cm)
  • Envelope size: 4-1/2″ x 5-3/4″ (11.4 x 14.6 cm)
  • Coordinating colors: Basic Gray, Calypso Coral, Cinnamon Cider, Daffodil Delight, Rich Razzleberry, Soft Sea Foam, Whisper White

SUBSCRIPTION INFORMATION

Subscribe to the December 2020 Paper Pumpkin Kit between 11 November and 10 December at paperpumpkin.com!

Note: Supplies may be limited toward the end of the subscription period.

*********************************************************************************************************

FREE Bonus Quite Curvy and Curvy Christmas Project Tutorials With Videos When You Purchase The Bundle From Me!!

A group of us worked together to create five awesome tutorials using the Stampin’ Up! Curvy Celebrations special release products with video tutorials!  You can get this set of exclusive tutorials when you purchase either the Quite Curvy Variety Bundle (item 158396) or the Quite Curvy Bundle (item 156228) from me between now and January 4!

If your order is $50 or greater and includes either of these bundles, you will get this set of tutorials in addition to the monthly online class tutorials AND your $10 thank you gift!  And you’ll also earn my Creative Stamping Designs Reward Points!

*********************************************************************************************************

Card stock cuts for this project:

  • Granny Apple Green Cardstock 2 – 4 1/8″ X 5 3/8″ (card front and inner liner mats), 1″ X 1″ (balloon)
  • Highland Heather Cardstock 1″ X 1″ (balloon)
  • Magenta Madness Cardstock 8 1/2″ X 5 1/2″ (card base scored and folded at 4 1/4″)
  • Mango Melody Cardstock 1″ X 1″ (balloon)
  • Whisper White Cardstock 2 – 4″ X 5 1/4″ (triangle, zebra & sentiment and one for inner liner)
  • Artistry Blooms Designer Series Paper 2 1/4″ X 6″ (piece for envelope flap)
  • Rainbow Glimmer Paper 2″ X 6″ (letters and number)

*********************************************************************************************************

Product List


Rainbow Glimmer Paper


Artistry Blooms Sequins


Happy Dies (English)


Playful Alphabet Dies


Stitched So Sweetly Dies


Stitched Triangles Dies


Foam Adhesive Sheets


Multipurpose Liquid Glue


Mini Glue Dots


$5.25


Stampin' Dimensionals


Stampin' Seal


$8.00


Bone Folder


$7.00


Paper Snips


$10.00


Paper Trimmer


$25.00


Clear Block Bundle


Stamparatus


$49.00

Stampin’ Up! Dragonfly Garden Friend Birthday Sneak Peek

Good Saturday morning my fellow stampers. How has everyone’s weekend started off? I’ll be at work all day today.

I have 1 more sneak peek card from last weekends OnStage@Home event for you. I can’t believe it’s already been a week since our OnStage@Home event. I’m loving these designs that the demonstrator came up with for these cards. They really showcase the whole suite. Here’s my take on the last design.

This card once again uses the Stampin’ Up! Dragonfly Garden Bundle. Everyone’s card is a little different depending on which pattern of DSP they chose.

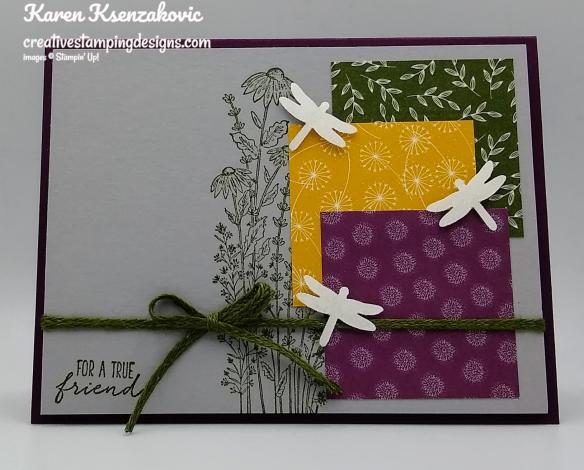
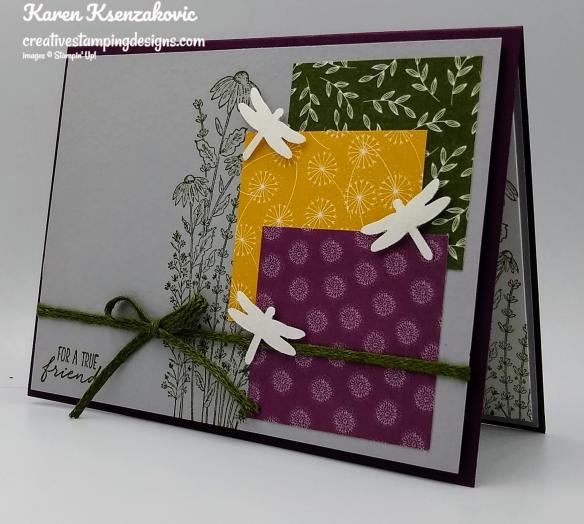
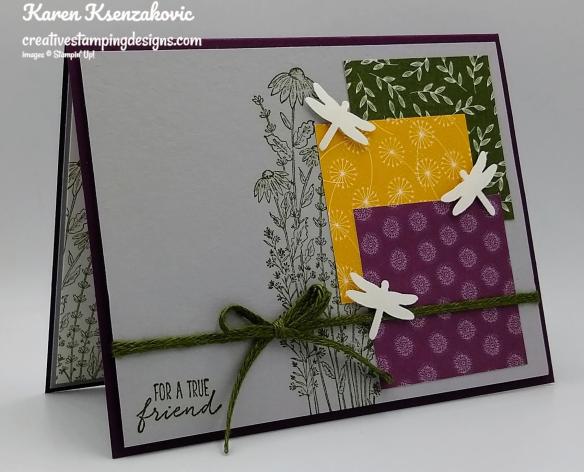
I started by stamping the wildflower image from the Stampin’ Up! Dragonfly Garden Photopolymer Stamp Set in Mossy Meadow Ink in the center of a Smoky Slate card front. I stamped the sentiment from the Dragonfly Garden stamp set in Mossy Meadow Ink on the bottom of the panel.

I adhered the 3 panels of Dandy Garden 6 X 6 Designer Series Paper that I chose to the right of the flowers using Multipurpose Liquid Glue. I wrapped a piece of the Mossy Meadow 3/16″ Braided Lined Trim (available January 5,2021) around the card front and tied a bow.

I cut 3 of the small dragonflies out of a panel of Whisper White cardstock using the Dragonflies Punch. I brushed them using my Clear Wink of Stella and adhered them to the card front using Stampin’ Dimensionals. I adhered the card front to a Blackberry Bliss card base using Stampin’ Dimensionals.

On the inside I stamped the sentiment from the Dragonfly Garden stamp set in Mossy Meadow Ink in the center of a Whisper White panel. I stamped the wildflower image from the Dragonfly Garden stamp set in Mossy Meadow Ink on either side of the panel. I adhered the Whisper White panel to a Smoky Slate mat using Stampin’ Seal and then to the inside of the Blackberry Bliss card base using Multipurpose Liquid Glue.

To finish my card I decorated a Medium Whisper White Envelope. I stamped the wildflower image from the Dragonfly Garden stamp set in Mossy Meadow Ink on the envelope front. I adhered a panel of the Dandy Garden DSP to the envelope flap.

Thank you for stopping by my blog today, I hope you liked my card. All items used for this card will be available from the January-June 2021 Mini Catalog on January 5th, 2021. If you are one of my customers and have placed an order in the past year I will be sending a catalog out to you as soon as I receive them. Happy Stamping!!

*********************************************************************************************************

If you need any stamping supplies, I’d love to be your Demonstrator. Just click HERE to go directly to my online store or drop me an email if you have any questions. 

MY CURRENT HOST CODE IS: 9XYYG2ZU

Use this host code when you order $50 or greater and receive a free gift from me! If your order is over $150, please do not use this code, but you’ll still get the free gift. The free gift is your choice of any 1 item valued up to $10.00 in the 2020-2021 Annual Catalog!   For any orders $50 or more I will also send you my monthly class tutorials.  Click HERE or go to my Customer Rewards for more details and to see what this months tutorials are.

 Click HERE to shop the clearance rack.

Please remember to use my current Host Code and make sure that you can see my name on the final checkout page listed as your Demonstrator when you order so that you know that you’re ordering with me and you’ll get my rewards! 

Happy Stamping, Karen!

*********************************************************************************************************

Beary Comforting

Subscribe November 11-December 10

If you haven’t heard already, Paper Pumpkin is our monthly One-Stop Box™ that offers a wide variety of unique papercrafting projects for subscribers of any skill level! These themed, all-inclusive craft kits encourage customers to explore their creativity, try new techniques, and discover their potential in papercrafting.

December’s cute and cuddly Paper Pumpkin kit—called “Beary Comforting”—is designed to uplift your loved ones as this beary tough year finally comes to a close. After a year like 2020, we all could use a big bear hug! With the help of this bear-themed kit, you can create 12 unbearably cute cards featuring warm and fuzzy friends, sweet stamps, and meaningful messages. Near or far, send your friends and family the extra comfort, love, and encouragement they need with this month’s Paper Pumpkin kit!

ABOUT THE DECEMBER KIT

Details

  • Kit contains enough supplies to create 12 cards and coordinating envelopes.
  • Card size: 4-1/4″ x 5-1/2″ (10.8 x 14 cm)
  • Envelope size: 4-1/2″ x 5-3/4″ (11.4 x 14.6 cm)
  • Coordinating colors: Basic Gray, Calypso Coral, Cinnamon Cider, Daffodil Delight, Rich Razzleberry, Soft Sea Foam, Whisper White

SUBSCRIPTION INFORMATION

Subscribe to the December 2020 Paper Pumpkin Kit between 11 November and 10 December at paperpumpkin.com!

Note: Supplies may be limited toward the end of the subscription period.

*********************************************************************************************************

FREE Bonus Quite Curvy and Curvy Christmas Project Tutorials With Videos When You Purchase The Bundle From Me!!

A group of us worked together to create five awesome tutorials using the Stampin’ Up! Curvy Celebrations special release products with video tutorials!  You can get this set of exclusive tutorials when you purchase either the Quite Curvy Variety Bundle (item 158396) or the Quite Curvy Bundle (item 156228) from me between now and January 4!

If your order is $50 or greater and includes either of these bundles, you will get this set of tutorials in addition to the monthly online class tutorials AND your $10 thank you gift!  And you’ll also earn my Creative Stamping Designs Reward Points!

*********************************************************************************************************

Card stock cuts for this project:

  • Blackberry Bliss Cardstock 8 1/2″ X 5 1/2″ (card base scored and folded at 4 1/4″)
  • Smoky Slate Cardstock 4″ X 5 1/4″ (card front), 4 1/8″ X 5 3/8″ (inner liner mat)
  • Whisper White Cardstock 1″ X 5″ (dragonflies), 4″ X 5 1/4″ (inner liner)
  • Dandy Garden 6 X 6 Designer Series Paper 3 – 2″ X 2″ (card front panels), 2 1/4″ X 6″ (piece for envelope flap)

*********************************************************************************************************

Product List

Stampin’ Up! Garden Wishes Sneak Peek for my Fun Fold Friday

Good Friday morning my stamping friends and welcome to my Fun Fold Friday. How was everyone’s week? I hope you all had a productive one. Does anyone have plans for the weekend? I’ll be working all day tomorrow. It’s been a rainy few days here but of course it’s suppose to be sunny tomorrow.

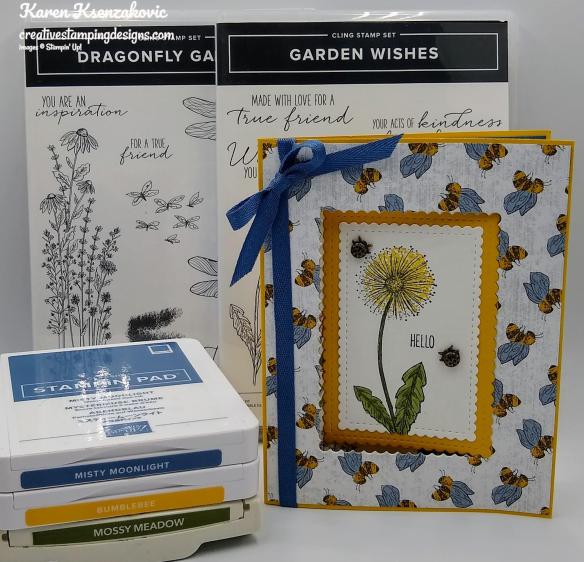
Today’s card I made on my Facebook Live video on Wednesday. If you were able to join me or watched the replay, thank you very much. If you’d like to watch my video and stamp along, the measurements are below along with the links to my Facebook page and my YouTube channel. You won’t be able to make the exact card unless you were able to purchase these set already. Both stamp sets and the DSP will be available in the January-June 2021 Mini Catalog. Here’s the card that I made.

I used the new Stampin’ Up! Garden Wishes Cling Stamp Set and the Stampin’ Up! Dragonfly Garden Cling Stamp Set to make my card today.

I started by lightly adhering a panel of the Dandy Garden 6 X 6 Designer Series Paper to a Bumblebee card base using a tiny amount of Stampin’ Seal just on 2 of the corners to hold it in place. I cut the center out using the 2nd largest die from the Stitched So Sweetly Dies. I set the pieces to the side and adhered the Dandy Garden DSP to the card base using Multipurpose Liquid Glue.

I tied a piece of the Misty Moonlight 2020-2022 In-Color 1/4″ Ribbon around the card front and tied a bow. I added a Glue Dot under the bow to hold it in place.

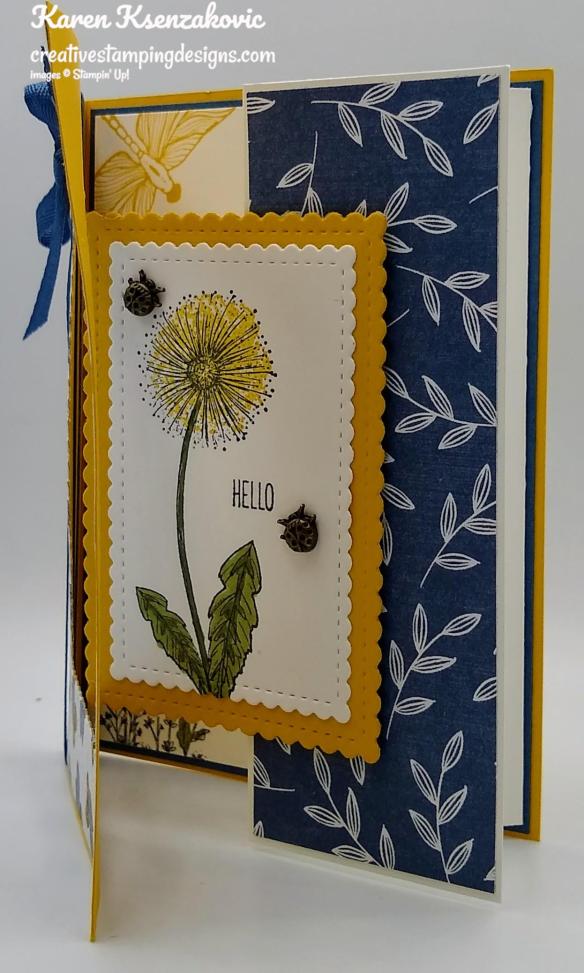
On a panel of Whisper White cardstock I stamped the dandelion image from the Garden Wishes stamp set in Tuxedo Black Memento Ink. I stamped the flower center image from the Garden Wishes stamp set in Bumblebee Ink, stamping off once, in the center of the dandelion. I colored the stem and leave in using my Mossy Meadow Stampin’ Blends Markers. I cut the image out using the 3rd largest die from the Stitched So Sweetly Dies. I adhered the artwork to the Bumblebee mat (which I cut out from the card base earlier), using Stampin’ Seal.

I adhered a panel of Dandy Garden DSP to the inner card base using Multipurpose Liquid Glue then adhered the matted artwork to it using Stampin’ Dimensionals. I added a couple of the Ladybug Trinkets to the artwork using Glue Dots.

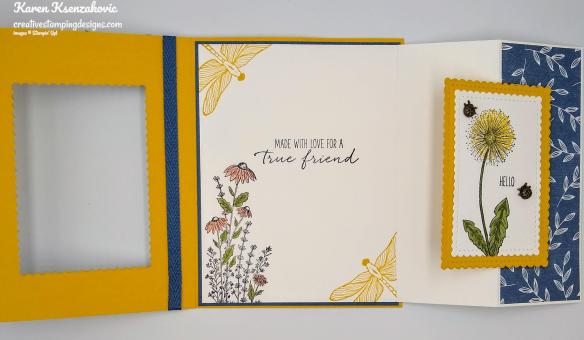
On the inside Z-Fold card I stamped the wild flower image from the Dragonfly Garden stamp set in Tuxedo Black Memento Ink on the bottom of the panel. I stamped the sentiment from the Garden Wishes stamp set in the center of the Whisper White panel I stamped the dragonfly image from the Dragonfly Garden stamp set in Bumblebee Ink on the top and bottom corners of the panel, masking it with a Post-It note so that I didn’t get ink on the side panel. I colored the flowers in using my Calypso Coral and Mossy Meadow Stampin’ Blends Markers. I adhered the inner card base to a Misty Moonlight mat using Stampin’ Seal and then to the inside of the Bumblebee card base using Multipurpose Liquid Glue.

To finish my card I decorated a Medium Whisper White Envelope. I stamped the dandelion image from the Garden Wishes stamp set in Tuxedo Black Memento Ink on the envelope front. I stamped the flower center image from the Garden Wishes stamp set in bumblebee Ink, stamping off once, in the center of the dandelion. I colored the leaves and stem in using my Mossy Meadow Stampin’ Blends Markers. I stamped the dragonfly image from the Dragonfly Garden stamp set in Bumblebee Ink on the envelope front. I adhered a panel of the Dandy Garden DSP to the envelope flap.

Thank you for stopping by my blog today. I hope you liked my card and will give it a try. The list of measurements are below if you’d like to stamp along while watching the video. The stamp sets and DSP for my project today will be available in the January-June 2021 Mini Catalog on January 5, 2021. If you are one of my customers and have placed an order this past year, I will be sending you a catalog as soon as they are available. If you need a catalog and would like me to be your demonstrator, please drop me a line and I will be more that happy to get one out to you as soon as I can. You can watch my video on my Facebook page Here.

You can also view the video on my YouTube channel Here. Happy Stamping!!

*********************************************************************************************************

If you need any stamping supplies, I’d love to be your Demonstrator. Just click HERE to go directly to my online store or drop me an email if you have any questions. 

MY CURRENT HOST CODE IS: 9XYYG2ZU

Use this host code when you order $50 or greater and receive a free gift from me! If your order is over $150, please do not use this code, but you’ll still get the free gift. The free gift is your choice of any 1 item valued up to $10.00 in the 2020-2021 Annual Catalog!   For any orders $50 or more I will also send you my monthly class tutorials.  Click HERE or go to my Customer Rewards for more details and to see what this months tutorials are.

 Click HERE to shop the clearance rack.

Please remember to use my current Host Code and make sure that you can see my name on the final checkout page listed as your Demonstrator when you order so that you know that you’re ordering with me and you’ll get my rewards! 

Happy Stamping, Karen!

*********************************************************************************************************

Beary Comforting

Subscribe November 11-December 10

If you haven’t heard already, Paper Pumpkin is our monthly One-Stop Box™ that offers a wide variety of unique papercrafting projects for subscribers of any skill level! These themed, all-inclusive craft kits encourage customers to explore their creativity, try new techniques, and discover their potential in papercrafting.

December’s cute and cuddly Paper Pumpkin kit—called “Beary Comforting”—is designed to uplift your loved ones as this beary tough year finally comes to a close. After a year like 2020, we all could use a big bear hug! With the help of this bear-themed kit, you can create 12 unbearably cute cards featuring warm and fuzzy friends, sweet stamps, and meaningful messages. Near or far, send your friends and family the extra comfort, love, and encouragement they need with this month’s Paper Pumpkin kit!

ABOUT THE DECEMBER KIT

Details

  • Kit contains enough supplies to create 12 cards and coordinating envelopes.
  • Card size: 4-1/4″ x 5-1/2″ (10.8 x 14 cm)
  • Envelope size: 4-1/2″ x 5-3/4″ (11.4 x 14.6 cm)
  • Coordinating colors: Basic Gray, Calypso Coral, Cinnamon Cider, Daffodil Delight, Rich Razzleberry, Soft Sea Foam, Whisper White

SUBSCRIPTION INFORMATION

Subscribe to the December 2020 Paper Pumpkin Kit between 11 November and 10 December at paperpumpkin.com!

Note: Supplies may be limited toward the end of the subscription period.

*********************************************************************************************************

FREE Bonus Quite Curvy and Curvy Christmas Project Tutorials With Videos When You Purchase The Bundle From Me!!

A group of us worked together to create five awesome tutorials using the Stampin’ Up! Curvy Celebrations special release products with video tutorials!  You can get this set of exclusive tutorials when you purchase either the Quite Curvy Variety Bundle (item 158396) or the Quite Curvy Bundle (item 156228) from me between now and January 4!

If your order is $50 or greater and includes either of these bundles, you will get this set of tutorials in addition to the monthly online class tutorials AND your $10 thank you gift!  And you’ll also earn my Creative Stamping Designs Reward Points!

*********************************************************************************************************

Card stock cuts for this project:

  • Bumblebee Cardstock 8 1/2″ X 5 1/2″ (card base scored and folded at 4 1/4″)
  • Misty Moonlight Cardstock (inner card base mat)
  • Whisper White Cardstock 8″ X 5 1/4″ (inner card base scored and folded at 2″ & 4″), 2 1/2″ x 3 1/2″ (artwork)
  • Dandy Garden 6 X 6 Designer Series Paper 4 1/8″ X 5 3/8″ (card front), 1 7/8″ x 5 1/8″ (inner card base panel), 2 1/4″ X 6″ (piece for envelope flap)

*********************************************************************************************************

Product List

Stampin’ Up! In The Pines for The Happy Inkin’ Thursday Blog Hop

Good Thursday morning my stamping friends and welcome to our Happy Inkin’ Thursday Blog Hop.  Hope you are all doing well.  If you are hopping over from Akiko, thank you for stopping by my blog. This week we have a sketch challenge. Be sure to take a moment to hop around to see everyone’s beautiful projects.
Here is our sketch for this week.

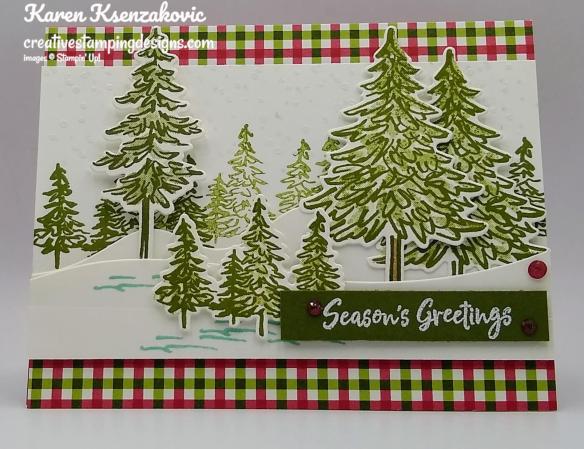
Here is my card using this sketch.

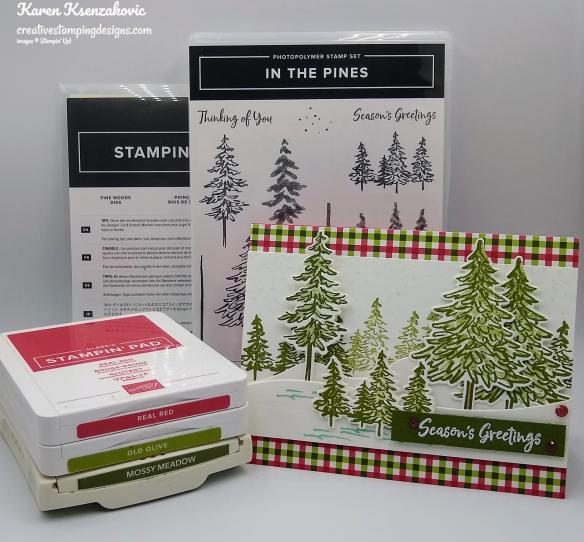
I used the Stampin’ Up! In The Pines Bundle for today’s card. I played along with the Double ‘D’ Challenge. Their theme is Pine Trees and/or Pine Cones. Here is their Mood Board.

I started by adhering a panel of Heartwarming Hugs Designer Series Paper to a Real Red card base using Multipurpose Liquid Glue. On a panel of Whisper White cardstock I stamped 2 of the largest tree and the group of 4 tree outlines from the Stampin’ Up! In The Pines Photopolymer Stamp Set in Old Olive Ink. I stamped the fill images for the same trees in Old Olive Ink, stamping off once. I stamped the tall tree outline from In The Pines stamp set in Mossy Meadow Ink on the Whisper White panel and the fill image for the same tree in Mossy Meadow Ink, stamped off once. I cut all the trees out using my Pine Woods Dies.

I took another panel of Whisper White cardstock and using the Pine Woods Dies, I cut the 2 snow curve images starting from the bottom. On the remaining cut piece I stamped the group of 4 tree outlines from the In The Pines stamp set in Old Olive Ink, some stamped full and some stamped off, across the panel. I randomly stamped the snow dots image from In The Pines stamp set on the top of the panel in Pool Party Ink, stamped off once. I stamped all over the top of the panel with the same stamp in Versamark Ink. I immediately sprinkled it with my White Stampin’ Emboss Powder and set it using my Heat Tool. I adhered the 2 curves to the stamped piece, adhering the 1st one with Glue Dots just on the ends and the top one using Stamping Dimensionals. I lined these up on my Grid Paper so that it measured 3 1/4″ X 5 1/2″. I stamped the snow drift image from the In The Pines stamp set, where I was going to be placing the die cut trees, in Pool Party Ink on the front panel. I adhered the die cut trees on the panel using Stampin’ Dimensionals, some behind the drifts and some in front.

On a strip of Mossy Meadow cardstock I stamped the sentiment from In The Pines stamp set in Versamark Ink. I immediately sprinkled it with my White Stampin’ Emboss Powder and set it using my Heat Tool. I adhered the sentiment strip to the card front using Stampin’ Dimensionals. I added a few Real Red Wonderful Gems to the artwork panel. I adhered the artwork to the card front using Stampin’ Dimensionals.

On the inside I stamped the sentiment from the Stampin’ Up! Wrapped In Christmas Cling Stamp Set in Mossy Meadow Ink in the center of a Whisper White panel. I stamped the group of 4 trees outline stamp from In The Pines stamp set in Old Olive Ink across the bottom of the panel stamped in full strength, then stamped again without re-inking. I stamped the snow drift image from In The Pines stamp set below the trees in Pool Party Ink. Using the Pine Woods Dies, I cut the bottom of the panel using the smallest curve die. I adhered the Whisper White panel to a Mossy Meadow mat using Stampin’ Seal and then to the inside of the Real Red card base using Multipurpose Liquid Glue.

To complete my card I decorated a Medium Whisper White Envelope. I stamped the small 4 tree outline image from In The Pines stamp set on the envelope front stamped full strength then again without re-inking. I also stamped the single small tree outline image from In The Pines stamp set in Old Olive Ink stamped full strength and again without re-inking. I stamped the snowdrift image from In The Pines stamp set in Pool Party Ink below the trees. I adhered a panel of Heartwarming Hugs DSP to the envelope flap.

Thank you for visiting my blog today. I hope you liked my card and will give it a try. Now that you’ve seen my card, take a minute to hop through all our projects today. If you click on the Next Blog button, you’ll go to Julie’s page. Or you can just click on the names below to go directly to all their blogs! Happy Hopping!!

Amy Koenders:

Mary Deatherage:

Kristi Gray:

Jaimie Babarczy:

Sue Prather:

Karen Finkle:

Akiko Sudano:

Karen Ksenzakovic: You Are Here

Julie Johnston:

*********************************************************************************************************

If you need any stamping supplies, I’d love to be your Demonstrator. Just click HERE to go directly to my online store or drop me an email if you have any questions. 

MY CURRENT HOST CODE IS: 9XYYG2ZU

Use this host code when you order $50 or greater and receive a free gift from me! If your order is over $150, please do not use this code, but you’ll still get the free gift. The free gift is your choice of any 1 item valued up to $10.00 in the 2020-2021 Annual Catalog!   For any orders $50 or more I will also send you my monthly class tutorials.  Click HERE or go to my Customer Rewards for more details and to see what this months tutorials are.

 Click HERE to shop the clearance rack.

Please remember to use my current Host Code and make sure that you can see my name on the final checkout page listed as your Demonstrator when you order so that you know that you’re ordering with me and you’ll get my rewards! 

Happy Stamping, Karen!

*********************************************************************************************************

Beary Comforting

Subscribe November 11-December 10

If you haven’t heard already, Paper Pumpkin is our monthly One-Stop Box™ that offers a wide variety of unique papercrafting projects for subscribers of any skill level! These themed, all-inclusive craft kits encourage customers to explore their creativity, try new techniques, and discover their potential in papercrafting.

December’s cute and cuddly Paper Pumpkin kit—called “Beary Comforting”—is designed to uplift your loved ones as this beary tough year finally comes to a close. After a year like 2020, we all could use a big bear hug! With the help of this bear-themed kit, you can create 12 unbearably cute cards featuring warm and fuzzy friends, sweet stamps, and meaningful messages. Near or far, send your friends and family the extra comfort, love, and encouragement they need with this month’s Paper Pumpkin kit!

ABOUT THE DECEMBER KIT

Details

  • Kit contains enough supplies to create 12 cards and coordinating envelopes.
  • Card size: 4-1/4″ x 5-1/2″ (10.8 x 14 cm)
  • Envelope size: 4-1/2″ x 5-3/4″ (11.4 x 14.6 cm)
  • Coordinating colors: Basic Gray, Calypso Coral, Cinnamon Cider, Daffodil Delight, Rich Razzleberry, Soft Sea Foam, Whisper White

SUBSCRIPTION INFORMATION

Subscribe to the December 2020 Paper Pumpkin Kit between 11 November and 10 December at paperpumpkin.com!

Note: Supplies may be limited toward the end of the subscription period.

*********************************************************************************************************

Card stock cuts for this project:

  • Mossy Meadow Cardstock 1/2″ X 2 3/4″ (sentiment), 4 1/8″ X 5 3/8″ (inner liner mat)
  • Real Red Cardstock 8 1/2″ X 5 1/2″ (card base scored and folded at 4 1/4″)
  • Whisper White Cardstock 4 1/4″ X 5 1/2″ (artwork cut with snowdrift dies), 3 1/2″ X 5 1/2″ (trees), 4″ X 5 1/4″ (inner liner)
  • Heartwarming Hugs Designer Series Paper 4 1/4″ X 5 1/2″ (card front), 2 1/4″ X 6″ (piece for envelope flap)

*********************************************************************************************************

Product List

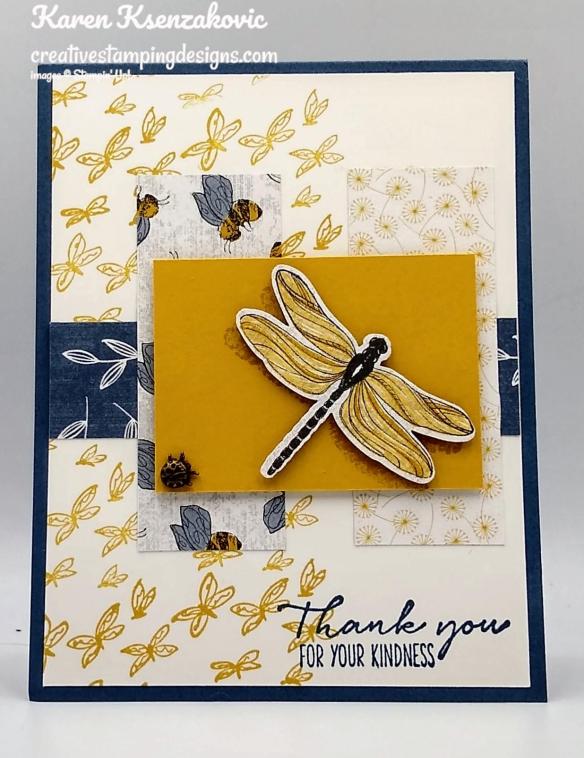
Stampin’ Up! Dragonfly Garden Thank You Sneak Peek

Good Wednesday morning my fellow stampers. How is everyone’s week going? We’re halfway through and on our way to the weekend. Another month flying by. I was walking home from work the other day and noticed everyone’s leaves raked to the curb waiting to be picked up, except mine. Mine are still green on my tree. I have a purple plum tree in my backyard and it’s still purple full of leaves. Other that pine trees, I have the only trees with leaves that haven’t turned on our block. My trees are definitely laughing at me.

I have sneak peek for you today of another card that we ‘made’ at OnStage@Home this past weekend. This is another one that everyone’s will look different depending on which patterns of the paper everyone chose. Here’s my take on the card.

I played along with Always Fun Challenge #188. Their theme is ‘Thank You’.

I used the Stampin’ Up! Dragonfly Garden Bundle which will be available for purchase January 5, 2021 from the January-June 2021 Mini Catalog.

I started by stamping the small dragonfly cluster image from the Stampin’ Up! Dragonfly Garden Stamp Set in Bumblebee Ink along the side of a Whisper White panel. I adhered a panel of Dandy Garden 6 X 6 Designer Series Paper across the center of the panel using Stampin’ Seal.

I stamped the sentiment from the Dragonfly Garden stamp set on the bottom of the panel in Misty Moonlight Ink. On a panel of Bumblebee cardstock I stamped the wings fill image from the Dragonfly Garden stamp set in Bumblebee Ink twice. From a panel of the Dandy Garden DSP I punched one of the dragonflies out using my Dragonflies Punch and adhered it to the Bumblebee panel, above the stamped wings so that it looked like a shadow, using Stampin’ Dimensionals.

I adhered the 2 shorter panels of Dandy Garden DSP to the card front using Multipurpose Liquid Glue. I adhered the Bumblebee panel to the card front using Stampin’ Dimensionals. I adhered the card front to a Misty Moonlight card base using Multipurpose Liquid Glue. I added a Ladybug Trinkets to the corner of the Bumblebee panel using a Glue Dot.

On the inside I stamped the sentiment from the Stampin’ Up! Ornate Thanks Photopolymer Stamp Set in the center of a Whisper White panel in Misty Moonlight Ink. I stamped the dragonfly image from Dragonfly Garden stamp set twice on the panel. I adhered the Whisper White panel to a Bumblebee mat using Stampin’ Seal and then to the inside of the Misty Moonlight card base using Multipurpose Liquid Glue.

To finish my card I decorated a Medium Whisper White Envelope. I stamped the dragonfly image from the Dragonfly Garden stamp set in Bumblebee Ink twice on the envelope front. I adhered a panel of Dandy Garden DSP to the envelope flap.

Thank you for stopping by my blog today, I hope you liked my card. All items used for today’s card, except for the Ornate Thanks stamp set, will be available from the January-June 2021 Mini Catalog on January 5, 2021. If you are one of my customers and have placed an order in the past year, I will be sending you the catalog as soon as I get them. Happy Stamping!!

****************************************************************************************************

Join me today at 4pm Today on Facebook Live .

I’m planning to go live on my Facebook page with a project today at 4:00pm ET.  Stop by my Facebook page at 4pm ET to see what card I will be making this week.

*********************************************************************************************************

If you need any stamping supplies, I’d love to be your Demonstrator. Just click HERE to go directly to my online store or drop me an email if you have any questions. 

MY CURRENT HOST CODE IS: 9XYYG2ZU

Use this host code when you order $50 or greater and receive a free gift from me! If your order is over $150, please do not use this code, but you’ll still get the free gift. The free gift is your choice of any 1 item valued up to $10.00 in the 2020-2021 Annual Catalog!   For any orders $50 or more I will also send you my monthly class tutorials.  Click HERE or go to my Customer Rewards for more details and to see what this months tutorials are.

 Click HERE to shop the clearance rack.

Please remember to use my current Host Code and make sure that you can see my name on the final checkout page listed as your Demonstrator when you order so that you know that you’re ordering with me and you’ll get my rewards! 

Happy Stamping, Karen!

*********************************************************************************************************

FREE Bonus Quite Curvy and Curvy Christmas Project Tutorials With Videos When You Purchase The Bundle From Me!!

A group of us worked together to create five awesome tutorials using the Stampin’ Up! Curvy Celebrations special release products with video tutorials!  You can get this set of exclusive tutorials when you purchase either the Quite Curvy Variety Bundle (item 158396) or the Quite Curvy Bundle (item 156228) from me between now and January 4!

If your order is $50 or greater and includes either of these bundles, you will get this set of tutorials in addition to the monthly online class tutorials AND your $10 thank you gift!  And you’ll also earn my Creative Stamping Designs Reward Points!

*********************************************************************************************************

Card stock cuts for this project:

  • Bumblebee Cardstock 2″ X 2 3/4″ (card front panel), 4 1/8″ X 5 3/8″ (inner liner mat)
  • Misty Moonlight Cardstock 4 1/4″ X 11″ (card base scored and folded at 5 1/2″)
  • Whisper White Cardstock 2 – 4″ X 5 1/4″ (card front and inner liner)
  • Dandy Garden 6 X 6 Designer Series Paper 1″ X 4″ (card front panel), 2 – 1 1/4″ X 3 1/4″ (card front panels), 2 1/4″ X 6″ (piece for envelope flap)

*********************************************************************************************************

Product List

Stampin’ Up! Wishes and Wonder for Amy’s Inkin’ Krew Blog Hop

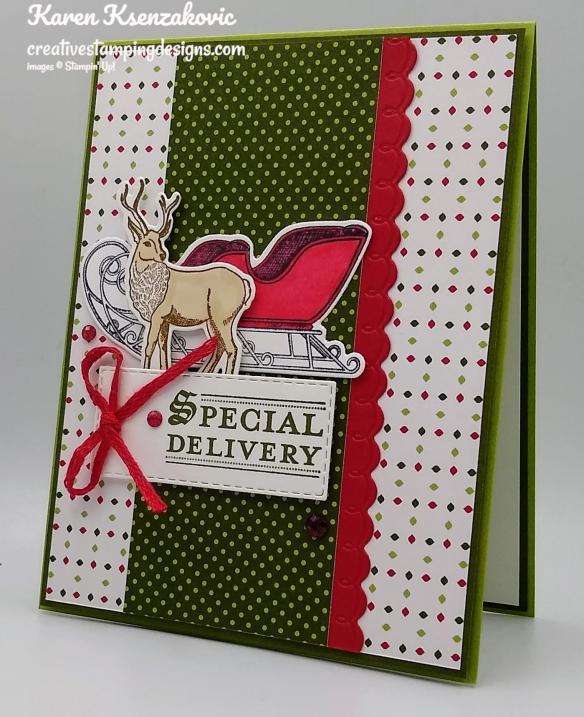
Good Tuesday morning my fellow stampers. Welcome to Amy’s Inkin’ Krew Team Blog Hop. It’s the 2nd Tuesday of the month so that means Blog Hop Day!! If you are starting with me, be sure to hop around to see everyone’s beautiful projects. If you’ve hopped over from Tara Carpenter’s blog, welcome to my blog and thank you for stopping by. The theme this month is “Christmas or Happy Holidays”.  We can interpret this however we want.  Here’s my card.

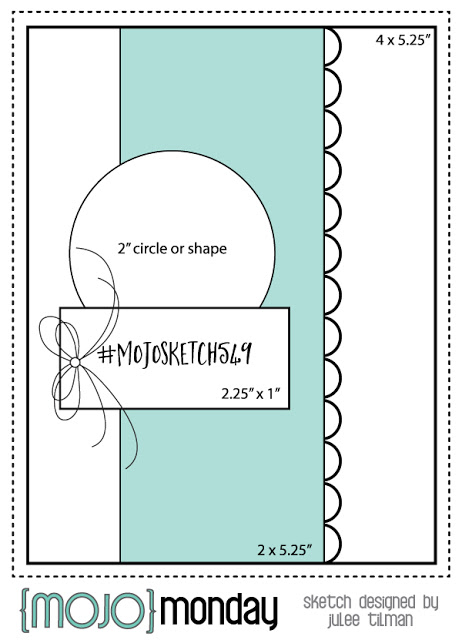
I used the Stampin’ Up! Wonder & Wishes Bundle for my card today. My design is from Mojo Monday Sketch #549. Here is their sketch.

I started by adhering a Heartwarming Hugs Designer Series Paper card front to a Mossy Meadow mat using Stampin’ Seal I cut a strip of Real Red cardstock using the scalloped edge die from the Peony Dies and adhered it to another panel of Heartwarming Hugs DSP using Stampin’ Seal. I adhered the panel to the card front using Multipurpose Liquid Glue.

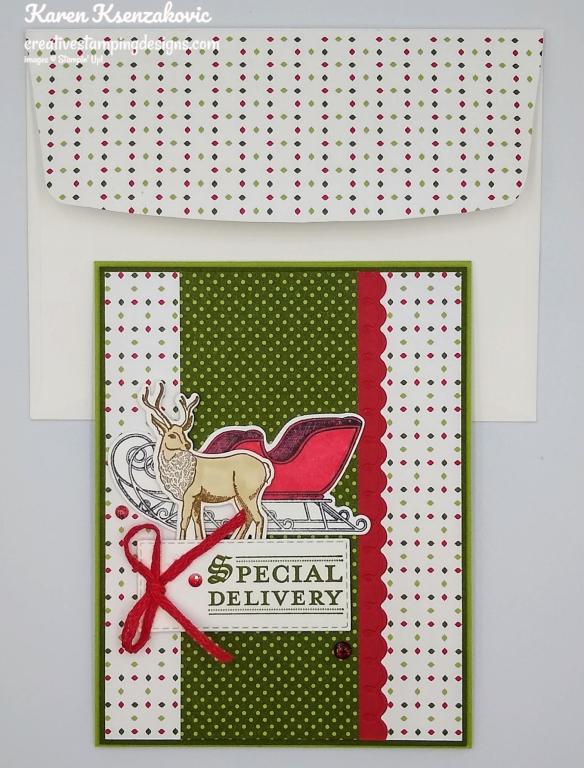
On a panel of Whisper White cardstock I stamped the sleigh image from the Stampin’ Up! Wishes & Wonder Cling Stamp Set in Tuxedo Black Memento Ink. I stamped the deer image from the Wishes & Wonder stamp set in Soft Suede Ink on the same panel. I colored the sleigh in using my Real Red Stampin’ Blends Markers and the deer in using my Crumb Cake Stampin’ Blends Markers. I cut the images out using my North Pole Wonder Dies. I stamped the sentiment from the Wishes & Wonder stamp set in Mossy Meadow Ink on the Whisper White panel and cut it out using my Stitched Rectangle Dies, keeping the sentiment to the right.

I adhered the sleigh to the card front using Glue Dots. I adhered the deer in front of the sleigh using Stampin’ Dimensionals. I adhered the sentiment below the images using Stampin’ Dimensionals. I added a few Real Red Wonderful Gems to the card front. I tied a small bow using the Real Red 3/16″ Braided Linen Trim and adhered it to the sentiment using a Glue Dot. I adhered the card front to a Pear Pizzazz card base using Stampin’ Dimensionals.

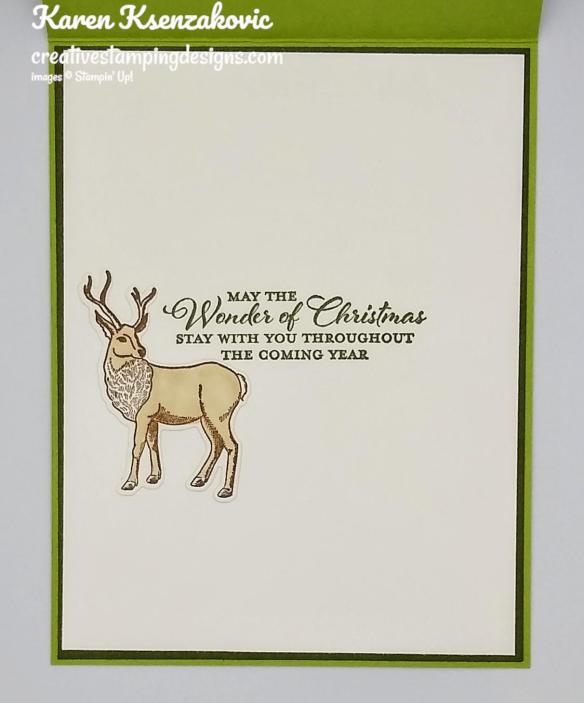
On the inside I stamped the sentiment from the Wishes & Wonder stamp set in Mossy Meadow Ink in the center of a Whisper White panel. I had stamped, colored and cut out a 2nd deer from the Wishes & Wonder stamp set, so I adhered it next to the sentiment using Multipurpose Liquid Glue. I adhered the Whisper White panel to a Mossy Meadow mat using Stampin’ Seal and then to the inside of the Pear Pizzazz card base using Multipurpose Liquid Glue.

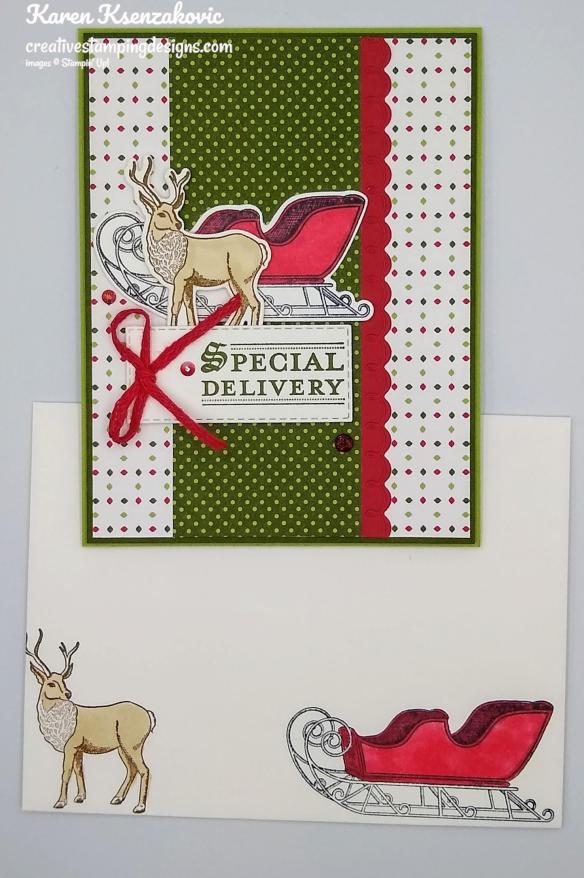
To complete my card I decorated a Medium Whisper White Envelope. I stamped the sleigh image from the Wishes & Wonder stamp set in Tuxedo Black Memento Ink on the envelope front and colored it in using my Real Red Stampin’ Blends Markers. I stamped the deer image from the Wishes & Wonder stamp set in Soft Suede Ink and colored it in using my Crumb Cake Stampin’ Blends Markers. I adhered a panel of Heartwarming Hugs DSP to the envelope flap.

Thank you for visiting by my blog today. I hope you liked my card and will give it a try. Now that you’ve seen my card, be sure to hop around to see everyone’s beautiful projects. Hit Previous to hop back to Tara Carpenter’s blog or hit Next to head over to Mary Deatherage’s blog. You can also click on each of the names and hop around that way. Happy Hopping!!

  1. Jaimie Babarczy:
  2. Karen Finkle:
  3. Tara Carpenter:
  4. Karen Ksenzakovic: You Are Here
  5. Mary Deatherage:
  6. Sue Prather:
  7. Krista Yagci:
  8. Terry Lynn Bright:
  9. Akiko Sudano:
  10. Donna Leonard:
  11. Lisa Jurich:
  12. Amy Koenders:

*********************************************************************************************************

If you need any stamping supplies, I’d love to be your Demonstrator. Just click HERE to go directly to my online store or drop me an email if you have any questions. 
MY CURRENT HOST CODE IS: 9XYYG2ZU

Use this host code when you order $50 or greater and receive a free gift from me! If your order is over $150, please do not use this code, but you’ll still get the free gift. The free gift is your choice of any 1 item valued up to $10.00 in the 2020-2021 Annual Catalog!   For any orders $50 or more I will also send you my monthly class tutorials.  Click HERE or go to my Customer Rewards for more details and to see what this months tutorials are.

 Click HERE to shop the clearance rack.

Please remember to use my current Host Code and make sure that you can see my name on the final checkout page listed as your Demonstrator when you order so that you know that you’re ordering with me and you’ll get my rewards! 

Happy Stamping, Karen!

*********************************************************************************************************

Jolly Gingerbread

LAST DAY TO SUBSCRIBE

Subscribe October 11 – November 10

Paper Pumpkin is our monthly subscription service that offers unique papercrafting projects for crafters of any skill level! In these all-inclusive kits, subscribers receive pre-cut paper pieces, embellishments, ink, and an exclusive stamp set designed to encourage them to explore their creativity. As their subscription continues, subscribers will have a collection of cards—and other creations—for a variety of occasions, in addition to a stockpile of supplies!


So, what’s in store for this month’s Paper Pumpkin kit? November’s cute, gingerbread-themed kit contains enough supplies to create one-of-a-kind Christmas crafts! Whether it’s a gift card carrier, traditional card, or tasty-looking tag, this sweet and seasonal kit is the key to heartfelt holiday gifting. With curly cutouts, sugary stickers, and delicious die-cut designs in a special-edition box, a jolly holiday will be on its way with this kit!

Details About The November Kit:

  • Kit contains enough supplies to create 15 gift card carriers and coordinating envelopes.
  • Kit contents can also be used to design traditional holiday cards, gift tags, and other paper projects.
  • Contents arrive in a collectible, special-edition box!
  • Project size: 2-1/4″ x 4″
  • Envelope size: 2-3/4″ x 4-3/8″
  • Coordinating colors: Cinnamon Cider, Daffodil Delight, Calypso Coral, Mint Macaron, Shaded Spruce, Blushing Bride, and Whisper White

Subscribe to the November 2020 Paper Pumpkin Kit from 11 October to 10 November at paperpumpkin.com!

Note: Supplies may be limited toward the end of the subscription period.

*********************************************************************************************************

Card stock cuts for this project:

  • Mossy Meadow Cardstock 2 – 4 1/8″ X 5 3/8″ (card front and inner liner mats)
  • Pear Pizzazz Cardstock 4 1/4″ X 11″ (card base scored and folded at 5 1/2″)
  • Real Red Cardstock 1″ X 5 1/4″ (scalloped edge)
  • Whisper White Cardstock 3 1/2″ X 3 1/2″ (artwork), 4″ X 5 1/4″ (inner liner)
  • Heartwarming Hugs Designer Series Paper 4″ X 5 1/4′ (card front), 2″ X 5 1/4″ (card front panel), 2 1/4″ X 6″ 9piece for envelope flap)

*********************************************************************************************************

Product List