Stampin’ Up! Catch You Later Childs Birthday Card

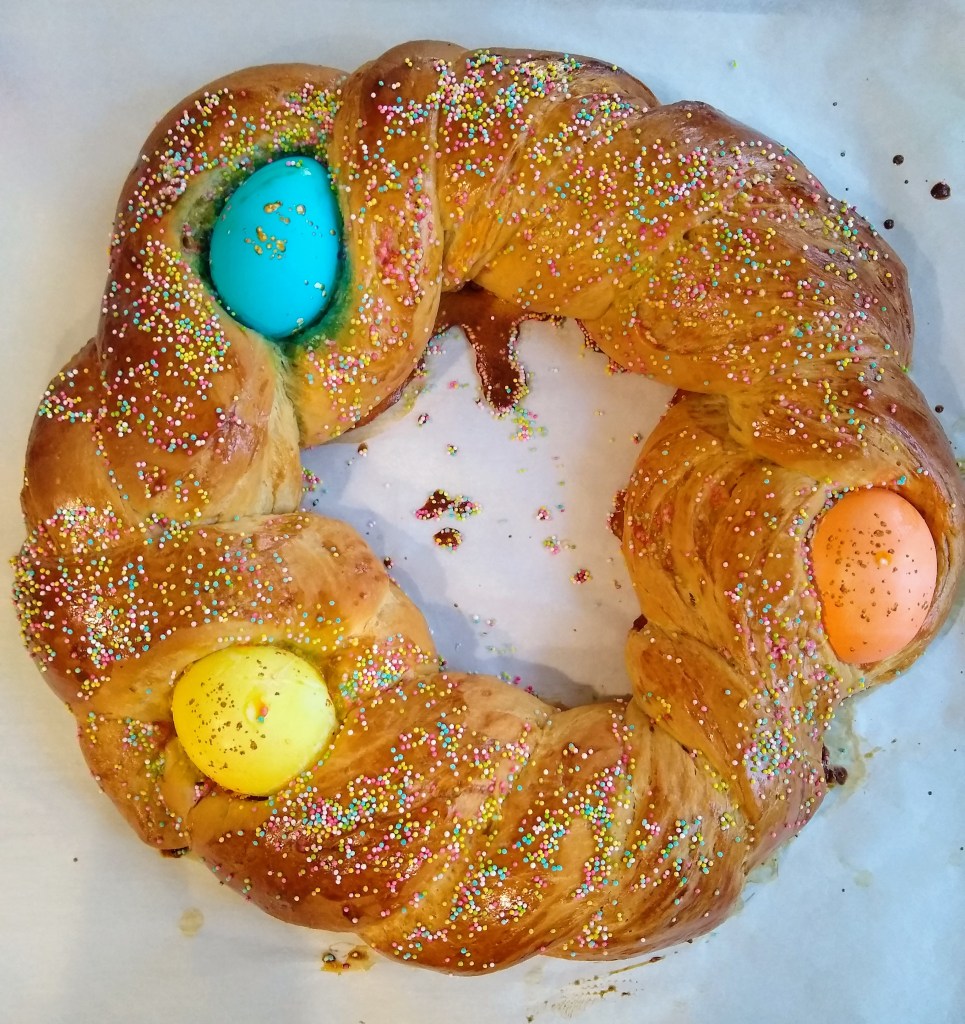
Good Saturday morning my stamping friends and welcome to the weekend. I hope you have some fun plans in the works. I’ll be prepping all day for our Easter brunch tomorrow. I’m looking forward to getting together with my niece and her daughter. Yesterday I made my Easter Egg bread. I started around 7am and didn’t take the last one out of the oven until 7pm. I made 8 loaves that I’ll be sharing with others. My family couldn’t wait to cut into the 1st one out of the oven and I have to admit neither could I. Here’s a picture of the 1st one out which is about 13″-14″ in diameter. They all came out perfect this year, YAY!!!

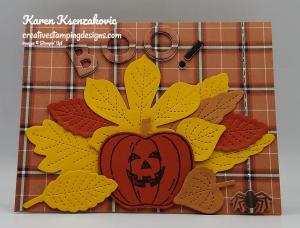
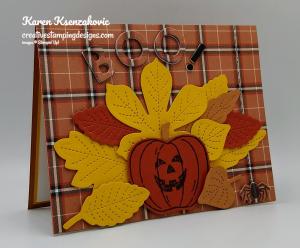
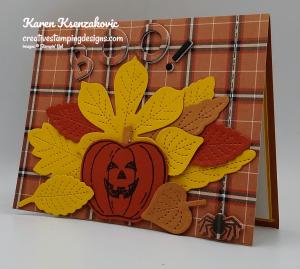
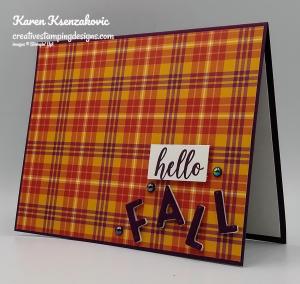
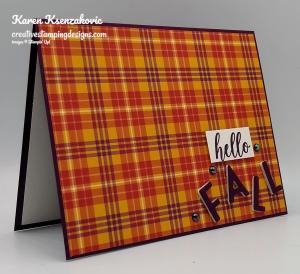
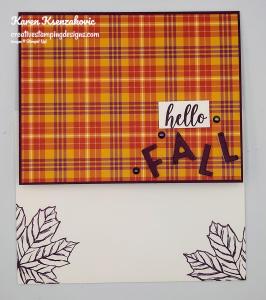
Today’s card is one that one of my cashiers asked me to make for her. Her grandson is turning 2 and loves monkeys, so I knew exactly what I wanted to make for her. Here’s my card for today.

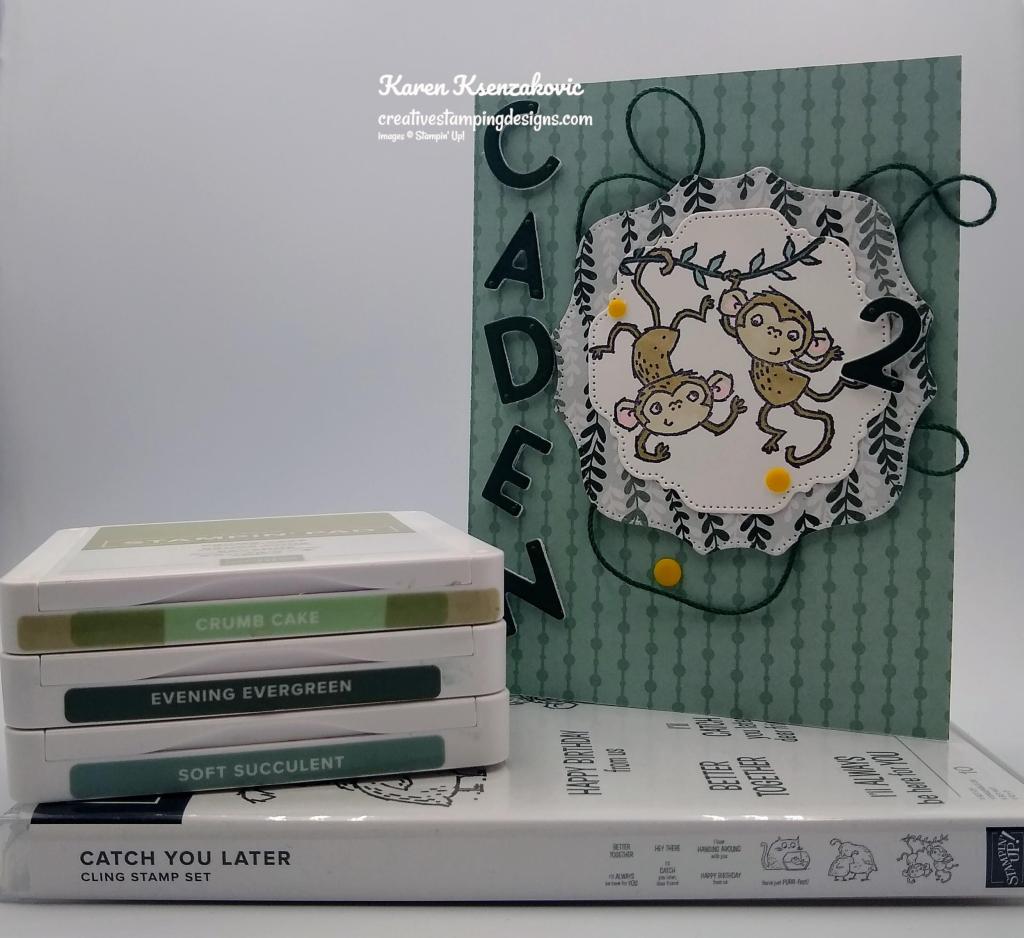
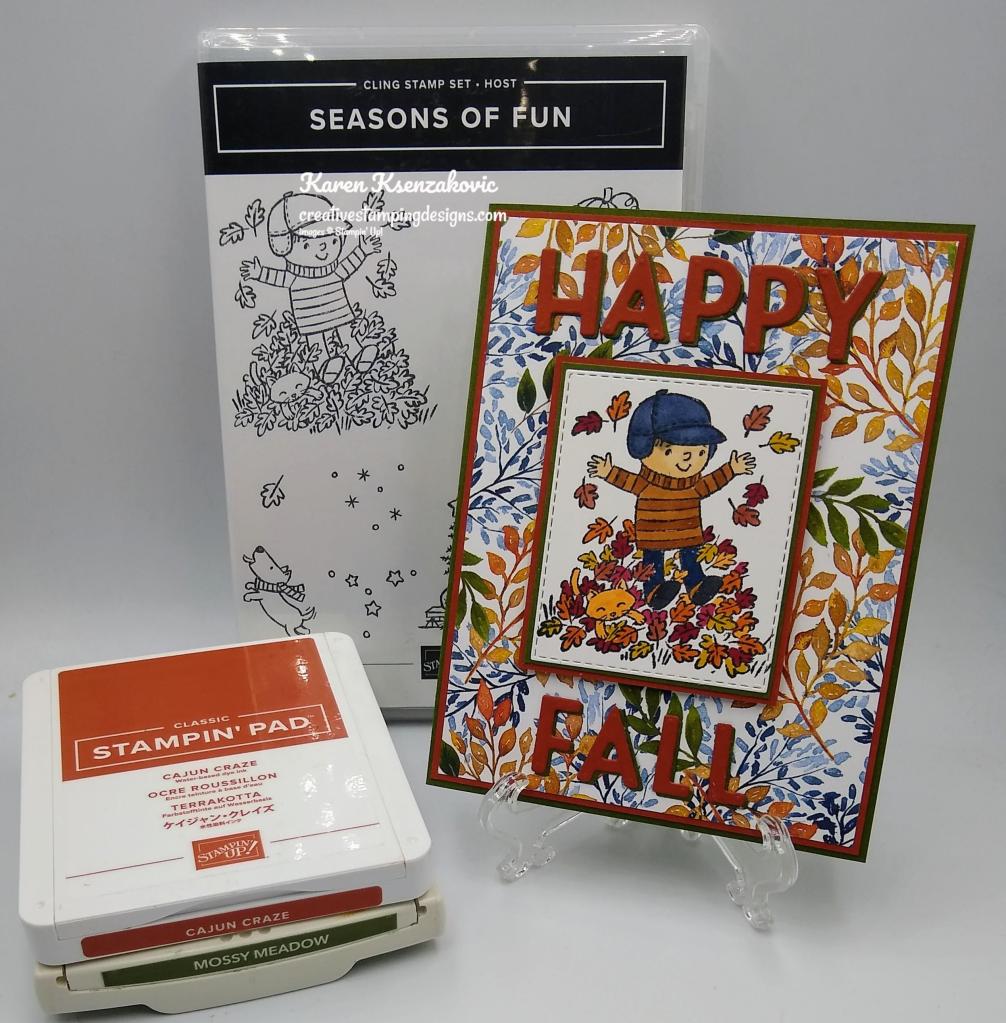
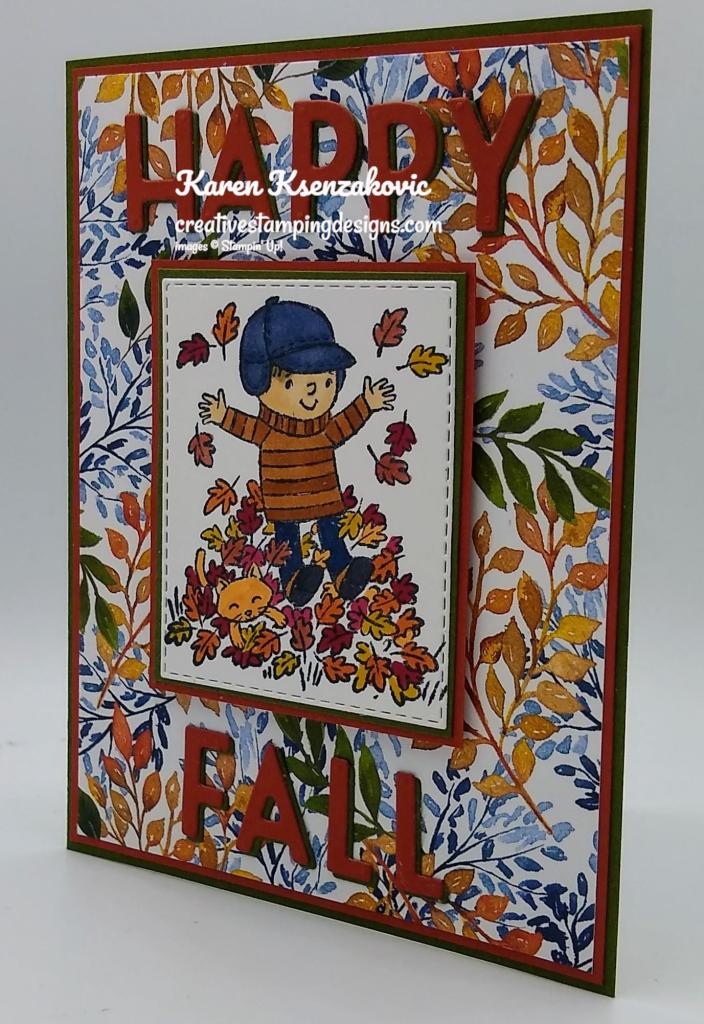
I used the Stampin’ Up! Catch You Later Cling Stamp Set along with the 2021-2023 In-Color Designer Series Paper, In the Wild Designer Series Paper, Playful Alphabet Dies and the Hippo & Friends Dies. All these items will be retiring, so if these are products you like grab them while you still can.

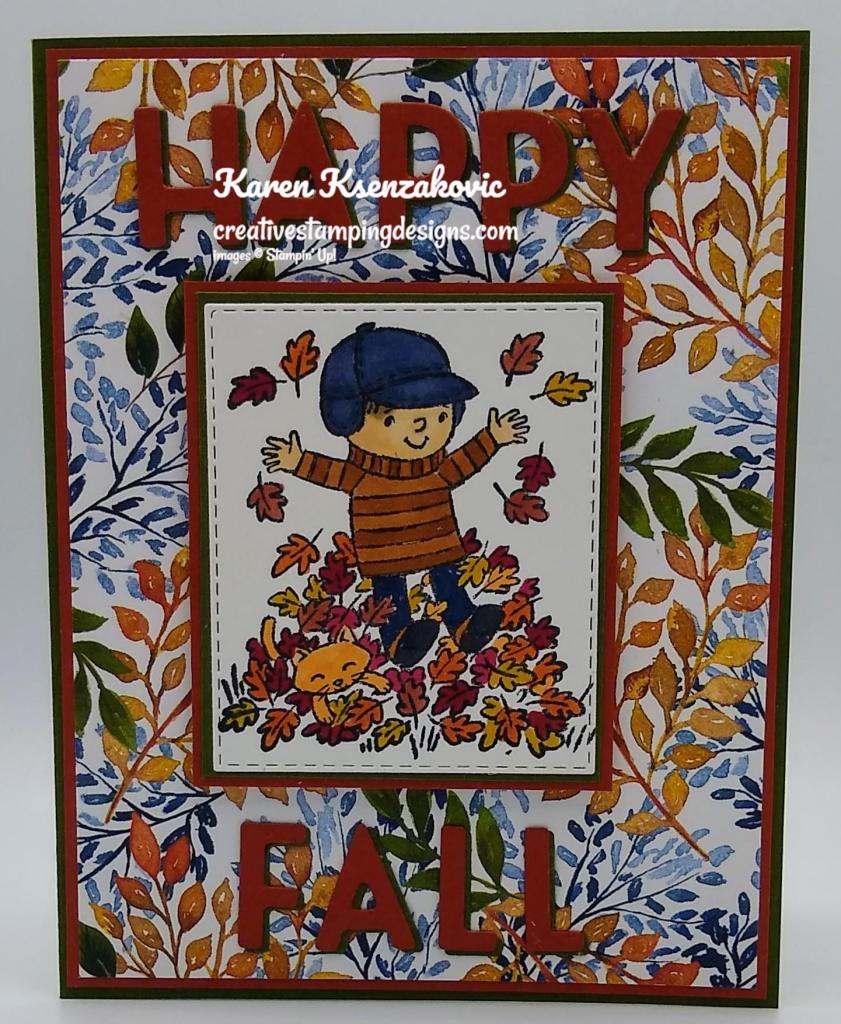
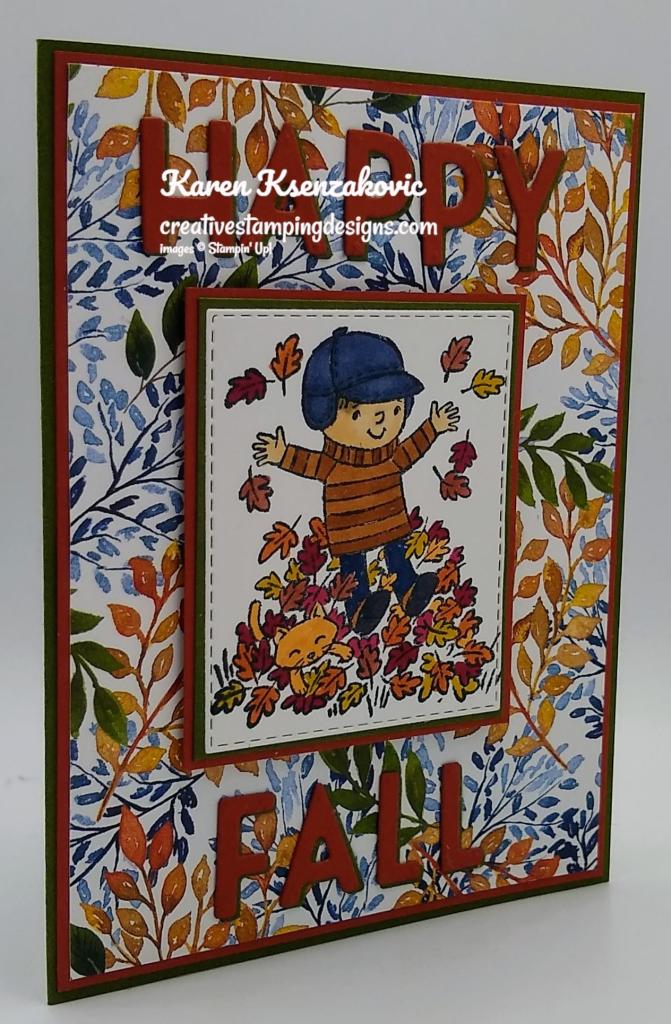
I started by adhering a panel of 2021-2023 In-Color DSP to a Soft Succulent card base. I stamped the monkey image from the Catch You Later stamp set in Tuxedo Black Ink on a panel of Basic White cardstock and colored it using my Crumb Cake, Evening Evergreen, Flirty Flamingo & Soft Succulent Stampin’ Blends Markers. I cut the image out using my Hippo & Friends Dies. I cut a panel of In the Wild DSP using the size larger die from the Hippo & Friends Dies and adhered the artwork to it using Stampin’ Seal. I adhered a piece of Evening Evergreen Bakers Twine from the Fan Baker’s Twine Pack on the card front and adhered the layered panel over it using Stampin’ Dimensionals.

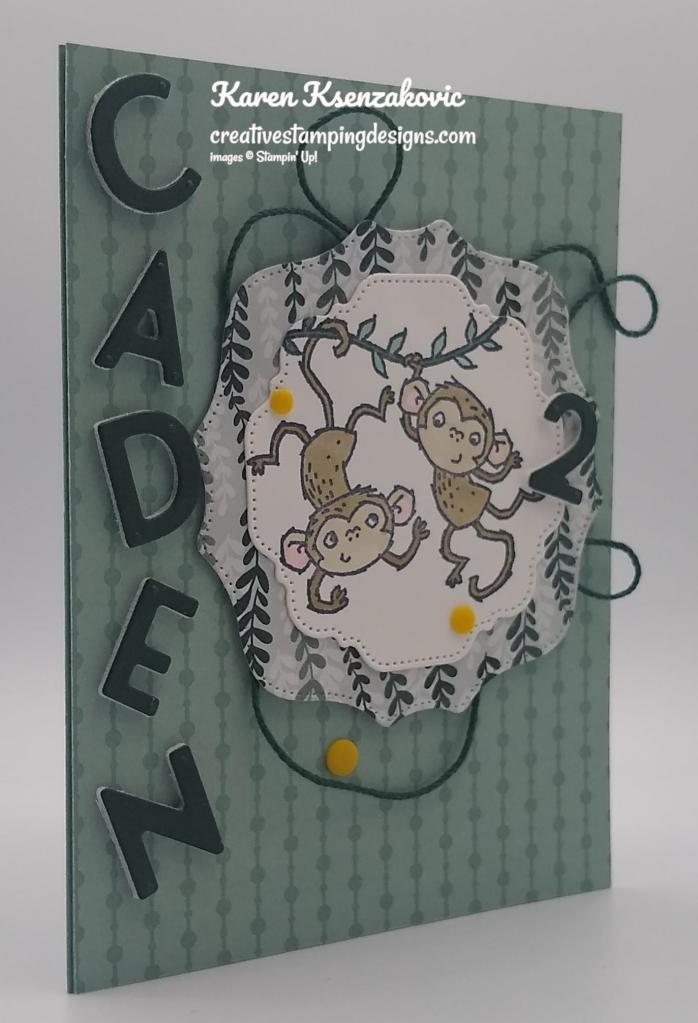
From a panel of Evening Evergreen cardstock that I had adhered to a Foam Adhesive Sheet, I cut the letters and number using the Playful Alphabet Dies. I adhered the letters down the side of the card front.

I adhered the #2 on the monkey’s foot on the artwork. I added a few Playing With Patterns Resin Dots to the card front.

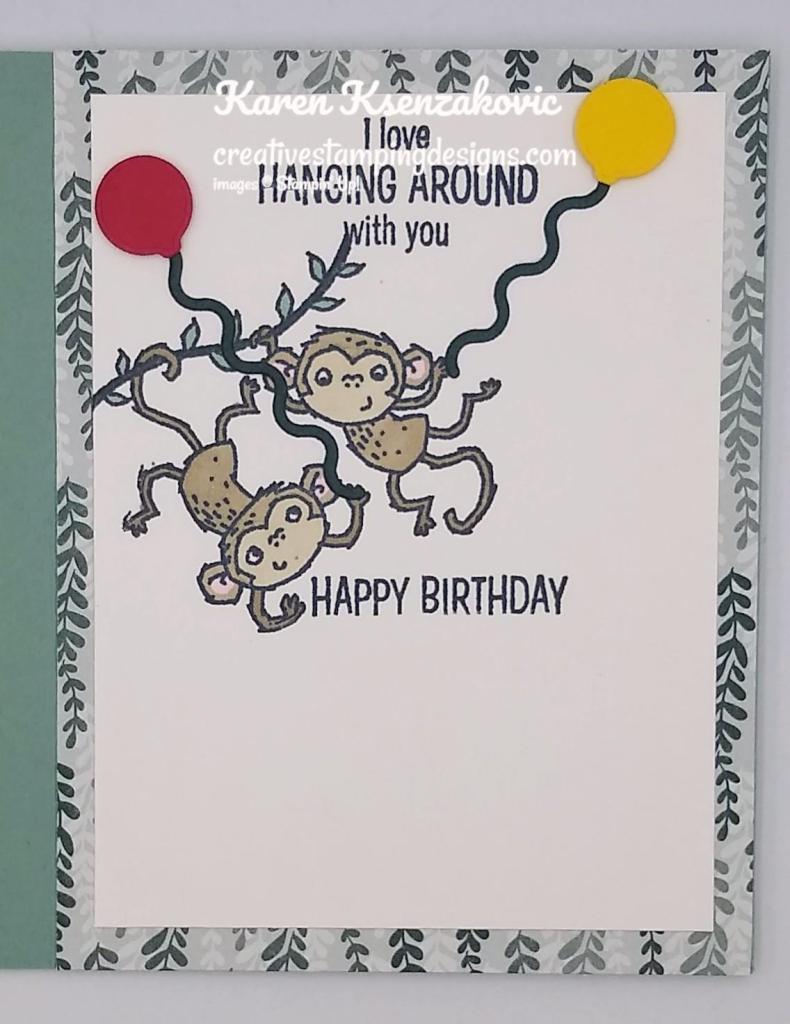
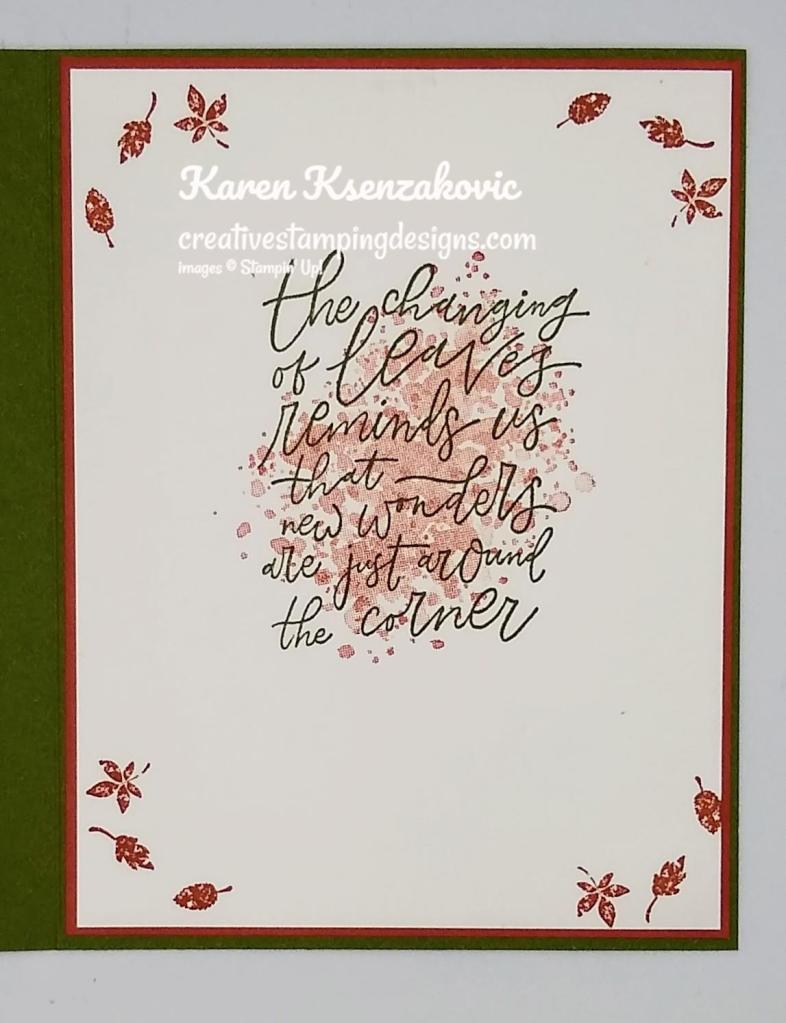
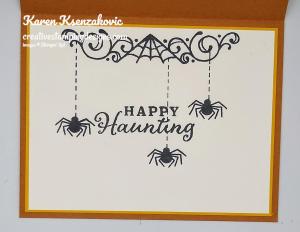
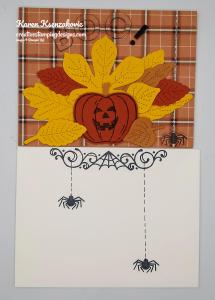
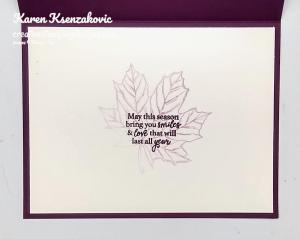
I adhered a panel of In the Wild DSP to the inside of the Soft Succulent card base. On a panel of Basic White cardstock I stamped the monkey image from the Catch You Later stamp set in Tuxedo Black Ink and colored it the same as the card front with my Stampin’ Blends Markers. I stamped the 2 sentiments from the Catch You Later stamp set by the monkey image. From the panel of Evening Evergreen cardstock I cut 2 of the string dies from the Hippo & Friends Dies. I cut 2 of the balloons from the Hippo & Friends Dies from scraps of Daffodil Delight and Real Red cardstock. I adhered the strings to the monkeys hands using Multipurpose Liquid Glue and the balloons to the strings using Stampin’ Dimensionals.

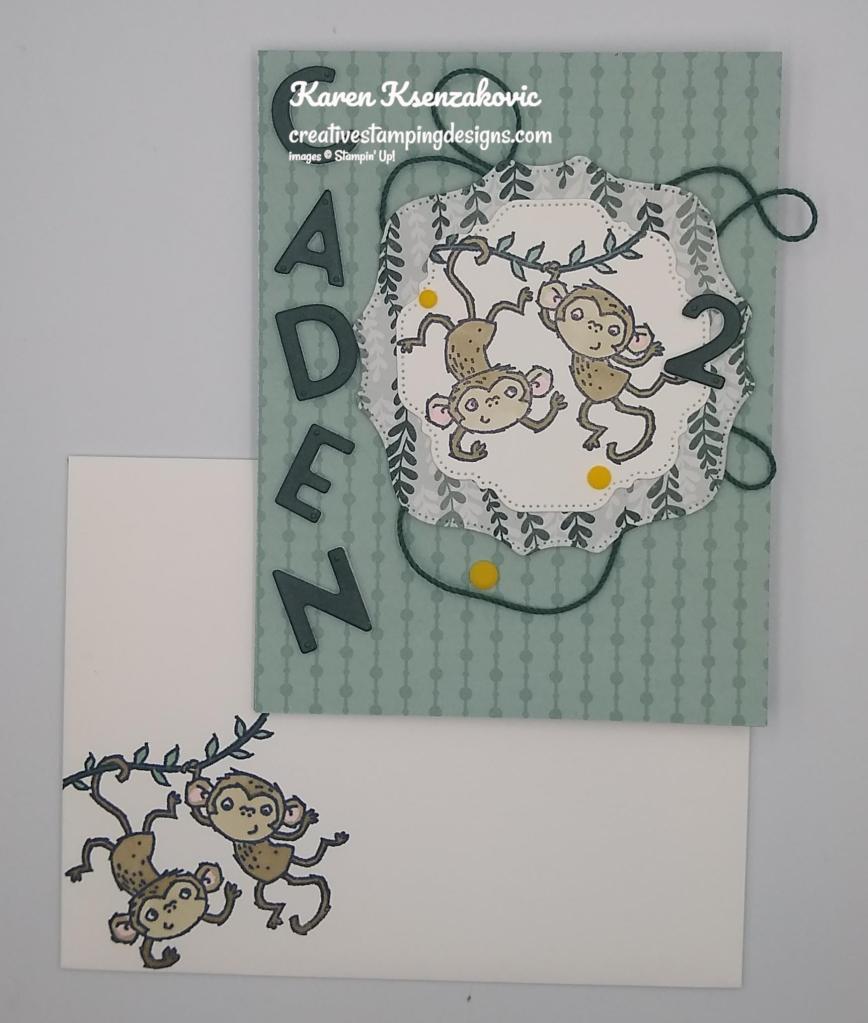
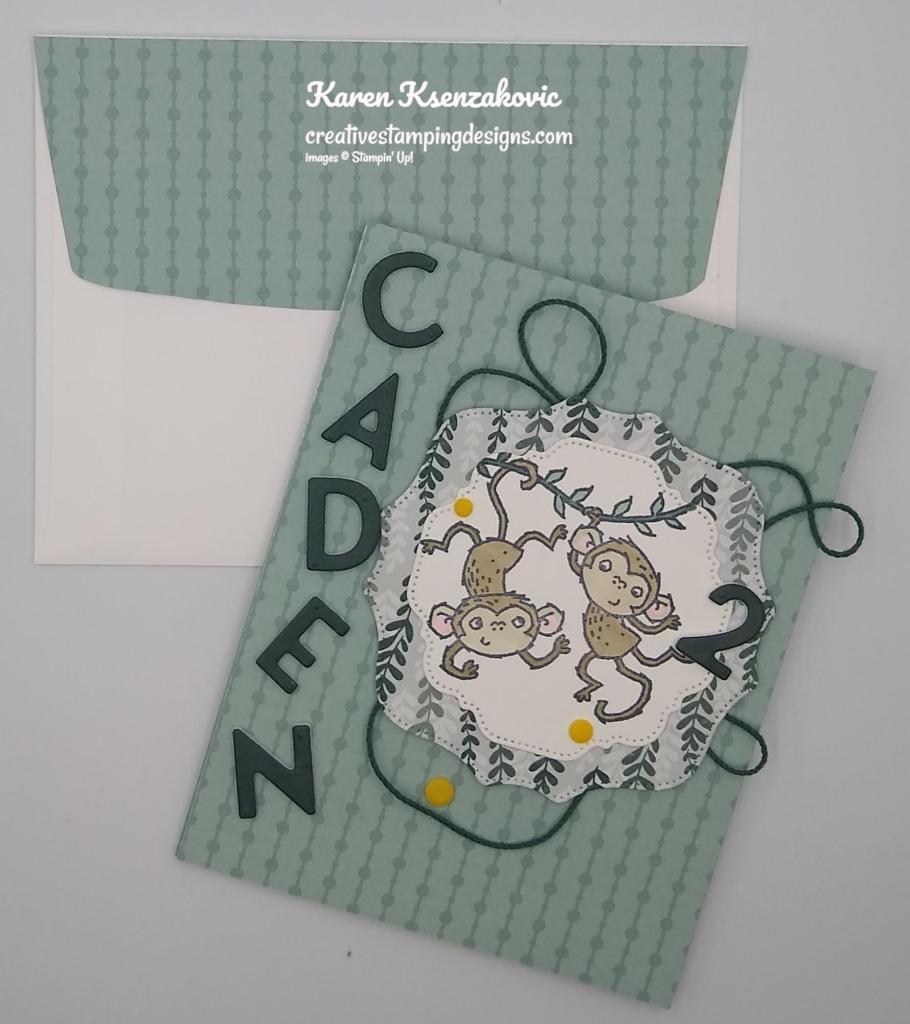
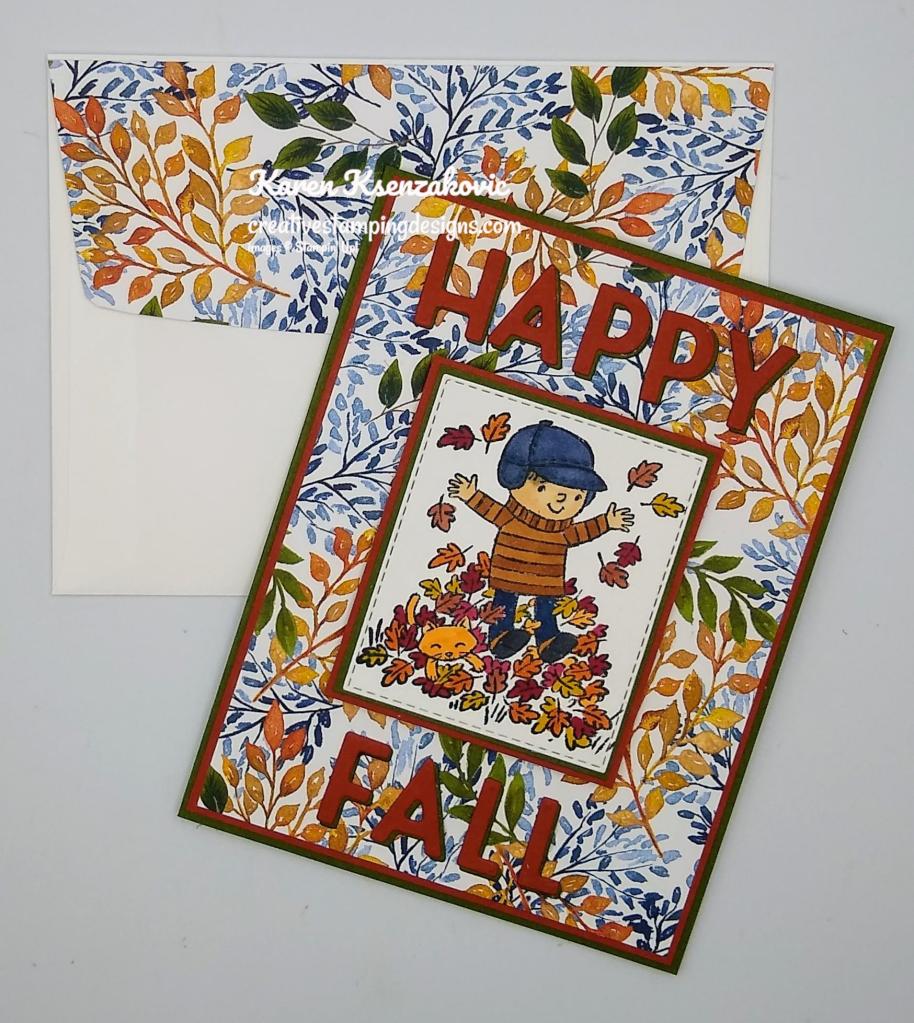
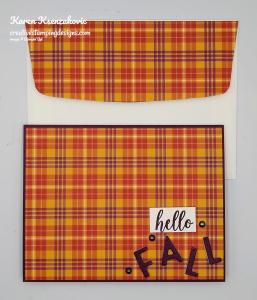
To finish my card, I decorated a Basic White Medium Envelope. I stamped the monkey image from the Catch You Later stamp set on the envelope front in Tuxedo Black Ink. I colored the image the same as I did for the card using my Stampin’ Blends Markers. I adhered a panel of the 2021-2023 In-Color DSP to the envelope flap.

Thank you for stopping by my blog today. I hope you liked my card and will give it a try. Happy Stamping!!

*********************************************************************************************************

If you need any stamping supplies, I’d love to be your Demonstrator. Just click HERE to go directly to my online store or drop me an email if you have any questions. 

MY CURRENT HOST CODE IS:   XXM77BHN

Use this host code when placing an order with me. When you order $50 or greater you will receive a free gift from me! If your order is over $150, please do not use this code, but you’ll still get the free gift. The free gift is your choice of any 1 item valued up to $10.00 from the 2021-2022 Annual Catalog or the January – June 2022 Mini Catalog!   For any orders $50 or more I will also send you my monthly class tutorials.  Click HERE or go to my Customer Rewards for more details and to see what this month’s tutorials are.

Please remember to use my current Host Code and make sure that you can see my name on the final checkout page listed as your Demonstrator when you order so that you know that you’re ordering with me and you’ll get my rewards! 

Happy Stamping, Karen

*********************************************************************************************************

New Designer Series Paper Share – $60.00 plus $8.00 for Priority Mail Shipping

I’m offering a Designer Series Paper share from the Stampin’ Up! 2022-2023 Annual Catalog and I’d love to have you join!!  I’m placing my share order early on May 3 and I’m going to use the expedited shipping option so I should be able to have the shares cut, bundled and back out to you during the week of May 9.

How my shares work:  I order full packs of all of the Designer Series Papers listed below, I cut them into 6″ x 6″ pieces (or 6″ x 12″ pieces for double shares) and give you one panel of each design from each pack on the list.  I pack up the paper in a cellophane bag and mail it back out to you just as quickly as I can!  Shares give you a good working sample of all of the papers so that you can decide which ones to order in full packs!

Here are the Designer Series Paper Shares that I am offering from the new Annual Catalog!

New Designer Series Paper Share – $60.00 plus $8 for Priority Mail shipping

You will receive one 6×6 sheet of each design from the following DSP packs (the number after the name indicates how many 6×6 sheets of that paper pack you will receive):

  • Abigail Rose – 6
  • Awash In Beauty – 6
  • Butterfly Kisses 6″ x 6″ – 12
  • Happy Forest Friends – 6
  • He’s The Man – 5 plus an assortment of the die cut pieces
  • Hues Of Happiness – 6
  • Lovely In Linen – 6
  • Perfectly Penciled – 6
  • Pretty Prints – 12
  • Sun Prints – 6
  • Tea Boutique 6″ x 6″ – 12
  • Texture Chic Specialty – 6
  • 2022-2024 In Color 6″ x 6″ – 10
  • 2021-2023 In Color 6″ x 6″ – 10
  • Brights 6″ x 6″ – 20
  • Neutrals 6″ x 6″ – 20
  • Regals 6″ x 6″ – 20
  • Subtles 6″ x 6″ – 20
  • 2022-2024 In Color 6″ x 6″ Glimmer Paper – 5
  • Brushstroke Specialty – 3
  • Distressed Gold Specialty – 1
  • Rose Gold Specialty – 3

In all, you’ll receive 201 – 6” x 6” sheets of designer or speciality paper!

Double DSP Share – $120 + $8 Shipping by Priority Mail – if you’d like double shares of the designer paper, I’m offering those too!  I’ll cut the 12″ x 12″ designer paper sheets into 6″ × 12″ so that you’ll be able to get 3 full A2 size card fronts from each sheet and you’ll get double sheets of the 6″ x 6″ since they’re already precut.

FREE Gift From Me! – As a bonus for joining my share, you’ll get a sampling of the new host exclusive Design A Daydream 12″ x 12″ Designer Series Paper!

Anyone is welcome to join in my share (please note, I can only ship to addresses within the US).  If you’d like to join, email the following information to creativestampingdesigns@gmail.com

  • Your first and last name
  • The email address that is connected to your PayPal account. I only accept PayPal for payment.  ***You do not need to have a PayPal account to pay the invoice, you can choose to pay by credit card without having a PayPal account.

Deadline to sign up for my share is Sunday, May 1 at 5:00 PM ET.

Let me know if you have any questions.  Thanks!

*********************************************************************************************************

The Stampin’ Up! 2021-2022 Annual Catalog Retiring Lists have posted, and the Last Chance Products Sale has begun!

Click here for a printable PDF list of all retiring items including the discounted prices.

LAST CHANCE PRODUCTS DETAILS

  • All products are available while supplies last, and there are no purchase limits, so order soon (or order now so that you don’t have to worry!) to make sure that you are able to get the items that you are wanting!
  • Discounted items can be added to a Starter Kit and redeemed as a 50% off item or with Stampin’ Rewards.
  • Stamp Sets are not guaranteed during this promotion and are while supplies last.
  • ORDER DEADLINES:  May 2, 2022, at 11:50 PM MT
  • The 2020-2022 In Colors – Cinnamon Cider, Just Jade, Bumblebee, Magenta Madness, and Misty Moonlight will be going away. I HIGHLY encourage you to stock up early on the 2020-2022 In-Color Cardstock, Ink Pads, and Refills as soon as possible, as these items sell out quickly!

Let me know if you have any questions.  Happy shopping!

*********************************************************************************************************

Celebrating In Color

Subscribe April 11- May 10


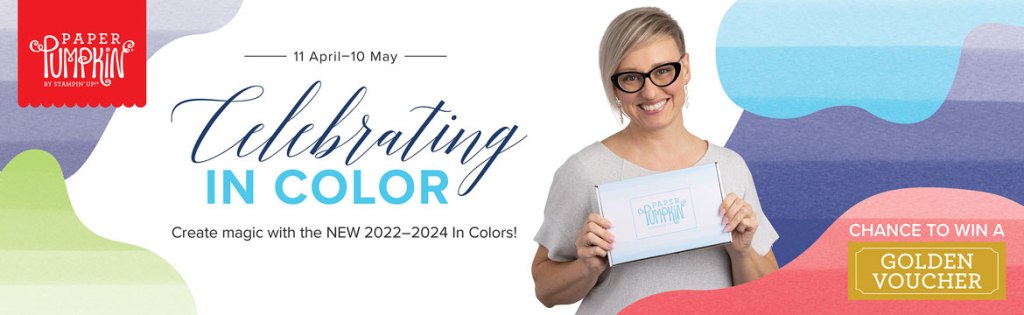
Create magic with the NEW 2022–2024 In Colors with this Paper Pumpkin kit! With vivid pops of green and red and a range of blues, these colors are perfect for fun festivities. Send your best wishes or happy moments with the large bold lettering and gorgeous gold foil details. Plus, you can also send gift cards with the included coordinating gift card holders!

ENDLESS COORDINATION

The Celebrating In Color Paper Pumpkin Kit is not just a gorgeous kit on its own, it can become a dazzling addition to all the coordinating 2022–2024 In Color products in the upcoming 2022–2023 Annual Catalog! There’s a whole new range of colors and products to mix and match with. Make sure you flip through the catalog and pick up all the coordinating products that catch your eye, and then make sure to show us what you come up with. Post your creations on social media using the hashtags #PaperPumpkin and #CelebratingInColor to ensure we see it!

That’s right! Not only does this kit come with 10 stunning cards and coordinating envelopes, it also includes 10 coordinating gift card holders as well. That means you can send your friends, family, or coworkers congratulatory words alongside a well-earned gift card to really show your appreciation for them.

As an added bonus, every May Paper Pumpkin subscriber will get the chance to win a GOLDEN Voucher worth $25 USD | $34 CAD in Stampin’ Up! products! The winners will find their Golden Voucher in their May 2022 Paper Pumpkin box. This is the perfect time to snag coordinating In Color products from the 2022–2023 Annual Catalog that will go live on 3 May 2022 in the online store!

Watch Sara in this video where she goes over her favorite features of the kit.

This kit includes:

  • Celebrating In Color Photopolymer Stamp Set
  • Basic Gray Classic Stampin’ Spot®
  • Printed card bases
  • Printed In Color envelopes
  • Printed In Color gift card holders
  • Foiled die cuts
  • Printed die cuts
  • Adhesive-backed In Color embellishments
  • Tear & Tape Adhesive
  • dimensionals

Card size: 4-1/4″ x 5-1/2″ (10.8 x 14 cm)

Coordinating Stampin’ Up! colors: Orchid Oasis, Parakeet Party, Starry Sky, Sweet Sorbet, Tahitian Tide

SUBSCRIPTION INFORMATION

Subscribe to the December Paper Pumpkin Kit between 11 April and 10 May at paperpumpkin.com!

Note: Supplies may be limited toward the end of the subscription period.

SUBSCRIPTION INFORMATION

Subscribe to the May Paper Pumpkin Kit between 11 April and 10 May at paperpumpkin.com!

Note: Supplies may be limited toward the end of the subscription period.

*********************************************************************************************************

Card stock cuts for this project:

  • Basic White Cardstock 4″ X 4″ (artwork), 3 3/4″ X 5″ (inner liner)
  • Daffodil Delight Cardstock scrap for balloon
  • Evening Evergreen Cardstock 5″ X 2″ (letters, number & strings)
  • Real Red Cardstock scrap for balloon
  • Soft Succulent Cardstock 8 1/2″ X 5 1/2″ (card base scored & folded at 4 1/4″)
  • In the Wild Designer Series Paper 4″ X 4″ (artwork mat), 4 1/4″ X 5 1/2″ (inner liner)
  • 2021-2023 In-Color 6 X 6 Designer Series Paper 4 1/4″ X 5 1/2″ (card front), 2 1/4″ X 6″ (envelope flap)

*********************************************************************************************************

Product List

Stampin’ Up! Seasons of Fun for The Happy Inkin’ Thursday Blog Hop

Good Thursday morning my stamping friends! Welcome to our Happy Inkin’ Thursday Blog Hop. I hope everyone is doing well today. If you are hopping over from Akiko Sudano’s blog, thank you for stopping by my blog. This week we have a Theme Challenge. Be sure to take a moment to hop around to see everyone’s beautiful projects. Here is my card using this weeks Theme.

I used the Stampin’ Up! Seasons of Fun Host Cling Stamp Set along with the Beauty of The Earth Designer Series Paper for my card today.

Our Theme this week is Autumn/Harvest.

I started by adhering a panel of Beauty of The Earth DSP to a Cajun Craze mat using Stampin’ Seal then to a Mossy Meadow card base using Multipurpose Liquid Glue.

On a panel of Basic White cardstock I stamped the fall image from the Seasons of Fun stamp set in Tuxedo Black Ink. I colored the image using my Basic Black, Cajun Craze, Cherry Cobbler, Cinnamon Cider, Ivory, Misty Moonlight, Night of Navy and Pumpkin Pie Stampin’ Blends Markers. I cut the image out using the 5th largest Stitched Rectangle Dies. The die wasn’t the size that I wanted, so I cut the top half, moved the die to the size I wanted lining up the stitches, turned the image and cut the bottom half. I adhered the artwork to a Mossy Meadow mat using Stampin’ Seal then to a Cajun Craze mat using Stampin’ Seal. I adhered the layered panel to the card front using Stampin’ Dimensionals.

Using my Playful Alphabet Dies, I cut the letters from a panel of Cajun Craze and Mossy Meadow cardstocks. I adhered the letters together making a shadow effect using Multipurpose Liquid Glue. I adhered the letters to the card front using Multipurpose Liquid Glue.

On the inside I stamped the sentiment from the Stampin’ Up! Beauty of Tomorrow Cling Stamp Set in Mossy Meadow Ink. I stamped the large splotch image from the Stampin’ Up! Gorgeous Leaves Cling Stamp Set in Cajun Craze Ink, stamping off once, over the sentiment . I stamped the small trio of leaves image from the Gorgeous Leaves stamp set in Cajun Craze Ink on the corners of the panel. I adhered the Basic White panel to a Cajun Craze mat using Stampin’ Seal and then to the inside of the Mossy Meadow card base using Multipurpose Liquid Glue.

To complete my card I decorated a Basic White Medium Envelope. I stamped the small leaf image from the Gorgeous Leaves stamp set in Cajun Craze Ink on the envelope front. I adhered a panel of Beauty of The Earth DSP to the envelope flap.

Thank you for visiting my blog today. I hope you liked my card and will give it a try. Now that you’ve seen my card, take a minute to hop through all our projects today. If you click on the Next Blog button, you’ll go to Amy’s page. Or you can just click on the names below to go directly to all their blogs! Happy Hopping!!

Amy Koenders:

Mary Deatherage:

Kristi Gray:

Jaimie Babarczy:

Sue Prather:

Karen Finkle:

Akiko Sudano:

Karen Ksenzakovic: You Are Here

*********************************************************************************************************

If you need any stamping supplies, I’d love to be your Demonstrator. Just click HERE to go directly to my online store or drop me an email if you have any questions. 

MY CURRENT HOST CODE IS:   JAK446GF

Use this host code when you order $50 or greater and receive a free gift from me! If your order is over $150, please do not use this code, but you’ll still get the free gift. The free gift is your choice of any 1 item valued up to $10.00 from the 2020-2021 Annual Catalog or the January-June 2021 Mini Catalog!   For any orders $50 or more I will also send you my monthly class tutorials.  Click HERE or go to my Customer Rewards for more details and to see what this months tutorials are.

Please remember to use my current Host Code and make sure that you can see my name on the final checkout page listed as your Demonstrator when you order so that you know that you’re ordering with me and you’ll get my rewards! 

Happy Stamping, Karen!

*********************************************************************************************************

Awesome Joining Promotions Until September 30, 2021

This image has an empty alt attribute; its file name is CRw3UiG1VcNw0fLUGVJqZ-YwyPUUS6uG8wmP4PTx-IdrSjQTpH-NKMtihO-191VvLnyi4n_MrGC7EEfGuHnVm2X-oA9cb_oiKgAHZnJdAnlMVA66mu2wtYmqiqWygCR5dtYtoVNkHcCb9w7RzyU6p9P124S08o1A2FmIRA8VDYEA1jbiHaw=s0-d-e1-ft

There is an AWESOME joining promotion happening!  If you purchase the Starter Kit between August 3 and September 30, you’ll get to pick a FREE bundle from this list!

  • Frosted Gingerbread
  • Christmas Season
  • Christmas To Remember
  • Whimsical Trees
  • Peaceful Deer
  • Sweet Little Stockings
  • Penguin Place
  • Peaceful Cabin
  • Arctic Bears
  • Beauty Of Tomorrow
  • Gorgeous Leaves
  • Nature’s Harvest

When you purchase the Starter Kit for $99 + taxes (if applicable), the kit ships for FREE and YOU get to pick $125 in Stampin’ Up! merchandise OF YOUR CHOICE. If you purchase the kit during Sale-a-bration, you’ll get an additional FREE bundle from the select twelve listed above (with a value up to $60.25!!) with your kit!  A free bundle in addition to $125 in merchandise for $99, YES PLEASE!! You will also get a past Paper Pumpkin Kit and other supplies free in your kit.

If you are planning on placing an order of $100, you might really want to consider joining. This is such an awesome joining deal, you don’t want to pass it up. There is no obligation to sell, have workshops or do Facebook lives. You can join strictly to be a ‘hobby demonstrator’ and enjoy the 20% discount. I would love to have you on my team!!! You also get to enjoy all the demonstrator perks like early ordering, sneak peeks at what’s coming and best of all the events. Why wait, this is such a great sign up promotions, join now and be a part of our awesome Stampin’ Up! family!!!

If you have any questions about joining, please drop me a note at creativestampingdesigns@gmail.com, I’d love to talk with you about it! You can find more information about joining on my blog @ creativestampingdesigns.com

*********************************************************************************************************

Haunts & Harvest

Subscribe August 11 – September 10

Hay, there! Experience everything the autumn season has to offer with the Haunts & Harvest Paper Pumpkin Kit! This month’s kit includes enough supplies to create 12 treat boxes—4 each of 3 designs. That means you can take your pick of apple, pumpkins, or jack-o-lantern treat boxes! Plus, the Paper Pumpkin box is designed to easily transform into a vintage wheelbarrow for you to display your harvest!

Whether you’re thinking about crisp red apples or you’re ready to carve some spooky jack-o-lanterns (or both!), the Haunts & Harvest Paper Pumpkin Kit—designed in a vivid fall palette—is a hands-on crafting experience for all autumn lovers!

Details:

  • Kit contains enough supplies to create 12 treat packages—4 each of 3 designs. The all-inclusive kit includes printed die-cut boxes, die-cut sheets, adhesive, and more!
  • Finished treat box size: 2-1/2″ x 2″ (6.4 x 5.1 cm)
  • Includes an exclusive stamp set and a Classic Stampin’ Spot
  •  Coordinating colors: Basic Black, Pale Papaya, Poppy Parade, Pumpkin Pie, Soft Succulent

Subscribe to the September 2021 Paper Pumpkin Kit between 11 August and 10 September at paperpumpkin.com!

Note: Supplies may be limited toward the end of the subscription period.

*********************************************************************************************************

Card stock cuts for this project:

  • Basic White Cardstock 3 1/4″ X 3 3/4″ (artwork), 4″ X 5 1/4″ (inner liner)
  • Cajun Craze Cardstock 2 – 4 1/8″ X 5 3/8″ (card front & inner liner mats), 2 7/16″ X 2 7/8″ (artwork mat), 1 1/4″ X 5 3/4″ (letters)
  • Mossy Meadow Cardstock 8 1/2″ X 5 1/2″ (card base scored & folded at 4 1/4″), 2 5/16″ x 2 3/4″ (artwork mat), 1 1/4″ X 5 3/4″ (letters)
  • Beauty of The Earth Designer Series Paper 4″ X 5 1/4″ (card front), 2 1/4″ X 6″ (envelope)

*********************************************************************************************************

Product List

Paper Snips

[103579]
$10.00

Stamparatus

[146276]
$49.00

Stampin’ Up! Zany Zebras Birthday

Good Sunday morning my stamping friends. How is everyone’s weekend going? I’m heading into work again today. I was hoping to have the day off, but they put me on the schedule. It’s a short day at the dog bakery though, I don’t go in until noon and I’m done by 5pm.

For today’s card a co-worker asked me to make her nieces daughter a 1st birthday card. It took me a bit to come up with something, since I thought I didn’t have anything appropriate for a 1 year old. Then I remembered and here’s what I came up with.

I used the Stampin’ Up! Zany Zebras Cling Stamp Set for my card along with a sneak peek inside of a new set coming in the January-June 2021 Mini Catalog.

I started by cutting a panel of Whisper White cardstock using the largest Stitched Triangle Dies. I stamped the adorable little zebra image from the Zany Zebras stamp set in Magenta Madness Ink on the bottom of the triangle. I added a little color to her stripes, mane and tail using my Mango Melody Stampin’ Blends Markers. I then embossed the triangle using the Subtle 3D Embossing Folder. From that same panel of Whisper White cardstock I stamped the zebra image again in Magenta Madness Ink and I stamped the sentiment from the Zany Zebras stamp set in Magenta Madness Ink. I used some washi tape to cover the happy part of the sentiment so I would just get the birthday. I cut the sentiment out using the smallest die from the Stitched So Sweetly Dies and I fussy cut the zebra using my Paper Snips, not cutting the mane or the tail. I added some color to her stripes using my Mango Melody Stampin’ Blends Markers.

I adhered the fussy cut zebra on top of the stamped zebra on the triangle using Stampin’ Dimensionals. I adhered the triangle to a Whisper White card front using Stampin’ Dimensionals. I cut all the letters and the #1 from a panel of Rainbow Glimmer Paper, which I adhered to a Foam Adhesive Sheet, using the Playful Alphabets Dies.

I cut 3 of the small balloons out using the Happy Dies one in Granny Apple Green, one in Highland Heather and one in Mango Melody. I embossed the Granny Apple Green and Highland Heather balloons using the Wrapped In Texture Embossing Folder. I cut the 3 strings and 3 bows from a panel of Magenta Madness cardstock using the Happy Dies. I adhered the strings to the back of the balloons using Glue Dots and the bows to the bottom of the balloons using a tiny amount of Multipurpose Liquid Glue. I adhered the balloons to the card front using Stampin’ Dimensionals. I adhered the #1 to the Mango Melody balloon. I adhered the letters to the card front the way I wanted them and adhered the die cut birthday under the happy using Stampin’ Dimensionals. I added some Artistry Blooms Adhesive-Backed Sequins to the card front. I adhered the card front to a Granny Apple Green mat using Stampin’ Seal and then to a Magenta Madness card base using Stampin’ Dimensionals.

On the inside I stamped a sentiment from a new set coming in the January-June 2021 Mini Catalog, the Stampin’ Up! Many Messages Cling Stamp Set. This is 1 large stamp with 19 sentiments on it. I used my Stamparatus to get just the one sentiment centered on a panel of Whisper White Cardstock. I used my Granny Apple Green Stampin’ Write Marker to ink up just the sentiment I wanted to use. I stamped the zebra image from the Zany Zebras stamp set to the side of the sentiment in Magenta Madness Ink and I stamped the party hat from the Zany Zebras stamp set in Magenta Madness Ink on the opposite side. I added color to the strips on the zebra and the pom-pom on the hat using my Mango Melody Stampin’ Blends Markers. I colored the dots on the hat in using my Granny Apple Green Stampin’ Write Marker. I stamped the grass image from the Zany Zebras stamp set under the zebra in Granny Apple Green Ink. I adhered the Whisper White panel to a Granny Apple Green mat using Stampin’ Seal and then to the inside of the Magenta Madness card base using Multipurpose Liquid Glue.

To finish my card I decorated a Medium Whisper White Envelope. I stamped the zebra image from the Zany Zebras stamp set in Magenta Madness Ink on the envelope front. I stamped the grass image from the Zany Zebras stamp set in Granny Apple Green Ink below the zebra. I added some color to the zebras stripes, mane and tail using my Mango Melody Stampin’ Blends Markers. I adhered a panel of Artistry Blooms Designer Series Paper to the envelope flap.

Thank you for stopping by my blog today. I hope you liked my card and will give it a try. Happy Stamping!!

*********************************************************************************************************

If you need any stamping supplies, I’d love to be your Demonstrator. Just click HERE to go directly to my online store or drop me an email if you have any questions. 

MY CURRENT HOST CODE IS: 9XYYG2ZU

Use this host code when you order $50 or greater and receive a free gift from me! If your order is over $150, please do not use this code, but you’ll still get the free gift. The free gift is your choice of any 1 item valued up to $10.00 in the 2020-2021 Annual Catalog!   For any orders $50 or more I will also send you my monthly class tutorials.  Click HERE or go to my Customer Rewards for more details and to see what this months tutorials are.

 Click HERE to shop the clearance rack.

Please remember to use my current Host Code and make sure that you can see my name on the final checkout page listed as your Demonstrator when you order so that you know that you’re ordering with me and you’ll get my rewards! 

Happy Stamping, Karen!

*********************************************************************************************************

Beary Comforting

Subscribe November 11-December 10

If you haven’t heard already, Paper Pumpkin is our monthly One-Stop Box™ that offers a wide variety of unique papercrafting projects for subscribers of any skill level! These themed, all-inclusive craft kits encourage customers to explore their creativity, try new techniques, and discover their potential in papercrafting.

December’s cute and cuddly Paper Pumpkin kit—called “Beary Comforting”—is designed to uplift your loved ones as this beary tough year finally comes to a close. After a year like 2020, we all could use a big bear hug! With the help of this bear-themed kit, you can create 12 unbearably cute cards featuring warm and fuzzy friends, sweet stamps, and meaningful messages. Near or far, send your friends and family the extra comfort, love, and encouragement they need with this month’s Paper Pumpkin kit!

ABOUT THE DECEMBER KIT

Details

  • Kit contains enough supplies to create 12 cards and coordinating envelopes.
  • Card size: 4-1/4″ x 5-1/2″ (10.8 x 14 cm)
  • Envelope size: 4-1/2″ x 5-3/4″ (11.4 x 14.6 cm)
  • Coordinating colors: Basic Gray, Calypso Coral, Cinnamon Cider, Daffodil Delight, Rich Razzleberry, Soft Sea Foam, Whisper White

SUBSCRIPTION INFORMATION

Subscribe to the December 2020 Paper Pumpkin Kit between 11 November and 10 December at paperpumpkin.com!

Note: Supplies may be limited toward the end of the subscription period.

*********************************************************************************************************

FREE Bonus Quite Curvy and Curvy Christmas Project Tutorials With Videos When You Purchase The Bundle From Me!!

A group of us worked together to create five awesome tutorials using the Stampin’ Up! Curvy Celebrations special release products with video tutorials!  You can get this set of exclusive tutorials when you purchase either the Quite Curvy Variety Bundle (item 158396) or the Quite Curvy Bundle (item 156228) from me between now and January 4!

If your order is $50 or greater and includes either of these bundles, you will get this set of tutorials in addition to the monthly online class tutorials AND your $10 thank you gift!  And you’ll also earn my Creative Stamping Designs Reward Points!

*********************************************************************************************************

Card stock cuts for this project:

  • Granny Apple Green Cardstock 2 – 4 1/8″ X 5 3/8″ (card front and inner liner mats), 1″ X 1″ (balloon)
  • Highland Heather Cardstock 1″ X 1″ (balloon)
  • Magenta Madness Cardstock 8 1/2″ X 5 1/2″ (card base scored and folded at 4 1/4″)
  • Mango Melody Cardstock 1″ X 1″ (balloon)
  • Whisper White Cardstock 2 – 4″ X 5 1/4″ (triangle, zebra & sentiment and one for inner liner)
  • Artistry Blooms Designer Series Paper 2 1/4″ X 6″ (piece for envelope flap)
  • Rainbow Glimmer Paper 2″ X 6″ (letters and number)

*********************************************************************************************************

Product List


Rainbow Glimmer Paper


Artistry Blooms Sequins


Happy Dies (English)


Playful Alphabet Dies


Stitched So Sweetly Dies


Stitched Triangles Dies


Foam Adhesive Sheets


Multipurpose Liquid Glue


Mini Glue Dots


$5.25


Stampin' Dimensionals


Stampin' Seal


$8.00


Bone Folder


$7.00


Paper Snips


$10.00


Paper Trimmer


$25.00


Clear Block Bundle


Stamparatus


$49.00

Stampin’ Up! Harvest Hellos for Amy’s Inkin’ Krew Team Blog Hop

Good Tuesday morning my fellow stampers. Welcome to Amy’s Inkin’ Krew Team Blog Hop. It’s the 2nd Tuesday of the month so that means Blog Hop Day!! If you are starting with me, be sure to hop around to see everyone’s beautiful projects. If you’ve hopped over from Amy Koenders blog, welcome to my blog and thank you for stopping by. The theme this month is “Halloween Fun”.  We can interpret this however we want.  I’m not a big Halloween fan, but I had a lot of fun creating this card.  Here’s my card.

My colors are from Fab Friday Challenge #196.  Here are their colors.

I also played along with ‘Just Us Girls’ Challenge #552.  They have a ‘Word Week’.  Here’s their theme.

I started by cutting the ‘BOO!’ out of a panel of Plaid Tidings 6 X 6 Designer Series Paper using the Playful Alphabet Dies.  I adhered the DSP panel to a Cinnamon Cider card base using Multipurpose Liquid Glue.

Using a Foam Adhesive sheet with a panel of Basic Black cardstock, I cut the ‘BOO!’ out again using the Playful Alphabet Dies and adhered it to the card front where I cut the letters out.  I adhered the DSP letters on top of the Basic Black foam pieces using Multipurpose Liquid Glue making sure the plaid lines lined up.  I cut the leaves from the Stitched Leaves Dies out of panels of Bumblebee, Cajun Craze and Cinnamon Cider cardstock.  I ran each of the leaves through my Stampin’ Cut & Emboss Machine again adding the stitching to them from the Stitched Leaves Dies.  I stamped the pumpkin image from the Stampin’ Up! Harvest Hellos Cling Stamp Set in Tuxedo Black Memento Ink on a panel of Cajun Craze cardstock.  I stamped the Jack-O-Lantern face from the Harvest Hellos stamp set in the center of the pumpkin using Tuxedo Black Memento Ink.  I punched the pumpkin out using my Apple Builder Punch.  I cut the stem for the pumpkin out of a scrap of Cinnamon Cider cardstock using the Apple Builder Punch and adhered it to the back of the pumpkin using a Glue Dot.

I arranged the leaves and pumpkin on the card front the way I wanted and adhered the leaves using Glue Dots and Multipurpose Liquid Glue and the pumpkin using Stampin’ Dimensionals.  I stamped the spider image from the Stampin’ Up! Celebration Tidings Photopolymer Stamp Set in Tuxedo Black Memento Ink on a scrap of the Plaid Tidings DSP.  I cut the spider out using the Celebration Labels Dies and adhered it to the card front using Mini Stampin’ Dimensionals, matching up the lines on the plaid.  Using my Basic Black Stampin’ Write Marker, I drew a line down the paper like he was coming down from his web.

On the inside I stamped the sentiment from the Celebration Tidings stamp set in Tuxedo Black Memento Ink in the center of a Whisper White panel.  I stamped the web image from the Celebration Tidings stamp set in Tuxedo Black Memento Ink on the top of the panel.  I stamped the spider image from the Celebration Tidings stamp set in Tuxedo Black Memento Ink 3 times on the panel and drew lines from the web down to the spiders using my Basic Black Stampin’ Write Marker.  I adhered the Whisper White panel to a Bumblebee mat using Stampin’ Seal and then to the inside of the Cinnamon Cider card base using Multipurpose Liquid Glue.

To complete my card I decorated a Medium Whisper White Envelope.  I stamped the spider web from the Celebration Tidings stamp set in Tuxedo Black Memento Ink on the top of the envelope front.  I stamped the spider image from the Celebration Tidings stamp set twice on the envelope front and drew lines from the web to the spiders using my Basic Black Stampin’ Write Marker.  I adhered a panel of Plaid Tidings DSP to the envelope flap.

Thank you for visiting by my blog today. I hope you liked my card and will give it a try. Now that you’ve seen my card, be sure to hop around to see everyone’s beautiful projects. Hit Previous to hop back to Amy’s blog or hit Next to head over to Jaimie Babarczy’s blog. You can also click on each of the names and hop around that way. Happy Hopping!!

  1. Karen Ksenzakovic: You Are Here
  2. Jaimie Babarczy:
  3. Sue Prather:
  4. Mary Deatherage:
  5. Donna Leonard:
  6. Akiko Sudano:
  7. Karen Finkle:
  8. Nicole Bloxom:
  9. Terry Lynn Bright:
  10. Amy Koenders:

****************************************************************************************************

If you need any stamping supplies, I’d love to be your Demonstrator. Just click HERE to go directly to my online store or drop me an email if you have any questions. 

MY CURRENT HOST CODE IS: G39RYMEX

Use this host code when you order $50 or greater and receive a free gift from me! If your order is over $150, please do not use this code, but you’ll still get the free gift. The free gift is your choice of any 1 item valued up to $10.00 in the 2020-2021 Annual Catalog!   For any orders $50 or more I will also send you my monthly class tutorials.  Click HERE or go to my Customer Rewards for more details and to see what this months tutorials are.

 Click HERE to shop the clearance rack.

Happy Stamping, Karen!

****************************************************************************************************

HELLO, PUMPKIN

SUBSCRIBE AUTUST 11 – SEPTEMBER 10

As the autumn season approaches, prepare to celebrate with the September Paper Pumpkin Kit! There’s so much to love about fall—some love the haunts of Halloween, many love the time to give thanks, and others love the changing colors and cooler temperatures. Whatever you love most about fall, September’s kit has everything you need to celebrate the season your way! Between a multi-occasion stamp set and enough supplies to design 20 cracker box treat packages, you can create custom fall crafts to celebrate Halloween, Thanksgiving, pumpkins, and leaves. Whether you make them all the same or mix ‘n’ match your crafts, there’s something for everyone in this kit!

September’s kit is a must-have for those who love to celebrate all things spooky. But, for those who don’t enjoy the Halloween haunts, the multi-occasion stamp set combined with a variety of die-cut and reversible paper pieces offers many ways to customize your fall crafts!

  • Kit contains enough supplies to create 20 cracker box treat packages.
  • Each cracker box treat package can be customized to celebrate Halloween, Thanksgiving, the autumn season, or all three!
  • Coordinating Colors: Bumblebee, Basic Black, Cajun Craze, Cinnamon Cider, Mossy Meadow, Old Olive, Pumpkin Pie, white

Subscribe to the September 2020 Paper Pumpkin Kit from 11 August to 10 September at paperpumpkin.com!

Note: Supplies may be limited toward the end of the subscription period.

****************************************************************************************************

Card stock cuts for this project:

  • Basic Black Cardstock 3″ X 2″ (letters)
  • Bumblebee Cardstock 3″ X 8 1/2″ (leaves), 4″ X 5 1/4″ (inner liner mat)
  • Cajun Craze Cardstock 3 1/2″ X 3″ (pumpkin and leaves)
  • Cinnamon Cider Cardstock 8 1/2″ X 5 1/2″ (card base scored and folded at 4 1/4″), 3″ X 2 1/4″ (leaves)
  • Whisper White Cardstock 3 7/8″ X 5 1/8″ (inner liner)
  • Plaid Tidings 6 X 6 Designer Series Paper 4 1/4″ X 5 1/2″ (card front), 2 1/4″ X 6″ (piece for envelope flap)

****************************************************************************************************

Product List

Stampin’ Up! Hello FALL CAS

Good Saturday morning my fellow stampers.  How is everyone doing today?  We’re into our 3 day weekend, hope you are doing something fun.  I have off today, but have to work tomorrow.  Our store is closed on Monday, but I may go in to get my paperwork done without being interrupted with the phones.  I’ll decide Monday morning what I want to do.

I have a clean and simple fun card for you today that was also quick and easy.  Take a look.

I played along with CASology Challenge #373.  Here is their cue card.

I started by adhering a panel of Plaid Tidings 6 X 6 Designer Series Paper to a Blackberry Bliss card base using Stampin’ Seal.

Using the Playful Alphabet Dies, I cut the letters ‘FALL’ from a panel of Blackberry Bliss cardstock which was adhered to a Foam Adhesive Sheet.  I adhered the letters to the bottom of the card front.

On a small panel of Whisper White cardstock I stamped the sentiment from the Stampin’ Up! Dressed To Impress Photopolymer Stamp Set in Blackberry Bliss Ink.   I adhered the sentiment above the letters using Stampin’ Dimensionals.  I added a few Iridescent Pearls to the card front.

On the inside I stamped the leaf image from the Stampin’ Up! Gather Together Photopolymer Stamp Set in Blackberry Bliss Ink, stamping off 3 times, in the center of a Whisper White panel.  I stamped the sentiment from the Gather Together stamp set in Blackberry Bliss Ink over the leave in the center of the panel.  I adhered the Whisper White panel to the inside of the Blackberry Bliss card base using Multipurpose Liquid Glue.

To finish my card I decorated a Medium Whisper White Envelope.  I stamped the leaf image from Gather Together stamp set in Blackberry Bliss Ink on the envelope front.  I adhered a panel of Plaid Tidings DSP to the envelope flap.

Thank you for stopping by my blog today.  I hope you liked my card and will give it a try. Happy Stamping!!

****************************************************************************************************

If you need any stamping supplies, I’d love to be your Demonstrator. Just click HERE to go directly to my online store or drop me an email if you have any questions. 

MY CURRENT HOST CODE IS: G39RYMEX

Use this host code when you order $50 or greater and receive a free gift from me! If your order is over $150, please do not use this code, but you’ll still get the free gift. The free gift is your choice of any 1 item valued up to $10.00 in the 2020-2021 Annual Catalog!   For any orders $50 or more I will also send you my monthly class tutorials.  Click HERE or go to my Customer Rewards for more details and to see what this months tutorials are.

 Click HERE to shop the clearance rack.

Happy Stamping, Karen!

****************************************************************************************************

STAMPIN’ UP! CLEARANCE RACK HAS BEEN UPDATED!!!

Stampin’ Up! has updated the Clearance Rack with lot of new items!   Head over there  quickly to get your hands on some great deals.  But hurry!!  Clearance Rack deals are only while supplies last!

I saw some retired In Color Card Stock and accessories, lots of pretty designer papers and embellishments and punches too!

Click HERE to head over to my Online Store to start shopping.

****************************************************************************************************

The Stampin’ Cut & Emboss Machine (Standard Size) is now available for you to order!!!
Here are the details:

The standard machine comes with all the plates you need to get started. The preorder will not include the replacement plates, but they will be available beginning with the customer launch on September 1.

Note that the Cutting Plates and Adhesive Sheets are already available to order. The optional Impression Mats are not be available; I’ll keep you updated on their availability.

So what sets our machines apart from the rest? Here are some of our favorite features:

  • Durable machines with high-quality results. The solid steel construction frame and rubber feet that securely grip the work surface produce crisp, clean, precise cutting and beautifully detailed embossing.
  • Easy to use. The machines and tools are designed for an intuitive die-cutting and embossing experience. For example, all plates are labeled with a number and are color coded for easy reference and use when building your sandwich. And just like the name suggests, our Magnetic Cutting Plates have fully-magnetic surfaces to make it easy to securely position your dies and keep them in place.
  • Simple to store. The platforms on both machines fold for space-saving storage and they look pretty too–the sleek, clean design suits any crafting space.
  • Portable. You can use both machines at home or on the go with their folding platforms and ergonomic carrying handles.

****************************************************************************************************

Stampin’ Up! Get & Go Starter Kit Promotion – Sept 1-30!

Have you thought about joining our Stampin’ Up! team?

Now is an awesome time to join.

The Get & Go Starter Kit promotion gives those who sign up to be a Stampin’ Up! demonstrator additional products to help get started right away!  In addition to the already great valued Starter Kit, you will receive precut paper, stamps, and embellishments!

Here are the details:

  • Promotion Dates: September 1–30, 2020
    Joining Deadline:  September 30, 2020; 11:50 PM (MT)
  • New demonstrators who submit their Independent Demonstrator Agreement (IDA) before 1 September or after 30 September will not be eligible for this promotion.
  • In addition to the regular starter kit (for $99 you choose $125 worth of products), if you join between September 1 and 30, you will also receive enough card stock pieces to make 16 cards, a pack of Rhinestone Basic Jewels, the So Much Love stamp set, and the Queen Anne’s Lace stamp set!!
    • 8 packs of precut card stock of the coastal cabana pack will be provided, and 8 packs of precut card stock of the Granny Apple Green pack, for a total of 16 cards (packs include envelopes).
  • Important note: Ink, adhesive, cutting tool, and clear block for stamping must be purchased separately. However, these products may be included as part of the Starter Kit product selection.

This is such a great deal!  For $99, you get to pick $125 merchandise of your choice for your Starter Kit plus you’ll get the Queen Annes’ Lace and So Much Love stamp sets, card kits to create 16 cards and a pack of Rhinestones for free!!

Drop me a note at creativestampingdesigns@gmail.com if you have questions about joining, I’m happy to talk to you about it.  You can also see more information about the benefits of becoming a Stampin’ Up! Demonstrator Here

****************************************************************************************************

HELLO, PUMPKIN

SUBSCRIBE AUTUST 11 – SEPTEMBER 10

As the autumn season approaches, prepare to celebrate with the September Paper Pumpkin Kit! There’s so much to love about fall—some love the haunts of Halloween, many love the time to give thanks, and others love the changing colors and cooler temperatures. Whatever you love most about fall, September’s kit has everything you need to celebrate the season your way! Between a multi-occasion stamp set and enough supplies to design 20 cracker box treat packages, you can create custom fall crafts to celebrate Halloween, Thanksgiving, pumpkins, and leaves. Whether you make them all the same or mix ‘n’ match your crafts, there’s something for everyone in this kit!

September’s kit is a must-have for those who love to celebrate all things spooky. But, for those who don’t enjoy the Halloween haunts, the multi-occasion stamp set combined with a variety of die-cut and reversible paper pieces offers many ways to customize your fall crafts!

  • Kit contains enough supplies to create 20 cracker box treat packages.
  • Each cracker box treat package can be customized to celebrate Halloween, Thanksgiving, the autumn season, or all three!
  • Coordinating Colors: Bumblebee, Basic Black, Cajun Craze, Cinnamon Cider, Mossy Meadow, Old Olive, Pumpkin Pie, white

Subscribe to the September 2020 Paper Pumpkin Kit from 11 August to 10 September at paperpumpkin.com!

Note: Supplies may be limited toward the end of the subscription period.

****************************************************************************************************

I’m cleaning my shelves and drawers out to make room for lots of new goodie.  I have my list right HERE and I’m trying to keep it up to date.   Check it out and let me know if there is anything you’d like to get.  If you are looking for something and don’t see it on the list, drop me a line and I will look through my stash to see if I missed it.  I have lots of older DSP too that I don’t have listed if there is any that you are looking for.

****************************************************************************************************

Card stock cuts for this project:

  • Blackberry Bliss Cardstock 8 1/2″ X 5 1/2″ (card base scored and folded at 4 1/4″), 2″ X 3″ (letters)
  • Whisper White Cardstock 5/8″ X 1 1/4″ (sentiment), 4″ X 5 1/4″ (inner liner)
  • Plaid Tidings 6 X 6 Designer Series Paper 4 1/8″ X 5 3/8″ (card front), 2 1/4″ X 6″ (piece for envelope flap)

****************************************************************************************************

Product List