Stampin’ Up! Happy Day Sunflower for Fun Fold Friday

Good Friday morning my fellow stampers and welcome to my Fun Fold Friday.  How was everyone’s week?  Have you made plans for the weekend yet?

I have a Double Z-Fold card for you today using one of my favorite sets from the 2020-2021 Annual Catalog.  Here’s my card for today.

My inspiration is from Hand Stamped Sentiments Challenge #346.  Here is their inspiration board.

I started by  a panel of Flowers For Every Season 6 X 6 Designer Series Paper to the front panel of the card base using Stampin’ Seal.  I adhered another panel of Flowers for Every Season DSP on the front section of the small Z-Fold card using Stampin’ Seal.

I adhered a panel of Flowers for Every Season DSP on the back panel of the card base using Multipurpose Liquid Glue.  I adhered the small Z-Fold card base to the large Z-Fold card base using Tear & Tape.  The longer section of the small Z-Fold is adhered to the front panel of the large card base and the small section is adhered to the back section.  I stamped the sentiment from the Stampin’ Up! Itty Bitty Birthdays Cling Stamp Set in Just Jade Ink on the Whisper White panel.  I cut the sentiment out using the Stitched So Sweetly Dies and adhered it to the front panel using Stampin’ Dimensionals.

On a panel of Whisper White cardstock I stamped the large sunflower from the Stampin’ Up! Celebrate Sunflowers Cling Stamp Set in Cinnamon Cider Ink.  I stamped 3 of the larger leaves from the Celebrate Sunflowers stamp set in Just Jade Ink on the Whisper White panel.  I colored the sunflower in using my Water Painter, filled with alcohol, and Bumblebee Ink on a clear block.  I colored the sunflower center in using my Cinnamon Cider Stampin’ Blends Markers and I colored the leaves in using my Just Jade Stampin’ Blends Markers.  I cut the flower and leaves out using the coordinating dies from the Sunflower Dies.  I adhered the sunflower to the card front using Stampin’ Dimensionals, hanging off the left side a little.  I trimmed the sunflower using my Paper Snips.  I cut the leaf vein from the Sunflower Dies out of a panel of Just Jade cardstock and adhered them to the solid leaves using tiny amounts of Multipurpose Liquid Glue.  I adhered the leaves under the sunflower using Glue Dots.  I added a few Bumblebee 2020-2022 In-Color Enamel Dots to the card front.

On the inside I adhered a Just Jade panel of cardstock to the back section of the small Z-Fold card using Multipurpose Liquid Glue.  I stamped the sentiment from the Celebrate Sunflowers stamp set on the Whisper White panel in Just Jade Ink.  I cut the sentiment out using my Stitched So Sweetly Dies and adhered it to the Just Jade panel using Stampin’ Seal.

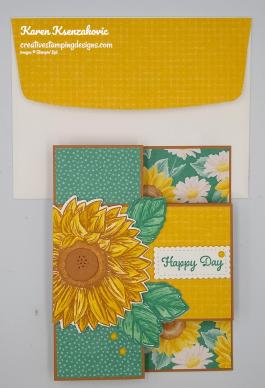
To finish my card I decorated a Medium Whisper White Envelope.  I stamped the small sunflower from the Celebrate Sunflowers stamp set in Cinnamon Cider Ink on the envelope front.  I colored the image in using my Water Painter with the Bumblebee Ink and my Cinnamon Cider and Just Jade Stampin’ Blends Markers.  I adhered a panel of Flowers for Every Season DSP to the envelope flap.

Thank you for stopping by my blog today.  I hope you liked my card and will give it a try. Happy Stamping!!

****************************************************************************************************

If you need any stamping supplies, I’d love to be your Demonstrator. Just click HERE to go directly to my online store or drop me an email if you have any questions. 

MY CURRENT HOST CODE IS: 4Z2KHBVY

Use this host code when you order $50 or greater and receive a free gift from me! If your order is over $150, please do not use this code, but you’ll still get the free gift. The free gift is your choice of any 1 item valued up to $10.00 in the 2020-2021 Annual Catalog!   For any orders $50 or more I will also send you my monthly class tutorials.  Click HERE or go to my Customer Rewards for more details and to see what this months tutorials are.

 Click HERE to shop the clearance rack.

Happy Stamping, Karen!

****************************************************************************************************

IT’S TIME TO REDEEM THOSE BONUS DAYS COUPONS YOU EARNED IN JULY!!

  • Redemption Deadline:  August 31 2020, by 11:50 PM (MT)
  • There is no limit to the number of coupon codes participants can use on an order during redemption.
  • Bonus Days coupon codes may be redeemed for any product (excluding Starter Kits and Paper Pumpkin monthly subscriptions).
    • New prepaid Paper Pumpkin codes may be discounted using Bonus Days coupon codes.
  • Bonus Days coupon codes will reduce the amount of an order.
  • Bonus Days coupon codes may be redeemed one time only.

****************************************************************************************************

HELLO, PUMPKIN

SUBSCRIBE AUTUST 11 – SEPTEMBER 10
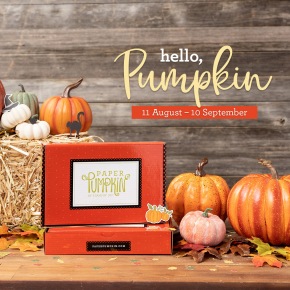
As the autumn season approaches, prepare to celebrate with the September Paper Pumpkin Kit! There’s so much to love about fall—some love the haunts of Halloween, many love the time to give thanks, and others love the changing colors and cooler temperatures. Whatever you love most about fall, September’s kit has everything you need to celebrate the season your way! Between a multi-occasion stamp set and enough supplies to design 20 cracker box treat packages, you can create custom fall crafts to celebrate Halloween, Thanksgiving, pumpkins, and leaves. Whether you make them all the same or mix ‘n’ match your crafts, there’s something for everyone in this kit!

September’s kit is a must-have for those who love to celebrate all things spooky. But, for those who don’t enjoy the Halloween haunts, the multi-occasion stamp set combined with a variety of die-cut and reversible paper pieces offers many ways to customize your fall crafts!

  • Kit contains enough supplies to create 20 cracker box treat packages.
  • Each cracker box treat package can be customized to celebrate Halloween, Thanksgiving, the autumn season, or all three!
  • Coordinating Colors: Bumblebee, Basic Black, Cajun Craze, Cinnamon Cider, Mossy Meadow, Old Olive, Pumpkin Pie, white

Subscribe to the September 2020 Paper Pumpkin Kit from 11 August to 10 September at paperpumpkin.com!

Note: Supplies may be limited toward the end of the subscription period.

****************************************************************************************************

I’m cleaning my shelves and drawers out to make room for lots of new goodie.  I have my list right HERE and I’m trying to keep it up to date.   Check it out and let me know if there is anything you’d like to get.  If you are looking for something and don’t see it on the list, drop me a line and I will look through my stash to see if I missed it.  I have lots of older DSP too that I don’t have listed if there is any that you are looking for.

****************************************************************************************************

Card stock cuts for this project:

  • Cinnamon Cider Cardstock 8 1/2″ X 5 1/2″ (large card base scored and folded at 2 1/8″ & 4 1/4″), 2 3/4″ x 8 1/2″ (small card base scored and folded at 2 1/8″ & 4 1/4″)
  • Just Jade Cardstock 4 1/4″ X 1 1/4″ (leaf veins), 2 5/8″ X 2 1/16″ (inner liner mat)
  • Whisper White Cardstock 4 1/2″ X 5 3/4″ (flower, leaves & sentiments)
  • Flowers For Every Season 6 X 6 Designer Series Paper 2″ X 5 3/8″ (large card front panel), 2 5/8″ x 4 1/8″ (small card front panel), 4 1/8″ X 5 3/8″ (inner liner), 2 1/4″ X 6″ (piece for envelope flap)

****************************************************************************************************

Product List

Stampin’ Up! Beautiful Autumn for the Happy Inkin’ Thursday Blog Hop

Good Thursday morning my stamping friends and welcome to our Happy Inkin’ Thursday Blog Hop.  How is everyone doing today?  If you are hopping over from Akiko, thank you for stopping by my blog. This week we have color challenge with some beautiful fall colors. Be sure to take a moment to hop around to see everyone’s beautiful projects .
Here are our colors for this week.

Here is my card using these colors.

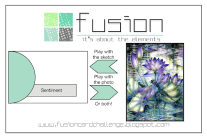
My design is from Fusion Card Challenge.  I chose to use just the sketch.  Here is their challenge.

I also played along with Daisy Chain Challenge #44.  Their Theme is ‘For Boys/Men’.

I joined in with Global Design Project #255.  They have a Theme Challenge this week. Here’s their theme.

I started by embossing an Early Espresso panel using the Old World Paper 3D Embossing Folder. 

I cut a panel of the Gilded Autumn Specialty Designer Series Paper using my Stitched Nested Labels Dies.  I adhered the die to the side of the embossed panel, hanging over the edge a bit, using Multipurpose Liquid Glue, leaving a spot to insert the sentiment under the die.  I trimmed the edge of the DSP using my Paper Trimmer.  I adhered the card front to a Crumb Cake card base using Stampin’ Dimensionals.

I stamped the sentiment from the Stampin’ Up! Beautiful Autumn Photopolymer Stamp Set in Early Espresso Ink on a strip of Very Vanilla cardstock.  I adhered the sentiment just under the die cut using Multipurpose Liquid Glue.  On a small panel of Very Vanilla cardstock I stamped the leaf images from the Beautiful Autumn stamp set 2 times each.  I stamped the outline of the maple leaves in Cajun Craze Ink and the outline of the oak leaves in Mint Macaron Ink.  I then stamped the fill image from the maple leaf in Cajun Craze Ink, stamping off once over the outline images.  I stamped the fill image from the oak leaf in Mint Macaron Ink, stamping off once over the outline images.  I stamped the outline image of the acorn from the Beautiful Autumn stamp set in Early Espresso Ink on the Very Vanilla panel.  I stamped the top of the acorn fill image in Early Espresso Ink, stamping off once over the outline image.  I stamped the bottom section of the acorn in Crumb Cake Ink, stamping off once over the outline image.  I cut the leaves and the acorn out using my Autumn Punch Pack.  I adhered the maple leaves to the right side of the sentiment using Multipurpose Liquid Glue for the bottom one and a Stampin’ Dimensional for the top leaf.  I adhered the oak leaves and the acorn to the left side of the sentiment using Multipurpose Liquid Glue for the bottom leaf, a Stampin’ Dimensional for the acorn and a Glue Dot for the top leaf.  I made a double loop bow using Linen Thread and adhered it to the top of the acorn using a Glue Dot.

On the inside I stamped the sentiment from the Beautiful Autumn stamp set in Early Espresso Ink in the center of a Very Vanilla panel.  I stamped the outline of the maple leaf from the Beautiful Autumn stamp set in Cajun Craze Ink next to the sentiment.  I stamped the fill image of the maple leaf in Cajun Craze Ink, stamping off once, over the outline image.  I stamped the outline of the oak leaf from the Beautiful Autumn stamp set in Mint Macaron Ink.  I stamped the fill image of the oak leaf in Mint Macaron Ink, stamping off once, over the outlined image.  I stamped the acorn image from the Beautiful Autumn stamp set in Early Espresso Ink below the oak leaf.  I stamped the top of the acorn fill image in Early Espresso Ink, stamping off once, over the outline image.  I stamped the bottom fill image of the acorn in Crumb Cake Ink, stamping off once, over the outlined image.  I adhered the Very Vanilla panel to an Early Espresso mat using Stampin’ Seal and then to the inside of the Crumb Cake card base using Multipurpose Liquid Glue.

To finish my card, I decorated a Medium Very Vanilla Envelope.  I stamped the leaf and acorn images from the Beautiful Autumn stamp set along the bottom front of the envelope the same as I did for the card.  I adhered a panel of the Gilded Autumn Specialty DSP to the envelope flap.

Thank you for visiting my blog today. I hope you liked my card and will give it a try. Now that you’ve seen my card, take a minute to hop through all our projects today. If you click on the Next Blog button, you’ll go to Amy’s page. Or you can just click on the names below to go directly to all their blogs! Happy Hopping!!

Eva Dobilas: Not hopping this week
Karen Ksenzakovic: You Are Here

****************************************************************************************************

If you need any stamping supplies, I’d love to be your Demonstrator. Just click HERE to go directly to my online store or drop me an email if you have any questions. 

MY CURRENT HOST CODE IS: 4Z2KHBVY

Use this host code when you order $50 or greater and receive a free gift from me! If your order is over $150, please do not use this code, but you’ll still get the free gift. The free gift is your choice of any 1 item valued up to $10.00 in the 2020-2021 Annual Catalog!   For any orders $50 or more I will also send you my monthly class tutorials.  Click HERE or go to my Customer Rewards for more details and to see what this months tutorials are.

 Click HERE to shop the clearance rack.

Happy Stamping, Karen!

****************************************************************************************************

IT’S TIME TO REDEEM THOSE BONUS DAYS COUPONS YOU EARNED IN JULY!!

  • Redemption Deadline:  August 31 2020, by 11:50 PM (MT)
  • There is no limit to the number of coupon codes participants can use on an order during redemption.
  • Bonus Days coupon codes may be redeemed for any product (excluding Starter Kits and Paper Pumpkin monthly subscriptions).
    • New prepaid Paper Pumpkin codes may be discounted using Bonus Days coupon codes.
  • Bonus Days coupon codes will reduce the amount of an order.
  • Bonus Days coupon codes may be redeemed one time only.

****************************************************************************************************

HELLO, PUMPKIN

SUBSCRIBE AUTUST 11 – SEPTEMBER 10

As the autumn season approaches, prepare to celebrate with the September Paper Pumpkin Kit! There’s so much to love about fall—some love the haunts of Halloween, many love the time to give thanks, and others love the changing colors and cooler temperatures. Whatever you love most about fall, September’s kit has everything you need to celebrate the season your way! Between a multi-occasion stamp set and enough supplies to design 20 cracker box treat packages, you can create custom fall crafts to celebrate Halloween, Thanksgiving, pumpkins, and leaves. Whether you make them all the same or mix ‘n’ match your crafts, there’s something for everyone in this kit!

September’s kit is a must-have for those who love to celebrate all things spooky. But, for those who don’t enjoy the Halloween haunts, the multi-occasion stamp set combined with a variety of die-cut and reversible paper pieces offers many ways to customize your fall crafts!

  • Kit contains enough supplies to create 20 cracker box treat packages.
  • Each cracker box treat package can be customized to celebrate Halloween, Thanksgiving, the autumn season, or all three!
  • Coordinating Colors: Bumblebee, Basic Black, Cajun Craze, Cinnamon Cider, Mossy Meadow, Old Olive, Pumpkin Pie, white

Subscribe to the September 2020 Paper Pumpkin Kit from 11 August to 10 September at paperpumpkin.com!

Note: Supplies may be limited toward the end of the subscription period.

****************************************************************************************************

Card stock cuts for this project:

  • Crumb Cake Cardstock 8 1/2″ X 5 1/2″ (card base scored and folded at 4 1/4″)
  • Early Espresso Cardstock 4″ X 5 1/4″ (card front), 4 1/8″ X 5 3/8″ (inner liner mat)
  • Very Vanilla Cardstock 3/4″ X 4″ (sentiment), 1 3/4″ X 3 1/2″ (leaves and acorn), 4″ X 5 1/4″ (inner liner)
  • Gilded Autumn Specialty Designer Series Paper 4 1/2″ X 3″ (die cut panel), 2 1/4″ X 6″ (piece for envelope flap)

****************************************************************************************************

Product List

Stampin’ Up! Updates

Good Wednesday morning my fellow stampers.  How is everyone doing today?  We’re halfway through the week and on our way to the weekend.  Is anyone starting to plan anything yet?

I have a few updates for you from Stampin’ Up!  Sorry no card for today.  I will be back tomorrow with a card for you.

IT’S TIME TO REDEEM THOSE BONUS DAYS COUPONS YOU EARNED IN JULY!!

We’re down to our last few days, so don’t miss out on your savings.

  • Redemption Deadline:  August 31 2020, by 11:50 PM (MT)
  • There is no limit to the number of coupon codes participants can use on an order during redemption.
  • Bonus Days coupon codes may be redeemed for any product (excluding Starter Kits and Paper Pumpkin monthly subscriptions).
    • New prepaid Paper Pumpkin codes may be discounted using Bonus Days coupon codes.
  • Bonus Days coupon codes will reduce the amount of an order.
  • Bonus Days coupon codes may be redeemed one time only.

****************************************************************************************************

The Stampin’ Cut & Emboss Machine (Standard Size) is now available for Demonstrators to preorder and it will be available for customers beginning September 1!
Here are the details:

  • Demonstrator preorder (standard machine only): August 4, 2020
  • Customer launch (standard machine and replacement plates): September 1, 2020
  • The new Magnetic Cutting Plate will be available for everyone to order starting on September 1!

The standard machine comes with all the plates you need to get started. The preorder will not include the replacement plates, but they will be available beginning with the customer launch on September 1.

Note that the Cutting Plates and Adhesive Sheets are already available to order. The optional Impression Mats will not be available on the demonstrator preorder or by the customer launch; I’ll keep you updated on their availability.

If you needed another reason to join as a Demonstrator…you can preorder the awesome new Stampin’ Cut & Emboss Machine early in August!  Drop me a note at creativestampingdesigns@gmail.com if you have questions about joining.  I’m happy to talk with you about it!

So what sets our machines apart from the rest? Here are some of our favorite features:

  • Durable machines with high-quality results. The solid steel construction frame and rubber feet that securely grip the work surface produce crisp, clean, precise cutting and beautifully detailed embossing.
  • Easy to use. The machines and tools are designed for an intuitive die-cutting and embossing experience. For example, all plates are labeled with a number and are color coded for easy reference and use when building your sandwich. And just like the name suggests, our Magnetic Cutting Plates have fully-magnetic surfaces to make it easy to securely position your dies and keep them in place.
  • Simple to store. The platforms on both machines fold for space-saving storage and they look pretty too–the sleek, clean design suits any crafting space.
  • Portable. You can use both machines at home or on the go with their folding platforms and ergonomic carrying handles.

****************************************************************************************************

Stampin’ Up! Get & Go Starter Kit Promotion – Sept 1-30!


The Get & Go Starter Kit promotion gives those who sign up to be a Stampin’ Up! demonstrator additional products to help get started right away!  In addition to the already great valued Starter Kit, you will receive precut paper, stamps, and embellishments to use in your first event!

Here are the details:

  • Promotion Dates: September 1–30, 2020
    Joining Deadline:  September 30, 2020; 11:50 PM (MT)
  • New demonstrators who submit their Independent Demonstrator Agreement (IDA) before 1 September or after 30 September will not be eligible for this promotion.
  • In addition to the regular starter kit (for $99 you choose $125 worth of products), if you join between September 1 and 30, you will also receive enough card stock pieces to make 16 cards, a pack of Rhinestone Basic Jewels, the So Much Love stamp set, and the Queen Anne’s Lace stamp set!!
    • 8 packs of precut card stock of the coastal cabana pack will be provided, and 8 packs of precut card stock of the Granny Apple Green pack, for a total of 16 cards (packs include envelopes).
  • Important note: Ink, adhesive, cutting tool, and clear block for stamping must be purchased separately. However, these products may be included as part of the Starter Kit product selection.

This is such a great deal!  For $99, you get to pick $125 merchandise of your choice for your Starter Kit plus you’ll get the Queen Annes’ Lace and So Much Love stamp sets, card kits to create 16 cards and a pack of Rhinestones for free!!

Drop me a note at creativestampingdesigns@gmail.com if you have questions about joining, I’m happy to talk to you about it.  You can also see more information about the benefits of becoming a Stampin’ Up! Demonstrator Here

****************************************************************************************************

HELLO, PUMPKIN

SUBSCRIBE AUTUST 11 – SEPTEMBER 10

As the autumn season approaches, prepare to celebrate with the September Paper Pumpkin Kit! There’s so much to love about fall—some love the haunts of Halloween, many love the time to give thanks, and others love the changing colors and cooler temperatures. Whatever you love most about fall, September’s kit has everything you need to celebrate the season your way! Between a multi-occasion stamp set and enough supplies to design 20 cracker box treat packages, you can create custom fall crafts to celebrate Halloween, Thanksgiving, pumpkins, and leaves. Whether you make them all the same or mix ‘n’ match your crafts, there’s something for everyone in this kit!

September’s kit is a must-have for those who love to celebrate all things spooky. But, for those who don’t enjoy the Halloween haunts, the multi-occasion stamp set combined with a variety of die-cut and reversible paper pieces offers many ways to customize your fall crafts!

  • Kit contains enough supplies to create 20 cracker box treat packages.
  • Each cracker box treat package can be customized to celebrate Halloween, Thanksgiving, the autumn season, or all three!
  • Coordinating Colors: Bumblebee, Basic Black, Cajun Craze, Cinnamon Cider, Mossy Meadow, Old Olive, Pumpkin Pie, white

Subscribe to the September 2020 Paper Pumpkin Kit from 11 August to 10 September at paperpumpkin.com!

Note: Supplies may be limited toward the end of the subscription period.

****************************************************************************************************

I’m cleaning my shelves and drawers out to make room for lots of new goodie.  I have my list right HERE and I’m trying to keep it up to date.   Check it out and let me know if there is anything you’d like to get.  If you are looking for something and don’t see it on the list, drop me a line and I will look through my stash to see if I missed it.  I have lots of older DSP too that I don’t have listed if there is any that you are looking for.

****************************************************************************************************

If you need any stamping supplies, I’d love to be your Demonstrator. Just click HERE to go directly to my online store or drop me an email if you have any questions. 

MY CURRENT HOST CODE IS: 4Z2KHBVY

Use this host code when you order $50 or greater and receive a free gift from me! If your order is over $150, please do not use this code, but you’ll still get the free gift. The free gift is your choice of any 1 item valued up to $10.00 in the 2020-2021 Annual Catalog!   For any orders $50 or more I will also send you my monthly class tutorials.  Click HERE or go to my Customer Rewards for more details and to see what this months tutorials are.

 Click HERE to shop the clearance rack.

Happy Stamping, Karen!

Stampin’ Up! Christmas Means More CAS

Good Tuesday morning my fellow stampers.  How has everyone’s week started off?  I hope everyone had a productive one.

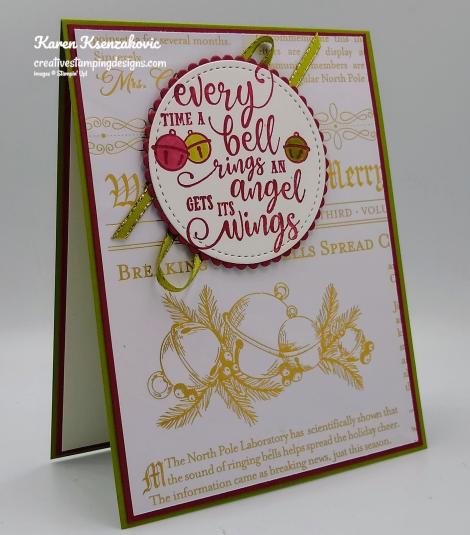
For today I have a quick and easy card for you.  Here’s today’s card.

I started by adhering a Wonder of the Season Specialty Designer Series Paper card front to a Cherry Cobbler mat using Stampin’ Seal.  I adhered the matted card front to an Old Olive card base using Multipurpose Liquid Glue.

I stamped the sentiment from the Stampin’ Up! Christmas Means More Photopolymer Stamp Set on a panel of Whisper White cardstock in Cherry Cobbler Ink.  I cut the sentiment out using the 2nd largest circle from the Stitched Shapes Dies.  I colored the bells in using my Cherry Cobbler and Old Olive Stampin’ Blends Markers.  I adhered the sentiment to a scalloped Cherry Cobbler mat that I had cut using my Layering Circle Dies.

I adhered a piece of 1/8″ Old Olive/Gold Trim from the All The Trimmings Ribbon Combo Pack, to the card front using a small amount of Stampin’ Seal.  I adhered the matted sentiment over the ribbon using Stampin’ Dimensionals.

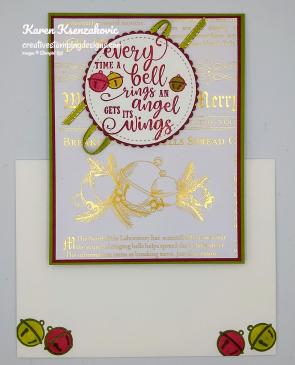
On the inside I stamped the sentiment from the Stampin’ Up! Wrapped In Christmas Cling Stamp Set in Cherry Cobbler Ink in the center of a Whisper White panel.  I stamped the bell image from the Christmas Means More stamp set on the top of the panel and by the sentiment.  I colored the bells in using my Cherry Cobbler and Old Olive Stampin’ Blends Markers.  I adhered the Whisper White panel to a Cherry Cobbler mat using Stampin’ Seal and then to the inside of the Old Olive card base using Multipurpose Liquid Glue.

To finish my card I decorated a Medium Whisper White Envelope.  I stamped the bell image from the Christmas Means More stamp set in Old Olive Ink on the envelope front and colored them in using my Cherry Cobbler and Old Olive Stampin’ Blends Markers.  I adhered a panel of Wonder of the Season Specialty DSP to the envelope flap.

Thank you for stopping by my blog today.  I hope you liked my card and will give it a try. Happy Stamping!!

****************************************************************************************************

If you need any stamping supplies, I’d love to be your Demonstrator. Just click HERE to go directly to my online store or drop me an email if you have any questions. 

MY CURRENT HOST CODE IS: 4Z2KHBVY

Use this host code when you order $50 or greater and receive a free gift from me! If your order is over $150, please do not use this code, but you’ll still get the free gift. The free gift is your choice of any 1 item valued up to $10.00 in the 2020-2021 Annual Catalog!   For any orders $50 or more I will also send you my monthly class tutorials.  Click HERE or go to my Customer Rewards for more details and to see what this months tutorials are.

 Click HERE to shop the clearance rack.

Happy Stamping, Karen!

****************************************************************************************************

IT’S TIME TO REDEEM THOSE BONUS DAYS COUPONS YOU EARNED IN JULY!!

  • Redemption Deadline:  August 31 2020, by 11:50 PM (MT)
  • There is no limit to the number of coupon codes participants can use on an order during redemption.
  • Bonus Days coupon codes may be redeemed for any product (excluding Starter Kits and Paper Pumpkin monthly subscriptions).
    • New prepaid Paper Pumpkin codes may be discounted using Bonus Days coupon codes.
  • Bonus Days coupon codes will reduce the amount of an order.
  • Bonus Days coupon codes may be redeemed one time only.

****************************************************************************************************

HELLO, PUMPKIN

SUBSCRIBE AUTUST 11 – SEPTEMBER 10

As the autumn season approaches, prepare to celebrate with the September Paper Pumpkin Kit! There’s so much to love about fall—some love the haunts of Halloween, many love the time to give thanks, and others love the changing colors and cooler temperatures. Whatever you love most about fall, September’s kit has everything you need to celebrate the season your way! Between a multi-occasion stamp set and enough supplies to design 20 cracker box treat packages, you can create custom fall crafts to celebrate Halloween, Thanksgiving, pumpkins, and leaves. Whether you make them all the same or mix ‘n’ match your crafts, there’s something for everyone in this kit!

September’s kit is a must-have for those who love to celebrate all things spooky. But, for those who don’t enjoy the Halloween haunts, the multi-occasion stamp set combined with a variety of die-cut and reversible paper pieces offers many ways to customize your fall crafts!

  • Kit contains enough supplies to create 20 cracker box treat packages.
  • Each cracker box treat package can be customized to celebrate Halloween, Thanksgiving, the autumn season, or all three!
  • Coordinating Colors: Bumblebee, Basic Black, Cajun Craze, Cinnamon Cider, Mossy Meadow, Old Olive, Pumpkin Pie, white

Subscribe to the September 2020 Paper Pumpkin Kit from 11 August to 10 September at paperpumpkin.com!

Note: Supplies may be limited toward the end of the subscription period.

****************************************************************************************************

I’m cleaning my shelves and drawers out to make room for lots of new goodie.  I have my list right HERE and I’m trying to keep it up to date.   Check it out and let me know if there is anything you’d like to get.  If you are looking for something and don’t see it on the list, drop me a line and I will look through my stash to see if I missed it.  I have lots of older DSP too that I don’t have listed if there is any that you are looking for.

****************************************************************************************************

Card stock cuts for this project:

  • Cherry Cobbler Cardstock 2 – 4 1/8″ X 5 3/8″ (card front and inner liner mats), 3″ X 3″ (scalloped circle)
  • Old Olive Cardstock 4 1/4″ X 11″ (card base scored and folded at 5 1/2″)
  • Whisper White Cardstock 3″ X 3″ (sentiment), 4″ X 5 1/4″ (inner liner)
  • Wonder of the Season Specialty Designer Series Paper 4″ X 5 1/4″ (card front), 2 1/4″ x 6″ (piece for envelope flap)

****************************************************************************************************

Product List

Stampin’ Up! Arrange A Thanksgiving Wreath

Good Monday morning my stamping friends.  How was everyone’s weekend?  Did anyone do anything fun?  I hope you are all getting off to a great start of a new week.

For today I played with another new to me set from the 2020-2021 Annual Catalog.  Here’s my card for today.

I started by adhering a panel of Poinsettia Place Designer Series Paper to a Just Jade mat using Stampin’ Seal and then to a Soft Suede card base using Multipurpose Liquid Glue.

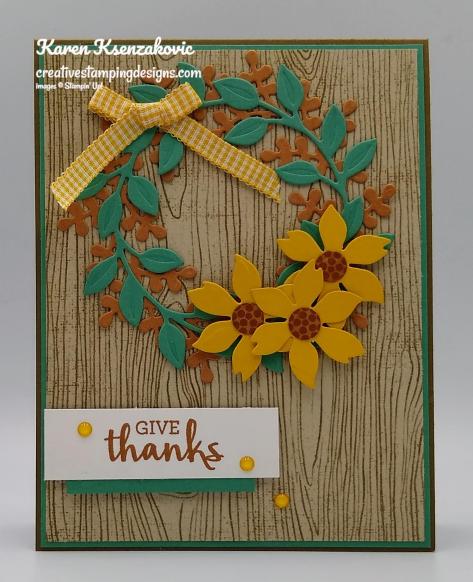
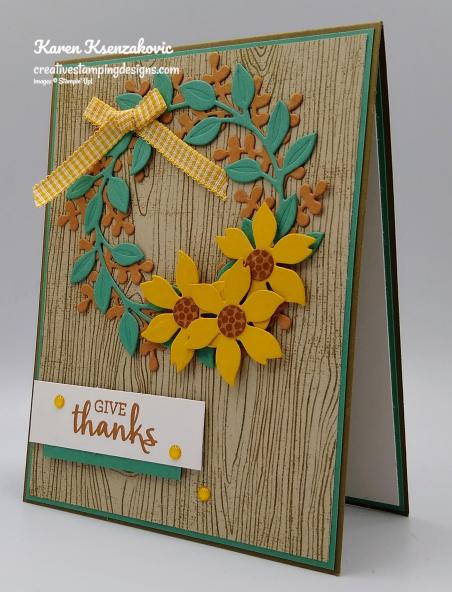
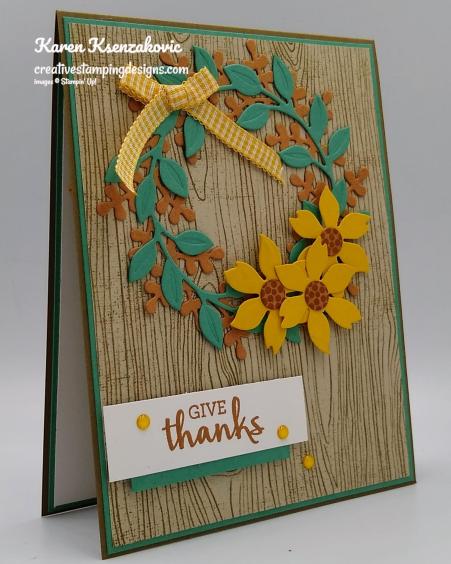
Using the Wreath Builder Dies, I cut one of the wreaths from a panel of Cinnamon Cider cardstock and one from a panel of Just Jade cardstock.  I cut 4 flowers from the same die set out of a panel of Bumblebee cardstock and 4 flower centers from the Cinnamon Cider cardstock.  I stamped the flower center image from the Stampin’ Up! Arrange A Wreath Photopolymer Stamp Set in Cinnamon Cider Ink on the flower center dies.  I adhered the centers to the Bumblebee flowers using Multipurpose Liquid Glue.  I adhered the Just Jade wreath on top of the Cinnamon Cider wreath using Multipurpose Liquid Glue then adhered it to the card front using Multipurpose Liquid Glue.  I adhered the flowers on the bottom of the wreath using Stampin’ Dimensionals and Glue Dots.

I made a small bow using the 1/4″ Bumblebee Gingham Ribbon and adhered it to the top of the wreath using a Glue Dot.  I stamped the sentiment from the Arrange A Wreath stamp set in Cinnamon Cider Ink on a panel of Whisper White cardstock.  I adhered a thin strip of Just Jade cardstock using Stampin’ Seal on the bottom back of the sentiment and adhered it to the card front using Stampin’ Dimensionals.  I added a few Bumblebee 2020-2022 In-Color Enamel Dots to the sentiment and card front.

On the inside I stamped the sentiment from the Stampin’ Up! Country Home Photopolymer Stamp Set in Cinnamon Cider Ink in the center of a Whisper White panel.  I adhered the extra flower I die cut above the sentiment using Multipurpose Liquid Glue.  I adhered the Whisper White panel to a Just Jade mat using Stampin’ Seal and then to the inside of the Soft Suede card base using Multipurpose Liquid Glue.

To complete my card I decorated a Medium Whisper White Envelope.  I adhered a strip of Poinsettia Place DSP to the front of the envelope and a panel to the envelope flap.

Thank you for stopping by my blog today.  I hope you liked my card and will give it a try. Happy Stamping!!


****************************************************************************************************

If you need any stamping supplies, I’d love to be your Demonstrator. Just click HERE to go directly to my online store or drop me an email if you have any questions. 

MY CURRENT HOST CODE IS: 4Z2KHBVY

Use this host code when you order $50 or greater and receive a free gift from me! If your order is over $150, please do not use this code, but you’ll still get the free gift. The free gift is your choice of any 1 item valued up to $10.00 in the 2020-2021 Annual Catalog!   For any orders $50 or more I will also send you my monthly class tutorials.  Click HERE or go to my Customer Rewards for more details and to see what this months tutorials are.

 Click HERE to shop the clearance rack.

Happy Stamping, Karen!

****************************************************************************************************

IT’S TIME TO REDEEM THOSE BONUS DAYS COUPONS YOU EARNED IN JULY!!

  • Redemption Deadline:  August 31 2020, by 11:50 PM (MT)
  • There is no limit to the number of coupon codes participants can use on an order during redemption.
  • Bonus Days coupon codes may be redeemed for any product (excluding Starter Kits and Paper Pumpkin monthly subscriptions).
    • New prepaid Paper Pumpkin codes may be discounted using Bonus Days coupon codes.
  • Bonus Days coupon codes will reduce the amount of an order.
  • Bonus Days coupon codes may be redeemed one time only.

****************************************************************************************************

HELLO, PUMPKIN

SUBSCRIBE AUTUST 11 – SEPTEMBER 10

As the autumn season approaches, prepare to celebrate with the September Paper Pumpkin Kit! There’s so much to love about fall—some love the haunts of Halloween, many love the time to give thanks, and others love the changing colors and cooler temperatures. Whatever you love most about fall, September’s kit has everything you need to celebrate the season your way! Between a multi-occasion stamp set and enough supplies to design 20 cracker box treat packages, you can create custom fall crafts to celebrate Halloween, Thanksgiving, pumpkins, and leaves. Whether you make them all the same or mix ‘n’ match your crafts, there’s something for everyone in this kit!

September’s kit is a must-have for those who love to celebrate all things spooky. But, for those who don’t enjoy the Halloween haunts, the multi-occasion stamp set combined with a variety of die-cut and reversible paper pieces offers many ways to customize your fall crafts!

  • Kit contains enough supplies to create 20 cracker box treat packages.
  • Each cracker box treat package can be customized to celebrate Halloween, Thanksgiving, the autumn season, or all three!
  • Coordinating Colors: Bumblebee, Basic Black, Cajun Craze, Cinnamon Cider, Mossy Meadow, Old Olive, Pumpkin Pie, white

Subscribe to the September 2020 Paper Pumpkin Kit from 11 August to 10 September at paperpumpkin.com!

Note: Supplies may be limited toward the end of the subscription period.

****************************************************************************************************

I’m cleaning my shelves and drawers out to make room for lots of new goodie.  I have my list right HERE and I’m trying to keep it up to date.   Check it out and let me know if there is anything you’d like to get.  If you are looking for something and don’t see it on the list, drop me a line and I will look through my stash to see if I missed it.  I have lots of older DSP too that I don’t have listed if there is any that you are looking for.

****************************************************************************************************

Card stock cuts for this project:

  • Bumblebee Cardstock 3 1/2″ X 3 1/2″ (flowers)
  • Cinnamon Cider Cardstock 4″ X 4″ (wreath & flower centers)
  • Just Jade Cardstock 4″ X 4″ (wreath), 2 – 4 1/8″ x 5 3/8″ (card front mat and inner liner mat), 1/4″ X 2″ (piece under sentiment)
  • Soft Suede Cardstock 4 1/4″ X 11″ (card base scored and folded at 5 1/2″)
  • Whisper White Cardstock 2 1/2″ X 3/4″ (sentiment), 4″ X 5 1/4″ (inner liner)
  • Poinsettia Place Designer Series Paper 4″ X 5 1/4″ (card front), 2 1/4″ X 6″ (piece for envelope flap), 4″ X 6″ (strip on envelope front)

****************************************************************************************************

Product List

Stampin’ Up! Sweetest Time Christmas

Good Sunday morning my fellow stampers.  How is everyone’s weekend going?  My daughter is coming home today, YAY!!!  She’s great being away for the first few days, by mid week she’s ready to come home.  It’ll be great having her back.  For the first time in 36 years that I’ve been working at the store I messed up.  I got up, dressed and went into work yesterday, just like I do every weekend.  The difference was that I wasn’t scheduled to work until today.  I make the monthly schedule up for everyone and I couldn’t remember that I wasn’t working.  I felt so foolish, but at the same time, I had a nice early start to my day yesterday.  I’ll be at work all day today, we double checked the schedule to make sure 😉

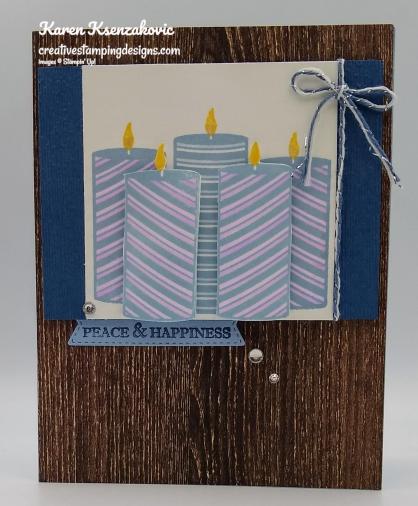
For today I have a pretty quick and easy card for you using another new set from the August-December 2020 Mini Catalog.  Here’s my card for today.

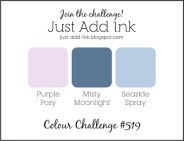
My colors are from Just Add Ink Challenge #519.  Here are their colors.

My design is from Try Stamping on Tuesday Challenge #470.  Here is their sketch.

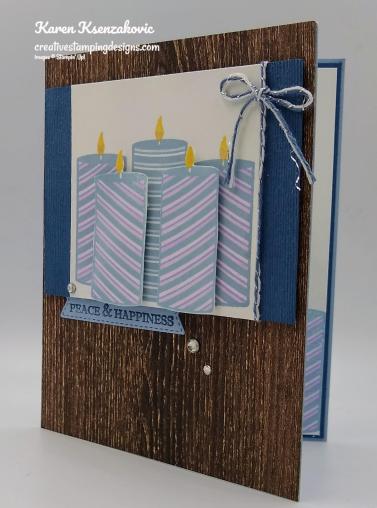
I started by adhering a panel of In Good Taste Designer Series Paper to a Seaside Spray card base using Stampin’ Seal.  On a panel of Whisper White cardstock I stamped the candle image from the Stampin’ Up! Sweetest Time Photopolymer Stamp Set in Seaside Spray Ink.  I stamped the flame image from the Sweetest Time stamp set on top of the candles in So Saffron Ink.  I colored 2 of the candles in using my Purple Posy Stampin’ Blends Marker and the center one in using my Seaside Spray Stampin’ Blends Markers.  I stamped the images again on another panel of Whisper White cardstock, colored 2 of the candles in using my Purple Posy Stampin’ Blends Markers and fussy cut them using my Paper Snips.

I embossed a panel of Misty Moonlight cardstock using the Subtle 3D Embossing Folder.  I adhered the artwork to the embossed panel using Multipurpose Liquid Glue.  I adhered the 2 fussy cut candles to the artwork using Stampin’ Dimensionals.  I wrapped a piece of Misty Moonlight/Silver Bakers Twine from the Flowers For Every Season Ribbon Combo Pack around the panel and tied a bow.  I adhered the matted panel to the card front using Stampin’ Dimensionals.

On a small panel of Seaside Spray cardstock I stamped the sentiment from the Stampin’ Up! Itty Bitty Christmas Cling Stamp Set in Misty Moonlight Ink.  I cut the image out using one of the dies from the Tasteful Labels Dies and adhered it to the card front, sneaking it just under the artwork, using Multipurpose Liquid Glue.  I added a few Rhinestone Basic Jewels to the card front.

On the inside I stamped the sentiments from the Sweetest Time stamp set in Misty Moonlight Ink in the center of a Whisper White panel.  I stamped the candle image from the Sweetest Time stamp set in Seaside Spray Ink and colored it in using my Purple Posy Stampin’ Blends Markers.  I stamped the flame image from the Sweetest Time stamp set in So Saffron Ink.  I adhered the Whisper White panel to a Misty Moonlight mat using Stampin’ Seal and then to the inside of the Seaside Spray card base using Multipurpose Liquid Glue.

To complete my card I decorated a Medium Whisper White Envelope.  I stamped the candle image from the Sweetest Time stamp set in Seaside Spray Ink on the envelope front.  I adhered a panel of In Good Taste DSP to the envelope flap.

Thank you for stopping by my blog today.  I hope you liked my card and will give it a try. Happy Stamping!!

****************************************************************************************************

If you need any stamping supplies, I’d love to be your Demonstrator. Just click HERE to go directly to my online store or drop me an email if you have any questions. 

MY CURRENT HOST CODE IS: 4Z2KHBVY

Use this host code when you order $50 or greater and receive a free gift from me! If your order is over $150, please do not use this code, but you’ll still get the free gift. The free gift is your choice of any 1 item valued up to $10.00 in the 2020-2021 Annual Catalog!   For any orders $50 or more I will also send you my monthly class tutorials.  Click HERE or go to my Customer Rewards for more details and to see what this months tutorials are.

 Click HERE to shop the clearance rack.

Happy Stamping, Karen!

****************************************************************************************************

IT’S TIME TO REDEEM THOSE BONUS DAYS COUPONS YOU EARNED IN JULY!!

  • Redemption Deadline:  August 31 2020, by 11:50 PM (MT)
  • There is no limit to the number of coupon codes participants can use on an order during redemption.
  • Bonus Days coupon codes may be redeemed for any product (excluding Starter Kits and Paper Pumpkin monthly subscriptions).
    • New prepaid Paper Pumpkin codes may be discounted using Bonus Days coupon codes.
  • Bonus Days coupon codes will reduce the amount of an order.
  • Bonus Days coupon codes may be redeemed one time only.

****************************************************************************************************

HELLO, PUMPKIN

SUBSCRIBE AUTUST 11 – SEPTEMBER 10

As the autumn season approaches, prepare to celebrate with the September Paper Pumpkin Kit! There’s so much to love about fall—some love the haunts of Halloween, many love the time to give thanks, and others love the changing colors and cooler temperatures. Whatever you love most about fall, September’s kit has everything you need to celebrate the season your way! Between a multi-occasion stamp set and enough supplies to design 20 cracker box treat packages, you can create custom fall crafts to celebrate Halloween, Thanksgiving, pumpkins, and leaves. Whether you make them all the same or mix ‘n’ match your crafts, there’s something for everyone in this kit!

September’s kit is a must-have for those who love to celebrate all things spooky. But, for those who don’t enjoy the Halloween haunts, the multi-occasion stamp set combined with a variety of die-cut and reversible paper pieces offers many ways to customize your fall crafts!

  • Kit contains enough supplies to create 20 cracker box treat packages.
  • Each cracker box treat package can be customized to celebrate Halloween, Thanksgiving, the autumn season, or all three!
  • Coordinating Colors: Bumblebee, Basic Black, Cajun Craze, Cinnamon Cider, Mossy Meadow, Old Olive, Pumpkin Pie, white

Subscribe to the September 2020 Paper Pumpkin Kit from 11 August to 10 September at paperpumpkin.com!

Note: Supplies may be limited toward the end of the subscription period.

****************************************************************************************************

I’m cleaning my shelves and drawers out to make room for lots of new goodie.  I have my list right HERE and I’m trying to keep it up to date.   Check it out and let me know if there is anything you’d like to get.  If you are looking for something and don’t see it on the list, drop me a line and I will look through my stash to see if I missed it.  I have lots of older DSP too that I don’t have listed if there is any that you are looking for.

****************************************************************************************************

Card stock cuts for this project:

  • Misty Moonlight Cardstock 3″ X 4″ (card front panel), 4 1/8″ X 5 3/8″ (inner liner mat)
  • Seaside Spray Cardstock 8 1/2″ X 5 1/2″ (card base scored and folded at 4 1/4″), 1″ X 2 1/2″ (sentiment)
  • Whisper White Cardstock 3″ X 3″ (artwork), 3″ X 3″ (panel for candles), 4″ X 5 1/4″ (inner liner)
  • In Good Taste Designer Series Paper 4 1/4″ X 5 1/2″ (card front), 2 1/4″ X 6″ (piece for envelope flap)

****************************************************************************************************

Product List

Stampin’ Up! Celebrate Sunflowers Together

Good Saturday morning my fellow stampers.  How has everyone’s weekend started off?  I’m at work today, but I have off tomorrow.  My daughter will be coming home tomorrow from house, cat & dog sitting.  I’ll be happy to have her home again.

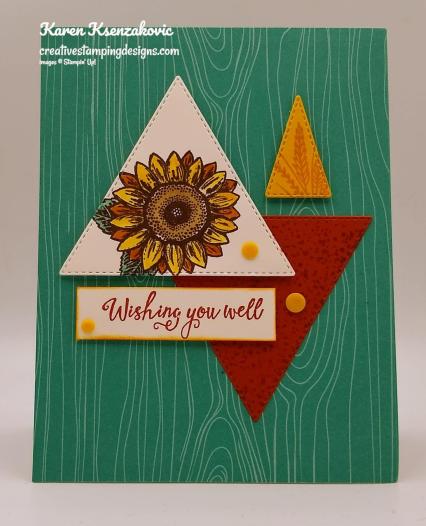
For today’s card I went a little out of my comfort zone a little and tried something a little different.  Here’s my card for today.

My design is from Freshly Made Sketches  Challenge #449.  Here is their sketch.

My colors are from As You See It Sunflower Skies Challenge #232.  Here are their colors.

I also joined in with Double “D” Challenge.  Their theme is Sunflowers.

I started by adhering a panel of Bermuda Bay from the Brights 6 X 6 Designer Series Paper to a Bermuda Bay card base using Multipurpose Liquid Glue.

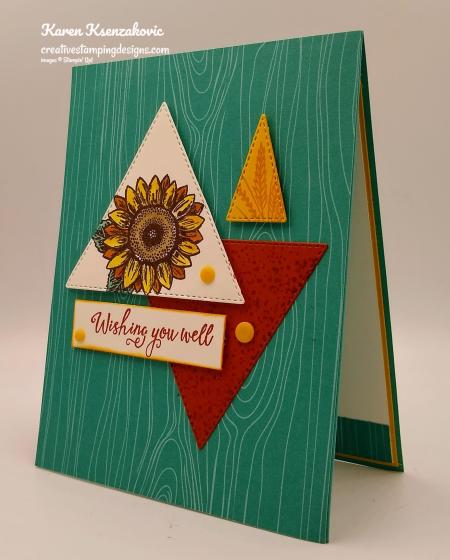
On a panel of Whisper White cardstock I stamped the small sunflower image from the Stampin’ Up! Celebrate Sunflowers Cling Stamp Set in Early Espresso Ink.  I colored the flower in using my Water Painter with Crushed Curry Ink and my Bermuda Bay, Cajun Craze and Crumb Cake Stampin’ Blends Markers.  I cut the image out using my Stitched Triangle Dies.  I cut another triangle the same size from a panel of Cajun Craze cardstock.  I stamped the Cajun Craze triangle using the splatter image from the Stampin’ Up! Gather Together Photopolymer Stamp Set in Cajun Craze Ink.  I stamped a small panel of Crushed Curry cardstock with the wheat image from the Gather Together stamp set in Crushed Curry Ink and cut it out using a smaller triangle from the Stitched Triangles Dies.  I adhered the Cajun Craze triangle to the card front using Stampin’ Seal.  I adhered the sunflower triangle over the Cajun Craze triangle using Stampin’ Dimensionals.  I adhered the small Crushed Curry triangle to the card front using Stampin’ Dimensionals.

On a strip of Whisper White cardstock I stamped the sentiment from the Gather Together stamp set in Cajun Craze Ink.  I sponged the edges using my Sponge Dauber with Crushed Curry Ink and adhered it to the card front using Stampin’ Dimensionals.  I added a few Crushed Curry Playing With Patterns Resin Dots to the card front.

On the inside I stamped the sentiment from the Gather Together stamp set in Cajun Craze Ink in the center of a Whisper White panel.  I stamped the small sunflower image from the Celebrate Sunflowers stamp set in Crushed Curry Ink, stamping off twice, in the center of the panel.  I adhered a strip of the Brights 6 X 6 DSP to the bottom of the panel using Stampin’ Seal.  I adhered the Whisper White panel to a Crushed Curry mat using Stampin’ Seal and then to the inside of the Bermuda Bay card base using Multipurpose Liquid Glue.

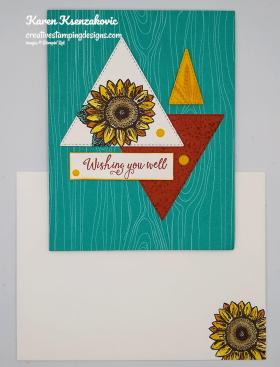
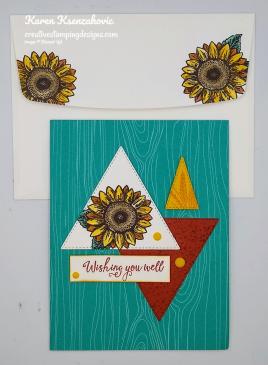
To finish my card I decorated  a Medium Whisper White Envelope.  I stamped the small sunflower image from the Celebrate Sunflowers stamp set on the envelope front and flap.  I colored the images in using my Water Painters with Crushed Curry Ink and my Bermuda Bay, Cajun Craze and Crumb Cake Stampin’ Blends Markers.

Thank you for stopping by my blog today.  I hope you liked my card and will give it a try. Happy Stamping!!

****************************************************************************************************

If you need any stamping supplies, I’d love to be your Demonstrator. Just click HERE to go directly to my online store or drop me an email if you have any questions. 

MY CURRENT HOST CODE IS: 4Z2KHBVY

Use this host code when you order $50 or greater and receive a free gift from me! If your order is over $150, please do not use this code, but you’ll still get the free gift. The free gift is your choice of any 1 item valued up to $10.00 in the 2020-2021 Annual Catalog!   For any orders $50 or more I will also send you my monthly class tutorials.  Click HERE or go to my Customer Rewards for more details and to see what this months tutorials are.

 Click HERE to shop the clearance rack.

Happy Stamping, Karen!

****************************************************************************************************

IT’S TIME TO REDEEM THOSE BONUS DAYS COUPONS YOU EARNED IN JULY!!

  • Redemption Deadline:  August 31 2020, by 11:50 PM (MT)
  • There is no limit to the number of coupon codes participants can use on an order during redemption.
  • Bonus Days coupon codes may be redeemed for any product (excluding Starter Kits and Paper Pumpkin monthly subscriptions).
    • New prepaid Paper Pumpkin codes may be discounted using Bonus Days coupon codes.
  • Bonus Days coupon codes will reduce the amount of an order.
  • Bonus Days coupon codes may be redeemed one time only.

****************************************************************************************************

HELLO, PUMPKIN

SUBSCRIBE AUTUST 11 – SEPTEMBER 10

As the autumn season approaches, prepare to celebrate with the September Paper Pumpkin Kit! There’s so much to love about fall—some love the haunts of Halloween, many love the time to give thanks, and others love the changing colors and cooler temperatures. Whatever you love most about fall, September’s kit has everything you need to celebrate the season your way! Between a multi-occasion stamp set and enough supplies to design 20 cracker box treat packages, you can create custom fall crafts to celebrate Halloween, Thanksgiving, pumpkins, and leaves. Whether you make them all the same or mix ‘n’ match your crafts, there’s something for everyone in this kit!

September’s kit is a must-have for those who love to celebrate all things spooky. But, for those who don’t enjoy the Halloween haunts, the multi-occasion stamp set combined with a variety of die-cut and reversible paper pieces offers many ways to customize your fall crafts!

  • Kit contains enough supplies to create 20 cracker box treat packages.
  • Each cracker box treat package can be customized to celebrate Halloween, Thanksgiving, the autumn season, or all three!
  • Coordinating Colors: Bumblebee, Basic Black, Cajun Craze, Cinnamon Cider, Mossy Meadow, Old Olive, Pumpkin Pie, white

Subscribe to the September 2020 Paper Pumpkin Kit from 11 August to 10 September at paperpumpkin.com!

Note: Supplies may be limited toward the end of the subscription period.

****************************************************************************************************

I’m cleaning my shelves and drawers out to make room for lots of new goodie.  I have my list right HERE and I’m trying to keep it up to date.   Check it out and let me know if there is anything you’d like to get.  If you are looking for something and don’t see it on the list, drop me a line and I will look through my stash to see if I missed it.  I have lots of older DSP too that I don’t have listed if there is any that you are looking for.

****************************************************************************************************

Card stock cuts for this project:

  • Bermuda Bay Cardstock 4 1/4″ X 11″ (card base scored and folded at 5 1/2″)
  • Cajun Craze Cardstock 3″ X 3″ (triangle)
  • Crushed Curry Cardstock 1″ X 2″ (triangle), 4 1/8″ X 5 3/8″ (inner liner mat)
  • Whisper White Cardstock 3″ X 3″ (artwork), 5/8″ X 2 3/8″ (sentiment), 4″ X 5 1/4″ (inner liner)
  • Brights 6 X 6 Designer Series Paper 4 1/4″ X 5 1/2″ (card front)

****************************************************************************************************

Product List

Stampin’ Up! Warm and Toasty Cheer for Fun Fold Friday

Good Friday morning my stamping friends and welcome to my Fun Fold Friday.  How was everyone’s week?  Does anyone have anything fun planned for the weekend?  My craft area got a little bit of a makeover yesterday.  I ordered new shelves and they got delivered on Wednesday.  I couldn’t wait to put them together and reorganize my area.  I usually do a reorganization on New Year’s, but it got done a little early this year.  It’s so nice, neat and more spread out that I can find things a little easier.

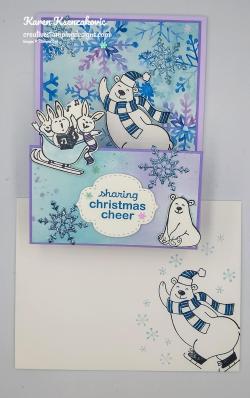
For today’s card I made an easel card.  I’m not sure if I’ve done this before, but it was a lot of fun.  The easel part was really easy.  Have you ever gone through stamping images and coloring them in and you go to look for the dies and there aren’t any?  I really thought this stamp set came with dies, guess I was thinking of another one.   I had everything stamped, colored and ready and I had to pull out my Paper Snips to fussy cut everything.  Now, if I lived closer to my upline Jaimie, I would have run over to her and asked her to cut them out for me since she is an expert at it.  Here’s my card for today.

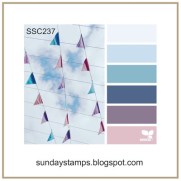
My colors are from Sunday Stamps Going Cool Challenge #237.  Here are their colors.

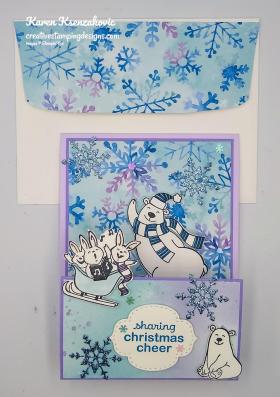
I started by adhering the Highland Heather easel part of the card to a Purple Posey card base using Multipurpose Liquid Glue.  I adhered 2 panels of the Snowflake Splendor Designer Series Paper to the base easel section and the outside easel section using Stampin’ Seal.

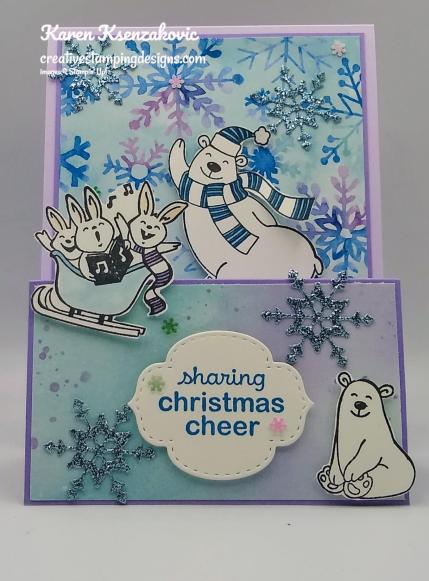
On a panel of Whisper White cardstock, I stamped the skating polar bear, singing bunnies and the small polar bear images from the Stampin’ Up! Warm & Toasty Cling Stamp Set in Tuxedo Black Memento Ink.  I stamped the sentiment from the Warm & Toasty stamp set in Pacific Point Ink on the same panel.  I cut the sentiment out using the Stitched So Sweetly Dies.  I colored the images in using my Balmy Blue, Highland Heather, Pacific Point & Purple Posy Stampin’ Write Markers.  I colored the sleigh in using my Balmy Blue Stampin’ Blends Marker.  I fussy cut all the images using my Paper Snips.  I cut the smallest snowflake from the So Many Snowflakes Dies out of a panel of Balmy Blue Glimmer Paper.  Using my Layering Ovals Dies I cut a panel of a Silver Foil Sheet.

I adhered the Silver Foil oval to the base of the easel using Multipurpose Liquid Glue.  I adhered the skating polar bear on the foil using Stampin’ Dimensionals.  I added a few of the Balmy Blue Glimmer snowflakes to the panel.

On the front panel of the easel I adhered the sentiment to the center using Stampin’ Dimensionals.  I adhered the singing bunnies to the top of the panel and the small polar bear to the bottom of the panel using Stampin’ Dimensionals.  I added 2 Balmy Blue Glimmer snowflakes to either side of the sentiment.  I added a few of the Adhesive Backed Snowflakes to the card front and sentiment.

On the inside I stamped the sentiment from the Warm & Toasty stamp set in the center of a Whisper White panel in Pacific Point Ink.  I stamped the snowflake image from the Warm & Toasty stamp set around the sentiment, stamping off twice, in Pacific Point Ink.  I stamped the small polar bear from the Warm & Toasty stamp set in Tuxedo Black Memento Ink on the bottom of the panel.  I adhered a thin strip of the Balmy Blue Glimmer paper to the side of the panel using Stampin’ Seal and trimmed it using my Paper Snips.  I adhered the Whisper White panel to a Highland Heather mat using Stampin’ Seal and then to the inside of the Purple Posy card base using Multipurpose Liquid Glue.

To finish my card I decorated a Medium Whisper White Envelope.  I stamped the skating polar bear image from the Warm & Toasty stamp set in Tuxedo Black Memento Ink on the front of the envelope and colored it in using my Balmy Blue & Pacific Point Stampin’ Write Markers.  I stamped the snowflake image from the Warm & Toasty stamp set in Pacific Point Ink, stamping off twice, around the bear.  I adhered a panel of Snowflake Splendor DSP to the envelope flap.

Thank you for stopping by my blog today.  I hope you liked my card and will give it a try. Happy Stamping!!

****************************************************************************************************

If you need any stamping supplies, I’d love to be your Demonstrator. Just click HERE to go directly to my online store or drop me an email if you have any questions. 

MY CURRENT HOST CODE IS: 4Z2KHBVY

Use this host code when you order $50 or greater and receive a free gift from me! If your order is over $150, please do not use this code, but you’ll still get the free gift. The free gift is your choice of any 1 item valued up to $10.00 in the 2020-2021 Annual Catalog!   For any orders $50 or more I will also send you my monthly class tutorials.  Click HERE or go to my Customer Rewards for more details and to see what this months tutorials are.

 Click HERE to shop the clearance rack.

Happy Stamping, Karen!

****************************************************************************************************

IT’S TIME TO REDEEM THOSE BONUS DAYS COUPONS YOU EARNED IN JULY!!

  • Redemption Deadline:  August 31 2020, by 11:50 PM (MT)
  • There is no limit to the number of coupon codes participants can use on an order during redemption.
  • Bonus Days coupon codes may be redeemed for any product (excluding Starter Kits and Paper Pumpkin monthly subscriptions).
    • New prepaid Paper Pumpkin codes may be discounted using Bonus Days coupon codes.
  • Bonus Days coupon codes will reduce the amount of an order.
  • Bonus Days coupon codes may be redeemed one time only.

****************************************************************************************************

HELLO, PUMPKIN

SUBSCRIBE AUTUST 11 – SEPTEMBER 10

As the autumn season approaches, prepare to celebrate with the September Paper Pumpkin Kit! There’s so much to love about fall—some love the haunts of Halloween, many love the time to give thanks, and others love the changing colors and cooler temperatures. Whatever you love most about fall, September’s kit has everything you need to celebrate the season your way! Between a multi-occasion stamp set and enough supplies to design 20 cracker box treat packages, you can create custom fall crafts to celebrate Halloween, Thanksgiving, pumpkins, and leaves. Whether you make them all the same or mix ‘n’ match your crafts, there’s something for everyone in this kit!

September’s kit is a must-have for those who love to celebrate all things spooky. But, for those who don’t enjoy the Halloween haunts, the multi-occasion stamp set combined with a variety of die-cut and reversible paper pieces offers many ways to customize your fall crafts!

  • Kit contains enough supplies to create 20 cracker box treat packages.
  • Each cracker box treat package can be customized to celebrate Halloween, Thanksgiving, the autumn season, or all three!
  • Coordinating Colors: Bumblebee, Basic Black, Cajun Craze, Cinnamon Cider, Mossy Meadow, Old Olive, Pumpkin Pie, white

Subscribe to the September 2020 Paper Pumpkin Kit from 11 August to 10 September at paperpumpkin.com!

Note: Supplies may be limited toward the end of the subscription period.

****************************************************************************************************

I’m cleaning my shelves and drawers out to make room for lots of new goodie.  I have my list right HERE and I’m trying to keep it up to date.   Check it out and let me know if there is anything you’d like to get.  If you are looking for something and don’t see it on the list, drop me a line and I will look through my stash to see if I missed it.  I have lots of older DSP too that I don’t have listed if there is any that you are looking for.

****************************************************************************************************

Card stock cuts for this project:

  • Highland Heather Cardstock 4″ X 10″ (easel card front scored and folded at 5 1/4″ & 7 5/8″), 4″ X 5 1/4″ (inner liner mat)
  • Purple Posey Cardstock 4 1/4″ X 11″ (card base scored and folded at 5 1/2″ )
  • Whisper White Cardstock 3″ X 6″ (artwork), 3 7/8″ X 5 1/8″ (inner liner)
  • Balmy Blue Glimmer Paper 1 1/4″ X 6″ (snowflakes), 1/4″ X 6″ (inner liner strip)
  • Silver Foil Sheet 3″ X 2″ (oval)
  • Snowflake Splendor Designer Series Paper 3 7/8″ X 5 1/8″ & 3 7/8″ X 2 1/8″ (easel panels), 2 1/4″ X 6″ (envelope flap panel)

****************************************************************************************************

Product List

Stampin’ Up! Coming Home for The Happy Inkin’ Thursday Blog Hop

Good Thursday morning my stamping friends and welcome to our Happy Inkin’ Thursday Blog Hop.  How is everyone doing today?  If you are hopping over from Akiko, thank you for stopping by my blog. This week we have sketch challenge. Be sure to take a moment to hop around to see everyone’s beautiful projects .
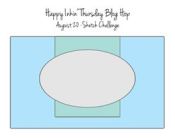
Here is the sketch we had to work from.

Here’s my card for today using this sketch.

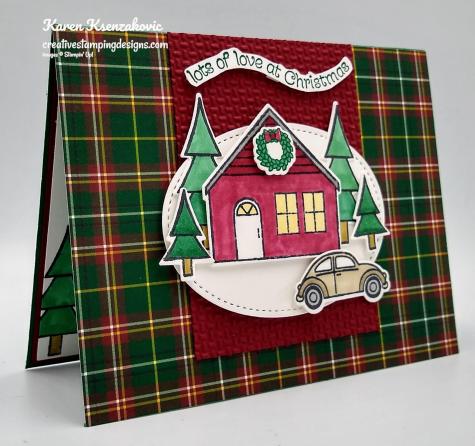
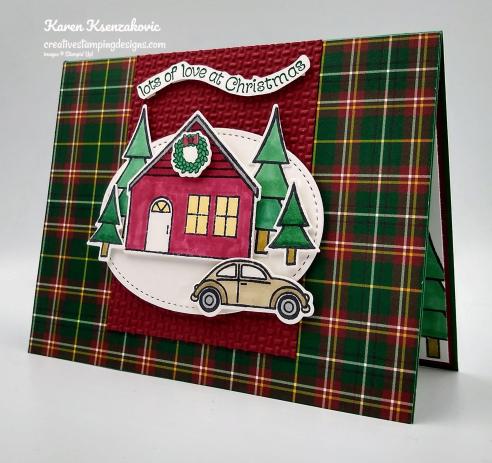
I started by adhering a panel of Plaid Tidings 6 X 6 Designer Series Paper to a Shaded Spruce card base using Stampin’ Seal.  I embossed a panel of Cherry Cobbler cardstock using the Wrapped in Texture Embossing Folder and adhered it to the card front using Multipurpose Liquid Glue.

Using the  Stampin’ Up! Coming Home Photopolymer Stamp Set, I stamped the car, house, trees and wreath in Tuxedo Black Memento Ink on a panel of Whisper White cardstock.  I colored all the images in using my Cherry Cobbler, Crumb Cake, Shaded Spruce, Smoky Slate, So Saffron and Soft Suede Stampin’ Blends Markers.  I cut all the images out using my Home Together Dies.

From the same panel of Whisper White cardstock, I cut the largest oval from the Stitched Shapes Dies.  I adhered the 2 largest trees to the oval using Glue Dots.  I adhered the house, trees and car to the oval using Stampin’ Dimensionals.  I added the wreath to the house using a Stampin’ Dimensional.  I adhered the oval to the card front using Stampin’ Dimensionals.  I stamped the sentiment from the Stampin’ Up! Itty Bitty Christmas Cling Stamp Set in Shaded Spruce Ink on the Whisper White panel and fussy cut it using my Paper Snips and adhered it to the top of the embossed panel using Stampin’ Dimensionals.

On the inside I stamped the sentiment from the Stampin’ Up! Wishes & Wonder Cling Stamp Set in Shaded Spruce Ink in the center of a Whisper White panel.  I stamped the large and small trees from the Coming Home stamp set in Tuxedo Black Memento Ink on the bottom of the panel and colored them in using my Shaded Spruce and Soft Suede Stampin’ Blends Markers.  I adhered the Whisper White panel to a Cherry Cobbler mat using Stampin’ Seal and then to the inside of the Shaded Spruce card base using Multipurpose Liquid Glue.

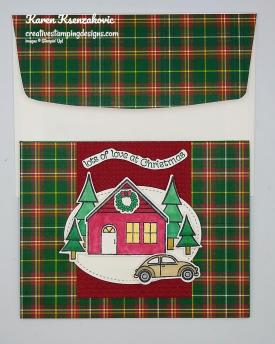
To finish my card I decorated a Medium Whisper White Envelope.  I stamped the card and house images from the Coming Home stamp set in Tuxedo Black Memento Ink on the envelope front.  I colored the images in using my Cherry Cobbler, Crumb Cake, Smoky Slate and So Saffron Stampin’ Blends Markers.  I adhered a panel of the Plaid Tidings 6 X 6 DSP to the envelope flap.

Thank you for visiting my blog today. I hope you liked my card and will give it a try. Now that you’ve seen my card, take a minute to hop through all our projects today. If you click on the Next Blog button, you’ll go to Amy’s page. Or you can just click on the names below to go directly to all their blogs! Happy Hopping!!

Karen Ksenzakovic:  You Are Here

****************************************************************************************************

If you need any stamping supplies, I’d love to be your Demonstrator. Just click HERE to go directly to my online store or drop me an email if you have any questions. 

MY CURRENT HOST CODE IS: 4Z2KHBVY

Use this host code when you order $50 or greater and receive a free gift from me! If your order is over $150, please do not use this code, but you’ll still get the free gift. The free gift is your choice of any 1 item valued up to $10.00 in the 2020-2021 Annual Catalog!   For any orders $50 or more I will also send you my monthly class tutorials.  Click HERE or go to my Customer Rewards for more details and to see what this months tutorials are.

 Click HERE to shop the clearance rack.

Happy Stamping, Karen!

****************************************************************************************************

IT’S TIME TO REDEEM THOSE BONUS DAYS COUPONS YOU EARNED IN JULY!!

  • Redemption Deadline:  August 31 2020, by 11:50 PM (MT)
  • There is no limit to the number of coupon codes participants can use on an order during redemption.
  • Bonus Days coupon codes may be redeemed for any product (excluding Starter Kits and Paper Pumpkin monthly subscriptions).
    • New prepaid Paper Pumpkin codes may be discounted using Bonus Days coupon codes.
  • Bonus Days coupon codes will reduce the amount of an order.
  • Bonus Days coupon codes may be redeemed one time only.

****************************************************************************************************

HELLO, PUMPKIN

SUBSCRIBE AUTUST 11 – SEPTEMBER 10

As the autumn season approaches, prepare to celebrate with the September Paper Pumpkin Kit! There’s so much to love about fall—some love the haunts of Halloween, many love the time to give thanks, and others love the changing colors and cooler temperatures. Whatever you love most about fall, September’s kit has everything you need to celebrate the season your way! Between a multi-occasion stamp set and enough supplies to design 20 cracker box treat packages, you can create custom fall crafts to celebrate Halloween, Thanksgiving, pumpkins, and leaves. Whether you make them all the same or mix ‘n’ match your crafts, there’s something for everyone in this kit!

September’s kit is a must-have for those who love to celebrate all things spooky. But, for those who don’t enjoy the Halloween haunts, the multi-occasion stamp set combined with a variety of die-cut and reversible paper pieces offers many ways to customize your fall crafts!

  • Kit contains enough supplies to create 20 cracker box treat packages.
  • Each cracker box treat package can be customized to celebrate Halloween, Thanksgiving, the autumn season, or all three!
  • Coordinating Colors: Bumblebee, Basic Black, Cajun Craze, Cinnamon Cider, Mossy Meadow, Old Olive, Pumpkin Pie, white

Subscribe to the September 2020 Paper Pumpkin Kit from 11 August to 10 September at paperpumpkin.com!

Note: Supplies may be limited toward the end of the subscription period.

****************************************************************************************************

Card stock cuts for this project:

  • Cherry Cobbler Cardstock 2 3/4″ x 3 3/4″ (embossed card front panel), 4 1/8″ X 5 3/8″ (inner liner mat)
  • Shaded Spruce Cardstock 8 1/2″ X 5 1/2″ (card base scored and folded at 4 1/4″)
  • Whisper White Cardstock 4 1/2″ X 5 1/2″ (artwork), 4″ X 5 1/4″ (inner liner)
  • Plaid Tidings 6 X 6 Designer Series Paper 4 1/4″ X 5 1/2″ (card front), 2 1/4″ X 6″ (piece for envelope flap)

****************************************************************************************************

Product List

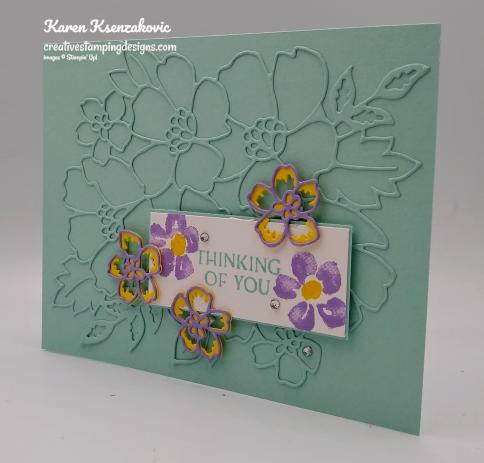
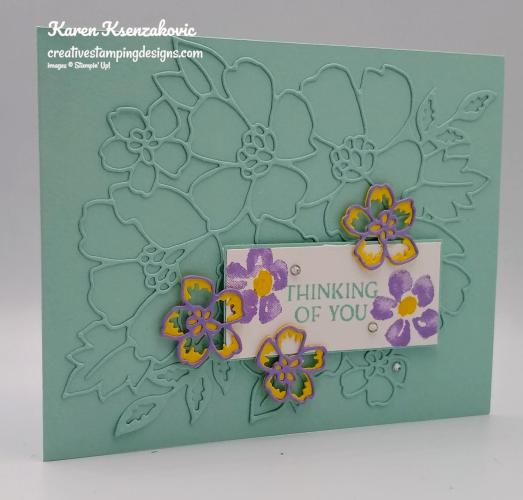
Stampin’ Up! Blossoms In Bloom

Good Wednesday morning my fellow stampers.  We’re halfway through the week and almost to the weekend.  Hope you are all having a productive week.  My day didn’t go exactly as planned yesterday.  I thought I was going to be alone all day and get so much done.  My sons girlfriend was at our house and didn’t leave till almost noon and my daughter called me because she forgot  things and needed me to either bring them to her or pick her up.  I ended up picking her up since I needed her to take my car so she could come home today to wait for a delivery while I’m at work.

For today’s card I decided to make something a little more summery, since it is still summer after all.  Here’s my card for today.

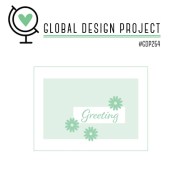
My design is from Global Design Project #254.  Here is their sketch

My colors are from CAS Colours & Sketch challenge #384.  Here are their colors.

I started by cutting the largest die from the Many Layered Blossoms Dies from a panel of Pool Party cardstock, adhered to an Adhesive Sheet, and adhered it to a Pool Party card base.  I cut the smaller flowers from the Many Layered Blossoms Dies from panels of Daffodil Delight and Highland Heather cardstock.

On a small panel of Whisper White cardstock, I stamped the sentiment from the Stampin’ Up! Blossoms In Bloom Photopolymer Stamp Set in Pool Party Ink.  I stamped the small flowers from the Blossoms In Bloom stamp set in Highland Heather Ink on either side of the sentiment and stamped the centers in Daffodil Delight Ink.  I adhered the Whisper White panel to a thin Pool Party mat using Stampin’ Seal and then to the card front using Stampin’ Dimensionals.

I adhered the small Highland Heather flowers to the small Daffodil Delight flowers using Multipurpose Liquid Glue just in the centers.  I adhered the die cut flowers to the card front using Stampin’ Dimensionals.  I added a few Rhinestone Basic Jewels to the card front.

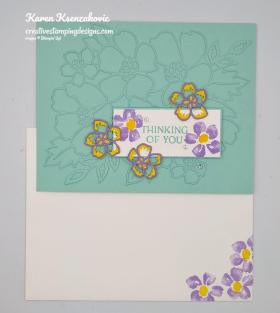
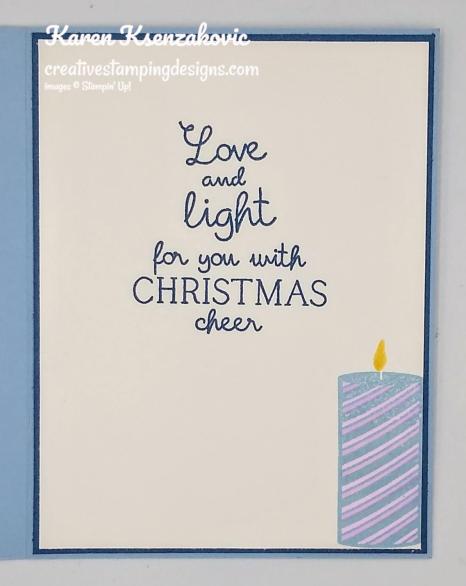
On the inside I stamped the large floral image from the Blossoms In Bloom stamp set in Highland Heather Ink, stamping off once, on a Whisper White panel.  I stamped the flower center image from the Blossoms In Bloom stamp set in Daffodil Delight Ink, stamping off once, in the center of each flower.  I stamped the sentiment from the Stampin’ Up! Bloom & Grow Photopolymer Stamp Set in Pool Party Ink in the center of the Whisper White panel.  I adhered the Whisper White panel to a Pool Party mat using Stampin’ Seal and then to the inside of the Pool Party card base using Multipurpose Liquid Glue.

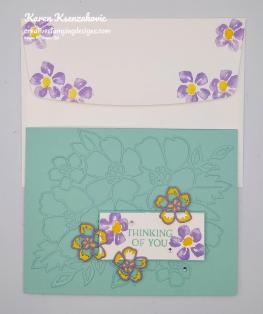
To finish my card I decorated a Medium Whisper White Envelope.  I stamped the small flower images from the Blossoms In Bloom stamp set in Highland Heather Ink on the envelope front and flap.  I stamped the flower centers in Daffodil Delight Ink.

Thank you for stopping by my blog today.  I hope you liked my card and will give it a try. Happy Stamping!!

****************************************************************************************************

If you need any stamping supplies, I’d love to be your Demonstrator. Just click HERE to go directly to my online store or drop me an email if you have any questions. 

MY CURRENT HOST CODE IS: 4Z2KHBVY

Use this host code when you order $50 or greater and receive a free gift from me! If your order is over $150, please do not use this code, but you’ll still get the free gift. The free gift is your choice of any 1 item valued up to $10.00 in the 2020-2021 Annual Catalog!   For any orders $50 or more I will also send you my monthly class tutorials.  Click HERE or go to my Customer Rewards for more details and to see what this months tutorials are.

 Click HERE to shop the clearance rack.

Happy Stamping, Karen!

****************************************************************************************************

IT’S TIME TO REDEEM THOSE BONUS DAYS COUPONS YOU EARNED IN JULY!!

  • Redemption Deadline:  August 31 2020, by 11:50 PM (MT)
  • There is no limit to the number of coupon codes participants can use on an order during redemption.
  • Bonus Days coupon codes may be redeemed for any product (excluding Starter Kits and Paper Pumpkin monthly subscriptions).
    • New prepaid Paper Pumpkin codes may be discounted using Bonus Days coupon codes.
  • Bonus Days coupon codes will reduce the amount of an order.
  • Bonus Days coupon codes may be redeemed one time only.

****************************************************************************************************

HELLO, PUMPKIN

SUBSCRIBE AUTUST 11 – SEPTEMBER 10

As the autumn season approaches, prepare to celebrate with the September Paper Pumpkin Kit! There’s so much to love about fall—some love the haunts of Halloween, many love the time to give thanks, and others love the changing colors and cooler temperatures. Whatever you love most about fall, September’s kit has everything you need to celebrate the season your way! Between a multi-occasion stamp set and enough supplies to design 20 cracker box treat packages, you can create custom fall crafts to celebrate Halloween, Thanksgiving, pumpkins, and leaves. Whether you make them all the same or mix ‘n’ match your crafts, there’s something for everyone in this kit!

September’s kit is a must-have for those who love to celebrate all things spooky. But, for those who don’t enjoy the Halloween haunts, the multi-occasion stamp set combined with a variety of die-cut and reversible paper pieces offers many ways to customize your fall crafts!

  • Kit contains enough supplies to create 20 cracker box treat packages.
  • Each cracker box treat package can be customized to celebrate Halloween, Thanksgiving, the autumn season, or all three!
  • Coordinating Colors: Bumblebee, Basic Black, Cajun Craze, Cinnamon Cider, Mossy Meadow, Old Olive, Pumpkin Pie, white

Subscribe to the September 2020 Paper Pumpkin Kit from 11 August to 10 September at paperpumpkin.com!

Note: Supplies may be limited toward the end of the subscription period.

****************************************************************************************************

I’m cleaning my shelves and drawers out to make room for lots of new goodie.  I have my list right HERE and I’m trying to keep it up to date.   Check it out and let me know if there is anything you’d like to get.  If you are looking for something and don’t see it on the list, drop me a line and I will look through my stash to see if I missed it.  I have lots of older DSP too that I don’t have listed if there is any that you are looking for.
****************************************************************************************************

Card stock cuts for this project:

  • Daffodil Delight Cardstock 2″ X 2 1/2″ (die cut flowers)
  • Highland Heather Cardstock 2″ X 2 1/2″ (die cut flowers)
  • Pool Party Cardstock 4 1/4″ X 11″ (card base scored and folded at 5 1/2″), 4 1/4″ X 5 1/2″ (card front die cut), 1 1/4″ x 2 3/4″ (sentiment mat), 4 1/8″ X 5 3/8″ (inner liner mat)
  • Whisper White Cardstock 1 3/16″ X 2 11/16″ (sentiment), 4″ X 5 1/4″ (inner liner)

****************************************************************************************************

Product List