Stampin’ Up! Arrange A Wreath for The Happy Inkin’ Thursday Blog Hop

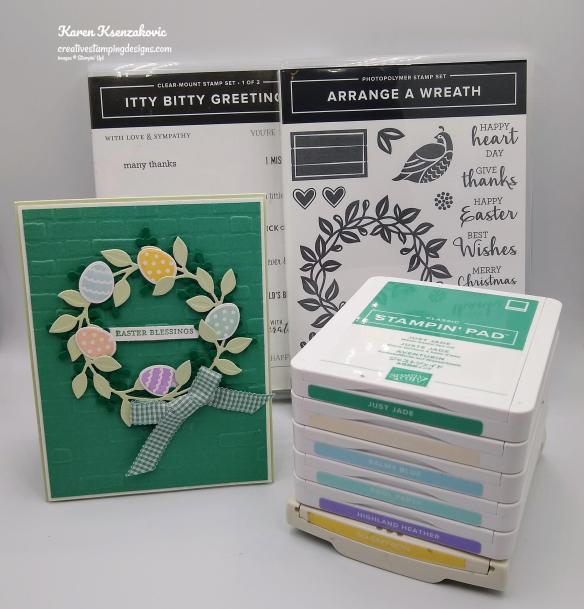
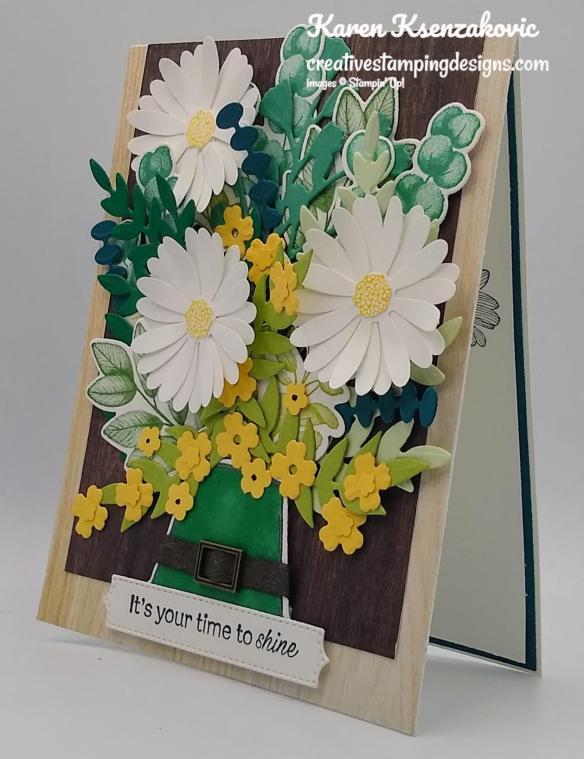
Good Thursday morning my stamping friends and welcome to our Happy Inkin’ Thursday Blog Hop. I hope everyone is doing well today. If you are hopping over from Akiko, thank you for stopping by my blog. This week we have a Theme Challenge. Be sure to take a moment to hop around to see everyone’s beautiful projects. I used the Stampin’ Up! Arrange A Wreath Photopolymer Stamp Set and the Stampin’ Up! Itty Bitty Greetings Cling Stamp Set for my card. Here is my card using this weeks theme.

I played along with the Tic Tac Toe Challenge #105. I went across the middle

I also played along with As You See It Challenge #246.

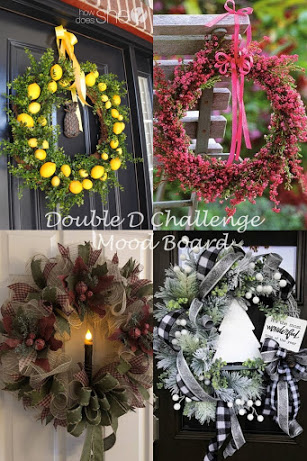
Here is our theme this week.

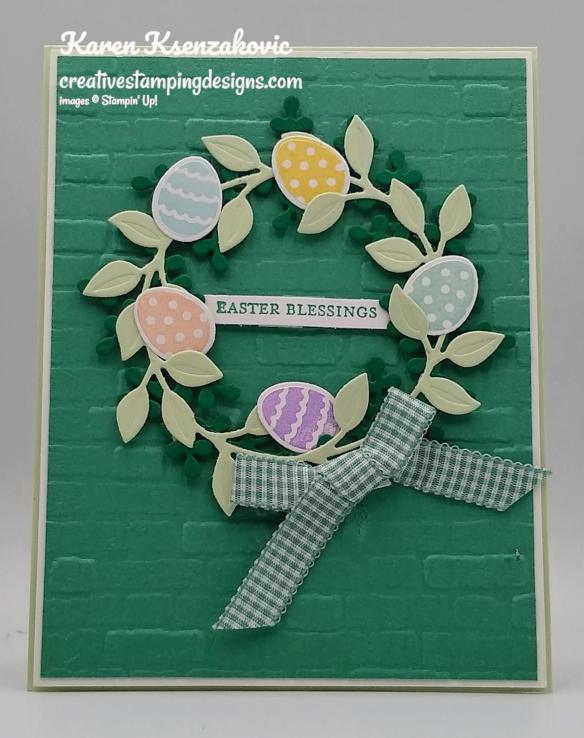
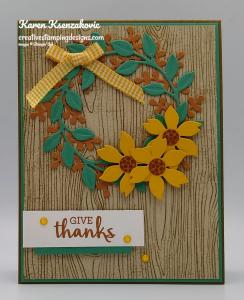
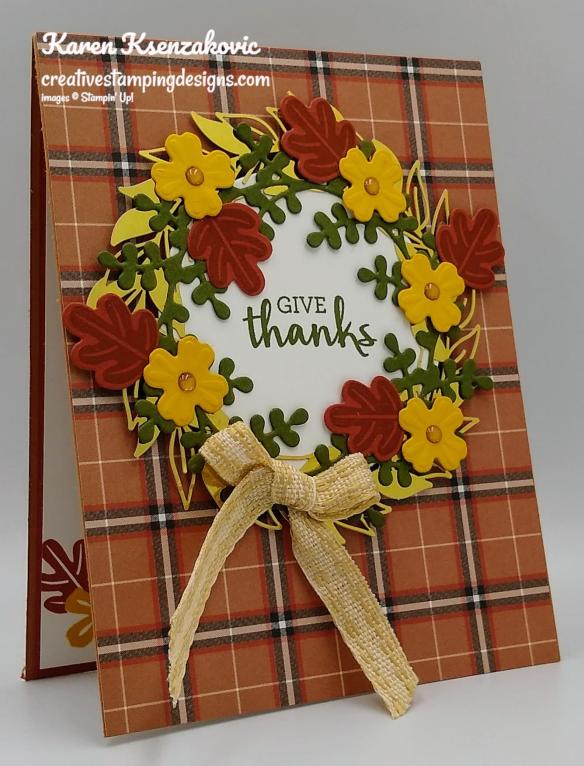
I started by embossing a Just Jade card front using the Brick and Mortar 3D Embossing Folder. I adhered the embossed panel to a Basic White mat using Multipurpose Liquid Glue and then to the front of a Soft Sea Foam card base using Stampin’ Dimensionals.

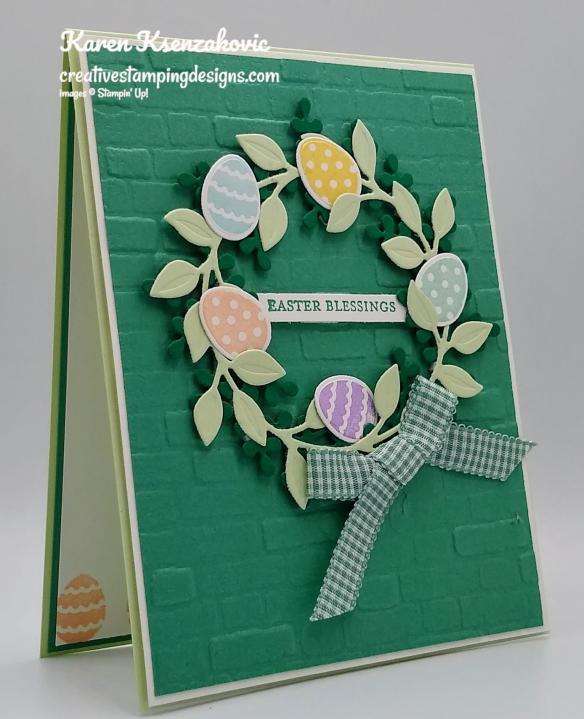
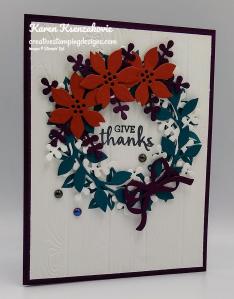
Using the Wreath Builder Dies, I cut one of the wreaths out of a panel of Soft Sea Foam cardstock and one from a panel of Shaded Spruce cardstock. I adhered the 2 wreaths together using Multipurpose Liquid Glue. On a strip of Basic White cardstock I stamped the sentiment from the Itty Bitty Greetings stamp set in Just Jade Ink. I adhered the sentiment to the back of the wreath using Glue Dots. I adhered the wreath to the card front using Stampin’ Dimensionals.

On a panel of Basic White cardstock I stamped the egg image from the Arrange A Wreath stamp set in Balmy Blue, Highland Heather, Petal Pink, Pool Party and So Saffron Inks. I cut all the eggs out using the Wreath Builder Dies. I adhered the eggs to the wreath using Glue Dots. I tied a bow using the Just Jade Gingham Ribbon from the Flowers For Every Season Ribbon Combo Pack and adhered it to the wreath using Glue dots.

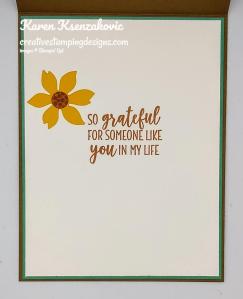
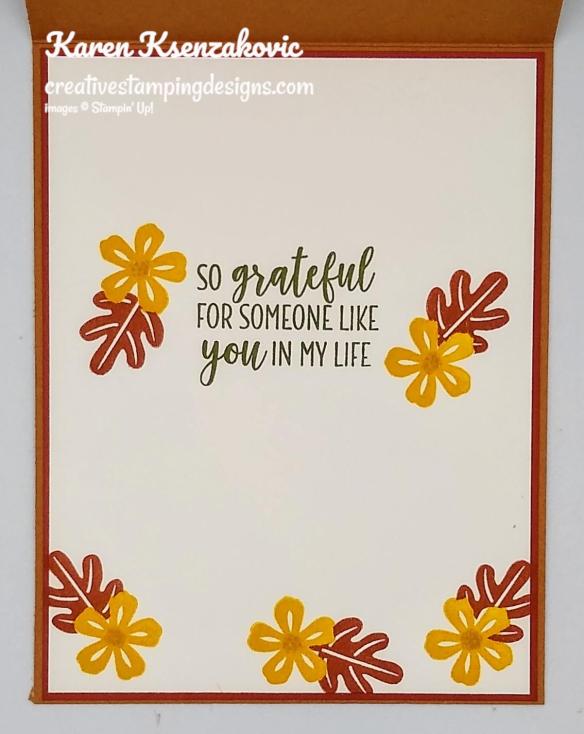
On the inside I stamped the sentiment from the Stampin’ Up! A Wish For Everything Cling Stamp Set in Just Jade Ink in the center of a Basic White panel. I stamped the egg image from the Arrange A Wreath stamp set along the bottom of the panel in Petal Pink, Highland Heather and Pool Party Inks. I adhered the Basic White panel to a Just Jade mat using Stampn’ Seal and then to the inside of the Soft Sea Foam card base using Multipurpose Liquid Glue.

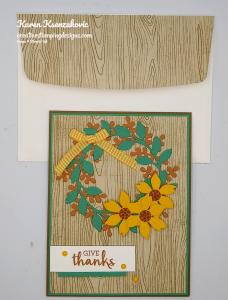
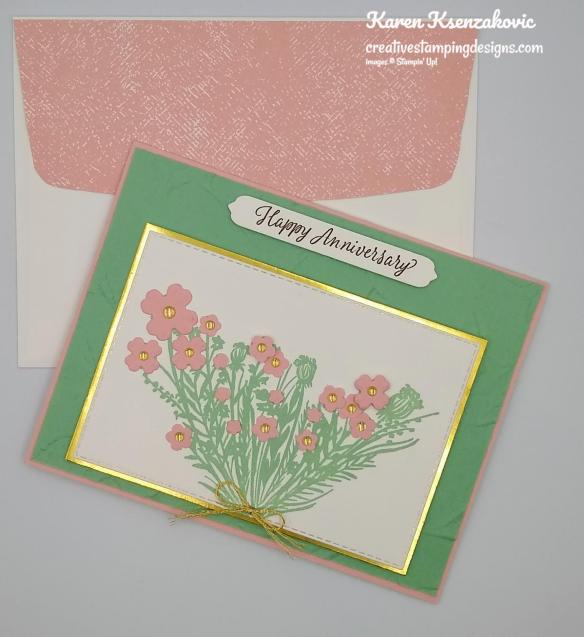
To complete my card I decorated a Basic White Medium Envelope. I stamped the egg image from the Arrange A Wreath stamp set in Balmy Blue, Highland Heather and Pool Party Inks across the bottom front of the envelope. I adhered a panel of Soft Sea Foam Subtle 6 X 6 Designer Series Paper to the envelope flap.

Thank you for visiting my blog today. I hope you liked my card and will give it a try. Now that you’ve seen my card, take a minute to hop through all our projects today. If you click on the Next Blog button, you’ll go to Amy’s page. Or you can just click on the names below to go directly to all their blogs! Happy Hopping!!

Amy Koenders:

Mary Deatherage:

Jaimie Babarczy:

Sue Prather:

Karen Finkle:

Akiko Sudano:

Karen Ksenzakovic: You Are Here

*********************************************************************************************************

If you need any stamping supplies, I’d love to be your Demonstrator. Just click HERE to go directly to my online store or drop me an email if you have any questions. 

MY CURRENT HOST CODE IS: 2QRN664Q

Use this host code when you order $50 or greater and receive a free gift from me! If your order is over $150, please do not use this code, but you’ll still get the free gift. The free gift is your choice of any 1 item valued up to $10.00 from the 2020-2021 Annual Catalog or the January-June 2021 Mini Catalog!   For any orders $50 or more I will also send you my monthly class tutorials.  Click HERE or go to my Customer Rewards for more details and to see what this months tutorials are.

 Click HERE to shop the clearance rack.

Please remember to use my current Host Code and make sure that you can see my name on the final checkout page listed as your Demonstrator when you order so that you know that you’re ordering with me and you’ll get my rewards! 

Happy Stamping, Karen!

*********************************************************************************************************

IT’S THE LAST-CHANCE PRODUCTS SALE

If you love great deals, Stampin’ Up!’s Last-Chance Products Sale is the perfect time to shop. You’ll get deep discounts on your favorite products from the 2020–2021 Annual Catalog—and as an extra bonus—you’ll get a peek at the list of items carrying over to the other catalogs. Many items will sell out fast, so don’t delay—shop early for the best selection!

Sales Period: March 24, 1:00 PM (MT) – May 3, 2021, 11:59 PM (MT)

  • Only select items in the 2020–2021 Annual Catalog will be discounted.
  • Sale applies to all order types except host items (see Last-Chance Products List for items on sale).
  • No minimum purchase is required.
  • Retiring items are available while supplies last.
  • Items and discounts may vary by market (depending on inventory levels).
  • Exclusions apply: Carryover items and some retiring items will not be discounted.
  • Ordering Deadline for retiring products:  May 3, 2021 at 11:59 PM (MT)

Here are the official retiring lists from Stampin’ Up!.

Head over to my online store to pick up those retiring items now!  They’re only available while supplies last from now through May 3!

*********************************************************************************************************

So Cool

Subscribe March 11 – April 10

  • The So Cool Paper Pumpkin Kit is a little taste of summer fun, with enough supplies to make 12 colorful, shaped cards with coordinating envelopes. Six card bases are popsicle shaped, the other six are semicircles: three watermelons and three rainbows. All of the cards are splashed with cheerful, vivid watercolor images. The kit also includes two full-size, matching sticker sheets, die-cut accents, fun embellishments, and more.
  • This kit was designed with kids in mind, as a way to spark their creative imagination and introduce them to papercrafting.
  • The So Cool Kit makes a great gift! It’s an even better way to enjoy some quality time with those special little ones in life.
  • Even though the So Cool Kit was designed with kids in mind, these fun-shaped cards, featuring vivid watercolors, are versatile enough to gift to kids of all ages—the young in years and the young at heart. They’re a great way to send some “sunshine in a card!” Who wouldn’t love that?
  • The kit’s exclusive So Cool Stamp Set is versatile, offering sentiments that can be used for multiple occasions such as birthdays, congrats, cheer, and more! It’s a great addition to any crafter’s collection.

Details

  • Kit includes enough supplies to make 12 fresh, fun-shaped cards—6 popsicles and 6 blank semicircles to color—and coordinating envelopes. Kit includes card bases, 2 full sticker sheets, decorative die-cut pieces, embellishments, and more.
  • Envelope size: 4-1/2″ x 5-3/4″ (11.4 x 14.6 cm)
  • Coordinating colors: Blackberry Bliss, Bermuda Bay, Bumblebee, Cinnamon Cider, Old Olive, Terracotta Tile
  • Coordinates with the Ice Cream Corner Suite from our January–June 2021 Mini Catalog.

Subscribe to the April Paper Pumpkin Kit between 11 March and 10 April at paperpumpkin.com!

Note: Supplies may be limited toward the end of the subscription period.

THERE’S MORE TO LOVE IN THE COORDINATING ICE CREAM CORNER SUITE!

154567

154567
ICE CREAM CORNER DESIGNER SERIES PAPER

Keep the creative fun going by pairing the So Cool Kit with the Ice Cream Corner Designer Series Paper (154567) featured in our 2021 January–June Mini Catalog. It’s a great way to use the kit’s stamps, ink, stickers, and more to further indulge your craving for summer fun. Plus, the paper is part of the matching Ice Cream Corner Suite, so there’s virtually no end to the possibilities!

Coordinating colors: Bermuda Bay, Blackberry Bliss, Cinnamon Cider, Old Olive, Petal Pink, Pool Party, Purple Posy, So Saffron, Soft Sea Foam, Terracotta Tile

Click this link to view the suite and start shopping.

*********************************************************************************************************

Card stock cuts for this project:

  • Basic White Cardstock 4 1/8″ X 5 3/8″ (card front mat), 2″ X 5″ (eggs), 1/4″ X 2 1/4″ (sentiment), 4″ X 5 1/4″ (inner liner)
  • Just Jade Cardstock 4″ X 5 1/4″ (card front), 4 1/8″ X 5 3/8″ (inner liner mat)
  • Shaded Spruce Cardstock 4 1/4′ X 4 1/4″ (wreath)
  • Soft Seafoam Cardstock 4 1/4′ X 11″ (card base scored and folded at 5 1/2″), 4 1/4′ X 4 1/4″ (wreath)
  • Subtle 6 X 6 Designer Series Paper 2 1/2″ X 6″ (envelope flap)

*********************************************************************************************************

Product List

Stampin’ Up! Forever Fern

Good Wednesday morning my stamping friends. We’re halfway through the week and heading towards the weekend. How is your week going?

It’s time for another inspiration challenge for The Card Concept. For the next 2 weeks we have a Luck of The Irish challenge. Here is my card that was inspired from the challenge photo.

I used multiple stamp sets for today’s card, but mainly the Stampin’ Up! Forever Fern Bundle and the Stampin’ Up! Daisy Lane Cling Stamp Set. I was inspired by the colors and the bouquet of flowers for my collage card.

I hope you will take a moment to visit The Card Concept and join us this week to play along with our challenge #150. How are you inspired by this photo?

I started by adhering a panel of In Good Taste Designer Series Paper to a Thick Basic White Card base using Multipurpose Liquid Glue. I adhered another darker panel of In Good Taste DSP to the card front using Stampin’ Seal.

On a panel of Basic White cardstock I stamped multiple fern images from the Stampin’ Up! Forever Fern Cling Stamp Set in Garden Green, Just Jade and Pear Pizzazz Inks. I cut the images out using the Forever Flourishing Dies. I punched 9 daisies using the Medium Daisy Punch and adhered them together in sets of 3 using tiny amounts of Multipurpose Liquid Glue. I stamped the flower pot from the Stampin’ Up! Simply Succulents Cling Stamp Set and stamped the sentiment from the Daisy Lane stamp set in Tuxedo Black Ink. I cut the flower pot and sentiment out using the Potted Succulents Dies and colored the flower pot in using my Shaded Spruce Stampin’ Blends Markers. Using my Forever Flourishing Dies I cut other fern and leaf images from the Just Jade, Pear Pizzazz, Pretty Peacock, Shaded Spruce and Soft Seafoam panels of cardstock. Using the tiny flower dies from the Wreath Builder Dies I cut out 12 flowers from the panel of So Saffron cardstock. I cut the tiny flowers using the Confetti Flowers Border Punch from the panel of So Saffron cardstock.

I flipped the flower pot upside down and adhered a piece of the 1/4″ Early Espresso Faux Suede Trim with an Antique Slide from the Antique Corners & Slides Embellishments around the pot adhering it in the back with Glue Dots. I adhered the flower pot to the card front using Stampin’ Dimensionals. I adhered the pieces of fern and flowers to the card front arranging them how I liked using Glue Dots, Multipurpose Liquid Glue and Stampin’ Dimensionals. I adhered the sentiment to the bottom of the card front using Stampin’ Dimensionals.

On the inside I stamped the sentiment and small daisy image from the Daisy Lane stamp set in the center of a Basic White panel in Tuxedo Black Ink. I colored the daisy centers in using my Daffodil Delight Stampin’ Blends Markers. I adhered the Basic White panel to a Pretty Peacock mat using Stampin’ Seal and then to the inside of the Thick Basic White card base using Stampin’ Seal.

To complete my card I decorated a Basic White Medium Envelope. I stamped some of the fern images from the Forever Fern stamp set on the envelope front and adhered a panel of In Good Taste DSP to the envelope flap.

Thank you for stopping by my blog today. I hope you liked my card and will give it a try. Happy Stamping!!

*********************************************************************************************************

If you need any stamping supplies, I’d love to be your Demonstrator. Just click HERE to go directly to my online store or drop me an email if you have any questions. 

MY CURRENT HOST CODE IS: 2QRN664Q

Use this host code when you order $50 or greater and receive a free gift from me! If your order is over $150, please do not use this code, but you’ll still get the free gift. The free gift is your choice of any 1 item valued up to $10.00 from the 2020-2021 Annual Catalog or the January-June 2021 Mini Catalog!   For any orders $50 or more I will also send you my monthly class tutorials.  Click HERE or go to my Customer Rewards for more details and to see what this months tutorials are.

 Click HERE to shop the clearance rack.

Please remember to use my current Host Code and make sure that you can see my name on the final checkout page listed as your Demonstrator when you order so that you know that you’re ordering with me and you’ll get my rewards! 

Happy Stamping, Karen!

*********************************************************************************************************

Available Now!!!

Bring in the beauty of nature with the artistic designs of the Butterfly Brilliance Bundle and coordinating designer series paper, along with textured specialty paper that will put a pop of brilliance on every project. The Butterfly Brilliance Collection will be available March2 — May 3, 2021.

*********************************************************************************************************

The 2019-2021 In-Colors will be retiring soon. See the complete list of items in my online store Here.

*********************************************************************************************************

Here’s To You

Subscribe February11th – March 10th

Three cheers for mountain air, a sky filled with sunshine, and finding joy in life’s journey! Adventure awaits inside this month’s majestic, mountain-themed kit. With enough elements and embellishments to create eight cards and coordinating envelopes, the Here’s to You Paper Pumpkin Kit is the perfect pick for celebrating life’s little moments and mountain-high milestones!

What makes March’s kit one-of-a-kind? The spectacular set of four free stencils—and a stamping sponge—that you’ll find inside! Pair this pack of stunning stencils with the kit’s contents to stamp a springtime scene, then store the set to stamp for any season in the future. Clean up your binoculars and dust off your hiking boots—the Here’s to You Paper Pumpkin Kit is ready to lead you on an excursion to explore your creativity!

ABOUT THE MARCH KIT

Details

  • Kit contains enough supplies to create 8 cards—4 each of 2 designs—and coordinating envelopes. The kit’s contents include printed card bases, die-cut paper pieces, embellishments, adhesive, and more!
  • Card size: 4-1/4″ x 5-1/2″ (10.8 x 14 cm)
  • Envelope size: 4-1/2″ x 5-3/4″ (11.4 x 14.6 cm)
  • Coordinating colors: Bumblebee, Calypso Coral, Old Olive, Petal Pink, Pretty Peacock, Seaside Spray
  • Includes four free stencils and a stamping sponge!
  • Arrives in a cute and collectible box.

Subscribe to the March 2021 Paper Pumpkin Kit between 11 February and 10 March at paperpumpkin.com!

Note: Supplies may be limited toward the end of the subscription period.

*********************************************************************************************************

Card stock cuts for this project:

  • Basic White Cardstock 8 1/2″ X 11″ (flowers, fern and inner liner)
  • Thick Basic White Cardstock 4 1/4″ X 11″ (card base scored and folded at 5 1/2″)
  • Just Jade Cardstock 2 1/2″ X 3″ (fern)
  • Pear Pizzazz Cardstock 5″ x 2″ (leaves die)
  • Pretty Peacock Cardstock 1″ x 4″ (eucalyptus)
  • Shaded Spruce Cardstock 3″ X 4 1/2″ (fern), 4 1/8″ x 5 3/8″ (inner liner mat)
  • Soft Sea Foam Cardstock 3″ X 4 1/2″ (fern)
  • So Saffron Cardstock 2″ X 5 1/2″ (tiny flowers)
  • In Good Taste Designer Series Paper 4 1/4″ X 5 1/2″ (card front), 3 3/4″ X 5″ (card front panel), 2 1/2″ X 6″ (envelope flap)

*********************************************************************************************************

Product List

Paper Snips

$10.00

Stamparatus

$49.00

Stampin’ Up! Corner Bouquet Anniversary

Good Monday morning my stamping friends. How was everyone’s weekend? Did anyone do anything exciting or fun? This time of year with the cold weather, other than work, I stay in and sometimes relax.

For today I have another Sale-A-Bration card for you. This is our last week to earn FREE product. There’s still time to place your orders and get your free items. For today I used the Stampin’ Up! Corner Bouquet Cling Stamp Set. Here’s today’s card.

My colors are from Color Throwdown #630. I just love these colors together.

I started by embossing a Mint Macaron card front using the Painted Texture 3D Embossing Folder and adhered it to a Blushing Bride card base using Multipurpose Liquid Glue.

On a panel of Basic White cardstock I stamped the image from the Corner Bouquet stamp set in Mint Macaron Ink. I cut the image out using the Stitched Rectangle Dies and adhered it to a Gold Foil mat using Stampin’ Seal. Using the Confetti Flowers Border Punch I punched out some tiny flowers from a panel of Blushing Bride cardstock. I cut some other flowers out of the Blushing Bride cardstock using the Wreath Builder Dies. I adhered the flowers to the artwork using tiny amounts of Multipurpose Liquid Glue and Stampin’ Dimensionals. I adhered the matted panel to the card front using Stampin’ Dimensionals.

I made a tiny bow using the Gold Trim from the Forever Greenery Trim Combo Pack and adhered it to the bottom of the flowers using a Glue Dot. On a panel of Basic White cardstock I stamped the sentiment from the Stampin’ Up! Many Messages Cling Stamp in Soft Suede Ink and cut it out using my Messages Dies. I adhered the sentiment to the top of the card front using Stampin’ Dimensionals. I added some Gold Glitter Enamel Dots to the flower centers.

On the inside I stamped the sentiment from the Stampin’ Up! Hearty To Heart Photopolymer Stamp Set in Soft Suede Ink in the center of a Basic White panel. I stamped the image from the Corner Bouquet stamp set in Mint Macaron Ink on the bottom of the panel and added some more of the Blushing Bride flowers I cut out using Multipurpose Liquid Glue. I adhered the Basic White panel to a Mint Macaron mat using Stampin’ Seal and then to the inside of the Blushing Bride card base using Stampin’ Seal. I added a few more Gold Glitter Enamel Dots to the flowers.

To finish my card I decorated a Basic White Medium Envelope. I stamped the image from the Corner Bouquet stamp set in Mint Macaron Ink on the envelope front. I adhered a panel of Blushing Bride Subtle 6 X 6 Designer Series Paper on the envelope flap.

Thank you for stopping by my blog today. I hope you liked my card and will give it a try. Happy Stamping!!

*********************************************************************************************************

If you need any stamping supplies, I’d love to be your Demonstrator. Just click HERE to go directly to my online store or drop me an email if you have any questions. 

MY CURRENT HOST CODE IS: 9BCVNW9D

Use this host code when you order $50 or greater and receive a free gift from me! If your order is over $150, please do not use this code, but you’ll still get the free gift. The free gift is your choice of any 1 item valued up to $10.00 from the 2020-2021 Annual Catalog or the January-June 2021 Mini Catalog!   For any orders $50 or more I will also send you my monthly class tutorials.  Click HERE or go to my Customer Rewards for more details and to see what this months tutorials are.

 Click HERE to shop the clearance rack.

Please remember to use my current Host Code and make sure that you can see my name on the final checkout page listed as your Demonstrator when you order so that you know that you’re ordering with me and you’ll get my rewards! 

Happy Stamping, Karen!

*********************************************************************************************************

Final Week of Sale-A-Bration!! Only 6 Days!!

Have you gotten all the FREE items you wanted!

This image has an empty alt attribute; its file name is 122020_sab_jan_us-en.jpg

Stampin’ Up!’s Sale-a-bration event is happening now!!  It will look a little different…it runs from January 5 through February 28 and there will be a second Sale-a-bration event later this year, but the shop, host and join benefits are still a part of the event!!

During Sale-A-Bration, you can earn FREE products. For every $50 or $100 you spend, you can choose between two purchasing levels of free products!  There are 8 free products available to pick from at the $50 level and 2 free products to pick from at the $100 level!

Stampin’ Up! is offering an exclusive host stamp set called Punch Party and you can get it for FREE with an order of $300 or greater placed during Sale-a-bration or by hosting a workshop with orders totaling $300 or greater during Sale-a-bration!  You can see the stamp set below.  You can read more details and find the list of punches that it coordinates with on page 17 in the Sale-a-bration Brochure.

This image has an empty alt attribute; its file name is stampin-up-party-punch-photopolymer-stamp-set-creativestampingdesigns.com_-2.jpg

If you’re interested in setting up a host code for yourself to see if you can collect orders totaling $300+ from yourself and your stamping friends, email me at creativestampingdesigns@gmail.com. I’d be happy to get you set up.

*********************************************************************************************************

Coming Soon!!!

Bring in the beauty of nature with the artistic designs of the Butterfly Brilliance Bundle and coordinating designer series paper, along with textured specialty paper that will put a pop of brilliance on every project. The Butterfly Brilliance Collection will be available March2 — May 3, 2021. Want it early??? This could be part of your starter kit for joining Stampin’ Up!

Final Week to Join and get Your 5 FREE Packs of Designer Series Paper

There’s no better time to join Stampin’ Up! than during Sale-A-Bration.   Stampin’ Up! has this AMAZING offer of five packs of 6″ x 6″ Designer Series Paper from the upcoming 2021-2022 Annual Catalog with your Starter Kit if you join during Sale-a-bration! You can not buy this DSP now, so why not get it FREE!. For $99 you get to choose $125 worth of products that will ship for free and Stampin’ Up! will also send you 5 packs, that’s 200 sheets of paper a $57.50 value, absolutely FREE. This offer ends February 28, 2021!!

This image has an empty alt attribute; its file name is 20201_sab_p16-2.jpg

Here are the details:

  • Starter Kit Price:  $99 + tax and it ships for free!
  • Starter Kit includes:
    • $125 in Stampin’ Up! merchandise of your choice from the current Annual Catalog, 2021 Mini Catalog or the online store (includes clearance rack items!).
    • 5 free packs of 6″ x 6″ Designer Series Paper (200 sheets in total!!) from the upcoming 2021-2022 Annual Catalog.  The packs are: Brights, Neutrals, Regals, Subtles & 2020-2022 In Colors…that’s $57.50 in free designer paper with your kit!!
    • 8 Annual Catalogs, 8 Mini Catalogs and 8 Sale-a-bration Brochures and a few additional business supplies.
  • You’ll get the following perks from Stampin’ Up! when you join:
    • At least a 20% discount on everything that you order as a Demonstrator!
    • Early peeks at new release items and preorders for new items for about a month before they are available to purchase!
    • The ability to attend Demonstrator exclusive Stampin’ Up! events!
    • No pressure to sell to anyone, hold classes or workshops or run a business.  You can simply order for yourself and get the discount!  And as long as you have at least $300 in sales per quarter, you’ll continue as an active Demonstrator and continue to get the discount.  If you aren’t able to maintain the $300 per quarter minimums, you simply go back to being a customer, no commitment required and no penalty if you decide that being a Demonstrator isn’t right for you.

Whether you’d like to start a business or would simply like to be a hobby demonstrator and get the great discount, I am here to help support you in any way that I can!

*********************************************************************************************************

The 2019-2021 In-Colors will be retiring soon. Why not stock up now and earn some free Sale-A-Bration items. See the complete list of items in my online store Here.

*********************************************************************************************************

Here’s To You

Subscribe February11th – March 10th

Three cheers for mountain air, a sky filled with sunshine, and finding joy in life’s journey! Adventure awaits inside this month’s majestic, mountain-themed kit. With enough elements and embellishments to create eight cards and coordinating envelopes, the Here’s to You Paper Pumpkin Kit is the perfect pick for celebrating life’s little moments and mountain-high milestones!

What makes March’s kit one-of-a-kind? The spectacular set of four free stencils—and a stamping sponge—that you’ll find inside! Pair this pack of stunning stencils with the kit’s contents to stamp a springtime scene, then store the set to stamp for any season in the future. Clean up your binoculars and dust off your hiking boots—the Here’s to You Paper Pumpkin Kit is ready to lead you on an excursion to explore your creativity!

ABOUT THE MARCH KIT

Details

  • Kit contains enough supplies to create 8 cards—4 each of 2 designs—and coordinating envelopes. The kit’s contents include printed card bases, die-cut paper pieces, embellishments, adhesive, and more!
  • Card size: 4-1/4″ x 5-1/2″ (10.8 x 14 cm)
  • Envelope size: 4-1/2″ x 5-3/4″ (11.4 x 14.6 cm)
  • Coordinating colors: Bumblebee, Calypso Coral, Old Olive, Petal Pink, Pretty Peacock, Seaside Spray
  • Includes four free stencils and a stamping sponge!
  • Arrives in a cute and collectible box.

Subscribe to the March 2021 Paper Pumpkin Kit between 11 February and 10 March at paperpumpkin.com!

Note: Supplies may be limited toward the end of the subscription period.

*********************************************************************************************************

Card stock cuts for this project:

  • Basic White Cardstock 3 1/4″ X 4 1/2″ (artwork), 4″ X 5 1/4″ (inner liner)
  • Blushing Bride Cardstock 8 1/2″ X 5 1/2″ (card base scored and folded at 4 1/4″), 4″ X 2″ (flowers)
  • Mint Macaron Cardstock 2 – 4 1/8″ X 5 3/8″ (card front and inner liner mat)
  • Gold Foil Sheet 3 1/8″ X 4 1/2″ (artwork mat)
  • Subtle 6 X 6 Designer Series Paper 2 1/2″ X 6″ (piece for envelope flap)

*********************************************************************************************************

Product List

Stampin’ Up! Arrange A Wreath for Amy’s Inkin’ Krew Blog Hop

Good Tuesday morning my fellow stampers. Welcome to Amy’s Inkin’ Krew Team Blog Hop. It’s the 2nd Tuesday of the month so that means Blog Hop Day!! If you are starting with me, be sure to hop around to see everyone’s beautiful projects. If you’ve hopped over from Jaimie Babarczy’s blog, welcome to my blog and thank you for stopping by. The theme this month is “Giving Thanks”.  We can interpret this however we want.  Here’s my card.

My colors were inspired by Paper Players Challenge #512. Here are their beautiful fall colors.

I also played along with Double “D” Challenge. Here is their theme.

I started by adhering a panel of Plaid Tidings 6 X 6 Designer Series Paper to a Cinnamon Cider card base using Multipurpose Liquid Glue.

I cut one of the wreaths from the Wreath Builder Dies out of a panel of Mossy Meadow cardstock and adhered it to a wreath from the Forever Gold Laser-Cut Designer Series Paper using small amounts of Multipurpose Liquid Glue. I stamped 5 of the leaf image from the Stampin’ Up! Arrange A Wreath Photopolymer Stamp Set in Cajun Craze Ink on a panel of Cajun Craze cardstock and cut them out using the Wreath Builder Dies. I cut 5 flowers out of a panel of Crushed Curry cardstock using the Wreath Builder Dies. I adhered the flowers and leaves to the wreath using Glue Dots.

I cut a circle out of a panel of Whisper White cardstock using the Layering Circle Dies. I stamped the sentiment from the Arrange A Wreath stamp set in Mossy Meadow Ink in the center of the circle. I adhered the wreath to the circle using Multipurpose Liquid Glue and adhered it to the card front using Stampin’ Dimensionals. I made a small bow using the 3/8″ Embroidered Ribbon and adhered it to the wreath using Glue Dots. I added Cinnamon Cider 2020-2022 In-Color Enamel Dots to the flower centers.

On the inside I stamped the sentiment from the Stampin’ Up! Country Home Photopolymer Stamp Set in Mossy Meadow Ink in the center of a Whisper White panel. I stamped the flowers and leaf images from the Arrange A Wreath stamp set in Crushed Curry and Cajun Craze Ink on the panel and colored the flower centers in using my Cinnamon Cider Stampin’ Blends Marker. I adhered the Whisper White panel to a Cajun Craze mat using Stampin’ Seal and then to the inside of the Cinnamon Cider card base using Multipurpose Liquid Glue.

To finish my card I decorated a Medium Whisper White Envelope. I stamped the flower and leaf images from the Arrange A Wreath stamp set in Crushed Curry and Cajun Craze Ink along the bottom of the envelope front and colored the flower centers in using my Cinnamon Cider Stampin’ Blends Markers.

I adhered a panel of the Plaid Tidings 6 X 6 DSP to the envelope flap.

Thank you for visiting by my blog today. I hope you liked my card and will give it a try. Now that you’ve seen my card, be sure to hop around to see everyone’s beautiful projects. Hit Previous to hop back to Jaimie Babarczy’s blog or hit Next to head over to Mary Deatherage’s blog. You can also click on each of the names and hop around that way. Happy Hopping!!

  1. Jaimie Babarczy:
  2. Karen Ksenzakovic: You Are Here
  3. Mary Deatherage:
  4. Karen Finkle:
  5. Akiko Sudano:
  6. Donna Leonard:
  7. Krista Yagci:
  8. Lisa Jurich:
  9. Tara Carpenter:
  10. Terry Lynn Bright:
  11. Amy Koenders:

*********************************************************************************************************

If you need any stamping supplies, I’d love to be your Demonstrator. Just click HERE to go directly to my online store or drop me an email if you have any questions. 

MY CURRENT HOST CODE IS: RUW6PQNH

Use this host code when you order $50 or greater and receive a free gift from me! If your order is over $150, please do not use this code, but you’ll still get the free gift. The free gift is your choice of any 1 item valued up to $10.00 in the 2020-2021 Annual Catalog!   For any orders $50 or more I will also send you my monthly class tutorials.  Click HERE or go to my Customer Rewards for more details and to see what this months tutorials are.

 Click HERE to shop the clearance rack.

Happy Stamping, Karen!

*********************************************************************************************************

Going on Now!!!

We all love gorgeous Designer Series Paper, and during this incredible sale, you can enjoy a 15% discount on select papers from our current catalogs! 

Stampin’ Up! has such beautiful Designer Series Paper and they’re putting a select list of those papers on sale for 15% off during the month of October!!  Now is a great time to stock up and save on some of the most popular paper designs…including papers from the August-December 2020 Mini Catalog!!

SALE DETAILS:

  • Sales Period:  October 1-31
  • All order types qualify for this promotion.
  • There is no limit to how many packages of Designer Series Paper may be purchased during this promotion.
  • Only select Designer Series Papers are available at a 15% discount during this promotion.
  • Orders must be placed—and closed—during the promotion period for the 15% discount to apply.
  • Designer Series Paper ordered as part of a Starter Kit or with Stampin’ Rewards qualify for the 15% discount
  • Sale Ends October 31, 2020 at 11:50 PM MT

The designer papers included in this sale are shown   Click on the image below to open up the full-size printable PDF:

Get your lists ready to start shopping now – October 31st! 

*********************************************************************************************************

Jolly Gingerbread

Subscribe October 11 – November 10

Paper Pumpkin is our monthly subscription service that offers unique papercrafting projects for crafters of any skill level! In these all-inclusive kits, subscribers receive pre-cut paper pieces, embellishments, ink, and an exclusive stamp set designed to encourage them to explore their creativity. As their subscription continues, subscribers will have a collection of cards—and other creations—for a variety of occasions, in addition to a stockpile of supplies!


So, what’s in store for this month’s Paper Pumpkin kit? November’s cute, gingerbread-themed kit contains enough supplies to create one-of-a-kind Christmas crafts! Whether it’s a gift card carrier, traditional card, or tasty-looking tag, this sweet and seasonal kit is the key to heartfelt holiday gifting. With curly cutouts, sugary stickers, and delicious die-cut designs in a special-edition box, a jolly holiday will be on its way with this kit!

Details About The November Kit:

  • Kit contains enough supplies to create 15 gift card carriers and coordinating envelopes.
  • Kit contents can also be used to design traditional holiday cards, gift tags, and other paper projects.
  • Contents arrive in a collectible, special-edition box!
  • Project size: 2-1/4″ x 4″
  • Envelope size: 2-3/4″ x 4-3/8″
  • Coordinating colors: Cinnamon Cider, Daffodil Delight, Calypso Coral, Mint Macaron, Shaded Spruce, Blushing Bride, and Whisper White

Subscribe to the November 2020 Paper Pumpkin Kit from 11 October to 10 November at paperpumpkin.com!

Note: Supplies may be limited toward the end of the subscription period.

*********************************************************************************************************

Card stock cuts for this project:

  • Cajun Craze Cardstock 3″ X 3″ (leaves), 4 1/8″ X 5 3/8″ (inner liner mat)
  • Cinnamon Cider Cardstock 4 1/4″ X 11″ (card base scored and folded at 5 1/2″)
  • Crushed Curry Cardstock 1″ X 4 1/4″ (flowers)
  • Mossy Meadow Cardstock 4″ X4″(wreath
  • Whisper White Cardstock 3″ X 3″ (wreath center), 4″ X 5 1/4″ (inner liner)
  • Plaid Tidings 6 X 6 Designer Series Paper 4 1/4″ X 5 1/2″ (card front), 2 1/4″ X 6″ (piece for envelope flap)

*********************************************************************************************************

Product List

Stampin’ Up! Arrange A Fall Wreath for The Happy Inkin’ Thursday Blog Hop

Good Thursday morning my stamping friends and welcome to our Happy Inkin’ Thursday Blog Hop.  Hope you are all doing well today.  If you are hopping over from Akiko, thank you for stopping by my blog. This week we have a color challenge. Be sure to take a moment to hop around to see everyone’s beautiful projects .
Here are our colors for this week.

Here’s my card using this weeks colors.

I played along with TGIF Inspiration Challenge #282.  Here is their inspiration.

I started by stamping the Wreath image from the Stampin’ Up! Arrange A Wreath Photopolymer Stamp Set in Pretty Peacock Ink in the center of a Whisper White card front.  I stamped the sentiment from the Arrange A Wreath stamp set in Tuxedo Black Memento Ink in the center of the wreath.  I embossed the panel using the Pinewood Planks 3D Embossing Folder.  I adhered the card front to a Blackberry Bliss mat using Multipurpose Liquid Glue and then to a Blackberry Bliss card base using Multipurpose Liquid Glue.

I cut 1 of the wreaths from the Wreath Builder Dies out of a panel of Whisper White cardstock and 1 from a panel of Pretty Peacock cardstock.  I adhered the wreaths to the card front using Stampin’ Dimensionals.  I cut 3 flowers from the Wreath Builder Dies out of a panel of Cajun Craze cardstock.  I cut the flower centers from a scrap of Basic Black cardstock.  I cut 9 sprigs from the Wreath Builder Dies out of a panel of Blackberry Bliss cardstock.  I adhered the flower centers to the back of the flowers using a tiny amount of Multipurpose Liquid Glue.  I adhered the flowers to the wreath using Stampin’ Dimensionals.  I adhered the sprigs around the flowers using Glue Dots.

From the Blackberry Bliss panel I cut the bow from the Wreath Builder Dies and adhered it to the wreath using Stampin’ Dimensionals.  I added a few Iridescent Pearls to the card front.

On the inside I stamped the sentiments from the Stampin’ Up! Country Home Photopolymer Stamp Set in Tuxedo Black Memento Ink in the center of a Whisper White panel.  I stamped the leaf image from the Arrange A Wreath stamp set in Cajun Craze Ink around the sentiment.  I adhered the Whisper White panel to a Pretty Peacock mat using Stampin’ Seal and then to the inside of the Blackberry Bliss card base using Multipurpose Liquid Glue.

To complete my card, I decorated a Medium Whisper White Envelope.  I stamped the leaf image from the Arrange A Wreath stamp set in Cajun Craze Ink on the envelope front and the envelope flap.

Thank you for visiting my blog today. I hope you liked my card and will give it a try. Now that you’ve seen my card, take a minute to hop through all our projects today. If you click on the Next Blog button, you’ll go to Julie’s page. Or you can just click on the names below to go directly to all their blogs! Happy Hopping!!

Karen Ksenzakovic:  You Are Here

****************************************************************************************************

If you need any stamping supplies, I’d love to be your Demonstrator. Just click HERE to go directly to my online store or drop me an email if you have any questions. 

MY CURRENT HOST CODE IS: G39RYMEX

Use this host code when you order $50 or greater and receive a free gift from me! If your order is over $150, please do not use this code, but you’ll still get the free gift. The free gift is your choice of any 1 item valued up to $10.00 in the 2020-2021 Annual Catalog!   For any orders $50 or more I will also send you my monthly class tutorials.  Click HERE or go to my Customer Rewards for more details and to see what this months tutorials are.

 Click HERE to shop the clearance rack.

Happy Stamping, Karen!

****************************************************************************************************

Joy To The World 

Subscribe September 11 – October 10

This holiday season, share the joy of Paper Pumpkin! The Joy to the World Paper Pumpkin Kit is an exclusive holiday kit that provides a specially-designed box, enough supplies to create eight elegant cards, and an opportunity to connect with the Stampin’ Up! global community.

With October’s magical kit, not only will you get a head start on your holiday crafting—you’ll get to create Christmas cards, share project ideas, and spread holiday cheer with Stampin’ Up! customers and demonstrators around the world! After you receive your kit,  join the Joy of Paper Pumpkin Facebook group to make the most of this month’s kit.

  • Kit contains enough supplies to create eight cards—four each of two designs—and coordinating envelopes.
  • Kit includes die-cut pieces in English, French, and German. This will allow you to create cards you can use to connect with other customers and demonstrators around the world—in their language!
    • Card size: 4-1/4″ x 5-1/2″ (10.8 x 14 cm)
    • Envelope size: 4-1/2″ x 5-3/4″ (11.4 x 14.6 cm)
  • Coordinating Colors: Cherry Cobbler, Crumb Cake, Early Espresso, Just Jade, Soft Sea Foam

The Joy to the World Paper Pumpkin Kit has been thoughtfully released in preparation for the season of spreading joy. October’s Paper Pumpkin kit was designed to bring people together—connecting them with one another and spreading joy with each other around the world! With die-cut sentiments in English, French, and German, subscribers can send holiday cheer to their friends across the globe—in their language.

To connect and spread joy with international customers and demonstrators through the Joy to the World Paper Pumpkin Kit, join our Facebook group: Joy of Paper Pumpkin! When connecting with your new friends, don’t forget to share your experience with the #joyofpaperpumpkin hashtag.

Subscribe to the October 2020 Paper Pumpkin Kit from 11 September to 10 October at paperpumpkin.com.

Note: Supplies may be limited toward the end of the subscription period.

****************************************************************************************************

Stampin’ Up! Get & Go Starter Kit Promotion – Sept 1-30!

Have you thought about joining our Stampin’ Up! team?

Now is an awesome time to join.

The Get & Go Starter Kit promotion gives those who sign up to be a Stampin’ Up! demonstrator additional products to help get started right away!  In addition to the already great valued Starter Kit, you will receive precut paper, stamps, and embellishments!

Here are the details:

  • Promotion Dates: September 1–30, 2020
    Joining Deadline:  September 30, 2020; 11:50 PM (MT)
  • New demonstrators who submit their Independent Demonstrator Agreement (IDA) before 1 September or after 30 September will not be eligible for this promotion.
  • In addition to the regular starter kit (for $99 you choose $125 worth of products), if you join between September 1 and 30, you will also receive enough card stock pieces to make 16 cards, a pack of Rhinestone Basic Jewels, the So Much Love stamp set, and the Queen Anne’s Lace stamp set!!
    • 8 packs of precut card stock of the coastal cabana pack will be provided, and 8 packs of precut card stock of the Granny Apple Green pack, for a total of 16 cards (packs include envelopes).
  • Important note: Ink, adhesive, cutting tool, and clear block for stamping must be purchased separately. However, these products may be included as part of the Starter Kit product selection.

This is such a great deal!  For $99, you get to pick $125 merchandise of your choice for your Starter Kit plus you’ll get the Queen Annes’ Lace and So Much Love stamp sets, card kits to create 16 cards and a pack of Rhinestones for free!!

Drop me a note at creativestampingdesigns@gmail.com if you have questions about joining, I’m happy to talk to you about it.  You can also see more information about the benefits of becoming a Stampin’ Up! Demonstrator Here

****************************************************************************************************

Card stock cuts for this project:

  • Basic Black Cardstock scrap for flower centers
  • Blackberry Bliss Cardstock 8 1/2″ X 5 1/2″ (card base scored and folded at 4 1/4″), 4 1/8″ X 5 3/8″ (card front mat), 3″ x 3 (bow and sprigs)
  • Cajun Craze Cardstock 3″ X 3″ (flowers)
  • Pretty Peacock Cardstock 4′ X 4″ (wreath), 4 1/8″ X 5 3/8″ (inner liner mat)
  • Whisper White Cardstock 2 – 4″ x 5 1/4″ (card front and inner liner), 4″ X 4″ (wreath)

****************************************************************************************************

Product List

Stampin’ Up! Arrange A Thanksgiving Wreath

Good Monday morning my stamping friends.  How was everyone’s weekend?  Did anyone do anything fun?  I hope you are all getting off to a great start of a new week.

For today I played with another new to me set from the 2020-2021 Annual Catalog.  Here’s my card for today.

I started by adhering a panel of Poinsettia Place Designer Series Paper to a Just Jade mat using Stampin’ Seal and then to a Soft Suede card base using Multipurpose Liquid Glue.

Using the Wreath Builder Dies, I cut one of the wreaths from a panel of Cinnamon Cider cardstock and one from a panel of Just Jade cardstock.  I cut 4 flowers from the same die set out of a panel of Bumblebee cardstock and 4 flower centers from the Cinnamon Cider cardstock.  I stamped the flower center image from the Stampin’ Up! Arrange A Wreath Photopolymer Stamp Set in Cinnamon Cider Ink on the flower center dies.  I adhered the centers to the Bumblebee flowers using Multipurpose Liquid Glue.  I adhered the Just Jade wreath on top of the Cinnamon Cider wreath using Multipurpose Liquid Glue then adhered it to the card front using Multipurpose Liquid Glue.  I adhered the flowers on the bottom of the wreath using Stampin’ Dimensionals and Glue Dots.

I made a small bow using the 1/4″ Bumblebee Gingham Ribbon and adhered it to the top of the wreath using a Glue Dot.  I stamped the sentiment from the Arrange A Wreath stamp set in Cinnamon Cider Ink on a panel of Whisper White cardstock.  I adhered a thin strip of Just Jade cardstock using Stampin’ Seal on the bottom back of the sentiment and adhered it to the card front using Stampin’ Dimensionals.  I added a few Bumblebee 2020-2022 In-Color Enamel Dots to the sentiment and card front.

On the inside I stamped the sentiment from the Stampin’ Up! Country Home Photopolymer Stamp Set in Cinnamon Cider Ink in the center of a Whisper White panel.  I adhered the extra flower I die cut above the sentiment using Multipurpose Liquid Glue.  I adhered the Whisper White panel to a Just Jade mat using Stampin’ Seal and then to the inside of the Soft Suede card base using Multipurpose Liquid Glue.

To complete my card I decorated a Medium Whisper White Envelope.  I adhered a strip of Poinsettia Place DSP to the front of the envelope and a panel to the envelope flap.

Thank you for stopping by my blog today.  I hope you liked my card and will give it a try. Happy Stamping!!


****************************************************************************************************

If you need any stamping supplies, I’d love to be your Demonstrator. Just click HERE to go directly to my online store or drop me an email if you have any questions. 

MY CURRENT HOST CODE IS: 4Z2KHBVY

Use this host code when you order $50 or greater and receive a free gift from me! If your order is over $150, please do not use this code, but you’ll still get the free gift. The free gift is your choice of any 1 item valued up to $10.00 in the 2020-2021 Annual Catalog!   For any orders $50 or more I will also send you my monthly class tutorials.  Click HERE or go to my Customer Rewards for more details and to see what this months tutorials are.

 Click HERE to shop the clearance rack.

Happy Stamping, Karen!

****************************************************************************************************

IT’S TIME TO REDEEM THOSE BONUS DAYS COUPONS YOU EARNED IN JULY!!

  • Redemption Deadline:  August 31 2020, by 11:50 PM (MT)
  • There is no limit to the number of coupon codes participants can use on an order during redemption.
  • Bonus Days coupon codes may be redeemed for any product (excluding Starter Kits and Paper Pumpkin monthly subscriptions).
    • New prepaid Paper Pumpkin codes may be discounted using Bonus Days coupon codes.
  • Bonus Days coupon codes will reduce the amount of an order.
  • Bonus Days coupon codes may be redeemed one time only.

****************************************************************************************************

HELLO, PUMPKIN

SUBSCRIBE AUTUST 11 – SEPTEMBER 10

As the autumn season approaches, prepare to celebrate with the September Paper Pumpkin Kit! There’s so much to love about fall—some love the haunts of Halloween, many love the time to give thanks, and others love the changing colors and cooler temperatures. Whatever you love most about fall, September’s kit has everything you need to celebrate the season your way! Between a multi-occasion stamp set and enough supplies to design 20 cracker box treat packages, you can create custom fall crafts to celebrate Halloween, Thanksgiving, pumpkins, and leaves. Whether you make them all the same or mix ‘n’ match your crafts, there’s something for everyone in this kit!

September’s kit is a must-have for those who love to celebrate all things spooky. But, for those who don’t enjoy the Halloween haunts, the multi-occasion stamp set combined with a variety of die-cut and reversible paper pieces offers many ways to customize your fall crafts!

  • Kit contains enough supplies to create 20 cracker box treat packages.
  • Each cracker box treat package can be customized to celebrate Halloween, Thanksgiving, the autumn season, or all three!
  • Coordinating Colors: Bumblebee, Basic Black, Cajun Craze, Cinnamon Cider, Mossy Meadow, Old Olive, Pumpkin Pie, white

Subscribe to the September 2020 Paper Pumpkin Kit from 11 August to 10 September at paperpumpkin.com!

Note: Supplies may be limited toward the end of the subscription period.

****************************************************************************************************

I’m cleaning my shelves and drawers out to make room for lots of new goodie.  I have my list right HERE and I’m trying to keep it up to date.   Check it out and let me know if there is anything you’d like to get.  If you are looking for something and don’t see it on the list, drop me a line and I will look through my stash to see if I missed it.  I have lots of older DSP too that I don’t have listed if there is any that you are looking for.

****************************************************************************************************

Card stock cuts for this project:

  • Bumblebee Cardstock 3 1/2″ X 3 1/2″ (flowers)
  • Cinnamon Cider Cardstock 4″ X 4″ (wreath & flower centers)
  • Just Jade Cardstock 4″ X 4″ (wreath), 2 – 4 1/8″ x 5 3/8″ (card front mat and inner liner mat), 1/4″ X 2″ (piece under sentiment)
  • Soft Suede Cardstock 4 1/4″ X 11″ (card base scored and folded at 5 1/2″)
  • Whisper White Cardstock 2 1/2″ X 3/4″ (sentiment), 4″ X 5 1/4″ (inner liner)
  • Poinsettia Place Designer Series Paper 4″ X 5 1/4″ (card front), 2 1/4″ X 6″ (piece for envelope flap), 4″ X 6″ (strip on envelope front)

****************************************************************************************************

Product List