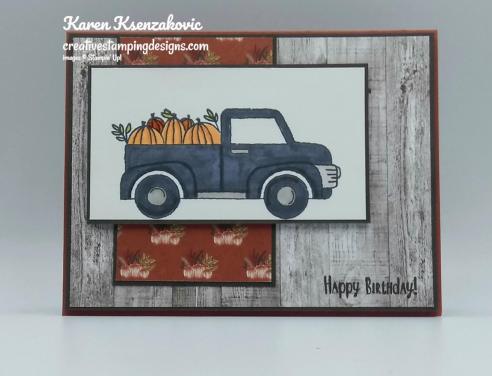
Stampin’ Up! Gather Together Thank You Card

Good Monday morning my fellow stampers.  How was everyone’s weekend?  Did anyone get to go apple picking or pumpkin picking?  The extent of my apple picking was going to Costco.  It’s not looking too promising for me going this year.

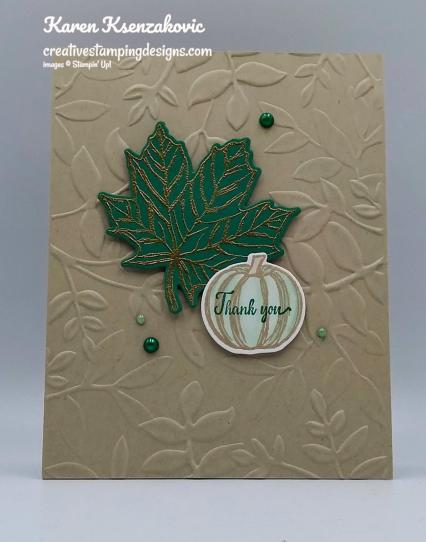
For today, I made another thank you card.  I need to send quite a few out in the next week or so, so I figured I’d better get busy making extra.  My card design and colors were a challenge given to us by my upline.  She’s doing a weekly challenge for our group.  Here’s my card.
Here are the sketch and colors for our challenge.

I started by embossing a panel of Crumb Cake cardstock using the Layered Leaves 3D Embossing Folder.  I adhered the embossed panel to a Crumb Cake card base using Multipurpose Liquid Glue.

On a panel of Shaded Spruce cardstock I stamped the large leaf image from the Stampin’ Up! Gather Together Photopolymer Stamp Set in Versamark Ink.  I immediately sprinkled it with Gold Stampin’ Emboss Powder and set it using my Heat Tool.  I cut the image out using the Gathered Leaves Dies and adhered it to the card front using Stampin’ Dimensionals.
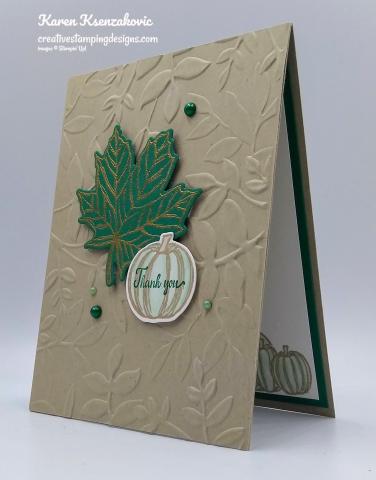
On a small piece of Whisper White cardstock I stamped the larger pumpkin image from the Gather Together stamp set in Crumb Cake Ink.  I colored the pumpkin in using my Crumb Cake and Mint Macaron Stampin’ Blends Markers and cut it out using my Gathered Leaves Dies.  I stamped the sentiment from the Stampin’ Up! New Wonders Cling Stamp Set in Shaded Spruce inside the pumpkin.  I adhered the pumpkin to the card front using Stampin’ Dimensionals.  I added 2 large and 2 small Pearl Basic Jewels that I had colored using my Dark Shaded Spruce and Dark Mint Macaron Stampin’ Blends Markers.
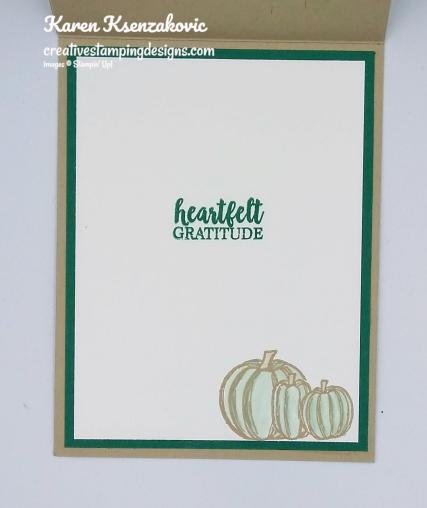
On the inside I stamped the smaller pumpkin image from the Gather Together stamp set in Crumb Cake Ink on the bottom of a Whisper White panel.  I masked the smaller pumpkins and stamped the larger pumpkin image from the Gather Together stamp set in Crumb Cake Ink next to them.  I colored all the pumpkins in using my Crumb Cake and Mint Macaron Stampin’ Blends Markers.  I stamped the sentiment from the Stampin’ Up! A Big Thank You Photopolymer Stamp Set in Shaded Spruce Ink in the center of the Whisper White panel.  I adhered the Whisper White panel to a Shaded Spruce mat using Snail and then to the inside of the Crumb Cake card base using Multipurpose Liquid Glue.

To finish my card I decorated a Medium Whisper White Envelope.  I stamped and colored the pumpkin images from the Gather Together stamp set on the envelope front the same as I did for the inside of the card.  I stamped the large leaf image from the Gather Together stamp set in Shaded Spruce Ink on the envelope flap.

Thank you for stopping by my blog today.  I hope you liked my card and will give it a try. Happy Stamping!!

****************************************************************************************************

If you need any stamping supplies, I’d be very happy to be your Demonstrator. Just click HERE to go directly to my online store or drop me an email if you have any questions. 

MY CURRENT HOST CODE IS: 3F496G6J

For any orders $50 or more I will send you my monthly class tutorials.  Click HERE or go to my Customer Rewards to see what this months tutorials are.

Click HERE to shop the clearance rack.

Happy Stamping, Karen!

****************************************************************************************************

CHRISTMAS IS COMING EARLY THIS YEAR

AVAILABLE NOVEMBER 1ST, THE NEW CHRISTMASTIME IS HERE SUITE

We hope you’re ready to make this holiday season magical, because the Christmastime Is Here Suite is! This exclusive, limited-time collection of festive, floral coordinating products has everything you need to share love, joy, and creativity this holiday season.

Products from the Christmastime Is Here Suite will be available while supplies last only starting November 1st, 2019

Here’s a sneak peek video of what’s included in the suite.
****************************************************************************************************

I have gathered up a lot of retired Stamp Sets, Embossing Folders & Dies  and put a list together for anyone interested.  I have single Stamp Sets along with Stamp Sets bundled with Dies or Punches.  Take a look and see if there is anything that you missed out on getting and would still like.  Click Here to go to my list.

****************************************************************************************************

Card stock cuts for this project:

  • Crumb Cake Cardstock 4 1/4″ X 11″ (card base scored and folded at 5 1/2″), 4 1/4″ X 5 1/2″ (card front)
  • Shaded Spruce Cardstock 4″ X 5 1/4″ (inner liner mat), 3 1/2″ X 3 1/2″ (leaf)
  • Whisper White Cardstock 3 3/4″ X 5″ (inner liner)

****************************************************************************************************

Product List

Stampin’ Up! Painted Harvest Thank You

Good Thursday morning my fellow stampers.  We’re on the down slide to the weekend, has anyone made any plans?  I’m hoping one weekend soon I can go apple picking.  Fall seems to be in full swing here and with fall comes apple picking for me.

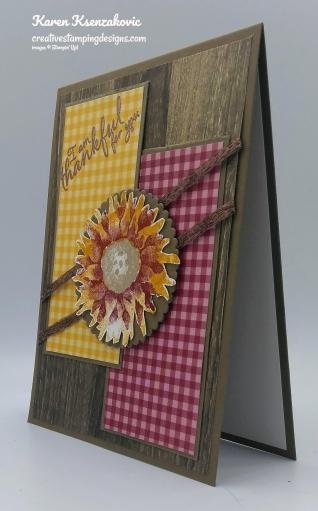
For today I have, what I believe to be, a real country looking thank you card.  Here’s my card.

My colors were inspired by Color Throwdown Challenge #564.  Here are their colors.

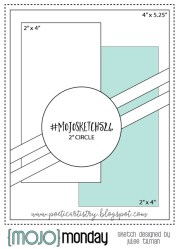
My design is from Mojo Monday Sketch #524.  Here is their sketch.

I started by stamping the 1st part of the sunflower image from the Stampin’ Up! Painted Harvest Photopolymer Stamp Set in Crushed Curry Ink.  I stamped the 2nd part of the sunflower image from the Painted Harvest stamp set in Cherry Cobbler Ink.  I stamped the inside of the sunflower in Crumb Cake Ink.  I then fussy cut the sunflower using my Paper Snips.  Using my Layering Circles Dies, I cut out the scalloped circle that fit best around my sunflower in Soft Suede cardstock.  I adhered the sunflower to the scalloped circle using Glue Dots.

I adhered 2 pieces of the gingham Regals 6 X 6 Designer Series Paper, one in Cherry Cobbler and one in Crushed Curry,  to Soft Suede mats using Snail.  I adhered the Cherry Cobbler matted DSP to a Pressed Petals Specialty Designer Series Paper card front using Multipurpose Liquid Glue.

On the top of the Crushed Curry DSP I stamped the sentiment from the Painted Harvest stamp set in Versamark Ink on an angle.  I immediately sprinkled it with my Copper Stampin’ Emboss Powder and set it using my Heat Tool.  I adhered the matted DSP to the Pressed Petals Specialty DSP card front using Multipurpose Liquid Glue.  I wrapped 2 pieces of the 1/4″ Copper Trim Ribbon around the card front and adhered it using a small amount of Snail on the back.  I adhered the card front to a Soft Suede card base using Multipurpose Liquid Glue.  I adhered the matted sunflower to the card front using Stampin’ Dimensionals.

On the inside I stamped the sentiment from the Painted Harvest stamp set in Soft Suede Ink in the center of a Whisper White panel.  I adhered a strip of the Pressed Petals Specialty DSP to the left side of the panel using Snail.  I adhered the Whisper White panel to the inside of the Soft Suede card base using Multipurpose Liquid Glue.

To finish my card I decorated a Medium Whisper White Envelope.  I stamped the sunflower image from the Painted Harvest stamp set on the envelope front the same as I did for the card.  I adhered a panel of the Crushed Curry Gingham Regals 6 X 6 DSP to the envelope flap.

Thank you for visiting my blog today.  I hope you liked my card and will give it a try. Happy Stamping!!

****************************************************************************************************

If you need any stamping supplies, I’d be very happy to be your Demonstrator. Just click HERE to go directly to my online store or drop me an email if you have any questions. 

MY CURRENT HOST CODE IS: 3F496G6J

For any orders $50 or more I will send you my monthly class tutorials.  Click HERE or go to my Customer Rewards to see what this months tutorials are.

Click HERE to shop the clearance rack.

Happy Stamping, Karen!

****************************************************************************************************

CHRISTMAS IS COMING EARLY THIS YEAR

AVAILABLE NOVEMBER 1ST, THE NEW CHRISTMASTIME IS HERE SUITE

We hope you’re ready to make this holiday season magical, because the Christmastime Is Here Suite is! This exclusive, limited-time collection of festive, floral coordinating products has everything you need to share love, joy, and creativity this holiday season.

Products from the Christmastime Is Here Suite will be available while supplies last only starting November 1st, 2019

Here’s a sneak peek video of what’s included in the suite.

****************************************************************************************************

WINTER WONDERS PAPER PUMPKIN

SUBSCRIBE TO PAPER PUMPKIN BY OCTOBER 10, 2019

ONLY 1 DAY LEFT TO SUBSCRIBE!!

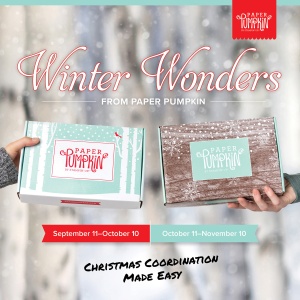
Paper Pumpkin wants to help you share love and joy this Christmas with a duo of delightful, special-edition kits. October’s kit includes 10 traditional cards, while November’s kit features 24 can’t-miss tags. Put them together and you have everything you need to make the season bright.

There’s something about the holidays that brings out the crafter in all of us. Even non-crafters like making simple and fun projects to celebrate the season. And since “simple and fun” is Paper Pumpkin’s middle name, we have the perfect kits for you!

In October and November we are offering back-to-back coordinating kits, one with Christmas cards, the other with Christmas tags. Both kits make it easy for you to add a handmade, personal touch to your holiday giving—without a lot of fuss. It’s Christmas made easy with Paper Pumpkin!

October Kit

Coordinating colors: Early Espresso, Pool Party, Poppy Parade, and Shaded Spruce

November Kit

Coordinating colors: Early Espresso, Pool Party, Poppy Parade, and Shaded Spruce

The October and November kits coordinate; however, each kit is all-inclusive and can stand alone.

Click Here for more information and to subscribe to Paper Pumpkin.

****************************************************************************************************

I have gathered up a lot of retired Stamp Sets, Embossing Folders & Dies  and put a list together for anyone interested.  I have single Stamp Sets along with Stamp Sets bundled with Dies or Punches.  Take a look and see if there is anything that you missed out on getting and would still like.  Click Here to go to my list.

****************************************************************************************************

Card stock cuts for this project:

  • Soft Suede Cardstock 4 1/4″ X 11″ (card base scored and folded at 5 1/2″),            2 – 2″ X 4″ (DSP mats on card front), 3″ X 3″ (artwork mat)
  • Whisper White Cardstock 4″ X 5 1/4″ (inner liner), 3″ X 3″ (artwork)
  • Pressed Petals Specialty Designer Series Paper 4″ X 5 1/4″ (card front), 1/2″ X 5 1/4″ (strip on inner liner)
  • Regals 6 X 6 Designer Series Paper 2 – 1 7/8″ X 3 7/8″ (card front), piece for envelope flap

****************************************************************************************************

Product List

Stampin’ Up! Cup of Christmas Cards

Good Monday morning my fellow stampers.  How was everyone’s weekend?  Were you able to join us for our Facebook live videos?  We all had a lot of fun making them.  I did my first ever video and I have to admit, I had fun with it.  If you were able to watch, thank you very much.

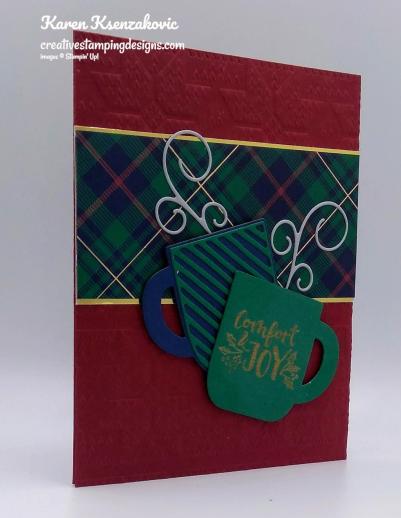
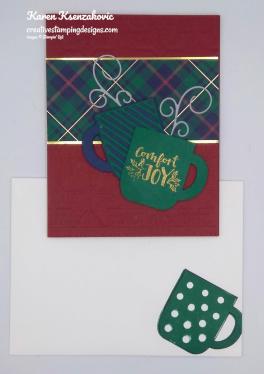
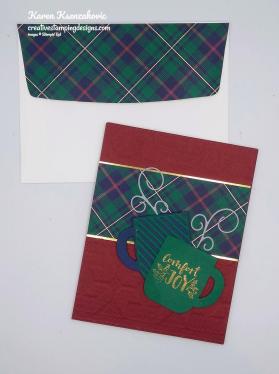
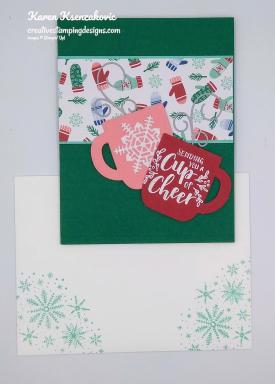
For today I have the 2 cards from the video for you.  Both cards are the same style just different color bases and Designer Series Paper.  My directions are the same for both cards just the different colors.  Here are my cards.

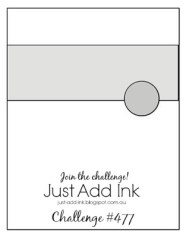
My card played along with the Just Add Ink Challenge #477.  Here is their sketch.

I started by embossing the Cherry Cobbler and Shaded Spruce card fronts using the Winter Knit 3D Embossing Folder.  I adhered the Let It Snow Specialty Designer Series Paper on the Coastal Cabana mat and the Wrapped In Plaid Designer Series Paper on the Gold Foil Sheet using Multipurpose Liquid Glue.  I adhered the matted DSP to each of the card fronts using Multipurpose Liquid Glue.

I cut out Flirty Flamingo, Night of Navy, Real Red and Shaded Spruce cups using the Cup of Cheer Dies.  On the Night of Navy mug I cut out the stripes from the Cup of Cheer Dies in Shaded Spruce cardstock and adhered them to the cup using Fine Tip Glue Pen.  For the Flirty Flamingo cup I cut out a snowflake from the Seasonal Layers Dies in Sparkle Glimmer Paper and adhered it to the cup using Multipurpose Liquid Glue.

For the Real Red and Shaded Spruce cups I stamped them both using sentiments from the Stampin’ Up! Cup of Christmas Photopolymer Stamp Set with Versamark Ink.  I sprinkled the Real Red one with Shimmer White Stampin’ Emboss Powder and the Shaded Spruce one with Gold Stampin’ Emboss Powder.  I immediately used my Heat Tool to set them.  I adhered the cups to the card fronts using Stampin’ Dimensionals.  I cut out the steam with a scroll die from the Christmas Cardinal Dies in Smoky Slate cardstock.  I adhered them to the cups using my Fine Tip Glue Pen.  I adhered the Cherry Cobbler card front to the Cherry Cobbler card base and the Shaded Spruce card front to the Shaded Spruce card base using Stampin’ Dimensionals.

On the insides I stamped one of the Whisper White panels in the center with the sentiment from the Cup of Christmas stamp set in Night of Navy Ink.  I stamped the holly image from the Cup of Christmas stamp set on either side of the sentiment in Shaded Spruce Ink.  On the other Whisper White panel in the center I stamped the sentiment from the Stampin’ Up! Frosted Foliage Cling Stamp Set in Shaded Spruce Ink.  I stamped the snowflake image from the Frosted Foliage stamp set in Coastal Cabana Ink, stamping off once, on either side of the sentiment.  I adhered the one stamped with the Night of Navy sentiment to the Shaded Spruce mat and the one stamped with the Shaded Spruce sentiment to the Coastal Cabana mat using Snail.  I adhered the Shaded Spruce matted sentiment to the inside of the Cherry Cobbler card base and the Coastal Cabana matted sentiment to the inside of the Shaded Spruce card base using Multipurpose Liquid Glue.

To finish my cards I decorated a Medium Whisper White Envelope.  I stamped the polka dot cup image from the Cup of Christmas stamp set in Shaded Spruce Ink on the envelope front.  I adhered a panel of the Wrapped in Plaid DSP to the envelope flap.

For the other Medium Whisper White Envelope I stamped the snowflake image from the Frosted Foliage stamp set in Coastal Cabana Ink on the envelope front.  I adhered a panel of Let it Snow Specialty DSP to the envelope flap.

Thank you for stopping by my blog today.  I hope you liked my cards and will give them a try.  Let me know which one you like better.  The list of supplies are below along with the measurements if you’d like to stamp along while watching the video.  You can watch it on my Facebook page Here.

You can also view the video on my YouTube channel Here.  Happy Stamping!!

****************************************************************************************************

If you need any stamping supplies, I’d be very happy to be your Demonstrator. Just click HERE to go directly to my online store or drop me an email if you have any questions. 

MY CURRENT HOST CODE IS: 3F496G6J

For any orders $50 or more I will send you my monthly class tutorials.  Click HERE or go to my Customer Rewards to see what this months tutorials are.

Click HERE to shop the clearance rack.

Happy Stamping, Karen!

****************************************************************************************************

CHRISTMAS IS COMING EARLY THIS YEAR

AVAILABLE NOVEMBER 1ST, THE NEW CHRISTMASTIME IS HERE SUITE

We hope you’re ready to make this holiday season magical, because the Christmastime Is Here Suite is! This exclusive, limited-time collection of festive, floral coordinating products has everything you need to share love, joy, and creativity this holiday season.

Products from the Christmastime Is Here Suite will be available while supplies last only starting November 1st, 2019

Here’s a sneak peek video of what’s included in the suite.

****************************************************************************************************

WINTER WONDERS PAPER PUMPKIN

SUBSCRIBE TO PAPER PUMPKIN BY OCTOBER 10, 2019

Paper Pumpkin wants to help you share love and joy this Christmas with a duo of delightful, special-edition kits. October’s kit includes 10 traditional cards, while November’s kit features 24 can’t-miss tags. Put them together and you have everything you need to make the season bright.

There’s something about the holidays that brings out the crafter in all of us. Even non-crafters like making simple and fun projects to celebrate the season. And since “simple and fun” is Paper Pumpkin’s middle name, we have the perfect kits for you!

In October and November we are offering back-to-back coordinating kits, one with Christmas cards, the other with Christmas tags. Both kits make it easy for you to add a handmade, personal touch to your holiday giving—without a lot of fuss. It’s Christmas made easy with Paper Pumpkin!

October Kit

Coordinating colors: Early Espresso, Pool Party, Poppy Parade, and Shaded Spruce

November Kit

Coordinating colors: Early Espresso, Pool Party, Poppy Parade, and Shaded Spruce

The October and November kits coordinate; however, each kit is all-inclusive and can stand alone.

Click Here for more information and to subscribe to Paper Pumpkin.

****************************************************************************************************

I have gathered up a lot of retired Stamp Sets, Embossing Folders & Dies  and put a list together for anyone interested.  I have single Stamp Sets along with Stamp Sets bundled with Dies or Punches.  Take a look and see if there is anything that you missed out on getting and would still like.  Click Here to go to my list.

****************************************************************************************************

Card cuts and Products are for both cards

Card stock cuts for this project:

  • Cherry Cobbler Cardstock 8 1/2″ X 5 1/2″ (card base for scored and folded at 4 1/4″), 4 1/4″ X 5 1/2″ (card front)
  • Coastal Cabana Cardstock 4 1/8″ X 5 3/8″ (inner liner mat), 2 1/8″ X 4 1/4″ (card front DSP mat)
  • Flirty Flamingo Cardstock 2 1/4″ X 2 3/4″ (mug)
  • Night of Navy Cardstock 2 1/4″ X 2 3/4″ (mug)
  • Real Red Cardstock 2 1/4″ X 2 3/4″ (mug)
  • Shaded Spruce Cardstock 4 1/4″ X 11″ (card base scored and folded at 5 1/2″), 4 1/4″ X 5 1/2″ (card front), 4 1/8″ X 5 3/8″ (inner liner mat), 2 1/4″ X 2 3/4″ (mug), 2 1/4″ X 2 1/4″ (stripes on night of navy mug)
  • Smoky Slate Cardstock 3″ X 6″ (steam die from mugs)
  • Whisper White Cardstock 2 – 4″ X 5 1/4″ (inner liners)
  • Let It Snow Specialty Designer Series Paper 2″ X 4 1/4″ (card front strip), piece for envelope flap
  • Wrapped In Plaid Designer Series Paper 2″ X 4 1/4″ (card front strip), piece for envelope flap

****************************************************************************************************

Product List

Heat Tool*

Heat Tool*
[100005]
$29.95

Paper Snips

$10.00

Stamparatus

$49.00

Stampin’ Up! Everything Amazing for Fun Fold Friday

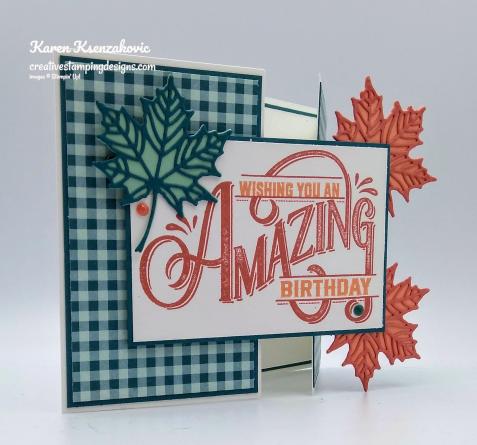
Good Friday morning my fellow stampers and welcome to Fun Fold Friday.  How was everyone’s week?  Are you ready for the weekend?  It’s here ready or not.  Is anyone making any plans?  Tomorrow is World Card Making Day, I hope you will be able to join my team in watching our Facebook Live videos.  They will be starting at 9am and continue until 9pm.  The link is below how to join or find us.

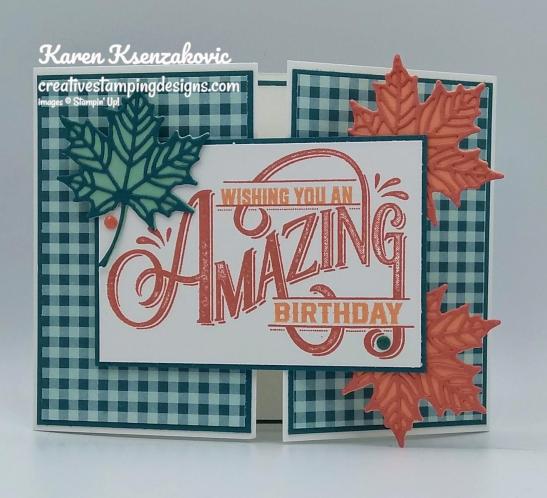
For today’s card I have a gate fold that I turned.  Here’s my card.

My colors were inspired by Hand Stamped Sentiments Challenge #324.  Here are their colors.

I started by adhering 2 panels of Come To Gather Designer Series Paper to Pretty Peacock mats using Snail.  I adhered both panels to the Whisper White card base using Multipurpose Liquid Glue.

On a panel of Whisper White cardstock I stamped the large image from the Stampin’ Up! Everything Amazing Photopolymer Stamp Set in Terracotta Tile Ink.  I stamped the 2 smaller sentiment from the Everything Amazing stamp set in Grapefruit Grove Ink on the larger image.  I adhered the artwork panel to a Pretty Peacock mat using Snail.  I cut leaves out using the Seasonal Layers Dies in Grapefruit Grove, Mint Macaron, Pretty Peacock and Terracotta Tile cardstocks.  I adhered the leaves to the artwork back and front using Glue Dots.  I added a couple 2019-2021 In-Color Faceted Dots to the artwork.

I adhered the artwork to the card front using Stampin’ Dimensionals only to the left half of the panel.

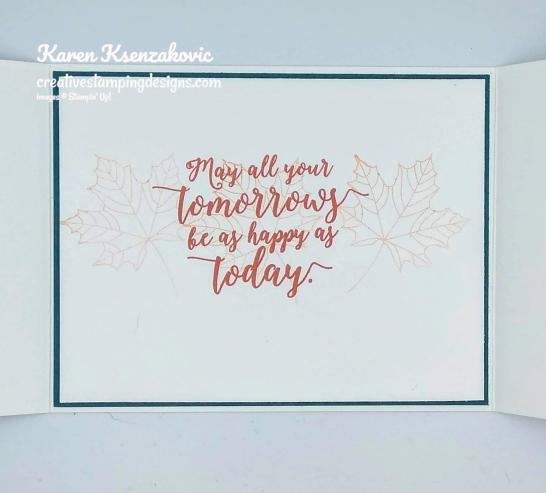
On the inside I stamped the sentiment from the Stampin’ Up! Colorful Seasons Photopolymer Stamp Set in Terracotta Tile Ink in the center of a Whisper White panel.  I stamped the leaf image from the Colorful Seasons stamp set in Grapefruit Grove Ink, stamping off once, on either side of the sentient and over the sentiment.  I adhered the Whisper White panel to a Pretty Peacock mat using Snail and then to the inside of the Whisper White card base using Multipurpose Liquid Glue.

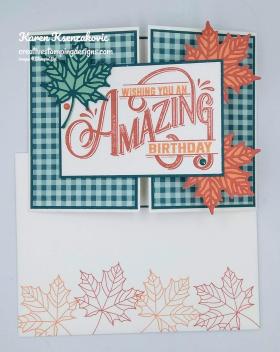
I finished my card by decorating a Medium Whisper White Envelope.  I stamped the leaf image from the Colorful Seasons stamp set in Grapefruit Grove and Terracotta Tile Ink across the bottom of the envelope front.  I adhered a panel of Come To Gather DSP to the envelope flap.

Thank you for stopping by my blog today.  I hope you liked my card and will give it a try.  Please don’t forget to hop on and watch us on our Facebook Lives videos tomorrow.  I will be going live at 4pm.  Happy Stamping!!

****************************************************************************************************

If you need any stamping supplies, I’d be very happy to be your Demonstrator. Just click HERE to go directly to my online store or drop me an email if you have any questions. 

MY CURRENT HOST CODE IS: 3F496G6J

For any orders $50 or more I will send you my monthly class tutorials.  Click HERE or go to my Customer Rewards to see what this months tutorials are.

Click HERE to shop the clearance rack.

Happy Stamping, Karen!

****************************************************************************************************

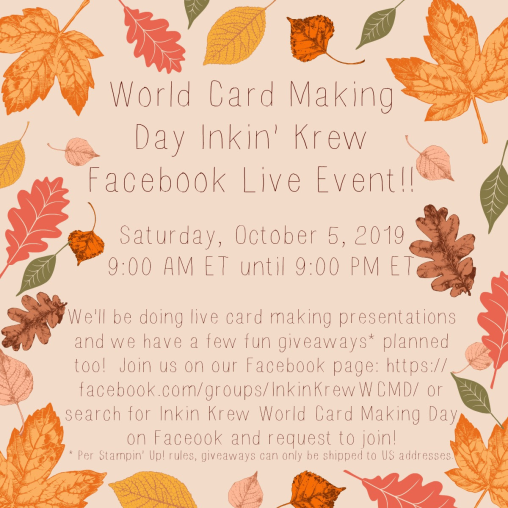
INKIN’ KREW WORLD CARD MAKING DAY FACEBOOK EVENT 

TOMORROW, SATURDAY OCTOBER 5TH

Save the date!!  You’re invited to attend a fun Facebook event on Saturday, October 5 to celebrate World Card Making Day!

Our team will be hosting a Facebook event that will run from about 9:00 AM ET until 9:00 PM ET with card making presentations and giveaways going all day long!!

I will be doing my live video at 4pm.

****************************************************************************************************

CHRISTMAS IS COMING EARLY THIS YEAR

AVAILABLE NOVEMBER 1ST, THE NEW CHRISTMASTIME IS HERE SUITE

We hope you’re ready to make this holiday season magical, because the Christmastime Is Here Suite is! This exclusive, limited-time collection of festive, floral coordinating products has everything you need to share love, joy, and creativity this holiday season.

Products from the Christmastime Is Here Suite will be available while supplies last only starting November 1st, 2019

Here’s a sneak peek video of what’s included in the suite.

****************************************************************************************************

WINTER WONDERS PAPER PUMPKIN

SUBSCRIBE TO PAPER PUMPKIN BY OCTOBER 10, 2019

Paper Pumpkin wants to help you share love and joy this Christmas with a duo of delightful, special-edition kits. October’s kit includes 10 traditional cards, while November’s kit features 24 can’t-miss tags. Put them together and you have everything you need to make the season bright.

There’s something about the holidays that brings out the crafter in all of us. Even non-crafters like making simple and fun projects to celebrate the season. And since “simple and fun” is Paper Pumpkin’s middle name, we have the perfect kits for you!

In October and November we are offering back-to-back coordinating kits, one with Christmas cards, the other with Christmas tags. Both kits make it easy for you to add a handmade, personal touch to your holiday giving—without a lot of fuss. It’s Christmas made easy with Paper Pumpkin!

October Kit

Coordinating colors: Early Espresso, Pool Party, Poppy Parade, and Shaded Spruce

November Kit

Coordinating colors: Early Espresso, Pool Party, Poppy Parade, and Shaded Spruce

The October and November kits coordinate; however, each kit is all-inclusive and can stand alone.

Click Here for more information and to subscribe to Paper Pumpkin.

****************************************************************************************************

I have gathered up a lot of retired Stamp Sets, Embossing Folders & Dies  and put a list together for anyone interested.  I have single Stamp Sets along with Stamp Sets bundled with Dies or Punches.  Take a look and see if there is anything that you missed out on getting and would still like.  Click Here to go to my list.

****************************************************************************************************

Card stock cuts for this project:

  • Pretty Peacock Cardstock 2 – 2 5/8″ X 4 1/8″ (card front mats), 3 7/8″ x 2 5/8″ (artwork mat), 4 1/8″ X 5 3/8″ (inner liner mat)
  • Whisper White Cardstock 4 1/4″ X 11″ (card base scored and folded at 2 3/4″ & 8 1/4″), 2 1/2″ X 3 3/4″ (artwork, 4″ X 5 1/4″ (inner liner)
  • Come To Gather Designer Series Paper 2 – 2 1/2″ X 4″ (card fronts), piece for envelope flap

****************************************************************************************************

Product List

Stampin’ Up! Well Written Wedding Card

Good Thursday morning my fellow stampers.  How has everyone’s week been going?  The weekend is right around the corner again and that means only 2 day’s till World Card Making Day.  Our team will be doing Facebook Live videos all day on Saturday starting at 9am and going until 9pm.  I hope you can join us, the link is listed below.  I will be doing my live video at 4pm, this will be my 1st Facebook Live.

For today’s card a friend asked me to make her a wedding card for this weekend.  I’ve seen cards made with the Puzzle Pieces Dies and I thought I’d put my own spin on it.  Here’s my card.

I played along with the Fab Friday Sketch Challenge #173.  Here is their sketch.

I started by embossing a Whisper White panel using the Scripty 3D Embossing Folder and adhered it to a Thick Whisper White card base using Multipurpose Liquid Glue.  I cut out 2 of the puzzle pieces using the Puzzle Pieces Die from a scrap of Thick Whisper White cardstock.  I wanted to make sure the puzzle pieces were a little sturdier, that’s why I used the thick cardstock.  I colored one of the pieces in using my Dark Basic Black Stampin’ Blends Marker.  I colored 3 Rhinestone Basic Jewels using my Dark Basic Black Stampin’ Blends Marker and added them to the puzzle piece, so it looked like buttons.  The other puzzle piece I left white and added Rhinestone Basic Jewels to the top to look like a necklace.

I cut the heart out of Sparkle Glimmer Paper using the Stitched Be Mine Dies.  I cut the ‘bride and groom’ sentiments out of Silver Foil Sheets using the Well Written Dies.  I adhered the puzzle pieces to the center of the heart using Stampin’ Dimensionals.  I adhered the bride on the top of the heart and groom on the bottom of the heart using Multipurpose Liquid Glue.

I adhered a piece of Silver 3/8″ Metallic-Edge Ribbon to the back of the heart using a Glue Dot.  I adhered the heart to the card front using Stampin’ Dimensionals.

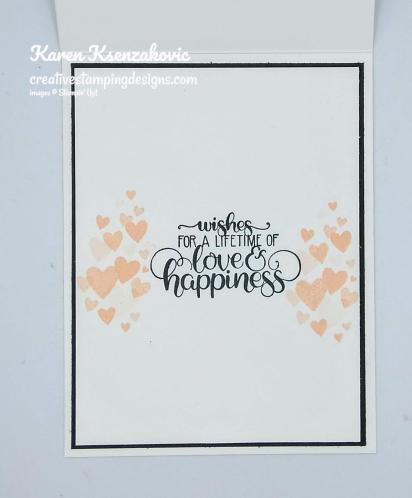
On the inside I stamped the sentiment from the Stampin’ Up! Dandelion Wishes Cling Stamp Set in Tuxedo Black Memento Ink in the center of a Whisper White panel.  I stamped the heart image from the Stampin’ Up! Forever Lovely Photopolymer Stamp Set in Petal Pink Ink on either side of the sentiment.  I adhered the Whisper White panel to a Basic Black mat using Snail and then to the inside of the Thick Whisper White card base using Multipurpose Liquid Glue.

To finish my card I decorated a Medium Whisper White Envelope.  I stamped the heart image from the Forever Lovely stamp set on the envelope front and envelope flap in Petal Pink Ink.

Thank you for stopping by my blog today.  I hope you liked my card and will give it a try. Happy Stamping!!

****************************************************************************************************

If you need any stamping supplies, I’d be very happy to be your Demonstrator. Just click HERE to go directly to my online store or drop me an email if you have any questions. 

MY CURRENT HOST CODE IS: 3F496G6J

For any orders $50 or more I will send you my monthly class tutorials.  Click HERE or go to my Customer Rewards to see what this months tutorials are.

Click HERE to shop the clearance rack.

Happy Stamping, Karen!

****************************************************************************************************

INKIN’ KREW WORLD CARD MAKING DAY FACEBOOK EVENT 

SATURDAY OCTOBER 5TH

Save the date!!  You’re invited to attend a fun Facebook event on Saturday, October 5 to celebrate World Card Making Day!

Our team will be hosting a Facebook event that will run from about 9:00 AM ET until 9:00 PM ET with card making presentations and giveaways going all day long!!

I will be doing my live video at 4pm.

****************************************************************************************************

CHRISTMAS IS COMING EARLY THIS YEAR

AVAILABLE NOVEMBER 1ST, THE NEW CHRISTMASTIME IS HERE SUITE

We hope you’re ready to make this holiday season magical, because the Christmastime Is Here Suite is! This exclusive, limited-time collection of festive, floral coordinating products has everything you need to share love, joy, and creativity this holiday season.

Products from the Christmastime Is Here Suite will be available while supplies last only starting November 1st, 2019

Here’s a sneak peek video of what’s included in the suite.

****************************************************************************************************

WINTER WONDERS PAPER PUMPKIN

SUBSCRIBE TO PAPER PUMPKIN BY OCTOBER 10, 2019

Paper Pumpkin wants to help you share love and joy this Christmas with a duo of delightful, special-edition kits. October’s kit includes 10 traditional cards, while November’s kit features 24 can’t-miss tags. Put them together and you have everything you need to make the season bright.

There’s something about the holidays that brings out the crafter in all of us. Even non-crafters like making simple and fun projects to celebrate the season. And since “simple and fun” is Paper Pumpkin’s middle name, we have the perfect kits for you!

In October and November we are offering back-to-back coordinating kits, one with Christmas cards, the other with Christmas tags. Both kits make it easy for you to add a handmade, personal touch to your holiday giving—without a lot of fuss. It’s Christmas made easy with Paper Pumpkin!

October Kit

Coordinating colors: Early Espresso, Pool Party, Poppy Parade, and Shaded Spruce

November Kit

Coordinating colors: Early Espresso, Pool Party, Poppy Parade, and Shaded Spruce

The October and November kits coordinate; however, each kit is all-inclusive and can stand alone.

Click Here for more information and to subscribe to Paper Pumpkin.

****************************************************************************************************

I have gathered up a lot of retired Stamp Sets, Embossing Folders & Dies  and put a list together for anyone interested.  I have single Stamp Sets along with Stamp Sets bundled with Dies or Punches.  Take a look and see if there is anything that you missed out on getting and would still like.  Click Here to go to my list.

****************************************************************************************************

Card stock cuts for this project:

  • Basid Black Cardstock 4″ X 5 1/4″ (inner liner mat)
  • Whisper White Cardstock 4 1/4″ X 5 1/2″ (card front), 3 7/8″ X 5 1/8″ (inner liner)
  • Thick Whisper White Cardstock 4 1/4″ X 11″ (card base scored and folded at 5 1/2″), scrap for puzzle pieces
  • Sparkle Glimmer Paper 4″ X 4″ (heart on card front)
  • Silver Foil Sheet 1″ X 5″ (cut out sentiment)

****************************************************************************************************

Product List

Stampin’ Up! Country Home CAS Thank You

Good Wednesday morning my fellow stampers.  We’re already half way through the week.  I finally have a day off, my 1st day off in about 3 weeks.  I’m so looking forward to spending some time at my craft table after I’m done with my errands.  I’m also going to decide if I’m going to join my team in doing a Facebook Live video this Saturday for World Card Making Day.  Part of me wants to  and the other part is so nervous.  There’s a link below to join in and watch everyone do their card making on Facebook.

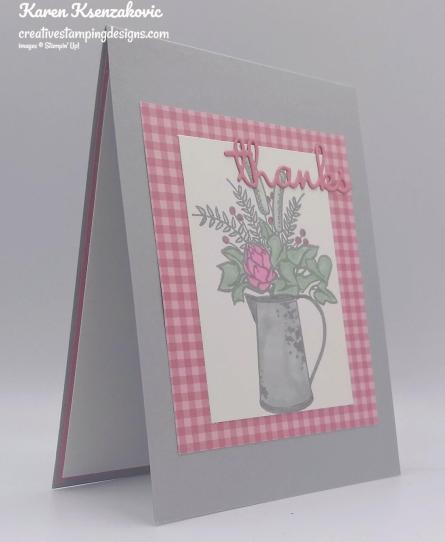
For today’s card I pulled out an older set to make you a clean and simple thank you card.  I will apologize now for my photos.  For some reason Smoky Slate doesn’t photograph well.  Here’s my card.

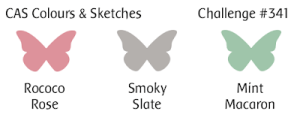
I played along with a couple challenges today.  I joined in with the CAS Colours & Sketch Challenge #341.  Here are their colors this week.

I also joined in with Sunday Stamps Sketch Challenge #214.  Here is their sketch.

I started by stamping the pitcher image from the Stampin’ Up! Country Home Photopolymer Stamp Set in Smoky Slate Ink on a Whisper White panel.  I stamped the floral image from the Country Home stamp set in Smoky Slate Ink above the pitcher.  I colored the image in using my Mint Macaron, Rococo Rose and Smoky Slate Stampin’ Blends Markers.

I adhered the artwork to a panel of Rococo Rose 2019-2021 In-Color Designer Series Paper using Snail.  I then adhered it to the card base using Snail.

I cut out the ‘thanks’ from a scrap of Rococo Rose cardstock using the Well Written Dies.  I adhered the sentiment to the card front using Multipurpose Liquid Glue.

On the inside I stamped the floral image from the Country Home stamp set in Smoky Slate Ink, stamping off twice, in the center of a Whisper White panel.  I stamped the sentiment from the Country Home stamp set in Smoky Slate Ink over the floral image.  I adhered the Whisper White panel to a Rococo Rose mat using Snail and then to the inside of the Smoky Slate card base using Multipurpose Liquid Glue.

To finish my card I decorated a Medium Whisper White Envelope.  I stamped the floral image from the Country Home stamp set in Smoky Slate Ink on the envelope front and colored it in the same as I did for the card front.  I adhered a panel of the Rococo Rose 2019-2021 In-Colors DSP to the envelope flap.

Thank you for visiting my blog today.  I hope you liked my quick and easy card and will give it a try.

Happy Stamping!!

****************************************************************************************************

If you need any stamping supplies, I’d be very happy to be your Demonstrator. Just click HERE to go directly to my online store or drop me an email if you have any questions. 

MY CURRENT HOST CODE IS: 3F496G6J

For any orders $50 or more I will send you my monthly class tutorials.  Click HERE or go to my Customer Rewards to see what this months tutorials are.

Click HERE to shop the clearance rack.

Happy Stamping, Karen!

****************************************************************************************************

INKIN’ KREW WORLD CARD MAKING DAY FACEBOOK EVENT 

SATURDAY OCTOBER 5TH

Save the date!!  You’re invited to attend a fun Facebook event on Saturday, October 5 to celebrate World Card Making Day!

Our team will be hosting a Facebook event that will run from about 9:00 AM ET until 9:00 PM ET with card making presentations and giveaways going all day long!!

More details and a link to join are coming soon, but put a note on your calendar to spend the day crafting with us!  See you all then!

****************************************************************************************************

CHRISTMAS IS COMING EARLY THIS YEAR

AVAILABLE NOVEMBER 1ST, THE NEW CHRISTMASTIME IS HERE SUITE

We hope you’re ready to make this holiday season magical, because the Christmastime Is Here Suite is! This exclusive, limited-time collection of festive, floral coordinating products has everything you need to share love, joy, and creativity this holiday season.

Products from the Christmastime Is Here Suite will be available while supplies last only starting November 1st, 2019

Here’s a sneak peek video of what’s included in the suite.

****************************************************************************************************

WINTER WONDERS PAPER PUMPKIN

SUBSCRIBE TO PAPER PUMPKIN BY OCTOBER 10, 2019

Paper Pumpkin wants to help you share love and joy this Christmas with a duo of delightful, special-edition kits. October’s kit includes 10 traditional cards, while November’s kit features 24 can’t-miss tags. Put them together and you have everything you need to make the season bright.

There’s something about the holidays that brings out the crafter in all of us. Even non-crafters like making simple and fun projects to celebrate the season. And since “simple and fun” is Paper Pumpkin’s middle name, we have the perfect kits for you!

In October and November we are offering back-to-back coordinating kits, one with Christmas cards, the other with Christmas tags. Both kits make it easy for you to add a handmade, personal touch to your holiday giving—without a lot of fuss. It’s Christmas made easy with Paper Pumpkin!

October Kit

Coordinating colors: Early Espresso, Pool Party, Poppy Parade, and Shaded Spruce

November Kit

Coordinating colors: Early Espresso, Pool Party, Poppy Parade, and Shaded Spruce

The October and November kits coordinate; however, each kit is all-inclusive and can stand alone.

Click Here for more information and to subscribe to Paper Pumpkin.

****************************************************************************************************

I have gathered up a lot of retired Stamp Sets, Embossing Folders & Dies  and put a list together for anyone interested.  I have single Stamp Sets along with Stamp Sets bundled with Dies or Punches.  Take a look and see if there is anything that you missed out on getting and would still like.  Click Here to go to my list.

****************************************************************************************************

Card stock cuts for this project:

  • Rococo Rose Cardstock 4 1/8″ X 5 3/8″ (inner liner mat)
  • Smoky Slate Cardstock 4 1/4″ X 11″ (card base scored and folded at 5 1/2″)
  • Whisper White Cardstock 3 3/8″ X 2 1/2″ (artwork), 4″ X 5 1/4″ (inner liner)
  • 2019-2021 In-Color Designer Series Paper 3 1/2″ X 4″ (card front), piece for envelope flap

****************************************************************************************************

Product List

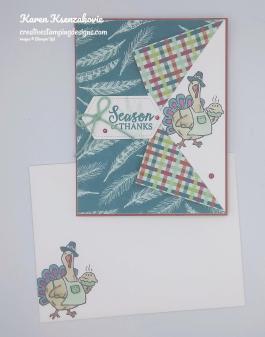
Stampin’ Up! Birds of a Feather Thanksgiving for Fun Fold Friday

Good Friday morning my fellow stampers and welcome to Fun Fold Friday.  How was everyone’s week? Are you ready for the weekend?  I hope you are making some fun plans.  I love this time of year when the air is a little cooler and the leaves are starting to change.  We’re having nice cool nights and very pleasant days right now.

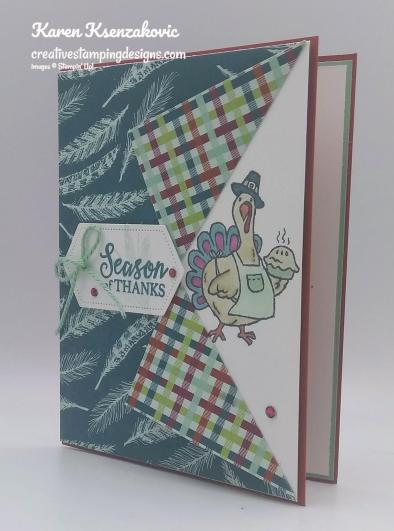
For today I have a quick fun fold for you.  Actually the only part that has the fold is the Designer Series Paper.  Here’s my card.

My colors were inspired by the Fab Friday Challenge #172.  Here are their colors. Love these gorgeous fall colors.

I started out by folding my Come To Gather Designer Series Paper.  On the 5 3/8″ side I cut up 2″ at the 2 11/16″ mark.  I scored from each of the corners on an angle to the cut line and folded on the scored lines.

On the right center edge of Whisper White cardstock I stamped the turkey image from the Stampin’ Up! Birds of a Feather Cling Stamp Set in Tuxedo Black Memento Ink.  I colored the turkey image in using my Blackberry Bliss, Cajun Craze, Crumb Cake, Mint Macaron and Pretty Peacock Stampin’ Blends Markers.  I adhered the folded DSP to the Whisper White panel using Multipurpose Liquid Glue.  I adhered the card front to a Cajun Craze  card base using Stampin’ Dimensionals.

On a small piece of Whisper White cardstock I stamped the sentiment from the Stampin’ Up! Gather Together Photopolymer Stamp Set in Pretty Peacock Ink.  I stamped the wheat image from the Gather Together stamp set in Mint Macaron Ink, stamping off once, over the sentiment.  I cut the sentiment out using the Stitched Nested Dies and adhered it to the card front using Stampin’ Dimensionals.  I added a small bow that I made from the Mint Macaron Nature’s Twine using a Glue Dot.  I added a few Rhinestone Basic Jewels that I colored using my Dark Blackberry Bliss Stampin’ Blend Marker.

On the inside I stamped the sentiment from the Gather Together stamp set in Pretty Peacock Ink in the center of a Whisper White panel.  I stamped the wheat image from the Gather Together stamp set in Mint Macaron Ink, stamping off once, over the sentiment.  I stamped the turkey image from the Birds of a Feather stamp set in Tuxedo Black Memento Ink on the bottom of the Whisper White panel.  I colored the turkey in the same as I did for the card front.  I adhered the Whisper White panel to a Mint Macaron mat using Snail and then to the inside of the Cajun Craze card base using Multipurpose Liquid Glue.

To finish my card I decorated a Medium Whisper White Envelope. I stamped the turkey image from the Birds of a Feather stamp set in Tuxedo Black Memento Ink on the envelope front.  I colored the turkey in the same as I did for the card front.  I adhered a panel of the Come To Gather DSP to the envelope flap.

Thank you for stopping by my blog today.  I hope you liked my card and will give it a try. I hope you all have a fun filled weekend.  See you Monday. Happy Stamping!!

****************************************************************************************************

If you need any stamping supplies, I’d be very happy to be your Demonstrator. Just click HERE to go directly to my online store or drop me an email if you have any questions. 

MY CURRENT HOST CODE IS: ADFAXYQE

For any orders $50 or more I will send you my monthly class tutorials.  Click HERE or go to my Customer Rewards to see what this months tutorials are.

Click HERE to shop the clearance rack.

Happy Stamping, Karen!

****************************************************************************************************

BUY 3 GET 1 FREE DESIGNER SERIES PAPER IS BACK BY POPULAR DEMAND

SEPTEMBER 4, 2019 THROUGH SEPTEMBER 30, 2019

By popular demand, Stampin’ Up! is bringing back the Designer Series Paper Sale! During September (4TH–30TH), you can buy three packages of select Designer Series Paper, and get one FREE!

Here are the details:

  • Sale Dates:  September 4–30
    • Order Deadline:  September 30, 2019; 11:50 pm (MT)
  • Only Designer Series Papers listed in the table below qualify for this promotion. You may mix and match papers from any of the listed papers.
  • There is no limit to how many times participants can buy three packages of Designer Series Paper, and get one free during this sale.
  • In the online ordering system, when three qualifying Designer Series Paper packs are entered, a prompt to add a free Designer Series Paper will appear.
  • In the online store, if a you order four packages of the same qualifying Designer Series Paper, you will need to enter three together and then order the fourth free item separately.
  • Designer Series Paper ordered as part of a Starter Kit does not qualify for this sale.
  • Designer Series Paper ordered with Stampin’ Rewards does not qualify for this sale.

Here are the Designer Series Paper Packs included in the sale:

ITEM PAGE DESCRIPTION PRICE
149100 166 PERENNIAL ESSENCE DESIGNER SERIES PAPER $11.50
149443 166 SEE A SILHOUETTE DESIGNER SERIES PAPER $11.50
149481 167 COME SAIL AWAY DESIGNER SERIES PAPER $11.50
149484 165 MAGNOLIA LANE DESIGNER SERIES PAPER $11.50
149488 165 GARDEN LANE DESIGNER SERIES PAPER $11.50
149489 165 FOLLOW YOUR ART DESIGNER SERIES PAPER $11.50
149497 165 WOVEN THREADS DESIGNER SERIES PAPER $11.50
149589 166 DINOROAR DESIGNER SERIES PAPER $11.50
149592 166 BIRD BALLAD DESIGNER SERIES PAPER $11.50
149500 167 PRESSED PETALS SPECIALTY DESIGNER SERIES PAPER $14.50

****************************************************************************************************

WINTER WONDERS PAPER PUMPKIN

SUBSCRIBE TO PAPER PUMPKIN BY OCTOBER 10, 2019

Paper Pumpkin wants to help you share love and joy this Christmas with a duo of delightful, special-edition kits. October’s kit includes 10 traditional cards, while November’s kit features 24 can’t-miss tags. Put them together and you have everything you need to make the season bright.

There’s something about the holidays that brings out the crafter in all of us. Even non-crafters like making simple and fun projects to celebrate the season. And since “simple and fun” is Paper Pumpkin’s middle name, we have the perfect kits for you!

In October and November we are offering back-to-back coordinating kits, one with Christmas cards, the other with Christmas tags. Both kits make it easy for you to add a handmade, personal touch to your holiday giving—without a lot of fuss. It’s Christmas made easy with Paper Pumpkin!

October Kit

Coordinating colors: Early Espresso, Pool Party, Poppy Parade, and Shaded Spruce

November Kit

Coordinating colors: Early Espresso, Pool Party, Poppy Parade, and Shaded Spruce

The October and November kits coordinate; however, each kit is all-inclusive and can stand alone.

Click Here for more information and to subscribe to Paper Pumpkin.

****************************************************************************************************

I have gathered up a lot of retired Stamp Sets, Embossing Folders & Dies  and put a list together for anyone interested.  I have single Stamp Sets along with Stamp Sets bundled with Dies or Punches.  Take a look and see if there is anything that you missed out on getting and would still like.  Click Here to go to my list.

****************************************************************************************************

Card stock cuts for this project:

  • Cajun Craze Cardstock 8 1/2″ X 5 1/2″ (card base scored and folded at 4 1/4″)
  • Mint Macaron Cardstock 4 1/8″ X 5 3/8″ (inner liner mat)
  • Whisper White Cardstock 4 1/8″ X 5 3/8″ (card front), 4″ X 5 1/4″ (inner liner)
  • Come To Gather Designer Series Paper 4 1/8″ X 5 3/8″ (card front), piece for envelope flap

****************************************************************************************************

Product List

Stampin’ Up! Free Skate Christmas Card and Mini Curvy Keepsakes Box

Good Thursday morning my fellow stampers.  We’re almost through another week and before you know it the weekend will be here.

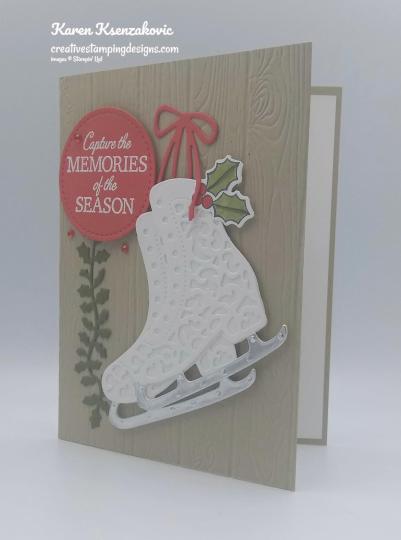
For today I have a couple projects to share with you that we made at our team meeting on Sunday.  Our team leader, Amy, comes up with the cutest ideas.  Both projects were 100% her designs.  First we made a Christmas card using the Stampin’ Up! Free Skate Bundle.  After making this card I am definitely going to purchase this set for myself.  It’s so much nicer in person than it is in the catalog.  Here’s the card we made.

I started by embossing a panel of Crumb Cake cardstock using the Pinewood Planks 3D Embossing Folder.  I adhered the card front to a Crumb Cake card base using Multipurpose Liquid Glue.  I stamped the sentiment from the Stampin’ Up! Free Skate Cling Stamp Set in Versamark Ink on a Poppy Parade panel.  I immediately sprinkled it with White Stampin’ Emboss Powder and set it using the Heat Tool.  I cut the sentiment out using the stitched circle from the Stitched Shapes Dies and the bow using the Detailed Skates Dies from the panel of Po9ppy Parade cardstock.  I cut the strip of holly leaves out of Mossy Meadow cardstock using the Detailed Skates Dies.  I cut 2 of the solid ice skates out and 2 of the detailed ice skates out using the Detailed Skates Dies from the Whisper White panel.  I cut 2 of the ice skate blades out of the Silver Foil Sheet using the Detailed Skates Dies.  I stamped the holly and berry image from the Free Skate stamp set in Tuxedo Black Memento Ink and colored it in using Old Olive and Poppy Parade Stampn’ Blends Markers.  I cut the holly image out using the Detailed Skates Dies.

To assemble everything, I adhered the detailed skate to the solid skate using Multipurpose Liquid Glue.  I adhered the  blades to the bottom of the skates using Multipurpose Liquid Glue.  I adhered the skates to the card front using Stampin’ Dimensionals and Multipurpose Liquid Glue.  I adhered the Holly to the skate using Multipurpose Liquid Glue.  I adhered the bow above the skates on the card front using Multipurpose Liquid Glue.

I adhered the strip of Holy leaves to the left of the skates using Multipurpose Liquid Glue and the sentiment circle above the holly using Stampin’ Dimensionals.  I added a few Red Rhinestones Basic Jewels to the card front.

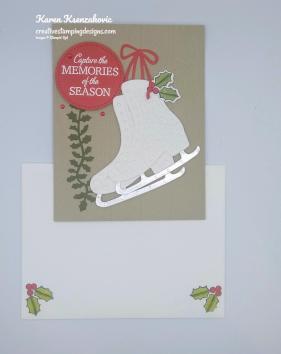
On the inside I stamped the sentiment from the Free Skate stamp set in Crumb Cake Ink on a Whisper White panel.  I stamped the holly and berry image from the Free Skate stamp set in Tuxedo Black Memento Ink by the sentiment and colored it in using my Old Olive and Poppy Parade Stampin’ Blends Markers.  I adhered the Whisper White panel to the inside of the Crumb Cake card base using Multipurpose Liquid Glue.

To finish my card I decorated a Medium Whisper White Envelope by stamping the Holly and Berry image from the Free Skate stamp set in Tuxedo Black Memento Ink on the envelope front and flap.  I colored them in using my Old Olive and Poppy Parade Stampin’ Blends Markers.

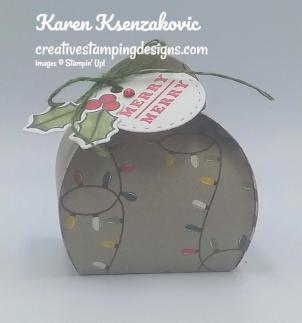
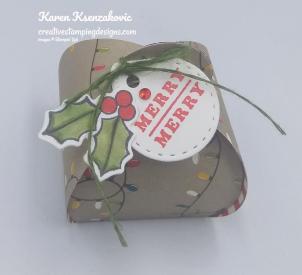
The other project we made at our team meeting was this adorable Mini Curvy Keepsakes Box.

Everyone got to choose the Designer Series Paper we wanted to use.  This adorable little box is cut from one sheet of the Night Before Christmas 6 X 6 Designer Series Paper Stack using the Mini Curvy Keepsakes Box Dies.  It was so simple to put together too.  Fold up the sides and it’s done.  These boxed would make great little favors that you can fill with candy or a little keepsake.

The only stamping on this was the tag and holly berry image.  We stamped the holly and berry image from the Free Skate stamp set in Tuxedo Black Memento Ink on a scrap of Whisper White cardstock.  We colored it in using the Old Olive and Poppy Parade Stampin’ Blends Markers and cut it out using the Detailed Skates Dies.  For the tag, we stamped the sentiment from the Stampin’ Up! Tiny Keepsakes Cling Stamp Set in Poppy Parade Ink on a scrap of Whisper White cardstock and cut it out using the Mini Curvy Keepsakes Box Dies.  We adhered the holly and berry to the tag using a Glue Dot and tied the tag to the box using some Mossy Meadow Linen Thread from the Magnolia Lane Ribbon Combo Pack.

Thank you for visiting my blog today.  I hope you liked the projects that I shared with you.  I had a lot of fun making both projects and what made it even more fun was stamping with Team Members and friends. It’s great being a part of this team.  If you’re interested in joining our team, please contact me for more information.  I’d love to have you join us.  Happy Stamping!

****************************************************************************************************

If you need any stamping supplies, I’d be very happy to be your Demonstrator. Just click HERE to go directly to my online store or drop me an email if you have any questions. 

MY CURRENT HOST CODE IS: ADFAXYQE

For any orders $50 or more I will send you my monthly class tutorials.  Click HERE or go to my Customer Rewards to see what this months tutorials are.

Click HERE to shop the clearance rack.

Happy Stamping, Karen!

****************************************************************************************************

BUY 3 GET 1 FREE DESIGNER SERIES PAPER IS BACK BY POPULAR DEMAND

SEPTEMBER 4, 2019 THROUGH SEPTEMBER 30, 2019

By popular demand, Stampin’ Up! is bringing back the Designer Series Paper Sale! During September (4TH–30TH), you can buy three packages of select Designer Series Paper, and get one FREE!

Here are the details:

  • Sale Dates:  September 4–30
    • Order Deadline:  September 30, 2019; 11:50 pm (MT)
  • Only Designer Series Papers listed in the table below qualify for this promotion. You may mix and match papers from any of the listed papers.
  • There is no limit to how many times participants can buy three packages of Designer Series Paper, and get one free during this sale.
  • In the online ordering system, when three qualifying Designer Series Paper packs are entered, a prompt to add a free Designer Series Paper will appear.
  • In the online store, if a you order four packages of the same qualifying Designer Series Paper, you will need to enter three together and then order the fourth free item separately.
  • Designer Series Paper ordered as part of a Starter Kit does not qualify for this sale.
  • Designer Series Paper ordered with Stampin’ Rewards does not qualify for this sale.

Here are the Designer Series Paper Packs included in the sale:

ITEM PAGE DESCRIPTION PRICE
149100 166 PERENNIAL ESSENCE DESIGNER SERIES PAPER $11.50
149443 166 SEE A SILHOUETTE DESIGNER SERIES PAPER $11.50
149481 167 COME SAIL AWAY DESIGNER SERIES PAPER $11.50
149484 165 MAGNOLIA LANE DESIGNER SERIES PAPER $11.50
149488 165 GARDEN LANE DESIGNER SERIES PAPER $11.50
149489 165 FOLLOW YOUR ART DESIGNER SERIES PAPER $11.50
149497 165 WOVEN THREADS DESIGNER SERIES PAPER $11.50
149589 166 DINOROAR DESIGNER SERIES PAPER $11.50
149592 166 BIRD BALLAD DESIGNER SERIES PAPER $11.50
149500 167 PRESSED PETALS SPECIALTY DESIGNER SERIES PAPER $14.50

****************************************************************************************************

WINTER WONDERS PAPER PUMPKIN

SUBSCRIBE TO PAPER PUMPKIN BY OCTOBER 10, 2019

Paper Pumpkin wants to help you share love and joy this Christmas with a duo of delightful, special-edition kits. October’s kit includes 10 traditional cards, while November’s kit features 24 can’t-miss tags. Put them together and you have everything you need to make the season bright.

There’s something about the holidays that brings out the crafter in all of us. Even non-crafters like making simple and fun projects to celebrate the season. And since “simple and fun” is Paper Pumpkin’s middle name, we have the perfect kits for you!

In October and November we are offering back-to-back coordinating kits, one with Christmas cards, the other with Christmas tags. Both kits make it easy for you to add a handmade, personal touch to your holiday giving—without a lot of fuss. It’s Christmas made easy with Paper Pumpkin!

October Kit

Coordinating colors: Early Espresso, Pool Party, Poppy Parade, and Shaded Spruce

November Kit

Coordinating colors: Early Espresso, Pool Party, Poppy Parade, and Shaded Spruce

The October and November kits coordinate; however, each kit is all-inclusive and can stand alone.

Click Here for more information and to subscribe to Paper Pumpkin.

****************************************************************************************************

I have gathered up a lot of retired Stamp Sets, Embossing Folders & Dies  and put a list together for anyone interested.  I have single Stamp Sets along with Stamp Sets bundled with Dies or Punches.  Take a look and see if there is anything that you missed out on getting and would still like.  Click Here to go to my list.

****************************************************************************************************

Card stock cuts for this project:

  • Crumb Cake Cardstock 8 1/2″ X 5 1/2″ (card base scored and folded at 4 1/4″), 4 1/4″ X 5 1/2″ (card front)
  • Mossy Meadow Cardstock 5″ X 1 1/4″ (holly leaf strip)
  • Poppy Parade Cardstock 2 1/2″ X 3 1/2″ (stitched circle and bow)
  • Whisper White Cardstock 4″ X 5 1/4″ (inner liner), 8 1/2″ X 5 1/2″ (skates, holly & tag on curvy box)
  • Silver Foil Sheet 6″ X 1″ (skate blades)
  • Night Before Christmas 6 X 6 Designer Series Paper 6″ X 6 ” (mini curvy box)

****************************************************************************************************

Product List

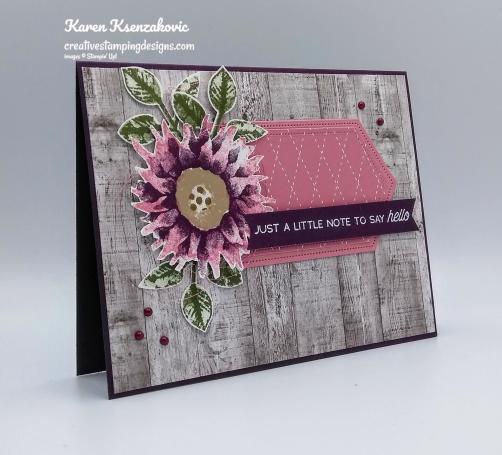
Stampin’ Up! Painted Harvest Card

Good Wednesday morning my fellow stampers.  We made it half way through the week already.  Hope your week is going well.

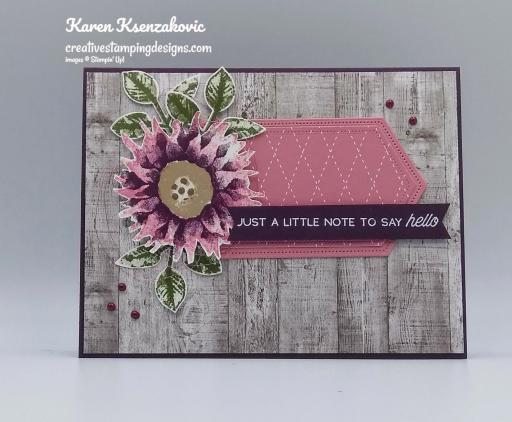
For today’s card I used one of my favorite stamp sets to create a different sunflower.  I’m not quite sure what I was thinking when I decided to fussy cut the whole sunflower out, but I did it.   Here’s my card.

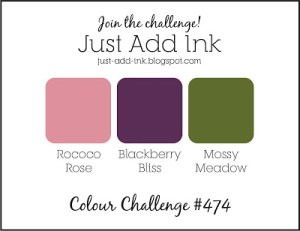
My colors were inspired by Just Add Ink Challenge #474.  Here are their colors.

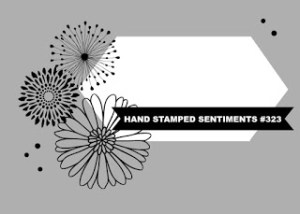
My design was inspired by Hand Stamped Sentiments Challenge #323.  Here is their sketch.

I started by adhering a panel of Come To Gather Designer Series Paper to a Blackberry Bliss card base using Multipurpose Liquid Glue.  I cut 2 of the Stitched Nested Labels Dies out, one in Rococo Rose cardstock and the other a size smaller in the Rococo Rose 2019-2021 In-Colors 6 X 6 Designer Series Paper.  I adhered the DSP label to the Rococo Rose label using Snail and then to the card front using Multipurpose Liquid Glue.

On a small Whisper White panel I stamped the 1st part of the sunflower image from the Stampin’ Up! Painted Harvest Photopolymer Stamp Set in Rococo Rose Ink.  I stamped the 2nd step of the sunflower from the Painted Harvest stamp set in Blackberry Bliss Ink over the 1st image.  I stamped the sunflower center image from the Painted Harvest stamp set in Crumb Cake Ink.  I stamped the sunflower seed image from the Painted Harvest stamp set in Soft Suede Ink.  I then fussy cut the sunflower out using my Paper Snips.  I adhered Stampin’ Dimensionals. to the back of the sunflower and added some of the Rose Metallic Thread to it so that it was sneaking out all around the sunflower.  I adhered the sunflower to the card front.  I stamped 3 of the leaf images from the Painted Harvest stamp set on a small panel of Whisper White cardstock.  I stamped the detailed leaf image in Mossy Meadow Ink and the fill in leaf image in Mossy Meadow Ink stamping off once.  I punched the leaves out using my Leaf Punch.  I adhered the leaves under the sunflower using Glue Dots.

On a strip of Blackberry Bliss cardstock I stamped the sentiment from the Stampin’ Up! A Little Lace Cling Stamp Set in Versamark Ink.  I immediately sprinkled it with White Stampin’ Emboss Powder and set it using my Heat Tool.  I made a banner of the sentiment strip.  I adhered the sentiment to the card front using Mini Stampin’ Dimensionals.  I added some Pearl Basic Jewels that I had colored in using my Dark Blackberry Bliss Stampin’ Blend Marker.

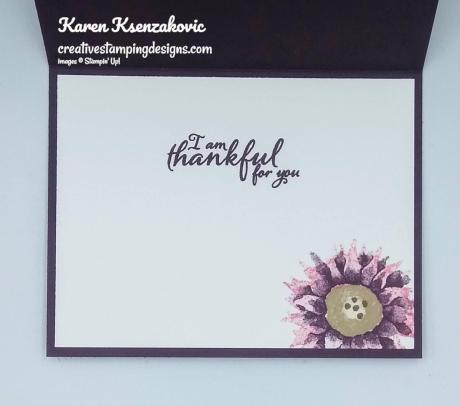
On the inside I stamped the sunflower image from the Painted Harvest stamp set, the same as I did for the card front, on the bottom corner of a Whisper White panel.  I stamped the sentiment from the Painted Harvest stamp set in the center of the Whisper White panel in Blackberry Bliss Ink.  I adhered the Whisper White panel to the inside of the Blackberry Bliss card base using Multipurpose Liquid Glue.

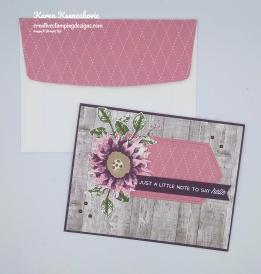
To finish my card I decorated a Medium Whisper White Envelope.  I stamped the sunflower image from the Painted Harvest stamp set on the front of the envelope the same as I did for the card front.  I adhered a panel of the 2019-2021 In-Color 6 X 6 DSP to the envelope flap.

Thank you for visiting my blog today.  I hope you liked my card and will give it a try. Happy Stamping!!

****************************************************************************************************

If you need any stamping supplies, I’d be very happy to be your Demonstrator. Just click HERE to go directly to my online store or drop me an email if you have any questions. 

MY CURRENT HOST CODE IS: ADFAXYQE

For any orders $50 or more I will send you my monthly class tutorials.  Click HERE or go to my Customer Rewards to see what this months tutorials are.

Click HERE to shop the clearance rack.

Happy Stamping, Karen!

****************************************************************************************************

BUY 3 GET 1 FREE DESIGNER SERIES PAPER IS BACK BY POPULAR DEMAND

SEPTEMBER 4, 2019 THROUGH SEPTEMBER 30, 2019

By popular demand, Stampin’ Up! is bringing back the Designer Series Paper Sale! During September (4TH–30TH), you can buy three packages of select Designer Series Paper, and get one FREE!

Here are the details:

  • Sale Dates:  September 4–30
    • Order Deadline:  September 30, 2019; 11:50 pm (MT)
  • Only Designer Series Papers listed in the table below qualify for this promotion. You may mix and match papers from any of the listed papers.
  • There is no limit to how many times participants can buy three packages of Designer Series Paper, and get one free during this sale.
  • In the online ordering system, when three qualifying Designer Series Paper packs are entered, a prompt to add a free Designer Series Paper will appear.
  • In the online store, if a you order four packages of the same qualifying Designer Series Paper, you will need to enter three together and then order the fourth free item separately.
  • Designer Series Paper ordered as part of a Starter Kit does not qualify for this sale.
  • Designer Series Paper ordered with Stampin’ Rewards does not qualify for this sale.

Here are the Designer Series Paper Packs included in the sale:

ITEM PAGE DESCRIPTION PRICE
149100 166 PERENNIAL ESSENCE DESIGNER SERIES PAPER $11.50
149443 166 SEE A SILHOUETTE DESIGNER SERIES PAPER $11.50
149481 167 COME SAIL AWAY DESIGNER SERIES PAPER $11.50
149484 165 MAGNOLIA LANE DESIGNER SERIES PAPER $11.50
149488 165 GARDEN LANE DESIGNER SERIES PAPER $11.50
149489 165 FOLLOW YOUR ART DESIGNER SERIES PAPER $11.50
149497 165 WOVEN THREADS DESIGNER SERIES PAPER $11.50
149589 166 DINOROAR DESIGNER SERIES PAPER $11.50
149592 166 BIRD BALLAD DESIGNER SERIES PAPER $11.50
149500 167 PRESSED PETALS SPECIALTY DESIGNER SERIES PAPER $14.50

****************************************************************************************************

WINTER WONDERS PAPER PUMPKIN

SUBSCRIBE TO PAPER PUMPKIN BY OCTOBER 10, 2019

Paper Pumpkin wants to help you share love and joy this Christmas with a duo of delightful, special-edition kits. October’s kit includes 10 traditional cards, while November’s kit features 24 can’t-miss tags. Put them together and you have everything you need to make the season bright.

There’s something about the holidays that brings out the crafter in all of us. Even non-crafters like making simple and fun projects to celebrate the season. And since “simple and fun” is Paper Pumpkin’s middle name, we have the perfect kits for you!

In October and November we are offering back-to-back coordinating kits, one with Christmas cards, the other with Christmas tags. Both kits make it easy for you to add a handmade, personal touch to your holiday giving—without a lot of fuss. It’s Christmas made easy with Paper Pumpkin!

October Kit

Coordinating colors: Early Espresso, Pool Party, Poppy Parade, and Shaded Spruce

November Kit

Coordinating colors: Early Espresso, Pool Party, Poppy Parade, and Shaded Spruce

The October and November kits coordinate; however, each kit is all-inclusive and can stand alone.

Click Here for more information and to subscribe to Paper Pumpkin.

****************************************************************************************************

I have gathered up a lot of retired Stamp Sets, Embossing Folders & Dies  and put a list together for anyone interested.  I have single Stamp Sets along with Stamp Sets bundled with Dies or Punches.  Take a look and see if there is anything that you missed out on getting and would still like.  Click Here to go to my list.

****************************************************************************************************

Card stock cuts for this project:

  • Blackberry Bliss Cardstock 8 1/2″ X 5 1/2″ (card base scored and folded at 4 1/4″), 1/2″ X 3 1/4″ (sentiment strip)
  • Rococo Rose Cardstock 4 1/2″ X 2 1/2″ (small dsp mat on card front)
  • Whisper  White Cardstock 4″ X 5 1/4″ (inner liner)
  • Come To Gather Designer series Paper 4 1/8″ X 5 3/8″ (card front)
  • 2019-2021 In-Colors Designer series Paper 4 1/2″ X 2 1/2″ (panel on card front), piece for envelope flap.

****************************************************************************************************

Product List

Stampin’ Up! Ride With Me Masculine Birthday Card

Good Tuesday morning my fellow stampers.  How has everyone’s week started off?

For today’s card I needed to make another masculine card using the Stampin’ Up! Ride With Me Photopolymer Stamp Set.  I was asked to make another masculine birthday card and the guy the card is for has always wanted a black truck.  Here’s my card.

My card was able to join in with the Fusion Card Challenge.  Here are their elements.

I started by adhering a panel of the Come To Gather Designer Series Paper to an Early Espresso mat using Snail.  I adhered a smaller panel of the Come To Gather DSP to another Early Espresso mat and adhered it to the top of the card front using Multipurpose Liquid Glue.

On a panel of Whisper White cardstock I stamped the truck image from the Ride With Me stamp set in Tuxedo Black Memento Ink.  I stamped the pumpkin image from the Ride With Me stamp set in the back of the truck in Tuxedo Black Memento Ink.  I colored the images in using my Basic black, Gray Granite, Old Olive and Pumpkin Pie Stampin’ Blends Markers.  I adhered the artwork to an Early Espresso mat using Snail.  I adhered the matted artwork to the card front using Stampin’ Dimensionals.

I stamped the sentiment from the Ride With Me stamp set on the bottom of the card front in Early Espresso Ink.  I adhered the card front to a Cajun Craze card base using Stampin’ Dimensionals.

On the inside I stamped the sentiment from the Stampin’ Up! Itty Bitty Birthdays Cling Stamp Set in Early Espresso Ink in the center of a Whisper White panel.  I stamped the pumpkin image from the Ride With Me stamp set across the bottom of the Whisper White panel in Tuxedo Black Memento Ink.  I colored the images in using my Old Olive and Pumpkin Pie Stampin’ Blends Markers.

To finish my card I decorated a Medium Whisper White Envelope.  I stamped the truck and pumpkin images in from the Ride With Me stamp set on the envelope front in Tuxedo Black Memento Ink. I colored the images in the same as I did for the card.  I adhered a panel of the Come To Gather DSP to the envelope flap.

Thank you for stopping by my blog today.  I hope you liked my card and will give it a try. Happy Stamping!!

****************************************************************************************************

If you need any stamping supplies, I’d be very happy to be your Demonstrator. Just click HERE to go directly to my online store or drop me an email if you have any questions. 

MY CURRENT HOST CODE IS: ADFAXYQE

For any orders $50 or more I will send you my monthly class tutorials.  Click HERE or go to my Customer Rewards to see what this months tutorials are.

Click HERE to shop the clearance rack.

Happy Stamping, Karen!

****************************************************************************************************

BUY 3 GET 1 FREE DESIGNER SERIES PAPER IS BACK BY POPULAR DEMAND

SEPTEMBER 4, 2019 THROUGH SEPTEMBER 30, 2019

By popular demand, Stampin’ Up! is bringing back the Designer Series Paper Sale! During September (4TH–30TH), you can buy three packages of select Designer Series Paper, and get one FREE!

Here are the details:

  • Sale Dates:  September 4–30
    • Order Deadline:  September 30, 2019; 11:50 pm (MT)
  • Only Designer Series Papers listed in the table below qualify for this promotion. You may mix and match papers from any of the listed papers.
  • There is no limit to how many times participants can buy three packages of Designer Series Paper, and get one free during this sale.
  • In the online ordering system, when three qualifying Designer Series Paper packs are entered, a prompt to add a free Designer Series Paper will appear.
  • In the online store, if a you order four packages of the same qualifying Designer Series Paper, you will need to enter three together and then order the fourth free item separately.
  • Designer Series Paper ordered as part of a Starter Kit does not qualify for this sale.
  • Designer Series Paper ordered with Stampin’ Rewards does not qualify for this sale.

Here are the Designer Series Paper Packs included in the sale:

ITEM PAGE DESCRIPTION PRICE
149100 166 PERENNIAL ESSENCE DESIGNER SERIES PAPER $11.50
149443 166 SEE A SILHOUETTE DESIGNER SERIES PAPER $11.50
149481 167 COME SAIL AWAY DESIGNER SERIES PAPER $11.50
149484 165 MAGNOLIA LANE DESIGNER SERIES PAPER $11.50
149488 165 GARDEN LANE DESIGNER SERIES PAPER $11.50
149489 165 FOLLOW YOUR ART DESIGNER SERIES PAPER $11.50
149497 165 WOVEN THREADS DESIGNER SERIES PAPER $11.50
149589 166 DINOROAR DESIGNER SERIES PAPER $11.50
149592 166 BIRD BALLAD DESIGNER SERIES PAPER $11.50
149500 167 PRESSED PETALS SPECIALTY DESIGNER SERIES PAPER $14.50

****************************************************************************************************

WINTER WONDERS PAPER PUMPKIN

SUBSCRIBE TO PAPER PUMPKIN BY OCTOBER 10, 2019

Paper Pumpkin wants to help you share love and joy this Christmas with a duo of delightful, special-edition kits. October’s kit includes 10 traditional cards, while November’s kit features 24 can’t-miss tags. Put them together and you have everything you need to make the season bright.

There’s something about the holidays that brings out the crafter in all of us. Even non-crafters like making simple and fun projects to celebrate the season. And since “simple and fun” is Paper Pumpkin’s middle name, we have the perfect kits for you!

In October and November we are offering back-to-back coordinating kits, one with Christmas cards, the other with Christmas tags. Both kits make it easy for you to add a handmade, personal touch to your holiday giving—without a lot of fuss. It’s Christmas made easy with Paper Pumpkin!

October Kit

Coordinating colors: Early Espresso, Pool Party, Poppy Parade, and Shaded Spruce

November Kit

Coordinating colors: Early Espresso, Pool Party, Poppy Parade, and Shaded Spruce

The October and November kits coordinate; however, each kit is all-inclusive and can stand alone.

Click Here for more information and to subscribe to Paper Pumpkin.

****************************************************************************************************

I have gathered up a lot of retired Stamp Sets, Embossing Folders & Dies  and put a list together for anyone interested.  I have single Stamp Sets along with Stamp Sets bundled with Dies or Punches.  Take a look and see if there is anything that you missed out on getting and would still like.  Click Here to go to my list.
****************************************************************************************************

Card stock cuts for this project:

  • Cajun Craze Cardstock 8 1/2″ X 5 1/2″ (card base scored and folded at 4 1/4″)
  • Early Espresso Cardstock 2 – 4 1/8″ X 5 3/8″ (card front and inner liner mats), 4 1/8″ X 2 3/8″ (artwork mat), 2 3/8″ X 3 3/4″ (dsp mat)
  • Whisper White Cardstock 4″ X 2 1/4″ (artwork), 4″ X 5 1/4″ (inner liner)
  • Come To Gather Designer Series Paper 4″ X 5 1/4″ (card front), 2 1/4″ X 3 5/8″ (panel on card front)

****************************************************************************************************

Product List