Stampin’ Up! Painted Harvest Card

Good Wednesday morning my fellow stampers.  We made it half way through the week already.  Hope your week is going well.

For today’s card I used one of my favorite stamp sets to create a different sunflower.  I’m not quite sure what I was thinking when I decided to fussy cut the whole sunflower out, but I did it.   Here’s my card.

My colors were inspired by Just Add Ink Challenge #474.  Here are their colors.

My design was inspired by Hand Stamped Sentiments Challenge #323.  Here is their sketch.

I started by adhering a panel of Come To Gather Designer Series Paper to a Blackberry Bliss card base using Multipurpose Liquid Glue.  I cut 2 of the Stitched Nested Labels Dies out, one in Rococo Rose cardstock and the other a size smaller in the Rococo Rose 2019-2021 In-Colors 6 X 6 Designer Series Paper.  I adhered the DSP label to the Rococo Rose label using Snail and then to the card front using Multipurpose Liquid Glue.

On a small Whisper White panel I stamped the 1st part of the sunflower image from the Stampin’ Up! Painted Harvest Photopolymer Stamp Set in Rococo Rose Ink.  I stamped the 2nd step of the sunflower from the Painted Harvest stamp set in Blackberry Bliss Ink over the 1st image.  I stamped the sunflower center image from the Painted Harvest stamp set in Crumb Cake Ink.  I stamped the sunflower seed image from the Painted Harvest stamp set in Soft Suede Ink.  I then fussy cut the sunflower out using my Paper Snips.  I adhered Stampin’ Dimensionals. to the back of the sunflower and added some of the Rose Metallic Thread to it so that it was sneaking out all around the sunflower.  I adhered the sunflower to the card front.  I stamped 3 of the leaf images from the Painted Harvest stamp set on a small panel of Whisper White cardstock.  I stamped the detailed leaf image in Mossy Meadow Ink and the fill in leaf image in Mossy Meadow Ink stamping off once.  I punched the leaves out using my Leaf Punch.  I adhered the leaves under the sunflower using Glue Dots.

On a strip of Blackberry Bliss cardstock I stamped the sentiment from the Stampin’ Up! A Little Lace Cling Stamp Set in Versamark Ink.  I immediately sprinkled it with White Stampin’ Emboss Powder and set it using my Heat Tool.  I made a banner of the sentiment strip.  I adhered the sentiment to the card front using Mini Stampin’ Dimensionals.  I added some Pearl Basic Jewels that I had colored in using my Dark Blackberry Bliss Stampin’ Blend Marker.

On the inside I stamped the sunflower image from the Painted Harvest stamp set, the same as I did for the card front, on the bottom corner of a Whisper White panel.  I stamped the sentiment from the Painted Harvest stamp set in the center of the Whisper White panel in Blackberry Bliss Ink.  I adhered the Whisper White panel to the inside of the Blackberry Bliss card base using Multipurpose Liquid Glue.

To finish my card I decorated a Medium Whisper White Envelope.  I stamped the sunflower image from the Painted Harvest stamp set on the front of the envelope the same as I did for the card front.  I adhered a panel of the 2019-2021 In-Color 6 X 6 DSP to the envelope flap.

Thank you for visiting my blog today.  I hope you liked my card and will give it a try. Happy Stamping!!

****************************************************************************************************

If you need any stamping supplies, I’d be very happy to be your Demonstrator. Just click HERE to go directly to my online store or drop me an email if you have any questions. 

MY CURRENT HOST CODE IS: ADFAXYQE

For any orders $50 or more I will send you my monthly class tutorials.  Click HERE or go to my Customer Rewards to see what this months tutorials are.

Click HERE to shop the clearance rack.

Happy Stamping, Karen!

****************************************************************************************************

BUY 3 GET 1 FREE DESIGNER SERIES PAPER IS BACK BY POPULAR DEMAND

SEPTEMBER 4, 2019 THROUGH SEPTEMBER 30, 2019

By popular demand, Stampin’ Up! is bringing back the Designer Series Paper Sale! During September (4TH–30TH), you can buy three packages of select Designer Series Paper, and get one FREE!

Here are the details:

  • Sale Dates:  September 4–30
    • Order Deadline:  September 30, 2019; 11:50 pm (MT)
  • Only Designer Series Papers listed in the table below qualify for this promotion. You may mix and match papers from any of the listed papers.
  • There is no limit to how many times participants can buy three packages of Designer Series Paper, and get one free during this sale.
  • In the online ordering system, when three qualifying Designer Series Paper packs are entered, a prompt to add a free Designer Series Paper will appear.
  • In the online store, if a you order four packages of the same qualifying Designer Series Paper, you will need to enter three together and then order the fourth free item separately.
  • Designer Series Paper ordered as part of a Starter Kit does not qualify for this sale.
  • Designer Series Paper ordered with Stampin’ Rewards does not qualify for this sale.

Here are the Designer Series Paper Packs included in the sale:

ITEM PAGE DESCRIPTION PRICE
149100 166 PERENNIAL ESSENCE DESIGNER SERIES PAPER $11.50
149443 166 SEE A SILHOUETTE DESIGNER SERIES PAPER $11.50
149481 167 COME SAIL AWAY DESIGNER SERIES PAPER $11.50
149484 165 MAGNOLIA LANE DESIGNER SERIES PAPER $11.50
149488 165 GARDEN LANE DESIGNER SERIES PAPER $11.50
149489 165 FOLLOW YOUR ART DESIGNER SERIES PAPER $11.50
149497 165 WOVEN THREADS DESIGNER SERIES PAPER $11.50
149589 166 DINOROAR DESIGNER SERIES PAPER $11.50
149592 166 BIRD BALLAD DESIGNER SERIES PAPER $11.50
149500 167 PRESSED PETALS SPECIALTY DESIGNER SERIES PAPER $14.50

****************************************************************************************************

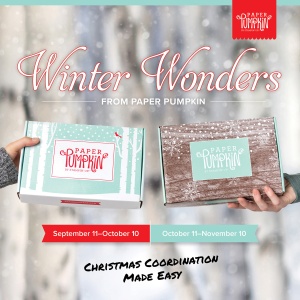
WINTER WONDERS PAPER PUMPKIN

SUBSCRIBE TO PAPER PUMPKIN BY OCTOBER 10, 2019

Paper Pumpkin wants to help you share love and joy this Christmas with a duo of delightful, special-edition kits. October’s kit includes 10 traditional cards, while November’s kit features 24 can’t-miss tags. Put them together and you have everything you need to make the season bright.

There’s something about the holidays that brings out the crafter in all of us. Even non-crafters like making simple and fun projects to celebrate the season. And since “simple and fun” is Paper Pumpkin’s middle name, we have the perfect kits for you!

In October and November we are offering back-to-back coordinating kits, one with Christmas cards, the other with Christmas tags. Both kits make it easy for you to add a handmade, personal touch to your holiday giving—without a lot of fuss. It’s Christmas made easy with Paper Pumpkin!

October Kit

Coordinating colors: Early Espresso, Pool Party, Poppy Parade, and Shaded Spruce

November Kit

Coordinating colors: Early Espresso, Pool Party, Poppy Parade, and Shaded Spruce

The October and November kits coordinate; however, each kit is all-inclusive and can stand alone.

Click Here for more information and to subscribe to Paper Pumpkin.

****************************************************************************************************

I have gathered up a lot of retired Stamp Sets, Embossing Folders & Dies  and put a list together for anyone interested.  I have single Stamp Sets along with Stamp Sets bundled with Dies or Punches.  Take a look and see if there is anything that you missed out on getting and would still like.  Click Here to go to my list.

****************************************************************************************************

Card stock cuts for this project:

  • Blackberry Bliss Cardstock 8 1/2″ X 5 1/2″ (card base scored and folded at 4 1/4″), 1/2″ X 3 1/4″ (sentiment strip)
  • Rococo Rose Cardstock 4 1/2″ X 2 1/2″ (small dsp mat on card front)
  • Whisper  White Cardstock 4″ X 5 1/4″ (inner liner)
  • Come To Gather Designer series Paper 4 1/8″ X 5 3/8″ (card front)
  • 2019-2021 In-Colors Designer series Paper 4 1/2″ X 2 1/2″ (panel on card front), piece for envelope flap.

****************************************************************************************************

Product List

Stampin’ Up Natures Beauty Sneak Peek

Good Monday morning my fellow stampers.  How was everyone’s weekend?  Did anyone do anything fun or exciting?  It was a beautiful weekend here. I went for a couple walks on Sunday.  I took a walk into town in the morning and since it was still cool enough I was able to bring Jasmine for a walk.  I feel so bad not bringing her, but the pavement is just too hot for her paws.  She love walking into town, she always thinks we’re going to her store, the dog bakery.  She knows they always give her extra treats.  Unfortunately they weren’t open yet.  Then in the afternoon my family and I went over to Dukes Estate for a nice long walk.  We only walked about 3 miles this time compared to the 7 last time we went.  I can’t wait to go back there in the fall when all the leaves are changing, and it will be a little cooler then.

I have another sneak peek from the 2019 Holiday Catalog for you.  Here’s my card for you today.

I joined in with Freshly Made Sketches Challenge #400 with my card today.  Here is their sketch.

My colors were inspired by CAS Colours & Sketches Challenge #333.  Here are their colors.

I started by stamping the sentiment from Stampin’ Up A Little Lace Cling Stamp Set in Soft Suede Ink on the bottom of an Old Olive card front. I embossed the card front using the Woodland Embossing Folder and added 3 Gold Metallic Pearls to the top.

I embossed a small panel of Grapefruit Grove card stock using the Subtle 3D Embossing Folder and then adhered it to a Cajun Craze mat using Multipurpose Liquid Glue.  I adhered the matted panel to the card front using Multipurpose Liquid Glue.  I wrapped a piece of the Old Olive/Pretty Peacock 3/8″ Reversible Ribbon around the card front and using Multipurpose Liquid Glue I adhered the card front to an Old Olive card base.

On a small panel of Whisper White cardstock I stamped the tree image from the Stampin’ Up Natures Beauty Cling Stamp Set (available Sept 4) in Soft Suede Ink a couple of times.  Using my Stamping Sponges I sponged the Whisper White panel using my Grapefruit Grove Ink on the top and Old Olive Ink on the bottom.   Using the grass image from the Natures Beauty stamp set I stamped some grass around the bottom sponged area in Old Olive Ink.  I adhered the sponged panel to a Cajun Craze mat using Snail.  On a small piece of Whisper White cardstock I stamped the fox image from the Natures Beauty stamp set in Cajun Craze Ink and fussy cut the image out using my Paper Snips.  I adhered the fox to the sponged panel using Stampin’ Dimensionals and adhered the panel to the card front using Stampin’ Dimensionals.  I cut a leaf out of Cajun Craze cardstock using the Gathered Leaves Dies (available Sept 4).  I adhered the leaf to the card front using Stampin’ Dimensionals and a Glue Dot.

On the inside I stamped the fox image from the Natures Beauty stamp set in Cajun Craze Ink, stamping off once, on the bottom of a Whisper White panel.  I stamped the tree image from the Natures Beauty stamp set in Soft Suede Ink, stamping off twice, 3 times across the middle of the Whisper White panel.  I stamped the sentiment from the Stampin’ Up A Big Thank You Photopolymer Stamp Set in Soft Suede Ink in the center of the Whisper White panel.  I adhered the Whisper White panel to a Cajun Craze mat using Snail and then to the inside of the Old Olive card base using Multipurpose Liquid Glue.

To finish my card I decorated a Medium Whisper White Envelope.  I stamped the fox image from the Natures Beauty stamp set in Cajun Craze Ink on the envelope front.  I stamped the tree images from the Natures Beauty stamp set in Soft Suede Ink, some full strength and some stamped off, across the envelope flap.

Thank you for stopping by my blog today.  I hope you like my card.  This set will be available for purchase on September 4th.  Happy Stamping!!

****************************************************************************************************

If you need any stamping supplies, I’d be very happy to be your Demonstrator. Just click HERE to go directly to my online store or drop me an email if you have any questions. 

MY CURRENT HOST CODE IS: 66KPP6BN

For any orders $50 or more I will send you my monthly class tutorials.  Click HERE or go to my Customer Rewards to see what this months tutorials are.

Click HERE to shop the clearance rack.

Happy Stamping, Karen!

***************************************************************************************************

I’m doing a 2019 Holiday Catalog Designer Series Paper share.  Click here for more information.

****************************************************************************************************

STAMPIN’ UP BONUS DAYS – COUPON REDEMTION GOING ON NOW!!

IF YOU HAVE QUESTIONS ON HOW TO REDEEM THEM, PLEASE CONTACT ME.

****************************************************************************************************

EXTRA, EXTRA!!  JOINING PROMOTION JULY 1, 2019 – AUGUST 31, 2019

From July 1 until August 31, new demonstrators will receive an additional $30 to put toward bonus products in their Starter Kit (for a total of $155 in merchandise for $99)!!  THEN, they’ll receive a $10 coupon code the following month.  Are you interested?  Keep reading to learn more!

Dates:  July 1 – August 31 at 11:50 PM MT

Details:

  • The bonus at initial sign up allows demonstrators to pick $30 more than usual.  You will pay $99 to sign up and choose $155 worth of Stampin’ Up! products in your Starter Kit.
  • Coupon codes will be sent between the fifth and seventh business day of the following month the new demonstrator signs up.
  • The email address listed in a new demonstrator’s profile will be used to send the $10 coupon code.
  • Coupon codes may be redeemed only once.
  • Coupon codes expire October 31, 2019; after this date, they will no longer be valid.
  • New demonstrators who submit their Independent Demonstrator Agreement (IDA) before July 1 or after August 31 will not be eligible for this promotion.

If you’ve ever considered purchasing that Starter Kit, now is a great time!  We’d love to have you join and get that discount for yourself or start your own business!!

If you are interested in joining my team click HERE for details or email me.  I’d love to have you on my team.

****************************************************************************************************

I have gathered up a lot of retired Stamp Sets, Embossing Folders & Dies  and put a list together for anyone interested.  I have single Stamp Sets along with Stamp Sets bundled with Dies or Punches.  Take a look and see if there is anything that you missed out on getting and would still like.  Click Here to go to my list.

****************************************************************************************************

Card stock cuts for this project:

  • Cajun Craze Cardstock 2 3/8″ X 2 5/8″ (artwork mat), 2 3/8″ X 3 1/8″ (grapefurit grove mat), 4 1/8″ X 5 3/8″ (inner liner mat)
  • Grapefruit Grove Cardstock 2 1/4″ X 3″ (card front panel)
  • Old Olive Cardstock 4 1/4″ X 11″ (card base scored and folded at 5 1/2″), 4 1/8″ X 5 3/8″ (card front)
  • Whisper White Cardstock 2 1/4″ X 2 1/2″ (artwork), 4″ X 5 1/4″ (inner liner)

****************************************************************************************************

Product List

Stampin’ Up A Little Lace Free As A Bird

Good Friday morning my fellow stampers.  Well the weekend is upon us, so hopefully some of you will have some time to relax and have fun.  I’m looking forward to getting together with some of my team members for a meeting and stamping time.

For today’s card I used another new bundle available NOW in the 2019-2020 Annual Catalog.  It’s the Stampin’ Up A Little Lace Bundle.  This new die is so elegant.  Take a look.

My card for today played along with the Watercooler Wednesday Challenge #224.  Here’s their challenge.

I started with a panel of Whisper White cardstock and ran it through my die cutting machine using the Stitched Lace Die.  I ran it through again using the edging die from the Stitched Lace Die to cut off about an inch from the bottom.

On the bottom of the Crumb Cake card base I stamped the sentiment from the Stampin’ Up A Little Lace Cling Stamp Set in Versamark Ink.  I immediately sprinkled it with my White Stampin’ Emboss Powder and set it using my Heat Tool.  I stamped the small flower image from the A Little Lace stamp set in Versamark Ink on the bottom left of the card front and immediately sprinkled it with White Stampin’ Emboss Powder and set it using my Heat Tool.

I wanted to do a little of the White Wash Technique on the small flower, so using my Aqua Painter I colored the flower in with the Whisper White Pigment Ink and let it dry completely.  Once it dried, using my Blender Pen, I colored the flower in with Purple Posy Ink.  I stamped the single bird from the Stampin’ Up Free As A Bird Cling Stamp Set in Soft Suede Ink on a small panel of Whisper White cardstock.  Using my Crumb Cake and Purple Posy Stampin’ Blends Markers, I colored the bird in.  I cut the bird out using the Stitched Nested Labels Dies. I adhered the lace panel to the Crumb Cake card base using Multipurpose Liquid Glue.  I adhered the artwork on the edge of the card base using Stampin’ Dimensionals.

On the inside I stamped the sentiment from the Free As A Bird stamp set in Crumb Cake Ink in the center of a Whisper White panel.  I stamped the edge image from the A Little Lace stamp set on either side of the Whisper White panel in Purple Posy Ink.  I adhered the Whisper White panel to a Purple Posy mat using Snail and then to the inside of the Crumb Cake card base using Multipurpose Liquid Glue.

To finish my card I decorated a Medium Whisper White Envelope.  I stamped the small flower image from the A Little Lace stamp set in Purple Posy Ink along the bottom edge of the envelope front and on the envelope flap.  The flowers on the envelope flap I colored in using my Purple Posy Stampin’ Blends Markers.

Thank you for visiting my blog today.  I hope you liked my card and will give it a try.  Happy Stamping!!

****************************************************************************************************

If you need any stamping supplies, I’d be very happy to be your Demonstrator.  Just click here to go directly to my online store or drop me an email if you have any questions. 

MY CURRENT HOST CODE IS: AHCJYGJN

For any orders $50 or more I will send you my monthly class tutorials.  Click here or go to my Customer Rewards to see what this months tutorials are.

Click here to shop the clearance rack.

Happy Stamping, Karen!

****************************************************************************************************

If you are interested in joining my team click here for details or email me.  I’d love to have you on my team.

****************************************************************************************************

Share A Little Love – June Paper Pumpkin Kit!

ONLY 3 DAYS LEFT TO SUBSCRIBE

Care about someone? Why not tell them?

The Paper Pumpkin June kit makes it easy for you to scatter sunshine this summer—whenever, with whomever. Not only do we give you 16 fun-sized, beach-themed cards and envelopes, but the kit also includes an exclusive carrying case so you’ll always have your cards on hand to share wherever you go. And don’t forget the exclusive stamp set and ink spot that completes every Paper Pumpkin kit!!

More about the June Kit:

  • In order to receive the June Paper Pumpkin Kit, you must have an active subscription by June 10 at 11:50 PM (MT).
  • The kit creates 16 fun-sized, beach-themed cards and envelopes.
  • Coordinating colors: Coastal Cabana, Crumb Cake, and Old Olive

Check out the quick video created by Stampin’ Up! with some sneak peaks of the June kit!
If you’re interested in subscribing to Paper Pumpkin yourself, you can either sign up for a subscription where you are billed monthly for your kit or you can purchase a prepaid subscription in my online store.  To see more information and to sign up for the monthly subscription, click here.  To see the options for prepaid subscriptions in my online store, click here.  Let me know if you have any questions.

****************************************************************************************************

Card stock cuts for this project:

  • Crumb Cake Cardstock 8 1/2″ x 5 1/2″ (card base scored and folded at 4 1/4″)
  • Purple Posy Cardstock 4″ X 5 1/4″ (inner liner mat)
  • Whisper White Cardstock 3 3/4″ X 5″ (inner liner), 2 1/4″ X 3″ (artwork)

****************************************************************************************************

Product List

Stampin’ Up Beautiful You, Strong and Beautiful Graduation Card

Good Tuesday morning my fellow stampers.  How is everyone doing today?

For today I used one of my all time favorite stamp sets for a graduation card for you.  My niece has graduated earning her Masters Degree and I wanted to send her a special card letting her know how proud I am of her.  I used a few items that will be retiring as of June 3rd for my card.  Take a look.

I’ve played along with a couple challenges today.  First off is the CAS(E) This Sketch challenge #322.  Here is their sketch.

Next I played along with the Paper Craft Crew challenge #337.  Here is their challenge.

I joined in with the Stampin’ Up Only Challenges #223.  Their challenge is ‘Anything Spring’. This includes spring holidays, birthdays, graduations, babies!

I also joined in with the CAS on Friday Challenge #158.  Their challenge is ‘Use Polkadots’.

I started by adhering a panel of the soon to retire Brights 6 X 6 Designer Series Paper to a Basic Black card bae using Snail.  I stamped the dancing woman image from the Stampin’ Up Beautiful You Clear Stamp Set on a panel of Whisper White cardstock.  I colored her in using my Light Basic Black, Ivory and Poppy Parade Stampin’ Blends Markers.  I adhered the artwork to a panel of Whisper White cardstock to give it a little color on color edge using Snail.  I then adhered it to the card front using Stampin’ Dimensionals.  I cut a tiny square to look like a graduation cap out of Basic Black cardstock.  I took a small piece of Whisper White Bakers Twine and pulled it apart to get very thin strands to make a tassel on the cap, tied it in a knot and adhered it using a Glue Dot. I adhered a Metallic Pearl in the center of the tassel.  I adhered the graduation cap to the top of the woman’s head using a Stampin’ Dimensional.

Using my Big Shot and the soon to retire Celebrate You Thinlits, I cut out the celebrate in Basic Black and Poppy Parade cardstocks.  I adhered the Basic Black on top or the Poppy Parade, so that it had the shadow look, using Multipurpose Liquid Glue.  I adhered the sentiment to the top of the artwork using Multipurpose Liquid Glue and thin strips of Stampin’ Dimensionals on the 2 ends.

On the inside I stamped the flowers from the new Stampin’ Up A Little Lace Cling Stamp Set in Tuxedo Black Memento Ink in 3 of the corners of a Whisper White panel.  I colored them in using my Granny Apple Green and Poppy Parade Stampin’ Blends Markers and added a little Rhinestone Basic Jewel in each flower.  I stamped the sentiment from the Stampin’ Up Strong & Beautiful Cling Stamp Set in the center of the Whisper White panel in Tuxedo Black Memento Ink.  Using my Big Shot I cut out the amazing and you from the Celebrate You Thinlits in Poppy Parade cardstock using a piece of the Multipurpose Adhesive Sheet behind it.  The Multipurpose Adhesive Sheets are great when you have very thin images to be glued down and don’t want to take a chance of making a mess with other adhesives.  I adhered the 2 sentiments above the stamped sentiment on the Whisper White panel.  I adhered the Whisper White panel to the inside of the Basic Black card base using Multipurpose Liquid Glue.

To finish my card I decorated a Medium Whisper White Envelope.  I stamped the flowers from the A Little Lace stamp set in Tuxedo Black Memento Ink on the envelope front.  I colored them in using my Granny Apple Green and Poppy Parade Stampin’ Blends Markers.  I adhered a piece of the Brights 6 X 6 DSP to the envelope flap.  I had to use a different pattern of DSP on the flap.  For the 1st time in all the years I’ve been making cards, I ran out of a DSP.  This has never happen to me.  The DSP usually retires before I have a chance to use it up.

Thank you for stopping by my blog today.  I hope you liked my card and will give it a try.  The Stampin’ Up Beautiful You Stamp Set and the Stampin’ Up Strong & Beautiful Stamp Set will be carrying over into the 2019-2020 Annual Catalog, but the Celebrate You Thinlits and the Brights 6 X 6 DSP will be retiring as of June 3rd.  The Stampin’ Up A Little Lace Stamp Set will be available June 4th for purchase.  Happy Stamping!!

****************************************************************************************************

If you need any stamping supplies, I’d be very happy to be your Demonstrator.  Just click here to go directly to my online store or drop me an email if you have any questions.

The Clearance Rack has been updated with lots of new deals! So check it out

Click here to shop the clearance rack.

MY CURRENT HOST CODE IS: 4WY7GYTC

Happy Stamping, Karen!

****************************************************************************************************

If you are interested in joining my team click here for details or email me.  I’d love to have you on my team.

****************************************************************************************************

Share A Little Love – June Paper Pumpkin Kit!

Care about someone? Why not tell them?

The Paper Pumpkin June kit makes it easy for you to scatter sunshine this summer—whenever, with whomever. Not only do we give you 16 fun-sized, beach-themed cards and envelopes, but the kit also includes an exclusive carrying case so you’ll always have your cards on hand to share wherever you go. And don’t forget the exclusive stamp set and ink spot that completes every Paper Pumpkin kit!!

More about the June Kit:

  • In order to receive the June Paper Pumpkin Kit, you must have an active subscription by June 10 at 11:50 PM (MT).
  • The kit creates 16 fun-sized, beach-themed cards and envelopes.
  • Coordinating colors: Coastal Cabana, Crumb Cake, and Old Olive

Check out the quick video created by Stampin’ Up! with some sneak peaks of the June kit!
If you’re interested in subscribing to Paper Pumpkin yourself, you can either sign up for a subscription where you are billed monthly for your kit or you can purchase a prepaid subscription in my online store.  To see more information and to sign up for the monthly subscription, click here.  To see the options for prepaid subscriptions in my online store, click here.  Let me know if you have any questions.

****************************************************************************************************

Stampin’ Up! has posted their retiring lists for the 2018-19 Annual Catalog and 2019 Occasions Catalog.  Head over to my online store to pick up those retiring items now!  They’re only available while supplies last from now through June 3!

A few notes about the lists:

  • Due to high demand for retiring stamp sets, these items will have guaranteed availability until May 24; all other products are not guaranteed and are available while supplies last only.
  • Order deadline to get the retiring products:  June 3, 2019; 11:50 PM (MT)

Please note, some of the bundle items may be carrying over into the new 2019-2020 Annual Catalog.  However, the bundle pricing will go away, so get them while you can at the discounted price!!

Stampin’ Up! Retirement List Clarification

It looks like every single stamp set from the 2018-19 Annual Catalog is being retired and that isn’t the case, the carryover sets are being transitioned to Cling Mount.

The stamp sets offered in clear-mount or wood-mount in the 2018–2019 annual catalog that are carrying over into the 2019–2020 annual catalog will be offered in clear-mount and/or wood-mount until existing inventory has been depleted or until June 4, 2019 (whichever comes first).

If the inventory is depleted, you will be notified of the automatic switch to cling when placing an order for that stamp set. This means that you may end up purchasing select cling stamp sets (in carryover artwork) before they can be ordered from the catalog!  All carryover rubber stamp sets will be available in cling medium only (with the exception of background stamps in North America) beginning June 4, 2019.

You can download copies of the full retiring lists in PDF Form here:

  • Click here to get a copy of the full retiring list from the Occasions Catalog.
  • Click here to get a copy of the full retiring list from the 2018-19 Annual Catalog.

****************************************************************************************************

EVERYTHING IS ROSY PRODUCE MEDLEY – AVAILABLE NOW!!

WHAT IS A PRODUCT MEDLEY?

Product medleys are new to Stampin’ Up!. In addition to being filled to the brim with cute, coordinating products, we’ve designed our product medleys to provide you with endless creative possibilities.

The Everything Is Rosy Product Medley includes these exclusive products:

  • Everything Is Rosy Photopolymer Stamp Set—18 stamps
  • Everything Is Rosy Dies—10 dies; largest die 2-7/8″ x 1″
  • 6″ x 6″ Designer Series Paper Stack—48 sheets; 8 each of 6 double-sided designs
  • 6″ x 6″ rose gold foil paper—8 sheets
  • Printed die cuts—2 sheets
  • Rose gold die cuts—4 sheets; 2 each of 2 designs
  • Rose gold adhesive backed mirror embellishments—60 embellishments; 1/4″
  • Melon Mambo 1/4″ Ruched Ribbon—10 yards
  • Night of Navy/Rose Gold 3/8″ Metallic –Edge Ribbon—10 yards
  • Rose Gold Shimmer Paint—1/2 oz.

Sales Period: May 1–31, 2019 while supplies last!

Click the image below to head over to my online store to get yours now!

Everything is Rosy Product Medely  [150059] $80.00

****************************************************************************************************

Card stock cuts for this project:

  • Basic Black Cardstock 8 1/2″ X 5 1/2″ (card bae scored and folded at 4 1/4″),        4 1/2″ X 1 1/2″ (piece for celebrate die), 1/2″ X 1/2″ (graduation cap)
  • Poppy Parde Cardstock 4 1/2″ X 4″ (celebrate dies)
  • Whisper White Cardstock 2 3/4″ X 4″ (artwork), 2 7/8″ X 4 1/8″ (artwork mat), 4″ X 5 1/4″ (inner liner)
  • Brights 6 X 6 Designer series paper 4 1/8″ X 5 3/8″ (card front)

****************************************************************************************************

Product List