Good Wednesday morning my stamping friends. How is everyone doing today? We’re halfway through the week and the weekend is right around the corner.
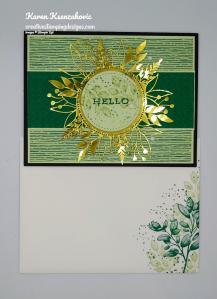
It’s time for another inspiration challenge for The Card Concepts. The inspiration photo is Fall Fun. Here is my card that was inspired from the challenge photo.
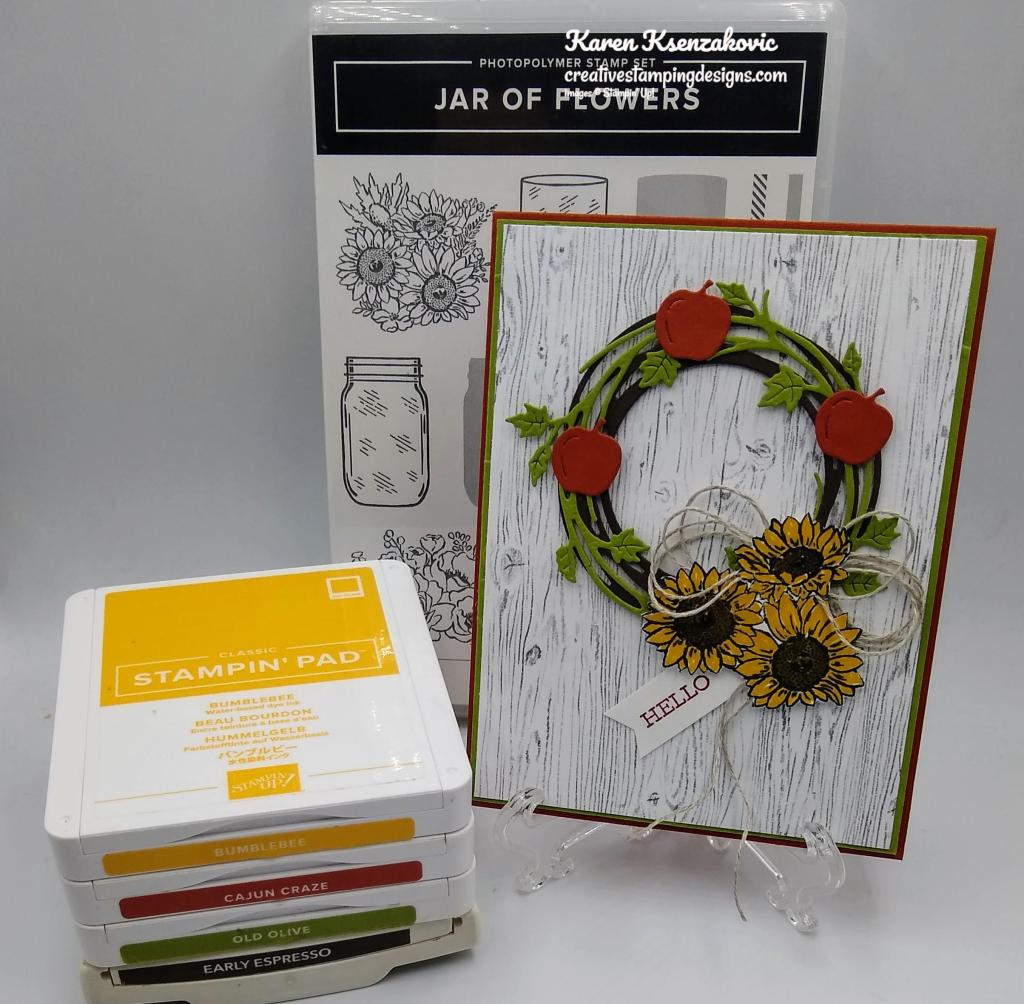
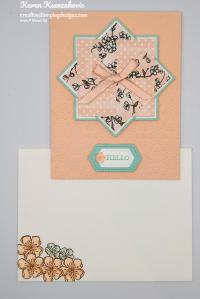
I used the Stampin’ Up! Jar of Flowers Photopolymer Stamp Set along with the Stampin’ Up! Sparkle of The Season Bundle and some new Heart & Home Designer Series Paper (coming in the January-June 2022 Mini Catalog) for my Clean & Layered card. I was inspired by the beautiful fall colors along with the sunflowers in the vase and the apples.
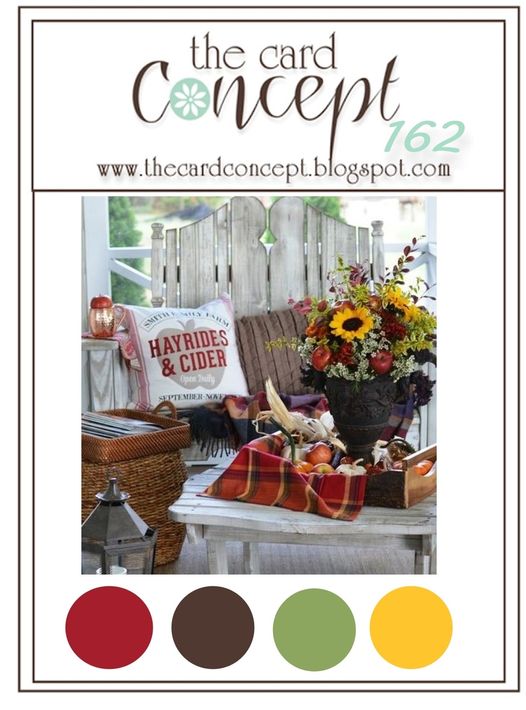
I hope you will take a moment to visit The Card Concepts and join us for our challenge #162. How are you inspired by this photo?
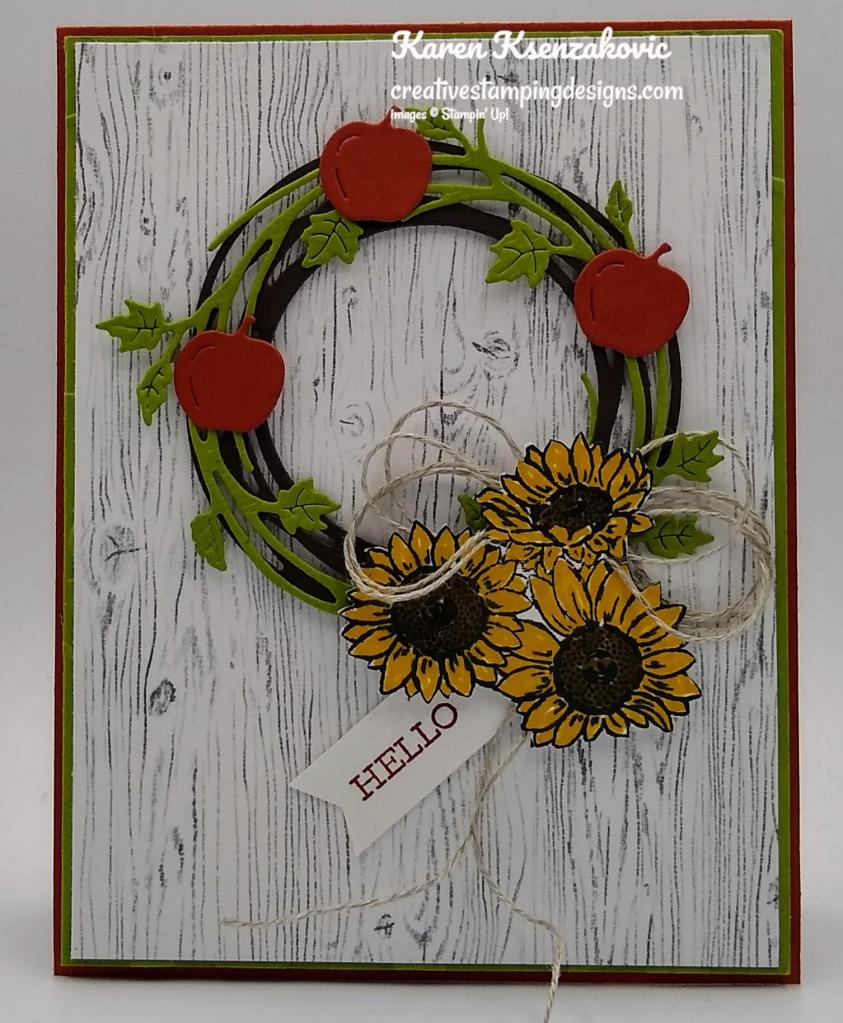
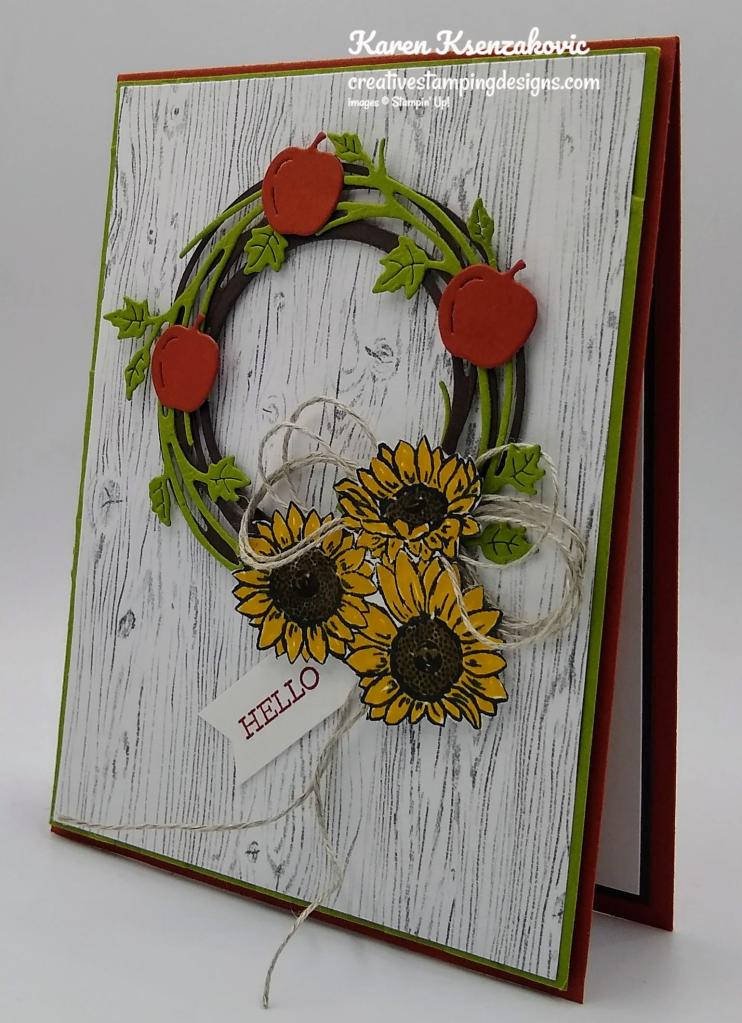
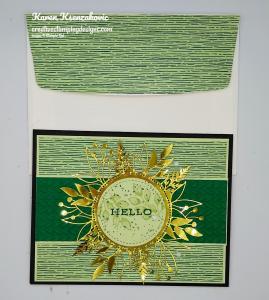
I started by adhering a panel of the gorgeous new Heart & Home DSP to an Old Olive mat. I adhered the layered panel to a Cajun Craze card base using Stampin’ Dimensionals.
I stamped the sunflower image from the Jar of Flowers stamp set in Tuxedo Black Ink on a panel of Basic White cardstock and colored the image in using my Bumblebee and Early Espresso Stampin’ Write Markers. I fussy cut the sunflowers using my Paper Snips. Using the Festive Finishes Dies, I cut multiple apples from a panel of Cajun Craze cardstock.
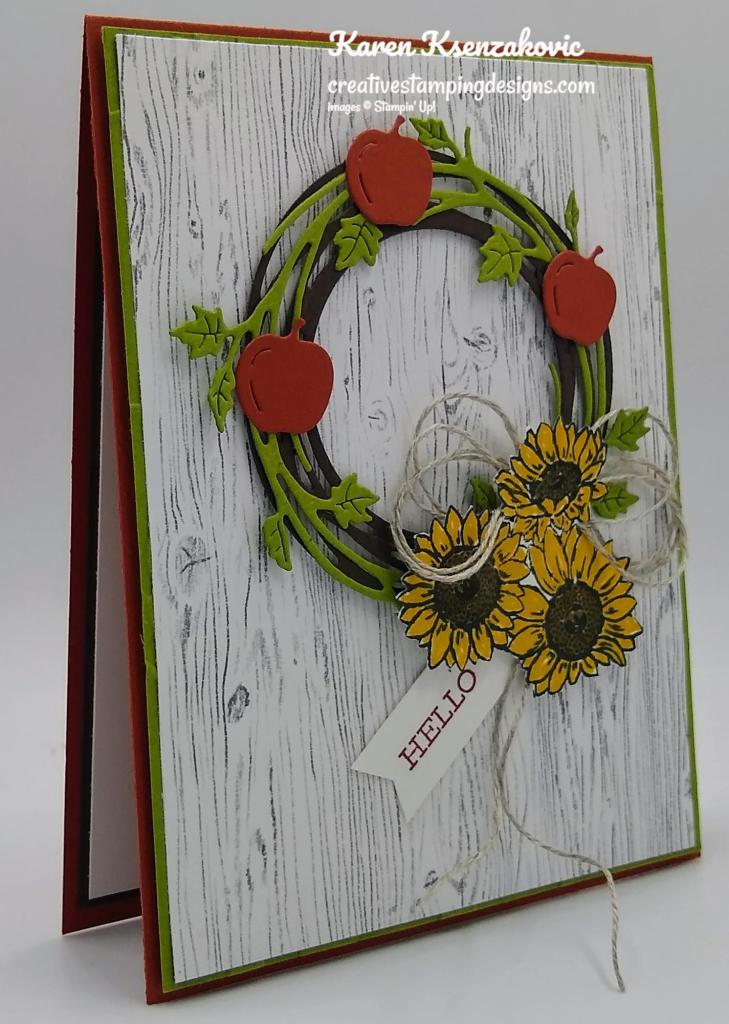
I cut the leaf wreath from a panel of Old Olive cardstock using my Seasonal Swirls Dies. I cut the swirly wreath from a panel of Early Espresso cardstock using the Painted Labels Dies. I didn’t want the solid center in the swirly wreath so I used the circle that fit the best from the Layering Circles Dies and cut it out. I layered the wreaths together the way I liked and adhered them to the card front using Stampin’ Dimensionals where I would be putting the flowers and the apples. I made a multi loop bow from a length of Linen Thread and adhered it to the wreath. I adhered the sunflowers over the bow and the apples randomly on the wreath. I stamped the sentiment from the Stampin’ Up! Free As A Bird Cling Stamp Set in Cajun Craze Ink and cut it into a banner using my Paper Snips. I adhered the sentiment tucking it under the flowers.
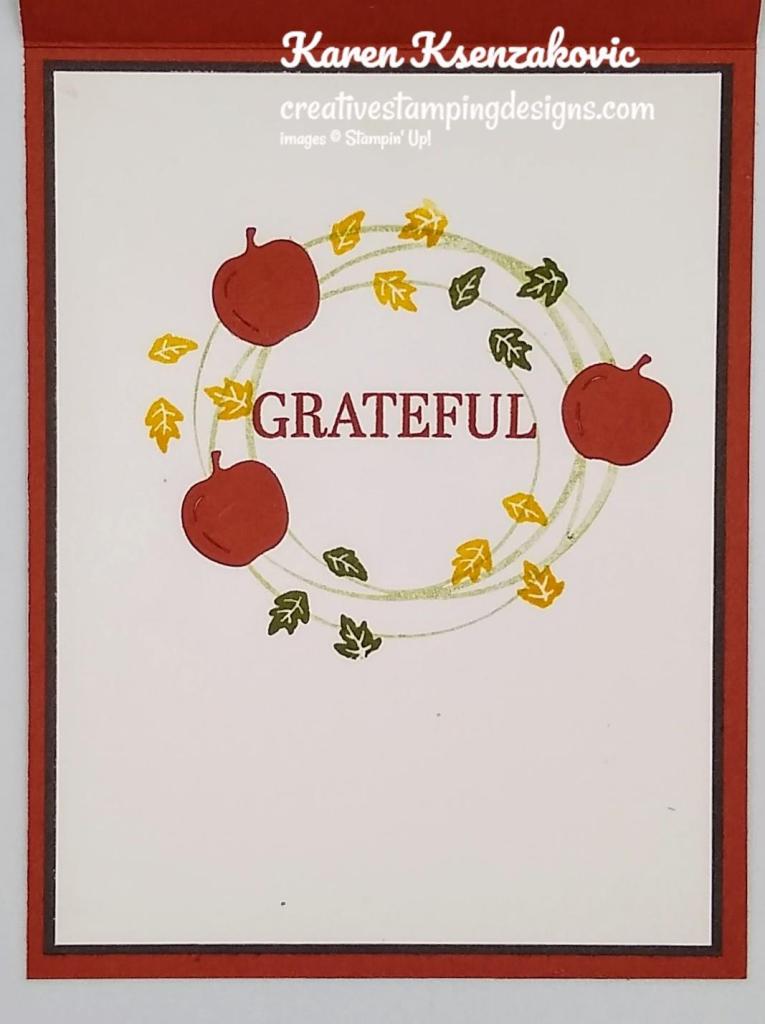
On the inside I stamped the swirly wreath from the Stampin’ Up! Sparkle of The Season Photopolymer Stamp Set in Old Olive Ink, stamping off once, on a panel of Basic White cardstock. I stamped the sentiment from the Sparkle of The Season stamp set in Cajun Craze Ink in the center of the wreath. I randomly stamped the trio leaves image from the Sparkle of The Season stamp set in Bumblebee and Old Olive Inks and adhered a few more of the apples I had cut out from the Festive Finishes Dies. I adhered the Basic White panel to an Early Espresso mat and then to the inside of the Cajun Craze card base.
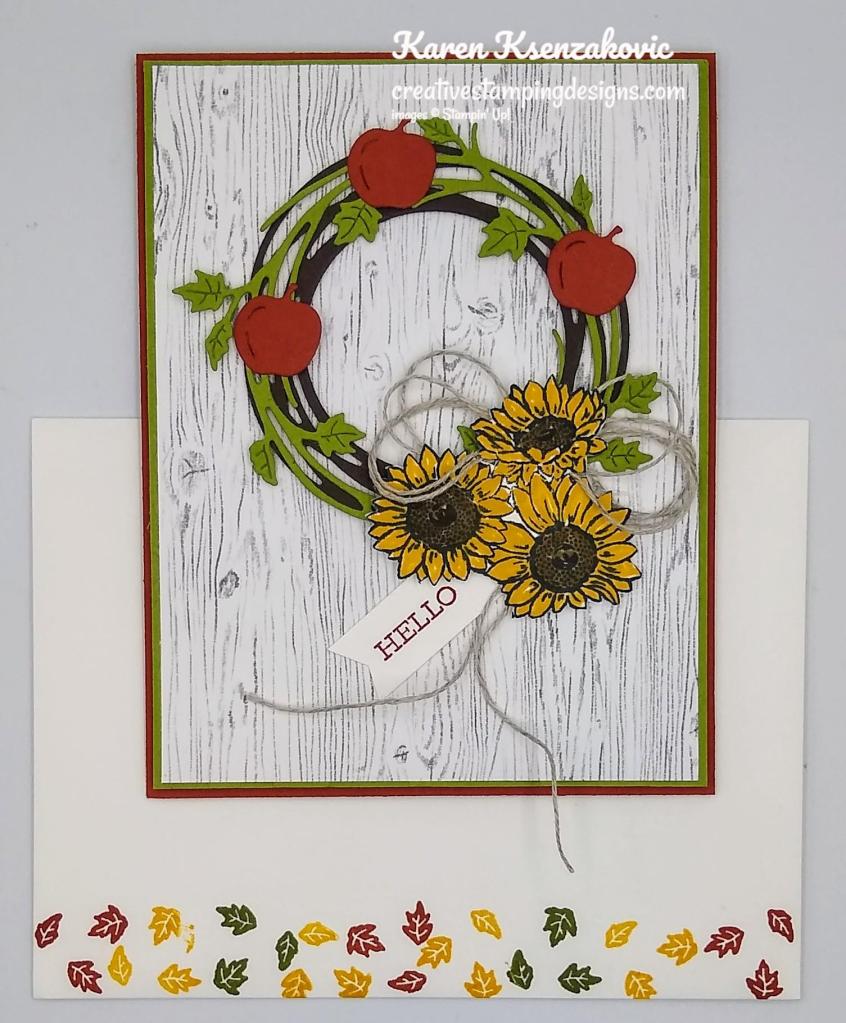
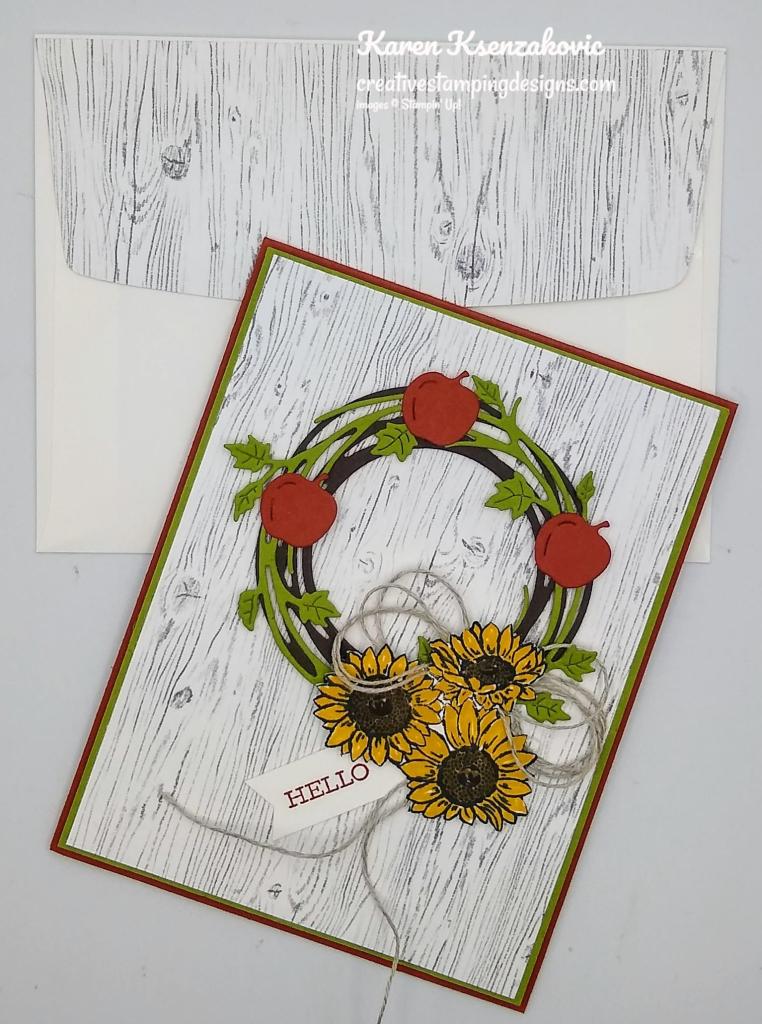
To complete my card I decorated a Basic White Medium Envelope. I stamped the trio leaf image from the Sparkle of The Season stamp set in Bumblebee, Cajun Craze and Old Olive Inks on the bottom of the envelope front. I adhered a panel of the Heart & Home DSP to the envelope flap.
Thank you for stopping by my blog today. I hope you liked my card and will give it a try. Happy Stamping!!
*********************************************************************************************************
I was given a heads up yesterday that the internet was down at work and all the transactions for the day had to be done manually. With that being said, as of right now, I’m not planning on going live today since I have a feeling I’m going to be working late. If anything changes I will post something on my Facebook page by 3:00. Hopefully if I can’t go live today, I’ll be back next week. Gotta love technology!!
*********************************************************************************************************
TODAY ONLY!!! 24-HOUR STAMP SALE GOING ON NOW!!
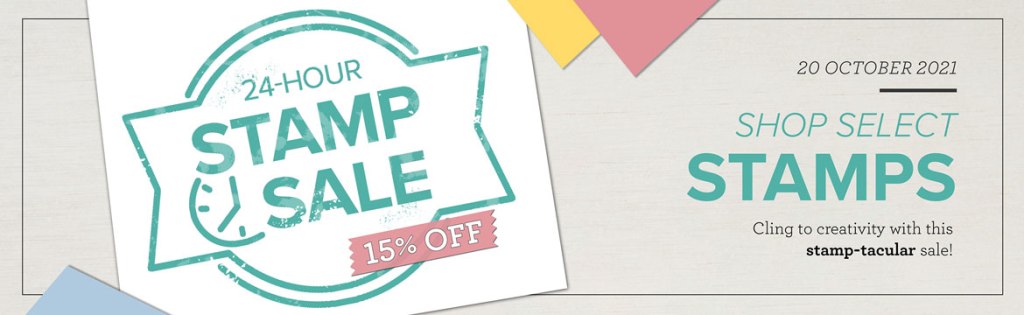
Can’t stop staring at a certain stamp set (or two, or three)? Stock up on stamp sets at a stellar price! For one day only, you can snag select cling stamp sets at a 15% discount. This short and stamp-tacular sale only happens once a year, so get in gear—it’s time to shop ’til you drop!
SALES PERIOD: 20 OCTOBER 2021
- The sale will run for ONE DAY ONLY!
- The 15% discount will apply to select cling stamp sets only.
- Every cling stamp set from the 2021–2022 Annual Catalog (excluding the Host stamp sets) will be discounted.
- Sale Date: Wednesday, October 20, 2021 from 12:00 AM to 11:50 PM (MT)
FREE GOLD & ROSE GOLD 6 X 6 METALLIC SPECIALTY PAPER OR HOLIDAY RHINESTONE BASIC JEWELS
In addition to this awesome sale, I’m offering either a pack of the Gold & Rose Gold Metallic Paper or a pack of the Holiday Rhinestone Basic Jewels with any order of $50 or more (before tax and shipping). This is in addition to your free gift of 1 item valued up to $10 from me, your Creative Stamping Designs Rewards and my October Online Tutorials. This will help you to get those holiday cards going with a little bling. This offer is for one day only, Wednesday October 20, 2021 during the Stampin’ Up! 24-hour Stamp Sale. This sale is for TODAY ONLY!!! Happy Shopping!!
*********************************************************************************************************
If you need any stamping supplies, I’d love to be your Demonstrator. Just click HERE to go directly to my online store or drop me an email if you have any questions.
MY CURRENT HOST CODE IS: BM9R7DQX
Use this host code when you order $50 or greater and receive a free gift from me! If your order is over $150, please do not use this code, but you’ll still get the free gift. The free gift is your choice of any 1 item valued up to $10.00 from the 2020-2021 Annual Catalog or the January-June 2021 Mini Catalog! For any orders $50 or more I will also send you my monthly class tutorials. Click HERE or go to my Customer Rewards for more details and to see what this months tutorials are.
Please remember to use my current Host Code and make sure that you can see my name on the final checkout page listed as your Demonstrator when you order so that you know that you’re ordering with me and you’ll get my rewards!
Stampin’ Up! has added more items to their Clearance Rack. All items are **While Supplies Last**. So don’t wait if there is something you’ve been wanting, grab it while you can.
Happy Stamping, Karen!
*********************************************************************************************************
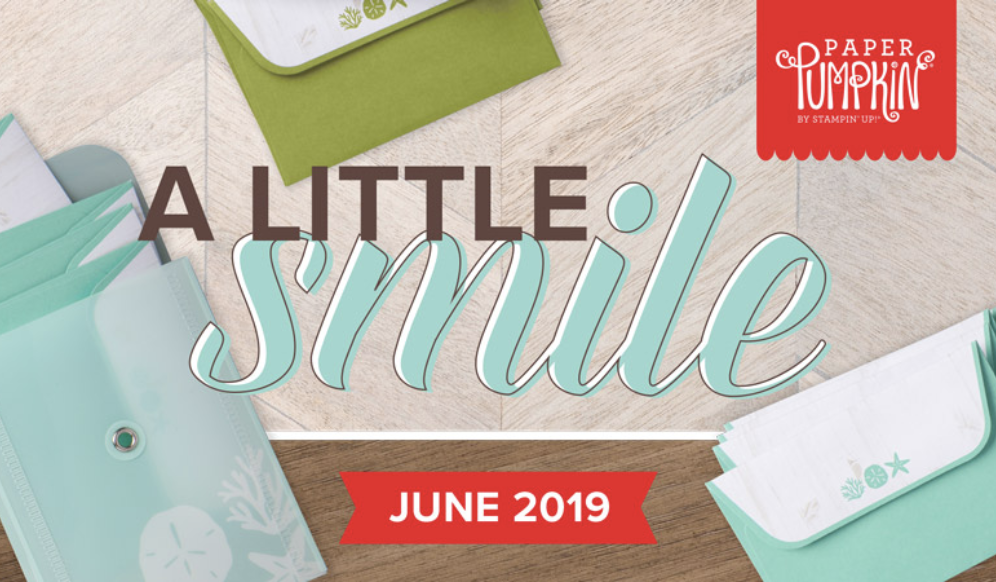
Gifts Galore
Subscribe October 11 – November 10

We all love to see piles of presents on Christmas morning. Make that your reality with the Gifts Galore Paper Pumpkin Kit! With classic Christmas sentiments, bright and festive colors, a sweet snowman, a tree with all the trimmings, or a playful pile of presents, you’ll have everything you need to make eye-catching treat packages that are sure to spread Christmas cheer. Each Gifts Galore box contains enough supplies to create nine treat packages—three each of three designs—and nine food-safe bags that are adorably styled for easy Christmas gifting. There’s plenty of joy to share with Gifts Galore!
- Kit contains enough supplies to create nine treat packages—three each of three designs—and nine food-safe bags.
- This all-inclusive kit includes printed die cuts, die-cut boxes, cellophane treat bags, adhesive, and more!
- Includes an exclusive stamp set and a Classic Stampin’ Spot
- Coordinating colors: Evening Evergreen, Flirty Flamingo, Old Olive, Pool Party, Poppy Parade
Subscribe to the November 2021 Paper Pumpkin Kit between 11 October and 10 November at paperpumpkin.com!
Note: Supplies may be limited toward the end of the subscription period.
*********************************************************************************************************
Card stock cuts for this project:
- Basic White Cardstock 1/2″ x 1 1/2″ (sentiment), 3 7/8″ x 5 1/8″ (inner liner)
- Cajun Craze Cardstock 4 1/4″ x 11″ (card base scored & folded at 5 1/2″), 2″ X 2 1/4″ (apples)
- Early Espresso Cardstock 3 1/4″ x 3 1/4″ (wreath), 4″ X 5 1/4″ (inner liner mat)
- Old Olive Cardstock 3 1/2″ X 3 1/2″ (wreath), 4 1/8″ X 5 3/8″ (card front mat)
- Heart & Home Designer Series Paper (available 1-4-22) 4″ X 5 1/4″ (card front), 2 1/4″ X 6″ (envelope flap)
*********************************************************************************************************
Product List

")
")


")


 Metallic-Edge Ribbon")