
Good Friday the 13th morning my stamping friends and welcome to my Fun Fold Friday. Is anyone superstitious out there? I’m not. My daughter and I along with my nephew, niece and her 2 boys, spent all day yesterday on the beach. I took the day off from my daily life and went and sat, walked swam and jumped waves for 8 hours yesterday. It was AMAZING. We had such a beautiful HOT day, but on the beach you don’t even feel the heat, especially when your in the water as much as we were. The sunburn today is telling me a little different. How was everyone’s week? Does anyone have any plans for the weekend yet? I’ll be working all day Saturday and attending my virtual team meeting on Sunday. We have a lot of fun even at our virtual meetings.
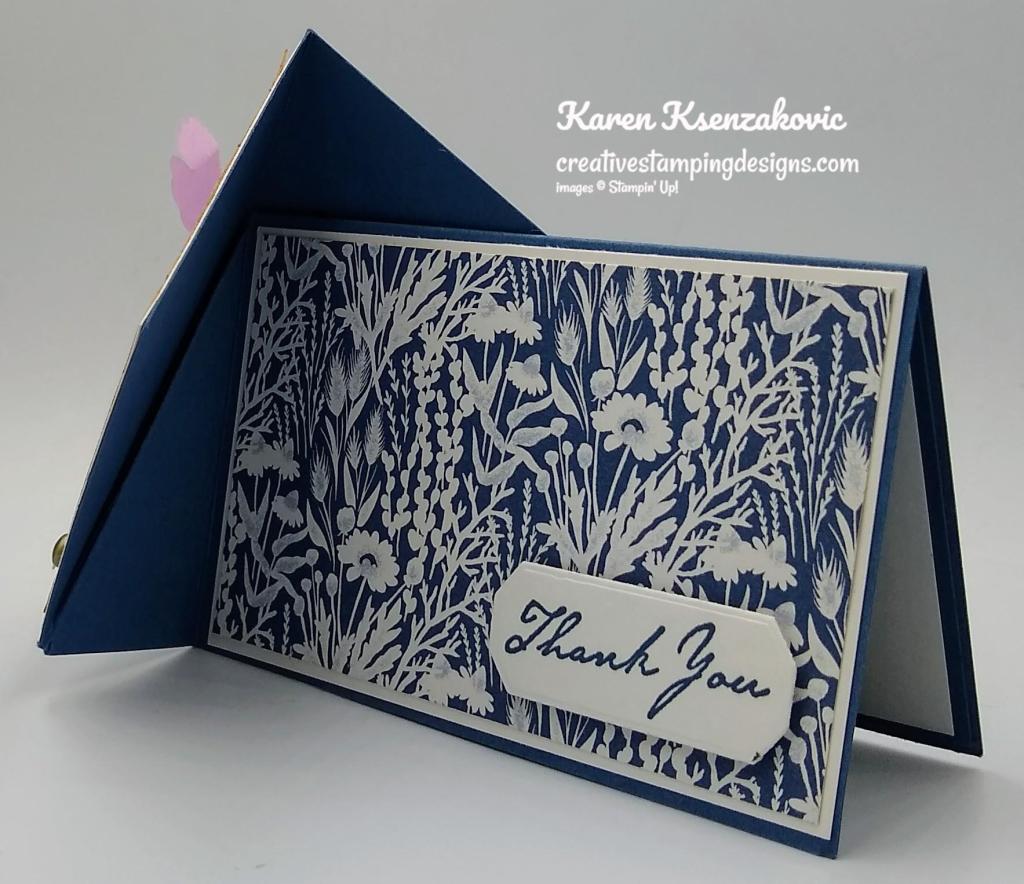
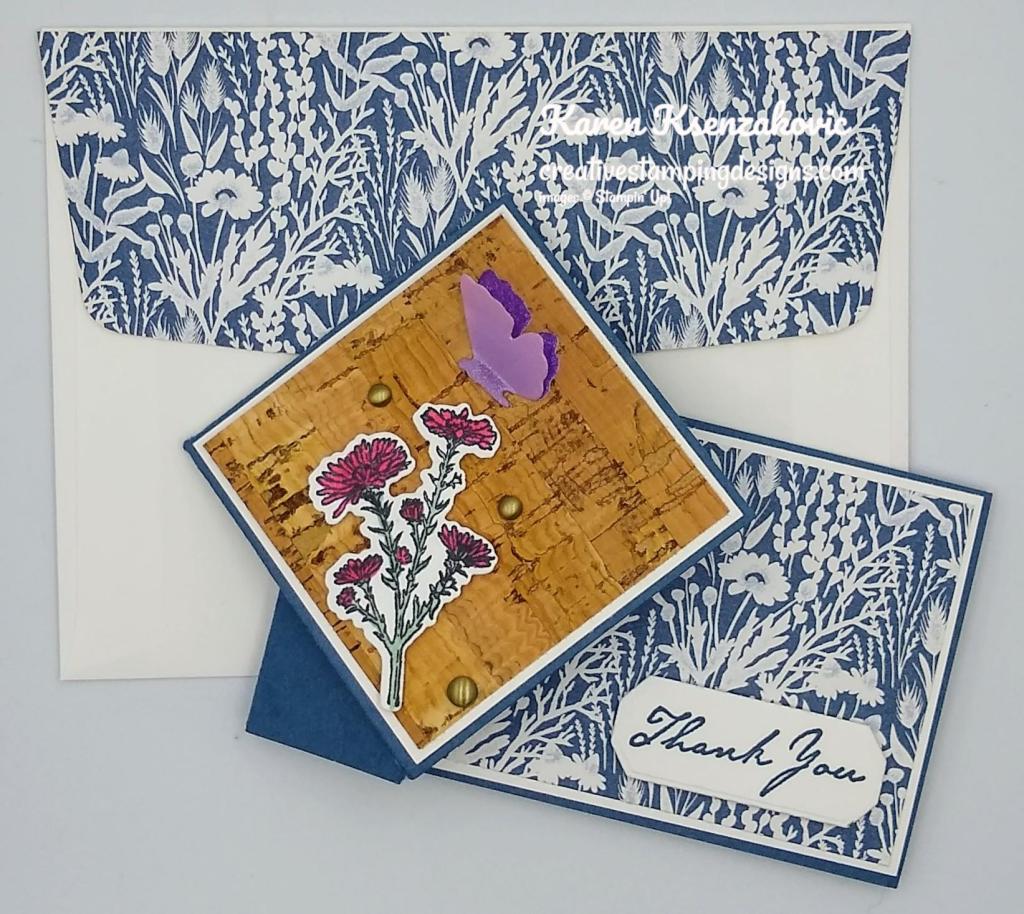
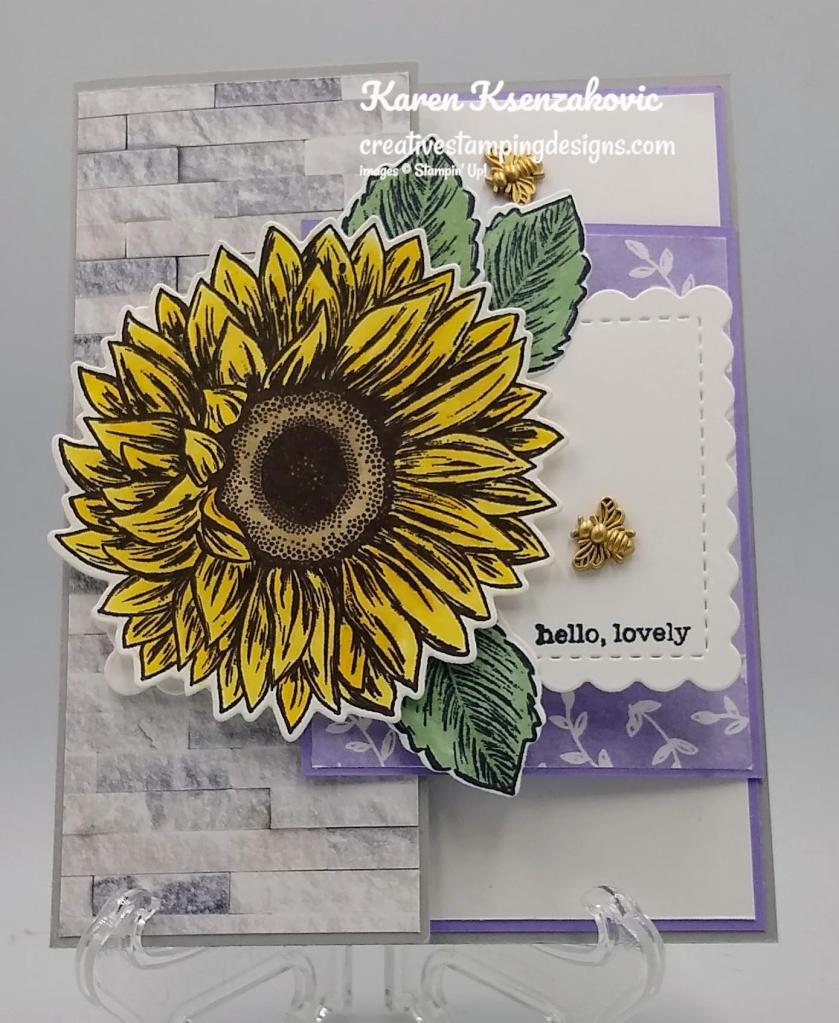
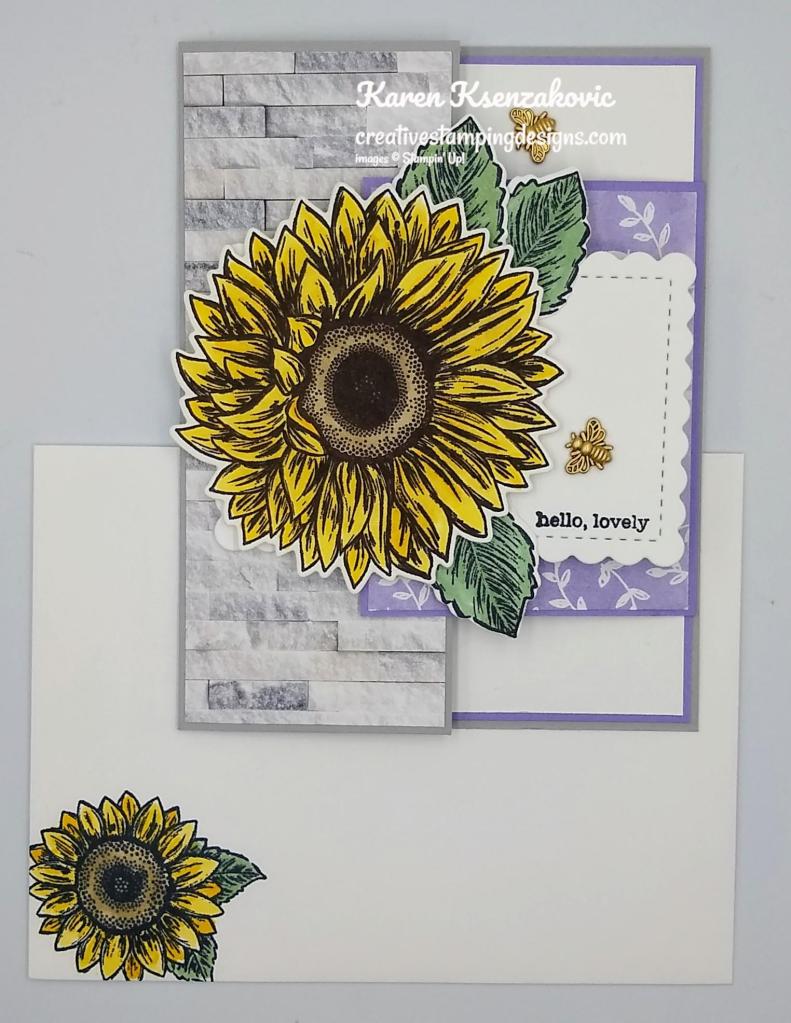
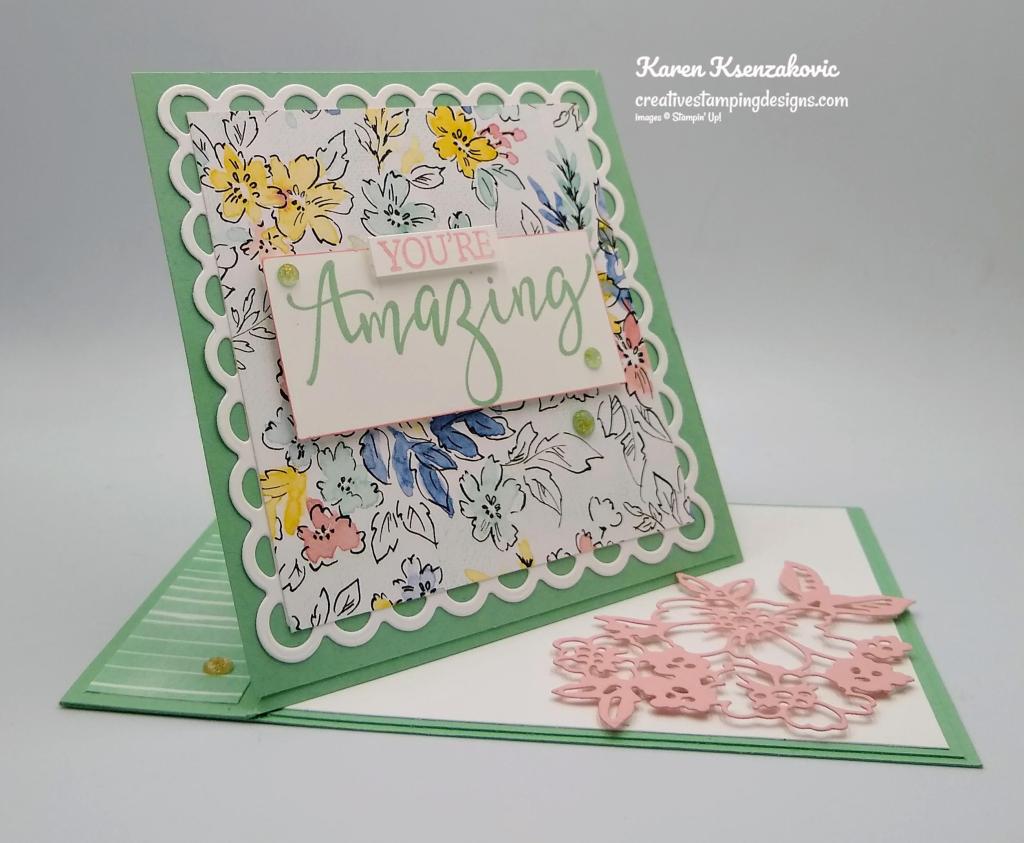
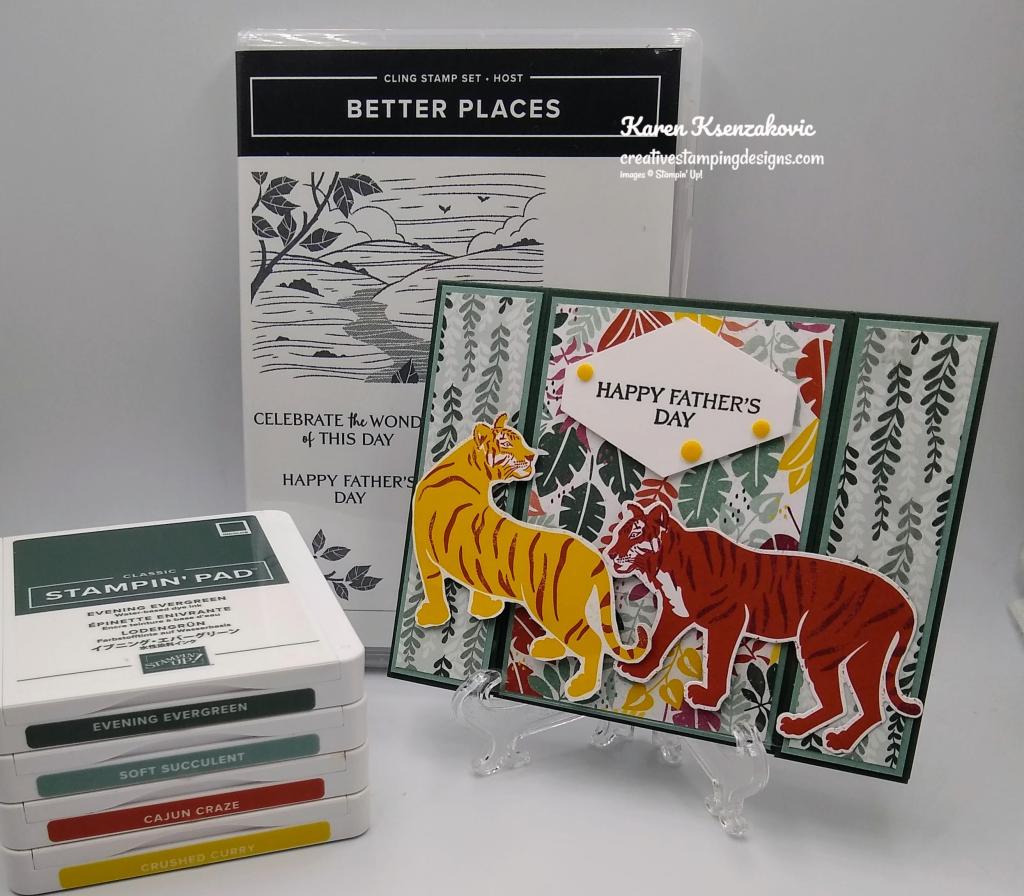
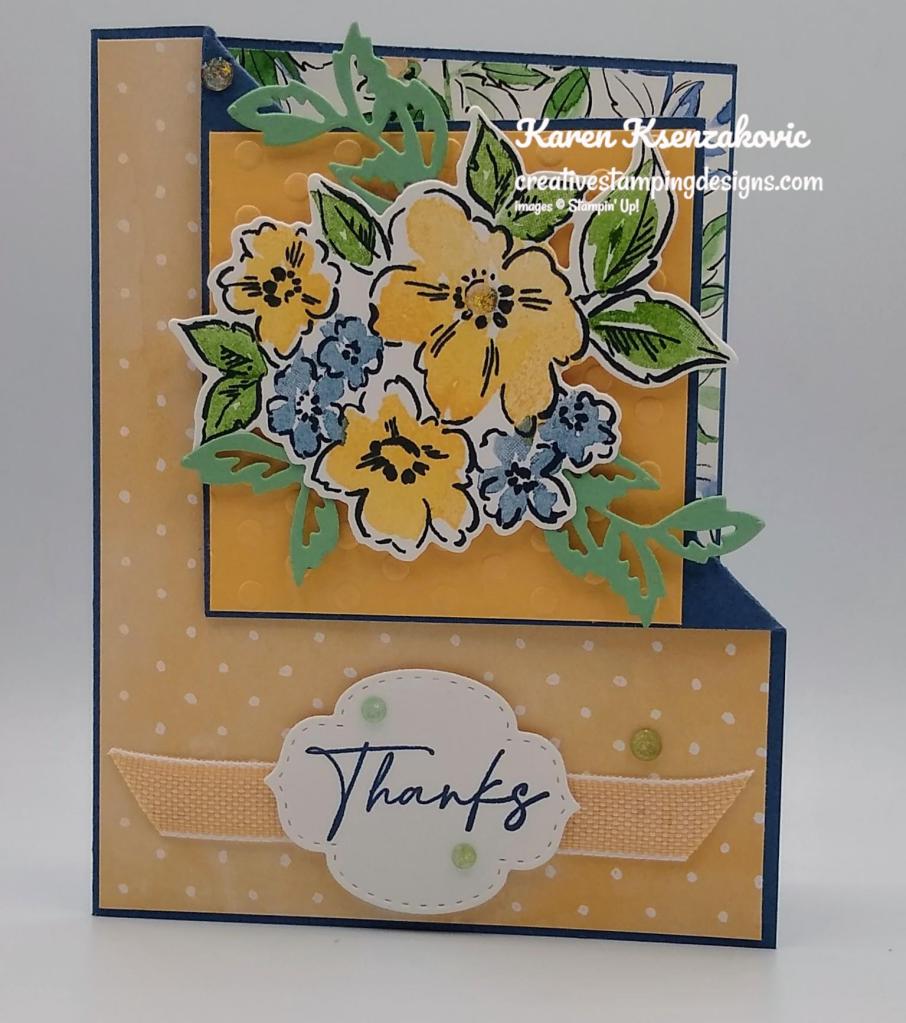
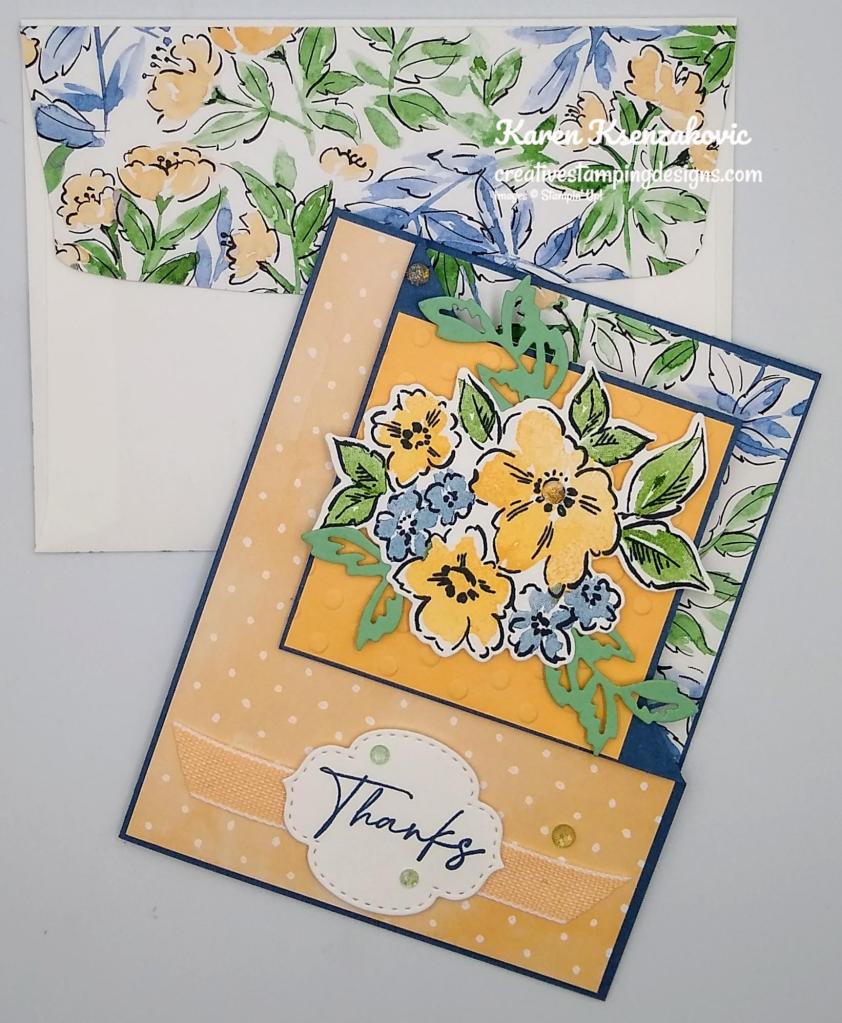
Today’s card I made on my Facebook Live video on Wednesday. If you were able to join me or watched the replay, thank you. If you were able to watch me, you were able to see what not to do when making this card. Luckily I was able to fix it without having to redo too much. If you’d like to watch my video and stamp along, the measurements are below along with the links to my Facebook page and my YouTube channel. Here’s my card for today.
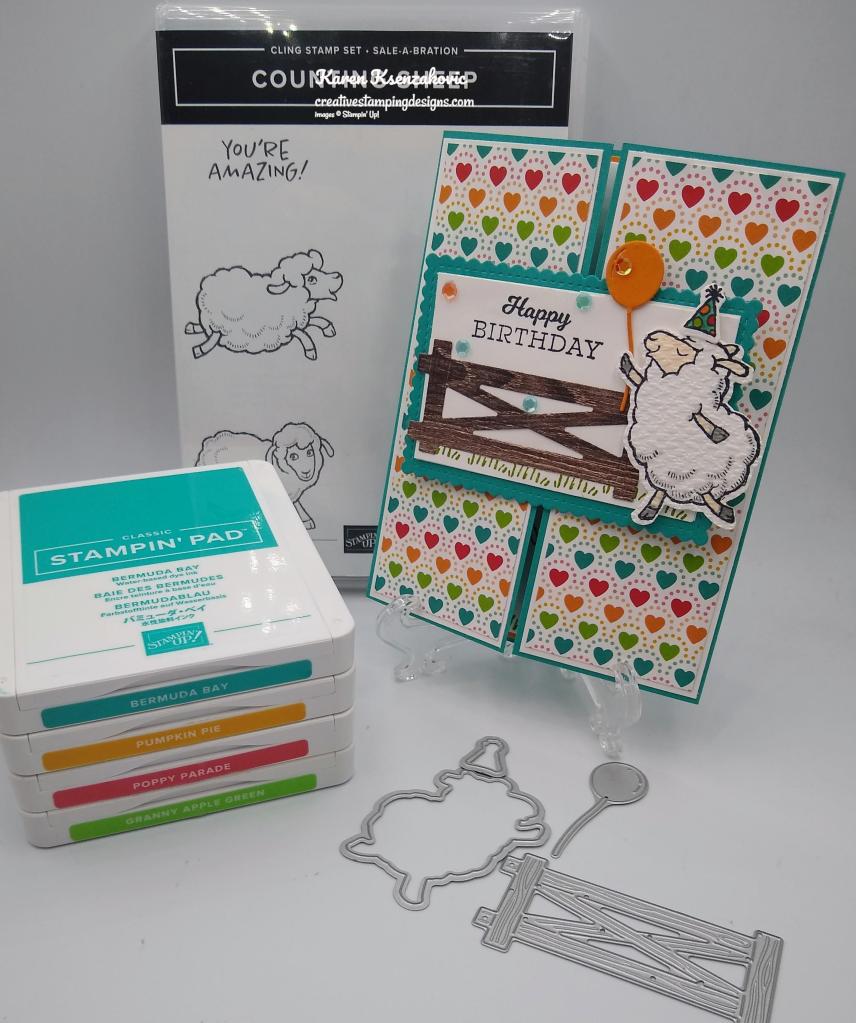
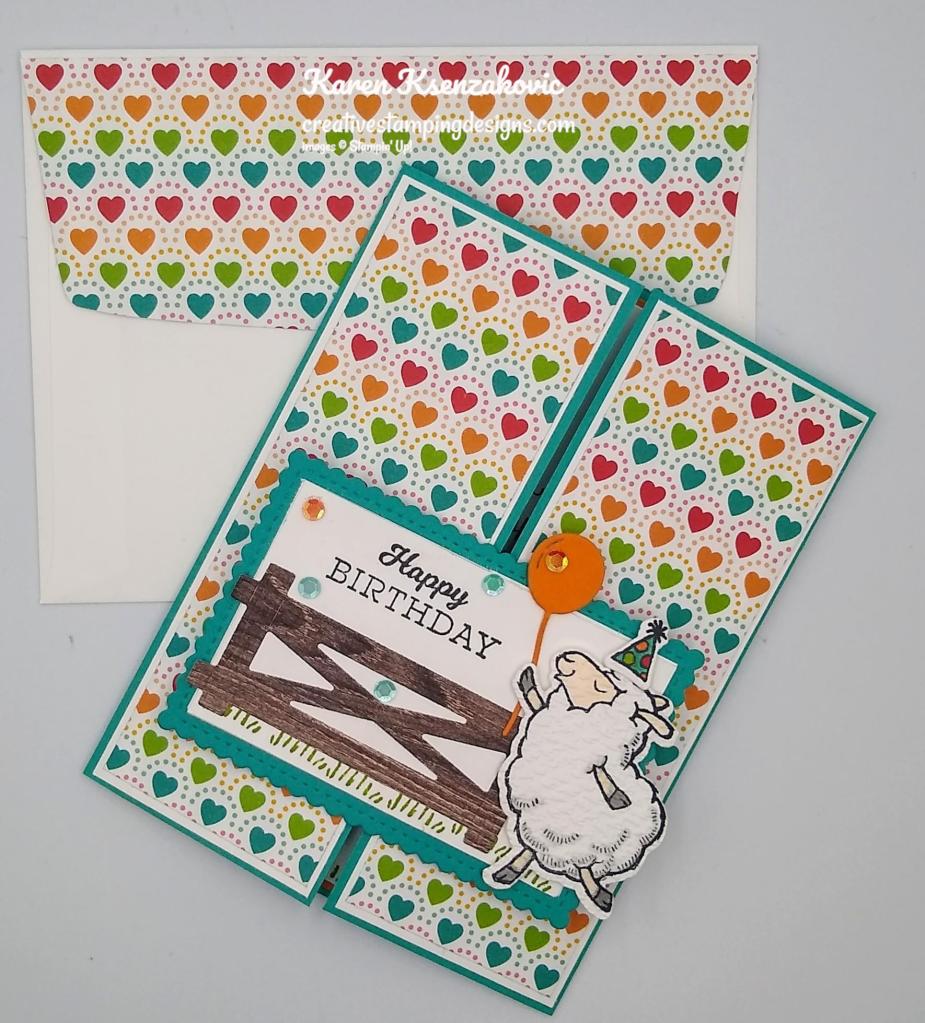
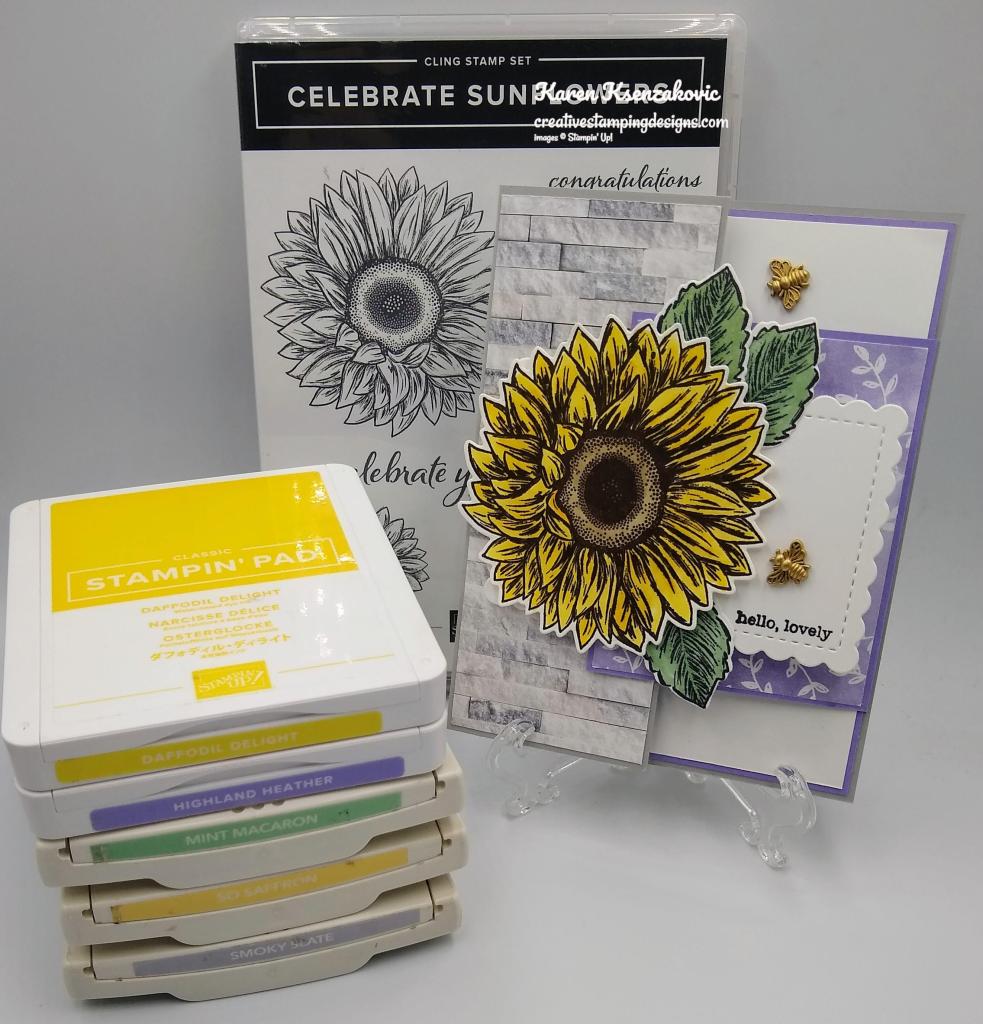
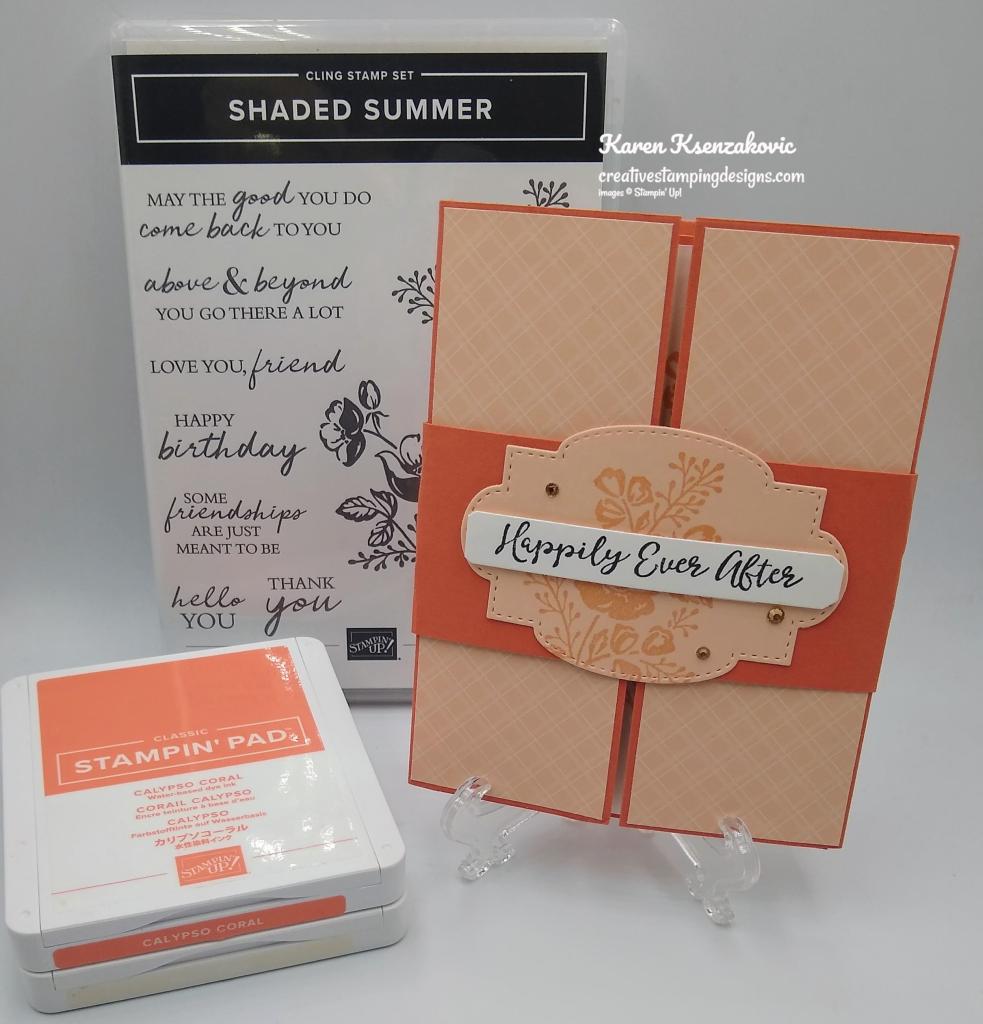
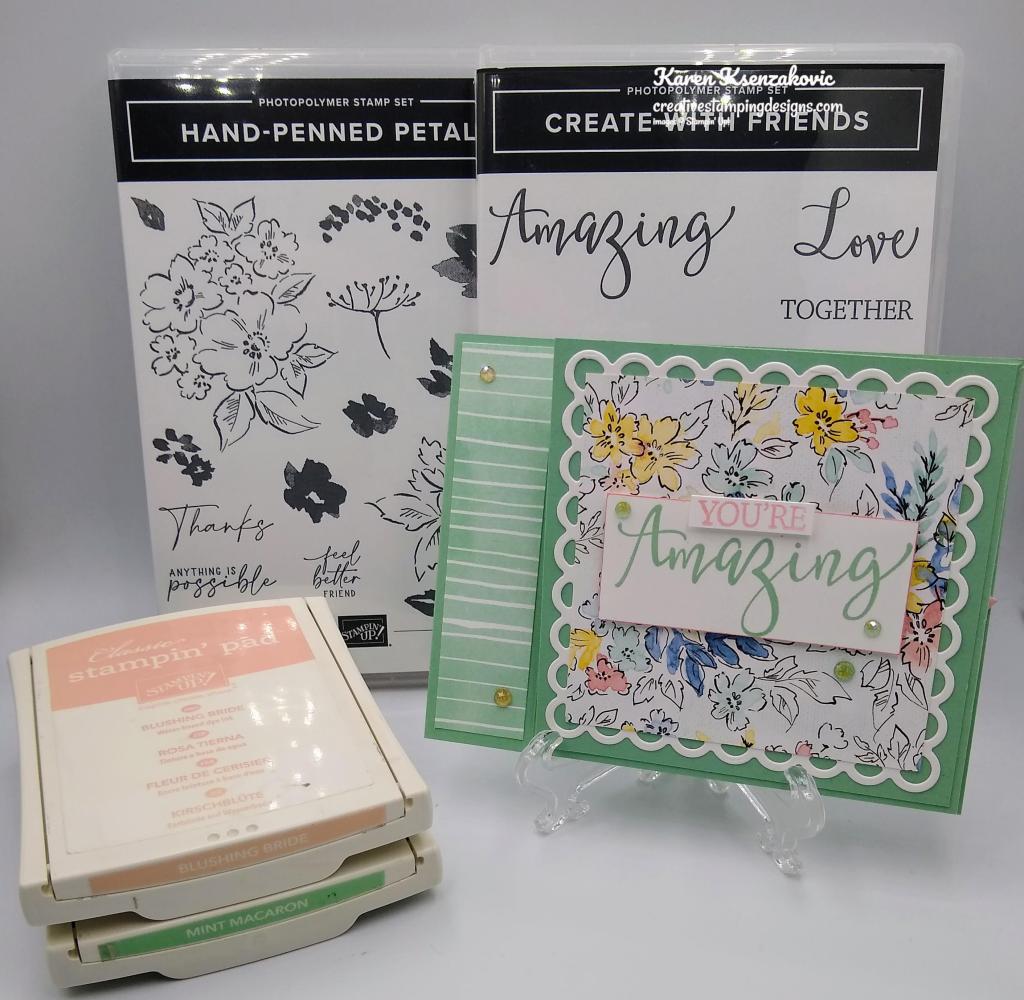
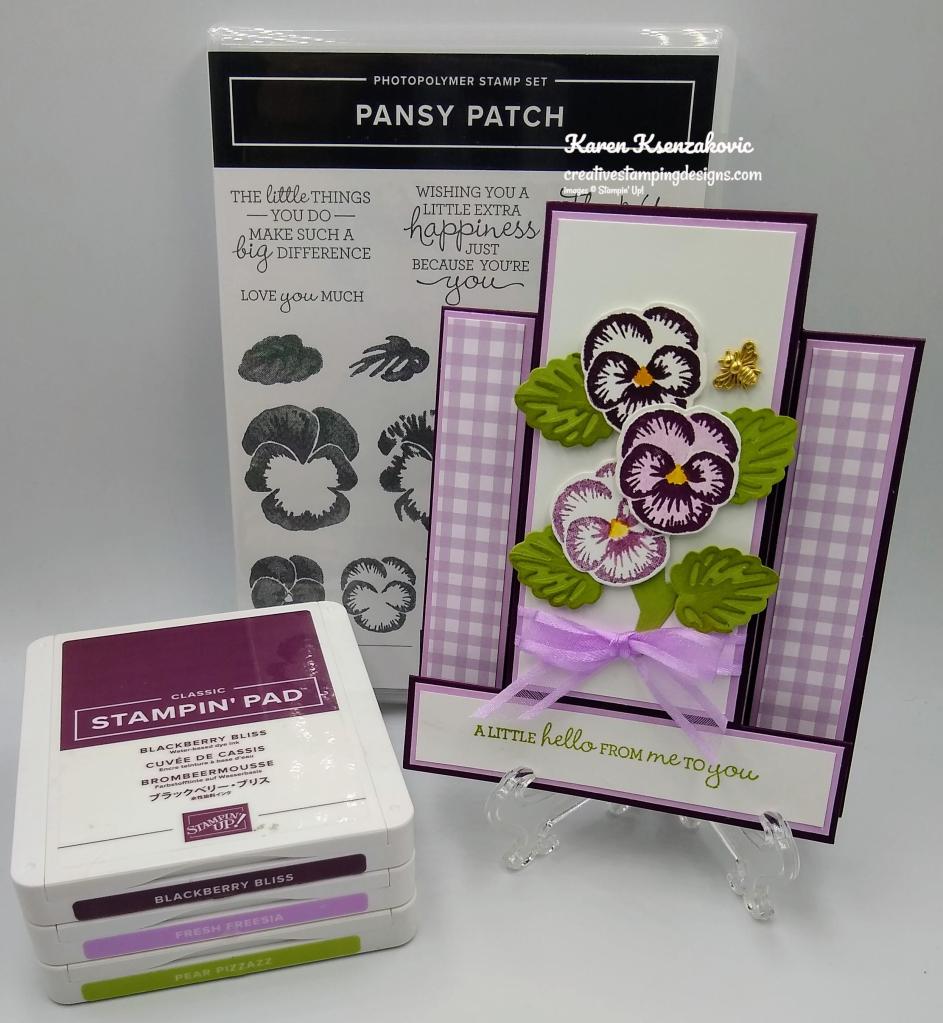
I used the Stampin’ Up! Counting Sheep Cling Stamp Set along with the Sheep Dies for my card today. I also used the Stampin’ Up! In Your Words Cling Stamp Set for the sentiments. All 3 of these items are from the August-September Sale-a-bration Catalog and are free with qualifying orders.
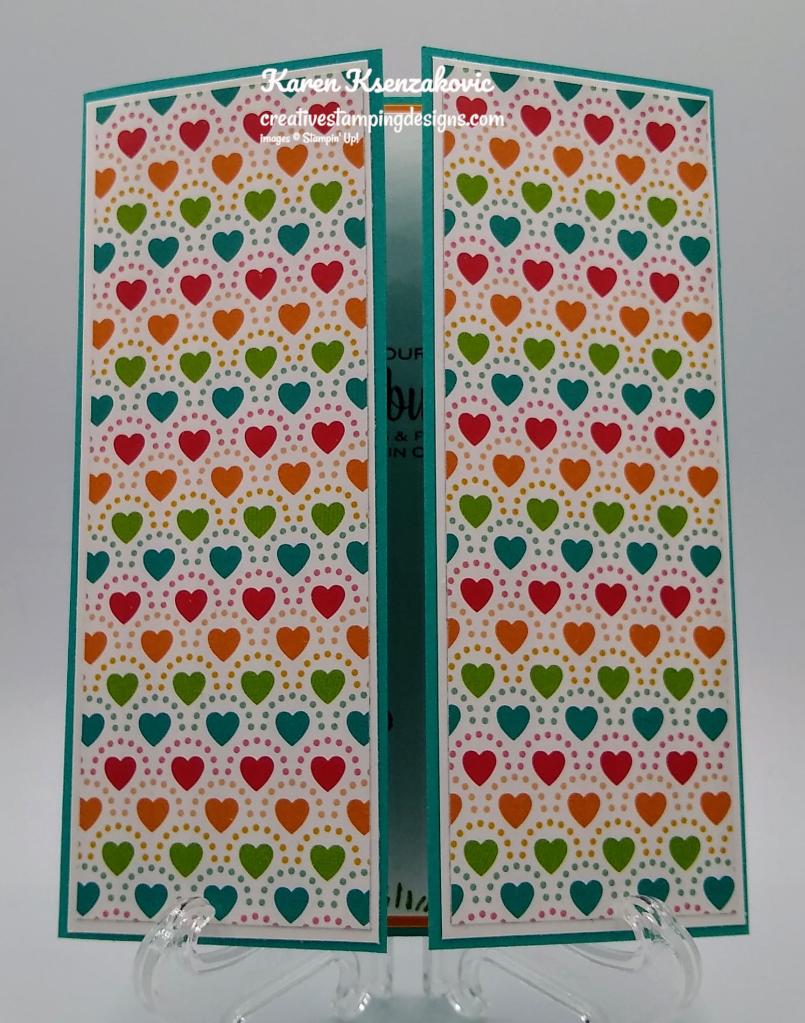
I started by adhering 2 panels of Pattern Party Host Designer Series Paper to Basic White mats using Multipurpose Liquid Glue.
I adhered the 2 layered panels to the front of a Bermuda Bay card base using Multipurpose Liquid Glue.

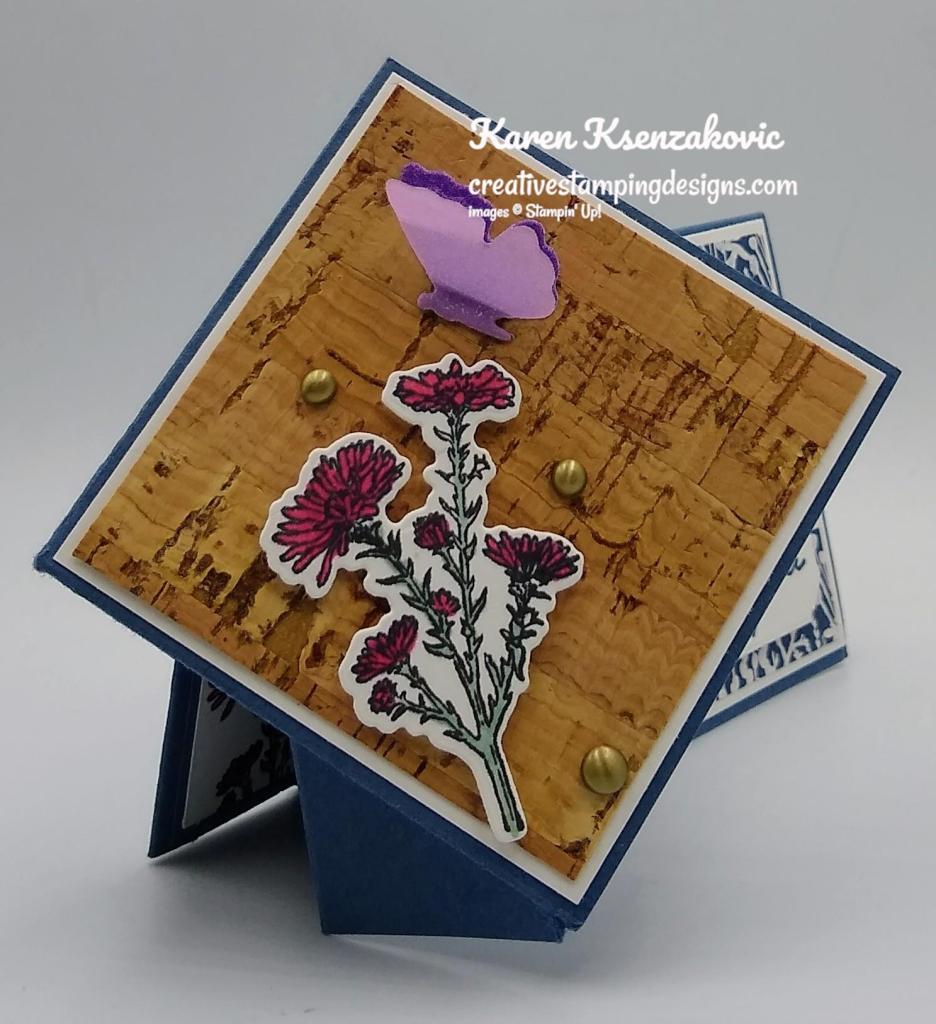
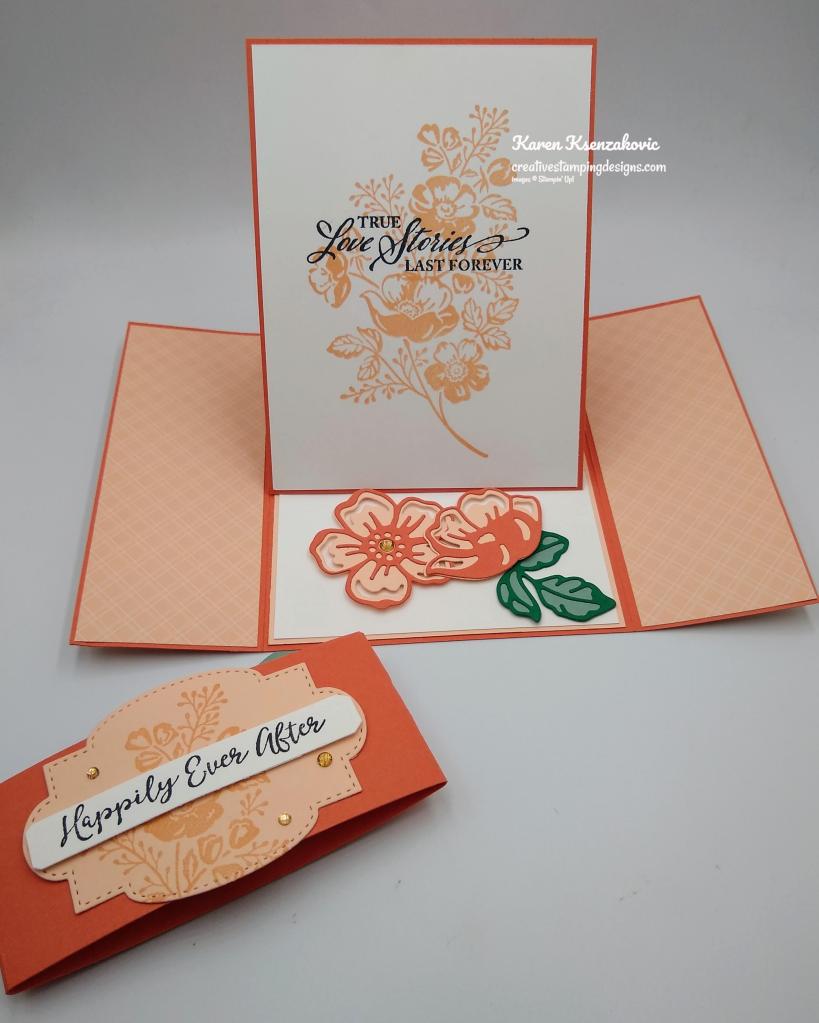
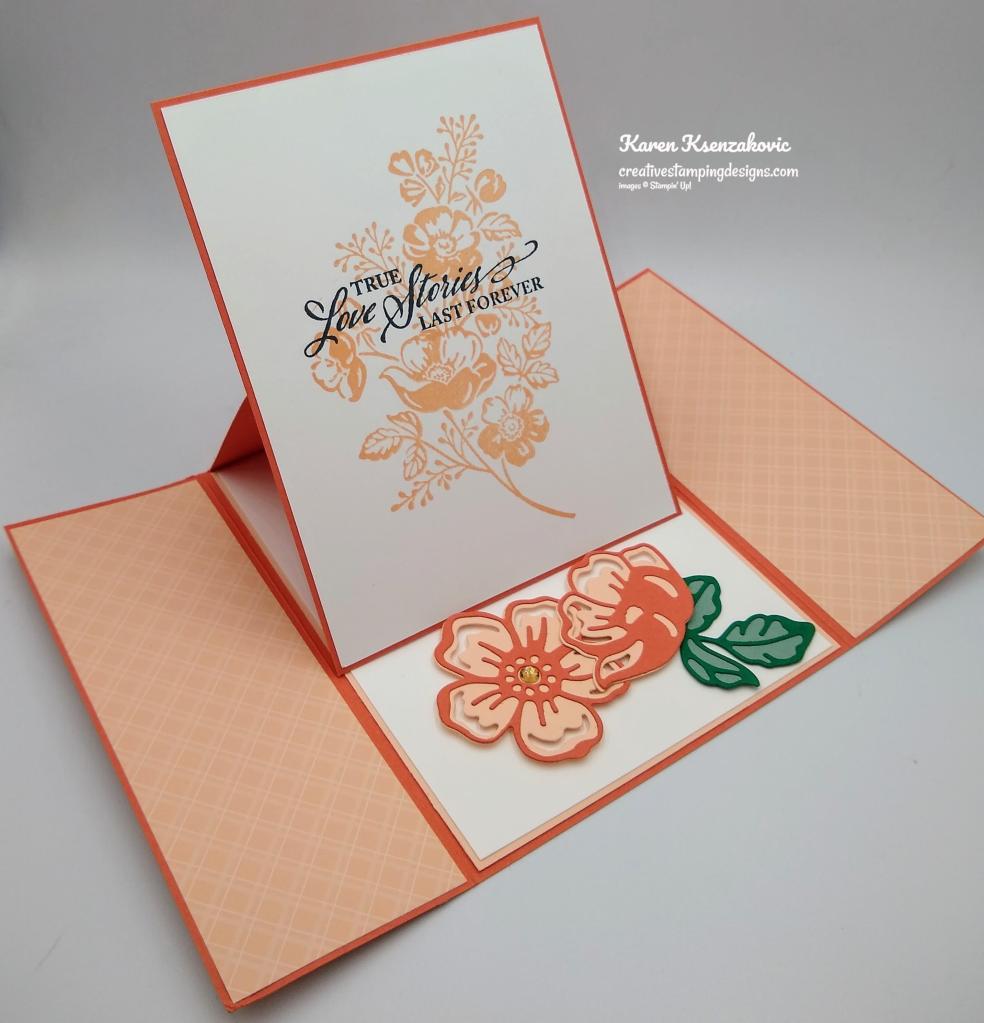
For the sliding mechanism I started by cutting a Bermuda Bay panel with the Stitched So Sweetly Dies. I adhered a small panel of the Basic White cardstock to the back of the scalloped rectangle using Stampin’ Seal. I scored 2 of the Basic White panels and folded them in half. I adhered the 2 folded panels folded edge in on the back of the scalloped rectangle. I adhered another one of the small Basic White panels on top of the folded panels using Stampn’ Seal. On the last small Basic White panel I stamped the grass image from the Counting Sheep stamp set in Granny Apple Green Ink on the bottom of the panel. I stamped the sentiment from the In Your Words stamp set in Tuxedo Black Ink on the top of the panel. I cut a panel of In Good Taste Designer Series Paper using the fence die from the Sheep Dies and adhered it to the Basic White panel using Multipurpose Liquid Glue. On a panel of Basic White cardstock I stamped the sheep image from the Counting Sheep stamp set in Tuxedo Black Ink. I colored the image in using my Petal Pink and Smoky Slate Stampin’ Blends Markers. I removed some of the ink using my Color Lifter to lighten the color. I cut the sheep out using my Sheep Dies and embossed the sheep using my Tasteful Textile 3D Embossing Folder. I stamped the party hat image from the Counting Sheep stamp set in Tuxedo Black Ink and cut the image out using my Sheep Die. I colored the hat in using my Bermuda Bay, Granny Apple Green, Poppy Parade and Pumpkin Pie Stampin’ Blends Markers. I adhered the hat to the sheep using Multipurpose Liquid Glue. I adhered the sheep to the Basic White panel using Stampin’ Dimensionals. I cut the balloon from a scrap of Pumpkin Pie cardstock and adhered it to the sheep. I adhered the artwork to the scalloped rectangle using Multipurpose Liquid Glue. I added a few Artistry Bloom Adhesive-Backed Sequins to the artwork

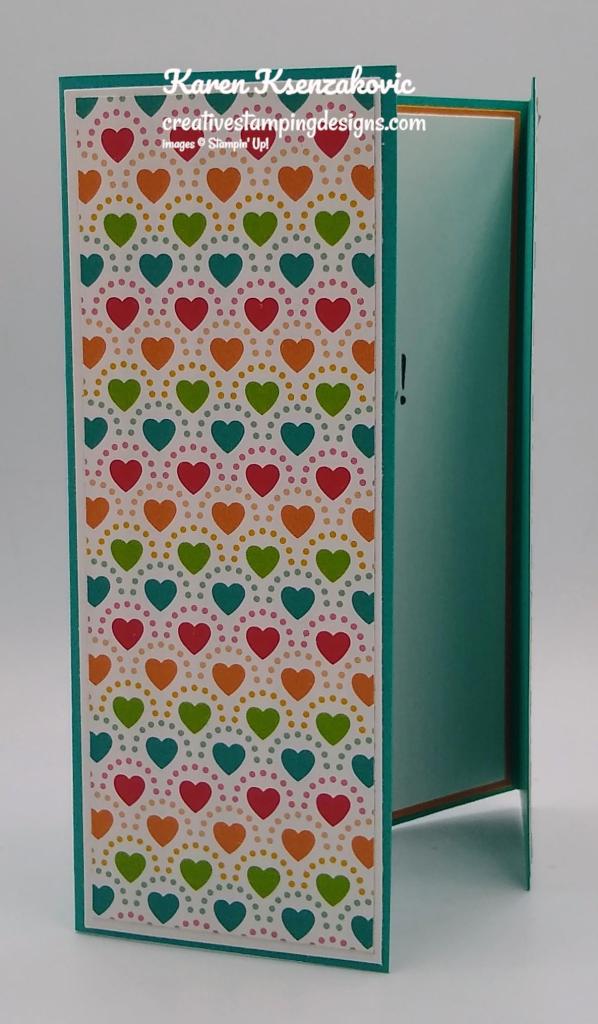
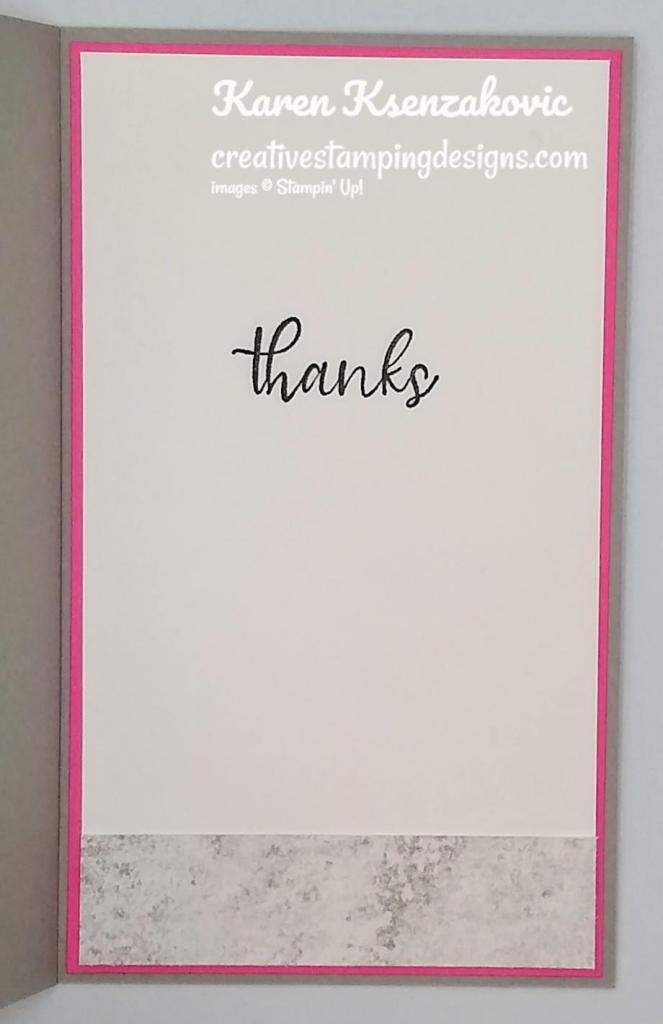
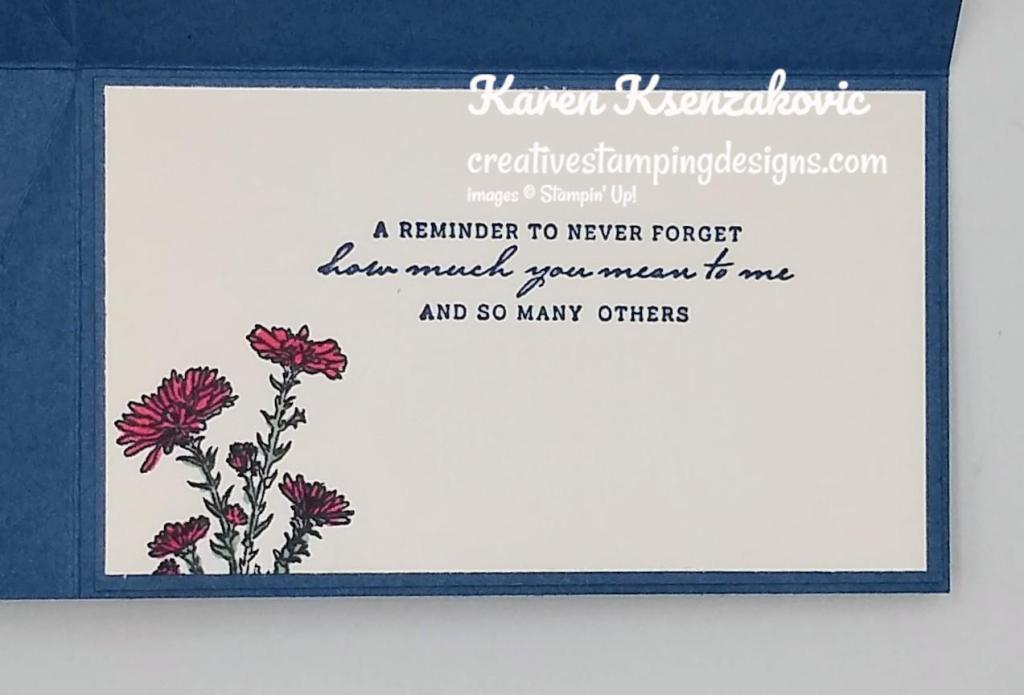
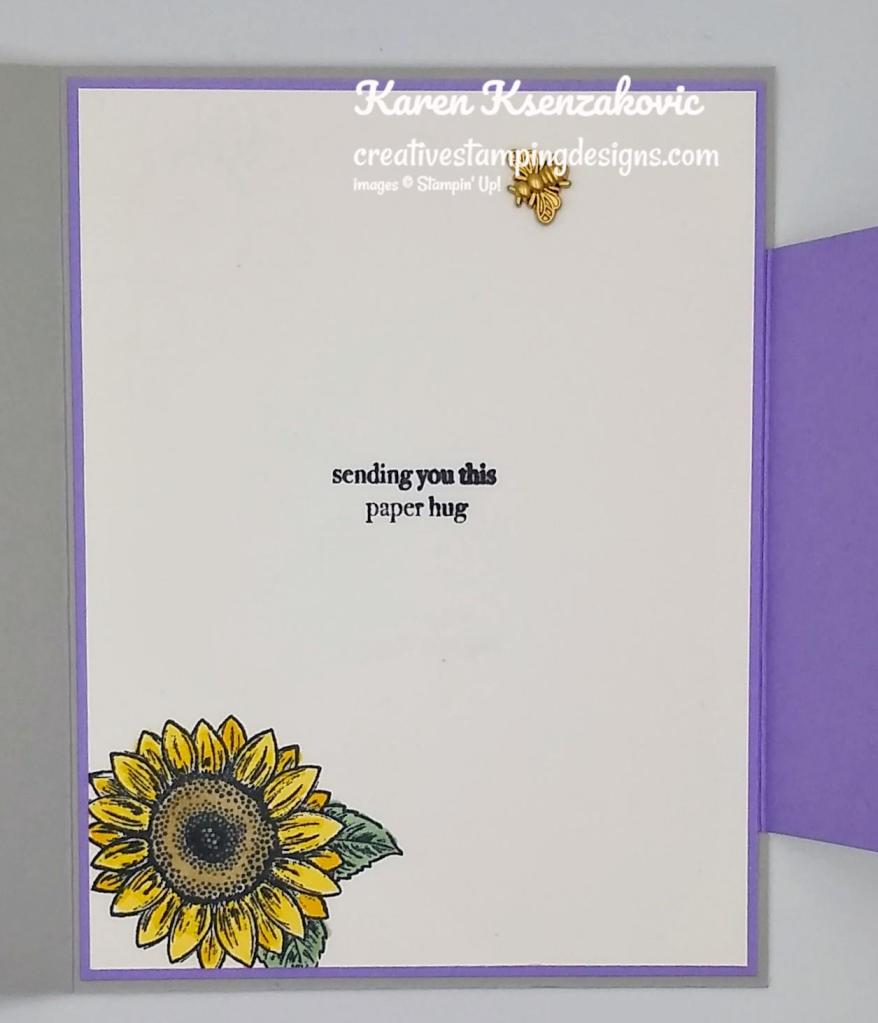
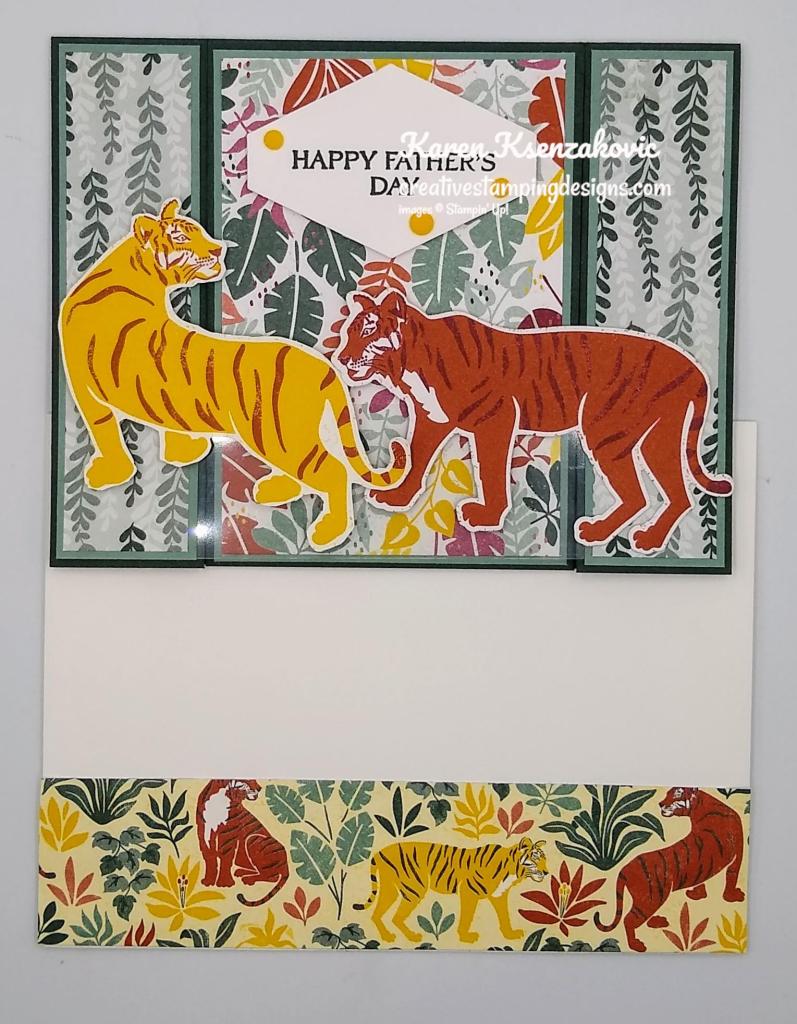
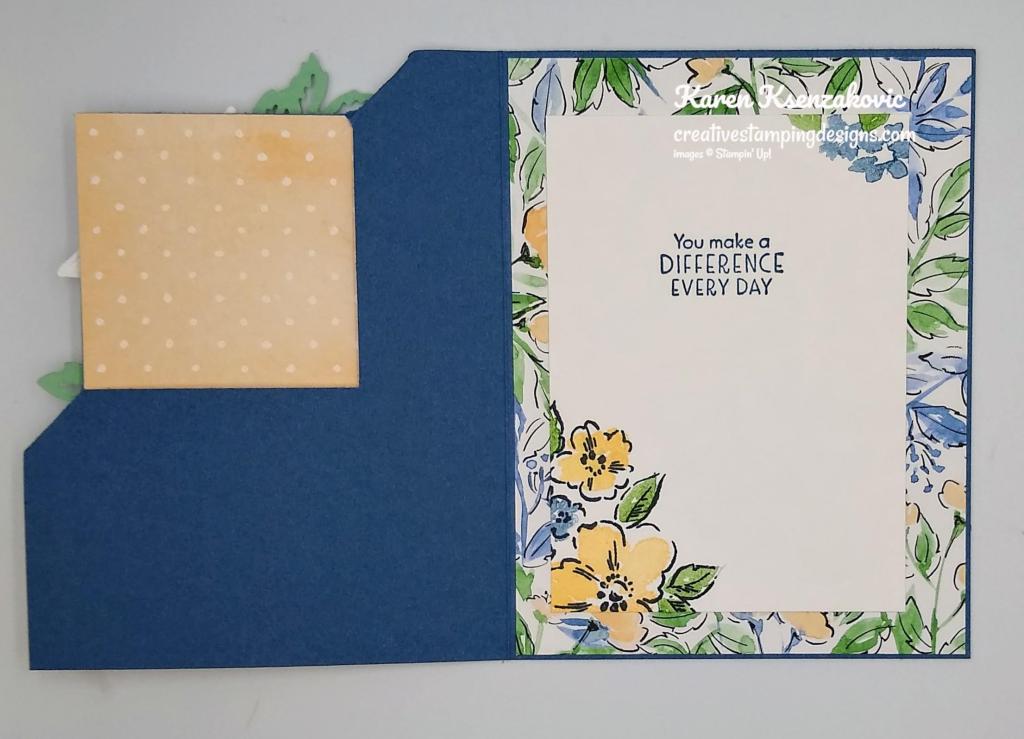
On the inside I stamped the sentiment from the In Your Words stamp set in Tuxedo Black Ink on a Basic White panel. I stamped the sheep image from the Counting Sheep stamp set in Tuxedo Black Ink and colored the image in using my Petal Pink and Smoky Slate Stampin’ Blends Markers. I stamped the grass image below the sheep in Granny Apple Green Ink. I adhered the Basic White panel to a Pumpkin Pie mat using Stampin’ Seal and then to the inside of the Bermuda Bay card base using Multipurpose Liquid Glue.
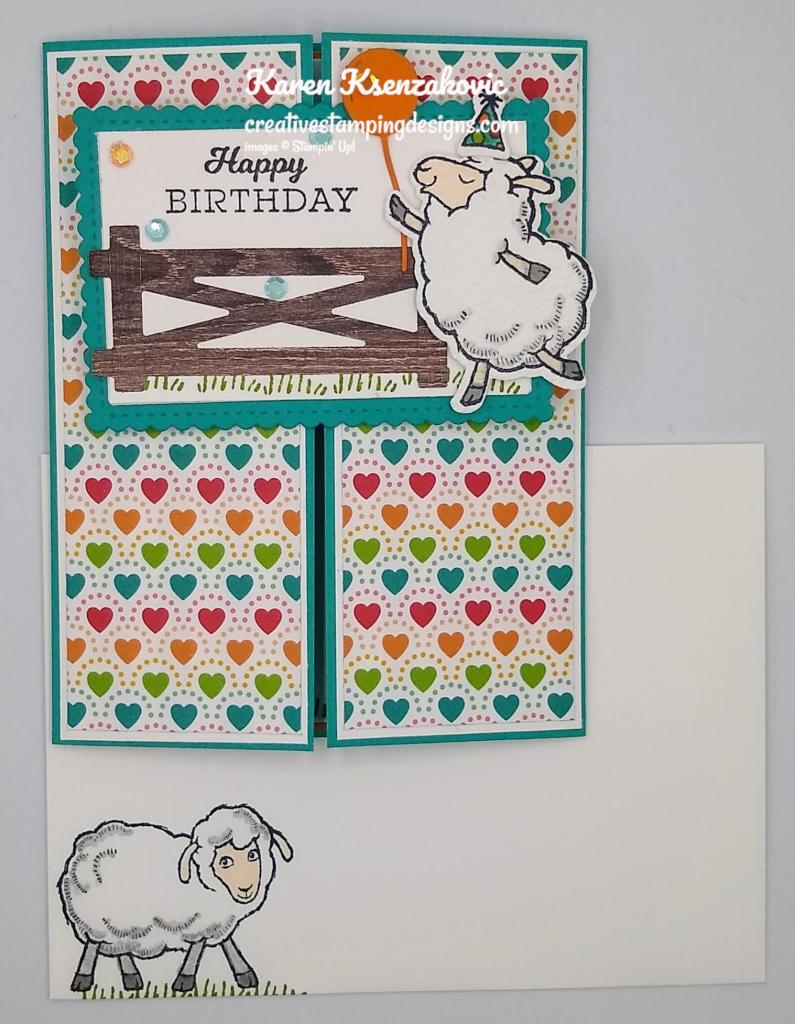
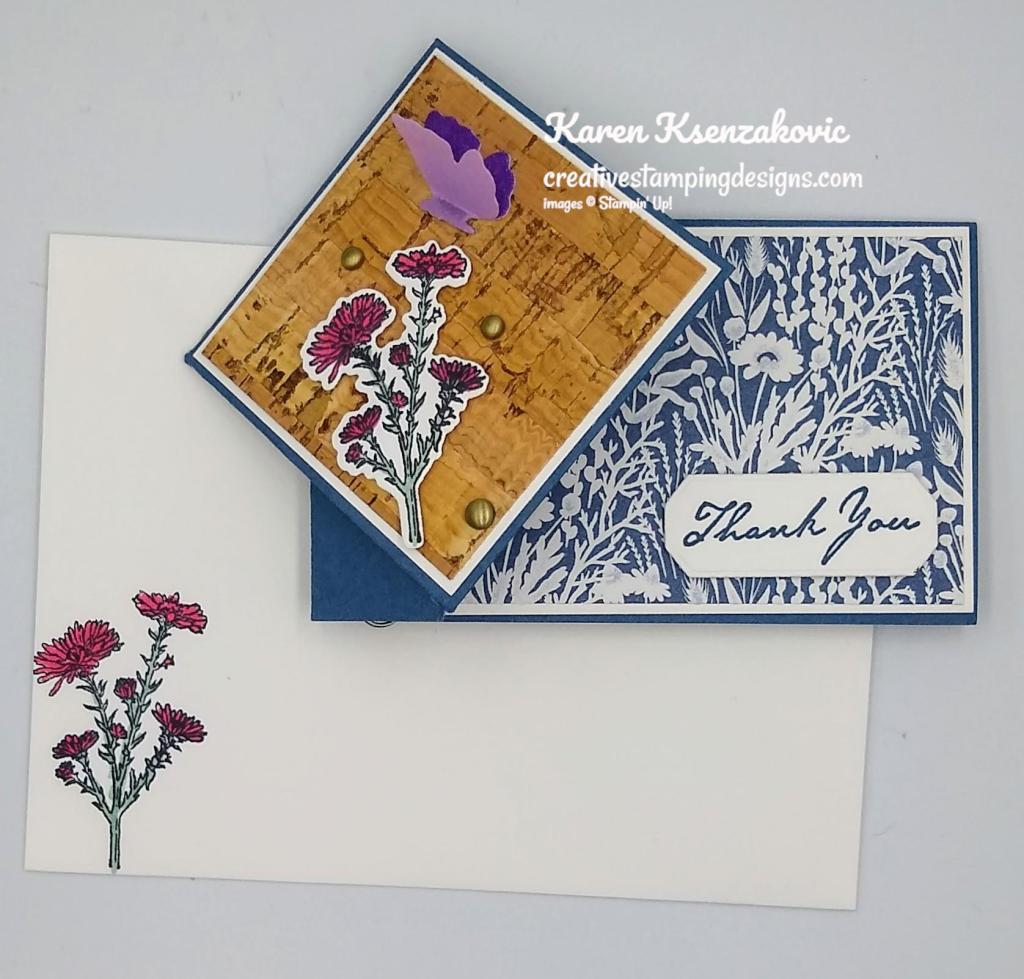
To finish my card I decorated a Basic White Medium Envelope. I stamped the sheep image from the Counting Sheep stamp set on the envelope front and colored it in using my Petal Pink and Smoky Slate Stampin’ Blends Markers. I stamped the grass image from the Counting Sheep stamp set below the sheep in Granny Apple Green Ink. I adhered a panel of Pattern Party Hose DSP to the envelope flap.
Thank you for stopping by my blog today. I hope you liked my card and will give it a try. If you do CASE this card, please feel free to post it in the comments of my Facebook page under the post. I’d love to see your take on the card. The list of measurements are below if you’d like to stamp along while watching the video. You can watch my video on my Facebook page Here.
You can also view the video on my YouTube channel Here. Happy Stamping!!
*********************************************************************************************************
If you need any stamping supplies, I’d love to be your Demonstrator. Just click HERE to go directly to my online store or drop me an email if you have any questions.
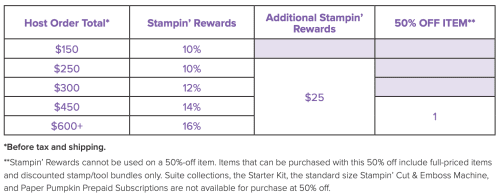
MY CURRENT HOST CODE IS: US3JFJ62
Use this host code when you order $50 or greater and receive a free gift from me! If your order is over $150, please do not use this code, but you’ll still get the free gift. The free gift is your choice of any 1 item valued up to $10.00 from the 2020-2021 Annual Catalog or the January-June 2021 Mini Catalog! For any orders $50 or more I will also send you my monthly class tutorials. Click HERE or go to my Customer Rewards for more details and to see what this months tutorials are.
Please remember to use my current Host Code and make sure that you can see my name on the final checkout page listed as your Demonstrator when you order so that you know that you’re ordering with me and you’ll get my rewards!
Happy Stamping, Karen!
*********************************************************************************************************
State Sales Tax Holidays
For those of you living in Massachusetts …you’ve got sales tax holiday coming up this weekend!!

The good news is that some items in the Stampin’ Up! Catalogs qualify for the sales tax holidays! The list of sales tax holidays by state and items in that state that qualify are listed below (click on the image to open up a full-size printable document):
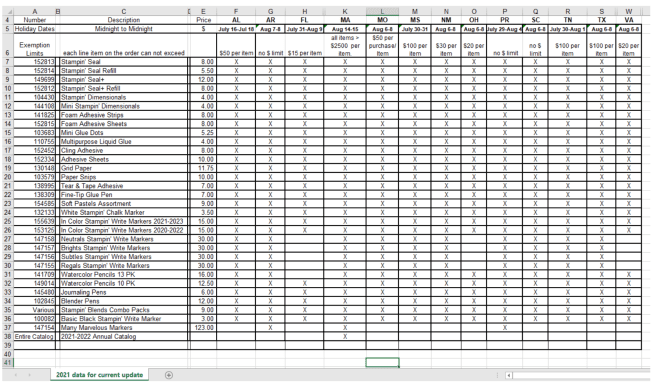
Please note that you must place your order with Stampin’ Up! during the tax holiday period in order to receive these items tax-free (which is midnight on the first day to midnight on the last day of the tax holiday). Also, keep in mind that this is a state sales tax holiday; the state statute may not apply to county, city, and special jurisdiction taxes.
If you live in one of those states, YAY! Have fun shopping tax free during your holiday!
*********************************************************************************************************
Haunts & Harvest
Subscribe August 11 – September 10
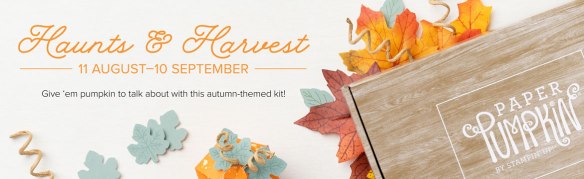
Hay, there! Experience everything the autumn season has to offer with the Haunts & Harvest Paper Pumpkin Kit! This month’s kit includes enough supplies to create 12 treat boxes—4 each of 3 designs. That means you can take your pick of apple, pumpkins, or jack-o-lantern treat boxes! Plus, the Paper Pumpkin box is designed to easily transform into a vintage wheelbarrow for you to display your harvest!
Whether you’re thinking about crisp red apples or you’re ready to carve some spooky jack-o-lanterns (or both!), the Haunts & Harvest Paper Pumpkin Kit—designed in a vivid fall palette—is a hands-on crafting experience for all autumn lovers!
Details:
- Kit contains enough supplies to create 12 treat packages—4 each of 3 designs. The all-inclusive kit includes printed die-cut boxes, die-cut sheets, adhesive, and more!
- Finished treat box size: 2-1/2″ x 2″ (6.4 x 5.1 cm)
- Includes an exclusive stamp set and a Classic Stampin’ Spot
- Coordinating colors: Basic Black, Pale Papaya, Poppy Parade, Pumpkin Pie, Soft Succulent
Subscribe to the September 2021 Paper Pumpkin Kit between 11 August and 10 September at paperpumpkin.com!
Note: Supplies may be limited toward the end of the subscription period.
*********************************************************************************************************
Card stock cuts for this project:
- Basic White Cardstock 2 – 2″ X 5 3/8″ (side panel mats), 5 – 2 1/16″ x 3 1/4″ (sliding mechanism), 2 1/4″ X 2″ (sheep), 4″ X 5 1/4″ (inner liner)
- Bermuda Bay Cardstock 8 1/2″ X 5 1/2″ (card base scored & folded at 2 1/8″ & 6 3/8″), 3″ X 4″ (scalloped rectangle)
- Pumpkin Pie Cardstock 4 1/8″ X 5 3/8″ (inner liner), scrap for balloon
- In Good Taste Designer Series Paper 3″ X 1 3/4″ (fence)
- Pattern Party Host Designer Series Paper 2 – 1 7/8″ X 5 1/4″ (side panels), 2 1/4″ X 6″ (envelope flap)
*********************************************************************************************************
Product List
")

")


 Host Designer Series Paper")


 Designer Series Paper")


 Shimmer Ribbon")


 Specialty Paper")


")
")


 Designer Series Paper")


 Designer Series Paper")


")


")
")
")


 Designer Series Paper")


 Open Weave Ribbon")


 Designer Series Paper")


")


 Woven Ribbon")


")


 Designer Series Paper")


