Good Friday morning my stamping friends. Welcome to my Fun Fold Friday. How was everyone’s week? Does anyone have plans for the weekend? I’ll be working all day Saturday depending on the amount of snow we get. Once we sell out of shovels and salt sometimes, they will close the store so that everyone can get home safely. Fortunately, I walk to work, so I don’t have to worry too much about travel.
Today’s card I made on my Facebook Live video on Wednesday. If you were able to join me or watched the replay, thank you. If you’d like to watch my video and stamp along, the measurements are below along with the links to my Facebook page and my YouTube channel. Here’s my card for today.
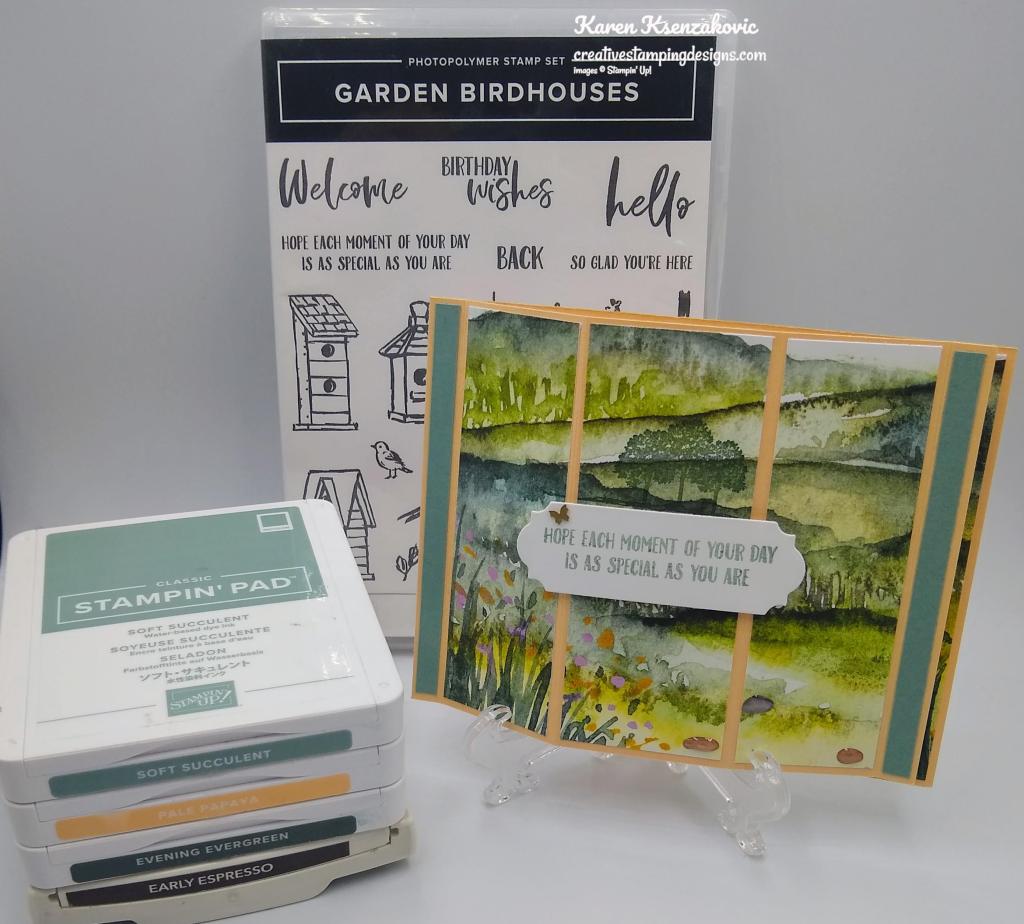
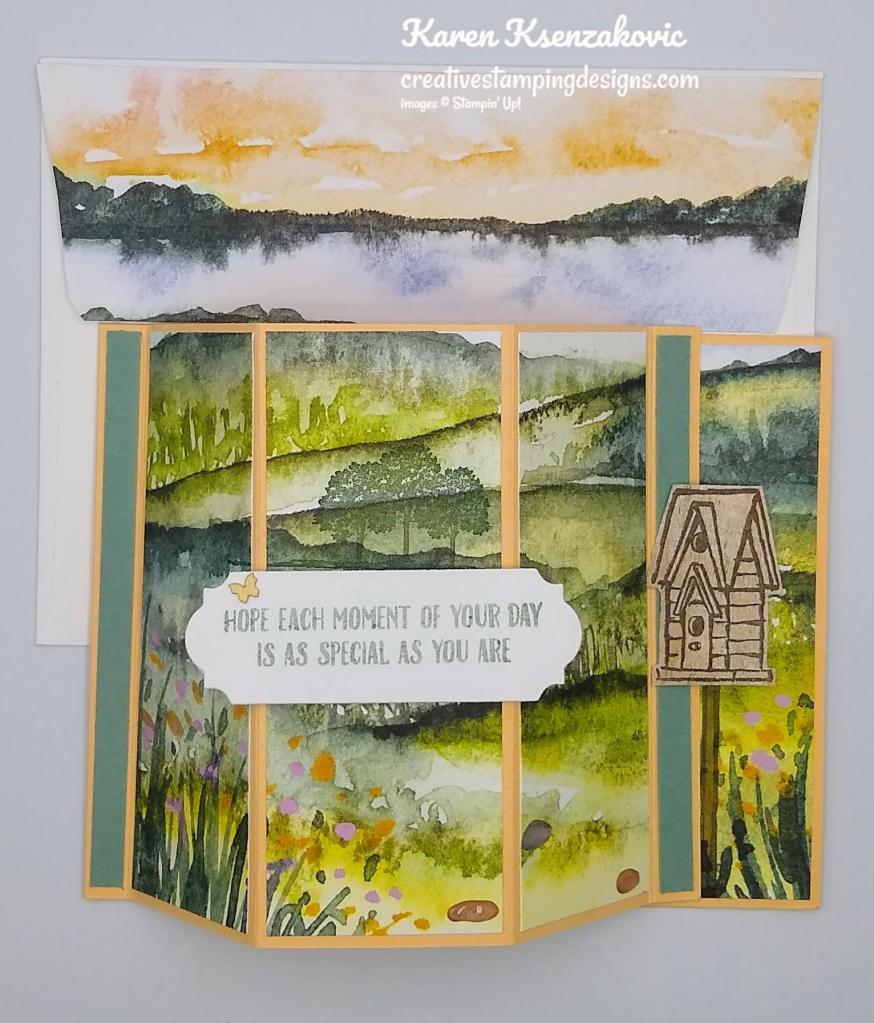
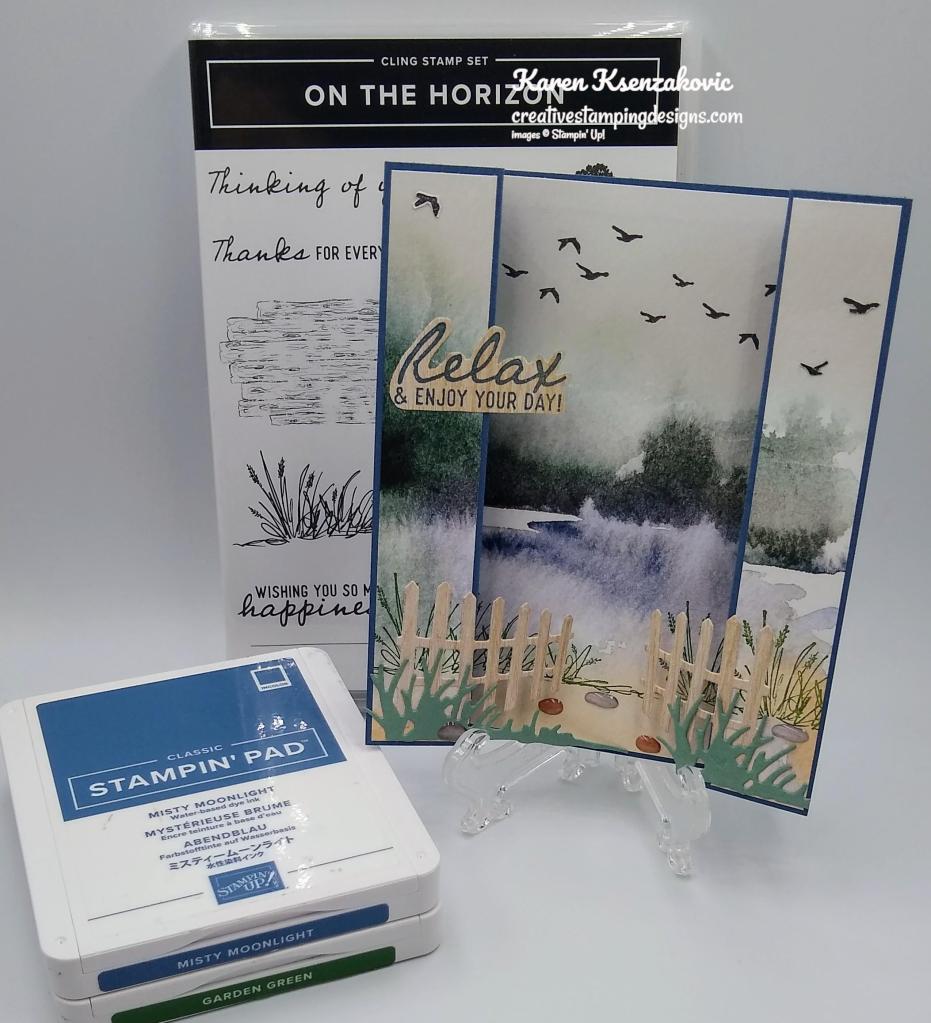
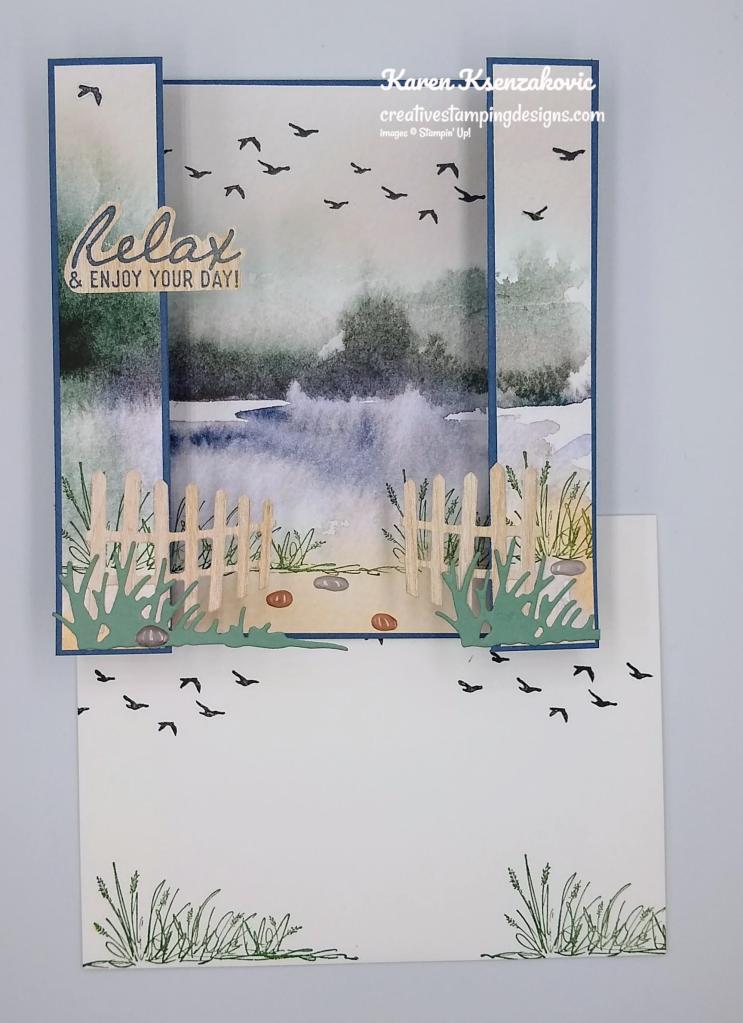
I used the Stampin’ Up! Garden Birdhouses Photopolymer Stamp Set along with the New Horizons 6 X 6 Designer Series Paper for my card today.

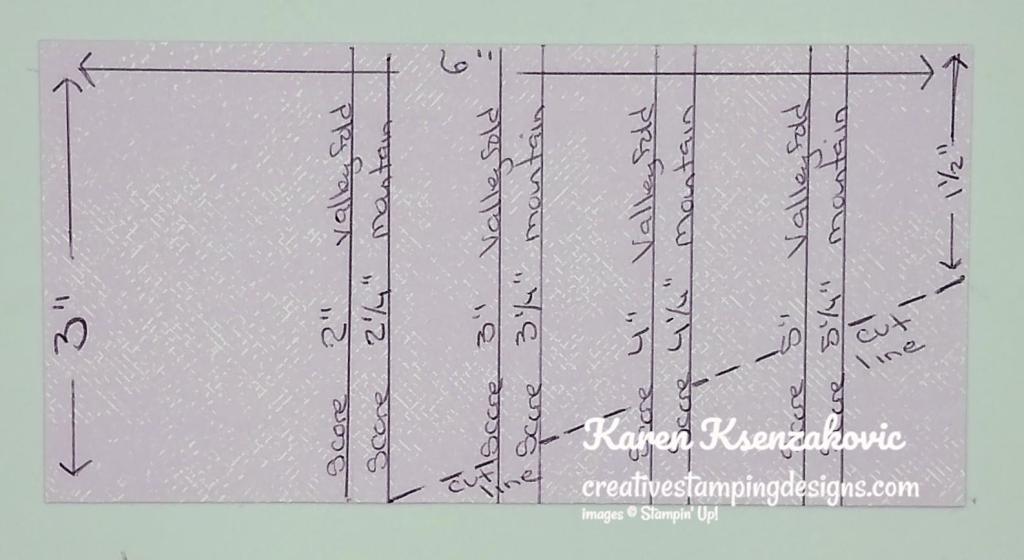
I started by scoring and folding the Pale Papaya card base as listed below. I adhered the card base together using Tear & Tape between the 5 1/8″ & 5 1/2″ score lines. I cut the panel of New Horizons DSP keeping them in order, at 1 5/8″, then 1 3/8″, then 1 5/8″ that left a 1 3/8″ panel. I placed the panels together on my Grid Paper and stamped the birdhouse pole from the Garden Birdhouses stamp set in Early Espresso Ink on the right 1 5/8″ panel. I colored the pole in using my Soft Suede Stampin’ Blends Marker. I stamped the tree image from the Stampin’ Up! On The Horizon Cling Stamp Set in Evening Evergreen Ink along one of the hills on the DSP. Starting with the left panel, I adhered the panels to the Pale Papaya card base using Multipurpose Liquid Glue.
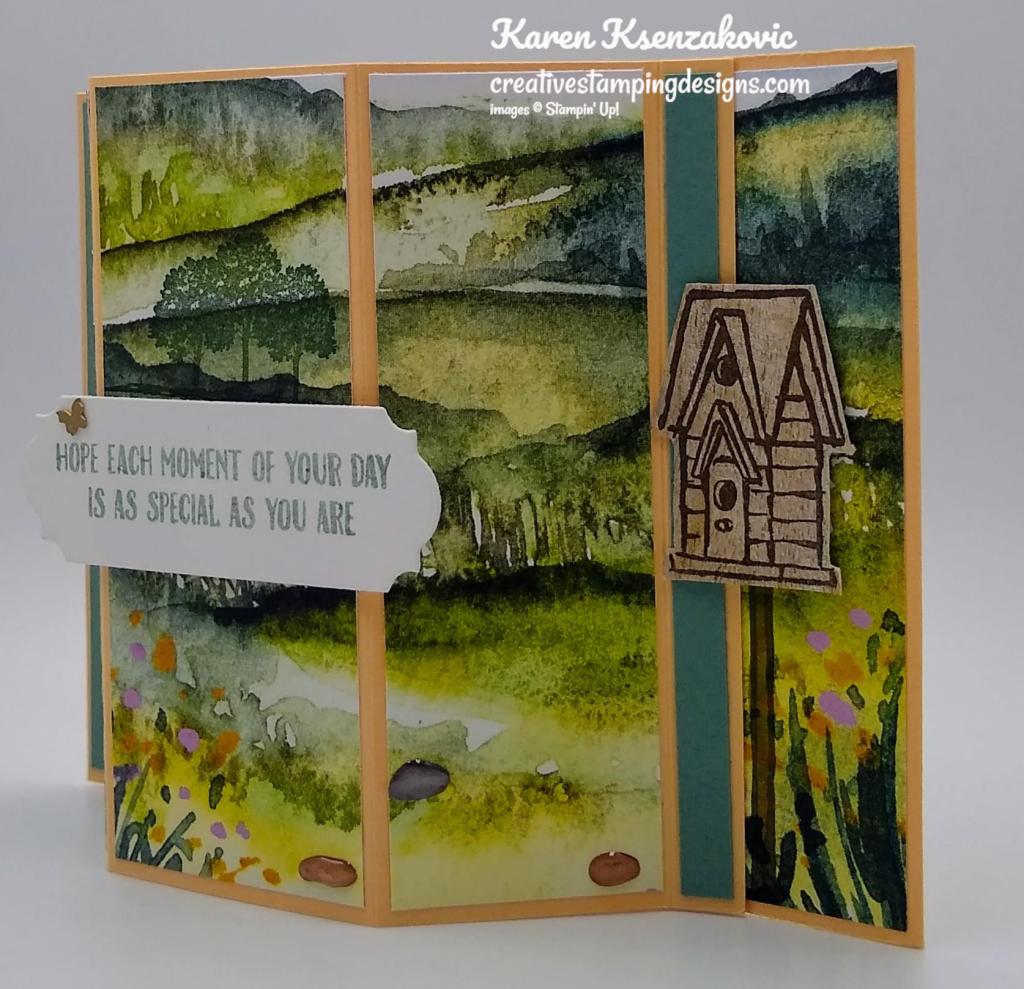
I adhered a scrap of In Good Taste DSP to a scrap of Basic Whtie cardstock and stamped the birdhouse image from the Garden Birdhouses stamp set on the DSP in Early Espresso Ink. I fussy cut the birdhouse using my Paper Snips. I adhered the birdhouse to the right panel of DSP on the card base in the center on the stamped pole image using Stampin’ Dimensionals on the right side of the birdhouse. I adhered the 2 – 1/4″ strips of Soft Succulent cardstock to the thin edges of the card base using Multipurpose Liquid Glue. I added a few Pebbles Enamel Shapes to the card front along the path.
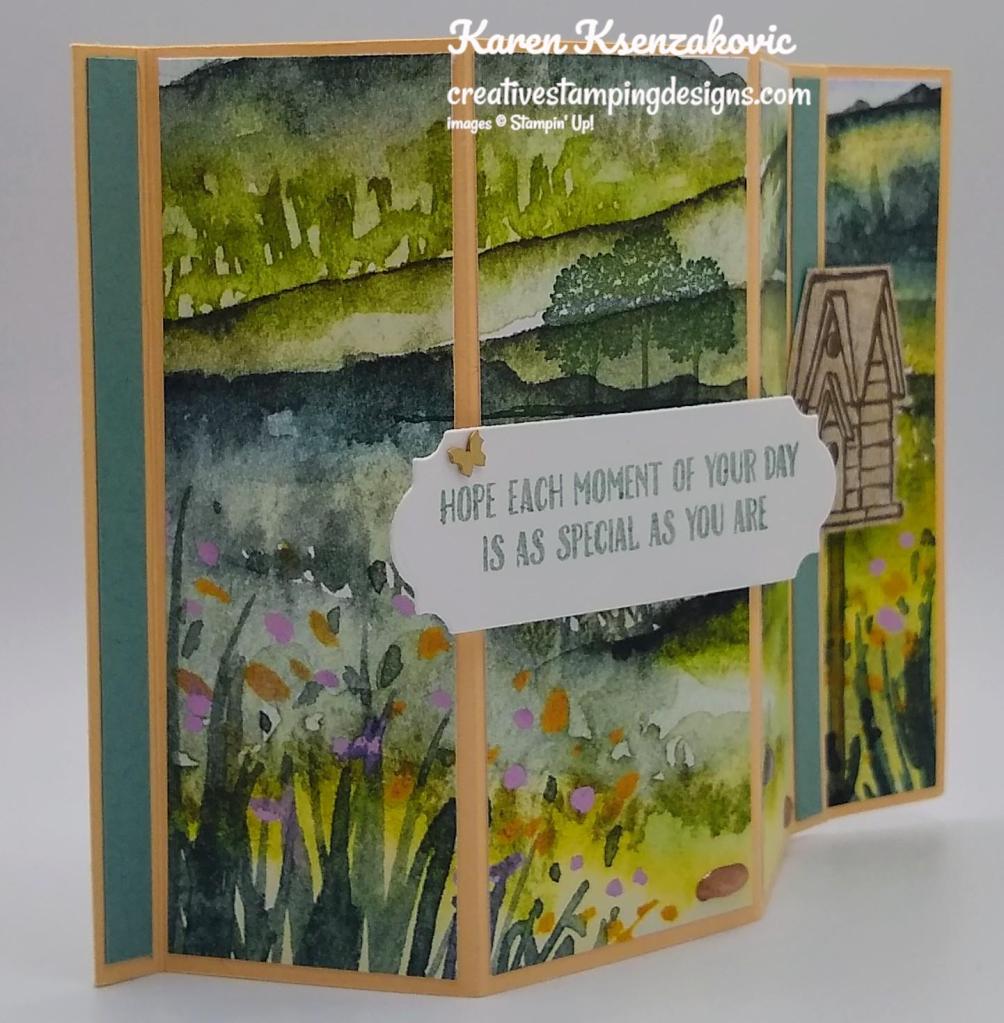
On a panel of Basic White cardstock I stamped the sentiment from the Garden Birdhouses stamp set in Soft Succulent Ink. I cut the sentiment out using my Ornate Frames Dies and adhered it to the center card front panel using Stampin’ Dimensionals. I added a Brushed Brass Butterfly to the sentiment.
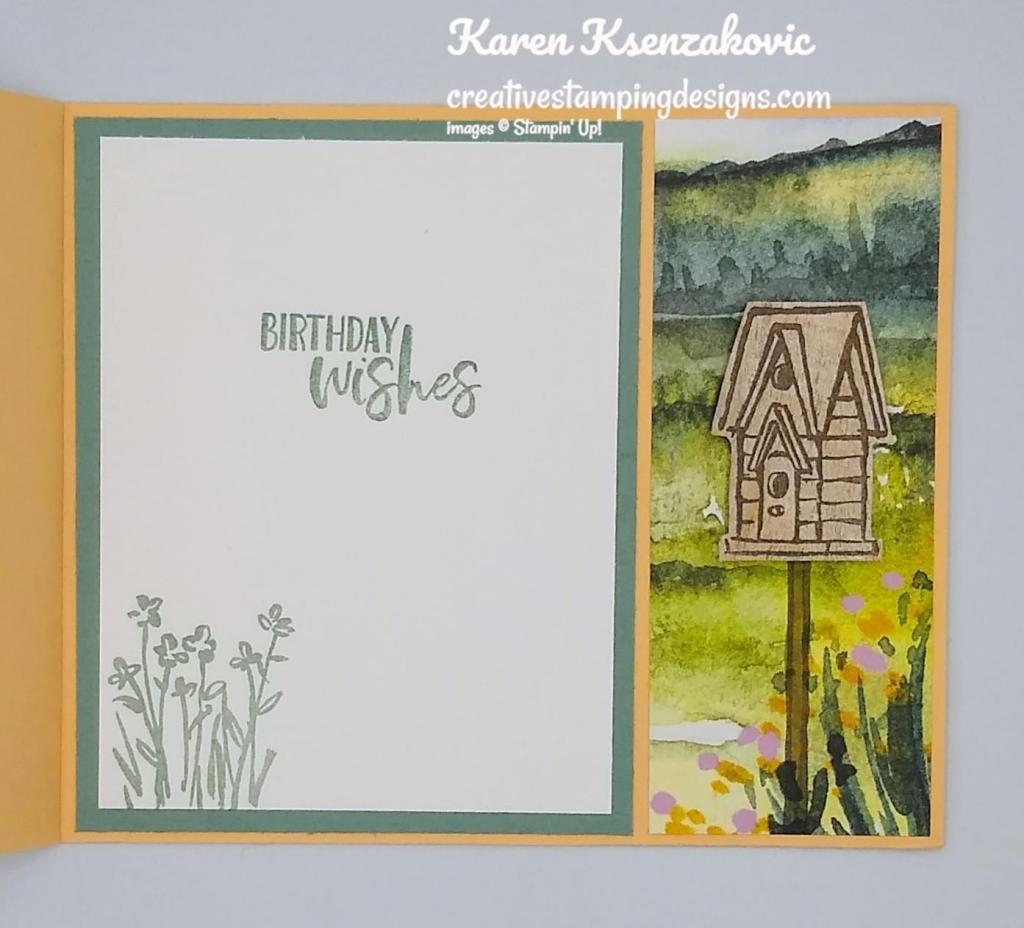
On the inside I stamped the sentiment from the Garden Birdhouses stamp set in Soft Succulent Ink on the Basic White panel. I stamped the flower images from the Garden Birdhouses stamp set in Soft Succulent Ink on the bottom of the panel. I adhered the Basic White panel to the Soft Succulent mat and then to the inside of the Pale Papaya card base.
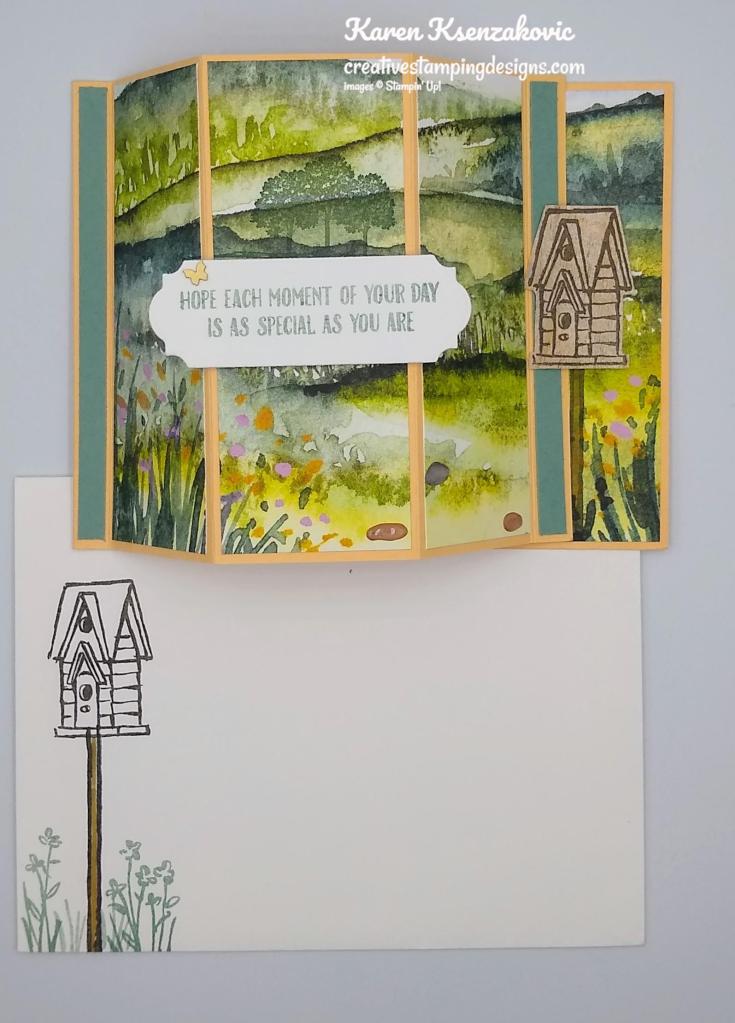
To complete my card, I decorated a Basic White Medium Envelope. I stamped the birdhouse image and pole from the Garden Birdhouses stamp set in Early Espresso Ink on the envelope front. I stamped the grass and flower images from the Garden Birdhouses stamp set in Soft Succulent Ink below the birdhouse. I adhered a panel of the New Horizon DSP to the envelope flap.
Thank you for stopping by my blog today. I hope you liked my card and will give it a try. I hope you will CASE this card and please feel free to post it in the comments of my Facebook page under the post. I’d love to see your take on the card. The list of measurements are below if you’d like to stamp along while watching the video. You can watch my video on my Facebook page Here.
You can also view the video on my YouTube channel Here. Happy Stamping!!
*********************************************************************************************************
If you need any stamping supplies, I’d love to be your Demonstrator. Just click HERE to go directly to my online store or drop me an email if you have any questions.
MY CURRENT HOST CODE IS: 6P9HT6GS
Use this host code when placing an order with me. When you order $50 or greater you will receive a free gift from me! If your order is over $150, please do not use this code, but you’ll still get the free gift. The free gift is your choice of any 1 item valued up to $10.00 from the 2020-2021 Annual Catalog or the July-December 2021 Mini Catalog! For any orders $50 or more I will also send you my monthly class tutorials. Click HERE or go to my Customer Rewards for more details and to see what this months tutorials are.
Please remember to use my current Host Code and make sure that you can see my name on the final checkout page listed as your Demonstrator when you order so that you know that you’re ordering with me and you’ll get my rewards!
Happy Stamping, Karen
*********************************************************************************************************

Looking for some past stamp sets or bundles. Check out my Retired List of items. Click Here to go to my Retirement Sale List page.
*********************************************************************************************************
Join The Stampin’ Up! Community During Sale-a-bration and get 2 FREE Stamp Sets
Now through February 28 you can get 2 FREE STAMP SETS when you join Stampin’ Up! For just $99 you get to choose $125 of product of your choice from any of the current catalogs and you can also choose any 2 Stamp Sets of your choice (cannot be host or Sale-a-bration sets) absolutely FREE!!! You can end up with $175 in product for just $99. There is no obligation to sell, you can join as a Hobby Demonstrator. Interested??? Ask me how. I’d love to have you on my team, drop me a note at creativestampingdesigns@gmail.com I’d be more than happy to talk to you about it.

Here is what $172.00 worth of product looks like and you can get it for just $99 and it ships for FREE. Stampin’ Up! also throws in a past Paper Pumpkin kit, catalogs and other material. We have an awesome team and I’d love to have you join us. Contact me and we can talk.
*********************************************************************************************************
Sale-a-bration January 4 – February 28!!!

Sale-a-bration is going on right now. Click Here for a PDF version of the Sale-a-bration brochure. This is my most favorite time of Stampin’ Up! because you get to earn FREE products. There are 7 wonderful stamp sets and 4 gorgeous packs of Designer Series Paper. You can earn all of these FREE with qualifying orders. Who doesn’t like FREE??????
When you are placing your order, don’t forget to use my Current Host Code 6P9HT6GS for all orders under $150.
*********************************************************************************************************
Host A Party During Sale-a-bration

If you host a party during Sale-a-bration, both you and your guests can earn FREE Sal-a-bration products! Plus, place any party or personal order of $300 or more and receive the exclusive Stampin’ Up! Calming Camellia Stamp Set for FREE! Interested? I can set up a Host Code for you and your friends/family to order with. Drop me a line at creativestampingdesigns@gmail.com. I’d be happy to talk to you about it.
*********************************************************************************************************
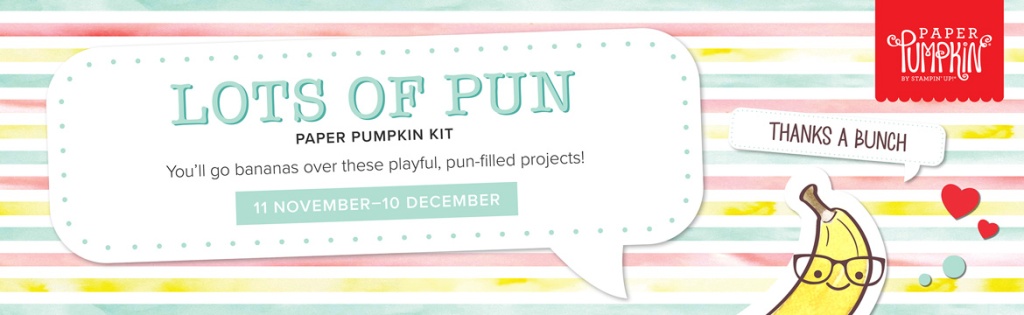
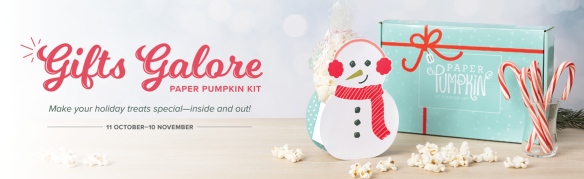
Safari Celebration
Subscribe January 11 – February 10

Did you see that? It’s a mischievous monkey swinging from tree to tree! What about that elephant marching through the mud? Can you catch an antelope galloping in the grass? Grab your binoculars, buckle up, and hop into our off-road truck—there’s so much to see on this safari!
Answer the call of the wild—and your creativity—with the Safari Celebration Paper Pumpkin Kit. This playful, party-themed kit includes all the goodies and gear you need to create nine cards and coordinating envelopes in safari-inspired shapes and patterns you’ll go wild for! Make every occasion a celebration with this month’s amusing animals, beautiful botanicals, and celebratory sentiments.
Don’t monkey around and miss this amazing adventure! Unleash your creativity with February’s wildly fun kit. To explore what’s inside, keep reading!
Details:
- This month’s kit contains enough elements to create 9 cards—3 each of 3 designs—and 9 coordinating envelopes. This all-inclusive kit includes printed card bases, die-cut paper pieces, embellishments, adhesive, and more!
- The Safari Celebration Paper Pumpkin Kit includes a Rich Razzleberry Classic Stampin’ Spot!
- This kit’s stamp set is an uplifting one! Make every occasion a celebration with sentiments that say “yay!”, “fantastic!”, and other fun phrases.
- Explore each of our current In Color collections with this colorful kit! Discover designs and paper pieces in Bumblebee (a 2020–2022 In Color), Fresh Freesia (a 2021–2023 In Color), and Soft Succulent (a 2021–2023 In Color).
- Card size: 4-1/4″ x 5-1/2″ (10.8 x 14 cm)
- Envelope size: 4-1/2″ x 5-3/4″ (11.4 x 14.6 cm)
- Coordinating colors: Bumblebee, Fresh Freesia, Pear Pizzazz, Rich Razzleberry, Soft Succulent, Soft Suede
Subscribe to the February 2022 Paper Pumpkin Kit between 11 January and 10 February at paperpumpkin.com!
Note: Supplies may be limited toward the end of the subscription period.
*********************************************************************************************************
Card stock cuts for this project:
- Basic White Cardstock 1 1/2″ X 3″ (sentiment), 3 7/8″ X 3″ (inner liner)
- Pale Papaya Cardstock 4 1/4″ X 11″ (card base scored & folded at 3/8″, 1 7/8″, 3 5/8″, 5 1/8″ & 5 1/2″ )
- Soft Succulent Cardstock 4 1/8″ X 3 3/4″ (cut 2 – 1/4″ strips off the 3 3/4″ side to make it 4 1/8″ X 3 1/4″ for the inner liner mat)
- In Good Taste Designer Series Paper scrap for the birdhouse
- New Horizon 6 X 6 Designer Series Paper 4 1/8″ X 6″ (card front panels), 2 1/4″ X 6″ (envelope flap)
*********************************************************************************************************
Product List

")


 Designer Series Paper")


")


")


 Designer Series Paper")


 Sheer Ribbon")


")


 Designer Series Paper")


")
")


 Specialty Designer Series Paper")


")
")


 Specialty Designer Series Paper")


 Shimmer Ribbon")


")
")


 Specialty Designer Series Paper")


")


 Open Weave Ribbon")


")


")


 Frayed Grosgrain Ribbon")