Stampin’ Up! Joyful Life Thank You

Good Monday morning my stamping friends. How was everyone’s weekend? Are you ready for the last week of October, YIKES!! This month flew by.

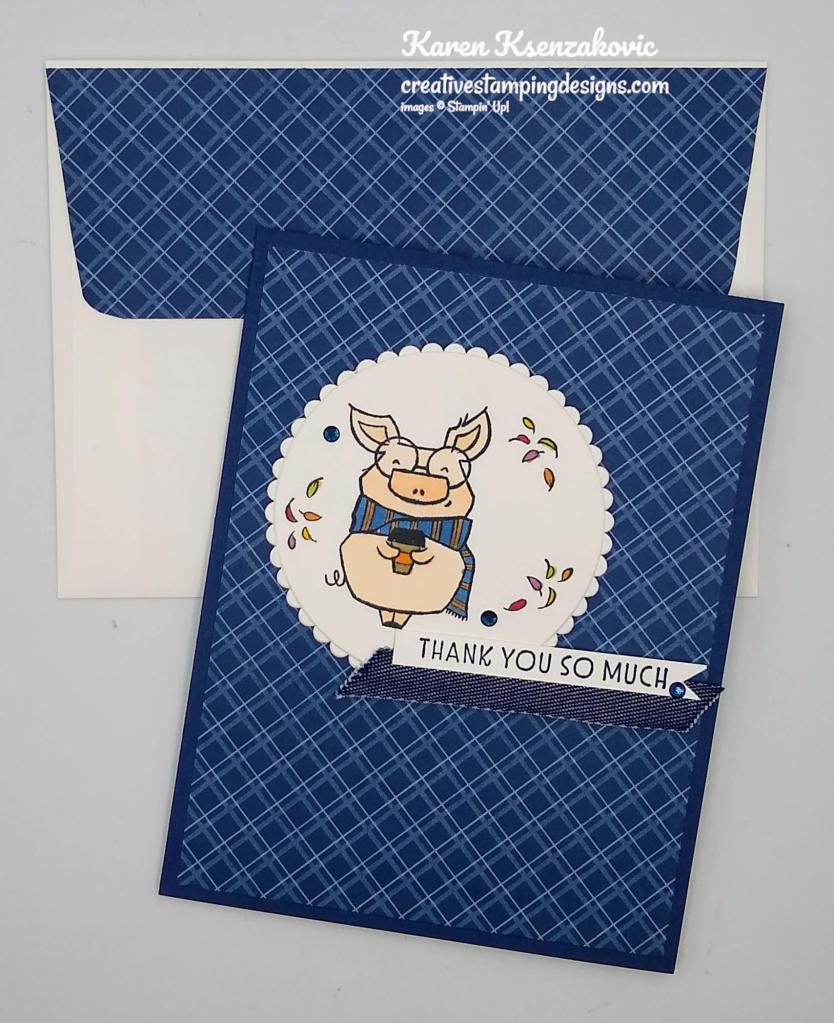
I have a quick card for you today using another one of my favorite sets from the July-December 2021 Mini Catalog. Here’s my card for today.
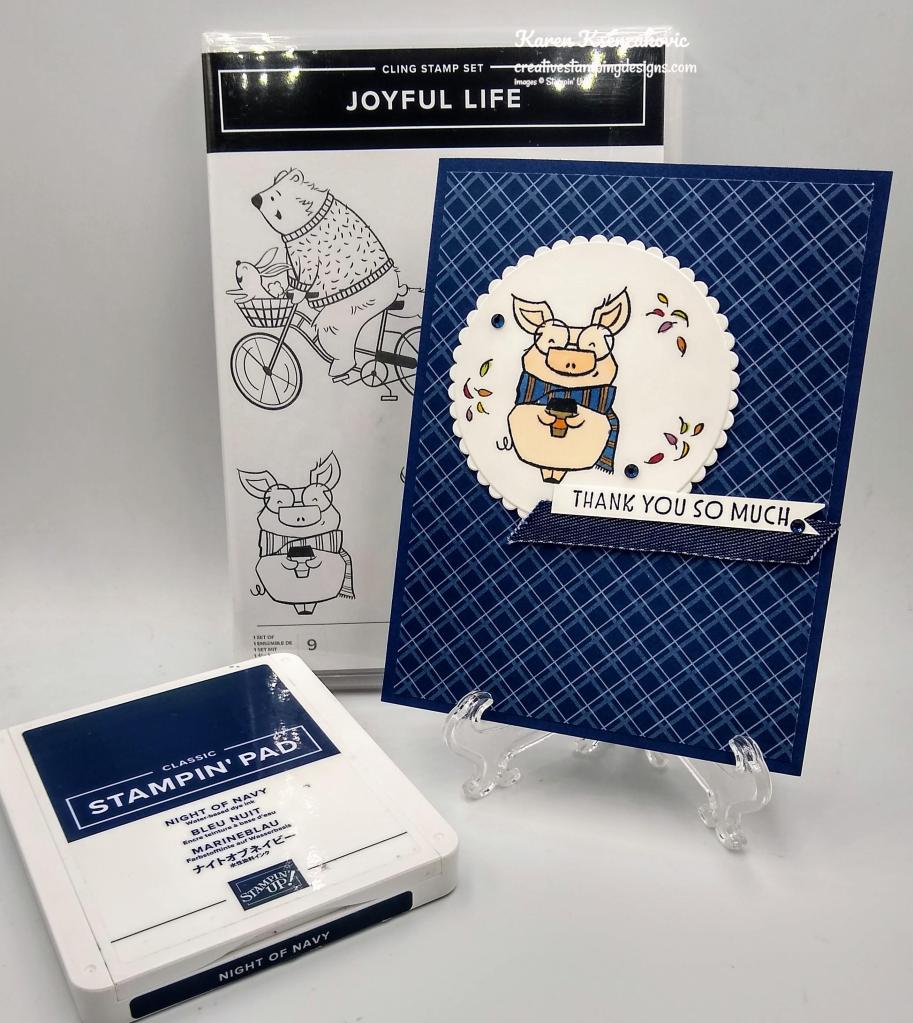
I used the Stampin’ Up! Joyful Life Cling Stamp Set along with the Neutrals 6 X 6 Designer Series Paper for my card today.
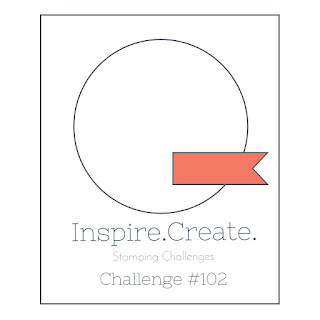
My design is from Inspire. Create. Challenge # 102.

I started by adhering a panel of the Neutrals DSP to a Night of Navy card base using Multipurpose Liquid Glue.

Using my Layering Circles Dies, I cut one of the solid circles and the coordinating scalloped circle from a panel of Basic White cardstock. On the solid circle I stamped the pig and leaf images from the Joyful Life stamp set in Tuxedo Black Ink to the left of the circle. I colored the images in using my Blackberry Bliss, Bronze, Crumb Cake, Daffodil Delight, Night of Navy, Old Olive, Petal Pink, Pumpkin Pie and Real Red Stampin’ Blends Markers. I adhered the solid circle to the scalloped circle using Stampin’ Seal and then to the card front using Stampin’ Dimensionals.
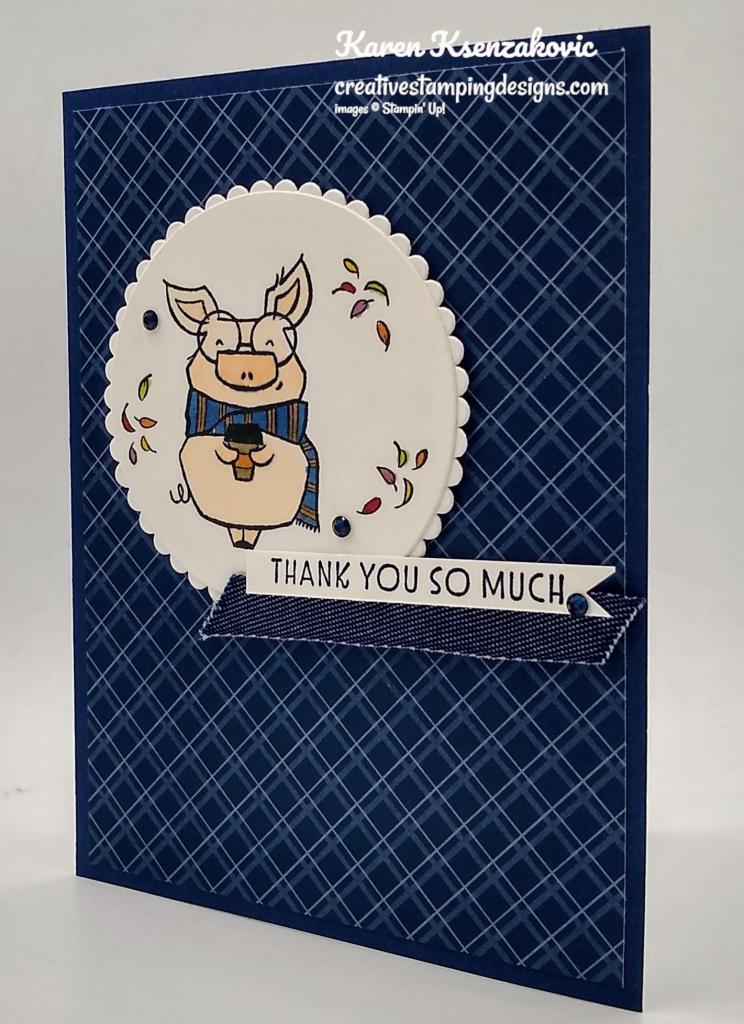
On a strip of Basic White cardstock I stamped the sentiment from the Stampin’ Up! Inspired Thoughts Cling Stamp Set in Night of Navy Ink. I cut the strip into a banner using my Paper Snips. I adhered a piece of the 3/8″ Denim Ribbon to the card front. I adhered the sentiment over the ribbon using Stampin’ Dimensionals. I added a few Night of Navy Holiday Rhinestone Basic Jewels to the card front.
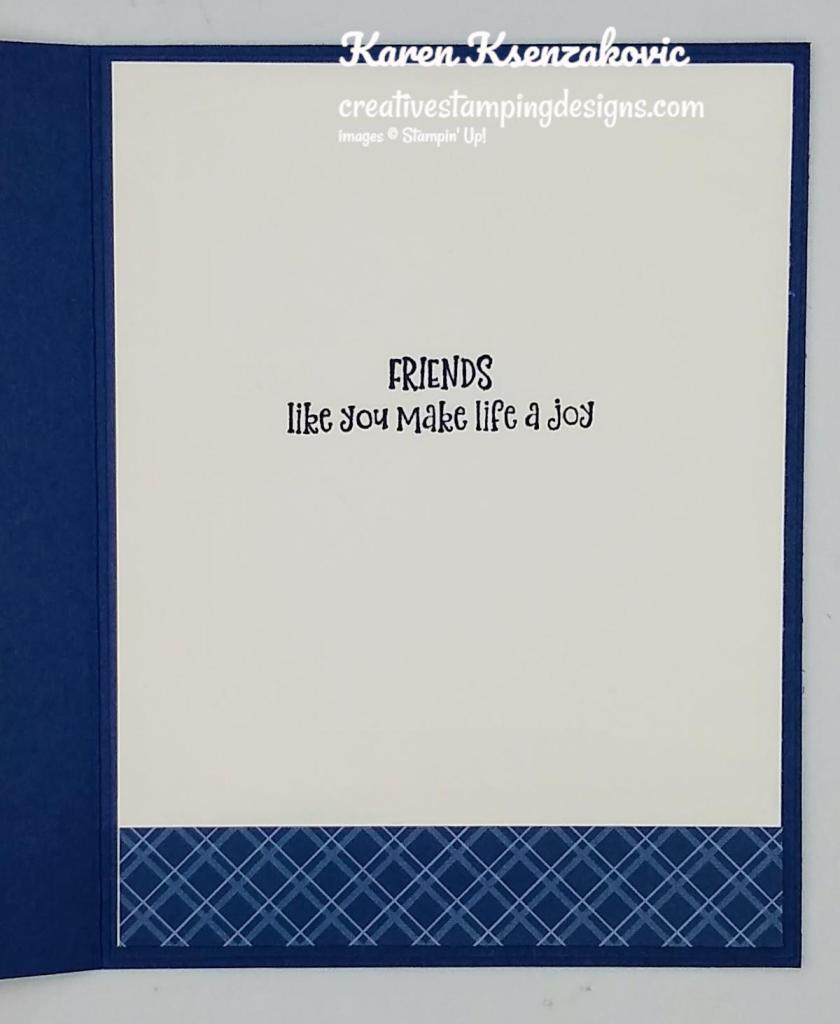
On the inside I stamped the sentiment from the Joyful Life stamp set on a panel of Basic White cardstock. I adhered a strip of the Neutrals DSP to the bottom of the panel using Stampin’ Seal. I adhered the Basic White panel to a Night of Navy mat using Stampin’ Seal and then to the inside of the Night of Navy card base using Multipurpose Liquid Glue.

To finish my card I decorated a Basic White Medium Envelope. I stamped the pig and leaf images from the Joyful Life stamp set on the envelope front in Tuxedo Black Ink and colored it the same as I did for the card. I adhered a panel of the Neutrals DSP to the envelope flap.
Thank you for stopping by my blog today. I hope you like my card and will give it a try. Happy Stamping!!

*********************************************************************************************************

If you need any stamping supplies, I’d love to be your Demonstrator. Just click HERE to go directly to my online store or drop me an email if you have any questions. 

MY CURRENT HOST CODE IS:   BM9R7DQX

Use this host code when you order $50 or greater and receive a free gift from me! If your order is over $150, please do not use this code, but you’ll still get the free gift. The free gift is your choice of any 1 item valued up to $10.00 from the 2020-2021 Annual Catalog or the January-June 2021 Mini Catalog!   For any orders $50 or more I will also send you my monthly class tutorials.  Click HERE or go to my Customer Rewards for more details and to see what this months tutorials are.

Please remember to use my current Host Code and make sure that you can see my name on the final checkout page listed as your Demonstrator when you order so that you know that you’re ordering with me and you’ll get my rewards! 

Stampin’ Up! has added more items to their Clearance Rack. All items are **While Supplies Last**. So don’t wait if there is something you’ve been wanting, grab it while you can.

Happy Stamping, Karen!

*********************************************************************************************************

Gifts Galore

Subscribe October 11 – November 10

This image has an empty alt attribute; its file name is 11-21_dheader_giftsgalore_novpp_na.jpg

We all love to see piles of presents on Christmas morning. Make that your reality with the Gifts Galore Paper Pumpkin Kit! With classic Christmas sentiments, bright and festive colors, a sweet snowman, a tree with all the trimmings, or a playful pile of presents, you’ll have everything you need to make eye-catching treat packages that are sure to spread Christmas cheer. Each Gifts Galore box contains enough supplies to create nine treat packages—three each of three designs—and nine food-safe bags that are adorably styled for easy Christmas gifting. There’s plenty of joy to share with Gifts Galore!

  • Kit contains enough supplies to create nine treat packages—three each of three designs—and nine food-safe bags. 
  • This all-inclusive kit includes printed die cuts, die-cut boxes, cellophane treat bags, adhesive, and more!
  • Includes an exclusive stamp set and a Classic Stampin’ Spot
  • Coordinating colors: Evening Evergreen, Flirty Flamingo, Old Olive, Pool Party, Poppy Parade

Subscribe to the November 2021 Paper Pumpkin Kit between 11 October and 10 November at paperpumpkin.com!

Note: Supplies may be limited toward the end of the subscription period.

*********************************************************************************************************

Card stock cuts for this project:

  • Basic White Cardstock 3″ X 5 1/2″ (circle dies), 1/4″ x 2 1/2″ (sentiment), 4″ X 5 1/4″ (inner liner)
  • Night of Navy Cardstock 8 1/2″ X 5 1/2″ (card base scored & folded at 4 1/4″), 4 1/8″ X 5 3/8″ (inner liner mat)
  • Neutrals 6 X 6 Designer Series Paper 4″ X 5 1/4″ (card front), 3/4″ X 4″ (inner liner), 2 1/4″ X 6″ (envelope flap)

*********************************************************************************************************

Product List

Stampin’ Up! Pink and Blue Snowflake Wishes

Good Saturday morning my stamping friends. I hope you have some fun activities planned for the weekend. I’ll be at work all day today and tomorrow.

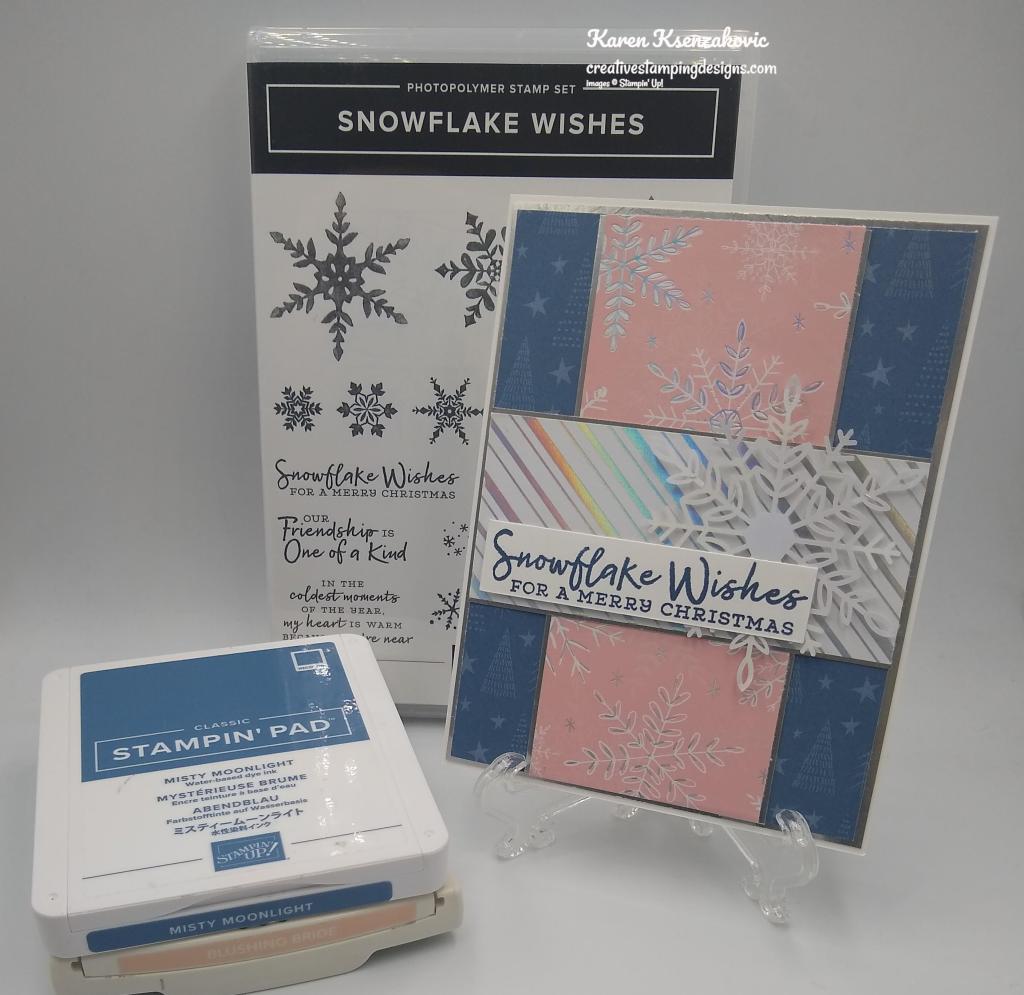
I have a quick card for you today using some non-traditional colors for Christmas. I like a mix between traditional and non-traditional. I also pulled out a set from the 2021-2022 Annual Catalog. Here’s my card for today.

I used the Stampin’ Up! Snowflake Wishes Photopolymer Stamp Set along with the Whimsy & Wonder Specialty Designer Series Paper for my card today.

I started by adhering panels of the Whimsy & Wonder DSP to Silver Foil mats from the Silver Foil Specialty Pack. I adhered the largest layered panel to a Thick Basic White card base. I adhered the long narrow layered panel next and the short narrow layered panel on the top.

I adhered one of the Wonderful Snowflakes to the card front using a Stampin’ Dimensional.

I stamped the sentiment from the Snowflake Wishes stamp set on a strip of Basic White cardstock in Misty Moonlight Ink. I adhered the sentiment to the card front overlapping the snowflake.

On the inside I stamped the sentiment from the Snowflake Wishes stamp set in Misty Moonlight Ink on a Basic White panel. I stamped the cluster of small snowflakes from the Snowflake Wishes stamp set in Blushing Bride Ink in either side of the sentiment. I adhered the Basic White panel to a Blushing Bride mat and then to the inside of the Thick Basic White card base.

To finish my card I decorated a Basic White Medium Envelope. I stamped the small cluster of snowflakes image from the Snowflake Wishes stamp set in Blushing Bride Ink on the envelope front. I adhered a panel of the Whimsy & Wonder DSP to the envelope flap.

Thank you for stopping by my blog today. I hope you liked my card and will give it a try. Happy Stamping!!

*********************************************************************************************************

If you need any stamping supplies, I’d love to be your Demonstrator. Just click HERE to go directly to my online store or drop me an email if you have any questions. 

MY CURRENT HOST CODE IS:   BM9R7DQX

Use this host code when you order $50 or greater and receive a free gift from me! If your order is over $150, please do not use this code, but you’ll still get the free gift. The free gift is your choice of any 1 item valued up to $10.00 from the 2020-2021 Annual Catalog or the January-June 2021 Mini Catalog!   For any orders $50 or more I will also send you my monthly class tutorials.  Click HERE or go to my Customer Rewards for more details and to see what this months tutorials are.

Please remember to use my current Host Code and make sure that you can see my name on the final checkout page listed as your Demonstrator when you order so that you know that you’re ordering with me and you’ll get my rewards! 

Stampin’ Up! has added more items to their Clearance Rack. All items are **While Supplies Last**. So don’t wait if there is something you’ve been wanting, grab it while you can.

Happy Stamping, Karen!

*********************************************************************************************************

Gifts Galore

Subscribe October 11 – November 10

This image has an empty alt attribute; its file name is 11-21_dheader_giftsgalore_novpp_na.jpg

We all love to see piles of presents on Christmas morning. Make that your reality with the Gifts Galore Paper Pumpkin Kit! With classic Christmas sentiments, bright and festive colors, a sweet snowman, a tree with all the trimmings, or a playful pile of presents, you’ll have everything you need to make eye-catching treat packages that are sure to spread Christmas cheer. Each Gifts Galore box contains enough supplies to create nine treat packages—three each of three designs—and nine food-safe bags that are adorably styled for easy Christmas gifting. There’s plenty of joy to share with Gifts Galore!

  • Kit contains enough supplies to create nine treat packages—three each of three designs—and nine food-safe bags. 
  • This all-inclusive kit includes printed die cuts, die-cut boxes, cellophane treat bags, adhesive, and more!
  • Includes an exclusive stamp set and a Classic Stampin’ Spot
  • Coordinating colors: Evening Evergreen, Flirty Flamingo, Old Olive, Pool Party, Poppy Parade

Subscribe to the November 2021 Paper Pumpkin Kit between 11 October and 10 November at paperpumpkin.com!

Note: Supplies may be limited toward the end of the subscription period.

*********************************************************************************************************

Card stock cuts for this project:

  • Basic White Cardstock 3 1/8″ x 11/16″ (sentiment), 3 7/8″ X 5 1/8″ (inner liner)
  • Basic White Thick Cardstock 8 1/2″ X 5 1/2″ (card base scored & folded at 4 1/4″)
  • Blushing Bride Cardstock 4″ X 5 1/4″ (inner liner mat)
  • Silver Foil Specialty Pack 4 1/8″ X 5 3/8″, 2 3/8″ X 5 1/5″ & 1 7/8″ x 4″ (card front mats)
  • Whimsy & Wonder Specialty Designer Series Paper 4″ X 5 1/4″, 2 1/4″ X 5 1/4″ & 1 3/4″ X 4″ (card front panels), 2 1/4″ X 6″ (envelope flap)

*********************************************************************************************************

Product List

Stampin’ Up! Jar of Flowers Wreath for The Card Concepts.

Good Wednesday morning my stamping friends. How is everyone doing today? We’re halfway through the week and the weekend is right around the corner.

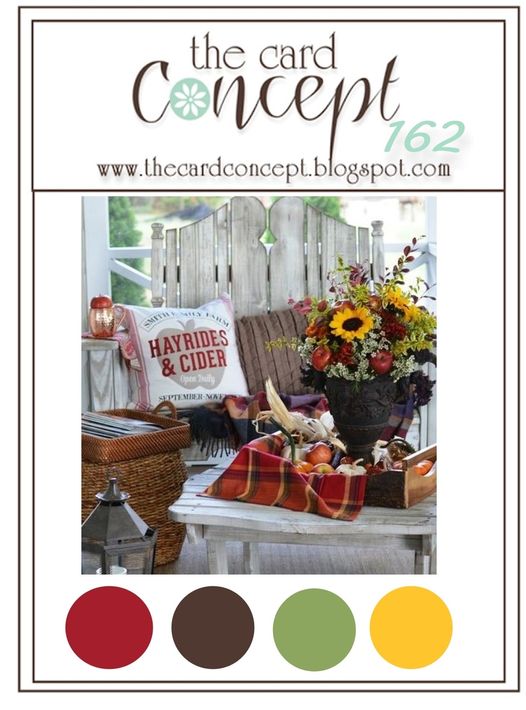
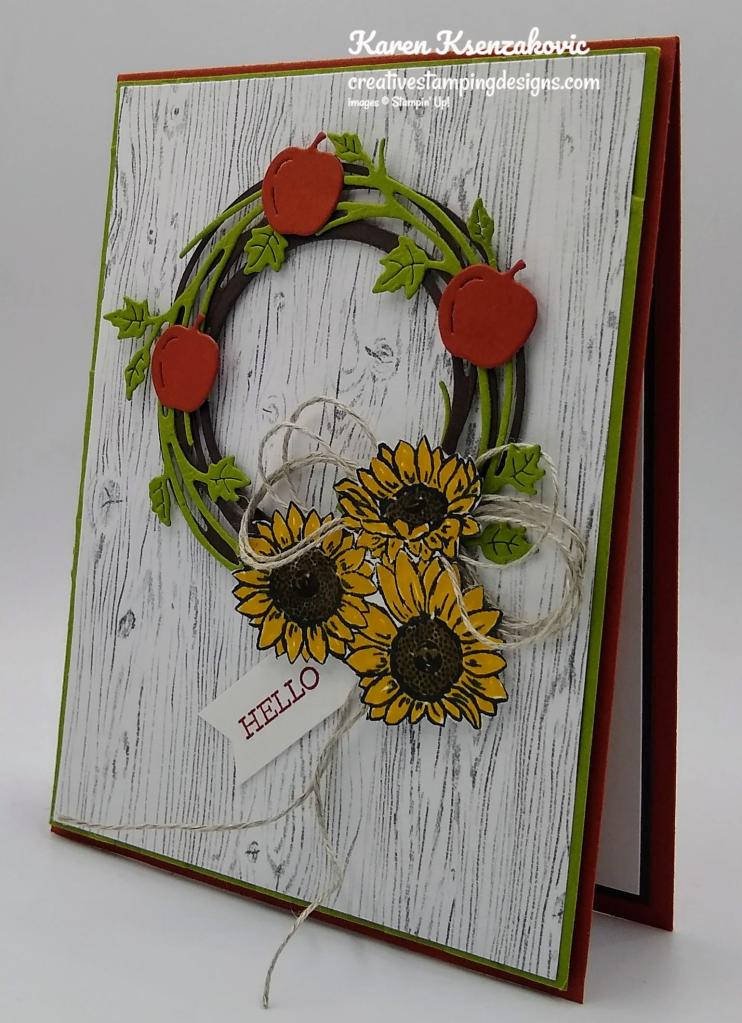
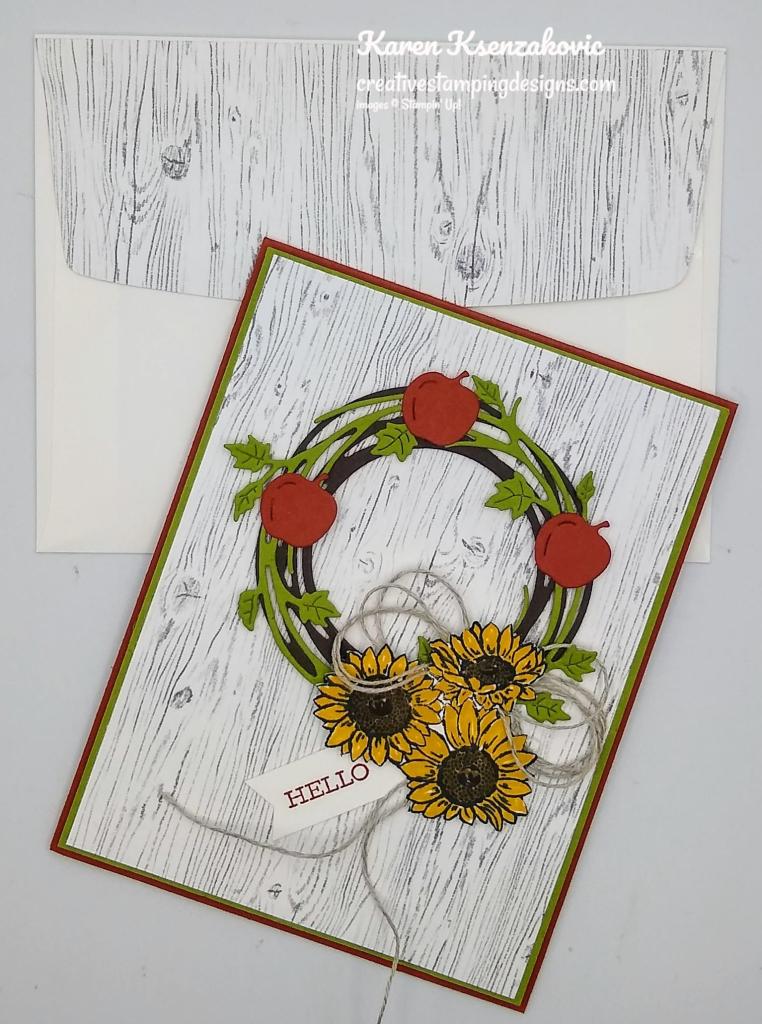
It’s time for another inspiration challenge for The Card Concepts. The inspiration photo is Fall Fun.  Here is my card that was inspired from the challenge photo.

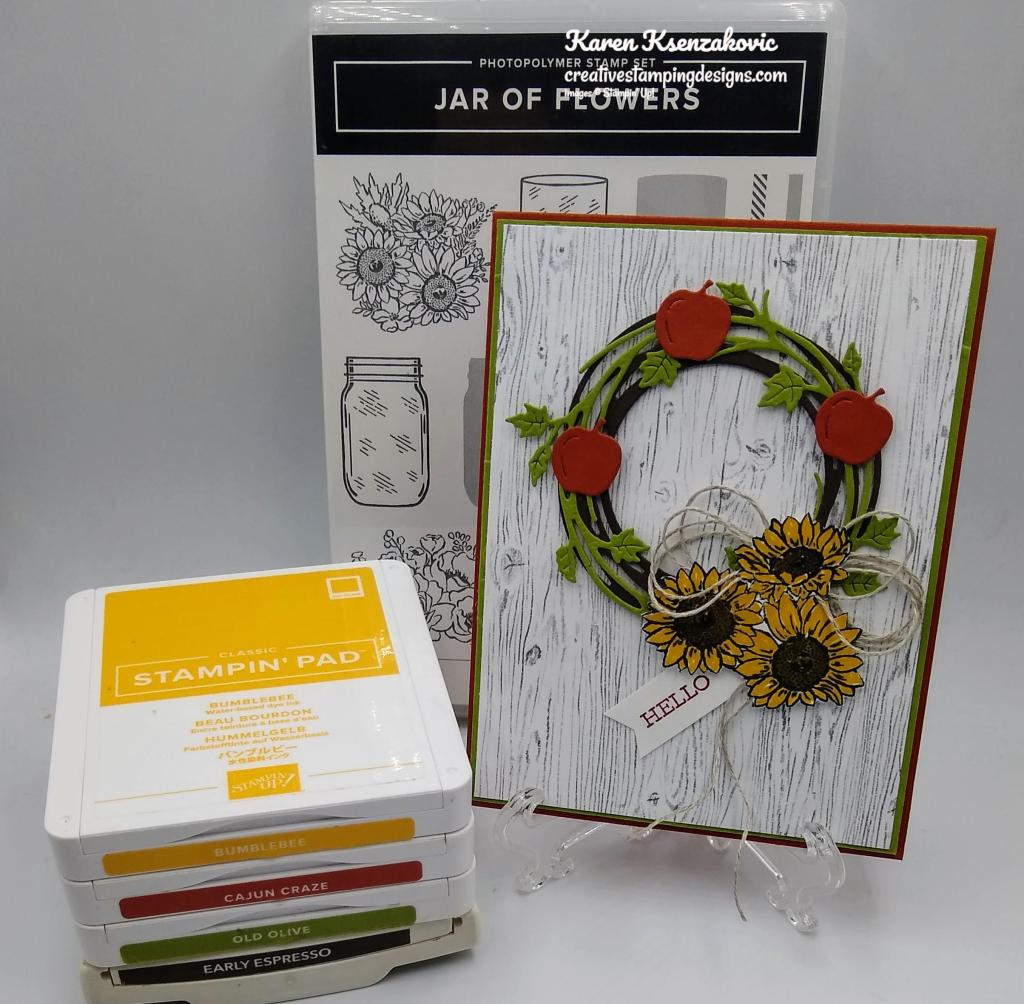
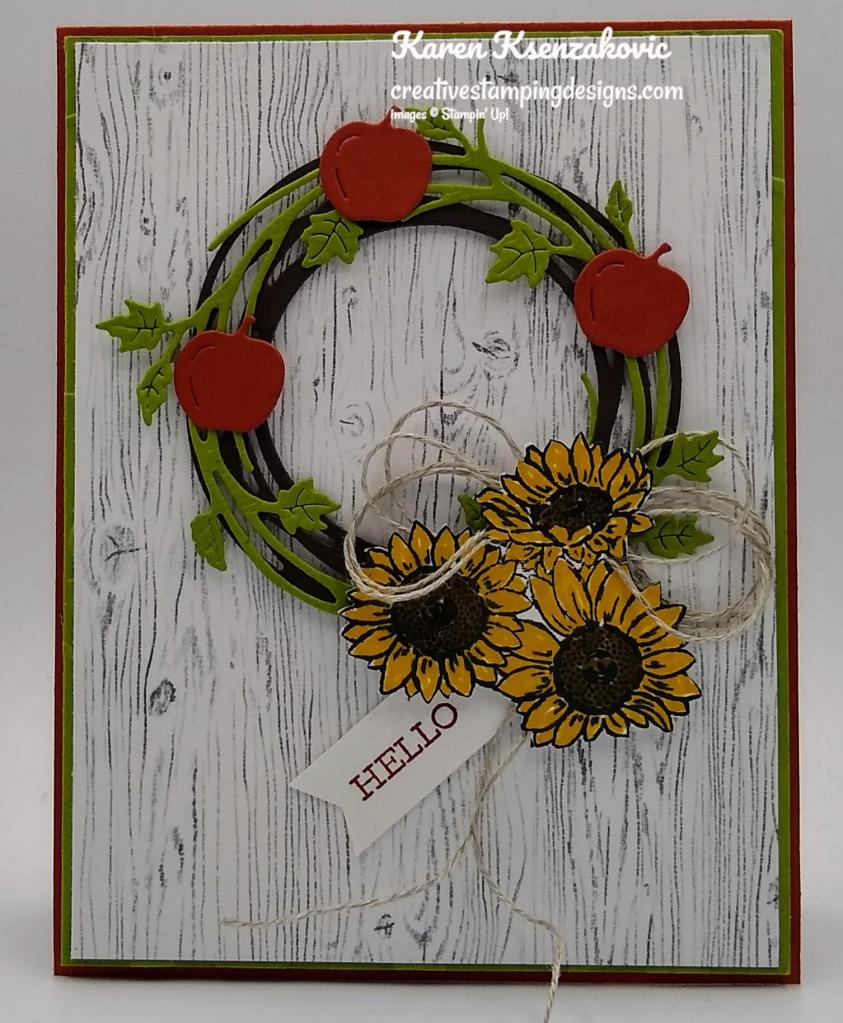
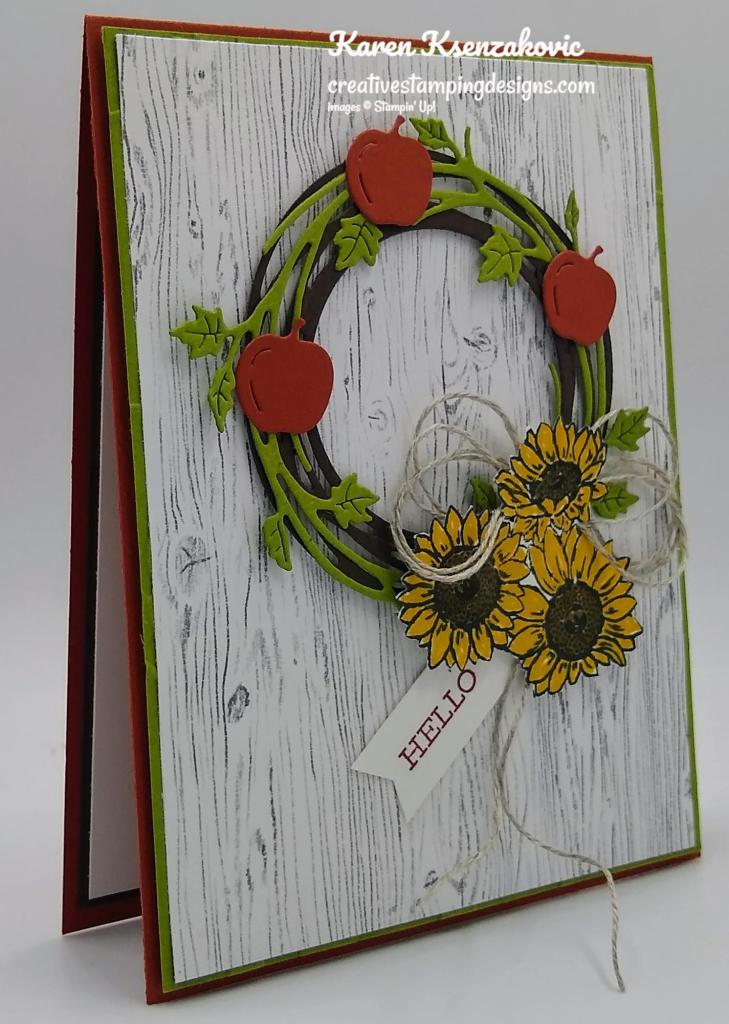
I used the Stampin’ Up! Jar of Flowers Photopolymer Stamp Set along with the Stampin’ Up! Sparkle of The Season Bundle and some new Heart & Home Designer Series Paper (coming in the January-June 2022 Mini Catalog) for my Clean & Layered card. I was inspired by the beautiful fall colors along with the sunflowers in the vase and the apples.

I hope you will take a moment to visit The Card Concepts and join us for our challenge #162.  How are you inspired by this photo?

I started by adhering a panel of the gorgeous new Heart & Home DSP to an Old Olive mat. I adhered the layered panel to a Cajun Craze card base using Stampin’ Dimensionals.

I stamped the sunflower image from the Jar of Flowers stamp set in Tuxedo Black Ink on a panel of Basic White cardstock and colored the image in using my Bumblebee and Early Espresso Stampin’ Write Markers. I fussy cut the sunflowers using my Paper Snips. Using the Festive Finishes Dies, I cut multiple apples from a panel of Cajun Craze cardstock.

I cut the leaf wreath from a panel of Old Olive cardstock using my Seasonal Swirls Dies. I cut the swirly wreath from a panel of Early Espresso cardstock using the Painted Labels Dies. I didn’t want the solid center in the swirly wreath so I used the circle that fit the best from the Layering Circles Dies and cut it out. I layered the wreaths together the way I liked and adhered them to the card front using Stampin’ Dimensionals where I would be putting the flowers and the apples. I made a multi loop bow from a length of Linen Thread and adhered it to the wreath. I adhered the sunflowers over the bow and the apples randomly on the wreath. I stamped the sentiment from the Stampin’ Up! Free As A Bird Cling Stamp Set in Cajun Craze Ink and cut it into a banner using my Paper Snips. I adhered the sentiment tucking it under the flowers.

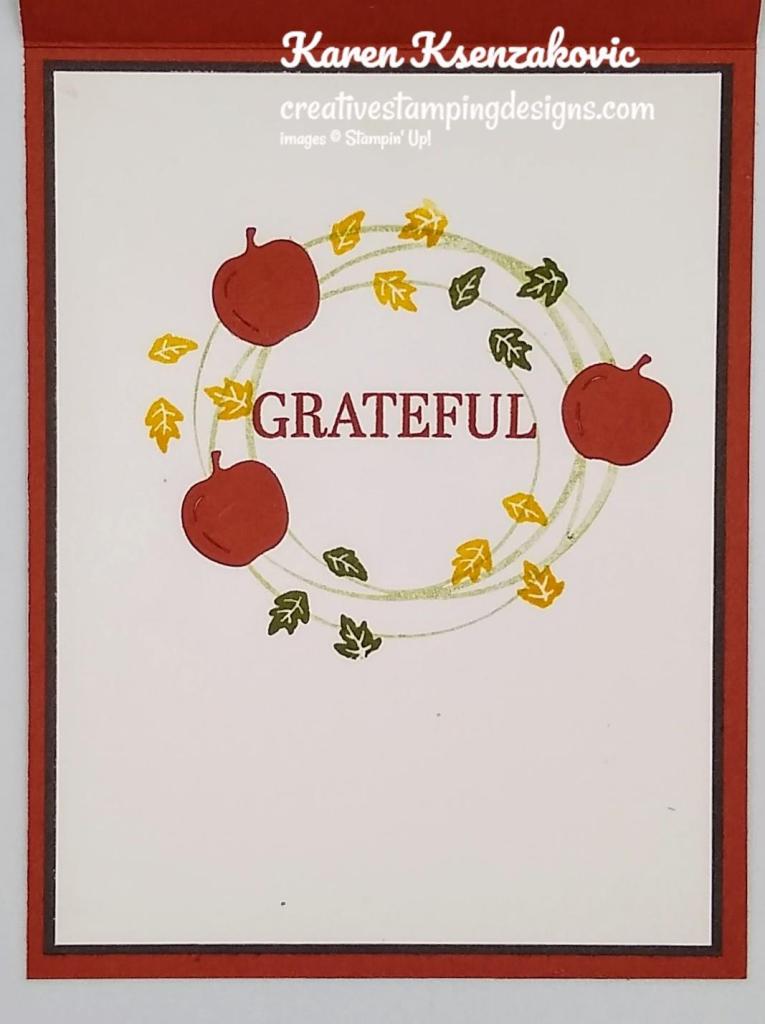
On the inside I stamped the swirly wreath from the Stampin’ Up! Sparkle of The Season Photopolymer Stamp Set in Old Olive Ink, stamping off once, on a panel of Basic White cardstock. I stamped the sentiment from the Sparkle of The Season stamp set in Cajun Craze Ink in the center of the wreath. I randomly stamped the trio leaves image from the Sparkle of The Season stamp set in Bumblebee and Old Olive Inks and adhered a few more of the apples I had cut out from the Festive Finishes Dies. I adhered the Basic White panel to an Early Espresso mat and then to the inside of the Cajun Craze card base.

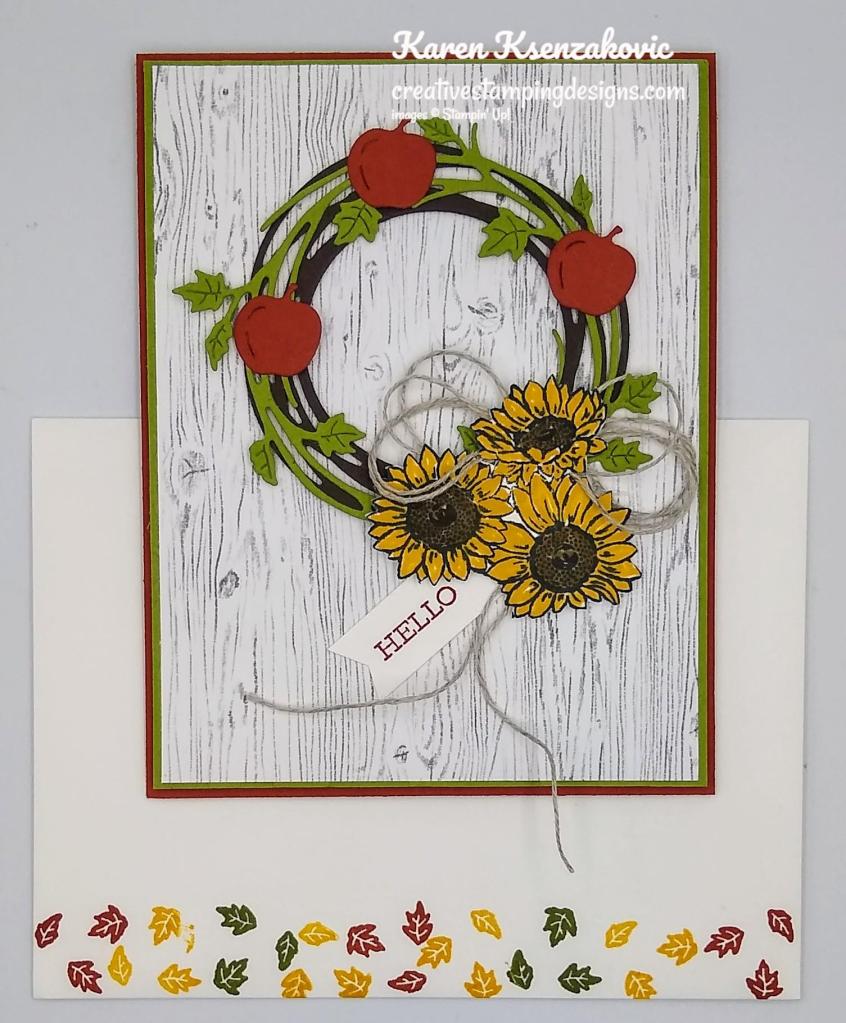
To complete my card I decorated a Basic White Medium Envelope. I stamped the trio leaf image from the Sparkle of The Season stamp set in Bumblebee, Cajun Craze and Old Olive Inks on the bottom of the envelope front. I adhered a panel of the Heart & Home DSP to the envelope flap.

Thank you for stopping by my blog today. I hope you liked my card and will give it a try. Happy Stamping!!

*********************************************************************************************************

I was given a heads up yesterday that the internet was down at work and all the transactions for the day had to be done manually. With that being said, as of right now, I’m not planning on going live today since I have a feeling I’m going to be working late. If anything changes I will post something on my Facebook page by 3:00. Hopefully if I can’t go live today, I’ll be back next week. Gotta love technology!!

*********************************************************************************************************

TODAY ONLY!!! 24-HOUR STAMP SALE GOING ON NOW!!

Can’t stop staring at a certain stamp set (or two, or three)? Stock up on stamp sets at a stellar price! For one day only, you can snag select cling stamp sets at a 15% discount. This short and stamp-tacular sale only happens once a year, so get in gear—it’s time to shop ’til you drop!

SALES PERIOD: 20 OCTOBER 2021

  • The sale will run for ONE DAY ONLY!
  • The 15% discount will apply to select cling stamp sets only.
  • Every cling stamp set from the 2021–2022 Annual Catalog (excluding the Host stamp sets) will be discounted.
  • Sale Date:  Wednesday, October 20, 2021 from 12:00 AM to 11:50 PM (MT)

FREE GOLD & ROSE GOLD 6 X 6 METALLIC SPECIALTY PAPER OR HOLIDAY RHINESTONE BASIC JEWELS

In addition to this awesome sale, I’m offering either a pack of the Gold & Rose Gold Metallic Paper or a pack of the Holiday Rhinestone Basic Jewels with any order of $50 or more (before tax and shipping). This is in addition to your free gift of 1 item valued up to $10 from me, your Creative Stamping Designs Rewards and my October Online Tutorials. This will help you to get those holiday cards going with a little bling. This offer is for one day only, Wednesday October 20, 2021 during the Stampin’ Up! 24-hour Stamp Sale. This sale is for TODAY ONLY!!! Happy Shopping!!

*********************************************************************************************************

If you need any stamping supplies, I’d love to be your Demonstrator. Just click HERE to go directly to my online store or drop me an email if you have any questions. 

MY CURRENT HOST CODE IS:   BM9R7DQX

Use this host code when you order $50 or greater and receive a free gift from me! If your order is over $150, please do not use this code, but you’ll still get the free gift. The free gift is your choice of any 1 item valued up to $10.00 from the 2020-2021 Annual Catalog or the January-June 2021 Mini Catalog!   For any orders $50 or more I will also send you my monthly class tutorials.  Click HERE or go to my Customer Rewards for more details and to see what this months tutorials are.

Please remember to use my current Host Code and make sure that you can see my name on the final checkout page listed as your Demonstrator when you order so that you know that you’re ordering with me and you’ll get my rewards! 

Stampin’ Up! has added more items to their Clearance Rack. All items are **While Supplies Last**. So don’t wait if there is something you’ve been wanting, grab it while you can.

Happy Stamping, Karen!

*********************************************************************************************************

Gifts Galore

Subscribe October 11 – November 10

This image has an empty alt attribute; its file name is 11-21_dheader_giftsgalore_novpp_na.jpg

We all love to see piles of presents on Christmas morning. Make that your reality with the Gifts Galore Paper Pumpkin Kit! With classic Christmas sentiments, bright and festive colors, a sweet snowman, a tree with all the trimmings, or a playful pile of presents, you’ll have everything you need to make eye-catching treat packages that are sure to spread Christmas cheer. Each Gifts Galore box contains enough supplies to create nine treat packages—three each of three designs—and nine food-safe bags that are adorably styled for easy Christmas gifting. There’s plenty of joy to share with Gifts Galore!

  • Kit contains enough supplies to create nine treat packages—three each of three designs—and nine food-safe bags. 
  • This all-inclusive kit includes printed die cuts, die-cut boxes, cellophane treat bags, adhesive, and more!
  • Includes an exclusive stamp set and a Classic Stampin’ Spot
  • Coordinating colors: Evening Evergreen, Flirty Flamingo, Old Olive, Pool Party, Poppy Parade

Subscribe to the November 2021 Paper Pumpkin Kit between 11 October and 10 November at paperpumpkin.com!

Note: Supplies may be limited toward the end of the subscription period.

*********************************************************************************************************

Card stock cuts for this project:

  • Basic White Cardstock 1/2″ x 1 1/2″ (sentiment), 3 7/8″ x 5 1/8″ (inner liner)
  • Cajun Craze Cardstock 4 1/4″ x 11″ (card base scored & folded at 5 1/2″), 2″ X 2 1/4″ (apples)
  • Early Espresso Cardstock 3 1/4″ x 3 1/4″ (wreath), 4″ X 5 1/4″ (inner liner mat)
  • Old Olive Cardstock 3 1/2″ X 3 1/2″ (wreath), 4 1/8″ X 5 3/8″ (card front mat)
  • Heart & Home Designer Series Paper (available 1-4-22) 4″ X 5 1/4″ (card front), 2 1/4″ X 6″ (envelope flap)

*********************************************************************************************************

Product List

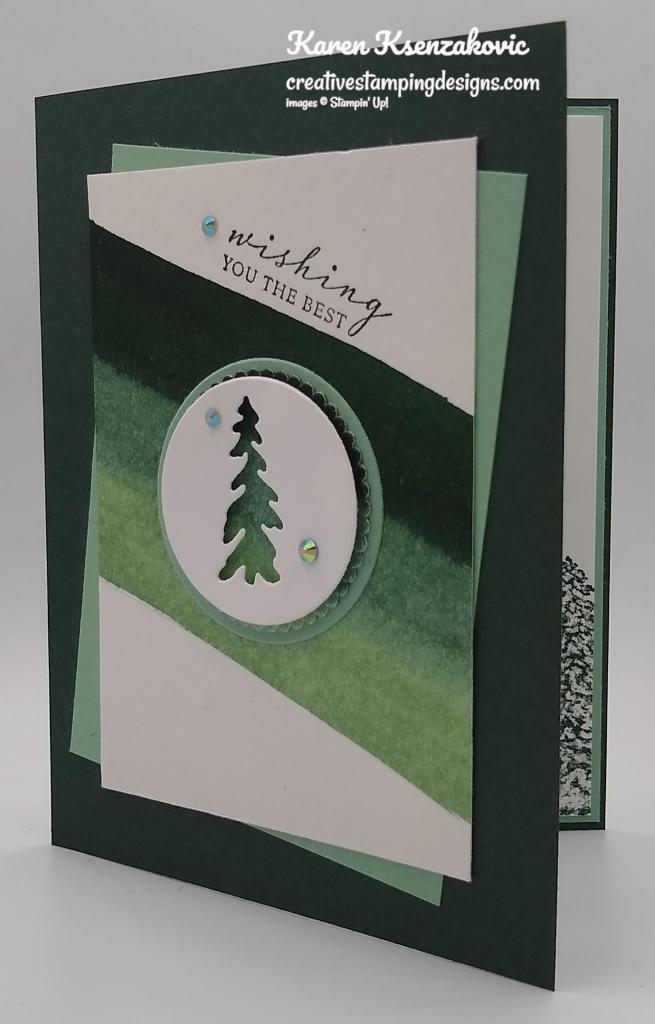
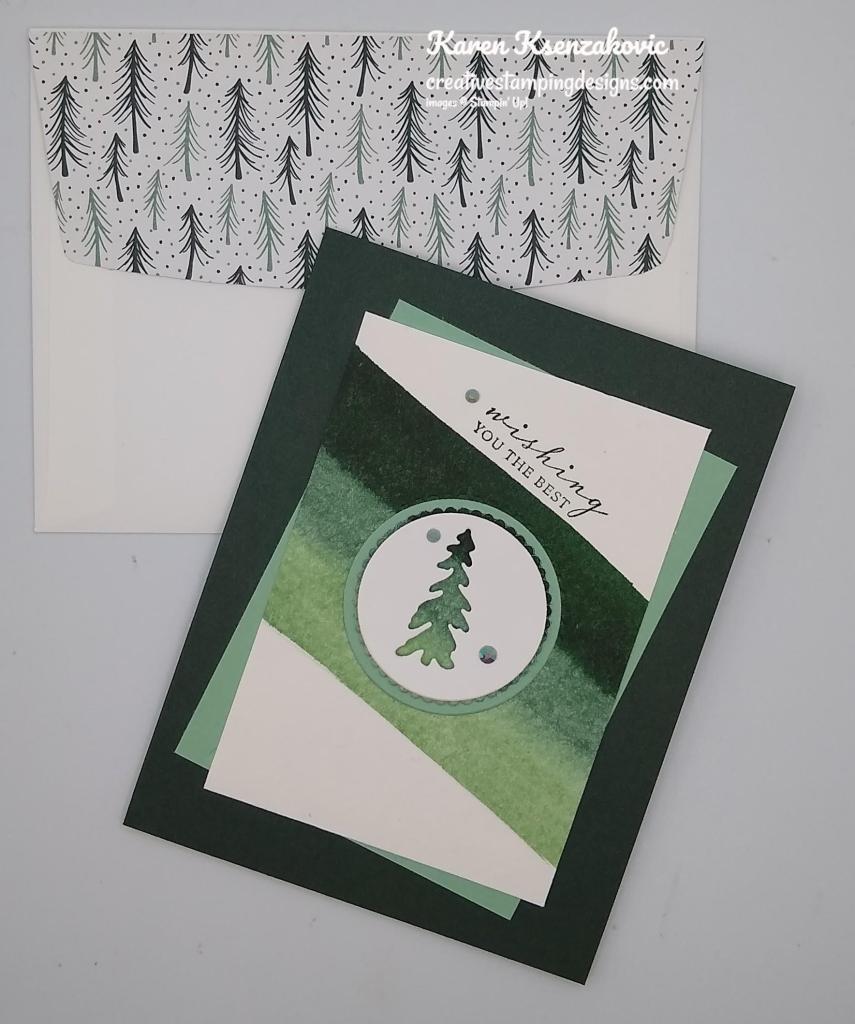
Stampin’ Up! Peaceful Cabin Watercolor

Good Monday morning my stamping friends. How was everyone’s weekend? I worked on Saturday, but was lucky to have Sunday off. It started out a beautiful autumn day, until the rain started.

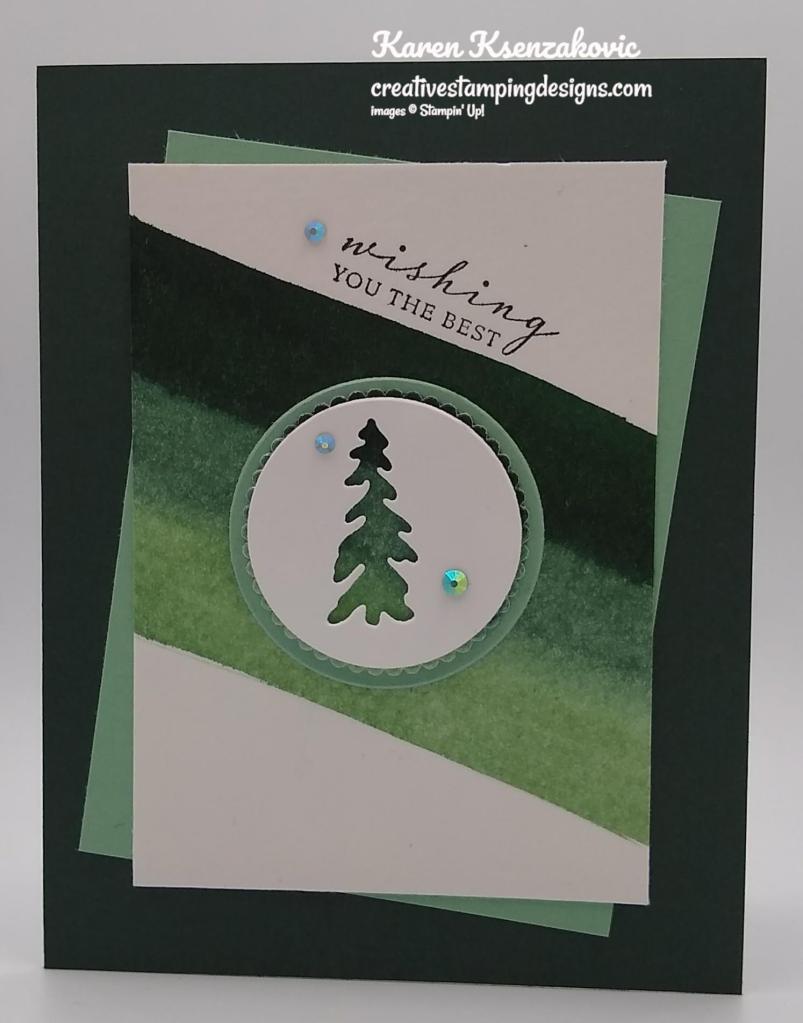
Today’s card is another CASE’d card from my upline Jaimie, similar to the one I showed yesterday using my Water Painters. Here’s my card for today.

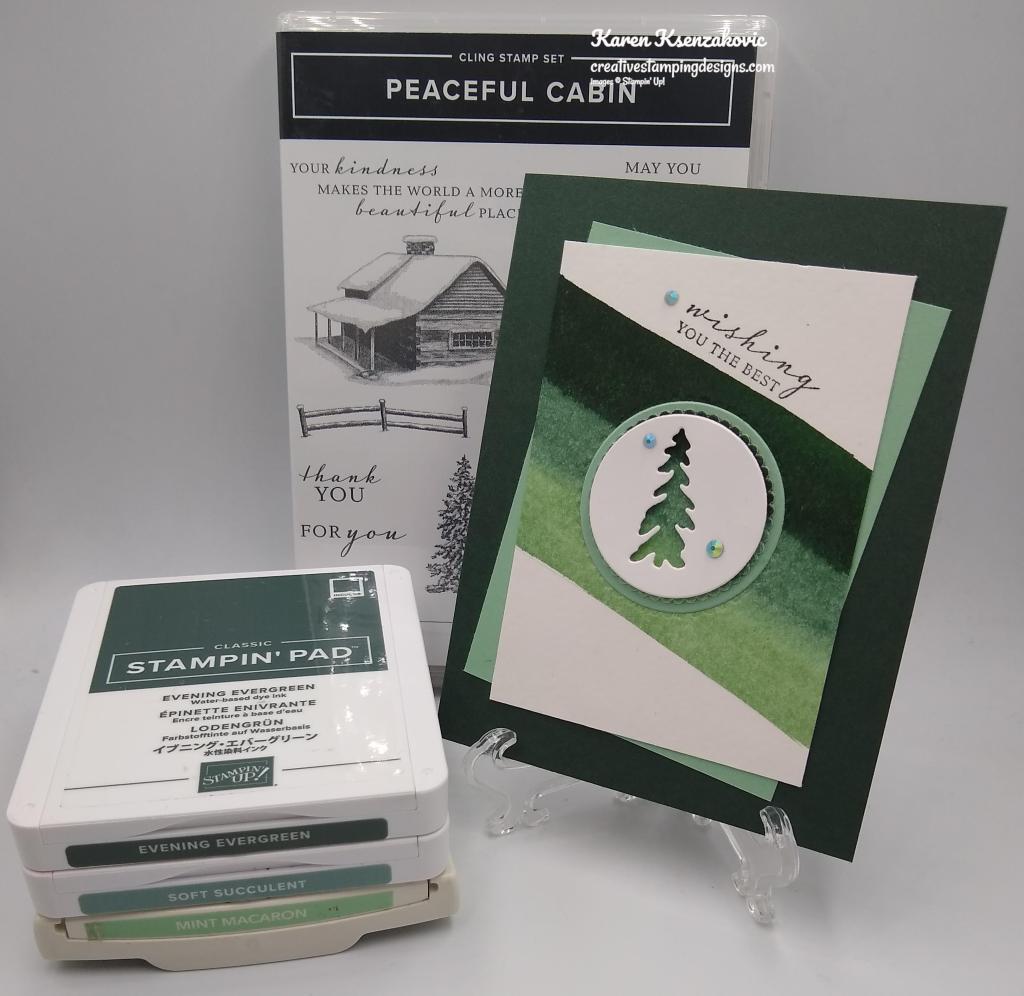
I used the Stampin’ Up! Peaceful Cabin Cling Bundle along with my Water Painters for my card today.

I started with a panel of Fluid 100 Watercolor Paper card front and one of my acrylic blocks. Using my Ink Refills, I put a drop of Evening Evergreen, Soft Succulent and Mint Macaron on the block. Making sure my largest Water Painter was really wet I lifted some of the Evening Evergreen Ink and brushed it across the Watercolor paper. I did the same with the Soft Succulent Ink and the Mint Macaron Ink, blending the inks together in between them. I used my Heat Tool on setting #1 to dry the panel.

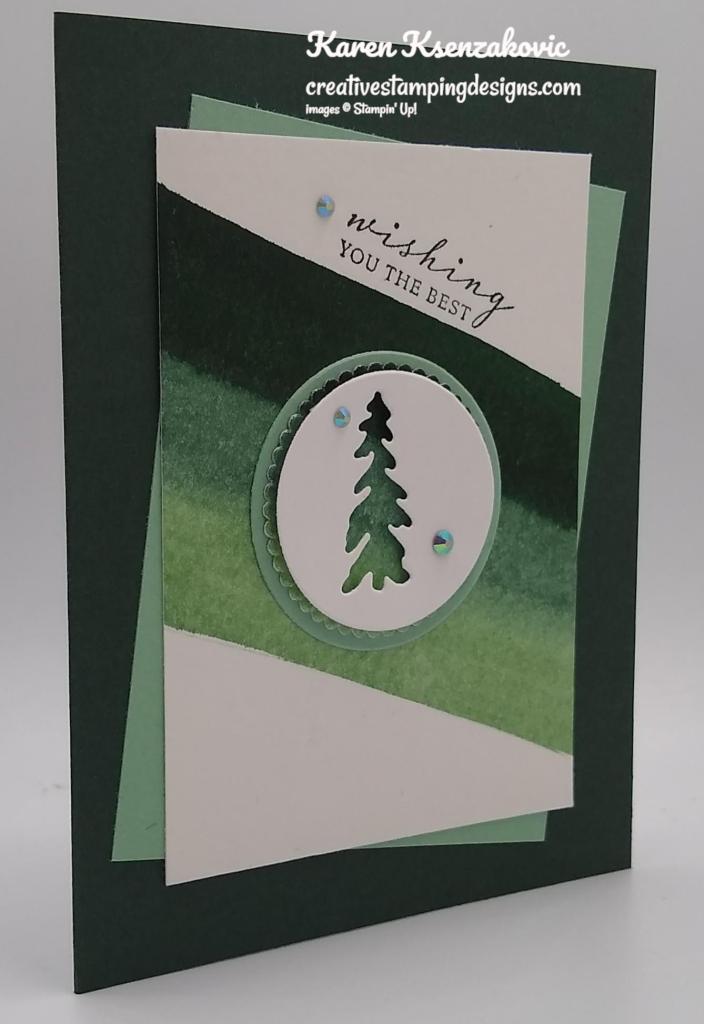
I stamped the sentiment from the Peaceful Cabin stamp set in Evening Evergreen Ink above the brushed ink on an angle. I adhered a panel of Mint Macaron card stock to an Evening Evergreen card base on an angle.

Using the 3rd largest scallop circle from the Layering Circles Dies, I cut the inked panel. I cut a panel of Mint Macaron cardstock using the 4th largest circle from the Layering Circles Dies. From a panel of Basic White cardstock I cut the 3rd largest circle using the Layering Circles Dies. I cut the tree die from my Cabin Dies from the Basic White circle. I adhered the Mint Macaron circle to the card front over the cut area. I adhered the scalloped circle over the Mint Macaron making sure the stripes from the brushed ink lined up. I adhered the tree cut circle die over the scalloped circle using Stampin’ Dimensionals. I adhered the card front over the Mint Macaron panel using Stampin’ Dimensionals. I added a few Soft Succulent 2021-2023 In-Color Jewels.

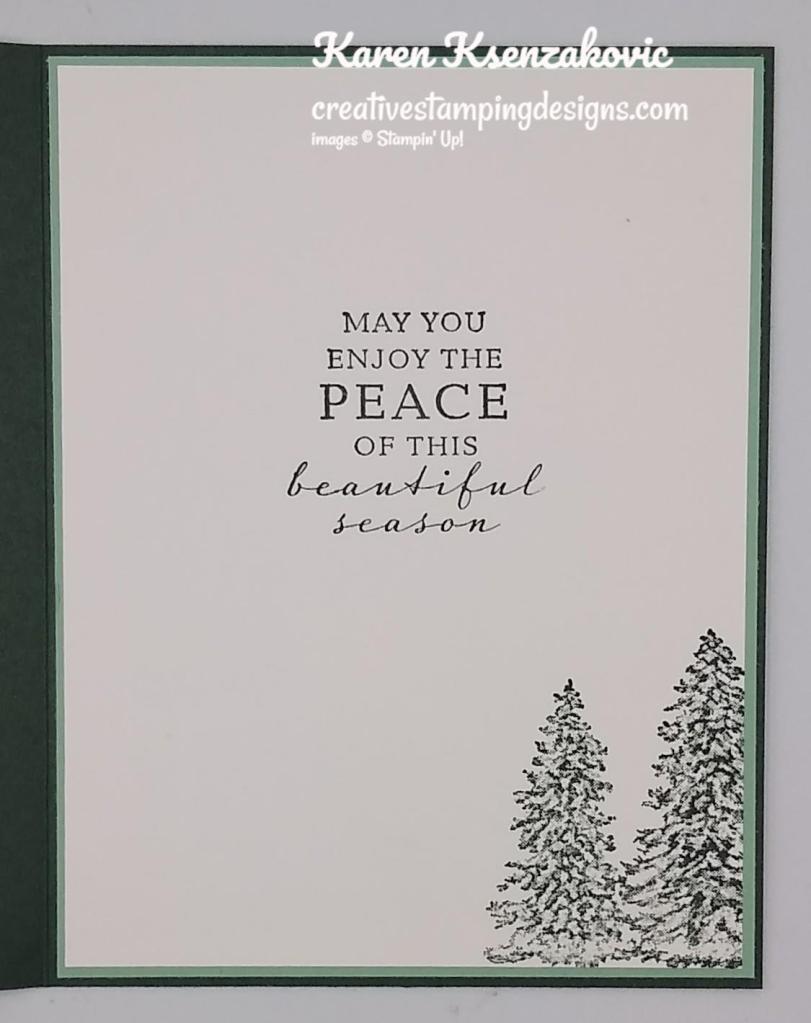
On the inside I stamped the sentiment from the Peaceful Cabin stamp set in Evening Evergreen Ink on a Basic White panel. I stamped the tree image from the Peaceful Cabin stamp set in Evening Evergreen Ink on the bottom of the panel. I adhered the Basic White panel to a Mint Macaron mat and then to the inside of the Evening Evergreen card base.

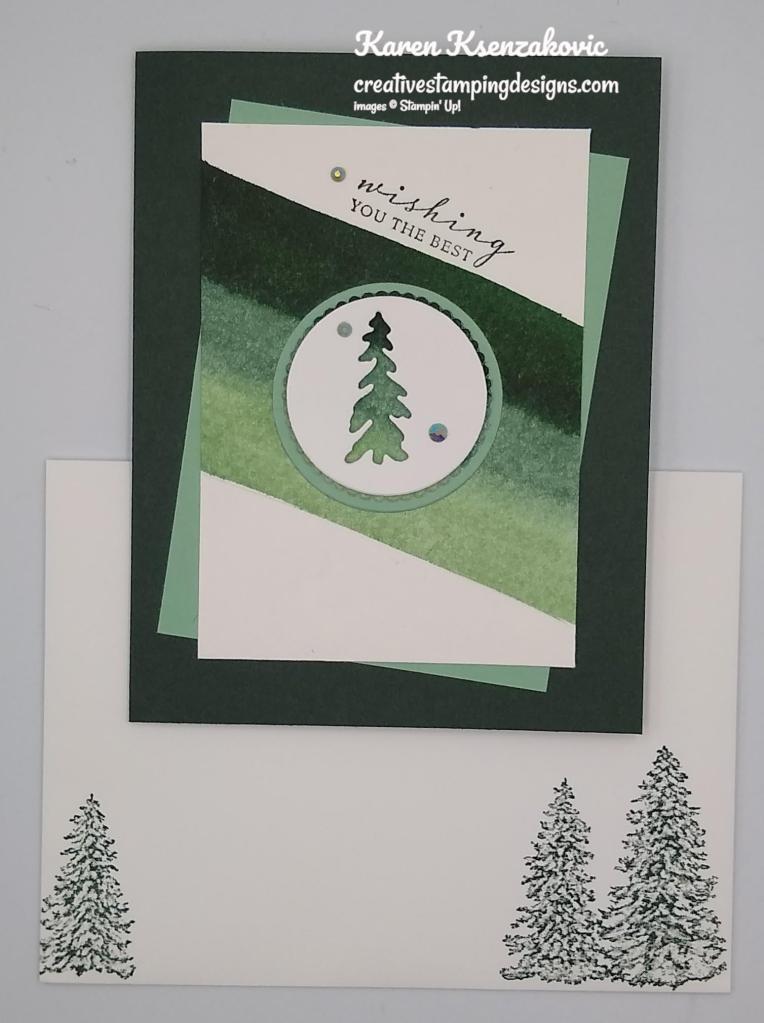
To finish my card I decorated a Basic White Medium Envelope. I stamped the tree image from the Peaceful Cabin stamp set in Evening Evergreen Ink on the envelope front. I adhered a panel of Tidings of Christmas 6 X 6 Designer Series Paper to the envelope flap.

Thank you for stopping by my blog today. I hope you liked this version of the watercolor card and will give it a try. The Water Painters are really fun to work with and design with. Happy Stamping!!

*********************************************************************************************************

If you need any stamping supplies, I’d love to be your Demonstrator. Just click HERE to go directly to my online store or drop me an email if you have any questions. 

MY CURRENT HOST CODE IS:   BM9R7DQX

Use this host code when you order $50 or greater and receive a free gift from me! If your order is over $150, please do not use this code, but you’ll still get the free gift. The free gift is your choice of any 1 item valued up to $10.00 from the 2020-2021 Annual Catalog or the January-June 2021 Mini Catalog!   For any orders $50 or more I will also send you my monthly class tutorials.  Click HERE or go to my Customer Rewards for more details and to see what this months tutorials are.

Please remember to use my current Host Code and make sure that you can see my name on the final checkout page listed as your Demonstrator when you order so that you know that you’re ordering with me and you’ll get my rewards! 

Stampin’ Up! has added more items to their Clearance Rack. All items are **While Supplies Last**. So don’t wait if there is something you’ve been wanting, grab it while you can.

Happy Stamping, Karen!

*********************************************************************************************************

Gifts Galore

Subscribe October 11 – November 10

This image has an empty alt attribute; its file name is 11-21_dheader_giftsgalore_novpp_na.jpg

We all love to see piles of presents on Christmas morning. Make that your reality with the Gifts Galore Paper Pumpkin Kit! With classic Christmas sentiments, bright and festive colors, a sweet snowman, a tree with all the trimmings, or a playful pile of presents, you’ll have everything you need to make eye-catching treat packages that are sure to spread Christmas cheer. Each Gifts Galore box contains enough supplies to create nine treat packages—three each of three designs—and nine food-safe bags that are adorably styled for easy Christmas gifting. There’s plenty of joy to share with Gifts Galore!

  • Kit contains enough supplies to create nine treat packages—three each of three designs—and nine food-safe bags. 
  • This all-inclusive kit includes printed die cuts, die-cut boxes, cellophane treat bags, adhesive, and more!
  • Includes an exclusive stamp set and a Classic Stampin’ Spot
  • Coordinating colors: Evening Evergreen, Flirty Flamingo, Old Olive, Pool Party, Poppy Parade

Subscribe to the November 2021 Paper Pumpkin Kit between 11 October and 10 November at paperpumpkin.com!

Note: Supplies may be limited toward the end of the subscription period.

*********************************************************************************************************

Card stock cuts for this project:

  • Basic White Cardstock 1 3/4″ X 1 3/4″ (circle), 4″ X 5 1/4″ (inner liner)
  • Evening Evergreen Cardstock 8 1/2″ X 5 1/2″ (card base scored & folded at 4 1/4″)
  • Mint Macaron Cardstock 2″ X 2″ (circle), 3 1/4″ x 4 3/8″ (card front panel)
  • Fluid 100 Watercolor Paper 3 1/16″ x 4 3/16″ (artwork)
  • Tidings of Christmas 6 X 6 Designer Series Paper 2 1/4″ x 6″ (envelope flap)

*********************************************************************************************************

Product List

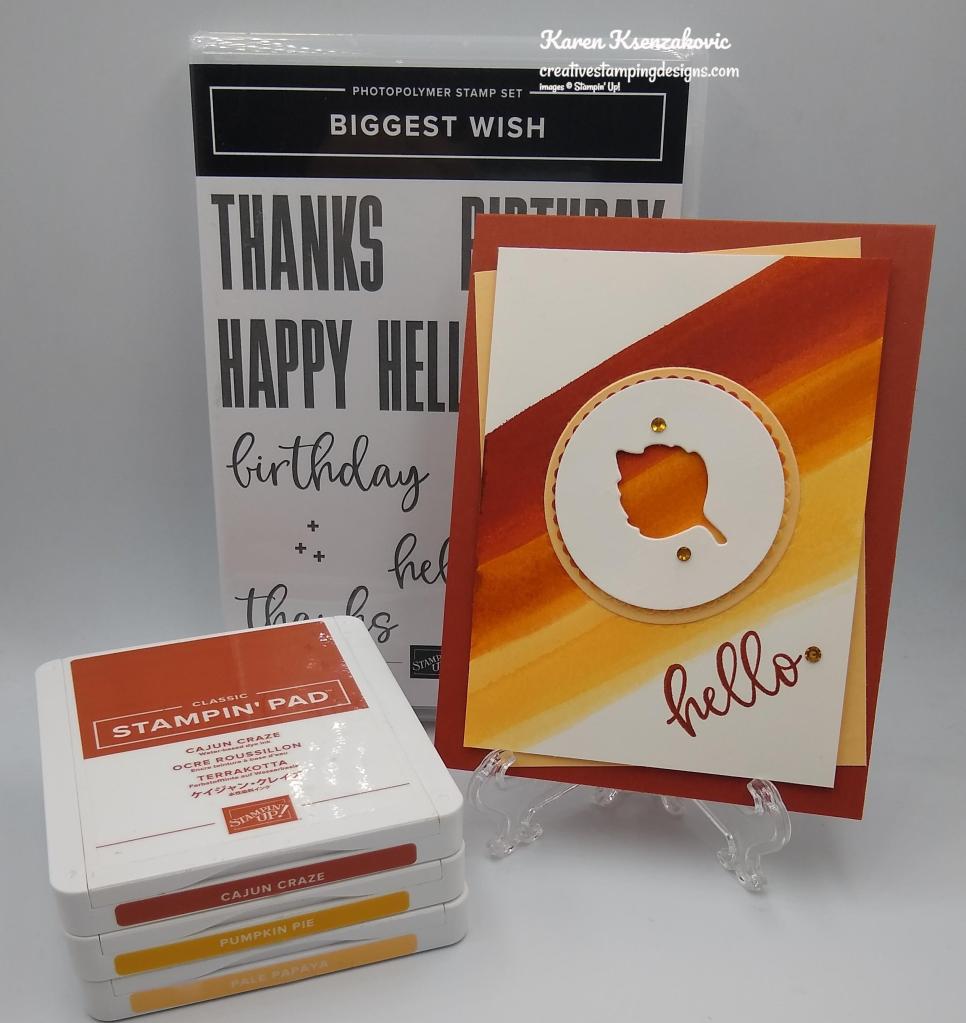
Stampin’ Up! Biggest Wish Watercolor

Good Sunday morning my stamping friends. How is everyone’s weekend going? I’ve got the day off today and it looks like it’s going to be a beautiful fall day. Unfortunately my husband is sick and my daughter is going to work, so I’ll just have to stay in and make some cards. I may run a couple errands just to get out for a bit.

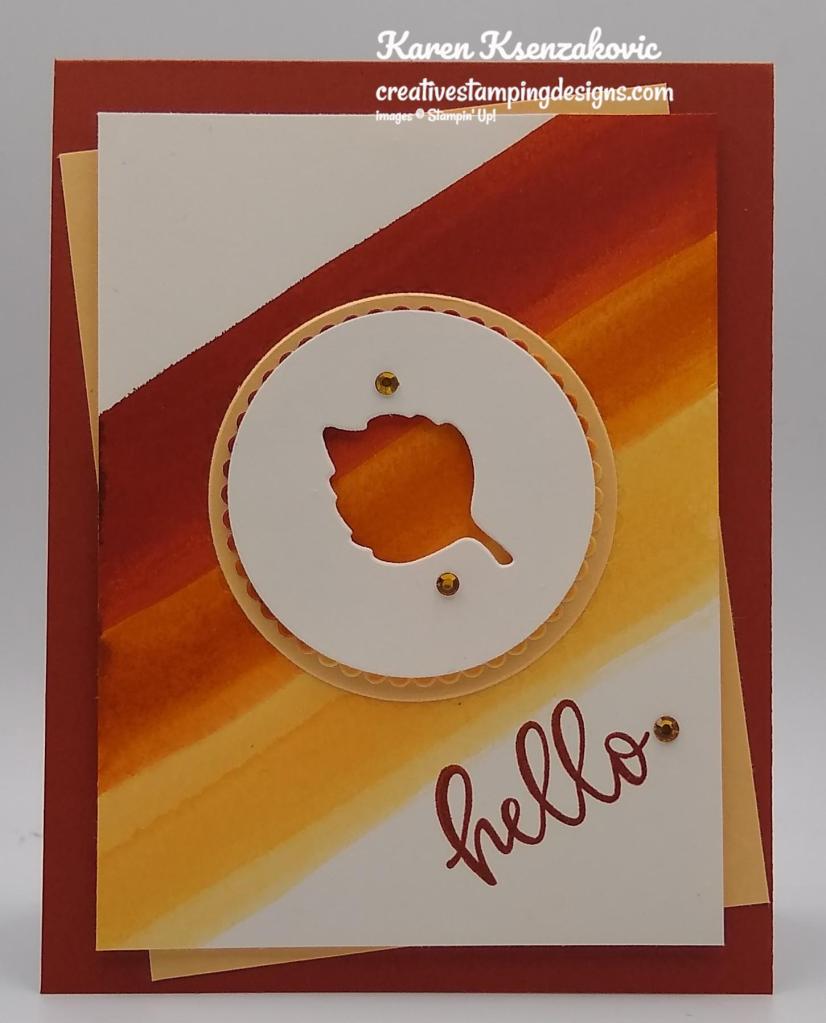
Today and tomorrow’s cards are a CASE from my upline Jaimie. Last week we had our monthly team meeting and she showed us a card using the Water Painters. I have to admit, since I’ve gotten all the Stampin’ Blends Markers I haven’t water colored. That was always my go to for relaxing. I changed my card up a bit from hers, but it’s basically the same. Here’s my card for today.

I used the Stampin’ Up! Biggest Wish Photopolymer Stamp Set along with my Water Painters and other sets for my card today.

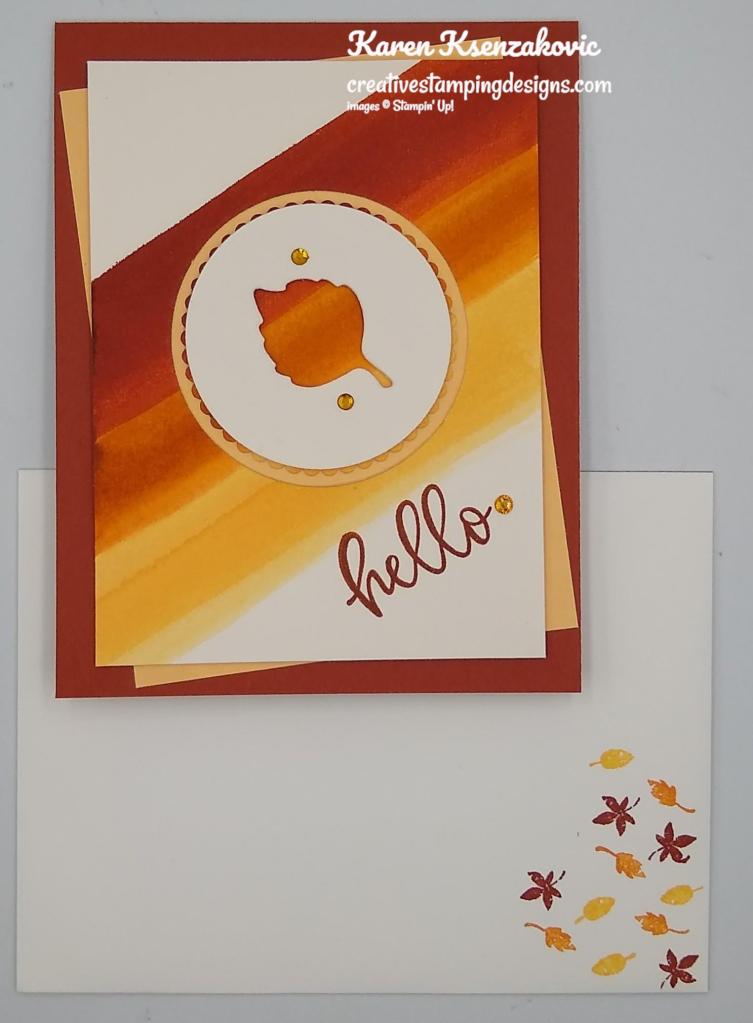
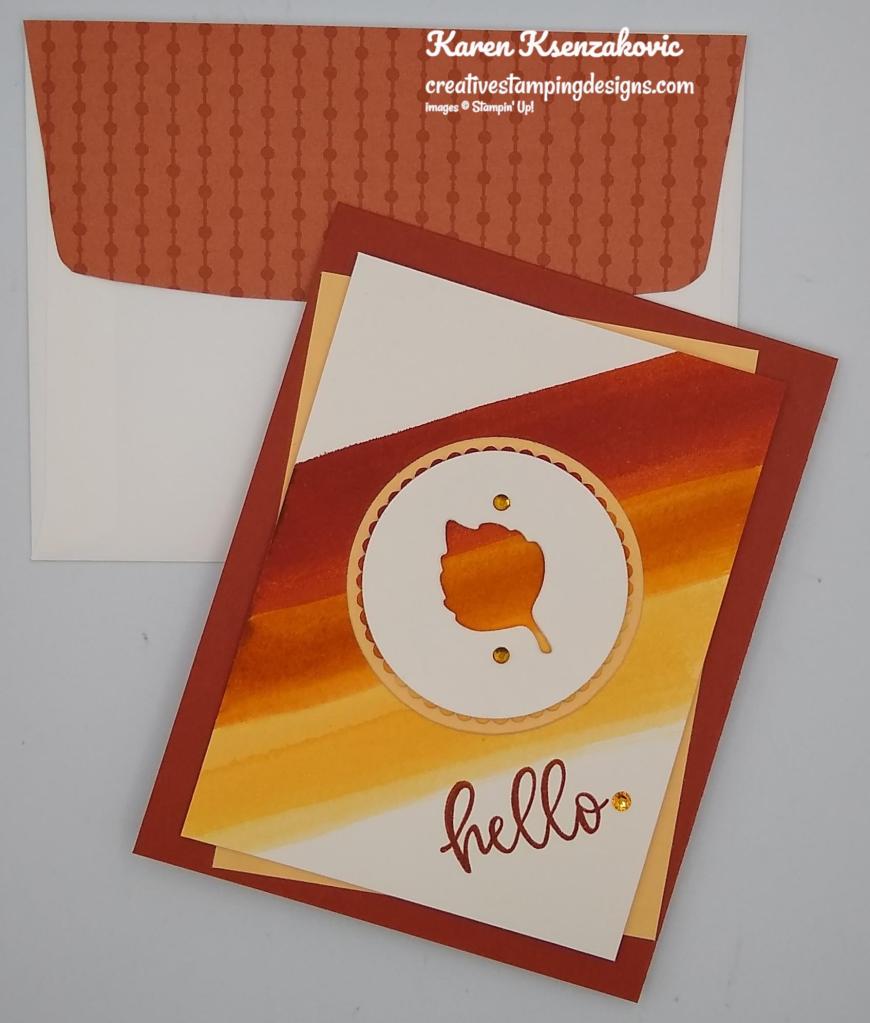
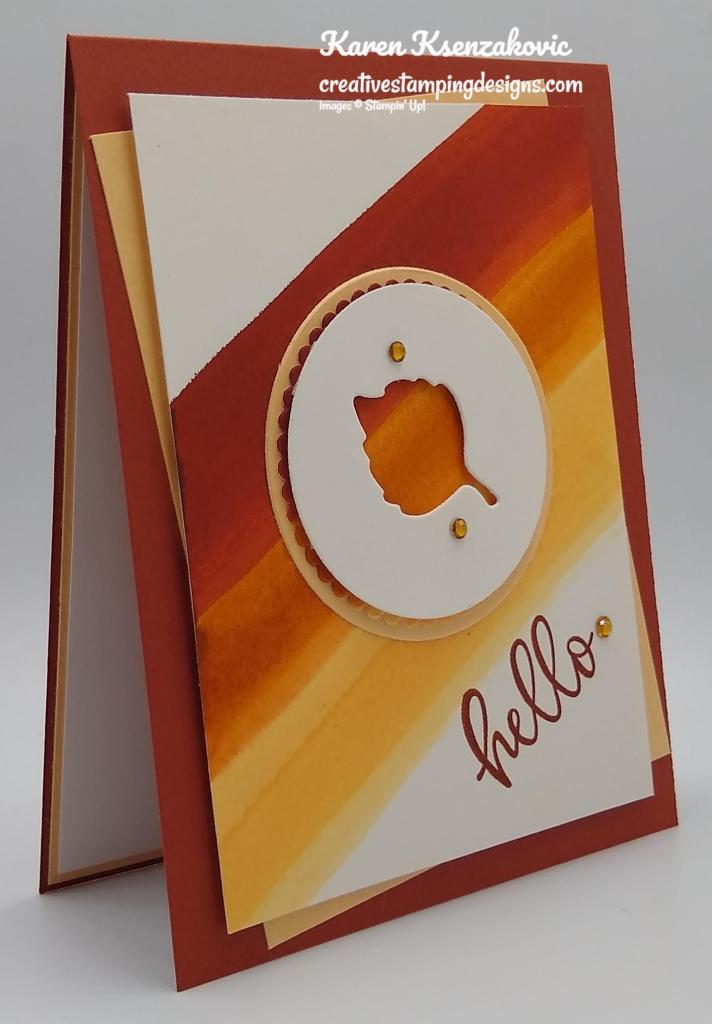
I started with a Shimmery White card front and one of my acrylic blocks. Using my Ink Refills, I put a drop of Cajun Craze, Pumpkin Pie and Pale Papaya in on the block. Making sure my largest Water Painter was really wet, you might want to have a little bowl of water handy, I lifted some of the Cajun Craze Ink and brushed it across the Shimmery White paper. I did the same with the Pumpkin Pie Ink and the Pale Papaya Ink, blending the inks together in between them. You can either let it dry on it’s own or use setting #1 on your Heat Tool to dry the panel.

I stamped the sentiment from the Biggest Wish stamp set in Cajun Craze Ink below the brushed ink on an angle. I adhered a panel of Pale Papaya card stock to a Cajun Craze card base on an angle.

Using the 4th largest scallop circle from the Layering Circles Dies, I cut the inked panel. I cut a panel of Pale Papaya cardstock using the 3rd largest circle from the Layering Circles Dies. From a panel of Shimmery White cardstock I cut the 4th largest circle using the Layering Circles Dies. From the Shimmery White circle I cut the leaf die using my Intricate Leaves Dies. I adhered the Pale Papaya circle to the card front over the cut area. I adhered the scalloped circle over the Pale Papaya making sure the stripes from the brushed ink lined up. I adhered the leaf cut circle die over the scalloped circle using Stampin’ Dimensionals. I adhered the card front over the Pale Papaya panel using Stampin’ Dimensionals. I added a few Pumpkin Pie rhinestones from the Holiday Rhinestone Basic Jewels.

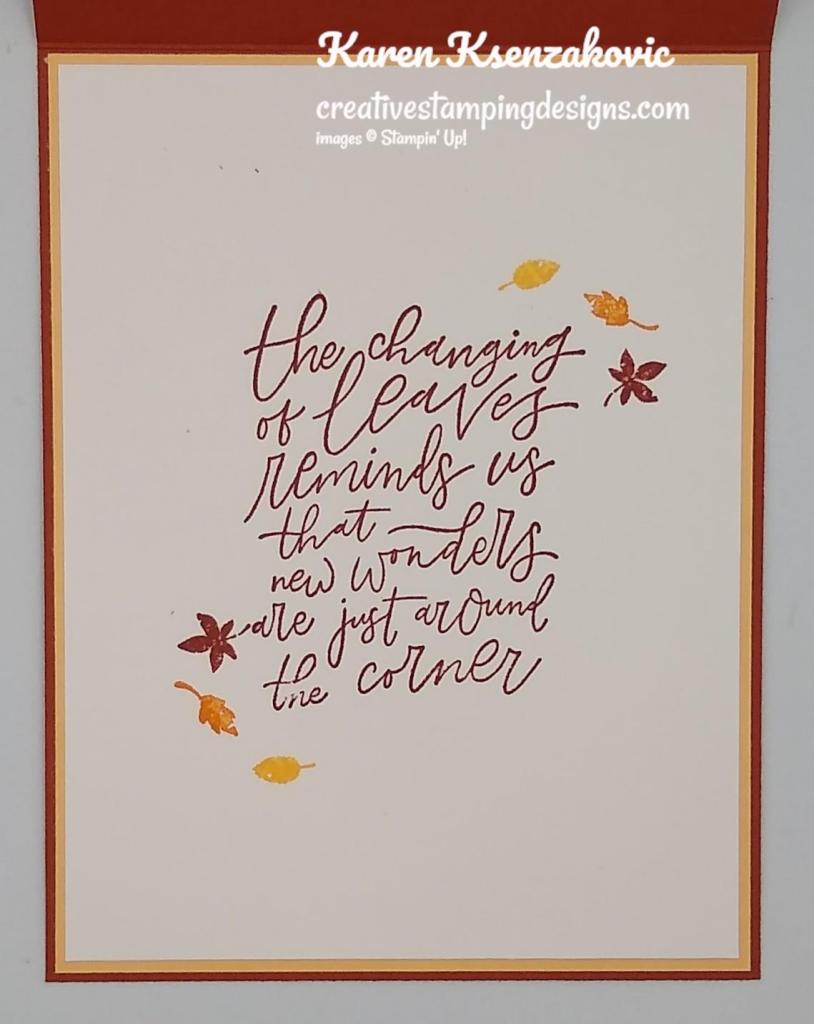
On the inside I stamped the sentiment from the Stampin’ Up! Beauty of Tomorrow Cling Stamp Set in Cajun Craze Ink on a Basic White panel. I stamped the trio leaf image from the Stampin’ Up! Gorgeous Leaves Cling Stamp Set on either side of the sentiment, coloring the stamp using my Cajun Craze, Pumpkin Pie and Pale Papaya Stampin’ Write Markers. I adhered the Basic White panel to a Pale Papaya mat and then to the inside of the Cajun Craze card base.

To finish my card I decorated a Basic White Medium Envelope. I stamped the trio leaves image from the Gorgeous Leaves stamp set, colored the same as I did for the card, on the envelope front. I adhered a panel of Cajun Craze from the Regals 6 X 6 Designer Series Paper to the envelope flap.

Thank you for stopping by my blog today. I hope you liked my card and will give it a try. Happy Stamping!!

*********************************************************************************************************

If you need any stamping supplies, I’d love to be your Demonstrator. Just click HERE to go directly to my online store or drop me an email if you have any questions. 

MY CURRENT HOST CODE IS:   BM9R7DQX

Use this host code when you order $50 or greater and receive a free gift from me! If your order is over $150, please do not use this code, but you’ll still get the free gift. The free gift is your choice of any 1 item valued up to $10.00 from the 2020-2021 Annual Catalog or the January-June 2021 Mini Catalog!   For any orders $50 or more I will also send you my monthly class tutorials.  Click HERE or go to my Customer Rewards for more details and to see what this months tutorials are.

Please remember to use my current Host Code and make sure that you can see my name on the final checkout page listed as your Demonstrator when you order so that you know that you’re ordering with me and you’ll get my rewards! 

Stampin’ Up! has added more items to their Clearance Rack. All items are **While Supplies Last**. So don’t wait if there is something you’ve been wanting, grab it while you can.

Happy Stamping, Karen!

*********************************************************************************************************

Gifts Galore

Subscribe October 11 – November 10

This image has an empty alt attribute; its file name is 11-21_dheader_giftsgalore_novpp_na.jpg

We all love to see piles of presents on Christmas morning. Make that your reality with the Gifts Galore Paper Pumpkin Kit! With classic Christmas sentiments, bright and festive colors, a sweet snowman, a tree with all the trimmings, or a playful pile of presents, you’ll have everything you need to make eye-catching treat packages that are sure to spread Christmas cheer. Each Gifts Galore box contains enough supplies to create nine treat packages—three each of three designs—and nine food-safe bags that are adorably styled for easy Christmas gifting. There’s plenty of joy to share with Gifts Galore!

  • Kit contains enough supplies to create nine treat packages—three each of three designs—and nine food-safe bags. 
  • This all-inclusive kit includes printed die cuts, die-cut boxes, cellophane treat bags, adhesive, and more!
  • Includes an exclusive stamp set and a Classic Stampin’ Spot
  • Coordinating colors: Evening Evergreen, Flirty Flamingo, Old Olive, Pool Party, Poppy Parade

Subscribe to the November 2021 Paper Pumpkin Kit between 11 October and 10 November at paperpumpkin.com!

Note: Supplies may be limited toward the end of the subscription period.

*********************************************************************************************************

Card stock cuts for this project:

  • Basic White Cardstock 4″ X 5 1/4″ (inner liner)
  • Cajun Craze Cardstock 4 1/4″ X 11″ (card base scored & folded at 5 1/2″)
  • Pale Papaya Cardstock 3 5/8″ X 4 7/8″ (card front mat), 3″ X 3″ (circle), 4 1/8″ X 5 3/8″ (inner liner mat)
  • Shimmery White Cardstock 3 5/8″ X 4 7/8″ (card front), 2 1/2″ X 2 1/2″ (circle)
  • Regals 6 X 6 Designer Series Paper 2 1/4″ X 6″ (envelope flap)

*********************************************************************************************************

Product List

Stampin’ Up! Happy Holly-Days

Good Saturday morning my stamping friends. How has everyone’s weekend started off? I’ll be at work all day today, but surprisingly I have off tomorrow. Looking forward to a day off.

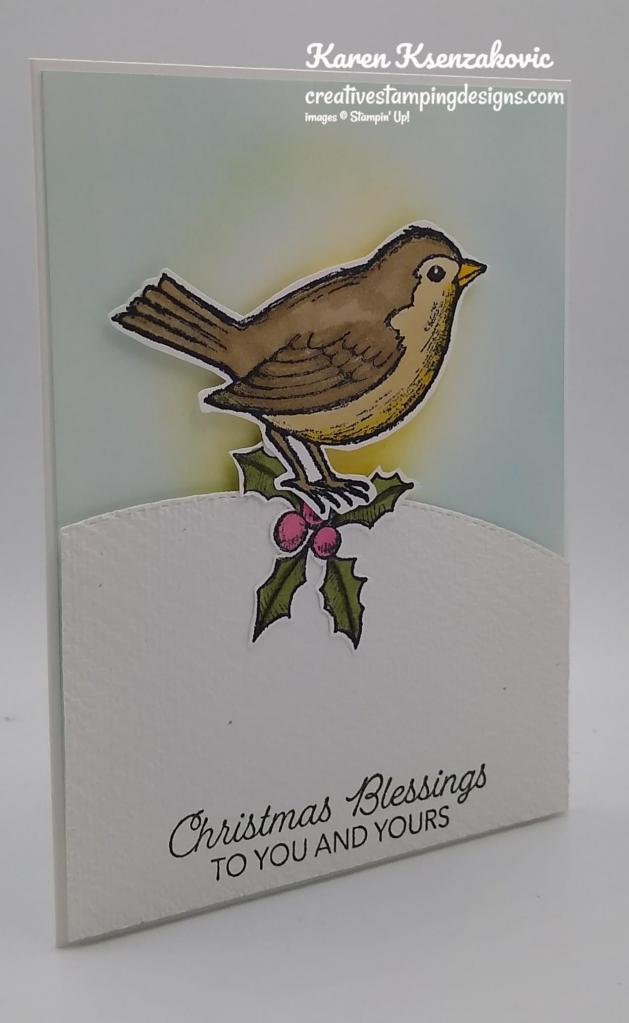
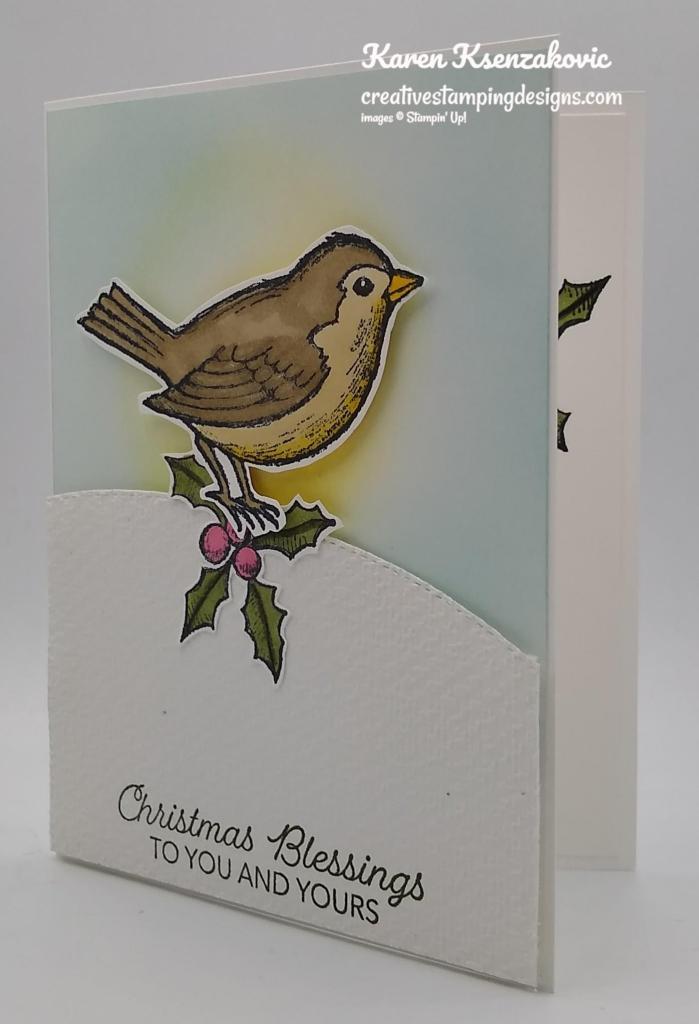
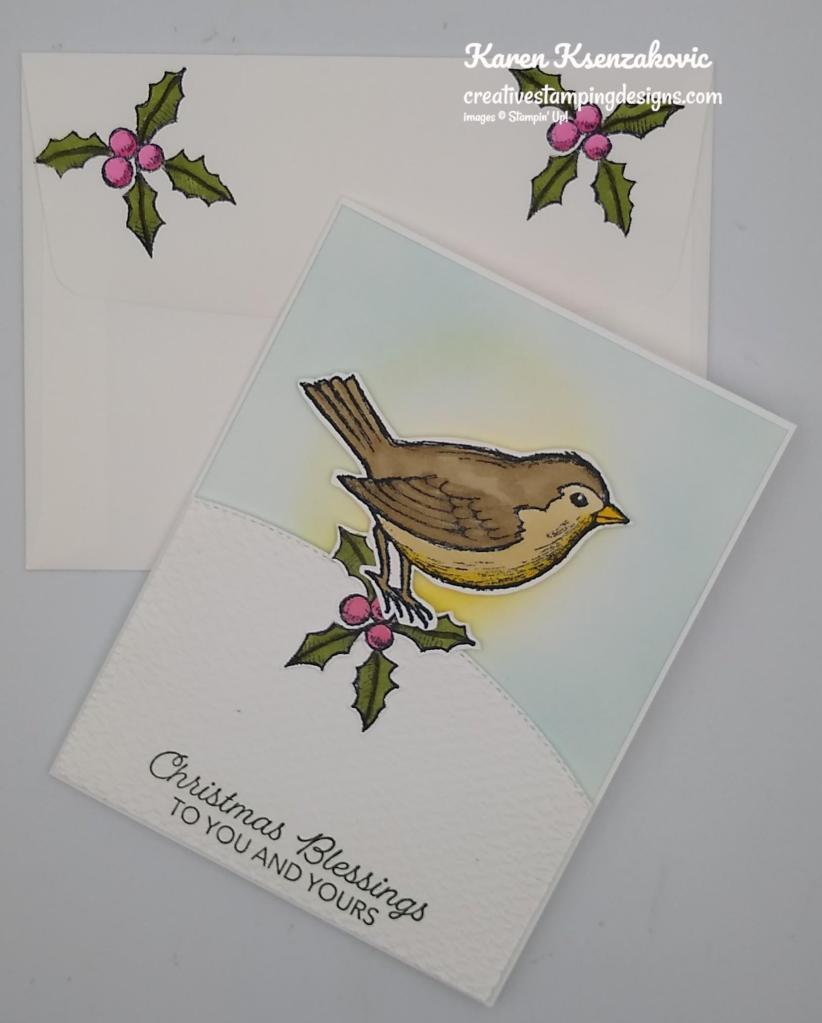
If you saw my Facebook live on Wednesday you saw that I stamped and cut out 2 different holly leaves. I had embossed 1 with Silver Embossing Powder and stamped the other with Tuxedo Black Ink. I asked those that were watching which one I should use. The majority picked the silver, but I had the black one and wanted to use it. So, today’s card is another version of yesterday’s.

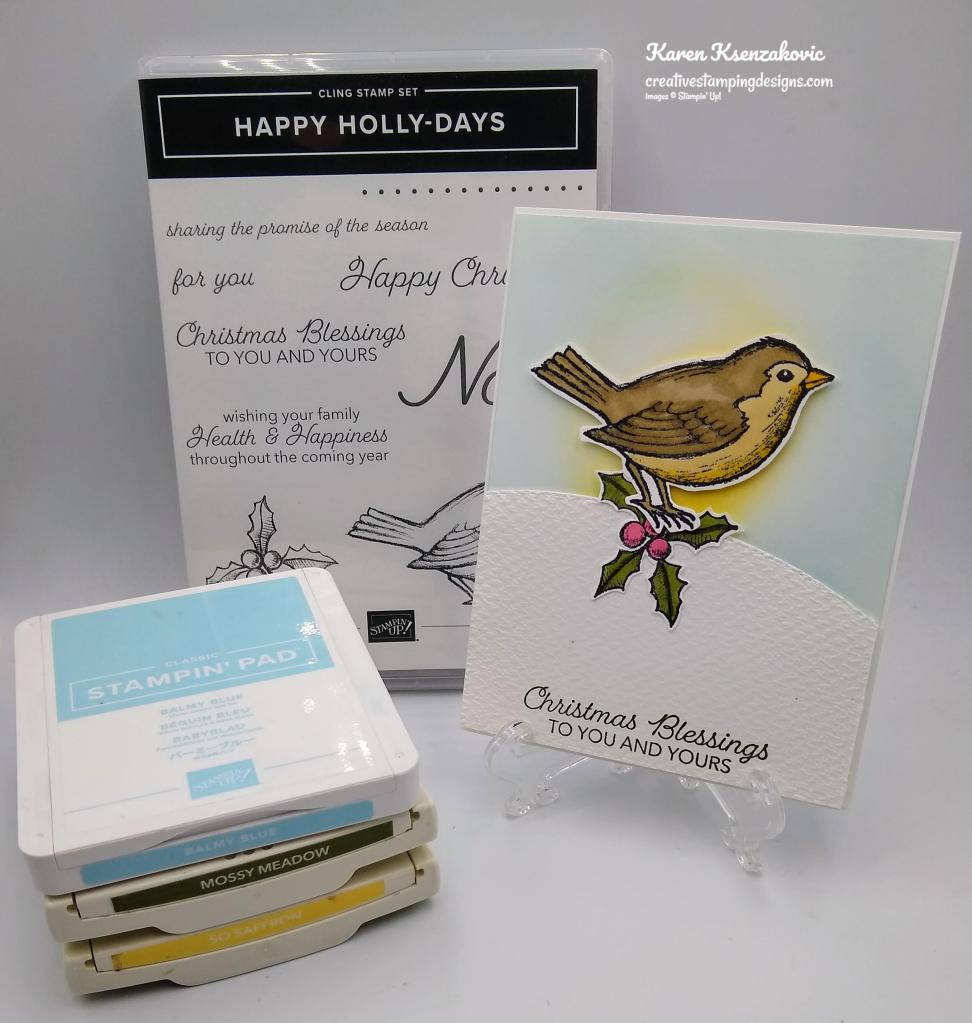
I used the Stampin’ Up! Happy Holly-Days Cling Stamp Set along with my Blending Brushes for my card today.

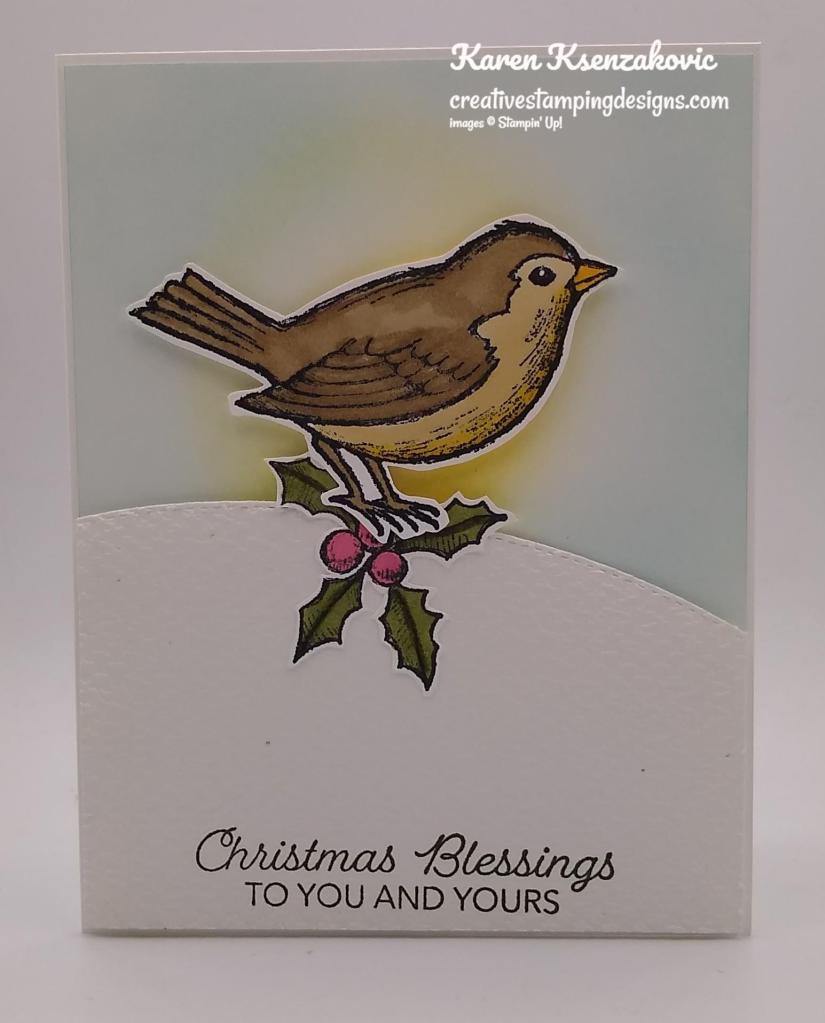
I started by using my Blending Brushes and my Balmy Blue and Daffodil Delight Inks and colored a Basic White card front. I adhered the panel to a Thick Basic White card front.

I cut a panel of Basic White cardstock using my Basic Borders Dies. I stamped the sentiment from the Happy Holly-Days stamp set in Mossy Meadow Ink on the bottom of the cut panel. I embossed the panel using my Tasteful Textile 3D Embossing Folder and adhered it to the card front using Stampin’ Dimensionals.

On a panel of Basic White cardstock I stamped the bird and holly images from the Happy Holly-Days stamp set in Tuxedo Black Ink. I colored the images in using my Crumb Cake, Daffodil Delight, Mossy Meadow and Polished Pink Stampin’ Blends Markers. I fussy cut the images using my Paper Snips and adhered them to the card front.

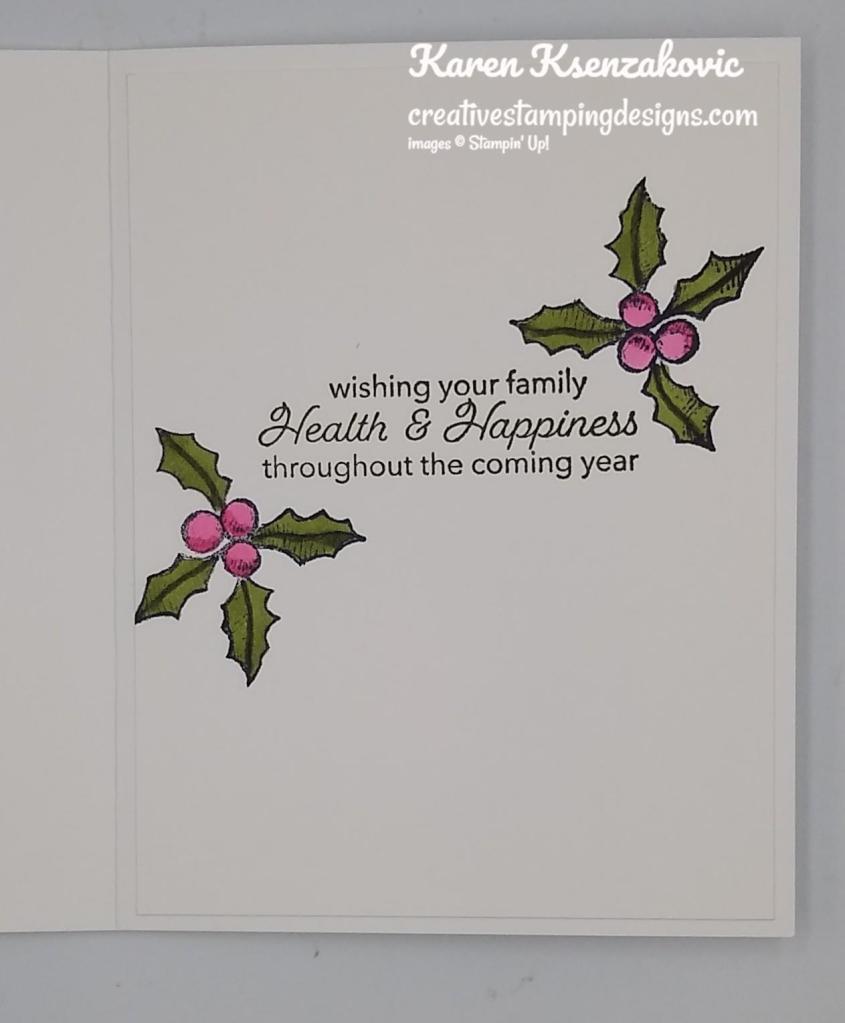
On the inside I stamped the sentiment from the Happy Holly-Days stamp set in Mossy Meadow Ink and the holly in Tuxedo Black Ink. I colored the holly in using my Mossy Meadow and Polished Pink Stampin’ Blends Markers. I adhered the Basic White panel to the inside of the Thick Basic White card base.

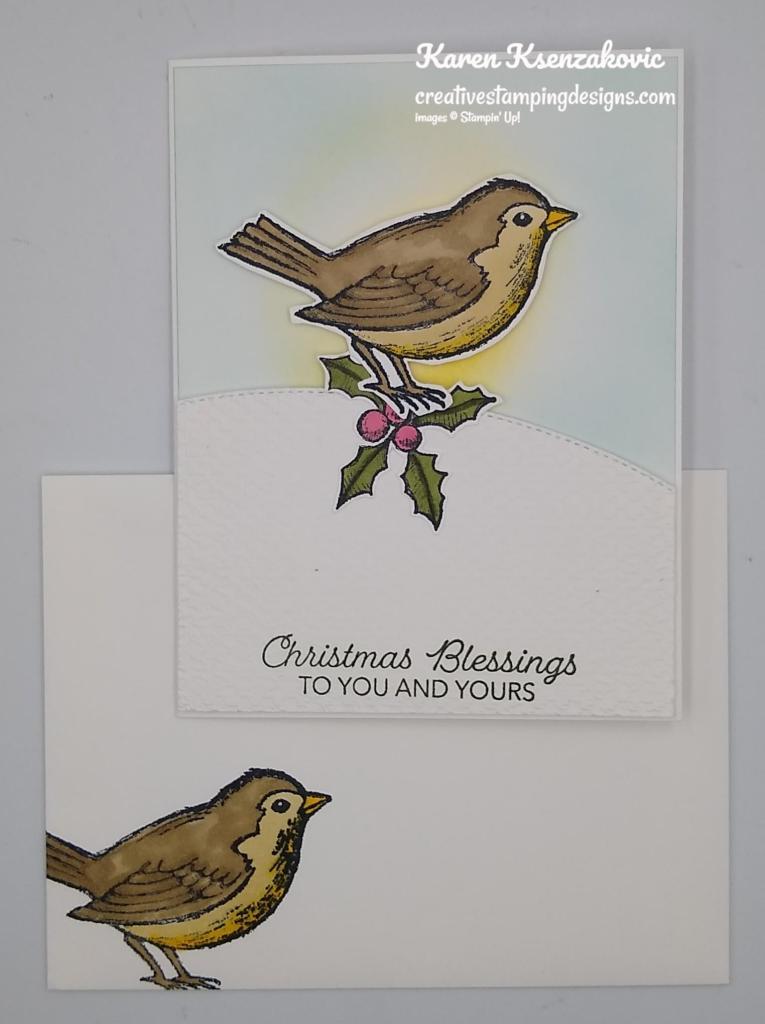
To finish my card I decorated a Basic White Medium Envelope. I stamped the bird and holly images from the Happy Holly-Days stamp set in Tuxedo Black Ink on the envelope front and envelope flap and colored them in the same as I did for the card.

Thank you for stopping by my blog today. I hope you liked today’s card and will try it out. Happy Stamping!!

*********************************************************************************************************

If you need any stamping supplies, I’d love to be your Demonstrator. Just click HERE to go directly to my online store or drop me an email if you have any questions. 

MY CURRENT HOST CODE IS:   BM9R7DQX

Use this host code when you order $50 or greater and receive a free gift from me! If your order is over $150, please do not use this code, but you’ll still get the free gift. The free gift is your choice of any 1 item valued up to $10.00 from the 2020-2021 Annual Catalog or the January-June 2021 Mini Catalog!   For any orders $50 or more I will also send you my monthly class tutorials.  Click HERE or go to my Customer Rewards for more details and to see what this months tutorials are.

Please remember to use my current Host Code and make sure that you can see my name on the final checkout page listed as your Demonstrator when you order so that you know that you’re ordering with me and you’ll get my rewards! 

Stampin’ Up! has added more items to their Clearance Rack. All items are **While Supplies Last**. So don’t wait if there is something you’ve been wanting, grab it while you can.

Happy Stamping, Karen!

*********************************************************************************************************

Gifts Galore

Subscribe October 11 – November 10

This image has an empty alt attribute; its file name is 11-21_dheader_giftsgalore_novpp_na.jpg

We all love to see piles of presents on Christmas morning. Make that your reality with the Gifts Galore Paper Pumpkin Kit! With classic Christmas sentiments, bright and festive colors, a sweet snowman, a tree with all the trimmings, or a playful pile of presents, you’ll have everything you need to make eye-catching treat packages that are sure to spread Christmas cheer. Each Gifts Galore box contains enough supplies to create nine treat packages—three each of three designs—and nine food-safe bags that are adorably styled for easy Christmas gifting. There’s plenty of joy to share with Gifts Galore!

  • Kit contains enough supplies to create nine treat packages—three each of three designs—and nine food-safe bags. 
  • This all-inclusive kit includes printed die cuts, die-cut boxes, cellophane treat bags, adhesive, and more!
  • Includes an exclusive stamp set and a Classic Stampin’ Spot
  • Coordinating colors: Evening Evergreen, Flirty Flamingo, Old Olive, Pool Party, Poppy Parade

Subscribe to the November 2021 Paper Pumpkin Kit between 11 October and 10 November at paperpumpkin.com!

Note: Supplies may be limited toward the end of the subscription period.

*********************************************************************************************************

Card stock cuts for this project:

  • Basic White Cardstock 2 – 4 1/8″ x 5 3/8″ (card front & artwork), 4″ X 5 1/4″ (inner liner)
  • Basic White Thick Cardstock 8 1/2″ X 5 1/2″ (card base scored & folded at 4 1/4″)

*********************************************************************************************************

Product List


Basic Borders Dies


Blending Brushes


$12.00


Mini Glue Dots


$5.25


Multipurpose Liquid Glue


Stampin' Dimensionals


Stampin' Seal


$8.00


Bone Folder


$7.00


Paper Snips


$10.00


Paper Trimmer


$25.00


Stamparatus


$49.00


Clear Block Bundle


Stampin’ Up! Eden’s Holly Jolly Wishes for The Happy Inkin’ Thursday Blog Hop

Good Thursday morning my stamping friends! Welcome to our Happy Inkin’ Thursday Blog Hop. I hope everyone is doing well today. If you are hopping over from Akiko Sudano’s blog, thank you for stopping by my blog. This week we have a Sketch Challenge. I can’t wait to see what everyone has created this week. Be sure to take a moment to hop around to see everyone’s beautiful projects. Here is my card using this weeks Sketch.

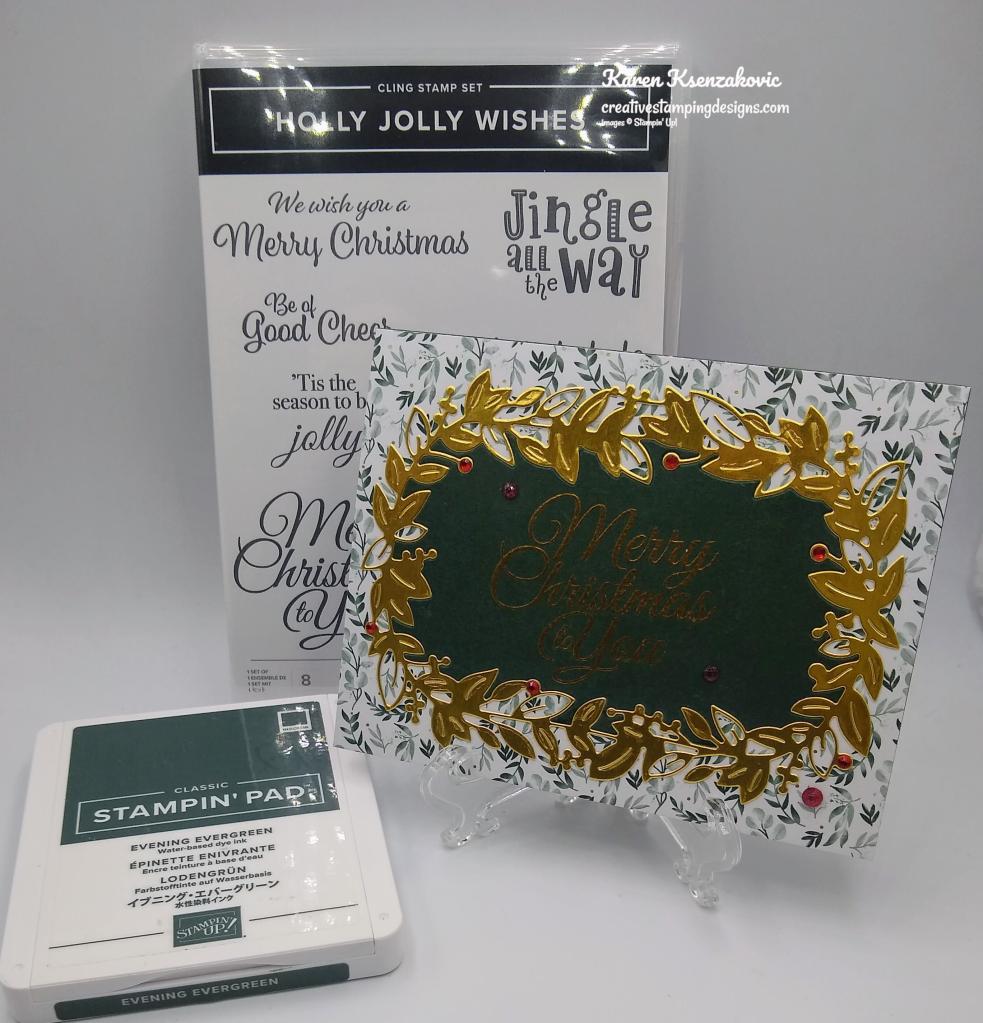
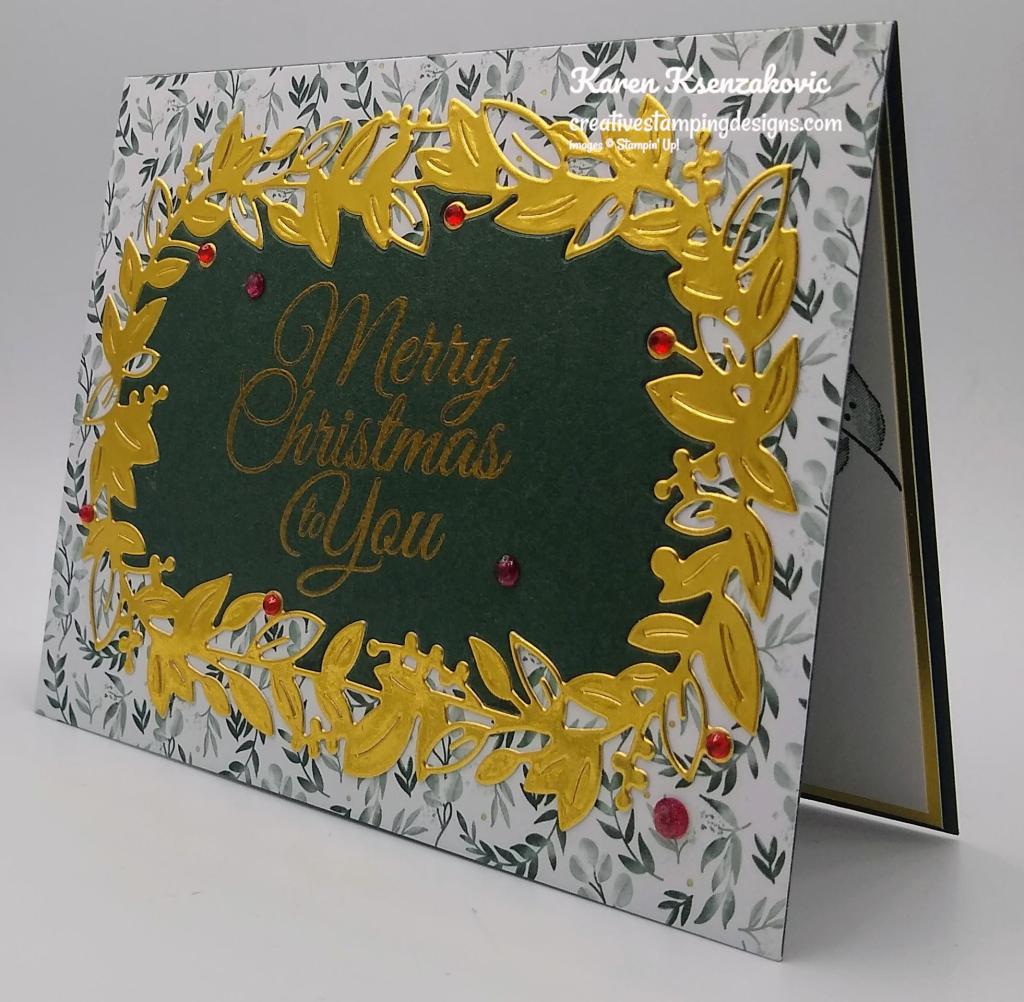
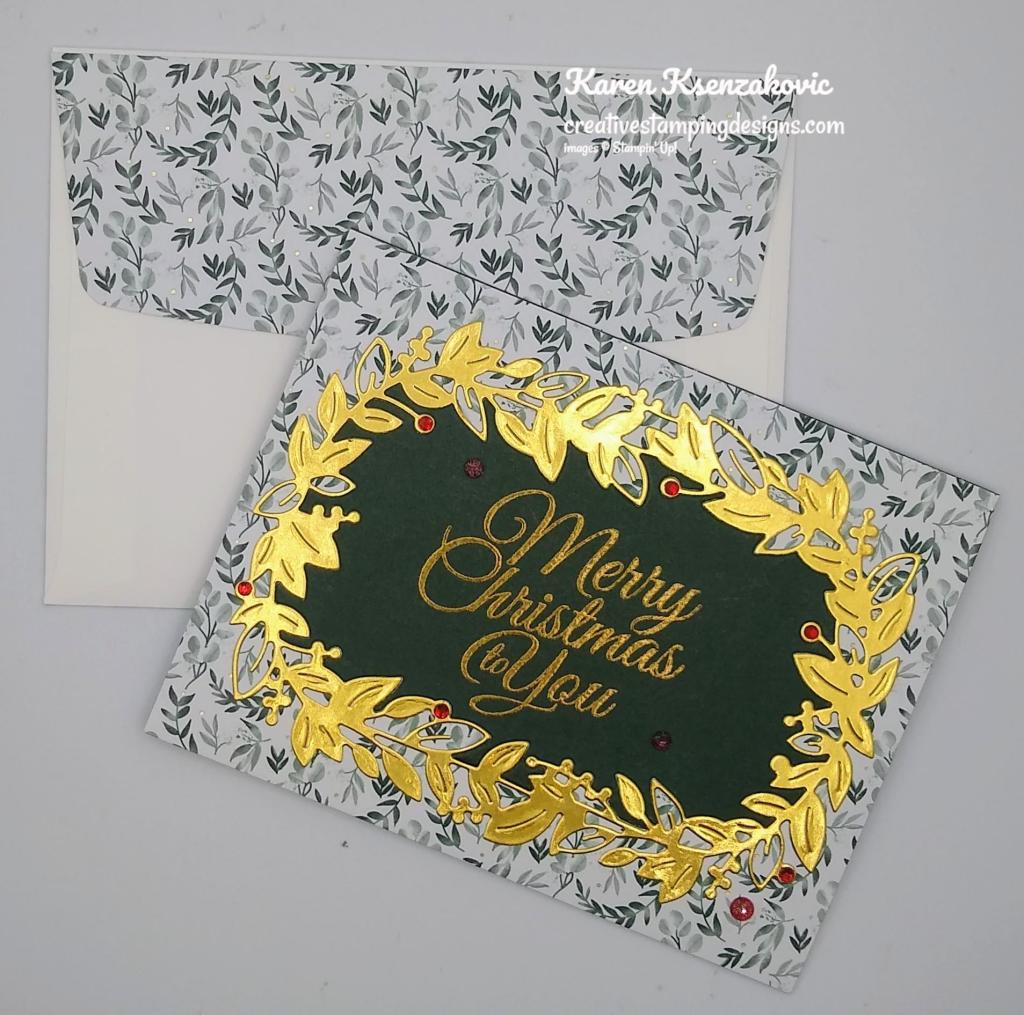
I used the Stampin’ Up! Holly Jolly Wishes Cling Stamp Set along with the Eden Dies (available 11-2-21) and the Ever Eden Specialty Designer Series Paper (available 11-2-21) for my card today.

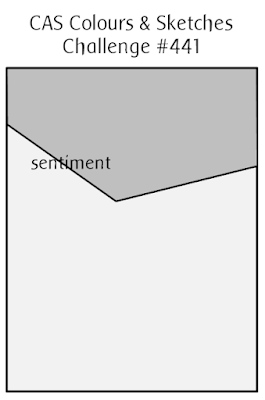
Here is our sketch for this week.

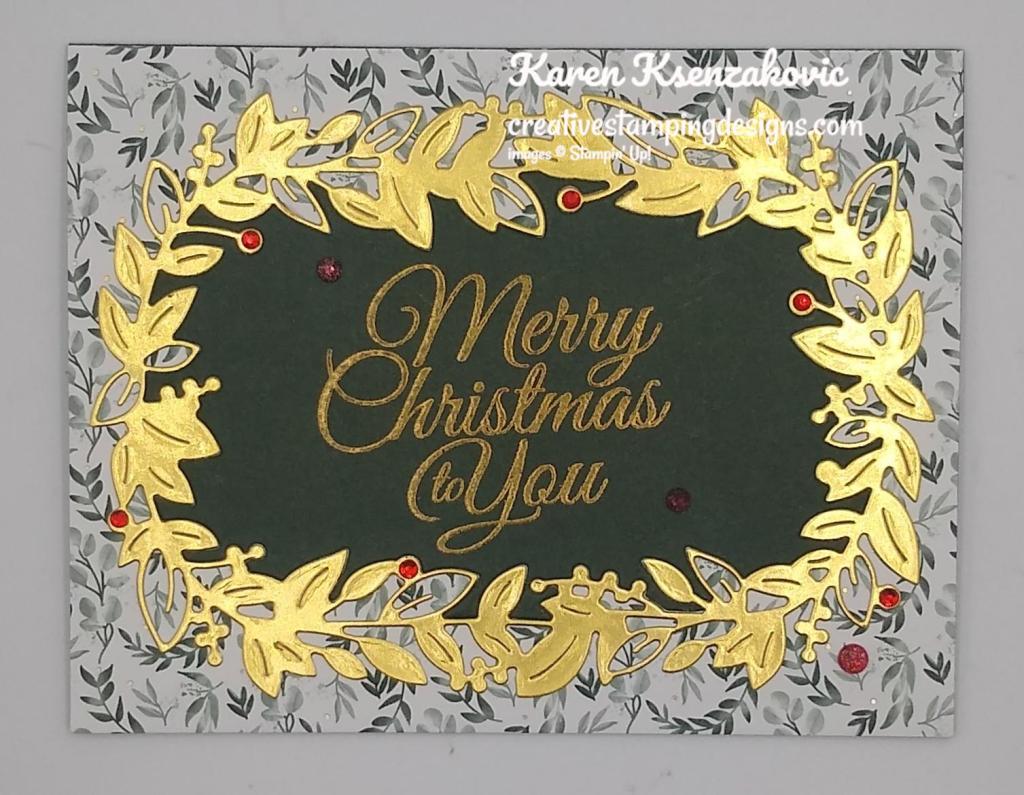
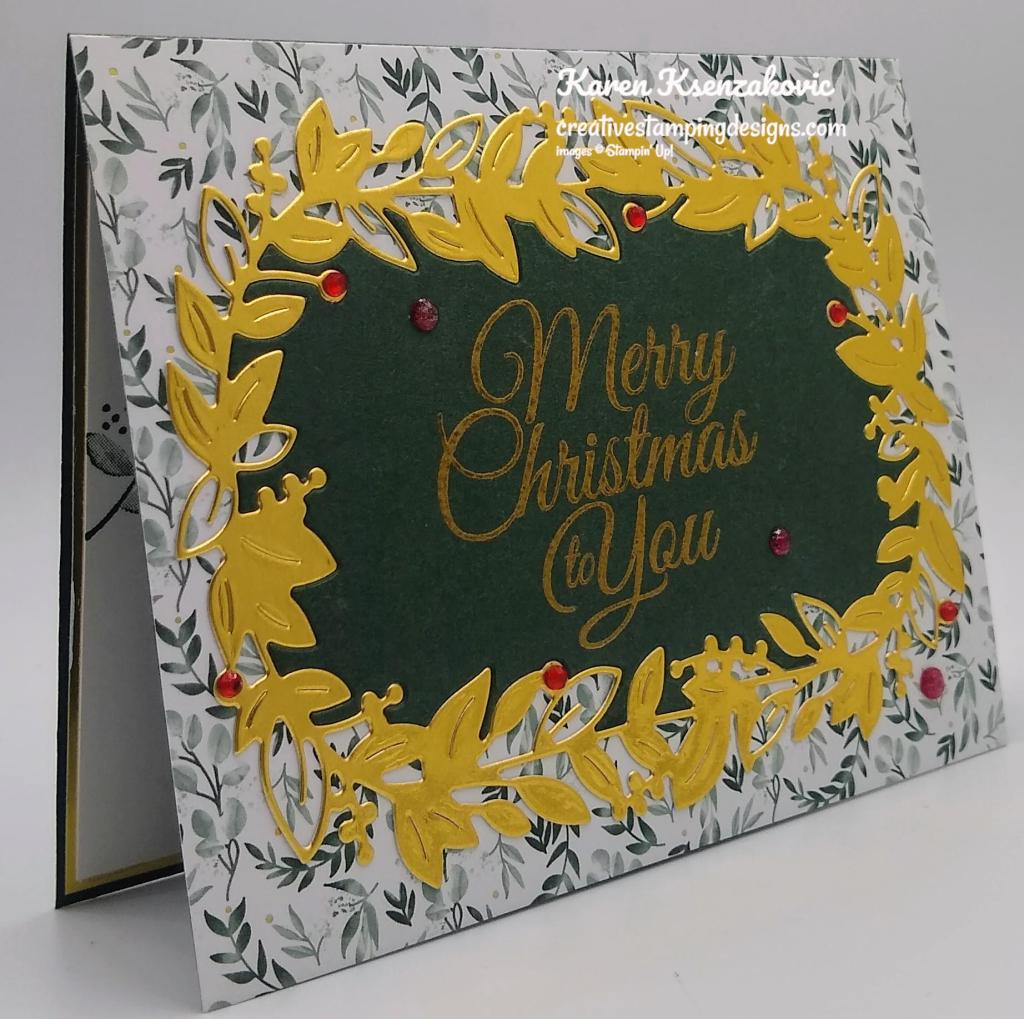
I started by adhering a panel of Ever Eden DSP to an Evening Evergreen card base. I cut a panel of Evening Evergreen and Gold Foil using the largest leaf frame die from the Eden Dies.

On the center section of the Evening Evergreen die cut I stamped the sentiment from the Holly Jolly Wishes stamp set in Versamark Ink. I immediately sprinkled it with my Gold Embossing Powder from the Metallics Embossing Powders and set it using my Heat Tool. I adhered the center section of the Evening Evergreen die to the card front then adhered the Gold Foil die to the card front matching up the cut pieces. Save the Evening Evergreen leaf frame die for another card

I added a few Wonderful Gems to the card front and Red Rhinestone Basic Jewels to the berry looking pieces on the die.

On the inside I stamped the sentiment from the Stampin’ Up! Encircled In Warmth Cling Stamp Set in Versamark Ink on a Basic White panel. I immediately sprinkled it with my Gold Embossing Powder and set it using my Heat Tool. I stamped the leaf images from the Stampin’ Up! Eden’s Garden Cling Stamp Set (available 11-2-21) in Evening Evergreen Ink on the top and sides of the panel. I adhered the Basic White panel to a Gold Foil mat and then to the inside of the Evening Evergreen card base.

To complete my card I decorated a Basic White Medium Envelope. I stamped the leaf images from the Eden’s Garden stamp set in Evening Evergreen Ink on the envelope front. I adhered a panel of Ever Eden DSP to the envelope flap.

Thank you for visiting my blog today. I hope you liked my card and will give it a try. Now that you’ve seen my card, take a minute to hop through all our projects today. If you click on the Next Blog button, you’ll go to Tara’s page. Or you can just click on the names below to go directly to all their blogs! Happy Hopping!!

Amy Koenders:

Mary Deatherage:

Kristi Gray:

Jaimie Babarczy:

Karen Finkle:

Akiko Sudano:

Karen Ksenzakovic: You Are Here

Tara Carpenter:

Terry Lynn Bright:

*********************************************************************************************************

If you need any stamping supplies, I’d love to be your Demonstrator. Just click HERE to go directly to my online store or drop me an email if you have any questions. 

MY CURRENT HOST CODE IS:   BM9R7DQX

Use this host code when you order $50 or greater and receive a free gift from me! If your order is over $150, please do not use this code, but you’ll still get the free gift. The free gift is your choice of any 1 item valued up to $10.00 from the 2020-2021 Annual Catalog or the January-June 2021 Mini Catalog!   For any orders $50 or more I will also send you my monthly class tutorials.  Click HERE or go to my Customer Rewards for more details and to see what this months tutorials are.

Please remember to use my current Host Code and make sure that you can see my name on the final checkout page listed as your Demonstrator when you order so that you know that you’re ordering with me and you’ll get my rewards! 

Stampin’ Up! has added more items to their Clearance Rack. All items are **While Supplies Last**. So don’t wait if there is something you’ve been wanting, grab it while you can.

Happy Stamping, Karen!

*********************************************************************************************************

Gifts Galore

Subscribe October 11 – November 10

This image has an empty alt attribute; its file name is 11-21_dheader_giftsgalore_novpp_na.jpg

We all love to see piles of presents on Christmas morning. Make that your reality with the Gifts Galore Paper Pumpkin Kit! With classic Christmas sentiments, bright and festive colors, a sweet snowman, a tree with all the trimmings, or a playful pile of presents, you’ll have everything you need to make eye-catching treat packages that are sure to spread Christmas cheer. Each Gifts Galore box contains enough supplies to create nine treat packages—three each of three designs—and nine food-safe bags that are adorably styled for easy Christmas gifting. There’s plenty of joy to share with Gifts Galore!

  • Kit contains enough supplies to create nine treat packages—three each of three designs—and nine food-safe bags. 
  • This all-inclusive kit includes printed die cuts, die-cut boxes, cellophane treat bags, adhesive, and more!
  • Includes an exclusive stamp set and a Classic Stampin’ Spot
  • Coordinating colors: Evening Evergreen, Flirty Flamingo, Old Olive, Pool Party, Poppy Parade

Subscribe to the November 2021 Paper Pumpkin Kit between 11 October and 10 November at paperpumpkin.com!

Note: Supplies may be limited toward the end of the subscription period.

*********************************************************************************************************

Card stock cuts for this project:

  • Basic White Cardstock 4″ X 5 1/4″ (inner liner)
  • Evening Evergreen Cardstock 8 1/2″ X 5 1/2″ (card base scored & folded at 4 1/4″), 4 1/4 x 5 1/2″ panel
  • Ever Eden Specialty Designer Series Paper 4 1/4″ X 5 1/2″ (card front), 2 1/4″ X 6″ (envelope flap)
  • Gold Foil Sheet 4 1/4″ X 5 1/2″ (leaf die cut frame), 4 1/8″ x 5 3/8″ (inner liner mat)

*********************************************************************************************************

Product List

Stampin’ Up! Snowbody Better CAS

Good Wednesday morning my stamping friends. We’re halfway through the week already and on the downhill to the weekend. WOW!! October is just flying by.

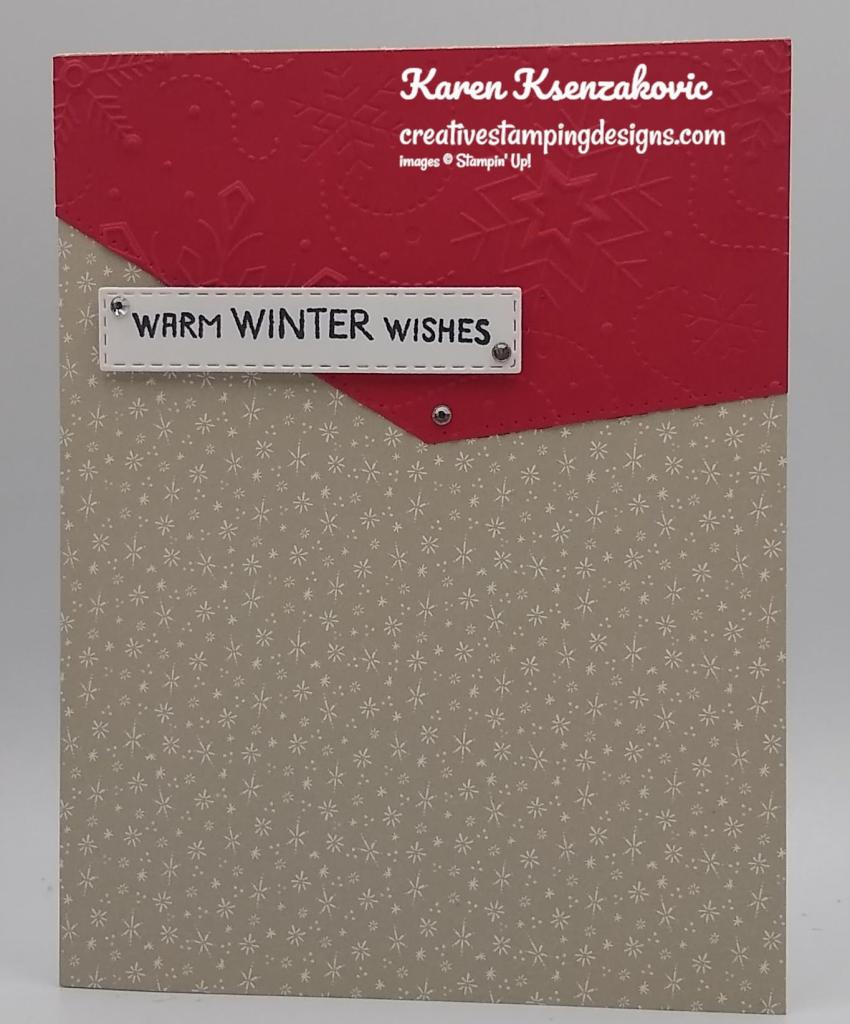
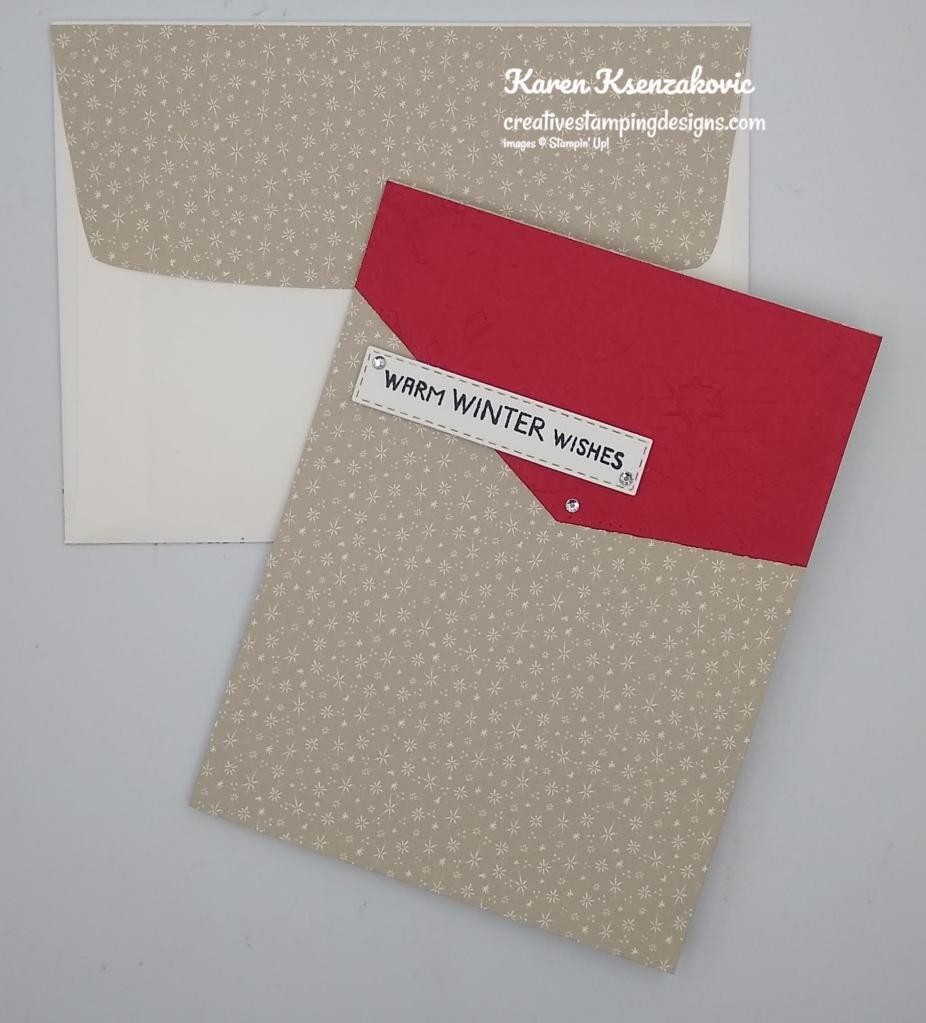
Today I have a clean and simple card for you which I actually had fun making. Today’s card can be used as a friendship card, birthday card, holiday card or anything else you can think of. Here’s my card for today.

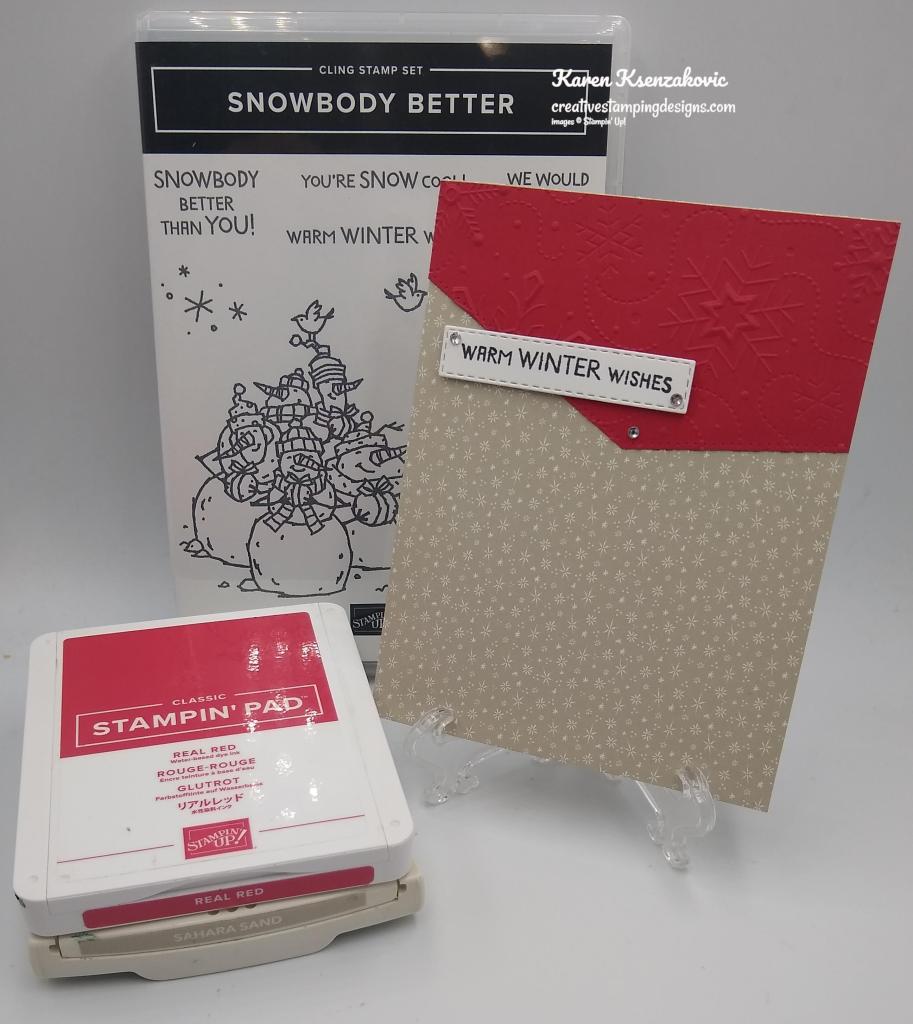
I used the Stampin’ Up! Snowbody Better Cling Stamp Set along with the Tidings of Christmas 6 X 6 Designer Series Paper for my card today.

My design is from CAS Colours & Sketches Challenge #441.

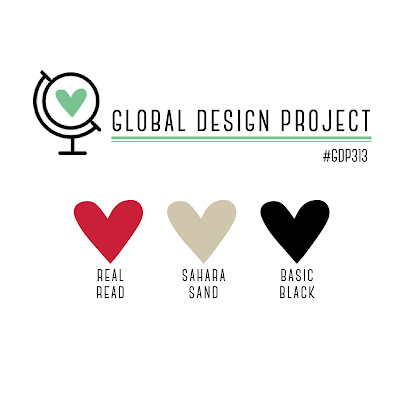
My colors are from Global Design Project Challenge #313.

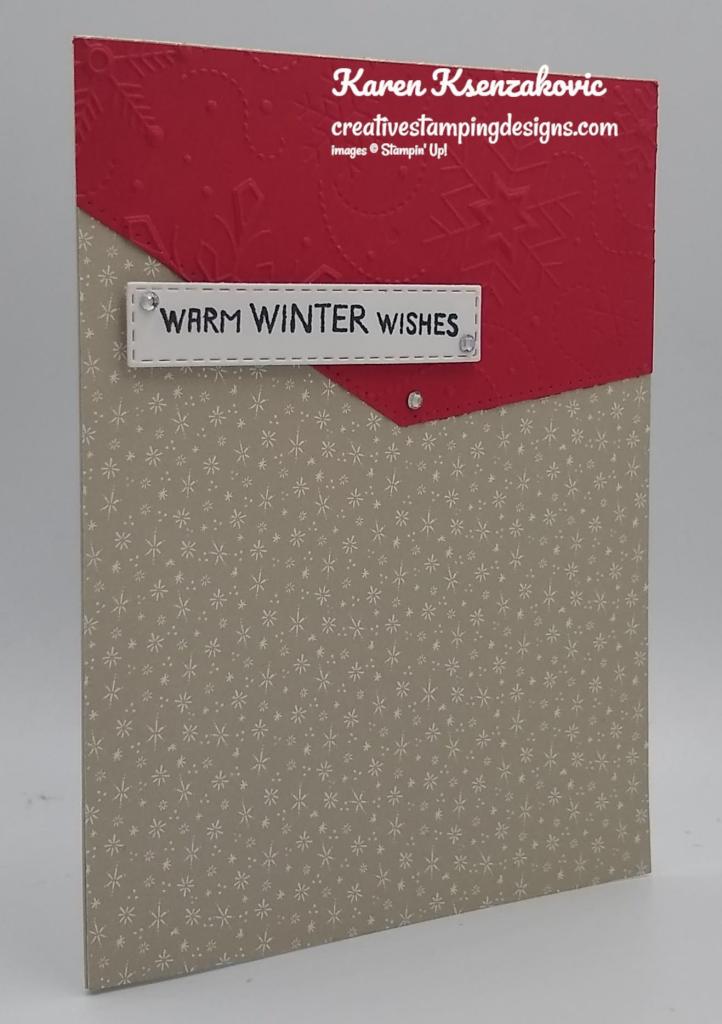
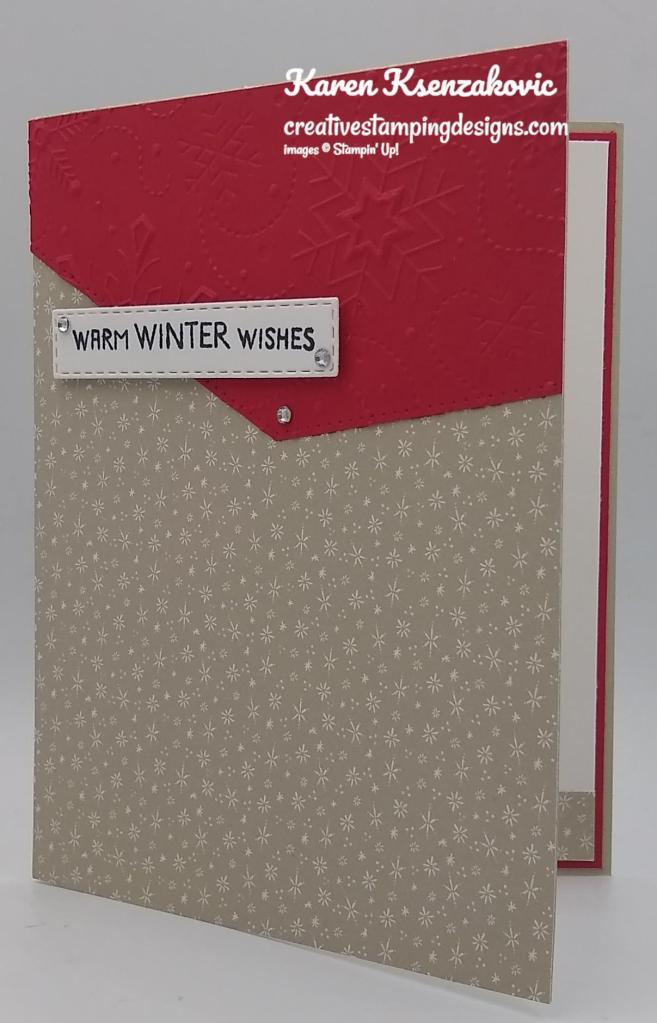
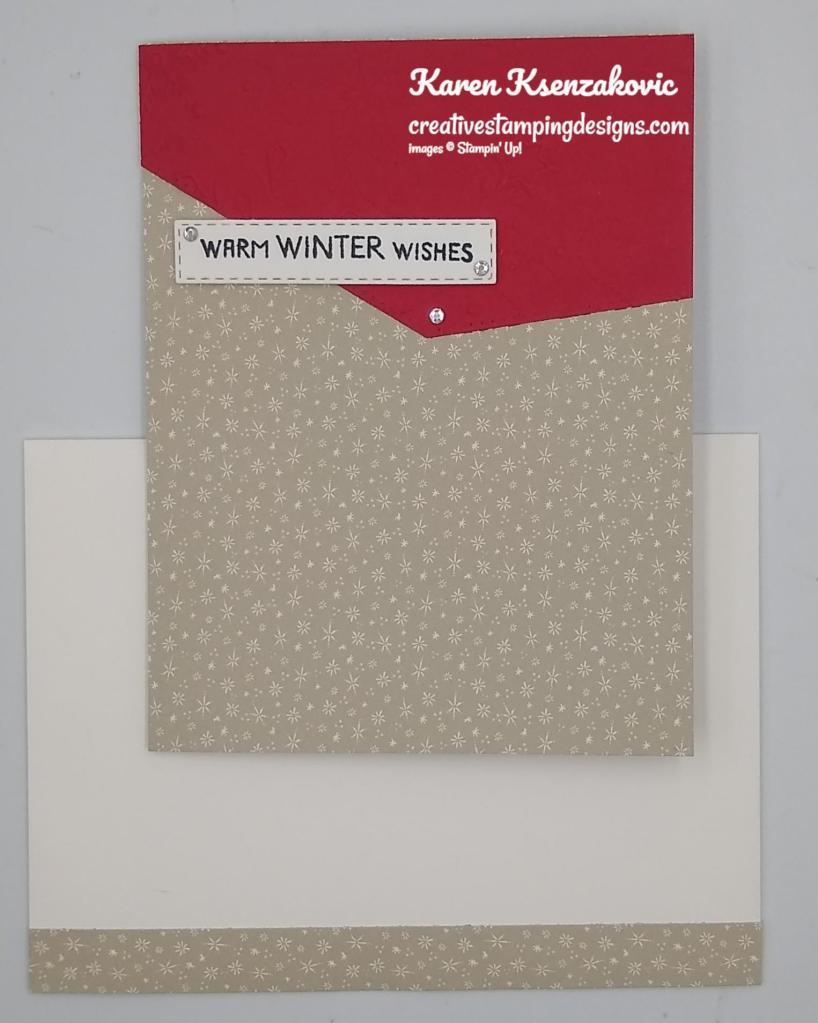
I started by adhering a Tiding of Christmas DSP card front to a Sahara Sand card base.

I cut a panel of Real Red cardstock using the Basic Borders Dies. I embossed the panel using the Wintry 3D Embossing Folder and adhered it to the top of the card front.

On a strip of Basic White cardstock I stamped the sentiment from the Snowbody Better stamp set in Tuxedo Black Ink. I cut the sentiment out using my Stitched Rectangle Dies and adhered it to the card front. I added a few Rhinestone Basic Jewels to the card front.

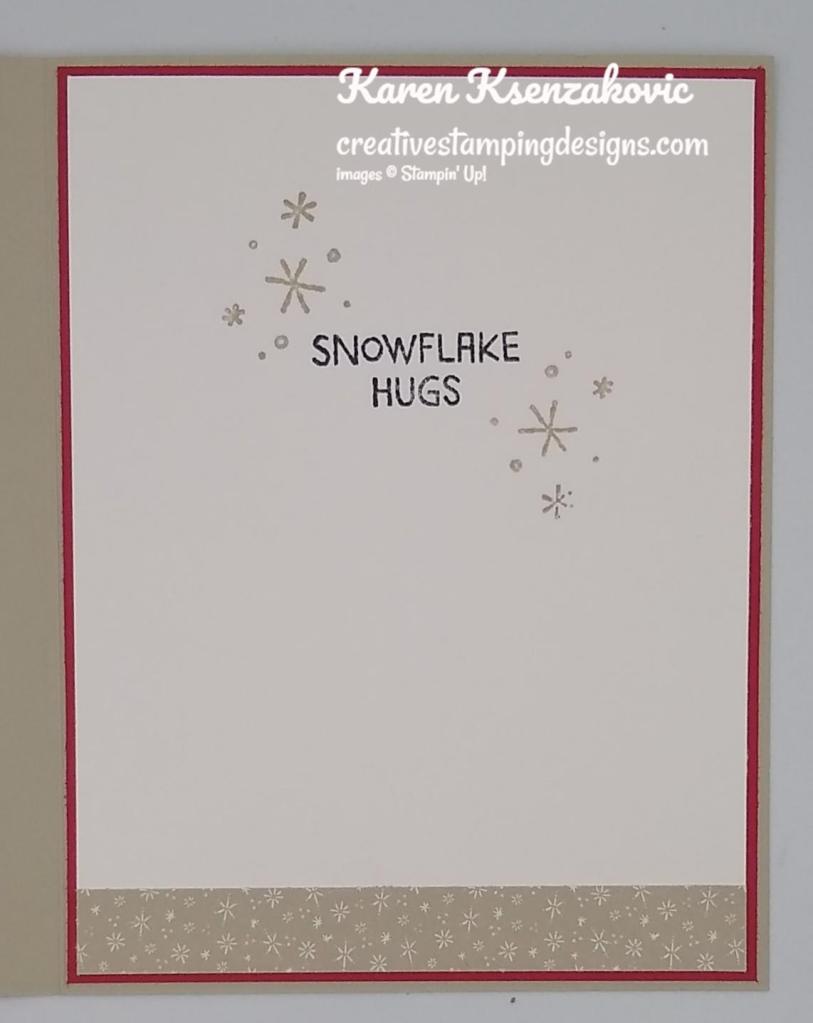
On the inside I stamped the sentiment from the Snowbody Better stamp set in Tuxedo Black Ink on a Basic White panel. I stamped the snowflake image from the Snowbody Better stamp set in Sahara Sand Ink, stamping off once, on either side of the sentiment. I adhered a strip of the Tidings of Christmas DSP to the bottom of the panel. I adhered the Basic White panel to a Real Red mat and then to the inside of the Sahara Sand card base.

To finish my card I decorated a Basic White Medium Envelope. I adhered a strip of the Tidings of Christmas DSP to the envelope front and a panel to the envelope flap.

Thank you for stopping by my blog today. I hope you liked my card and will give it a try. Happy Stamping!!

*********************************************************************************************************

Join me today at 4:00pm on my Facebook Live.

I’m planning to go live on my Facebook page with a project today at 4pm ET.  Please join me if you can to see what card I will be making today.

*********************************************************************************************************

If you need any stamping supplies, I’d love to be your Demonstrator. Just click HERE to go directly to my online store or drop me an email if you have any questions. 

MY CURRENT HOST CODE IS:   BM9R7DQX

Use this host code when you order $50 or greater and receive a free gift from me! If your order is over $150, please do not use this code, but you’ll still get the free gift. The free gift is your choice of any 1 item valued up to $10.00 from the 2020-2021 Annual Catalog or the January-June 2021 Mini Catalog!   For any orders $50 or more I will also send you my monthly class tutorials.  Click HERE or go to my Customer Rewards for more details and to see what this months tutorials are.

Please remember to use my current Host Code and make sure that you can see my name on the final checkout page listed as your Demonstrator when you order so that you know that you’re ordering with me and you’ll get my rewards! 

Stampin’ Up! has added more items to their Clearance Rack. All items are **While Supplies Last**. So don’t wait if there is something you’ve been wanting, grab it while you can.

Happy Stamping, Karen!

*********************************************************************************************************

Gifts Galore

Subscribe October 11 – November 10

We all love to see piles of presents on Christmas morning. Make that your reality with the Gifts Galore Paper Pumpkin Kit! With classic Christmas sentiments, bright and festive colors, a sweet snowman, a tree with all the trimmings, or a playful pile of presents, you’ll have everything you need to make eye-catching treat packages that are sure to spread Christmas cheer. Each Gifts Galore box contains enough supplies to create nine treat packages—three each of three designs—and nine food-safe bags that are adorably styled for easy Christmas gifting. There’s plenty of joy to share with Gifts Galore!

  • Kit contains enough supplies to create nine treat packages—three each of three designs—and nine food-safe bags. 
  • This all-inclusive kit includes printed die cuts, die-cut boxes, cellophane treat bags, adhesive, and more!
  • Includes an exclusive stamp set and a Classic Stampin’ Spot
  • Coordinating colors: Evening Evergreen, Flirty Flamingo, Old Olive, Pool Party, Poppy Parade

Subscribe to the November 2021 Paper Pumpkin Kit between 11 October and 10 November at paperpumpkin.com!

Note: Supplies may be limited toward the end of the subscription period.

*********************************************************************************************************

Card stock cuts for this project:

  • Basic White Cardstock 3″ X 1″ (sentiment), 4″ X 5 1/4″ (inner liner)
  • Real Red Cardstock 4 1/4″ X 3″ (card front panel), 4 1/8″ X 5 3/8″ (inner liner mat)
  • Sahara Sand Cardstock 8 1/2″ X 5 1/2″ (card base scored & folded at 4 1/4″)
  • Tidings of Christmas 6 X 6 Designer Series Paper 4 1/4″ X 5 1/2″ (card front), 1/2″ X 4″ (inner liner), 1/2″ X 6″ & 2 1/4″ X 6″ (envelope)

*********************************************************************************************************

Product List

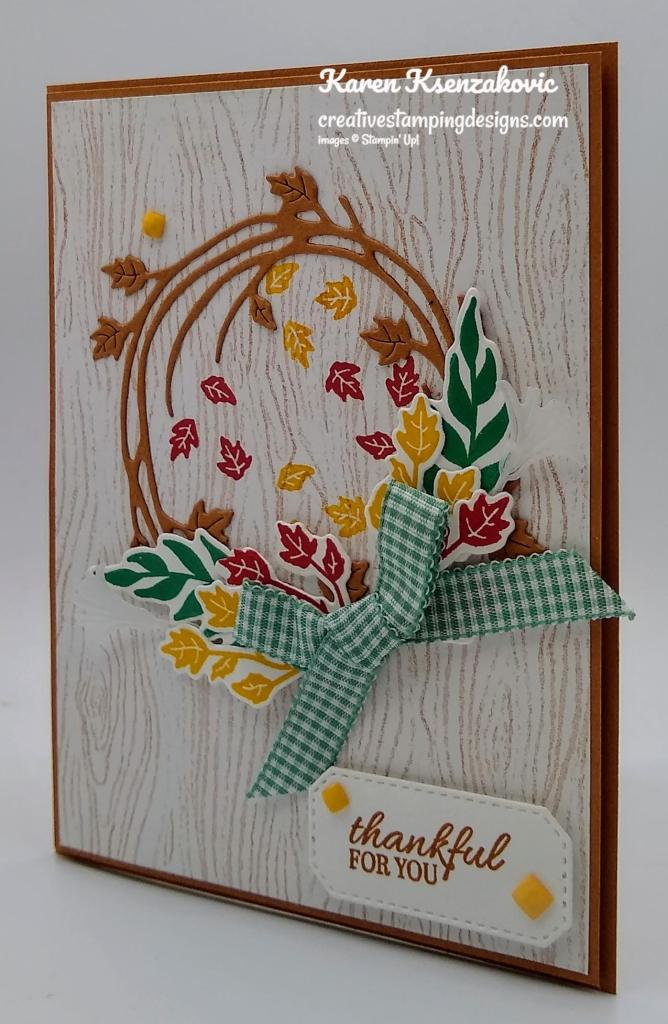
Stampin’ Up! Sparkle of The Season for Amy’s Inkin’ Krew Team Blog Hop

Good Tuesday morning my fellow stampers. Welcome to Amy’s Inkin’ Krew Team Blog Hop. It’s the 2nd Tuesday of the month so that means Blog Hop Day!! If you are starting with me, be sure to hop around to see everyone’s beautiful projects. If you’ve hopped over from Shirley Gentry’s blog, welcome to my blog and thank you for stopping by. The theme this month is “Giving Thanks”.  We can interpret this however we want.  Here’s my card for today.

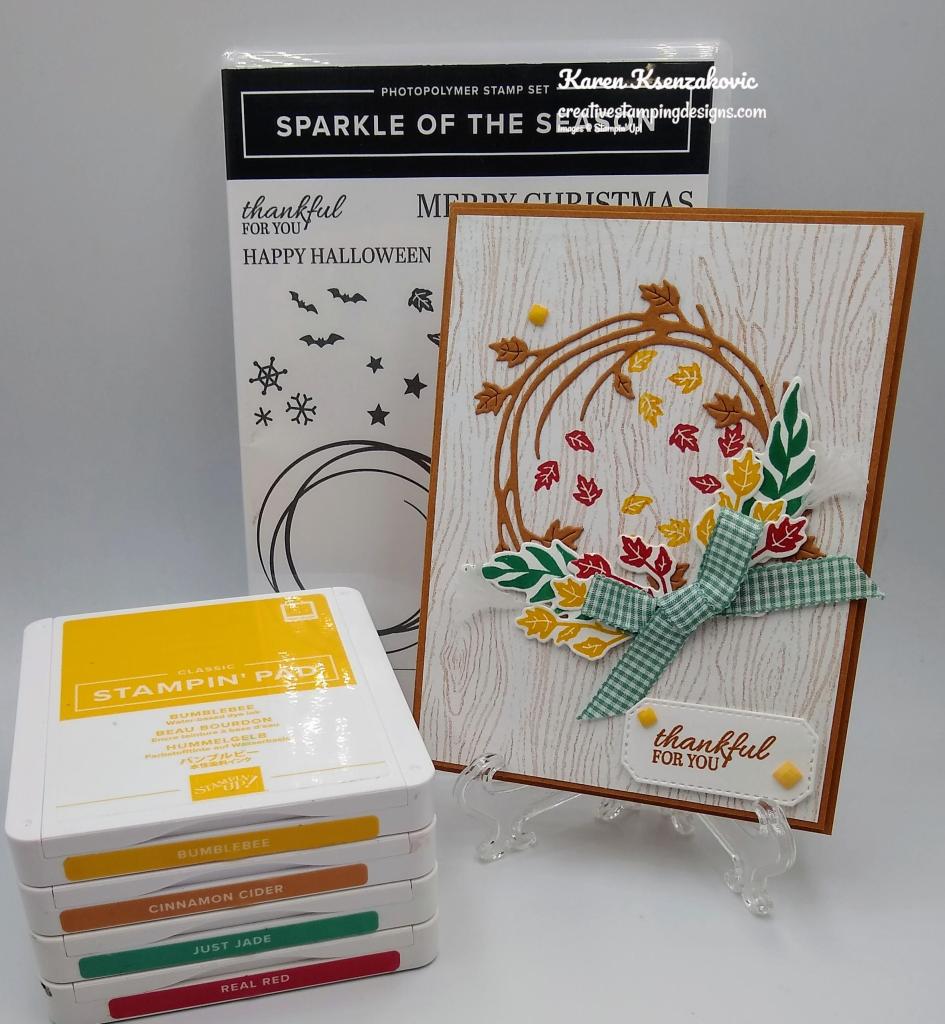
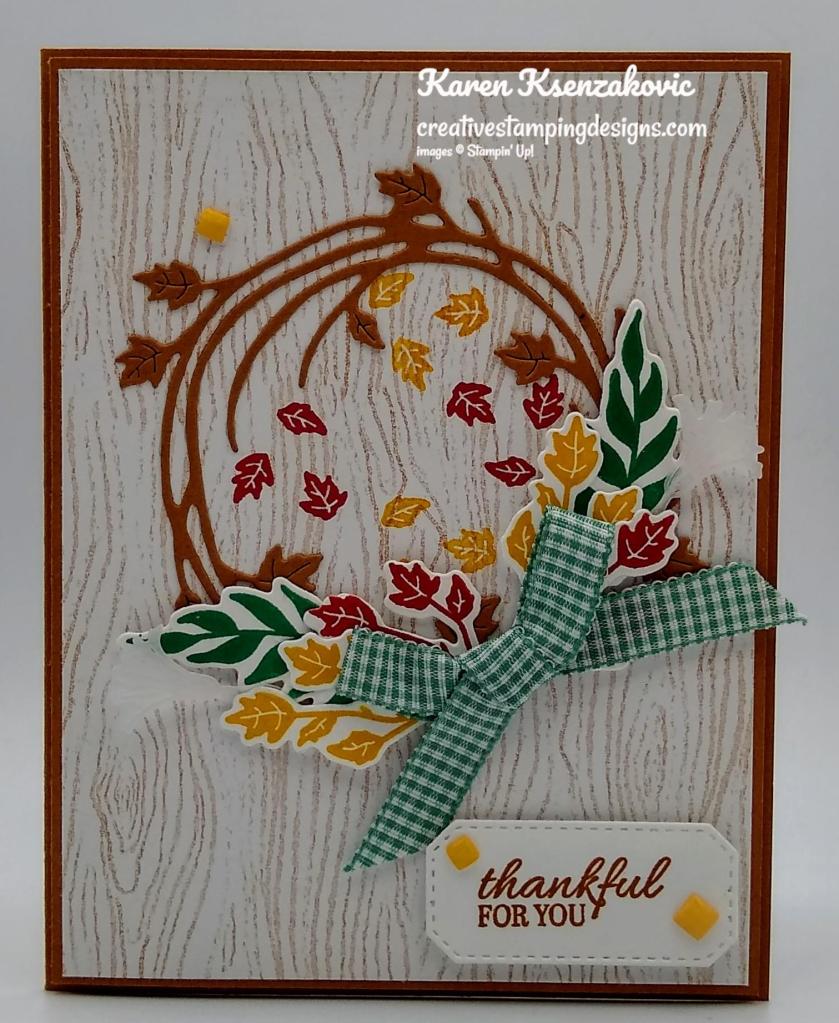
I used the Stampin’ Up! Sparkle of The Season Bundle along with the Bloom Where You’re Planted Designer Series Paper for my card today.

I started by adhering a panel of Bloom Where You’re Planted DSP to a Cinnamon Cider mat.

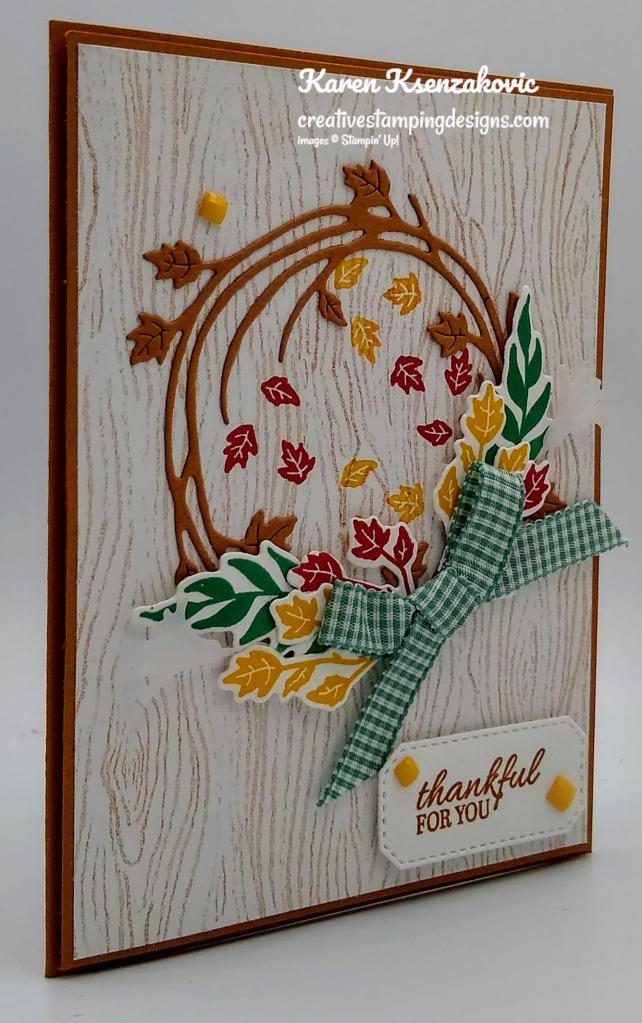
From a panel of Cinnamon Cider cardstock, I cut the leafy wreath using my Seasonal Swirls Dies. I adhered the wreath to the card front. I stamped the trio leaf image from the Stampin’ Up! Sparkle of The Season Photopolymer Stamp Set in Bumblebee and Real Red Inks inside the wreath on the DSP. On a panel of Basic White cardstock I stamped the leaf image from the Sparkle of The Season stamp set 2 times in Bumblebee Ink and 2 times in Real Red Ink. I stamped the other leafy image from the Sparkle of The Season stamp set in Just Jade Ink twice. I cut all the images out, along with the small floral die from a panel of Vellum Paper, using my Seasonal Swirls Dies.

I tied a bow using the Just Jade 3/8″ Gingham Ribbon from Flowers For Every Season Ribbon Combo Pack and adhered it to the bottom of the wreath. I adhered the die cut leaf images under the bow. On the Basic White panel I stamped the sentiment from the Sparkle of The Season stamp set in Cinnamon Cider Ink and cut it out using my Hippo & Friends Dies and adhered it to the bottom of the card front. I adhered the card front to a Cinnamon Cider card base. I added a few Bumblebee 2020-2022 In-Color Square Gems to the card front.

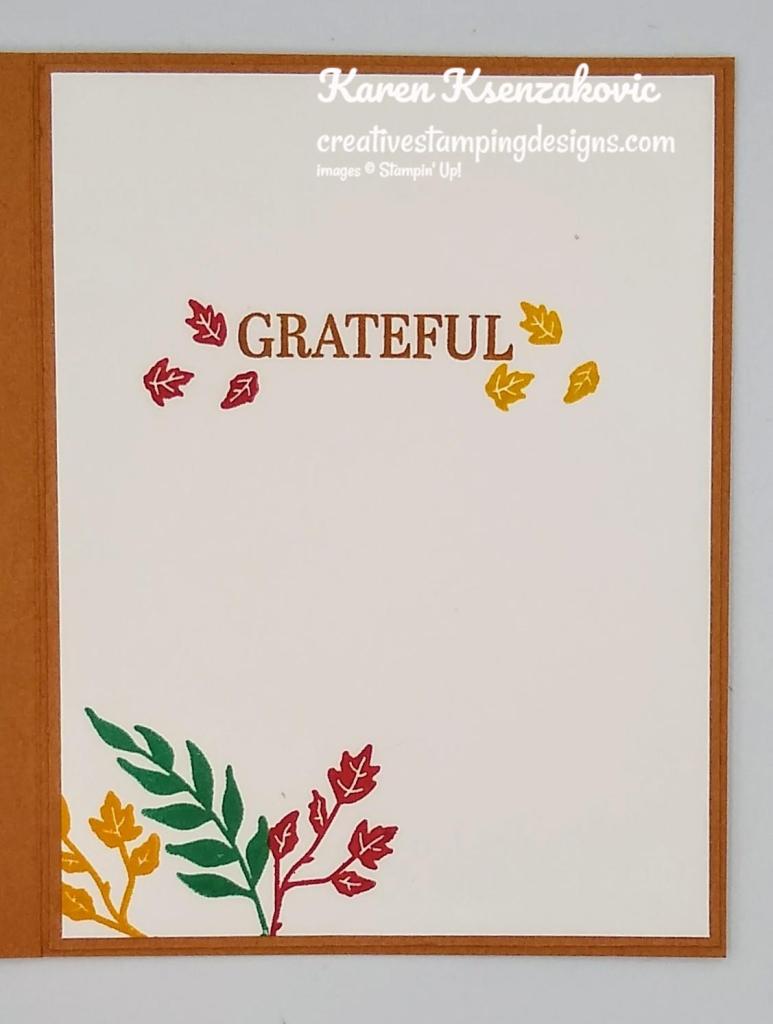
On the inside I stamped the sentiment from the Sparkle of The Season stamp set in Cinnamon Cider Ink. I stamped the trio leaf image on either side of the sentiment in Bumblebee and Real Red Inks. I stamped the leaf images from the Sparkle of the Season stamp set in Bumblebee, Just Jade and Real Red Inks on the bottom of the panel. I adhered the Basic White panel to a Cinnamon Cider mat and then to the inside of the Cinnamon Cider card base.

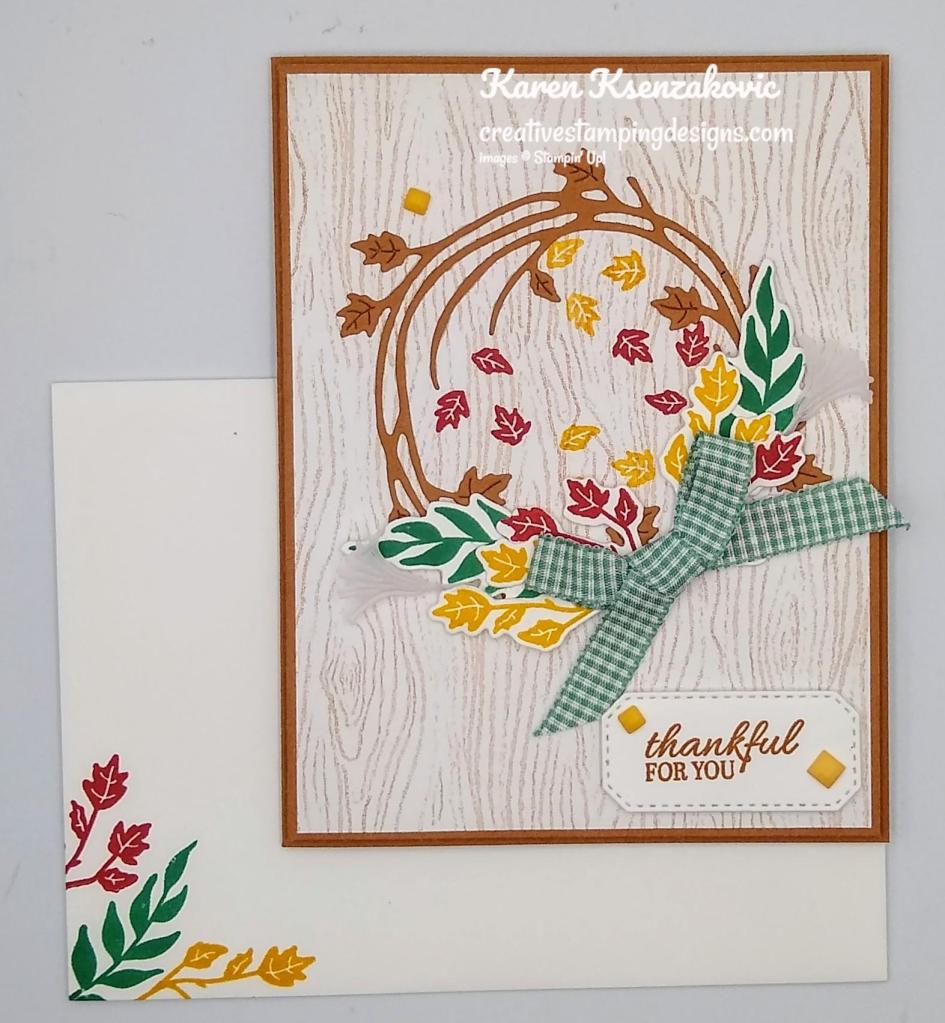
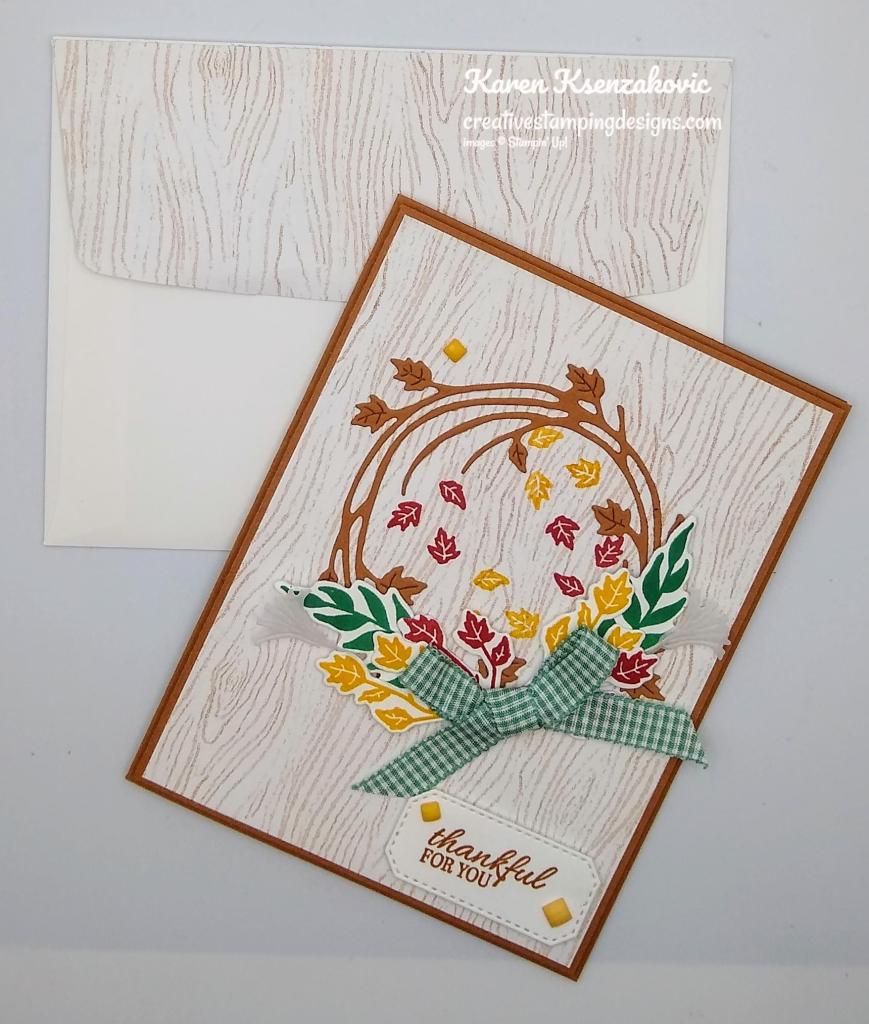
To complete my card I decorated a Basic White Medium Envelope. I stamped the leaf images from the Sparkle of The Season stamp set in Bumblebee, Just Jade and Real Red Inks on the envelope front. I adhered a panel of Bloom Where You’re Planted DSP to the envelope flap.

Thank you for visiting by my blog today, I hope you liked my card and will give it a try. Now that you’ve seen my card, be sure to hop around to see everyone’s beautiful projects. Hit Previous to hop back to Jillian Good’s blog or hit Next to head over to Karen Finkle’s blog. You can also click on each of the names and hop around that way. I hope you enjoy seeing everyone’s projects. Happy Hopping!!

  1. Jaimie Babarczy
  2. Tara Carpenter
  3. Jillian Good
  4. Karen Ksenzakovic You Are Here
  5. Karen Finkle
  6. Akiko Sudano
  7. Mary Deatherage
  8. Donna Leonard
  9. Terry Lynn Bright
  10. Amy Koenders

*********************************************************************************************************

If you need any stamping supplies, I’d love to be your Demonstrator. Just click HERE to go directly to my online store or drop me an email if you have any questions. 

MY CURRENT HOST CODE IS:   BM9R7DQX

Use this host code when you order $50 or greater and receive a free gift from me! If your order is over $150, please do not use this code, but you’ll still get the free gift. The free gift is your choice of any 1 item valued up to $10.00 from the 2020-2021 Annual Catalog or the January-June 2021 Mini Catalog!   For any orders $50 or more I will also send you my monthly class tutorials.  Click HERE or go to my Customer Rewards for more details and to see what this months tutorials are.

Please remember to use my current Host Code and make sure that you can see my name on the final checkout page listed as your Demonstrator when you order so that you know that you’re ordering with me and you’ll get my rewards! 

Stampin’ Up! has added more items to their Clearance Rack. All items are **While Supplies Last**. So don’t wait if there is something you’ve been wanting, grab it while you can.

Happy Stamping, Karen!

*********************************************************************************************************

Gifts Galore

Subscribe October 11 – November 10

We all love to see piles of presents on Christmas morning. Make that your reality with the Gifts Galore Paper Pumpkin Kit! With classic Christmas sentiments, bright and festive colors, a sweet snowman, a tree with all the trimmings, or a playful pile of presents, you’ll have everything you need to make eye-catching treat packages that are sure to spread Christmas cheer. Each Gifts Galore box contains enough supplies to create nine treat packages—three each of three designs—and nine food-safe bags that are adorably styled for easy Christmas gifting. There’s plenty of joy to share with Gifts Galore!

  • Kit contains enough supplies to create nine treat packages—three each of three designs—and nine food-safe bags. 
  • This all-inclusive kit includes printed die cuts, die-cut boxes, cellophane treat bags, adhesive, and more!
  • Includes an exclusive stamp set and a Classic Stampin’ Spot
  • Coordinating colors: Evening Evergreen, Flirty Flamingo, Old Olive, Pool Party, Poppy Parade

Subscribe to the November 2021 Paper Pumpkin Kit between 11 October and 10 November at paperpumpkin.com!

Note: Supplies may be limited toward the end of the subscription period.

*********************************************************************************************************

Card stock cuts for this project:

  • Basic White Cardstock 5″ X 3″ (leaves & sentiments), 4″ X 5 1/4″ (inner liner)
  • Cinnamon Cider Cardstock 8 1/2″ X 5 1/2″ (card base scored & folded at 4 1/4″), 2 – 4 1/8″ X 5 3/8″ (card front & inner liner mats), 3 1/2″ X 3 1/2″ (wreath)
  • Bloom Where You’re Planted Designer Series Paper 4″ X 5 1/4″(card front), 2 1/4″ X 6″ (envelope flap)
  • Vellum Paper 1″ X 2″ (floral die)

*********************************************************************************************************

Product List

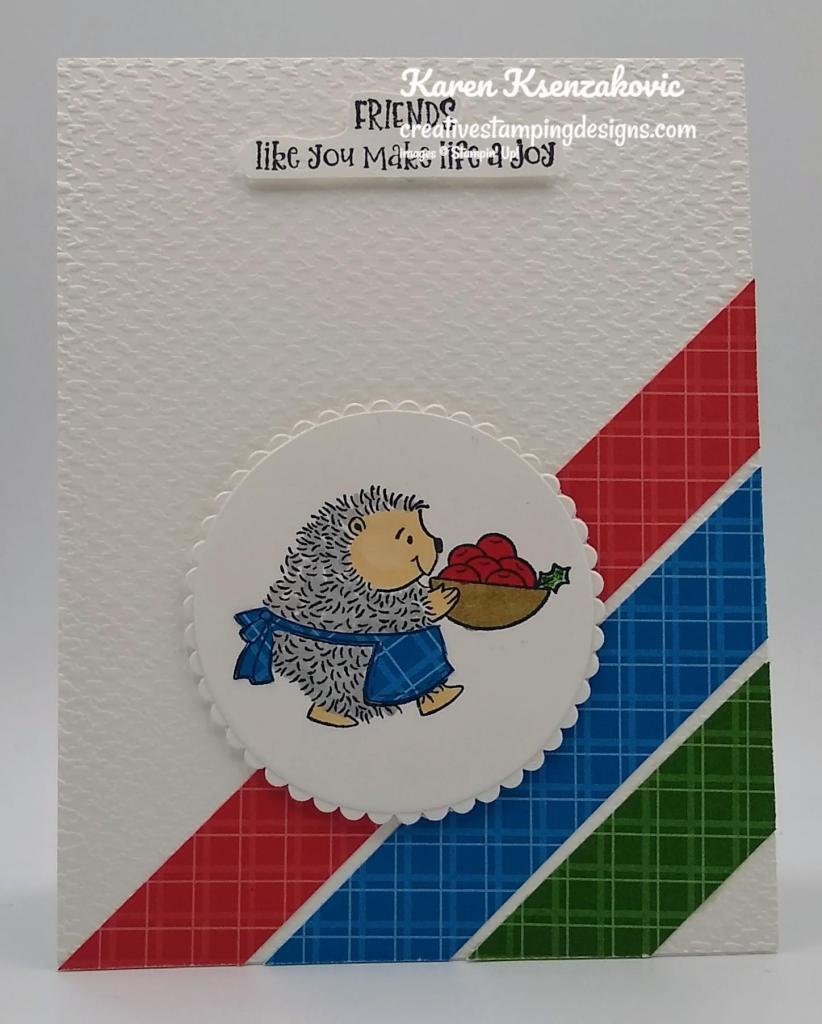
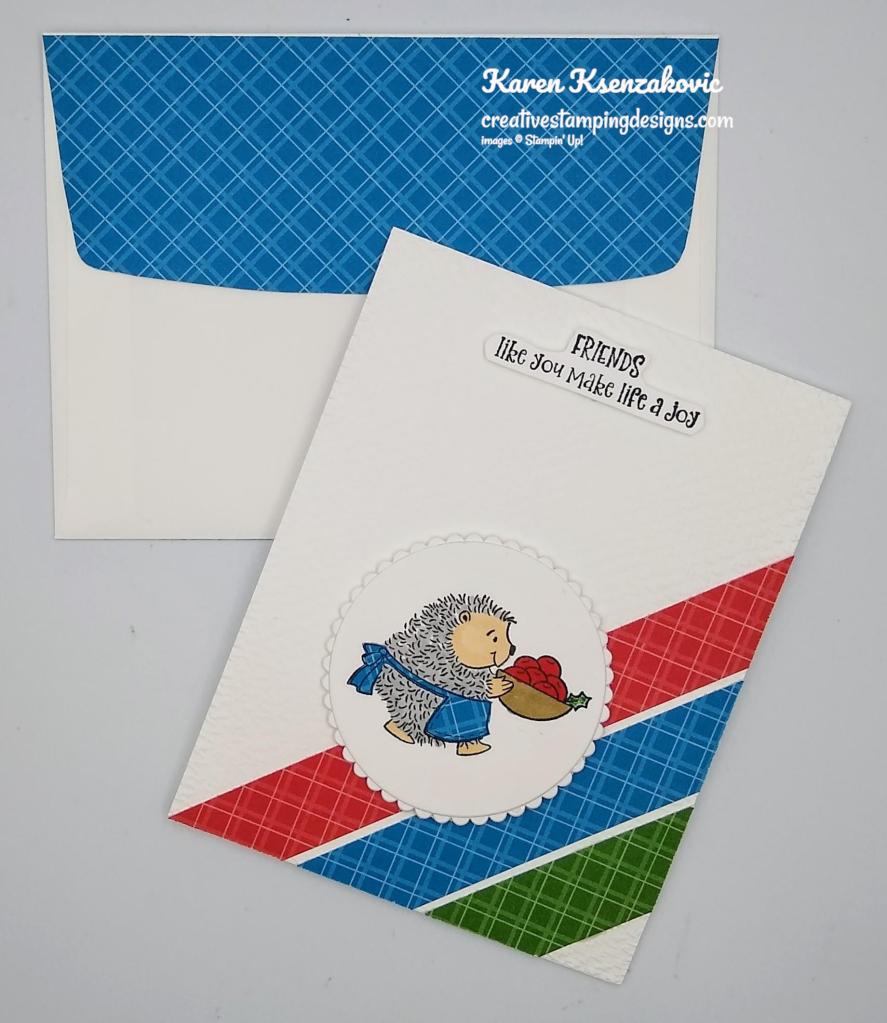
Stampin’ Up! Joyful Life CAS

Good Sunday morning my stamping friends. How is your weekend going? Is anyone doing anything adventurous and fun?

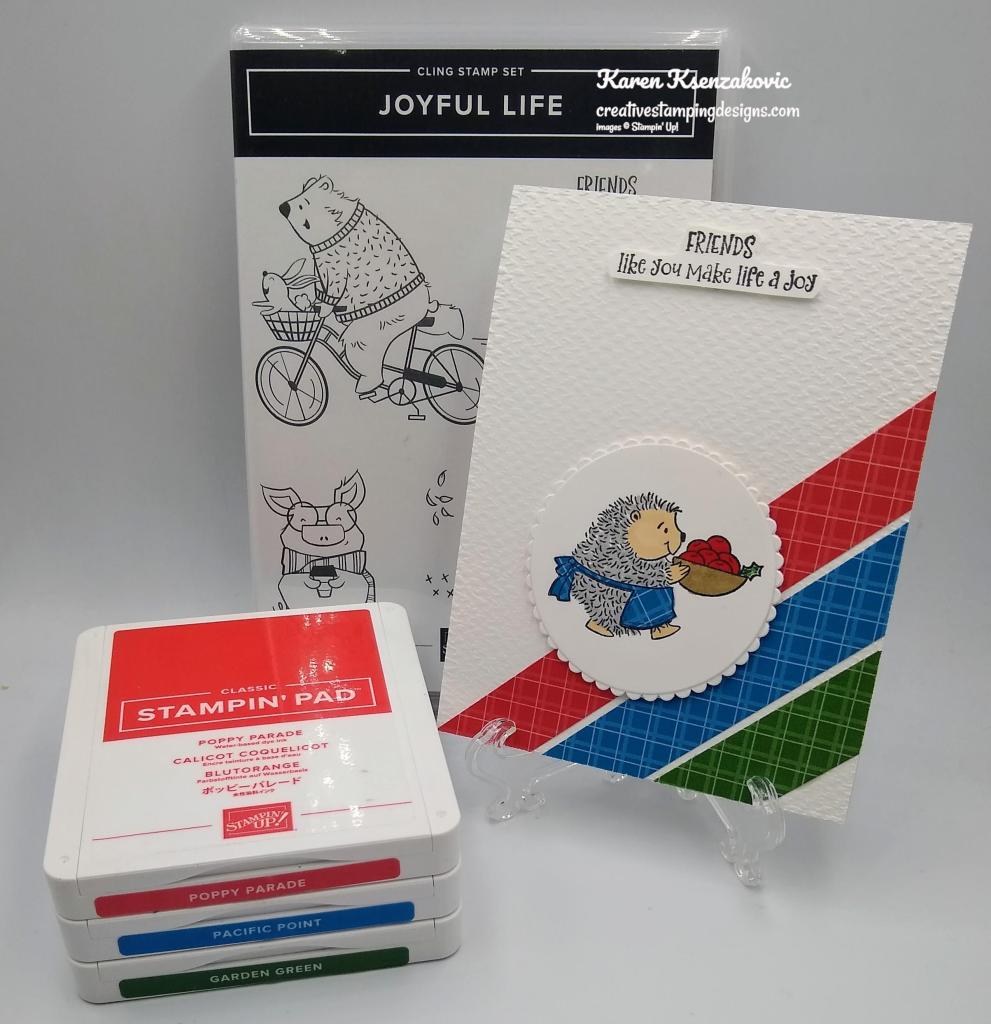
I used another one of my favorite sets today for a CAS card. Here’s my card for today.

I used the Stampin’ Up! Joyful Life Cling Stamp Set along with the Brights 6 X 6 Designer Series Paper and the Regals 6 X 6 Designer Series Paper for my card today.

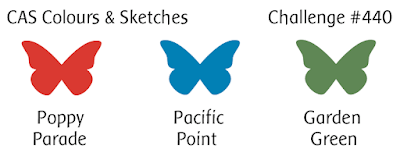
My colors are from CAS Colours & Sketches Challenge #440.

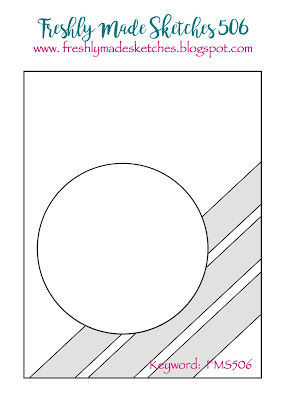
My design is from Freshly Made Sketches Challenge #506.

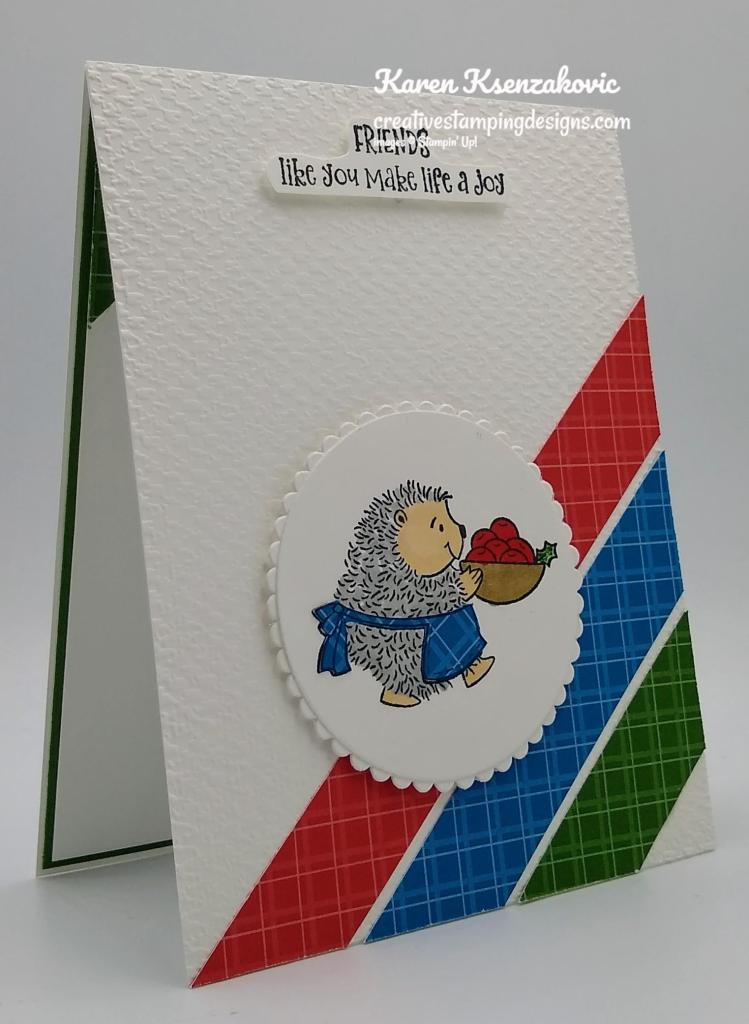
I started by embossing a Basic White card front using the Tasteful Textile 3D Embossing Folder. I adhered 2 strips of the Brights DSP in Poppy Parade and Pacific Point and 1 strip of the Garden Green Regals DSP to the card front on an angle. I adhered the card front to a Thick Basic White card base.

Using my Layering Circle Dies I cut the 3rd largest circle and the coordinating scallop circle from a panel of Basic White cardstock. I stamped the image from the Joyful Life stamp set in Tuxedo Black Ink on the circle. I colored the image in using my Crumb Cake, Ivory, Poppy Parade and Smoky Slate Stampin’ Blends Markers and my Garden Green Stampin’ Write Marker. On a scrap of the Pacific Point Brights DSP I stamped the same image from the Joyful Life stamp set in Tuxedo Black Ink and fussy cut the apron out using my Paper Snips and adhered it to the stamped image. I adhered the circle to the scalloped circle and then to the card front.
On a scrap of Basic White cardstock I stamped the sentiment from the Joyful Life stamp set in Tuxedo Black Ink and fussy cut it using my Paper Snips. I adhered the sentiment to the top of the card front.

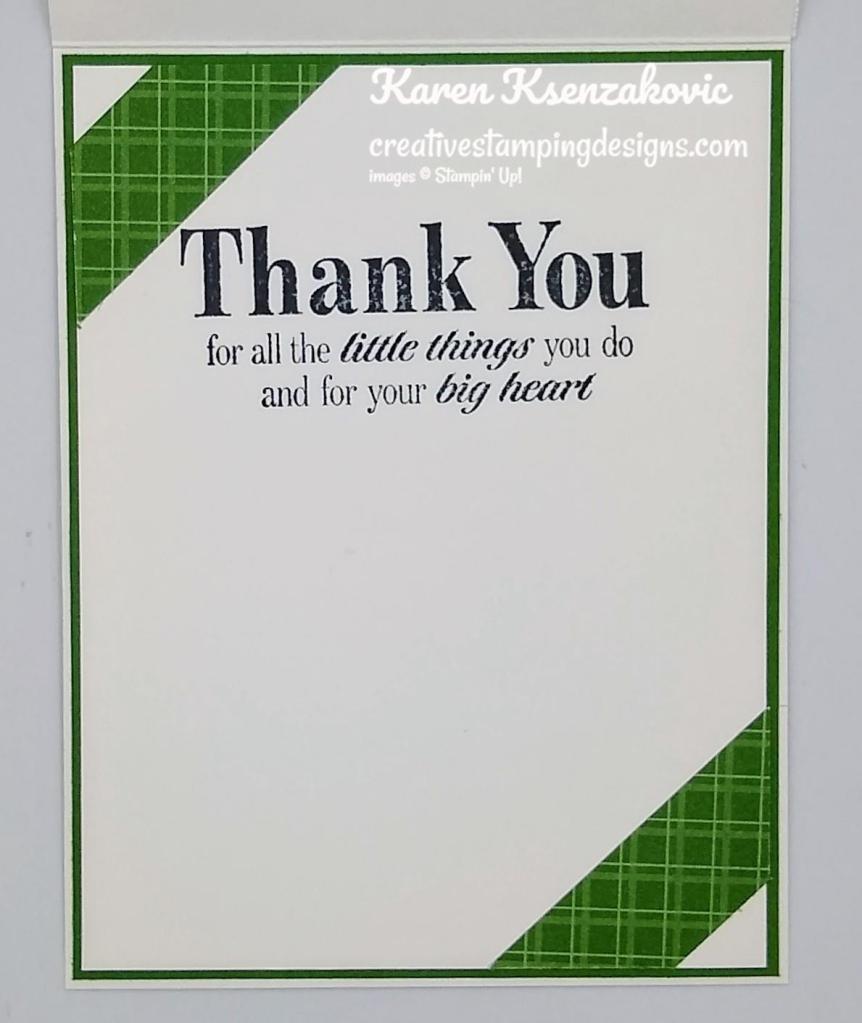
On the inside I stamped the sentiment from the Stampin‘ Up! Sunny Sentiments Cling Stamp Set in Tuxedo Black Ink on a Basic White panel. I adhered 2 strips of the Garden Green Regals DSP to the corners of the panel. I adhered the Basic White panel to a Garden Green mat and then to the inside of the Thick Basic White card base.

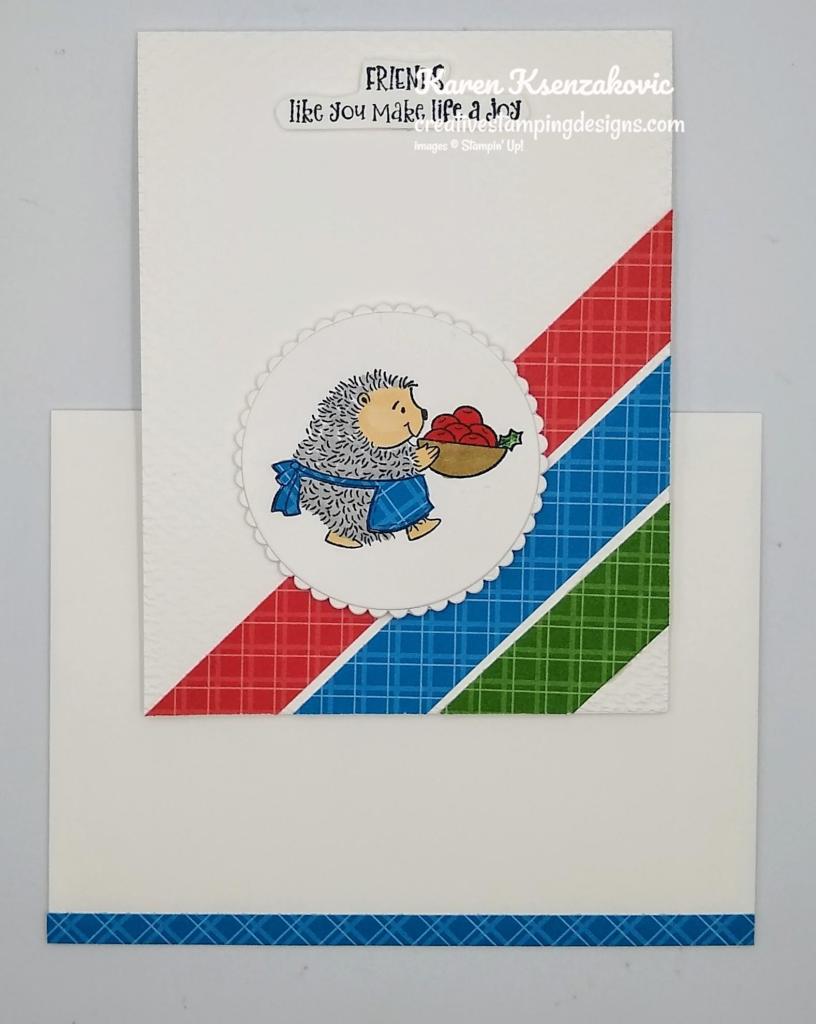
To finish my card I decorated a Basic White Medium Envelope. I adhered a strip of the Brights DSP to the envelope front and a panel to the envelope flap.

Thank you for stopping by my blog today. I hope you liked my card and will give it a try. Happy Stamping!!

*********************************************************************************************************

If you need any stamping supplies, I’d love to be your Demonstrator. Just click HERE to go directly to my online store or drop me an email if you have any questions. 
MY CURRENT HOST CODE IS:   BM9R7DQX

Use this host code when you order $50 or greater and receive a free gift from me! If your order is over $150, please do not use this code, but you’ll still get the free gift. The free gift is your choice of any 1 item valued up to $10.00 from the 2020-2021 Annual Catalog or the January-June 2021 Mini Catalog!   For any orders $50 or more I will also send you my monthly class tutorials.  Click HERE or go to my Customer Rewards for more details and to see what this months tutorials are.
Please remember to use my current Host Code and make sure that you can see my name on the final checkout page listed as your Demonstrator when you order so that you know that you’re ordering with me and you’ll get my rewards! 

Happy Stamping, Karen!

*********************************************************************************************************

Stampin’ Up! has added more items to their Clearance Rack. All items are **While Supplies Last**. So don’t wait if there is something you’ve been wanting, grab it while you can.

*********************************************************************************************************

NEW KIT ADDED

Santa’s back in a fun and easy tag kit to spruce up your Christmas gifting! The Love, Santa Tag Kit has everything you need to create 12 whimsically designed tags.

That means you’ll find printed die-cut tags and labels, sequin embellishments, pink and white baker’s twine, an exclusive stamp set, a Night of Navy Classic Stampin’ Spot, and more in this all-inclusive kit! You can sleigh ride right in without the prep work. 

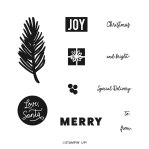
This is the kit exclusive photopolymer stamp set called Love, Santa!

  • Kit contains enough supplies to create 12 tags—3 each of 4 designs.
  • Includes printed die-cut tags, decorative die cuts, adhesive, embellishments, and pink baker’s twine.
  • Features an exclusive stamp set and a Night of Navy Classic Stampin’ Spot.
  • Finished tag size:  approximately 2-1/2″ x 4-3/4″ (6.4 x 12.1 cm)
  • Coordinating colors: Bumblebee, Just Jade, Night of Navy, Polished Pink, Poppy Parade


158375 LOVE, SANTA TAG KIT $19.00 USD | $26.00 CAD

Available in English (158375) and French (158376).

Love, Santa Treat Bags – Also Available

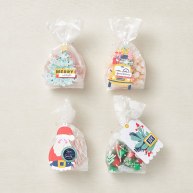
And to make Christmas gifting even easier, the Love, Santa Treat Bags (available for purchase separately) are food-safe cellophane bags that coordinate with the Love, Santa tags! The treat bags come in a pack of 12—3 each of 4 festive designs.

That’s right—figuring out how to dress up your gifts this year is no longer a “Claus” for concern! But don’t relax too soon as these products are based on availability!

  • 12 treat bags
  • 3 each of 4 designs
  • 4″ x 9-1/2″ (10.2 x 24.1 cm)
  • Food safe

158381 LOVE, SANTA TREAT BAGS $7.00 USD | $9.50https://www.youtube.com/embed/p6QuK9rDDSY?version=3&rel=1&showsearch=0&showinfo=1&iv_load_policy=1&fs=1&hl=en&autohide=2&wmode=transparent

Watch this video for more details about the new Christmas Whimsy Kit!

*********************************************************************************************************

Coming Soon!! Eden’s Garden

Click on the image for a flyer of all the items coming November 2nd. Want to get it early??? Demonstrators can preorder the items. Contact me at creativestampingdesigns@gmail.com and I’d be happy to talk to you about joining.

*********************************************************************************************************

Peaceful Christmas

Subscribe September 11 – October 10


When you picture a peaceful Christmas, what comes to mind? Do you see snow outside your window, softly swirling through the sky? A tree trimmed with tinsel, a fire crackling nearby? Maybe you’re dreaming of decorating a holly jolly gingerbread house. Can you catch a whiff of Christmas cookies wafting through the air?

Whatever it is you think about when Christmas comes to town, picture a peaceful Christmas with the Peaceful Christmas Paper Pumpkin Kit! This glimmering and gleaming kit is your creative kickstart to Christmas cardmaking. With sprinkles of snow, shimmering silver skies, and heartwarming holiday wishes, you’ll have enough elements and embellishments to create 10 Christmas cards and coordinating envelopes.

Speaking of coordination, make even more Christmas magic with Peaceful Place products! Our stunning Peaceful Place Suite Collection (item 156277) pairs perfectly with the kit’s components. Brew a cup of cocoa, snuggle up with a soft blanket, and prepare for a cozy craft night in!

Details:

  • The kit contains enough elements to create 10 Christmas cards—5 each of 2 designs—and coordinating envelopes. This all-inclusive kit includes printed card bases, die-cut paper pieces, embellishments, adhesive, and more!
  • October’s kit arrives in a cute collectible box covered with enchanting evergreen trees. Use this special, limited-edition box to store your holiday handicrafts, or transform it into a well-wrapped package for a present!
  • The kit’s contents pair perfectly with the Peaceful Place Suite Collection (item 156277). To continue your Christmas crafting, combine the kit’s components with the suite’s patterned paper, shimmery sequins, and more!
  • Card size: 4-1/4″ x 5-1/2″ (10.8 x 14 cm)
  • Envelope size: 4-1/2″ x 5-3/4″ (11.4 x 14.6 cm)
  • Coordinating colors: Basic Gray, Real Red, Shaded Spruce, silver foil

Subscribe to the October 2021 Paper Pumpkin Kit between 11 September and 10 October at paperpumpkin.com!

Note: Supplies may be limited toward the end of the subscription period.

*********************************************************************************************************

Card stock cuts for this project:

  • Basic White Cardstock 4 1/4″ X 5 1/2″ (card front), 5″ X 3″ (circles), 4″ X 5 1/4″ (inner liner)
  • Basic White Thick Cardstock 4 1/4″ X 11″ (card base scored & folded at 5 1/2″)
  • Garden Green Cardstock 4 1/8″ X 5 3/8″ (inner liner)
  • Brights 6 x 6 Designer Series Paper 2 – 3/4″ X 6″ (card front), 1/4″ X 6″ & 2 1/4″ X 6″ (envelope)
  • Regals 6 X 6 Designer Series Paper 3/4″ X 6″ (card front & inner liner)

*********************************************************************************************************

Product List