Stampin’ Up! Over The Moon

Good Tuesday morning my stamping friends.  How has everyone’s week started off?

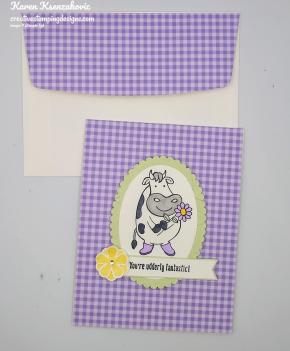
For today’s card I pulled out a stamp set from the Annual Catalog and used some new items too.  With all the new items from the new Mini Catalog, we sometimes forget about the awesome stamps that are in the Annual Catalog.  Here’s my card.

My card played along with the Just Add Ink Challenge #492.  Here is their sketch.

I also played along with Always Fun Challenge #150.  Theirs is a Theme challenge.  Their Theme is ‘Animals’

I started by adhering a panel of Highland Heather Subtle 6X6 Designer Series Paper to the Thick Whisper White card base using Snail.

On a small panel of Whisper White cardstock I stamped the cow image from the Stampin’ Up! Over The Moon Cling Stamp Set in Tuxedo Black Memento Ink.  I colored the image in using my Light Basic Black, Highland Heather, Light Smoky Slate, So Saffron and Soft Seafoam Stampin’ Blends Markers.  I cut the image out using my Layering Ovals Dies.  I cut the scallop oval from the Layering Ovals Dies that was 2X larger than my artwork from a Soft Seafoam cardstock panel.  I embossed the scalloped oval using my Stone 3D Embossing Folder.  This folder is a Sale-A-Bration item which comes with a stamp set.  I adhered the artwork to the scalloped oval using Multipurpose Liquid Glue.  I adhered the artwork to the card front using Stampin’ Dimensionals.

On a thin strip of Whisper White cardstock I stamped the sentiment from the Over The Moon stamp set in Tuxedo Black Memento Ink.  I cut the strip into a banner using my Paper Snips.  I adhered the sentiment to a Soft Seafoam strip, which I made a banner out of, using Snail. I adhered the sentiment across the artwork using Stampin’ Dimensionals on the ends.  On a strip of Whisper White cardstock I stamped 2 of the flower images from the Stampin’ Up! Thoughtful Blooms Photopolymer Stamp Set in So Saffron Ink.  I punched the flowers out using the Small Bloom  Punch.  The stamp set and punch are 2 more items you can get with a qualifying order from Sale-A-Bration.  I adhered the flowers together using a Glue Dot and adhered them to the banner using a dot of Multipurpose Liquid Glue.  I added a Rhinestone Basic Jewel to the center of the flower.

On the inside I stamped the sentiment from the Over The Moon stamp set in Tuxedo Black Memento Ink in the center of the Whisper White panel.  I stamped the sentiment from the Stampin’ Up! Peaceful Moments Cling Stamp Set in Tuxedo Black Memento Ink under the 1st one.  I stamped another cow image from the Over The Moon stamp set in Tuxedo Black Memento Ink on the bottom of the Whisper White panel.  I colored the cow I using my Light Basic Black and Light Smoky Slate Stampin’ Blends Markers. I adhered the Whisper White panel to a Highland Heather mat using Snail and then to the inside of the Thick Whisper White card base using Multipurpose Liquid Glue.  I added a couple Rhinestone Basic Jewels to either side of the sentiment.
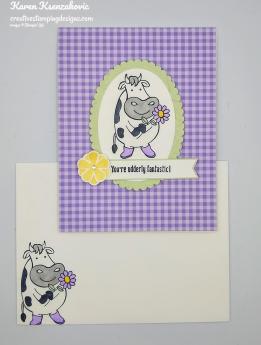
To finish my card I decorated a Medium Whisper White Envelope.  I stamped the cow image from the Over The Moon stamp set in Tuxedo Black Memento Ink on the envelope front.  I colored the image in using my Light Basic Black, Highland Heather, Light Smoky Slate and So Saffron Stampin’ Blends Markers.  I adhered a Highland Heather panel of the Subtle 6 X 6 DSP to the envelope flap.

Thank you for stopping by my blog today.  I hope you liked my card and will give it a try. Happy Stamping!!

****************************************************************************************************

If you need any stamping supplies, I’d love to be your Demonstrator. Just click HERE to go directly to my online store or drop me an email if you have any questions. 

MY CURRENT HOST CODE IS: QCX43K4E

Use this host code when you order $50 or greater and receive a free gift from me! If your order is over $150, please do not use this code, but you’ll still get the free gift. The free gift is your choice of any item valued up to $10.00 in either the 2019-2020 Annual Catalog or the 2020 January-June Mini Catalog!   For any orders $50 or more I will also send you my monthly class tutorials.  Click HERE or go to my Customer Rewards for more details and to see what this months tutorials are.

Click HERE to shop the clearance rack.

Happy Stamping, Karen!

****************************************************************************************************

BRINGING THE JOYS OF SPRING MARCH PAPER PUMPKIN KIT

Paper Pumpkin March 2020: No Matter the Weather

Cheers to seven years! This March, Paper Pumpkin has reached another exciting milestone: our seventh year of delivering fun, easy, creative projects to you. To thank everyone who has helped us along the way, we’re including an additional FREE stamp set with every March kit. This means that every subscriber will receive two stamp sets!
The March 2020 kit will arrive in an exclusive, specially-designed box that you will love! Think daffodils, raindrops, and a fresh spring vibe.

About the March Kit

  • Kit contains supplies for 12 cards and envelopes (4 cards of 3 designs)
  • Notecard size: 5″ x 3-1/2″ (12.7 x 8.9 cm)
  • Envelope size: 5-1/8″ x 3-5/8″ (13 x 9.2 cm)

Coordinating Colors: Balmy Blue, Basic Gray, Calypso Coral, Grapefruit Grove, Gray Granite, Pear Pizzazz, Petal Pink, Shaded Spruce, and So Saffron

About the FREE Stamp Set

  • The additional stamp set is a great value and coordinates with the March kit design; however, you do not need it to complete the March cards.
  • The additional stamp set is a 4×6 footprint, which is larger than most Paper Pumpkin sets and is designed for use on a variety of crafting projects.

Subscription Information

  • Subscribe for the March kit at paperpumpkin.com from February 11–March 10.
  • Supplies may be limited toward the end of each subscription period.

****************************************************************************************************

Card stock cuts for this project:

  • Highland Heather Cardstock 4 1/8″ X 5 3/8″ (inner liner mat)
  • Soft Seafoam Cardstock 4 1/2″ X 4″ (artwork mat), 9/16″ X 2 3/4″ (banner mat)
  • Whisper White Cardstock 3″ X 4 1/4″ (artwork), 1/2″ X 2 3/4″ (banner),1″ X 3″ (panel for flowers), 4″ X 5 1/4″ (inner liner)
  • Thick Whisper White Cardstock 4 1/4″ X 11″ (card base scored and folded at 5 1/2″)
  • Subtle 6″ X 6″ Designer Series Paper 4 1/4″ X 5 1/2″ (card front), 2 1/4″ X 6″ (piece for envelope flap)

****************************************************************************************************

Product List

Stampin’ Up! Positive Thoughts Birthday

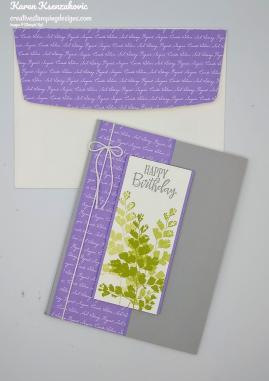
Good Monday morning my fellow stampers.  How was everyone’s weekend?  It was cold here on Saturday.   When I walked to work in the morning it was only 11degrees out.  Other than the cold it was a sunny weekend, which was a nice change.

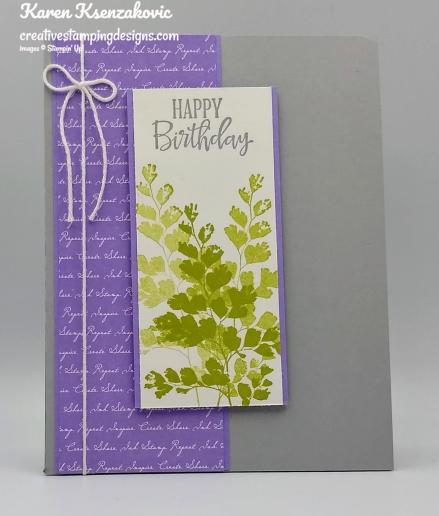
For today I have a Clean & Simple card for you that uses very little products.  Here’s my card.

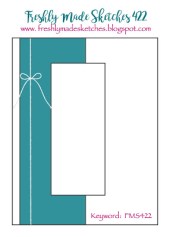
My card joined in with Freshly Made Sketches Challenge #422.  Here is their sketch.

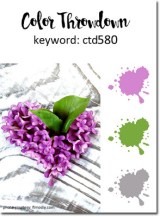
My colors were inspired by Color Throwdown Challenge #580.  Here are their colors.

I also played along with Water Cooler Wednesday Challenge #258.  Here is their theme.

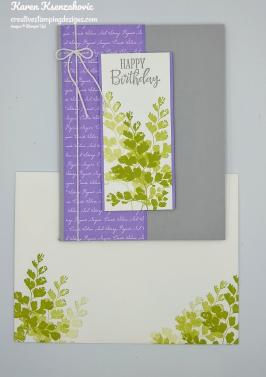
I started by adhering a panel of Highland Heather Subtle 6″ X 6″ Designer Series Paper to a Highland Heather mat using Snail.  I adhered the matted panel to a Smoky Slate card front using Multipurpose Liquid Glue.

On a small panel of Whisper White cardstock I stamped the fern image from the Stampin’ Up! Positive Thoughts Cling Stamp Set in Pear Pizzazz Ink 3 times without re-inking the stamp.  I stamped the sentiment from the Stampin’ Up! Peaceful Moments Cling Stamp Set in Smoky Slate Ink on the top of the panel.  I adhered the artwork to a Highland Heather mat using Snail.  I adhered the matted artwork to the Smoky Slate card front using Stampin’ Dimensionals.

I wrapped a piece of Whisper White Solid Bakers Twine around the card front and tied a small bow.  I added a Glue Dot under the bow to keep it in place.  I adhered the card front to a Smoky Slate card base using Stampin’ Dimensionals.

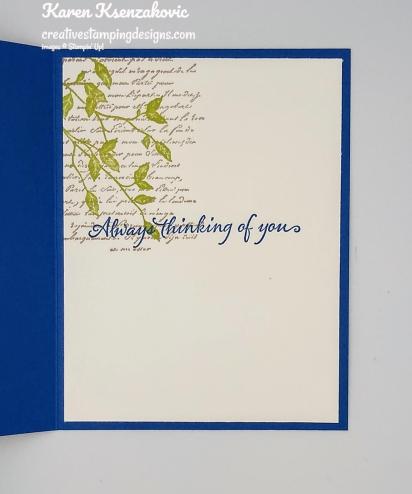
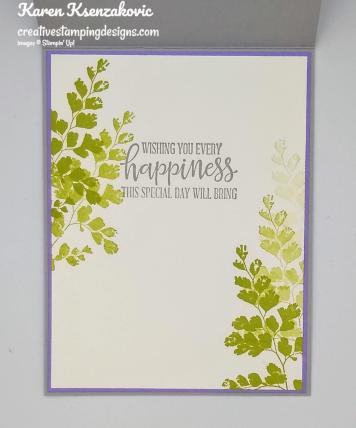
On the inside I stamped the sentiment from the Peaceful Moments stamp set in Smoky Slate Ink in the center of a Whisper White panel.  I stamped the fern image from the Positive Thoughts stamp set in Pear Pizzazz Ink on either side of the panel 3 times without re-inking the stamp.  I adhered the Whisper White panel to a Highland Heather mat using Snail and then to the inside of the Smoky Slate card base using Multipurpose Liquid Glue.

To finish my card I decorated a Medium Whisper White Envelope.  I stamped the fern image from the Positive Thoughts stamp set on the bottom of the envelope front in Pear Pizzazz Ink.  I stamped it 3 times on each side with out re-inking the stamp.  I adhered a panel of Highland Heather Subtle 6″ X 6″ DSP to the envelope flap.

Thank you for stopping by my blog today.  I hope you liked my card and will give it a try. Happy Stamping!!

****************************************************************************************************

If you need any stamping supplies, I’d love to be your Demonstrator. Just click HERE to go directly to my online store or drop me an email if you have any questions. 

MY CURRENT HOST CODE IS: QCX43K4E

Use this host code when you order $50 or greater and receive a free gift from me! If your order is over $150, please do not use this code, but you’ll still get the free gift. The free gift is your choice of any item valued up to $10.00 in either the 2019-2020 Annual Catalog or the 2020 January-June Mini Catalog!   For any orders $50 or more I will also send you my monthly class tutorials.  Click HERE or go to my Customer Rewards for more details and to see what this months tutorials are.

Click HERE to shop the clearance rack.

Happy Stamping, Karen!

****************************************************************************************************

BRINGING THE JOYS OF SPRING MARCH PAPER PUMPKIN KIT

Paper Pumpkin March 2020: No Matter the Weather

Cheers to seven years! This March, Paper Pumpkin has reached another exciting milestone: our seventh year of delivering fun, easy, creative projects to you. To thank everyone who has helped us along the way, we’re including an additional FREE stamp set with every March kit. This means that every subscriber will receive two stamp sets!
The March 2020 kit will arrive in an exclusive, specially-designed box that you will love! Think daffodils, raindrops, and a fresh spring vibe.

About the March Kit

  • Kit contains supplies for 12 cards and envelopes (4 cards of 3 designs)
  • Notecard size: 5″ x 3-1/2″ (12.7 x 8.9 cm)
  • Envelope size: 5-1/8″ x 3-5/8″ (13 x 9.2 cm)

Coordinating Colors: Balmy Blue, Basic Gray, Calypso Coral, Grapefruit Grove, Gray Granite, Pear Pizzazz, Petal Pink, Shaded Spruce, and So Saffron

About the FREE Stamp Set

  • The additional stamp set is a great value and coordinates with the March kit design; however, you do not need it to complete the March cards.
  • The additional stamp set is a 4×6 footprint, which is larger than most Paper Pumpkin sets and is designed for use on a variety of crafting projects.

Subscription Information

  • Subscribe for the March kit at paperpumpkin.com from February 11–March 10.
  • Supplies may be limited toward the end of each subscription period.

****************************************************************************************************

Card stock cuts for this project:

  • Highland Heather Cardstock 2 1/8″ x 5 1/2″ (DSP mat), 1 7/8″ X 4″ (artwork mat), 4 1/8″ X 5 3/8″ (inner liner mat)
  • Smoky Slate Cardstock 4 1/4″ X 11″ (card base scored and folded at 5 1/2″), 4 1/4″ X 5 1/2″ (card front)
  • Whisper White Cardstock 1 3/4″ x 4″ (artwork), 4″ X 5 1/4″ (inner liner)
  • Subtle 6 X 6 Designer Series Paper 2″ X 5 1/2″(card front), 2 1/4″ X 6″ (piece for envelope flap)

****************************************************************************************************

Product List

Stampin’ Up! Beautiful Day Pressed Petals CAS

Good Wednesday morning my stamping friends.  How is everyone’s week going?  This Friday is Valentine’s Day, is anyone doing anything fun?  It’ll be a stay at home night for me.  Maybe make a nice dinner, but I definitely will not be going out to dinner.  I did make cute little valentines for all my cashiers and co-workers.  I love giving them little treats every now and then just to let them know how much I appreciate them.

I made a really quick and easy card for you today.  I used one of my favorite 2018-2020 In-Colors, Blueberry Bushel.  This is one of my favorite shades of blue, it’s such a rich color.  The 2018-2020 In-Colors will be retiring at the beginning of June.  If there is one or all the colors that you like, don’t wait to get them.  The paper and ink are the first things to sell out.  Here’s my card for today.

I started by cutting a band for the card front in Blueberry Bushel cardstock using the Detailed Bands Dies.  I adhered it to a Pressed Petals Specialty Designer Series Paper card front using Glue Dots.  I folded the ends of the band around the back of the DSP and adhered them with Glue Dots.  I just love when the Designer Series Paper does most of the work for you.  This paper is so gorgeous and realistic looking.

I adhered the card front to a Blueberry Bushel card base using Multipurpose Liquid Glue.  On a scrap of Shimmer White cardstock I stamped the sentiment from the Stampin’ Up! Very Versailles Cling Stamp Set in Blueberry Bushel Ink.

I cut the sentiment out using the oval die from the Detailed Bands Dies.  I adhered the sentiment to the center of the band on the card front using Snail.

On the inside I stamped the script image from the Very Versailles stamp set in Crumb Cake Ink on the top left of a Whisper White panel.  I stamped the cascading leaves image from the Very Versailles stamp set on top of the script image in Pear Pizzazz Ink.  I stamped the sentiment from the Very Versailles stamp set in Blueberry Bushel Ink in the center of the panel.  I adhered the Whisper White panel to the inside of the Blueberry Bushel card base using Multipurpose Liquid Glue.

To finish my card I decorated a Medium Whisper White Envelope.  I stamped the script image from the Very Versailles stamp set in Crumb Cake Ink on the envelope front.  I stamped the cascading leaf image from the Very Versailles stamp set in Pear Pizzazz Ink on top of the script.  I adhered a panel of the Pressed Petals Specialty DSP to the envelope flap.

Thank you for stopping by my blog today.  I hope you liked my card and will give it a try. Happy Stamping!!

****************************************************************************************************

If you need any stamping supplies, I’d love to be your Demonstrator. Just click HERE to go directly to my online store or drop me an email if you have any questions. 

MY CURRENT HOST CODE IS: QCX43K4E

Use this host code when you order $50 or greater and receive a free gift from me! If your order is over $150, please do not use this code, but you’ll still get the free gift. The free gift is your choice of any item valued up to $10.00 in either the 2019-2020 Annual Catalog or the 2020 January-June Mini Catalog!   For any orders $50 or more I will also send you my monthly class tutorials.  Click HERE or go to my Customer Rewards for more details and to see what this months tutorials are.

Click HERE to shop the clearance rack.

Happy Stamping, Karen!

****************************************************************************************************

BRINGING THE JOYS OF SPRING MARCH PAPER PUMPKIN KIT

Paper Pumpkin March 2020: No Matter the Weather

Cheers to seven years! This March, Paper Pumpkin has reached another exciting milestone: our seventh year of delivering fun, easy, creative projects to you. To thank everyone who has helped us along the way, we’re including an additional FREE stamp set with every March kit. This means that every subscriber will receive two stamp sets!
The March 2020 kit will arrive in an exclusive, specially-designed box that you will love! Think daffodils, raindrops, and a fresh spring vibe.

About the March Kit

  • Kit contains supplies for 12 cards and envelopes (4 cards of 3 designs)
  • Notecard size: 5″ x 3-1/2″ (12.7 x 8.9 cm)
  • Envelope size: 5-1/8″ x 3-5/8″ (13 x 9.2 cm)

Coordinating Colors: Balmy Blue, Basic Gray, Calypso Coral, Grapefruit Grove, Gray Granite, Pear Pizzazz, Petal Pink, Shaded Spruce, and So Saffron

About the FREE Stamp Set

  • The additional stamp set is a great value and coordinates with the March kit design; however, you do not need it to complete the March cards.
  • The additional stamp set is a 4×6 footprint, which is larger than most Paper Pumpkin sets and is designed for use on a variety of crafting projects.

Subscription Information

  • Subscribe for the March kit at paperpumpkin.com from February 11–March 10.
  • Supplies may be limited toward the end of each subscription period.

****************************************************************************************************

Card stock cuts for this project:

  • Blueberry Bushel Cardstock 8 1/2″ X 5 1/2″ (card base scored and folded at 4 1/4″), 4″ X 5 1/4″ (scroll band on card front)
  • Shimmery White Cardstock (scrap for sentiment)
  • Whisper White Cardstock 4″ X 5 1/4″ (inner liner)
  • Pressed Petals Specialty Designer Series Paper 4 1/8″ X 5 3/8″ (card front), 2 1/4″ X 6″ (piece for envelope flap)

****************************************************************************************************

Product List

Stampin’ Up! Power of Hope

Good Monday morning my fellow stampers.  How was everyone’s weekend?  It ended up being a beautiful weekend here. Did  anyone do anything fun?

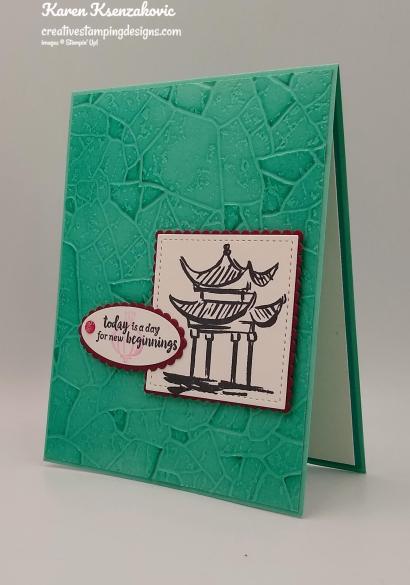
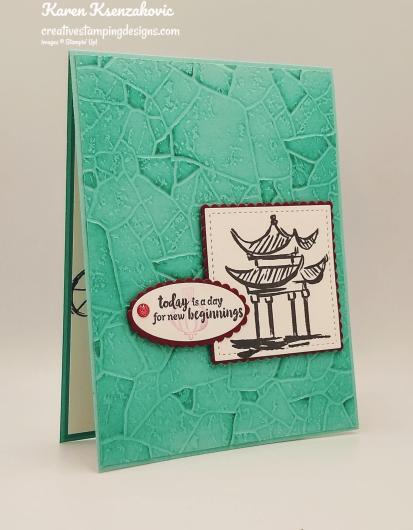
For today’s card I used one of the Sale-A-Bration bundle that you can earn  with a $100 order.  I wasn’t sure I was gong to like it, but once I started playing with it I love it.  Here’s my card.

I played along with Fab Friday Color Challenge #182.   Here are their colors.

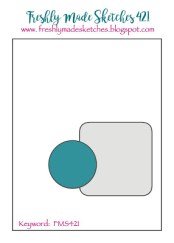
I also joined in with Freshly Made Sketches Challenge #421.  Here is their sketch.

I started by embossing a Coastal Cabana card front using the Stone 3D Embossing Folder.  This folder is only available with the stamp set as a bundle FREE with a qualifying order of $100 from Sale-A-Bration.  Using my Stamping Sponges I sponged Bermuda Bay Ink over the embossed panel to add some darker shading.  I adhered the embossed panel to a Coastal Cabana card base using Multipurpose Liquid Glue.

On a small panel of Whisper White cardstock I stamped the image from the Stampin’ Up! Power Of Hope Cling Stamp Set in Tuxedo Black Memento Ink.  I cut the image out using the Stitched Shapes Dies.  Using the Layering Squares Dies, I cut the scallop square that fit the stitched square in Merry Merlot cardstock.  I adhered the stitched square to the Merry Merlot scalloped square using Snail and then to the card front using Stampin’ Dimensionals.

On the same panel of Whisper White cardstock I stamped the sentiment from the Power of Hope stamp set in Tuxedo Black Memento Ink.  I cut the sentiment out using the Layering Ovals Dies.  I stamped the lantern image from the Power of Hope stamp set in Melon Mambo Ink, stamping off 3 times, over the sentiment.  Using my Layering Ovals Dies, I cut the scallop oval that matched the sentiment oval out of Merry Merlot cardstock.  I adhered the sentiment oval to the scallop oval using Snail and then to the card front using Stampin’ Dimensionals.  I added a Melon Mambo Glitter Enamel Dot to the sentiment.

On the inside I stamped the sentiment from the Power of Hope stamp set in the center of a Whisper White panel.  I stamped the tree image from the Power of Hope stamp set over the sentiment in Tuxedo Black Memento Ink, stamping off 4 times.  I stamped the bottom image from the Power of Hope stamp set in Tuxedo Black Memento Ink and colored the image in using my Melon Mambo and Merry Merlot Stampin’ Write Markers.  I adhered the Whisper White panel to a Bermuda Bay mat using Snail and then to the inside of the Coastal Cabana card base using Multipurpose Liquid Glue.

To finish my card I decorated a Medium Whisper White Envelope.  I stamped the images from the Power of Hope stamp set in Tuxedo Black Memento Ink on the envelope front and colored the one image in using my Melon Mambo and Merry Merlot Stampin’ Write Markers.  I stamped the lantern image from the Power of Hope stamp set across the envelope flap in Bermuda Bay and Melon Mambo Ink stamping twice before reinking the stamp.

Thank you for stopping by my blog today.  I hope you liked my card.  Don’t forget, this Power of Hope Bundle is available as a Sale-A-Bration item FREE with a qualifying order of $100 or more.  Happy Stamping!!

****************************************************************************************************

If you need any stamping supplies, I’d love to be your Demonstrator. Just click HERE to go directly to my online store or drop me an email if you have any questions. 

MY CURRENT HOST CODE IS: QCX43K4E

Use this host code when you order $50 or greater and receive a free gift from me! If your order is over $150, please do not use this code, but you’ll still get the free gift. The free gift is your choice of any item valued up to $10.00 in either the 2019-2020 Annual Catalog or the 2020 January-June Mini Catalog!   For any orders $50 or more I will also send you my monthly class tutorials.  Click HERE or go to my Customer Rewards for more details and to see what this months tutorials are.

Click HERE to shop the clearance rack.

Happy Stamping, Karen!

****************************************************************************************************

CELEBRATE A LOVELY DAY WITH FEBRUARY’S PAPER PUMPKIN KIT

LAST DAY TO SUBSCRIBE

February’s Paper Pumpkin kit is coming, and love is in the air! The Lovely Day kit is versatile, elegant, and the perfect way to help you celebrate birthdays and other grand occasions.

The Lovely Day Paper Pumpkin kit coordinates perfectly with the Happy Birthday to You Stamp Set (item 152308), which is available as part of Stampin’ Up!’s Sale-A-Bration promotion. You can get it for FREE by reaching the qualifying purchase amount of $50 usd/$60 cad by March 31, 2020.

About the February Kit:

  1. Kit details: Makes nine cards and envelopes
  2. Card size: 4-1/4” x 5-1/2” (10.8 x 14 cm)
  3. Envelope size: 4-1/2” x 5-3/4” (11.4 x 14.6 cm)
  4. Coordinating Stampin’ Up! colors: Petal Pink, Pool Party, Pretty Peacock, Rich Razzleberry, Rococo Rose, and Old Olive

Subscribe for the February kit at paperpumpkin.com from January 11 to February 10, 2020.
Supplies may be limited toward the end of each subscription period.

****************************************************************************************************

Card stock cuts for this project:

  • Bermuda Bay Cardstock 4 1/8″ X 5 3/8″ (inner liner mat)
  • Coastal Cabana Cardstock 4 1/4″ X 11″ (card base scored and folded at 5 1/2″), 4 1/8″ X 5 3/8″ (card front)
  • Merry Merlot Cardstock 4 1/4″ X 2 1/2″ (panel for mats)
  • Whisper White Cardstock 4″ X 5 1/4″ (inner liner), 4 1/2″ X 2 1/2″ (panel for artwork and sentiment)

****************************************************************************************************

Product List

Stampin’ Up! Hello Honey Bee for Happy Inkin’ Thursday Blog Hop

Good Thursday morning my fellow stampers and welcome to the Happy Inkin’ Thursday Blog Hop. How is everyone doing today? If you are hopping over from Akiko, thank you for stopping by. Be sure to take a moment to hop around to see everyone’s beautiful projects today. This week we had a Color Challenge, here are the colors we got to work with.

Here is my card using the colors. I’ll admit, I had to think for a moment what to make.

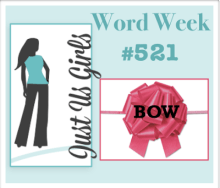
My card played along with the ‘Just Us Girls’ Challenge #521.  Here is their theme.

I started by adhering a panel of Golden Honey Specialty Designer Series Paper, (Free Sale-A-Bration item), to a Whisper White card front using Snail. Using my Dark Basic Black Stampin’ Blends Marker, I colored a piece of the 3/8″ Gold Metallic Edge Ribbon.  Once it was dry, I wrapped it around the card front.  With a smaller piece of the colored ribbon I tied a small bow and adhered it to the top of the ribbon using a Glue Dot.  I adhered the card front to a Basic Black card base using Stampin’ Dimensionals.

I cut a panel of Whisper White cardstock using the largest Stitched Nested Labels Dies and adhered it to the card front using Multipurpose Liquid Glue.  Using my Detailed Bees Dies, I cut a panel of the Golden Honey Specialty DSP using the bee hive die.  I cut out 2 honey combs from a Gold Foil Sheet using the Detailed Bees Dies.  I adhered the honey combs to the card front using Multipurpose Liquid Glue and adhered the bee hive on top of the honey comb using Stampin’ Dimensionals.  I added a few of the ‘honey’ pieces to the honey comb using Multipurpose Liquid Glue and Mini Stampin’ Dimensionals.  On a scrap of Whisper White cardstock I stamped 2 of the small bees from the Stampin’ Up! Honey Bee Cling Stamp Set in Tuxedo Black Memento Ink.  I cut the bees out using the Detailed Bees Dies.  I colored the stripes on the bees in using my Dark Daffodil Delight Stampin’ Blends Markers and I added some Clear Wink of Stella to the bees wings.  I adhered the bees to the card front using Stampin’ Dimensionals.

On a thin strip of Whisper White cardstock I stamped the sentiment from the Honey Bee stamp set in Tuxedo Black Memento Ink.  I adhered the sentiment to a Basic Black mat using Snail and then to the card front using Stampin’ Dimensionals.

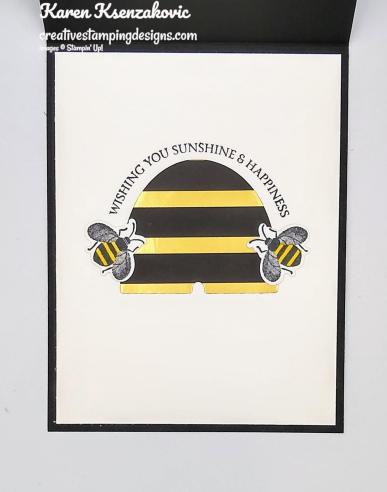
On the inside I cut another one of the bee hives using the Detailed Bees Dies and the Golden Honey Specialty DSP.  I adhered the bee hive to the center of a Whisper White panel.  I stamped the sentiment from the Honey Bee stamp set in Tuxedo Black Memento Ink above the bee hive.  I stamped 2 more bees of the small bees from the Honey Bee stamp set on a scrap of Whisper White cardstock.  I cut the bees out using the Detailed Bees Dies.  I colored the bees stripes in using my Dark Daffodil Delight Stampin’ Blends Marker and added some Clear Wink of Stella to the bees wings..  I adhered the bees to the bee hive using Glue Dots.  I adhered the Whisper  White panel to the inside of the Basic Black card base using Multipurpose Liquid Glue.

To finish my card I decorated a Medium Whisper White Envelope.  I stamped the small bee image from the Honey Bee stamp set across the bottom of the envelope front.  I colored the bees stripes using my Dark Daffodil Delight Stampin’ Blends Markers.  I adhered a panel of the Golden Honey Specialty DSP to the envelope flap.

Thank you for visiting my blog today. I hope you liked my card and will give it a try.  Now that you’ve seen my card, hop around to see everyone else’s projects.  You can hit the next button to hop over to Amy Koenders blog or you can just click on the names below. Happy Hopping!!

Amy Koenders:
Mary Deatherage:
Kristi Gray:
Jaimie Babarczy:
Sue Prather:
Karen Finkle:
Eva Dobilas:
Akiko Sudano:
Karen Ksenzakovic: You Are Here

****************************************************************************************************

If you need any stamping supplies, I’d love to be your Demonstrator. Just click HERE to go directly to my online store or drop me an email if you have any questions. 

MY CURRENT HOST CODE IS: QCX43K4E

Use this host code when you order $50 or greater and receive a free gift from me! If your order is over $150, please do not use this code, but you’ll still get the free gift. The free gift is your choice of any item valued up to $10.00 in either the 2019-2020 Annual Catalog or the 2020 January-June Mini Catalog!   For any orders $50 or more I will also send you my monthly class tutorials.  Click HERE or go to my Customer Rewards for more details and to see what this months tutorials are.

Click HERE to shop the clearance rack.

Happy Stamping, Karen!

****************************************************************************************************

CELEBRATE A LOVELY DAY WITH FEBRUARY’S PAPER PUMPKIN KIT

February’s Paper Pumpkin kit is coming, and love is in the air! The Lovely Day kit is versatile, elegant, and the perfect way to help you celebrate birthdays and other grand occasions.

The Lovely Day Paper Pumpkin kit coordinates perfectly with the Happy Birthday to You Stamp Set (item 152308), which is available as part of Stampin’ Up!’s Sale-A-Bration promotion. You can get it for FREE by reaching the qualifying purchase amount of $50 usd/$60 cad by March 31, 2020.

About the February Kit:

  1. Kit details: Makes nine cards and envelopes
  2. Card size: 4-1/4” x 5-1/2” (10.8 x 14 cm)
  3. Envelope size: 4-1/2” x 5-3/4” (11.4 x 14.6 cm)
  4. Coordinating Stampin’ Up! colors: Petal Pink, Pool Party, Pretty Peacock, Rich Razzleberry, Rococo Rose, and Old Olive

Subscribe for the February kit at paperpumpkin.com from January 11 to February 10, 2020.
Supplies may be limited toward the end of each subscription period.

****************************************************************************************************

Card stock cuts for this project:

  • Basic Black Cardstock 4 1/4″ X 11″ (card base scored and folded at 5 1/2″), 7/16″ X 1 7/16″ (sentiment mat)
  • Whisper White Cardstock 4 1/8″ X 5 3/8″ (card front), 3′ X 5 1/2″ (artwork), 3/8″ X 1 3/8″ (sentiment), 4″ X 5 1/4″ (inner liner)
  • Gold Foil Sheet piece for honey combs
  • Golden Honey Specialty Designer Series Paper 4 1/8″ X 5 3/8″ (card front), pieces for bee hive, 2 1/4″ X 6″ (piece for envelope flap)

****************************************************************************************************

Product List

Stampin’ Up! Heart To Heart Poppies

Good Wednesday morning my fellow stampers.  We’ve made it half way through the week already.  How is everyone doing today?  It’s been like spring here the past couple days.  I know this is just a tease before the freezing weather starts, but it’s been nice.

Today’s card is another one we did at our Stamp Camp class last night.  I wanted to do all pretty easy cards and wanted at least one where the designer paper did all the work.  Here’s my card.

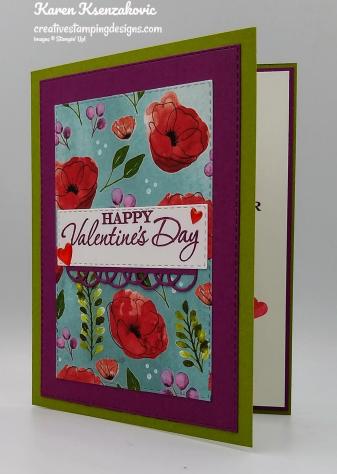
I started by cutting the Rich Razzleberry card front using the largest Stitched Rectangle Die.  I cut the Peaceful Poppies Designer Series Paper using the 3rd from the largest Stitched Rectangle Die.  I adhered the DSP to the Rich Razzleberry mat using Snail and adhered it to the Old Olive card base using Multipurpose Liquid Glue.

On a small panel of Whisper White cardstock I stamped the sentiment from the Stampin’ Up! Heart To Heart Photopolymer Stamp Set in Rich Razzleberry Ink.  I cut the sentiment out using the Stitched Rectangle Dies.  I cut the scallop edge piece from the Painted Labels Dies out of a scrap of Rich Razzleberry cardstock.  I adhered the scallop edge to the bottom of the sentiment using Snail.

I adhered the sentiment to the card front using Multipurpose Liquid Glue.  I colored 2 of the Heart Epoxy Droplets using my Dark Poppy Parade Stampin’ Blends Marker and adhered them to the sentiment.

On the inside I stamped the sentiment from the Heart To Heart stamp set in Rich Razzleberry Ink in the center of a Whisper White panel.  I stamped the small heart below the sentiment from the Heart To Heart stamp set colored with my Old Olive and Poppy Parade Stampin’ Write Markers.  I stamped the small Heart from the Heart To Heart stamp set around the sentiment in Poppy Parade Ink.  I adhered the Whisper White panel to a Rich Razzleberry mat using Snail and then to the inside of the Old Olive card base using Multipurpose Liquid Glue.

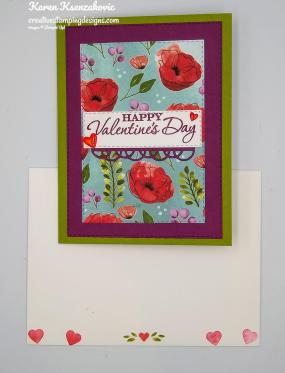
To finish my card I decorated a Medium Whisper White Envelope.  I stamped the tiny heat image from the Heart To Heart stamp set colored with my Old Olive and Poppy Parade Stampin’ Write Markers, on the bottom of the envelope front.  I stamped the small heart from the Heart To Heart stamp set twice in Poppy Parade Ink on either side of the tiny heart image.  I adhered a panel of the Peaceful Poppies DSP to the envelope flap.

Thank you for stopping by my blog today.  I hope you liked my card and will give it a try. Happy Stamping!!

****************************************************************************************************

If you need any stamping supplies, I’d love to be your Demonstrator. Just click HERE to go directly to my online store or drop me an email if you have any questions. 

MY CURRENT HOST CODE IS: QCX43K4E

Use this host code when you order $50 or greater and receive a free gift from me! If your order is over $150, please do not use this code, but you’ll still get the free gift. The free gift is your choice of any item valued up to $10.00 in either the 2019-2020 Annual Catalog or the 2020 January-June Mini Catalog!   For any orders $50 or more I will also send you my monthly class tutorials.  Click HERE or go to my Customer Rewards for more details and to see what this months tutorials are.

Click HERE to shop the clearance rack.

Happy Stamping, Karen!

****************************************************************************************************

CELEBRATE A LOVELY DAY WITH FEBRUARY’S PAPER PUMPKIN KIT

February’s Paper Pumpkin kit is coming, and love is in the air! The Lovely Day kit is versatile, elegant, and the perfect way to help you celebrate birthdays and other grand occasions.

The Lovely Day Paper Pumpkin kit coordinates perfectly with the Happy Birthday to You Stamp Set (item 152308), which is available as part of Stampin’ Up!’s Sale-A-Bration promotion. You can get it for FREE by reaching the qualifying purchase amount of $50 usd/$60 cad by March 31, 2020.

About the February Kit:

  1. Kit details: Makes nine cards and envelopes
  2. Card size: 4-1/4” x 5-1/2” (10.8 x 14 cm)
  3. Envelope size: 4-1/2” x 5-3/4” (11.4 x 14.6 cm)
  4. Coordinating Stampin’ Up! colors: Petal Pink, Pool Party, Pretty Peacock, Rich Razzleberry, Rococo Rose, and Old Olive

Subscribe for the February kit at paperpumpkin.com from January 11 to February 10, 2020.
Supplies may be limited toward the end of each subscription period.

****************************************************************************************************

Card stock cuts for this project:

  • Old Olive Cardstock 8 1/2″ X 5 1/2″ (card base scored and folded at 4 1/4″)
  • Rich Razzleberry Cardstock 4″ X 5 1/5″ (card front), 4 1/8″ X 5 3/8″ (inner liner mat)
  • Whisper White Cardstock 4″ X 5 1/4″ (inner liner), 1 2/3″ X 4″ (sentiment)
  • Peaceful Poppies Designer Series Paper 4 1/2″ X 3 1/4″ (card front), 2 1/4″ X 6″ (piece for envelope flap)

****************************************************************************************************

Product List

Stampin’ Up! Beautiful Poppy Moments

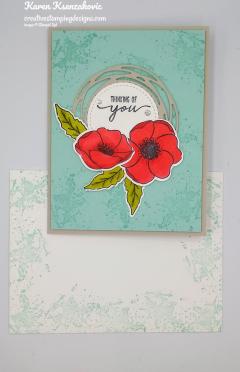
Good Tuesday morning my fellow stampers.  How is your week starting off?  Tonight is my Stamp Camp Class so I have another pretty easy card since I’m not sure what kind of stampers the new ladies are.  Here’s my card.

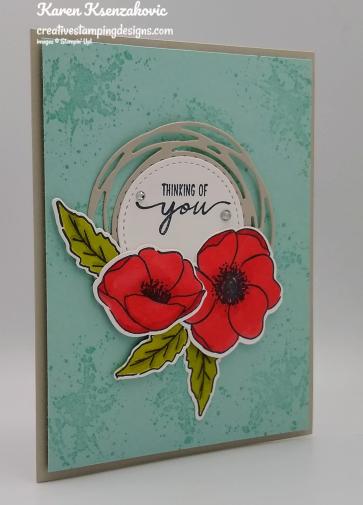
I started by using the splatter image from the Stampin’ Up! Painted Poppies Cling Stamp Set and stamped the Pool Party card front using Pool Party Ink.  I stamped the 2 poppy images and the leaf image from the Painted Poppies stamp set in Tuxedo Black Memento Ink on a small panel of Whisper White cardstock.  I colored the images in using my Old Olive and Poppy Parade Stampin’ Blends Markers.  I cut the images out using my Painted Labels Dies.

On a panel of Whisper White cardstock I stamped the sentiment from the Stampin’ Up! Beautiful Moments Cling Stamp Set in Tuxedo Black Memento Ink.  I cut the sentiment out using the 2nd smallest circle from the Stitched Shapes Dies making sure that the sentiment was near the top of the circle.  I cut the swirly circle  out of Sahara Sand cardstock using the Painted Labels Dies.

I adhered the sentiment to the center of the swirly circle using Snail.  I adhered the flowers and leaves to the bottom of the sentiment using Glue Dots.  I adhered the artwork to the card front using Stampin’ Dimensionals and I adhered the card front to the Sahara Sand card base using Stampin’ Dimensionals.

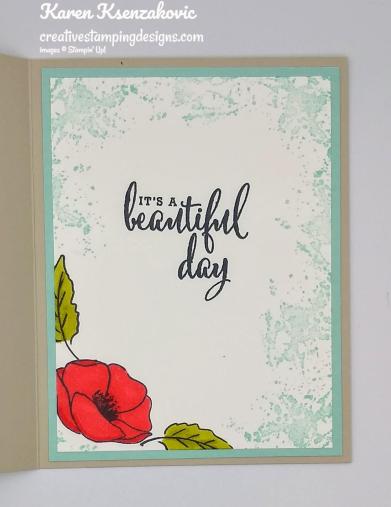
On the inside I stamped the sentiment from the Stampin’ Up! Love What You Do Photopolymer Stamp Set in Tuxedo Black Memento Ink in the center of a Whisper White panel.  I stamped the poppy  and leaf image from the Painted Poppies stamp set in Tuxedo Black Memento Ink on the bottom of the panel.  I colored the image in using my Old Olive and Poppy Parade Stampin’ Blends Markers.  I stamped the splatter image from the Painted Poppies stamp set in Pool Party Ink all around the edges of the Whisper White panel.  I adhered the Whisper White panel to a Pool Party mat using Snail and then to the inside of the Sahara Sand card base using Multipurpose Liquid Glue.

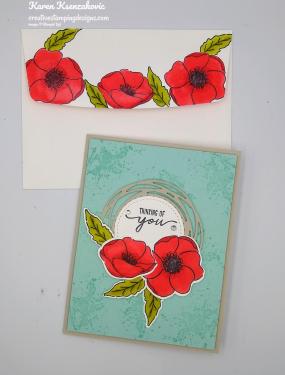
To finish my card I decorated a Medium Whisper White Envelope.  I stamped the splatter image from the Painted Poppies stamp set in Pool Party Ink all around the front of the envelope.  I stamped the poppy and leaf images from the Painted Poppies stamp set in Tuxedo Black Memento Ink on the envelope flap.  I colored the images in using my Old Olive and Poppy Parade Stampin’ Blends Markers.

Thank you for visiting my blog today.  I hope you liked my card and will give it a try. Happy Stamping!!

****************************************************************************************************

If you need any stamping supplies, I’d love to be your Demonstrator. Just click HERE to go directly to my online store or drop me an email if you have any questions. 

MY CURRENT HOST CODE IS: QCX43K4E

Use this host code when you order $50 or greater and receive a free gift from me! If your order is over $150, please do not use this code, but you’ll still get the free gift. The free gift is your choice of any item valued up to $10.00 in either the 2019-2020 Annual Catalog or the 2020 January-June Mini Catalog!   For any orders $50 or more I will also send you my monthly class tutorials.  Click HERE or go to my Customer Rewards for more details and to see what this months tutorials are.

Click HERE to shop the clearance rack.

Happy Stamping, Karen!

****************************************************************************************************

CELEBRATE A LOVELY DAY WITH FEBRUARY’S PAPER PUMPKIN KIT

February’s Paper Pumpkin kit is coming, and love is in the air! The Lovely Day kit is versatile, elegant, and the perfect way to help you celebrate birthdays and other grand occasions.

The Lovely Day Paper Pumpkin kit coordinates perfectly with the Happy Birthday to You Stamp Set (item 152308), which is available as part of Stampin’ Up!’s Sale-A-Bration promotion. You can get it for FREE by reaching the qualifying purchase amount of $50 usd/$60 cad by March 31, 2020.

About the February Kit:

  1. Kit details: Makes nine cards and envelopes
  2. Card size: 4-1/4” x 5-1/2” (10.8 x 14 cm)
  3. Envelope size: 4-1/2” x 5-3/4” (11.4 x 14.6 cm)
  4. Coordinating Stampin’ Up! colors: Petal Pink, Pool Party, Pretty Peacock, Rich Razzleberry, Rococo Rose, and Old Olive

Subscribe for the February kit at paperpumpkin.com from January 11 to February 10, 2020.
Supplies may be limited toward the end of each subscription period.

****************************************************************************************************

Card stock cuts for this project:

  • Pool Party Cardstock 2 – 4″ X  5 1/4″ (card front and inner liner mat)
  • Sahara Sand Cardstock 8 1/2″ X 5 1/2″(card base scored and folded at 4 1/4″), 3 1/2″ X 3 1/4″ (swirl)
  • Whisper Whtie Cardstock 3 1/2″ X 4 1/2″ (flowers and leaves), 2 1/2″ X 2 1/2″ (sentiment), 3 3/4″ X 5″ (inner liner)

****************************************************************************************************

Product List

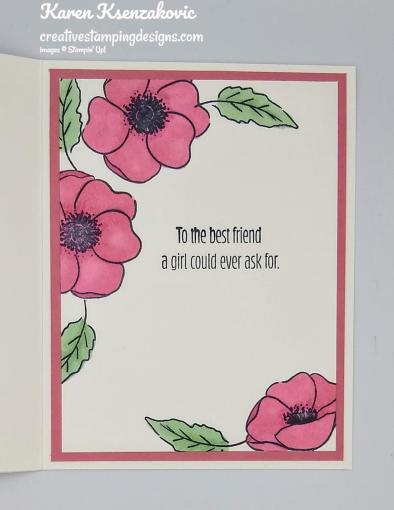
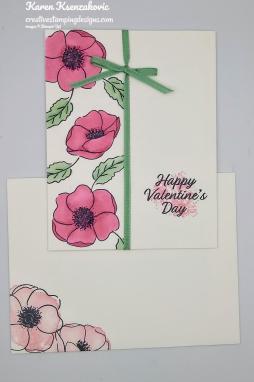
Stampin’ Up! Meant To Be Poppies

Good Monday morning my fellow stampers.  How was everyone’s weekend?  Did you all watch the Super Bowl last night?  I watched bits and pieces and the half time show.  I have to admit, I really only watch for the commercials.

I have a pretty easy card for you today.  I’m having a Stamp Camp class tomorrow night and I have a couple new people joining me.  I’m not sure what kind of stampers they are, so I thought I’d keep it pretty simple.  Here’s one of the cards we’re going to make.

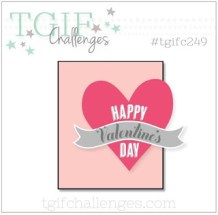
I played along with TGIF Challenge #249.  Here is their theme.

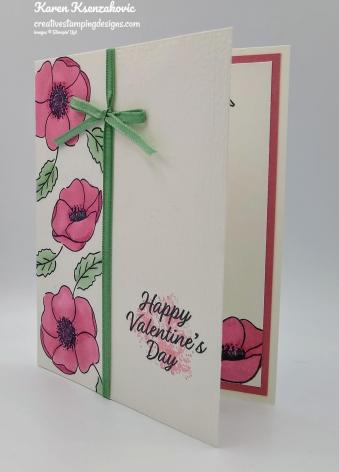
I started with a small panel of Whisper White cardstock and stamped the 2 different poppy images from the Stampin’ Up! Painted Poppies Cling Stamp Set in Tuxedo Black Memento Ink.  I stamped the leaf image from the Painted Poppies stamp set in Tuxedo Black Memento Ink by the flower images.  I colored the flowers and leaves in using my Mint Macaron and Rococo Rose Stampin’ Blends Markers.

I stamped the sentiment from the Stampin’ Up! Meant To Be Cling Stamp Set in Tuxedo Black Memento Ink on the bottom right of a Whisper White card front.  I stamped the splatter image from the Painted Poppies stamp set in Rococo Rose Ink over the stamped sentiment.  I embossed the Whisper White card front using the Subtle 3D Embossing Folder.

I adhered the artwork to the card front using Multipurpose Liquid Glue.  I wrapped a piece of Mint Macaron 1/8″ Sheer Linen Ribbon around the card front and tied a bow.  I adhered the card front to a Whisper White card base using Multipurpose Liquid Glue.

On the inside I stamped the sentiment from the Meant To Be stamp set in the center of a Whisper White panel in Tuxedo Black Memento Ink.  I stamped the poppy and leaf images from the Painted Poppies stamp set in Tuxedo Black Memento Ink on the top and bottom corners of the Whisper White panel.  I colored the images in using my Mint Macaron and Rococo Rose Stampin’ Blends Markers.  I adhered the Whisper White panel to a Rococo Rose mat using Snail and then to the inside of the Whisper White card base using Multipurpose Liquid Glue.

To finish my card, I decorated a Medium Whisper White Envelope.  I stamped the poppy image from the Painted Poppies stamp set in Tuxedo Black Memento Ink on the bottom front of the envelope.  I colored the images in using the color fill image stamp from the Painted Poppies stamp set.  I adhered a panel of Pressed Petals Specialty Designer Series Paper to the envelope flap.

Thank you for stopping by my blog today.  I hope you liked my card and will give it a try. Happy Stamping!!

****************************************************************************************************

If you need any stamping supplies, I’d love to be your Demonstrator. Just click HERE to go directly to my online store or drop me an email if you have any questions. 

MY CURRENT HOST CODE IS: QCX43K4E

Use this host code when you order $50 or greater and receive a free gift from me! If your order is over $150, please do not use this code, but you’ll still get the free gift. The free gift is your choice of any item valued up to $10.00 in either the 2019-2020 Annual Catalog or the 2020 January-June Mini Catalog!   For any orders $50 or more I will also send you my monthly class tutorials.  Click HERE or go to my Customer Rewards for more details and to see what this months tutorials are.

Click HERE to shop the clearance rack.

Happy Stamping, Karen!

****************************************************************************************************

CELEBRATE A LOVELY DAY WITH FEBRUARY’S PAPER PUMPKIN KIT

February’s Paper Pumpkin kit is coming, and love is in the air! The Lovely Day kit is versatile, elegant, and the perfect way to help you celebrate birthdays and other grand occasions.

The Lovely Day Paper Pumpkin kit coordinates perfectly with the Happy Birthday to You Stamp Set (item 152308), which is available as part of Stampin’ Up!’s Sale-A-Bration promotion. You can get it for FREE by reaching the qualifying purchase amount of $50 usd/$60 cad by March 31, 2020.

About the February Kit:

  1. Kit details: Makes nine cards and envelopes
  2. Card size: 4-1/4” x 5-1/2” (10.8 x 14 cm)
  3. Envelope size: 4-1/2” x 5-3/4” (11.4 x 14.6 cm)
  4. Coordinating Stampin’ Up! colors: Petal Pink, Pool Party, Pretty Peacock, Rich Razzleberry, Rococo Rose, and Old Olive

Subscribe for the February kit at paperpumpkin.com from January 11 to February 10, 2020.
Supplies may be limited toward the end of each subscription period.

****************************************************************************************************

Card stock cuts for this project:

  • Rococo Rose Cardstock 4′ X 5 1/4″ (inner liner mat)
  • Whisper White Cardstock 8 1/2″ X 5 1/2″ (card base scored and folded at 4 1/4″), 4 1/4″ X 5 1/2″ (card front), 2″ X 5 1/2″ (artwork), 3 3/4″ X 5″ (inner liner)
  • Pressed petals Specialty Designer Series Paper 2 1/4″ X 6″(envelope flap)

****************************************************************************************************

Product List

Stampin’ Up! Enjoy Life for Fun Fold Friday

Good Friday morning my fellow stampers and welcome to my Fun Fold Friday.  How was everyone’s week?  The weekend is here and hopefully you have made some fun plans.  Tomorrow’s the 1st of February already so that means I have to work in the office sending out our monthly statements.

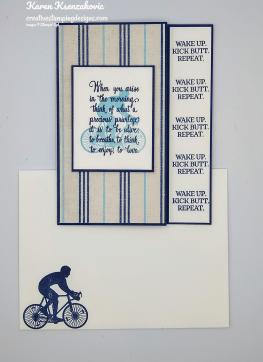
I had to make one more masculine birthday card for the month.  Today is my husband, my great nephew and my nephew’s birthday.  One masculine card wasn’t bad enough for the day, I had to make 3.  As you know I struggle with masculine cards, but the one I made Tuesday for the 9 year old and today’s were the hardest.  Today’s is for a teenager that I’m honestly not sure what he’s into.  I came up with a quick and easy card for today’s fun fold for a teenage boy.

I started with my Night of Navy card base and I cut 1 1/4″ off the right front edge.  I adhered a panel of the Come Sail Away Designer Series Paper to the front of the card base using Snail.

On a small panel of Whisper White cardstock I stamped the sentiment from the Stampin’ Up! Enjoy Life Photopolymer Stamp Set in Night of Navy Ink.  I stamped the cyclist image from the Enjoy Life stamp set in Balmy Blue Ink over the sentiment.  I adhered the artwork to a Night of Navy mat using Snail and then to the card front using Stampin’ Dimensionals.

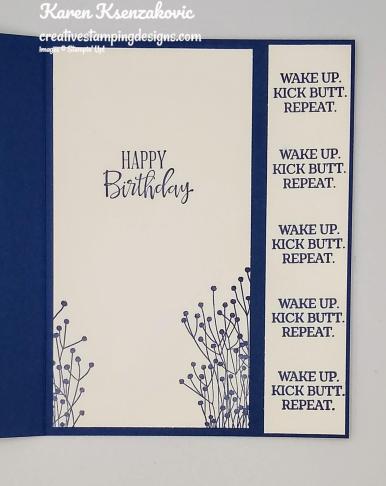
On a thin strip of Whisper White cardstock I stamped the sentiment from the Enjoy Life stamp set in Night of Navy Ink multiple times with the help of my Stamparatus.  The plate on the Stamparatus is hinged so you can stamp in a row keeping it perfectly straight.  I adhered the strip of Whisper White cardstock to the right side of the card base using Multipurpose Liquid Glue.

On the inside I stamped the sentiment from the Stampin’ Up! Peaceful Moments Cling Stamp Set in Night of Navy Ink in the center of a Whisper White panel.  I stamped the foliage image from the Enjoy Life in Night of Navy Ink on both sides of the bottom of the Whisper White panel.  I adhered the Whisper White panel to the inside of the Night of Navy card base using Multipurpose Liquid Glue.

To finish my card I decorated a Medium Whisper White Envelope.  I stamped the cyclist image from the Enjoy Life stamp set in Night of Navy Ink on the bottom of the envelope front.  I adhered a panel of the Come Sail Away DSP to the envelope flap.

Thank you for stopping by my blog today.  I hope you liked my card and will give it a try. Happy Stamping!!

****************************************************************************************************

If you need any stamping supplies, I’d love to be your Demonstrator. Just click HERE to go directly to my online store or drop me an email if you have any questions. 

MY CURRENT HOST CODE IS: QCX43K4E

Use this host code when you order $50 or greater and receive a free gift from me! If your order is over $150, please do not use this code, but you’ll still get the free gift. The free gift is your choice of any item valued up to $10.00 in either the 2019-2020 Annual Catalog or the 2020 January-June Mini Catalog!   For any orders $50 or more I will also send you my monthly class tutorials.  Click HERE or go to my Customer Rewards for more details and to see what this months tutorials are.

Click HERE to shop the clearance rack.

Happy Stamping, Karen!

****************************************************************************************************

CELEBRATE A LOVELY DAY WITH FEBRUARY’S PAPER PUMPKIN KIT

February’s Paper Pumpkin kit is coming, and love is in the air! The Lovely Day kit is versatile, elegant, and the perfect way to help you celebrate birthdays and other grand occasions.

The Lovely Day Paper Pumpkin kit coordinates perfectly with the Happy Birthday to You Stamp Set (item 152308), which is available as part of Stampin’ Up!’s Sale-A-Bration promotion. You can get it for FREE by reaching the qualifying purchase amount of $50 usd/$60 cad by March 31, 2020.

About the February Kit:

  1. Kit details: Makes nine cards and envelopes
  2. Card size: 4-1/4” x 5-1/2” (10.8 x 14 cm)
  3. Envelope size: 4-1/2” x 5-3/4” (11.4 x 14.6 cm)
  4. Coordinating Stampin’ Up! colors: Petal Pink, Pool Party, Pretty Peacock, Rich Razzleberry, Rococo Rose, and Old Olive

Subscribe for the February kit at paperpumpkin.com from January 11 to February 10, 2020.
Supplies may be limited toward the end of each subscription period.

****************************************************************************************************

Card stock cuts for this project:

  • Night of Navy Cardstock 8 1/2″ X 5 1/2″ (card base scored and folded at 4 1/4″), 2 7/8″ X 2 1/4″ (artwork mat)
  • Whisper White Cardstock 2 3/4″ X 2 1/8″ (artwork), 1 1/8″ X 5 3/8″ (strip on side), 2 3/4″ X 5 1/4″ (inner liner)
  • Come Sail Away Designer Series Paper 2 7/8″ X 5 3/8″ (card front), 2 1/2″ X 6″ (piece for envelope flap)

****************************************************************************************************

Product List

Stampin’ Up! Timeless Tropical Aloha Birthday

Good Wednesday morning my stamping friends.  How is everyone doing today?  Hope you are all having a wonderful week.

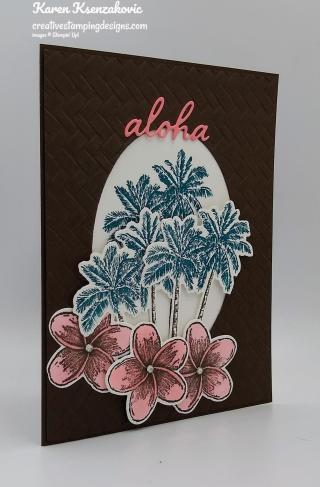
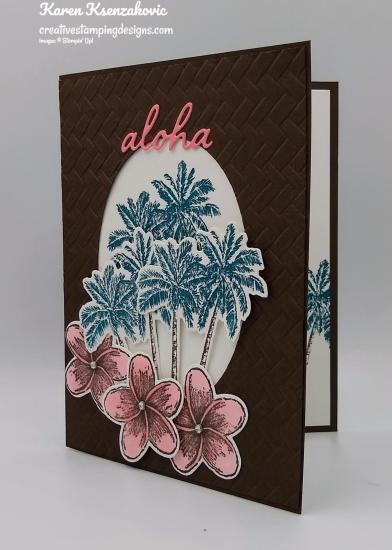
I played with another one of the new bundles from the 2020 January-June Mini Catalog for today’s card.  Take a look.

The colors for my card were inspired by Inspire. Create. Challenge #061.  Here are their colors.

I started by cutting an oval in an Early Espresso card front using the largest oval from the Layering Ovals Dies.  I then embossed the panel using my Coastal Weave 3ED Embossing folder.
On a Whisper White panel I stamped the palm tree image from the Stampin’ Up! Timeless Tropical Cling Stamp Set using my Early Espresso and Pretty Peacock Stampin’ Write Markers.  I stamped 2 more palm trees on a smaller panel of Whisper White cardstock using my Early Espresso and Pretty Peacock Stampin’ Write Markers.  I cut the 2 additional palm trees out using my In The Tropics Dies.  I adhered the Whisper White panel to the back of the embossed Early Espresso card front using Multipurpose Liquid Glue.  I adhered the palm trees to the artwork using Stampin’ Dimensionals.
On another small panel of Whisper White cardstock I stamped the flower image from the Timeless Tropical stamp set in Early Espresso Ink 3 times.  I colored the flowers in using my Flirty Flamingo Stampin’ Blends Markers.  I cut the flowers out using my In The Tropics Dies.  I adhered 2 of the flowers to the bottom of the oval using Glue Dots and the last one using Stampin’ Dimensionals.  I cut the sentiment out of a piece of Flirty Flamingo cardstock using the In The Tropics Dies.  I adhered the sentiment to the top of the oval using Multipurpose Liquid Glue.  I adhered the card front to an Early Espresso card base using Multipurpose Liquid Glue.  I added a Rhinestone Basic Jewel to the center of each flower.

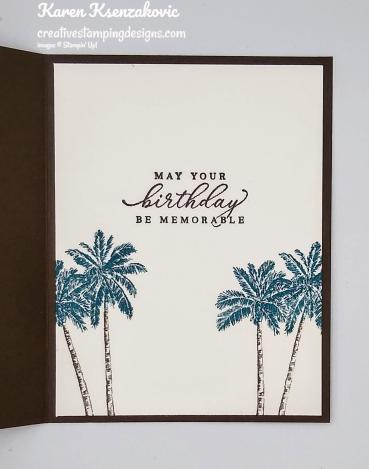
On the inside I stamped the sentiment from the Timeless Tropical stamp set in Early Espresso Ink in the center of a Whisper White panel.  I stamped the palm tree image from the Timeless Tropical stamp set twice on the bottom of the panel using my Early Espresso and Pretty Peacock Stampin’ Write Markers.  I adhered the Whisper White panel to the inside of the Early Espresso card base using Multipurpose Liquid Glue.

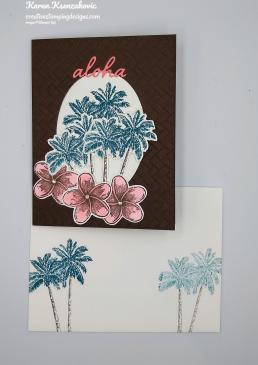
To finish my card I decorated a Medium Whisper White Envelope.  I stamped the palm tree image from the Timeless Tropical stamp set twice on the envelope front using my Early Espresso and Pretty Peacock Stampin’ Write Markers.  I stamped the flower image from the Timeless Tropical stamp set in Early Espresso Ink across the envelope flap.  I colored the flowers in using my Flirty Flamingo Stampin’ Blends Markers.

Thank you for stopping by my blog today.  I hope you liked my card and will give it a try. Happy Stamping!!

****************************************************************************************************

If you need any stamping supplies, I’d love to be your Demonstrator. Just click HERE to go directly to my online store or drop me an email if you have any questions. 

MY CURRENT HOST CODE IS: U7DEP9F9

Use this host code when you order $50 or greater and receive a free gift from me! If your order is over $150, please do not use this code, but you’ll still get the free gift. The free gift is your choice of any item valued up to $10.00 in either the 2019-2020 Annual Catalog or the 2020 January-June Mini Catalog!   For any orders $50 or more I will also send you my monthly class tutorials.  Click HERE or go to my Customer Rewards for more details and to see what this months tutorials are.

Click HERE to shop the clearance rack.

Happy Stamping, Karen!

****************************************************************************************************

CELEBRATE A LOVELY DAY WITH FEBRUARY’S PAPER PUMPKIN KIT

February’s Paper Pumpkin kit is coming, and love is in the air! The Lovely Day kit is versatile, elegant, and the perfect way to help you celebrate birthdays and other grand occasions.

The Lovely Day Paper Pumpkin kit coordinates perfectly with the Happy Birthday to You Stamp Set (item 152308), which is available as part of Stampin’ Up!’s Sale-A-Bration promotion. You can get it for FREE by reaching the qualifying purchase amount of $50 usd/$60 cad by March 31, 2020.

About the February Kit:

  1. Kit details: Makes nine cards and envelopes
  2. Card size: 4-1/4” x 5-1/2” (10.8 x 14 cm)
  3. Envelope size: 4-1/2” x 5-3/4” (11.4 x 14.6 cm)
  4. Coordinating Stampin’ Up! colors: Petal Pink, Pool Party, Pretty Peacock, Rich Razzleberry, Rococo Rose, and Old Olive

Subscribe for the February kit at paperpumpkin.com from January 11 to February 10, 2020.
Supplies may be limited toward the end of each subscription period.

****************************************************************************************************

Card stock cuts for this project:

  • Early Espresso Cardsock 8 1/2″ X 5 1/2″ (card base scored and folded at 4 1/4″), 4 1/8″ X 5 3/8″ (card front)
  • Flirty Flamingo Cardstock 1″ X 2″ (sentiment)
  • Whisper White Cardstock 4″ X 5 1/4″ (inner liner), 3 7/8″ X 5″ (artwork), 2 1/2″ X 4 1/2″ (panel for trees), 2″ X 6″ (panel for flowers)

****************************************************************************************************

Product List