Stampin’ Up! Timeless Tropical CAS

Good Sunday morning my stamping friends. How is everyone’s weekend going? I worked all day yesterday and I’ll be working at the dog boutique today.

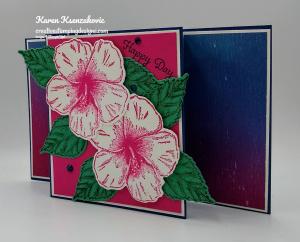
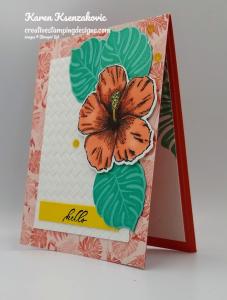
I have a quick and easy card with a simple layout for you today using a set that I haven’t pulled out in a while. Here’s my card for today.
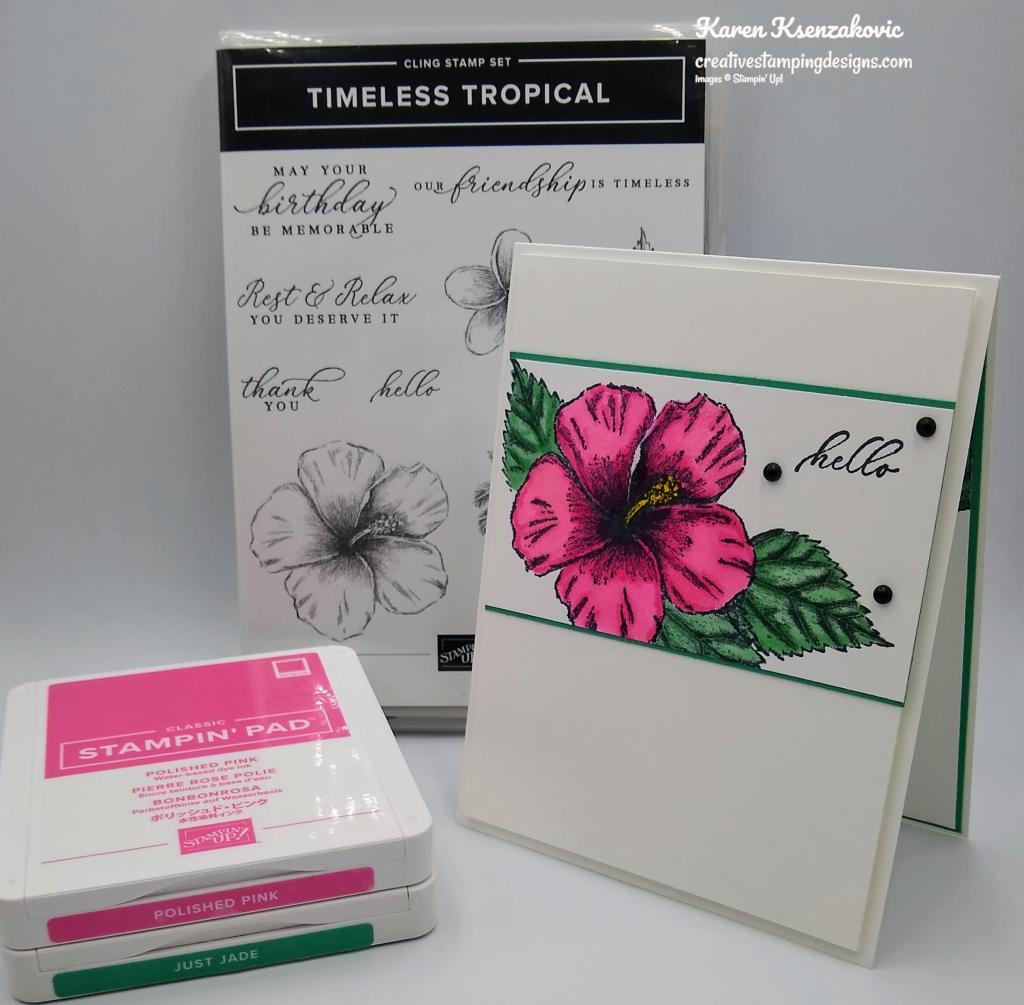
I used the Stampin’ Up! Timeless Tropical Cling Stamp Set for my card today.
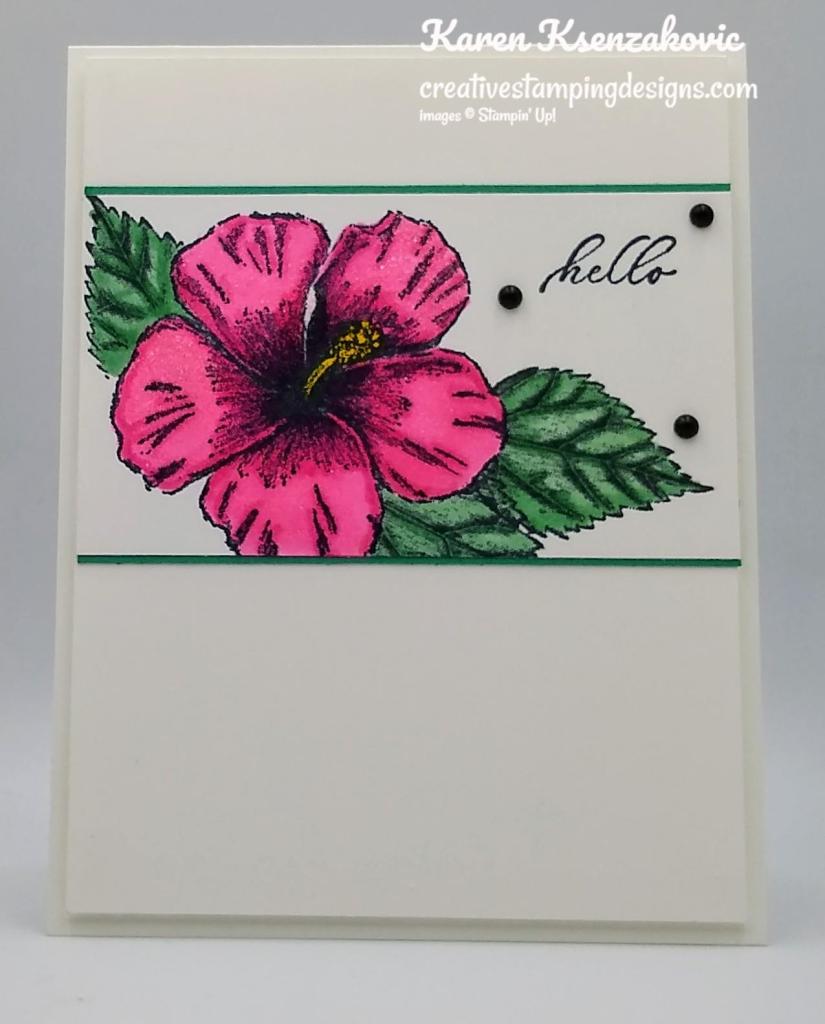
I started by stamping the large hibiscus flower from the Timeless Tropical stamp set in Tuxedo Black Ink on a panel of Basic White cardstock. I masked the image using a Post-It note and stamped the leaf image from the Timeless Tropical stamp set around the flower.
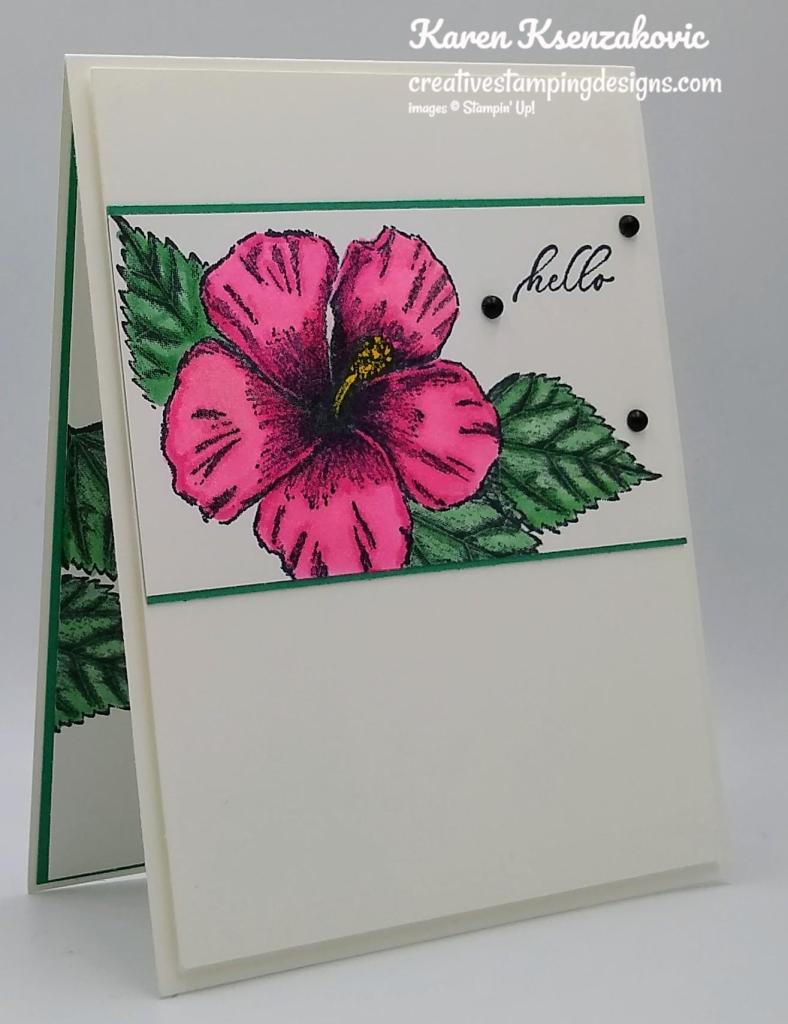
I colored the flower in using my Polished Pink Stampin’ Blends Markers and the leaves in using my Just Jade Stampin’ Blends Markers. I brushed the flower using my Clear Wink of Stella to give it a shimmer. I stamped the sentiment from the Timeless Tropical stamp set on the top of the panel in Tuxedo Black Ink. I adhered the artwork to a Just Jade mat using Stampin’ Seal.
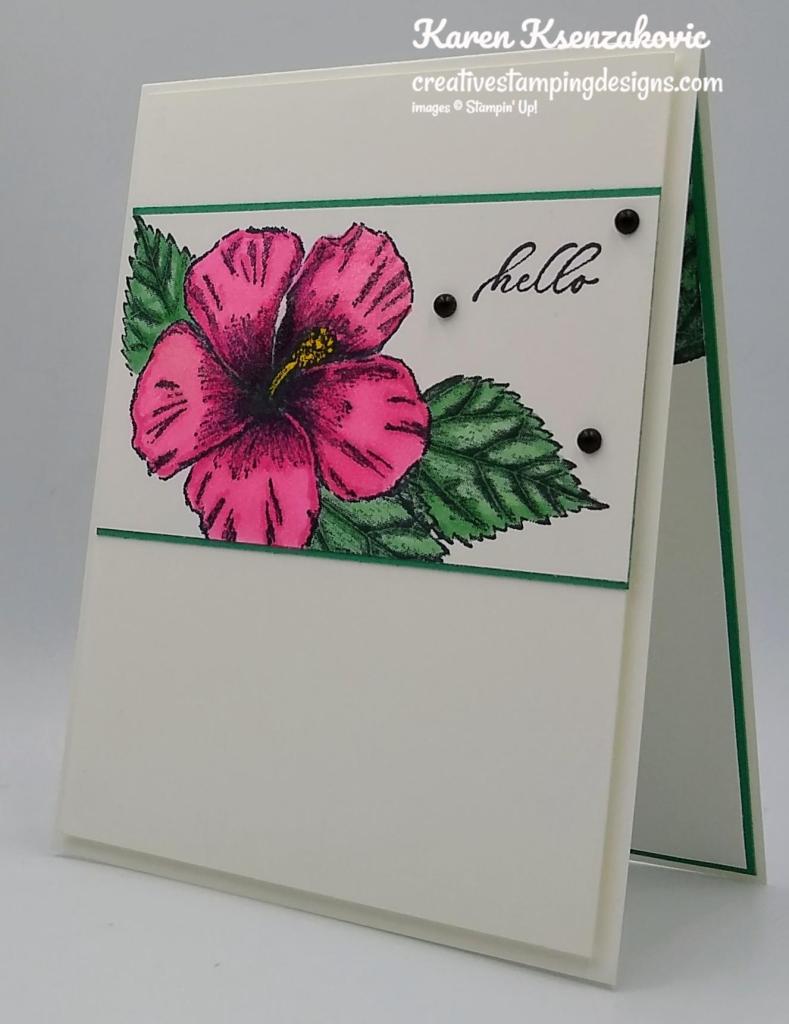
I adhered the matted panel to a Basic White card front using Stampin’ Seal and then to the front of a Basic White card base using Stampin’ Dimensionals. I added a few Matte Black Dots to the card front.
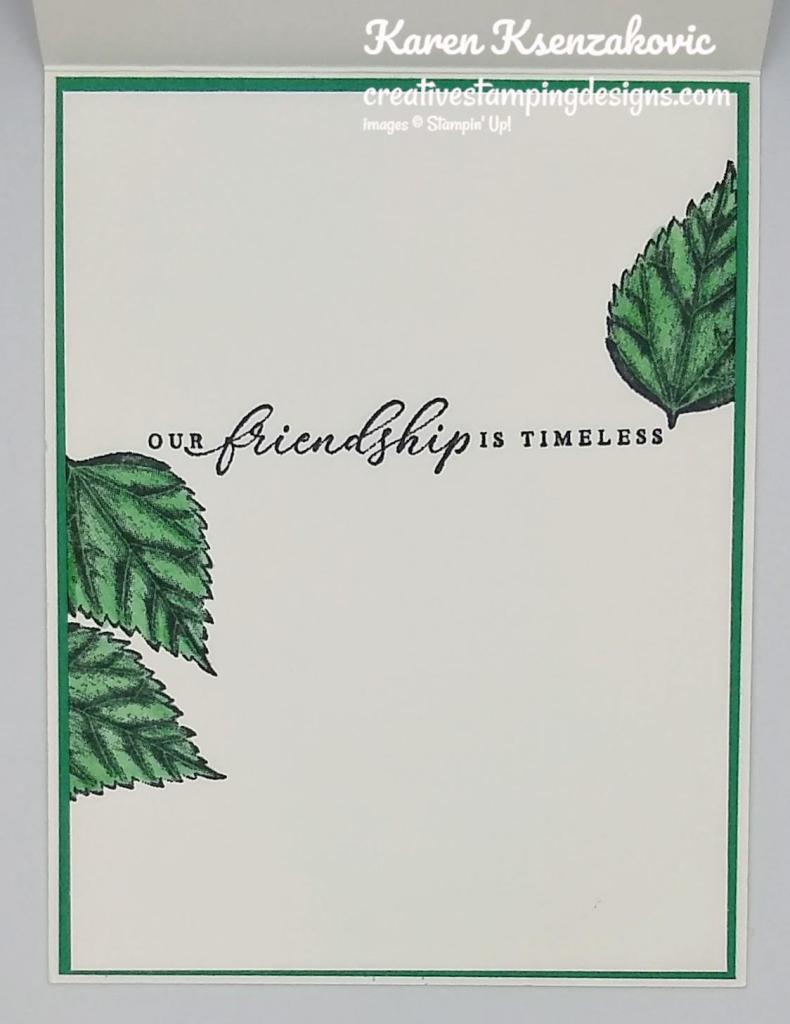
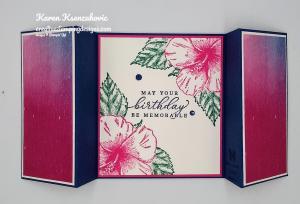
On the inside I stamped the sentiment from the Timeless Tropical stamp set in Tuxedo Black Ink in the center of a Basic White panel. I stamped the leaf image from the Timeless Tropical stamp set on the sides of the panel and colored them in using my Just Jade Stampin’ Blends Markers. I adhered the Basic White panel to a Just Jade mat using Stampin’ Seal and then to the inside of the Basic White card base using Stampin’ Seal.

To finish my card I decorated a Basic White Medium Envelope. I stamped the hibiscus and the leaves from the Timeless Tropical stamp set in Tuxedo Black Ink on the envelope front. I colored the images in using my Just Jade and Polished Pink Stampn’ Blends Markers. I adhered a panel of the Just Jade 2020-2022 6 X 6 In-Color Designer Series Paper to the envelope flap.

Thank you for stopping by my blog today. I hope you liked my card and will give it a try. Happy Stamping!!

*********************************************************************************************************

If you need any stamping supplies, I’d love to be your Demonstrator. Just click HERE to go directly to my online store or drop me an email if you have any questions. 

MY CURRENT HOST CODE IS: 9R4BQD64

Use this host code when you order $50 or greater and receive a free gift from me! If your order is over $150, please do not use this code, but you’ll still get the free gift. The free gift is your choice of any 1 item valued up to $10.00 from the 2020-2021 Annual Catalog or the January-June 2021 Mini Catalog!   For any orders $50 or more I will also send you my monthly class tutorials.  Click HERE or go to my Customer Rewards for more details and to see what this months tutorials are.

 Click HERE to shop the clearance rack.

Please remember to use my current Host Code and make sure that you can see my name on the final checkout page listed as your Demonstrator when you order so that you know that you’re ordering with me and you’ll get my rewards! 

Happy Stamping, Karen!

*********************************************************************************************************

Stampin’ Up! has updating the Clearance Rack with some new goodies over night!  Head over there quickly to get your hands on some great deals.  But hurry!!  Clearance Rack deals are only while supplies last!

CLICK HERE to head over to my online store to shop those great deals, but it must be after midnight MOUNTAIN TIME tonight!!  Have fun shopping!

*********************************************************************************************************

Batter Up!

Subscribe April 11 – May 10

Whether you’re crafting for a father, grandfather, nephew, or brother, we’ve got all your bases covered with the Batter Up! Paper Pumpkin Kit! This month’s kit is the perfect pick for making masculine masterpieces.

Then again, we know that grass-stained pants and sliding into home aren’t just for the boys—this month’s kit is a triple threat! Designed with men, sport-lovin’ ladies, and baseball fanatics in mind, anyone would bounce from their spot in the bleachers if they received a classic card from the Batter Up! kit. After all, this month’s kit was made for celebrating the all-stars, MVPs, and the greats—no matter what team they play on!

Step up to the plate, take a swing, and knock it out of the park! With the Batter Up! Paper Pumpkin Kit, it’s your turn to go to bat for all the people who’ve gone to bat for you. This month’s timeless kit with a “throwback” theme contains enough grand slam supplies to create nine cards—and coordinating envelopes—featuring classic colors, pinwheel and pinstripe patterns, and vintage-washed paper pieces. There’s no “batter” way to root, root, root for your home team and honor the all-stars in your life!

A beloved baseball-themed kit would be incomplete without the sport’s signature, sticky snack—the official bubble gum of the MLB! A favorite in the field, the Batter Up! Paper Pumpkin Kit contains a couple sticks of the chewy staple; chew while you craft, slide a piece into a card, or save it for later.

Send a seventh-inning stretch in a classic card with all-star stripes, a nostalgic nod, and a stamp set fit for an MVP! But, before you give it all you’ve got, give this month’s promotional video a watch. See what the Batter Up! kit is all about! Play ball!

Details

  • Kit contains enough supplies to create 9 cards—3 each of 3 designs—and coordinating envelopes. The all-inclusive kit includes printed card bases, die-cut paper pieces, embellishments, adhesive, and more!
    • Card size: 4-1/4″ x 5-1/2″ (10.8 x 14 cm)
    • Envelope size: 4-1/2″ x 5-3/4″ (11.4 x 14.6 cm)
  • Coordinating colors: Basic White, Bumblebee, Night of Navy, Pacific Point, Real Red, Smoky Slate, Soft Suede
  • Comes with the official bubble gum of the MLB—a ballpark favorite! Chew while you craft, slide a piece into a card, or save it for later.

Subscribe to the May 2021 Paper Pumpkin Kit between 11 April and 10 May at paperpumpkin.com!

Note: Supplies may be limited toward the end of the subscription period.

*********************************************************************************************************

Card stock cuts for this project:

  • Basic White Cardstock 4 1/4″ X 11? (card base scored and folded at 5 1/2″), 2 – 4″ X 5 1/4′ (card front and inner liner), 2 1/4″ X 4″ (artwork)
  • Just Jade Cardstock 2 3/8″ X 4″ (artwork mat), 4 1/8″ X 5 3/8″ (inner liner mat)
  • 2020-2022 In-Color Designer Series Paper 2 1/2″ X 6″ (envelope flap)

*********************************************************************************************************

Product List

Stampin’ Up! Timeless Tropical Hello for Fun Fold Friday

Good Friday morning my stamping friends and welcome to my Fun Fold Friday.  How was everyone’s week?  Does anyone have plans for the weekend?  I had a nice surprise yesterday at work.  I was saying good bye and said that I’d see everyone Saturday, turns out I have off, YAY!!!  I do have to work Sunday though.  I’m on the road early this morning, we left the house at 7am to take my little nephews to Crystal Cave in Kutztown, PA.  I’m very excited about bringing them.  I’ve heard that it’s only around 56 degrees in the cave, so I’m dressing for outside but bringing a sweatshirt for inside.  I can’t wait to see all the crystals inside the cave.

For today I have an easy Fun Fold for you and my card was inspired by some flowers in my garden again. After everything that happen with my dog the other day, I woke up to these beauties.

Here is my card for today.

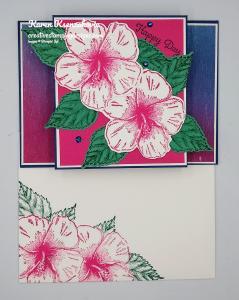
I started by scoring and folding a Night of Navy card base at 2 1/4″, 3 5/8″, 7 3/8″ & 8 3/4″.  Your card base will look like photo below.

I adhered 2 panels of the Artistry Blooms Designer Series Paper to Whisper White mats using Stampin’ Seal.  I adhered the matted DSP to the side panels of the Night of Navy card base using Multipurpose Liquid Glue.  On a panel of Whisper White cardstock I stamped the hibiscus image from the Stampin’ Up! Timeless Tropical Cling Stamp Set in Melon Mambo Ink twice and cut the images out using my In The Tropics Dies.  On a panel of Just Jade cardstock I stamped the leaf image from the Timeless Tropics stamp set in Shaded Spruce Ink 6 times and cut the images out using my In The Tropics Dies.

I stamped the sentiment from the Stampin’ Up! Itty Bitty Birthdays Cling Stamp Set in Night of Navy Ink on a panel of Melon Mambo cardstock.  I adhered the Melon Mambo cardstock to a Whisper White mat using Stampin’ Seal.  I adhered the die cut hibiscus using Stampin’ Dimensionals to the card front.  I adhered the die cut leaves under the hibiscus images using Glue Dots.  I adhered the card front to the Night of Navy card base using Multipurpose Liquid Glue.  I added a few Night of Navy Holiday Rhinestone Basic Jewels to the card front.

On the back (inside) of the card I stamped the sentiment from the Timeless Tropical stamp set in Night of Navy Ink in the center of a Whisper White panel.  I stamped the hibiscus image from the Timeless Tropical stamp set in Melon Mambo Ink on the 2 corners of the panel.  I stamped the leaf image from the Timeless Tropical stamp set around the hibiscus.  I adhered the Whisper White panel to a Melon Mambo mat using Stampin’ Seal and then to the back of the Night of Navy card base using Multipurpose Liquid Glue.  I adhered 2 panels of the Artistry Blooms DSP to Whisper White mats using Stampin’ Seal and then to the 2 side panels of the Night of Navy card base using Multipurpose Liquid Glue.  I added a couple Night of Navy Holiday Rhinestone Basic Jewels to the sentiment panel.

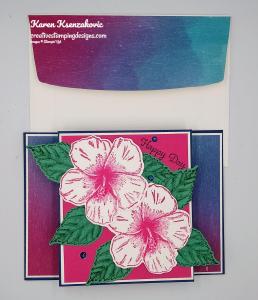
To finish my card I decorated a Medium Whisper White Envelope.  I stamped the Hibiscus image from the Timeless Tropical stamp set in Melon Mambo Ink on the front of the envelope.  I stamped the leaf image from the Timeless Tropical stamp set in Shaded Spruce Ink around the hibiscus.  I adhered a panel of Artistry Blooms DSP to the envelope flap.

Thank you for stopping by my blog today.  I hope you liked my card and will give it a try. Happy Stamping!!

****************************************************************************************************

If you need any stamping supplies, I’d love to be your Demonstrator. Just click HERE to go directly to my online store or drop me an email if you have any questions. 

MY CURRENT HOST CODE IS: FXTA29WD

Use this host code when you order $50 or greater and receive a free gift from me! If your order is over $150, please do not use this code, but you’ll still get the free gift. The free gift is your choice of any 1 item valued up to $10.00 in the 2020-2021 Annual Catalog!   For any orders $50 or more I will also send you my monthly class tutorials.  Click HERE or go to my Customer Rewards for more details and to see what this months tutorials are.

 Click HERE to shop the clearance rack.

Happy Stamping, Karen!

****************************************************************************************************

LAST WEEK FOR BONUS DAYS!! DON’T MISS OUT!!

Bonus Days from Stampin’ Up! are back!!  For every $50 merchandise that you purchase between July 1 and August 3, you’ll earn a $5 coupon that can be redeemed between August 4 and 31!  

Here are the details:

  • An email address is required to participate; Bonus Days coupon codes can be delivered only via email.
  • If you earn multiple codes from a single order, you will receive one email with multiple codes.  If you earn multiple codes from multiple orders, they will receive separate emails for each code earned.
  • All order types qualify for this promotion.  Fax and email orders still require an email address.
  • Orders that are started before the promotion begins will not go toward earning coupon codes.
  • There is no limit to the number of coupon codes you can earn per order or throughout the duration of the Bonus Days earning period!!
  • Deadline for coupon earning:  August 3, 2020 at 11:50 PM (MT)

Click hereto head over to my online store to start earning those coupons now!  Don’t forget to use my current Host Code so that you will get your free gift from me, any 1 item in the catalog valued up to $10 with a qualifying order.  Detail about the free gift are here.  Let me know if you have any questions.

Get your shopping lists ready and start earning those coupons!

****************************************************************************************************

WORLD’S GREATEST BY PAPER PUMPKIN

SUBSCRIBE JULY11 – AUGUST 10

With Paper Pumpkin, you are provided with everything you need to explore your creativity and discover new ways to craft. As we navigate a “new normal” in today’s world, there’s plenty of opportunity to papercraft! And, more importantly, there’s no better time than now to create something that’ll show the essential people in your life just how awesome you think they are.

Lately, it’s become especially clear who the everyday heroes are—they’ve always surrounded us! Teachers, doctors, hairdressers, nurses, delivery workers, cashiers, and even our friends, kids, and family members go above and beyond to enrich our lives. These people are truly the world’s greatest at what they do!

Celebrate and appreciate the everyday heroes in your life with the August Paper Pumpkin Kit. The cards included in this kit are specifically designed for celebrating life’s champions!

  • The intended use of this kit is to celebrate and appreciate life’s champions and everyday heroes.
  • Especially during this time, this is something anyone can do to make a difference. The August kit makes it easy!
  • Distinktive stamps are photo-realistic stamps that create an impressive detailed image with a single stamp.
  • The Distinktive stamps included in August’s kit are an especially excellent feature for new stampers still exploring their creativity!
  • Masculine card designs can be difficult to find, this kit has a real masculine feel.
  • While the elements of the August kit can be used to show appreciation for anyone, the masculine card designs are perfect for the men in your life!

About the August Kit:

  • Kit contains enough supplies to create nine cards and coordinating envelopes.
  • Card size: 4-1/4” x 5-1/2” (10.8 x 14 cm)
  • Envelope size: 4-1/2” x 5-3/4” (11.4 x 14.6 cm)
  • Coordinating Colors: Bumblebee, gold, Mint Macaron, Pacific Point, Soft Suede, white
  • The kit’s stamp set includes Distinktive stamps
  • Subscribe to the August 2020 Paper Pumpkin Kit from 11 July to 10 August at paperpumpkin.com!

Note: Supplies may be limited toward the end of the subscription period.

****************************************************************************************************

I’m cleaning my shelves and drawers out to make room for lots of new goodie.  I have my list right HERE and I’m trying to keep it up to date.   Check it out and let me know if there is anything you’d like to get.  If you are looking for something and don’t see it on the list, drop me a line and I will look through my stash to see if I missed it.  I have lots of older DSP too that I don’t have listed if there is any that you are looking for.

****************************************************************************************************

Card stock cuts for this project:

  • Just Jade Cardstock 2 1/2″ X 6″ (die cut leaves)
  • Melon Mambo Cardstock 4″ X 3 1/2″ (card front), 4 1/8″ X 3 5/8″ (inner liner mat)
  • Night of Navy Cardstock 4 1/4″ X 11″ (card base scored and folded at 2 1/4″, 3 5/8″, 7 3/8″ & 8 3/4″)
  • Whisper White Cardstock 4 – 2 1/8″ X 4 1/8″ (side panel dsp mats), 4 1/8″ X 3 1/2″ (card front mat), 3 1/2″ X 4″ (inner liner), 4″ X 5 1/2″ (flowers)
  • Artistry Blooms Designer Series Paper 4 – 2″ X 4″ (side panels), 2 1/4″ X 6″ (piece for envelope flap)

****************************************************************************************************

Product List

Stampin’ Up! Tropical Thank You for Happy Inkin’ Thursday Blog Hop

Good Thursday morning my stamping friends and welcome to the Happy Inkin’ Thursday Blog Hop. How is everyone doing today?  If you are hopping over from Akiko, thank you for stopping by my blog. Be sure to take a moment to hop around to see everyone’s beautiful projects today. This week we had a Color Challenge.  Here are the colors we had to work with.

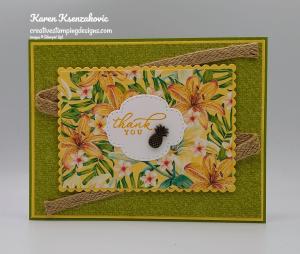
Here’s what I came up with for these colors.

I started by adhering a panel of the Tropical Oasis Designer Series Paper to a So Saffron mat using Snail.  I adhered the matted DSP to an Old Olive card base using Multipurpose Liquid Glue.

I cut a panel of So Saffron cardstock using the larges scalloped rectangle from the Stitched So Sweetly Dies.  I adhered a panel of Tropical Oasis DSP to the scalloped rectangle using Snail.  I adhered a piece of the Braided Burlap Trim to the card front using Glue Dots and adhered the matted DSP to the card front, on top of the Burlap Trim, using Stampin’ Dimensionals.

On a small panel of Whisper White cardstock I stamped the sentiment from the Stampin’ Up! Timeless Tropical Cling Stamp Set in Mango Melody  Ink.  I cut the image out using the Stitched So Sweetly Dies and adhered it to the card front using Multipurpose Liquid Glue.  I added a Tropical Oasis Trinket to the sentiment die.

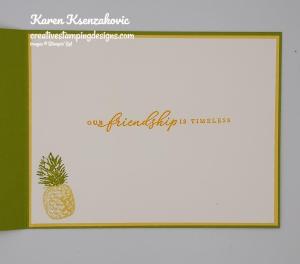
On the inside I stamped the sentiment from the Timeless Tropical stamp set in Mango Melody Ink in the center of a Whisper White panel.  I stamped the pineapple image from the Timeless Tropical stamp set on the bottom of the panel.  To get the 2-tone color, I stamped just the bottom portion of the pineapple in my So Saffron Ink and colored the top leaves using my Pear Pizzazz Stampin’ Write Marker.  I adhered the Whisper White panel to a So Saffron mat using Snail and then to the inside of the Old Olive card base using Multipurpose Liquid Glue.

To finish my card I decorated a Medium Whisper White Envelope.  I stamped the pineapple image from the Timeless Tropical stamp set on the front of the envelope getting the 2-tone by stamping the bottom in my So Saffron Ink and coloring the top using my Pear Pizzazz Stampin’ Write Marker.  I adhered a panel of Tropical Oasis DSP to the envelope flap.

Thank you for visiting my blog today. I hope you liked my card and will give it a try. Now that you’ve seen my card, take a minute to hop through all our projects today. If you click on the Next Blog button, you’ll go to Amy’s page. Or you can just click on the names below to go directly to all the blogs! Happy Hopping!!

Karen Ksenzakovic: You Are Here

****************************************************************************************************

If you need any stamping supplies, I’d love to be your Demonstrator. Just click HERE to go directly to my online store or drop me an email if you have any questions. 

MY CURRENT HOST CODE IS: KBMV24AJ

Use this host code when you order $50 or greater and receive a free gift from me! If your order is over $150, please do not use this code, but you’ll still get the free gift. The free gift is your choice of any item valued up to $10.00 in either the 2019-2020 Annual Catalog or the 2020 January-June Mini Catalog!   For any orders $50 or more I will also send you my monthly class tutorials.  Click HERE or go to my Customer Rewards for more details and to see what this months tutorials are.

 Click HERE to shop the clearance rack.

Happy Stamping, Karen!

****************************************************************************************************

2020-2021 Annual Catalog Designer Series Paper Share.

Deadline to sign up for my share is Tuesday, June 2 at 1:00 PM ET

Do you want all the great new Designer Series Paper from the 2020-2021 Annual Catalog, but can’t afford everything? I’m offering a Designer Series Paper share from the Stampin’ Up! 2020-2021 Annual Catalog and I’d love to have you join!!  I’m placing my share order early on June 3 and I’m going to use the expedited shipping option so I should be able to have the shares cut, bundled and back out to you during the week of June 8.  Click here for more information.

****************************************************************************************************

JUNE 2020 PAPER PUMPKIN BOX OF SUNSHINE

Subscribe May 11 – June 10

This exclusive Sara-inspired Paper Pumpkin kit is here to help you #sharesunshine. It includes supplies for eight handmade cards and is specially designed to help you create a box full of cheer. Once you’ve made all the cards, use any leftover pieces to decorate the box. Fill it with yellow goodies, add the included adhesive label, address it to someone special, and brighten their life with a little sunshine!

It’s a one-of-a-kind kit, inspired by Sara and her #sharesunshine passion.  It provides a unique crafting experience with the added Box of Sunshine element.

  • Kit contains supplies for 8 cards and envelopes (2 cards of 4 designs)
    • Card size: 4-1/4″ x 5-1/2″ (10.8 x 14 cm)
    • Envelope size: 4-1/2″ x 5-3/4″ (11.4 x 14.6 cm)

Coordinating Colors: Basic Black, Bumblebee, Crushed Curry, Poppy Parade, Shaded Spruce, White, and Gold

This kit includes extra pieces and stickers (including a sticker label) to help you create cards AND a Box of Sunshine filled with treats and goodies to send to a friend. (Treats not included.)

  • Subscribe for the June kit from 11 May–10 June at paperpumpkin.com.
  • Supplies may be limited toward the end of each subscription period.

****************************************************************************************************

2019-2020 Annual Catalog and Mini Catalog Retiring List

Let me know if you have any questions about the retiring lists!  You can also download copies of the full retiring lists in PDF Form here:

  • Click here to get a copy of the full retiring list from the 2019-20 Annual Catalog.  The font is super tiny, so you’ll need to zoom out to read it!
  • Click here to get a copy of the full retiring list from the January-June 2020 Mini Catalog.  The font is super tiny, so you’ll need to zoom out to read it!

Have fun shopping!  Don’t forget, everything except for the stamp sets are only available while supplies last!!

One quick FYI, the Stampin’ Blends are NOT retiring, they’re being repackaged and sold as Combo Packs starting with the new catalog. So don’t panic! They’re still going to be available.

****************************************************************************************************

The Ornate Garden Suite available NOW.  Click HERE or on the image below to see a printable PDF of all the fabulous items available in the suite.

****************************************************************************************************

MAKING A DIFFERENCE: COVID-19 PRODUCT GIVEBACK

Stampin’ Up! is committed to making a difference in our global communities and caring about people first. As part of our Making a Difference program we’re offering a product giveback opportunity to support organizations that are helping COVID-19 frontline responders and communities vulnerable to the pandemic.

You can purchase the Share Sunshine PDF Download and we will donate 100% of the proceeds to COVID-19 efforts.

The Share Sunshine PDF Download is a digital stamp set that’s packed with both lighthearted and heartfelt sentiments and imagery relevant to the unique COVID-19 and social distancing situation we’re currently experiencing–including many ideas that came from you!  You can use the download in your cardmaking and papercrafting projects. Simply print the imagery on cardstock and cut it out using our Paper Trimmer, punches, or dies. Since we are physically distanced from each other, now is a perfect time to share sunshine with our friends and family by sending cards!

  • Product: Share Sunshine PDF Download. Buy it here!
  • Price: $12.00 USD
  • Dates: April 28 – June 2, 2020 or later; if the offer period extends beyond June 2, we’ll let you know

****************************************************************************************************

Card stock cuts for this project:

  • Old Olive Cardstock 4 1/4″ X 11″ (card base scored and folded at 5 1/2″)
  • So Saffron Cardstock 2 – 4 1/8″ X 5 3/8″ (card front and inner liner mats), 4 1/2″ X 3 1/2″ (artwork mat)
  • Whisper White Cardstock 2 1/4″ x 1 3/4″ (sentiment), 4″ X 5 1/4″ (inner liner)
  • Tropical Oasis Designer Series Paper 4″ X 5 1/4″ (card front), 2 3/4″ X 3 15/16″ (artwork), 2 1/4″ X 6″ (piece for envelope flap)

****************************************************************************************************

Product List

Stampin’ Up! Tropical Birthday

Good Tuesday morning my fellow stampers.  How was everyone’s Memorial Day?  I hope you all enjoyed your day.  It was a beautiful day here. We had a small picnic and enjoyed sitting around just talking and being with people.  My husband was busy with my nieces boys playing bean bag toss and laser tag.  Now it’s back to ‘normal’.  Today is my daughters actual birthday, so I’m hoping to do something with her even if it’s just watching a movie or going for a nice walk.

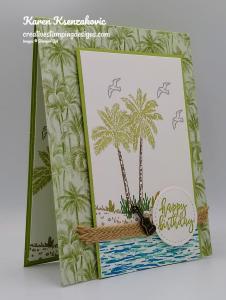
For today I thought I’d make a tropical card for you using some retiring items and items that are carrying over.  I did use multiple stamp sets for my card. Here’s my card for today.

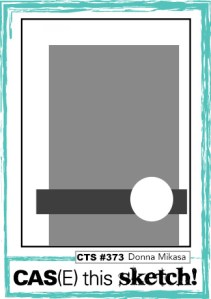
My design is from CAS(E) This Sketch Challenge #373.  Here is their sketch.

I joined in with Seize The Birthday Totally Tropical Challenge #191.

I started by adhering a panel of Tropical Oasis Designer Series Paper to a Pear Pizzazz card base using Snail. 

On a panel of Whisper White cardstock I stamped the shoreline image from the Stampin’ Up! By The Dock Cling Stamp Set in Crumb Cake Ink.  I stamped the palm tree image from the Stampin’ Up! Timeless Tropical Cling Stamp Set, which I colored using my Pear Pizzazz and Soft Suede Stampin’ Write Markers, on the shoreline.  I stamped the bird image from the By The Dock stamp set in Smoky Slate Ink above the palm trees 3 times.  I stamped the water image from the Stampin’ Up! High Tide Photopolymer Stamp Set first in Coastal Cabana then in Pacific Point Inks below the shoreline.  I stamped the small grass image from the High Tide stamp set in Garden Green Ink around the base of the palm trees.  I adhered the artwork to a Pear Pizzazz mat using Snail and then to the card front using Stampin’ Dimensionals.  I adhered a piece of the Braided Burlap Trim across the artwork using Glue Dots.

On a small panel of Whisper White cardstock I stamped the sentiment from the By The Dock stamp set in Pear Pizzazz Ink and cut the image out using the smallest circle from the Stitched Shapes Dies.  I adhered the sentiment to the card front, over the Burlap Trim, using Stampin’ Dimensionals.  I added a Ukulele Tropical Oasis Trinket to the card front using a Glue Dot.

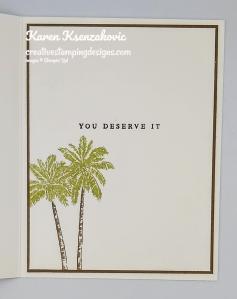
On the inside I stamped the sentiment from the Timeless Tropical stamp set in Pear Pizzazz Ink in top center of a Whisper White panel.  I stamped the shoreline image from By The Dock stamp set in Crumb Cake Ink on the bottom of the panel.  I stamped the palm tree image from the Timeless Tropical stamp set, which I colored using my Pear Pizzazz and Soft Suede Stampin’ Write Markers, on the shoreline.  I stamped the bird image from the By The Dock stamp set in Smoky Slate Ink above the palm tree.  I adhered the Whisper White panel to a Pear Pizzazz mat using Snail and then to the inside of the Pear Pizzazz card base using Multipurpose Liquid Glue.

To finish my card I decorated a Medium Whisper White Envelope.  I stamped the shoreline image from the By The Dock stamp set on the bottom front of the envelope in Crumb Cake Ink.  I stamped the palm tree image from the Timeless Tropical stamp set, which I colored using my Pear Pizzazz and Soft Suede Stampin’ Write Markers, on the shoreline.  I stamped the small grass image from the High Tide stamp set in Garden Green Ink around the base of the palm trees.  I adhered a panel of Tropical Oasis DSP to the envelope flap.

Thank you for stopping by my blog today.  I hope you liked my card and will give it a try. Happy Stamping!!

****************************************************************************************************

If you need any stamping supplies, I’d love to be your Demonstrator. Just click HERE to go directly to my online store or drop me an email if you have any questions. 

MY CURRENT HOST CODE IS: KBMV24AJ

Use this host code when you order $50 or greater and receive a free gift from me! If your order is over $150, please do not use this code, but you’ll still get the free gift. The free gift is your choice of any item valued up to $10.00 in either the 2019-2020 Annual Catalog or the 2020 January-June Mini Catalog!   For any orders $50 or more I will also send you my monthly class tutorials.  Click HERE or go to my Customer Rewards for more details and to see what this months tutorials are.

 Click HERE to shop the clearance rack.

Happy Stamping, Karen!

****************************************************************************************************

2020-2021 Annual Catalog Designer Series Paper Share.

Deadline to sign up for my share is Tuesday, June 2 at 1:00 PM ET

Do you want all the great new Designer Series Paper from the 2020-2021 Annual Catalog, but can’t afford everything? I’m offering a Designer Series Paper share from the Stampin’ Up! 2020-2021 Annual Catalog and I’d love to have you join!!  I’m placing my share order early on June 3 and I’m going to use the expedited shipping option so I should be able to have the shares cut, bundled and back out to you during the week of June 8.  Click here for more information.

****************************************************************************************************

JUNE 2020 PAPER PUMPKIN BOX OF SUNSHINE

Subscribe May 11 – June 10

This exclusive Sara-inspired Paper Pumpkin kit is here to help you #sharesunshine. It includes supplies for eight handmade cards and is specially designed to help you create a box full of cheer. Once you’ve made all the cards, use any leftover pieces to decorate the box. Fill it with yellow goodies, add the included adhesive label, address it to someone special, and brighten their life with a little sunshine!

It’s a one-of-a-kind kit, inspired by Sara and her #sharesunshine passion.  It provides a unique crafting experience with the added Box of Sunshine element.

  • Kit contains supplies for 8 cards and envelopes (2 cards of 4 designs)
    • Card size: 4-1/4″ x 5-1/2″ (10.8 x 14 cm)
    • Envelope size: 4-1/2″ x 5-3/4″ (11.4 x 14.6 cm)

Coordinating Colors: Basic Black, Bumblebee, Crushed Curry, Poppy Parade, Shaded Spruce, White, and Gold

This kit includes extra pieces and stickers (including a sticker label) to help you create cards AND a Box of Sunshine filled with treats and goodies to send to a friend. (Treats not included.)

  • Subscribe for the June kit from 11 May–10 June at paperpumpkin.com.
  • Supplies may be limited toward the end of each subscription period.

****************************************************************************************************

2019-2020 Annual Catalog and Mini Catalog Retiring List

Let me know if you have any questions about the retiring lists!  You can also download copies of the full retiring lists in PDF Form here:

  • Click here to get a copy of the full retiring list from the 2019-20 Annual Catalog.  The font is super tiny, so you’ll need to zoom out to read it!
  • Click here to get a copy of the full retiring list from the January-June 2020 Mini Catalog.  The font is super tiny, so you’ll need to zoom out to read it!

Have fun shopping!  Don’t forget, everything except for the stamp sets are only available while supplies last!!

One quick FYI, the Stampin’ Blends are NOT retiring, they’re being repackaged and sold as Combo Packs starting with the new catalog. So don’t panic! They’re still going to be available.

****************************************************************************************************

The Ornate Garden Suite available NOW.  Click HERE or on the image below to see a printable PDF of all the fabulous items available in the suite.

****************************************************************************************************

MAKING A DIFFERENCE: COVID-19 PRODUCT GIVEBACK

Stampin’ Up! is committed to making a difference in our global communities and caring about people first. As part of our Making a Difference program we’re offering a product giveback opportunity to support organizations that are helping COVID-19 frontline responders and communities vulnerable to the pandemic.

You can purchase the Share Sunshine PDF Download and we will donate 100% of the proceeds to COVID-19 efforts.

The Share Sunshine PDF Download is a digital stamp set that’s packed with both lighthearted and heartfelt sentiments and imagery relevant to the unique COVID-19 and social distancing situation we’re currently experiencing–including many ideas that came from you!  You can use the download in your cardmaking and papercrafting projects. Simply print the imagery on cardstock and cut it out using our Paper Trimmer, punches, or dies. Since we are physically distanced from each other, now is a perfect time to share sunshine with our friends and family by sending cards!

  • Product: Share Sunshine PDF Download. Buy it here!
  • Price: $12.00 USD
  • Dates: April 28 – June 2, 2020 or later; if the offer period extends beyond June 2, we’ll let you know

****************************************************************************************************

Card stock cuts for this project:

  • Pear Pizzazz Cardstock 4 1/4′ X 11″ (card base scored and folded at 5 1/2″), 3′ X 4 15/16″ (artwork mat), 4 1/8″ X 5 3/8″ (inner liner mat)
  • Whisper White Cardstock 2 7/8″ x 4 7/8″ (artwork), 2″ X 2″ (sentiment), 4″ x 5 1/4″ (inner liner)
  • Tropical Oasis Designer Series Paper 4 1/4″ x 5 1/2″ (card front), 2 1/4″ X 6″ (piece for envelope flap)

****************************************************************************************************

Product List

Stampin’ Up! Timeless Tropical Chic

Good Monday morning my stamping friends and for all my Star Wars friends out there, May the 4th Be With You!   How was everyone’s weekend?  We had gorgeous weather here.  I believe it hit 80 yesterday, but the high is only in the 60’s today.  I was able to get some yard work done along with some more spring cleaning and a little crafting.

For today’s card I combine 2 tropical stamp sets, one that is retiring and one that’s carrying over.  Here’s my card for today.

My colors were inspired by TGIF Color Challenge #262.  Here are their colors.

My design is from Hand Stamped Sentiments Sketch Challenge #338.  Here is their sketch.

I started by adhering a panel of Tropical Oasis Designer Series Paper to a Calypso Coral card base using Snail.  I embossed a Whisper White card front using the Coastal Weave 3D Embossing Folder and adhered it to the card base using Multipurpose Liquid Glue.

On a small panel of Whisper White cardstock I stamped the hibiscus image from the Stampin’ Up! Timeless Tropical Cling Stamp Set in Tuxedo Black Memento Ink.  I colored the image in using my Calypso Coral and Daffodil Delight Stampin’ Blends Markers.  Using my In The Tropics Dies, I cut the image out. This stamp set and dies will be carrying over to the 2020-2021 Annual Catalog, but the bundle price will not.  If this is a set that you like, grab it now while you can still get 10% off.   I stamped the leaf image from the Stampin’ Up! Tropical Chic Cling Stamp Set in Coastal Cabana Ink on a panel of Coastal Cabana cardstock 3 times.  I cut the leaves out using my Tropical Dies.  Using Stampin’ Dimensionals, I adhered the flower to the card front to the right side of the embossed panel.  I adhered the leaves under the flower using Glue Dots.

On a thin strip of Daffodil Delight cardstock I stamped the sentiment from the Timeless Tropical stamp set in Tuxedo Black Memento Ink.  I adhered the sentiment strip to the card front using Glue Dots.  I added a few Daffodil Delight Gingham Gala Adhesive-Backed Sequins to the card front.

On the inside I stamped the sentiment from the Tropical Chic stamp set in Tuxedo Black Memento Ink in the center of a Whisper White panel.  I stamped the leaf image from the Tropical Chic stamp set in Coastal Cabana Ink around the top of the panel, stamping full strength and stamping off.  I adhered the Whisper White panel to a Calypso Coral mat using Snail and then to the inside of the Calypso Coral card base using Multipurpose Liquid Glue.

To finish my card I decorated a Medium Whisper White Envelope.  I stamped the leaf image from Tropical Chic in Coastal Cabana Ink on the envelope front.  I adhered a panel of Tropical Oasis Designer Series Paper to the envelope flap.

Thank you for stopping by my blog today.  I hope you liked my card and will give it a try. Happy Stamping!!

****************************************************************************************************

If you need any stamping supplies, I’d love to be your Demonstrator. Just click HERE to go directly to my online store or drop me an email if you have any questions. 

MY CURRENT HOST CODE IS: KBMV24AJ

Use this host code when you order $50 or greater and receive a free gift from me! If your order is over $150, please do not use this code, but you’ll still get the free gift. The free gift is your choice of any item valued up to $10.00 in either the 2019-2020 Annual Catalog or the 2020 January-June Mini Catalog!   For any orders $50 or more I will also send you my monthly class tutorials.  Click HERE or go to my Customer Rewards for more details and to see what this months tutorials are.

The Clearance Rack has been updated.  Click HERE to shop the clearance rack.

Happy Stamping, Karen!

****************************************************************************************************

THINGS ARE GOING FAST.  IF YOU ARE INTERESTED IN ANY OF THE RETIRING ITEMS, DON’T WALK, RUN OVER TO GRAB THEM WHILE YOU STILL CAN.

2019-2020 Annual Catalog and Mini Catalog Retiring List

Let me know if you have any questions about the retiring lists!  You can also download copies of the full retiring lists in PDF Form here:

  • Click here to get a copy of the full retiring list from the 2019-20 Annual Catalog.  The font is super tiny, so you’ll need to zoom out to read it!
  • Click here to get a copy of the full retiring list from the January-June 2020 Mini Catalog.  The font is super tiny, so you’ll need to zoom out to read it!

****************************************************************************************************

The Ornate Garden Suite available NOW.  Click HERE or on the image below to see a printable PDF of all the fabulous items available in the suite.

****************************************************************************************************

MAKING A DIFFERENCE: COVID-19 PRODUCT GIVEBACK

Stampin’ Up! is committed to making a difference in our global communities and caring about people first. As part of our Making a Difference program we’re offering a product giveback opportunity to support organizations that are helping COVID-19 frontline responders and communities vulnerable to the pandemic.

You can purchase the Share Sunshine PDF Download and we will donate 100% of the proceeds to COVID-19 efforts.

The Share Sunshine PDF Download is a digital stamp set that’s packed with both lighthearted and heartfelt sentiments and imagery relevant to the unique COVID-19 and social distancing situation we’re currently experiencing–including many ideas that came from you!  You can use the download in your cardmaking and papercrafting projects. Simply print the imagery on cardstock and cut it out using our Paper Trimmer, punches, or dies. Since we are physically distanced from each other, now is a perfect time to share sunshine with our friends and family by sending cards!

  • Product: Share Sunshine PDF Download. Buy it here!
  • Price: $12.00 USD
  • Dates: April 28 – June 2, 2020 or later; if the offer period extends beyond June 2, we’ll let you know

****************************************************************************************************

Card stock cuts for this project:

  • Calypso Coral Cardstock 4 1/4″ X 11″ (card base scored and folded at 5 1/2″), 4″ X 5 1/4″ (inner liner mat)
  • Coastal Cabana Cardstock 1 3/4″ X 7 1/4″ (leaves)
  • Daffodil Delight Cardstock 1/2″ X 2 3/4″ (sentiment)
  • Whisper White Cardstock 3 1/4″ X 4 1/2″ (card front), 2 3/4″ X 2 3/4″ (flower), 3 3/4″ X 5″ (inner liner)
  • Tropical Oasis Designer Series Paper 4 1/4″ X 5 1/2″ (card front panel), 2 1/4″ X 6″ (piece for envelope flap)

****************************************************************************************************

Product List

Stampin’ Up! Tropical Hello

Good Tuesday morning my fellow stampers.  How has everyone’s week started off?  I’ve got a busy week ahead.  Today is my only day off 😦  Normally I only work on Monday’s and Wednesday’s, but it’s the end of the month and the 1st of May on Friday, so I have to work.  I don’t know about you, but April was a big blur to me.  When I was sitting at my desk yesterday I looked at the calendar and didn’t even realize that the month was just about over.  All my days are just blending together lately.

Today I used some more of the retiring items for my card.  I want to use them as much as possible because once they are gone, I won’t use them.  Here’s my card for today.

My colors were inspired by Fab Friday Color Challenge # 188.  Here are their colors.

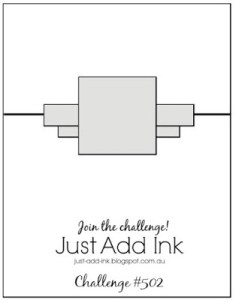
My sketch is from Just Add Ink Challenge #502.  Here is their sketch.

I joined in with Always Fun Challenge #160 also.  There theme challenge is to use ‘Embossing Folders’.

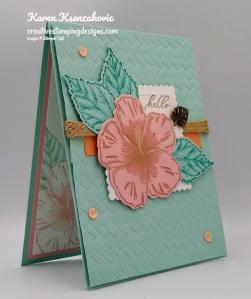
I started by embossing a Pool Party card front using the Coastal Weave 3D Embossing Folder.  I embossed the top 1/3 then turned the cardstock around leaving about 3/4″ and embossed the bottom section.   I wrapped a piece of the 5/16″ Braided Burlap Trim around the un-embossed section and secured it on the back of the panel using Snail.  I adhered a strip of Grapefruit Grove cardstock just under the trim using Snail.

On a panel of Whisper White cardstock I stamped the sentiment from the Stampin’ Up! Timeless Tropical Cling Stamp Set in Crumb Cake Ink.  I cut the panel using the 2nd largest square from the Stitched Shapes Dies, making sure the sentiment was in the top right corner.  I cut a scalloped square from a panel of Whisper White cardstock using my Layering Squares Dies.  I adhered the stitched square to the scalloped square using Snail.

On a panel of Blushing Bride cardstock I stamped the hibiscus flower from the Timeless Tropical stamp set in Crumb Cake Ink.  I highlighted the center of the flower using my Blushing Bride Stampin’ Write Marker and added some Clear Wink of Stella to the center of the flower.  I cut the image out using my In The Tropics Dies.  On a panel of Pool Party cardstock I stamped the leaf image from the Timeless Tropical stamp set in Bermuda Bay Ink 3 times.  I cut the images out using my In The Tropics Dies.  I adhered the leaves to the back of the flower using Glue Dots and adhered the flower to the sentiment square using Multipurpose Liquid Glue.  I adhered the artwork to the card front using Stampin’ Dimensionals.  I added a Tropical Oasis Trinket just under the sentiment using a Glue Dot.  I adhered the card front to a Pool Party card base using Stampin’ Dimensionals.  I added a few Grapefruit Grove Gingham Gala Adhesive-Backed Sequins to the card front.

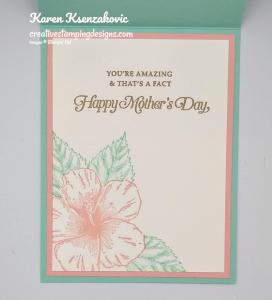
On the inside I stamped the sentiments from the Stampin’ Up! Strong & Beautiful Cling Stamp Set in Crumb Cake Ink in the center of a Whisper White panel.  I stamped the hibiscus image from the Timeless Tropical stamp set in Blushing Bride Ink on the bottom of the panel.  Using the masking technique, I stamped the leaves from the Timeless Tropical stamp set around the flower in Pool Party Ink.  I adhered the Whisper White panel to a Blushing Bride mat using Snail and then to the inside of the Pool Party card base using Multipurpose Liquid Glue.

To finish my card I decorated a Medium Whisper White Envelope.  I stamped the hibiscus from the Timeless Tropical stamp set in Blushing Bride Ink on the bottom front of the envelope.  I stamped the leaf image from the Timeless Tropical stamp set in Pool Party Ink around the flower and on the envelope flap.

Thank you for stopping by my blog today.  I hope you liked my card and will give it a try. Although the stamp set and dies will be carrying over to the new 2020-2021 Annual Catalog, the bundle pricing will not.  You can still save 10% by purchasing this bundle before June 2nd. Don’t forget, the Grapefruit Grove cardstock, Tropical Oasis Trinkets, Coastal Weave 3D Embossing Folder, the Braided Burlap Trim and the Gingham Gala Adhesive-Backed Sequins are all retiring.  Now’s the time to grab them before they’re gone.  Happy Stamping!!

****************************************************************************************************

If you need any stamping supplies, I’d love to be your Demonstrator. Just click HERE to go directly to my online store or drop me an email if you have any questions. 

MY CURRENT HOST CODE IS: KBMV24AJ

Use this host code when you order $50 or greater and receive a free gift from me! If your order is over $150, please do not use this code, but you’ll still get the free gift. The free gift is your choice of any item valued up to $10.00 in either the 2019-2020 Annual Catalog or the 2020 January-June Mini Catalog!   For any orders $50 or more I will also send you my monthly class tutorials.  Click HERE or go to my Customer Rewards for more details and to see what this months tutorials are.

The Clearance Rack has been updated.  Click HERE to shop the clearance rack.

Happy Stamping, Karen!

****************************************************************************************************

THINGS ARE GOING FAST.  IF YOU ARE INTERESTED IN ANY OF THE RETIRING ITEMS, DON’T WALK, RUN OVER TO GRAB THEM WHILE YOU STILL CAN.

2019-2020 Annual Catalog and Mini Catalog Retiring List

Let me know if you have any questions about the retiring lists!  You can also download copies of the full retiring lists in PDF Form here:

  • Click here to get a copy of the full retiring list from the 2019-20 Annual Catalog.  The font is super tiny, so you’ll need to zoom out to read it!
  • Click here to get a copy of the full retiring list from the January-June 2020 Mini Catalog.  The font is super tiny, so you’ll need to zoom out to read it!

****************************************************************************************************

The Ornate Garden Suite available NOW.  Click HERE or on the image below to see a printable PDF of all the fabulous items available in the suite.

****************************************************************************************************

Card stock cuts for this project:

  • Blushing Bride Cardstock 2 3/4″ X 2 3/4″ (flower), 4″ X 5 1/4″ (inner liner mat)
  • Grapefruit Grove Cardstock 1/2″ X 3 1/2″(strip on card front)
  • Pool Party Cardstock 4 1/4″ X 11″ (card base scored and folded at 5 1/2″), 4 1/8″ X 5 3/8″ (card front), 5 1/2″ X 1 3/4″ (leaves)
  • Whisper White Cardstock 3″ X 6″ (squares), 3 3/4″ X 5″ (inner liner)

****************************************************************************************************

Product List

Stampin’ Up! Timeless Tropical

Good morning Tuesday my stamping friends.  How is everyone doing today?

Yesterday I was telling you about cleaning my craft table off and finding lots of bits and pieces of cards that I started, but never did anything with.  Well today’s card uses some more of the pieces I found lying around, so I thought I’d put them together to make another card for you.  Here’s what I came up with.

I had the frame I had made using the Stampin’ Up! Swirly Frames Photopolymer Stamp Set which I stamped in Early Espresso Ink on a Soft Suede panel and cut out using the Rectangle Stitched Dies.  I also had a beach scene which was created on a panel of Whisper White cardstock.  I had stamped the sand from the Stampin’ Up! High Tide Photopolymer Stamp Set in Crumb Cake Ink.  I stamped the water from the High Tide stamp set in Bermuda Bay and Coastal Cabana Inks.  I sponged the sky using my Stamping Sponge, in Pool Party Ink.  The birds from the Sailing Home Cling Stamp Set were stamped in Tuxedo Black Memento Ink in the sky.  I adhered the beach scene to the back of the frame using Snail.  On a small panel of Whisper White cardstock I stamped the palm tree image from the Stampin’ Up! Timeless Tropical Cling Stamp Set which I colored using my Pear Pizzazz and Soft Suede Stampin’ Write Markers.  I cut the image out using my In The Tropics Dies.

I adhered the palm trees to the artwork using Multipurpose Liquid Glue, letting the palms hang over the frame a little.  I adhered a panel of Tropical Oasis Designer Series Paper to a Thick Whisper White card base using Snail.  I adhered the framed artwork to the card front using Stampin’ Dimensionals.

On a strip of Whisper White cardstock I stamped the top of the sentiment from the Timeless Tropical stamp set in Early Espresso Ink.  I cut the sentiment out using my Classic Label Punch and adhered it to the artwork using Stampin’ Dimensionals.  I added a pineapple from the Tropical Oasis Trinkets to the artwork using a Glue Dot.

On the inside I stamped the bottom of the sentiment from the Timeless Tropical stamp set in Early Espresso Ink in the center of a Whisper White panel.  I stamped the palm tree image from the Timeless Tropical stamp set, which I colored using my Pear Pizzazz and Soft Suede Stampin’ Write Markers, on the bottom of the panel.  I adhered the Whisper White panel to a Soft Suede mat using Snail and then to the inside of the Thick Whisper White card base using Multipurpose Liquid Glue.

To finish my card I decorated a Medium Whisper White Envelope.  I stamped the palm tree image from the Timeless Tropical stamp set, which I colored using my Pear Pizzazz and Soft Suede Stampin’ Write Markers, on the envelope front.   I adhered a panel of the Tropical Oasis DSP to the envelope flap.

Thank you for stopping by my blog today.  I hope you liked my card and will give it a try. Don’t forget to look around your craft table for card pieces that you started and never finished.  You’d be surprised what you can come up with from pieces just sitting around. Happy Stamping!!

****************************************************************************************************

If you need any stamping supplies, I’d love to be your Demonstrator. Just click HERE to go directly to my online store or drop me an email if you have any questions. 

MY CURRENT HOST CODE IS: 6WETZ6WW

Use this host code when you order $50 or greater and receive a free gift from me! If your order is over $150, please do not use this code, but you’ll still get the free gift. The free gift is your choice of any item valued up to $10.00 in either the 2019-2020 Annual Catalog or the 2020 January-June Mini Catalog!   For any orders $50 or more I will also send you my monthly class tutorials.  Click HERE or go to my Customer Rewards for more details and to see what this months tutorials are.

Click HERE to shop the clearance rack.

Happy Stamping, Karen!

****************************************************************************************************

The Ornate Garden Suite available NOW.  Click HERE or on the image below to see a printable PDF of all the fabulous items available in the suite.

****************************************************************************************************

APRIL 2020 PAPER PUMPKIN:  MY WONDERFUL FAMILY

SUBSCRIBE MARCH 11-APRIL 10

At Paper Pumpkin, we believe in making a difference—especially when it comes to helping you build relationships through papercrafting. For April, we created a fun, family appreciation themed card kit that would make it easy for you to share your hearts with those you love most: mom, dad, daughter, son, sister, and brother. April’s kit even includes Mother’s Day and Father’s Day sentiments, giving you the perfect way to show your appreciation for beloved parents on their special days with a beautiful, handmade card.
One more thing about this “fam-tastic” kit: The Paper Pumpkin team knows that everyone’s clan is unique. With that in mind, we provided sentiments that would include anyone in your life who feels like family; for instance, “brothers” and “sisters” who have helped you along the journey of life.

About the April Kit: 

  • Kit contains supplies for 8 cards and envelopes
  • Card size: 4-1/4″ x 5-1/2″ (10.8 x 14 cm)
  • Envelope size: 4-1/2″ x 5-3/4″ (11.4 x 14.6 cm)
  • Coordinating Colors: Crushed Curry, Early Espresso, Melon Mambo, Mint Macaron, Pear Pizzazz, Shaded Spruce, Soft Sea Foam

Subscribe for the April Paper Pumpkin kit from March 11–April 10 at paperpumpkin.com. Supplies may be limited toward the end of the subscription period

****************************************************************************************************

Card stock cuts for this project:

  • Soft Suede Cardstock 3 1/2″ X 5″ (frame), 4″ X 5 1/4″ (inner liner mat)
  • Whisper White Cardstock 3″ X 4 1/4″ (artwork), 3 1/2″ X 2 1/2″ (trees), 1/2″ X 3″ (sentiment), 3 7/8″ X 5 1/8″ (inner liner)
  • Thick Whisper White Cardstock 8 1/2″ X 5 1/2″ (card base scored and folded at 4 1/4″)
  • Tropical Oasis Designer Series Paper 4 1/4″ X 5 1/2″ (card front), 2 1/4″ X 6″ (piece for envelope flap)

****************************************************************************************************

Product List

Stampin’ Up! By The Dock for Happy Inkin’ Thursday Blog Hop

Good Thursday morning my stamping friends and welcome to the Happy Inkin’ Thursday Blog Hop. How is everyone doing today? Hope you are all staying heathly and safe. If you are hopping over from Akiko, thank you for stopping by my blog. Be sure to take a moment to hop around to see everyone’s beautiful projects today. This week we had a Color Challenge, here are the colors we got to work with.

Here’s what I came up with for these colors.

My design is from Global Design Projects Sketch Challenge #234.  Here is their sketch.

I started by adhering a panel of Tropical Oasis Designer Series Paper to a Soft Suede card base using Snail.

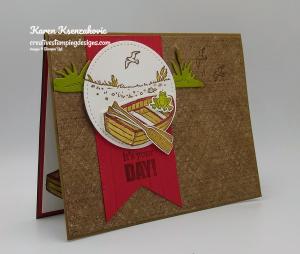
On a Whisper White cardstock panel I stamped the shoreline and bird images from the Stampin’ Up! By The Dock Cling Stamp Set in Soft Suede Ink.  I cut the image out using the 2nd largest circle from the Stitched Shapes Dies.  I stamped the boat and oars images from the By The Dock stamp set in Soft Suede Ink on the Whisper White panel.  I colored the images in using my Dark Real Red and Light Soft Suede Stampin’ Blends Markers.  I stamped the frog image from the By The Dock stamp set in Old Olive Ink and colored it in using my Old Olive Stampin’ Blends Markers.  I cut the images out using the Dockside Dies.  From a small panel of Old Olive cardstock I cut the shoreline from the Dockside Dies out.  I cut the die cut in half using my Paper Snips.  I cut a banner using my Banner Triple Punch from a small panel of Real Red cardstock.  I stamped the sentiment from the Stampin’ Up! Itty Bitty Birthday’s Cling Stamp Set in Soft Suede Ink on the bottom of the banner.  I embossed the banner using my Pinewood Planks 3D Embossing Folder.

I adhered the banner to the card front using Multipurpose Liquid Glue. I adhered the boat, oars and frog to the stitched circle using Stampin’ Dimensionals and Glue Dots.  I adhered the artwork to the banner using Stampin’ Dimensionals. I adhered the shoreline die behind the artwork using Glue Dots.  I stamped a couple more of the birds from the By The Dock stamp set on the card front in Soft Suede Ink.

On the inside I stamped the sentiment from the Stampin’ Up! Timeless Tropical Cling Stamp Set in Soft Suede Ink in the center of a Whisper White panel.  I stamped the boat image from the By The Dock stamp set in Soft Suede Ink on the bottom of the panel and colored it in using my Dark Real Red and Light Soft Suede Stampin’ Blends Markers.  I stamped the bird image from the By The Dock stamp set 3 times above the sentiment in Soft Suede Ink.  I adhered the Whisper White panel to a Real Red mat using Snail and then to the inside of the Soft Suede card base using Multipurpose Liquid Glue.

To finish my card I decorated a Medium Whisper White Envelope.  I stamped the boat and frog images from the By The Dock stamp set in Soft Suede Ink on the bottom of the envelope front.  I colored the images in using my Old Olive, Dark Real Red and Light Soft Suede Stampin’ Blends Markers.  I stamped the bird image from the By The Dock stamp set in Soft Suede Ink, 3 times in the center of the envelope front.  I adhered a panel of the Tropical Oasis DSP to the envelope flap.

Thank you for visiting my blog today. I hope you liked my card and will give it a try. Now that you’ve seen my card, hop around to see everyone else’s projects. You can hit the next button to hop over to Amy Koenders blog or you can just click on the names below. Happy Hopping!!

Amy Koenders:
Mary Deatherage:
Kristi Gray:
Jaimie Babarczy: 
Sue Prather: Sorry – not able to join this week
Karen Finkle:
Eva Dobilas:  Not able to join this week
Akiko Sudano:
Karen Ksenzakovic: You Are Here

****************************************************************************************************

If you need any stamping supplies, I’d love to be your Demonstrator. Just click HERE to go directly to my online store or drop me an email if you have any questions. 

MY CURRENT HOST CODE IS: 6WETZ6WW

Use this host code when you order $50 or greater and receive a free gift from me! If your order is over $150, please do not use this code, but you’ll still get the free gift. The free gift is your choice of any item valued up to $10.00 in either the 2019-2020 Annual Catalog or the 2020 January-June Mini Catalog!   For any orders $50 or more I will also send you my monthly class tutorials.  Click HERE or go to my Customer Rewards for more details and to see what this months tutorials are.

Click HERE to shop the clearance rack.

Happy Stamping, Karen!

****************************************************************************************************

The Ornate Garden Suite available NOW.  Click HERE or on the image below to see a printable PDF of all the fabulous items available in the suite.

****************************************************************************************************

APRIL 2020 PAPER PUMPKIN:  MY WONDERFUL FAMILY

SUBSCRIBE MARCH 11-APRIL 10

At Paper Pumpkin, we believe in making a difference—especially when it comes to helping you build relationships through papercrafting. For April, we created a fun, family appreciation themed card kit that would make it easy for you to share your hearts with those you love most: mom, dad, daughter, son, sister, and brother. April’s kit even includes Mother’s Day and Father’s Day sentiments, giving you the perfect way to show your appreciation for beloved parents on their special days with a beautiful, handmade card.
One more thing about this “fam-tastic” kit: The Paper Pumpkin team knows that everyone’s clan is unique. With that in mind, we provided sentiments that would include anyone in your life who feels like family; for instance, “brothers” and “sisters” who have helped you along the journey of life.

About the April Kit: 

  • Kit contains supplies for 8 cards and envelopes
  • Card size: 4-1/4″ x 5-1/2″ (10.8 x 14 cm)
  • Envelope size: 4-1/2″ x 5-3/4″ (11.4 x 14.6 cm)
  • Coordinating Colors: Crushed Curry, Early Espresso, Melon Mambo, Mint Macaron, Pear Pizzazz, Shaded Spruce, Soft Sea Foam

Subscribe for the April Paper Pumpkin kit from March 11–April 10 at paperpumpkin.com. Supplies may be limited toward the end of the subscription period

****************************************************************************************************

Card stock cuts for this project:

  • Soft Suede Cardstock 8 1/2″ X 5 1/2″ (card base scored and folded at 4 1/4″)
  • Real Red Cardstock 2″ X 4″ (banner), 4 1/8″ X 5 3/8″ (inner liner mat)
  • Old Olive Cardstock 3″ X 1 1/2″ (shoreline die)
  • Whisper White Cardstock 3″ X 5″ (artwork), 4″ X 5 1/4″ (inner liner)
  • Tropical Oasis Designer Series Paper 4 1/8″ X 5 3/8″ (card front), 2 1/4″ X 6″ (piece for envelope flap)

****************************************************************************************************

Product List

Stampin’ Up! Ornate Tea Together for Happy Inkin’ Thursday Blog Hop

Good Thursday morning my stamping friends.  How is everyone doing today?  Welcome to the Happy Inkin’ Thursday Blog Hop. If you are hopping over from Akiko, thank you for stopping by. This week we had a Sketch Challenge. Be sure to hop around to see everyone’s beautiful projects.
Here is the sketch we had to work from.

Here’s my card using this weeks sketch.

I started by adhering a panel of the Ornate Garden Specialty Designer Series Paper to an Early Espresso mat using Snail.  I added a strip of Blushing Bride cardstock to the bottom of the panel using Multipurpose Liquid Glue.  I wrapped a piece of Mint Macaron 1/8″ Sheer Linen Ribbon around the Blushing Bride strip and tied a small bow.  I adhered the card front to a Blushing Bride card base using Stampin’ Dimensionals.

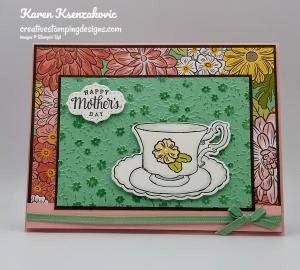
I embossed a panel of Mint Macaron cardstock using the Ornate Floral 3D Embossing Folder.  I swiped my Mint Macaron stamp pad across the panel to highlight the raised parts.  I adhered the embossed panel to an Early Espresso mat using Multipurpose Liquid Glue.  On a small panel of Whisper White cardstock I stamped the tea cup image from the Stampin’ Up! Tea Together Cling Stamp Set in Early Espresso Ink.  I cut the image out using my Tea Time Dies.  I stamped the small flower image from the Stampin’ Up! Ornate Style  Cling Stamp Set in Early Espresso Ink in the center of the tea cup.  I colored the tea cup using my Mint Macaron Stampin’ Blends Markers and the flower image in using my Old Olive and So Saffron Stampin’ Blends Markers.  I adhered the tea cup to the embossed panel using Stampin’ Dimensionals.

On a scrap of Whisper White cardstock I stamped the sentiment from the Tea Together stamp set in Early Espresso Ink  I cut the image out using my Stitched So Sweetly Dies.  The sentiment fits perfectly with the smallest die.

I adhered the sentiment to the embossed panel using Stampin’ Dimensionals.  I adhered the artwork to the card front using Stampin’ Dimensionals.  I added a Pearl Basic Jewel in the center of the flower on the tea cup.

On the inside I stamped the sentiment from the Stampin’ Up! Timeless Tropical Cling Stamp Set in the center of a Whisper White panel.  I stamped the tea cup image from the Tea Together stamp set in Blushing Bride Ink over the sentiment.  I adhered the Whisper White panel to an Early Espresso mat using Snail and then to the inside of the Blushing Bride card base using Multipurpose Liquid Glue.

To finish my card I decorated a Medium Whisper White Envelope.  I stamped the teacup image from the Tea Together stamp set in Early Espresso Ink on the envelope front.  I stamped the sentiment from the Tea Together stamp set in Blushing Bride Ink inside the tea cup.  I adhered a panel of the Ornate Garden Specialty DSP to the envelope flap.

Thank you for visiting my blog today. I hope you liked my card and will give it a try. Now that you’ve seen my card, take a minute to hop through all our projects today. If you click on the Next Blog button, you’ll go to Amy’s page. Or you can just click on the names below to go directly to all the blogs! Happy Hopping!!

Amy Koenders:
Mary Deatherage:
Kristi Gray:
Jaimie Babarczy:
Sue Prather: Sitting out this week
Karen Finkle:
Eva Dobilas:
Akiko Sudano:
Karen Ksenzakovic: You Are Here

****************************************************************************************************

If you need any stamping supplies, I’d love to be your Demonstrator. Just click HERE to go directly to my online store or drop me an email if you have any questions. 

MY CURRENT HOST CODE IS: 6WETZ6WW

Use this host code when you order $50 or greater and receive a free gift from me! If your order is over $150, please do not use this code, but you’ll still get the free gift. The free gift is your choice of any item valued up to $10.00 in either the 2019-2020 Annual Catalog or the 2020 January-June Mini Catalog!   For any orders $50 or more I will also send you my monthly class tutorials.  Click HERE or go to my Customer Rewards for more details and to see what this months tutorials are.

Click HERE to shop the clearance rack.

Happy Stamping, Karen!

****************************************************************************************************

The Ornate Garden Suite will be available starting April 1st.  Don’t want to wait, you can get it now as a demonstrator.  If you are interested in joining my team, just email me at creativestampingdesigns@gmail.com and I’ll be happy to help you.  Click HERE or on the image below to see a printable PDF of all the fabulous items available in the suite.

****************************************************************************************************

APRIL 2020 PAPER PUMPKIN:  MY WONDERFUL FAMILY

SUBSCRIBE MARCH 11-APRIL 10

At Paper Pumpkin, we believe in making a difference—especially when it comes to helping you build relationships through papercrafting. For April, we created a fun, family appreciation themed card kit that would make it easy for you to share your hearts with those you love most: mom, dad, daughter, son, sister, and brother. April’s kit even includes Mother’s Day and Father’s Day sentiments, giving you the perfect way to show your appreciation for beloved parents on their special days with a beautiful, handmade card.
One more thing about this “fam-tastic” kit: The Paper Pumpkin team knows that everyone’s clan is unique. With that in mind, we provided sentiments that would include anyone in your life who feels like family; for instance, “brothers” and “sisters” who have helped you along the journey of life.

About the April Kit: 

  • Kit contains supplies for 8 cards and envelopes
  • Card size: 4-1/4″ x 5-1/2″ (10.8 x 14 cm)
  • Envelope size: 4-1/2″ x 5-3/4″ (11.4 x 14.6 cm)
  • Coordinating Colors: Crushed Curry, Early Espresso, Melon Mambo, Mint Macaron, Pear Pizzazz, Shaded Spruce, Soft Sea Foam

Subscribe for the April Paper Pumpkin kit from March 11–April 10 at paperpumpkin.com. Supplies may be limited toward the end of the subscription period

****************************************************************************************************

Card stock cuts for this project:

  • Blushing Bride Cardstock 8 1/2″ X 5 1/2″ (card base scored and folded at 4 1/4″), 1/2″ X 5 3/8″ (strip on bottom of card front)
  • Early Espresso Cardstock 4 1/8″ X 5 3/8″ (card front mat), 4 1/4″ X 3″ (artwork mat), 4″ X 5 1/5″ (inner liner mat)
  • Mint Macaron Cardstock 4 1/8″ X 2 7/8″ (artwork)
  • Whisper White Cardstock 2 1/2″ X 3 1/2″ (tea cup and sentiment), 3 3/4″ X 5″ (inner liner)
  • Ornate Garden Specialty Designer Series Paper 4″ X 5 1/4″ (card front), 2 1/4″ X 6″ (piece for envelope flap)

****************************************************************************************************

Product List

Stampin’ Up! Timeless Tropical Oasis for Fun Fold Friday

Good Friday morning my fellow stampers and welcome to my Fun Fold Friday.  How was everyone’s week? The weekend is here already, have you made any plans?  I’ll be at work all weekend, end of the month and 1st of the month.  The good news is I get to take Monday off, YAY!!

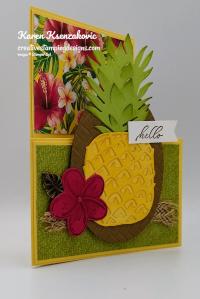
Today’s fun fold card is a pretty quick one.  My daughter has been asking me to make a card using the pineapple from the In The Tropics Dies. Here’s my card.

I started by cutting 2 of the pineapples out using the In The Tropics Dies from So Saffron cardstock.  One of them I poked all the little pieces out and sponged it using my Sponge Dauber and So Saffron Ink.  I focused on sponging only the pointy pieces of the pineapple.  I then adhered the cut out piece to the pineapple that I didn’t punch the little pieces out of using Multipurpose Liquid Glue.  I cut the pineapple top out of Pear Pizzazz cardstock using the In The Tropics Dies.  I sponged the edges and points of the leaves using Pear Pizzazz Ink and my Sponge Dauber.  I adhered the pineapple top to the pineapple base using Multipurpose Liquid Glue.  I cut the largest oval from the Layering Ovals Dies out of a panel of Soft Suede cardstock.  I embossed it using my Coastal Weave 3D Embossing Folder.  I adhered the pineapple to the embossed oval using Multipurpose Liquid Glue.

For the card base I started with an 8 1/2″ X 5 1/2″ piece of So Saffron scored and folded at 4 1/4″.  I then cut the front of the card base at 2 3/4″ to the center fold and then up to the top along the center fold.  I adhered a panel of So Saffron to the front piece using Multipurpose Liquid Glue.  I adhered a panel of Tropical Oasis Designer Series Paper to the card front using Snail.

I adhered a strip of the 5/16″ Braided Burlap Trim to the card front using Snail.  I adhered the matted pineapple to the card front over the trim using Stampin’ Dimensionals.  On a small piece of Lovely Lipstick cardstock I stamped the small flower from the Stampin’ Up! Timeless Tropical Cling Stamp Set in Soft Suede Ink.  I cut the image out using my In The Tropics Dies and adhered it to the left of the pineapple using Stampin’ Dimensionals.  I added a leaf from the Tropical Oasis Trinkets using a Glue Dot, tucked just under the flower.  I added a Lovely Lipstick Happiness Blooms Enamel Dot to the center of the flower.  On a thin strip of Whisper White cardstock I stamped the sentiment from the Timeless Tropical stamp set in Soft Suede Ink and made it into a banner using my Paper Snips.  I adhered the sentiment to the top of the pineapple using Glue Dots.

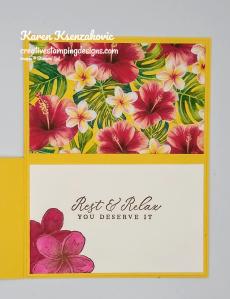
On the inside I stamped the sentiment from the Timeless Tropical stamp set in Soft Suede Ink in the center of the Whisper White panel.  I stamped the small flower image from the Timeless Tropical stamp set in Soft Suede Ink on the bottom corner of the panel.  I colored the flowers in using my Lovely Lipstick Stampin’ Blends Markers.  I adhered the Whisper White panel to the bottom of a So Saffron panel using Snail.   I adhered a panel of the Tropical Oasis DSP to the top of the So Saffron panel using Snail.  I adhered the panel to the inside of the card base using Multipurpose Liquid Glue.

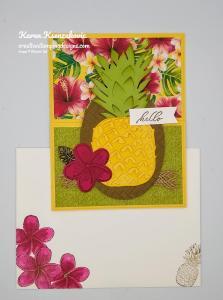
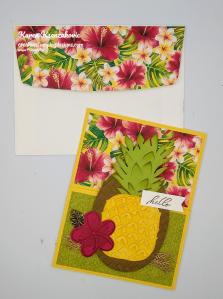
To finish my card I decorated  Medium Whisper White Envelope.  I stamped the small flower image from the Timeless Tropical stamp set in Soft Suede Ink on the bottom front of the envelope.  I stamped the pineapple image from the Timeless Tropical stamp set in Soft Suede Ink on the bottom front of the envelope.  I colored the flowers in using my Lovely Lipstick Stampin’ Blends Markers.  I adhered a panel of the Tropical Oasis DSP to the envelope flap.

Thank you for stopping by my blog today.  I hope you liked my card and will give it a try. Happy Stamping!!

****************************************************************************************************

If you need any stamping supplies, I’d love to be your Demonstrator. Just click HERE to go directly to my online store or drop me an email if you have any questions. 

MY CURRENT HOST CODE IS: QCX43K4E

Use this host code when you order $50 or greater and receive a free gift from me! If your order is over $150, please do not use this code, but you’ll still get the free gift. The free gift is your choice of any item valued up to $10.00 in either the 2019-2020 Annual Catalog or the 2020 January-June Mini Catalog!   For any orders $50 or more I will also send you my monthly class tutorials.  Click HERE or go to my Customer Rewards for more details and to see what this months tutorials are.

Click HERE to shop the clearance rack.

Happy Stamping, Karen!

****************************************************************************************************

BRINGING THE JOYS OF SPRING MARCH PAPER PUMPKIN KIT

Paper Pumpkin March 2020: No Matter the Weather

Cheers to seven years! This March, Paper Pumpkin has reached another exciting milestone: our seventh year of delivering fun, easy, creative projects to you. To thank everyone who has helped us along the way, we’re including an additional FREE stamp set with every March kit. This means that every subscriber will receive two stamp sets!
The March 2020 kit will arrive in an exclusive, specially-designed box that you will love! Think daffodils, raindrops, and a fresh spring vibe.

About the March Kit

  • Kit contains supplies for 12 cards and envelopes (4 cards of 3 designs)
  • Notecard size: 5″ x 3-1/2″ (12.7 x 8.9 cm)
  • Envelope size: 5-1/8″ x 3-5/8″ (13 x 9.2 cm)

Coordinating Colors: Balmy Blue, Basic Gray, Calypso Coral, Grapefruit Grove, Gray Granite, Pear Pizzazz, Petal Pink, Shaded Spruce, and So Saffron

About the FREE Stamp Set

  • The additional stamp set is a great value and coordinates with the March kit design; however, you do not need it to complete the March cards.
  • The additional stamp set is a 4×6 footprint, which is larger than most Paper Pumpkin sets and is designed for use on a variety of crafting projects.

Subscription Information

  • Subscribe for the March kit at paperpumpkin.com from February 11–March 10.
  • Supplies may be limited toward the end of each subscription period.

****************************************************************************************************

Card stock cuts for this project:

  • Lovely Lipstick Cardstock 2″ X 2″ (flower)
  • Pear Pizzazz Cardstock 3″ X 3″ (pineapple top)
  • So Saffron Cardstock 8 1/2″ X 5 1/2″ (card base scored and folded at 4 1/4″), 4 1/8″ X 5 3/8″ (inner liner mat), 4 1/8″ X 2 5/8″ (card front mat), 5″ X 2 1/2″ (pineapple)
  • Soft Suede Cardstock 3 1/2″ X 4 1/2″ (mat for pineapple)
  • Whisper White Cardstock 4″ X 2 1/2″ (inner liner), 1/2″ X 1 1/2″ (sentiment)
  • Tropical Oasis Designer Series Paper 2 – 4″ X 2 1/2″ (card front and inner panel), 2 1/4″ X 6″ (piece for envelope flap)

****************************************************************************************************

Product List