Stampin’ Up! Sounds of The Season

Good Tuesday morning my stamping friends.  How has everyone’s week started off?  Today is the first day in months that I am home alone.  My husband had to go into the office, my son is at work and my daughter is house sitting at my nieces.  It’s just me and my dog for the day.  I can have some peace and quiet.  I love being in the house alone in silence.  I am so looking forward to just doing my own thing today without being interrupted.

For today I played with a new set to me and made you a Christmas card.  Here’s my card for today.

My colors are from ‘Just Us Girls’ color challenge # 549.  As soon as I saw their colors I thought they would make a beautiful Christmas card. Here are their colors.

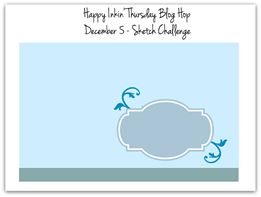
My design is from Mojo Monday Sketch #543.  Here is their sketch.

I started by adhering a panel of the returning Brightly Gleaming Specialty Designer Series Paper to a Merry Merlot card front using Stampin’ Seal.  I cut a panel of Crumb Cake cardstock using my Stitched Rectangle Dies.  I stamped the sentiment from the Stampin’ Up! Perfectly Plaid Photopolymer Stamp Set on the top of the rectangle panel in Merry Merlot Ink and adhered it to the card front between the 2 panels using Multipurpose Liquid Glue.  I embossed another panel of Crumb Cake cardstock using my Pinewood Planks 3D Embossing Folder and adhered it near the bottom of the card front using Multipurpose Liquid Glue.

I cut 3 bells out of a Gold Foil Sheet using the Sounds of the Season Dies.  I cut the boughs from the Sounds of the Season Dies out of a panel of Pretty Peacock cardstock along with just the tops of the 2 bells with the holly leaves.  I cut the tops of the 2 bells with the holly leaves out of a panel of Merry Merlot cardstock also.  I wanted the holly from the Pretty Peacock panel and the berries from the Merry Merlot panel.  I inserted the holly and berries into the gold bells keeping them in place with Stampin’ Dimensionals on the back of the bells.  I adhered the center bell pieces which I had cut from  the Merry Merlot and Pretty Peacock card stock, in the center of the bells using a tiny drop of Multipurpose Liquid Glue.  I cut the largest circle from the Stitched Shapes Dies out of a panel of Shimmery White cardstock.  I attached a piece of the gold trim from the Forever Greenery Trim Combo Pack, around the top of the bells.  I adhered the bells to the Shimmery White stitched circle using Stampin’ Dimensionals.  I adhered the Pretty Peacock pine boughs to the top of the circle using Stampin’ Seal.  I adhered the gold trim to the back of the circle using Stampin’ Seal.  I tied a small bow using the Old Olive/Pretty Peacock 3/8″ Reversible Ribbon and adhered it to the top of the circle using Glue Dots.  I adhered the artwork to the card front using Stampin’ Dimensionals.  I adhered the card front to a Crumb Cake card base using Multipurpose Liquid Glue.

On the inside I stamped the sentiment from the Stampin’ Up! Cherish The Season Cling Stamp Set to the center of a Very Vanilla panel using Merry Merlot Ink.  I stamped the pine boughs from the Cherish the Season stamp set in Pretty Peacock Ink on the top of the panel.  I stamped the smallest bell from the Cherish the Season stamp set in Crumb Cake Ink on the boughs.  I adhered the Very Vanilla panel to a Pretty Peacock mat using Stampin’ Seal and then to the inside of the Crumb Cake card base using Multipurpose Liquid Glue.

To finish my card I decorated a Medium Very Vanilla Envelope.  I stamped the pine boughs from the Cherish the Season stamp set in Pretty Peacock Ink on the front of the envelope.  I stamped the smallest bell from Cherish the Season stamp set in Crumb Cake Ink on the boughs.  I adhered a panel of Brightly Gleaming Specialty DSP to the envelope flap.

Thank you for visiting my blog today.  I hope you liked my card and will give it a try. Happy Stamping!!

****************************************************************************************************

If you need any stamping supplies, I’d love to be your Demonstrator. Just click HERE to go directly to my online store or drop me an email if you have any questions. 

MY CURRENT HOST CODE IS: 4Z2KHBVY

Use this host code when you order $50 or greater and receive a free gift from me! If your order is over $150, please do not use this code, but you’ll still get the free gift. The free gift is your choice of any 1 item valued up to $10.00 in the 2020-2021 Annual Catalog!   For any orders $50 or more I will also send you my monthly class tutorials.  Click HERE or go to my Customer Rewards for more details and to see what this months tutorials are.

 Click HERE to shop the clearance rack.

Happy Stamping, Karen!

****************************************************************************************************

IT’S TIME TO REDEEM THOSE BONUS DAYS COUPONS YOU EARNED IN JULY!!

  • Redemption Deadline:  August 31 2020, by 11:50 PM (MT)
  • There is no limit to the number of coupon codes participants can use on an order during redemption.
  • Bonus Days coupon codes may be redeemed for any product (excluding Starter Kits and Paper Pumpkin monthly subscriptions).
    • New prepaid Paper Pumpkin codes may be discounted using Bonus Days coupon codes.
  • Bonus Days coupon codes will reduce the amount of an order.
  • Bonus Days coupon codes may be redeemed one time only.

****************************************************************************************************

HELLO, PUMPKIN

SUBSCRIBE AUTUST 11 – SEPTEMBER 10

As the autumn season approaches, prepare to celebrate with the September Paper Pumpkin Kit! There’s so much to love about fall—some love the haunts of Halloween, many love the time to give thanks, and others love the changing colors and cooler temperatures. Whatever you love most about fall, September’s kit has everything you need to celebrate the season your way! Between a multi-occasion stamp set and enough supplies to design 20 cracker box treat packages, you can create custom fall crafts to celebrate Halloween, Thanksgiving, pumpkins, and leaves. Whether you make them all the same or mix ‘n’ match your crafts, there’s something for everyone in this kit!

September’s kit is a must-have for those who love to celebrate all things spooky. But, for those who don’t enjoy the Halloween haunts, the multi-occasion stamp set combined with a variety of die-cut and reversible paper pieces offers many ways to customize your fall crafts!

  • Kit contains enough supplies to create 20 cracker box treat packages.
  • Each cracker box treat package can be customized to celebrate Halloween, Thanksgiving, the autumn season, or all three!
  • Coordinating Colors: Bumblebee, Basic Black, Cajun Craze, Cinnamon Cider, Mossy Meadow, Old Olive, Pumpkin Pie, white

Subscribe to the September 2020 Paper Pumpkin Kit from 11 August to 10 September at paperpumpkin.com!

Note: Supplies may be limited toward the end of the subscription period.

****************************************************************************************************

I’m cleaning my shelves and drawers out to make room for lots of new goodie.  I have my list right HERE and I’m trying to keep it up to date.   Check it out and let me know if there is anything you’d like to get.  If you are looking for something and don’t see it on the list, drop me a line and I will look through my stash to see if I missed it.  I have lots of older DSP too that I don’t have listed if there is any that you are looking for.

****************************************************************************************************

Card stock cuts for this project:

  • Crumb Cake Cardstock 4 1/4″ X 11″ (card base scored and folded at 5 1/2″), 4 1/4″ X 5″ (stitched rectangle), 4″ X 1 1/4″ (card front panel)
  • Merry Merlot Cardstock 4″ X 5 1/4″ (card front), 2″ X 2″ (partial bells and rims)
  • Pretty Peacock Cardstock 5″ X 2″  (partial bells, rims and pine boughs)
  • Shimmery White Cardstock 3″ X 3″ (stitched circle)
  • Very Vanilla Cardstock 4″ X 5 1/4″ (inner liner)
  • Gold Foil Sheet 3 1/2″ X 3″ (bells)
  • Brightly Gleaming Specialty Designer Series Paper 3″ x 5 1/4″ (card front panel), 2 1/4″ X 6″ (piece for envelope flap)

****************************************************************************************************

Product List

Stampin’ Up! Snow Wonder Very Merry

Good Sunday morning my stamping friends.  How is everyone’s weekend going?  Did anyone do anything fun yesterday?  Things have cooled down here a bit, it’s only been in the 80’s, so it’s a little easier to get things outside done.

I have another Christmas card for you today and I played with another new bundle for using some non-traditional colors.  Here’s my card for today.

My sketch is from Atlantic Hearts Sketch Challenge #380.  Those of you that know me, knot that I just love layering and this design was perfect for me.  Here is their sketch.

My colors were inspired by CAS Colours & Sketches Challenge #382.  I love taking non-traditional Christmas colors and trying to make a card with them. Here are their colors.

I started by adhering a panel of the Wonder of the Season Specialty Designer Series Paper to a Garden Green card base using Stampin’ Seal.

I adhered a panel of Blushing Bride Subtle 6 X 6 Designer Series Paper to a Garden Green mat using Stampin’ Seal.  I adhered a panel of ‘Tis The Season 6 X 6 Designer Series Paper to a Garden Green Mat.  I embossed a small panel of Whisper White cardstock using the Winter Snow Embossing Folder and adhered it to a Garden Green mat using Multipurpose Liquid Glue.  On a panel of Whisper White cardstock I stamped the snowman image from the Stampin’ Up! Snow Wonder Cling Stamp Set in Tuxedo Black Memento Ink.  I colored the holly leave on the hat in using my Garden Green Stampin’ Write Marker.  I colored the scarf, hat and berries on the holly in using my Terracotta Tile Stampin’ Write Marker.   I stamped the sentiment from the Stampin’ Up! Itty Bitty Christmas Cling Stamp Set on a small panel of Whisper White cardstock in Tuxedo Black Memento Ink and cut it out using the smallest oval from the Stitched Shapes Dies.  I adhered it to a Garden Green mat that I cut out using the smallest scallop oval from the Layering Ovals Dies.

I adhered the matted Blushing Bride panel to the card front using Stampin’ Seal.  I adhered the ‘Tis The Season DSP panel over the 1st panel using Stampin’ Dimensionals and Glue Dots.  I adhered the matted embossed panel on top of the other 2 using Stampin’ Dimensionals.  I adhered the snowman to the top of the embossed panel using Stampin’ Dimensionals.  I adhered the sentiment overlapping the snowman and DSP panel using Stampin’ Dimensionals and Glue Dots.

On the inside I stamped the sentiment from the Snow Wonder stamp set in Tuxedo Black Memento Ink in the center of a Whisper White panel.  I stamped the snowflake image from the Snow Wonder stamp set in Blushing Bride Ink, stamping off once, on the corners of the panel and on either side of the sentiment.  I adhered the Whisper White panel to a Garden Green mat using Stampin’ Seal and then to the inside of the Garden Green card base using Multipurpose Liquid Glue.

To finish my card I decorated a Medium Whisper White Envelope.  I stamped the snowman image from the Snow Wonder stamp set in Tuxedo Black Memento Ink on the envelope front.  I colored the image in using my Garden Green and Terracotta Tile Stampin’ Write Marker.  I adhered a panel of ‘Tis The Season DSP to the envelope flap.

Thank you for stopping by my blog today.  I hope you liked my card and will give it a try. Happy Stamping!!

****************************************************************************************************

If you need any stamping supplies, I’d love to be your Demonstrator. Just click HERE to go directly to my online store or drop me an email if you have any questions. 

MY CURRENT HOST CODE IS: 4Z2KHBVY

Use this host code when you order $50 or greater and receive a free gift from me! If your order is over $150, please do not use this code, but you’ll still get the free gift. The free gift is your choice of any 1 item valued up to $10.00 in the 2020-2021 Annual Catalog!   For any orders $50 or more I will also send you my monthly class tutorials.  Click HERE or go to my Customer Rewards for more details and to see what this months tutorials are.

 Click HERE to shop the clearance rack.

Happy Stamping, Karen!

****************************************************************************************************

IT’S TIME TO REDEEM THOSE BONUS DAYS COUPONS YOU EARNED IN JULY!!

  • Redemption Deadline:  August 31 2020, by 11:50 PM (MT)
  • There is no limit to the number of coupon codes participants can use on an order during redemption.
  • Bonus Days coupon codes may be redeemed for any product (excluding Starter Kits and Paper Pumpkin monthly subscriptions).
    • New prepaid Paper Pumpkin codes may be discounted using Bonus Days coupon codes.
  • Bonus Days coupon codes will reduce the amount of an order.
  • Bonus Days coupon codes may be redeemed one time only.

****************************************************************************************************

WORLD’S GREATEST BY PAPER PUMPKIN

SUBSCRIBE JULY11 – AUGUST 10

With Paper Pumpkin, you are provided with everything you need to explore your creativity and discover new ways to craft. As we navigate a “new normal” in today’s world, there’s plenty of opportunity to papercraft! And, more importantly, there’s no better time than now to create something that’ll show the essential people in your life just how awesome you think they are.

Lately, it’s become especially clear who the everyday heroes are—they’ve always surrounded us! Teachers, doctors, hairdressers, nurses, delivery workers, cashiers, and even our friends, kids, and family members go above and beyond to enrich our lives. These people are truly the world’s greatest at what they do!

Celebrate and appreciate the everyday heroes in your life with the August Paper Pumpkin Kit. The cards included in this kit are specifically designed for celebrating life’s champions!

  • The intended use of this kit is to celebrate and appreciate life’s champions and everyday heroes.
  • Especially during this time, this is something anyone can do to make a difference. The August kit makes it easy!
  • Distinktive stamps are photo-realistic stamps that create an impressive detailed image with a single stamp.
  • The Distinktive stamps included in August’s kit are an especially excellent feature for new stampers still exploring their creativity!
  • Masculine card designs can be difficult to find, this kit has a real masculine feel.
  • While the elements of the August kit can be used to show appreciation for anyone, the masculine card designs are perfect for the men in your life!

About the August Kit:

  • Kit contains enough supplies to create nine cards and coordinating envelopes.
  • Card size: 4-1/4” x 5-1/2” (10.8 x 14 cm)
  • Envelope size: 4-1/2” x 5-3/4” (11.4 x 14.6 cm)
  • Coordinating Colors: Bumblebee, gold, Mint Macaron, Pacific Point, Soft Suede, white
  • The kit’s stamp set includes Distinktive stamps
  • Subscribe to the August 2020 Paper Pumpkin Kit from 11 July to 10 August at paperpumpkin.com!

Note: Supplies may be limited toward the end of the subscription period.

****************************************************************************************************

I’m cleaning my shelves and drawers out to make room for lots of new goodie.  I have my list right HERE and I’m trying to keep it up to date.   Check it out and let me know if there is anything you’d like to get.  If you are looking for something and don’t see it on the list, drop me a line and I will look through my stash to see if I missed it.  I have lots of older DSP too that I don’t have listed if there is any that you are looking for.

****************************************************************************************************

Card stock cuts for this project:

  • Garden Green Cardstock 4 1/4″ X 11″ (card base scored and folded at 5 1/2″), 2″ x 4 1/2″, 2 1/4″ X 3 1/4″, 1 1/2″ X 4″(card front mats), 4″ x 5 1/4″(inner liner mat)
  • Whisper White Cardstock 1 3/8″ X 3 7/8″ (card front embossed panel), 4″ X 4″ (artwork & sentiment), 3 7/8″ X 5 1/8″ (inner liner)
  • Subtle 6 X 6 Designer Series Paper 1 7/8″ X 4 3/8″ (card front panel)
  • ‘Tis The Season 6 X 6 designer Series Paper 2 1/8″ X 3 1/8″ (card front panel), 2 1/4″ X 6″ (piece for envelope flap)
  • Wonder of the Season Specialty Designer Series Paper 4 1/8″ X 5 3/8″(card front)

****************************************************************************************************

Product List

Stampin’ Up! Warm and Toasty Cool Yule

Good Saturday morning my fellow stampers.  How has your weekend started off?  I’m working today, but I have off tomorrow.  I’m not sure what we are doing tomorrow, if anything.

I’m on a roll with Christmas cards now.  I need to get 50 done by the beginning of December.  I figured as long as I try to get 3-5 done a week I should be good.  Here’s today’s card.

My design is from Try Stamping on Tuesday Challenge #468.  Here is their sketch.

I started by adhering a panel of Plaid Tidings 6 X 6 Designer Series Paper to a Cherry Cobbler card base using Stampin’ Seal.  I adhered a panel of Cherry Cobbler cardstock, which I made into a banner using the Banner Triple Punch, to the left side using Stampin’ Seal.

On a small panel of Whisper White cardstock I stamped the adorable deer image from the Stampin’ Up! Warm & Toasty Cling Stamp Set in Early Espresso Ink.  I colored the image in using my Cherry Cobbler, Crumb Cake and Ivory Stampin’ Blends Markers.  I stamped the sentiment from the Warm & Toasty stamp set above the deer in Early Espresso Ink.  I cut the top of a panel of Shaded Spruce cardstock using the Delightful Tag Topper Punch and embossed the panel using the Wrapped In Texture Embossing Folder.  I adhered the artwork to the tag using Multipurpose Liquid Glue.

I added a piece of the Gold Metallic Trim, form the Forever Greenery Trim Combo Pack, to the top of the tag and frayed it.  I adhered the tag to the card front using Stampin’ Dimensionals.  I added a few Shaded Spruce Holiday Rhinestone Basic Jewels to the card front.

On the inside I stamped the sentiment from the Warm & Toasty stamp set in Early Espresso Ink in the center of a Whisper White panel.  I adhered a strip of Plaid Tidings DSP to the bottom of the panel.  I adhered the Whisper White panel to a Shaded Spruce mat using Stampin’ Seal and then to the inside of the Cherry Cobbler card base using Multipurpose Liquid Glue.

To finish my card I decorated a Medium Whisper White Envelope.  I stamped the deer image from the Warm & Toasty stamp set in Early Espresso Ink on the envelope front and colored it in using my Cherry Cobbler, Crumb Cake and Ivory Stampin’ Blends Markers.  I adhered a panel of the Plaid Tidings DSP to the envelope flap.

Thank you for stopping by my blog today.  I hope you liked my card and will give it a try. Happy Stamping!!

****************************************************************************************************

If you need any stamping supplies, I’d love to be your Demonstrator. Just click HERE to go directly to my online store or drop me an email if you have any questions. 

MY CURRENT HOST CODE IS: 4Z2KHBVY

Use this host code when you order $50 or greater and receive a free gift from me! If your order is over $150, please do not use this code, but you’ll still get the free gift. The free gift is your choice of any 1 item valued up to $10.00 in the 2020-2021 Annual Catalog!   For any orders $50 or more I will also send you my monthly class tutorials.  Click HERE or go to my Customer Rewards for more details and to see what this months tutorials are.

 Click HERE to shop the clearance rack.

Happy Stamping, Karen!

****************************************************************************************************

IT’S TIME TO REDEEM THOSE BONUS DAYS COUPONS YOU EARNED IN JULY!!

  • Redemption Deadline:  August 31 2020, by 11:50 PM (MT)
  • There is no limit to the number of coupon codes participants can use on an order during redemption.
  • Bonus Days coupon codes may be redeemed for any product (excluding Starter Kits and Paper Pumpkin monthly subscriptions).
    • New prepaid Paper Pumpkin codes may be discounted using Bonus Days coupon codes.
  • Bonus Days coupon codes will reduce the amount of an order.
  • Bonus Days coupon codes may be redeemed one time only.

****************************************************************************************************

WORLD’S GREATEST BY PAPER PUMPKIN

SUBSCRIBE JULY11 – AUGUST 10

With Paper Pumpkin, you are provided with everything you need to explore your creativity and discover new ways to craft. As we navigate a “new normal” in today’s world, there’s plenty of opportunity to papercraft! And, more importantly, there’s no better time than now to create something that’ll show the essential people in your life just how awesome you think they are.

Lately, it’s become especially clear who the everyday heroes are—they’ve always surrounded us! Teachers, doctors, hairdressers, nurses, delivery workers, cashiers, and even our friends, kids, and family members go above and beyond to enrich our lives. These people are truly the world’s greatest at what they do!

Celebrate and appreciate the everyday heroes in your life with the August Paper Pumpkin Kit. The cards included in this kit are specifically designed for celebrating life’s champions!

  • The intended use of this kit is to celebrate and appreciate life’s champions and everyday heroes.
  • Especially during this time, this is something anyone can do to make a difference. The August kit makes it easy!
  • Distinktive stamps are photo-realistic stamps that create an impressive detailed image with a single stamp.
  • The Distinktive stamps included in August’s kit are an especially excellent feature for new stampers still exploring their creativity!
  • Masculine card designs can be difficult to find, this kit has a real masculine feel.
  • While the elements of the August kit can be used to show appreciation for anyone, the masculine card designs are perfect for the men in your life!

About the August Kit:

  • Kit contains enough supplies to create nine cards and coordinating envelopes.
  • Card size: 4-1/4” x 5-1/2” (10.8 x 14 cm)
  • Envelope size: 4-1/2” x 5-3/4” (11.4 x 14.6 cm)
  • Coordinating Colors: Bumblebee, gold, Mint Macaron, Pacific Point, Soft Suede, white
  • The kit’s stamp set includes Distinktive stamps
  • Subscribe to the August 2020 Paper Pumpkin Kit from 11 July to 10 August at paperpumpkin.com!

Note: Supplies may be limited toward the end of the subscription period.

****************************************************************************************************

I’m cleaning my shelves and drawers out to make room for lots of new goodie.  I have my list right HERE and I’m trying to keep it up to date.   Check it out and let me know if there is anything you’d like to get.  If you are looking for something and don’t see it on the list, drop me a line and I will look through my stash to see if I missed it.  I have lots of older DSP too that I don’t have listed if there is any that you are looking for.

****************************************************************************************************

Card stock cuts for this project:

  • Cherry Cobbler Cardstock 4 1/4″ X 11″ (card base scored and folded at 5 1/2″), 2′ X 4″ (card front banner)
  • Shaded Spruce Cardstock 2″ X 4 3/8″ (tag), 4 1/8″ X 5 3/8″ (inner liner mat)
  • Whisper White Cardstock 1 7/8″ X 3 3/8″ (artwork), 4″ X 5 1/4″ (inner liner)
  • Plaid Tidings 6 X 6 Designer Series Paper 4 1/4″ X 5 1/2″ (card front), 1/2″ X 4″ (strip on inner liner), 2 1/4″ X 6″ (piece for envelope flap)

****************************************************************************************************

Product List

Stampin’ Up! Snowflake Wishes for Fun Fold Friday

Good Friday morning my stamping friends.  How was everyone’s week?  Does anyone have plans for the weekend?  I know some are still without power after the hurricane on Tuesday here and are not expecting it back until next week.  I’m hoping that you get power back sooner than expected.  My heart goes out to you.

I have a drapery card for you today. I have made a diagram for you that I attached below explaining how to make the folded panel.  Here’s my card for today.

I started by stamping a panel of Misty Moonlight cardstock with the sentiment from the Stampin’ Up! Snowflake Wishes Photopolymer Stamp Set in VersaMark Ink.  I immediately sprinkled it with my White Emboss Powder and set it using my Heat Tool.

I embossed the panel using the new Winter Snow Embossing Folder.  I cut and scored a 4″ X 11 1/2″ panel of Snowflake Splendor Designer Series Paper as in the diagram below.

I adhered the folded panel to the card front using Multipurpose Liquid Glue.  I wrapped a piece of 1/4″ Snowflake Splendor Ribbon around the card front and tied a small bow.  I tacked the bow in place using a Glue Dot.  I adhered the card front to a Misty Moonlight card base using Multipurpose Liquid Glue.  I added a few Adhesive-Backed Snowflakes to the card front.

On the inside I stamped the sentiment from the Snowflake Wishes stamp set in Misty Moonlight Ink in the center of a Whisper White panel.  I stamped the snowflake image from the Snowflake Wishes stamp set in Misty Moonlight Ink, stamping off once, above the sentiment.  I adhered a strip of Snowflake Splendor DSP to the side of the panel.  I adhered the Whisper White panel to a Misty Moonlight mat using Stampin’ Seal and then to the inside of the Misty Moonlight card base using Multipurpose Liquid Glue.

To finish my card I decorated a Medium Whisper White Envelope.  I stamped the snowflake image from the Snowflake Wishes stamp set along the bottom front of the envelope in Misty Moonlight Ink.  I adhered a panel of Snowflake Splendor DSP to the envelope flap.

Thank you for stopping by my blog today.  I hope you liked my card and will give it a try. Happy Stamping!!

****************************************************************************************************

If you need any stamping supplies, I’d love to be your Demonstrator. Just click HERE to go directly to my online store or drop me an email if you have any questions. 

MY CURRENT HOST CODE IS: 4Z2KHBVY

Use this host code when you order $50 or greater and receive a free gift from me! If your order is over $150, please do not use this code, but you’ll still get the free gift. The free gift is your choice of any 1 item valued up to $10.00 in the 2020-2021 Annual Catalog!   For any orders $50 or more I will also send you my monthly class tutorials.  Click HERE or go to my Customer Rewards for more details and to see what this months tutorials are.

 Click HERE to shop the clearance rack.

Happy Stamping, Karen!

****************************************************************************************************

IT’S TIME TO REDEEM THOSE BONUS DAYS COUPONS YOU EARNED IN JULY!!

  • Redemption Deadline:  August 31 2020, by 11:50 PM (MT)
  • There is no limit to the number of coupon codes participants can use on an order during redemption.
  • Bonus Days coupon codes may be redeemed for any product (excluding Starter Kits and Paper Pumpkin monthly subscriptions).
    • New prepaid Paper Pumpkin codes may be discounted using Bonus Days coupon codes.
  • Bonus Days coupon codes will reduce the amount of an order.
  • Bonus Days coupon codes may be redeemed one time only.

****************************************************************************************************

WORLD’S GREATEST BY PAPER PUMPKIN

SUBSCRIBE JULY11 – AUGUST 10

With Paper Pumpkin, you are provided with everything you need to explore your creativity and discover new ways to craft. As we navigate a “new normal” in today’s world, there’s plenty of opportunity to papercraft! And, more importantly, there’s no better time than now to create something that’ll show the essential people in your life just how awesome you think they are.

Lately, it’s become especially clear who the everyday heroes are—they’ve always surrounded us! Teachers, doctors, hairdressers, nurses, delivery workers, cashiers, and even our friends, kids, and family members go above and beyond to enrich our lives. These people are truly the world’s greatest at what they do!

Celebrate and appreciate the everyday heroes in your life with the August Paper Pumpkin Kit. The cards included in this kit are specifically designed for celebrating life’s champions!

  • The intended use of this kit is to celebrate and appreciate life’s champions and everyday heroes.
  • Especially during this time, this is something anyone can do to make a difference. The August kit makes it easy!
  • Distinktive stamps are photo-realistic stamps that create an impressive detailed image with a single stamp.
  • The Distinktive stamps included in August’s kit are an especially excellent feature for new stampers still exploring their creativity!
  • Masculine card designs can be difficult to find, this kit has a real masculine feel.
  • While the elements of the August kit can be used to show appreciation for anyone, the masculine card designs are perfect for the men in your life!

About the August Kit:

  • Kit contains enough supplies to create nine cards and coordinating envelopes.
  • Card size: 4-1/4” x 5-1/2” (10.8 x 14 cm)
  • Envelope size: 4-1/2” x 5-3/4” (11.4 x 14.6 cm)
  • Coordinating Colors: Bumblebee, gold, Mint Macaron, Pacific Point, Soft Suede, white
  • The kit’s stamp set includes Distinktive stamps
  • Subscribe to the August 2020 Paper Pumpkin Kit from 11 July to 10 August at paperpumpkin.com!

Note: Supplies may be limited toward the end of the subscription period.

****************************************************************************************************

I’m cleaning my shelves and drawers out to make room for lots of new goodie.  I have my list right HERE and I’m trying to keep it up to date.   Check it out and let me know if there is anything you’d like to get.  If you are looking for something and don’t see it on the list, drop me a line and I will look through my stash to see if I missed it.  I have lots of older DSP too that I don’t have listed if there is any that you are looking for.

****************************************************************************************************

Card stock cuts for this project:

    • Misty Moonlight Cardstock 8 1/2″ X 5 1/2″ (card base scored and folded at 4 1/4″), 4 1/4″ X 5 1/2″ (card front), 4 1/8″ X 5 3/8″ (inner liner mat)
    • Whisper White Cardstock 4″ X 5 1/4″ (inner liner)
    • Snowflake Splendor Designer Series Paper 4″ X 11 1/2″ (card front panel scored and folded at 3″, 4″, 6″, 7″, 9″ & 10″), 1/2″ X 4″ (strip for inner liner), 2 1/4″ X6″(piece for envelope flap)

****************************************************************************************************

Product List

Stampin’ Up! Gnome for the Holidays

Good Wednesday morning my stamping friends.  How is everyone doing today?  We’re halfway through the week and before you know it the weekend will be here.  I got a lot done my couple days off.  I did a lot of running around on Monday and I just stayed put yesterday.

For today I made you my first Christmas card of the season.  I was so excited to play with this set, I think it is so cute.  Here is my card for today.

My design is from Sunday Stamps Get Sketchy Challenge #236.  Here is their sketch.

I started by stamping my artwork on a panel of Whisper White cardstock.  I stamped the gnome and tree image from the Stampin’ Up! Gnome for the Holidays Cling Stamp Set in Tuxedo Black Memento Ink.  I colored the images in using my Crumb Cake, Daffodil Delight, Gray Granite, Ivory, Just Jade, Night of Navy, Real Red, Shaded Spruce, Smoky Slate and Soft Suede Stampin’ Blends Markers.  I stamped the sentiment from the Gnome for the Holidays stamp set on the top of the Whisper White panel in Tuxedo Black Memento Ink.  I adhered the artwork to a Real Red mat using Stampin’ Seal.

I adhered a panel of ‘Tis The Season 6 X 6 Designer Series Paper to a Garden Green card base using Stampin’ Seal.  I adhered 2 more panels of ‘Tis The Season 6 X 6 DSP to Real Red mats using Stampin’ Seal.

I adhered the long matted DSP to the card front using Stampin’ Seal. I then adhered the smaller matted DSP on top of the long one using Stampin’ Dimensionals.  I adhered the matted artwork to the top of the 2 matted DSP panels using Stampin’ Dimensionals.

On the inside I stamped the sentiment from the Gnome for the Holidays stamp set in Tuxedo Black Memento Ink in the center of a Whisper White panel.  I stamped 2 of the gnome images from the Gnome for the Holidays stamp set in Tuxedo Black Memento Ink on the bottom of the panel.  I colored the images in using my Crumb Cake, Daffodil Delight, Gray Granite, Ivory, Just Jade, Night of Navy, Real Red & Shaded Spruce Stampin’ Blends Markers.  I adhered the Whisper White panel to a Real Red mat using Stampin’ Seal and then to the inside of the Garden Green card base using Multipurpose Liquid Glue.

To finish my card I decorated a Medium Whisper White Envelope.  I stamped the tree and gnome images from the Gnome for the Holidays stamp set in Tuxedo Black Memento Ink on the envelope front and colored the images in with my Stampin’ Blends Markers.  I adhered a panel of ‘Tis The Season 6 X 6 DSP to the envelope flap.

Thank you for stopping by my blog today.  I hope you liked my card and will give it a try. Happy Stamping!!

****************************************************************************************************

If you need any stamping supplies, I’d love to be your Demonstrator. Just click HERE to go directly to my online store or drop me an email if you have any questions. 

MY CURRENT HOST CODE IS: 4Z2KHBVY

Use this host code when you order $50 or greater and receive a free gift from me! If your order is over $150, please do not use this code, but you’ll still get the free gift. The free gift is your choice of any 1 item valued up to $10.00 in the 2020-2021 Annual Catalog!   For any orders $50 or more I will also send you my monthly class tutorials.  Click HERE or go to my Customer Rewards for more details and to see what this months tutorials are.

 Click HERE to shop the clearance rack.

Happy Stamping, Karen!

****************************************************************************************************

WORLD’S GREATEST BY PAPER PUMPKIN

SUBSCRIBE JULY11 – AUGUST 10

With Paper Pumpkin, you are provided with everything you need to explore your creativity and discover new ways to craft. As we navigate a “new normal” in today’s world, there’s plenty of opportunity to papercraft! And, more importantly, there’s no better time than now to create something that’ll show the essential people in your life just how awesome you think they are.

Lately, it’s become especially clear who the everyday heroes are—they’ve always surrounded us! Teachers, doctors, hairdressers, nurses, delivery workers, cashiers, and even our friends, kids, and family members go above and beyond to enrich our lives. These people are truly the world’s greatest at what they do!

Celebrate and appreciate the everyday heroes in your life with the August Paper Pumpkin Kit. The cards included in this kit are specifically designed for celebrating life’s champions!

  • The intended use of this kit is to celebrate and appreciate life’s champions and everyday heroes.
  • Especially during this time, this is something anyone can do to make a difference. The August kit makes it easy!
  • Distinktive stamps are photo-realistic stamps that create an impressive detailed image with a single stamp.
  • The Distinktive stamps included in August’s kit are an especially excellent feature for new stampers still exploring their creativity!
  • Masculine card designs can be difficult to find, this kit has a real masculine feel.
  • While the elements of the August kit can be used to show appreciation for anyone, the masculine card designs are perfect for the men in your life!

About the August Kit:

  • Kit contains enough supplies to create nine cards and coordinating envelopes.
  • Card size: 4-1/4” x 5-1/2” (10.8 x 14 cm)
  • Envelope size: 4-1/2” x 5-3/4” (11.4 x 14.6 cm)
  • Coordinating Colors: Bumblebee, gold, Mint Macaron, Pacific Point, Soft Suede, white
  • The kit’s stamp set includes Distinktive stamps
  • Subscribe to the August 2020 Paper Pumpkin Kit from 11 July to 10 August at paperpumpkin.com!

Note: Supplies may be limited toward the end of the subscription period.

****************************************************************************************************

I’m cleaning my shelves and drawers out to make room for lots of new goodie.  I have my list right HERE and I’m trying to keep it up to date.   Check it out and let me know if there is anything you’d like to get.  If you are looking for something and don’t see it on the list, drop me a line and I will look through my stash to see if I missed it.  I have lots of older DSP too that I don’t have listed if there is any that you are looking for.

****************************************************************************************************

Card stock cuts for this project:

  • Garden Green Cardstock 8 1/2″ X 5 1/2″ (card base scored and folded at 4 1/4″)
  • Real Red Cardstock 2 1/2″ X 5 1/2″, 3 1/8″ X 3 7/8″ * 3″ X4″, 4 1/8″ X 5 3/8″ (mats for artwork, DSP’s & inner liner)
  • Whisper White Cardstock 2 7/8″ X 3 7/8″ (artwork), 4″ X 5 1/4″ (inner liner)
  • ‘Tis The Season 6 X 6 Designer Series Paper 4 1/4″ X 5 1/2″ (card front), 2 3/8″ X 5 1/2″ & 3″ X 3 3/4″ (card front panels), 2 1/4″ X 6″ (piece for envelope flap)

****************************************************************************************************

Product List

Stampin’ Up! Let It Snow Gift Card Holder for Fun Fold Friday

Good Friday morning my fellow stampers and welcome to my Fun Fold Friday.  How was everyone’s week?  Hope you had a productive one.  The weekend is here already and the countdown has begun.  This will probably be my last Christmas card for you.  I think I’m all caught up and ready to start writing them out and get them in the mail.  Have you gotten all your Christmas cards made yet?  I have to work on Saturday, but   I’m looking forward to Sunday we have our in person team meeting.  I always have so much fun getting together with my team members and stamping.  Amy always has some beautiful projects for us to make.  We have a nice lunch together, take care of some business and then we get to stamp and create.

For today’s card I have a Gift Card Holder for you.  Seems that a lot of gift cards are given out around this time.  My niece always asks me to make her one or two for her boys teachers, so I’m always looking for new ideas.  My card for today uses up a lot of Designer Series Paper.  Those that read my blog from Tuesday know that I had hand surgery.  This card was NOT made ahead of time (guess I wasn’t thinking).  I did a better job doing all the fussy cutting for this card with my hands all bandaged up that I do without.  Once I got those Paper Snips on my fingers properly, I went to town cutting.   Here’s my card for today.

My colors were inspired by Sunday Stamps Challenge #219.  Here are their colors.

I also played along with “Just Us Girls” Challenge #516.  Here is their theme.

I joined in with Cardz 4 Galz Challenge #112.  Their theme is ‘Cute Christmas’.

I started by adhering a panel of the Let It Snow Specialty Designer Series Paper to a Real Red card base using Snail.  I adhered a panel of Blueberry Bushel Noble Peacock Foil Sheets to the center of the card base using Multipurpose Liquid glue and set it aside.

I folded the Coastal Cabana card base into a Z-Fold card.  I adhered the smaller panels of the Let It Snow DSP to 5 of the 6 sides.  I did not adhere a piece to the back which will be getting adhered to the larger card base.   I fussy cut some of the snowmen from one of the panels of Let It Snow DSP using my Paper Snips.

On the front of the Z-Fold I adhered 2 of the fussy cut snowmen using Multipurpose Liquid Glue.  I stamped the sentiment from the Stampin’ Up! Snowman Season Photopolymer Stamp Set on the DSP in Shaded Spruce Ink. I immediately sprinkled it with Clear Stampin’ Emboss Powder and set it using my Heat Tool.  You can emboss any color when you use your ink and the Clear Stampin’ Emboss Powder.  I just love the way an embossed sentiment looks, so I do this a lot.

When you open the card to the right I had adhered 2 panels of the Let It Snow DSP.  I adhered another one of the fussy cut snowmen using Multipurpose Liquid Glue.  I stamped the sentiment from the Stampin’ Up! Itty Bitty Christmas Cling Stamp Set in Shaded Spruce Ink.  I immediately sprinkled it with my Clear Emboss Powder and set it using my Heat Tool.

When you open the Z-Fold to the left you get the inside of the card.  On the back panel I stamped the sentiment from the Snowman Season stamp set in Shaded Spruce Ink on a Whisper White panel.  I stamped the small snowman image from the Snowman Season stamp set in Coastal Cabana ink, stamping off once, over the sentiment.  I adhered the Whisper White panel to the card base using Multipurpose Liquid Glue.  I took a 2″ piece of Let It Snow DSP and using the 1″ Circle Punch, I cut a half circle in the center of the panel.  I adhered the small panel to the center using Tear & Tape Adhesive.  The gift card will slide in and out real easily.  I adhered the Z-Fold card to the card base using Tear & Tape Adhesive.  I used the Tear & Tape because I figured the card is going to get opened and closed a lot and I really wanted to make sure it sticks well.

To finish my card I decorated a Medium Whisper White Envelope.  I adhered a strip of Let It Snow DSP to the front of the envelope and a panel to the envelope flap.

Thank you for stopping by my blog today.  I hope you liked my gift card holder and will give it a try.  It’s a pretty quick and easy card once you get all your DSP cut up.  Happy Stamping!!

****************************************************************************************************

If you need any stamping supplies, I’d be very happy to be your Demonstrator. Just click HERE to go directly to my online store or drop me an email if you have any questions. 

MY CURRENT HOST CODE IS: NVSKQ72X

For any orders $50 or more I will send you my monthly class tutorials.  Click HERE or go to my Customer Rewards to see what this months tutorials are.

Click HERE to shop the clearance rack.

Happy Stamping, Karen!

****************************************************************************************************

Stampin’ Up!’s Year-End Closeout is here while supplies last!!  You can save on a selection of retiring and surplus items including holiday catalog items, stamp sets, and Paper Pumpkin past kits! Shop early to avoid missing out as items on the sale are only available while supplies last! Supplies are limited and popular items will sell out quickly. This amazing sale ends on January 2.

Head over to my Online store to see all the Discounted Items and Retiring Favorites Items.  You don’t want to miss out on these savings because when they are gone THEY ARE GONE!

****************************************************************************************************

SOMETHING FOR EVERYTHING PAPER PUMPKIN 
SUBSCRIBE TO PAPER PUMPKIN BY DECEMBER 10, 2019

December’s Something for Everything kit includes a super-versatile stamp set complete with 13 sentiments that can be used for occasions ranging from wedding, to get well, birthdays, and more! Plus, the three full-sized card designs (four of each) are gorgeous AND multiuse.  Paper Pumpkin’s December kit makes it easier than ever to give a handmade card to a friend—no matter what the occasion!

This is an all-card kit, with 13 sentiments to cover tons of occasions from weddings, get well, birthday, and more, this set does it all.

Kit details: Makes 12 cards and envelopes

Card size: 4 1/4″ x 5-1/2″ (10.8 x 14 cm)

Envelope size: 4-1/2″ x 5-3/4″ (11.4 x 14.6 cm)

Coordinating colors: Crushed Curry, Grapefruit Grove, Old Olive, Shaded Spruce, Terracotta Tile

  • Subscribe for the December kit at paperpumpkin.com from November 11–December 10.
  • Supplies may be limited toward the end of each subscription period.

Interested in subscribing to Paper Pumpkin?  You can either sign up for a subscription where you are billed monthly for your kit or you can purchase a prepaid subscription in my online store. To see more information and to sign up for the monthly subscription,  Click Here. To see the options for prepaid subscriptions in my online store, Click Here.

****************************************************************************************************

Card stock cuts for this project:

  • Coastal Cabana Cardstock 4 1/4″ X 9 3/4″ (center card base scored and folded at 3 1/4″ & 6 1/2″)
  • Real Red Cardstock 4 1/4″ X 5 1/2″ (back card base)
  • Whisper White Cardstock 2 7/8″ x 3 7/8″ (inner liner)
  • Noble Peacock Foil Sheets 3 1/2″ X 4 1/2″ (center card base mat)
  • Let It Snow Specialty Designer Series Paper 5 – 3 1/8″ X 4 1/8″ (pieces for each of the center card base), 3″ x 2″ (gift card slot), 4″ X 5 1/4″ (back card base front), piece for envelope flap

****************************************************************************************************

Product List

Stampin’ Up! Let It Snow For Happy Inkin’ Thursday Blog Hop

Good Thursday morning my stamping friends. Welcome to the Happy Inkin’ Thursday Blog Hop. If you are hopping over from Akiko, thank you for stopping by. This week we had a Sketch Challenge. Be sure to hop around to see everyone’s beautiful projects. I’m continuing with my quick and easy cards for this week.  Here’s what I came up with for the sketch.

Here is out sketch for this week.

I started by adhering a panel of Let It Snow Specialty Designer Series Paper to a Thick Whisper White card base using Multipurpose Liquid Glue.

I adhered a thin panel of the Let It Snow Specialty DSP to a Real Red Mat using Snail.  I adhered the matted DSP to the bottom of the card front using Multipurpose Liquid Glue.

I stamped the sentiment from the Stampin’ Up! Snowman Season Photopolymer Stamp Set on a small panel of Whisper White cardstock in Coastal Cabana Ink.  I punched the sentiment out using the Pretty Label Punch.  Using the Pretty Label Punch I punched out 2 more labels in Real Red cardstock.  I adhered the 2 labels to the back of the Whisper White label using Multipurpose Liquid Glue, arranging it so that it framed the Whisper White label.  I cut the snowflakes in Sparkle Glimmer Paper using the Christmas Layers Dies.  I snipped the snowflakes in half and arranged them so that they came out on either side of the sentiment.  I adhered the snowflakes to the card front using Glue Dots and Multipurpose Liquid Glue.  I adhered the sentiment over the snowflakes using Stampin’ Dimensionals.

On the inside I stamped the sentiment from the Snowman Season stamp set in Coastal Cabana Ink in the center of a Whisper White panel.  I stamped the snowflake image from the Snowman Season stamp set in Coastal Cabana Ink on either side of the sentiment.  I stamped the small snowman image from the Snowman Season stamp set in Coastal Cabana Ink, stamping off once, over the sentiment.  I adhered a thin strip of Let It Snow DSP to the bottom of the Whisper White panel using Snail  I adhered the Whisper White panel to a Real Red mat using Snail and then to the inside of the Thick Whisper White card base using Multipurpose Liquid Glue.

To finish my card I decorated a Medium Whisper White Envelope.  I adhered a strip of the Let It Snow DSP to the envelope front and a panel to the envelope flap.

Thank you for stopping by my blog today.  I hope you liked my card and will give it a try. Now that you’ve seen my card, take a minute to hop through all our projects today. If you click on the Next Blog button, you’ll go right to Amy’s page. Or you can just click on the names below to go directly to all the blogs! Happy Hopping!!

Karen Ksenzakovic: You are here

****************************************************************************************************

If you need any stamping supplies, I’d be very happy to be your Demonstrator. Just click HERE to go directly to my online store or drop me an email if you have any questions. 

MY CURRENT HOST CODE IS: NVSKQ72X

For any orders $50 or more I will send you my monthly class tutorials.  Click HERE or go to my Customer Rewards to see what this months tutorials are.

Click HERE to shop the clearance rack.

Happy Stamping, Karen!

****************************************************************************************************

Stampin’ Up!’s Year-End Closeout is here while supplies last!!  You can save on a selection of retiring and surplus items including holiday catalog items, stamp sets, and Paper Pumpkin past kits! Shop early to avoid missing out as items on the sale are only available while supplies last! Supplies are limited and popular items will sell out quickly. This amazing sale ends on January 2.

Head over to my Online store to see all the Discounted Items and Retiring Favorites Items.  You don’t want to miss out on these savings because when they are gone THEY ARE GONE!

****************************************************************************************************

SOMETHING FOR EVERYTHING PAPER PUMPKIN 
SUBSCRIBE TO PAPER PUMPKIN BY DECEMBER 10, 2019

December’s Something for Everything kit includes a super-versatile stamp set complete with 13 sentiments that can be used for occasions ranging from wedding, to get well, birthdays, and more! Plus, the three full-sized card designs (four of each) are gorgeous AND multiuse.  Paper Pumpkin’s December kit makes it easier than ever to give a handmade card to a friend—no matter what the occasion!

This is an all-card kit, with 13 sentiments to cover tons of occasions from weddings, get well, birthday, and more, this set does it all.

Kit details: Makes 12 cards and envelopes

Card size: 4 1/4″ x 5-1/2″ (10.8 x 14 cm)

Envelope size: 4-1/2″ x 5-3/4″ (11.4 x 14.6 cm)

Coordinating colors: Crushed Curry, Grapefruit Grove, Old Olive, Shaded Spruce, Terracotta Tile

  • Subscribe for the December kit at paperpumpkin.com from November 11–December 10.
  • Supplies may be limited toward the end of each subscription period.

Interested in subscribing to Paper Pumpkin?  You can either sign up for a subscription where you are billed monthly for your kit or you can purchase a prepaid subscription in my online store. To see more information and to sign up for the monthly subscription,  Click Here. To see the options for prepaid subscriptions in my online store, Click Here.

****************************************************************************************************

Card stock cuts for this project:

  • Real Red Cardstock 4″ X 5 1/4″ (inner liner mat), 7/8″ X 5 1/2″ (strip on front mat), 2″ X 6″ (pretty label punch)
  • Whisper White Cardstock 2″ X 3″ (sentiment), 3 7/8″ X 5 1/8″ (inner liner)
  • Thick Whisper White Cardstock 8 1/2″ X 5 1/2″(card base scored and folded at 4 1/4″)
  • Let It Snow Specialty Designer Series Paper 4 1/4″ X 5 1/2″ (card front), 3/4″ X 5 1/2″ (strip on front), 1/4″ X 5 1/8″ (strip on inner liner), 1″ X 6″ (strip on envelope front), 2 1/4”X 6″ (envelope flap)
  • Sparkle Glimmer Paper 3 1/4″ X 2 3/4″ (card front snowflakes)

****************************************************************************************************

Product List

Stampin’ Up! Wrapped in Plaid Winter Woods

Good Wednesday morning my fellow stampers.  Happy half way through  the work week day!!  Hope everyone’s week is moving right along.  Other than my surgery getting delayed for 3 hours yesterday, everything went well.  I got to be awake for the whole thing and was able to ask the doctor questions as he was performing the surgery.    The first hand wasn’t too bad, but by the time he started the second the numbness was wearing off.  He did numb it up again though.  Having a bit of trouble using my finger now, but I’ll figure out how and keep moving right along.

For today’s card I used a stamp set from the Annual Catalog which I absolutely love.    Here’s my card.

My colors were inspired by CAS Colours & Sketches Challenge #350.  Here are their colors.

I started by adhering a panel of Wrapped In Plaid Specialty Designer Series Paper to a Shaded Spruce card base using Multipurpose Liquid Glue.

On a panel of Whisper White cardstock I stamped the tree image from the Stampin’ Up Winter Woods Cling Stamp Set in Shaded Spruce Ink.  I cut the image out using the largest Stitched Nested Labels Dies and cut the top section off.  I adhered the artwork to the top of the card front using Stampin’ Dimensionals.  I needed a star for the top of the tree, so I grabbed the Stitched Stars Dies and cut a small star out of a scrap of Gold Foil Sheet.  I adhered the star to the top of the tree using a Glue dot.  I added Red Rhinestone Basic Jewels all over the tree.

On a strip of Whisper White cardstock I stamped the sentiment from the Winter Woods stamp set in Shaded Spruce Ink.  I made a banner out of the strip using my Banner Triple Punch.  I adhered a small strip of a Gold Foil Sheet to the bottom of the banner using Snail and adhered it to the bottom of the card front using Stampin’ Dimensionals.  I tied a small bow from the Shaded Spruce/Gold 3/8″ Striped Ribbon and adhered it to the end of the banner using a Glue Dot.

On the inside I stamped the sentiment from the Stampin’ Up Merry Christmas To All Photopolymer Stamp Set in Shaded Spruce Ink in the center of a Whisper White panel.  I stamped the pine bough image from the Winter Woods stamp set in Shaded Spruce Ink on either side of the sentiment.  I adhered the Whisper White panel to a Cherry Cobbler mat using Snail and then to the inside of the Shaded Spruce card base using Multipurpose Liquid Glue.

To finish my card I decorated a Medium Whisper White Envelope.  I stamped the tree image from the Winter Woods stamp set in Shaded Spruce Ink on the envelope front. I stamped one in full strength and another stamped off.  I adhered a panel of the Wrapped In Plaid Specialty DSP to the envelope flap.

Thank you for stopping by my blog today.  I hope you liked my card and will give it a try. Happy Stamping!!

****************************************************************************************************

If you need any stamping supplies, I’d be very happy to be your Demonstrator. Just click HERE to go directly to my online store or drop me an email if you have any questions. 

MY CURRENT HOST CODE IS: NVSKQ72X

For any orders $50 or more I will send you my monthly class tutorials.  Click HERE or go to my Customer Rewards to see what this months tutorials are.

Click HERE to shop the clearance rack.

Happy Stamping, Karen!

****************************************************************************************************

Stampin’ Up!’s Year-End Closeout is here while supplies last!!  You can save on a selection of retiring and surplus items including holiday catalog items, stamp sets, and Paper Pumpkin past kits! Shop early to avoid missing out as items on the sale are only available while supplies last! Supplies are limited and popular items will sell out quickly. This amazing sale ends on January 2.

Head over to my Online store to see all the Discounted Items and Retiring Favorites Items.  You don’t want to miss out on these savings because when they are gone THEY ARE GONE!

****************************************************************************************************

SOMETHING FOR EVERYTHING PAPER PUMPKIN 
SUBSCRIBE TO PAPER PUMPKIN BY DECEMBER 10, 2019

December’s Something for Everything kit includes a super-versatile stamp set complete with 13 sentiments that can be used for occasions ranging from wedding, to get well, birthdays, and more! Plus, the three full-sized card designs (four of each) are gorgeous AND multiuse.  Paper Pumpkin’s December kit makes it easier than ever to give a handmade card to a friend—no matter what the occasion!

This is an all-card kit, with 13 sentiments to cover tons of occasions from weddings, get well, birthday, and more, this set does it all.

Kit details: Makes 12 cards and envelopes

Card size: 4 1/4″ x 5-1/2″ (10.8 x 14 cm)

Envelope size: 4-1/2″ x 5-3/4″ (11.4 x 14.6 cm)

Coordinating colors: Crushed Curry, Grapefruit Grove, Old Olive, Shaded Spruce, Terracotta Tile

  • Subscribe for the December kit at paperpumpkin.com from November 11–December 10.
  • Supplies may be limited toward the end of each subscription period.

Interested in subscribing to Paper Pumpkin?  You can either sign up for a subscription where you are billed monthly for your kit or you can purchase a prepaid subscription in my online store. To see more information and to sign up for the monthly subscription,  Click Here. To see the options for prepaid subscriptions in my online store, Click Here.

****************************************************************************************************

Card stock cuts for this project:

  • Cherry Cobbler Cardstock 4 1/8″ X 5 3/8″ (inner liner mat)
  • Shaded Spruce Cardstock 8 1/2″ X 5 1/2″ (card base scored and folded at 4 1/4″)
  • Whisper White Cardstock 4″ X 5 1/4″ (inner liner), 1″ X 3 1/8″ (card front banner), 3″ X 5″ (artwork)
  • Gold Foil Sheets 3/8″ X 2 5/8″ (strip under banner)
  • Wrapped In Plaid Specialty Designer Series Paper 3 3/4″ X 5 1/2″(card front)

****************************************************************************************************

Product List

Stampin’ Up! Christmas Tidings With a Sneak Peek

Good Tuesday morning my stamping friends.  How has everyone’s week started?  I hope everyone is doing well and finishing up all your cards to get in the mail early.  I’m having a class tonight and the ladies will be making a few more Christmas cards to add to their stash.  They may even be making this one.  Before my class though I will be gong in for surgery.  I’ve had trigger finger in both of my hands and I just couldn’t stand the pain anymore or the locking of my fingers.  I am having both hands operated on at the same time, I must be nuts.  I was told that I am to use my hands immediately, so I figured why not have a class.  The first thing my daughter said when I told her I was having surgery was ” so you’ll be ok to bake cookies this year then right?”.  You can see where her priorities are, lol.

So today I have a card that looks more involved than it really is.  Once you get the couple pieces cut out, it goes together really quick.  I was very hesitant about getting the Toile Tiding Designer Series Paper, I wasn’t sure I was going to like it.  It’s only 2 colors + Very Vanilla, Garden Green on one side and Real Red on the other.  I’m so happy I bought it, I really love the designs on this paper.  Once again I was inspired by one of my team members, Akiko, who made this card for our weekly blog hop a couple weeks ago.  Here is her card.  Here’s my take on it.

I started by cutting a circle in a Very Vanilla card front using the 2nd largest circle from the Layering Circles Dies.  As in my description, I have a little sneak peek of something coming January 3, 2020 in the new Mini Catalog (formally known as the occasions catalog).  I embossed the Very Vanilla panel using the new Parisian Flourish 3D Embossing Folder, isn’t it just gorgeous.  Using the largest scallop circle from the Layering Circles Dies, I cut a piece of Real Red cardstock.  I used the 2nd largest circle die from the Layering Circles Dies to cut the inside of the scallop circle to make a frame.  I adhered the scallop frame to the Very Vanilla card front using Multipurpose Liquid Glue.  I cut a panel of Toile Tidings DSP using the largest circle die from the Layering Circles Dies making sure to get the image I wanted in the circle.  I adhered the Toile Tidings DSP circle behind the Very Vanilla panel using Stampin’ Dimensionals.

I wrapped a piece of Garden Green 3/8″ Double-Stitched Ribbon around the panel and tied a knot.  I adhered the Very Vanilla panel to a Garden Green card base using Stampin’ Dimensionals.

On a scrap of Very Vanilla cardstock I stamped the sentiment from the Stampin’ Up! Toile Christmas Cling Stamp Set in Garden Green Ink. I cut the sentiment out using the Christmas Cardinal Dies. I adhered the cut sentiment to the card front using Stampin’ Dimensionals.  I added a few Real Red Toile Tidings Glitter Enamel Dots to the card front.

On the inside I stamped the sentiment from the Toile Christmas stamp set in Garden Green Ink in the center of a Very Vanilla panel.  I stamped the branch image from the Toile Christmas stamp set on either side of the panel in Garden Green Ink.  I colored the berries on the branches in using my Real Red Stampin’ Blends Markers.  I adhered the Very Vanilla panel to a Real Red mat using Snail and then to the inside of the Garden Green card base using Multipurpose Liquid Glue.

To finish my card I decorated a Medium Very Vanilla Envelope.  I stamped the branch image from the Toile Christmas stamp set in Garden Green Ink on the envelope front.  I colored the berries on the branch in using my Real Red Stampin’ Blends Marker.  I adhered a panel of the Toile Tidings DSP to the envelope flap.

Thank you for visiting my blog today.  I hope you liked my card and will give it a try. Happy Stamping!!

****************************************************************************************************

If you need any stamping supplies, I’d be very happy to be your Demonstrator. Just click HERE to go directly to my online store or drop me an email if you have any questions. 

MY CURRENT HOST CODE IS: NVSKQ72X

For any orders $50 or more I will send you my monthly class tutorials.  Click HERE or go to my Customer Rewards to see what this months tutorials are.

Click HERE to shop the clearance rack.

Happy Stamping, Karen!

****************************************************************************************************

SOMETHING FOR EVERYTHING PAPER PUMPKIN 
SUBSCRIBE TO PAPER PUMPKIN BY DECEMBER 10, 2019

December’s Something for Everything kit includes a super-versatile stamp set complete with 13 sentiments that can be used for occasions ranging from wedding, to get well, birthdays, and more! Plus, the three full-sized card designs (four of each) are gorgeous AND multiuse.  Paper Pumpkin’s December kit makes it easier than ever to give a handmade card to a friend—no matter what the occasion!

This is an all-card kit, with 13 sentiments to cover tons of occasions from weddings, get well, birthday, and more, this set does it all.

Kit details: Makes 12 cards and envelopes

Card size: 4 1/4″ x 5-1/2″ (10.8 x 14 cm)

Envelope size: 4-1/2″ x 5-3/4″ (11.4 x 14.6 cm)

Coordinating colors: Crushed Curry, Grapefruit Grove, Old Olive, Shaded Spruce, Terracotta Tile

  • Subscribe for the December kit at paperpumpkin.com from November 11–December 10.
  • Supplies may be limited toward the end of each subscription period.

Interested in subscribing to Paper Pumpkin?  You can either sign up for a subscription where you are billed monthly for your kit or you can purchase a prepaid subscription in my online store. To see more information and to sign up for the monthly subscription,  Click Here. To see the options for prepaid subscriptions in my online store, Click Here.

****************************************************************************************************

Card stock cuts for this project:

  • Garden Green Cardstock 4 1/4″ X 11″ (card base scored and folded at 5 1/2″)
  • Real Red Cardstock 4″ X 5 1/4″ (inner liner mat), 3 1/2″ X 3 1/2″ (scallop frame)
  • Very Vanilla Cardstock 4″ X 5 1/4″ (card front), 3 3/4″ X 5″ (inner liner)
  • Toile Tidings Designer Series Paper

****************************************************************************************************

Product List

Stampin’ Up! Night Before Christmas Wish for Everything

Good Monday morning my fellow stampers and Happy December!!  How was everyone’s long weekend?  Did anyone brave going out on Black Friday to start their holiday shopping? I definitely did NOT.  I stayed in and got my house decorated for Christmas.  This has been a tradition of mine for years to decorate the weekend after Thanksgiving.  I decorate the inside and my husband does the outside.  Sometimes I think he is trying to compete with Christmas Vacation though.  I didn’t decorate as much this year as I normally do.  Christmas usually explodes in my house, going all out decorating every room to the fullest.  We are leaving for a vacation (finally after 5 years) on January 6th and I will need to pack up everything before I leave, I don’t want to have to come home to having to pack up Christmas.

For this week, I’m doing some pretty quick and easy cards for you.  We’re getting to crunch time to finish up Christmas cards, so I figured I give you some quick ones using up a lot of DSP.  Today’s card was inspired by my upline Jaimie.  I’ve had this piece of DSP and didn’t know how to use it without ruining the beautiful picture, Jaimie made a card last week using this paper and I loved it.  Here’s today’s card.

This is one of the cards we are going to make at my Stamp Camp this week.  I started by cutting the panel of Night Before Christmas Designer Series Paper in half so that I could make 2 cards from this one piece.  Now everyone knows that I don’t make any 2 cards the same, but when I’m having a class everyone else makes my card.

I adhered the Night Before Christmas DSP to a Very Vanilla mat using Snail.  I adhered the matted DSP to a Night of Navy card front using Multipurpose Liquid Glue.  I cut the Merry Christmas sentiment out of a scrap of Very Vanilla cardstock using the Word Wishes Dies.  I adhered the sentiment to the card front using Multipurpose Liquid Glue.

They are a little difficult to see, but I added a few Gold Glitter Enamel Dots to the card front to add a little glimmer.

On the inside I stamped the sentiment from the Stampin’ Up! A Wish For Everything Cling Stamp Set in Night of Navy Ink in the center of a Very Vanilla panel.  I stamped the tree image from the Stampin’ Up Winter Woods Cling Stamp Set off to the side in Old Olive Ink.  I adhered the Very Vanilla panel to the inside of the Night of Navy card base using Multipurpose Liquid Glue.

To finish my card I decorated a Medium Very Vanilla Envelope.  I stamped the tree image from the Winter Woods stamp set in Old Olive Ink on the envelope front.  I adhered a panel of the Night Before Christmas DSP to the envelope flap.

Thank you for stopping by my blog today.  I hope you liked my card and will give it a try. Happy Stamping!!

****************************************************************************************************

If you need any stamping supplies, I’d be very happy to be your Demonstrator. Just click HERE to go directly to my online store or drop me an email if you have any questions. 

MY CURRENT HOST CODE IS: NVSKQ72X

For any orders $50 or more I will send you my monthly class tutorials.  Click HERE or go to my Customer Rewards to see what this months tutorials are.

Click HERE to shop the clearance rack.

Happy Stamping, Karen!

****************************************************************************************************

SOMETHING FOR EVERYTHING PAPER PUMPKIN 
SUBSCRIBE TO PAPER PUMPKIN BY DECEMBER 10, 2019

December’s Something for Everything kit includes a super-versatile stamp set complete with 13 sentiments that can be used for occasions ranging from wedding, to get well, birthdays, and more! Plus, the three full-sized card designs (four of each) are gorgeous AND multiuse.  Paper Pumpkin’s December kit makes it easier than ever to give a handmade card to a friend—no matter what the occasion!

This is an all-card kit, with 13 sentiments to cover tons of occasions from weddings, get well, birthday, and more, this set does it all.

Kit details: Makes 12 cards and envelopes

Card size: 4 1/4″ x 5-1/2″ (10.8 x 14 cm)

Envelope size: 4-1/2″ x 5-3/4″ (11.4 x 14.6 cm)

Coordinating colors: Crushed Curry, Grapefruit Grove, Old Olive, Shaded Spruce, Terracotta Tile

  • Subscribe for the December kit at paperpumpkin.com from November 11–December 10.
  • Supplies may be limited toward the end of each subscription period.

Interested in subscribing to Paper Pumpkin?  You can either sign up for a subscription where you are billed monthly for your kit or you can purchase a prepaid subscription in my online store. To see more information and to sign up for the monthly subscription,  Click Here. To see the options for prepaid subscriptions in my online store, Click Here.

****************************************************************************************************

Card stock cuts for this project:

  • Night of Navy Cardstock 4 1/4″ X 11″ (card base scored and folded at 5 1/2″)
  • Very Vanilla Cardstock 3 1/4″ X 5 1/2″ (card front mat), 4″ X 5 1/4″ (inner liner)
  • Night Before Christmas Designer Series Paper 3″ X 5 1/2″(card front), piece for envelope flap

****************************************************************************************************

Product List