Stampin’ Up! Blossoms In Bloom

Good Wednesday morning my fellow stampers.  We’re halfway through the week and almost to the weekend.  Hope you are all having a productive week.  My day didn’t go exactly as planned yesterday.  I thought I was going to be alone all day and get so much done.  My sons girlfriend was at our house and didn’t leave till almost noon and my daughter called me because she forgot  things and needed me to either bring them to her or pick her up.  I ended up picking her up since I needed her to take my car so she could come home today to wait for a delivery while I’m at work.

For today’s card I decided to make something a little more summery, since it is still summer after all.  Here’s my card for today.

My design is from Global Design Project #254.  Here is their sketch
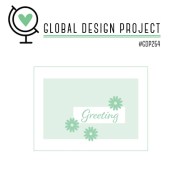
My colors are from CAS Colours & Sketch challenge #384.  Here are their colors.

I started by cutting the largest die from the Many Layered Blossoms Dies from a panel of Pool Party cardstock, adhered to an Adhesive Sheet, and adhered it to a Pool Party card base.  I cut the smaller flowers from the Many Layered Blossoms Dies from panels of Daffodil Delight and Highland Heather cardstock.
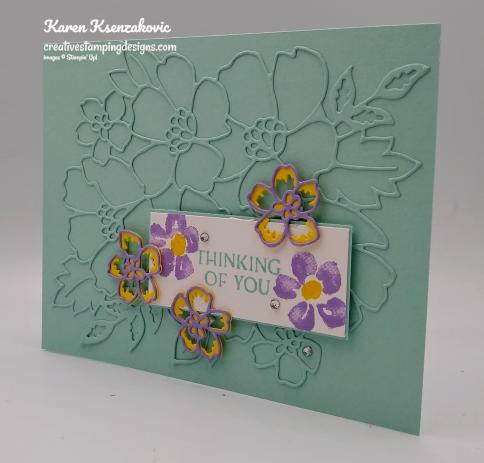
On a small panel of Whisper White cardstock, I stamped the sentiment from the Stampin’ Up! Blossoms In Bloom Photopolymer Stamp Set in Pool Party Ink.  I stamped the small flowers from the Blossoms In Bloom stamp set in Highland Heather Ink on either side of the sentiment and stamped the centers in Daffodil Delight Ink.  I adhered the Whisper White panel to a thin Pool Party mat using Stampin’ Seal and then to the card front using Stampin’ Dimensionals.
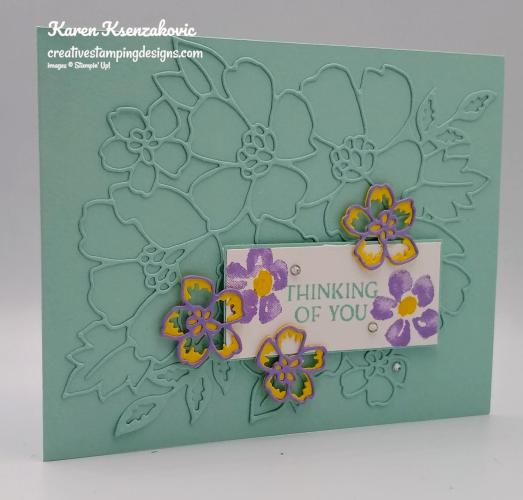
I adhered the small Highland Heather flowers to the small Daffodil Delight flowers using Multipurpose Liquid Glue just in the centers.  I adhered the die cut flowers to the card front using Stampin’ Dimensionals.  I added a few Rhinestone Basic Jewels to the card front.

On the inside I stamped the large floral image from the Blossoms In Bloom stamp set in Highland Heather Ink, stamping off once, on a Whisper White panel.  I stamped the flower center image from the Blossoms In Bloom stamp set in Daffodil Delight Ink, stamping off once, in the center of each flower.  I stamped the sentiment from the Stampin’ Up! Bloom & Grow Photopolymer Stamp Set in Pool Party Ink in the center of the Whisper White panel.  I adhered the Whisper White panel to a Pool Party mat using Stampin’ Seal and then to the inside of the Pool Party card base using Multipurpose Liquid Glue.
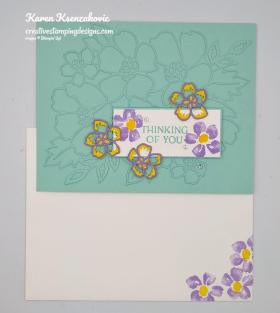
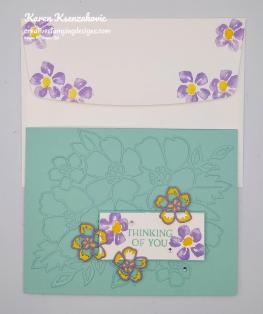
To finish my card I decorated a Medium Whisper White Envelope.  I stamped the small flower images from the Blossoms In Bloom stamp set in Highland Heather Ink on the envelope front and flap.  I stamped the flower centers in Daffodil Delight Ink.

Thank you for stopping by my blog today.  I hope you liked my card and will give it a try. Happy Stamping!!

****************************************************************************************************

If you need any stamping supplies, I’d love to be your Demonstrator. Just click HERE to go directly to my online store or drop me an email if you have any questions. 

MY CURRENT HOST CODE IS: 4Z2KHBVY

Use this host code when you order $50 or greater and receive a free gift from me! If your order is over $150, please do not use this code, but you’ll still get the free gift. The free gift is your choice of any 1 item valued up to $10.00 in the 2020-2021 Annual Catalog!   For any orders $50 or more I will also send you my monthly class tutorials.  Click HERE or go to my Customer Rewards for more details and to see what this months tutorials are.

 Click HERE to shop the clearance rack.

Happy Stamping, Karen!

****************************************************************************************************

IT’S TIME TO REDEEM THOSE BONUS DAYS COUPONS YOU EARNED IN JULY!!

  • Redemption Deadline:  August 31 2020, by 11:50 PM (MT)
  • There is no limit to the number of coupon codes participants can use on an order during redemption.
  • Bonus Days coupon codes may be redeemed for any product (excluding Starter Kits and Paper Pumpkin monthly subscriptions).
    • New prepaid Paper Pumpkin codes may be discounted using Bonus Days coupon codes.
  • Bonus Days coupon codes will reduce the amount of an order.
  • Bonus Days coupon codes may be redeemed one time only.

****************************************************************************************************

HELLO, PUMPKIN

SUBSCRIBE AUTUST 11 – SEPTEMBER 10
As the autumn season approaches, prepare to celebrate with the September Paper Pumpkin Kit! There’s so much to love about fall—some love the haunts of Halloween, many love the time to give thanks, and others love the changing colors and cooler temperatures. Whatever you love most about fall, September’s kit has everything you need to celebrate the season your way! Between a multi-occasion stamp set and enough supplies to design 20 cracker box treat packages, you can create custom fall crafts to celebrate Halloween, Thanksgiving, pumpkins, and leaves. Whether you make them all the same or mix ‘n’ match your crafts, there’s something for everyone in this kit!

September’s kit is a must-have for those who love to celebrate all things spooky. But, for those who don’t enjoy the Halloween haunts, the multi-occasion stamp set combined with a variety of die-cut and reversible paper pieces offers many ways to customize your fall crafts!

  • Kit contains enough supplies to create 20 cracker box treat packages.
  • Each cracker box treat package can be customized to celebrate Halloween, Thanksgiving, the autumn season, or all three!
  • Coordinating Colors: Bumblebee, Basic Black, Cajun Craze, Cinnamon Cider, Mossy Meadow, Old Olive, Pumpkin Pie, white

Subscribe to the September 2020 Paper Pumpkin Kit from 11 August to 10 September at paperpumpkin.com!

Note: Supplies may be limited toward the end of the subscription period.

****************************************************************************************************

I’m cleaning my shelves and drawers out to make room for lots of new goodie.  I have my list right HERE and I’m trying to keep it up to date.   Check it out and let me know if there is anything you’d like to get.  If you are looking for something and don’t see it on the list, drop me a line and I will look through my stash to see if I missed it.  I have lots of older DSP too that I don’t have listed if there is any that you are looking for.

****************************************************************************************************

Card stock cuts for this project:

  • Daffodil Delight Cardstock 2″ X 2 1/2″ (die cut flowers)
  • Highland Heather Cardstock 2″ X 2 1/2″ (die cut flowers)
  • Pool Party Cardstock 4 1/4″ X 11″ (card base scored and folded at 5 1/2″), 4 1/4″ X 5 1/2″ (card front die cut), 1 1/4″ x 2 3/4″ (sentiment mat), 4 1/8″ X 5 3/8″ (inner liner mat)
  • Whisper White Cardstock 1 3/16″ X 2 11/16″ (sentiment), 4″ X 5 1/4″ (inner liner)

****************************************************************************************************

Product List

Stampin’ Up! Sounds of The Season

Good Tuesday morning my stamping friends.  How has everyone’s week started off?  Today is the first day in months that I am home alone.  My husband had to go into the office, my son is at work and my daughter is house sitting at my nieces.  It’s just me and my dog for the day.  I can have some peace and quiet.  I love being in the house alone in silence.  I am so looking forward to just doing my own thing today without being interrupted.

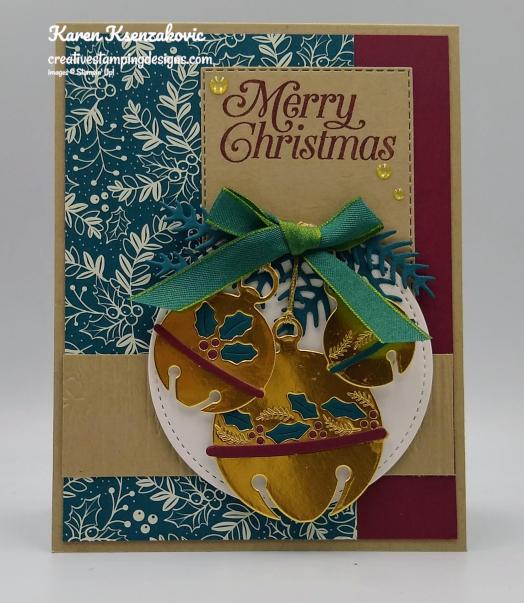
For today I played with a new set to me and made you a Christmas card.  Here’s my card for today.

My colors are from ‘Just Us Girls’ color challenge # 549.  As soon as I saw their colors I thought they would make a beautiful Christmas card. Here are their colors.

My design is from Mojo Monday Sketch #543.  Here is their sketch.

I started by adhering a panel of the returning Brightly Gleaming Specialty Designer Series Paper to a Merry Merlot card front using Stampin’ Seal.  I cut a panel of Crumb Cake cardstock using my Stitched Rectangle Dies.  I stamped the sentiment from the Stampin’ Up! Perfectly Plaid Photopolymer Stamp Set on the top of the rectangle panel in Merry Merlot Ink and adhered it to the card front between the 2 panels using Multipurpose Liquid Glue.  I embossed another panel of Crumb Cake cardstock using my Pinewood Planks 3D Embossing Folder and adhered it near the bottom of the card front using Multipurpose Liquid Glue.

I cut 3 bells out of a Gold Foil Sheet using the Sounds of the Season Dies.  I cut the boughs from the Sounds of the Season Dies out of a panel of Pretty Peacock cardstock along with just the tops of the 2 bells with the holly leaves.  I cut the tops of the 2 bells with the holly leaves out of a panel of Merry Merlot cardstock also.  I wanted the holly from the Pretty Peacock panel and the berries from the Merry Merlot panel.  I inserted the holly and berries into the gold bells keeping them in place with Stampin’ Dimensionals on the back of the bells.  I adhered the center bell pieces which I had cut from  the Merry Merlot and Pretty Peacock card stock, in the center of the bells using a tiny drop of Multipurpose Liquid Glue.  I cut the largest circle from the Stitched Shapes Dies out of a panel of Shimmery White cardstock.  I attached a piece of the gold trim from the Forever Greenery Trim Combo Pack, around the top of the bells.  I adhered the bells to the Shimmery White stitched circle using Stampin’ Dimensionals.  I adhered the Pretty Peacock pine boughs to the top of the circle using Stampin’ Seal.  I adhered the gold trim to the back of the circle using Stampin’ Seal.  I tied a small bow using the Old Olive/Pretty Peacock 3/8″ Reversible Ribbon and adhered it to the top of the circle using Glue Dots.  I adhered the artwork to the card front using Stampin’ Dimensionals.  I adhered the card front to a Crumb Cake card base using Multipurpose Liquid Glue.

On the inside I stamped the sentiment from the Stampin’ Up! Cherish The Season Cling Stamp Set to the center of a Very Vanilla panel using Merry Merlot Ink.  I stamped the pine boughs from the Cherish the Season stamp set in Pretty Peacock Ink on the top of the panel.  I stamped the smallest bell from the Cherish the Season stamp set in Crumb Cake Ink on the boughs.  I adhered the Very Vanilla panel to a Pretty Peacock mat using Stampin’ Seal and then to the inside of the Crumb Cake card base using Multipurpose Liquid Glue.

To finish my card I decorated a Medium Very Vanilla Envelope.  I stamped the pine boughs from the Cherish the Season stamp set in Pretty Peacock Ink on the front of the envelope.  I stamped the smallest bell from Cherish the Season stamp set in Crumb Cake Ink on the boughs.  I adhered a panel of Brightly Gleaming Specialty DSP to the envelope flap.

Thank you for visiting my blog today.  I hope you liked my card and will give it a try. Happy Stamping!!

****************************************************************************************************

If you need any stamping supplies, I’d love to be your Demonstrator. Just click HERE to go directly to my online store or drop me an email if you have any questions. 

MY CURRENT HOST CODE IS: 4Z2KHBVY

Use this host code when you order $50 or greater and receive a free gift from me! If your order is over $150, please do not use this code, but you’ll still get the free gift. The free gift is your choice of any 1 item valued up to $10.00 in the 2020-2021 Annual Catalog!   For any orders $50 or more I will also send you my monthly class tutorials.  Click HERE or go to my Customer Rewards for more details and to see what this months tutorials are.

 Click HERE to shop the clearance rack.

Happy Stamping, Karen!

****************************************************************************************************

IT’S TIME TO REDEEM THOSE BONUS DAYS COUPONS YOU EARNED IN JULY!!

  • Redemption Deadline:  August 31 2020, by 11:50 PM (MT)
  • There is no limit to the number of coupon codes participants can use on an order during redemption.
  • Bonus Days coupon codes may be redeemed for any product (excluding Starter Kits and Paper Pumpkin monthly subscriptions).
    • New prepaid Paper Pumpkin codes may be discounted using Bonus Days coupon codes.
  • Bonus Days coupon codes will reduce the amount of an order.
  • Bonus Days coupon codes may be redeemed one time only.

****************************************************************************************************

HELLO, PUMPKIN

SUBSCRIBE AUTUST 11 – SEPTEMBER 10

As the autumn season approaches, prepare to celebrate with the September Paper Pumpkin Kit! There’s so much to love about fall—some love the haunts of Halloween, many love the time to give thanks, and others love the changing colors and cooler temperatures. Whatever you love most about fall, September’s kit has everything you need to celebrate the season your way! Between a multi-occasion stamp set and enough supplies to design 20 cracker box treat packages, you can create custom fall crafts to celebrate Halloween, Thanksgiving, pumpkins, and leaves. Whether you make them all the same or mix ‘n’ match your crafts, there’s something for everyone in this kit!

September’s kit is a must-have for those who love to celebrate all things spooky. But, for those who don’t enjoy the Halloween haunts, the multi-occasion stamp set combined with a variety of die-cut and reversible paper pieces offers many ways to customize your fall crafts!

  • Kit contains enough supplies to create 20 cracker box treat packages.
  • Each cracker box treat package can be customized to celebrate Halloween, Thanksgiving, the autumn season, or all three!
  • Coordinating Colors: Bumblebee, Basic Black, Cajun Craze, Cinnamon Cider, Mossy Meadow, Old Olive, Pumpkin Pie, white

Subscribe to the September 2020 Paper Pumpkin Kit from 11 August to 10 September at paperpumpkin.com!

Note: Supplies may be limited toward the end of the subscription period.

****************************************************************************************************

I’m cleaning my shelves and drawers out to make room for lots of new goodie.  I have my list right HERE and I’m trying to keep it up to date.   Check it out and let me know if there is anything you’d like to get.  If you are looking for something and don’t see it on the list, drop me a line and I will look through my stash to see if I missed it.  I have lots of older DSP too that I don’t have listed if there is any that you are looking for.

****************************************************************************************************

Card stock cuts for this project:

  • Crumb Cake Cardstock 4 1/4″ X 11″ (card base scored and folded at 5 1/2″), 4 1/4″ X 5″ (stitched rectangle), 4″ X 1 1/4″ (card front panel)
  • Merry Merlot Cardstock 4″ X 5 1/4″ (card front), 2″ X 2″ (partial bells and rims)
  • Pretty Peacock Cardstock 5″ X 2″  (partial bells, rims and pine boughs)
  • Shimmery White Cardstock 3″ X 3″ (stitched circle)
  • Very Vanilla Cardstock 4″ X 5 1/4″ (inner liner)
  • Gold Foil Sheet 3 1/2″ X 3″ (bells)
  • Brightly Gleaming Specialty Designer Series Paper 3″ x 5 1/4″ (card front panel), 2 1/4″ X 6″ (piece for envelope flap)

****************************************************************************************************

Product List

Stampin’ Up! Nothing’s Better Than Coffee

Good Monday morning my fellow stampers.  How was everyone’s weekend?  I worked Saturday, but I had Sunday off.  It was a rainy cool day here.  It was almost like a touch of fall sneaking in.

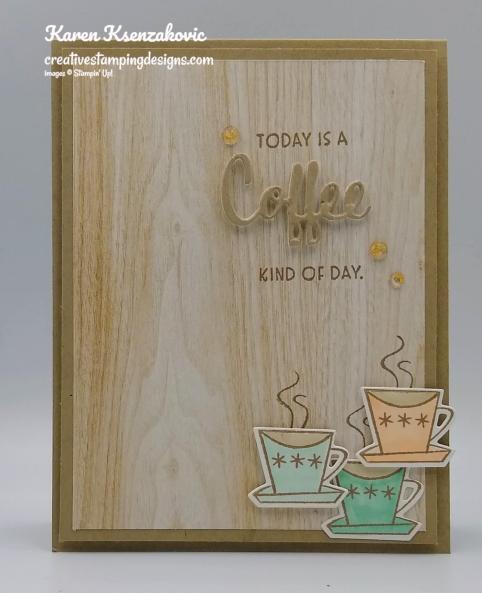
For today I played around with one of the sets I just love from the new 2020-2021 Annual Catalog.  I’m not really a coffee drinker, but I know a lot of people that are.  Here’s my card for today.

My colors are from Color Throwdown challenge #606.  Here are their colors.

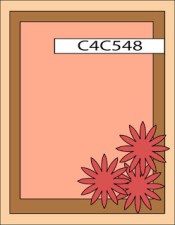
My design is from Crazy 4 Challenges #548.  Here is their sketch.

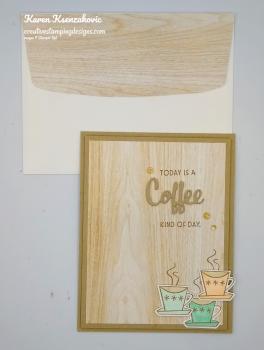
I started by adhering a panel of In Good Taste Designer Series Paper to a Crumb Cake mat using Stampin’ Seal.  I stamped the sentiments from the Stampin’ Up! Nothing’s Better Than Cling Stamp Set in Crumb Cake Ink on the top of the panel in Crumb Cake Ink.  I cut the ‘coffee’ out of a small panel of Crumb Cake cardstock, which I adhered to a Foam Adhesive Sheet, using my Love You More Than Dies.  I adhered the sentiment between the 2 stamped sentiments.

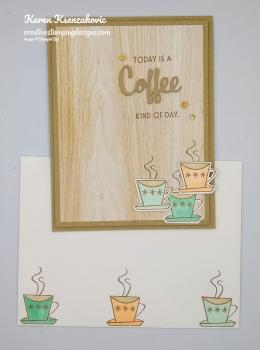
I stamped 3 coffee cups from the Nothing’s Better Than stamp set in Crumb Cake Ink on a panel of Whisper White cardstock.  I colored the images in using my Crumb Cake, Petal Pink and Pool Party Stampin’ Blends Markers.  I cut the images out using my Love You More Than Dies.  I stamped the steam image from the Nothing’s Better Than stamp set in Crumb Cake Ink on the bottom of the panel.  I adhered the 1st coffee cup using Glue Dots.  I adhered the other 2 coffee cups using Stampin’ Dimensionals, over lapping them a little.

I adhered the card front to a Crumb Cake card base using Stampin’ Dimensionals.  I added a few Clear Wonderful Gems to the card front.

On the inside I stamped the sentiments from the Nothing’s Better Than stamp set in Crumb Cake Ink in the center of a Whisper White panel.  I stamped 3 coffee cups from the Nothing’s Better Than stamp set in Crumb Cake Ink on the bottom of the panel.  I stamped the steam image above the coffee cups in Crumb Cake Ink.  I colored the images in using my Crumb Cake, Petal Pink and Pool Party Stampin’ Blends Markers.  I adhered the Whisper White panel to a Petal Pink mat using Stampin’ Seal and then to the inside of the Crumb Cake card base using Multipurpose Liquid Glue.

To complete my card, I decorated a Medium Whisper White Envelope.  I stamped 3 of the coffee cups from the Nothing’s Better Than stamp set in Crumb Cake Ink on the bottom of the envelope front.  I stamped the steam image from the Nothing’s Better Than stamp set above each cup.  I colored the images in using my Crumb Cake, Petal Pink and Pool Party Stampin’ Blends Markers.  I adhered a panel of In Good Taste DSP to the envelope flap.

Thank you for stopping by my blog today.  I hope enjoyed my card and will give it a try. Happy Stamping!!

****************************************************************************************************

If you need any stamping supplies, I’d love to be your Demonstrator. Just click HERE to go directly to my online store or drop me an email if you have any questions. 

MY CURRENT HOST CODE IS: 4Z2KHBVY

Use this host code when you order $50 or greater and receive a free gift from me! If your order is over $150, please do not use this code, but you’ll still get the free gift. The free gift is your choice of any 1 item valued up to $10.00 in the 2020-2021 Annual Catalog!   For any orders $50 or more I will also send you my monthly class tutorials.  Click HERE or go to my Customer Rewards for more details and to see what this months tutorials are.

 Click HERE to shop the clearance rack.

Happy Stamping, Karen!

****************************************************************************************************

IT’S TIME TO REDEEM THOSE BONUS DAYS COUPONS YOU EARNED IN JULY!!

  • Redemption Deadline:  August 31 2020, by 11:50 PM (MT)
  • There is no limit to the number of coupon codes participants can use on an order during redemption.
  • Bonus Days coupon codes may be redeemed for any product (excluding Starter Kits and Paper Pumpkin monthly subscriptions).
    • New prepaid Paper Pumpkin codes may be discounted using Bonus Days coupon codes.
  • Bonus Days coupon codes will reduce the amount of an order.
  • Bonus Days coupon codes may be redeemed one time only.

****************************************************************************************************

HELLO, PUMPKIN

SUBSCRIBE AUTUST 11 – SEPTEMBER 10

As the autumn season approaches, prepare to celebrate with the September Paper Pumpkin Kit! There’s so much to love about fall—some love the haunts of Halloween, many love the time to give thanks, and others love the changing colors and cooler temperatures. Whatever you love most about fall, September’s kit has everything you need to celebrate the season your way! Between a multi-occasion stamp set and enough supplies to design 20 cracker box treat packages, you can create custom fall crafts to celebrate Halloween, Thanksgiving, pumpkins, and leaves. Whether you make them all the same or mix ‘n’ match your crafts, there’s something for everyone in this kit!

September’s kit is a must-have for those who love to celebrate all things spooky. But, for those who don’t enjoy the Halloween haunts, the multi-occasion stamp set combined with a variety of die-cut and reversible paper pieces offers many ways to customize your fall crafts!

  • Kit contains enough supplies to create 20 cracker box treat packages.
  • Each cracker box treat package can be customized to celebrate Halloween, Thanksgiving, the autumn season, or all three!
  • Coordinating Colors: Bumblebee, Basic Black, Cajun Craze, Cinnamon Cider, Mossy Meadow, Old Olive, Pumpkin Pie, white

Subscribe to the September 2020 Paper Pumpkin Kit from 11 August to 10 September at paperpumpkin.com!

Note: Supplies may be limited toward the end of the subscription period.

****************************************************************************************************

I’m cleaning my shelves and drawers out to make room for lots of new goodie.  I have my list right HERE and I’m trying to keep it up to date.   Check it out and let me know if there is anything you’d like to get.  If you are looking for something and don’t see it on the list, drop me a line and I will look through my stash to see if I missed it.  I have lots of older DSP too that I don’t have listed if there is any that you are looking for.

****************************************************************************************************

Card stock cuts for this project:

  • Crumb Cake Cardstock 4 1/4″ X 11″ (card base scored and folded at 5 1/2″), 4″ X 5 1/4″ (card front mat), 1 1/2″ X 2″ (sentiment)
  • Petal Pink Cardstock 4 1/8″ X 5 3/8″(inner liner mat)
  • Whisper White Cardstock 1 1/4″ X 4 1/4″ (coffee cups), 4″ X 5 1/4″(inner liner)
  • In Good Taste Designer Series Paper 3 3/4″ X 5″ (card front), 2 1/4″ X 6″ (piece for envelope flap)

****************************************************************************************************

Product List

Stampin’ Up! Itty Bitty Greetings CAS Sympathy

Good Sunday morning my stamping friends.  How is everyone’s weekend going?  We have a very rainy day here, great day to craft of just get inside things done. Temperatures here in NJ are dropping a bit, which I’m kind of happy about since we don’t have A/C.  We’re only supposed to be in the 80’s for the next week, YAY!!!  My daughter is heading over to my nieces today to animal and house sit for the week, I have to admit I’m going to be a little lost here without her.

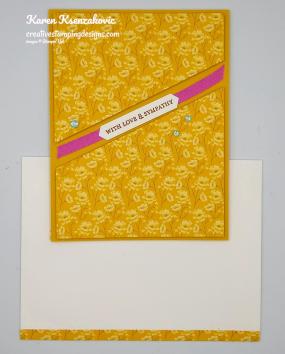
I have a clean and simple card for you today using mainly Designer Series Paper.  Here’s my card for today.

My colors are from Hand Stamped Sentiments Challenge #345.  I chose to use mostly Bumblebee with a touch of the Magenta Madness and Coastal Cabana.  Here are their colors.

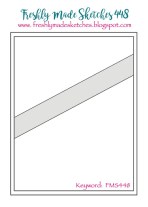
My design is from Freshly Made Sketches Challenge #448.  Here is their sketch.

I started by adhering a panel of Flowers For Every Season 6 X 6 Designer Series Paper to a panel of Bumblebee cardstock using Stampin’ Seal.  I cut the panel of a diagonal using my Paper Trimmer.  I moved the cut line to the 1/2″ mark and cut again.

I adhered the cut panels to a Bumblebee card base using Stampin’ Dimensionals.  I added a strip of Magenta Madness 1/4″ 2020-2022 In-Color Ribbon between the panels on the card base using Stampin’ Seal.  On a thin strip of Whisper White cardstock I stamped the sentiment from the Stampin’ Up! Itty Bitty Greetings Cling Stamp Set in Cinnamon Cider Ink.  I cut the sentiment out using my Classic Label Punch.

I adhered the sentiment to the ribbon using Glue Dots.  I added a few Coastal Cabana Holiday Rhinestone Basic Jewels to the card front.

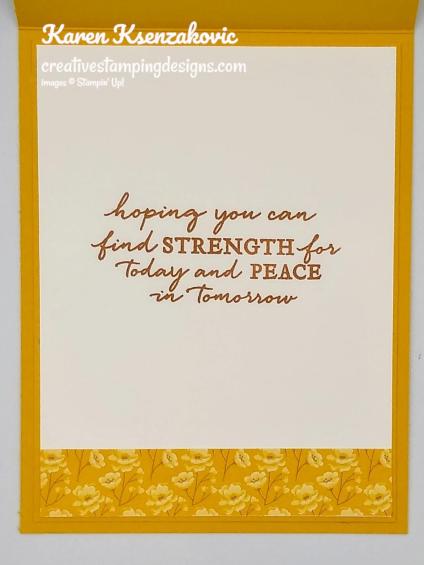
On the inside I stamped the sentiment from the Stampin’ Up! Path of Petals Photopolymer Stamp Set in Cinnamon Cider Ink in the center of a Whisper White panel.  I adhered a strip of Flowers for Every Season DSP to the bottom of the panel using Stampin’ Seal.  I adhered the Whisper White panel to a Bumblebee mat using Stampin’ Seal and then to the inside of the Bumblebee card base using Multipurpose Liquid Glue.

To finish my card I decorated a Medium Whisper White Envelope keeping it very simple.  I adhered a panel of Flowers for Every Season DSP to the front of the envelope and the envelope flap.

Thank you for stopping my my blog today.  I hope you liked my card and will give it a try. Happy Stamping!!

****************************************************************************************************

If you need any stamping supplies, I’d love to be your Demonstrator. Just click HERE to go directly to my online store or drop me an email if you have any questions. 

MY CURRENT HOST CODE IS: 4Z2KHBVY

Use this host code when you order $50 or greater and receive a free gift from me! If your order is over $150, please do not use this code, but you’ll still get the free gift. The free gift is your choice of any 1 item valued up to $10.00 in the 2020-2021 Annual Catalog!   For any orders $50 or more I will also send you my monthly class tutorials.  Click HERE or go to my Customer Rewards for more details and to see what this months tutorials are.

 Click HERE to shop the clearance rack.

Happy Stamping, Karen!

****************************************************************************************************

IT’S TIME TO REDEEM THOSE BONUS DAYS COUPONS YOU EARNED IN JULY!!

  • Redemption Deadline:  August 31 2020, by 11:50 PM (MT)
  • There is no limit to the number of coupon codes participants can use on an order during redemption.
  • Bonus Days coupon codes may be redeemed for any product (excluding Starter Kits and Paper Pumpkin monthly subscriptions).
    • New prepaid Paper Pumpkin codes may be discounted using Bonus Days coupon codes.
  • Bonus Days coupon codes will reduce the amount of an order.
  • Bonus Days coupon codes may be redeemed one time only.

****************************************************************************************************

HELLO, PUMPKIN

SUBSCRIBE AUTUST 11 – SEPTEMBER 10

As the autumn season approaches, prepare to celebrate with the September Paper Pumpkin Kit! There’s so much to love about fall—some love the haunts of Halloween, many love the time to give thanks, and others love the changing colors and cooler temperatures. Whatever you love most about fall, September’s kit has everything you need to celebrate the season your way! Between a multi-occasion stamp set and enough supplies to design 20 cracker box treat packages, you can create custom fall crafts to celebrate Halloween, Thanksgiving, pumpkins, and leaves. Whether you make them all the same or mix ‘n’ match your crafts, there’s something for everyone in this kit!

September’s kit is a must-have for those who love to celebrate all things spooky. But, for those who don’t enjoy the Halloween haunts, the multi-occasion stamp set combined with a variety of die-cut and reversible paper pieces offers many ways to customize your fall crafts!

  • Kit contains enough supplies to create 20 cracker box treat packages.
  • Each cracker box treat package can be customized to celebrate Halloween, Thanksgiving, the autumn season, or all three!
  • Coordinating Colors: Bumblebee, Basic Black, Cajun Craze, Cinnamon Cider, Mossy Meadow, Old Olive, Pumpkin Pie, white

Subscribe to the September 2020 Paper Pumpkin Kit from 11 August to 10 September at paperpumpkin.com!

Note: Supplies may be limited toward the end of the subscription period.

****************************************************************************************************

I’m cleaning my shelves and drawers out to make room for lots of new goodie.  I have my list right HERE and I’m trying to keep it up to date.   Check it out and let me know if there is anything you’d like to get.  If you are looking for something and don’t see it on the list, drop me a line and I will look through my stash to see if I missed it.  I have lots of older DSP too that I don’t have listed if there is any that you are looking for.

****************************************************************************************************

Card stock cuts for this project:

  • Bumblebee Cardstock 4 1/4″ X 11″ (card base scored and folded at 5 1/2), 2- 4″ X 5 1/4″ (card front and inner liner mat)
  • Whisper White Cardstock 1/2″ x 3″ (sentiment), 3 7/8″ X 5 1/8″ (inner liner)
  • Flowers for Every Season 6 X 6 Designer Series Paper 4″ X 5 1/4″ (card front), 3/4″ X 3 7/8″ (inner liner), 1/4″ X 6″ (envelope front), 2 1/4″ X 6″ (envelope flap)

****************************************************************************************************

Product List

Stampin’ Up! Butterfly Wishes for Fun Fold Friday

Goof Friday morning my stamping friends and welcome to my Fun Fold Friday.  How was everyone’s week?  Does anyone have plans for the weekend?  I’m working tomorrow and Sunday dropping my daughter off for the week so she can house and animal sit while my niece is away.  She does this every year and it’s so hard since her and I do almost everything together.

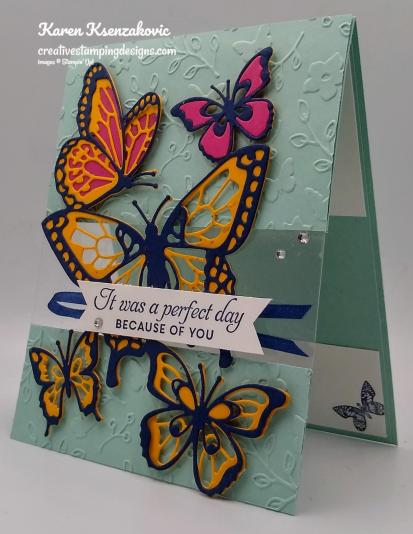
For today I made a floating card for you.  I haven’t done one of these in a while and I forgot how much I like them.  Here’s my card for today.

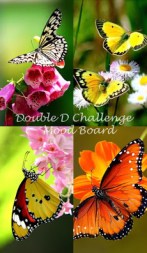
My inspiration came from the Double D Challenge.  Here is their inspiration.

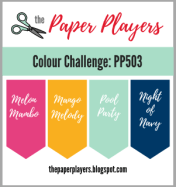
My colors are from the Paper Players Color Challenge #503.  As soon as I saw these colors I thought butterflies.  Here are their colors.

I started by scoring and cutting a Pool Party card base.  I cut the front panel, from the fold, at the 2 1/2″ mark.  I cut the bottom portion that I cut off to a 1 1/2″ panel.  I embossed 2 panels of Pool Party card stock using the Meadow Moments Embossing Folder.  Using Stampin’ Seal, I adhered a Window Sheet to the 1 1/2″ panel about 1/4″ in.  I lined the bottom of the panel up with the bottom of the back of the card base and adhered the top of the Window Sheet to the top of the card base using Stampin’ Seal.  I adhered the 2 embossed panels over the top and the bottom panels of the Window Sheet using Multipurpose Liquid Glue.

Using the Butterfly Beauty Dies, I cut 1 from a panel of Night of Navy cardstock and 1 from a panel of Mango Melody cardstock.  I also cut just the top 2 butterflies out of a panel of Melon Mambo cardstock.  I adhered the Night of Navy die to the top of the Mango Melody die using tiny amounts of Multipurpose Liquid Glue just in the larger areas.  I adhered the Melon Mambo inner pieces of the butterflies to the back of one  butterfly and to the front of the other using Multipurpose Liquid Glue.  I adhered the butterflies to the card front using Stampin’ Dimensionals only on the top and bottom.  I didn’t want to use any on the center butterfly since I didn’t want them to show through the Window Sheet.

On a strip of Whisper White cardstock I stamped the sentiment from the Stampin’ Up! Butterfly Wishes Cling Stamp Set in Night of Navy Ink.  I cut both ends of the strip into a banner using my Banner Triple Punch.  I adhered a piece of 1/8″ Night of Navy Ribbon from the Playing With Patterns Ribbon Combo Pack to the butterflies using Glue Dots.  I adhered the sentiment over the ribbon using Stampn’ Dimensionals.  I added a few Rhinestone Basic Jewels to the card front.

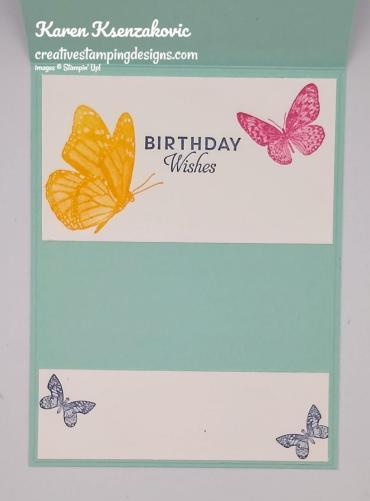
On the inside I stamped the sentiment from the Butterfly Wishes stamp set in Night of Navy Ink on a Whisper White panel.  I stamped the larger butterfly from the Butterfly Wishes stamp set in Mango Melody Ink on one side of the sentiment and the medium butterfly from the Butterfly Wishes stamp set in Melon Mambo Ink on the other side.  I adhered the Whisper White panel to the top of a Pool Party mat using Stampin’ Seal.  I stamped the small butterfly from the Butterfly Wishes stamp set in Night of Navy in on a smaller panel of Whisper White cardstock.  I adhered the smaller panel to the bottom of the Pool Party mat using Stampin’ Seal.  I adhered the matted panels to the inside of the Pool Party card base using Multipurpose Liquid Glue.

To finish my card I decorated a Medium Whisper White Envelope.  I stamped the larger butterfly from the Butterfly Wishes stamp set in Mango Melody Ink, the medium butterfly in Melon Mambo and the small butterfly in Night of Navy Ink on the envelope front and flap.

Thank you for stopping by my blog today.  I hope you liked my card and will give it a try. Happy Stamping!!

****************************************************************************************************

If you need any stamping supplies, I’d love to be your Demonstrator. Just click HERE to go directly to my online store or drop me an email if you have any questions. 

MY CURRENT HOST CODE IS: 4Z2KHBVY

Use this host code when you order $50 or greater and receive a free gift from me! If your order is over $150, please do not use this code, but you’ll still get the free gift. The free gift is your choice of any 1 item valued up to $10.00 in the 2020-2021 Annual Catalog!   For any orders $50 or more I will also send you my monthly class tutorials.  Click HERE or go to my Customer Rewards for more details and to see what this months tutorials are.

 Click HERE to shop the clearance rack.

Happy Stamping, Karen!

****************************************************************************************************

IT’S TIME TO REDEEM THOSE BONUS DAYS COUPONS YOU EARNED IN JULY!!

  • Redemption Deadline:  August 31 2020, by 11:50 PM (MT)
  • There is no limit to the number of coupon codes participants can use on an order during redemption.
  • Bonus Days coupon codes may be redeemed for any product (excluding Starter Kits and Paper Pumpkin monthly subscriptions).
    • New prepaid Paper Pumpkin codes may be discounted using Bonus Days coupon codes.
  • Bonus Days coupon codes will reduce the amount of an order.
  • Bonus Days coupon codes may be redeemed one time only.

****************************************************************************************************

HELLO, PUMPKIN

SUBSCRIBE AUTUST 11 – SEPTEMBER 10

As the autumn season approaches, prepare to celebrate with the September Paper Pumpkin Kit! There’s so much to love about fall—some love the haunts of Halloween, many love the time to give thanks, and others love the changing colors and cooler temperatures. Whatever you love most about fall, September’s kit has everything you need to celebrate the season your way! Between a multi-occasion stamp set and enough supplies to design 20 cracker box treat packages, you can create custom fall crafts to celebrate Halloween, Thanksgiving, pumpkins, and leaves. Whether you make them all the same or mix ‘n’ match your crafts, there’s something for everyone in this kit!

September’s kit is a must-have for those who love to celebrate all things spooky. But, for those who don’t enjoy the Halloween haunts, the multi-occasion stamp set combined with a variety of die-cut and reversible paper pieces offers many ways to customize your fall crafts!

  • Kit contains enough supplies to create 20 cracker box treat packages.
  • Each cracker box treat package can be customized to celebrate Halloween, Thanksgiving, the autumn season, or all three!
  • Coordinating Colors: Bumblebee, Basic Black, Cajun Craze, Cinnamon Cider, Mossy Meadow, Old Olive, Pumpkin Pie, white

Subscribe to the September 2020 Paper Pumpkin Kit from 11 August to 10 September at paperpumpkin.com!

Note: Supplies may be limited toward the end of the subscription period.

****************************************************************************************************

I’m cleaning my shelves and drawers out to make room for lots of new goodie.  I have my list right HERE and I’m trying to keep it up to date.   Check it out and let me know if there is anything you’d like to get.  If you are looking for something and don’t see it on the list, drop me a line and I will look through my stash to see if I missed it.  I have lots of older DSP too that I don’t have listed if there is any that you are looking for.

****************************************************************************************************

Card stock cuts for this project:

  • Mango Melody Cardstock 4 1/4″ X 5 1/2″ (butterflies)
  • Melon Mambo Cardstock 4 1/4″ X 3 1/2″ (butterflies)
  • Night of Navy Cardstock 4 1/4″ X 5 1/2″ (butterflies)
  • Pool Party Cardstock 4 1/4″ X 11″ (card base scored and folded at 5 1/2″), 4 1/4″ X 2 1/2″ (upper card front), 4 1/4″ X 1/2″ (lower card front), 4 1/8″ X 5 3/8″ (inner liner mat)
  • Whisper White Cardstock 3 1/2″ X 5/8″ (sentiment), 4″ X 2 1/4″ (upper inner liner), 4″ X 1 1/4″ (bottom inner liner)
  • Window Sheet 4 1/4″ X 3″ (card front)

****************************************************************************************************

Product List

Stampin’ Up! Life is Beautiful for Happy Inkin’ Thursday Blog Hop

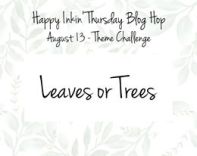
Good Thursday morning my stamping friends and welcome to our Happy Inkin’ Thursday Blog Hop.  How is everyone doing today?  If you are hopping over from Akiko, thank you for stopping by my blog. This week we have something different, we have a Theme challenge. Be sure to take a moment to hop around to see everyone’s beautiful projects .
Here is the Theme we had to work from.

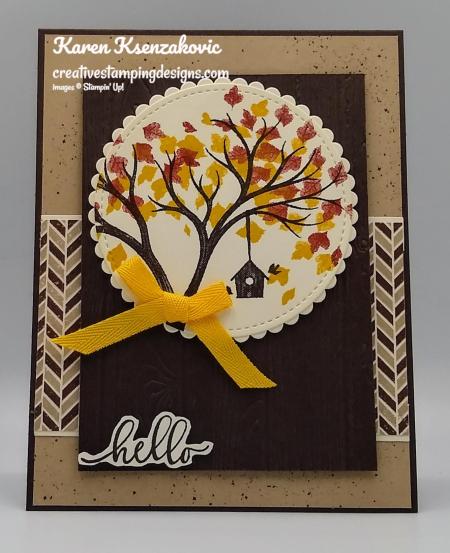
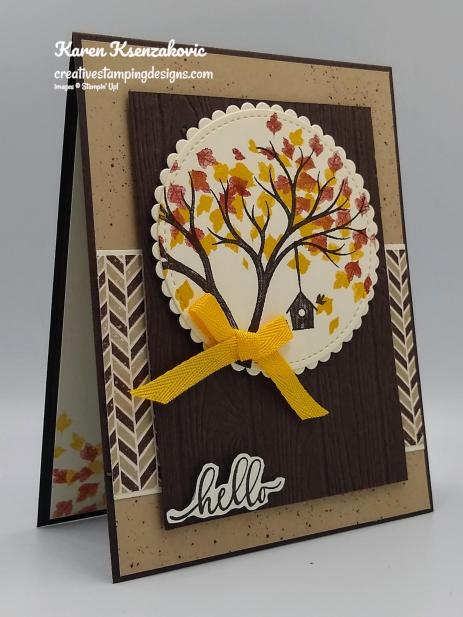
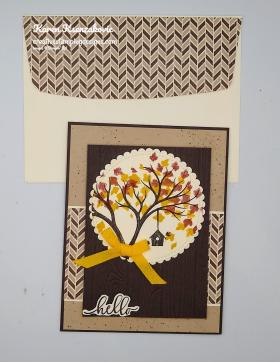
Here’s what I came up with.

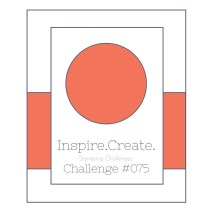
My design is from Inspire. Create. Sketch Challenge #075.  Here is their sketch.

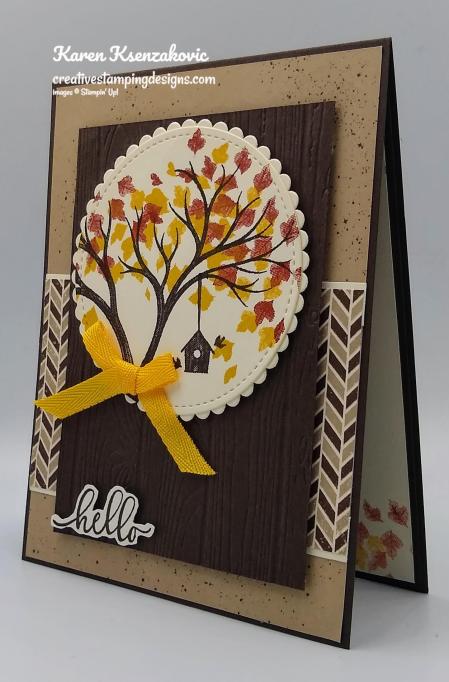
I started by adhering a panel of Gilded Autumn Specialty Designer Series Paper to an Early Espresso card base using Stampin’ Seal.  I adhered another panel of Gilded Autumn Specialty DSP to a Very Vanilla mat using Stampin’ Seal.  I adhered the matted panel to the card front using Multipurpose Liquid Glue.

On a panel of Very Vanilla cardstock I stamped the tree image from the Stampin’ Up! Life is Beautiful Photopolymer Stamp Set in Early Espresso Ink.  I stamped the bird house image from the Life is Beautiful stamp set in Early Espresso Ink, hanging from the bottom branch.  I stamped the leaf image from the Life is Beautiful stamp set in Bumblebee Ink and Cajun Craze Inks on the tree branches.  I cut the image out using the largest circle from the Stitched Shapes Dies.  I cut the largest scallop circle from the Layering Circles Dies out of a panel of Very Vanilla cardstock.  I adhered the artwork to the scallop circle mat using Stampin’ Seal.  I embossed a panel of Early Espresso cardstock using the Pinewood Plank 3D Embossing Folder.  I adhered the matted artwork to the embossed panel using Stampin’ Dimensionals.

I adhered the Early Espresso panel to the card front using Stampin’ Dimensionals.  I tied a small bow using the 1/4″ Bumblebee Ribbon 2020-2022 In-Color Ribbon and adhered it to the artwork using a Glue Dot.  I stamped the sentiment from the Life is Beautiful stamp set in Early Espresso Ink on a panel of Very Vanilla cardstock and fussy cut it using my Paper Snips.  I adhered the sentiment to the bottom of the embossed panel using Stampin’ Dimensionals.

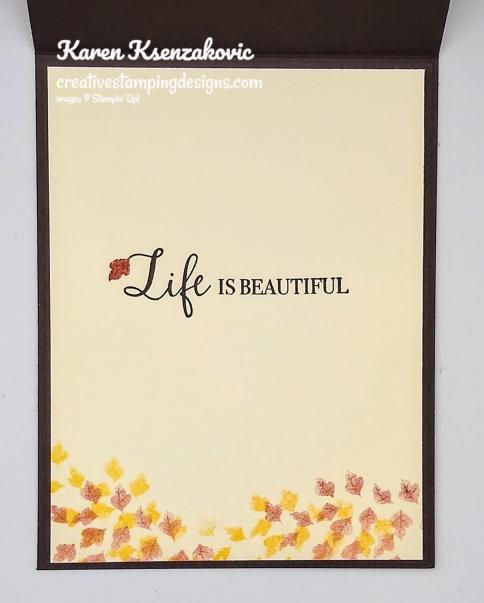
On the inside I stamped the sentiment from the Life is Beautiful stamp set in the center of Very Vanilla panel in Early Espresso Ink.  I stamped the leaf image from the Life is Beautiful stamp set in Bumblebee and Cajun Craze Inks on the bottom of the panel.  I adhered the Very Vanilla panel to an Early Espresso mat using Stampin’ Seal and then to the inside of the Early Espresso card base using Multipurpose Liquid Glue.

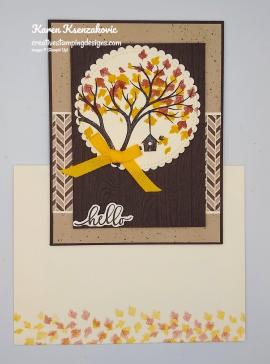
To finish my card I decorated a Medium Very Vanilla Envelope.  I stamped the leaf image from the Life is Beautiful stamp set in Bumblebee and Cajun Craze Inks on the bottom front of the envelope.  I adhered a panel of Gilded Autumn Specialty DSP to the envelope flap.

Thank you for visiting my blog today. I hope you liked my card and will give it a try. Now that you’ve seen my card, take a minute to hop through all our projects today. If you click on the Next Blog button, you’ll go to Amy’s page. Or you can just click on the names below to go directly to all the blogs! Happy Hopping!!

Karen Ksenzakovic:  You Are Here

****************************************************************************************************

If you need any stamping supplies, I’d love to be your Demonstrator. Just click HERE to go directly to my online store or drop me an email if you have any questions. 

MY CURRENT HOST CODE IS: 4Z2KHBVY

Use this host code when you order $50 or greater and receive a free gift from me! If your order is over $150, please do not use this code, but you’ll still get the free gift. The free gift is your choice of any 1 item valued up to $10.00 in the 2020-2021 Annual Catalog!   For any orders $50 or more I will also send you my monthly class tutorials.  Click HERE or go to my Customer Rewards for more details and to see what this months tutorials are.

 Click HERE to shop the clearance rack.

Happy Stamping, Karen!

****************************************************************************************************

IT’S TIME TO REDEEM THOSE BONUS DAYS COUPONS YOU EARNED IN JULY!!

  • Redemption Deadline:  August 31 2020, by 11:50 PM (MT)
  • There is no limit to the number of coupon codes participants can use on an order during redemption.
  • Bonus Days coupon codes may be redeemed for any product (excluding Starter Kits and Paper Pumpkin monthly subscriptions).
    • New prepaid Paper Pumpkin codes may be discounted using Bonus Days coupon codes.
  • Bonus Days coupon codes will reduce the amount of an order.
  • Bonus Days coupon codes may be redeemed one time only.

****************************************************************************************************

HELLO, PUMPKIN

SUBSCRIBE AUTUST 11 – SEPTEMBER 10

As the autumn season approaches, prepare to celebrate with the September Paper Pumpkin Kit! There’s so much to love about fall—some love the haunts of Halloween, many love the time to give thanks, and others love the changing colors and cooler temperatures. Whatever you love most about fall, September’s kit has everything you need to celebrate the season your way! Between a multi-occasion stamp set and enough supplies to design 20 cracker box treat packages, you can create custom fall crafts to celebrate Halloween, Thanksgiving, pumpkins, and leaves. Whether you make them all the same or mix ‘n’ match your crafts, there’s something for everyone in this kit!

September’s kit is a must-have for those who love to celebrate all things spooky. But, for those who don’t enjoy the Halloween haunts, the multi-occasion stamp set combined with a variety of die-cut and reversible paper pieces offers many ways to customize your fall crafts!

  • Kit contains enough supplies to create 20 cracker box treat packages.
  • Each cracker box treat package can be customized to celebrate Halloween, Thanksgiving, the autumn season, or all three!
  • Coordinating Colors: Bumblebee, Basic Black, Cajun Craze, Cinnamon Cider, Mossy Meadow, Old Olive, Pumpkin Pie, white

Subscribe to the September 2020 Paper Pumpkin Kit from 11 August to 10 September at paperpumpkin.com!

Note: Supplies may be limited toward the end of the subscription period.

****************************************************************************************************

Card stock cuts for this project:

  • Early Espresso Cardstock 4 1/4″ X 11″ (card base scored and folded at 5 1/2″), 3 1/4″ X 4 1/2″ (embossed card front panel), 4 1/8″ X 5 3/8″ (inner liner mat)
  • Very Vanilla Cardstock 2 1/2″ X 4 1/8″ (small dsp mat), 4″ X 7″ (artwork, scalloped mat & sentiment), 4′ X 5 1/4″ (inner liner)
  • Gilded Autumn Specialty Designer Series Paper 4 1/8″ X 5 3/8″ (card front), 2 3/8″ X 4 1/8″ (card front panel), 2 1/4″ X 6″ (piece for envelope flap)

****************************************************************************************************

Product List

Stampin’ Up! Beautiful World

Good Monday morning my stamping friends.  How was everyone’s weekend?  Are you all ready to tackle another week?  Tomorrow is a very exciting day for me.  It’s the day we demonstrators get to register for our OnStage event and I’m suppose to be heading to the beach for the day.  One of the greatest perks of being a demonstrator is that we get to attend these conventions, see new items coming, get the catalog early,  have a wonderful prize patrol and best of all get to spend time with our fellow demonstrators. This year will be a little different since they are doing everything virtually.  It will still be fun I’m sure.  I wish I had a larger house, I’d have my local team members over and we could all attend virtually together.  I’m going to miss getting together with my team, it’s such an awesome group of people.

For today I’ve made you a masculine card using the set from the 2020-2021 Annual Catalog.  Here’s my card for today.

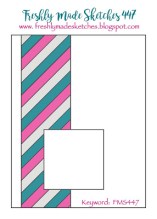
My design is from Freshly Made Sketches Challenge #447.  Here is their sketch.

I started by embossing a Mossy Meadow card front using the Old World Paper 3D Embossing Folder.

I adhered a panel of the World of Good Specialty Designer Series Paper to a Very Vanilla mat using Stampin’ Seal.  I adhered the matted panel to the embossed card front using Stampin’ Dimensionals.

On a small panel of Very Vanilla cardstock I stamped the sentiment from the Stampin’ Up! Beautiful World Cling Stamp Set in Mossy Meadow Ink. I cut the sentiment out using one of the squares from the Stitched Shapes Dies.  I adhered it to a Brass Foil Sheet mat using Stampin’ Seal.  I adhered a piece of the Early Espresso 1/4″ Faux Suede Trim to the card front using a couple Glue Dots.  I adhered the matted sentiment over the trim using Stampin’ Dimensionals.  I adhered the card front to a Mossy Meadow card base using Multipurpose Liquid Glue.

On the inside I stamped the sentiment from the Beautiful World stamp set in Mossy Meadow Ink in the center of a Very Vanilla panel.  I stamped the quill image from the Beautiful World stamp set in Mossy Meadow Ink above the sentiment.  I stamped the ink pot image from the Beautiful World stamp set on the bottom of the panel in Mossy Meadow Ink.  I adhered the Very Vanilla panel to a Mossy Meadow mat using Stampin’ Seal and then to the inside of the Mossy Meadow card base using Multipurpose Liquid Glue.

To finish my card I decorated a Medium Very Vanilla Envelope.  I stamped the quill and ink pot images from the Beautiful World stamp set in Mossy Meadow Ink on the front of the envelope.  I adhered a panel of the World of Good Specialty DSP to the envelope flap.

Thank you for stopping by my blog today.  I hope you liked my card and will give it a try. Happy Stamping!!

****************************************************************************************************

If you need any stamping supplies, I’d love to be your Demonstrator. Just click HERE to go directly to my online store or drop me an email if you have any questions. 

MY CURRENT HOST CODE IS: 4Z2KHBVY

Use this host code when you order $50 or greater and receive a free gift from me! If your order is over $150, please do not use this code, but you’ll still get the free gift. The free gift is your choice of any 1 item valued up to $10.00 in the 2020-2021 Annual Catalog!   For any orders $50 or more I will also send you my monthly class tutorials.  Click HERE or go to my Customer Rewards for more details and to see what this months tutorials are.

 Click HERE to shop the clearance rack.

Happy Stamping, Karen!

****************************************************************************************************

IT’S TIME TO REDEEM THOSE BONUS DAYS COUPONS YOU EARNED IN JULY!!

  • Redemption Deadline:  August 31 2020, by 11:50 PM (MT)
  • There is no limit to the number of coupon codes participants can use on an order during redemption.
  • Bonus Days coupon codes may be redeemed for any product (excluding Starter Kits and Paper Pumpkin monthly subscriptions).
    • New prepaid Paper Pumpkin codes may be discounted using Bonus Days coupon codes.
  • Bonus Days coupon codes will reduce the amount of an order.
  • Bonus Days coupon codes may be redeemed one time only.

****************************************************************************************************

WORLD’S GREATEST BY PAPER PUMPKIN

SUBSCRIBE JULY11 – AUGUST 10

LAST DAY TO SUBSCRIBE!!

With Paper Pumpkin, you are provided with everything you need to explore your creativity and discover new ways to craft. As we navigate a “new normal” in today’s world, there’s plenty of opportunity to papercraft! And, more importantly, there’s no better time than now to create something that’ll show the essential people in your life just how awesome you think they are.

Lately, it’s become especially clear who the everyday heroes are—they’ve always surrounded us! Teachers, doctors, hairdressers, nurses, delivery workers, cashiers, and even our friends, kids, and family members go above and beyond to enrich our lives. These people are truly the world’s greatest at what they do!

Celebrate and appreciate the everyday heroes in your life with the August Paper Pumpkin Kit. The cards included in this kit are specifically designed for celebrating life’s champions!

  • The intended use of this kit is to celebrate and appreciate life’s champions and everyday heroes.
  • Especially during this time, this is something anyone can do to make a difference. The August kit makes it easy!
  • Distinktive stamps are photo-realistic stamps that create an impressive detailed image with a single stamp.
  • The Distinktive stamps included in August’s kit are an especially excellent feature for new stampers still exploring their creativity!
  • Masculine card designs can be difficult to find, this kit has a real masculine feel.
  • While the elements of the August kit can be used to show appreciation for anyone, the masculine card designs are perfect for the men in your life!

About the August Kit:

  • Kit contains enough supplies to create nine cards and coordinating envelopes.
  • Card size: 4-1/4” x 5-1/2” (10.8 x 14 cm)
  • Envelope size: 4-1/2” x 5-3/4” (11.4 x 14.6 cm)
  • Coordinating Colors: Bumblebee, gold, Mint Macaron, Pacific Point, Soft Suede, white
  • The kit’s stamp set includes Distinktive stamps
  • Subscribe to the August 2020 Paper Pumpkin Kit from 11 July to 10 August at paperpumpkin.com!

Note: Supplies may be limited toward the end of the subscription period.

****************************************************************************************************

I’m cleaning my shelves and drawers out to make room for lots of new goodie.  I have my list right HERE and I’m trying to keep it up to date.   Check it out and let me know if there is anything you’d like to get.  If you are looking for something and don’t see it on the list, drop me a line and I will look through my stash to see if I missed it.  I have lots of older DSP too that I don’t have listed if there is any that you are looking for.

****************************************************************************************************

Card stock cuts for this project:

  • Mossy Meadow Cardstock 4 1/4″ X 11″ (card base scored and folded at 5 1/2″), 4 1/4″ X 5 1/2″ (card front), 4 1/8″ X 5 3/8″ (inner liner mat)
  • Very Vanilla Cardstock 2 1/8″ X 5 1/2″ (dsp mat), 2″ X 2″ (sentiment), 4″ X 5 1/4″(inner liner)
  • Brass Foil Sheet 1 3/4″ X 1 3/4″ (sentiment mat)
  • World of Good Specialty Designer Series Paper 2″ X 5 1/2″ (card front panel), 2 1/4″ X 6″ (piece for envelope flap)

****************************************************************************************************

Product List

Stampin’ Up! Snow Wonder Very Merry

Good Sunday morning my stamping friends.  How is everyone’s weekend going?  Did anyone do anything fun yesterday?  Things have cooled down here a bit, it’s only been in the 80’s, so it’s a little easier to get things outside done.

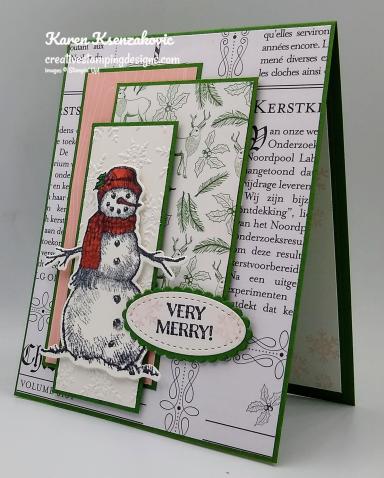
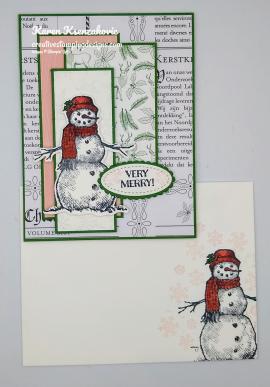
I have another Christmas card for you today and I played with another new bundle for using some non-traditional colors.  Here’s my card for today.

My sketch is from Atlantic Hearts Sketch Challenge #380.  Those of you that know me, knot that I just love layering and this design was perfect for me.  Here is their sketch.

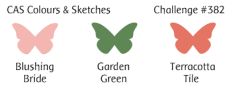
My colors were inspired by CAS Colours & Sketches Challenge #382.  I love taking non-traditional Christmas colors and trying to make a card with them. Here are their colors.

I started by adhering a panel of the Wonder of the Season Specialty Designer Series Paper to a Garden Green card base using Stampin’ Seal.

I adhered a panel of Blushing Bride Subtle 6 X 6 Designer Series Paper to a Garden Green mat using Stampin’ Seal.  I adhered a panel of ‘Tis The Season 6 X 6 Designer Series Paper to a Garden Green Mat.  I embossed a small panel of Whisper White cardstock using the Winter Snow Embossing Folder and adhered it to a Garden Green mat using Multipurpose Liquid Glue.  On a panel of Whisper White cardstock I stamped the snowman image from the Stampin’ Up! Snow Wonder Cling Stamp Set in Tuxedo Black Memento Ink.  I colored the holly leave on the hat in using my Garden Green Stampin’ Write Marker.  I colored the scarf, hat and berries on the holly in using my Terracotta Tile Stampin’ Write Marker.   I stamped the sentiment from the Stampin’ Up! Itty Bitty Christmas Cling Stamp Set on a small panel of Whisper White cardstock in Tuxedo Black Memento Ink and cut it out using the smallest oval from the Stitched Shapes Dies.  I adhered it to a Garden Green mat that I cut out using the smallest scallop oval from the Layering Ovals Dies.

I adhered the matted Blushing Bride panel to the card front using Stampin’ Seal.  I adhered the ‘Tis The Season DSP panel over the 1st panel using Stampin’ Dimensionals and Glue Dots.  I adhered the matted embossed panel on top of the other 2 using Stampin’ Dimensionals.  I adhered the snowman to the top of the embossed panel using Stampin’ Dimensionals.  I adhered the sentiment overlapping the snowman and DSP panel using Stampin’ Dimensionals and Glue Dots.

On the inside I stamped the sentiment from the Snow Wonder stamp set in Tuxedo Black Memento Ink in the center of a Whisper White panel.  I stamped the snowflake image from the Snow Wonder stamp set in Blushing Bride Ink, stamping off once, on the corners of the panel and on either side of the sentiment.  I adhered the Whisper White panel to a Garden Green mat using Stampin’ Seal and then to the inside of the Garden Green card base using Multipurpose Liquid Glue.

To finish my card I decorated a Medium Whisper White Envelope.  I stamped the snowman image from the Snow Wonder stamp set in Tuxedo Black Memento Ink on the envelope front.  I colored the image in using my Garden Green and Terracotta Tile Stampin’ Write Marker.  I adhered a panel of ‘Tis The Season DSP to the envelope flap.

Thank you for stopping by my blog today.  I hope you liked my card and will give it a try. Happy Stamping!!

****************************************************************************************************

If you need any stamping supplies, I’d love to be your Demonstrator. Just click HERE to go directly to my online store or drop me an email if you have any questions. 

MY CURRENT HOST CODE IS: 4Z2KHBVY

Use this host code when you order $50 or greater and receive a free gift from me! If your order is over $150, please do not use this code, but you’ll still get the free gift. The free gift is your choice of any 1 item valued up to $10.00 in the 2020-2021 Annual Catalog!   For any orders $50 or more I will also send you my monthly class tutorials.  Click HERE or go to my Customer Rewards for more details and to see what this months tutorials are.

 Click HERE to shop the clearance rack.

Happy Stamping, Karen!

****************************************************************************************************

IT’S TIME TO REDEEM THOSE BONUS DAYS COUPONS YOU EARNED IN JULY!!

  • Redemption Deadline:  August 31 2020, by 11:50 PM (MT)
  • There is no limit to the number of coupon codes participants can use on an order during redemption.
  • Bonus Days coupon codes may be redeemed for any product (excluding Starter Kits and Paper Pumpkin monthly subscriptions).
    • New prepaid Paper Pumpkin codes may be discounted using Bonus Days coupon codes.
  • Bonus Days coupon codes will reduce the amount of an order.
  • Bonus Days coupon codes may be redeemed one time only.

****************************************************************************************************

WORLD’S GREATEST BY PAPER PUMPKIN

SUBSCRIBE JULY11 – AUGUST 10

With Paper Pumpkin, you are provided with everything you need to explore your creativity and discover new ways to craft. As we navigate a “new normal” in today’s world, there’s plenty of opportunity to papercraft! And, more importantly, there’s no better time than now to create something that’ll show the essential people in your life just how awesome you think they are.

Lately, it’s become especially clear who the everyday heroes are—they’ve always surrounded us! Teachers, doctors, hairdressers, nurses, delivery workers, cashiers, and even our friends, kids, and family members go above and beyond to enrich our lives. These people are truly the world’s greatest at what they do!

Celebrate and appreciate the everyday heroes in your life with the August Paper Pumpkin Kit. The cards included in this kit are specifically designed for celebrating life’s champions!

  • The intended use of this kit is to celebrate and appreciate life’s champions and everyday heroes.
  • Especially during this time, this is something anyone can do to make a difference. The August kit makes it easy!
  • Distinktive stamps are photo-realistic stamps that create an impressive detailed image with a single stamp.
  • The Distinktive stamps included in August’s kit are an especially excellent feature for new stampers still exploring their creativity!
  • Masculine card designs can be difficult to find, this kit has a real masculine feel.
  • While the elements of the August kit can be used to show appreciation for anyone, the masculine card designs are perfect for the men in your life!

About the August Kit:

  • Kit contains enough supplies to create nine cards and coordinating envelopes.
  • Card size: 4-1/4” x 5-1/2” (10.8 x 14 cm)
  • Envelope size: 4-1/2” x 5-3/4” (11.4 x 14.6 cm)
  • Coordinating Colors: Bumblebee, gold, Mint Macaron, Pacific Point, Soft Suede, white
  • The kit’s stamp set includes Distinktive stamps
  • Subscribe to the August 2020 Paper Pumpkin Kit from 11 July to 10 August at paperpumpkin.com!

Note: Supplies may be limited toward the end of the subscription period.

****************************************************************************************************

I’m cleaning my shelves and drawers out to make room for lots of new goodie.  I have my list right HERE and I’m trying to keep it up to date.   Check it out and let me know if there is anything you’d like to get.  If you are looking for something and don’t see it on the list, drop me a line and I will look through my stash to see if I missed it.  I have lots of older DSP too that I don’t have listed if there is any that you are looking for.

****************************************************************************************************

Card stock cuts for this project:

  • Garden Green Cardstock 4 1/4″ X 11″ (card base scored and folded at 5 1/2″), 2″ x 4 1/2″, 2 1/4″ X 3 1/4″, 1 1/2″ X 4″(card front mats), 4″ x 5 1/4″(inner liner mat)
  • Whisper White Cardstock 1 3/8″ X 3 7/8″ (card front embossed panel), 4″ X 4″ (artwork & sentiment), 3 7/8″ X 5 1/8″ (inner liner)
  • Subtle 6 X 6 Designer Series Paper 1 7/8″ X 4 3/8″ (card front panel)
  • ‘Tis The Season 6 X 6 designer Series Paper 2 1/8″ X 3 1/8″ (card front panel), 2 1/4″ X 6″ (piece for envelope flap)
  • Wonder of the Season Specialty Designer Series Paper 4 1/8″ X 5 3/8″(card front)

****************************************************************************************************

Product List

Stampin’ Up! Warm and Toasty Cool Yule

Good Saturday morning my fellow stampers.  How has your weekend started off?  I’m working today, but I have off tomorrow.  I’m not sure what we are doing tomorrow, if anything.

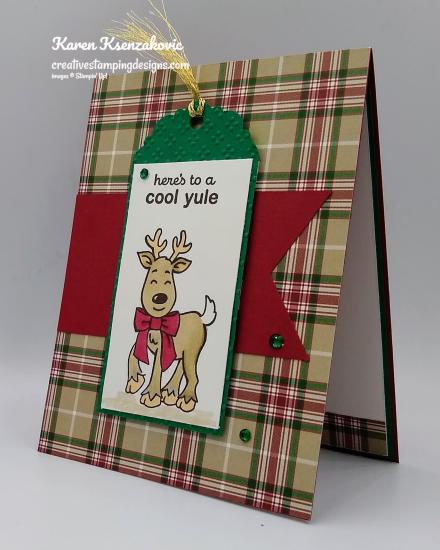
I’m on a roll with Christmas cards now.  I need to get 50 done by the beginning of December.  I figured as long as I try to get 3-5 done a week I should be good.  Here’s today’s card.

My design is from Try Stamping on Tuesday Challenge #468.  Here is their sketch.

I started by adhering a panel of Plaid Tidings 6 X 6 Designer Series Paper to a Cherry Cobbler card base using Stampin’ Seal.  I adhered a panel of Cherry Cobbler cardstock, which I made into a banner using the Banner Triple Punch, to the left side using Stampin’ Seal.

On a small panel of Whisper White cardstock I stamped the adorable deer image from the Stampin’ Up! Warm & Toasty Cling Stamp Set in Early Espresso Ink.  I colored the image in using my Cherry Cobbler, Crumb Cake and Ivory Stampin’ Blends Markers.  I stamped the sentiment from the Warm & Toasty stamp set above the deer in Early Espresso Ink.  I cut the top of a panel of Shaded Spruce cardstock using the Delightful Tag Topper Punch and embossed the panel using the Wrapped In Texture Embossing Folder.  I adhered the artwork to the tag using Multipurpose Liquid Glue.

I added a piece of the Gold Metallic Trim, form the Forever Greenery Trim Combo Pack, to the top of the tag and frayed it.  I adhered the tag to the card front using Stampin’ Dimensionals.  I added a few Shaded Spruce Holiday Rhinestone Basic Jewels to the card front.

On the inside I stamped the sentiment from the Warm & Toasty stamp set in Early Espresso Ink in the center of a Whisper White panel.  I adhered a strip of Plaid Tidings DSP to the bottom of the panel.  I adhered the Whisper White panel to a Shaded Spruce mat using Stampin’ Seal and then to the inside of the Cherry Cobbler card base using Multipurpose Liquid Glue.

To finish my card I decorated a Medium Whisper White Envelope.  I stamped the deer image from the Warm & Toasty stamp set in Early Espresso Ink on the envelope front and colored it in using my Cherry Cobbler, Crumb Cake and Ivory Stampin’ Blends Markers.  I adhered a panel of the Plaid Tidings DSP to the envelope flap.

Thank you for stopping by my blog today.  I hope you liked my card and will give it a try. Happy Stamping!!

****************************************************************************************************

If you need any stamping supplies, I’d love to be your Demonstrator. Just click HERE to go directly to my online store or drop me an email if you have any questions. 

MY CURRENT HOST CODE IS: 4Z2KHBVY

Use this host code when you order $50 or greater and receive a free gift from me! If your order is over $150, please do not use this code, but you’ll still get the free gift. The free gift is your choice of any 1 item valued up to $10.00 in the 2020-2021 Annual Catalog!   For any orders $50 or more I will also send you my monthly class tutorials.  Click HERE or go to my Customer Rewards for more details and to see what this months tutorials are.

 Click HERE to shop the clearance rack.

Happy Stamping, Karen!

****************************************************************************************************

IT’S TIME TO REDEEM THOSE BONUS DAYS COUPONS YOU EARNED IN JULY!!

  • Redemption Deadline:  August 31 2020, by 11:50 PM (MT)
  • There is no limit to the number of coupon codes participants can use on an order during redemption.
  • Bonus Days coupon codes may be redeemed for any product (excluding Starter Kits and Paper Pumpkin monthly subscriptions).
    • New prepaid Paper Pumpkin codes may be discounted using Bonus Days coupon codes.
  • Bonus Days coupon codes will reduce the amount of an order.
  • Bonus Days coupon codes may be redeemed one time only.

****************************************************************************************************

WORLD’S GREATEST BY PAPER PUMPKIN

SUBSCRIBE JULY11 – AUGUST 10

With Paper Pumpkin, you are provided with everything you need to explore your creativity and discover new ways to craft. As we navigate a “new normal” in today’s world, there’s plenty of opportunity to papercraft! And, more importantly, there’s no better time than now to create something that’ll show the essential people in your life just how awesome you think they are.

Lately, it’s become especially clear who the everyday heroes are—they’ve always surrounded us! Teachers, doctors, hairdressers, nurses, delivery workers, cashiers, and even our friends, kids, and family members go above and beyond to enrich our lives. These people are truly the world’s greatest at what they do!

Celebrate and appreciate the everyday heroes in your life with the August Paper Pumpkin Kit. The cards included in this kit are specifically designed for celebrating life’s champions!

  • The intended use of this kit is to celebrate and appreciate life’s champions and everyday heroes.
  • Especially during this time, this is something anyone can do to make a difference. The August kit makes it easy!
  • Distinktive stamps are photo-realistic stamps that create an impressive detailed image with a single stamp.
  • The Distinktive stamps included in August’s kit are an especially excellent feature for new stampers still exploring their creativity!
  • Masculine card designs can be difficult to find, this kit has a real masculine feel.
  • While the elements of the August kit can be used to show appreciation for anyone, the masculine card designs are perfect for the men in your life!

About the August Kit:

  • Kit contains enough supplies to create nine cards and coordinating envelopes.
  • Card size: 4-1/4” x 5-1/2” (10.8 x 14 cm)
  • Envelope size: 4-1/2” x 5-3/4” (11.4 x 14.6 cm)
  • Coordinating Colors: Bumblebee, gold, Mint Macaron, Pacific Point, Soft Suede, white
  • The kit’s stamp set includes Distinktive stamps
  • Subscribe to the August 2020 Paper Pumpkin Kit from 11 July to 10 August at paperpumpkin.com!

Note: Supplies may be limited toward the end of the subscription period.

****************************************************************************************************

I’m cleaning my shelves and drawers out to make room for lots of new goodie.  I have my list right HERE and I’m trying to keep it up to date.   Check it out and let me know if there is anything you’d like to get.  If you are looking for something and don’t see it on the list, drop me a line and I will look through my stash to see if I missed it.  I have lots of older DSP too that I don’t have listed if there is any that you are looking for.

****************************************************************************************************

Card stock cuts for this project:

  • Cherry Cobbler Cardstock 4 1/4″ X 11″ (card base scored and folded at 5 1/2″), 2′ X 4″ (card front banner)
  • Shaded Spruce Cardstock 2″ X 4 3/8″ (tag), 4 1/8″ X 5 3/8″ (inner liner mat)
  • Whisper White Cardstock 1 7/8″ X 3 3/8″ (artwork), 4″ X 5 1/4″ (inner liner)
  • Plaid Tidings 6 X 6 Designer Series Paper 4 1/4″ X 5 1/2″ (card front), 1/2″ X 4″ (strip on inner liner), 2 1/4″ X 6″ (piece for envelope flap)

****************************************************************************************************

Product List

Stampin’ Up! Snowflake Wishes for Fun Fold Friday

Good Friday morning my stamping friends.  How was everyone’s week?  Does anyone have plans for the weekend?  I know some are still without power after the hurricane on Tuesday here and are not expecting it back until next week.  I’m hoping that you get power back sooner than expected.  My heart goes out to you.

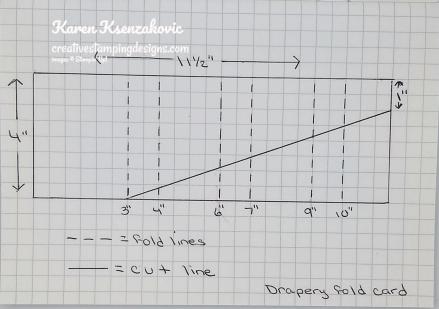
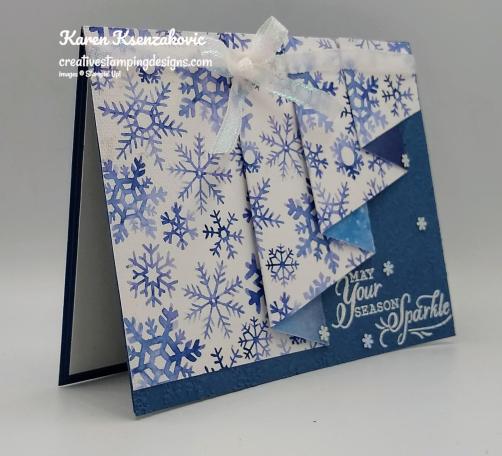
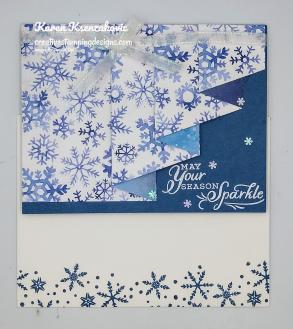
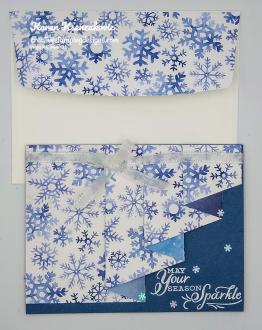
I have a drapery card for you today. I have made a diagram for you that I attached below explaining how to make the folded panel.  Here’s my card for today.

I started by stamping a panel of Misty Moonlight cardstock with the sentiment from the Stampin’ Up! Snowflake Wishes Photopolymer Stamp Set in VersaMark Ink.  I immediately sprinkled it with my White Emboss Powder and set it using my Heat Tool.

I embossed the panel using the new Winter Snow Embossing Folder.  I cut and scored a 4″ X 11 1/2″ panel of Snowflake Splendor Designer Series Paper as in the diagram below.

I adhered the folded panel to the card front using Multipurpose Liquid Glue.  I wrapped a piece of 1/4″ Snowflake Splendor Ribbon around the card front and tied a small bow.  I tacked the bow in place using a Glue Dot.  I adhered the card front to a Misty Moonlight card base using Multipurpose Liquid Glue.  I added a few Adhesive-Backed Snowflakes to the card front.

On the inside I stamped the sentiment from the Snowflake Wishes stamp set in Misty Moonlight Ink in the center of a Whisper White panel.  I stamped the snowflake image from the Snowflake Wishes stamp set in Misty Moonlight Ink, stamping off once, above the sentiment.  I adhered a strip of Snowflake Splendor DSP to the side of the panel.  I adhered the Whisper White panel to a Misty Moonlight mat using Stampin’ Seal and then to the inside of the Misty Moonlight card base using Multipurpose Liquid Glue.

To finish my card I decorated a Medium Whisper White Envelope.  I stamped the snowflake image from the Snowflake Wishes stamp set along the bottom front of the envelope in Misty Moonlight Ink.  I adhered a panel of Snowflake Splendor DSP to the envelope flap.

Thank you for stopping by my blog today.  I hope you liked my card and will give it a try. Happy Stamping!!

****************************************************************************************************

If you need any stamping supplies, I’d love to be your Demonstrator. Just click HERE to go directly to my online store or drop me an email if you have any questions. 

MY CURRENT HOST CODE IS: 4Z2KHBVY

Use this host code when you order $50 or greater and receive a free gift from me! If your order is over $150, please do not use this code, but you’ll still get the free gift. The free gift is your choice of any 1 item valued up to $10.00 in the 2020-2021 Annual Catalog!   For any orders $50 or more I will also send you my monthly class tutorials.  Click HERE or go to my Customer Rewards for more details and to see what this months tutorials are.

 Click HERE to shop the clearance rack.

Happy Stamping, Karen!

****************************************************************************************************

IT’S TIME TO REDEEM THOSE BONUS DAYS COUPONS YOU EARNED IN JULY!!

  • Redemption Deadline:  August 31 2020, by 11:50 PM (MT)
  • There is no limit to the number of coupon codes participants can use on an order during redemption.
  • Bonus Days coupon codes may be redeemed for any product (excluding Starter Kits and Paper Pumpkin monthly subscriptions).
    • New prepaid Paper Pumpkin codes may be discounted using Bonus Days coupon codes.
  • Bonus Days coupon codes will reduce the amount of an order.
  • Bonus Days coupon codes may be redeemed one time only.

****************************************************************************************************

WORLD’S GREATEST BY PAPER PUMPKIN

SUBSCRIBE JULY11 – AUGUST 10

With Paper Pumpkin, you are provided with everything you need to explore your creativity and discover new ways to craft. As we navigate a “new normal” in today’s world, there’s plenty of opportunity to papercraft! And, more importantly, there’s no better time than now to create something that’ll show the essential people in your life just how awesome you think they are.

Lately, it’s become especially clear who the everyday heroes are—they’ve always surrounded us! Teachers, doctors, hairdressers, nurses, delivery workers, cashiers, and even our friends, kids, and family members go above and beyond to enrich our lives. These people are truly the world’s greatest at what they do!

Celebrate and appreciate the everyday heroes in your life with the August Paper Pumpkin Kit. The cards included in this kit are specifically designed for celebrating life’s champions!

  • The intended use of this kit is to celebrate and appreciate life’s champions and everyday heroes.
  • Especially during this time, this is something anyone can do to make a difference. The August kit makes it easy!
  • Distinktive stamps are photo-realistic stamps that create an impressive detailed image with a single stamp.
  • The Distinktive stamps included in August’s kit are an especially excellent feature for new stampers still exploring their creativity!
  • Masculine card designs can be difficult to find, this kit has a real masculine feel.
  • While the elements of the August kit can be used to show appreciation for anyone, the masculine card designs are perfect for the men in your life!

About the August Kit:

  • Kit contains enough supplies to create nine cards and coordinating envelopes.
  • Card size: 4-1/4” x 5-1/2” (10.8 x 14 cm)
  • Envelope size: 4-1/2” x 5-3/4” (11.4 x 14.6 cm)
  • Coordinating Colors: Bumblebee, gold, Mint Macaron, Pacific Point, Soft Suede, white
  • The kit’s stamp set includes Distinktive stamps
  • Subscribe to the August 2020 Paper Pumpkin Kit from 11 July to 10 August at paperpumpkin.com!

Note: Supplies may be limited toward the end of the subscription period.

****************************************************************************************************

I’m cleaning my shelves and drawers out to make room for lots of new goodie.  I have my list right HERE and I’m trying to keep it up to date.   Check it out and let me know if there is anything you’d like to get.  If you are looking for something and don’t see it on the list, drop me a line and I will look through my stash to see if I missed it.  I have lots of older DSP too that I don’t have listed if there is any that you are looking for.
****************************************************************************************************

Card stock cuts for this project:

    • Misty Moonlight Cardstock 8 1/2″ X 5 1/2″ (card base scored and folded at 4 1/4″), 4 1/4″ X 5 1/2″ (card front), 4 1/8″ X 5 3/8″ (inner liner mat)
    • Whisper White Cardstock 4″ X 5 1/4″ (inner liner)
    • Snowflake Splendor Designer Series Paper 4″ X 11 1/2″ (card front panel scored and folded at 3″, 4″, 6″, 7″, 9″ & 10″), 1/2″ X 4″ (strip for inner liner), 2 1/4″ X6″(piece for envelope flap)

****************************************************************************************************

Product List