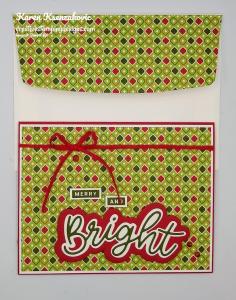
Stampin’ Up! Peace and Joy CAS

God Wednesday morning my fellow stampers. How is everyone’s week going? We’re halfway through and on our way to another weekend. Hope you are thinking of some fun plans.

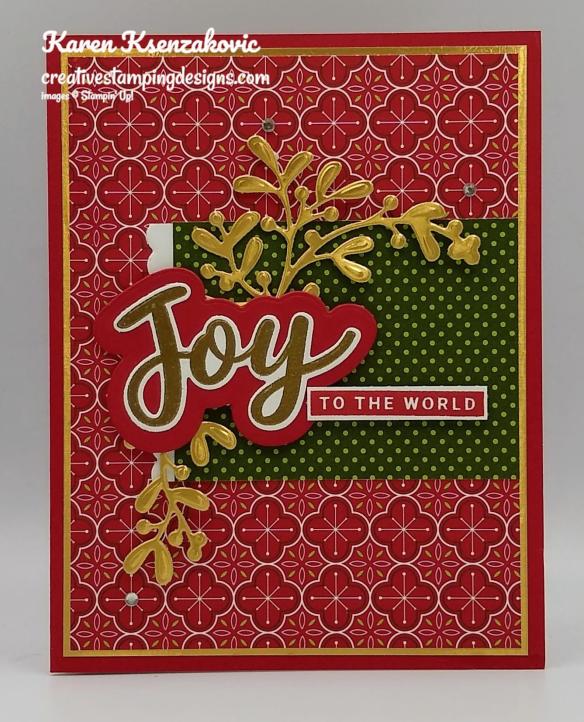
I have a clean and simple card for you today using one of the fun bundles from the August-December Mini Catalog. Here’s my card for today.
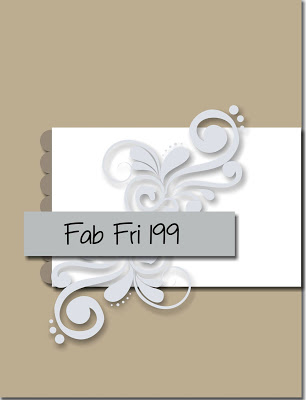
My design is from Fab Friday Challenge #199. Here is their sketch.
I started by adhering a panel of Heartwarming Hugs Designer Series Paper to a Brushed Metallic mat using Multipurpose Liquid Glue. I adhered the matted panel to a Real Red card base using Multipurpose Liquid Glue.
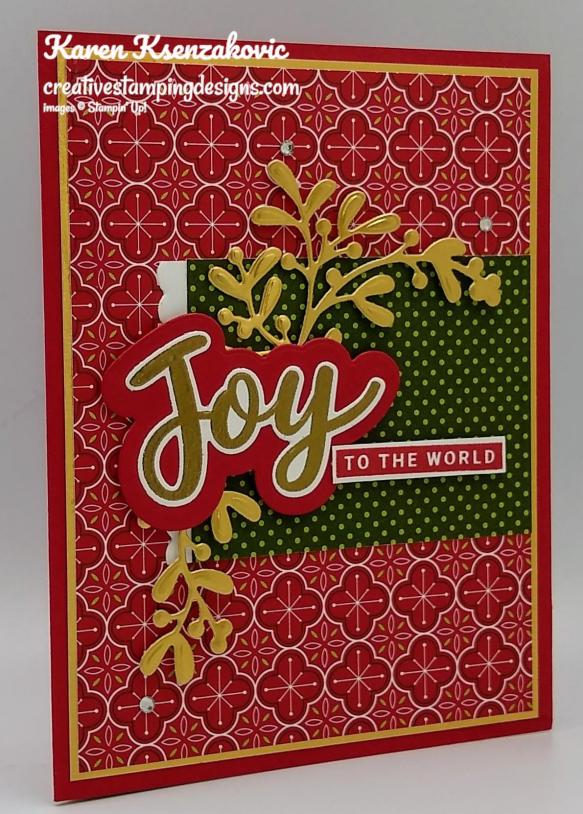
I cut a small panel of Whisper White cardstock using the scallop edge die from the Budding Blooms Dies and adhered it to the back of a panel of Heartwarming Hugs DSP using Stampin’ Seal. I adhered the panel to the card front using Multipurpose Liquid Glue. On a panel of Whisper White cardstock I stamped the sentiment ‘Joy’ from the Stampin’ Up! Peace & Joy Photopolymer Stamp Set in Versamark Ink. I immediately sprinkled it with my Gold Stampin’ Emboss Powder and set it using my Heat Tool. I cut the image out using the Joy Dies. I cut the mat for the sentiment from a panel of Real Red cardstock using the Joy Dies and adhered the sentiment to it using Multipurpose Liquid Glue. I cut a flourish out of a panel of Brushed Metallic paper using my Christmas Layers Dies. Using my Paper Snips I cut the flourish and adhered it to the back of the sentiment using Stampin’ Seal, having one piece going up and the other going down. I adhered the sentiment to the card front using Stampn’ Dimensionals.
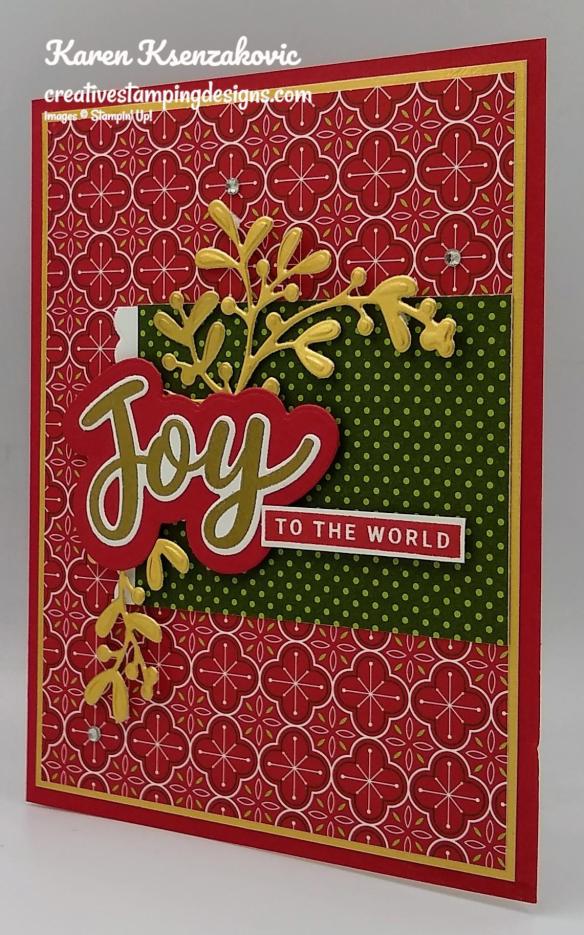
I stamped the sentiment from the Peace & Joy stamp set in Real Red Ink on a thin strip of Whisper White cardstock and fussy cut the image using my Paper Snips. I adhered the sentiment next to the ‘Joy’ using Stampin’ Dimensionals. I added a few Rhinestone Basic Jewels to the card front.
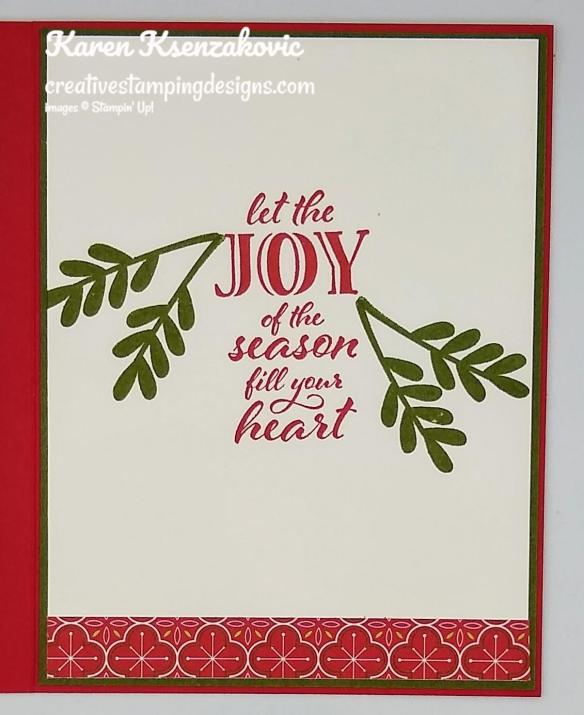
On the inside I stamped the sentiment from the Stampin’ Up! Wrapped In Christmas Cling Stamp Set in Real Red Ink in the center of a Whisper White panel. I stamped the sprig image from the Peace & Joy stamp set in Mossy Meadow Ink on either side of the sentiment. I adhered a strip of Heartwarming Hugs DSP to the bottom of the panel using Stampin’ Seal. I adhered the Whisper White panel to a Mossy Meadow mat using Stampin’ Seal and then to the inside of the Real Red card base using Multipurpose Liquid Glue.
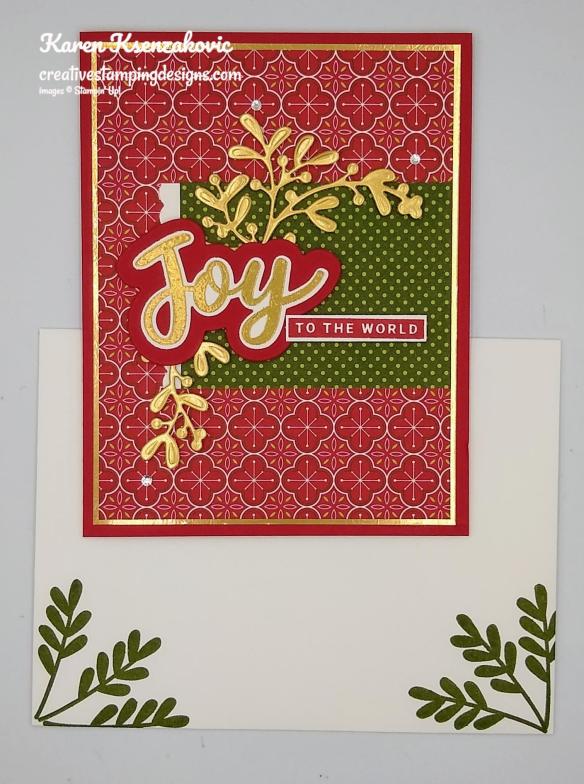
To finish my card I decorated a Medium Whisper White Envelope. I stamped the sprig image from the Peace & Joy stamp set in Mossy Meadow Ink on the envelope front.
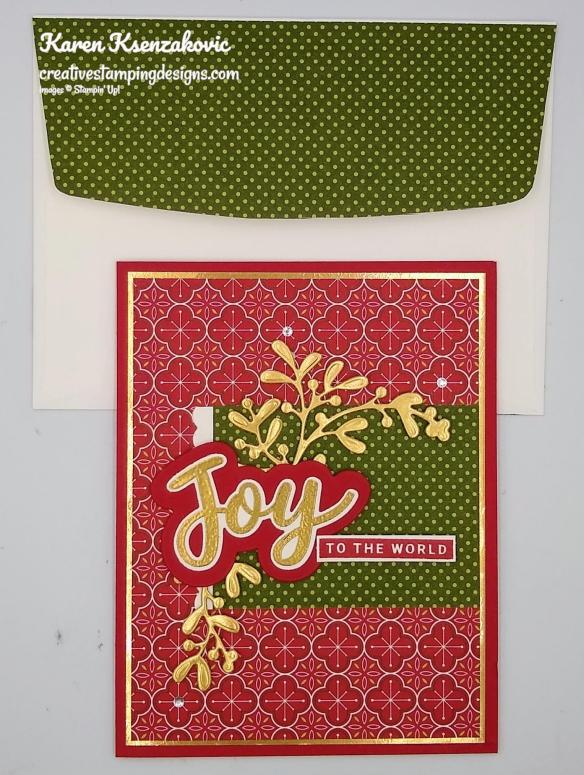
I adhered a panel of Heartwarming Hugs DSP to the envelope flap.

Thank you for stopping by my blog today. I hope you liked my card and will give it a try. Happy Stamping!!

*********************************************************************************************************

If you need any stamping supplies, I’d love to be your Demonstrator. Just click HERE to go directly to my online store or drop me an email if you have any questions. 

MY CURRENT HOST CODE IS: RUW6PQNH

Use this host code when you order $50 or greater and receive a free gift from me! If your order is over $150, please do not use this code, but you’ll still get the free gift. The free gift is your choice of any 1 item valued up to $10.00 in the 2020-2021 Annual Catalog!   For any orders $50 or more I will also send you my monthly class tutorials.  Click HERE or go to my Customer Rewards for more details and to see what this months tutorials are.

 Click HERE to shop the clearance rack.

Happy Stamping, Karen!

****************************************************************************************************

Join me today at 4pm Today on Facebook Live .

I’m planning to go live on my Facebook page with a project today at 4:00pm ET.  Stop by my Facebook page at 4pm ET to see what card I will be making this week.

*********************************************************************************************************

Going on Now!!!

We all love gorgeous Designer Series Paper, and during this incredible sale, you can enjoy a 15% discount on select papers from our current catalogs! 

Stampin’ Up! has such beautiful Designer Series Paper and they’re putting a select list of those papers on sale for 15% off during the month of October!!  Now is a great time to stock up and save on some of the most popular paper designs…including papers from the August-December 2020 Mini Catalog!!

SALE DETAILS:

  • Sales Period:  October 1-31
  • All order types qualify for this promotion.
  • There is no limit to how many packages of Designer Series Paper may be purchased during this promotion.
  • Only select Designer Series Papers are available at a 15% discount during this promotion.
  • Orders must be placed—and closed—during the promotion period for the 15% discount to apply.
  • Designer Series Paper ordered as part of a Starter Kit or with Stampin’ Rewards qualify for the 15% discount
  • Sale Ends October 31, 2020 at 11:50 PM MT

The designer papers included in this sale are shown   Click on the image below to open up the full-size printable PDF:

Get your lists ready to start shopping now – October 31st! 

*********************************************************************************************************

Jolly Gingerbread

Subscribe October 11 – November 10
Paper Pumpkin is our monthly subscription service that offers unique papercrafting projects for crafters of any skill level! In these all-inclusive kits, subscribers receive pre-cut paper pieces, embellishments, ink, and an exclusive stamp set designed to encourage them to explore their creativity. As their subscription continues, subscribers will have a collection of cards—and other creations—for a variety of occasions, in addition to a stockpile of supplies!


So, what’s in store for this month’s Paper Pumpkin kit? November’s cute, gingerbread-themed kit contains enough supplies to create one-of-a-kind Christmas crafts! Whether it’s a gift card carrier, traditional card, or tasty-looking tag, this sweet and seasonal kit is the key to heartfelt holiday gifting. With curly cutouts, sugary stickers, and delicious die-cut designs in a special-edition box, a jolly holiday will be on its way with this kit!

Details About The November Kit:

  • Kit contains enough supplies to create 15 gift card carriers and coordinating envelopes.
  • Kit contents can also be used to design traditional holiday cards, gift tags, and other paper projects.
  • Contents arrive in a collectible, special-edition box!
  • Project size: 2-1/4″ x 4″
  • Envelope size: 2-3/4″ x 4-3/8″
  • Coordinating colors: Cinnamon Cider, Daffodil Delight, Calypso Coral, Mint Macaron, Shaded Spruce, Blushing Bride, and Whisper White

Subscribe to the November 2020 Paper Pumpkin Kit from 11 October to 10 November at paperpumpkin.com!

Note: Supplies may be limited toward the end of the subscription period.

*********************************************************************************************************

Card stock cuts for this project:

  • Mossy Meadow Cardstock 4 1/8″ X 5 3/8″ (inner liner mat)
  • Real Red Cardstock 8 1/2″ X 5 1/2″ (card base scored and folded at 4 1/4″), 2 1/4″ X 2 3/4″ (sentiment mat)
  • Whisper White Cardstock 2 1/4″ X 1″ (scallop edge on card front), 2 1/2″ X 2″ (joy), 1/4″ X 2″ (small sentiment), 4″ X 5 1/4″ (inner liner)
  • Brushed Metallic Paper 4″ X 5 1/4″ (card front mat), 4″ X 2 1/2″ (flourish)
  • Heartwarming Hugs Designer Series Paper 3 7/8″ X 5 1/8″ (card front), 2 1/4″ X 3″ (card front panel), 1/2″ x 4″ (inner liner strip), 2 1/4″ X 6″ (piece for envelope flap)

*********************************************************************************************************

Product List

Stampin’ Up! Curvy Christmas Sneak Peek

Good Monday morning my stamping friends. Happy Columbus Day!! How was everyone’s weekend? Did anyone do anything fun? I’ve got a busy couple weeks ahead of me with work. I think in the next 2 1/2 weeks I have 2 day’s off. I did have yesterday off and was able to squeeze in a little craft time once I got my yard work done. I rushed in the morning to get things done since they said it was going to rain. It never started till later on at night.

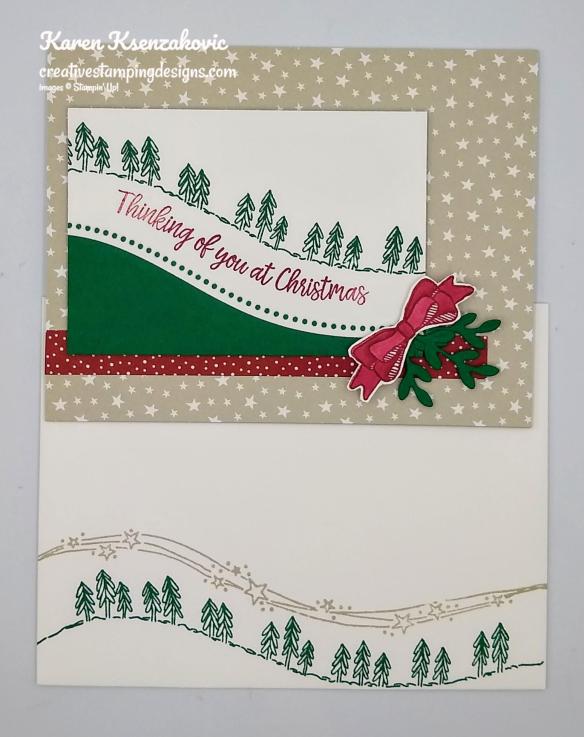
For today I have a sneak peek for you. Next month we have a new collection coming out called Curvy Celebration. Part of it is for Christmas and will only be available until January 4th. The bundle part of the collection will be available through June. It will be in the new January-June 2021 Mini Catalog, YAY!! Here’s my card for today.

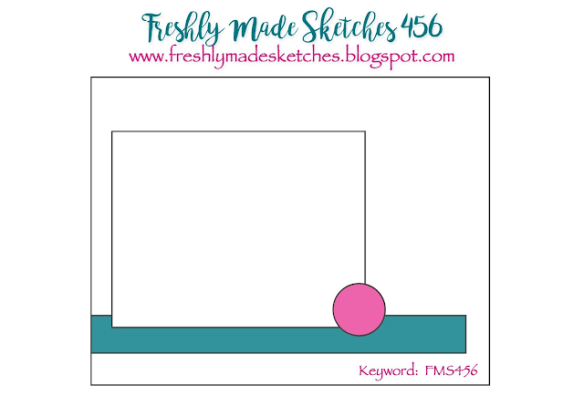
My design is from Freshly Made Sketches Challenge #456. Here is their sketch.

I started by adhering a panel of the upcoming Classic Christmas 6 X 6 Designer Series Paper to a Sahara Sand card base using Multipurpose Liquid Glue.

On a panel of Whisper White cardstock I stamped the pine tree image from the Stampin’ Up! Curvy Christmas Photopolymer Stamp Set (available 11-3-20) in Shaded Spruce Ink. I stamped the sentiment from the Curvy Christmas stamp set in Cherry Cobbler Ink below the tree image. Using one of the Curvy Dies, I cut below the sentiment lining up the curve in the die with the curve in the sentiment. I adhered the artwork to a Shaded Spruce panel using Stampin’ Seal. I adhered another strip of the Classic Christmas DSP to the card front using Stampin’ Seal and adhered the artwork overlapping the strip using Stampin’ Dimensionals.

I stamped the bow image from the Curvy Christmas stamp set in Cherry Cobbler Ink on a panel of Whisper White cardstock and colored the image in using my Cherry Cobbler Stampin’ Blends Markers. I fussy cut the bow using my Paper Snips. I cut 2 sprigs from the Curvy Dies out of a panel of Shaded Spruce cardstock. I snipped the sprigs to the size I wanted and adhered them to the corner of the artwork using Glue Dots, I adhered the bow on top of the sprigs using a Stampin’ Dimensional.

On the inside I stamped the sentiment from the Curvy Christmas stamp set in Cherry Cobbler Ink in the center of a Whisper White panel. I stamped the pine tree image from the Curvy Christmas stamp set in Shaded Spruce Ink on the bottom of the panel and the star image from the Curvy Christmas stamp set in Sahara Sand Ink above the tree image. I adhered the Whisper White panel to a Shaded Spruce mat using Stampin’ Seal and then to the inside of the Sahara Sand card base using Multipurpose Liquid Glue.

To finish my card I decorated a Medium Whisper White Envelope. I stamped the pine tree image from the Curvy Christmas stamp set in Shaded Spruce Ink on the bottom of the envelope front. I stamped the star image from the Curvy Christmas stamp set in Sahara Sand Ink above the tree image.

I adhered a panel of the Classic Christmas 6 X 6 DSP to the envelope flap.

Thank you for stopping by my blog today. I hope you liked my card. The products used today will be available November 3, 2020. Happy Stamping!!

*********************************************************************************************************

If you need any stamping supplies, I’d love to be your Demonstrator. Just click HERE to go directly to my online store or drop me an email if you have any questions. 

MY CURRENT HOST CODE IS: RUW6PQNH

Use this host code when you order $50 or greater and receive a free gift from me! If your order is over $150, please do not use this code, but you’ll still get the free gift. The free gift is your choice of any 1 item valued up to $10.00 in the 2020-2021 Annual Catalog!   For any orders $50 or more I will also send you my monthly class tutorials.  Click HERE or go to my Customer Rewards for more details and to see what this months tutorials are.

 Click HERE to shop the clearance rack.

Happy Stamping, Karen!

*********************************************************************************************************

Going on Now!!!

We all love gorgeous Designer Series Paper, and during this incredible sale, you can enjoy a 15% discount on select papers from our current catalogs! 

Stampin’ Up! has such beautiful Designer Series Paper and they’re putting a select list of those papers on sale for 15% off during the month of October!!  Now is a great time to stock up and save on some of the most popular paper designs…including papers from the August-December 2020 Mini Catalog!!

SALE DETAILS:

  • Sales Period:  October 1-31
  • All order types qualify for this promotion.
  • There is no limit to how many packages of Designer Series Paper may be purchased during this promotion.
  • Only select Designer Series Papers are available at a 15% discount during this promotion.
  • Orders must be placed—and closed—during the promotion period for the 15% discount to apply.
  • Designer Series Paper ordered as part of a Starter Kit or with Stampin’ Rewards qualify for the 15% discount
  • Sale Ends October 31, 2020 at 11:50 PM MT

The designer papers included in this sale are shown   Click on the image below to open up the full-size printable PDF:

Get your lists ready to start shopping now – October 31st! 

*********************************************************************************************************

Jolly Gingerbread

Subscribe October 11 – November 10

Paper Pumpkin is our monthly subscription service that offers unique papercrafting projects for crafters of any skill level! In these all-inclusive kits, subscribers receive pre-cut paper pieces, embellishments, ink, and an exclusive stamp set designed to encourage them to explore their creativity. As their subscription continues, subscribers will have a collection of cards—and other creations—for a variety of occasions, in addition to a stockpile of supplies!


So, what’s in store for this month’s Paper Pumpkin kit? November’s cute, gingerbread-themed kit contains enough supplies to create one-of-a-kind Christmas crafts! Whether it’s a gift card carrier, traditional card, or tasty-looking tag, this sweet and seasonal kit is the key to heartfelt holiday gifting. With curly cutouts, sugary stickers, and delicious die-cut designs in a special-edition box, a jolly holiday will be on its way with this kit!

Details About The November Kit:

  • Kit contains enough supplies to create 15 gift card carriers and coordinating envelopes.
  • Kit contents can also be used to design traditional holiday cards, gift tags, and other paper projects.
  • Contents arrive in a collectible, special-edition box!
  • Project size: 2-1/4″ x 4″
  • Envelope size: 2-3/4″ x 4-3/8″
  • Coordinating colors: Cinnamon Cider, Daffodil Delight, Calypso Coral, Mint Macaron, Shaded Spruce, Blushing Bride, and Whisper White

Subscribe to the November 2020 Paper Pumpkin Kit from 11 October to 10 November at paperpumpkin.com!

Note: Supplies may be limited toward the end of the subscription period.

*********************************************************************************************************

Card stock cuts for this project:

  • Sahara Sand Cardstock 8 1/2″ X 5 1/2″ (card base scored and folded at 4 1/4″)
  • Shaded Spruce Cardstock 2 3/4″ X 4″ (artwork mat), 2 1/2″ X 2″ (sprigs), 4 1/8″ X 5 3/8″ (inner liner mat)
  • Whisper White Cardstock 2 3/4″ X 4″ (artwork), 4″ X 5 1/4″ (inner liner)
  • Classic Christmas 6 x 6 Designer Series paper 4 1/4″ X 5 1/2″ (card front), 1/2″ X 5″ (strip on card front), 2 1/4″ X 6″ (piece for envelope flap)

*********************************************************************************************************

Product List

Stampin’ Up! Forever Greenery Quick and Easy Card

Good Sunday morning my fellow stampers. How is everyone’s weekend going? It was a gorgeous day here yesterday. It’s suppose to be a little cooler here today and rain. Great crafting day in my books. I’m hoping to get some crafting in after I pack up all my lawn ornaments. I try to get them all put away before the leaves start falling from the trees.

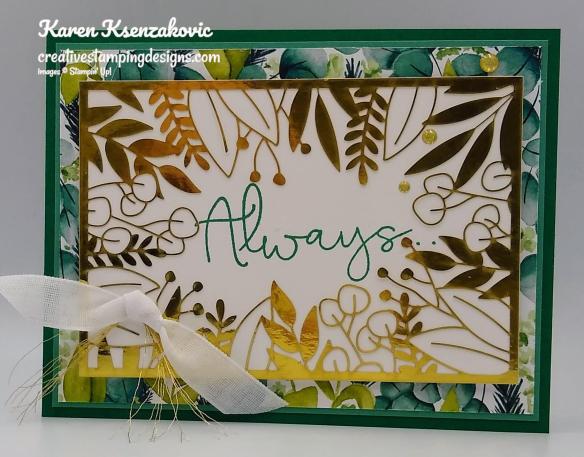
I have a quick and easy card for you today. Here’s my card for today.

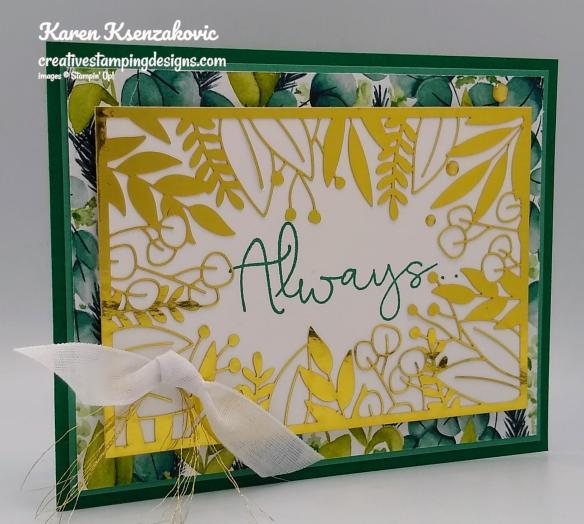
I started by adhering a panel of Forever Greenery DSP to a Just Jade mat using Stampin’ Seal and then to a Shaded Spruce card base using Multipurpose Liquid Glue. I stamped the sentiment from the Stampin’ Up! Filed of Flowers Photopolymer Stamp Set in Just Jade Ink in the center of a Whisper White panel. I adhered a panel of the Forever Gold Laser-Cut Specialty Designer Series Paper to the Whisper White panel using tiny amounts of Multipurpose Liquid Glue around the edges. I adhered it to the card front using Stampin’ Dimensionals.

I tied a small knot using the 1/2″ Whisper white Faux Linen Ribbon from the Flowers For Every Season Ribbon Combo Pack and threaded a small piece of the Gold Trim from the Forever Greenery Trim Combo Pack through it. I Frayed the gold trim and adhered it to the card front using a Glue Dot.

I added a few Gold Glitter Enamel Dots to the card front.

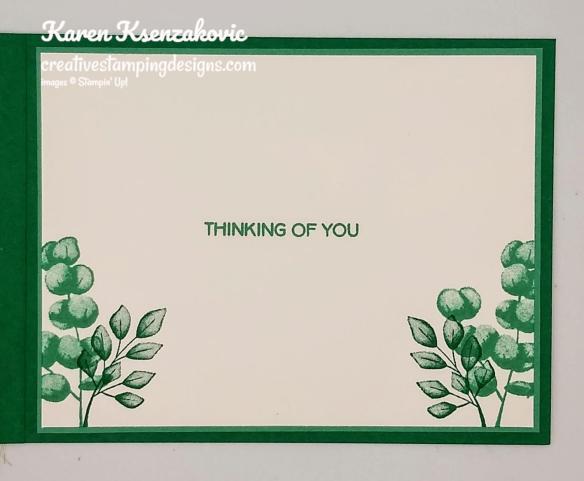
On the inside I stamped the sentiment from the Field of Flowers stamp set in the center of a Whisper White panel. I stamped 2 of the fern images from the Stampin’ Up! Forever Fern Cling Stamp Set on the bottom of the panel. I stamped on in Eucalyptus image in Just Jade Ink and the smaller leafy image in Shaded Spruce Ink. I adhered the Whisper White panel to a Just Jade mat using Stampin’ Seal and then to the inside of the Shaded Spruce card base using Multipurpose Liquid Glue.

To finish my card I decorated a Medium Whisper White Envelope. I stamped the eucalyptus image in Just Jade Ink and the smaller leafy image in Shaded Spruce Ink, both from the Forever Fern stamp set, on the envelope front.

I adhered a panel of Forever Greenery DSP to the envelope flap.

Thank you for stopping by my blog today. I hope you liked my card and will give it a try. Happy Stamping!!

****************************************************************************************************

If you need any stamping supplies, I’d love to be your Demonstrator. Just click HERE to go directly to my online store or drop me an email if you have any questions. 

MY CURRENT HOST CODE IS: RUW6PQNH

Use this host code when you order $50 or greater and receive a free gift from me! If your order is over $150, please do not use this code, but you’ll still get the free gift. The free gift is your choice of any 1 item valued up to $10.00 in the 2020-2021 Annual Catalog!   For any orders $50 or more I will also send you my monthly class tutorials.  Click HERE or go to my Customer Rewards for more details and to see what this months tutorials are.

 Click HERE to shop the clearance rack.

Happy Stamping, Karen!

****************************************************************************************************

Going on Now!!!

We all love gorgeous Designer Series Paper, and during this incredible sale, you can enjoy a 15% discount on select papers from our current catalogs! 

Stampin’ Up! has such beautiful Designer Series Paper and they’re putting a select list of those papers on sale for 15% off during the month of October!!  Now is a great time to stock up and save on some of the most popular paper designs…including papers from the August-December 2020 Mini Catalog!!

SALE DETAILS:

  • Sales Period:  October 1-31
  • All order types qualify for this promotion.
  • There is no limit to how many packages of Designer Series Paper may be purchased during this promotion.
  • Only select Designer Series Papers are available at a 15% discount during this promotion.
  • Orders must be placed—and closed—during the promotion period for the 15% discount to apply.
  • Designer Series Paper ordered as part of a Starter Kit or with Stampin’ Rewards qualify for the 15% discount
  • Sale Ends October 31, 2020 at 11:50 PM MT

The designer papers included in this sale are shown   Click on the image below to open up the full-size printable PDF:

Get your lists ready to start shopping now – October 31st! 

*****************************************************************************************************

Jolly Gingerbread

Subscribe October 11 – November 10

Paper Pumpkin is our monthly subscription service that offers unique papercrafting projects for crafters of any skill level! In these all-inclusive kits, subscribers receive pre-cut paper pieces, embellishments, ink, and an exclusive stamp set designed to encourage them to explore their creativity. As their subscription continues, subscribers will have a collection of cards—and other creations—for a variety of occasions, in addition to a stockpile of supplies!


So, what’s in store for this month’s Paper Pumpkin kit? November’s cute, gingerbread-themed kit contains enough supplies to create one-of-a-kind Christmas crafts! Whether it’s a gift card carrier, traditional card, or tasty-looking tag, this sweet and seasonal kit is the key to heartfelt holiday gifting. With curly cutouts, sugary stickers, and delicious die-cut designs in a special-edition box, a jolly holiday will be on its way with this kit!

Details About The November Kit:

  • Kit contains enough supplies to create 15 gift card carriers and coordinating envelopes.
  • Kit contents can also be used to design traditional holiday cards, gift tags, and other paper projects.
  • Contents arrive in a collectible, special-edition box!
  • Project size: 2-1/4″ x 4″
  • Envelope size: 2-3/4″ x 4-3/8″
  • Coordinating colors: Cinnamon Cider, Daffodil Delight, Calypso Coral, Mint Macaron, Shaded Spruce, Blushing Bride, and Whisper White

Subscribe to the November 2020 Paper Pumpkin Kit from 11 October to 10 November at paperpumpkin.com!

Note: Supplies may be limited toward the end of the subscription period.

****************************************************************************************************

Card stock cuts for this project:

  • Just Jade Cardstock 2 – 5 1/4″ X 4″ (card front and inner liner mats)
  • Shaded Spruce Cardstock 4 1/4″ X 11″ (card base scored and folded at 5 1/2″)
  • Whisper White Cardstock 4 5/8″ X 3 1/8″ (card front panel), 5 1/8″ X 3 7/8″ (inner liner)
  • Forever Greenery Designer Series Paper 5 1/8″ X 3 7/8″ (card front), 2 1/4″ X 6″ (piece for envelope flap)
  • Forever Gold Specialty Designer Series Paper 1 panel

*********************************************************************************************************

Product List

Stampin’ Up! Snow Wonder for Fun Fold Friday

Good Friday morning my fellow stampers and welcome to my Fun Fold Friday. How was everyone’s week? I hope you are all ready for the weekend.

Today’s card is one I made on Wednesday on my Facebook live video. If you were able to join me live or watch the replay, thank you very much. If you weren’t and you would like to see it, the links are below. I got my inspiration for the design from Patty Bennett, you can see her card Here. Here is my take on her design.

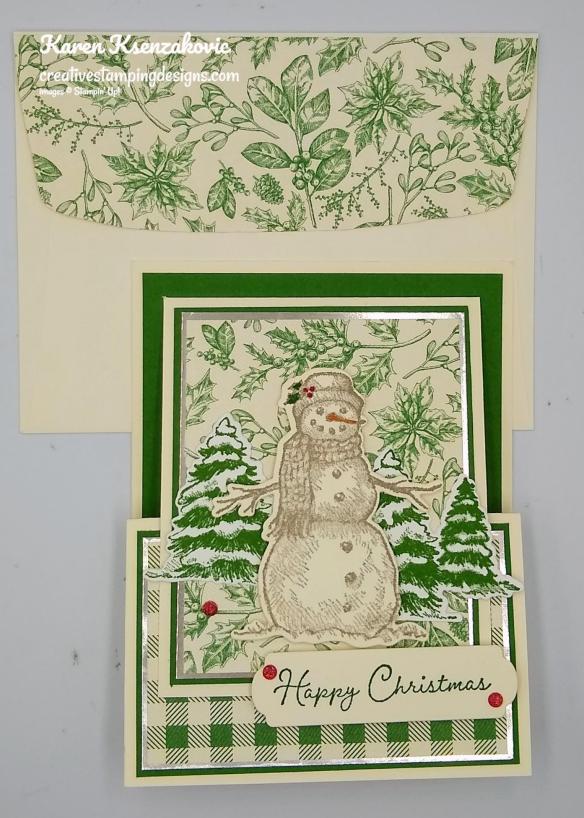
I started by adhering the 2 panels of Champagne Foil to Garden Green mats using Stampin’ Seal. I adhered 2 panels of Toile Tidings Designer Series Paper to the matted Champagne Foil using Stampin’ Seal. I adhered the smaller matted panel to the front easel section of the Thick Very Vanilla card base using Multipurpose Liquid Glue. I adhered the other matted panel to the smaller Thick Very Vanilla card base using Multipurpose Liquid Glue.

On a panel of Very Vanilla cardstock I stamped the snowman image from the Stampn’ Up! Snow Wonder Cling Stamp Set in Gray Granite Ink. I cut the image out using my Snow Time Dies. I colored just the holly & berries on the snowman’s hat using my Garden Green and Real Red Stampin’ Write Markers. I colored the carrot nose using my Pumpkin Pie Stampin’ Write Marker. I stamped the tree image from the Snow Wonder stamp set in Garden Green Ink twice on a panel of Whisper White cardstock and cut the images out using my Snow Time Dies. I adhered the trees to the small card front using Glue Dots. I adhered the snowman on top of the trees using Stampin’ Dimensionals.

On a strip of Very Vanilla cardstock I stamped the sentiment from the Snow Wonder stamp set in Garden Green Ink. I cut the sentiment out using the smaller of the 2 frame dies from the Snow Time Dies. I adhered the sentiment to the bottom of the small card front using Stampin’ Dimensionals. I added a few Real Red Wonderful Gems to the sentiment and card front. I adhered the small card base to the back panel of the large easel card base using Multipurpose Liquid glue.

After I was all finished with my video Wednesday, I realized I had the inner liner and inner liner mat that I forgot to use. I stamped the sentiment from the Snow Wonder stamp set in Garden Green Ink in the center of the Very Vanilla panel. It’s very hard to see, but I embossed the corners of the panel using the snowflake die from the Snow Time Dies. I adhered the Very Vanilla panel to a Garden Green mat using Stampin’ Seal and then to the inside of the small Thick Very Vanilla card base using Multipurpose Liquid Glue.

To finish my card I decorated a Medium Very Vanilla Envelope. I stamped the snowman image from the Snow Wonder stamp set in Gray Granite Ink on the envelope front. I colored the holly, berries and carrot nose in using my Garden Green, Real Red and Pumpkin Pie Stampin’ Write Markers.

I adhered a panel of the Toile Tidings DSP to the envelope flap.

Thank you for stopping by my blog today.  I hope you liked my card and will give it a try.  The list of supplies are below along with the measurements if you’d like to stamp along while watching the video.  You can watch it on my Facebook page Here.

You can also view the video on my YouTube channel Here. Happy Stamping!!

****************************************************************************************************

If you need any stamping supplies, I’d love to be your Demonstrator. Just click HERE to go directly to my online store or drop me an email if you have any questions. 

MY CURRENT HOST CODE IS: RUW6PQNH

Use this host code when you order $50 or greater and receive a free gift from me! If your order is over $150, please do not use this code, but you’ll still get the free gift. The free gift is your choice of any 1 item valued up to $10.00 in the 2020-2021 Annual Catalog!   For any orders $50 or more I will also send you my monthly class tutorials.  Click HERE or go to my Customer Rewards for more details and to see what this months tutorials are.

 Click HERE to shop the clearance rack.

Happy Stamping, Karen!

****************************************************************************************************

Going on Now!!!

We all love gorgeous Designer Series Paper, and during this incredible sale, you can enjoy a 15% discount on select papers from our current catalogs! 

Stampin’ Up! has such beautiful Designer Series Paper and they’re putting a select list of those papers on sale for 15% off during the month of October!!  Now is a great time to stock up and save on some of the most popular paper designs…including papers from the August-December 2020 Mini Catalog!!

SALE DETAILS:

  • Sales Period:  October 1-31
  • All order types qualify for this promotion.
  • There is no limit to how many packages of Designer Series Paper may be purchased during this promotion.
  • Only select Designer Series Papers are available at a 15% discount during this promotion.
  • Orders must be placed—and closed—during the promotion period for the 15% discount to apply.
  • Designer Series Paper ordered as part of a Starter Kit or with Stampin’ Rewards qualify for the 15% discount
  • Sale Ends October 31, 2020 at 11:50 PM MT

The designer papers included in this sale are shown   Click on the image below to open up the full-size printable PDF:

Get your lists ready to start shopping now – October 31st! 

****************************************************************************************************

Joy To The World 

Subscribe September 11 – October 10

This holiday season, share the joy of Paper Pumpkin! The Joy to the World Paper Pumpkin Kit is an exclusive holiday kit that provides a specially-designed box, enough supplies to create eight elegant cards, and an opportunity to connect with the Stampin’ Up! global community.

With October’s magical kit, not only will you get a head start on your holiday crafting—you’ll get to create Christmas cards, share project ideas, and spread holiday cheer with Stampin’ Up! customers and demonstrators around the world! After you receive your kit,  join the Joy of Paper Pumpkin Facebook group to make the most of this month’s kit.

  • Kit contains enough supplies to create eight cards—four each of two designs—and coordinating envelopes.
  • Kit includes die-cut pieces in English, French, and German. This will allow you to create cards you can use to connect with other customers and demonstrators around the world—in their language!
    • Card size: 4-1/4″ x 5-1/2″ (10.8 x 14 cm)
    • Envelope size: 4-1/2″ x 5-3/4″ (11.4 x 14.6 cm)
  • Coordinating Colors: Cherry Cobbler, Crumb Cake, Early Espresso, Just Jade, Soft Sea Foam

The Joy to the World Paper Pumpkin Kit has been thoughtfully released in preparation for the season of spreading joy. October’s Paper Pumpkin kit was designed to bring people together—connecting them with one another and spreading joy with each other around the world! With die-cut sentiments in English, French, and German, subscribers can send holiday cheer to their friends across the globe—in their language.

To connect and spread joy with international customers and demonstrators through the Joy to the World Paper Pumpkin Kit, join our Facebook group: Joy of Paper Pumpkin! When connecting with your new friends, don’t forget to share your experience with the #joyofpaperpumpkin hashtag.

Subscribe to the October 2020 Paper Pumpkin Kit from 11 September to 10 October at paperpumpkin.com.

Note: Supplies may be limited toward the end of the subscription period.

****************************************************************************************************

Card stock cuts for this project:

  • Garden Green Cardstock 4″ X 5 1/4″ (large card base panel), 4″ X 3 1/4″ (small card front mat), 4″ X 2 1/2″ (easel front mat), 4 1/8″ X 3 3/8″ (inner liner mat)
  • Very Vanilla Cardstock 3″ X 3 1/2″ (snowman), 3 1/4″ X 1″ (sentiment), 4″ X 3 1/4″ (inner liner)
  • Whisper White Cardstock 2′ X 41/4″ (trees)
  • Thick Very Vanilla Cardstock 4 1/4″ X 11″ (card base scored and folded at 2 3/4″ & 5 1/2″), 3 1/2″ X 8 1/2″ (small card base scored and folded at 4 1/4″)
  • Champagne Foil Sheet 3 1/8″ X 3 7/8″ (small card front mat), 2 3/8″ X 3 7/8″ (easel front mat)
  • Toile Tidings Designer Series Paper 3″ X 3 3/4″ (small card front), 2 1/4″ X 3 3/4″ (easel front), 2 1/4″ X 6″ (piece for envelope flap)

*********************************************************************************************************

Product List

Stampin’ Up! Warm Hugs for The Happy Inkin’ Thursday Blog Hop

Good Thursday morning my stamping friends and welcome to our Happy Inkin’ Thursday Blog Hop. Hope you are all doing well today.  If you are hopping over from Akiko, thank you for stopping by my blog. This week we have a Theme challenge. Be sure to take a moment to hop around to see everyone’s beautiful projects .
Here is our Theme for this week.

Here is my card using this Theme.

My design is from Try Stamping on Tuesday Challenge #477. Here is their sketch.

I also played along with “Just Us Girls” Word Week Challenge #556. Here is their word.

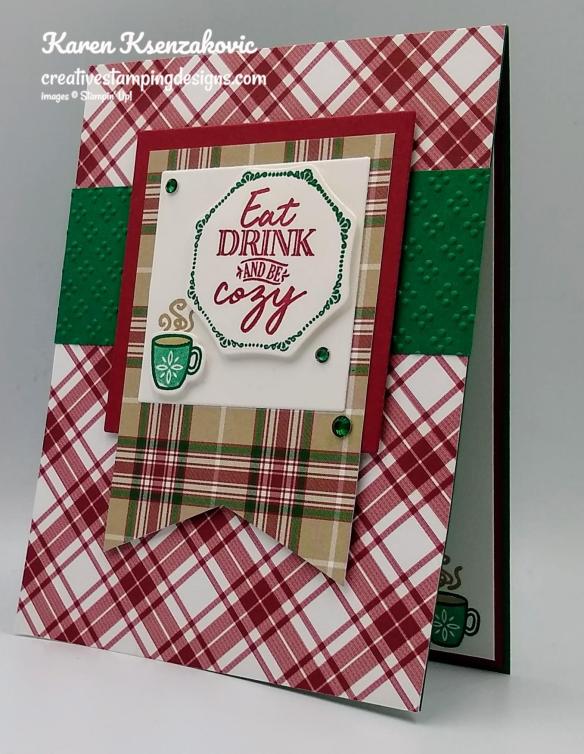
I started by adhering a panel of Plaid Tidings 6 X 6 Designer Series Paper to a Shaded Spruce card base using Multipurpose Liquid Glue. I embossed a panel of Shaded Spruce card stock using the Wrapped in Texture Embossing Folder and adhering it to the card front using Multipurpose Liquid Glue.

I cut a panel of Cherry Cobbler cardstock using the largest square from the Layering Squares Dies. I cut a panel of Plaid Tidings DSP into a banner using my Paper Snips and adhered it to the Cherry Cobbler square using Stampin’ Seal. I adhered the matted banner to the card front using Stampin’ Dimensionals.

On a panel of Whisper White cardstock I stamped the outline mug image from the Stampin’ Up! Warm Hugs Photopolymer Stamp Set in Shaded Spruce Ink. I stamped the mug fill image in Shaded Spruce Ink, stamped off once. I colored the inside of the mug in using my Crumb Cake Stampn’ Blends Markers. I stamped the decorative round border image from the Warm Hugs stamp set in Shaded Spruce Ink. I stamped the sentiment from the Warm Hugs stamp set in Cherry Cobbler Ink. I cut the images out using my Warm Wrapped Dies. I cut the other small panel of Whisper White cardstock using the 4th largest square from the Layering Square Dies and stamped the steam image from the Warm Hugs stamp set in Crumb Cake Ink. I adhered the die cut mug below the steam using Mini Stampin’ Dimensionals and the sentiment using Stampin’ Dimensionals. I adhered the artwork to the banner using Multipurpose Liquid Glue. I added a few Shaded Spruce Holiday Rhinestone Basic Jewels to the card front.

On the inside I stamped the sentiments from the Warm Hugs stamp set in Cherry Cobbler Ink in the center of a Whisper White panel. I stamped the outline mug image from the Warm Hugs stamp set in Shaded Spruce Ink on the bottom of the panel. I stamped the fill image in Shaded Spruce Ink, stamped off once, inside the outline. I stamped the steam image from the Warm Hugs stamp set in Crumb Cake Ink above the mugs. I colored the inside of the mugs in using my Crumb Cake Stampin’ Blends Markers. I adhered the Whisper White panel to a Cherry Cobbler mat using Stampin’ Seal and then to the inside of the Shaded Spruce card base using Multipurpose Liquid Glue.

To finish my card I decorated a Medium Whisper White Envelope. I stamped the mug image from the Warm Hugs stamp set along the bottom of the envelope front the same as I did for the card.

I adhered a panel of Plaid Tidings DSP to the envelope flap.

Thank you for visiting my blog today. I hope you liked my card and will give it a try. Now that you’ve seen my card, take a minute to hop through all our projects today. If you click on the Next Blog button, you’ll go to Julie’s page. Or you can just click on the names below to go directly to all their blogs! Happy Hopping!!

Amy Koenders:

Mary Deatherage:

Kristi Gray:

Jaimie Babarczy:

Sue Prather:

Karen Finkle:

Akiko Sudano:

Karen Ksenzakovic: You Are Here

Julie Johnston:

*********************************************************************************************************

If you need any stamping supplies, I’d love to be your Demonstrator. Just click HERE to go directly to my online store or drop me an email if you have any questions. 

MY CURRENT HOST CODE IS: RUW6PQNH

Use this host code when you order $50 or greater and receive a free gift from me! If your order is over $150, please do not use this code, but you’ll still get the free gift. The free gift is your choice of any 1 item valued up to $10.00 in the 2020-2021 Annual Catalog!   For any orders $50 or more I will also send you my monthly class tutorials.  Click HERE or go to my Customer Rewards for more details and to see what this months tutorials are.

 Click HERE to shop the clearance rack.

Happy Stamping, Karen!

****************************************************************************************************

Joy To The World 

Subscribe September 11 – October 10

This holiday season, share the joy of Paper Pumpkin! The Joy to the World Paper Pumpkin Kit is an exclusive holiday kit that provides a specially-designed box, enough supplies to create eight elegant cards, and an opportunity to connect with the Stampin’ Up! global community.

With October’s magical kit, not only will you get a head start on your holiday crafting—you’ll get to create Christmas cards, share project ideas, and spread holiday cheer with Stampin’ Up! customers and demonstrators around the world! After you receive your kit,  join the Joy of Paper Pumpkin Facebook group to make the most of this month’s kit.

  • Kit contains enough supplies to create eight cards—four each of two designs—and coordinating envelopes.
  • Kit includes die-cut pieces in English, French, and German. This will allow you to create cards you can use to connect with other customers and demonstrators around the world—in their language!
    • Card size: 4-1/4″ x 5-1/2″ (10.8 x 14 cm)
    • Envelope size: 4-1/2″ x 5-3/4″ (11.4 x 14.6 cm)
  • Coordinating Colors: Cherry Cobbler, Crumb Cake, Early Espresso, Just Jade, Soft Sea Foam

The Joy to the World Paper Pumpkin Kit has been thoughtfully released in preparation for the season of spreading joy. October’s Paper Pumpkin kit was designed to bring people together—connecting them with one another and spreading joy with each other around the world! With die-cut sentiments in English, French, and German, subscribers can send holiday cheer to their friends across the globe—in their language.

To connect and spread joy with international customers and demonstrators through the Joy to the World Paper Pumpkin Kit, join our Facebook group: Joy of Paper Pumpkin! When connecting with your new friends, don’t forget to share your experience with the #joyofpaperpumpkin hashtag.

Subscribe to the October 2020 Paper Pumpkin Kit from 11 September to 10 October at paperpumpkin.com.

Note: Supplies may be limited toward the end of the subscription period.

****************************************************************************************************

Going On Now!!

We all love gorgeous Designer Series Paper, and during this incredible sale, you can enjoy a 15% discount on select papers from our current catalogs! 

Stampin’ Up! has such beautiful Designer Series Paper and they’re putting a select list of those papers on sale for 15% off during the month of October!!  Now is a great time to stock up and save on some of the most popular paper designs…including papers from the August-December 2020 Mini Catalog!!

SALE DETAILS:

  • Sales Period:  October 1-31
  • All order types qualify for this promotion.
  • There is no limit to how many packages of Designer Series Paper may be purchased during this promotion.
  • Only select Designer Series Papers are available at a 15% discount during this promotion.
  • Orders must be placed—and closed—during the promotion period for the 15% discount to apply.
  • Designer Series Paper ordered as part of a Starter Kit or with Stampin’ Rewards qualify for the 15% discount
  • Sale Ends October 31, 2020 at 11:50 PM MT

The designer papers included in this sale are shown   Click on the image below to open up the full-size printable PDF:

Get your lists ready to start shopping on October 1st – October 31st! 

****************************************************************************************************

Card stock cuts for this project:

  • Cherry Cobbler Cardstock 3″ X 3″ (card front panel), 4 1/8″ X 5 3/8″ (inner liner mat)
  • Shaded Spruce Cardstock 4 1/4″ X 11″ (card base scored and folded at 5 1/2″), 4 1/4″ X 1 1/2″ (card front panel)
  • Whisper White Cardstock 2 – 2 1/2″ X 2 1/2″ (panel of banner and artwork), 4″ X 5 1/4″ (inner liner)
  • Plaid Tidings 6 X 6 Designer Series Paper 4 1/4″ X 5 1/2″ (card front), 2 1/2″ X 3 3/4″ (banner), 2 1/4″ X 6″ (piece for envelope flap)

*********************************************************************************************************

Product List

Stampin’ Up! Touched My Heart Sympathy

Good Wednesday morning my fellow stampers. How is everyone’s week going? We’re halfway through and on the way to the weekend already. As of now they are saying it’s going to be a nice weekend, but this is NJ and the weather changes hourly.

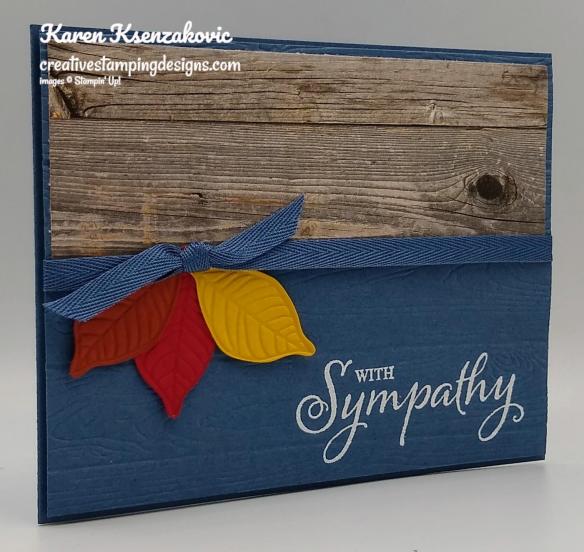
Today’s card is one I really don’t like making. It’s one thing if I make them to have on hand, but it’s another when I have to make one special. One of my daughter’s friends brother died last weekend while out hiking in AZ. Dehydration and heat stroke they believe. Young man, only in his 30’s, very sad. I wanted to make a card for her friend and mother since I knew both of them, so here’s what I made.

I started by stamping the sentiment from the Stampin’ Up! Host Touched My Heart Cling Stamp Set in Versamark Ink on a Misty Moonlight panel. I immediately sprinkled it with White Stampin’ Emboss Powder and set it using my Heat Tool.

I embossed the panel using my Pinewood Planks 3D Embossing Folder. I then adhered a panel of In Good Taste Designer Series Paper to the top of the panel using Multipurpose Liquid Glue. I wrapped a piece of Misty Moonlight 1/4″ 2020-2022 In-Color Ribbon around the panel and tied a knot.

I cut 3 leave using the Nature’s Roots Dies, one in Bumblebee, one in Cajun Craze and one in Real Red. I adhered the leaves just under the knot using Glue Dots and then added a Glue Dot under the knot. I adhered the card front to a Misty Moonlight card base using Stampin’ Dimensionals.

On the inside I stamped the sentiment from the Stampn’ Up! Path of Petals Photopolymer Stamp Set in Misty Moonlight Ink in the center of a Whisper White panel. I stamped the tall tree from the Stampin’ Up! Rooted In Nature Cling Stamp Set in Gray Granite Ink, stamping off once, over the sentiment. I adhered the Whisper White panel to a Misty Moonlight mat using Stampin’ Seal and then to the inside of the Misty Moonlight card base using Multipurpose Liquid Glue.

To finish my card I decorated a Medium Whisper White Envelope. I stamped the tall tree from the Rooted in Nature stamp set in Gray Granite Ink on the envelope front.

I adhered a panel of In Good Taste DSP to the envelope flap.

Thank you for stopping by my bog today. I hope you liked my card and will give it a try. Happy Stamping!!

****************************************************************************************************

Join me today at 4pm Today on Facebook Live .

I’m planning to go live on my Facebook page with a project today at 4:00pm ET.  Stop by my Facebook page at 4pm ET to see what card I will be making this week.

****************************************************************************************************

If you need any stamping supplies, I’d love to be your Demonstrator. Just click HERE to go directly to my online store or drop me an email if you have any questions. 

MY CURRENT HOST CODE IS: RUW6PQNH

Use this host code when you order $50 or greater and receive a free gift from me! If your order is over $150, please do not use this code, but you’ll still get the free gift. The free gift is your choice of any 1 item valued up to $10.00 in the 2020-2021 Annual Catalog!   For any orders $50 or more I will also send you my monthly class tutorials.  Click HERE or go to my Customer Rewards for more details and to see what this months tutorials are.

 Click HERE to shop the clearance rack.

Happy Stamping, Karen!

****************************************************************************************************

Going on Now!!!

We all love gorgeous Designer Series Paper, and during this incredible sale, you can enjoy a 15% discount on select papers from our current catalogs! 

Stampin’ Up! has such beautiful Designer Series Paper and they’re putting a select list of those papers on sale for 15% off during the month of October!!  Now is a great time to stock up and save on some of the most popular paper designs…including papers from the August-December 2020 Mini Catalog!!

SALE DETAILS:

  • Sales Period:  October 1-31
  • All order types qualify for this promotion.
  • There is no limit to how many packages of Designer Series Paper may be purchased during this promotion.
  • Only select Designer Series Papers are available at a 15% discount during this promotion.
  • Orders must be placed—and closed—during the promotion period for the 15% discount to apply.
  • Designer Series Paper ordered as part of a Starter Kit or with Stampin’ Rewards qualify for the 15% discount
  • Sale Ends October 31, 2020 at 11:50 PM MT

The designer papers included in this sale are shown   Click on the image below to open up the full-size printable PDF:

Get your lists ready to start shopping now – October 31st! 

****************************************************************************************************

Joy To The World 

Subscribe September 11 – October 10

This holiday season, share the joy of Paper Pumpkin! The Joy to the World Paper Pumpkin Kit is an exclusive holiday kit that provides a specially-designed box, enough supplies to create eight elegant cards, and an opportunity to connect with the Stampin’ Up! global community.

With October’s magical kit, not only will you get a head start on your holiday crafting—you’ll get to create Christmas cards, share project ideas, and spread holiday cheer with Stampin’ Up! customers and demonstrators around the world! After you receive your kit,  join the Joy of Paper Pumpkin Facebook group to make the most of this month’s kit.

  • Kit contains enough supplies to create eight cards—four each of two designs—and coordinating envelopes.
  • Kit includes die-cut pieces in English, French, and German. This will allow you to create cards you can use to connect with other customers and demonstrators around the world—in their language!
    • Card size: 4-1/4″ x 5-1/2″ (10.8 x 14 cm)
    • Envelope size: 4-1/2″ x 5-3/4″ (11.4 x 14.6 cm)
  • Coordinating Colors: Cherry Cobbler, Crumb Cake, Early Espresso, Just Jade, Soft Sea Foam

The Joy to the World Paper Pumpkin Kit has been thoughtfully released in preparation for the season of spreading joy. October’s Paper Pumpkin kit was designed to bring people together—connecting them with one another and spreading joy with each other around the world! With die-cut sentiments in English, French, and German, subscribers can send holiday cheer to their friends across the globe—in their language.

To connect and spread joy with international customers and demonstrators through the Joy to the World Paper Pumpkin Kit, join our Facebook group: Joy of Paper Pumpkin! When connecting with your new friends, don’t forget to share your experience with the #joyofpaperpumpkin hashtag.

Subscribe to the October 2020 Paper Pumpkin Kit from 11 September to 10 October at paperpumpkin.com.

Note: Supplies may be limited toward the end of the subscription period.

****************************************************************************************************

Card stock cuts for this project:

  • Bumblebee Cardstock 1 1/4″ X 2″ (leaf)
  • Cajun Craze Cardstock 1 1/4″ X 2′ (leaf)
  • Misty Moonlight Cardstock 4 1/4″ X 11″ (card base scored and folded at 5 1/2″), 4 1/8″ x 5 3/8″ (card front), 4″ X 5 1/4″ (inner liner mat)
  • Real Red Cardstock 1 1/4″ X 2″ (leaf)
  • Whisper White Cardstock 3 7/8″ X 5 1/8″ (inner liner)
  • In Good Taste Designer Series Paper 2″ X 5 1/4″ (card front panel), 2 1/4′ X 6″ (piece for envelope flap)

*********************************************************************************************************

Product List

Stampin’ Up! Love Of Leaves Video Tutorial

Good Monday morning my stamping friends. How was everyone’s weekend? Did anyone do anything fun? It was a gorgeous Autumn weekend here. I spent Saturday watching my team members doing Facebook Live videos for World Card Making Day and I had to work on Sunday.

Today’s card was the 2nd video that I did on Saturday. The measurements along with the links for the video are listed below. If you were able to either watch me live or watch the replay, thank you very much, I really appreciate it. Here’s my card for today.

My colors are from the Color Throwdown Color Challenge #613. Here are their colors.

I played along with As You See It Theme Challenge #235. Here is their theme.

I also played along with Just Add Ink Challenge #525. Here is their theme.

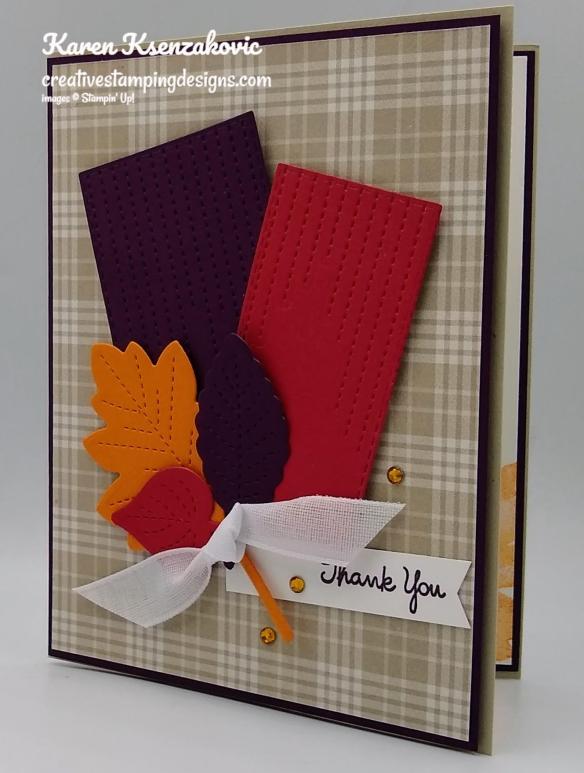
I started by adhering a panel of Plaid Tidings 6 X 6 Designer Series Paper to a Blackberry Bliss mat using Stampin’ Seal.

I cut a panel of Blackberry Bliss cardstock using the 3rd from the smallest Stitched Rectangle Dies and I cut a panel of Real Red cardstock using the 2nd from the smallest Stitched Rectangle Dies. I then embossed both panels using the stitched die from the Stitched Leaves Dies. I adhered the 2 rectangles together on the bottom only, using Stampin’ Seal and adhered them to the card front using Stampin’ Dimensionals. I cut and embossed 3 leaves out from the Stitched Leaves Dies, one in Blackberry Bliss, one in Pumpkin Pie and one in Real Red. I adhered the leaves to the rectangles using Stampin’ Dimensionals and Glue Dots.

On a thin strip of Whisper White cardstock, I stamped the sentiment from the Stampin’ Up! Love of Leaves Photopolymer Stamp Set in Blackberry Bliss Ink. I cut the strip into a banner using the Banner Pick A Punch. I adhered the banner just under the leaf stem using Glue Dots. I tied a knot using the 1/2″ Whisper White Faux Linen Ribbon and adhered it to the leaf stems using a Glue Dot. I added a few Pumpkin Pie Holiday Rhinestone Basic Jewels to the card front. I adhered the card front to a Sahara Sand card base using Stampin’ Dimensionals.

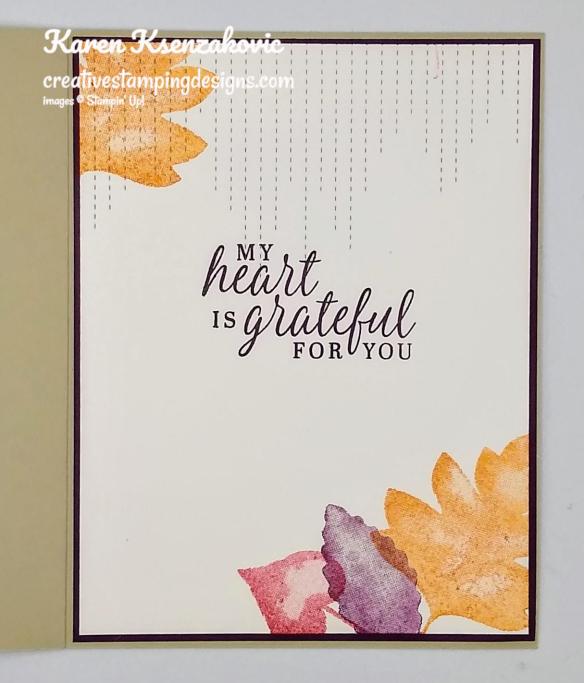
On the inside I stamped the sentiment from the Stampin’ Up! Beautiful Autumn Photopolymer Stamp Set in Blackberry Bliss Ink in the center of a Whisper White panel. I stamped the 3 leaf images from the Love of Leaves stamp set in Blackberry Bliss, Pumpkin Pie and Real Red Ink on the bottom of the panel and the one leaf on the top. I adhered the Whisper White panel to a Blackberry Bliss mat using Stampin’ Seal and then to the inside of the Sahara Sand card base using Multipurpose Liquid Glue.

To complete my card I decorated a Medium Whisper White Envelope. I stamped the 3 leaves from the Love of Leaves stamp set on the envelope front in Blackberry Bliss, Pumpkin Pie and Real Red.

I adhered a panel of Plaid Tidings DSP to the envelope flap.

Thank you for stopping by my blog today.  I hope you liked my card and will give it a try.  The list of supplies are below along with the measurements if you’d like to stamp along while watching the video.  You can watch it on my Facebook page Here. You can watch it on our World Card Making Day Inkin’ Krew Facebook page Here.

You can also view it on my YouTube Channel Here. Happy Stamping!!

****************************************************************************************************

If you need any stamping supplies, I’d love to be your Demonstrator. Just click HERE to go directly to my online store or drop me an email if you have any questions. 

MY CURRENT HOST CODE IS: RUW6PQNH

Use this host code when you order $50 or greater and receive a free gift from me! If your order is over $150, please do not use this code, but you’ll still get the free gift. The free gift is your choice of any 1 item valued up to $10.00 in the 2020-2021 Annual Catalog!   For any orders $50 or more I will also send you my monthly class tutorials.  Click HERE or go to my Customer Rewards for more details and to see what this months tutorials are.

 Click HERE to shop the clearance rack.

Happy Stamping, Karen!

****************************************************************************************************

Going on Now!!!

We all love gorgeous Designer Series Paper, and during this incredible sale, you can enjoy a 15% discount on select papers from our current catalogs! 

Stampin’ Up! has such beautiful Designer Series Paper and they’re putting a select list of those papers on sale for 15% off during the month of October!!  Now is a great time to stock up and save on some of the most popular paper designs…including papers from the August-December 2020 Mini Catalog!!

SALE DETAILS:

  • Sales Period:  October 1-31
  • All order types qualify for this promotion.
  • There is no limit to how many packages of Designer Series Paper may be purchased during this promotion.
  • Only select Designer Series Papers are available at a 15% discount during this promotion.
  • Orders must be placed—and closed—during the promotion period for the 15% discount to apply.
  • Designer Series Paper ordered as part of a Starter Kit or with Stampin’ Rewards qualify for the 15% discount
  • Sale Ends October 31, 2020 at 11:50 PM MT

The designer papers included in this sale are shown   Click on the image below to open up the full-size printable PDF:

Get your lists ready to start shopping on October 1st – October 31st! 

****************************************************************************************************

Subscribe September 11 – October 10

This holiday season, share the joy of Paper Pumpkin! The Joy to the World Paper Pumpkin Kit is an exclusive holiday kit that provides a specially-designed box, enough supplies to create eight elegant cards, and an opportunity to connect with the Stampin’ Up! global community.

With October’s magical kit, not only will you get a head start on your holiday crafting—you’ll get to create Christmas cards, share project ideas, and spread holiday cheer with Stampin’ Up! customers and demonstrators around the world! After you receive your kit,  join the Joy of Paper Pumpkin Facebook group to make the most of this month’s kit.

  • Kit contains enough supplies to create eight cards—four each of two designs—and coordinating envelopes.
  • Kit includes die-cut pieces in English, French, and German. This will allow you to create cards you can use to connect with other customers and demonstrators around the world—in their language!
    • Card size: 4-1/4″ x 5-1/2″ (10.8 x 14 cm)
    • Envelope size: 4-1/2″ x 5-3/4″ (11.4 x 14.6 cm)
  • Coordinating Colors: Cherry Cobbler, Crumb Cake, Early Espresso, Just Jade, Soft Sea Foam

The Joy to the World Paper Pumpkin Kit has been thoughtfully released in preparation for the season of spreading joy. October’s Paper Pumpkin kit was designed to bring people together—connecting them with one another and spreading joy with each other around the world! With die-cut sentiments in English, French, and German, subscribers can send holiday cheer to their friends across the globe—in their language.

To connect and spread joy with international customers and demonstrators through the Joy to the World Paper Pumpkin Kit, join our Facebook group: Joy of Paper Pumpkin! When connecting with your new friends, don’t forget to share your experience with the #joyofpaperpumpkin hashtag.

Subscribe to the October 2020 Paper Pumpkin Kit from 11 September to 10 October at paperpumpkin.com.

Note: Supplies may be limited toward the end of the subscription period.

****************************************************************************************************

Card stock cuts for this project:

  • Blackberry Bliss Cardstock 2 – 4 1/8″ X 5 3/8″ (card front and inner liner mats), 2″ X 3 1/2″ (card front rectangle), 1 1/2″ X 2 1/4″ (leaf)
  • Pumpkin Pie Cardstock 2 1/4″ X 4″ (leaf)
  • Real Red Cardstock 3″ X 13/4″ (card front rectangle), 1 1/2″ X 2″ (leaf)
  • Sahara Sand Cardstock 8 1/2″ X 5 1/2″ (card base scored and folded at 4 1/4″)
  • Plaid Tidings 6 X 6 Designer Series Paper 4″ X 5 1/4″ (card front), 2 1/4″ X 6″ (piece for envelope flap)

*********************************************************************************************************

Product List

Stampin’ Up! Blushing Poinsettia Petals

Good Saturday morning my stamping friends.  Happy World Card Making Day!!!  Hope you will all be busy creating today and sharing/mailing your beautiful cards.  I’m a little early today, since I have to get ready for our event.

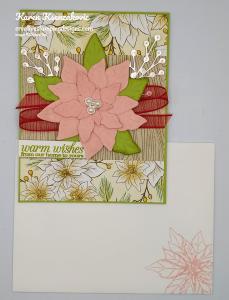
For today I used the beautiful Stampin’ Up! Poinsettia Petals Bundle.  Here’s my card for today.

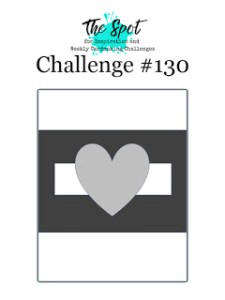
My design is from The Spot Challenge # 130.  Here is their sketch.

I started by adhering a panel of Poinsettia Place Designer Series Paper to a Pear Pizzazz card base using Stampin’ Seal.  I adhered another panel of the Poinsettia Place DSP across the center of the card front using Stampin’ Seal.

From a panel of Blushing Bride cardstock I cut 1 each of the large, medium, small and extra small flowers from the Poinsettia Dies.  I brushed each of the flowers using my Clear Wink of Stella to give it a little shimmer.  From a panel of Pear Pizzazz cardstock I cut the largest flower die from the Poinsettia Dies.  I snipped all the leaves apart using my Paper Snips and sponged the edges using my Stamping Sponge and Pear Pizzazz Ink.  I adhered the flowers together using Glue Dots or tiny amounts of Multipurpose Liquid Glue.  I adhered the Pear Pizzazz leaves behind the flower using Multipurpose Liquid Glue.  I zig-zagged a piece of Real Red 3/8″ Sheer Ribbon on the card front using Stampin’ Seal.

I adhered the flower to the center of the card front using Stampin’ Dimensionals.  I cut 2 sprigs from the Poinsettia Dies our of a panel of Silver Foil and adhered them under the flower using Multipurpose Liquid Glue.  I added a Beaded Pearl to the center of the flower using a Glue Dot.  On a thin strip of Whisper White cardstock I stamped the sentiment from the Stampin’ Up! Poinsettia Petals Photopolymer Stamp Set in Pear Pizzazz Ink.  I adhered the sentiment to the bottom left of the flower using Stampin’ Dimensionals.

On the inside I stamped the sentiment from the Poinsettia Petals stamp set in Pear Pizzazz Ink in the center of a Whisper White panel.  I stamped the poinsettia image from the Poinsettia Petals stamp set in Blushing Bride Ink on 2 of the corners of the panel.  I adhered the Whisper White panel to a Blushing Bride mat using Stampin’ Seal and then to the inside of the Pear Pizzazz card base using Multipurpose Liquid Glue.

To finish my card I decorated a Medium Whisper White Envelope.  I stamped the poinsettia image from the Poinsettia Petals stamp set in Blushing Bride Ink on the envelope front.  I adhered a panel of Poinsettia Place DSP to the envelope flap.

Thank you for stopping by my blog today.  I hope you liked my card and will give it a try.  I hope you will be able to join us today for our World Card Making Event.  The link is below to join in our Facebook page.  It’s going to be a fun day of card making videos.  Happy Stamping!!

****************************************************************************************************

If you need any stamping supplies, I’d love to be your Demonstrator. Just click HERE to go directly to my online store or drop me an email if you have any questions. 

MY CURRENT HOST CODE IS: RUW6PQNH

Use this host code when you order $50 or greater and receive a free gift from me! If your order is over $150, please do not use this code, but you’ll still get the free gift. The free gift is your choice of any 1 item valued up to $10.00 in the 2020-2021 Annual Catalog!   For any orders $50 or more I will also send you my monthly class tutorials.  Click HERE or go to my Customer Rewards for more details and to see what this months tutorials are.

 Click HERE to shop the clearance rack.

Happy Stamping, Karen!

****************************************************************************************************

Join me today at 11am and 5pm, I’ll be making a card on Facebook Live. 

****************************************************************************************************

Going On NOW!!

We all love gorgeous Designer Series Paper, and during this incredible sale, you can enjoy a 15% discount on select papers from our current catalogs! 

Stampin’ Up! has such beautiful Designer Series Paper and they’re putting a select list of those papers on sale for 15% off during the month of October!!  Now is a great time to stock up and save on some of the most popular paper designs…including papers from the August-December 2020 Mini Catalog!!

SALE DETAILS:

  • Sales Period:  October 1-31
  • All order types qualify for this promotion.
  • There is no limit to how many packages of Designer Series Paper may be purchased during this promotion.
  • Only select Designer Series Papers are available at a 15% discount during this promotion.
  • Orders must be placed—and closed—during the promotion period for the 15% discount to apply.
  • Designer Series Paper ordered as part of a Starter Kit or with Stampin’ Rewards qualify for the 15% discount
  • Sale Ends October 31, 2020 at 11:50 PM MT

The designer papers included in this sale are shown   Click on the image below to open up the full-size printable PDF:

Get your lists ready to start shopping Now until October 31st! 

****************************************************************************************************

World Card Making Day Inkin’ Krew Facebook Live Event Today, All Day!!!

Our FB page is up and running and you’ll want to join right away.

You’re invited to join our team this Saturday, October 3rd, for World Card Making Day. We’re going to be posting some things between now and Saturday, but the event will be in full-swing starting at 9am Eastern Time on Saturday!
Be sure that you go to the Notifications at the top of the page – once you’re “in” – and select ALL so that you don’t miss a thing!! Here’s the link!

There’ll be presentations every hour starting at 9:00 until 9:00pm and of course Prize Patrol.

****************************************************************************************************

Joy To The World 

Subscribe September 11 – October 10

This holiday season, share the joy of Paper Pumpkin! The Joy to the World Paper Pumpkin Kit is an exclusive holiday kit that provides a specially-designed box, enough supplies to create eight elegant cards, and an opportunity to connect with the Stampin’ Up! global community.

With October’s magical kit, not only will you get a head start on your holiday crafting—you’ll get to create Christmas cards, share project ideas, and spread holiday cheer with Stampin’ Up! customers and demonstrators around the world! After you receive your kit,  join the Joy of Paper Pumpkin Facebook group to make the most of this month’s kit.

  • Kit contains enough supplies to create eight cards—four each of two designs—and coordinating envelopes.
  • Kit includes die-cut pieces in English, French, and German. This will allow you to create cards you can use to connect with other customers and demonstrators around the world—in their language!
    • Card size: 4-1/4″ x 5-1/2″ (10.8 x 14 cm)
    • Envelope size: 4-1/2″ x 5-3/4″ (11.4 x 14.6 cm)
  • Coordinating Colors: Cherry Cobbler, Crumb Cake, Early Espresso, Just Jade, Soft Sea Foam

The Joy to the World Paper Pumpkin Kit has been thoughtfully released in preparation for the season of spreading joy. October’s Paper Pumpkin kit was designed to bring people together—connecting them with one another and spreading joy with each other around the world! With die-cut sentiments in English, French, and German, subscribers can send holiday cheer to their friends across the globe—in their language.

To connect and spread joy with international customers and demonstrators through the Joy to the World Paper Pumpkin Kit, join our Facebook group: Joy of Paper Pumpkin! When connecting with your new friends, don’t forget to share your experience with the #joyofpaperpumpkin hashtag.

Subscribe to the October 2020 Paper Pumpkin Kit from 11 September to 10 October at paperpumpkin.com.

Note: Supplies may be limited toward the end of the subscription period.

****************************************************************************************************

Card stock cuts for this project:

  • Blushing Bride Cardstock 5 1/2″ X 6″ (poinsettia), 4 1/8″ X 5 3/8″ (inner liner mat)
  • Pear Pizzazz Cardstock 4 1/4″ X 11″ (card base scored and folded at 5 1/2″), 3 1/4″ X 3 1/4″ (poinsettia leaves)
  • Whisper White Cardstock 1/2″ X 2″ (sentiment), 4″ X 5 1/4″ (inner liner)
  • Poinsettia Place Designer Serie Paper 4 1/8″ X 5 3/8″ (card front), 3″ X 4 1/8″ (card front panel), 2 1/4″ X 6″ (piece for envelope flap)
  • Silver Foil Sheet 2 1/4″ X 2 1/4″ (sprigs)

****************************************************************************************************

Product List

Stampin’ Up! Rooted In Nature Peekaboo For Fun Fold Friday

Good Friday morning my stamping friends and welcome to my Fun Fold Friday.  How was everyone’s week?  Is anyone doing anything fun this weekend?  Tomorrow is World Card Making Day and our team has a whole day planned out with videos from 9am-9pm, information below about it.

Today’s card is one that I made on Wednesday afternoon on my Facebook Live video.  If you were able to join me or you watched the replay, thank you very much.  If you’d like to view my video either on Facebook or YouTube, the link is below.   My card is actually a peekaboo card and not a folded one today.  Here’s my card.

I started by lightly adhering a panel of In Good Taste Designer Series Paper to a Gray Granite card base using the tiniest amount of Stampin’ Seal.  Using the largest tree die from the Nature’s Roots Dies, I cut the center of the card front.

I removed the DSP from the card base, very carefully not to tear the cardstock.  I stamped the large tree image from the Stampin’ Up! Rooted In Nature Cling Stamp Set in Gray Granite Ink, stamping off once.   I stamped the tree image through the card front so that it was aligned perfectly..

I adhered the DSP back to the card base using Multipurpose Liquid Glue.

I cut and embossed the smallest leaf from the Nature’s Roots Dies in Bumblebee, Misty Moonlight and Seaside Spray cardstock.  I adhered the leaves to the card front using Glue Dots for the bottom 2 and Stampin’ Dimensionals for the top leaf.  I added a multi-looped bow I made using Linen Thread and Misty Moonlight/Silver Bakers Twine from the Flowers For Every Season Ribbon Comb Pack, with a Glue Dot.

On the inside I stamped the sentiment from the Stampin’ Up! Autumn Goodness Photopolymer Stamp Set in Misty Moonlight Ink in the center of the tree.  I stamped the sentiment from the Stampin’ Up! Many Mates Cling Stamp Set in Misty Moonlight Ink on the bottom of the panel.  I adhered the Whisper White panel to a Misty Moonlight mat using Stampin’ Seal and then to the inside of the Gray Granite card base using Multipurpose Liquid Glue, making sure the tree lined up with the die cut card front.  I added a couple Bumblebee 2020-2022 In-Color Enamel Dots to the tree and the card front.

To finish my card I decorated a Medium Whisper White Envelope.  I stamped the largest leaf image from the Rooted In Nature stamp set on the bottom front of the envelope in Misty Moonlight, Bumblebee and Seaside Spray Inks.  I adhered a panel of In Good Taste DSP to the envelope flap.

Thank you for stopping by my blog today.  I hope you liked my card and will give it a try.  The list of supplies are below along with the measurements if you’d like to stamp along while watching the video.  You can watch it on my Facebook page Here.

You can also view the video on my YouTube channel Here.  Happy Stamping!!

****************************************************************************************************

If you need any stamping supplies, I’d love to be your Demonstrator. Just click HERE to go directly to my online store or drop me an email if you have any questions. 

MY CURRENT HOST CODE IS: RUW6PQNH

Use this host code when you order $50 or greater and receive a free gift from me! If your order is over $150, please do not use this code, but you’ll still get the free gift. The free gift is your choice of any 1 item valued up to $10.00 in the 2020-2021 Annual Catalog!   For any orders $50 or more I will also send you my monthly class tutorials.  Click HERE or go to my Customer Rewards for more details and to see what this months tutorials are.

 Click HERE to shop the clearance rack.

Happy Stamping, Karen!

****************************************************************************************************

Going on Now!!!

We all love gorgeous Designer Series Paper, and during this incredible sale, you can enjoy a 15% discount on select papers from our current catalogs! 

Stampin’ Up! has such beautiful Designer Series Paper and they’re putting a select list of those papers on sale for 15% off during the month of October!!  Now is a great time to stock up and save on some of the most popular paper designs…including papers from the August-December 2020 Mini Catalog!!

SALE DETAILS:

  • Sales Period:  October 1-31
  • All order types qualify for this promotion.
  • There is no limit to how many packages of Designer Series Paper may be purchased during this promotion.
  • Only select Designer Series Papers are available at a 15% discount during this promotion.
  • Orders must be placed—and closed—during the promotion period for the 15% discount to apply.
  • Designer Series Paper ordered as part of a Starter Kit or with Stampin’ Rewards qualify for the 15% discount
  • Sale Ends October 31, 2020 at 11:50 PM MT

The designer papers included in this sale are shown   Click on the image below to open up the full-size printable PDF:

Get your lists ready to start shopping on October 1st – October 31st! 

****************************************************************************************************

Our FB page is up and running and you’ll want to join right away.

You’re invited to join our team this Saturday, October 3rd, for World Card Making Day. We’re going to be posting some things between now and Saturday, but the event will be in full-swing starting at 9am Eastern Time on Saturday!
Be sure that you go to the Notifications at the top of the page – once you’re “in” – and select ALL so that you don’t miss a thing!! Here’s the link!

There’ll be presentations every hour starting at 9:00 until 9:00pm and of course Prize Patrol.

****************************************************************************************************

Joy To The World 

Subscribe September 11 – October 10

This holiday season, share the joy of Paper Pumpkin! The Joy to the World Paper Pumpkin Kit is an exclusive holiday kit that provides a specially-designed box, enough supplies to create eight elegant cards, and an opportunity to connect with the Stampin’ Up! global community.

With October’s magical kit, not only will you get a head start on your holiday crafting—you’ll get to create Christmas cards, share project ideas, and spread holiday cheer with Stampin’ Up! customers and demonstrators around the world! After you receive your kit,  join the Joy of Paper Pumpkin Facebook group to make the most of this month’s kit.

  • Kit contains enough supplies to create eight cards—four each of two designs—and coordinating envelopes.
  • Kit includes die-cut pieces in English, French, and German. This will allow you to create cards you can use to connect with other customers and demonstrators around the world—in their language!
    • Card size: 4-1/4″ x 5-1/2″ (10.8 x 14 cm)
    • Envelope size: 4-1/2″ x 5-3/4″ (11.4 x 14.6 cm)
  • Coordinating Colors: Cherry Cobbler, Crumb Cake, Early Espresso, Just Jade, Soft Sea Foam

The Joy to the World Paper Pumpkin Kit has been thoughtfully released in preparation for the season of spreading joy. October’s Paper Pumpkin kit was designed to bring people together—connecting them with one another and spreading joy with each other around the world! With die-cut sentiments in English, French, and German, subscribers can send holiday cheer to their friends across the globe—in their language.

To connect and spread joy with international customers and demonstrators through the Joy to the World Paper Pumpkin Kit, join our Facebook group: Joy of Paper Pumpkin! When connecting with your new friends, don’t forget to share your experience with the #joyofpaperpumpkin hashtag.

Subscribe to the October 2020 Paper Pumpkin Kit from 11 September to 10 October at paperpumpkin.com.

Note: Supplies may be limited toward the end of the subscription period.

****************************************************************************************************

Card stock cuts for this project:

  • Bumblebee Cardstock 1 1/4″ X 1 3/4″ (leaf)
  • Gray Granite Cardstock 4 1/4″ X 11″ (card base scored and folded at 5 12″)
  • Misty Moonlight Cardstock 4 1/8″ X 5 3/8″ (inner liner mat), 1 1/4″ X 1 3/4″ (leaf)
  • Seaside Spray Cardstock 1 1/4″ X 1 3/4″ (leaf)
  • Whisper White Cardstock 4″ X 5 1/4″ (inner liner)
  • In Good Taste Designer Series Paper 4 1/8″ X 5 3/8″ (card front), 2 1/4″ X 6″ (piece for envelope flap)

****************************************************************************************************

Product List

Stampin’ Up! Merry and Bright CAS

Good Tuesday morning my fellow stampers.  How has everyone’s week started off?

I have another CAS card for you today.  I’m slowly learning when it comes to holiday cards that’s the way to go.  I do make some extravagant ones.  Those go to special people that I know don’t toss them to the side right away and take a moment to look at the card.  Here’s my card for today.

I played along with Always Fun Challenge #182.  Their Theme is “Die Cutting”.

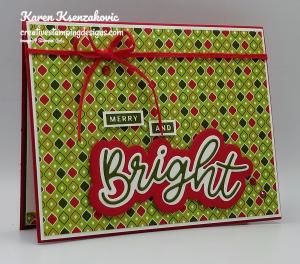
I started by adhering a Heartwarming Hugs Designer Series Paper card front to a Whisper White mat using Stampin’ Seal.

I wrapped a piece of the Real Red 3 16″ Braided Linen Trim around the card front and tied  a bow.  I adhered the card front to a Real Red card base using Stampin’ Dimensionals.  Using my Joy Dies, I cut the 3 layers of the sentiment. The largest, background, in Real Red, the middle outline in Whisper White and the word in Mossy Meadow.  I adhered the 3 layers together using Multipurpose Liquid Glue and adhered it to the card front using Stampin’ Dimensionals.

On a thin strip of Whisper White cardstock I stamped the ‘MERRY, AND’  sentiments from the Stampin’ UP! Peace & Joy Photopolymer Stamp Set in Mossy Meadow Ink.  I cut the words out using my Paper Snips and adhered them above the sentiment using Mini Stampin’ Dimensionals.  I added a few Wonderful Gems to the card front.

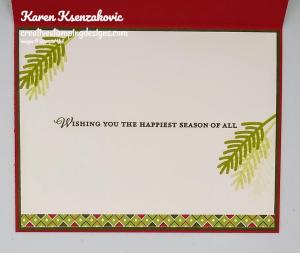
On the inside I stamped the sentiment from the Stampin’ Up! Wishes & Wonder Cling Stamp Set in Mossy Meadow Ink in the center of a Whisper White panel.  I stamped the pine boughs image from the Peace & Joy stamp set in Pear Pizzazz Ink, 1 full strength and 1 stamped off.  I adhered a thin strip of Heartwarming Hugs DSP to the bottom of the panel using Stampin’ Seal.  I adhered the Whisper White panel to a Mossy Meadow mat using Stampin’ Seal and then to the inside of the Real Red card base using Multipurpose Liquid Glue.

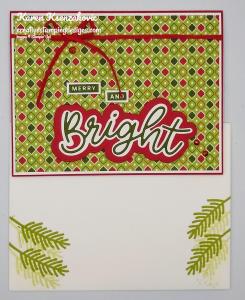
To finish my card I decorated a Medium Whisper White Envelope.  I stamped the pine bough image from the Peace & Joy stamp set in Pear Pizzazz Ink on the envelope front.  I adhered a panel of Heartwarming Hugs DSP to the envelope flap.

Thank you for stopping by my blog today.  I hope you liked my card and will give it a try. Happy Stamping!!

****************************************************************************************************

If you need any stamping supplies, I’d love to be your Demonstrator. Just click HERE to go directly to my online store or drop me an email if you have any questions. 

MY CURRENT HOST CODE IS: G39RYMEX

Use this host code when you order $50 or greater and receive a free gift from me! If your order is over $150, please do not use this code, but you’ll still get the free gift. The free gift is your choice of any 1 item valued up to $10.00 in the 2020-2021 Annual Catalog!   For any orders $50 or more I will also send you my monthly class tutorials.  Click HERE or go to my Customer Rewards for more details and to see what this months tutorials are.

 Click HERE to shop the clearance rack.

Happy Stamping, Karen!

****************************************************************************************************

We all love gorgeous Designer Series Paper, and during this incredible sale, you can enjoy a 15% discount on select papers from our current catalogs! 

Stampin’ Up! has such beautiful Designer Series Paper and they’re putting a select list of those papers on sale for 15% off during the month of October!!  Now is a great time to stock up and save on some of the most popular paper designs…including papers from the August-December 2020 Mini Catalog!!

SALE DETAILS:

  • Sales Period:  October 1-31
  • All order types qualify for this promotion.
  • There is no limit to how many packages of Designer Series Paper may be purchased during this promotion.
  • Only select Designer Series Papers are available at a 15% discount during this promotion.
  • Orders must be placed—and closed—during the promotion period for the 15% discount to apply.
  • Designer Series Paper ordered as part of a Starter Kit or with Stampin’ Rewards qualify for the 15% discount
  • Sale Ends October 31, 2020 at 11:50 PM MT

The designer papers included in this sale are shown   Click on the image below to open up the full-size printable PDF:

Get your lists ready to start shopping on October 1st – October 31st! 

****************************************************************************************************

World Card Making Day, this Saturday October 3rd.  Our Inkin’ Krew Team will be doing videos all day, every hour.  I will post a schedule soon.

****************************************************************************************************

Joy To The World 

Subscribe September 11 – October 10

This holiday season, share the joy of Paper Pumpkin! The Joy to the World Paper Pumpkin Kit is an exclusive holiday kit that provides a specially-designed box, enough supplies to create eight elegant cards, and an opportunity to connect with the Stampin’ Up! global community.

With October’s magical kit, not only will you get a head start on your holiday crafting—you’ll get to create Christmas cards, share project ideas, and spread holiday cheer with Stampin’ Up! customers and demonstrators around the world! After you receive your kit,  join the Joy of Paper Pumpkin Facebook group to make the most of this month’s kit.

  • Kit contains enough supplies to create eight cards—four each of two designs—and coordinating envelopes.
  • Kit includes die-cut pieces in English, French, and German. This will allow you to create cards you can use to connect with other customers and demonstrators around the world—in their language!
    • Card size: 4-1/4″ x 5-1/2″ (10.8 x 14 cm)
    • Envelope size: 4-1/2″ x 5-3/4″ (11.4 x 14.6 cm)
  • Coordinating Colors: Cherry Cobbler, Crumb Cake, Early Espresso, Just Jade, Soft Sea Foam

The Joy to the World Paper Pumpkin Kit has been thoughtfully released in preparation for the season of spreading joy. October’s Paper Pumpkin kit was designed to bring people together—connecting them with one another and spreading joy with each other around the world! With die-cut sentiments in English, French, and German, subscribers can send holiday cheer to their friends across the globe—in their language.

To connect and spread joy with international customers and demonstrators through the Joy to the World Paper Pumpkin Kit, join our Facebook group: Joy of Paper Pumpkin! When connecting with your new friends, don’t forget to share your experience with the #joyofpaperpumpkin hashtag.

Subscribe to the October 2020 Paper Pumpkin Kit from 11 September to 10 October at paperpumpkin.com.

Note: Supplies may be limited toward the end of the subscription period.

****************************************************************************************************

Stampin’ Up! Get & Go Starter Kit Promotion – Sept 1-30!

There is only 1 Day left to take advantage of this amazing joining offer.

The Get & Go Starter Kit promotion gives those who sign up to be a Stampin’ Up! demonstrator additional products to help get started right away!  In addition to the already great valued Starter Kit, you will receive precut paper, stamps, and embellishments!

Here are the details:

  • Promotion Dates: September 1–30, 2020
    Joining Deadline:  September 30, 2020; 11:50 PM (MT)
  • New demonstrators who submit their Independent Demonstrator Agreement (IDA) before 1 September or after 30 September will not be eligible for this promotion.
  • In addition to the regular starter kit (for $99 you choose $125 worth of products), if you join between September 1 and 30, you will also receive enough card stock pieces to make 16 cards, a pack of Rhinestone Basic Jewels, the So Much Love stamp set, and the Queen Anne’s Lace stamp set!!
    • 8 packs of precut card stock of the coastal cabana pack will be provided, and 8 packs of precut card stock of the Granny Apple Green pack, for a total of 16 cards (packs include envelopes).
  • Important note: Ink, adhesive, cutting tool, and clear block for stamping must be purchased separately. However, these products may be included as part of the Starter Kit product selection.

This is such a great deal!  For $99, you get to pick $125 merchandise of your choice for your Starter Kit plus you’ll get the Queen Annes’ Lace and So Much Love stamp sets, card kits to create 16 cards and a pack of Rhinestones for free!!

Drop me a note at creativestampingdesigns@gmail.com if you have questions about joining, I’m happy to talk to you about it.  You can also see more information about the benefits of becoming a Stampin’ Up! Demonstrator Here

****************************************************************************************************

Card stock cuts for this project:

  • Mossy Meadow Cardstock 1 1/2″ X 4″ (sentiment), 4 1/8″ X 5 3/8″ (inner liner mat)
  • Real Red Cardstock 8 1/2″ X 5 1/2″ (card base scored and folded at 4 1/4″), 2 1/4″ X 4″ (sentiment mat)
  • Whisper White Cardstock 4 1/8″ X 5 3/8″ (card front mat), 1 5/8″ X 4″ (sentiment outline), 3/8″ X 2″  (sentiment), 4″ X 5 1/4″ (inner liner)
  • Heartwarming Hugs Designer Series Paper 4″ X 5 1/4″ (card front), 1/4″ X 5 1/4″ (strip on inner liner), 2 1/4″ X 6″ (piece for envelope flap)

****************************************************************************************************

Product List