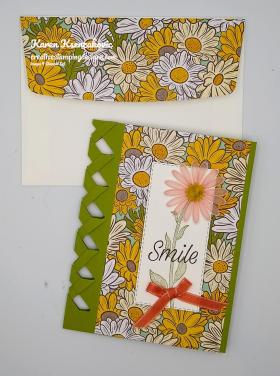
Stampin’ Up! Special Tasteful Touches Sneak Peek

Good Monday morning my stamping friends.  How was everyone’s weekend?  It ended up being a beautiful day here yesterday.  I took my fur baby and went for a nice walk and enjoyed the sunshine.

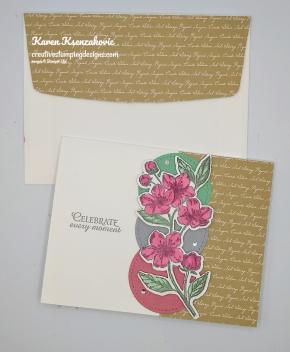
For today’s card I mixed a little retiring DSP with some new DSP.  Some of the new DSP coming is so realistic looking, it’s beautiful.  Here’s my card for today.
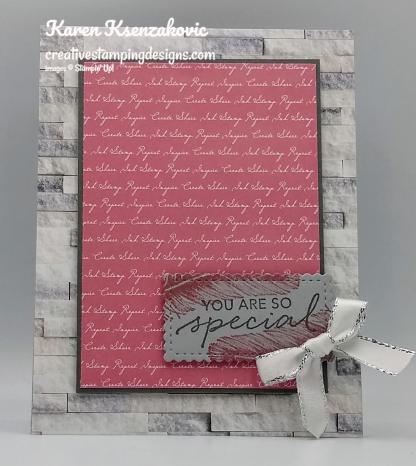
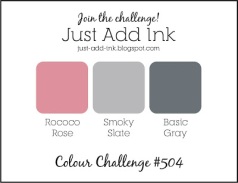
My colors were inspired by Just Add Ink Colour Challenge #504.  Here are their colors.
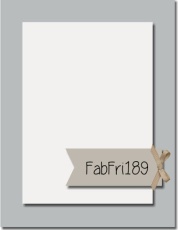
My design is from Fab Friday Sketch Challenge #189.  Here is their sketch.
I started by adhering a panel of the beautiful In Good Taste Designer Series Paper to a Smoky Slate card base using Snail.
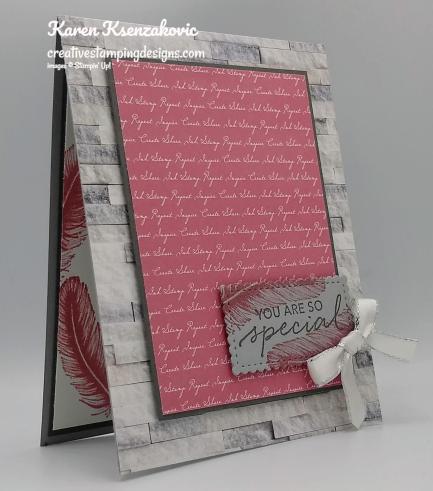
I adhered a panel of Rococo Rose 2019-2021 In-Color 6 X 6 Designer Series Paper to a Basic Gray mat using Snail.  I adhered the matted DSP to the card front using Stampin’ Dimensionals.
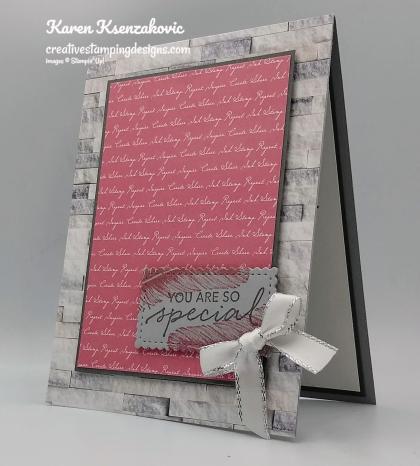
On a small panel of Smoky Slate cardstock I stamped the sentiment from the new Stampin’ Up! Tasteful Touches Cling Stamp Set in Basic Gray Ink.  I stamped the feather image from the Tasteful Touches stamp set in Rococo Rose Ink above and below the sentiment.  I cut the sentiment out using the Stitched So Sweetly Dies.  I adhered the sentiment to the card front using Stampin’ Dimensionals.  I made a small bow from the Silver 3/8″ Metallic Edge Ribbon and adhered it to the sentiment with a Glue Dot.
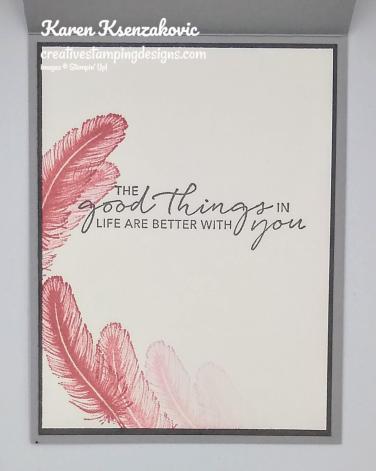
On the inside I stamped the sentiment from the Tasteful Touches stamp set in Basic Gray Ink in the center of a Whisper White panel.  I stamped the feather image from the Tasteful Touches stamp set on the left side of the panel in Rococo Rose Ink, stamping in full strength and then continuing to stamp until the stamp ran out of ink.  I adhered the Whisper White panel to a Basic Gray mat using Snail and then to the inside of the Smoky Slate card base using Multipurpose Liquid Glue.
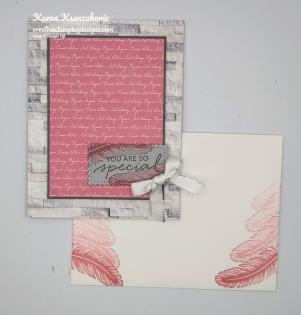
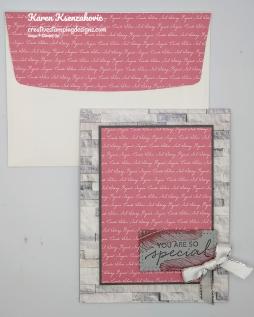
To finish my card I decorated a Medium Whisper White Envelope.  I stamped the feather image from the Tasteful Touches in Rococo Rose Ink on both sides of the envelope front.  I stamped in full strength and continued stamping until the ink ran out.  I adhered a panel of the Rococo Rose 2019-2021 In-Color 6 X 6 DSP to the envelope flap.

Thank you for stopping by my blog today.  I hope you liked my card and will give it a try. Happy Stamping!!

****************************************************************************************************

If you need any stamping supplies, I’d love to be your Demonstrator. Just click HERE to go directly to my online store or drop me an email if you have any questions. 

MY CURRENT HOST CODE IS: KBMV24AJ

Use this host code when you order $50 or greater and receive a free gift from me! If your order is over $150, please do not use this code, but you’ll still get the free gift. The free gift is your choice of any item valued up to $10.00 in either the 2019-2020 Annual Catalog or the 2020 January-June Mini Catalog!   For any orders $50 or more I will also send you my monthly class tutorials.  Click HERE or go to my Customer Rewards for more details and to see what this months tutorials are.

The Clearance Rack has been updated.  Click HERE to shop the clearance rack.

Happy Stamping, Karen!

****************************************************************************************************

THINGS ARE GOING FAST.  IF YOU ARE INTERESTED IN ANY OF THE RETIRING ITEMS, DON’T WALK, RUN OVER TO GRAB THEM WHILE YOU STILL CAN.

2019-2020 Annual Catalog and Mini Catalog Retiring List

Let me know if you have any questions about the retiring lists!  You can also download copies of the full retiring lists in PDF Form here:

  • Click here to get a copy of the full retiring list from the 2019-20 Annual Catalog.  The font is super tiny, so you’ll need to zoom out to read it!
  • Click here to get a copy of the full retiring list from the January-June 2020 Mini Catalog.  The font is super tiny, so you’ll need to zoom out to read it!

Have fun shopping!  Don’t forget, everything except for the stamp sets are only available while supplies last!!
One quick FYI, the Stampin’ Blends are NOT retiring, they’re being repackaged and sold as Combo Packs starting with the new catalog. So don’t panic! They’re still going to be available.

****************************************************************************************************

2020-2021 Annual Catalog Designer Series Paper Share.

Do you want all the great new Designer Series Paper from the 2020-2021 Annual Catalog, but can’t afford everything? I’m offering a Designer Series Paper share from the Stampin’ Up! 2020-2021 Annual Catalog and I’d love to have you join!!  I’m placing my share order early on June 3 and I’m going to use the expedited shipping option so I should be able to have the shares cut, bundled and back out to you during the week of June 8.  Click here for more information.

****************************************************************************************************

The Ornate Garden Suite available NOW.  Click HERE or on the image below to see a printable PDF of all the fabulous items available in the suite.

****************************************************************************************************
MAKING A DIFFERENCE: COVID-19 PRODUCT GIVEBACK

Stampin’ Up! is committed to making a difference in our global communities and caring about people first. As part of our Making a Difference program we’re offering a product giveback opportunity to support organizations that are helping COVID-19 frontline responders and communities vulnerable to the pandemic.

You can purchase the Share Sunshine PDF Download and we will donate 100% of the proceeds to COVID-19 efforts.

The Share Sunshine PDF Download is a digital stamp set that’s packed with both lighthearted and heartfelt sentiments and imagery relevant to the unique COVID-19 and social distancing situation we’re currently experiencing–including many ideas that came from you!  You can use the download in your cardmaking and papercrafting projects. Simply print the imagery on cardstock and cut it out using our Paper Trimmer, punches, or dies. Since we are physically distanced from each other, now is a perfect time to share sunshine with our friends and family by sending cards!

  • Product: Share Sunshine PDF Download. Buy it here!
  • Price: $12.00 USD
  • Dates: April 28 – June 2, 2020 or later; if the offer period extends beyond June 2, we’ll let you know

****************************************************************************************************

Card stock cuts for this project:

  • Basic Gray Cardstock 4″ X 5 1/4″ (inner liner mat)
  • Smoky Slate Cardstock 4 1/4″ X 11″ (card base scored and folded at 5 1/2″), 1 1/2′ X 3″ (sentiment)
  • Whisper White Cardstock 3 7/8″ X 5 1/8″ (inner liner)
  • 2019-2021 In-Color 6 X 6 Designer Series Paper 3 1/8″ X 4 3/8″ (card front), 2 1/4″ X 6″ (piece for envelope flap)
  • In Good Taste Designer Series Paper 4 1/4″ X 5 1/2″ (card front)

****************************************************************************************************

Product List

Stampin’ Up! Mountain Air Birthday

Good Saturday morning my fellow stampers.  The weekend is upon us and we are back to chilly weather here.  I covered all my plants last night to save them from the frost.  I’ve got to work today, but I have off tomorrow for Mother’s Day.  How about all of you, what is everyone up to this weekend?

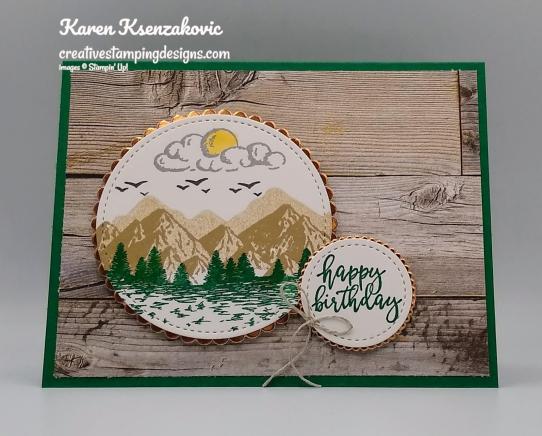
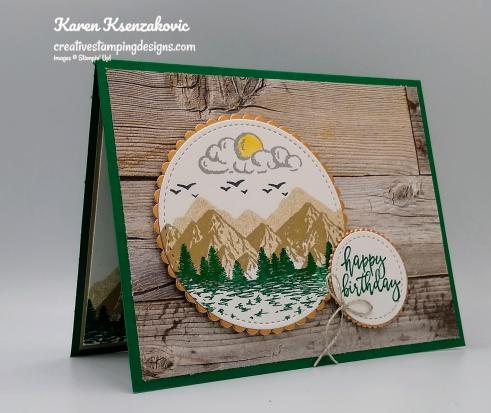
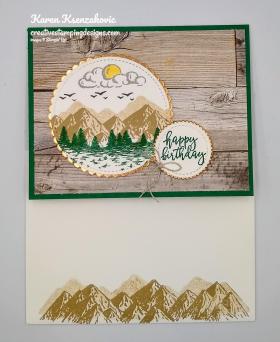
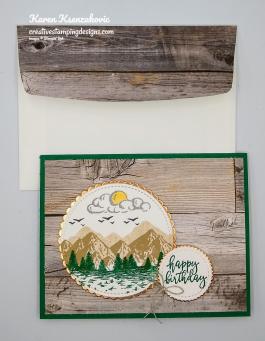
I’ve got a masculine card for you today using some of the new DSP from the 2020-2021 Annual Catalog.  Here’s my card for today.

My card today played along with the Aud Sentiments Challenge #250.  Their theme is ‘Masculine + A Sentiment’.

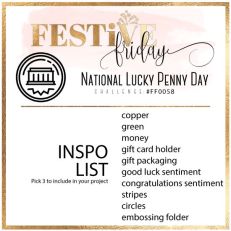
I also played along with Festive Friday Challenge #0058.  Here is their Inspo List.  I used copper, green and circles.  There’s also stripes from the wood.

I started by adhering a panel of the gorgeous new In Good Taste Designer Series Paper to a Shaded Spruce card base using Snail.

On a panel of Whisper White cardstock I stamped the detailed mountain image from the Stampin’ Up! Mountain Air Photopolymer Stamp Set in Crumb Cake Ink.  I flipped the stamp over and stamped the reverse image in Crumb Cake Ink, stamping off once, behind the detailed mountain.  I stamped the tree image from the Mountain Air stamp set in Shaded Spruce Ink below the mountain image.  I stamped the cloud/moon image from the Mountain Air stamp set in Smoky Slate Ink above the mountain.  I colored the moon in using my So Saffron Stampin’ Blends Markers.  I stamped the bird image from the Mountain Air stamp set in Tuxedo Black Memento Ink above the mountains 3 times.  I cut the image out using the largest circle from the Stitched Shapes Dies.  I cut a scalloped mat out of a Copper Foil Sheet using the largest scallop circle from the Layering Circles Dies.  I adhered the artwork to the copper mat using Multipurpose Liquid Glue and adhered the artwork to the card front using Stampin’ Dimensionals.

I stamped the sentiment from the Stampin’ Up! By The Dock Cling Stamp Set in Shaded Spruce Ink on a Whisper White panel.  I cut the image out using the smallest circle from the Stitched Shapes Dies.  I cut a scalloped circle from a Copper Foil Sheet using the Layering Circles Dies.  I adhered the sentiment to the Copper mat using Multipurpose Liquid Glue and then adhered it to the card front using Stampin’ Dimensionals.  I tied a small bow from the Linen Thread and adhered it to the sentiment using a Glue Dot.

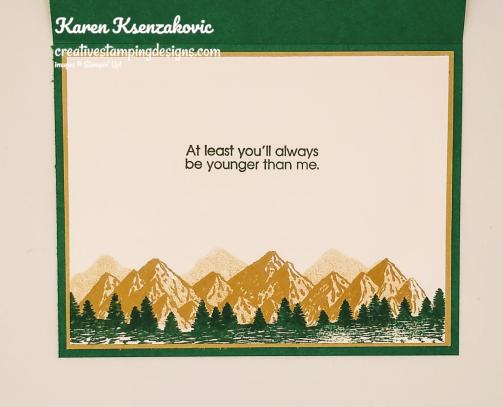
On the inside I stamped the sentiment from the Stampin’ Up! Itty Bitty Birthdays Cling Stamp Set in Shaded Spruce Ink in the center of a Whisper White panel.  I stamped the detailed mountain image from the Mountain Air stamp set in Crumb Cake Ink on the bottom of the panel.  I reversed the stamp and stamped the image behind the mountains in Crumb Cake Ink, stamping off once.  I stamped the tree image from the Mountain Air stamp set in Shaded Spruce Ink below the mountain image.  I adhered the Whisper White panel to a Crumb Cake mat using Snail and then to the inside of the Shaded Spruce card base using Multipurpose Liquid Glue.

To finish my card I decorated a Medium Whisper White Envelope.  I stamped the detailed mountain image from the Mountain Air stamp set in Crumb Cake Ink on the envelope front.  I reversed the stamp and stamped the image behind the mountain in Crumb Cake Ink, stamping off once.  I adhered a panel of the In Good Taste DSP to the envelope flap.

Thank you for stopping by my blog today.  I hope you liked my card and will give it a try. Happy Stamping!!

****************************************************************************************************

If you need any stamping supplies, I’d love to be your Demonstrator. Just click HERE to go directly to my online store or drop me an email if you have any questions. 

MY CURRENT HOST CODE IS: KBMV24AJ

Use this host code when you order $50 or greater and receive a free gift from me! If your order is over $150, please do not use this code, but you’ll still get the free gift. The free gift is your choice of any item valued up to $10.00 in either the 2019-2020 Annual Catalog or the 2020 January-June Mini Catalog!   For any orders $50 or more I will also send you my monthly class tutorials.  Click HERE or go to my Customer Rewards for more details and to see what this months tutorials are.

The Clearance Rack has been updated.  Click HERE to shop the clearance rack.

Happy Stamping, Karen!

****************************************************************************************************

THINGS ARE GOING FAST.  IF YOU ARE INTERESTED IN ANY OF THE RETIRING ITEMS, DON’T WALK, RUN OVER TO GRAB THEM WHILE YOU STILL CAN.

2019-2020 Annual Catalog and Mini Catalog Retiring List

Let me know if you have any questions about the retiring lists!  You can also download copies of the full retiring lists in PDF Form here:

  • Click here to get a copy of the full retiring list from the 2019-20 Annual Catalog.  The font is super tiny, so you’ll need to zoom out to read it!
  • Click here to get a copy of the full retiring list from the January-June 2020 Mini Catalog.  The font is super tiny, so you’ll need to zoom out to read it!

****************************************************************************************************

The Ornate Garden Suite available NOW.  Click HERE or on the image below to see a printable PDF of all the fabulous items available in the suite.

****************************************************************************************************

MAKING A DIFFERENCE: COVID-19 PRODUCT GIVEBACK

Stampin’ Up! is committed to making a difference in our global communities and caring about people first. As part of our Making a Difference program we’re offering a product giveback opportunity to support organizations that are helping COVID-19 frontline responders and communities vulnerable to the pandemic.

You can purchase the Share Sunshine PDF Download and we will donate 100% of the proceeds to COVID-19 efforts.

The Share Sunshine PDF Download is a digital stamp set that’s packed with both lighthearted and heartfelt sentiments and imagery relevant to the unique COVID-19 and social distancing situation we’re currently experiencing–including many ideas that came from you!  You can use the download in your cardmaking and papercrafting projects. Simply print the imagery on cardstock and cut it out using our Paper Trimmer, punches, or dies. Since we are physically distanced from each other, now is a perfect time to share sunshine with our friends and family by sending cards!

  • Product: Share Sunshine PDF Download. Buy it here!
  • Price: $12.00 USD
  • Dates: April 28 – June 2, 2020 or later; if the offer period extends beyond June 2, we’ll let you know

****************************************************************************************************

Card stock cuts for this project:

  • Crumb Cake Cardstock 4″ X 5 1/4″ (inner liner mat)
  • Shaded Spruce Cardstock 8 1/2″ X 5 1/2″ (card base scored and folded at 4 1/4″)
  • Whisper White Cardstock 3 1/4″ X 4 1/2″ (artwork and sentiment), 3 7/8″ X 5 1/8″ (inner liner)
  • Copper Foil Sheet 5″ X 3 1/2″ (artwork and sentiment mats)
  • In Good Taste Designer Series Paper 4″ X 5 1/4″ (card front), 2 1/4″ X 6″ (piece for envelope flap)

****************************************************************************************************

Product List

Stampin’ Up! Dandelion Wishes for the Happy Inkin’ Thursday Blog Hop

Good Thursday morning my stamping friends.  How is everyone doing today?  Welcome to the Happy Inkin’ Thursday Blog Hop. If you are hopping over from Akiko, thank you for stopping by my blog. This week we had a Sketch Challenge. Be sure to hop around to see everyone’s beautiful projects .
Here is the sketch we had to work from.

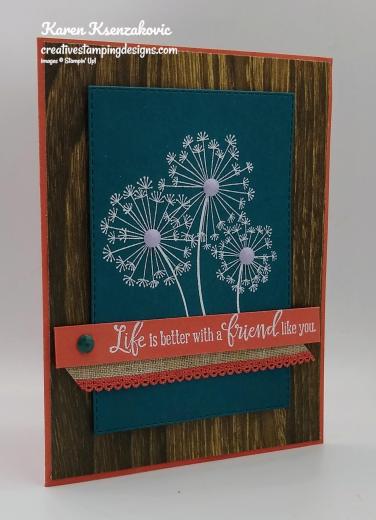
Here’s my card using this sketch.

My colors were inspired by  CAS Colours & Sketches Challenge #369.  Here are their colors.

I started by adhering a panel of Pressed Petals Specialty Designer Series Paper to a Terracotta Tile card base using Snail.

On a panel of Pretty Peacock cardstock I stamped the image from the Stampin’ Up! Dandelion Wishes Cling Stamp Set in Versamaark Ink.  I immediately sprinkled it with my White Embossing Powder and set it using my Heat Tool.  I cut the image out using my Stitched Rectangle Dies.  I adhered the artwork to the card front using Stampin’ Dimensionals and added 3 Purple Posy 2019-2021 In-Color Faceted Dots to the flower centers.

I stamped the sentiment from the Stampin’ Up! Peaceful Moments Cling Stamp Set in Versamark Ink on a Terracotta Tile strip of cardstock.  I immediately sprinkled it with my White Embossing Powder and set it using my Heat Tool.  I adhered a piece of Terracotta Tile 1/2″ Scallop Linen Ribbon using a tiny amount of Snail to hold it in place.  I adhered the sentiment strip on top of the ribbon using Glue Dots.  I added a Pretty Peacock 2019-2021 In-Color Faceted Dot to the end of the sentiment.

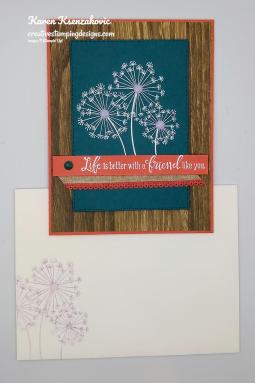
On the inside I stamped the sentiment from the Peaceful Moments stamp set in Pretty Peacock Ink in the center of a Whisper White panel.  I stamped the flower image from the Dandelion Wishes stamp set, which I colored using my Purple Posy Stampin’ Write Marker, over the sentiment.  I adhered the Whisper White panel to a Pretty Peacock mat using Snail and then to the inside of the Terracotta Tile card base using Multipurpose Liquid Glue.

To finish my card I decorated a Medium Whisper White Envelope.  I stamped the flower image from the Dandelion Wishes stamp set, which I colored using my Purple Posy Stampin’ Write Marker, on the envelope front.  I adhered a panel of Pressed Petals Specialty DSP to the envelope flap.

Thank you for visiting my blog today. I hope you liked my card and will give it a try. Now that you’ve seen my card, take a minute to hop through all our projects today. If you click on the Next Blog button, you’ll go to Amy’s page. Or you can just click on the names below to go directly to all the blogs! Happy Hopping!!

Karen Ksenzakovic: You Are Here

****************************************************************************************************

If you need any stamping supplies, I’d love to be your Demonstrator. Just click HERE to go directly to my online store or drop me an email if you have any questions. 

MY CURRENT HOST CODE IS: KBMV24AJ

Use this host code when you order $50 or greater and receive a free gift from me! If your order is over $150, please do not use this code, but you’ll still get the free gift. The free gift is your choice of any item valued up to $10.00 in either the 2019-2020 Annual Catalog or the 2020 January-June Mini Catalog!   For any orders $50 or more I will also send you my monthly class tutorials.  Click HERE or go to my Customer Rewards for more details and to see what this months tutorials are.

The Clearance Rack has been updated.  Click HERE to shop the clearance rack.

Happy Stamping, Karen!

****************************************************************************************************

THINGS ARE GOING FAST.  IF YOU ARE INTERESTED IN ANY OF THE RETIRING ITEMS, DON’T WALK, RUN OVER TO GRAB THEM WHILE YOU STILL CAN.

2019-2020 Annual Catalog and Mini Catalog Retiring List

Let me know if you have any questions about the retiring lists!  You can also download copies of the full retiring lists in PDF Form here:

  • Click here to get a copy of the full retiring list from the 2019-20 Annual Catalog.  The font is super tiny, so you’ll need to zoom out to read it!
  • Click here to get a copy of the full retiring list from the January-June 2020 Mini Catalog.  The font is super tiny, so you’ll need to zoom out to read it!

****************************************************************************************************

The Ornate Garden Suite available NOW.  Click HERE or on the image below to see a printable PDF of all the fabulous items available in the suite.

****************************************************************************************************

MAKING A DIFFERENCE: COVID-19 PRODUCT GIVEBACK

Stampin’ Up! is committed to making a difference in our global communities and caring about people first. As part of our Making a Difference program we’re offering a product giveback opportunity to support organizations that are helping COVID-19 frontline responders and communities vulnerable to the pandemic.

You can purchase the Share Sunshine PDF Download and we will donate 100% of the proceeds to COVID-19 efforts.

The Share Sunshine PDF Download is a digital stamp set that’s packed with both lighthearted and heartfelt sentiments and imagery relevant to the unique COVID-19 and social distancing situation we’re currently experiencing–including many ideas that came from you!  You can use the download in your cardmaking and papercrafting projects. Simply print the imagery on cardstock and cut it out using our Paper Trimmer, punches, or dies. Since we are physically distanced from each other, now is a perfect time to share sunshine with our friends and family by sending cards!

  • Product: Share Sunshine PDF Download. Buy it here!
  • Price: $12.00 USD
  • Dates: April 28 – June 2, 2020 or later; if the offer period extends beyond June 2, we’ll let you know

****************************************************************************************************

Card stock cuts for this project:

  • Pretty Peacock Cardstock 4 3/4′ X 3 1/2″ (artwork), 4 1/8″ X 5 3/8″ (inner liner mat)
  • Terracotta Tile Cardstock 8 1/2″ X 5 1/2″ (card base scored and folded at 4 1/4″), 1/2″ X 4″ (sentiment strip)
  • Whisper White Cardstock 4″ X 5 1/4″ (inner liner)
  • Pressed Petal Specialty Designer Series Paper 4 1/8″ X 5 3/8″ (card front), 2 1/4″ X 6″ (piece for envelope flap)

****************************************************************************************************

Product List

Stampin’ Up! Amazing Birthday For The Happy Inkin’ Thursday Blog Hop

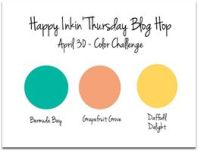
Good Thursday morning my stamping friends and welcome to the Happy Inkin’ Thursday Blog Hop. How is everyone doing today? Hope you are all staying healthy.  If you are hopping over from Akiko, thank you for stopping by my blog. Be sure to take a moment to hop around to see everyone’s beautiful projects today. This week we had a Color Challenge, here are the colors we got to work with.

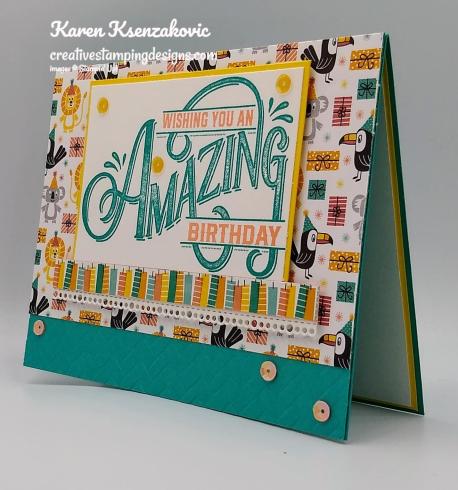
Here’s what I came up with for these colors.

My design is from Try Stampin’ On Tuesday Challenge #454.  Here is their sketch.

I started by embossing a Bermuda Bay card front using the Coastal Weave 3D Embossing Folder.  I adhered a panel of Birthday Bonanza Designer Series Paper to the embossed panel using Multipurpose Liquid Glue and adhered the panel to a Bermuda Bay card base using Multipurpose Liquid Glue.

On a panel of Whisper White cardstock I stamped the large image from the Stampin’ Up! Everything Amazing Photopolymer Stamp Set in Bermuda Bay Ink.  I stamped the insert words from the Everything Amazing stamp set in Grapefruit Grove Ink.  I adhered the artwork to a Daffodil Delight mat using Snail.

Using the Ornate Borders Dies, I cut a strip of Whisper White cardstock.  I adhered a thin strip of the Birthday Bonanza DSP above the cut border using Multipurpose Liquid Glue.  I adhered the artwork to the card front using Stampin’ Dimensionals and the border just below the artwork using Stampin’ Dimensionals.  I added a few Gingham Gala Adhesive-Backed Sequins to the card front.

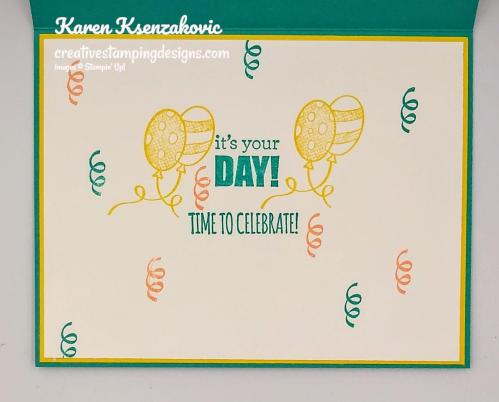
On the inside I stamped the sentiments from the Stampin’ Up! Itty Bitty Birthdays Cling Stamp Set in Bermuda Bay Ink in the center of a Whisper White panel.  I stamped the balloon image from the Everything Amazing stamp set in Daffodil Delight Ink on either side of the sentiment.  I stamped the streamer image from the Everything Amazing stamp set randomly in Bermuda Bay and Grapefruit Grove Ink on the panel.  I adhered the Whisper White panel to a Daffodil Delight mat using Snail and then to the inside of the Bermuda Bay card base using Multipurpose Liquid Glue.

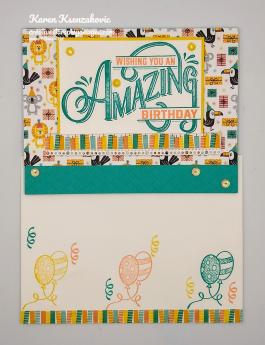
To finish my card I decorated a Medium Whisper White Envelope.  I adhered a strip of the Birthday Bonanza DSP to the envelope front and a panel on the envelope flap.  I stamped the balloon and streamer images from the Everything Amazing stamp set in Bermuda Bay, Daffodil Delight and Grapefruit Grove Inks on the bottom front of the envelope.

Thank you for visiting my blog today. I hope you liked my card and will give it a try. Now that you’ve seen my card, take a minute to hop through all our projects today. If you click on the Next Blog button, you’ll go to Amy’s page. Or you can just click on the names below to go directly to all the blogs! Happy Hopping!!

Karen Ksenzakovic: You Are Here

****************************************************************************************************

If you need any stamping supplies, I’d love to be your Demonstrator. Just click HERE to go directly to my online store or drop me an email if you have any questions. 

MY CURRENT HOST CODE IS: KBMV24AJ

Use this host code when you order $50 or greater and receive a free gift from me! If your order is over $150, please do not use this code, but you’ll still get the free gift. The free gift is your choice of any item valued up to $10.00 in either the 2019-2020 Annual Catalog or the 2020 January-June Mini Catalog!   For any orders $50 or more I will also send you my monthly class tutorials.  Click HERE or go to my Customer Rewards for more details and to see what this months tutorials are.

The Clearance Rack has been updated.  Click HERE to shop the clearance rack.

Happy Stamping, Karen!

****************************************************************************************************

THINGS ARE GOING FAST.  IF YOU ARE INTERESTED IN ANY OF THE RETIRING ITEMS, DON’T WALK, RUN OVER TO GRAB THEM WHILE YOU STILL CAN.

2019-2020 Annual Catalog and Mini Catalog Retiring List

Let me know if you have any questions about the retiring lists!  You can also download copies of the full retiring lists in PDF Form here:

  • Click here to get a copy of the full retiring list from the 2019-20 Annual Catalog.  The font is super tiny, so you’ll need to zoom out to read it!
  • Click here to get a copy of the full retiring list from the January-June 2020 Mini Catalog.  The font is super tiny, so you’ll need to zoom out to read it!

****************************************************************************************************

The Ornate Garden Suite available NOW.  Click HERE or on the image below to see a printable PDF of all the fabulous items available in the suite.

****************************************************************************************************

MAKING A DIFFERENCE: COVID-19 PRODUCT GIVEBACK

Stampin’ Up! is committed to making a difference in our global communities and caring about people first. As part of our Making a Difference program we’re offering a product giveback opportunity to support organizations that are helping COVID-19 frontline responders and communities vulnerable to the pandemic.

You can purchase the Share Sunshine PDF Download and we will donate 100% of the proceeds to COVID-19 efforts.

The Share Sunshine PDF Download is a digital stamp set that’s packed with both lighthearted and heartfelt sentiments and imagery relevant to the unique COVID-19 and social distancing situation we’re currently experiencing–including many ideas that came from you!  You can use the download in your cardmaking and papercrafting projects. Simply print the imagery on cardstock and cut it out using our Paper Trimmer, punches, or dies. Since we are physically distanced from each other, now is a perfect time to share sunshine with our friends and family by sending cards!

  • Product: Share Sunshine PDF Download. Buy it here!
  • Price: $12.00 USD
  • Dates: April 28 – June 2, 2020 or later; if the offer period extends beyond June 2, we’ll let you know

****************************************************************************************************

Card stock cuts for this project:

  • Bermuda Bay Cardstock 8 1/2″ X 5 1/2″ (card base scored and folded at 4 1/4″), 4 1/4″ X 5 1/2″ (card front)
  • Daffodil Delight Cardstock 3 3/4″ X 2 1/2″ (artwork mat), 4 1/8″ X 5 3/8″ (inner liner mat)
  • Whisper White Cardstock 3 5/8″ X 2 3/8″ (artwork), 1/2″ X 4 1/2″(card front border)
  • Birthday Bonanza Designer Series Paper 3 1/2″ X 5 1/2″ (card front panel), 3/8″ X 4 1/2″ (border strip), 2 1/4″ X 6″ (piece for envelope flap)

****************************************************************************************************

Product List

Stampin’ Up! Ornate Hello

Good Saturday morning my fellow stampers.  Does anyone have any plans for this weekend?  Maybe some gardening, spring cleaning, crafting, binge watching?  I’ll be working today, but I do have off tomorrow.  I’m hoping to start re-organizing my craft area to get ready for some of the new things that will be coming in the 2020-2021 Annual Catalog.  We got a sneak peek at it this week, I can’t wait till I can place my order.  That’s one of the best parts of being a demonstrator, you get to order early.  If anyone is interested in joining our team, drop me a line and I would be happy to help you sign up.

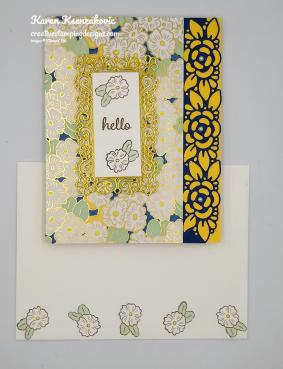
For today I have one more card using the Ornate Garden Suite.  This was another one I was playing around with doing for my video last Saturday, but decided on a different one.  I made it to use for an Anniversary, but it could easily be used for a birthday too.  Here’s my card for today.

I started by coloring a panel of the Ornate Garden Specialty Designer Series Paper using my Light Mint Macaron, Light Night of Navy, Light Pineapple Punch and Light So Saffron Stampin’ Blends Markers.  One of the great things about 2 of the designs from this DSP pack is that you can color them any colors and any way you want.

Using the beautiful Ornate Borders Dies, I cut a panel of Night of Navy cardstock using the flower border.  I adhered the colored DSP to the edge of the die cut border using Snail and then adhered it to a So Saffron card base using Multipurpose Liquid Glue.  I added 3 Pearl Basic Jewels in the center of the die cut flowers down the side.  I love the way the Night of Navy looks on top of the So Saffron.

To pick up the gold from the DSP, using the Ornate Layers Dies, I cut a Gold Foil Sheet using the small frame.  I stamped the sentiment from the Stampin’ Up! Timeless Tulips Photopolymer Stamp Set in Soft Suede Ink on a small panel of Whisper White cardstock.  I stamped the small flower image from the Stampin’ Up! Ornate Style Cling Stamp Set in Soft Suede Ink above and below the sentiment.  I colored the images in using my Light Mint Macaron and Light Pineapple Punch Stampin’ Blends Markers.  I adhered the Whisper White panel to the Gold Foil frame using Stampin’ Dimensionals and then to the card front using Stampin’ Dimensionals.

On the inside I stamped the sentiment from the Stampin’ Up! Well Said Cling Stamp Set in Soft Suede Ink in the center of a Whisper White panel .  I stamped the large floral image from the Ornate Style stamp set in So Saffron Ink over the sentiment, stamping off once.  I adhered the Whisper White panel to a Night of Navy mat using Snail and then to the inside of the So Saffron card base using Multipurpose Liquid Glue.

To finish my card I decorated a Medium Whisper White Envelope.  I stamped the small flower image from the Ornate Style stamp set across the bottom of the envelope front in Soft Suede Ink.  I colored the images in using my Light Mint Macaron and Light Pineapple Punch Stampin’ Blends Markers.  I adhered a panel of the Ornate Garden Specialty DSP, which I had colored using my Light Mint Macaron, Light Night of Navy, Light Pineapple Punch and Light So Saffron Stampin’ Blends Markers,  to the envelope flap.

Thank you for stopping by my blog today.  I hope you liked my card and will give it a try. Happy Stamping!!

****************************************************************************************************

If you need any stamping supplies, I’d love to be your Demonstrator. Just click HERE to go directly to my online store or drop me an email if you have any questions. 

MY CURRENT HOST CODE IS: KBMV24AJ

Use this host code when you order $50 or greater and receive a free gift from me! If your order is over $150, please do not use this code, but you’ll still get the free gift. The free gift is your choice of any item valued up to $10.00 in either the 2019-2020 Annual Catalog or the 2020 January-June Mini Catalog!   For any orders $50 or more I will also send you my monthly class tutorials.  Click HERE or go to my Customer Rewards for more details and to see what this months tutorials are.

The Clearance Rack has been updated.  Click HERE to shop the clearance rack.

Happy Stamping, Karen!

****************************************************************************************************

2019-2020 Annual Catalog and Mini Catalog Retiring List

Let me know if you have any questions about the retiring lists!  You can also download copies of the full retiring lists in PDF Form here:

  • Click here to get a copy of the full retiring list from the 2019-20 Annual Catalog.  The font is super tiny, so you’ll need to zoom out to read it!
  • Click here to get a copy of the full retiring list from the January-June 2020 Mini Catalog.  The font is super tiny, so you’ll need to zoom out to read it!

****************************************************************************************************

MAY 2020 PAPER PUMPKIN:

DESIGNED WITH (IN) COLOR IN MIND

SUBSCRIBE APRIL 11- MAY 10

The Paper Pumpkin team loves planning fun surprises, so we’ve been VERY excited to let you know what we have in store for the month of May: a fabulous kit featuring 2020–2022 In Colors, plus Purple Posy, an In Color from the 2019–2021 collection. This means that as Paper Pumpkin subscribers, you will be first to get your hands on new In Color products. And that’s just the beginning of things to love about this kit!

A Kit In Color

  • Kit contains supplies for 12 cards and envelopes
  • 8 cards are traditional size
    • Card size: 4-1/4″ x 5-1/2″ (10.8 x 14 cm)
    • Envelope size: 4-1/2″ x 5-3/4″ (11.4 x 14.6 cm)
  • 4 cards are note card size
    • Notecard size: 5″ x 3-1/2″ (12.7 x 8.9 cm)
    • Envelope size: 5-1/8″ x 3-5/8″ (13 x 9.2 cm)

Coordinating Colors: Bumblebee, Just Jade, Magenta Madness, Misty Moonlight, Pumpkin Pie, and Purple Posy

  • Subscribe for the May 2020 Paper Pumpkin kit from April 11–May 10 at paperpumpkin.com.
  • Supplies may be limited toward the end of the subscription period.
  • The In Color reveal happens April 24, so stay tuned!

****************************************************************************************************

The Ornate Garden Suite available NOW.  Click HERE or on the image below to see a printable PDF of all the fabulous items available in the suite.

****************************************************************************************************

Card stock cuts for this project:

  • Night of Navy Cardstock 1 1/4″ X 5 1/2″ (card front strip), 4 1/8″ X 5 3/8″ (inner liner mat)
  • So Saffron Cardstock 4 1/4″ X 11″ (card base scored and folded at 5 1/2″)
  • Whisper White Cardstock 1 1/8″ X 2 1/2″ (sentiment), 4″ X 5 1/4″ (inner liner)
  • Ornate Garden Specialty Designer Series Paper 3 3/8″ X 5 1/2″ (card front), 2 1/4″ X 6″ (piece for envelope flap)

****************************************************************************************************

Product List

Stampin’ Up! Special Someone for Happy Inkin’ Thursday Blog Hop

Good Thursday morning my stamping friends.  How is everyone doing today?  Welcome to the Happy Inkin’ Thursday Blog Hop. If you are hopping over from Akiko, thank you for stopping by my blog. This week we had a Sketch Challenge. Be sure to hop around to see everyone’s beautiful projects .
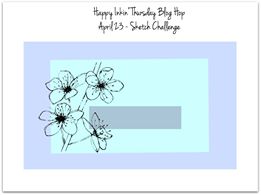
Here is the sketch we had to work from.

Here’s my card using this sketch.

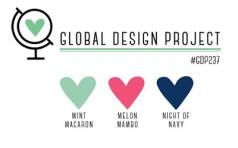
My colors were inspired by Global Design Project Challenge #237.  Here are their colors.

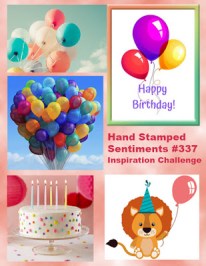
I also played along with Hand Stamped Sentiments Challenge #337.  Here is their Inspiration.

I started by adhering a panel of Mint Macaron Subtle 6 X 6 Designer Series Paper to a Mint Macaron card base using Snail.

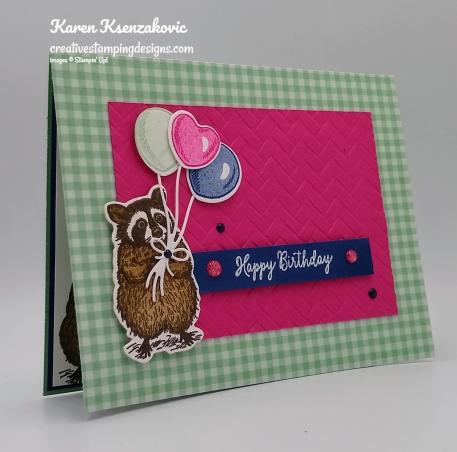
On a panel of Whisper White cardstock I stamped the racoon image from the Stampin’ Up! Special Someone Photopolymer Stamp Set first in Early Espresso for the outline then in Soft Suede for the fill color.  I stamped 2 round balloons and one heart balloon from the Special Someone stamp set on the same panel.  I stamped the round balloons first in Mint Macaron and Night of Navy for the outlines.  I then stamped the fill color in Mint Macaron and Night of Navy, stamping off once.  I did the same for the heart balloon, stamped the outline in Melon Mambo and the fill color in Melon Mambo stamping off once.  I cut the images out using the Special Day Dies and I also cut out the balloon strings and the bow.

I embossed a Melon Mambo panel using the Coastal Weave 3D Embossing Folder.  I adhered the embossed panel to the card front using Multipurpose Liquid Glue.  I adhered the racoon to the embossed panel using Stampin Dimensionals.  I adhered the balloon strings to the racoon using a Glue Dot and the bow to the strings using a tiny drop of Multipurpose Liquid Glue.  I adhered the balloons to the top of the strings on the embossed panel using Stampin’ Dimensionals.  On a strip of Night of Navy cardstock I stamped the sentiment from the Special Someone stamp set in Versamark Ink.  I immediately sprinkled it with my White Stampin’ Emboss Powder and set it using my Heat Tool.  I adhered the sentiment strip to the card front using Stampin’ Dimensionals.  I added a couple Melon Mango Glitter Enamel Dots to the sentiment strip.  I added a couple Night of Navy Happiness Blooms Enamel Dots to the card front and one to the center of the bow.

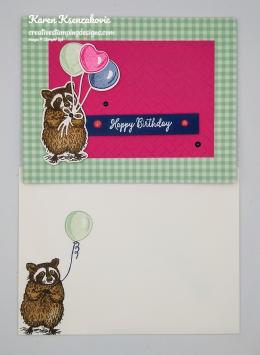
On the inside I stamped the sentiments from the Special Someone stamp set in Night of Navy Ink in the center of a Whisper White panel.  I stamped the racoon image from the Special Someone stamp set on the bottom of the panel, first in Early Espresso Ink for the outline then in Soft Suede Ink for the fill color.  I stamped the mouse image from the Special Someone stamp set on the bottom of the panel.  I stamped the outline image in Basic Gray Ink and the fill image in Smoky Slate Ink.  I adhered the Whisper White panel to a Night of Navy mat using Snail and then to the inside of the Mint Macaron card base using Multipurpose Liquid Glue.

To finish my card I decorated a Medium Whisper White Envelope.  I stamped the racoon image from the Special Someone stamp set on the bottom front of the envelope.  I stamped the outline image in Early Espresso Ink and the fill image in Soft Suede Ink.  I stamped the balloon string image from the Special Someone stamp set in Night of Navy Ink.  I stamped the balloon image from the Special Someone stamp set first the outline image in Mint Macaron Ink and the fill image in Mint Macaron Ink, stamping off once.  I adhered a panel of the Melon Mambo Brights 6 X 6 Designer Series Paper to the envelope flap.

Thank you for visiting my blog today. I hope you liked my card and will give it a try. Now that you’ve seen my card, take a minute to hop through all our projects today. If you click on the Next Blog button, you’ll go to Amy’s page. Or you can just click on the names below to go directly to all the blogs! Happy Hopping!!

Karen Ksenzakovic:  You Are Here

****************************************************************************************************

If you need any stamping supplies, I’d love to be your Demonstrator. Just click HERE to go directly to my online store or drop me an email if you have any questions. 

MY CURRENT HOST CODE IS: KBMV24AJ

Use this host code when you order $50 or greater and receive a free gift from me! If your order is over $150, please do not use this code, but you’ll still get the free gift. The free gift is your choice of any item valued up to $10.00 in either the 2019-2020 Annual Catalog or the 2020 January-June Mini Catalog!   For any orders $50 or more I will also send you my monthly class tutorials.  Click HERE or go to my Customer Rewards for more details and to see what this months tutorials are.

The Clearance Rack has been updated.  Click HERE to shop the clearance rack.

Happy Stamping, Karen!

****************************************************************************************************

2019-2020 Annual Catalog and Mini Catalog Retiring List

Let me know if you have any questions about the retiring lists!  You can also download copies of the full retiring lists in PDF Form here:

  • Click here to get a copy of the full retiring list from the 2019-20 Annual Catalog.  The font is super tiny, so you’ll need to zoom out to read it!
  • Click here to get a copy of the full retiring list from the January-June 2020 Mini Catalog.  The font is super tiny, so you’ll need to zoom out to read it!

****************************************************************************************************

MAY 2020 PAPER PUMPKIN:

DESIGNED WITH (IN) COLOR IN MIND

SUBSCRIBE APRIL 11- MAY 10

The Paper Pumpkin team loves planning fun surprises, so we’ve been VERY excited to let you know what we have in store for the month of May: a fabulous kit featuring 2020–2022 In Colors, plus Purple Posy, an In Color from the 2019–2021 collection. This means that as Paper Pumpkin subscribers, you will be first to get your hands on new In Color products. And that’s just the beginning of things to love about this kit!

A Kit In Color

  • Kit contains supplies for 12 cards and envelopes
  • 8 cards are traditional size
    • Card size: 4-1/4″ x 5-1/2″ (10.8 x 14 cm)
    • Envelope size: 4-1/2″ x 5-3/4″ (11.4 x 14.6 cm)
  • 4 cards are note card size
    • Notecard size: 5″ x 3-1/2″ (12.7 x 8.9 cm)
    • Envelope size: 5-1/8″ x 3-5/8″ (13 x 9.2 cm)

Coordinating Colors: Four NEW In Colors plus Purple Posy from the 2019–2021 In Color collection. (The new In Colors will be introduced on April 24.)

  • Subscribe for the May 2020 Paper Pumpkin kit from April 11–May 10 at paperpumpkin.com.
  • Supplies may be limited toward the end of the subscription period.
  • The In Color reveal happens April 24, so stay tuned!

****************************************************************************************************

The Ornate Garden Suite available NOW.  Click HERE or on the image below to see a printable PDF of all the fabulous items available in the suite.

****************************************************************************************************

Card stock cuts for this project:

  • Melon Mambo Cardstock 3″ X 4 1/4″ (card front panel)
  • Mint Macaron Cardstock 8 1/2″ X 5 1/2″ (card base scored and folded at 4 1/4″)
  • Night of Navy Cardstock 1/2″ X 3″ (sentiment), 4 1/8″ X 5 3/8″ (inner liner mat)
  • Whisper White Cardstock 5 1/4′ x 1 3/4″ (artwork), 4″ X 5 1/4″ (inner liner)
  • Subtle 6 X 6 Designer Series Paper (4 1/4″ X 5 1/2″ (card front)

****************************************************************************************************

Product List

Stampin’ Up! Pastel Timeless Tulips CAS

Good Monday morning my fellow stampers.  How was everyone’s weekend?  I did enjoy my weekend off.  It was nice not to have to get up and have to leave for work for a few days.

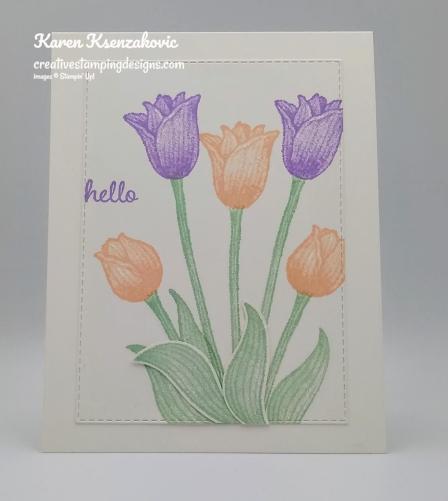
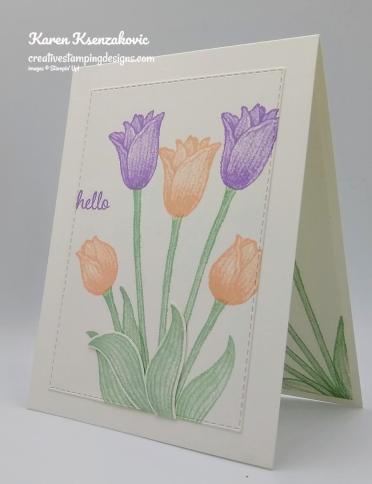
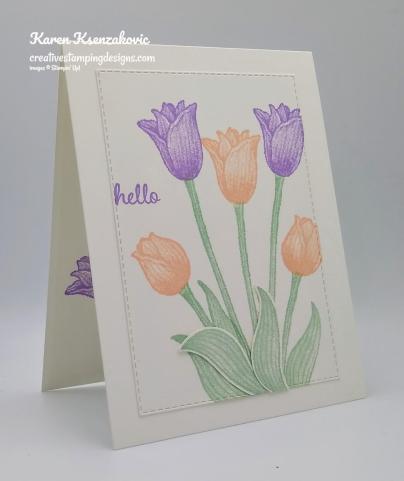
I have a Clean and Simple spring card for you today.  I’m not sure if I want to use this for a Birthday or Mother’s Day, so I left the sentiment pretty open.  Here’s today’s card.

My colors were inspired by CAS Colours & Sketch Challenge #365.  These colors just said springtime to me as soon as I saw them.  Here are their colors.

I joined in with Always Fun Challenges #158.  Their theme is “CAS (clean and simple)”.

I started by stamping the stem image from the Stampin’ Up! Timeless Tulips Photopolymer Stamp Set 5 times on a panel of Whisper White cardstock in Mint Macaron Ink.  I stamped the leaf image from the Timeless Tulips stamp set in Mint Macaron Ink on the stems and a couple on a scrap piece of Whisper White cardstock.  The leave on the scrap cardstock I cut out using the Tulip Builder Punch.

I stamped the medium tulip image and the small tulip image from the Timeless Tulips stamp set on the stems in Highland Heather and Petal Pink Inks.  I cut the image out using the 2nd largest die from the Stitched Rectangle Dies.  I adhered the punched out leaves to the stems using Glue Dots.

I stamped the sentiment from the Timeless Tulips stamp set in Highland Heather Ink on the left side of the panel.  I adhered the artwork to a Thick Whisper White card base using Snail.

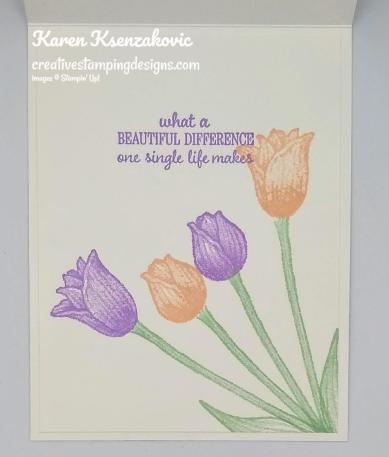
On the inside I stamped the sentiment from the Timeless Tulips stamp set in Highland Heather Ink in the center of a Whisper White panel.  I stamped the stem image from the Timeless Tulips stamp set in Mint Macaron Ink on the bottom of the panel 4 times.  I stamped the leaf image from the Timeless Tulips stamp set in Mint Macaron Ink on either side of the stems.  I stamped the medium and small tulip images from the Timeless Tulips stamp set in Highland Heather and Petal Pink Inks on the stems.  I adhered the Whisper White panel to the inside of the Whisper White card base using Multipurpose Liquid Glue.

To finish my card I decorated a Medium Whisper White Envelope.  I stamped the stem image from the Timeless Tulips stamp set 3 times on the envelope front in Mint Macaron Ink.  I stamped the leaf image from the Timeless Tulips stamp set on the stems in Mint Macaron Ink.  I stamped the medium tulip image from the Timeless Tulips stamp set in Highland Heather and Petal Pink Inks on the stems.  I adhered a panel of Perennial Essence Designer Series Paper to the envelope flap.

Thank you for stopping by my blog today.  I hope you liked my card and will give it a try. Happy Stamping!!

****************************************************************************************************

If you need any stamping supplies, I’d love to be your Demonstrator. Just click HERE to go directly to my online store or drop me an email if you have any questions. 

MY CURRENT HOST CODE IS: 6WETZ6WW

Use this host code when you order $50 or greater and receive a free gift from me! If your order is over $150, please do not use this code, but you’ll still get the free gift. The free gift is your choice of any item valued up to $10.00 in either the 2019-2020 Annual Catalog or the 2020 January-June Mini Catalog!   For any orders $50 or more I will also send you my monthly class tutorials.  Click HERE or go to my Customer Rewards for more details and to see what this months tutorials are.

Click HERE to shop the clearance rack.

Happy Stamping, Karen!

****************************************************************************************************

MAY 2020 PAPER PUMPKIN:

DESIGNED WITH (IN) COLOR IN MIND

SUBSCRIBE APRIL 11- MAY 10

The Paper Pumpkin team loves planning fun surprises, so we’ve been VERY excited to let you know what we have in store for the month of May: a fabulous kit featuring 2020–2022 In Colors, plus Purple Posy, an In Color from the 2019–2021 collection. This means that as Paper Pumpkin subscribers, you will be first to get your hands on new In Color products. And that’s just the beginning of things to love about this kit!

A Kit In Color

  • Kit contains supplies for 12 cards and envelopes
  • 8 cards are traditional size
    • Card size: 4-1/4″ x 5-1/2″ (10.8 x 14 cm)
    • Envelope size: 4-1/2″ x 5-3/4″ (11.4 x 14.6 cm)
  • 4 cards are note card size
    • Notecard size: 5″ x 3-1/2″ (12.7 x 8.9 cm)
    • Envelope size: 5-1/8″ x 3-5/8″ (13 x 9.2 cm)

Coordinating Colors: Four NEW In Colors plus Purple Posy from the 2019–2021 In Color collection. (The new In Colors will be introduced on April 24.)

  • Subscribe for the May 2020 Paper Pumpkin kit from April 11–May 10 at paperpumpkin.com.
  • Supplies may be limited toward the end of the subscription period.
  • The In Color reveal happens April 24, so stay tuned!

****************************************************************************************************

INKIN’ KREW ORNATE GARDEN FACEBOOK EVENT – SATURDAY APRIL 18TH

Our team is hosting a fun event on Facebook on Saturday, April 18 from 1:00 PM ET until around 6:00 PM ET!

We’ll be sharing projects created with this pretty suite of products with you throughout the afternoon via Live videos and photos!

We’re setting up a Facebook page for the event and we’ll be opening it up on Thursday, April 16.  I’ll be sharing a link to the page on my blog and on my business Facebook page then so keep an eye out for the invitation coming soon!

Everyone is welcome to join us!  We look forward to sharing this beautiful suite of products with you!!

Let me know if you have questions.  See you all then!

****************************************************************************************************

The Ornate Garden Suite available NOW.  Click HERE or on the image below to see a printable PDF of all the fabulous items available in the suite.

****************************************************************************************************

Card stock cuts for this project:

  • Whisper White Cardstock 2 – 4″ X 5 1/4″ (card front and inner liner)
  • Thick Whisper White Cardstock 4 1/4″ X 11″ (card base scored and folded at 5 1/2″)
  • Perennial Essence Designer Series Paper 2 1/4″ X 6″ (piece for envelope flap)

****************************************************************************************************

Product List

Stampin’ Up! Sailing Home for Happy Inkin’ Thursday Blog Hop

Good Thursday morning my stamping friends.  How is everyone doing today?  Welcome to the Happy Inkin’ Thursday Blog Hop. If you are hopping over from Akiko, thank you for stopping by my blog. This week we had a Sketch Challenge. Be sure to hop around to see everyone’s beautiful projects .
Here is the sketch we had to work from.

Here’s my card using this weeks sketch.

My colors were inspired by Hand Stamped Sentiments Challenge #336.  Here are their colors.

I also played along with Cardz 4 Guys Challenge #242.  Their theme is ‘ On, In of By The Sea’.

I started by adhering a panel of Peaceful Poppies Designer Series Paper to a Poppy Parade card base using Snail.  I stamped the bird image from the Stampin’ Up! Sailing Home Cling Stamp Set in Tuxedo Black Memento Ink to the top of the panel.

I cut a panel of Peaceful Poppies DSP using the Stitched Rectangle Dies.  I stamped the sentiment from the Stampin’ Up! High Tide Photopolymer Stamp Set in Tuxedo Black Memento Ink on the top of the panel.  On a small panel of Whisper White cardstock I stamped the lighthouse image from the Sailing Home stamp set, which I colored with my Crumb Cake and Poppy Parade Stampin’ Write Markers.  I cut the image out using the Smooth Sailing Dies.  I adhered the lighthouse image to the DSP using Stampin’ Dimensionals.

I adhered a piece of the Braided Burlap Trim to the back of the artwork using Glue Dots and then adhered the artwork to the card front using Stampin’ Dimensionals.  I added a few Frosted Epoxy Droplets, which I colored using my Dark Daffodil Delight Stampin’ Blends Marker.

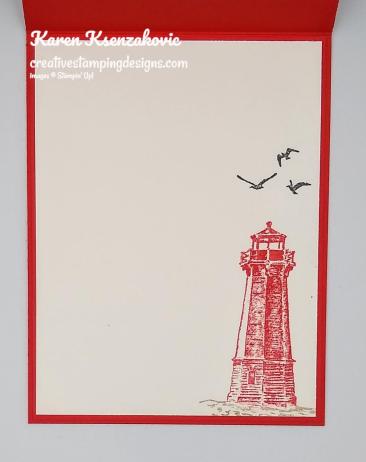
On the inside I stamped the lighthouse image from the Sailing Home stamp set, which I colored using my Crumb Cake and Poppy Parade Stampin’ Write Markers, on the bottom of a Whisper White panel.  I stamped the bird image from the Sailing Home stamp set in Tuxedo Black Memento Ink above the lighthouse.  I did not stamp a sentiment since I wasn’t sure what I wanted to use the card for yet.  I adhered the Whisper White panel to a Poppy Parade mat using Snail and then to the inside of the Poppy Parade card base using Multipurpose Liquid Glue.

To finish my card I decorated a Medium Whisper White Envelope.  I stamped the lighthouse image from the Sailing Home stamp set, which I colored using my Crumb Cake and Poppy Parade Stampin’ Write Markers, on the bottom front of the envelope.  I adhered a panel of the Peaceful Poppies DSP to the envelope flap.

Thank you for visiting my blog today. I hope you liked my card and will give it a try. Now that you’ve seen my card, take a minute to hop through all our projects today. If you click on the Next Blog button, you’ll go to Amy’s page. Or you can just click on the names below to go directly to all the blogs! Happy Hopping!!

Karen Ksenzakovic: You Are Here

****************************************************************************************************

If you need any stamping supplies, I’d love to be your Demonstrator. Just click HERE to go directly to my online store or drop me an email if you have any questions. 

MY CURRENT HOST CODE IS: 6WETZ6WW

Use this host code when you order $50 or greater and receive a free gift from me! If your order is over $150, please do not use this code, but you’ll still get the free gift. The free gift is your choice of any item valued up to $10.00 in either the 2019-2020 Annual Catalog or the 2020 January-June Mini Catalog!   For any orders $50 or more I will also send you my monthly class tutorials.  Click HERE or go to my Customer Rewards for more details and to see what this months tutorials are.

Click HERE to shop the clearance rack.

Happy Stamping, Karen!

****************************************************************************************************

The Ornate Garden Suite available NOW.  Click HERE or on the image below to see a printable PDF of all the fabulous items available in the suite.

****************************************************************************************************

APRIL 2020 PAPER PUMPKIN:  MY WONDERFUL FAMILY

SUBSCRIBE MARCH 11-APRIL 10

TOMORROW IS THE LAST DAY TO SUBSCRIBE!!

At Paper Pumpkin, we believe in making a difference—especially when it comes to helping you build relationships through papercrafting. For April, we created a fun, family appreciation themed card kit that would make it easy for you to share your hearts with those you love most: mom, dad, daughter, son, sister, and brother. April’s kit even includes Mother’s Day and Father’s Day sentiments, giving you the perfect way to show your appreciation for beloved parents on their special days with a beautiful, handmade card.
One more thing about this “fam-tastic” kit: The Paper Pumpkin team knows that everyone’s clan is unique. With that in mind, we provided sentiments that would include anyone in your life who feels like family; for instance, “brothers” and “sisters” who have helped you along the journey of life.

About the April Kit: 

  • Kit contains supplies for 8 cards and envelopes
  • Card size: 4-1/4″ x 5-1/2″ (10.8 x 14 cm)
  • Envelope size: 4-1/2″ x 5-3/4″ (11.4 x 14.6 cm)
  • Coordinating Colors: Crushed Curry, Early Espresso, Melon Mambo, Mint Macaron, Pear Pizzazz, Shaded Spruce, Soft Sea Foam

Subscribe for the April Paper Pumpkin kit from March 11–April 10 at paperpumpkin.com. Supplies may be limited toward the end of the subscription period

****************************************************************************************************

Card stock cuts for this project:

  • Poppy Parade Cardstock 4 1/4″ X 11″ (card base scored and folded at 5 1/2″), 4 1/8″ X 5 3/8″ (inner liner mat)
  • Whisper White Cardstock 4″ X 5 1/4″ (inner liner), 3 1/2″ X 2 1/4″ (artwork)
  • Peaceful Poppies Designer Series Paper 4 1/4″ X 5 1/2″ (card front), 3″ X 4 1/4″ (artwork), 2 1/4″ X 6″ (piece for envelope flap)

****************************************************************************************************

Product List

Stampin’ Up! Forever Blossoms

Good Sunday morning my stamping friends.  How has everyone’s weekend been so far?  I had to work yesterday, which was supposed to be a partial day ended up being all day.  So much for people having to stay home.  It was just a crazy busy day.  I’m home today and hoping to finish up some of my spring cleaning.

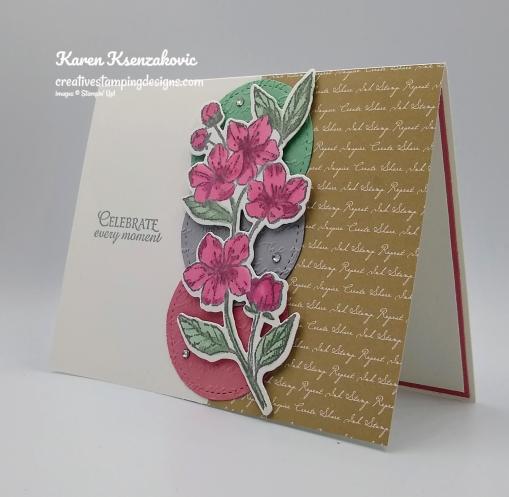
Today’s card can be used for a lot of different occasions.  I left the sentiment pretty general so I can use it for whatever I need.  Here’s today’s card.

My design today is from Freshly Made Sketches Challenge #429.  Here is their sketch.

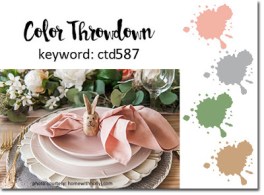
My colors are from Color Throwdown Challenge #587.  Here is their color pallet.

I started by adhering a panel of the Neutrals 6 X 6 Designer Series Paper to the front of a Thick Whisper White card base using Snail.  Using my Stitched Shapes Dies, I cut 3 circles, one in Mint Macaron, one in Rococo Rose and one in Smoky Slate.  I embossed the circles using my Scripty 3D Embossing Folder.  I adhered the circles to the card front using Multipurpose Liquid Glue overlapping the DSP halfway.

On a panel of Whisper White cardstock I stamped the large floral image from the Stampin’ Up! Forever Blossoms Cling Stamp Set in Smoky Slate Ink.  I colored the image in using my Mint Macaron and Rococo Rose Stampin’ Blends Markers.  I cut the image out using the matching Cherry Blossoms Dies.  Using Stampin’ Dimensionals, I adhered the floral image to the card front on top of the circles.

I stamped the sentiment from the Stampin’ Up! Honey Bee Cling Stamp Set in Smoky Slate Ink to the left of the artwork.  I added a few Rhinestone Basic Jewels to the card front.

On the inside I stamped the sentiment from the Honey Bee stamp set in Smoky Slate Ink in the center of a  Whisper White panel.  I stamped the flower, leaves and flower bud images from the Forever Blossoms stamp set in Smoky Slate Ink on the panel.  I colored the images in using my Mint Macaron and Rococo Rose Stampin’ Blends Markers.  I adhered the Whisper White panel to a Rococo Rose mat using Snail and then to the inside of the Thick Whisper White card base using Multipurpose Liquid Glue.

To finish my card I decorated a Medium Whisper White Envelope.  I stamped the flower, leaves and flower bud images from the Forever Blossoms stamp set in Smoky Slate Ink on the envelope front.  I colored the images in using my Mint Macaron and Rococo Rose Stampin’ Blends Markers.  I adhered a panel of the Neutrals 6 X 6 DSP to the envelope flap.

Thank you for stopping by my blog today.  I hope you liked my card and will give it a try. Happy Stamping!!

****************************************************************************************************

If you need any stamping supplies, I’d love to be your Demonstrator. Just click HERE to go directly to my online store or drop me an email if you have any questions. 

MY CURRENT HOST CODE IS: 6WETZ6WW

Use this host code when you order $50 or greater and receive a free gift from me! If your order is over $150, please do not use this code, but you’ll still get the free gift. The free gift is your choice of any item valued up to $10.00 in either the 2019-2020 Annual Catalog or the 2020 January-June Mini Catalog!   For any orders $50 or more I will also send you my monthly class tutorials.  Click HERE or go to my Customer Rewards for more details and to see what this months tutorials are.

Click HERE to shop the clearance rack.

Happy Stamping, Karen!

****************************************************************************************************

The Ornate Garden Suite available NOW.  Click HERE or on the image below to see a printable PDF of all the fabulous items available in the suite.

****************************************************************************************************

APRIL 2020 PAPER PUMPKIN:  MY WONDERFUL FAMILY

SUBSCRIBE MARCH 11-APRIL 10

At Paper Pumpkin, we believe in making a difference—especially when it comes to helping you build relationships through papercrafting. For April, we created a fun, family appreciation themed card kit that would make it easy for you to share your hearts with those you love most: mom, dad, daughter, son, sister, and brother. April’s kit even includes Mother’s Day and Father’s Day sentiments, giving you the perfect way to show your appreciation for beloved parents on their special days with a beautiful, handmade card.
One more thing about this “fam-tastic” kit: The Paper Pumpkin team knows that everyone’s clan is unique. With that in mind, we provided sentiments that would include anyone in your life who feels like family; for instance, “brothers” and “sisters” who have helped you along the journey of life.

About the April Kit: 

  • Kit contains supplies for 8 cards and envelopes
  • Card size: 4-1/4″ x 5-1/2″ (10.8 x 14 cm)
  • Envelope size: 4-1/2″ x 5-3/4″ (11.4 x 14.6 cm)
  • Coordinating Colors: Crushed Curry, Early Espresso, Melon Mambo, Mint Macaron, Pear Pizzazz, Shaded Spruce, Soft Sea Foam

Subscribe for the April Paper Pumpkin kit from March 11–April 10 at paperpumpkin.com. Supplies may be limited toward the end of the subscription period

****************************************************************************************************

Card stock cuts for this project:

  • Mint Macaron Cardstock 2 1/4″ X 2 1/4″ (stitched circle)
  • Rococo Rose Cardstock 2 1/4″ X 2 1/4″ (stitched circle), 4 1/8″ X 5 3/8″ (inner liner mat)
  • Smoky Slate Cardstock 2 1/4″ X 2 1/4″ (stitched circle)
  • Whisper White Cardstock 4 1/2″ X 2 1/2″ (artwork), 4″ X 5 1/4″ (inner liner)
  • Thick Whisper White Cardstock 8 1/2″ X 5 1/2″ (card base scored and folded at 4 1/4″)
  • Neutrals 6 X 6 Designer Series Paper 2 1/2″ X 4 1/4″ (card front), 2 1/4″ X 6″ (piece for envelope flap)

****************************************************************************************************

Product List

Stampin’ Up! Ornate Smile Daisy Lane for Fun Fold Friday

Good Friday morning my stamping friends and welcome to my Fun Fold Friday.  How was everyone’s week?  Is anyone planning anything for the weekend?  I’m working a partial day tomorrow and getting my spring cleaning done.

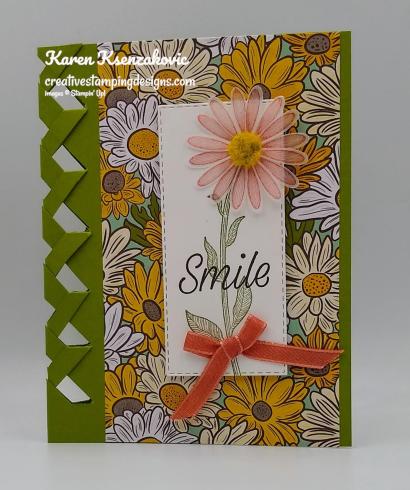
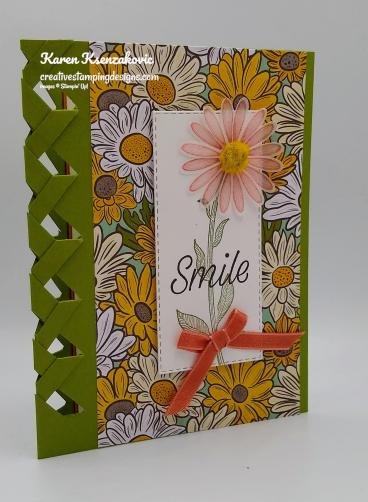
For today’s card I made a fold I haven’t done in a while and forgot how much I like it.  I do have detailed pictures and instructions for you since it is a little hard to explain.  Here’s today’s card.

I’ve combined the Ornate Garden Specialty Designer Series Paper with the Stampin’ Up! Daisy Lane Cling Stamp Set for my card.  Click HERE for a  template which I got from Lisa Curcio, to do the braid on the edge.

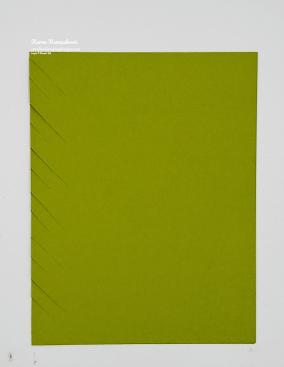
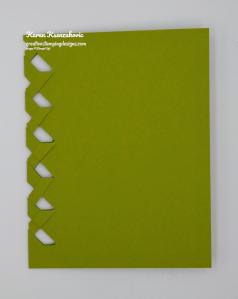
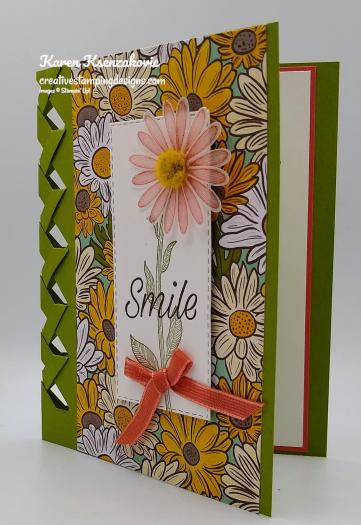
I lined the template up with the edge of my card and cut carefully on the lines all the way down the edge so it looks like photo above.  When you open your card base it looks like the 2nd picture above.

Starting at the bottom, you want to fold down the bottom  cut piece and carefully cut it off using your Paper Snips as shown above and set it aside (you will need it later).  Fold the next cut piece down and tuck it behind the point below it.  Continue doing this all the way to the top cut piece.

When you finish folding and tucking all the pieces down it will look like the 1st picture above.  Take the small piece that you cut off and adhere it to the top of the card, using Glue Dots, lining it up and tucking it under the top point so it looks like the middle photo above.  When you fold your card back in half it will look like the end photo.

I adhered a panel of the Ornate Garden Specialty DSP to the card front using Snail.  On a small panel of Whisper White card stock I stamped the stem image from the Daisy Lane stamp set in Old Olive Ink.  I stamped the sentiment from the Daisy Lane stamp set in Early Espresso Ink across the stem.  I cut the image out using my Rectangle Stitched Dies.

On a small piece of Vellum card stock I stamped the medium daisy image from the Daisy Lane stamp set in Terracotta Tile Ink twice.  I cut the images out using the Medium Daisy Punch.  I adhered the 2 cut daisies together using a Glue dot and adhered it to the stem image using a Glue Dot.  I added a Perennial Essence Floral Center to the daisy.  I adhered the artwork to the card front using Stampin’ Dimensionals.  I tied a small bow made from the Terracotta Tile 1/4″ Ornate Garden Ribbon and adhered it to the bottom of the stem using a Glue Dot.

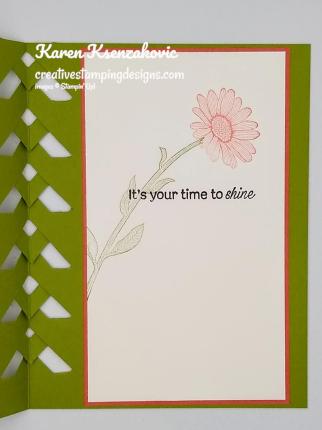
On the inside I stamped the sentiment from the Daisy Lane stamp set in Early Espresso Ink in the center of a Whisper White panel.  I stamped the stem image from the Daisy Lane stamp set in Old Olive Ink, stamping off once, on the side of the panel.  I stamped the small daisy image from the Daisy Lane stamp set in Terracotta Tile Ink, stamping off once, to the top of the stem.  I adhered the Whisper White panel to a Terracotta Tile mat using Snail and then to the inside of the Old Olive card base using Multipurpose Liquid Glue.

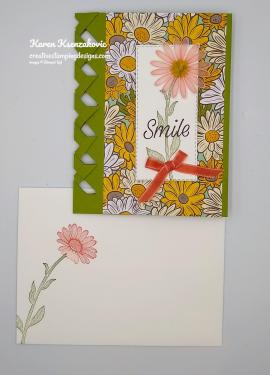
To finish my card I decorated a Medium Whisper White Envelope.  I stamped the stem image from the Daisy Lane stamp set in Old Olive Ink on the envelope front.  I stamped the small daisy image from the Daisy Lane stamp set in Terracotta Tile Ink on the top of the stem.  I adhered a panel of the Ornate Garden Specialty DSP to the envelope flap.

Thank you for stopping by my blog today.  I hope you liked my card and will give it a try. Happy Stamping!!

****************************************************************************************************

If you need any stamping supplies, I’d love to be your Demonstrator. Just click HERE to go directly to my online store or drop me an email if you have any questions. 

MY CURRENT HOST CODE IS: 6WETZ6WW

Use this host code when you order $50 or greater and receive a free gift from me! If your order is over $150, please do not use this code, but you’ll still get the free gift. The free gift is your choice of any item valued up to $10.00 in either the 2019-2020 Annual Catalog or the 2020 January-June Mini Catalog!   For any orders $50 or more I will also send you my monthly class tutorials.  Click HERE or go to my Customer Rewards for more details and to see what this months tutorials are.

Click HERE to shop the clearance rack.

Happy Stamping, Karen!

****************************************************************************************************

The Ornate Garden Suite available NOW.  Click HERE or on the image below to see a printable PDF of all the fabulous items available in the suite.

****************************************************************************************************

APRIL 2020 PAPER PUMPKIN:  MY WONDERFUL FAMILY

SUBSCRIBE MARCH 11-APRIL 10

At Paper Pumpkin, we believe in making a difference—especially when it comes to helping you build relationships through papercrafting. For April, we created a fun, family appreciation themed card kit that would make it easy for you to share your hearts with those you love most: mom, dad, daughter, son, sister, and brother. April’s kit even includes Mother’s Day and Father’s Day sentiments, giving you the perfect way to show your appreciation for beloved parents on their special days with a beautiful, handmade card.
One more thing about this “fam-tastic” kit: The Paper Pumpkin team knows that everyone’s clan is unique. With that in mind, we provided sentiments that would include anyone in your life who feels like family; for instance, “brothers” and “sisters” who have helped you along the journey of life.

About the April Kit: 

  • Kit contains supplies for 8 cards and envelopes
  • Card size: 4-1/4″ x 5-1/2″ (10.8 x 14 cm)
  • Envelope size: 4-1/2″ x 5-3/4″ (11.4 x 14.6 cm)
  • Coordinating Colors: Crushed Curry, Early Espresso, Melon Mambo, Mint Macaron, Pear Pizzazz, Shaded Spruce, Soft Sea Foam

Subscribe for the April Paper Pumpkin kit from March 11–April 10 at paperpumpkin.com. Supplies may be limited toward the end of the subscription period

****************************************************************************************************

Card stock cuts for this project:

  • Old Olive  Cardstock 8 1/2″ X 5 1/2″ (card base scored and folded at 4 1/4″)
  • Terracotta Tile Cardstock 3 1/8″ X 5 3/8″ (inner liner mat)
  • Whisper White Cardstock 3 1/2″ X 4″ (artwork), 3″ X 5 1/4″ (inner liner)
  • Ornate Garden Specialty Designer Series Paper 3 1/4″ X 5 1/2″ (card front), 2 1/4″ X 6″ (piece for envelope flap)
  • Vellum Cardstock 2″ X 4″ (daisies)

****************************************************************************************************

Product List