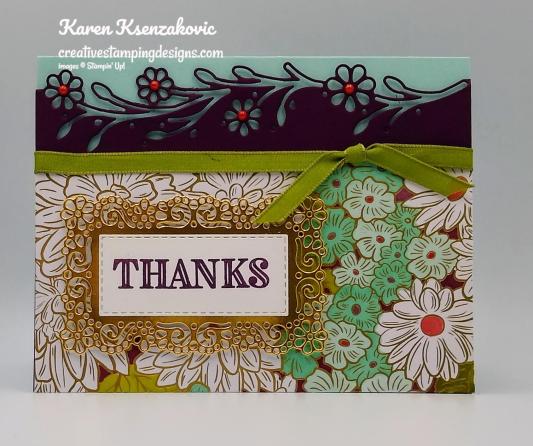
Stampin’ Up! Ornate Horizontal Thanks

Good Sunday morning my stamping friends.  How is your weekend going?  I had off all day yesterday, but I have to go in today to work.  Were any of you able to watch our Ornate Garden Facebook Live Event yesterday?  We had so much fun creating the cards.  If you were able to watch, I appreciate you,  if you weren’t able to watch, you can still go over and watch all the replays.  I think we gave everyone a lot of inspiration.

Here is one of the cards I made yesterday on my Facebook Live.  If you’d like to watch the video, here is the link https://www.facebook.com/515622098864089/videos/240690183743889/
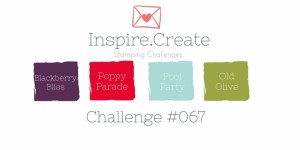
The colors in my card were from Inspire. Create Color Challenge #067.  Here is their color pallet.
I also joined in with the Cupcake Inspirations Challenge #491.  Here is their theme.

I started by coloring a panel of Ornate Garden Specialty Designer Series Paper using my Blackberry Bliss, Old Olive Pool Party and Poppy Parade Stampin’ Blends Markers.

Using the Ornate Borders Dies, I cut the edge of a Blackberry Bliss card front.  Isn’t that die cut just beautiful.  I adhered the colored panel of Ornate Garden Specialty DSP to the Blackberry Bliss card front using Snail.  I wrapped a piece of the Old Olive 1/4″ Ornate Ribbon around the card front and tied a knot.  I added a Glue Dot under the knot to hold it in place.  I adhered the card front to a Pool Party card base using Stampin’ Dimensionals.
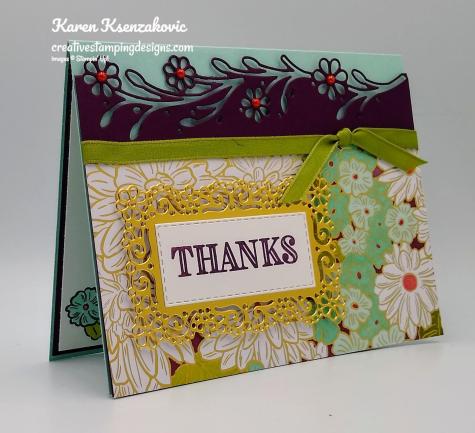
Using my Ornate Layers Dies I cut a Gold Foil Sheet using one of the smaller frames.  On a small panel of Whisper White cardstock, which i cut using the smallest Stitched Rectangle Die, I stamped the sentiment from the Stampin’ Up! Ornate Thanks Photopolymer Stamp Set in Blackberry Bliss Ink.  I adhered the sentiment to the Gold Foil frame using Snail and then to the card front using Stampin’ Dimensionals.  I added a few Pearl Basic Jewels, which i colored using my Dark Poppy Parade Stampin’ Blends Marker, to the center of the cut flowers.
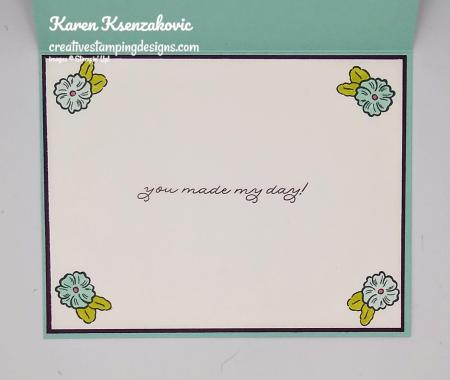
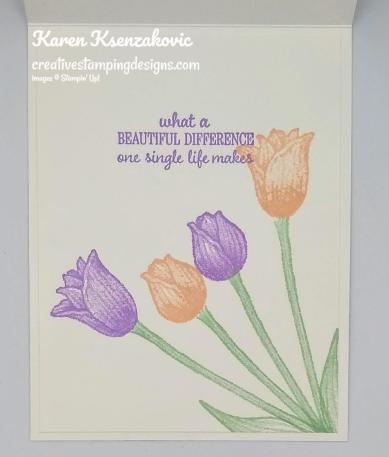
On the inside I stamped the sentiment from the Ornate Thanks stamp set in Blackberry Bliss Ink in the center of a Whisper White panel.  I stamped the small flower image from the Stampin’ Up! Ornate Style Cling Stamp Set in Tuxedo Black Memento Ink in the 4 corners of the panel.  I colored the images in using my Old Olive, Pool Party and Poppy Parade Stampin’ Blends Markers.  I adhered the Whisper White panel to a Blackberry Bliss mat using Snail and then to the inside of the Pool Party card base using Multipurpose Liquid Glue.

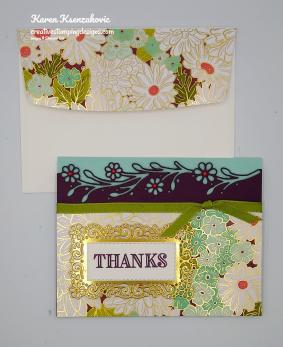
To finish my card I decorated a Medium Whisper White Envelope.  I stamped the small flower image from the Ornate Style stamps set in Tuxedo Black Memento Ink on the bottom front of the envelope.  I colored the images in using my Old Olive, Pool Party and Poppy Parade Stampin’ Blends Markers.  I adhered a colored panel of the Ornate Garden Specialty DSP to the envelope flap.

Thank you for stopping by my blog today.  I hope you liked my card and will give it a try.  The list of supplies are below along with the measurements if you’d like to stamp along while watching the video.  You can watch it on my Facebook page Here.

You can also view the video on my YouTube channel Here.   Happy Stamping!!

****************************************************************************************************

If you need any stamping supplies, I’d love to be your Demonstrator. Just click HERE to go directly to my online store or drop me an email if you have any questions. 

MY CURRENT HOST CODE IS: 6WETZ6WW

Use this host code when you order $50 or greater and receive a free gift from me! If your order is over $150, please do not use this code, but you’ll still get the free gift. The free gift is your choice of any item valued up to $10.00 in either the 2019-2020 Annual Catalog or the 2020 January-June Mini Catalog!   For any orders $50 or more I will also send you my monthly class tutorials.  Click HERE or go to my Customer Rewards for more details and to see what this months tutorials are.

The Clearance Rack has been updated.  Click HERE to shop the clearance rack.

Happy Stamping, Karen!

****************************************************************************************************

MAY 2020 PAPER PUMPKIN:

DESIGNED WITH (IN) COLOR IN MIND

SUBSCRIBE APRIL 11- MAY 10
The Paper Pumpkin team loves planning fun surprises, so we’ve been VERY excited to let you know what we have in store for the month of May: a fabulous kit featuring 2020–2022 In Colors, plus Purple Posy, an In Color from the 2019–2021 collection. This means that as Paper Pumpkin subscribers, you will be first to get your hands on new In Color products. And that’s just the beginning of things to love about this kit!

A Kit In Color

  • Kit contains supplies for 12 cards and envelopes
  • 8 cards are traditional size
    • Card size: 4-1/4″ x 5-1/2″ (10.8 x 14 cm)
    • Envelope size: 4-1/2″ x 5-3/4″ (11.4 x 14.6 cm)
  • 4 cards are note card size
    • Notecard size: 5″ x 3-1/2″ (12.7 x 8.9 cm)
    • Envelope size: 5-1/8″ x 3-5/8″ (13 x 9.2 cm)

Coordinating Colors: Four NEW In Colors plus Purple Posy from the 2019–2021 In Color collection. (The new In Colors will be introduced on April 24.)

  • Subscribe for the May 2020 Paper Pumpkin kit from April 11–May 10 at paperpumpkin.com.
  • Supplies may be limited toward the end of the subscription period.
  • The In Color reveal happens April 24, so stay tuned!

****************************************************************************************************

The Ornate Garden Suite available NOW.  Click HERE or on the image below to see a printable PDF of all the fabulous items available in the suite.

****************************************************************************************************

Card stock cuts for this project:

  • Blackberry Bliss Cardstock 4 1/4″ X 5 1/2″ (card front), 4 1/8″ X 5 3/8″ (inner liner mat)
  • Pool Party Cardstock 8 1/2″ X 5 1/2″ (card base scored and folded at 4 1/4″)
  • Whisper White Cardstock 2 3/4″ X 1 1/4″ (sentiment on front), 4″ X 5 1/4″ (inner liner)
  • Gold Foil Sheet 3 1/2″ X 2 1/4″ (frame)
  • Ornate Garden Specialty Designer Series Paper 3″ X 5 1/2″ (card front), 2 1/4″ X 6″ (piece for envelope flap)

****************************************************************************************************

Product List

Stampin’ Up! Ornate Garden Suite Facebook Live Event

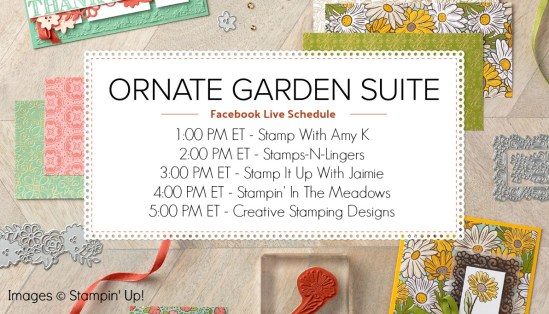
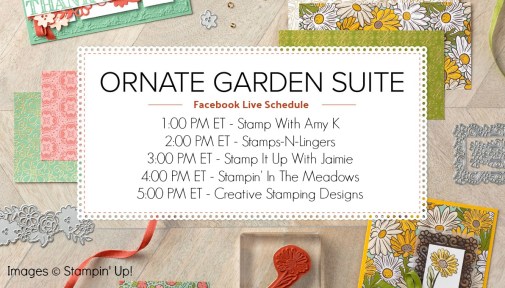
Good Saturday morning my stamping friends.  Today’s the day!! My Stampin’ Up! team will be doing Facebook Live videos starting today at 1pm ET and ending around 6pm ET.  I’m scheduled to go live at 5pm ET.  Hope you’ll join us today to see what everyone is making.  Below is the schedule of our  Facebook Live Videos.

INKIN’ KREW ORNATE GARDEN FACEBOOK EVENT –

TODAY, SATURDAY APRIL 18TH

We’ll be sharing projects created with this pretty suite of products with you throughout the afternoon via Live videos and photos!

Everyone is welcome to join us!  We look forward to sharing this beautiful suite of products with you!!  Our Facebook page is all set up for the event and it’s open for joining!  Click this link to go to the group and then click the “join” button and we’ll get you approved ASAP:

https://www.facebook.com/groups/1833741716756137/?fref=nf

Come on over and get joined up – then be sure to turn on notifications so you don’t miss a minute! Hope to “see” you!

We all love a chance to win free stuff!!! We’ll be picking 5 random winners after the event from those who’ve left comments on any post or video during our event!!
Here are the prizes that you’ll be entered to win by leaving us comments:
  • Ornate Thanks stamp set
  • Ornate Style stamp set
  • Ornate Garden DSP
  • Ornate Floral 3D Embossing Folder
  • Ornate Garden Ribbon Combo Pack & Gilded Gems
Please note: Anyone is welcome to leave us a comment but per Stampin’ Up! rules, we are only able to ship the giveaways to addresses in the US.

You have to comment throughout the event to be entered to win the random drawing, so…you need to mark your calendar!

Let me know if you have questions.  See you all then!

****************************************************************************************************

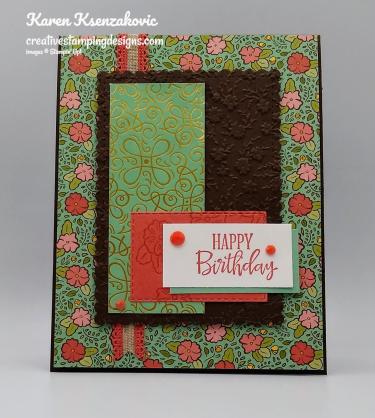
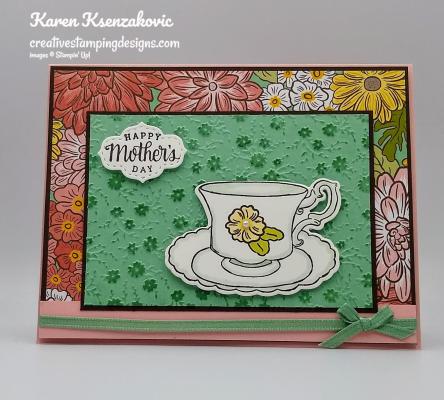
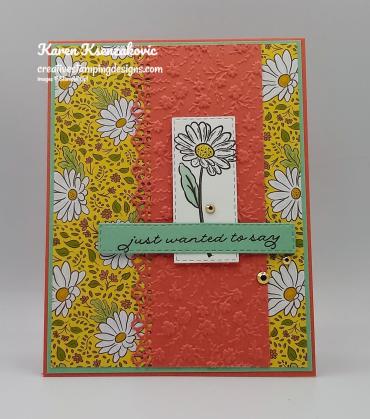
Here are some of the cards I’ve already made with the Stampin’ Up! Ornate Garden Suite.  Some of them I only used dies, others the stamps.  Click on the pictures and they will take you right to the blog with the directions on how to make them.

I hope you liked the cards I showed you and will join us this afternoon to see what everyone will be creating.

Happy Stamping!!

****************************************************************************************************

If you need any stamping supplies, I’d love to be your Demonstrator. Just click HERE to go directly to my online store or drop me an email if you have any questions. 

MY CURRENT HOST CODE IS: 6WETZ6WW

Use this host code when you order $50 or greater and receive a free gift from me! If your order is over $150, please do not use this code, but you’ll still get the free gift. The free gift is your choice of any item valued up to $10.00 in either the 2019-2020 Annual Catalog or the 2020 January-June Mini Catalog!   For any orders $50 or more I will also send you my monthly class tutorials.  Click HERE or go to my Customer Rewards for more details and to see what this months tutorials are.

The Clearance Rack has been updated.  Click HERE to shop the clearance rack.

Happy Stamping, Karen!

****************************************************************************************************

MAY 2020 PAPER PUMPKIN:

DESIGNED WITH (IN) COLOR IN MIND

SUBSCRIBE APRIL 11- MAY 10

The Paper Pumpkin team loves planning fun surprises, so we’ve been VERY excited to let you know what we have in store for the month of May: a fabulous kit featuring 2020–2022 In Colors, plus Purple Posy, an In Color from the 2019–2021 collection. This means that as Paper Pumpkin subscribers, you will be first to get your hands on new In Color products. And that’s just the beginning of things to love about this kit!

A Kit In Color

  • Kit contains supplies for 12 cards and envelopes
  • 8 cards are traditional size
    • Card size: 4-1/4″ x 5-1/2″ (10.8 x 14 cm)
    • Envelope size: 4-1/2″ x 5-3/4″ (11.4 x 14.6 cm)
  • 4 cards are note card size
    • Notecard size: 5″ x 3-1/2″ (12.7 x 8.9 cm)
    • Envelope size: 5-1/8″ x 3-5/8″ (13 x 9.2 cm)

Coordinating Colors: Four NEW In Colors plus Purple Posy from the 2019–2021 In Color collection. (The new In Colors will be introduced on April 24.)

  • Subscribe for the May 2020 Paper Pumpkin kit from April 11–May 10 at paperpumpkin.com.
  • Supplies may be limited toward the end of the subscription period.
  • The In Color reveal happens April 24, so stay tuned!

****************************************************************************************************

The Ornate Garden Suite available NOW.  Click HERE or on the image below to see a printable PDF of all the fabulous items available in the suite.


Stampin’ Up! Sailing Home Thanks for Fun Fold Friday

Good Friday morning my stamping friends and welcome to my Fun Fold Friday.  How was everyone’s week?  The weekend is here once again.  My team has a fun event planned for tomorrow starting at 1pm.  We will be doing Facebook live videos showcasing the Ornate Garden Suite, there will even be giveaways at the end of the event.  You will just need to leave a comment during the live videos.  I’m planning on going live at 5pm.  Our Facebook page is all set up for the event and it’s open for joining!  Click this link to go to the group and then click the “join” button and we’ll get you approved ASAP: https://www.facebook.com/groups/1833741716756137/  Looking forward to seeing you there.

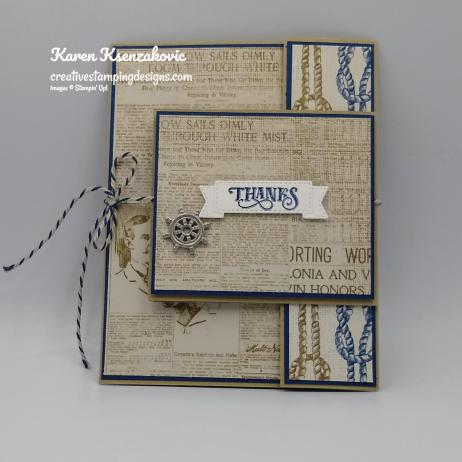
For today’s card I used a suite from the 2019-2020 Annual Catalog which will be ending the beginning of June.  I don’t know if these items will be carrying over, so I wanted to make sure I got to use them.  My card is actually 2 cards in one.   Here’s my card.

I played along with the Watercooler Wednesday Challenge #267.  Here is their theme.

I started with a Crumb Cake card base which is larger than normal.  It’s 5 1/2″ X 10″ scored and folded at 4 1/4″ & 8 1/2″.

I adhered 2 panels of Come Sail Away Designer Series Paper to Night of Navy mats using Snail and then adhered them to the front of the card base and the small fold over piece using Multipurpose Liquid Glue.  I adhered a smaller panel of Come Sail Away DSP to a Night of Navy mat using Snail.  I stamped the sentiment from the Stampin’ Up! Sailing Home Cling Stamp Set in Night of Navy Ink on a small Whisper White panel.  I cut the sentiment out using the banner die from the Smooth Sailing Dies and adhered it to the small card front using Stampin’ Dimensionals.

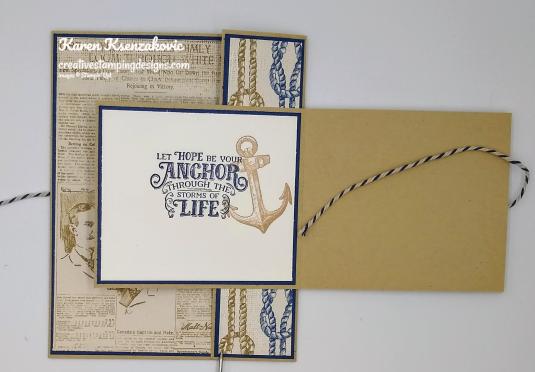
On the inside of the small card base, I stamped the sentiment from the Sailing Home stamp set in Night of Navy Ink in the center of a small Whisper White panel.  I stamped the anchor image from the Sailing Home stamp set in Crumb Cake Ink to the right of the sentiment.  I adhered the Whisper White panel to a Night of Navy mat using Snail and then to the inside of the small Crumb Cake card base using Multipurpose Liquid Glue.  I adhered the small card base to the fold over panel of the large card base using Multipurpose Liquid Glue, only on 1″ of the back near the fold.  I wrapped a piece of the Night of Navy/Sahara Sand Bakers Twine around the card bases and tied a bow on the left side.  I adhered the small card front to the small card base using Stampin’ Dimensionals.  I added a Sail Away Trinket just below the sentiment using Glue Dots.

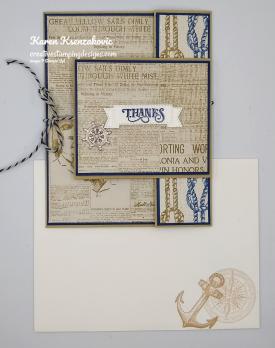
On the inside I stamped the sentiment from the Stampin’ Up! Ornate Thanks Photopolymer Stamp Set in Night of Navy Ink in the center of a Whisper White panel.  I stamped the compass image from the Sailing Home stamp set on the bottom of the panel in Crumb Cake Ink, stamping off once.  I stamped the anchor image from the Sailing Home stamp set in Crumb Cake Ink overlapping the compass image.  I adhered the Whisper White panel to a Night of Navy mat using Snail and then to the inside of the Crumb Cake card base using Multipurpose Liquid Glue.

To finish my I decorated a Medium Whisper White Envelope.  I stamped the compass image from the Sailing Home stamp set in Crumb Cake Ink on the bottom of the envelope front, stamping off once.  I stamped the anchor image from the Sailing Home stamp set in Crumb Cake Ink overlapping the compass image.  I adhered a panel of Come Sail Away DSP to the envelope flap.

Thank you for stopping by my blog today.  I hope you liked my card and will give it a try. Happy Stamping!

****************************************************************************************************

If you need any stamping supplies, I’d love to be your Demonstrator. Just click HERE to go directly to my online store or drop me an email if you have any questions. 

MY CURRENT HOST CODE IS: 6WETZ6WW

Use this host code when you order $50 or greater and receive a free gift from me! If your order is over $150, please do not use this code, but you’ll still get the free gift. The free gift is your choice of any item valued up to $10.00 in either the 2019-2020 Annual Catalog or the 2020 January-June Mini Catalog!   For any orders $50 or more I will also send you my monthly class tutorials.  Click HERE or go to my Customer Rewards for more details and to see what this months tutorials are.

The Clearance Rack has been updated.  Click HERE to shop the clearance rack.

Happy Stamping, Karen!

****************************************************************************************************

INKIN’ KREW ORNATE GARDEN FACEBOOK EVENT –

TOMORROW, SATURDAY APRIL 18TH

Our team is hosting a fun event on Facebook on Saturday, April 18 from 1:00 PM ET until around 6:00 PM ET!

We’ll be sharing projects created with this pretty suite of products with you throughout the afternoon via Live videos and photos!  Here is the schedule.

Everyone is welcome to join us!  We look forward to sharing this beautiful suite of products with you!!

Let me know if you have questions.  See you all then!

****************************************************************************************************

MAY 2020 PAPER PUMPKIN:

DESIGNED WITH (IN) COLOR IN MIND

SUBSCRIBE APRIL 11- MAY 10

The Paper Pumpkin team loves planning fun surprises, so we’ve been VERY excited to let you know what we have in store for the month of May: a fabulous kit featuring 2020–2022 In Colors, plus Purple Posy, an In Color from the 2019–2021 collection. This means that as Paper Pumpkin subscribers, you will be first to get your hands on new In Color products. And that’s just the beginning of things to love about this kit!

A Kit In Color

  • Kit contains supplies for 12 cards and envelopes
  • 8 cards are traditional size
    • Card size: 4-1/4″ x 5-1/2″ (10.8 x 14 cm)
    • Envelope size: 4-1/2″ x 5-3/4″ (11.4 x 14.6 cm)
  • 4 cards are note card size
    • Notecard size: 5″ x 3-1/2″ (12.7 x 8.9 cm)
    • Envelope size: 5-1/8″ x 3-5/8″ (13 x 9.2 cm)

Coordinating Colors: Four NEW In Colors plus Purple Posy from the 2019–2021 In Color collection. (The new In Colors will be introduced on April 24.)

  • Subscribe for the May 2020 Paper Pumpkin kit from April 11–May 10 at paperpumpkin.com.
  • Supplies may be limited toward the end of the subscription period.
  • The In Color reveal happens April 24, so stay tuned!

****************************************************************************************************

The Ornate Garden Suite available NOW.  Click HERE or on the image below to see a printable PDF of all the fabulous items available in the suite.

****************************************************************************************************

Card stock cuts for this project:

  • Crumb Cake Cardstock 5 1/2″ X 10″ (card base scored and folded at 4 1/4″ & 8 1/2″), 7″ X 3″ (small card base scored and folded at 3 1/2″)
  • Night of Navy Cardstock 2 – 4 1/8″ x 5 3/8″ (card front and inner liner mats), 2 – 2 7/8″ X 3 3/8″ (small card front and inner liner mats), 1 3/8″ X 5 3/8″ (side strip mat on large card base)
  • Whisper White Cardstock 4″ X 5 1/4″ (inner liner), 2 3/4″ X 3 1/4″ (small card inner liner)
  • Come Sail Away Designer Series Paper 4′ X 5 1/4″ (card front), 1 1/4″ X 4 1/4″ (card front strip), 2 3/4″ X 3 1/4″ (small card front), 2 1/4″ X 6″ (envelope flap)

****************************************************************************************************

Product List

Stampin’ Up! Hello Fabulous! for Happy Inkin’ Thursday Blog Hop

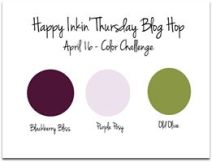
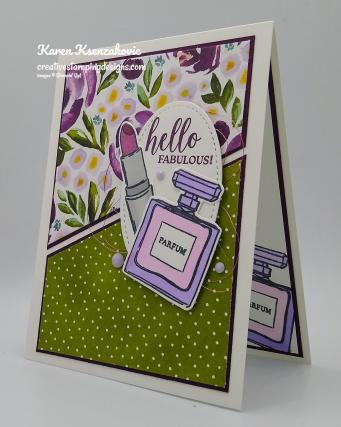
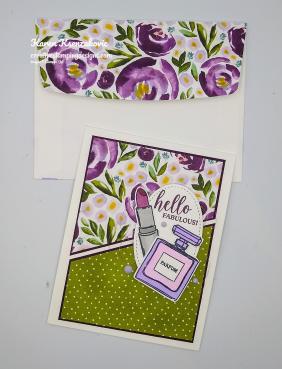
Good Thursday morning my stamping friends and welcome to the Happy Inkin’ Thursday Blog Hop. How is everyone doing today? Hope you are all staying heathly, we’re all good here. If you are hopping over from Akiko, thank you for stopping by my blog. Be sure to take a moment to hop around to see everyone’s beautiful projects today. This week we had a Color Challenge, here are the colors we got to work with.  I just love this color combo.

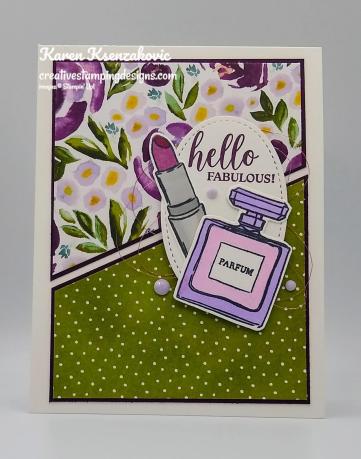
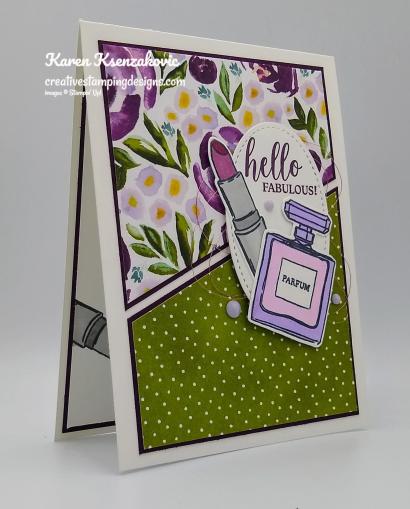
Here’s what I came up with for these colors.

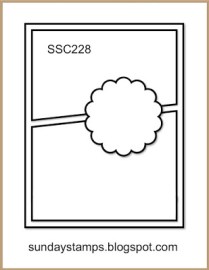
My design is from Sunday Stamps Challenge #228.  Here is their sketch.

I started by very lightly tacking the 2 panels of Best Dressed Designer Series Paper to the Blackberry Bliss cardstock with Snail.  Using my Paper Trimmer, I cut all the panels at the same time on a slight angle.  I adhered the 2 pieces of Best Dressed DSP that I wanted, to the Blackberry Bliss mat using Snail.  I adhered the matted panels to a Thick Whisper White card base using Multipurpose Liquid Glue.

On a panel of Whisper White cardstock I stamped the sentiment from the Stampin’ Up! Dressed To Impress Photopolymer Stamp Set in Blackberry Bliss Ink.  I cut the sentiment out using the 2nd smallest oval from the Stitched Shapes Dies.  On the same panel of Whisper White cardstock, I stamped the perfume bottle and lipstick images from the Dressed To Impress stamp set in Tuxedo Black Memento Ink.  I colored the perfume bottle in using my Purple Posy Stampin’ Blends Markers.  To get the darker purple around the outside of the bottle, I colored it over multiple times.  I colored the lipstick image in using my Blackberry Bliss and Smoky Slate Stampin’ Blends Markers.  I cut the images out using my All Dressed Up Dies.  I added some Clear Wink of Stella to the images to give it a little shimmer.

I adhered the cut images to the sentiment oval using Glue Dots.  It’s hard to see in the photo, but I adhered some Rose Metallic Thread to the back of the artwork then adhered the artwork to the card front using Stampin’ Dimensionals.  I added a few Purple Posy 2019-2021 Faceted Dots to the card front.

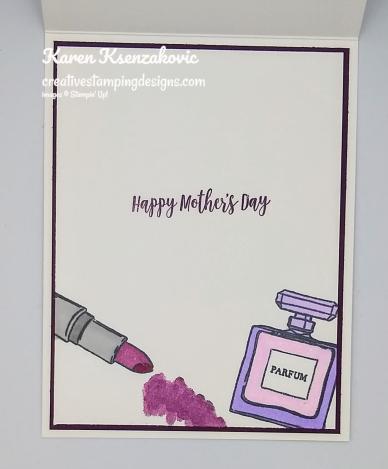
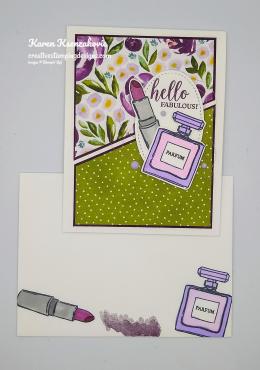
On the inside I stamped the sentiment from the Dressed To Impress stamp set in Blackberry Bliss Ink in the center of a Whisper White panel.  I stamped the perfume bottle and lipstick images from the Dressed To Impress stamp set in Tuxedo Black Memento Ink on the bottom of the panel.  I stamped the lipstick smudge image, (not real sure that’s what it’s supposed to be but it fit), from the Dressed To Impress stamp set in Blackberry Bliss Ink.  I colored the images in using my Blackberry Bliss, Purple Posy and Smoky Slate Stampin’ Blends Markers and added a little Clear Wink of Stella to the images.  I adhered the Whisper White panel to a Blackberry Bliss mat using Snail and then to the inside of the Thick Whisper White card base using Multipurpose Liquid Glue.

To finish my card I decorated a Medium Whisper White Envelope.  I stamped the perfume bottle and lipstick images from the Dressed To Impress stamp set in Tuxedo Black Memento Ink on the envelope front.  I stamped the lipstick smudge image from the Dressed to impress stamp set in Blackberry Bliss Ink on the envelope front.  I colored the images in using my Blackberry Bliss, Purple Posy and Smoky Slate Stampin’ Blends Markers.  I adhered a panel of Best Dressed DSP to the envelope flap.

Thank you for visiting my blog today. I hope you liked my card and will give it a try. Now that you’ve seen my card, take a minute to hop through all our projects today. If you click on the Next Blog button, you’ll go to Amy’s page. Or you can just click on the names below to go directly to all the blogs! Happy Hopping!!

Eva Dobilas: Not Hopping
Karen Ksenzakovic:  You Are Here

****************************************************************************************************

If you need any stamping supplies, I’d love to be your Demonstrator. Just click HERE to go directly to my online store or drop me an email if you have any questions. 

MY CURRENT HOST CODE IS: 6WETZ6WW

Use this host code when you order $50 or greater and receive a free gift from me! If your order is over $150, please do not use this code, but you’ll still get the free gift. The free gift is your choice of any item valued up to $10.00 in either the 2019-2020 Annual Catalog or the 2020 January-June Mini Catalog!   For any orders $50 or more I will also send you my monthly class tutorials.  Click HERE or go to my Customer Rewards for more details and to see what this months tutorials are.

The Clearance Rack has been updated.  Click HERE to shop the clearance rack.

Happy Stamping, Karen!

****************************************************************************************************

MAY 2020 PAPER PUMPKIN:

DESIGNED WITH (IN) COLOR IN MIND

SUBSCRIBE APRIL 11- MAY 10

The Paper Pumpkin team loves planning fun surprises, so we’ve been VERY excited to let you know what we have in store for the month of May: a fabulous kit featuring 2020–2022 In Colors, plus Purple Posy, an In Color from the 2019–2021 collection. This means that as Paper Pumpkin subscribers, you will be first to get your hands on new In Color products. And that’s just the beginning of things to love about this kit!

A Kit In Color

  • Kit contains supplies for 12 cards and envelopes
  • 8 cards are traditional size
    • Card size: 4-1/4″ x 5-1/2″ (10.8 x 14 cm)
    • Envelope size: 4-1/2″ x 5-3/4″ (11.4 x 14.6 cm)
  • 4 cards are note card size
    • Notecard size: 5″ x 3-1/2″ (12.7 x 8.9 cm)
    • Envelope size: 5-1/8″ x 3-5/8″ (13 x 9.2 cm)

Coordinating Colors: Four NEW In Colors plus Purple Posy from the 2019–2021 In Color collection. (The new In Colors will be introduced on April 24.)

  • Subscribe for the May 2020 Paper Pumpkin kit from April 11–May 10 at paperpumpkin.com.
  • Supplies may be limited toward the end of the subscription period.
  • The In Color reveal happens April 24, so stay tuned!

****************************************************************************************************

INKIN’ KREW ORNATE GARDEN FACEBOOK EVENT – SATURDAY APRIL 18TH

Our team is hosting a fun event on Facebook this Saturday, April 18 from 1:00 PM ET until around 6:00 PM ET!

We’ll be sharing projects created with this pretty suite of products with you throughout the afternoon via Live videos and photos!

We’re setting up a Facebook page for the event and we’ll be opening it up on Thursday, April 16.  I’ll be sharing a link to the page on my blog and on my business Facebook page then so keep an eye out for the invitation coming soon!

Everyone is welcome to join us!  We look forward to sharing this beautiful suite of products with you!!

Let me know if you have questions.  See you all then!

****************************************************************************************************

The Ornate Garden Suite available NOW.  Click HERE or on the image below to see a printable PDF of all the fabulous items available in the suite.

****************************************************************************************************

Card stock cuts for this project:

  • Blackberry Bliss Cardstock 3 3/4″ X 5″ (card front DSP mats), 4 1/8″ X 5 3/8″ (inner liner mat)
  • Whisper White Cardstock 4″ x 5 1/4″ (inner liner), 4 3/8″ X 3″ (artwork)
  • Thick Whisper White Cardstock 4 1/4″ X 11″ (card base scored and folded at 5 1/2″)
  • Best Dressed Designer Series Paper 2 – 3 5/8″ X 4 3/4″ (card front), 2 1/4″ X 6″ (piece for envelope flap)

****************************************************************************************************

Product List

Stampin’ Up! Ornate Garden Facebook Page Event Is Open

INKIN’ KREW FACEBOOK PAGE EVENT IS OPEN!!

Our team is hosting a fun event on Facebook on Saturday, April 18 from 1:00 PM ET until around 6:00 PM ET!

We’ll be sharing projects created with this pretty suite of products with you throughout the afternoon via Live videos and photos!  And we’ve got a few prizes to give away too!

Our Facebook page is all set up for the event and it’s open for joining!  Click this link to go to the group and then click the “join” button and we’ll get you approved ASAP: https://www.facebook.com/groups/1833741716756137/

If you’re interested in our Facebook Live schedule of events for Saturday, here it is!

Everyone is welcome to join us!  We look forward to sharing this beautiful suite of products with you!!

Let me know if you have questions.  See you all over there!

****************************************************************************************************

If you need any stamping supplies, I’d love to be your Demonstrator. Just click HERE to go directly to my online store or drop me an email if you have any questions. 

MY CURRENT HOST CODE IS: 6WETZ6WW

Use this host code when you order $50 or greater and receive a free gift from me! If your order is over $150, please do not use this code, but you’ll still get the free gift. The free gift is your choice of any item valued up to $10.00 in either the 2019-2020 Annual Catalog or the 2020 January-June Mini Catalog!   For any orders $50 or more I will also send you my monthly class tutorials.  Click HERE or go to my Customer Rewards for more details and to see what this months tutorials are.

The Clearance Rack has been updated.  Click HERE to shop the clearance rack.

Happy Stamping, Karen!

****************************************************************************************************

MAY 2020 PAPER PUMPKIN:

DESIGNED WITH (IN) COLOR IN MIND

SUBSCRIBE APRIL 11- MAY 10

The Paper Pumpkin team loves planning fun surprises, so we’ve been VERY excited to let you know what we have in store for the month of May: a fabulous kit featuring 2020–2022 In Colors, plus Purple Posy, an In Color from the 2019–2021 collection. This means that as Paper Pumpkin subscribers, you will be first to get your hands on new In Color products. And that’s just the beginning of things to love about this kit!

A Kit In Color

  • Kit contains supplies for 12 cards and envelopes
  • 8 cards are traditional size
    • Card size: 4-1/4″ x 5-1/2″ (10.8 x 14 cm)
    • Envelope size: 4-1/2″ x 5-3/4″ (11.4 x 14.6 cm)
  • 4 cards are note card size
    • Notecard size: 5″ x 3-1/2″ (12.7 x 8.9 cm)
    • Envelope size: 5-1/8″ x 3-5/8″ (13 x 9.2 cm)

Coordinating Colors: Four NEW In Colors plus Purple Posy from the 2019–2021 In Color collection. (The new In Colors will be introduced on April 24.)

  • Subscribe for the May 2020 Paper Pumpkin kit from April 11–May 10 at paperpumpkin.com.
  • Supplies may be limited toward the end of the subscription period.
  • The In Color reveal happens April 24, so stay tuned!

****************************************************************************************************

The Ornate Garden Suite available NOW.  Click HERE or on the image below to see a printable PDF of all the fabulous items available in the suite.

****************************************************************************************************

ITEMS ALL AVAILABLE NOW 

Stampin’ Up! Have A Beautiful Day

Good Wednesday morning my stamping friends.  How has your week been going so far?

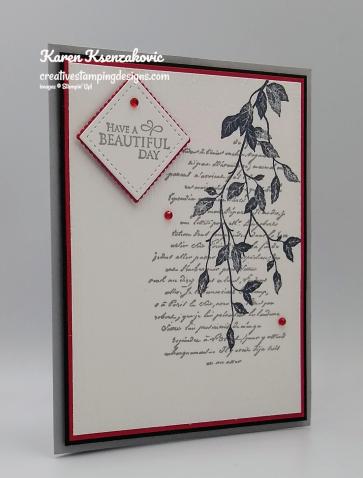
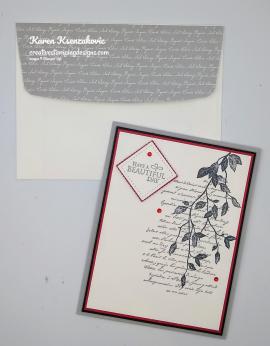
Today I was asked to be a Guest Star Stamper for Color Throwdown Challenge #589.  I am beyond thrilled to be doing this.  Here is the card I designed for their challenge today.

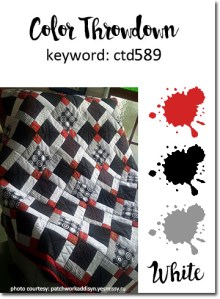
Here are the Color Throwdown Challenge #589 colors.

I started by stamped the script image from the Stampin’ Up! Very Versailles Cling Stamp Set in Smoky Slate Ink on a panel of Whisper White cardstock.  I stamped the leaf image from the Very Versailles stamp set in Tuxedo Black Memento Ink over the script image.  I embossed the panel using my Subtle 3D Embossing Folder.

I adhered the artwork to a Real Red mat using Multipurpose Liquid Glue and then to a Basic Black mat using Snail.  I adhered the matted artwork to a Smoky Slate card base using Stampin’ Dimensionals.

On a small piece of Whisper White cardstock I stamped the sentiment from the Very Versailles stamp set in Smoky Slate Ink.  I cut the image out using the smallest square from the Stitched Shapes Dies.  I cut a Real Red scalloped mat using the Layering Squares Dies.  I adhered the sentiment to the scalloped mat using Snail and then to the card front using Stampin’ Dimensionals.  I added a few Red Rhinestone Basic Jewels to the card front.

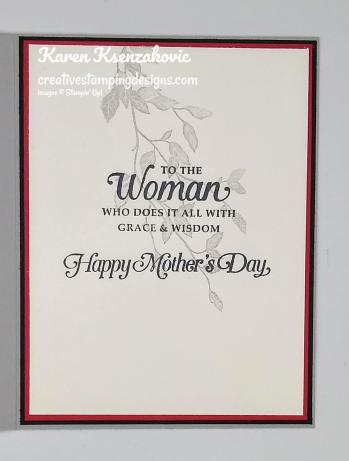
On the inside I stamped the sentiments from the Stampin’ Up! Strong & Beautiful Cling Stamp Set in Tuxedo Black Memento Ink in the center of a Whisper White panel.  I stamped the leaf image from the Very Versailles stamp set in Smoky Slate Ink over the sentiment, stamping off once.  I adhered the Whisper White panel to a Real Red mat using Snail and then to a Basic Black mat using Snail.  I adhered the matted panel to the inside of a Smoky Slate card base using Multipurpose Liquid Glue.

To finish my card I decorated a Medium Whisper White Envelope.  I stamped the script image from the Very Versailles stamp set in Smoky Slate Ink on the envelope front. I stamped the leaf image from the Very Versailles stamp set in Tuxedo Black Memento Ink over the script image on the envelope front.  I adhered a panel of Smoky Slate Neutrals 6 X 6 Designer Series Paper to the envelope flap.

Thank you for stopping by my blog today.  I hope you liked my card and will give it a try. Happy Stamping!!

****************************************************************************************************

If you need any stamping supplies, I’d love to be your Demonstrator. Just click HERE to go directly to my online store or drop me an email if you have any questions. 

MY CURRENT HOST CODE IS: 6WETZ6WW

Use this host code when you order $50 or greater and receive a free gift from me! If your order is over $150, please do not use this code, but you’ll still get the free gift. The free gift is your choice of any item valued up to $10.00 in either the 2019-2020 Annual Catalog or the 2020 January-June Mini Catalog!   For any orders $50 or more I will also send you my monthly class tutorials.  Click HERE or go to my Customer Rewards for more details and to see what this months tutorials are.

The Clearance Rack has been updated.  Click HERE to shop the clearance rack.

Happy Stamping, Karen!

****************************************************************************************************

MAY 2020 PAPER PUMPKIN:

DESIGNED WITH (IN) COLOR IN MIND

SUBSCRIBE APRIL 11- MAY 10

The Paper Pumpkin team loves planning fun surprises, so we’ve been VERY excited to let you know what we have in store for the month of May: a fabulous kit featuring 2020–2022 In Colors, plus Purple Posy, an In Color from the 2019–2021 collection. This means that as Paper Pumpkin subscribers, you will be first to get your hands on new In Color products. And that’s just the beginning of things to love about this kit!

A Kit In Color

  • Kit contains supplies for 12 cards and envelopes
  • 8 cards are traditional size
    • Card size: 4-1/4″ x 5-1/2″ (10.8 x 14 cm)
    • Envelope size: 4-1/2″ x 5-3/4″ (11.4 x 14.6 cm)
  • 4 cards are note card size
    • Notecard size: 5″ x 3-1/2″ (12.7 x 8.9 cm)
    • Envelope size: 5-1/8″ x 3-5/8″ (13 x 9.2 cm)

Coordinating Colors: Four NEW In Colors plus Purple Posy from the 2019–2021 In Color collection. (The new In Colors will be introduced on April 24.)

  • Subscribe for the May 2020 Paper Pumpkin kit from April 11–May 10 at paperpumpkin.com.
  • Supplies may be limited toward the end of the subscription period.
  • The In Color reveal happens April 24, so stay tuned!

****************************************************************************************************

INKIN’ KREW ORNATE GARDEN FACEBOOK EVENT – SATURDAY APRIL 18TH

Our team is hosting a fun event on Facebook on Saturday, April 18 from 1:00 PM ET until around 6:00 PM ET!

We’ll be sharing projects created with this pretty suite of products with you throughout the afternoon via Live videos and photos!

We’re setting up a Facebook page for the event and we’ll be opening it up on Thursday, April 16.  I’ll be sharing a link to the page on my blog and on my business Facebook page then so keep an eye out for the invitation coming soon!

Everyone is welcome to join us!  We look forward to sharing this beautiful suite of products with you!!

Let me know if you have questions.  See you all then!

****************************************************************************************************

The Ornate Garden Suite available NOW.  Click HERE or on the image below to see a printable PDF of all the fabulous items available in the suite.

****************************************************************************************************

Card stock cuts for this project:

  • Basic Black Cardstock 4″ X 5 1/4″ (card front mat), 4 1/8″ X 5 3/8″ (inner liner mat)
  • Real Red Cardstock 3 7/8″ X 5 1/8″ (card front), 4″ X 5 1/4″ (inner liner mat), 1 1/2″ X 1 1/2″ (sentiment mat)
  • Smoky Slate Cardstock 8 1/2″ X 5 1/2″ (card base scored and folded at 4 1/4″)
  • Whisper White Cardstock 3 3/4″ X 5″ (artwork), 3 7/8″ X 5 1/8″ (inner liner), 1 1/2″ X 1 1/2″ (sentiment)

****************************************************************************************************

Product List

Stampin’ Up! Updated Clearance Rack

DON’T WAIT, RUSH RIGHT OVER

This is my 2nd post today.  If you want to see my card click here.

Stampin’ Up! has updated the Clearance Rack with lot of new goodies!   Head over there quickly to get your hands on some awesome deals.  But hurry!!  Clearance Rack deals are only while supplies last!

I saw lots of Holiday Catalog designer series paper and embellishments as well as lots of dies and some card kits too!

****************************************************************************************************

If you need any stamping supplies, I’d love to be your Demonstrator. Just click HERE to go directly to my online store or drop me an email if you have any questions. 

MY CURRENT HOST CODE IS: 6WETZ6WW

Use this host code when you order $50 or greater and receive a free gift from me! If your order is over $150, please do not use this code, but you’ll still get the free gift. The free gift is your choice of any item valued up to $10.00 in either the 2019-2020 Annual Catalog or the 2020 January-June Mini Catalog!   For any orders $50 or more I will also send you my monthly class tutorials.  Click HERE or go to my Customer Rewards for more details and to see what this months tutorials are.

The Clearance Rack has been updated.  Click HERE to shop the clearance rack.

Happy Stamping, Karen!

****************************************************************************************************

MAY 2020 PAPER PUMPKIN:

DESIGNED WITH (IN) COLOR IN MIND

SUBSCRIBE APRIL 11- MAY 10

The Paper Pumpkin team loves planning fun surprises, so we’ve been VERY excited to let you know what we have in store for the month of May: a fabulous kit featuring 2020–2022 In Colors, plus Purple Posy, an In Color from the 2019–2021 collection. This means that as Paper Pumpkin subscribers, you will be first to get your hands on new In Color products. And that’s just the beginning of things to love about this kit!

A Kit In Color

  • Kit contains supplies for 12 cards and envelopes
  • 8 cards are traditional size
    • Card size: 4-1/4″ x 5-1/2″ (10.8 x 14 cm)
    • Envelope size: 4-1/2″ x 5-3/4″ (11.4 x 14.6 cm)
  • 4 cards are note card size
    • Notecard size: 5″ x 3-1/2″ (12.7 x 8.9 cm)
    • Envelope size: 5-1/8″ x 3-5/8″ (13 x 9.2 cm)

Coordinating Colors: Four NEW In Colors plus Purple Posy from the 2019–2021 In Color collection. (The new In Colors will be introduced on April 24.)

  • Subscribe for the May 2020 Paper Pumpkin kit from April 11–May 10 at paperpumpkin.com.
  • Supplies may be limited toward the end of the subscription period.
  • The In Color reveal happens April 24, so stay tuned!

****************************************************************************************************

INKIN’ KREW ORNATE GARDEN FACEBOOK EVENT – SATURDAY APRIL 18TH

Our team is hosting a fun event on Facebook on Saturday, April 18 from 1:00 PM ET until around 6:00 PM ET!

We’ll be sharing projects created with this pretty suite of products with you throughout the afternoon via Live videos and photos!

We’re setting up a Facebook page for the event and we’ll be opening it up on Thursday, April 16.  I’ll be sharing a link to the page on my blog and on my business Facebook page then so keep an eye out for the invitation coming soon!

Everyone is welcome to join us!  We look forward to sharing this beautiful suite of products with you!!

Let me know if you have questions.  See you all then!

****************************************************************************************************

The Ornate Garden Suite available NOW.  Click HERE or on the image below to see a printable PDF of all the fabulous items available in the suite.

****************************************************************************************************

Stampin’ Up! Hello Painted Poppies for Amy’s Inkin’ Krew Team Blog Hop

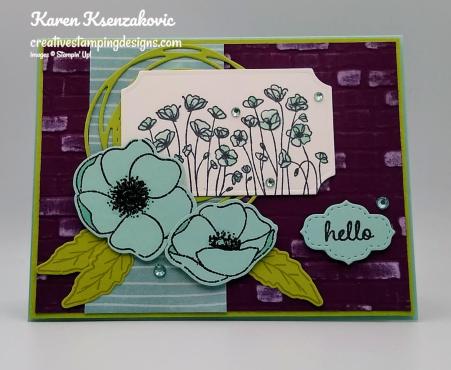
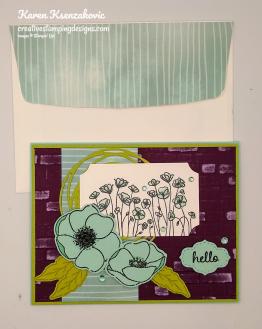
Good Tuesday morning my fellow stampers. Welcome to Amy’s Inkin’ Krew Team Blog Hop. It’s the 2nd Tuesday of the month so it’s Blog Hop Day!! If you are starting with me, be sure to hop around to see everyone’s beautiful projects. If you’ve hopped over from Amy Koenders blog, welcome to my blog and thank you for stopping by. The theme this month is “For the Girls/Ladies”. We can interpret this any way that we’d like.  I decided to make a Mother’s Day Card.  Here’s my card.

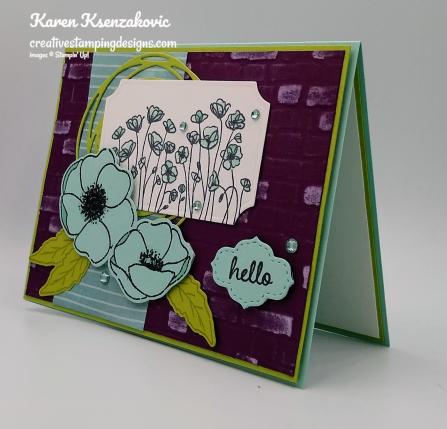
I started by embossing a panel of Blackberry Bliss using the Brick & Mortar 3D Embossing Folder.  I took my Whisper White Craft Stamp Pad and gently brushed it across the panel to add some dimension to the bricks. I adhered the embossed panel to a Pear Pizzazz mat using Multipurpose Liquid Glue.  I adhered a panel of Peaceful Poppies Designer Series Paper to the top of the embossed panel.

I stamped the poppy images from the Stampin’ Up! Painted Poppies Cling Stamp Set in Versamark Ink on a panel of Pool Party cardstock.  I immediately sprinkled it with my Black Stampin’ Emboss Powder and set it using my Heat Tool.  I cut the images out using the Painted Labels Dies.  I stamped the leaf image from the Painted Poppies stamp set in Pear Pizzazz Ink on a panel of Pear Pizzazz cardstock 3 times.  I cut the images out using my Painted Labels Dies.  I cut the swirly circle from the Painted Labels Dies out of the square of Pear Pizzazz cardstock and adhered it to the top of the DSP panel using Multipurpose Liquid Glue.

On a panel of Whisper White cardstock I stamped the small poppy image from the Painted Poppies stamp set in Tuxedo Black Memento Ink.  I colored the image in using my Pool Party Stampin’ Blends Markers and cut the image out using the frame from the Painted Labels Dies.  I adhered the artwork to the card front using Glue Dots.  I adhered the die cut poppies and leaves to the card front using Stampin’ Dimensionals and Glue Dots.  I stamped the sentiment from the Stampin’ Up! Timeless Tulips Photopolymer Stamp Set in Tuxedo Black Memento Ink on the Pool Party cardstock.  I cut the sentiment out using my Stitched So Sweetly Dies and adhered it to the card front using Stampin’ Dimensionals.  I added a few Coastal Cabana Holiday Rhinestone Basic Jewels to the card front.  I adhered the card front to the Pool Party card base using Stampin’ Dimensionals.

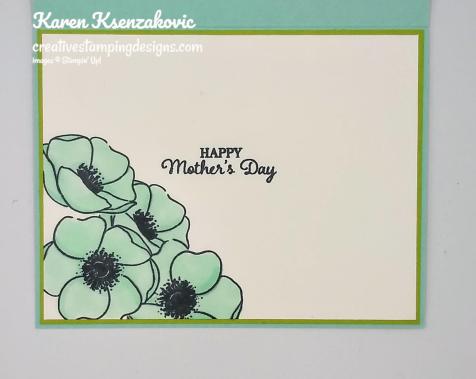
On the inside I stamped the sentiment form the Timeless Tulips stamp set in the center of a Whisper White panel.  I stamped the poppy images from the Painted Poppies stamp set in Tuxedo Black Memento Ink, using the masking technique, on the bottom left corner of the panel.  I colored the images in using my Pool Party Stampin’ Blends Markers.  I adhered the Whisper White panel to a Pear Pizzazz mat using Snail and then to the inside of the Pool Party card base using Multipurpose Liquid Glue.

To finish my card I decorated a Medium Whisper White Envelope.  I stamped the poppy images from the Painted Poppies stamp set in Tuxedo Black Memento Ink on the envelope front.  I colored the images in using my Pool Party Stampin’ Blends Markers.  I adhered a panel of Peaceful Poppies DSP to the envelope flap.

Thank you for visiting by my blog today. I hope you liked my card and will give it a try. Now that you’ve seen my card, be sure to hop around to see everyone’s beautiful projects. Hit Previous to hop back to Amy Koenders blog or hit Next to head over to Connie Troyer’s blog. You can also click on each of the names and hop around that way. Happy Hopping!!

  1. Karen Ksenzakovic –  You Are Here
  2. Connie Troyer –
  3. Mary Deatherage –
  4. Akiko Sudano –
  5. Leslie Larkin –
  6. Karen Finkle –
  7. Julie Johnston –
  8. Amy Koenders –

****************************************************************************************************

If you need any stamping supplies, I’d love to be your Demonstrator. Just click HERE to go directly to my online store or drop me an email if you have any questions. 

MY CURRENT HOST CODE IS: 6WETZ6WW

Use this host code when you order $50 or greater and receive a free gift from me! If your order is over $150, please do not use this code, but you’ll still get the free gift. The free gift is your choice of any item valued up to $10.00 in either the 2019-2020 Annual Catalog or the 2020 January-June Mini Catalog!   For any orders $50 or more I will also send you my monthly class tutorials.  Click HERE or go to my Customer Rewards for more details and to see what this months tutorials are.

The Clearance Rack has been updated.  Click HERE to shop the clearance rack.

Happy Stamping, Karen!

****************************************************************************************************

MAY 2020 PAPER PUMPKIN:

DESIGNED WITH (IN) COLOR IN MIND

SUBSCRIBE APRIL 11- MAY 10

The Paper Pumpkin team loves planning fun surprises, so we’ve been VERY excited to let you know what we have in store for the month of May: a fabulous kit featuring 2020–2022 In Colors, plus Purple Posy, an In Color from the 2019–2021 collection. This means that as Paper Pumpkin subscribers, you will be first to get your hands on new In Color products. And that’s just the beginning of things to love about this kit!

A Kit In Color

  • Kit contains supplies for 12 cards and envelopes
  • 8 cards are traditional size
    • Card size: 4-1/4″ x 5-1/2″ (10.8 x 14 cm)
    • Envelope size: 4-1/2″ x 5-3/4″ (11.4 x 14.6 cm)
  • 4 cards are note card size
    • Notecard size: 5″ x 3-1/2″ (12.7 x 8.9 cm)
    • Envelope size: 5-1/8″ x 3-5/8″ (13 x 9.2 cm)

Coordinating Colors: Four NEW In Colors plus Purple Posy from the 2019–2021 In Color collection. (The new In Colors will be introduced on April 24.)

  • Subscribe for the May 2020 Paper Pumpkin kit from April 11–May 10 at paperpumpkin.com.
  • Supplies may be limited toward the end of the subscription period.
  • The In Color reveal happens April 24, so stay tuned!

****************************************************************************************************

INKIN’ KREW ORNATE GARDEN FACEBOOK EVENT – SATURDAY APRIL 18TH

Our team is hosting a fun event on Facebook on Saturday, April 18 from 1:00 PM ET until around 6:00 PM ET!

We’ll be sharing projects created with this pretty suite of products with you throughout the afternoon via Live videos and photos!

We’re setting up a Facebook page for the event and we’ll be opening it up on Thursday, April 16.  I’ll be sharing a link to the page on my blog and on my business Facebook page then so keep an eye out for the invitation coming soon!

Everyone is welcome to join us!  We look forward to sharing this beautiful suite of products with you!!

Let me know if you have questions.  See you all then!

****************************************************************************************************

The Ornate Garden Suite available NOW.  Click HERE or on the image below to see a printable PDF of all the fabulous items available in the suite.

****************************************************************************************************

Card stock cuts for this project:

  • Blackberry Bliss Cardstock 4″ X 5 1/4″ (card front)
  • Pear Pizzazz Cardstock 2 – 4 1/8″ X 5 3/8″ (card front and inner liner mats), 3″ X 3″ (swirly circle), 1 1/2″ X 4″ (leaves)
  • Pool Party Cardstock 8 1/2″ X 5 1/2″ (card base scored and folded at 4 1/4″), 3″ X 4″ (flowers)
  • Whisper White Cardstock 2 1/2″ X 4″ (artwork), 4″ X 5 1/4″ (inner liner)
  • Peaceful Poppies Designer Series Paper 2″ X 4″ (card front panel), 2 1/4″ X 6″ (panel for envelope flap)

****************************************************************************************************

Product List

Stampin’ Up! Pastel Timeless Tulips CAS

Good Monday morning my fellow stampers.  How was everyone’s weekend?  I did enjoy my weekend off.  It was nice not to have to get up and have to leave for work for a few days.

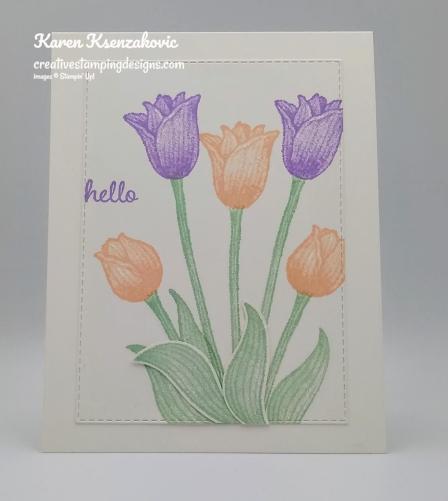
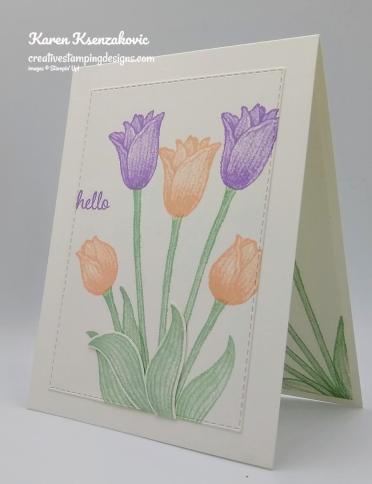
I have a Clean and Simple spring card for you today.  I’m not sure if I want to use this for a Birthday or Mother’s Day, so I left the sentiment pretty open.  Here’s today’s card.

My colors were inspired by CAS Colours & Sketch Challenge #365.  These colors just said springtime to me as soon as I saw them.  Here are their colors.

I joined in with Always Fun Challenges #158.  Their theme is “CAS (clean and simple)”.

I started by stamping the stem image from the Stampin’ Up! Timeless Tulips Photopolymer Stamp Set 5 times on a panel of Whisper White cardstock in Mint Macaron Ink.  I stamped the leaf image from the Timeless Tulips stamp set in Mint Macaron Ink on the stems and a couple on a scrap piece of Whisper White cardstock.  The leave on the scrap cardstock I cut out using the Tulip Builder Punch.

I stamped the medium tulip image and the small tulip image from the Timeless Tulips stamp set on the stems in Highland Heather and Petal Pink Inks.  I cut the image out using the 2nd largest die from the Stitched Rectangle Dies.  I adhered the punched out leaves to the stems using Glue Dots.

I stamped the sentiment from the Timeless Tulips stamp set in Highland Heather Ink on the left side of the panel.  I adhered the artwork to a Thick Whisper White card base using Snail.

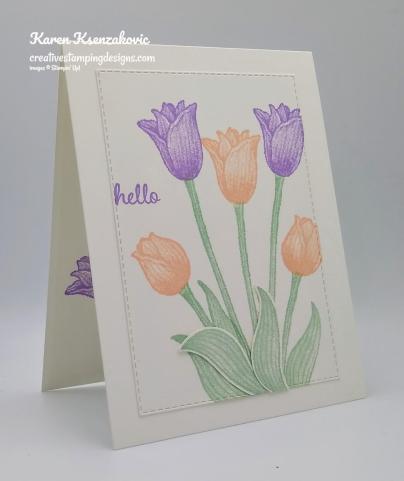
On the inside I stamped the sentiment from the Timeless Tulips stamp set in Highland Heather Ink in the center of a Whisper White panel.  I stamped the stem image from the Timeless Tulips stamp set in Mint Macaron Ink on the bottom of the panel 4 times.  I stamped the leaf image from the Timeless Tulips stamp set in Mint Macaron Ink on either side of the stems.  I stamped the medium and small tulip images from the Timeless Tulips stamp set in Highland Heather and Petal Pink Inks on the stems.  I adhered the Whisper White panel to the inside of the Whisper White card base using Multipurpose Liquid Glue.

To finish my card I decorated a Medium Whisper White Envelope.  I stamped the stem image from the Timeless Tulips stamp set 3 times on the envelope front in Mint Macaron Ink.  I stamped the leaf image from the Timeless Tulips stamp set on the stems in Mint Macaron Ink.  I stamped the medium tulip image from the Timeless Tulips stamp set in Highland Heather and Petal Pink Inks on the stems.  I adhered a panel of Perennial Essence Designer Series Paper to the envelope flap.

Thank you for stopping by my blog today.  I hope you liked my card and will give it a try. Happy Stamping!!

****************************************************************************************************

If you need any stamping supplies, I’d love to be your Demonstrator. Just click HERE to go directly to my online store or drop me an email if you have any questions. 

MY CURRENT HOST CODE IS: 6WETZ6WW

Use this host code when you order $50 or greater and receive a free gift from me! If your order is over $150, please do not use this code, but you’ll still get the free gift. The free gift is your choice of any item valued up to $10.00 in either the 2019-2020 Annual Catalog or the 2020 January-June Mini Catalog!   For any orders $50 or more I will also send you my monthly class tutorials.  Click HERE or go to my Customer Rewards for more details and to see what this months tutorials are.

Click HERE to shop the clearance rack.

Happy Stamping, Karen!

****************************************************************************************************

MAY 2020 PAPER PUMPKIN:

DESIGNED WITH (IN) COLOR IN MIND

SUBSCRIBE APRIL 11- MAY 10

The Paper Pumpkin team loves planning fun surprises, so we’ve been VERY excited to let you know what we have in store for the month of May: a fabulous kit featuring 2020–2022 In Colors, plus Purple Posy, an In Color from the 2019–2021 collection. This means that as Paper Pumpkin subscribers, you will be first to get your hands on new In Color products. And that’s just the beginning of things to love about this kit!

A Kit In Color

  • Kit contains supplies for 12 cards and envelopes
  • 8 cards are traditional size
    • Card size: 4-1/4″ x 5-1/2″ (10.8 x 14 cm)
    • Envelope size: 4-1/2″ x 5-3/4″ (11.4 x 14.6 cm)
  • 4 cards are note card size
    • Notecard size: 5″ x 3-1/2″ (12.7 x 8.9 cm)
    • Envelope size: 5-1/8″ x 3-5/8″ (13 x 9.2 cm)

Coordinating Colors: Four NEW In Colors plus Purple Posy from the 2019–2021 In Color collection. (The new In Colors will be introduced on April 24.)

  • Subscribe for the May 2020 Paper Pumpkin kit from April 11–May 10 at paperpumpkin.com.
  • Supplies may be limited toward the end of the subscription period.
  • The In Color reveal happens April 24, so stay tuned!

****************************************************************************************************

INKIN’ KREW ORNATE GARDEN FACEBOOK EVENT – SATURDAY APRIL 18TH

Our team is hosting a fun event on Facebook on Saturday, April 18 from 1:00 PM ET until around 6:00 PM ET!

We’ll be sharing projects created with this pretty suite of products with you throughout the afternoon via Live videos and photos!

We’re setting up a Facebook page for the event and we’ll be opening it up on Thursday, April 16.  I’ll be sharing a link to the page on my blog and on my business Facebook page then so keep an eye out for the invitation coming soon!

Everyone is welcome to join us!  We look forward to sharing this beautiful suite of products with you!!

Let me know if you have questions.  See you all then!

****************************************************************************************************

The Ornate Garden Suite available NOW.  Click HERE or on the image below to see a printable PDF of all the fabulous items available in the suite.

****************************************************************************************************

Card stock cuts for this project:

  • Whisper White Cardstock 2 – 4″ X 5 1/4″ (card front and inner liner)
  • Thick Whisper White Cardstock 4 1/4″ X 11″ (card base scored and folded at 5 1/2″)
  • Perennial Essence Designer Series Paper 2 1/4″ X 6″ (piece for envelope flap)

****************************************************************************************************

Product List

Stampin’ Up! Perennial Easter Promise

Good Sunday morning and Happy Easter to all my stamping friends.  How is everyone doing this morning?

I have another Easter card for you today that my son’s girlfriend asked me to make for her.  It seemed appropriate for today.  Here’s today’s card.

My card was inspired by Global Design Project Theme Challenge #235.  Here is their theme.

I also played along with Watercooler Wednesday Challenge #266. Here is their challenge.

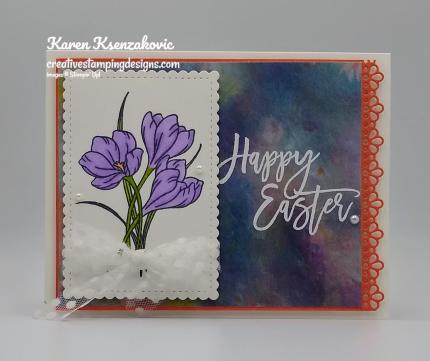
I started by cutting the edge of a Calypso Coral card front mat using the new Ornate Borders Dies.

On a panel of Perennial Essence Designer Series Paper I stamped the sentiment from the Stampin’ Up! Easter Promise Cling Stamp Set in Versamark Ink.  I immediately sprinkled it with my White Stampin’ Emboss Powder and set it using my Heat Tool.  I adhered the DSP to the die cut mat using Snail and then to a Whisper White card base using Stampin’ Dimensionals.

On a small panel of Whisper White cardstock I stamped the crocus image from the Easter Promise stamp set in Tuxedo Black Memento Ink.  I colored the image in using my Light Calypso Coral, Granny Apple Green and Highland Heather Stampin’ Blends Markers.  I cut the image out using my Stitched So Sweetly Dies.  I wrapped a piece of Whisper White Polka Dot Tulle Ribbon around the artwork and tied a bow.  I adhered the artwork to the card front using Stampin’ Dimensionals.  I added a few Pearl Basic Jewels to the card front.

On the inside I stamped the sentiment from the Easter Promise stamp set in Tuxedo Black Memento Ink in the center of a Whisper White panel.  I stamped the cross image from the Easter Promise stamp set in Highland Heather Ink above the sentiment.  I colored the leaves on the vine with my Light Granny Apple Green Stampin’ Blends Marker.  I adhered the Whisper White panel to a Calypso Coral mat using Snail and then to the inside of the Whisper White card base using Multipurpose Liquid Glue.

To finish my card I decorated a Medium Whisper White Envelope.  I stamped the crocus image from the Easter Promise stamp set in Tuxedo Black Memento Ink on the bottom front of the envelope and colored it in using my Light Calypso Coral, Granny Apple Green and Highland Heather Stampin’ Blends Markers.  I adhered a panel of the Perennial Essence DSP to the envelope flap.

Thank you for stopping by my blog today.  I hope you liked my card and will give it a try. I hope you all have a wonderful Easter, despite the circumstances.  Enjoy the rest of your weekend and I’ll see you tomorrow.  Happy Stamping!!

****************************************************************************************************

If you need any stamping supplies, I’d love to be your Demonstrator. Just click HERE to go directly to my online store or drop me an email if you have any questions. 
MY CURRENT HOST CODE IS: 6WETZ6WW

Use this host code when you order $50 or greater and receive a free gift from me! If your order is over $150, please do not use this code, but you’ll still get the free gift. The free gift is your choice of any item valued up to $10.00 in either the 2019-2020 Annual Catalog or the 2020 January-June Mini Catalog!   For any orders $50 or more I will also send you my monthly class tutorials.  Click HERE or go to my Customer Rewards for more details and to see what this months tutorials are.
Click HERE to shop the clearance rack.

Happy Stamping, Karen!

****************************************************************************************************

INKIN’ KREW ORNATE GARDEN FACEBOOK EVENT – SATURDAY APRIL 18TH

Our team is hosting a fun event on Facebook on Saturday, April 18 from 1:00 PM ET until around 6:00 PM ET!

We’ll be sharing projects created with this pretty suite of products with you throughout the afternoon via Live videos and photos!

We’re setting up a Facebook page for the event and we’ll be opening it up on Thursday, April 16.  I’ll be sharing a link to the page on my blog and on my business Facebook page then so keep an eye out for the invitation coming soon!

Everyone is welcome to join us!  We look forward to sharing this beautiful suite of products with you!!

Let me know if you have questions.  See you all then!

****************************************************************************************************

The Ornate Garden Suite available NOW.  Click HERE or on the image below to see a printable PDF of all the fabulous items available in the suite.

****************************************************************************************************

Card stock cuts for this project:

  • Calypso Coral Cardstock 2 – 4″ X 5 1/4″ (card front and inner liner mat)
  • Whisper White Cardstock 8 1/2″ X 5 1/2″ (card base scored and folded at 4 1/4″), 4 1/2″ X 3″ (artwork), 3 7/8″ X 5 1/8″ (inner liner)
  • Perennial Essence Designer Series Paper 3 7/8″ X 4 13/16″ (card front), 2 1/4″ X 6″ (piece for envelope flap)

**************************************************************************************************** Product List