Stampin’ Up Floral Essence Sneak Peek

Good Friday morning my fellow stampers.  Well the weekend is here ready or not.  Has anyone made any fun plans?  I’m really hoping, in between working, to supervise getting some of my flowers in the ground.  I’m still with 1 arm and can’t seem to get the digging down properly yet.  I’ve mastered quite a bit 1 handed, most importantly card making.

So I have a little sneak peek for you today.  I’ve used a new stamp set coming in the 2019-2020 Annual Catalog.  If you don’t have a demonstrator and would like a catalog, drop me a line and I’d be happy to send one out to you.  Here’s my card for today.
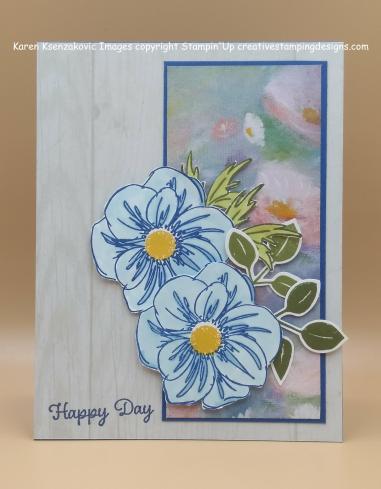
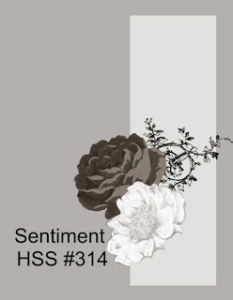
I’ve used a tiny bit of old and a whole lot of new on my card.  I’ve also played along with Hand Stamped Sentiments challenge #314.  Here’s their sketch.
I started with a panel of the soon to retire Petal Promenade Designer Series Paper and adhered it to a Blueberry Bushel card base using Multipurpose Liquid Glue.

I adhered a panel of the gorgeous new Perennial Essence Designer Series Paper to a mat of Blueberry Bushel using Multipurpose Liquid Glue.  I adhered the matted DSP to the card front using Multipurpose Liquid Glue.  I stamped the sentiment from the Stampin’ Up Itty Bitty Birthdays Cling Stamp Set in Blueberry Bushel Ink to the left of the matted DSP.
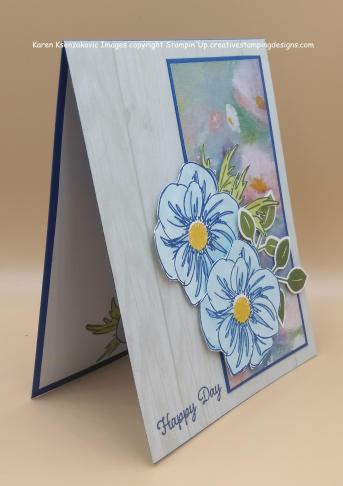
On a scrap piece of Whisper White cardstock I stamped the flower from the new Stampin’ Up Floral Essence Photopolymer Stamp Set in Blueberry Bushel Ink.  I stamped the inside of the flowers in Crushed Curry Ink.  I stamped the leaf images from the same stamp set in Mossy Meadow and Old Olive Inks.  I colored the flowers in using my Balmy Blue Stampin’ Blends Markers.  I colored the leaf image in using my Old Olive Stampin’ Blends Markers.  I fussy cut the flowers and the smaller leaf image out using my Paper Snips.  I punched the larger leaf image out using my Leaf Punch.  I arranged the flowers and leaves how I liked them on the card front and adhered them with Glue Dots and Stampin’ Dimensionals.

On the inside I stamped a couple flowers from the Floral Essence stamp set on the bottom corner of a Whisper White panel in Blueberry Bushel Ink using the masking technique.  I stamped the leaves from the same stamp set in Old Olive Ink and the flower centers in Crushed Curry Ink.  I colored the flowers in using my Balmy Blue Stampin’ Blends Markers and the leaves in using my Old Olive Stampin’ Blends Markers.  I stamped the sentiment from the same stamp set in Blueberry Bushel Ink in the center of the panel.  I adhered the Whisper White panel to the inside of the Blueberry Bushel card base using Multipurpose Liquid Glue.

To finish my card I decorated a Medium Whisper White Envelope.  I stamped the flowers from the Floral Essence stamp set on the envelope front and colored them in the same as I did for the card.  I adhered a panel of the Perennial Essence DSP to the envelope flap.

Thank you for stopping by my blog today.  I hope you liked my card.  These products will be available on June 4th if you are interested in them.  It’s truly a beautiful suite.  Happy Stamping!!

****************************************************************************************************

If you need any stamping supplies, I’d be very happy to be your Demonstrator.  Just click here to go directly to my online store or drop me an email if you have any questions.

The Clearance Rack has been updated with lots of new deals! So check it out

Click here to shop the clearance rack.

MY CURRENT HOST CODE IS: 4WY7GYTC

Happy Stamping, Karen!

****************************************************************************************************

If you are interested in joining my team click here for details or email me.  I’d love to have you on my team.

****************************************************************************************************

Share A Little Love – June Paper Pumpkin Kit!
Care about someone? Why not tell them?

The Paper Pumpkin June kit makes it easy for you to scatter sunshine this summer—whenever, with whomever. Not only do we give you 16 fun-sized, beach-themed cards and envelopes, but the kit also includes an exclusive carrying case so you’ll always have your cards on hand to share wherever you go. And don’t forget the exclusive stamp set and ink spot that completes every Paper Pumpkin kit!!

More about the June Kit:

  • In order to receive the June Paper Pumpkin Kit, you must have an active subscription by June 10 at 11:50 PM (MT).
  • The kit creates 16 fun-sized, beach-themed cards and envelopes.
  • Coordinating colors: Coastal Cabana, Crumb Cake, and Old Olive

Check out the quick video created by Stampin’ Up! with some sneak peaks of the June kit!
If you’re interested in subscribing to Paper Pumpkin yourself, you can either sign up for a subscription where you are billed monthly for your kit or you can purchase a prepaid subscription in my online store.  To see more information and to sign up for the monthly subscription, click here.  To see the options for prepaid subscriptions in my online store, click here.  Let me know if you have any questions.

****************************************************************************************************

Stampin’ Up! has posted their retiring lists for the 2018-19 Annual Catalog and 2019 Occasions Catalog.  Head over to my online store to pick up those retiring items now!  They’re only available while supplies last from now through June 3!

A few notes about the lists:

  • Due to high demand for retiring stamp sets, these items will have guaranteed availability until May 24; all other products are not guaranteed and are available while supplies last only.
  • Order deadline to get the retiring products:  June 3, 2019; 11:50 PM (MT)

Please note, some of the bundle items may be carrying over into the new 2019-2020 Annual Catalog.  However, the bundle pricing will go away, so get them while you can at the discounted price!!

Stampin’ Up! Retirement List Clarification

It looks like every single stamp set from the 2018-19 Annual Catalog is being retired and that isn’t the case, the carryover sets are being transitioned to Cling Mount.

The stamp sets offered in clear-mount or wood-mount in the 2018–2019 annual catalog that are carrying over into the 2019–2020 annual catalog will be offered in clear-mount and/or wood-mount until existing inventory has been depleted or until June 4, 2019 (whichever comes first).

If the inventory is depleted, you will be notified of the automatic switch to cling when placing an order for that stamp set. This means that you may end up purchasing select cling stamp sets (in carryover artwork) before they can be ordered from the catalog!  All carryover rubber stamp sets will be available in cling medium only (with the exception of background stamps in North America) beginning June 4, 2019.

You can download copies of the full retiring lists in PDF Form here:

  • Click here to get a copy of the full retiring list from the Occasions Catalog.
  • Click here to get a copy of the full retiring list from the 2018-19 Annual Catalog.

****************************************************************************************************

EVERYTHING IS ROSY PRODUCE MEDLEY – AVAILABLE NOW!!

WHAT IS A PRODUCT MEDLEY?

Product medleys are new to Stampin’ Up!. In addition to being filled to the brim with cute, coordinating products, we’ve designed our product medleys to provide you with endless creative possibilities.

The Everything Is Rosy Product Medley includes these exclusive products:

  • Everything Is Rosy Photopolymer Stamp Set—18 stamps
  • Everything Is Rosy Dies—10 dies; largest die 2-7/8″ x 1″
  • 6″ x 6″ Designer Series Paper Stack—48 sheets; 8 each of 6 double-sided designs
  • 6″ x 6″ rose gold foil paper—8 sheets
  • Printed die cuts—2 sheets
  • Rose gold die cuts—4 sheets; 2 each of 2 designs
  • Rose gold adhesive backed mirror embellishments—60 embellishments; 1/4″
  • Melon Mambo 1/4″ Ruched Ribbon—10 yards
  • Night of Navy/Rose Gold 3/8″ Metallic –Edge Ribbon—10 yards
  • Rose Gold Shimmer Paint—1/2 oz.

Sales Period: May 1–31, 2019 while supplies last!

Click the image below to head over to my online store to get yours now!
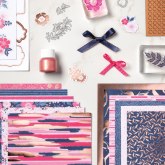
Everything is Rosy Product Medely  [150059] $80.00

****************************************************************************************************

Card stock cuts for this project:

  • Blueberry Bushel Cardstock 4 1/4″ X 11″ (card base scored and folded at 5 1/2″), 2 1/4″ X 5″ (card front panel mat)
  • Whisper White Cardstock 4″ X 5 1/4″ (inner liner) scraps for flowers and leaves.
  • Perennial Essence Designer Series Paper 2 1/8″ X 4 7/8″ (front panel), piece for envelope flap
  • Petal Promenade Designer Series Paper 4 1/4″ X 5 1/2″ (card front)

****************************************************************************************************

Product List

Stampin’ Up Life Is Grand

Good Friday morning my fellow stampers.  Well we made it through another week.  Is anyone doing anything fun this weekend?

For today’s card I’m using the soon to retire Stampin’ Up Life Is Grand Stamp Set and Share What You Love Specialty Designer Series Paper.  I’m also giving you a sneak peek of one of the new dies in the up coming 2019-2020 Annual Catalog. I’ve got a really quick and easy card for you here.  Here’s my card.

I started with a panel of the Share What You Love Specialty Designer Series Paper as a card front and wrapped a piece of the Rich Razzleberry 1/4″ Velvet Ribbon (retiring June 3rd) around it.  I adhered the card front to a Mint Macaron card base using Multipurpose Liquid Glue.

On a small piece of Whisper White cardstock I stamped the sentiment from Life Is Grand stamp set in Rich Razzleberry Ink.  I cut the sentiment out using my Big Shot and the NEW Stitched Nested Labels Dies (available June 4th).  I adhered the label to the card front using Stampin’ Dimensionals.

I added a few Share What You Love Artisan Pearls (retiring June 3rd) to it along with a piece of the 1/4″ Velvet Ribbon tied into a knot.

On the inside I stamped a sentiment from the Life Is Grand stamp set in Rich Razzleberry Ink in the center of a Whisper White panel.  I added a strip of the Share What You Love Specialty DSP to the bottom of the panel using Snail.  I adhered the Whisper White panel to the inside of the Mint Macaron card base using Multipurpose Liquid Glue.

To finish my card I decorated a Medium Whisper White Envelope.  I adhered a piece of the Share What You Love Specialty DSP to the envelope front and envelope flap.

Thank you for visiting my blog today.  I hope you liked my quick and easy card and will give it a try.  Happy Stamping!!

****************************************************************************************************

If you need any stamping supplies, I’d be very happy to be your Demonstrator.  Just click here to go directly to my online store or drop me an email if you have any questions.

The Clearance Rack has been updated with lots of new deals! So check it out

Click here to shop the clearance rack.

MY CURRENT HOST CODE IS: 4WY7GYTC

Happy Stamping, Karen!

****************************************************************************************************

If you are interested in joining my team click here for details or email me.  I’d love to have you on my team.

****************************************************************************************************

If you’re on my mailing list I will be sending you a catalog as soon as I get them the beginning of May. If you want to be on my mailing list, you must have placed an order of $50 or more before May 1st 2019.

****************************************************************************************************

Stampin’ Up! has posted their retiring lists for the 2018-19 Annual Catalog and 2019 Occasions Catalog.  Head over to my online store to pick up those retiring items now!  They’re only available while supplies last from now through June 3!

A few notes about the lists:

  • Due to high demand for retiring stamp sets, these items will have guaranteed availability until May 24; all other products are not guaranteed and are available while supplies last only.
  • Order deadline to get the retiring products:  June 3, 2019; 11:50 PM (MT)

Please note, some of the bundle items may be carrying over into the new 2019-2020 Annual Catalog.  However, the bundle pricing will go away, so get them while you can at the discounted price!!

Stampin’ Up! Retirement List Clarification

It looks like every single stamp set from the 2018-19 Annual Catalog is being retired and that isn’t the case, the carryover sets are being transitioned to Cling Mount.

The stamp sets offered in clear-mount or wood-mount in the 2018–2019 annual catalog that are carrying over into the 2019–2020 annual catalog will be offered in clear-mount and/or wood-mount until existing inventory has been depleted or until June 4, 2019 (whichever comes first).

If the inventory is depleted, you will be notified of the automatic switch to cling when placing an order for that stamp set. This means that you may end up purchasing select cling stamp sets (in carryover artwork) before they can be ordered from the catalog!  All carryover rubber stamp sets will be available in cling medium only (with the exception of background stamps in North America) beginning June 4, 2019.

You can download copies of the full retiring lists in PDF Form here:

  • Click here to get a copy of the full retiring list from the Occasions Catalog.
  • Click here to get a copy of the full retiring list from the 2018-19 Annual Catalog.

****************************************************************************************************

About the “Shelli” Kit

Shelli Gardner worked closely with designers and concept artists to create a Paper Pumpkin kit that is uniquely hers. It includes an exclusive photopolymer stamp set, paper and crafting materials to create 12 mailable cards (3 cards of 4 unique designs), 12 exclusive, coordinating envelopes, and a Classic Stampin’ Spot.

Coordinating colors: Crumb Cake, Early Espresso, Old Olive, Petal Pink, Pool Party, Pretty Peacock, Soft Suede, and Very Vanilla

  • In order to receive the Hugs from Shelli kit, the subscriber must have an active subscription by May 10 at 11:50 PM (MT).
  • Supplies may be limited toward the end of the subscription period.

Don’t miss out on the May Paper Pumpkin.  Click HERE to subscribe.

****************************************************************************************************

Card stock cuts for this project:

  • Mint Macaron Cardstock 8 1/2″ X 5 1/2″ (card base scored and folded at 4 1/4″)
  • Whisper White Cardstock 4 1/4″ X 2 1/2″ (artwork), 4″ X 5 1/4″ (inner liner)
  • Share What You Love Specialty Designer Series Paper 4 1/4″ X 5 1/2″ (card front). 3/4″ X 4″ (piece for bottom of inner liner), pieces for envelope front and flap

****************************************************************************************************

Product List

Stampin’ Up Sailing Home Sneak Peek

Good Wednesday morning my fellow stampers and Happy May Day everyone! .  We’re half way through the week and on our way to the weekend.  I can’t believe it’s May already. Before you know it, Memorial Day will be here.

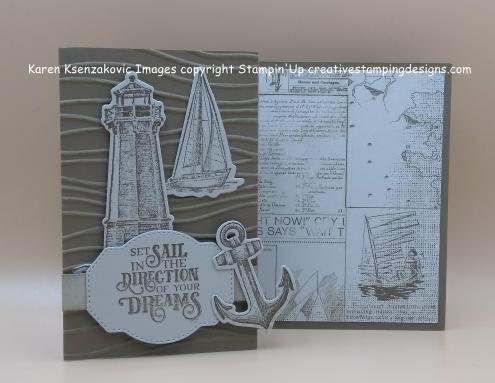
For today’s card I have a little sneak peek for you from the up coming 2019-2020 Annual Catalog.  It’s the Stampin’ Up Sailing Home Bundle.  This was the first set that caught my eye and I just had to have it.  I’ve also made a fun fold card for you.  Here’s my card.

I joined in with the TGIF Inspiration Challenge #209 .  Here’s their challenge.

I started with a Soft Suede card base and scored it at 5 1/2″ and 2 3/4″.  I adhered a panel of the up coming Come Sail Away Designer Series Paper to the inside.  I just love news print paper on cards.

I took a small panel of the Soft Suede cardstock and ran it through my Big Shot using the Seaside Textured Impressions Embossing Folder.  This folder will be retiring as of June 3rd, so now’s the time to grab it if it’s something you’ve been wanting.  I stamped the anchor, lighthouse, sailboat and sentiment images from the Sailing Home stamp set in Soft Suede Ink on a panel of Sahara Sand cardstock.  I then cut them out using the Smooth Sailing Dies.  I also cut a strip of Sahara Sand cardstock and sponged it with Soft Suede Ink using my Stamping Sponge.

I arranged the pieces the way I wanted to on the embossed panel.  I adhered them using Glue Dots and Stampin’ Dimensionals.  I adhered the card front to the front panel of the card base using Multipurpose Liquid Glue.

On the small inside panel I adhered a piece of Sahara Sand cardstock using Multipurpose Liquid Glue.  I stamped the sentiment from the Stampin’ Up High Tide Stamp Set in Soft Suede Ink.  I stamped the grass and birds from the same stamp set on the bottom of the panel in Sahara Sand Ink stamping off once.

To finish my card I decorated a Medium Very Vanilla Envelope.  I started by sponging all around the front and back of the envelope with Soft Suede Ink and my Stamping Sponge.  I stamped the lighthouse and sailboat from the Sailing Home stamp set in Soft Suede Ink.  I adhered a panel of the Come Sail Away DSP to the envelope flap.

Thank you for stopping by my blog today.  I hope that you liked my card.  This stamp set, dies and DSP will all be available June 4th for purchase.  Happy Stamping!!

****************************************************************************************************

If you need any stamping supplies, I’d be very happy to be your Demonstrator.  Just click here to go directly to my online store or drop me an email if you have any questions.

The Clearance Rack has been updated with lots of new deals! So check it out

Click here to shop the clearance rack.

MY CURRENT HOST CODE IS: 4WY7GYTC

Happy Stamping, Karen!

****************************************************************************************************

If you are interested in joining my team click here for details or email me.  I’d love to have you on my team.

****************************************************************************************************

If you’re on my mailing list I will be sending you a catalog as soon as I get them the beginning of May. If you want to be on my mailing list, you must have placed an order of $50 or more before May 1st 2019.

****************************************************************************************************

Stampin’ Up! has posted their retiring lists for the 2018-19 Annual Catalog and 2019 Occasions Catalog.  Head over to my online store to pick up those retiring items now!  They’re only available while supplies last from now through June 3!

A few notes about the lists:

  • Due to high demand for retiring stamp sets, these items will have guaranteed availability until May 24; all other products are not guaranteed and are available while supplies last only.
  • Order deadline to get the retiring products:  June 3, 2019; 11:50 PM (MT)

Please note, some of the bundle items may be carrying over into the new 2019-2020 Annual Catalog.  However, the bundle pricing will go away, so get them while you can at the discounted price!!

Stampin’ Up! Retirement List Clarification

It looks like every single stamp set from the 2018-19 Annual Catalog is being retired and that isn’t the case, the carryover sets are being transitioned to Cling Mount.

The stamp sets offered in clear-mount or wood-mount in the 2018–2019 annual catalog that are carrying over into the 2019–2020 annual catalog will be offered in clear-mount and/or wood-mount until existing inventory has been depleted or until June 4, 2019 (whichever comes first).

If the inventory is depleted, you will be notified of the automatic switch to cling when placing an order for that stamp set. This means that you may end up purchasing select cling stamp sets (in carryover artwork) before they can be ordered from the catalog!  All carryover rubber stamp sets will be available in cling medium only (with the exception of background stamps in North America) beginning June 4, 2019.

You can download copies of the full retiring lists in PDF Form here:

  • Click here to get a copy of the full retiring list from the Occasions Catalog.
  • Click here to get a copy of the full retiring list from the 2018-19 Annual Catalog.

****************************************************************************************************

About the “Shelli” Kit

Shelli Gardner worked closely with designers and concept artists to create a Paper Pumpkin kit that is uniquely hers. It includes an exclusive photopolymer stamp set, paper and crafting materials to create 12 mailable cards (3 cards of 4 unique designs), 12 exclusive, coordinating envelopes, and a Classic Stampin’ Spot.

Coordinating colors: Crumb Cake, Early Espresso, Old Olive, Petal Pink, Pool Party, Pretty Peacock, Soft Suede, and Very Vanilla

  • In order to receive the Hugs from Shelli kit, the subscriber must have an active subscription by May 10 at 11:50 PM (MT).
  • Supplies may be limited toward the end of the subscription period.

Don’t miss out on the May Paper Pumpkin.  Click HERE to subscribe.

****************************************************************************************************

Card stock cuts for this project:

  • Sahara Sand Cardsock 3 7/8″ X 2 3/8″ (inner liner) scraps for all cut out pieces
  • Soft Suede Cardstock 4 1/4″ X 11″ (card base scored and folded at 5 1/2″&2 3/4″), 4 1/4″ X 2 3/4″ (embossed card front)
  • Come Sail Away Designer Series Paper 4″ X 5 1/4″(inside card base), piece for envelope flap

****************************************************************************************************

Product List

Stampn’ Up Daisy Lane Sneak Peek

Good Wednesday morning my fellow stampers.  How are you all doing?

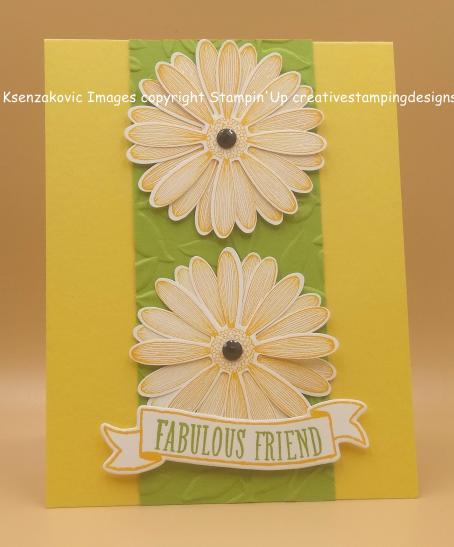
I’ve got a little sneak peek for you of one of the new stamp sets coming in the 2019-2020 Annual Catalog.  It’s the Stampin’ Up Daisy Lane Stamp Set.  If you like daisies, you’ll love this set.  Here’s my card.

I played along with 2 challenges with my card today.

CAS(E) This Sketch #318  Here is their sketch.

Just Us Girls color week #484.  Here are their colors

I started by running a panel of Granny Apple Green through my Big Shot using the Layered Leaves 3D Embossing Folder.  I adhered the embossed panel to a  Daffodil Delight card base using Multipurpose Liquid Glue.

Next on some scraps of Whisper White cardstock I stamped the daisy image from the Daisy Lane stamp set in Mango Melody Ink multiple times.  I punched the daisies out using my Daisy Punch.  I layered the daisies together using Glue Dots.

I adhered the daisies to the card front using Stampin’ Dimensionals and added a Basic Black Faceted Dot in the center of each daisy.  On another scrap of Whisper White cardstock I stamped the sentiment from the Stampin’ Up Banners For You Stamp Set (retiring in June).  I stamped the banner in Mango Melody Ink and the sentiment in Granny Apple Green Ink.  I cut the banner out using my Big Shot and the soon to retire Bunch Of Banners Framelits Dies.  I adhered the banner over the bottom daisy using double Stampin’ Dimensionals so that it wasn’t squashing the daisy.

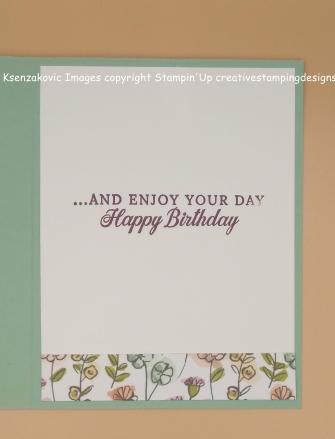
On the inside I stamped the stem from the Daisy Lane stamp set in Granny Apple Green Ink stamping off once on a Whisper White panel.  I stamped another daisy blossom from the same stamp set in Mango Melody Ink stamping off once.  I stamped the sentiment from the same stamp set in Granny Apple Green Ink over the daisy blossom.  I adhered the Whisper White panel to the inside of the Daffodil Delight card base using Multipurpose Liquid Glue.

To finish my card I decorated a Medium Whisper White Envelope.  I stamped the daisy blossom image from the Daisy Lane stamp set in Mango Melody Ink on the envelope front and the envelope flap.

Thank you for visiting my blog today.  I hope you liked my sneak peek of one of the up coming stamp sets that will be available June 4, 2019.  Happy Stamping!!

****************************************************************************************************

If you need any stamping supplies, I’d be very happy to be your Demonstrator.  Just click here to go directly to my online store or drop me an email if you have any questions.

The Clearance Rack has been updated with lots of new deals! So check it out

Click here to shop the clearance rack.

MY CURRENT HOST CODE IS: 7923DX9M

Happy Stamping, Karen!

****************************************************************************************************

If you are interested in joining my team click here for details or email me.  I’d love to have you on my team.

****************************************************************************************************

If you’re on my mailing list I will be sending you a catalog as soon as I get them the beginning of May. If you want to be on my mailing list, you must have placed an order of $50 or more before May 1st 2019.

****************************************************************************************************

Stampin’ Up! has posted their retiring lists for the 2018-19 Annual Catalog and 2019 Occasions Catalog.  Head over to my online store to pick up those retiring items now!  They’re only available while supplies last from now through June 3!

A few notes about the lists:

  • Due to high demand for retiring stamp sets, these items will have guaranteed availability until May 24; all other products are not guaranteed and are available while supplies last only.
  • Order deadline to get the retiring products:  June 3, 2019; 11:50 PM (MT)

Click the images below to head over to shop the specific retiring items:

Please note, some of the bundle items may be carrying over into the new 2019-2020 Annual Catalog.  However, the bundle pricing will go away, so get them while you can at the discounted price!!

Stampin’ Up! Retirement List Clarification

It looks like every single stamp set from the 2018-19 Annual Catalog is being retired and that isn’t the case, the carryover sets are being transitioned to Cling Mount.

The stamp sets offered in clear-mount or wood-mount in the 2018–2019 annual catalog that are carrying over into the 2019–2020 annual catalog will be offered in clear-mount and/or wood-mount until existing inventory has been depleted or until June 4, 2019 (whichever comes first).

If the inventory is depleted, you will be notified of the automatic switch to cling when placing an order for that stamp set. This means that you may end up purchasing select cling stamp sets (in carryover artwork) before they can be ordered from the catalog!  All carryover rubber stamp sets will be available in cling medium only (with the exception of background stamps in North America) beginning June 4, 2019.

Here is the list of stamp sets that WILL be in the 2019-2020 Annual Catalog.  The stamp sets on this list will not be retiring, they will simply be transitioned to Cling Mount moving forward:

  • Accented Blooms
  • Animal Outing
  • Artisan Textures
  • Barn Door
  • Beautiful Day
  • Beautiful You
  • Bee Thankful
  • Birthday Backgrounds
  • Bokeh Dots
  • Botanical Bliss
  • Country Road
  • Crafting Forever
  • Dandelion Wishes
  • Dashing Deer
  • First Frost
  • Flourishing Phrases
  • Gallery Grunge
  • Healing Hugs
  • Heartland
  • Hold on to Hope
  • Itty Bitty Greetings
  • Kindness & Compassion
  • Label Me Pretty
  • Lilypad Lake
  • Little Elephant
  • Little Twinkle
  • Love You to Pieces
  • Magical Mermaid
  • Painted Glass
  • Peaceful Place
  • Perennial Birthday
  • Pop of Petals
  • Rooted in Nature
  • Sea of Textures
  • Sorry for Everything
  • Special Celebrations
  • Stitched All Around
  • This Little Piggy
  • Tropical Chic
  • Winter Woods

Any other stamp sets in the 2018-19 Annual Catalog that are NOT on this list will be retired.  Sorry again for the confusion!  Stampin’ Up! is aware of the confusion and hopefully will be posting an updated list for us.

You can download copies of the full retiring lists in PDF Form here:

  • Click here to get a copy of the full retiring list from the Occasions Catalog.
  • Click here to get a copy of the full retiring list from the 2018-19 Annual Catalog.

****************************************************************************************************

About the “Shelli” Kit

Shelli Gardner worked closely with designers and concept artists to create a Paper Pumpkin kit that is uniquely hers. It includes an exclusive photopolymer stamp set, paper and crafting materials to create 12 mailable cards (3 cards of 4 unique designs), 12 exclusive, coordinating envelopes, and a Classic Stampin’ Spot.

Coordinating colors: Crumb Cake, Early Espresso, Old Olive, Petal Pink, Pool Party, Pretty Peacock, Soft Suede, and Very Vanilla

  • In order to receive the Hugs from Shelli kit, the subscriber must have an active subscription by May 10 at 11:50 PM (MT).
  • Supplies may be limited toward the end of the subscription period.

Don’t miss out on the May Paper Pumpkin.  Click HERE to subscribe.

****************************************************************************************************

Card stock cuts for this project:

  • Daffodil Delight Cardstock 4 1/4″ X 11″ (card base scored and folded at 5 1/2″)
  • Granny Apple Green Cardstock 2 1/4″ X 5 1/2″ (embossed card front)
  • Whisper White Cardstock 4″ X  5 1/4″ (inner liner) scraps for daisies and banner

****************************************************************************************************

Product List

Stampin’ Up OnStage Sneak Peeks

Good Monday morning my fellow stampers and Happy Tax Day.  Has everyone gotten their taxes done?  Do you do them early or wait until the very last second to get them in?   How was everyone’s weekend?  Mine was Awesome!!  I was at OnStage in Atlantic City NJ.  The new Catalog is GORGEOUS.

I can only show you the cover, but believe me when I tell you there are so many wonderful new items you’re going to want them all.  If you’re on my mailing list I will be sending you a catalog as soon as I get them the beginning of May.  If you want to be on my mailing list, you must have placed an order of $50 or more before May 1st 2019.

So, I have a few sneak peeks for you today along with the Make ‘N Takes we made at OnStage and all the goodies we got.  I have a lot of pictures on my Facebook page too.

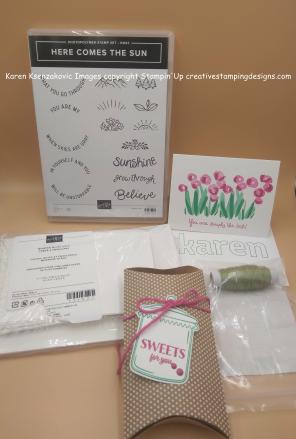
To start off, before we even got into the convention, my Uplines gave us these awesome gifts.  They are the most wonderful and generous people ever.

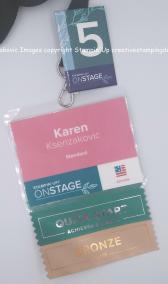
When we checked in we received this beautiful canvas bag full of goodies.  The bag is in one of the new In-Colors, Pretty Peacock.

We got to do some Make ‘N Takes while we were there.  We played with some of the new stamp sets from the new catalog.  Here are the cards we made.

This one was made with the new Stampin’ Up Free As A Bird Stamp Set, Bird Ballad Designer Series Paper and the beautiful 3/8″ Scalloped Lace Trim Ribbon.

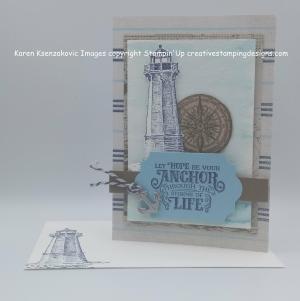
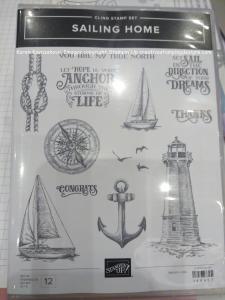
This is one of my favorites made with the new Stampin’ Up Sailing Home Stamp Set, Come Sail Away Designer Series Paper, Sail Away Trinkets and the beautiful Night of Navy/Sahara Sand Baker’s Twine.

This gorgeous card was made with the new Stampin’ Up Floral Essence Stamp Set, Perennial Flower Punch, Perennial Essence Designer Series Paper and the Perennial Essence Vellum Cardstock

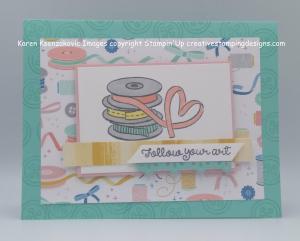
This card was made with the new Stampin’ Up It Starts With Art Stamp Set and Follow Your Art Designer Series Paper.

This last card we made was a sneak peek of the May Paper Pumpkin Kit.

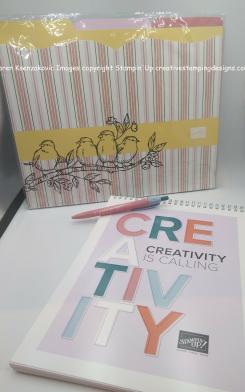
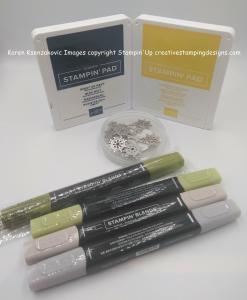
After we were all done with all our Make ‘N Takes we were allowed to divide the items up amongst ourselves at the table.  I came home with all these fun goodies.

The middle stamp set was the one in the bag and the one on the right I won with the Prize Patrol.

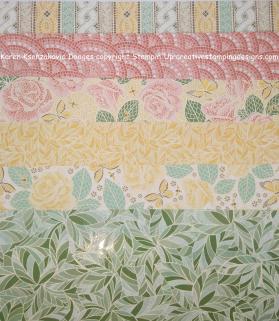
At the very end they gave out one more big Prize Patrol to everyone.  This beautiful Mosaic Mood Specialty Designer Series Paper.

All in All, it was a wonderful time with friends and stamping.  I’m already looking forward to November and our next OnStage Local.  If you are interested in joining my team and being able to go to these OnStage events, click here for details or email me.  I’d be glad to have you on my team.

I’ll be back tomorrow with a new card for you.  I wanted to just give you a little sneak peek at what’s to come.  Happy stamping!!

****************************************************************************************************

If you need any stamping supplies, I’d be very happy to be your Demonstrator.  Just click here to go directly to my online store or drop me an email if you have any questions.  Click here to shop the clearance rack.

MY CURRENT HOST CODE IS: 7923DX9M

Happy Stamping, Karen!

****************************************************************************************************

YOUR SPACE. YOUR WAY.

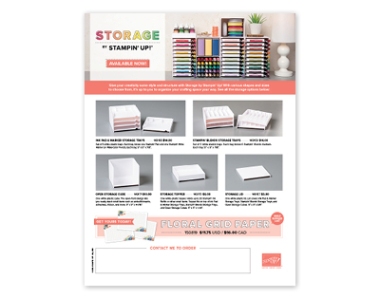
Whether you have an entire room or a small corner in your home for stamping, your creative space should be tailored to you. Stampin’ Up!’s new product line, Storage by Stampin’ Up!, provides you with modular storage solutions that let you organize—and customize—your space your way!

PRODUCT DETAILS

Product Launch: April 1, 2019

  • Can be added to any type of order beginning April 1, 2019.
  • No order limits apply.
  • Storage by Stampin’ Up! will be featured in the 2019–2020 annual catalog.

FEATURES AND BENEFITS

Storage by Stampin’ Up! is designed to store and showcase your Stampin’ Pads, Stampin’ Ink Refills, Stampin’ Blends, Stampin’ Write Markers, Watercolor Pencils, and other accessories. Here are some other features and benefits of Storage by Stampin’ Up!:

  • Keeps products organized, tidy, visible, and trackable at all times.
  • Ensures that your Stampin’ Pads, Stampin’ Write Markers, and Stampin’ Blends are all stored horizontally, as recommended.
  • Designed to be stylish, durable, compact, stackable, and modular.
  • Blends in naturally with most home decor with its white neutral color.
  • Stacks vertically and can be arranged to fit practically any flat workspace.
  • Easily assembled and disassembled for rearrangement and/or cleaning.

Click the image below to open the flyer with full details:

Click this image for some example ways to configure the storage pieces:

****************************************************************************************************

Stampin’ Up! Die Cutting & Embossing Product Line Changes

Big News!!  Stampin’ Up! has just announced that they’ll be transitioning to a new manufacturer for their dies and embossing folders moving forward!

Stampin’ Up! is moving to a direct-to-manufacturer relationship. This means that they will work directly with the factories who manufacture their dies and folders instead of working with another company who then works with different factories. This gives them greater control and potential in the manufacturing process. Yay!

TRANSITION TO NEW DIE-CUTTING AND EMBOSSING LINE

Here’s a look at how this transition will unfold:

Through June 3, 2019 Die and Folder Supply: While Supplies Last and Interruptions·  Inventory on some retiring dies may be depleted before the end of the 2019 occasions and 2018–2019 annual catalog sales period; Stampin’ Up! will not replenish inventory on any retiring dies and folders that sell out.·  Inventory on some dies and folders carrying over into the 2019–2020 catalog may be depleted; if this happens, they may go on backorder or may not be available to order until they have replenished the inventory.
April 15–June 3, 2019 Retiring List·  The old-style die-cutting & embossing machine will be on the retiring list while supplies last. This also includes related products such as plates and platforms.·  Dies and embossing folders included on the retiring list will not be offered in the new catalog in any format.·  Dies and standard embossing folders NOT included on the retiring list will be carried over into the 2019–2020 annual catalog. Stampin’ Up! will use up their current inventory before starting to ship new-style dies, so even if you place an order in 2020, you might receive an old-style die or folder.
Beginning June 4, 2019 2019–2020 Annual Catalog·  All new dies and embossing folders (denoted with a “New” icon in the catalog) will be produced by their new supplier and made in the new style with a different and high-quality product design.·  For carryover dies and non-3D embossing folders, Stampin’ Up! will use up their current inventory before starting to ship new-style dies, so even if you place an order in 2020, you might receive an old-style die or folder.·  All new and carryover 3D embossing folders will be produced by their new supplier and made in the new style with a different and high-quality product design.

·  Carryover 3D embossing folders (previously named Dynamic) will not be available to order beginning with the catalog launch but they are in process on getting these ready to go and they’ll be available as soon as possible. Stampin’ Up! will let you know when they are ready.

·  No die-cutting & embossing machine will be available for purchase from Stampin’ Up! in the 2019–2020 annual catalog.

HIGHLIGHTS: NEW-STYLE DIES AND EMBOSSING FOLDERS

Since Stampin’ Up! is using a new supplier for their dies and embossing folders, they’ll be manufactured differently, which means the way you use them will be a little different. A few of the changes between the old-style and new-style products are listed below. In the future, Stampin’ Up! will also provide videos to show how to craft with the new-style dies and embossing folders and better showcase the features described below.

Here are some of the changes you’ll notice with our new-style dies and embossing folders:

  • The new-style open dies (those that coordinate with stamps) use a high quality metal that’s thinner than before but still as strong and durable.
  • The new-style dies have an added lip to the inside of the blades.
  • On old-style dies, when you place an open die (dies that coordinate with stamps) over a stamped image, a small border of cardstock is visible around the stamped image. With new-style dies, the die hugs the edge of the stamped image. Instead of aligning the die to the space around the stamped image, you will align it to the edges of the stamped image. When the image is cut, there will still be a cardstock border around the image.

OLD STYLE ALIGNMENT

2019_DIE_COMPARISON__1
2019_DIE_COMPARISON__3

NEW STYLE ALIGNMENT

2019_DIE_COMPARISON__2
2019_DIE_COMPARISON__4
  • They’ve improved the adhesive that secures the dies to the insert sheet in the package so that it’s not too sticky. It’s easier to remove dies from the insert sheet, and the adhesive won’t cling to the dies.  (1,000 Yay’s for this update!!)
  • They’ve standardized the size of the die inserts for easier storage. There are now only two insert sizes: 5″ x 7″ (12.7 x 17.8 cm), which coordinate in size with the stamp cases, and 6″ x 6″ (15.2 x 15.2 cm). The standard sizes will allow uniform storage in whatever system you use. The envelopes that the dies come in will be slightly larger.
  • With old-style Dynamic folders, they recommended that you spritz cardstock before embossing to soften the fibers so you got a better impression. Now, that extra step will not be necessary because the new-style folders usually create a crisp impression without spritzing. The way the new folders are manufactured also gives options for more detailed and intricate designs in the future.
  • 3D folders are thinner than the old-style Dynamic folders. Because they are thinner, you will need to use a shim, depending on the die-cutting & embossing machine you use.

I’m really excited about the new product line and can’t wait to get my hands on them this weekend!  I’ll be sharing photos and details just as soon as I can!


Stampin’ Trimmer Discontinuation

Stampin’ Up! will be retiring the Stampin’ Trimmer as of June 3, 2019, including all accessories—replacement cutting blades, scoring blades, and cutting mats. As most of you know, they’ve experienced challenges with their supplier and are taking the opportunity to research and explore a replacement option for this product, which will not be the same as the current Stampin’ Trimmer. There will be a gap in time between when the current Stampin’ Trimmer retires and when a new product becomes available, but they do not currently have an estimated timeframe.

While the replacement cutting blades will also retire with the trimmer and will not be featured in the annual catalog, Stampin’ Up! has ordered what would normally be six months of inventory based on recent historical patterns to help customers during this transition away from their current trimmer. But please know that this news could cause faster inventory depletion.

  • When the retiring list goes live on April 15, the order limit for the blades will increase from three to six (and the limit will remain at six until they’re no longer available).
  • From now until September, intermittent shipments of blades will be received from the supplier. Throughout these months, Stampin’ Up! anticipates times when the blades will not be orderable (and not offered as a backorder). During those downtimes, you will have the option to enter an email address to receive notification when the blades are available again.

Click the images below to head right over to my online store to start shopping for the Stampin’ Trimmer and the replacement pieces:

Price Increases in the 2019-2020 Stampin’ Up! Annual Catalog

Stampin’ Up! will also be doing so pricing changes in the 2019-2020 Annual Catalog. Here is the note that they’ve posted and you can find a link to the new price list below:

We regularly review our pricing, taking into account the cost of doing business, global exchange rates, increased supplier costs, and market comparisons. When it comes to making changes, we are conservative and put off price increases for as long as we can because we know they impact demonstrators and their customers.

Click here for a complete list of individual product price increases in the 2019–2020 annual catalog.


Stampin’ Up Just Because Sneak Peek

Good Monday morning my fellow stampers.  Hope you all had a wonderful weekend and have made some fun plans for tonight.  My plans usually involve staying home and trying to stay up till midnight.  I may just have to work at my craft table to stay awake.  What every your plans are, stay safe ringing the New Year in.  I can’t believe the year is over and we start a new one tomorrow.

For today’s card I used a Host exclusive set called Just Because.  You can earn this set by having a qualifying party or spending $150.00 yourself on products.  Here’s my card for today.

I started with a panel of Floral Romance Specialty Designer Series Paper, (available January 3, 2019, just 3 days away), as my card front.  I adhered another piece of the same paper to the bottom portion of the card front using Glue Dots.  The bottom is a beautiful Vellum piece so you have to be careful when adhering it or you may be able to see the adhesive used.  I then wrapped a piece of Linen Thread around the card front twice just at the vellum piece.

On a small piece of Whisper White cardstock I stamped one of the images from the Just Because Host Exclusive stamp set in Tuxedo Black Memento Ink.  I colored it in using my Mossy Meadow, (available January 3, 2019), and Petal Pink Stampin’ Blends Markers.  I adhered the artwork to a Petal Pink Mat using Snail then to a Fresh Fig mat using Multipurpose Liquid Glue.  I adhered the matted artwork to the card front using Stampin’ Dimensionals.  I adhered the card front to a Fresh Fig card base using Multipurpose Liquid Glue.

On a scrap piece of Whisper White cardstock I stamped the Happy Anniversary sentiment from Itty Bitty Greetings stamp set in Fresh Fig Ink.  Using my Big Shot and Bunch Of Banners Framelits I cut the sentiment out and adhered it under the artwork using Mini Stampin’ Dimensionals.  I added a few Clear Rhinestone Basic Jewels to the card front.

On the inside I stamped the image from Just Because Host Exclusive stamp set on a Whisper White panel.  I colored the stamp in using my Mossy Meadow and Petal Pink Stampin’ Write Markers stamping it off once.  I stamped the sentiment from Forever Lovely stamp set (available January 3, 2019) over the stamped image in Mossy Meadow Ink.  I adhered the Whisper White panel to a Sahara Sand mat using Snail then adhered it to the Fresh Fig card base using Multipurpose Liquid Glue.

To finish my card I decorated a Medium Whisper White Envelope.  I stamped the vase image from Just Because stamp set on the front of the envelope colored the same as I did for the inner liner.  I adhered a piece of Floral Romance Specialty DSP to the envelope flap.

Thank you for stopping by my blog today.  I hope you liked my card and will give it a try. I hope you all have a Happy Healthy and Safe New Year.  I will see you next year!Happy Stamping.

****************************************************************************************************

If you need any stamping supplies, I’d be very happy to be your Demonstrator.  Just click here to go directly to my online store or drop me an email if you have any questions.

MY CURRENT HOST CODE IS: MBWFWZCA

Happy Stamping, Karen!

****************************************************************************************************

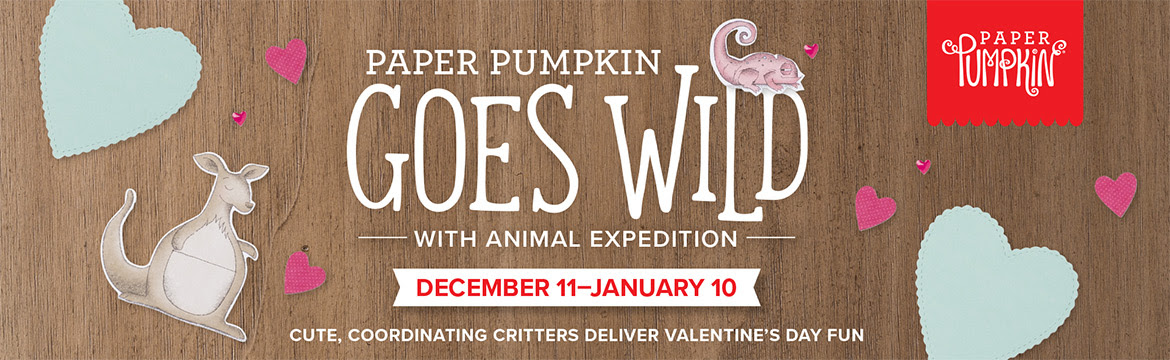
Paper Pumpkin and Animal Expedition Go Wild for Valentine’s Day

January’s Paper Pumpkin Kit is a Valentine Kit called Be Mine. It combines everything you love about Paper Pumpkin-style treat packaging with adorable critter coordination in the popular Animal Expedition Kit!

About the Kit

January’s Paper Pumpkin kit is a Valentine kit coordinates with the Animal Expedition Suite. Here are a few more details:

  • Makes 24 adorable Valentine’s treat packages
  • Coordinating colors: Crumb Cake, Flirty Flamingo, Lemon Lime Twist, Melon Mambo, Petal Pink, and Pool Party

Subscribers must have an active subscription by January 10, 2019 to receive the Be Mine, Valentine kit.

Supplies are limited, so don’t wait—subscribe today!

In the event of supplies running out, Stampin’ Up! will end the subscription period early and stop taking new subscribers for January.

If you’re interested in subscribing to Paper Pumpkin yourself, you can either sign up for a subscription where you are billed monthly for your kit or you can purchase a prepaid subscription in my online store.  Just click here to go directly to my online store.  To see more information and sign up for the monthly subscription click here.

****************************************************************************************************

Card stock cuts for this project:

  • Fresh Fig Cardstock 4 1/4″ X 11″ (card base scored and folded at 5 1/2″), 2 1/4″ X 2 7/8″ (artwork mat)
  • Petal Pink Cardstock 2 1/8″ X 2 3/4″ (artwork mat)
  • Sahara Sand Cardstock 4″ X 5 1/4″ (inner liner mat)
  • Whisper White Cardstock 2″ X 2 5/8″ (artwork), 3 3/4″ X 5″ (inner liner)
  • Floral Romance Specialty Designer Series Paper 4 1/8″ X 5 3/8″ (card front),        2 1/2″ X 4 1/8″ (bottom card front)

****************************************************************************************************

Product List

Stampin’ Up Humming Along Sneak Peek

Good Thursday morning my fellow stampers.  This week is just flying by, isn’t it?  I just love long weekends and short weeks.

I’ve got another sneak peek for you.  Only 1 week and you can order from the new 2019 Occasions Catalog and Sale-A-Bration Catalog, YAY!  I used the Stampin’ Up Humming Along Cling Stamp Set. Take a look.

I started with a Sahara Sand card front and using my Big Shot I ran it through with the new Lace Dynamic Textured Impressions Embossing Folder.  I adhered it to a Whisper White mat using Multipurpose Liquid Glue.  I then adhered it to a Mint Macaron card base using Multipurpose Liquid Glue.

On a small piece of Whisper White cardstock I stamped the Hibiscus image from the Humming Along stamp set in Tuxedo Black Memento Ink.  I colored it in using my Mint Macaron, Petal Pink, Pineapple Punch and Poppy Parade Stampin’ Blends Markers.  I fussy cut it using my Paper Snips then adhered it to a panel of Poppy Parade cardstock using Stampin’ Dimensionals.

I adhered the artwork to a Whisper White mat using Snail then adhered it to the card front using Multipurpose Liquid Glue. I attached a bow made from the Whisper White Polka Dot Tulle Ribbon, with a glue dot to the Hibiscus stem.  I added a few Mint Macaron Faceted Dots to the card front.

On the inside I stamped the hibiscus image from the Humming Along stamp set in Petal Pink Ink, stamping off once, in the center of a Whisper White panel.  I stamped the sentiment from the same stamp set in Tuxedo Black Memento Ink over the flower.  I adhered the Whisper White panel to the Mint Macaron card base using Multipurpose Liquid Glue.

To finish my card I decorated a Medium Whisper White Envelope.  I stamped the Hibiscus in Petal Pink Ink on the envelope front and the leaf in Mint Macaron Ink on the envelope flap.  Both stamps are from the Humming Along stamp set.

Thank you for stopping by my blog today.  I hope you liked my card and will give it at try once you can purchase these items.  Happy Stamping!

****************************************************************************************************

If you need any stamping supplies, I’d be very happy to be your Demonstrator.  Just click here to go directly to my online store or drop me an email if you have any questions.

MY CURRENT HOST CODE IS: MBWFWZCA

Happy Stamping, Karen!

****************************************************************************************************

Paper Pumpkin and Animal Expedition Go Wild for Valentine’s Day

January’s Paper Pumpkin Kit is a Valentine Kit called Be Mine. It combines everything you love about Paper Pumpkin-style treat packaging with adorable critter coordination in the popular Animal Expedition Kit!

About the Kit

January’s Paper Pumpkin kit is a Valentine kit coordinates with the Animal Expedition Suite. Here are a few more details:

  • Makes 24 adorable Valentine’s treat packages
  • Coordinating colors: Crumb Cake, Flirty Flamingo, Lemon Lime Twist, Melon Mambo, Petal Pink, and Pool Party

Subscribers must have an active subscription by January 10, 2019 to receive the Be Mine, Valentine kit.

Supplies are limited, so don’t wait—subscribe today!

In the event of supplies running out, Stampin’ Up! will end the subscription period early and stop taking new subscribers for January.

If you’re interested in subscribing to Paper Pumpkin yourself, you can either sign up for a subscription where you are billed monthly for your kit or you can purchase a prepaid subscription in my online store.  Just click here to go directly to my online store.  To see more information and sign up for the monthly subscription click here.

****************************************************************************************************

Card stock cuts for this project:

  • Mint Macaron Cardstock 8 1/2″ X 5 1/2″ (card base scored and folded at 4 1/4″)
  • Poppy Parade Cardstock 2 1/8″ X 3 1/2″ (artwork panel)
  • Sahara Sand Cardstock 4″ X 5 1/4″ (card front)
  • Whisper White Cardstock 4 1/8″ X 5 3/8″ (card front mat), 2 1/4″ X 3 5/8″ (artwork panel mat), 2 1/4″ X 4″ (artwork), 4″ X 5 1/4″ (inner liner)

****************************************************************************************************

Product List

Stampin’ Up Time For Tea for Fab Friday #153

Good Wednesday morning my fellow stampers.  Did you all have a nice Christmas?  Was Santa good to you?  Did anyone get some fun new stamping products?  Hope you all had an enjoyable day with your loved ones.

For today’s card I have a little sneak peek for you.  I played along with the Fab Friday sketch challenge #153.  Please be sure to stop by Fab Friday to play along and see what everyone has made.  Here is their sketch.

Here is what I came up with for the sketch.  Take a look.

I started with a Crumb Cake card base and using Snail I adhered a panel of the beautiful All My Love Designer Series Paper, which will be available January 3, 2019.  I adhered a smaller strip of the same DSP about 2/3 of the way down the card front.

On a small piece of Whisper White cardstock, I stamped the teacup image from the Stampin’ Up Time For Tea Photopolymer Stamp Set in Lovely Lipstick Ink.  Using my Lovely Lipstick Stampin’ Write Marker I colored part of the sentiment in and stamped it above and below the teacup.  I colored the teacup in using my Flirty Flamingo Stampin’ Blends Markers.  Using my Big Shot and my Stitched Shaped Framelits Dies, I cut out the teacup with my second largest stitched circle.  I adhered the artwork to a Pearlized Doilie using Multipurpose Liquid Glue.

Using my Big Shot, I cut a circle out from Balmy Blue cardstock using my Layering Circles Framelits Dies.  I adhered the Balmy Blue circle just under the Doilie.  I adhered the layered artwork to the card front using Stampin’ Dimensionals.

On the inside on a Whisper White panel I stamped the bottom section of the sentiment from the Time For Tea stamp set in Lovely Lipstick Ink.  I stamped the teacup in Flirty Flamingo Ink, stamping off twice, on top of the sentiment.  I adhered the Whisper White panel to a Balmy Blue mat using Snail then adhered it to the Crumb Cake card base using Multipurpose Liquid Glue.

To finish my card, I decorated a Medium Whisper White Envelope.  I stamped the teacup from the Time For Tea stamp set in Flirty Flamingo Ink on the front of the envelope.  I adhered a piece of the All My Love DSP on the envelope flap.

Thank you for stopping by my blog today.  I hope you liked my card and will give it a try.  Only 8 days till you can order from the new 2019 Occasions Catalog and earn FREE products from the Sale-A-Bration catalog.  Happy Stamping.

****************************************************************************************************

If you need any stamping supplies, I’d be very happy to be your Demonstrator.  Just click here to go directly to my online store or drop me an email if you have any questions.

MY CURRENT HOST CODE IS: MBWFWZCA

Happy Stamping, Karen!

****************************************************************************************************

Paper Pumpkin and Animal Expedition Go Wild for Valentine’s Day

January’s Paper Pumpkin Kit is a Valentine Kit called Be Mine. It combines everything you love about Paper Pumpkin-style treat packaging with adorable critter coordination in the popular Animal Expedition Kit!

About the Kit

January’s Paper Pumpkin kit is a Valentine kit coordinates with the Animal Expedition Suite. Here are a few more details:

  • Makes 24 adorable Valentine’s treat packages
  • Coordinating colors: Crumb Cake, Flirty Flamingo, Lemon Lime Twist, Melon Mambo, Petal Pink, and Pool Party

Subscribers must have an active subscription by January 10, 2019 to receive the Be Mine, Valentine kit.

Supplies are limited, so don’t wait—subscribe today!

In the event of supplies running out, Stampin’ Up! will end the subscription period early and stop taking new subscribers for January.

If you’re interested in subscribing to Paper Pumpkin yourself, you can either sign up for a subscription where you are billed monthly for your kit or you can purchase a prepaid subscription in my online store.  Just click here to go directly to my online store.  To see more information and sign up for the monthly subscription click here.

****************************************************************************************************

Card stock cuts for this project:

  • Crumb Cake Cardstock 4 1/4″ X 11″ (card base scored and folded at 5 1/2″)
  • Balmy Blue Cardstock 4 1/8″ X 5 3/8″ (inner liner mat), 3″ X 3″ (circle under doilie)
  • Whisper White Cardstock 4″ X 5 1/4″ (inner liner), 3″ X 3″ (artwork)
  • All My Love Designer Series Paper 4 1/8″ X 5 3/8″ (card front), 1′ X 3 1/2″ (strip on front)

****************************************************************************************************

Product List

Stampin’ Up Beauty Abounds for CAS(E) This Sketch #302

Good Monday morning my fellow stampers.  Well, tonight’s the night.  Santa comes once everyone is all snuggled in for the night.  Is everyone ready?  I’m just about there.  I still have wrapping to do, then it’s time to prepare our 7 fish Christmas Eve dinner.

I have another sneak peek for you today.  I used a couple different stamp sets from the up coming Occasions Catalog along with some beautiful Designer Series Paper from Sale-A-Bration that will be available January 3, 2019.  I also played along with CAS(E) This Sketch challenge # 302.  Please be sure to stop by CAS(E) This Sketch to see all the beautiful projects and to play along.  I love doing sketch challenges because it really gives me a great place to start.  Here’s their sketch.

Here is what I came up with for the sketch.  Take a look.

I started with a Grapefruit Grove card front.  I adhered, with Snail, a piece of the gorgeous new Botanical Butterfly Designer Series Paper, which you can earn FREE from Sale-A-Bration starting January 3, 2019.  This paper is just one of the amazing items you can earn with a $50.00 order.

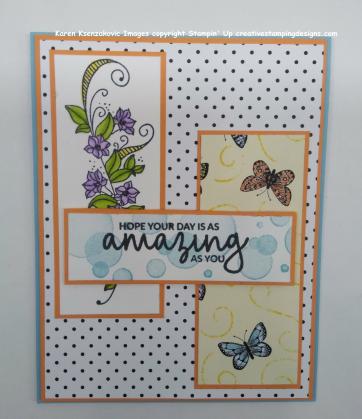
On a small piece of Whisper White cardstock I stamped the floral scroll from the Beauty Abounds Cling Stamp Set in Tuxedo Black Memento Ink.  I colored it in using my Daffodil Delight, Granny Apple Green and Highland Heather Stampin’ Blends Markers.  I adhered it to a Grapefruit Grove mat using Snail.  I adhered another smaller piece of the Botanical Butterfly Designer Series Paper to a Grapefruit Grove mat using Snail.  I adhered the 2 matted pieces to the card front using Multipurpose Liquid Glue.

I stamped the Bokeh Dots from the Beauty Abounds stamp set in Balmy Blue Ink on another small piece of Whisper White cardstock.  I stamped the sentiment from the Incredible Like You Photopolymer Stamp Set in Tuxedo Black Memento Ink over the dots.  I adheres the sentiment strip to a Grapefruit Grove mat using Snail then adhered it to the card front over the 2 artwork pieces using Stampin’ Dimensionals.  I adhered the card front to a Balmy Blue card base using Stampin’ Dimensionals.

On the inside, I stamped the Happy Birthday from the Amazing Life Photopolymer Stamp Set in Tuxedo Black Memento Ink in the center of a Whisper White panel.  I stamped the scroll above the Happy Birthday in Balmy Blue Ink.  I adhered the Whisper White panel to the Balmy Blue card base using Multipurpose Liquid Glue.

To finish my card, I decorated a Medium Whisper White Envelope.  I stamped the floral scroll from the Beauty Abounds stamp set in Tuxedo Black Memento Ink on the front of the envelope.  I adhered a piece of the Botanical Butterfly DSP to the envelope flap.

Thank you for stopping by my blog today.  I hope you liked my card.  All the products uses today will be available January 3, 2019.  Purchasing these stamp sets earns you the free Designer Series Paper.

****************************************************************************************************

If you need any stamping supplies, I’d be very happy to be your Demonstrator.  Just click here to go directly to my online store or drop me an email if you have any questions.

MY CURRENT HOST CODE IS: MBWFWZCA

Happy Stamping, Karen!

****************************************************************************************************

Card stock cuts for this project:

  • Balmy Blue Cardstock 4 1/4″ X 11″ (card base scored and folded at 5 1/2″)
  • Grapefruit Grove Cardstock 4 1/8″ X 5 3/8″ (card front mat), 2-3 7/8″ X 1 5/8″(artwork mats), 3 3/8″ X 1 1/8″ (sentiment mat)
  • Whisper White Cardstock 3 3/4″ X 1 1/2″(artwork), 1″ X 3 1/4″ (front sentiment),    4″ X 5 1/4″ (inner liner)
  • Botanical Butterfly Designer Series Paper 4″ X 5 1/4″(card front), 3 3/4″ X 1 1/2″(artwork)

****************************************************************************************************

Product List

Stampin’ Up Humming Along Sneak Peek for Freshly Made Sketches

Good Friday morning all my fellow stampers.  Well we’ve made it through another week and for some you may have a nice long weekend coming up with Christmas being only 4 days away, YIKES.  Is everyone ready?  I finally got my Christmas cards mailed out and hopefully they will arrive before Christmas.

For today I’ve got a sneak peek for you of a new stamp set and Designer Series Paper coming up in the new 2019 Occasions Catalog, which you will be able to order from in less than 2 weeks my friends, YAY.  I’ve also played along with the Freshly Made Sketches #368.  Please be sure to stop by Freshly Made Sketches to see the beautiful projects and to play along.  Here is their sketch.

This sketch really helped me out today, since I was having major crafters block.  Here is my take on the sketch.  Take a look.

I started with a card base of Sahara Sand cardstock.  I adhered a piece of the new BEAUTIFUL Floral Romance Designer Series Paper, available January 3, 2019, using Multipurpose Liquid Glue. I matted another piece of the DSP on a small piece of Sahara Sand cardstock using Snail.

I took a small piece of Pear Pizzazz cardstock and ran it through my Big Shot using the Lovely Floral Dynamic Textured Impressions Embossing Folder.  I then adhered it to a Sahara Sand mat using Multipurpose Liquid Glue.  I adhered the 2 matted pieces onto the card front.  The Pear Pizzazz one I used Multipurpose Liquid Glue and the DSP one I used Stampin’ Dimensionals.

On a small piece of Whisper White cardstock I stamped the sentiment from the new Humming Along stamp set, available January 3, 2019, in Petal Pink Ink.  I cut the sentiment out using my Big Shot and the Layering Ovals Framelits Dies.  I edged the oval using my Mossy Meadow Stampin’ Write Marker to give a little dimension.  I cut the Sahara Sand mat out using the same framelits dies.  I adhered the sentiment to the Sahara Sand mat using Multipurpose Liquid Glue then adhered it to the card front using Stampin’ Dimensionals.  I added a few Clear Rhinestone Basic Jewels for a little bling.

On the inside I used the One For All stamp set, but only the sentiment part of one of the stamps.  I colored the stamp using my Mossy Meadow and Petal Pink Stampin’ Write Markers and stamped it in the center of a Whisper White panel.  I then stamped the leaf from the Humming Along stamp set in Pear Pizzazz Ink, stamping off twice, in the center of the sentiment.  I adhered the Whisper White panel to the Sahara Sand card base using Multipurpose Liquid Glue.

To finish my card off I decorated a Medium Whisper White Envelope.  I stamped the leaf from Humming Along stamp set on the bottom front of the envelope in Pear Pizzazz Ink.  I adhered a piece of Floral Romance DSP to the envelope flap.

Thank you for stopping by my blog today.  I hope you liked my card.  These items will all be available on January 3, 2019.  Happy Stamping!

****************************************************************************************************

If you need any stamping supplies, I’d be very happy to be your Demonstrator.  Just click here to go directly to my online store or drop me an email if you have any questions.

MY CURRENT HOST CODE IS: MBWFWZCA

Happy Stamping, Karen!

****************************************************************************************************

Card stock cuts for this project:

  • Sahara Sand Cardstock 4 1/4″ X 11″ (card base scored and folded at 5 1/2″),       2-2 1/8″ X 2 7/8″ (mats for card front pieces), scrap for oval
  • Pear Pizzazz Cardstock 2′ X 2 3/4″ (embossed card front piece)
  • Whisper White Cardstock 4′ X 5 1/4″ (inner liner), scrap for oval sentiment
  • Floral Romance Designer Series Paper 4″ X 5 1/4″ (card front), 2″ X 2 3/4″ (matted card front piece)

****************************************************************************************************
Product List