Stampin’ Up! Best Dressed Beautiful You CAS Card

Good Wednesday morning my fellow stampers.  It’s 1 week until Christmas.  If you haven’t gotten things done, today’s a great day to get going.   I have a half day off this week to try to get anything else done that I have to do. I don’t know how Christmas got here so quickly, but it did and I just have to go with it.

For today I have a quick and easy card for you showcasing one of the new Designer Series Papers from the New 2020 Mini Catalog.  Here’s my card.
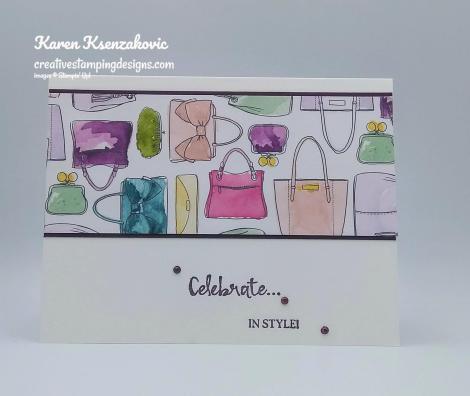
I started by adhering a panel of the new Best Dressed 6″ X 6″ Designer Series Paper to a Blackberry Bliss mat using Snail.  I adhered the matted panel to a Thick Whisper White card base using Multipurpose Liquid Glue.
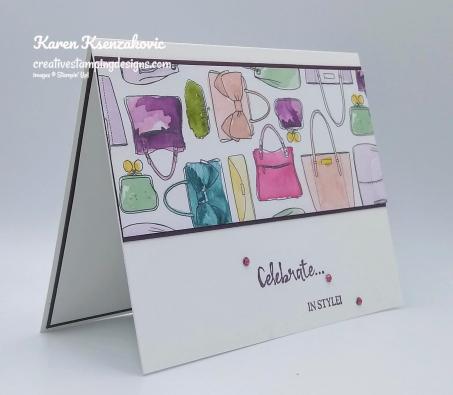
I stamped the 2 sentiments from the Stampin’ Up! Beautiful You Cling Stamp Set in Blackberry Bliss Ink below the matted panel.
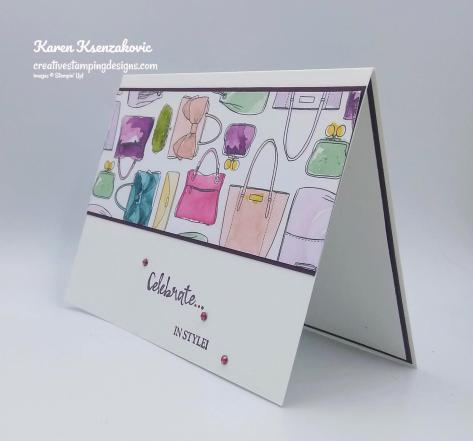
I added a few Rhinestone Basic Jewels which I colored using my Dark Blackberry Bliss Stampin’ Blends Marker.
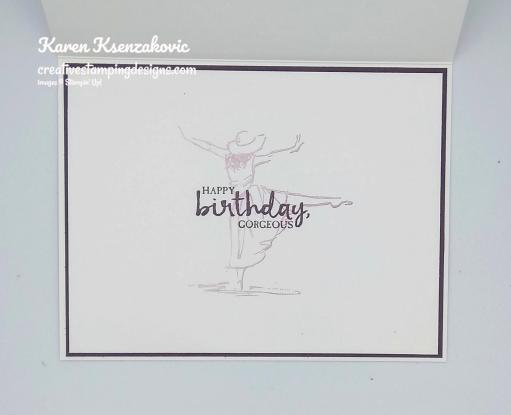
On the inside I stamped the sentiment from the Beautiful You stamp set in Blackberry Bliss Ink in the center of a Whisper White panel.  I stamped the dancing woman image from the Beautiful You stamp set in Blackberry Bliss Ink, stamping off 4 times, over the sentiment.  I adhered the Whisper White panel to a Blackberry Bliss mat using Snail and then to the inside of the Thick Whisper White card base using Multipurpose Liquid Glue.
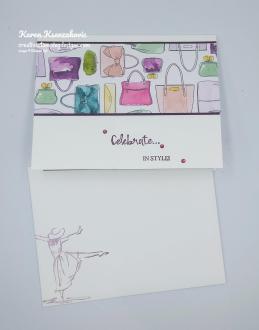
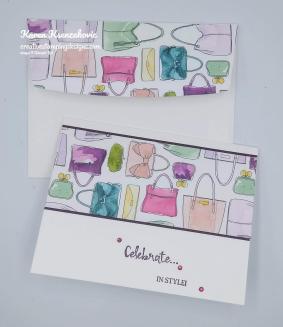
To finish my card I decorated a Medium Whisper White Envelope.  I stamped the dancing woman image from the Beautiful You stamp set on the envelope front in Blackberry Bliss Ink, stamping off once.  I adhered a panel of the Best Dressed 6″X6″ DSP to the envelope flap.

Thank you for stopping by my blog today.  I hope you liked my card and will give it a try. Happy Stamping!!

****************************************************************************************************

If you need any stamping supplies, I’d be very happy to be your Demonstrator. Just click HERE to go directly to my online store or drop me an email if you have any questions. 

MY CURRENT HOST CODE IS: NVSKQ72X

For any orders $50 or more I will send you my monthly class tutorials.  Click HERE or go to my Customer Rewards to see what this months tutorials are.

STAMPIN’ UP! CLEARANCE RACK UPDATE

Stampin’ Up! has updated the Clearance Rack with lot of new goodies!  Yay!!!  Head over there speedy quick to get your hands on some great deals.  But hurry!!  Clearance Rack deals are only while supplies last!

Click HERE to shop the clearance rack.

Happy Stamping, Karen!

****************************************************************************************************

I’LL BEE YOURS PAPER PUMPKIN

SUBSCRIBE TO PAPER PUMPKIN DECEMBER 11, 2019 – JANUARY 10, 2020
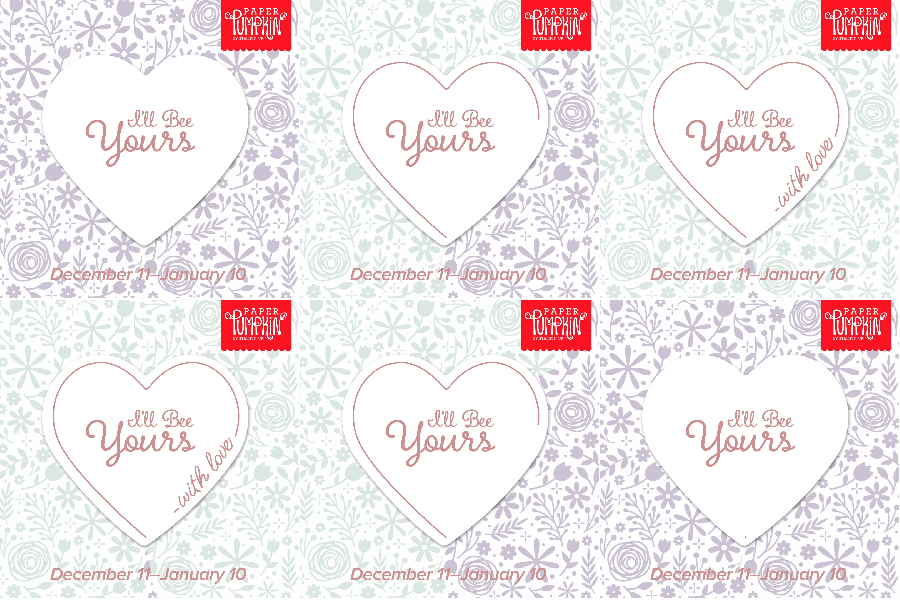
Paper Pumpkin’s first kit of 2020 is all about L-O-V-E. Whether you want handmade favors for Valentine’s Day, a bridal shower, or a remarkably romantic wedding, this month’s kit has everything you need to help you celebrate your favorite friendships and love stories. So make it a “LOVE”-ly year with Paper Pumpkin.

About the January Kit
Kit details: Makes 20 treat bags + 10 mini cards and envelopes
Card size: 3″ x 3″ (7.5 x 7.5 cm)
Envelope size: 3-1/8″ x 3-1/8″ (7.8 x 7.8 cm)
Bag size: 3-1/4″ x 4″ (8.2 x 10 cm)
Coordinating Stampin’ Up! colors: Crushed Curry, Highland Heather, Mint Macaron, and Rococo Rose

Coordinating Product
It’s “BEE”-yond question: You can get more from the I’ll Bee Yours kit when they buy the Heart Punch Pack (item 151292) from the 2020 January–June Mini Catalog. Both punches coordinate with the heart stamp in the kit so you can craft for love-filled occasions now . . . and later! Think: weddings, showers, birthdays, and more! See additional details about the punch pack below.
Heart Punch Pack (item 151292), $34.00 usd/$46.00 cad

Subscribe for the January kit at paperpumpkin.com from December 11–January 10.
Supplies may be limited toward the end of each subscription period.

****************************************************************************************************

Stampin’ Up!’s Year-End Closeout is here while supplies last!!  You can save on a selection of retiring and surplus items including holiday catalog items, stamp sets, and Paper Pumpkin past kits! Shop early to avoid missing out as items on the sale are only available while supplies last! Supplies are limited and popular items will sell out quickly. This amazing sale ends on January 2.

Head over to my Online store to see all the Discounted Items and Retiring Favorites Items.  You don’t want to miss out on these savings because when they are gone THEY ARE GONE!

****************************************************************************************************

Card stock cuts for this project:

  • Blackberry Bliss Cardstock 2 3/8″ X 5 1/2″ (card front mat), 4 1/8″ X 5 3/8″ (inner liner mat)
  • Whisper White Cardstock 4″ X 5 1/4″(inner liner)
  • Thick Whisper White Cardstock 8 1/2″ X 5 1/2″ (card base scored and folded at 4 1/4″)
  • Best Dressed 6″ X 6″ Designer Series Paper 2 1/4″ X 5 1/2″ (card front), piece for envelope flap

****************************************************************************************************

Product List

Stampin’ Up! Forever Blossoms Wedding Sneak Peek

Good Tuesday morning my fellow stampers.  How has everyone’s week started off?  One week from today is Christmas Eve, yikes!!  Have you gotten you shopping done, baking done, cards mailed.  You all know I got my baking done.  My cards just went in the mail (here’s hoping they get to everyone on time).  Shopping??? Well, I haven’t really gotten any done.  I’ve sent my husband out to pick things up, guess that’s next on my list of things to do.  I’m really running out of time here.

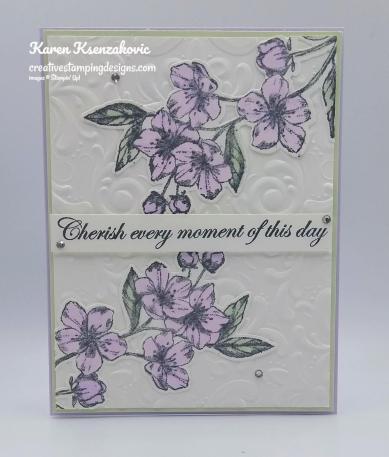
For today I have another sneak peek for you using the Stampin’ Up! Forever Blossoms Bundle.  When I saw this set in the New 2020 Mini Catalog, I just knew I had to have it.  My son needs a wedding card for New Years Day, so I thought I’d play around with this bundle.  Here’s my card.

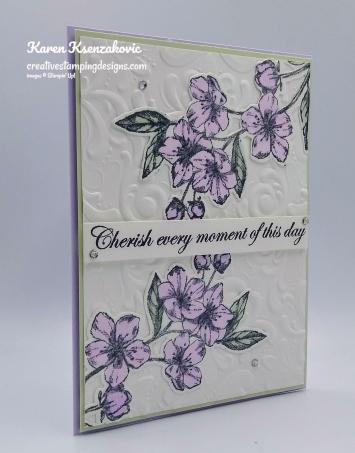
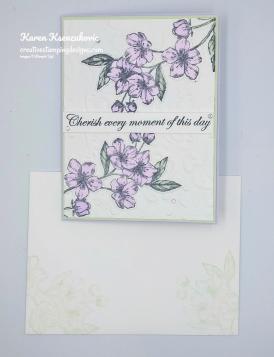
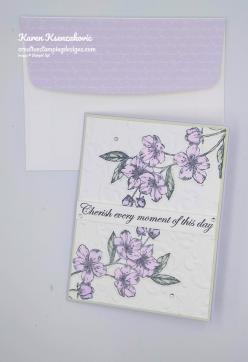
I started by embossing a Whisper White card front using the new Parisian Flourish 3D Embossing Folder.  I stamped the large floral image from the Stampin’ Up! Forever Blossoms Cling Stamp Set in Tuxedo Black Memento Ink twice on a panel of Whisper White cardstock.  I colored the image in using my Purple Posy and Soft Seafoam Stampin’ Blends Markers.  I cut the images out using the Cherry Blossoms Dies.

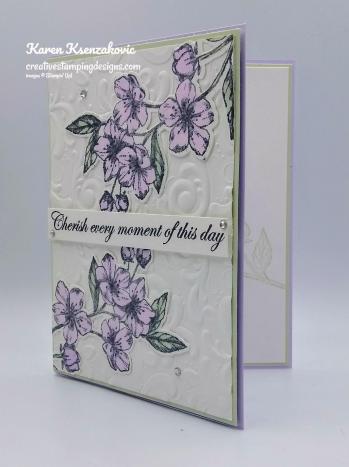
I adhered the cut images to the embossed Whisper White panel using Multipurpose Liquid Glue letting them hang off on either side.  I cut the pieces that were hanging off the card front to make them even.  I adhered the card front to a Soft Seafoam mat using Multipurpose Liquid Glue.  I stamped the sentiment from the Forever Blossoms stamp set in Tuxedo Black Memento Ink on a thin strip of Whisper White cardstock.  I adhered the sentiment to the card front using Stampin’ Dimensionals.

I adhered the matted card front to a Purple Posy card base using Stampin’ Dimensional.  I added a few Rhinestone Basic Jewels to the card front.

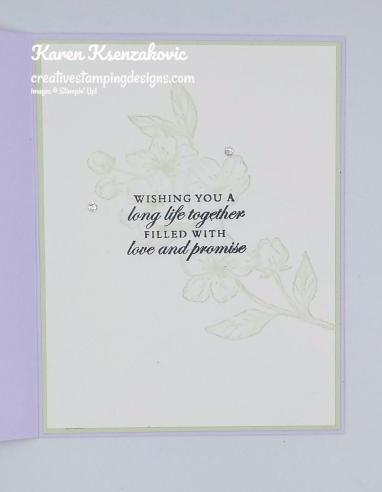
On the inside I stamped the large floral image from the Forever Blossoms stamp set in Soft Seafoam Ink on a panel of Whisper White.  I stamped the sentiment from the Forever Blossoms stamp set in Tuxedo Black Memento Ink over the floral image in the center of the panel.  I adhered the Whisper White panel to a Soft Seafoam mat using Snail and then to the inside of the Purple Posy card base using Multipurpose Liquid Glue.  I added a couple more Rhinestone Basic Jewels to the inside.

To finish my card I decorated a Medium Whisper White Envelope.  I stamped the large floral image from the Forever Blossoms stamp set in Soft Seafoam Ink on the envelope front.  I adhered a panel of Purple Posy 2019-2021 In-Color 6″ X 6″ Designer Series Paper to the envelope flap.

Thank you for stopping by my blog today.  I hope you liked my card.  Stamp Set, Dies and Embossing Folder used for today’s card will be available in just 2 1/2 short weeks. Happy Stamping!!

****************************************************************************************************

If you need any stamping supplies, I’d be very happy to be your Demonstrator. Just click HERE to go directly to my online store or drop me an email if you have any questions. 

MY CURRENT HOST CODE IS: NVSKQ72X

For any orders $50 or more I will send you my monthly class tutorials.  Click HERE or go to my Customer Rewards to see what this months tutorials are.

Click HERE to shop the clearance rack.

Happy Stamping, Karen!

****************************************************************************************************

I’LL BEE YOURS PAPER PUMPKIN

SUBSCRIBE TO PAPER PUMPKIN DECEMBER 11, 2019 – JANUARY 10, 2020

Paper Pumpkin’s first kit of 2020 is all about L-O-V-E. Whether you want handmade favors for Valentine’s Day, a bridal shower, or a remarkably romantic wedding, this month’s kit has everything you need to help you celebrate your favorite friendships and love stories. So make it a “LOVE”-ly year with Paper Pumpkin.

About the January Kit
Kit details: Makes 20 treat bags + 10 mini cards and envelopes
Card size: 3″ x 3″ (7.5 x 7.5 cm)
Envelope size: 3-1/8″ x 3-1/8″ (7.8 x 7.8 cm)
Bag size: 3-1/4″ x 4″ (8.2 x 10 cm)
Coordinating Stampin’ Up! colors: Crushed Curry, Highland Heather, Mint Macaron, and Rococo Rose

Coordinating Product
It’s “BEE”-yond question: You can get more from the I’ll Bee Yours kit when they buy the Heart Punch Pack (item 151292) from the 2020 January–June Mini Catalog. Both punches coordinate with the heart stamp in the kit so you can craft for love-filled occasions now . . . and later! Think: weddings, showers, birthdays, and more! See additional details about the punch pack below.
Heart Punch Pack (item 151292), $34.00 usd/$46.00 cad

Subscribe for the January kit at paperpumpkin.com from December 11–January 10.
Supplies may be limited toward the end of each subscription period.

****************************************************************************************************

Stampin’ Up!’s Year-End Closeout is here while supplies last!!  You can save on a selection of retiring and surplus items including holiday catalog items, stamp sets, and Paper Pumpkin past kits! Shop early to avoid missing out as items on the sale are only available while supplies last! Supplies are limited and popular items will sell out quickly. This amazing sale ends on January 2.

Head over to my Online store to see all the Discounted Items and Retiring Favorites Items.  You don’t want to miss out on these savings because when they are gone THEY ARE GONE!

****************************************************************************************************

Card stock cuts for this project:

  • Purple Posy Cardstock 8 1/2″ X 5 1/2″ (card base scored and folded at 4 1/4″)
  • Soft Seafoam Cardstock 2 – 4 1/8″ X 5 3/8″ (card front and inner liner mat)
  • Whisper White Cardstock 2 – 4″ X 5 1/4″ (card front and inner liner), 1/2″ X 4″ (sentiment), 4″ X 5″ (flowers)
  • 2019-2021 In-Color 6 X 6 Designer Series Paper 2 1/4″ X 6″ (envelope flap)

****************************************************************************************************

Product List

Stampin’ Up! Come Sail Away to a New Adventure

Good Monday morning my stamping friends.  How was everyone’s weekend?  I got all my baking done and now I just have to make up all the platters that I give out.  I like to make up all the platters at once so that I’m not pulling containers in and out since there are so many.  The final count was 25 different kinds and 1820 cookies not including the bar cookies.  I have to admit, by Saturday night I was wiped.

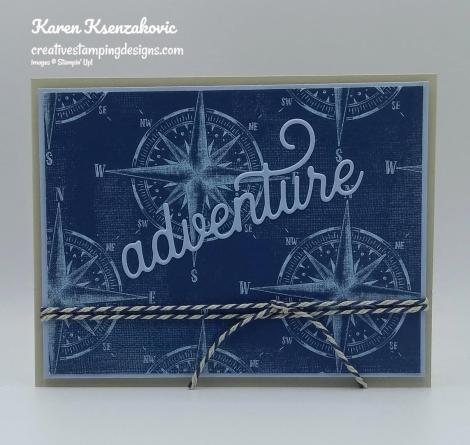
For today’s card, my husband asked me to make a card for a co-worker of his that is leaving for a new job.  I decided to bring out some DSP from the Annual Catalog and came up with a really quick card that he loved.  I even let him help design the card, just a little though.  Here’s my card.

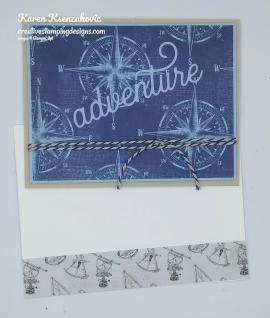
I started by adhering a panel of Come Sail Away Designer Series Paper to a Seaside Spray mat using Snail.  I wrapped a piece of Night of Navy/Sahara Sand Bakers Twine around the matted DSP twice and tie a square knot.

I cut the sentiment out of a scrap piece of Seaside Spray cardstock using the Sweet Silhouette Dies.  I adhered the sentiment to the card front using Multipurpose Liquid Glue.

I adhered the card front to a Sahara Sand card base using Stampin’ Dimensionals.

On the inside I adhered another panel of the Come Sail Away DSP to the card base using Multipurpose Liquid glue.  I stamped the sentiments from the Stampin’ Up! Well Said Cling Stamp Set in Night of Navy Ink in the center of a Whisper White panel.  I adhered the Whisper White panel to the DSP using Multipurpose Liquid Glue.

To finish my card I decorated a Medium Whisper White Envelope.  I adhered a strip of Come Sail Away DSP to the envelope front and a panel to the envelope flap.

Thank you for stopping by my blog today.  I hope you liked my card and will give it a try. Happy Stamping!!

****************************************************************************************************

If you need any stamping supplies, I’d be very happy to be your Demonstrator. Just click HERE to go directly to my online store or drop me an email if you have any questions. 

MY CURRENT HOST CODE IS: NVSKQ72X

For any orders $50 or more I will send you my monthly class tutorials.  Click HERE or go to my Customer Rewards to see what this months tutorials are.

Click HERE to shop the clearance rack.

Happy Stamping, Karen!

****************************************************************************************************

I’LL BEE YOURS PAPER PUMPKIN

SUBSCRIBE TO PAPER PUMPKIN DECEMBER 11, 2019 – JANUARY 10, 2020

Paper Pumpkin’s first kit of 2020 is all about L-O-V-E. Whether you want handmade favors for Valentine’s Day, a bridal shower, or a remarkably romantic wedding, this month’s kit has everything you need to help you celebrate your favorite friendships and love stories. So make it a “LOVE”-ly year with Paper Pumpkin.

About the January Kit
Kit details: Makes 20 treat bags + 10 mini cards and envelopes
Card size: 3″ x 3″ (7.5 x 7.5 cm)
Envelope size: 3-1/8″ x 3-1/8″ (7.8 x 7.8 cm)
Bag size: 3-1/4″ x 4″ (8.2 x 10 cm)
Coordinating Stampin’ Up! colors: Crushed Curry, Highland Heather, Mint Macaron, and Rococo Rose

Coordinating Product
It’s “BEE”-yond question: You can get more from the I’ll Bee Yours kit when they buy the Heart Punch Pack (item 151292) from the 2020 January–June Mini Catalog. Both punches coordinate with the heart stamp in the kit so you can craft for love-filled occasions now . . . and later! Think: weddings, showers, birthdays, and more! See additional details about the punch pack below.
Heart Punch Pack (item 151292), $34.00 usd/$46.00 cad

Subscribe for the January kit at paperpumpkin.com from December 11–January 10.
Supplies may be limited toward the end of each subscription period.

****************************************************************************************************

Stampin’ Up!’s Year-End Closeout is here while supplies last!!  You can save on a selection of retiring and surplus items including holiday catalog items, stamp sets, and Paper Pumpkin past kits! Shop early to avoid missing out as items on the sale are only available while supplies last! Supplies are limited and popular items will sell out quickly. This amazing sale ends on January 2.

Head over to my Online store to see all the Discounted Items and Retiring Favorites Items.  You don’t want to miss out on these savings because when they are gone THEY ARE GONE!

****************************************************************************************************

Card stock cuts for this project:

  • Sahara Sand Cardstock 4 1/4″ X 11″ (card base scored and folded at 5 1/2″
  • Seaside Spray Cardstock 4″ X 5 1/4″ (card front mat)
  • Whisper White Cardstock 3 1/2″ X 4 3/4″ (inner liner)
  • Come Sail Away Designer Series Paper 3 7/8″ X 5 1/8″ (card front), 4 1/8″ X 5 3/8″ (inner liner mat)

****************************************************************************************************

Product List

Stampin’ Up Timeless Tulips Sneak Peek for Fun Fold Friday

Good Friday the 13th morning my stamping friends and welcome to my Fun Fold Friday.  How was everyone’s week?  I’ve got all my cookie doughs mixed, some of my bar cookies made and today and tomorrow I bake everything off.  My house will have the wonderful aroma of freshly baked cookies for the next couple days.  Now to have the willpower not to eat them.

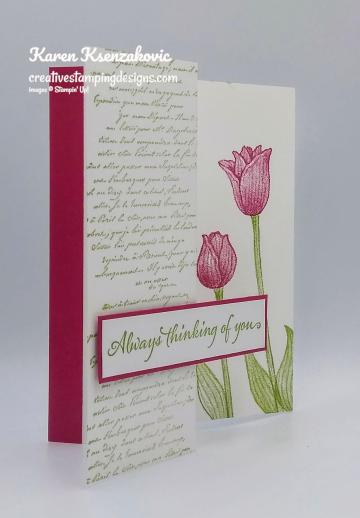
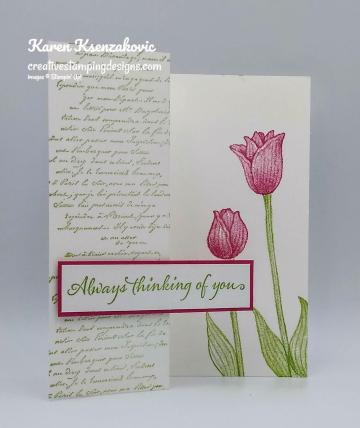
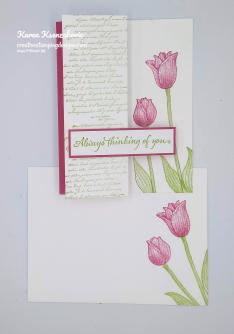
For today’s I made a card for you doing Simple Stamping .  I never do simple, but I thought I’d give it a try.  All I used was Stamp, Ink and Paper.  There are no layers, except for the sentiment and one thin strip.  Here’s my card.

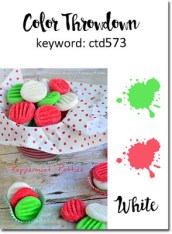
My colors were inspired by the Color Throwdown Challenge #573.  Here are their colors.

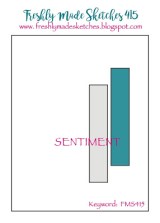
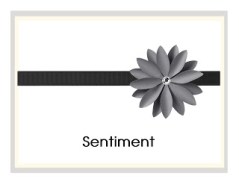
I played along with the Freshly Made Sketches Challenge #415.  Here is their sketch.

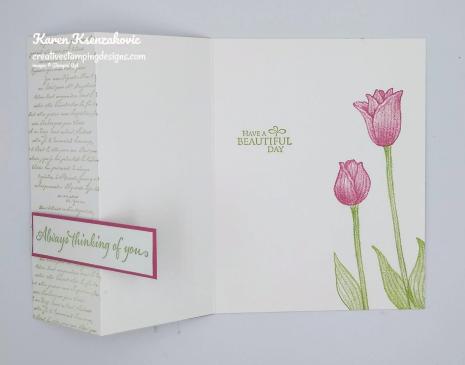
I started by folding my Thick Whisper White card base at 4 1/4″ & 2″ (a little different than a regular Z-Fold).

I adhered a thin strip of Lovely Lipstick cardstock to the left edge of the card base, on the fold, using Multipurpose Liquid Glue.  On the 2″ card front I stamped the script image from the Stampin’ Up! Very Versailles Cling Stamp Set twice in Granny Apple Green Ink stamping off once.  I stamped the sentiment from the Very Versailles stamp set in Granny Apple Green Ink on a strip of Whisper White cardstock.  I adhered the sentiment strip to a Lovely Lipstick mat using Snail.

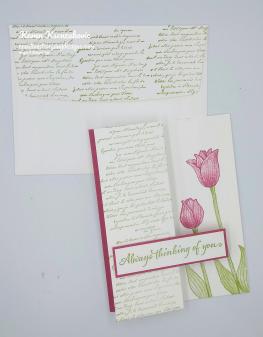
I stamped the tulip stems and leaves from the Stampin’ Up! Timeless Tulips Photopolymer Stamp Set in Granny Apple Green Ink on the right of the card base.  I stamped the medium and small tulip images from the Timeless Tulips stamp set in Lovely Lipstick Ink on the stems.  I adhered the sentiment, so that it went across the stems, on the card front using Stampin’ Dimensionals.

On the inside I stamped the sentiment from the Very Versailles stamp set in Granny Apple Green Ink behind the fold.

To finish my card I decorated a Medium Whisper White Envelope.  I stamped the tulip stems and leaves from the Timeless Tulips stamp set on the envelope front.  I stamped the medium and small tulip image from the Timeless Tulips stamp set in Lovely Lipstick Ink on the stems.  I stamped the script image from the Very Versailles stamp set on the envelope flap.

Thank you for stopping by my blog today.  I hope you liked my card.  The Timeless Tulips Stamp Set will be available for purchase on January 3, 2020 from the New January-June Mini Catalog.  Happy Stamping.

****************************************************************************************************

If you need any stamping supplies, I’d be very happy to be your Demonstrator. Just click HERE to go directly to my online store or drop me an email if you have any questions. 

MY CURRENT HOST CODE IS: NVSKQ72X

For any orders $50 or more I will send you my monthly class tutorials.  Click HERE or go to my Customer Rewards to see what this months tutorials are.

Click HERE to shop the clearance rack.

Happy Stamping, Karen!

****************************************************************************************************

I’LL BEE YOURS PAPER PUMPKIN

SUBSCRIBE TO PAPER PUMPKIN DECEMBER 11, 2019 – JANUARY 10, 2020

Paper Pumpkin’s first kit of 2020 is all about L-O-V-E. Whether you want handmade favors for Valentine’s Day, a bridal shower, or a remarkably romantic wedding, this month’s kit has everything you need to help you celebrate your favorite friendships and love stories. So make it a “LOVE”-ly year with Paper Pumpkin.

About the January Kit
Kit details: Makes 20 treat bags + 10 mini cards and envelopes
Card size: 3″ x 3″ (7.5 x 7.5 cm)
Envelope size: 3-1/8″ x 3-1/8″ (7.8 x 7.8 cm)
Bag size: 3-1/4″ x 4″ (8.2 x 10 cm)
Coordinating Stampin’ Up! colors: Crushed Curry, Highland Heather, Mint Macaron, and Rococo Rose

Coordinating Product
It’s “BEE”-yond question: You can get more from the I’ll Bee Yours kit when they buy the Heart Punch Pack (item 151292) from the 2020 January–June Mini Catalog. Both punches coordinate with the heart stamp in the kit so you can craft for love-filled occasions now . . . and later! Think: weddings, showers, birthdays, and more! See additional details about the punch pack below.
Heart Punch Pack (item 151292), $34.00 usd/$46.00 cad

Subscribe for the January kit at paperpumpkin.com from December 11–January 10.
Supplies may be limited toward the end of each subscription period.

****************************************************************************************************

Stampin’ Up!’s Year-End Closeout is here while supplies last!!  You can save on a selection of retiring and surplus items including holiday catalog items, stamp sets, and Paper Pumpkin past kits! Shop early to avoid missing out as items on the sale are only available while supplies last! Supplies are limited and popular items will sell out quickly. This amazing sale ends on January 2.

Head over to my Onlinestore to see all the Discounted Items and Retiring Favorites Items.  You don’t want to miss out on these savings because when they are gone THEY ARE GONE!

****************************************************************************************************

Card stock cuts for this project:

  • Lovely Lipstick Cardstock 7/8″ X 3 3/38″ (sentiment mat), 1/2″ X 5 1/2″ (side strip)
  • Whisper Whtie Cardstock 3/4″ X 3 1/4″ (sentiment)
  • Thick Whisper White Cardstock 8 1/2″ X 5 1/2″ (card base scored and folded at 2″ & 4 1/4″)

****************************************************************************************************


Product List

Stampin’ Up Painted Poppies Sneak Peek

Good Wednesday morning my fellow stampers.Can you believe that Christmas is  2 weeks from today?  I really need to get moving.  After work today and after getting my stitches out,  I will be starting my marathon baking.  I start by mixing all my cookie doughs tonight and tomorrow, then I bake continuously all day Friday and Saturday.  Not sure how many different kinds I will be making this year yet, I kind of decide as I go.  The past few years it’s been around 25 or 26 different ones.  Time will tell.

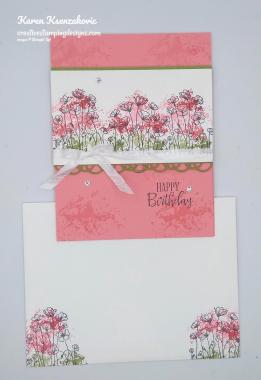
For today I have another card that we made this past Sunday at our in person team meeting. The card was designed by my Team Leader Amy and one of our team members Sue.  This card uses the Stampin’ Up! Painted Poppies Bundle available January 3, 2020 from the New January-June Mini Catalog.   Here’s my card.

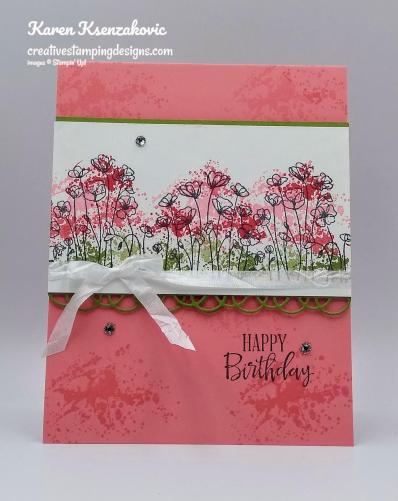
I started by stamping the large splatter image from the Stampin’ Up! Painted Poppies Stamp Set in Flirty Flamingo Ink on the front of the Flirty Flamingo card base.  Some were stamped in full strength and some were stamped off.  I stamped the sentiment from the Stampin’ Up! Peaceful Moments Cling Stamp Set on the bottom right of the card base in Tuxedo Black Memento Ink.

On a panel of Thick Whisper White cardstock I stamped the small floral image from the Painted Poppies stamp set in Tuxedo Black Memento Ink.   I stamped the image twice, once slightly off the panel to the left and the second time as close to the first as you can without overlapping.  I stamped the small splatter image from the Painted Poppies stamp set in Old Olive Ink along the lower part of the stems, stamping twice before reinking.  I stamped the large splatter image from the Painted Poppies stamp set in Flirty Flamingo Ink across the flowers stamping off once.  I stamped the small splatter image from the Painted Poppies stamp set in Poppy Parade Ink across the flowers, stamping twice before reinking.

Using the Painted Labels Dies I cut the lacy scalloped strip twice from the 1 1/2″ X 3″ strip of Old Olive cardstock. I adhered the scallop strips to the bottom of the artwork, overlapping in the center so that they fit  end to end using Snail.  I adhered the 1/2″ strip of Old Olive cardstock to the top of the artwork using Snail.  I wrapped a piece of Whisper White 1/4″ Crinkled Seam Binding Ribbon around the artwork and tied a bow.  I adhered the artwork to the Flirty Flamingo card base using Stampin’ Dimensionals.  I added a few Rhinestone Basic Jewels to the card front and artwork.

On the inside I stamped the sentiment from the Peaceful Moments stamp set in the center of a Whisper White panel in Tuxedo Black Memento Ink.  I stamped the small floral image from the Painted Poppies stamp set in Tuxedo Black Memento Ink along the bottom of the panel twice.  I stamped the colors on the image the same as I did for the artwork.  I adhered the Whisper White panel to the inside of the Flirty Flamingo card base using Multipurpose Liquid Glue.

To finish my card I decorated a Medium Whisper White Envelope.  I stamped the small floral image from the Painted Poppies stamp set in Tuxedo Black Memento Ink on the front of the envelope and the envelope flap.  I stamped the colors on the image the same as I did for the artwork.

Thank you for visiting my blog today.  I hope you liked my card.  The stamp sets and dies used for today’s card will be available January 3, 2020 from the New Mini Catalog. Happy Stamping!!

****************************************************************************************************

If you need any stamping supplies, I’d be very happy to be your Demonstrator. Just click HERE to go directly to my online store or drop me an email if you have any questions. 

MY CURRENT HOST CODE IS: NVSKQ72X

For any orders $50 or more I will send you my monthly class tutorials.  Click HERE or go to my Customer Rewards to see what this months tutorials are.

Click HERE to shop the clearance rack.

Happy Stamping, Karen!

****************************************************************************************************

TODAY’S THE DAY!!! Got fun goodies on your Stampin’ Up! wish list? For one day only, shipping on any qualifying product order is absolutely free. Simply spend a minimum of $50 usd/$65 cad or more (before tax). But don’t wait! This offer will be over in a flash!  This incredible deal lasts for 24 hours only

As an extra special bonus,  orders placed through me TODAY ONLY of $50 or more will receive a free pack of Noble Peacock Rhinestones.

****************************************************************************************************

Stampin’ Up!’s Year-End Closeout is here while supplies last!!  You can save on a selection of retiring and surplus items including holiday catalog items, stamp sets, and Paper Pumpkin past kits! Shop early to avoid missing out as items on the sale are only available while supplies last! Supplies are limited and popular items will sell out quickly. This amazing sale ends on January 2.

Head over to my Online store to see all the Discounted Items and Retiring Favorites Items.  You don’t want to miss out on these savings because when they are gone THEY ARE GONE!

****************************************************************************************************

Card stock cuts for this project:

  • Flirty Flaming Cardstock 4 1/4″ X 11″ (card base scored and folded at 5 1/2″)
  • Old Olive Cardstock 1/2″ X 4 1/4″ strip and 1 1/2″ X 3″ (scallop trim)
  • Whisper White Cardstock 4″ X 5 1/4″ (inner liner)
  • Thick Whisper White Cardstock 2 1/2″ X 4 1/4″ (artwork)

****************************************************************************************************

Product List

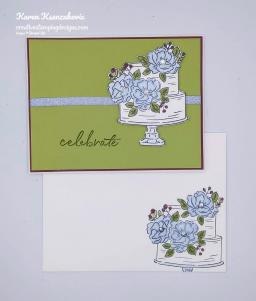
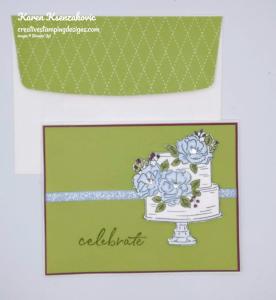
Stampin’ Up! Happy Birthday To You Sneak Peek for Amy’s Inkin’ Krew Team Blog Hop

Good Tuesday morning my fellow stampers and welcome to Amy’s Inkin’ Krew Team Blog Hop. It’s the 2nd Tuesday of the month and you know what that means, Blog Hop Day!! If you are starting with me, be sure to hop around to see everyone’s awesome projects. If you’ve hopped over from Amy Koenders blog, welcome to my blog and thank you for stopping by. The theme this month is “Celebrate”. We can interpret this any way that we’d like.

For today’s card I’m giving you a little sneak peek of an upcoming Sale-A-Bration stamp set.  I knew I wanted this set the first time I saw it at OnStage.

My colors were inspired by Fab Friday Challenge #178.  Here are their colors.

I played along with Hand Stamped Sentiments Challenge #329 for my design.  Here is their sketch.

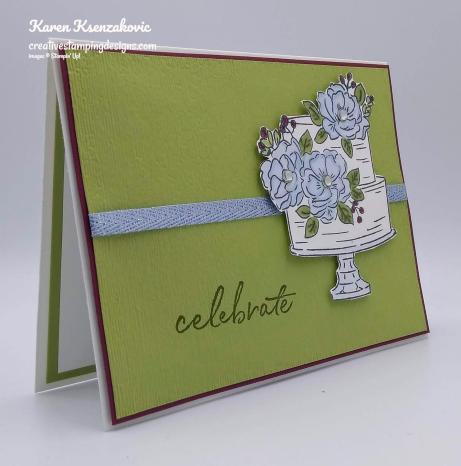
I started by stamping the sentiment from the Stampin’ Up! Happy Birthday To You Cling Stamp Set, (new Sale-A-Bration item starting January 3, 2020), in Mossy Meadow Ink on the bottom of a Pear Pizzazz card front.  I embossed the Pear Pizzazz card front using the Subtle 3D Embossing Folder.

I wrapped a piece of the Seaside Spray Metallic Ribbon around the card front then adhered the card front to a Merry Merlot mat using Multipurpose Liquid Glue.  I adhered the matted card front to a Whisper White card base using Stampin’ Dimensionals.

On a small piece of Whisper White cardstock I stamped the cake image from the Happy Birthday To You stamp set in Tuxedo Black Memento Ink .  I colored the cake in using my Mossy Meadow and Seaside Spray Stampin’ Blends Markers and my Merry Merlot and Pear Pizzazz Stampin’ Write Markers.  I fussy cut the cake using my Paper Snips and adhered the cake to the card front using Stampin’ Dimensionals.  I added a few Rhinestone Basic Jewels to the flower centers on the cake.

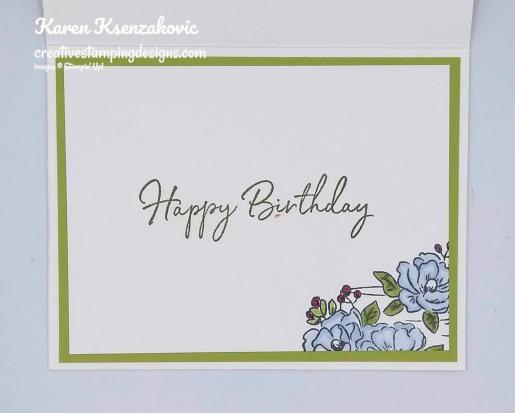
On the inside I stamped the sentiment from the Happy Birthday To You stamp set in Mossy Meadow Ink in the center of a Whisper White panel.  I stamped the top of the cake image from the Happy Birthday To You stamp set on the bottom corner of the panel and colored it in the same as I did on the card front.  I adhered the Whisper White panel to a Pear Pizzazz mat using Snail and then to the inside of the Whisper White card base using Multipurpose Liquid Glue.

To finish my card I decorated a Medium Whisper White Envelope.  I stamped the cake image from the Happy Birthday To You stamp set on the front of the envelope.  I adhered a panel of the Subtle 6 X 6 Designer Series Paper to the envelope flap.

Thank you for visiting by my blog today. I hope you liked my card and will give it a try. Now be sure to hit Previous to hop back to Amy Koenders blog or hit Next to head over to Jaimie Babarczy’s blog. You can also click on each of the names and hop around that way. Happy Hopping!!

  1. Karen Ksenzakovic – You Are Here
  2. Jaimie Babarczy –
  3. Karen Finkle –
  4. Leslie Larkin –
  5. Mary Deatherage –
  6. Sue Prather –
  7. Akiko Sudano –
  8. Shirley Gentry –
  9. Amy Koenders –

****************************************************************************************************

If you need any stamping supplies, I’d be very happy to be your Demonstrator. Just click HERE to go directly to my online store or drop me an email if you have any questions. 

MY CURRENT HOST CODE IS: NVSKQ72X

For any orders $50 or more I will send you my monthly class tutorials.  Click HERE or go to my Customer Rewards to see what this months tutorials are.

Click HERE to shop the clearance rack.

Happy Stamping, Karen!

****************************************************************************************************

FREE SHIPPING FROM STAMPIN’ UP!

Got fun goodies on your Stampin’ Up! wish list? Then it’s time to circle Wednesday, December 11 on your calendar and get ready to shop. Why? For one day only, shipping on any qualifying product order is absolutely free. Simply spend a minimum of $50 usd/$65 cad or more (before tax). But don’t wait! This offer will be over in a flash!!!! This incredible deal lasts for 24 hours only

Here are the Free Shipping  details:

  • Sales Period:  December 11, 2019 from 12:01 am (MT)–11:59 pm (MT)
  • All order types qualify for this promotion.
  • Free shipping applies after the $50 qualifying amount has been met.
  • The minimum qualifying amount to receive free shipping is $50  or more (before tax).
  • With the exception of month-to-month Paper Pumpkin subscriptions, all Stampin’ Up! products qualify for the promotion, including year-end closeout items.
  • Free shipping only applies during the 24-hour period the promotion is live; this means that the order must be opened and closed on December 11, 2019.
  • Prepaid Paper Pumpkin subscriptions are eligible for FREE shipping under the same rules as all other Stampin’ Up! items during the promotion.
  • Month-to-month Paper Pumpkin subscriptions are NOT eligible for free shipping. Subscriptions billed and shipped for December will be charged for the normal amount ($22.00 shipping included) + tax. Important note: December Paper Pumpkin billing and shipment will be delayed until December 16 due to increased workload in the distribution center.

****************************************************************************************************

Stampin’ Up!’s Year-End Closeout is here while supplies last!!  You can save on a selection of retiring and surplus items including holiday catalog items, stamp sets, and Paper Pumpkin past kits! Shop early to avoid missing out as items on the sale are only available while supplies last! Supplies are limited and popular items will sell out quickly. This amazing sale ends on January 2.

Head over to my Online store to see all the Discounted Items and Retiring Favorites Items.  You don’t want to miss out on these savings because when they are gone THEY ARE GONE!

****************************************************************************************************

SOMETHING FOR EVERYTHING PAPER PUMPKIN 
SUBSCRIBE TO PAPER PUMPKIN BY DECEMBER 10, 2019

LAST DAY TO SUBSCRIBE!!

December’s Something for Everything kit includes a super-versatile stamp set complete with 13 sentiments that can be used for occasions ranging from wedding, to get well, birthdays, and more! Plus, the three full-sized card designs (four of each) are gorgeous AND multiuse.  Paper Pumpkin’s December kit makes it easier than ever to give a handmade card to a friend—no matter what the occasion!

This is an all-card kit, with 13 sentiments to cover tons of occasions from weddings, get well, birthday, and more, this set does it all.

Kit details: Makes 12 cards and envelopes

Card size: 4 1/4″ x 5-1/2″ (10.8 x 14 cm)

Envelope size: 4-1/2″ x 5-3/4″ (11.4 x 14.6 cm)

Coordinating colors: Crushed Curry, Grapefruit Grove, Old Olive, Shaded Spruce, Terracotta Tile

  • Subscribe for the December kit at paperpumpkin.com from November 11–December 10.
  • Supplies may be limited toward the end of each subscription period.

Interested in subscribing to Paper Pumpkin?  You can either sign up for a subscription where you are billed monthly for your kit or you can purchase a prepaid subscription in my online store. To see more information and to sign up for the monthly subscription,  Click Here. To see the options for prepaid subscriptions in my online store, Click Here.

****************************************************************************************************

Card stock cuts for this project:

  • Merry Merlot Cardstock 5 3/8″ X 4 1/8″ (card front mat)
  • Pear Pizzazz Cardstock 2 – 5 1/4″ X 4″ (card front and inner liner mat)
  • Whisper White Cardstock 8 1/2″ X 5 1/2″ (card base scored and folded at 4 1/4″), 5″ X 3 3/4″ (inner liner), 3″ X 4″ (cake)
  • Subtle 6 X 6 Designer Series Paper for envelope flap

****************************************************************************************************

Product List

Stampin’ Up! Peaceful Moments Sneak Peek

Good Monday morning my stamping friends.  How was everyone’s weekend?  Have you been getting you shopping done, cookies made, decorations up?  I had to work on Saturday, but Sunday was a day of fun.  We had our in person team meeting and I got to stamp with my team members and friends.  I always love when I get to stamp with others.  We had a wonderful lunch together followed by our meeting and then we got to make some beautiful projects.  Here are a couple pictures from our day.

This is Akiko, Terry Lynn and I working on our projects.

This is Terry Lynn, myself, Akiko and our wonderful team leader Amy.

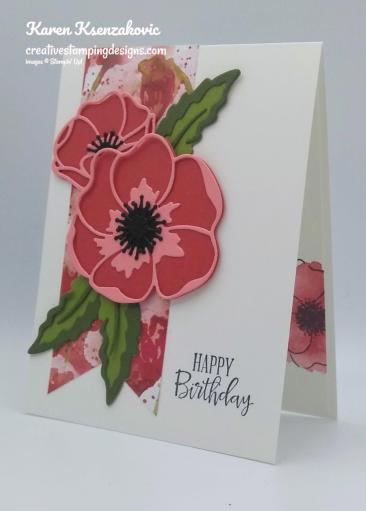
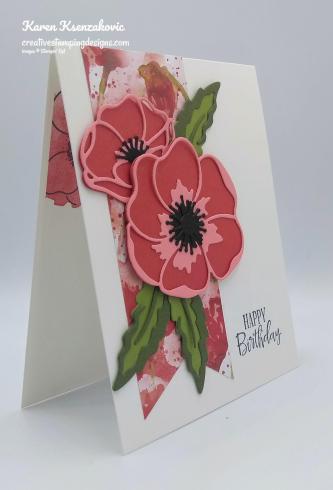
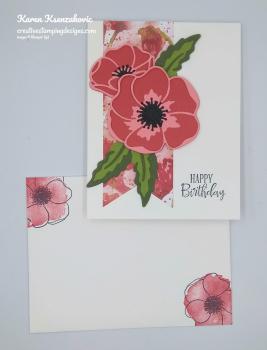
Here is one of the projects we made at our meeting using the Stampin’ Up! Peaceful Moments Bundle (available Jan 3, 2020).

I started by stamping the sentiment from the Stampin’ Up Peaceful Moments Cling Stamp Set, on the lower right of Thick Whisper White card base in Tuxedo Black Memento Ink.  Using the Banner Triple Punch I punched the end of the Peaceful Poppies Designer Series Paper panel and adhered it to the card front using Snail.

Using the Poppy Moments Dies for all of the die cutting, I cut the 2 different solid parts of the poppies out of Poppy Parade cardstock and the 2 different outlines of the poppies out of Flirty Flamingo cardstock.  I cut 3 of the solid part of the leaves out of Old Olive cardstock and 3 of the leaf outlines out of Mossy Meadow cardstock.  I cut all 3 of the poppy centers out of Basic Black cardstock.  I adhered the poppy outlines to the solid poppies and the leaf outlines to the solid leaves using Multipurpose Liquid Glue.  I adhered the flower centers using a Glue Dot.

I adhered the smaller poppy to the card front first using Multipurpose Liquid Glue.  I adhered the larger poppy to the card front, overlapping the smaller one a little, using Stampin’ Dimensionals.  I adhered the leaves under the poppies using Glue Dots.

On the inside I stamped the sentiment from the Peaceful Moments stamp set in Tuxedo Black Memento Ink in the center of the Whisper White panel.  I stamped the poppy outline image from the Stampin’ Up! Painted Poppies Cling Stamp Set on either side of the sentiment in Tuxedo Black Memento Ink.  I stamped the fill image from the Painted Poppies stamp set in Poppy Parade Ink over each outline image.  I adhered the Whisper White panel to the inside of the Thick Whisper White card base using Multipurpose Liquid Glue.

To finish my card I decorated a Medium Whisper White Envelope.  I stamped the poppy outline image from the Painted Poppies stamp set in Tuxedo Black Memento Ink on the envelope front and flap.  I stamped the fill image from the Painted Poppies stamp set in Poppy Parade Ink over the outlined images.

Thank you for stopping by my blog today.  I hope you liked my card that was designed by my Team Leader Amy.  All products for this card will be available on January 3, 2020 from the New Mini Catalog.  If you are a customer of mine, you will  be getting your catalog shortly.  If you are not and would like to become one of my customers, just drop me a note along with you address and I will get a catalog in the mail to you ASAP. Happy Stamping!!

****************************************************************************************************

If you need any stamping supplies, I’d be very happy to be your Demonstrator. Just click HERE to go directly to my online store or drop me an email if you have any questions. 

MY CURRENT HOST CODE IS: NVSKQ72X

For any orders $50 or more I will send you my monthly class tutorials.  Click HERE or go to my Customer Rewards to see what this months tutorials are.

Click HERE to shop the clearance rack.

Happy Stamping, Karen!

****************************************************************************************************

Stampin’ Up!’s Year-End Closeout is here while supplies last!!  You can save on a selection of retiring and surplus items including holiday catalog items, stamp sets, and Paper Pumpkin past kits! Shop early to avoid missing out as items on the sale are only available while supplies last! Supplies are limited and popular items will sell out quickly. This amazing sale ends on January 2.

Head over to my Online store to see all the Discounted Items and Retiring Favorites Items.  You don’t want to miss out on these savings because when they are gone THEY ARE GONE!

****************************************************************************************************

SOMETHING FOR EVERYTHING PAPER PUMPKIN 
SUBSCRIBE TO PAPER PUMPKIN BY DECEMBER 10, 2019

ONLY 2 DAYS LEFT TO SUBSCRIBE!!

December’s Something for Everything kit includes a super-versatile stamp set complete with 13 sentiments that can be used for occasions ranging from wedding, to get well, birthdays, and more! Plus, the three full-sized card designs (four of each) are gorgeous AND multiuse.  Paper Pumpkin’s December kit makes it easier than ever to give a handmade card to a friend—no matter what the occasion!

This is an all-card kit, with 13 sentiments to cover tons of occasions from weddings, get well, birthday, and more, this set does it all.

Kit details: Makes 12 cards and envelopes

Card size: 4 1/4″ x 5-1/2″ (10.8 x 14 cm)

Envelope size: 4-1/2″ x 5-3/4″ (11.4 x 14.6 cm)

Coordinating colors: Crushed Curry, Grapefruit Grove, Old Olive, Shaded Spruce, Terracotta Tile

  • Subscribe for the December kit at paperpumpkin.com from November 11–December 10.
  • Supplies may be limited toward the end of each subscription period.

Interested in subscribing to Paper Pumpkin?  You can either sign up for a subscription where you are billed monthly for your kit or you can purchase a prepaid subscription in my online store. To see more information and to sign up for the monthly subscription,  Click Here. To see the options for prepaid subscriptions in my online store, Click Here.

****************************************************************************************************

Card stock cuts for this project:

  • Basic Black Cardstock 1″ X 2 1/2″ (poppy centers)
  • Flirty Flamingo Cardstock 3″ X 4″ (poppy outline die)
  • Mossy Meadow Cardstock 2 1/4″ X 3″ (leaf outline die)
  • Old Olive Cardstock 2 1/4″ X 3″ (leaf dies)
  • Poppy Parade Cardstock 3″ X 4″ (poppies)
  • Whisper White Cardstock 4′ X 5 1/4″ (inner liner)
  • Thick Whisper White Cardstock 4 1/4″ X 11″ (card base scored and folded at 5 1/2″)
  • Peaceful Poppies Designer Series Paper 2″ X 5 3/8″ (banner)

****************************************************************************************************

Product List

Stampin’ Up! Let It Snow For Happy Inkin’ Thursday Blog Hop

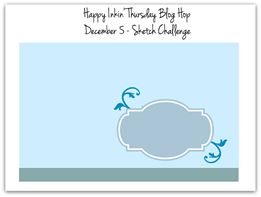
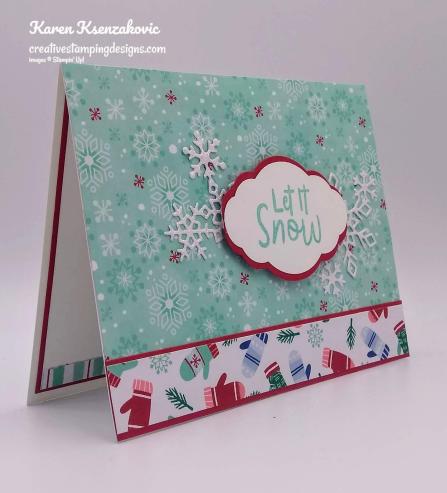
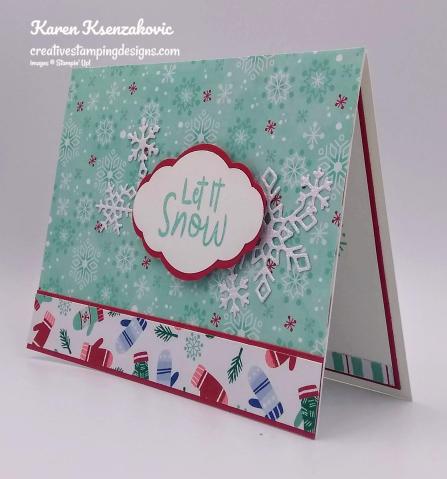
Good Thursday morning my stamping friends. Welcome to the Happy Inkin’ Thursday Blog Hop. If you are hopping over from Akiko, thank you for stopping by. This week we had a Sketch Challenge. Be sure to hop around to see everyone’s beautiful projects. I’m continuing with my quick and easy cards for this week.  Here’s what I came up with for the sketch.

Here is out sketch for this week.

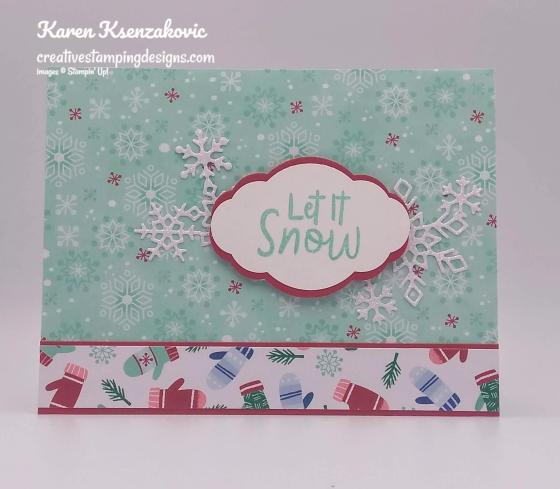
I started by adhering a panel of Let It Snow Specialty Designer Series Paper to a Thick Whisper White card base using Multipurpose Liquid Glue.

I adhered a thin panel of the Let It Snow Specialty DSP to a Real Red Mat using Snail.  I adhered the matted DSP to the bottom of the card front using Multipurpose Liquid Glue.

I stamped the sentiment from the Stampin’ Up! Snowman Season Photopolymer Stamp Set on a small panel of Whisper White cardstock in Coastal Cabana Ink.  I punched the sentiment out using the Pretty Label Punch.  Using the Pretty Label Punch I punched out 2 more labels in Real Red cardstock.  I adhered the 2 labels to the back of the Whisper White label using Multipurpose Liquid Glue, arranging it so that it framed the Whisper White label.  I cut the snowflakes in Sparkle Glimmer Paper using the Christmas Layers Dies.  I snipped the snowflakes in half and arranged them so that they came out on either side of the sentiment.  I adhered the snowflakes to the card front using Glue Dots and Multipurpose Liquid Glue.  I adhered the sentiment over the snowflakes using Stampin’ Dimensionals.

On the inside I stamped the sentiment from the Snowman Season stamp set in Coastal Cabana Ink in the center of a Whisper White panel.  I stamped the snowflake image from the Snowman Season stamp set in Coastal Cabana Ink on either side of the sentiment.  I stamped the small snowman image from the Snowman Season stamp set in Coastal Cabana Ink, stamping off once, over the sentiment.  I adhered a thin strip of Let It Snow DSP to the bottom of the Whisper White panel using Snail  I adhered the Whisper White panel to a Real Red mat using Snail and then to the inside of the Thick Whisper White card base using Multipurpose Liquid Glue.

To finish my card I decorated a Medium Whisper White Envelope.  I adhered a strip of the Let It Snow DSP to the envelope front and a panel to the envelope flap.

Thank you for stopping by my blog today.  I hope you liked my card and will give it a try. Now that you’ve seen my card, take a minute to hop through all our projects today. If you click on the Next Blog button, you’ll go right to Amy’s page. Or you can just click on the names below to go directly to all the blogs! Happy Hopping!!

Karen Ksenzakovic: You are here

****************************************************************************************************

If you need any stamping supplies, I’d be very happy to be your Demonstrator. Just click HERE to go directly to my online store or drop me an email if you have any questions. 

MY CURRENT HOST CODE IS: NVSKQ72X

For any orders $50 or more I will send you my monthly class tutorials.  Click HERE or go to my Customer Rewards to see what this months tutorials are.

Click HERE to shop the clearance rack.

Happy Stamping, Karen!

****************************************************************************************************

Stampin’ Up!’s Year-End Closeout is here while supplies last!!  You can save on a selection of retiring and surplus items including holiday catalog items, stamp sets, and Paper Pumpkin past kits! Shop early to avoid missing out as items on the sale are only available while supplies last! Supplies are limited and popular items will sell out quickly. This amazing sale ends on January 2.

Head over to my Online store to see all the Discounted Items and Retiring Favorites Items.  You don’t want to miss out on these savings because when they are gone THEY ARE GONE!

****************************************************************************************************

SOMETHING FOR EVERYTHING PAPER PUMPKIN 
SUBSCRIBE TO PAPER PUMPKIN BY DECEMBER 10, 2019

December’s Something for Everything kit includes a super-versatile stamp set complete with 13 sentiments that can be used for occasions ranging from wedding, to get well, birthdays, and more! Plus, the three full-sized card designs (four of each) are gorgeous AND multiuse.  Paper Pumpkin’s December kit makes it easier than ever to give a handmade card to a friend—no matter what the occasion!

This is an all-card kit, with 13 sentiments to cover tons of occasions from weddings, get well, birthday, and more, this set does it all.

Kit details: Makes 12 cards and envelopes

Card size: 4 1/4″ x 5-1/2″ (10.8 x 14 cm)

Envelope size: 4-1/2″ x 5-3/4″ (11.4 x 14.6 cm)

Coordinating colors: Crushed Curry, Grapefruit Grove, Old Olive, Shaded Spruce, Terracotta Tile

  • Subscribe for the December kit at paperpumpkin.com from November 11–December 10.
  • Supplies may be limited toward the end of each subscription period.

Interested in subscribing to Paper Pumpkin?  You can either sign up for a subscription where you are billed monthly for your kit or you can purchase a prepaid subscription in my online store. To see more information and to sign up for the monthly subscription,  Click Here. To see the options for prepaid subscriptions in my online store, Click Here.

****************************************************************************************************

Card stock cuts for this project:

  • Real Red Cardstock 4″ X 5 1/4″ (inner liner mat), 7/8″ X 5 1/2″ (strip on front mat), 2″ X 6″ (pretty label punch)
  • Whisper White Cardstock 2″ X 3″ (sentiment), 3 7/8″ X 5 1/8″ (inner liner)
  • Thick Whisper White Cardstock 8 1/2″ X 5 1/2″(card base scored and folded at 4 1/4″)
  • Let It Snow Specialty Designer Series Paper 4 1/4″ X 5 1/2″ (card front), 3/4″ X 5 1/2″ (strip on front), 1/4″ X 5 1/8″ (strip on inner liner), 1″ X 6″ (strip on envelope front), 2 1/4”X 6″ (envelope flap)
  • Sparkle Glimmer Paper 3 1/4″ X 2 3/4″ (card front snowflakes)

****************************************************************************************************

Product List

Stampin’ Up! Wrapped in Plaid Winter Woods

Good Wednesday morning my fellow stampers.  Happy half way through  the work week day!!  Hope everyone’s week is moving right along.  Other than my surgery getting delayed for 3 hours yesterday, everything went well.  I got to be awake for the whole thing and was able to ask the doctor questions as he was performing the surgery.    The first hand wasn’t too bad, but by the time he started the second the numbness was wearing off.  He did numb it up again though.  Having a bit of trouble using my finger now, but I’ll figure out how and keep moving right along.

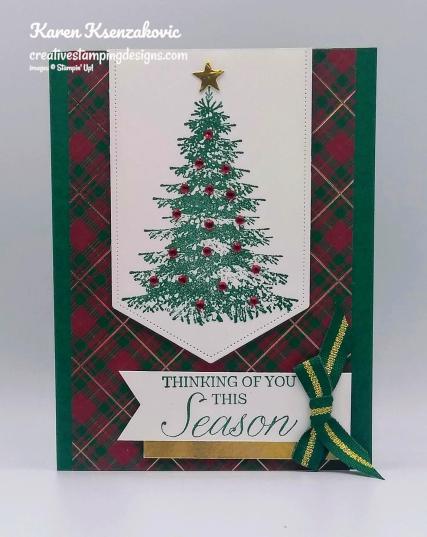
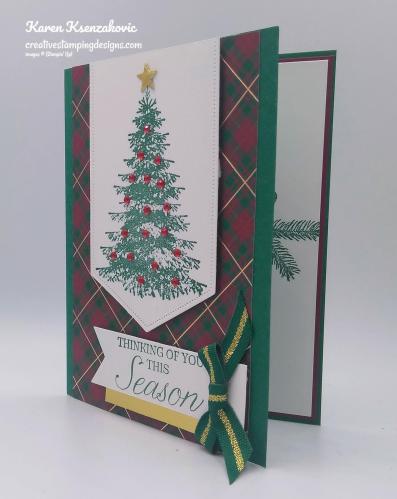
For today’s card I used a stamp set from the Annual Catalog which I absolutely love.    Here’s my card.

My colors were inspired by CAS Colours & Sketches Challenge #350.  Here are their colors.

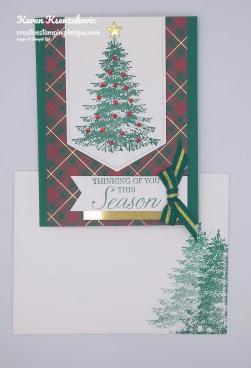
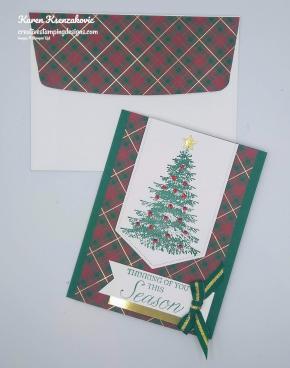
I started by adhering a panel of Wrapped In Plaid Specialty Designer Series Paper to a Shaded Spruce card base using Multipurpose Liquid Glue.

On a panel of Whisper White cardstock I stamped the tree image from the Stampin’ Up Winter Woods Cling Stamp Set in Shaded Spruce Ink.  I cut the image out using the largest Stitched Nested Labels Dies and cut the top section off.  I adhered the artwork to the top of the card front using Stampin’ Dimensionals.  I needed a star for the top of the tree, so I grabbed the Stitched Stars Dies and cut a small star out of a scrap of Gold Foil Sheet.  I adhered the star to the top of the tree using a Glue dot.  I added Red Rhinestone Basic Jewels all over the tree.

On a strip of Whisper White cardstock I stamped the sentiment from the Winter Woods stamp set in Shaded Spruce Ink.  I made a banner out of the strip using my Banner Triple Punch.  I adhered a small strip of a Gold Foil Sheet to the bottom of the banner using Snail and adhered it to the bottom of the card front using Stampin’ Dimensionals.  I tied a small bow from the Shaded Spruce/Gold 3/8″ Striped Ribbon and adhered it to the end of the banner using a Glue Dot.

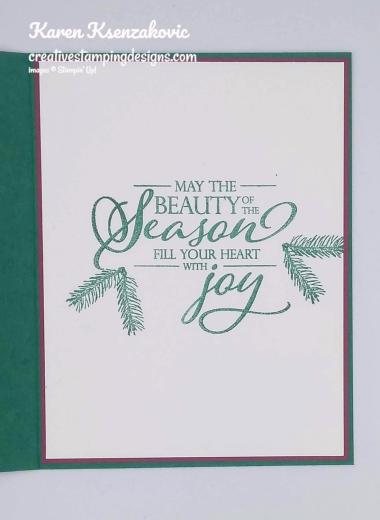
On the inside I stamped the sentiment from the Stampin’ Up Merry Christmas To All Photopolymer Stamp Set in Shaded Spruce Ink in the center of a Whisper White panel.  I stamped the pine bough image from the Winter Woods stamp set in Shaded Spruce Ink on either side of the sentiment.  I adhered the Whisper White panel to a Cherry Cobbler mat using Snail and then to the inside of the Shaded Spruce card base using Multipurpose Liquid Glue.

To finish my card I decorated a Medium Whisper White Envelope.  I stamped the tree image from the Winter Woods stamp set in Shaded Spruce Ink on the envelope front. I stamped one in full strength and another stamped off.  I adhered a panel of the Wrapped In Plaid Specialty DSP to the envelope flap.

Thank you for stopping by my blog today.  I hope you liked my card and will give it a try. Happy Stamping!!

****************************************************************************************************

If you need any stamping supplies, I’d be very happy to be your Demonstrator. Just click HERE to go directly to my online store or drop me an email if you have any questions. 

MY CURRENT HOST CODE IS: NVSKQ72X

For any orders $50 or more I will send you my monthly class tutorials.  Click HERE or go to my Customer Rewards to see what this months tutorials are.

Click HERE to shop the clearance rack.

Happy Stamping, Karen!

****************************************************************************************************

Stampin’ Up!’s Year-End Closeout is here while supplies last!!  You can save on a selection of retiring and surplus items including holiday catalog items, stamp sets, and Paper Pumpkin past kits! Shop early to avoid missing out as items on the sale are only available while supplies last! Supplies are limited and popular items will sell out quickly. This amazing sale ends on January 2.

Head over to my Online store to see all the Discounted Items and Retiring Favorites Items.  You don’t want to miss out on these savings because when they are gone THEY ARE GONE!

****************************************************************************************************

SOMETHING FOR EVERYTHING PAPER PUMPKIN 
SUBSCRIBE TO PAPER PUMPKIN BY DECEMBER 10, 2019

December’s Something for Everything kit includes a super-versatile stamp set complete with 13 sentiments that can be used for occasions ranging from wedding, to get well, birthdays, and more! Plus, the three full-sized card designs (four of each) are gorgeous AND multiuse.  Paper Pumpkin’s December kit makes it easier than ever to give a handmade card to a friend—no matter what the occasion!

This is an all-card kit, with 13 sentiments to cover tons of occasions from weddings, get well, birthday, and more, this set does it all.

Kit details: Makes 12 cards and envelopes

Card size: 4 1/4″ x 5-1/2″ (10.8 x 14 cm)

Envelope size: 4-1/2″ x 5-3/4″ (11.4 x 14.6 cm)

Coordinating colors: Crushed Curry, Grapefruit Grove, Old Olive, Shaded Spruce, Terracotta Tile

  • Subscribe for the December kit at paperpumpkin.com from November 11–December 10.
  • Supplies may be limited toward the end of each subscription period.

Interested in subscribing to Paper Pumpkin?  You can either sign up for a subscription where you are billed monthly for your kit or you can purchase a prepaid subscription in my online store. To see more information and to sign up for the monthly subscription,  Click Here. To see the options for prepaid subscriptions in my online store, Click Here.

****************************************************************************************************

Card stock cuts for this project:

  • Cherry Cobbler Cardstock 4 1/8″ X 5 3/8″ (inner liner mat)
  • Shaded Spruce Cardstock 8 1/2″ X 5 1/2″ (card base scored and folded at 4 1/4″)
  • Whisper White Cardstock 4″ X 5 1/4″ (inner liner), 1″ X 3 1/8″ (card front banner), 3″ X 5″ (artwork)
  • Gold Foil Sheets 3/8″ X 2 5/8″ (strip under banner)
  • Wrapped In Plaid Specialty Designer Series Paper 3 3/4″ X 5 1/2″(card front)

****************************************************************************************************

Product List

Stampin’ Up! Christmas Tidings With a Sneak Peek

Good Tuesday morning my stamping friends.  How has everyone’s week started?  I hope everyone is doing well and finishing up all your cards to get in the mail early.  I’m having a class tonight and the ladies will be making a few more Christmas cards to add to their stash.  They may even be making this one.  Before my class though I will be gong in for surgery.  I’ve had trigger finger in both of my hands and I just couldn’t stand the pain anymore or the locking of my fingers.  I am having both hands operated on at the same time, I must be nuts.  I was told that I am to use my hands immediately, so I figured why not have a class.  The first thing my daughter said when I told her I was having surgery was ” so you’ll be ok to bake cookies this year then right?”.  You can see where her priorities are, lol.
So today I have a card that looks more involved than it really is.  Once you get the couple pieces cut out, it goes together really quick.  I was very hesitant about getting the Toile Tiding Designer Series Paper, I wasn’t sure I was going to like it.  It’s only 2 colors + Very Vanilla, Garden Green on one side and Real Red on the other.  I’m so happy I bought it, I really love the designs on this paper.  Once again I was inspired by one of my team members, Akiko, who made this card for our weekly blog hop a couple weeks ago.  Here is her card.  Here’s my take on it.

I started by cutting a circle in a Very Vanilla card front using the 2nd largest circle from the Layering Circles Dies.  As in my description, I have a little sneak peek of something coming January 3, 2020 in the new Mini Catalog (formally known as the occasions catalog).  I embossed the Very Vanilla panel using the new Parisian Flourish 3D Embossing Folder, isn’t it just gorgeous.  Using the largest scallop circle from the Layering Circles Dies, I cut a piece of Real Red cardstock.  I used the 2nd largest circle die from the Layering Circles Dies to cut the inside of the scallop circle to make a frame.  I adhered the scallop frame to the Very Vanilla card front using Multipurpose Liquid Glue.  I cut a panel of Toile Tidings DSP using the largest circle die from the Layering Circles Dies making sure to get the image I wanted in the circle.  I adhered the Toile Tidings DSP circle behind the Very Vanilla panel using Stampin’ Dimensionals.

I wrapped a piece of Garden Green 3/8″ Double-Stitched Ribbon around the panel and tied a knot.  I adhered the Very Vanilla panel to a Garden Green card base using Stampin’ Dimensionals.

On a scrap of Very Vanilla cardstock I stamped the sentiment from the Stampin’ Up! Toile Christmas Cling Stamp Set in Garden Green Ink. I cut the sentiment out using the Christmas Cardinal Dies. I adhered the cut sentiment to the card front using Stampin’ Dimensionals.  I added a few Real Red Toile Tidings Glitter Enamel Dots to the card front.

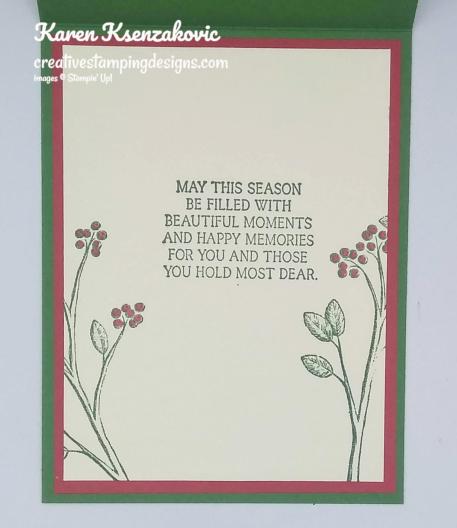
On the inside I stamped the sentiment from the Toile Christmas stamp set in Garden Green Ink in the center of a Very Vanilla panel.  I stamped the branch image from the Toile Christmas stamp set on either side of the panel in Garden Green Ink.  I colored the berries on the branches in using my Real Red Stampin’ Blends Markers.  I adhered the Very Vanilla panel to a Real Red mat using Snail and then to the inside of the Garden Green card base using Multipurpose Liquid Glue.

To finish my card I decorated a Medium Very Vanilla Envelope.  I stamped the branch image from the Toile Christmas stamp set in Garden Green Ink on the envelope front.  I colored the berries on the branch in using my Real Red Stampin’ Blends Marker.  I adhered a panel of the Toile Tidings DSP to the envelope flap.

Thank you for visiting my blog today.  I hope you liked my card and will give it a try. Happy Stamping!!

****************************************************************************************************

If you need any stamping supplies, I’d be very happy to be your Demonstrator. Just click HERE to go directly to my online store or drop me an email if you have any questions. 

MY CURRENT HOST CODE IS: NVSKQ72X

For any orders $50 or more I will send you my monthly class tutorials.  Click HERE or go to my Customer Rewards to see what this months tutorials are.

Click HERE to shop the clearance rack.

Happy Stamping, Karen!

****************************************************************************************************

SOMETHING FOR EVERYTHING PAPER PUMPKIN 
SUBSCRIBE TO PAPER PUMPKIN BY DECEMBER 10, 2019

December’s Something for Everything kit includes a super-versatile stamp set complete with 13 sentiments that can be used for occasions ranging from wedding, to get well, birthdays, and more! Plus, the three full-sized card designs (four of each) are gorgeous AND multiuse.  Paper Pumpkin’s December kit makes it easier than ever to give a handmade card to a friend—no matter what the occasion!

This is an all-card kit, with 13 sentiments to cover tons of occasions from weddings, get well, birthday, and more, this set does it all.

Kit details: Makes 12 cards and envelopes

Card size: 4 1/4″ x 5-1/2″ (10.8 x 14 cm)

Envelope size: 4-1/2″ x 5-3/4″ (11.4 x 14.6 cm)

Coordinating colors: Crushed Curry, Grapefruit Grove, Old Olive, Shaded Spruce, Terracotta Tile

  • Subscribe for the December kit at paperpumpkin.com from November 11–December 10.
  • Supplies may be limited toward the end of each subscription period.

Interested in subscribing to Paper Pumpkin?  You can either sign up for a subscription where you are billed monthly for your kit or you can purchase a prepaid subscription in my online store. To see more information and to sign up for the monthly subscription,  Click Here. To see the options for prepaid subscriptions in my online store, Click Here.

****************************************************************************************************

Card stock cuts for this project:

  • Garden Green Cardstock 4 1/4″ X 11″ (card base scored and folded at 5 1/2″)
  • Real Red Cardstock 4″ X 5 1/4″ (inner liner mat), 3 1/2″ X 3 1/2″ (scallop frame)
  • Very Vanilla Cardstock 4″ X 5 1/4″ (card front), 3 3/4″ X 5″ (inner liner)
  • Toile Tidings Designer Series Paper

****************************************************************************************************

Product List