Stampin’ Up! Sunshine & Tulips Springtime Scenes for The Card Concepts

Good Wednesday morning stamping friends. I hope you are all having a wonderful week. We’re halfway through and on our way to the weekend. Tomorrow this time I’ll be flying out to Long Beach CA for OnStage. I’m so excited to get my hands on the new catalog and see the new products coming in May.

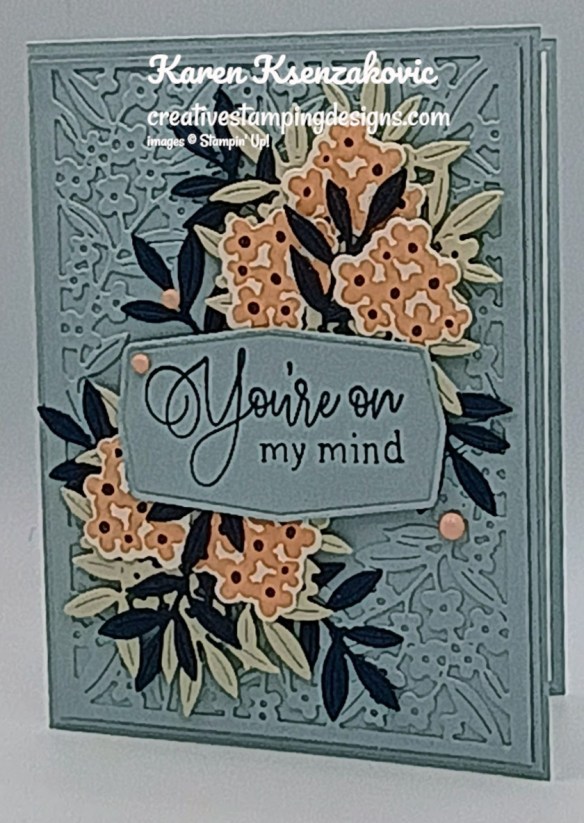
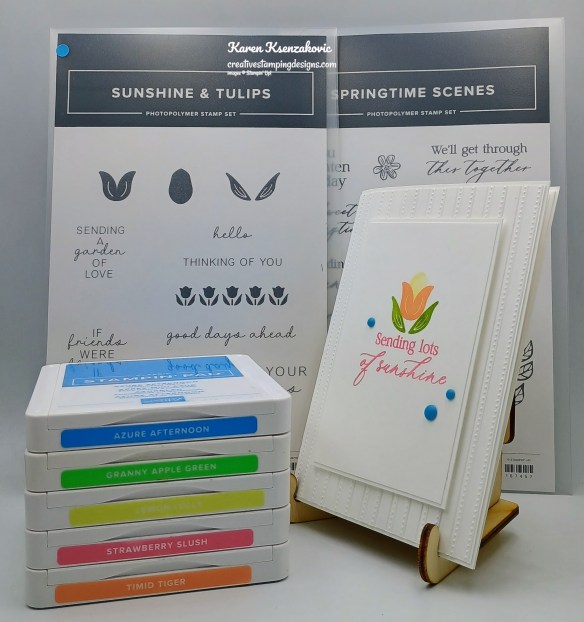
Today’s card is for the inspiration challenge from The Card Concepts. The inspiration photo #225 is April Flowers. I used lots of layered on my card again, since that is one of my favorite kinds of cards to make. If you’d like to see a quick video of how I made this card, Click Here to go to my Instagram Reels. Here’s my card for today.
Stampin' Up! Sunshine & Tulips Springtime Scenes 1 creativestampingdesigns.com

I used the Stampin’ Up! Sunshine & Tulips Stamp Set along with the Stampin’ Up! Springtime Scenes Stamp Set and Lovely Stripes 3D Embossing Folder for my card today. I was inspired by the tulips in the photo along with the colors for my Clean & Layered card.

I hope you will take a moment to visit The Card Concepts and join us for our challenge 225.  How are you inspired by the photos?

Stampin' Up! Sunshine & Tulips Springtime Scenes 2 creativestampingdesigns.com

Emboss a panel of Basic White using the Lovely Stripes EF. Adhere the embossed panel to a Basic White Thick card base.

Stampin' Up! Sunshine & Tulips Springtime Scenes 3 creativestampingdesigns.com

On a panel of Basic White, stamp the sentiment from Springtime Scenes stamp set in Strawberry Slush Ink. Stamp the leaf image from Sunshine & Tulips stamp set above the sentiment in Granny Apple Green Ink. Stamp the outside tulip image from Sunshine & Tulips stamp set in Timid Tiger Ink above the leaf image. Stamp the inside tulip image from the Sunshine & Tulips stamp set in Lemon Lolly Ink over the outside image.

Stampin' Up! Sunshine & Tulips Springtime Scenes 4 creativestampingdesigns.com

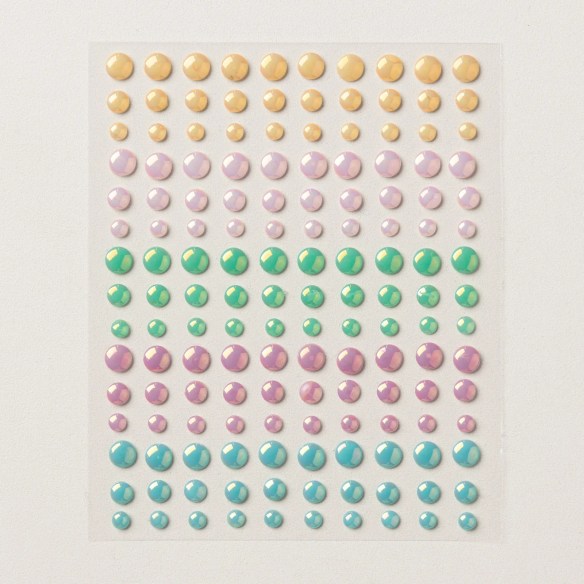
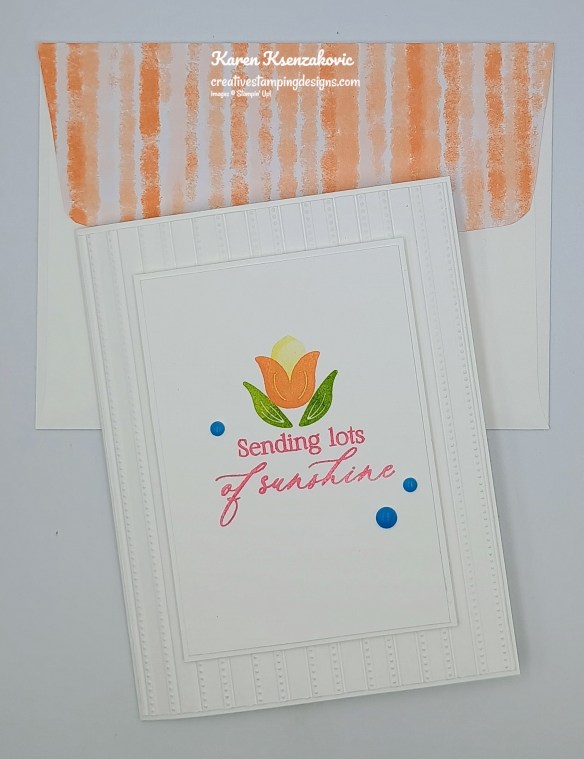
Adhere the artwork panel to a Basic White mat. Adhere the layered panel to the card front with Stampin’ Dimensionals. Add a few Rainbow Adhesive-Backed Dots to the card front.
Stampin' Up! Sunshine & Tulips Springtime Scenes 5 creativestampingdesigns.com

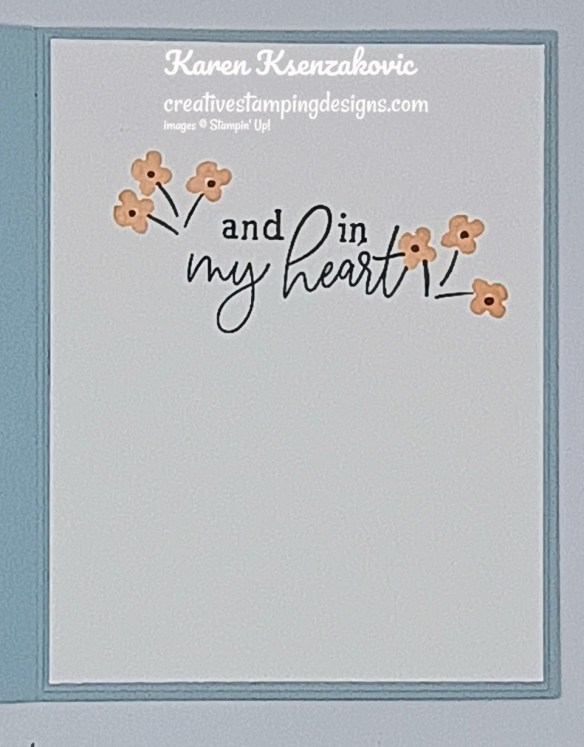
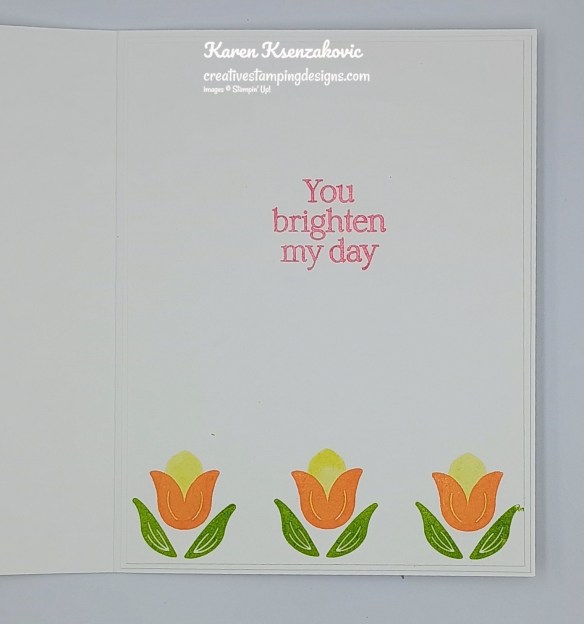
On a panel of Basic White, stamp the sentiment from the Springtime Scenes stamp set in Strawberry Slush Ink. Stamp the leaf image from the Sunshine & Tulips stamp set in Granny Apple Green Ink on the bottom of the panel. Stamp the outside tulip image from Sunshine & Tulips stamp set in Timid Tiger Ink. Stamp the inside tulip image from the Sunshine & Tulips stamp set in Lemon Lolly Ink over the outside images. Adhere the Basic White panel to a Basic White mat then to the inside of the Basic White thick card base.
Stampin' Up! Sunshine & Tulips Springtime Scenes 6 creativestampingdesigns.com

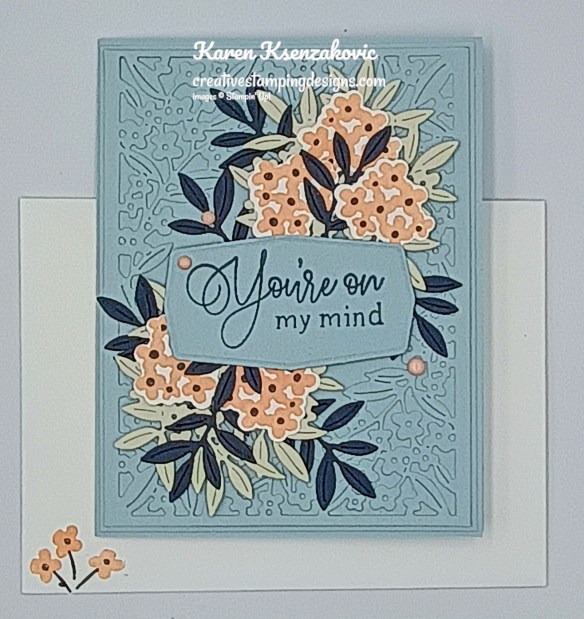
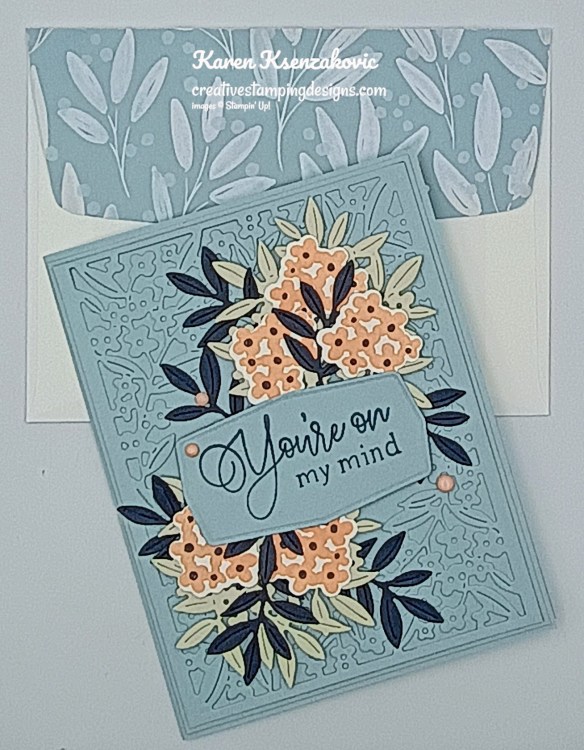
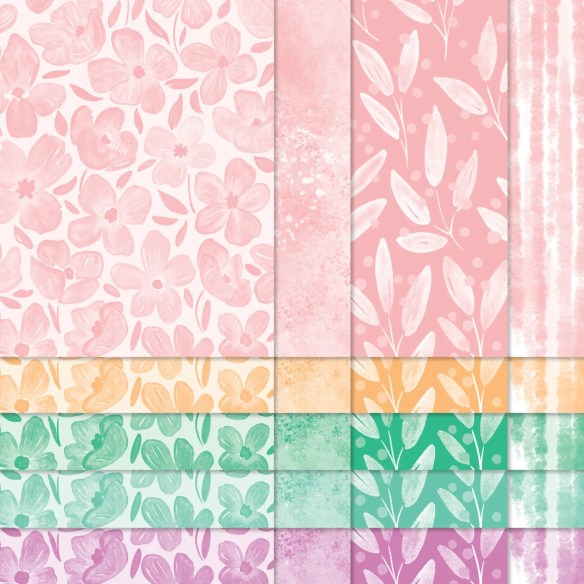
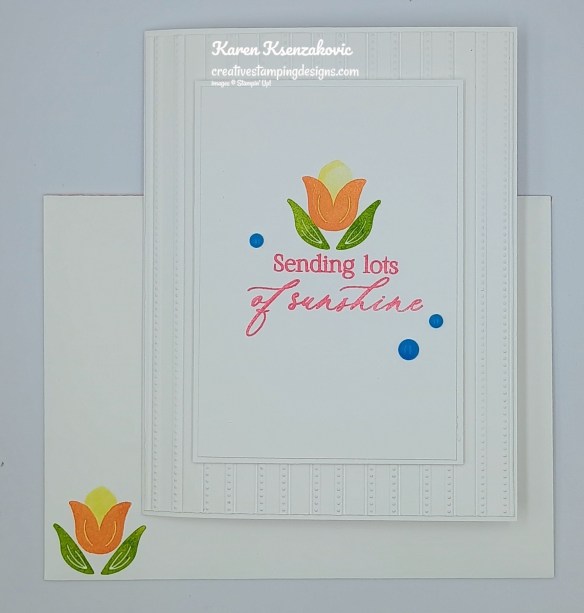
Decorate a Basic White Medium Envelope to finish your card. Stamp the leaf image from the Sunshine & Tulips stamp set in Granny Apple Green Ink on the envelope front. Stamp the outside tulip image from the Sunshine & Tulips stamp set in Timid Tiger Ink and the inside tulip image in Lemon Lolly Ink. Adhere a panel of 2025-2027 In-Color DSP to the envelope flap.
Stampin' Up! Sunshine & Tulips Springtime Scenes 7 creativestampingdesigns.com

Thank you for stopping by my blog today. I hope you like the card and will give it a try. Happy Stamping!!

*********************************************************************************************************

If you need any stamping supplies, I’d love to be your Demonstrator. Just click HERE to go directly to my online store or drop me an email if you have any questions. 

*********************************************************************************************************

Poetry Garden Online Class Registration Open
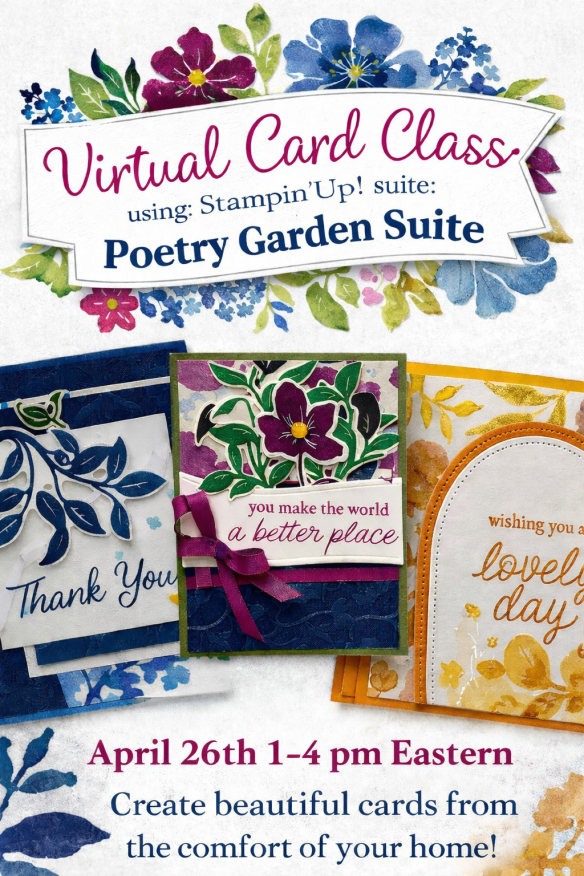
Tara Carpenter and I are teaming up to offer a fun online class using Stampin’ Up! March Online Exclusive Poetry Garden Suite.  We will be creating 6 different cards during the class including 2 Fun Fold Cards.  Sign Up now by Clicking Here to reserve your spot.

The class fee includes:

  • Stampin’ Up! Garden Epoxy Dots (full pack)
  • Stampin’ Up! Berry Burst 1/4″ Shiny Ribbon (full pack)
  • Pre-cut card kits to complete each card
  • Zoom class with complete instructions to complete each card
  • PDF with detailed directions

During sign up you will have the option to add additional items to your order that you can take advantage of at no additional shipping cost.  These items are optional, however if you want to recreate the cards you will need them. If you’ve attended a previous class, you were given a discount code, there is a spot to put that code on the form and the discount only applies to the products that you check off that you wish to purchase, not the class.  Since the Bundles are already discounted, the discount does not apply to them either.

The class will be held Sunday April 26th from 1 to 4 pm Eastern Time via Zoom.  This allows anyone in the United States to participate live!  Can’t join us live… no worries, we will record the session so it can be replayed at any time.

I will email written directions that will include directions, cardstock cuts as well as photos to help you create each card.

The bundles are not included in the price of the class.  You can purchase the bundle through me at an additional 10% discount of the Online Exclusive price (see below).

Class Cost $40 + $10 (Shipping) 

Additional purchased items will be included in the above shipping price.  I will invoice you through PayPal and invoices must be paid by April 5th to insure I can get the products delivered, packaged up and out to you with enough time.  

Deadline: Sunday April 5th 

Click Here to register for the class now!! Let me know if you have any questions.

*********************************************************************************************************

Card stock cuts for this project:

  • Basic White Cardstock (2) – 4 1/8″ x 5 3/8″(card front & inner liner mats), (2) – 4″ x 5 1/4″(card front & inner liner), 2 7/8″ x 4 1/8″ (artwork), 3″ x 4 1/4″(artwork mat)
  • Basic Whtie Thick Cardstock 5 1/2″ x 8 1/2″(card base scored & folded at 4 1/4″)
  • 2025-2027 6 x 6 In-Color Designer Series Paper 2 1/4″ x 6″(envelope flap)

*********************************************************************************************************

Product List

Stampin’ Up! Forever Florals

Good Sunday morning stamping friends and welcome to Daylight Savings Time, my favorite time of the year. What kind of plans do you have for today? I’ll be heading to Amy’s this afternoon for our quarterly team meeting and stamping with friends.

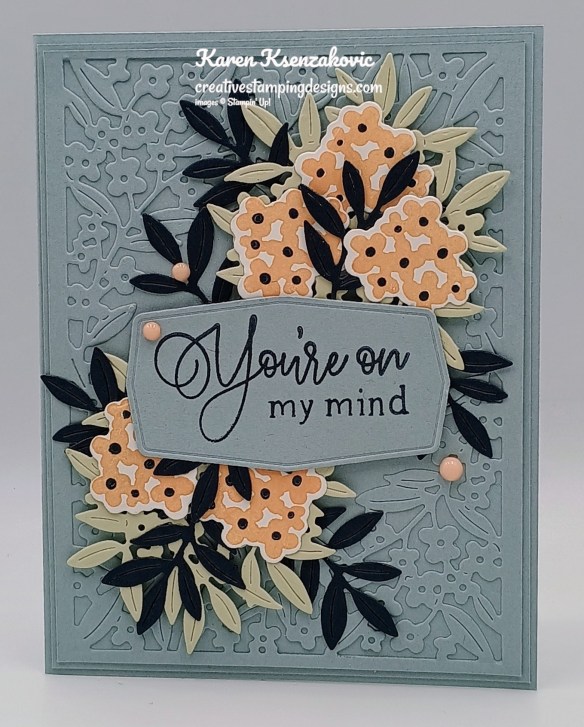
I played with another new bundle that just became available with the March Online Exclusives. Here’s my card for today

Stampin' Up! Forever Florals 1 creativestampingdesigns.com

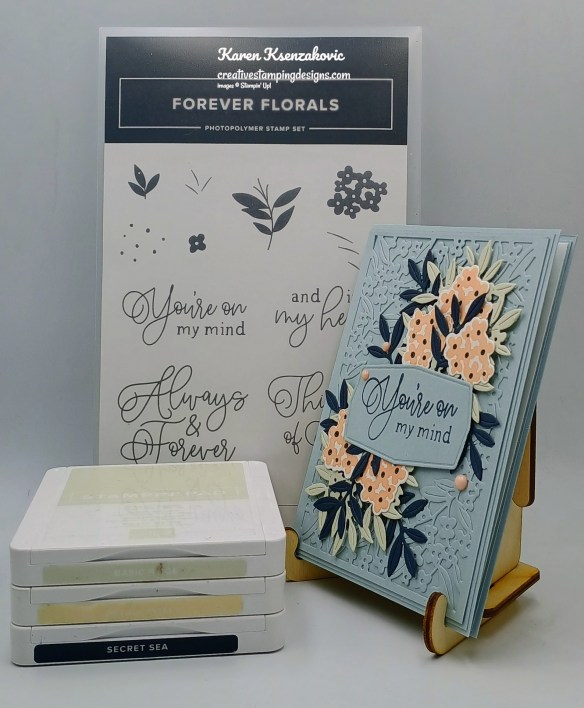
I used the Stampin’ Up! Forever Florals Bundle for my card today.

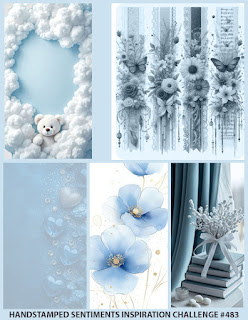
I played along with the Hand Stamped Sentiments Inspiration Challenge #483

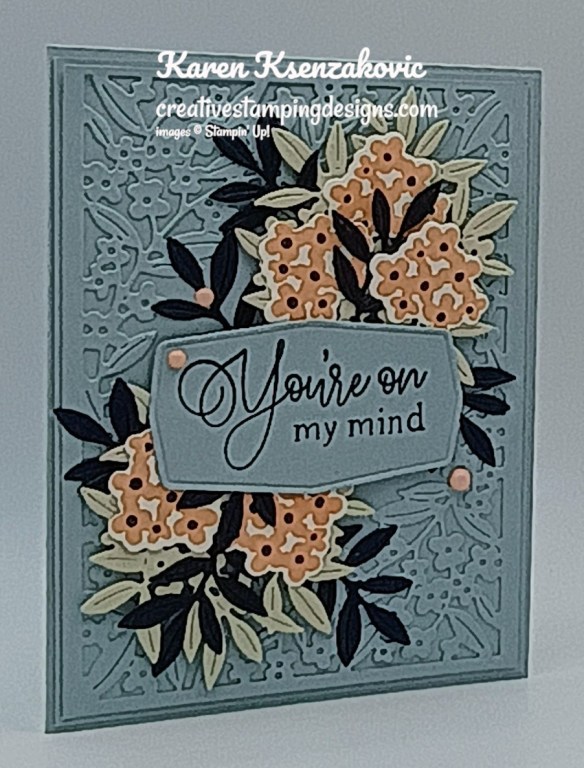
Stampin' Up! Forever Florals 2 creativestampingdesigns.com

Cut a Cloud Cover card front using the largest Forever Florals Dies. Adhere the die cut panel to a Cloud Cover mat then to the front of the Cloud Cover card base.

Stampin' Up! Forever Florals 3 creativestampingdesigns.com

Die cut 2 of the large leaf/flower die using the Forever Florals Dies from a panel of Basic Beige. Cut the small leaf die using the Forever Florals Dies from a panel of Secret Sea. On a panel of Basic White, stamp the cluster of flower image from the Forever Florals stamp set in Petal Pink Ink 5 times. Stamp the flower center image from the Forever Florals stamp set in Secret Sea Ink over the flower image. Cut the flower out using the Forever Florals Dies. Arrange and adhere the flowers and leaves to the card front.

Stampin' Up! Forever Florals 4 creativestampingdesigns.com

On a panel of Cloud Cover, stamp the sentiment from the Forever Florals stamp set in Secret Sea Ink. Cut the sentiment out using the Forever Florals Dies. Adhere the sentiment to the card front with Stampin’ Dimensionals. Add a few Muted Palette Dots to the card front.

Stampin' Up! Forever Florals 5 creativestampingdesigns.com

Stamp the sentiment from Forever Florals stamp set in Secret Sea Ink on a panel of Basic White. Stamp the small stem image from Forever Florals stamp set in Secret Sea Ink next to the sentiments. Stamp the single flower image from Forever Florals stamp set in Petal Pink Ink. Adhere the Basic White panel to a Cloud Cover mat then to the inside of the Cloud Cover card base.

Stampin' Up! Forever Florals 6 creativestampingdesigns.com

Decorate a Basic White Medium Envelope to finish your card. Stamp the small stem image from the Forever Florals stamp set in Secret Sea Ink on the envelope front. Stamp the single flower image from Forever Florals stamp set on the stems in Petal Pink Ink and the flower centers in Secret Sea. Adhere a panel of 2025-2027 In-Color DSP to the envelope flap.

Stampin' Up! Forever Florals 7 creativestampingdesigns.com

Thank you for stopping by my blog today. I hope you like the card and will give it a try. Happy Stamping!!

*********************************************************************************************************

If you need any stamping supplies, I’d love to be your Demonstrator. Just click HERE to go directly to my online store or drop me an email if you have any questions. 

*********************************************************************************************************

Double Creative Stamping Designs Rewards

The new March Online Exclusives are now available to order.  I’m offering Double Creative Stamping Designs Rewards. THAT’S 2X THE REWARDS FOR YOU FROM ME!!!  March 3 – Monday March 9 for all orders over $50 (before tax & shipping)!! How does this work? For a $50 you’ll earn 2 rewards, $100 you’ll earn 4 rewards, $150 you’ll earn 6 rewards, etc. Head over to my Online Store and get those orders in early and earn those Double Rewards!!

*********************************************************************************************************

Poetry Garden Online Class Registration Open

Tara Carpenter and I are teaming up to offer a fun online class using Stampin’ Up! March Online Exclusive Poetry Garden Suite.  We will be creating 6 different cards during the class including 2 Fun Fold Cards.  Sign Up now by Clicking Here to reserve your spot.

The class fee includes:

  • Stampin’ Up! Garden Epoxy Dots (full pack)
  • Stampin’ Up! Berry Burst 1/4″ Shiny Ribbon (full pack)
  • Pre-cut card kits to complete each card
  • Zoom class with complete instructions to complete each card
  • PDF with detailed directions

During sign up you will have the option to add additional items to your order that you can take advantage of at no additional shipping cost.  These items are optional, however if you want to recreate the cards you will need them. If you’ve attended a previous class, you were given a discount code, there is a spot to put that code on the form and the discount only applies to the products that you check off that you wish to purchase, not the class.  Since the Bundles are already discounted, the discount does not apply to them either.

The class will be held Sunday April 26th from 1 to 4 pm Eastern Time via Zoom.  This allows anyone in the United States to participate live!  Can’t join us live… no worries, we will record the session so it can be replayed at any time.

I will email written directions that will include directions, cardstock cuts as well as photos to help you create each card.

The bundles are not included in the price of the class.  You can purchase the bundle through me at an additional 10% discount of the Online Exclusive price (see below).

Class Cost $40 + $10 (Shipping) 

Additional purchased items will be included in the above shipping price.  I will invoice you through PayPal and invoices must be paid by April 5th to insure I can get the products delivered, packaged up and out to you with enough time.  

Deadline: Sunday April 5th 

Click Here to register for the class now!! Let me know if you have any questions.

*********************************************************************************************************

I’ve updated my Retired List. I’ve added a LOT more items that have been retired by Stampin’ Up! at a discounted price. Check out my list, there might be something that you missed out on and really wanted. You can find it by Clicking Here.

*********************************************************************************************************

Card stock cuts for this project:

  • Basic Beige Cardstock 3 1/4″ x 5 1/2″(die cuts)
  • Basic White Cardstock 3″ x 4″(die cuts), 4″ x 5 1/4″(inner liner)
  • Cloud Cover Cardstock 5 1/2″ x 8 1/2″(card base scored & folded at 4 1/4″), (2) – 4 1/8″ x 5 3/8″(card front & inner liner mats), 4″ x 5 1/4″(card front), 1 3/4″ xc 3 1/4″(sentiment)
  • Secret Sea Cardstock 3 1/4″ x 4″(die cuts)
  • 2025-2027 6×6 In-Color Designer Series Paper 2 1/4″ x 6″(envelope)

*********************************************************************************************************

Product List

Stampin’ Up! Flower Fair Make A Wish

Good Saturday morning stamping friends and welcome to the weekend. I hope you are starting to make some plans for the weekend. I’ll be working all day today and I’m guessing it won’t be too busy since it’s supposed to be a rainy day again.

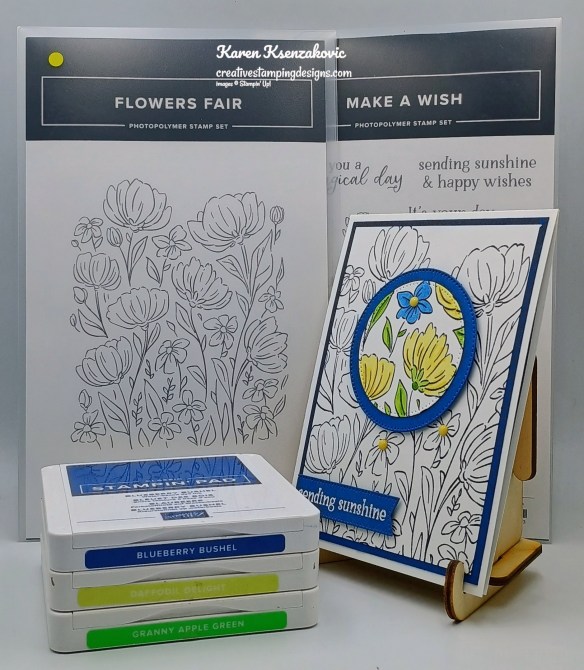
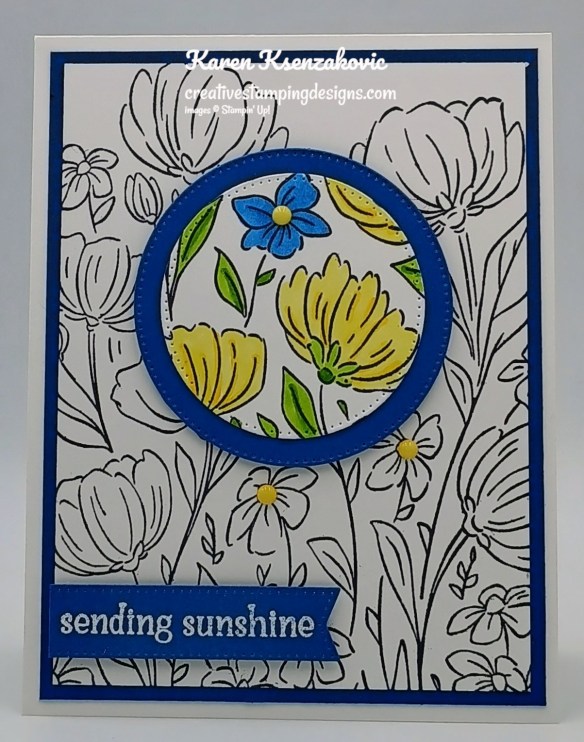
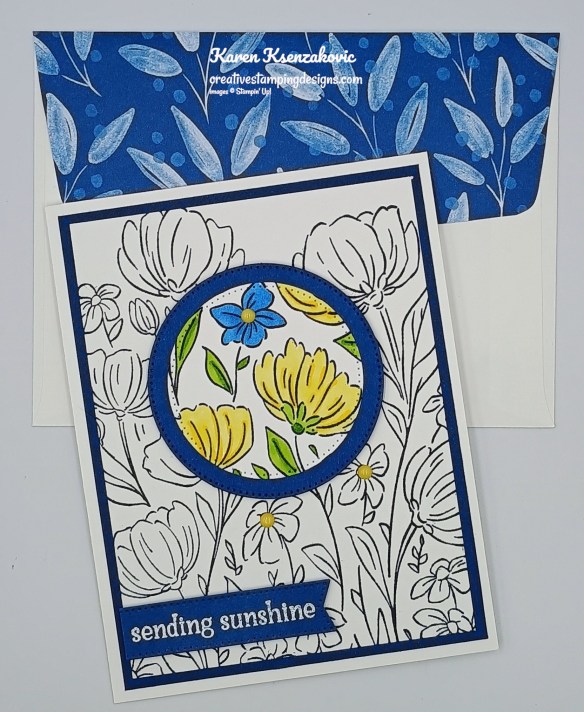
I played with some new Online Exclusive sets for today’s card doing a simple and fun technique If you’d like to see a quick video on how I made this card, Click Here to go to my Instagram Reels. Here is my card for today.

Stampin' Up! Flower Fair Spotlight 1 creativestampingdesigns.com

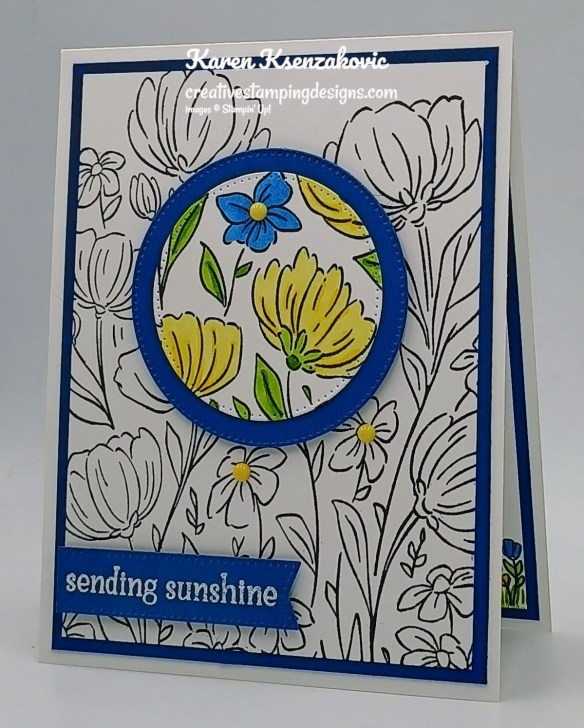
I used the new Stampin’ Up! Flower Fair Stamp Set along with the Stylish Shapes Dies and Stampin’ Up! Make A Wish Stamp Set for my card today.

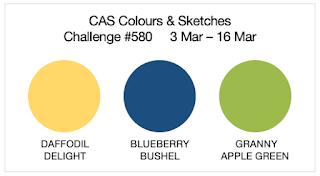
The colors for my card today are from the Colours & Sketches Challenge #580

Stampin' Up! Flower Fair Spotlight 2 creativestampingdesigns.com

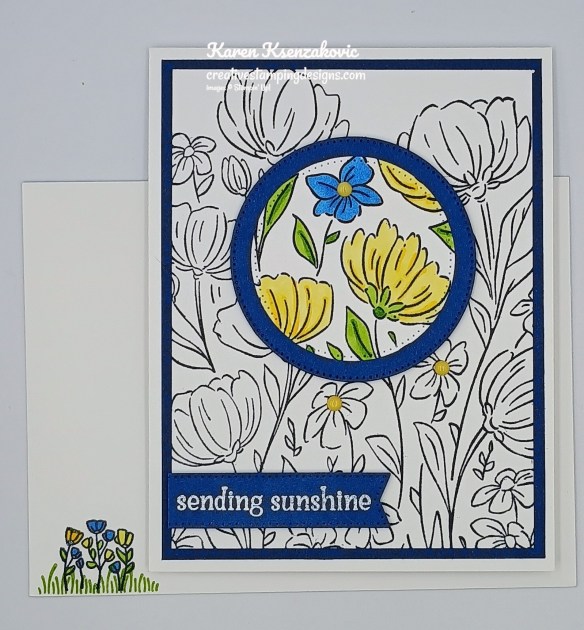
Stamp the flower image from Flower Fair stamp set in Tuxedo Black Ink on a Basic White card front. Using the Stylish Shapes Dies, cut a circle out from the image. Using the next size larger circle from the Stylish Shapes Dies, cut a panel of Blueberry Bushel. Color the die cut area only using Blueberry Bushel, Daffodil Delight and Granny Apple Green Stampin’ Blends Markers.

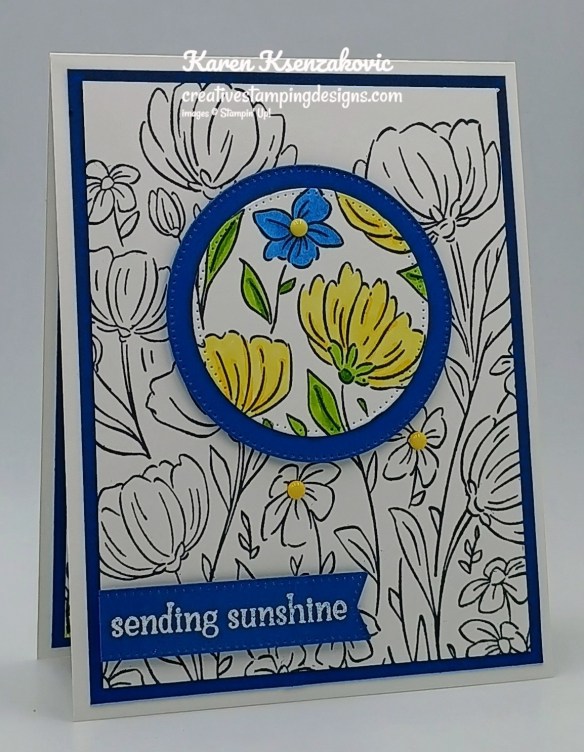
Stampin' Up! Flower Fair Spotlight 3 creativestampingdesigns.com

Adhere the stamped Basic White panel to a Blueberry Bushel mat. Adhere the layered panel to a Basic White Thick card base. Adhere the colored die cut to the Blueberry Bushel die cut mat. Adhere the layered panel to the card front, where you cut it from, with Stampin’ Dimensionals.

Stampin' Up! Flower Fair Spotlight 4 creativestampingdesigns.com

On a panel of Blueberry Bushel, stamp the sentiment from the Make A Wish stamp set in Versamark Ink. Sprinkle the sentiment with White Embossing Powder and set it using the Heat Tool. Cut the sentiment out using the banner die from the Stylish Shapes Dies. Adhere the sentiment to the card front with Stampin’ Dimensionals. Add a few Muted Palette Dots to the card front.

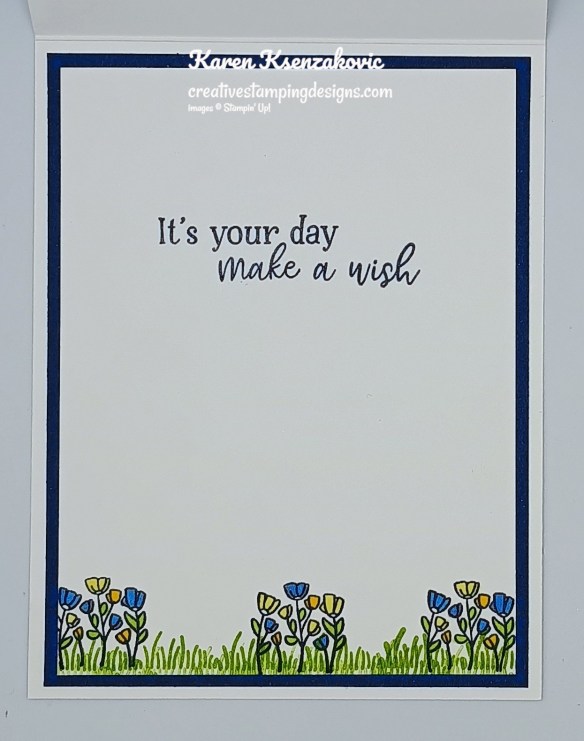
Stampin' Up! Flower Fair Spotlight 5 creativestampingdesigns.com

Stamp the sentiment from the Make A Wish stamp set in Blueberry Bushel Ink on a panel of Basic White. Stamp the grass image from Make A Wish stamp set along the bottom of the panel. Stamp the flower image from Make A Wish stamp set in Tuxedo Black Ink on the bottom of the panel. Color the images using Blueberry Bushel, Daffodil Delight and Granny Apple Green Stampin’ Blends Markers. Adhere the Basic White panel to a Blueberry Bushel mat then to the inside of the Basic Whtie Thick card base.

Stampin' Up! Flower Fair Spotlight 6 creativestampingdesigns.com

Decorate a Basic White Medium Envelope to finish the card. Stamp the grass image from the Make A Wish stamp set in Granny Apple Green Ink on the envelope front. Stamp the flower image from the Make A Wish stamp set in Tuxedo Black Ink. Color the image with Blueberry Bushel, Daffodil Delight and Granny Apple Green Stampin’ Blends Markers. Adhere a panel of Regals 6 x 6 DSP to the envelope flap.

Stampin' Up! Flower Fair Spotlight 7 creativestampingdesigns.com

Thank you for stopping by my blog today. I hope you like the card and will give it a try. Happy Stamping!!

*********************************************************************************************************

If you need any stamping supplies, I’d love to be your Demonstrator. Just click HERE to go directly to my online store or drop me an email if you have any questions. 

*********************************************************************************************************

Double Creative Stamping Designs Rewards

The new March Online Exclusives are now available to order.  I’m offering Double Creative Stamping Designs Rewards. THAT’S 2X THE REWARDS FOR YOU FROM ME!!!  March 3 – Monday March 9 for all orders over $50 (before tax & shipping)!! How does this work? For a $50 you’ll earn 2 rewards, $100 you’ll earn 4 rewards, $150 you’ll earn 6 rewards, etc. Head over to my Online Store and get those orders in early and earn those Double Rewards!!

*********************************************************************************************************

Poetry Garden Online Class Registration Open

Tara Carpenter and I are teaming up to offer a fun online class using Stampin’ Up! March Online Exclusive Poetry Garden Suite.  We will be creating 6 different cards during the class including 2 Fun Fold Cards.  Sign Up now by Clicking Here to reserve your spot.

The class fee includes:

  • Stampin’ Up! Garden Epoxy Dots (full pack)
  • Stampin’ Up! Berry Burst 1/4″ Shiny Ribbon (full pack)
  • Pre-cut card kits to complete each card
  • Zoom class with complete instructions to complete each card
  • PDF with detailed directions

During sign up you will have the option to add additional items to your order that you can take advantage of at no additional shipping cost.  These items are optional, however if you want to recreate the cards you will need them. If you’ve attended a previous class, you were given a discount code, there is a spot to put that code on the form and the discount only applies to the products that you check off that you wish to purchase, not the class.  Since the Bundles are already discounted, the discount does not apply to them either.

The class will be held Sunday April 26th from 1 to 4 pm Eastern Time via Zoom.  This allows anyone in the United States to participate live!  Can’t join us live… no worries, we will record the session so it can be replayed at any time.

I will email written directions that will include directions, cardstock cuts as well as photos to help you create each card.

The bundles are not included in the price of the class.  You can purchase the bundle through me at an additional 10% discount of the Online Exclusive price (see below).

Class Cost $40 + $10 (Shipping) 

Additional purchased items will be included in the above shipping price.  I will invoice you through PayPal and invoices must be paid by April 5th to insure I can get the products delivered, packaged up and out to you with enough time.  

Deadline: Sunday April 5th 

Click Here to register for the class now!! Let me know if you have any questions.

*********************************************************************************************************

I’ve updated my Retired List. I’ve added a LOT more items that have been retired by Stampin’ Up! at a discounted price. Check out my list, there might be something that you missed out on and really wanted. You can find it by Clicking Here.

*********************************************************************************************************

Card stock cuts for this project:

  • Basic White Cardstock (2) – 3 3/4″ x 5″(card front & inner liner)
  • Basic White Thick Cardstock 4 1/4″ x 11″(card base scored & folded at 5 1/2″)
  • Blueberry Bushel Cardstock (2) – 4″ x 5 1/4″(card front & inner liner mats), 3″ x 3″(spotlight mat), 1″ x 3 1/4″(sentiment)
  • regals 6 x 6 Designer Series Paper 2 1/4″ x 6″(envelope)

*********************************************************************************************************

Product List

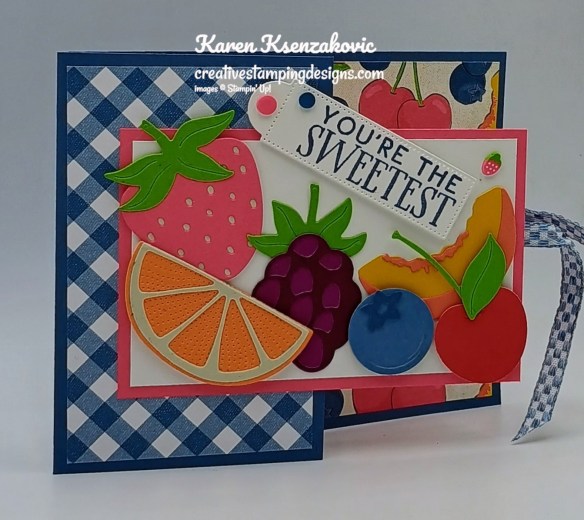
Stampin’ Up! Filled with Sweetness for Fun Fold Friday

Good Friday morning stamping friends, welcome to my fun fold Friday. I hope you all had a great week and are looking forward to the weekend. We went from one extreme to another here in NJ. We’re getting ready to float away with all the rain we’re having, yet we still have snow on the ground. I was hoping that March would come in really windy to dry up the ground a little.

Today’s card is one that I did on my YouTube Live yesterday. If you were able to join me, thank you for hopping on. If you’d like to watch the replay and stamp along, the measurements are on the bottom of this post along with the link to my video. Here’s my card for today.

Stampin' Up! Filled with Sweetness Fun Fold 1 creativestampingdesigns.com

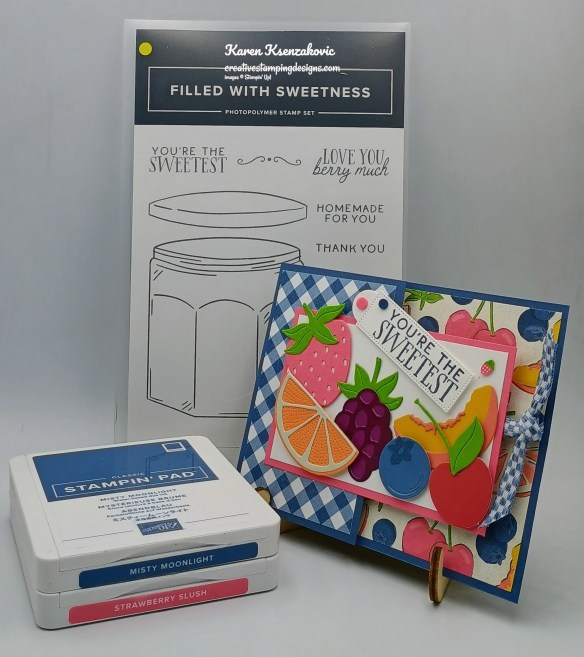
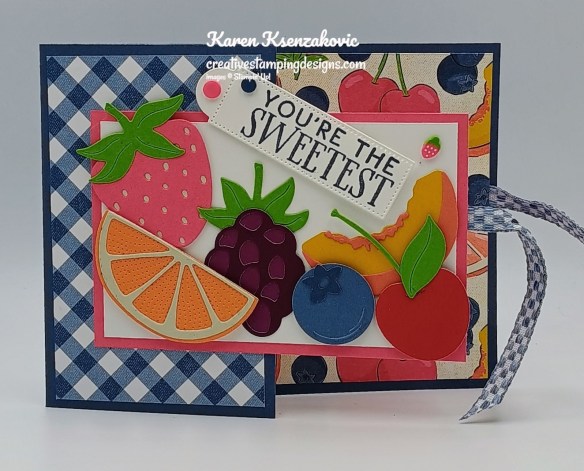
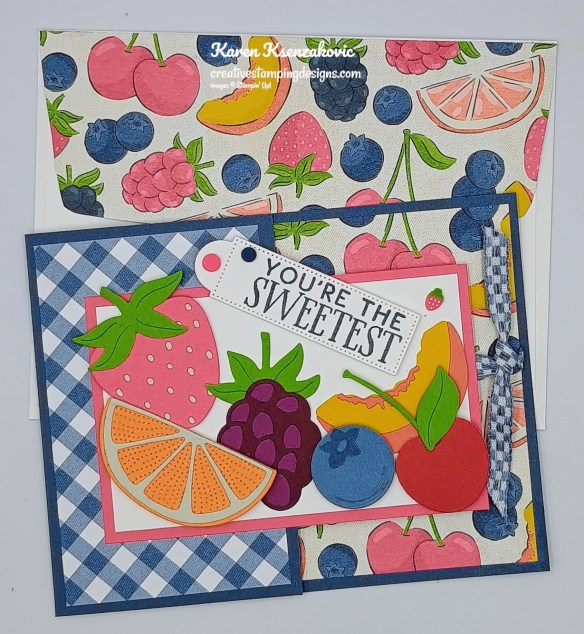
I used the Stampin’ Up! Filled With Sweetness Bundle along with the Homemade Sweetness Designer Series Paper and Made With Sweetness Dies for my card today.

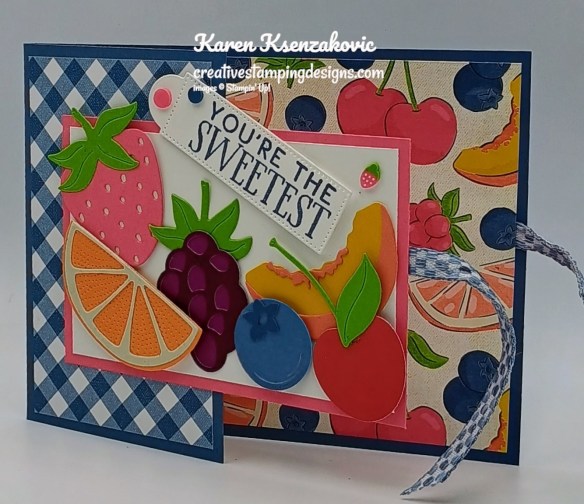
Stampin' Up! Filled with Sweetness Fun Fold 2 creativestampingdesigns.com

Stamp the sentiment from Filled With Sweetness stamp set in Misty Moonlight Ink on a panel of Basic White. Cut the sentiment out using the Filled With Sweetness Dies. Adhere a panel of Homemade Sweetness DSP to the front of the card base.

Stampin' Up! Filled with Sweetness Fun Fold 3 creativestampingdesigns.com

Using the Made With Sweetness Dies cut all the fruit images. Stems and leaves from Granny Apple Green. Strawberry from Strawberry Slush and Basic Beige. Peach from Crushed Curry and Calypso Coral. Cherry from Real Red. Blackberry from Blackberry Bliss Two-Tone cardstock. Blueberry from Misty Moonlight Two-Tone cardstock. Adhere the pieces together. Arrange the fruit pieces on a panel of Basic White the way you like them. Adhere the Basic White panel to a Strawberry Slush mat.

Stampin' Up! Filled with Sweetness Fun Fold 4 creativestampingdesigns.com

Adhere a piece of Misty Moonlight 1/4″ Checkered Trim to the card front, adhering it with Tear & Tape. Adhere the artwork panel to the card front, adding adhesive only to the back left half of the panel. Adhere the sentiment to the card front with Stampin’ Dimensionals. Add a few Strawberries and Dots to the card front.

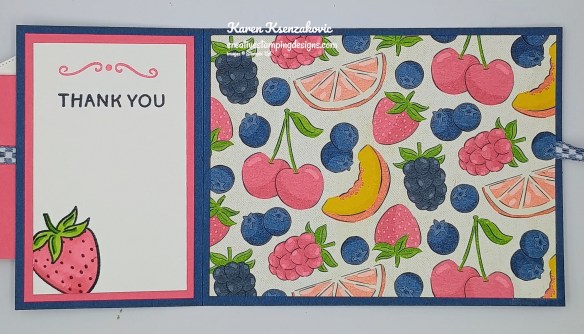
Stampin' Up! Filled with Sweetness Fun Fold 5 creativestampingdesigns.com

Adhere a piece of Misty Moonlight 1/4″ Checkered Trim to the inside back panel of the Misty Moonlight card base securing it with Tear & Tape. Adhere a panel of Homemade Sweetness DSP to the back panel. Stamp the sentiment from Filled With Sweetness stamp set in Misty Moonlight Ink on a panel of Basic White. Stamp the scroll image from the Filled With Sweetness stamp set in Strawberry Slush Ink above the sentiment. Stamp the strawberry image from the Filled With Sweetness stamp set in Tuxedo Black Ink on the bottom of the panel. Color the image with Granny Apple Green and Strawberry Slush Stampin’ Blends Markers. Adhere the Basic White panel to a Strawberry Slush mat then to the inside of the Misty Moonlight card base.

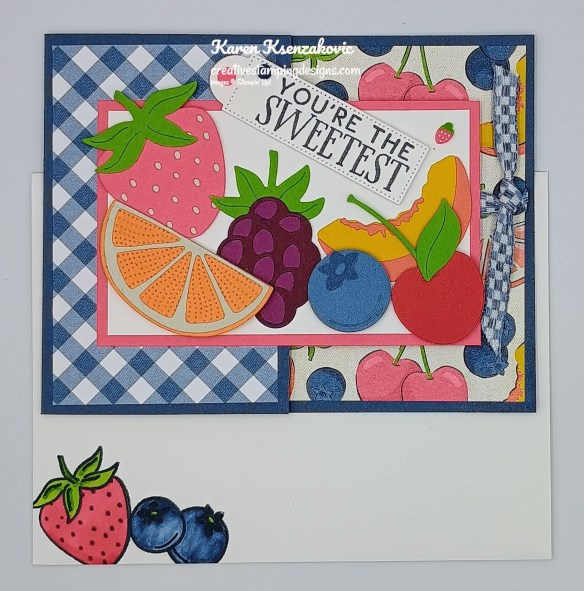
Stampin' Up! Filled with Sweetness Fun Fold 6 creativestampingdesigns.com

Decorate a Basic Whtie Medium Envelope to finish your card. Stamp the strawberry and blueberry images from the Filled With Sweetness stamp set in Tuxedo Black Ink on the envelope front. Color the images with Granny Apple Green, Misty Moonlight and Strawberry Slush Stampin’ Blends Markers. Adhere a panel of Homemade Sweetness DSP to the envelope flap.

Stampin' Up! Filled with Sweetness Fun Fold 7 creativestampingdesigns.com

Thank you for stopping by my blog today. I hope you liked my card and will give it a try. I hope you will CASE this card and please feel free to post it in the comments of my Facebook page under my post. I’d love to see your take it. You can watch my video on my YouTube Channel Here.

If you watch this on my YouTube channel, please remember to subscribe so that you will get notified when a new video goes live. Thank you to those that have subscribed already. Happy Stamping!!

*********************************************************************************************************

If you need any stamping supplies, I’d love to be your Demonstrator. Just click HERE to go directly to my online store or drop me an email if you have any questions. 

*********************************************************************************************************

Double Creative Stamping Designs Rewards

The new March Online Exclusives are now available to order.  I’m offering Double Creative Stamping Designs Rewards. THAT’S 2X THE REWARDS FOR YOU FROM ME!!!  March 3 – Monday March 9 for all orders over $50 (before tax & shipping)!! How does this work? For a $50 you’ll earn 2 rewards, $100 you’ll earn 4 rewards, $150 you’ll earn 6 rewards, etc. Head over to my Online Store and get those orders in early and earn those Double Rewards!!

*********************************************************************************************************

Poetry Garden Online Class Registration Open

Tara Carpenter and I are teaming up to offer a fun online class using Stampin’ Up! March Online Exclusive Poetry Garden Suite.  We will be creating 6 different cards during the class including 2 Fun Fold Cards.  Sign Up now by Clicking Here to reserve your spot.

The class fee includes:

  • Stampin’ Up! Garden Epoxy Dots (full pack)
  • Stampin’ Up! Berry Burst 1/4″ Shiny Ribbon (full pack)
  • Pre-cut card kits to complete each card
  • Zoom class with complete instructions to complete each card
  • PDF with detailed directions

During sign up you will have the option to add additional items to your order that you can take advantage of at no additional shipping cost.  These items are optional, however if you want to recreate the cards you will need them. If you’ve attended a previous class, you were given a discount code, there is a spot to put that code on the form and the discount only applies to the products that you check off that you wish to purchase, not the class.  Since the Bundles are already discounted, the discount does not apply to them either.

The class will be held Sunday April 26th from 1 to 4 pm Eastern Time via Zoom.  This allows anyone in the United States to participate live!  Can’t join us live… no worries, we will record the session so it can be replayed at any time.

I will email written directions that will include directions, cardstock cuts as well as photos to help you create each card.

The bundles are not included in the price of the class.  You can purchase the bundle through me at an additional 10% discount of the Online Exclusive price (see below).

Class Cost $40 + $10 (Shipping) 

Additional purchased items will be included in the above shipping price.  I will invoice you through PayPal and invoices must be paid by April 5th to insure I can get the products delivered, packaged up and out to you with enough time.  

Deadline: Sunday April 5th 

Click Here to register for the class now!! Let me know if you have any questions.

*********************************************************************************************************

Stampin’ Up! Product of The Month

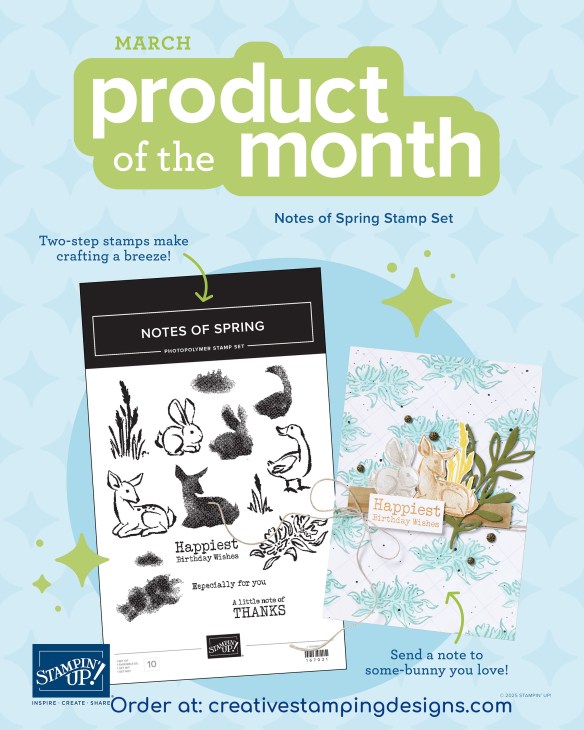
Spring into stamping with the Notes of Spring Stamp Set! Featuring adorable springtime animals like a deer, bunny, and duck, plus some delicate river plants, this stamp set makes it easy to create layered, watercolor-style images. Includes a few all-occasion sentiments to complete your handmade cards for birthdays, thank-you’s, and more.

The Notes of Spring Stamp Set is the exclusive Product of the Month for March 2026! Only available until stocks run out—don’t wait to get yours! This is a Two-Step Stampin’ set; it allows you to layer two or more images to create one final image with extra texture and dimension in the colors you want. This is a Distinktive stamp set; it has a special texture that gives added depth and dimension in a single step, creating photo-realistic images.
DETAILS
– March 2026 Product of the Month
– 15 photopolymer stamps
– Suggested clear blocks (sold separately): b, c
– Two-Step
– Distinktive
PHOTOPOLYMER STAMPS
– Are clear stamps that make image placement easy.
– Have just enough give to create a perfectly stamped image every time.
– Cling to clear blocks without slipping.
– Are repositionable—temporarily mount on clear blocks to stamp, then remove to store.
– Save space—one set of blocks (sold separately) works for all your stamps.
– Are packed in a slim, durable envelope for easy storage and lasting protection.

*********************************************************************************************************

Card stock cuts for this project:

  • Basic Beige Cardstock 1 1/2″ x 3 1/2″(die cuts)
  • Basic White Cardstock 2 1/2″ x 4″(card front panel), 2 1/4″ x 3 3/4″(inner liner)
  • Calypso coral Cardstock 1 1/2″ x 2 1/4″(die cuts)
  • Crushed Curry Cardstock 1 1/4″ x 2 1/4″(die cuts)
  • Granny Apple Green Cardstock 2″ x 2 1/4″ (die cuts)
  • Misty Moonlight Cardstock 4 1/4″ x 8 1/4″(card base scored & folded at 2 3/4″)
  • Real Red Cardstock 1 1/4″ x 1 1/4″(die cut)
  • Strawberry Slush Cardstock 2 3/4″ x 4 1/4″(card front panel mat), 2 1/2″ x 4″(inner liner mat), 1 3/4″ x 1 3/4″(die cuts)
  • Timid Tiger Cardstock 1 1/4″ x 2 1/4″(die cut)
  • Blackberry Bliss Two-Tone Cardstock 1 3/4″ x 2 1/2″(die cuts)
  • Misty Moonlight Two-Tone Cardstock 1 1//4″ x 1 3/4″(die cuts)
  • Homemade Sweetness Designer Series Paper 2 3/4″ x 4″(card front), 4″ x 5 1/4″(inside card panel), 2 1/4″ x 6″(envelope flap)

*********************************************************************************************************

Product List

Stampin’ Up! Friendly Foliage for The Happy Inkin’ Thursday Blog Hop

Good Thursday morning stamping friends welcome to our Happy Inkin’ Thursday Blog Hop. If you are starting with me, thank you, I hope you will stop by everyone’s blog to see the awesome projects they have created this week. If you are hopping over from Mary’s blog, thank you for stopping by. This week we have a Color Challenge to work with. If you’d like to see a quick video on how I made this card, Click Here to go to my Instagram Reels. Here is my card using this week’s colors.

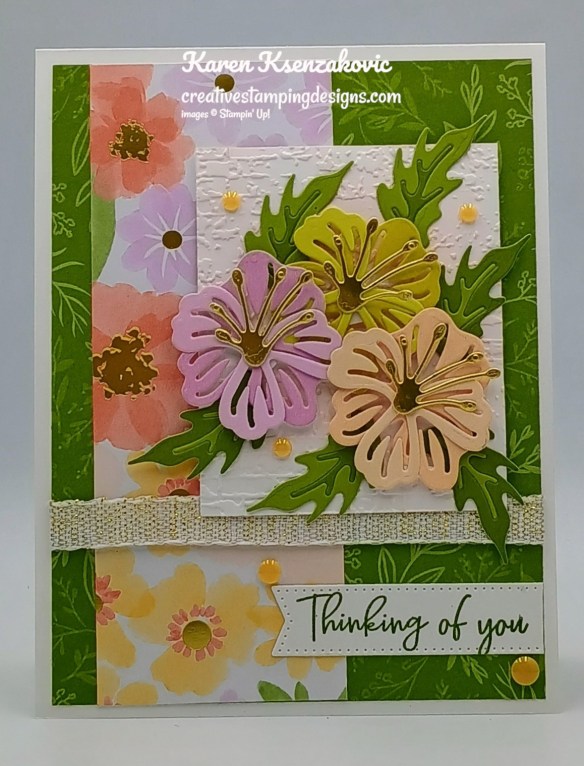
Stampin' UP! Friendly Foliage Thinking of You 1 creativestampingdesigns.com

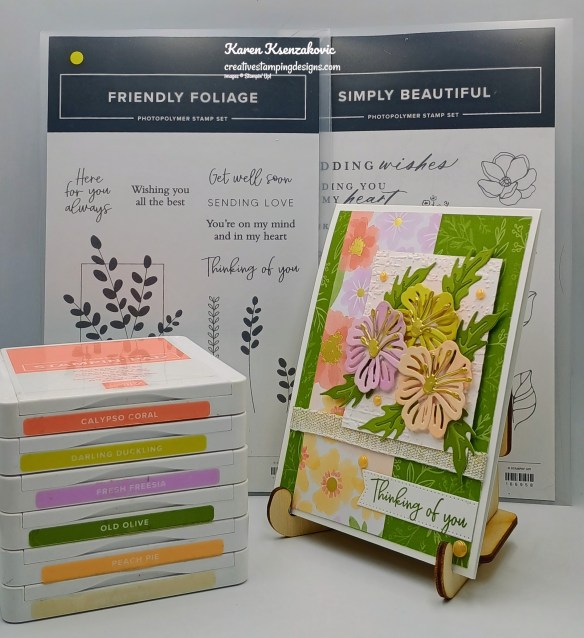
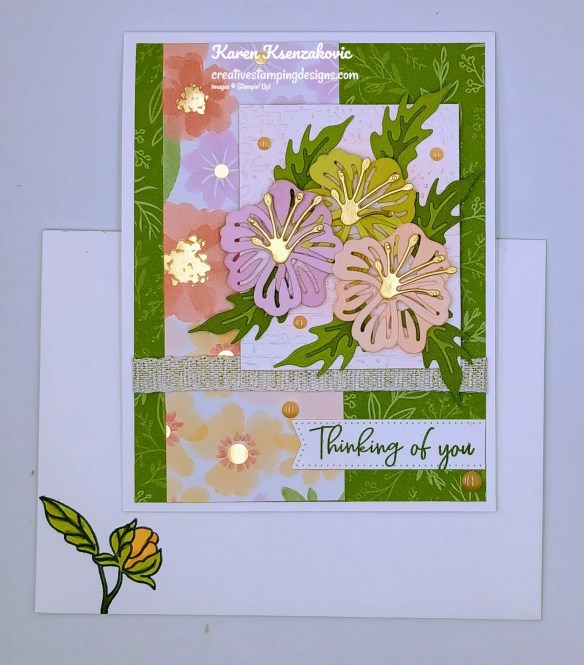
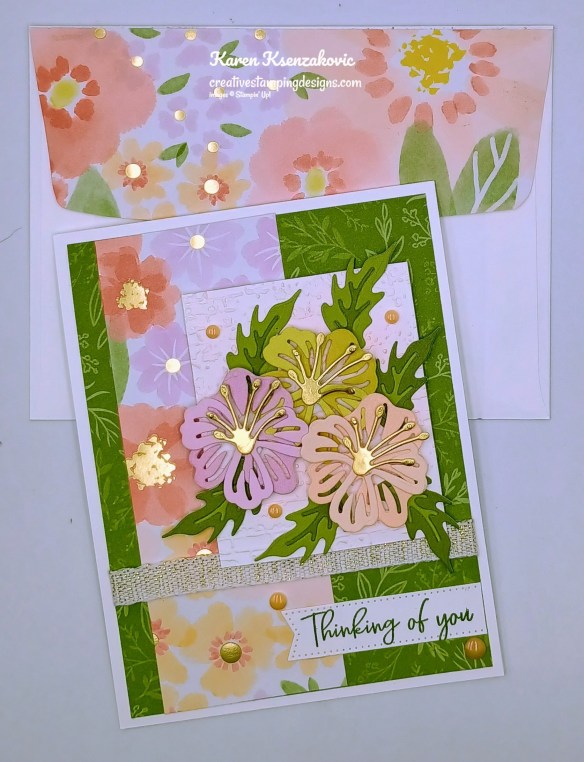
I used the Stampin’ Up! Friendly Foliage Stamp Set along with the Lovely & Beautiful Specialty Designer Series Paper, Exposed Brick 3D Embossing Folder, Stylish Shapes Dies and Stampin’ Up! Simply Beautiful Bundle for my card today.

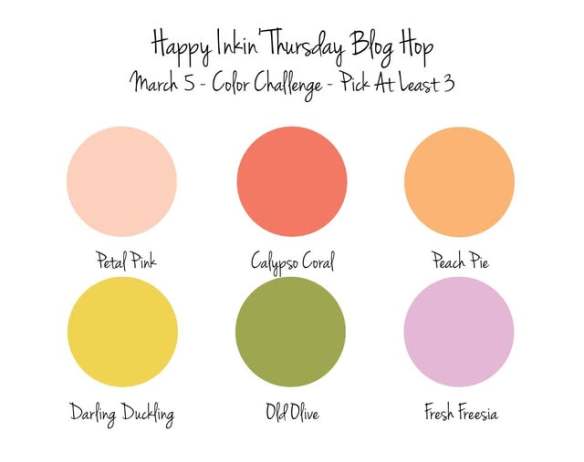
There are out colors for this week

Stampin' UP! Friendly Foliage Thinking of You 2 creativestampingdesigns.com

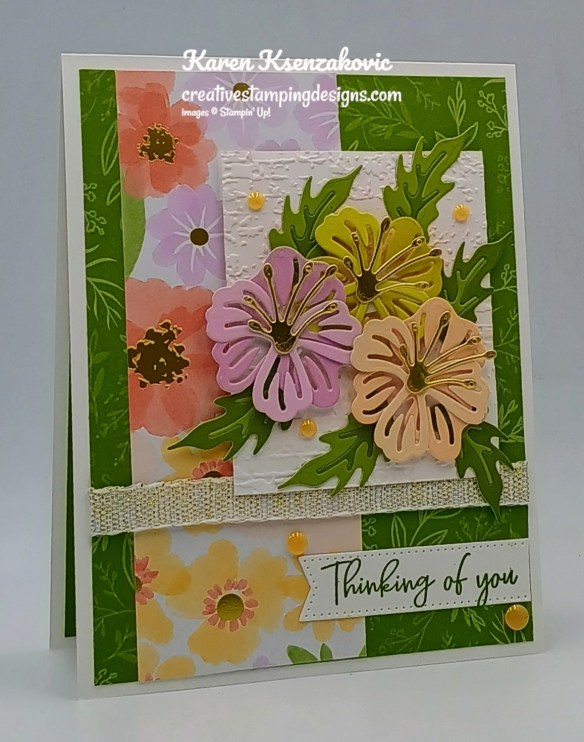
Adhere a panel of Lovely & Beautiful DSP to another panel of Lovely & Beautiful DSP. Wrap a piece of Gold White 3/8″ Ribbon around the layered panel and adhere it on the back. Adhere the layered panel to a Basic White thick card base.

Stampin' UP! Friendly Foliage Thinking of You 3 creativestampingdesigns.com

Emboss a panel of Basic Whtie using the Exposed Brick EF. Using the Simply Beautiful Dies, cut the leaves from a panel of Two-Tone Old Olive cardstock, the flowers from panels of Two-Tone Darling Duckling, Two-Tone Fresh Freesia and Two-Tone Petal Pink cardstocks, and the flower centers from Gold Foil paper. Adhere the flower and leaf pieces together.

Stampin' UP! Friendly Foliage Thinking of You 4 creativestampingdesigns.com

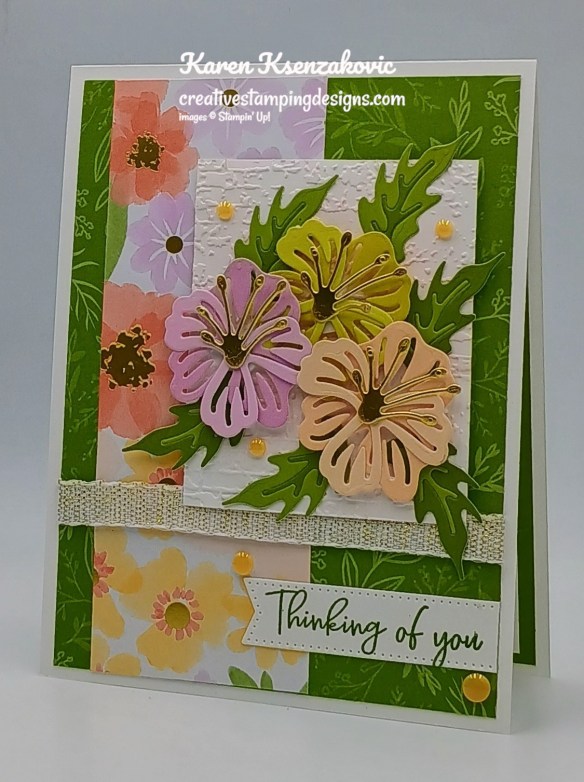
Adhere the flowers to the embossed panel with Stampin’ Dimensionals. Adhere the leaves under the flowers. Adhere the artwork panel to the card front with Stampin’ Dimensionals. Stamp the sentiment from Friendly Foliage stamp set in Old Olive Ink on a panel of Basic White. Cut the sentiment out using the Stylish Shapes Dies. Adhere the sentiment to the card front. Add a few 2024-2026 In-Color Flat Pearls to the card front.

Stampin' UP! Friendly Foliage Thinking of You 5 creativestampingdesigns.com

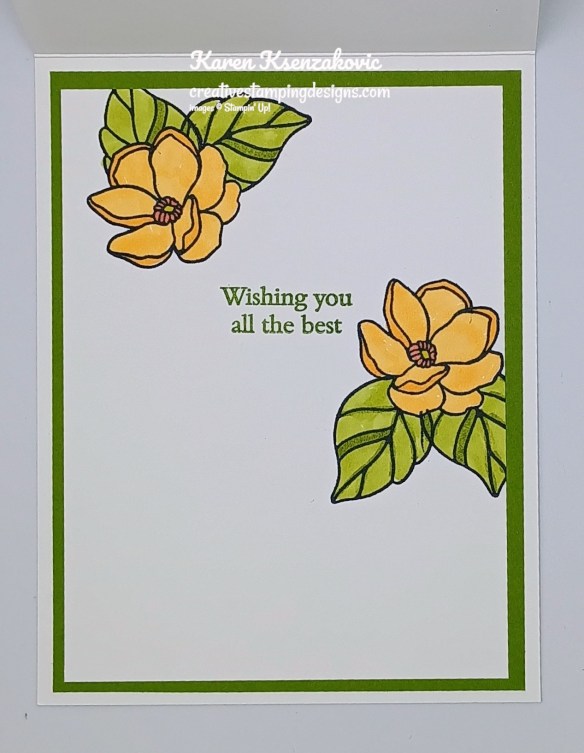
Stamp the sentiment from the Friendly Foliage stamp set in Old Olive Ink on a panel of Basic White. Stamp the small flower and leaf images from the Simply Beautiful stamp set in Tuxedo Black Ink next to the sentiment. Color the images with Old Olive and Peach Pie Stampin’ Blends Markers. Adhere the Basic Whtie panel to an Old Olive mat then to the inside of the Basic Whtie Thick card base.

Stampin' UP! Friendly Foliage Thinking of You 6 creativestampingdesigns.com

To complete your card, decorate a Basic White Medium Envelope. Stamp the small flower image from the Simply Beautiful stamp set in Tuxedo Black Ink on the envelope front. Color the image using Old Olive and Peach Pie Stampin’ Blends Markers. Adhere a panel of Lovely & Beautiful DSP to the envelope flap.

Stampin' UP! Friendly Foliage Thinking of You 7 creativestampingdesigns.com

Thank you for stopping by my blog today. Now that you’ve seen my card, let’s get on with the hop! Click the next button below to hop over to see what Tara has created. Happy Hopping

Just in case you get lost along the way, here is a list of the team members involved in the hop today.

Amy Koenders

Mary Deatherage

Karen Ksenzakovic You Are Here

Tara Carpenter

Terry Lynn Bright

Nicole Bloxom

********************************************************************************************************

If you need any stamping supplies, I’d love to be your Demonstrator. Just click HERE to go directly to my online store or drop me an email if you have any questions. 

*********************************************************************************************************

Card stock cuts for this project:

  • Basic White Cardstock 3 3/4″ x 5″(inner liner)
  • Basic White Thick Cardstock 4 1/4″ x 11″(card base scored & folded at 5 1/2″)
  • Old Olive Cardstock 4″ x 5 1/4″(inner liner mat)
  • Lovely & Beautiful Specialty Designer Series Paper 4″ x 5 1/4″(card front), 2″ x 5 1/2″(card front panel), 2 1/4″ x 6″(envelope)
  • Darling Duckling Two-Tone Cardstock 1 1/2″ x 3″(die cuts)
  • Fresh Freesia Two-Tone Cardstock 1 1/2″ x 3″(die cuts)
  • Old Olive Two-tone Cardstock 1 1/2″ x 4″(die cuts)
  • Petal Pink Two-Tone Cardstock 1 1/2″ x 3″(die cuts)
  • Gold Foil 1″ x 3″(die cuts)

*********************************************************************************************************

Product List

Stampin’ Up! A Round of Hellos Daisies

Good Wednesday morning stamping friends. I hope you are all having a wonderful week. Since I didn’t have to work on Monday, my days are all mixed up.

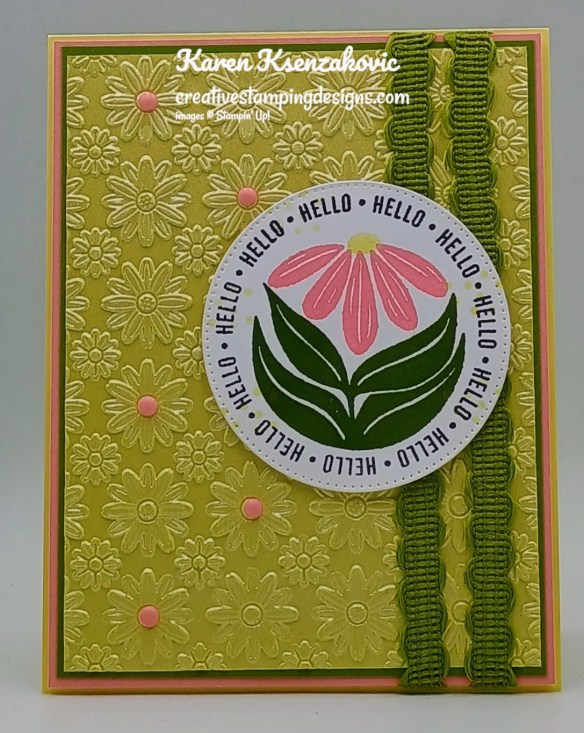
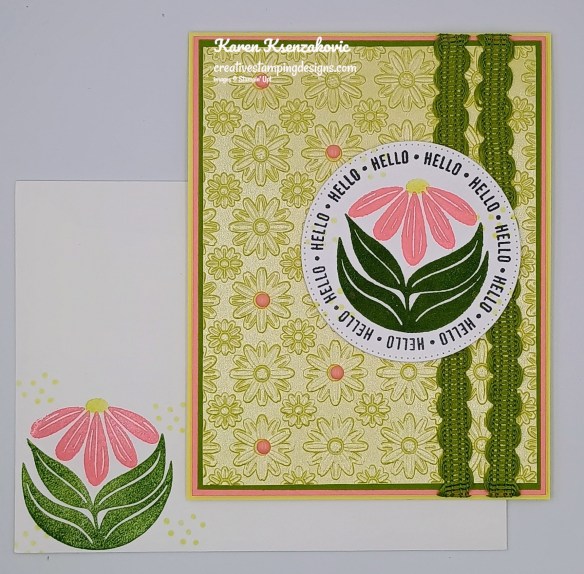
The star of today’s card is the new embossing folder. This was a must have for me. It makes beautiful cards all by itself. If you’d like to see a quick video on how I made this card, Click Here to go to my Instagram Reels. Here is my card for today.

Stampin' Up! A Round of Hellos 1 creativestampingdesigns.com

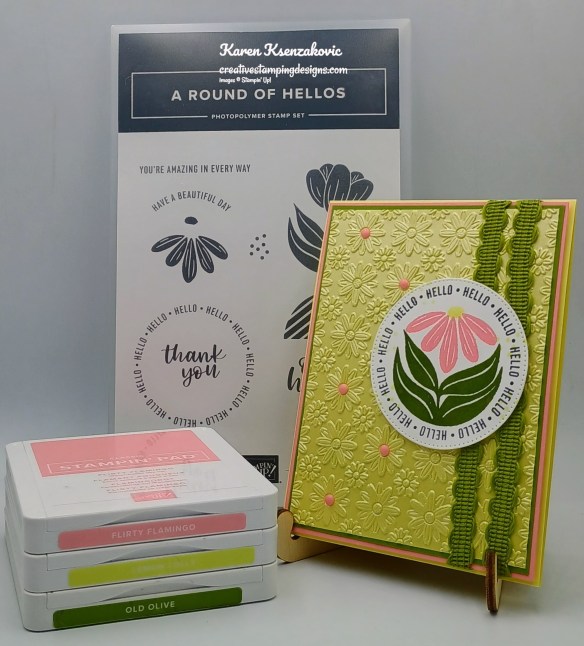
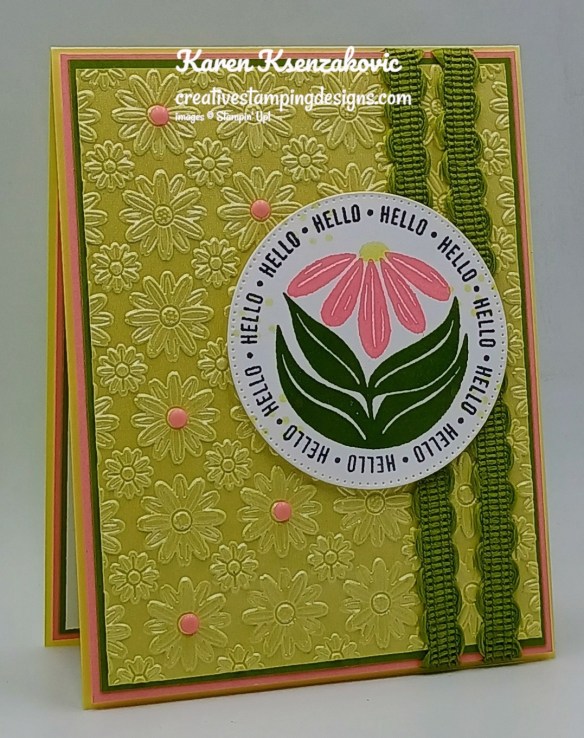
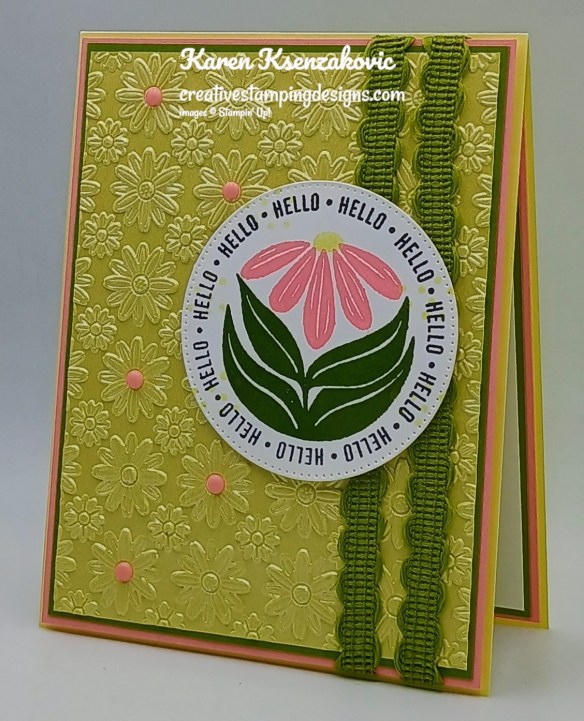
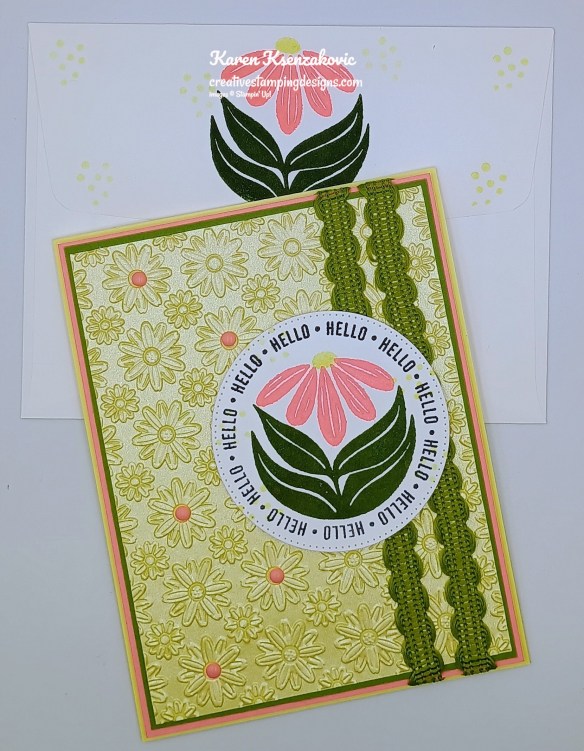
I used the Stampin’ Up! A Round of Hellos Stamp Set along with the new Lazy Daisy 3D Embossing Folder, Pastels Shimmer Specialty Paper and Stylish Shapes Dies for my card today.

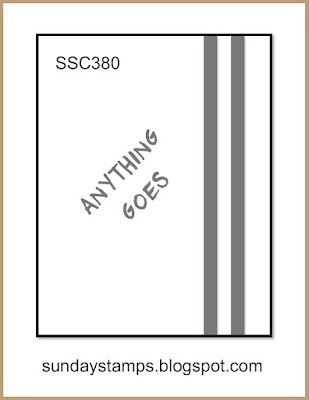
My design is from Sunday Stamps Wide Open Challenge #380.

Stampin' Up! A Round of Hellos 2 creativestampingdesigns.com

Emboss a panel of Lemon Lolly Pastel Shimmer Paper using the new Lazy Daisy EF. Adhere the embossed panel to an Old Olive mat.

Stampin' Up! A Round of Hellos 3 creativestampingdesigns.com

Adhere the layered panel to a Flirty Flamingo mat. Wrap 2 pieces of Old Olive 3/8″ Specialty Rickrack around the layered panel and adhere in the back. Adhere the layered panel to a Lemon Lolly card base with Stampin’ Dimensionals.

Stampin' Up! A Round of Hellos 4 creativestampingdesigns.com

On a panel of Basic White, stamp the round of Hellos sentiment from A Round of Hellos stamp set in Tuxedo Black Ink. Stamp the leaf image from A Round of Hellos stamp set in Old Olive Ink in the center of the sentiment. Stamp the flower image from A Round of Hellos stamp set in Flirty Flamingo Ink. Stamp the flower center in and the splatter image randomly around the panel in Lemon Lolly Ink. Cut the image out using the Stylish Shapes Dies. Adhere the artwork to the card front with Stampin’ Dimensionals. Add a few Rainbow Adhesive-Backed Dots to the card front.

Stampin' Up! A Round of Hellos 5 creativestampingdesigns.com

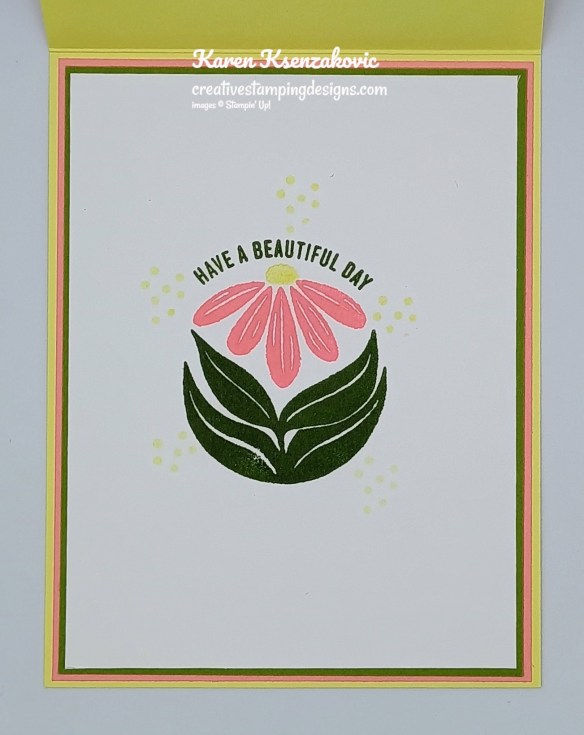
Stamp the sentiment from A Round of Hellos stamp set in Old Olive Ink on a panel of Basic Whtie. Stamp the flower image from A Round of Hellos stamp set in Flirty Flamingo Ink below the sentiment. Stamp the leaf image in Old Olive Ink and the flower center in Lemon Lolly Ink. Randomly stamp the splatter image around the flower and sentiment in Lemon Lolly Ink. Adhere the Basic White panel to Old Olive and Flirty Flamingo mats then to the inside of the Lemon Lolly card base.

Stampin' Up! A Round of Hellos 6 creativestampingdesigns.com

to finish your card, decorate a Basic White Medium Envelope. Stamp the leaf image from A Round of Hellos stamp set on the envelope front and flap. Stamp the flower image in Flirty Flamingo and the flower center in Lemon Lolly Inks.

Stampin' Up! A Round of Hellos 7 creativestampingdesigns.com

Thank you for stopping by my blog today. I hope you like the card and will give it a try. Happy Stamping!!

*********************************************************************************************************

If you need any stamping supplies, I’d love to be your Demonstrator. Just click HERE to go directly to my online store or drop me an email if you have any questions. 

*********************************************************************************************************

Double Creative Stamping Designs Rewards

The new March Online Exclusives are now available to order.  I’m offering Double Creative Stamping Designs Rewards. THAT’S 2X THE REWARDS FOR YOU FROM ME!!!  March 3 – Monday March 9 for all orders over $50 (before tax & shipping)!! How does this work? For a $50 you’ll earn 2 rewards, $100 you’ll earn 4 rewards, $150 you’ll earn 6 rewards, etc. Head over to my Online Store and get those orders in early and earn those Double Rewards!!

*********************************************************************************************************

Poetry Garden Online Class Registration Open

Tara Carpenter and I are teaming up to offer a fun online class using Stampin’ Up! March Online Exclusive Poetry Garden Suite.  We will be creating 6 different cards during the class including 2 Fun Fold Cards.  Sign Up now by Clicking Here to reserve your spot.

The class fee includes:

  • Stampin’ Up! Garden Epoxy Dots (full pack)
  • Stampin’ Up! Berry Burst 1/4″ Shiny Ribbon (full pack)
  • Pre-cut card kits to complete each card
  • Zoom class with complete instructions to complete each card
  • PDF with detailed directions

During sign up you will have the option to add additional items to your order that you can take advantage of at no additional shipping cost.  These items are optional, however if you want to recreate the cards you will need them. If you’ve attended a previous class, you were given a discount code, there is a spot to put that code on the form and the discount only applies to the products that you check off that you wish to purchase, not the class.  Since the Bundles are already discounted, the discount does not apply to them either.

The class will be held Sunday April 26th from 1 to 4 pm Eastern Time via Zoom.  This allows anyone in the United States to participate live!  Can’t join us live… no worries, we will record the session so it can be replayed at any time.

I will email written directions that will include directions, cardstock cuts as well as photos to help you create each card.

The bundles are not included in the price of the class.  You can purchase the bundle through me at an additional 10% discount of the Online Exclusive price (see below).

Class Cost $40 + $10 (Shipping) 

Additional purchased items will be included in the above shipping price.  I will invoice you through PayPal and invoices must be paid by April 5th to insure I can get the products delivered, packaged up and out to you with enough time.  

Deadline: Sunday April 5th 

Click Here to register for the class now!! Let me know if you have any questions.

*********************************************************************************************************

Stampin’ Up! Product of The Month

Spring into stamping with the Notes of Spring Stamp Set! Featuring adorable springtime animals like a deer, bunny, and duck, plus some delicate river plants, this stamp set makes it easy to create layered, watercolor-style images. Includes a few all-occasion sentiments to complete your handmade cards for birthdays, thank-you’s, and more.

The Notes of Spring Stamp Set is the exclusive Product of the Month for March 2026! Only available until stocks run out—don’t wait to get yours! This is a Two-Step Stampin’ set; it allows you to layer two or more images to create one final image with extra texture and dimension in the colors you want. This is a Distinktive stamp set; it has a special texture that gives added depth and dimension in a single step, creating photo-realistic images.
DETAILS
– March 2026 Product of the Month
– 15 photopolymer stamps
– Suggested clear blocks (sold separately): b, c
– Two-Step
– Distinktive
PHOTOPOLYMER STAMPS
– Are clear stamps that make image placement easy.
– Have just enough give to create a perfectly stamped image every time.
– Cling to clear blocks without slipping.
– Are repositionable—temporarily mount on clear blocks to stamp, then remove to store.
– Save space—one set of blocks (sold separately) works for all your stamps.
– Are packed in a slim, durable envelope for easy storage and lasting protection.

*********************************************************************************************************

Card stock cuts for this project:

  • Basic White Cardstock 3″ x 4″(artwork), 3 7/8″ x 5 1/8″(inner liner)
  • Flirty Flamingo Cardstock (2) – 4 1/8″ x 5 3/8″ (card front & inner liner mats)
  • Lemon Lolly Cardstock 4 1/4″ x 11″(card base scored & folded at 5 1/2″)
  • Old Olive Cardstock (2) – 4″ x 5 1/4″ (card front & inner liner mats)
  • Pastel Shimmer Specialty Designer Series Paper 3 7/8″ x 5 1/8″(card front)

*********************************************************************************************************

Product List

March Online Exclusives Available, Double Creative Stamping Designs Rewards, Registration for Online Class Open, 3 new Kits & New March Product of The Month Available Starting Today

The New March Online Exclusives are now available to order. Click on the image below for a printable PDF of the March Online Exclusives available.

There are some awesome new products available. Contact me if you have any questions.

*********************************************************************************************************

Double Creative Stamping Designs Rewards

The new March Online Exclusives are now available to order.  I’m offering Double Creative Stamping Designs Rewards. THAT’S 2X THE REWARDS FOR YOU FROM ME!!!  Starting today March 3 – Monday March 9 for all orders over $50 (before tax & shipping)!! How does this work? For a $50 you’ll earn 2 rewards, $100 you’ll earn 4 rewards, $150 you’ll earn 6 rewards, etc. Head over to my Online Store and get those orders in early and earn those Double Rewards!!

*********************************************************************************************************

Poetry Garden Online Class Registration Open

Tara Carpenter and I are teaming up to offer a fun online class using Stampin’ Up! March Online Exclusive Poetry Garden Suite.  We will be creating 6 different cards during the class including 2 Fun Fold Cards.  Sign Up now by Clicking Here to reserve your spot.

The class fee includes:

  • Stampin’ Up! Garden Epoxy Dots (full pack)
  • Stampin’ Up! Berry Burst 1/4″ Shiny Ribbon (full pack)
  • Pre-cut card kits to complete each card
  • Zoom class with complete instructions to complete each card
  • PDF with detailed directions

During sign up you will have the option to add additional items to your order that you can take advantage of at no additional shipping cost.  These items are optional, however if you want to recreate the cards you will need them. If you’ve attended a previous class, you were given a discount code, there is a spot to put that code on the form and the discount only applies to the products that you check off that you wish to purchase, not the class.  Since the Bundles are already discounted, the discount does not apply to them either.

The class will be held Sunday April 26th from 1 to 4 pm Eastern Time via Zoom.  This allows anyone in the United States to participate live!  Can’t join us live… no worries, we will record the session so it can be replayed at any time.

I will email written directions that will include directions, cardstock cuts as well as photos to help you create each card.

The bundles are not included in the price of the class.  You can purchase the bundle through me at an additional 10% discount of the Online Exclusive price (see below).

Class Cost $40 + $10 (Shipping) 

Additional purchased items will be included in the above shipping price.  I will invoice you through PayPal and invoices must be paid by April 5th to insure I can get the products delivered, packaged up and out to you with enough time.  

Deadline: Sunday April 5th 

Click Here to register for the class now!! Let me know if you have any questions.

*********************************************************************************************************

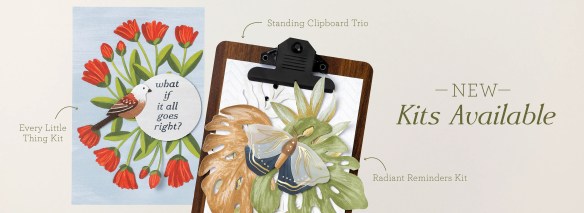
3 New Kits Available

Kits Collections include designed projects that come in a range of project types. They are perfect for new crafters, busy crafters, or crafters who want quick and easy projects.

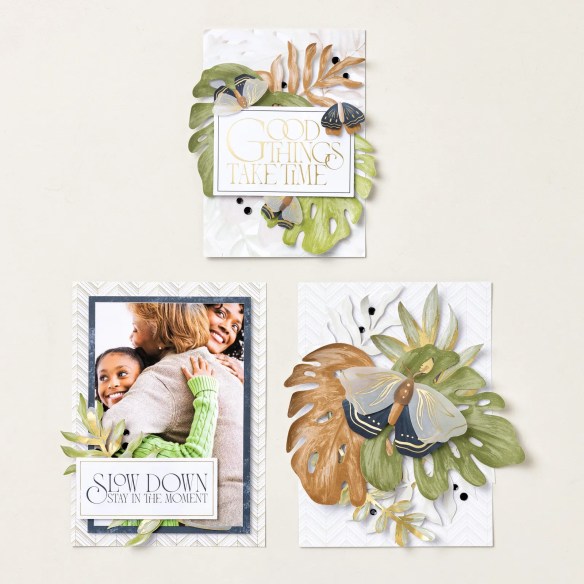
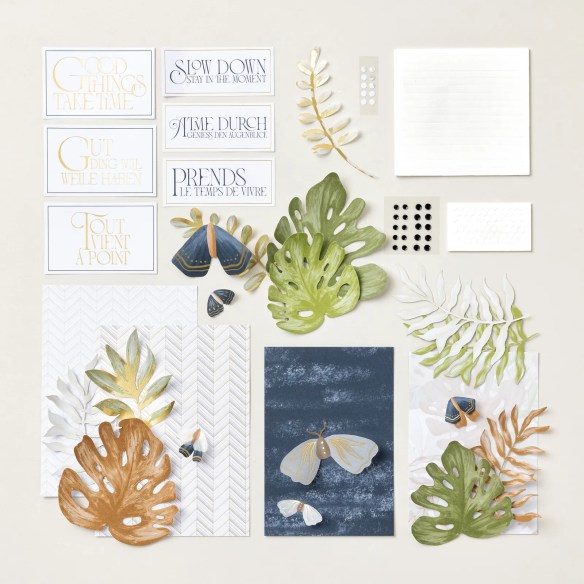
Radiant Reminders Kit

Create three DIY displays with the Radiant Reminders Kit. Featuring monstera leaves, luna moths, and neutral patterns in beige, black, brown, green, and gold, these handmade home decor pieces let your creativity shine while adding natural, organic style to any room. Display your creations on clipboards from the Standing Clipboard Trio Kit (sold separately), or add them to your favorite frames, bulletin board, or other fun display.

DETAILS
– Makes 3 displays
– Colors: Basic Beige, gold, Mossy Meadow, Old Olive, Pecan Pie, Secret Sea
– Coordinates with the Standing Clipboard Trio Kit (sold separately)
– Sentiments printed in English, French, and German

Kit includes one of each item listed below.
– Step-by-step instructions
– Precut paper images
– Printed labels
– Includes gold foil
– Adhesive

#167820

++++++++++++++++++++++++++++++++++++++++++++++++++++++++++++++++++++++

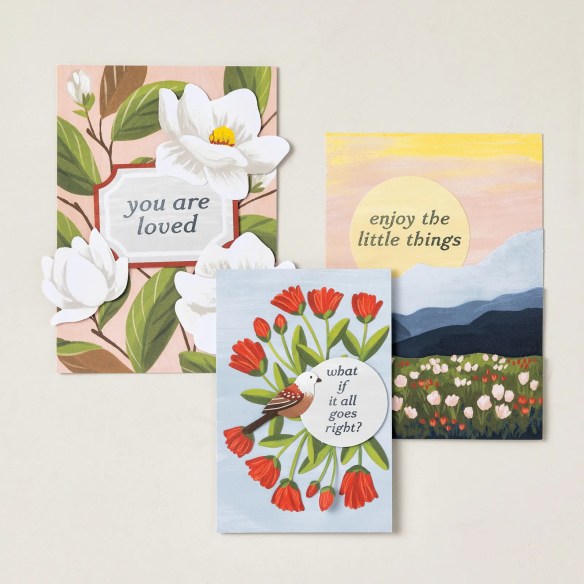
Every Little Thing Kit

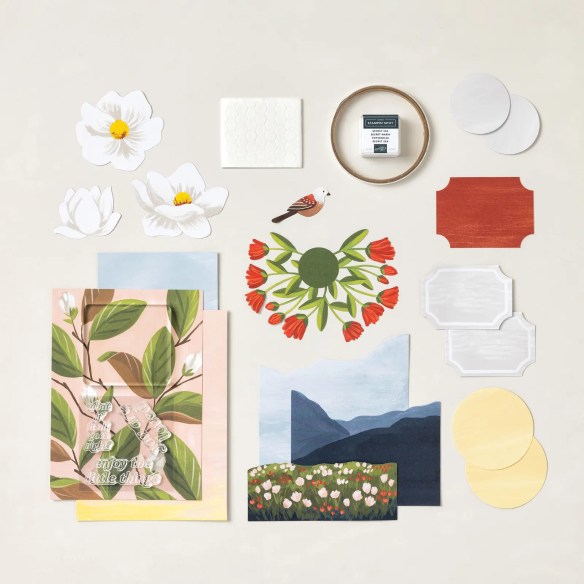
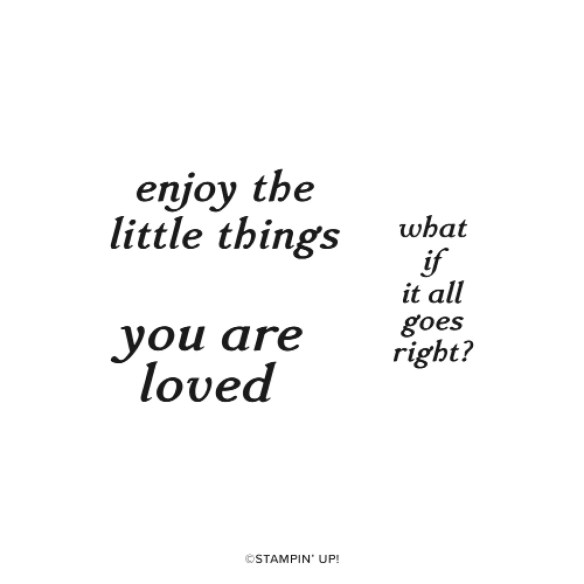
Create three DIY floral and nature-inspired paper artworks with the Every Little Thing Kit. Featuring magnolias, tulips, mountains, and a bird, each piece includes uplifting sentiment stamps to brighten your home. Display them on the clipboards from the Standing Clipboard Trio Kit (sold separately) for a personalized decor touch.

DETAILS
– Makes 3 paper artworks: 1 each of 3 designs
– 2 large: 5″ x 7″ (12.7 x 17.8 cm)
– 1 small: 4″ x 6″ (10.2 x 15.2 cm)
– Colors: Basic Beige, Cajun Craze, Cloud Cover, Daffodil Delight, Early Espresso, Mossy Meadow, Old Olive, Pecan Pie, Petal Pink, Secret Sea

Kit includes one of each item listed below.
– Every Little Thing Stamp Set
– Clear stamp block
– Secret Sea Classic Stampin’ Spot
– Step-by-step instructions
– Precut paper pieces
– Adhesive

#167992

++++++++++++++++++++++++++++++++++++++++++++++++++++++++++++++++++++++

Standing Clipboard Trio Kit

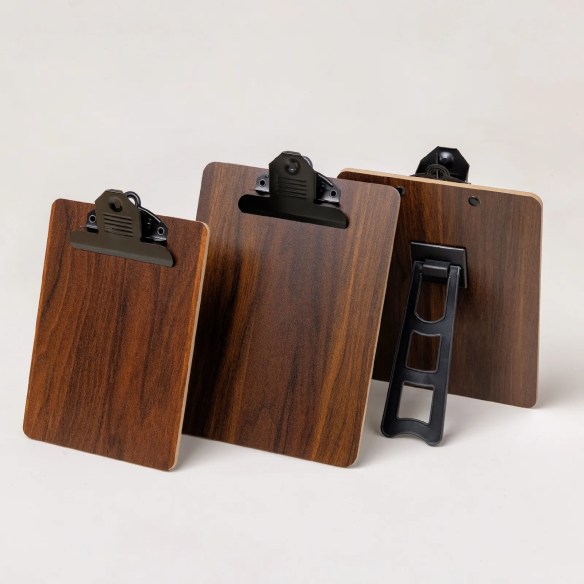
The Standing Clipboard Trio Kit includes three clipboards you can use to showcase creations from the coordinating Radiant Reminders and Every Little Thing Kits (sold separately). These are also great for your handmade cards, photos, stamped art, and favorite quotes. Each clipboard comes assembled and features a sturdy backing and kickstand. They’re perfect for adding a personal touch to your desk, craft room, or office.
DETAILS
– 3 easel clipboards: 1 small and 2 large
– Small clipboard: 4-3/4″ x 6-3/4″ (12.1 x 17.2 cm)
– Large clipboard: 6″ x 8″ (15.2 x 20.3 cm)
– Color: Brown

#167819

*********************************************************************************************************

Stampin’ Up! Product of The Month

Spring into stamping with the Notes of Spring Stamp Set! Featuring adorable springtime animals like a deer, bunny, and duck, plus some delicate river plants, this stamp set makes it easy to create layered, watercolor-style images. Includes a few all-occasion sentiments to complete your handmade cards for birthdays, thank-you’s, and more.

The Notes of Spring Stamp Set is the exclusive Product of the Month for March 2026! Only available until stocks run out—don’t wait to get yours! This is a Two-Step Stampin’ set; it allows you to layer two or more images to create one final image with extra texture and dimension in the colors you want. This is a Distinktive stamp set; it has a special texture that gives added depth and dimension in a single step, creating photo-realistic images.
DETAILS
– March 2026 Product of the Month
– 15 photopolymer stamps
– Suggested clear blocks (sold separately): b, c
– Two-Step
– Distinktive
PHOTOPOLYMER STAMPS
– Are clear stamps that make image placement easy.
– Have just enough give to create a perfectly stamped image every time.
– Cling to clear blocks without slipping.
– Are repositionable—temporarily mount on clear blocks to stamp, then remove to store.
– Save space—one set of blocks (sold separately) works for all your stamps.
– Are packed in a slim, durable envelope for easy storage and lasting protection.

*********************************************************************************************************

Reminder!!! 2024 – 2026 In-Colors Soon to Retire

Do you LOVE the 2024-2026 In-Colors. This is a perfect time to stock up on the Ink Pads, DSP, Cardstock, Blends and Embellishments especially with Free Shipping Wednesday-Friday. Next month I will get to see the new catalog with the 2026-2028 In-Colors, which means that the 2024-2026 In-Colors will be retiring. Don’t wait until they go out of stock, stock up now so you don’t miss out.

Head over to my Online Store and Stock Up on all your favorite colors HERE!!

Product List

<!— 163807,163816,163793,166693,163824,163784,163810,163819,163799,166657,163827,163783,163811,163820,163801,166690,163828,163785,163808,163817,163795,166698,163825,163787,163809,163818,163797,166701,163826,163786,165299,165266,

*********************************************************************************************************

If you need any stamping supplies, I’d love to be your Demonstrator. Just click HERE to go directly to my online store or drop me an email if you have any questions. 

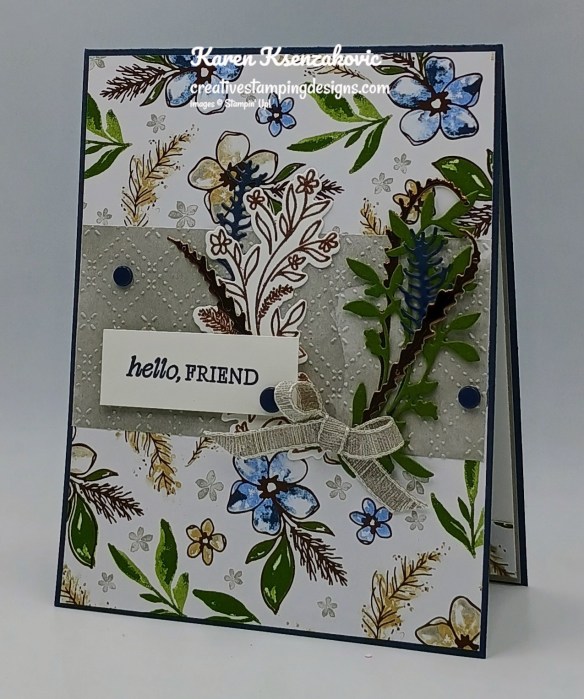
Stampin’ Up! Delicate Whispers for The Happy Inkin’ Thursday Blog Hop

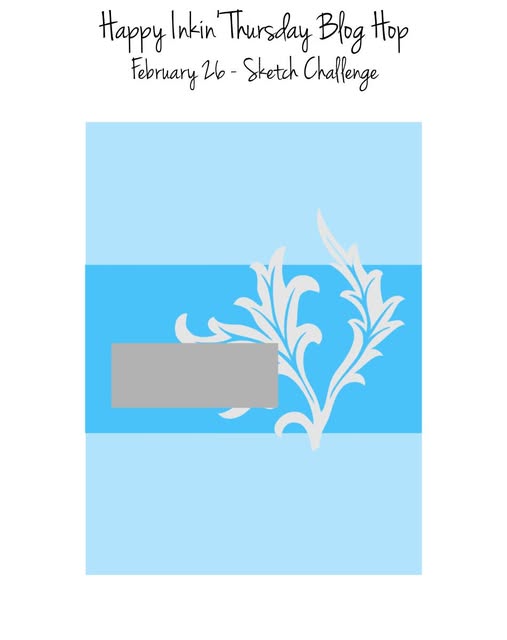
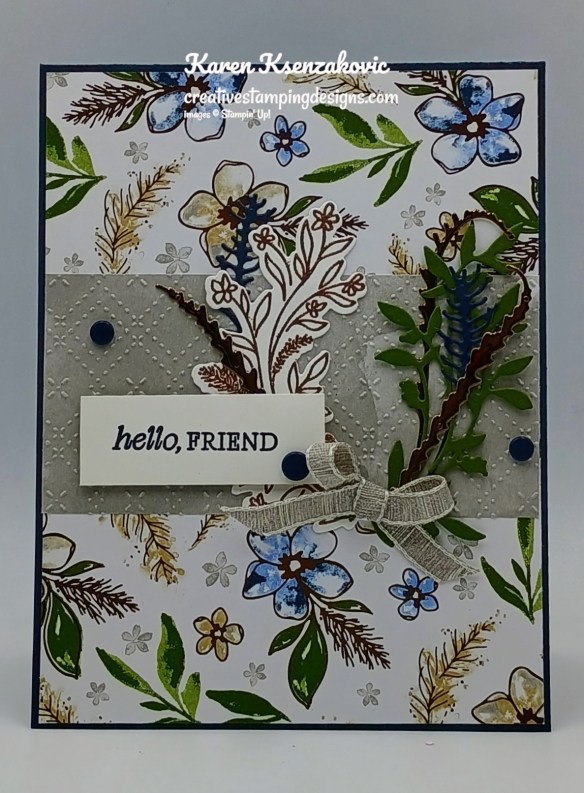
Good Thursday morning stamping friends welcome to our Happy Inkin’ Thursday Blog Hop. If you are starting with me, thank you, I hope you will stop by everyone’s blog to see the awesome projects they have created this week. If you are hopping over from Mary’s blog, thank you for stopping by. This week we have a Sketch Challenge to work with. If you’d like to see a quick video on how I made this card, Click Here to go to my Instagram Reels. Here is my card using this week’s Sketch.

Stampin' Up! Delicate Whispers Friend 1 creativestampingdesigns.com

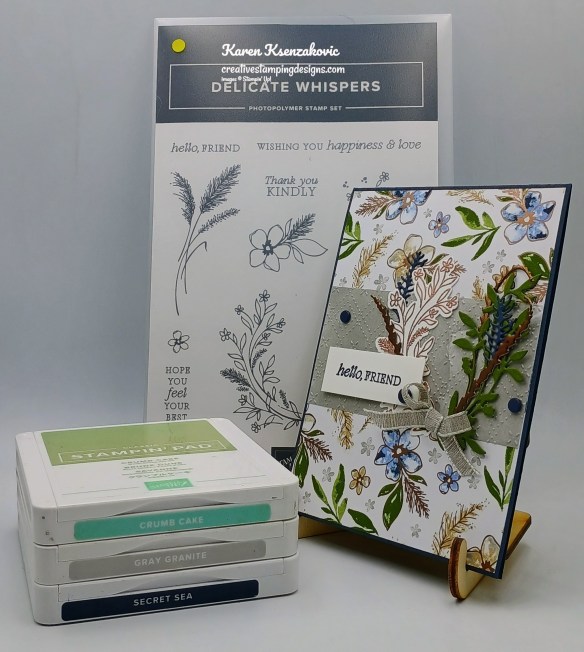
I used the Stampin’ Up! Delicate Whispers Bundle along with the Delicate Dreams Specialty Designer Series Paper (both available March 3) and the Beautiful Patterns 3D Embossing Folder for my card today.

This is our sketch for this week.

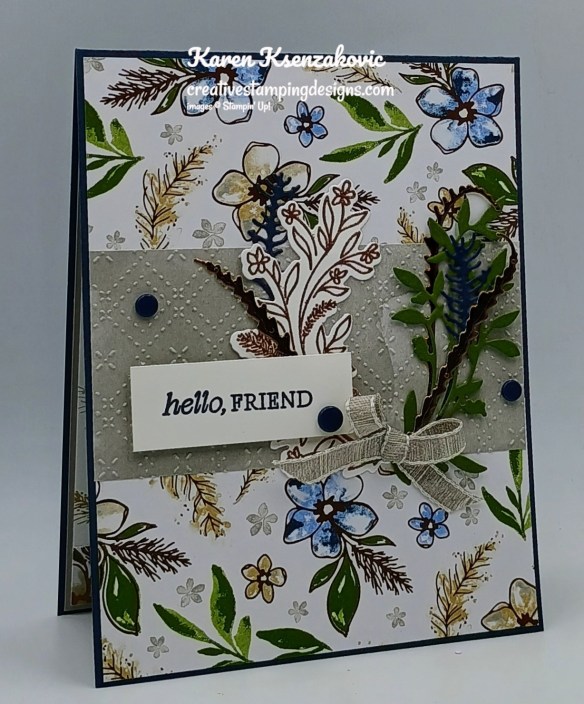
Stampin' Up! Delicate Whispers Friend 2 creativestampingdesigns.com

Adhere a panel of Delicate Dreams DSP to a Secret Sea card base. Emboss a smaller panel of Delicate Dreams DSP using the Beautiful Patters EF. Adhere the embossed panel to the card front

Stampin' Up! Delicate Whispers Friend 3 creativestampingdesigns.com

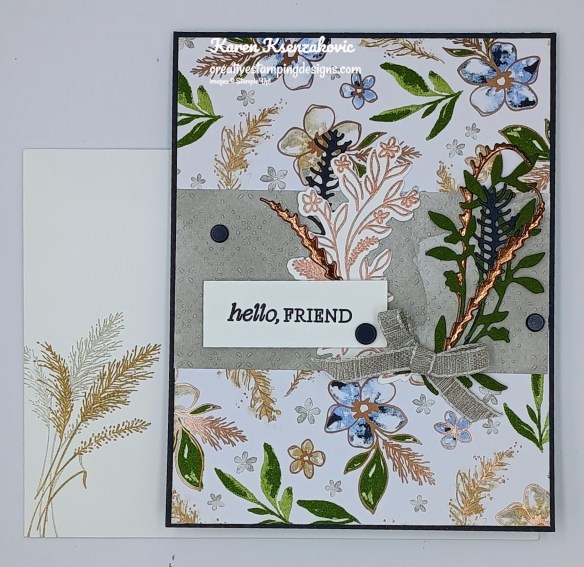
Stamp the sentiment from the Delicate Whispers stamp set in Secret Sea Ink on a panel of Basic White. Adhere the sentiment to the card front with Stampin’ Dimensionals. On a panel of Basic White, stamp the floral image from Delicate Whispers stamp set in Versamark Ink. Sprinkle the image with Copper Embossing Powder and set it using the Heat Tool. Cut the image out using the Delicate Whispers Dies.

Stampin' Up! Delicate Whispers Friend 4 creativestampingdesigns.com

Using the Delicate Whispers Dies, cut the leaf die from a panel of Mossy Meadow, the feathery die from a panel of Secret Sea and the sprig die from a panel of Earthen Toned Metallic Paper. Arrange all the die cuts next to the sentiment. tie a small bow using the Gray Granite 1/4″ Variegated Trim. Adhere the bow to the bottom of the collage. Add a few Natural Matte Dots to the card front.

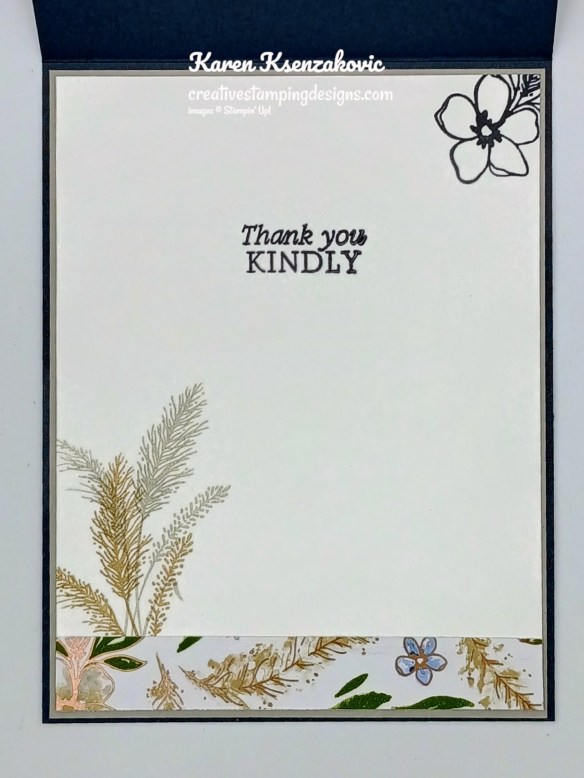
Stampin' Up! Delicate Whispers Friend 5 creativestampingdesigns.com

Stamp the sentiment from the Delicate Whispers stamp set in Secret Sea Ink on a panel of Basic White. Stamp the small flower image from the Delicate Whispers stamp set on the top corner of the panel. Stamp the feathery image from the Delicate Whispers stamp set in Crumb Cake and Gray Granite Inks on the bottom of the panel. Adhere a panel of Delicate Dreams DSP to the bottom of the panel. Adhere the Basic White panel to a Gray Granite mat then to the inside of the Secret Sea card base.

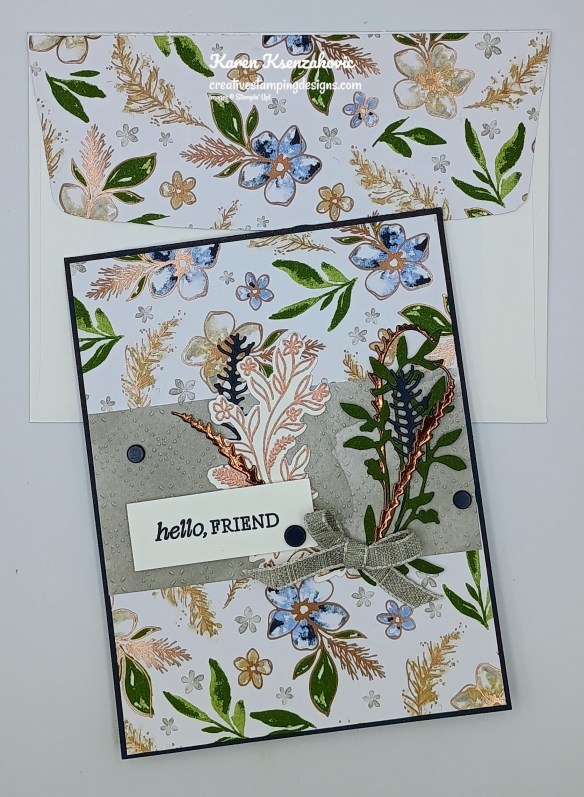
Stampin' Up! Delicate Whispers Friend 6 creativestampingdesigns.com

Decorate a Basic White Medium Envelope to complete your card. Stamp the feathery image from the Delicate Whispers stamp set in Crumb Cake and Gray Granite Inks on the envelope front. Adhere a panel of Delicate Dreams DSP to the envelope flap.

Stampin' Up! Delicate Whispers Friend 7 creativestampingdesigns.com

Thank you for stopping by my blog today. Now that you’ve seen my card, let’s get on with the hop! Click the next button below to hop over to see what Tara has created. Happy Hopping

Just in case you get lost along the way, here is a list of the team members involved in the hop today.

Amy Koenders

Mary Deatherage

Karen Ksenzakovic You Are Here

Tara Carpenter

Terry Lynn Bright

Nicole Bloxom

********************************************************************************************************

If you need any stamping supplies, I’d love to be your Demonstrator. Just click HERE to go directly to my online store or drop me an email if you have any questions. 

*********************************************************************************************************

Card stock cuts for this project:

  • Basic White Cardstock3/4″ x 2″(sentiment), 2″ x 3 1/4″(die cut), 4″ x 5 1/4″(inner linr)
  • Gray Granite Cardstock 4 1/8″ x 5 3/8″(inner liner mat)
  • Mossy Meadow Cardstock 2 1/2″ x 2 1/2″(die cut)
  • Secret Sea Cardstock 4 1/4″ x 11″(card base scored & folded at 5 1/2″)
  • Delicate Dreams specialty Designer Series Paper 4 1/8″ x 5 3/8″(card front), 2″ x 4 1/8″(card front panel, 1/2″ x 4″(inner liner), 2 1/4″ x 6″(envelope)
  • Earthen Toned Metallic Specialty Paper 1″ x 4″(die cuts)

*********************************************************************************************************

Product List

Stampin’ Up! Paradise Garden Sunflowers

Good snowy Wednesday morning stamping friends. Yup, another 2″ of snow to shovel this morning. At this rate, I’m not going to see my lawn and gardens until May. I hope you are having a good week; we’re already halfway through it and this is the last week of February.

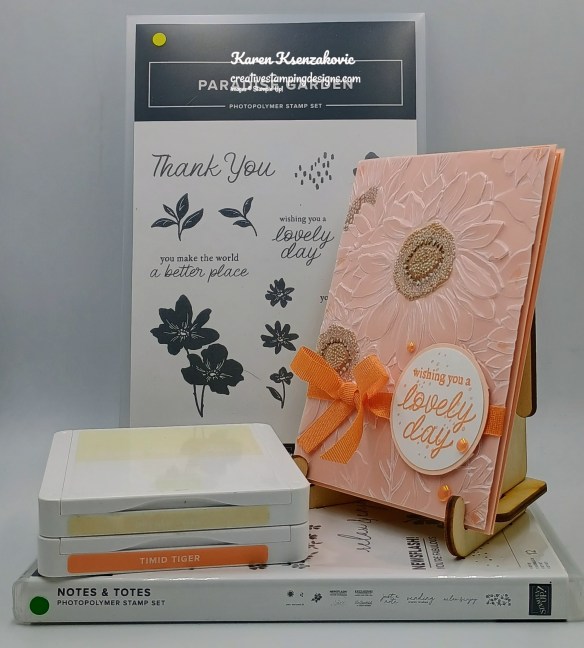
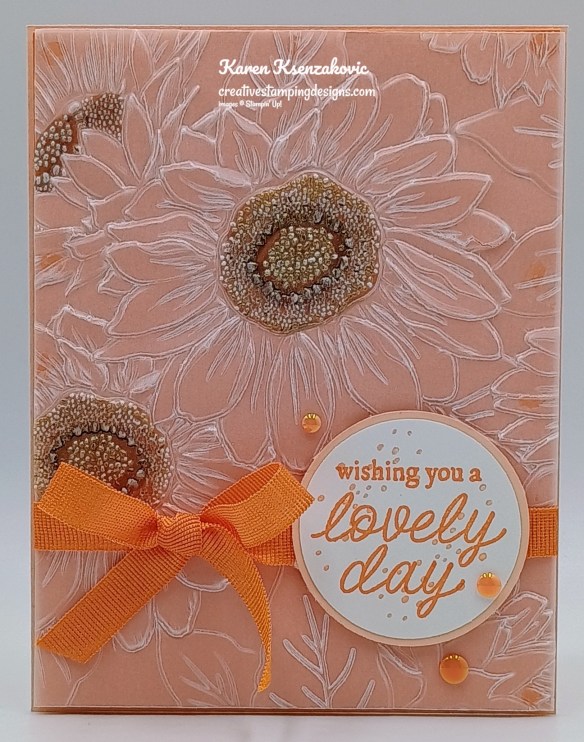
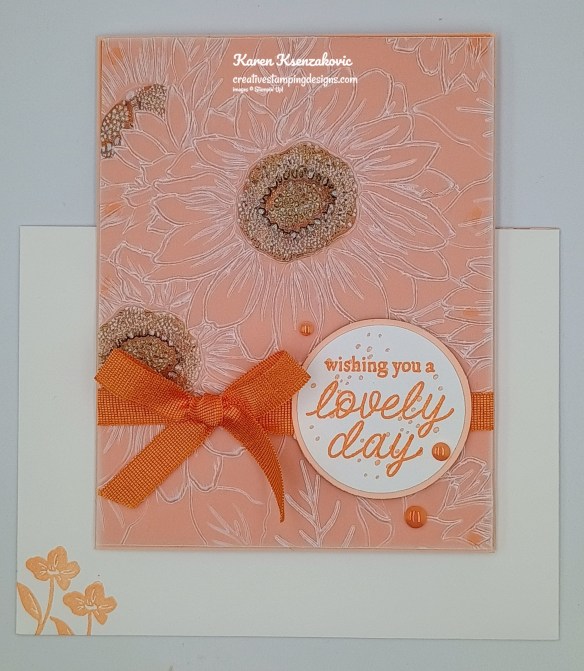
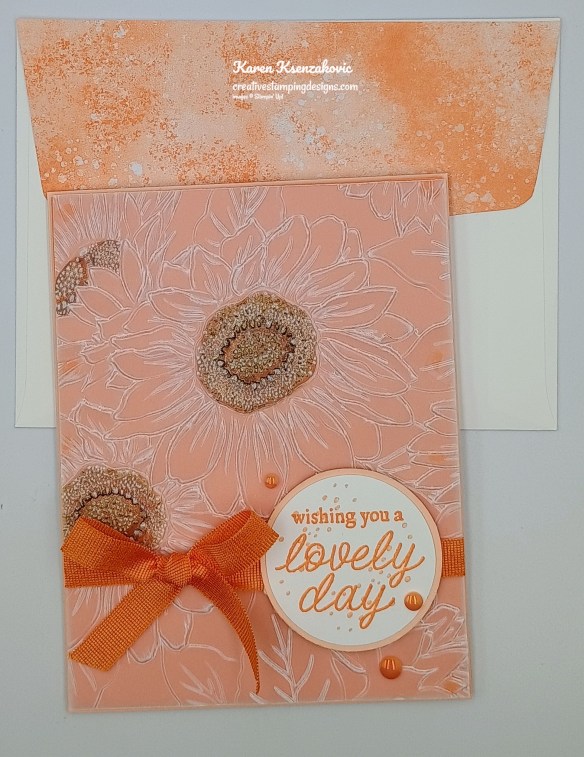
For today’s card I did some dry embossing on Vellum. As a lot of you know, I’m not a fan of orange, but I love Timid Tiger. Here’s my card for today.

Stampin' Up! Paradise Garden Sunflower 1 creativestampingdesigns.com

I used the Sunflower 3D Embossing Folder along with the Stampin’ Up! Paradise Garden Stamp Set (available March 3), Vellum Specialty Paper and Stampin’ Up! Notes & Totes Stamp Set for my card today.

Stampin' Up! Paradise Garden Sunflower 2 creativestampingdesigns.com

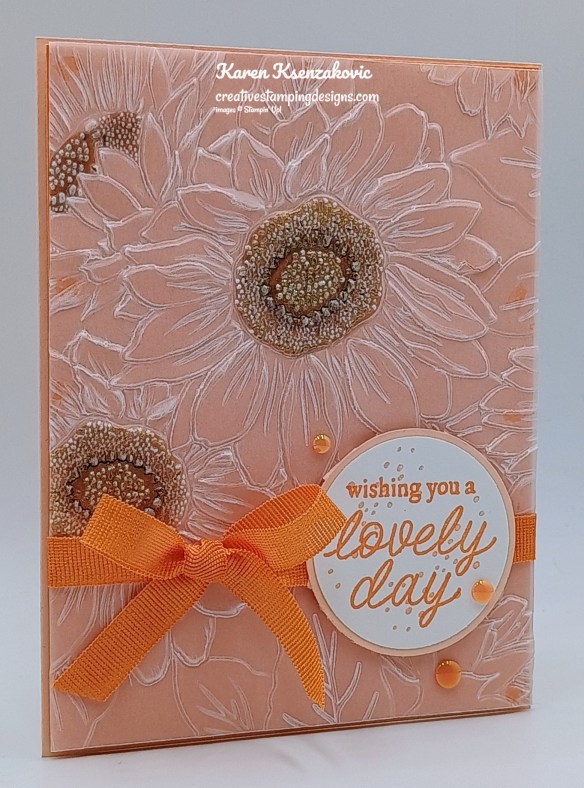
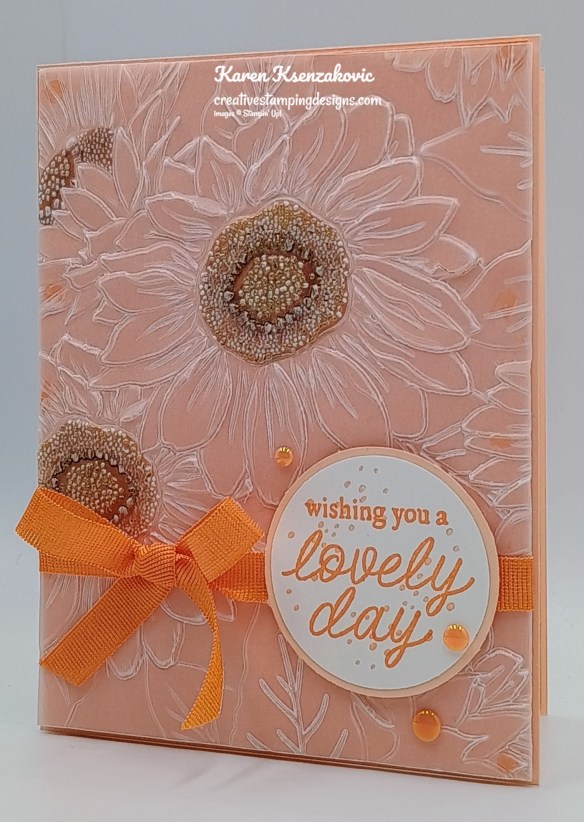
Emboss a panel of Vellum Paper using the Sunflower EF. On the back of the embossed panel, color the sunflower centers using the Pecan Pie Stampin’ Blends Markers. Adhere the embossed panel to a panel of Timid Tiger.

Stampin' Up! Paradise Garden Sunflower 3 creativestampingdesigns.com

Wrap a piece of the Timid Tiger 3/8″ Faux Linen Ribbon around the panel and tie a bow. Adhere the layered panel to a Petal Pink card front with Stampin’ Dimensionals.. Go over the front of the embossed panel flower centers with Clear Wink of Stella Glitter Brush.

Stampin' Up! Paradise Garden Sunflower 4 creativestampingdesigns.com

Stamp the sentiment from Paradise Garden stamp set in Timid Tiger Ink on a panel of Basic White. Stamp the splatter image from the Notes & Totes stamp set in Petal Pink Ink over the sentiment. Punch the sentiment out using the 1 3/4″ Circle Punch. Punch a mat from a panel of Petal Pink using the 1 7/8″ Circle Punch. Adhere the sentiment to the mat. Adhere the layered sentiment to the card front over the ribbon using Stampin’ Dimensionals.

Stampin' Up! Paradise Garden Sunflower 5 creativestampingdesigns.com

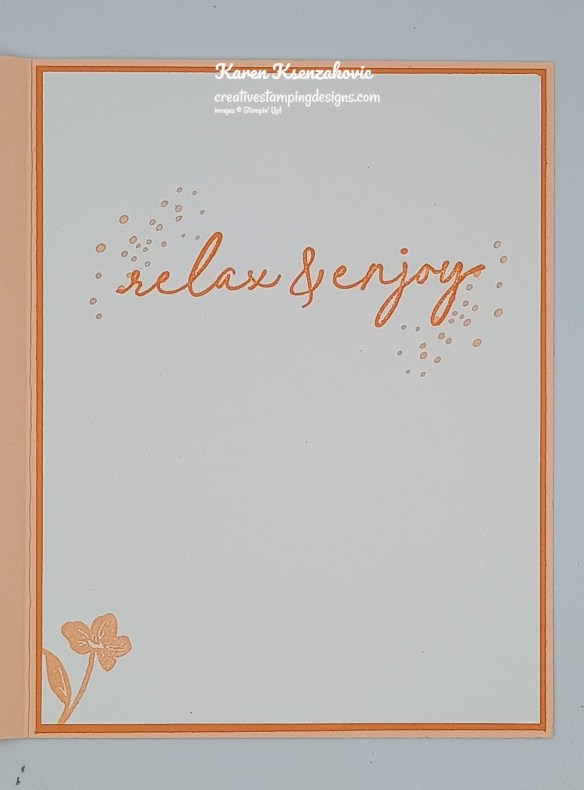
Stamp the sentiment from the Notes & Totes stamp set in Timid Tiger Ink on a panel of Basic White. Stamp the splatter image from the Notes & Totes stamp set in Petal Pink by the sentiment. Stamp the small flower image from the Paradise Garden stamp set in Petal Pink Ink on the bottom of the panel. Adhere the Basic White panel to a Timid Tiger mat then to the inside of the Petal Pink card base.

Stampin' Up! Paradise Garden Sunflower 6 creativestampingdesigns.com

Decorate a Basic White Medium Envelope to finish your card. Stamp the small flower image from the Paradise Garden stamp set in Petal Pink Ink on the envelope front 2 times. Adhere a panel of 2025-2027 In-Color DSP to the envelope flap.

Stampin' Up! Paradise Garden Sunflower 7 creativestampingdesigns.com

Thank you for stopping by my blog today. I hope you like the card and will give it a try. Happy Stamping!!

*********************************************************************************************************

If you need any stamping supplies, I’d love to be your Demonstrator. Just click HERE to go directly to my online store or drop me an email if you have any questions. 

*********************************************************************************************************

Final Days to Redeem Those Bonus Days Coupons February 3 – 28

  • Redemption Period: February 3–28, 2026
    • There is no limit to the number of coupon codes you can redeem on an order during the redemption period. If you’re redeeming multiple codes, you must put a space between each code.
    • You may only redeem coupon codes one time. You cannot redeem them after February 28.
    • You can redeem Bonus Days coupon codes for month-to-month Paper Pumpkin subscriptions and new prepaid subscriptions.
    • Some restrictions apply. Coupons can’t be redeemed towards Starter Kits and you cannot use them on exchanges.
    • Redemption period ends:  February 28, 2026, at 11:59 p.m. (MT)

*********************************************************************************************************

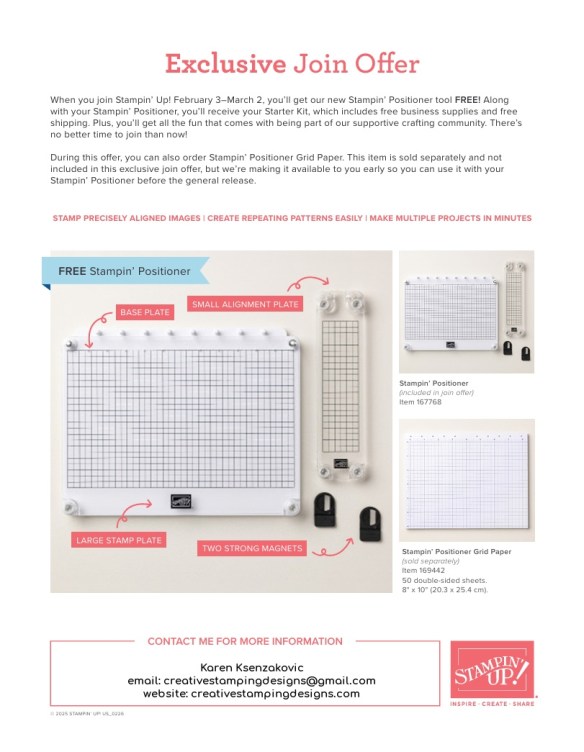
February 3 – March 2 – Stampin’ Up! Joining Special – Free Positioning Tool

Stampin’ Up! has an amazing new tool that will be available for FREE with the purchase of a Starter Kit between February 3-March 2!!  Anyone that purchases the Starter Kit during the promotion will get the awesome new Stampin’ Positioner with their Starter Kit absolutely FREE!! As a bonus for joining my team, you get to attend all my monthly Online Classes absolutely FREE. Contact me today and we can talk about getting you signed up.

Here are the Starter Kit promotion details:

  • Promotion Period: February 3–March 2
  • New team members who purchase their Starter Kit February 3–March 2 will also receive our new Stampin’ Positioner*.
  • New demonstrators who submit their Independent Demonstrator Agreement (IDA) before February 3 or after March 2 will not be eligible for this offer.
  • Joining deadline:  March 2, 2026, at 11:59 p.m. (MT)

*What’s the Stampin’ Positioner?

It’s Stampin’ Up!’s new stamping alignment tool that makes stamping easier and more accurate. It allows you to stamp precisely aligned images, create repeating patterns and Two-Step Stampin’ images easily, and make multiple projects in minutes.

Stampin’ Positioner Grid Paper will also be available for to order but it is not included as part of this exclusive join offer.

A few other things to know:

  • The Stampin’ Positioner WILL be available for purchase by everyone at a later date.  We have not been given any details on when that will be.
  • The Stampin’ Positioner is available for a limited time for current Demonstrators to purchase.

You can read more details about the joining offer on this PDF (click the image to open a full-size printable PDF):

We’d love to have you join our team!!  Once you join, you get at least a 20% discount on all of your Stampin’ Up! purchases and you get to preorder from the upcoming catalogs and promotions!! You can attend the Stampin’ Up! events too. There’s never an obligation to sell, you can join to enjoy the discount for yourself. Contact me if you have any questions and we can talk. I’d love to have you on my team. I’d be more than happy to answer any of your questions, contact me at creativestampingdesigns@gmail.com

You can read a bit more information about the benefits of being a Demonstrator and a part of our team here.  When you’re ready to join, you can get started here.  Let me know if you have any questions.

*********************************************************************************************************

Card stock cuts for this project:

  • Basic White Cardstock 2″ x 2″(sentiment), 4″ x 5 1/4″(inner liner)
  • Petal Pink Cardstock 5 1/2″ x 8 1/2″(card base scored & folded at 4 1/4″), 2 1/4″ x 2 1/4″(sentiment mat)
  • Timid Tiger Cardstock (2) – 4 1/8″ x 5 3/8″(inner liner mat)
  • Vellum Specialty Paper 4 1/8″ x 5 3/8″(card front)
  • 2025-2027 In-Color 6 x 6 Designer Series Paper 2 1/4″ x 6″(envelope)

*********************************************************************************************************

Product List

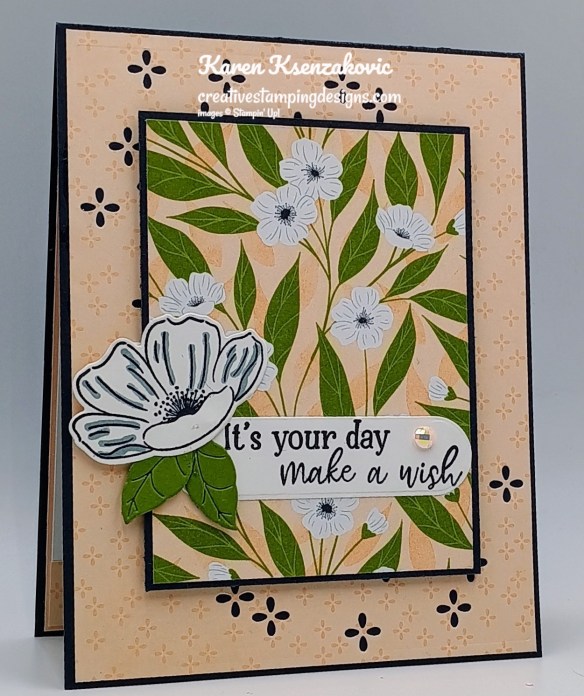
Stampin’ Up! Make A Wish

Good Tuesday morning stamping friends. We’re all dug out from the snow, but the winds last night were horrific. I had trouble sleeping they were so bad and we’re back to being COLD!! I just can’t get warm no matter what I do. Spring can’t get here quick enough.

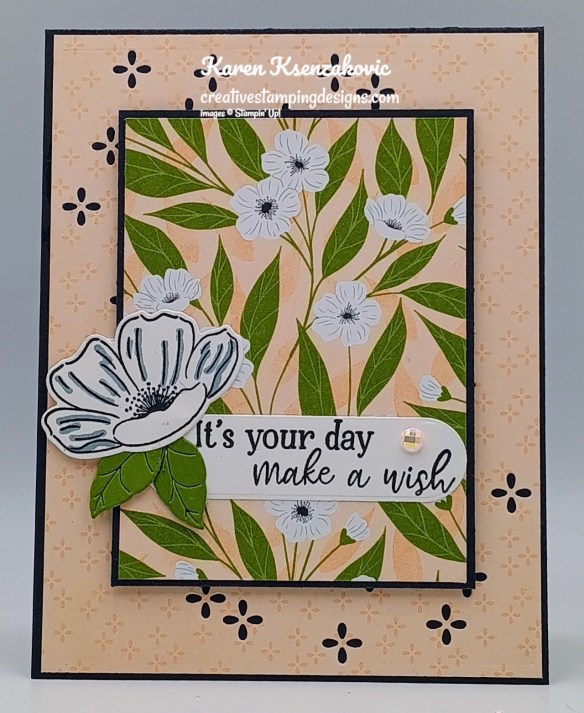
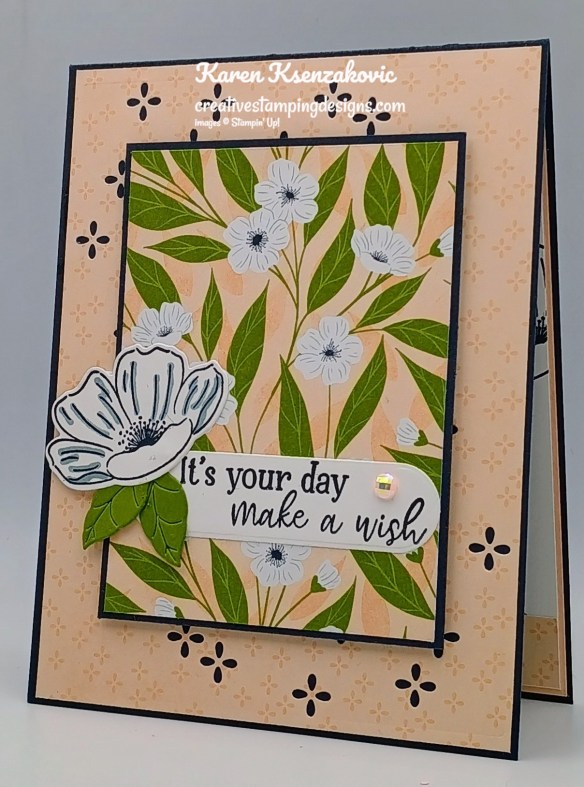
I have a quick card today where I mixed a couple different Online Exclusive sets and DSP.  If you’d like to see a quick video on how I made this card, Click Here to go to my Instagram Reels. Here is my card for today.

Stampin' Up! Make A Wish CAS 1 creativestampingdesigns.com

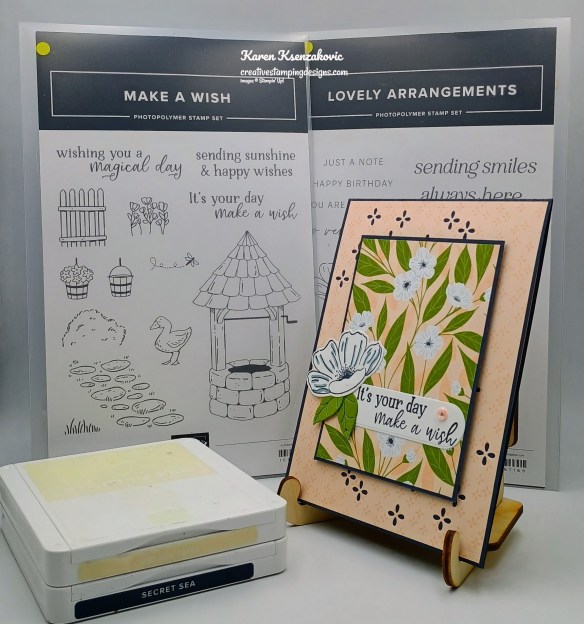
I used the new Stampin’ Up! Make A Wish Stamp Set (available March 3) along with the Lovely Arrangements Bundle and Lovely Blossoms Designer Series Paper for my card today.

Stampin' Up! Make A Wish CAS 2 creativestampingdesigns.com

Die cut a panel of Lovely Blossoms DSP using the Lovely Arrangements Dies. Adhere the panel to a Secret Sea card base. Adhere a smaller panel of Lovely Blossoms DSP to a Secret Sea mat. Adhere the layered panel to the center of the card front with Stampin’ Dimensionals.

Stampin' Up! Make A Wish CAS 3 creativestampingdesigns.com

Stamp the sentiment from Make A Wish stamp set in Secret Sea Ink on a panel of Basic White. Cut the sentiment out using the Lovely Arrangements Dies. Adhere the sentiment to the card front.

Stampin' Up! Make A Wish CAS 4 creativestampingdesigns.com

Stamp the flower from Lovely Arrangements stamp set in Secret Sea Ink on a panel of Basic White. Using the Lovely Arrangements Dies, cut out the flower. Cut the leaves from a panel of Old Olive. Adhere the flower to the card front by the sentiment. Adhere the leaves under the flower. Add a Pearlized Faceted Circle to the sentiment.

Stampin' Up! Make A Wish CAS 5 creativestampingdesigns.com

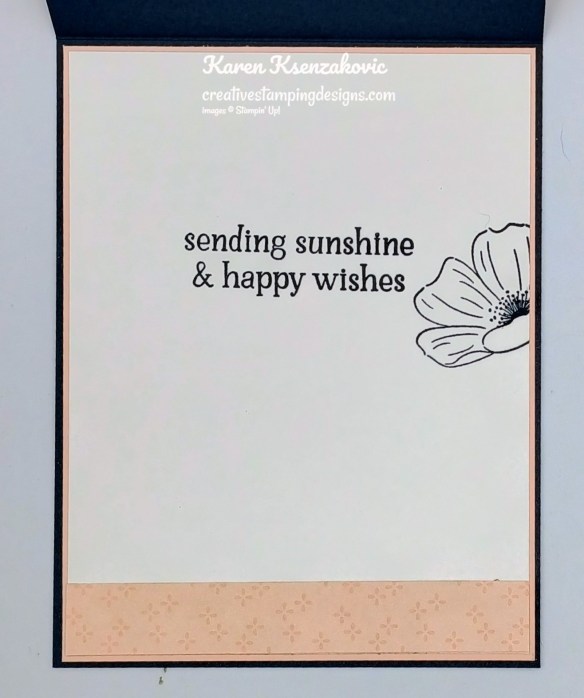
Stamp the sentiment from the Make A Wish stamp set in Secret Sea Ink on a panel of Basic White. Stamp the flower image from the Lovely Arrangements stamp set in Secret Sea Ink next to the sentiment. Adhere a panel of Lovely Arrangement DSP to the bottom of the panel. Adhere the Basic White panel to a Petal Pink mat then to the inside of the Secret Sea card base.

Stampin' Up! Make A Wish CAS 6 creativestampingdesigns.com

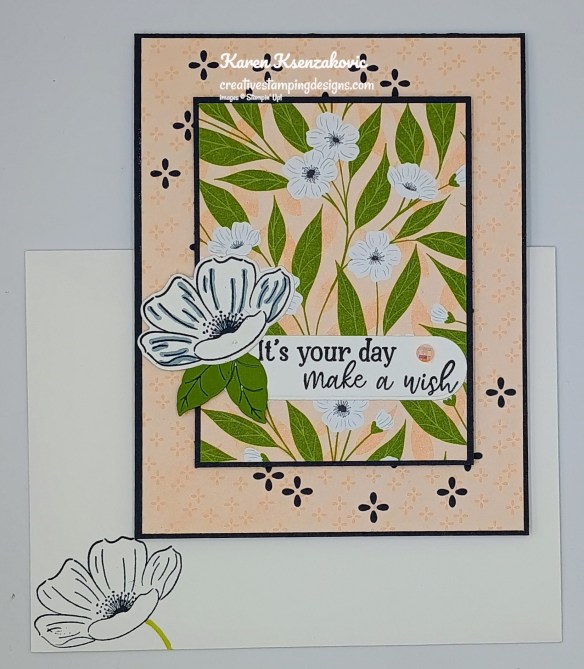
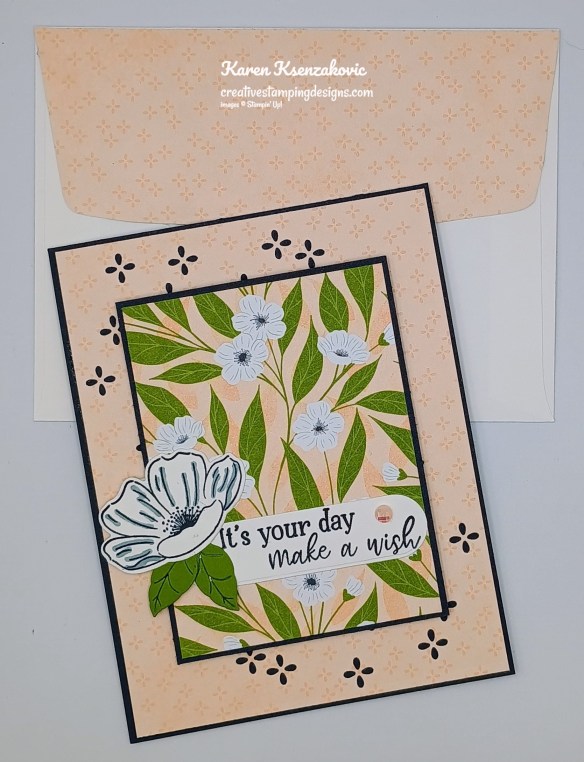
Decorate a Basic White Medium Envelope to finish your card. Stamp the flower image from the Lovely Arrangements stamp set in Secret Sea Ink on the envelope front. Adhere a panel of Lovely Blossoms DSP to the envelope flap.

Stampin' Up! Make A Wish CAS 7 creativestampingdesigns.com

Thank you for stopping by my blog today. I hope you like the card and will give it a try. Happy Stamping!!

*********************************************************************************************************

If you need any stamping supplies, I’d love to be your Demonstrator. Just click HERE to go directly to my online store or drop me an email if you have any questions. 

*********************************************************************************************************

Final Days to Redeem Those Bonus Days Coupons February 3 – 28

  • Redemption Period: February 3–28, 2026
    • There is no limit to the number of coupon codes you can redeem on an order during the redemption period. If you’re redeeming multiple codes, you must put a space between each code.
    • You may only redeem coupon codes one time. You cannot redeem them after February 28.
    • You can redeem Bonus Days coupon codes for month-to-month Paper Pumpkin subscriptions and new prepaid subscriptions.
    • Some restrictions apply. Coupons can’t be redeemed towards Starter Kits and you cannot use them on exchanges.
    • Redemption period ends:  February 28, 2026, at 11:59 p.m. (MT)

*********************************************************************************************************

February 3 – March 2 – Stampin’ Up! Joining Special – Free Positioning Tool

Stampin’ Up! has an amazing new tool that will be available for FREE with the purchase of a Starter Kit between February 3-March 2!!  Anyone that purchases the Starter Kit during the promotion will get the awesome new Stampin’ Positioner with their Starter Kit absolutely FREE!! As a bonus for joining my team, you get to attend all my monthly Online Classes absolutely FREE. Contact me today and we can talk about getting you signed up.

Here are the Starter Kit promotion details:

  • Promotion Period: February 3–March 2
  • New team members who purchase their Starter Kit February 3–March 2 will also receive our new Stampin’ Positioner*.
  • New demonstrators who submit their Independent Demonstrator Agreement (IDA) before February 3 or after March 2 will not be eligible for this offer.
  • Joining deadline:  March 2, 2026, at 11:59 p.m. (MT)

*What’s the Stampin’ Positioner?

It’s Stampin’ Up!’s new stamping alignment tool that makes stamping easier and more accurate. It allows you to stamp precisely aligned images, create repeating patterns and Two-Step Stampin’ images easily, and make multiple projects in minutes.

Stampin’ Positioner Grid Paper will also be available for to order but it is not included as part of this exclusive join offer.

A few other things to know:

  • The Stampin’ Positioner WILL be available for purchase by everyone at a later date.  We have not been given any details on when that will be.
  • The Stampin’ Positioner is available for a limited time for current Demonstrators to purchase.

You can read more details about the joining offer on this PDF (click the image to open a full-size printable PDF):

We’d love to have you join our team!!  Once you join, you get at least a 20% discount on all of your Stampin’ Up! purchases and you get to preorder from the upcoming catalogs and promotions!! You can attend the Stampin’ Up! events too. There’s never an obligation to sell, you can join to enjoy the discount for yourself. Contact me if you have any questions and we can talk. I’d love to have you on my team. I’d be more than happy to answer any of your questions, contact me at creativestampingdesigns@gmail.com

You can read a bit more information about the benefits of being a Demonstrator and a part of our team here.  When you’re ready to join, you can get started here.  Let me know if you have any questions.

*********************************************************************************************************

Card stock cuts for this project:

  • Basic White Cardstock 1 1/4″ x 3″(sentiment), 2″ x 2 1/4″(die cut), 4″ x 5 1/4″(inner liner)
  • Old Olive Cardstock 1 1/2″ x 1 1/2″(die cuts)
  • Petal Pink Cardstock 4 1/8″ x 5 3/8″(inner liner mat)
  • Secret Sea Cardstock 4 1/4″ x 11″(card base scored & folded at 5 1/2″), 3″ x 4″(card front panel mat)
  • Lovely Blossoms Designer Series Paper 4″ x 5 1/4″(card front), 2 7/8″ x 3 7/8″(card front panel), 5/8″ x 4″(inner liner), 2 1/4″ x 6″(envelope)

*********************************************************************************************************

Product List