Stampin’ Up! Autumn Leaves Easel Fold

Good Saturday morning stamping friends and welcome to the weekend. It’s still raining here in NJ. Yesterday was pretty bad with flooding. It took my husband well over an hour to get home because of all the roads closed because of floods. We’re expecting more rain today, but tomorrow it’s supposed to be up in the 80’s again until Wednesday with no rain. Hopefully it will help to dry things up a little and turn the rest of my tomoatoes red.

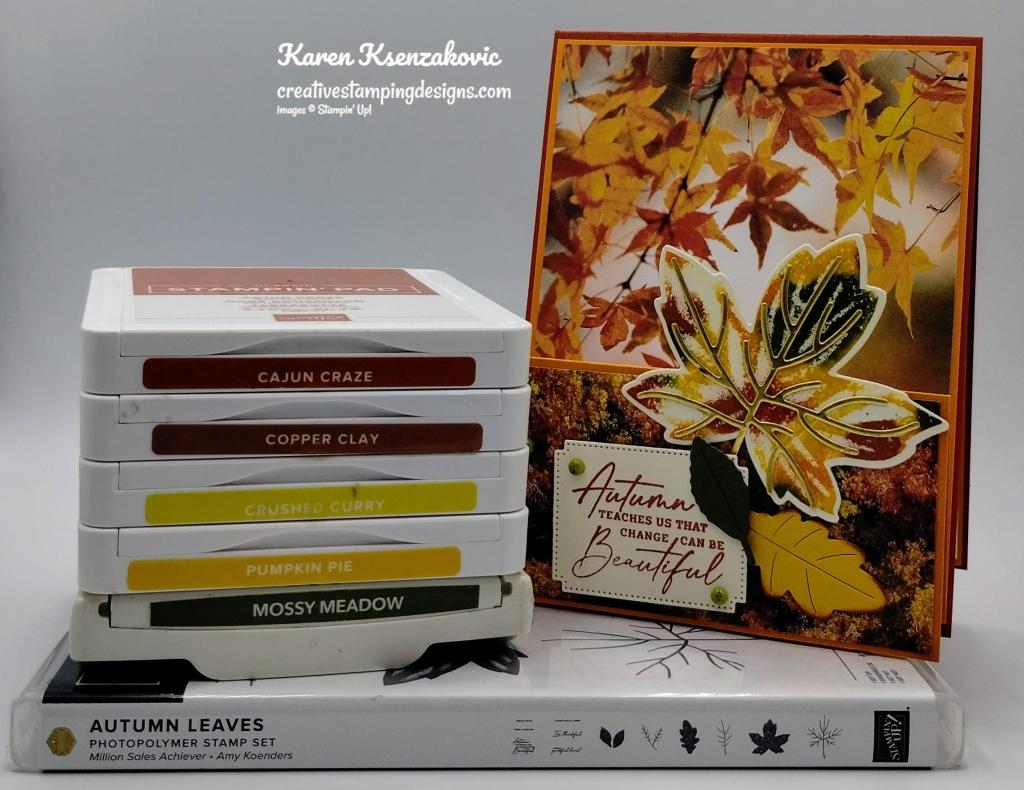
Today’s card idea I got from a team member of mine Rosie Kean. She made a similar card a few weeks back and I really liked it. I used a couple different techniques on the card using the Blending Brushes and Baby Wipe Technique which is one of my favorites to use in the fall. If you’d like to see a quick video of how I made the card, Click Here to see my Instagram Reel. Here’s my card for today.

Stampin' Up! Autumn Leaves Easel 1 creativestampingdesigns.com

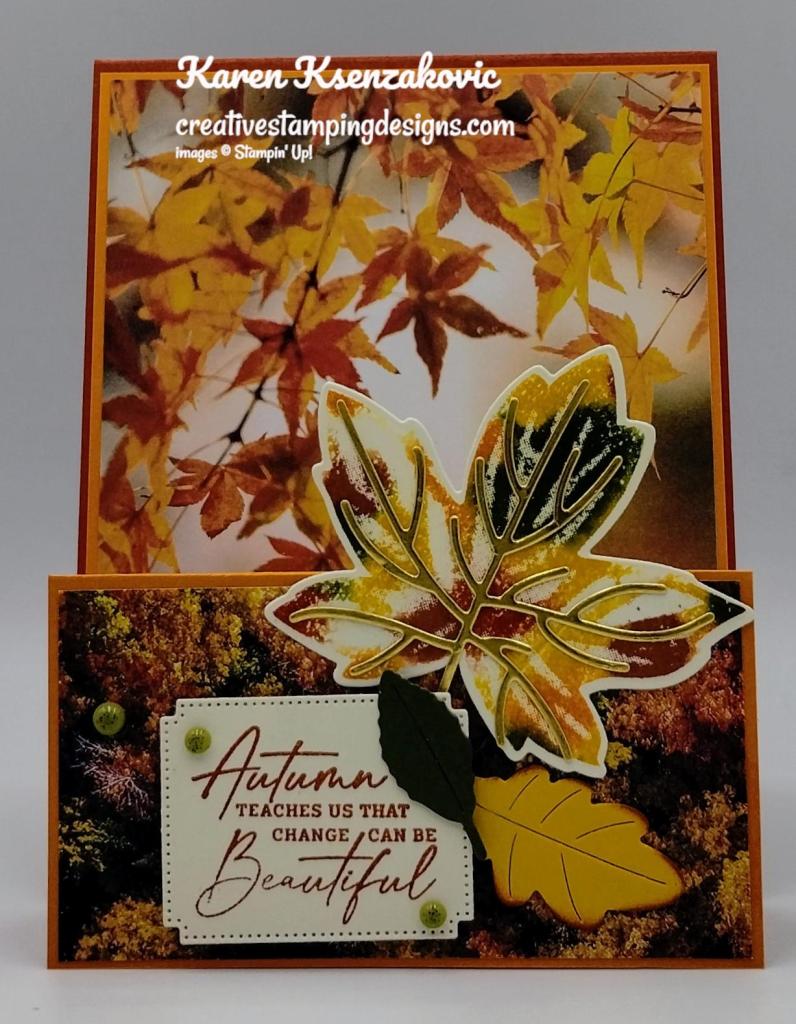
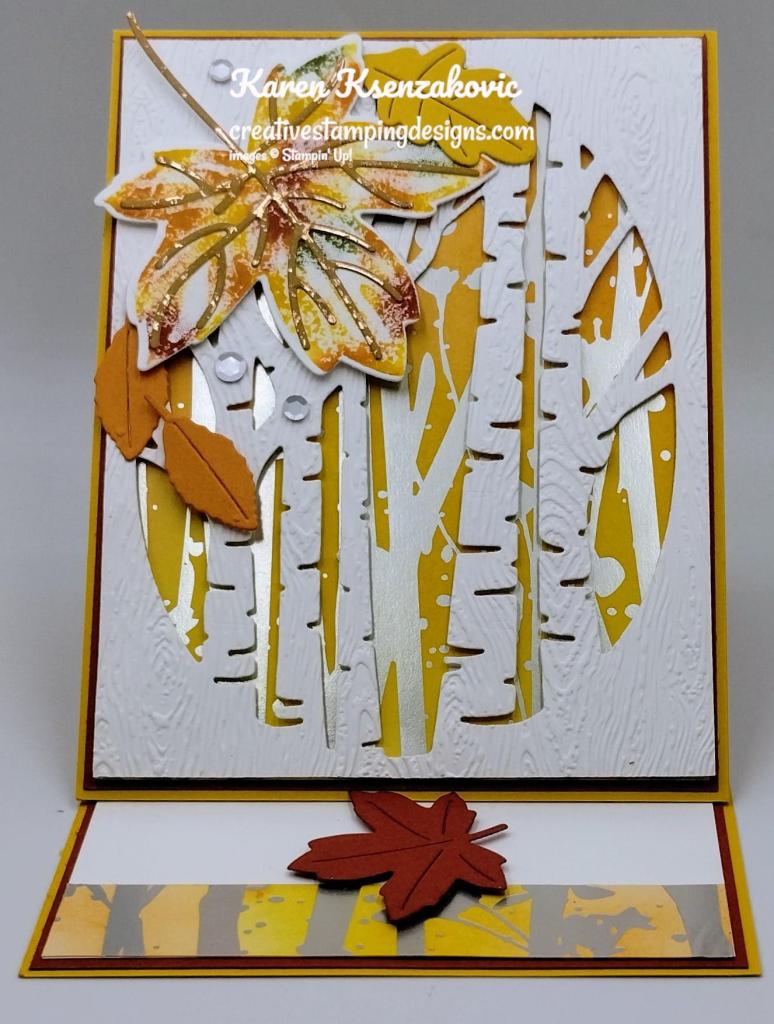
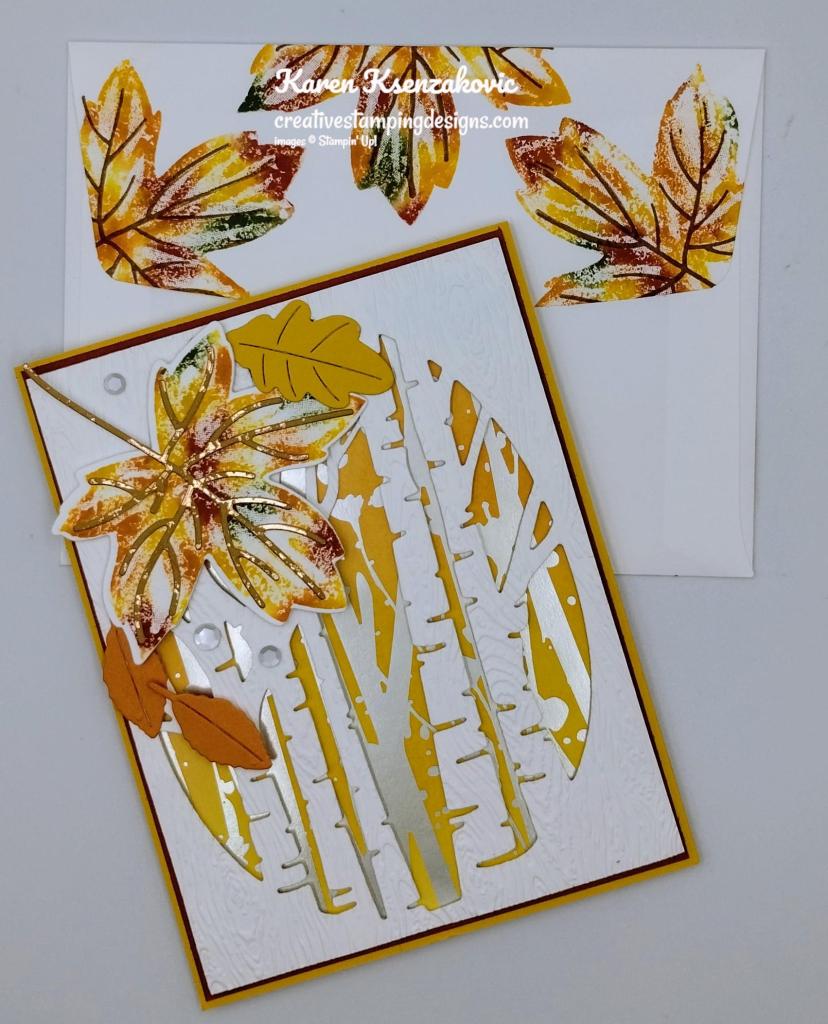
I used the Stampin’ Up! Autumn Leaves Bundle along with the Aspen Trees Dies, Timber 3D Embossing Folder and Online Exclusive Naturally Gilded Specialty Designer Series Paper for my card today.
Stampin' Up! Autumn Leaves Easel 2 creativestampingdesigns.com

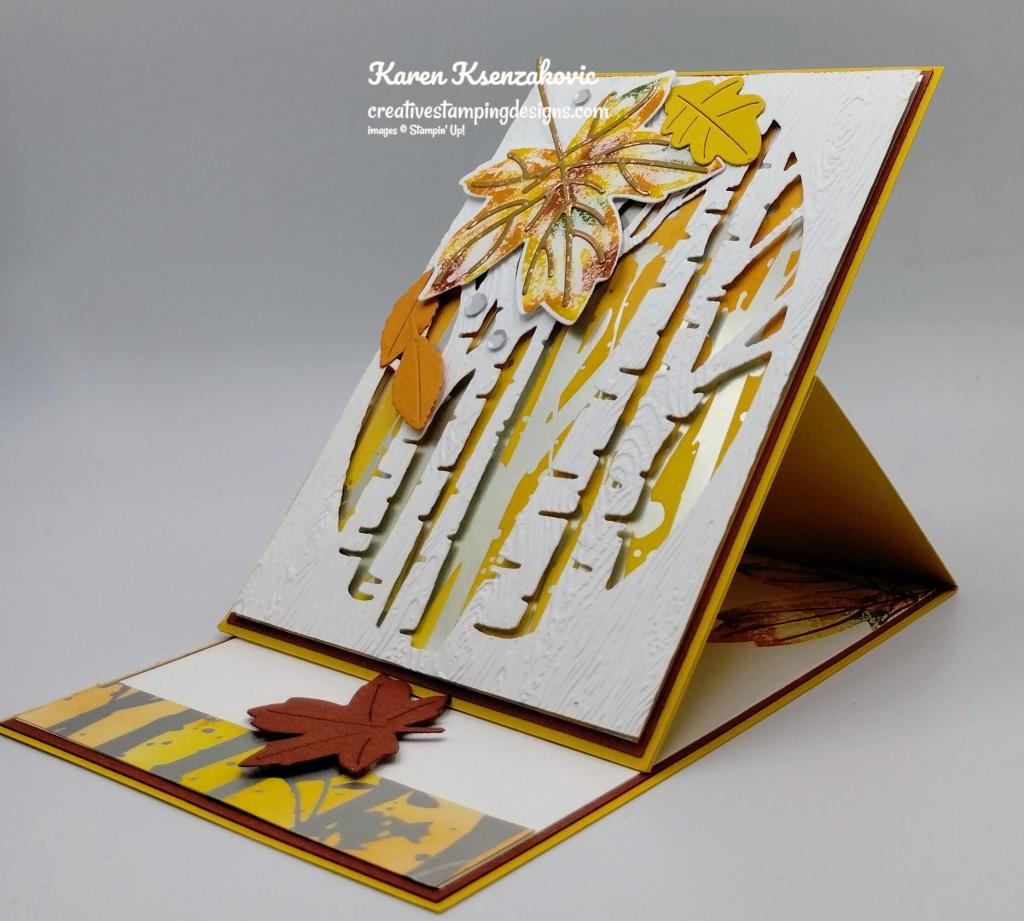
I started by cutting a Basic White card front using the Aspen Trees Dies. I then embossed the panel using the Timber 3D Embossing Folder. I took a panel of the Naturally Gilded DSP and using my Blending Brushes added Crushed Curry and Pumpkin Pie Inks. I adhered the panel to a Cajun Craze mat using Stampin’ Seal. I adhered the layered panel to the Crushed Curry easel card front using Multipurpose Liquid Glue.
Stampin' Up! Autumn Leaves Easel 3 creativestampingdesigns.com

I adhered the die cut embossed card front to the layered panel using Stampin’ Dimensionals. Using the Autumn Leaves Dies, I cut the maple leaf from a panel of Cajun Craze, Oak leaf from a panel of Crushed Curry and Elm leaves from a panel of Pumpkin Pie.

Stampin' Up! Autumn Leaves Easel 4 creativestampingdesigns.com

I took 2 folded baby wipes and put them in an empty stamp case. I added drops of Cajun Craze, Crushed Curry, Daffodil Delight, Old Olive and Pumpkin Pie from Stampin’ Ink Refills. I love this technique for the fall because every leaf comes out different. I inked the large maple leaf from the Stampin’ Up! Autumn Leaves Photopolymer Stamp Set and stamped it on a panel of Basic White. I cut the leaf out using the Autumn Leave Dies and the leaf veins from a panel of Oxidized Copper paper and adhered it to the stamped leaf. I adhered the leaf to the card front using Stampin’ Dimensionals. I adhered the oak and elm leaves to the card front using Multipurpose Liquid Glue and Stampin’ Dimensionals. I added a few silver Naturals Adhesive Backed Sequins to the card front.

Stampin' Up! Autumn Leaves Easel 5 creativestampingdesigns.com

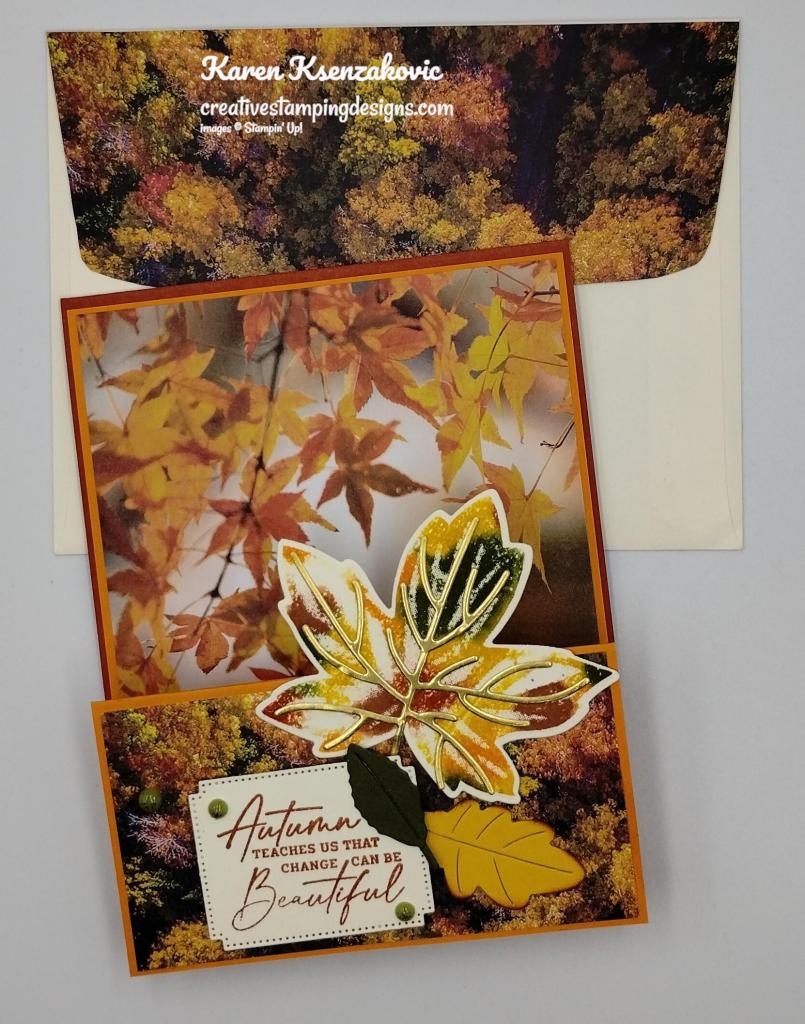
On the inside, I stamped the sentiment from the Autumn Leaves stamp set in Cajun Craze Ink. I stamped 2 maple leaves from the Autumn Leaves stamp set in the top corners of the panel using the same inked baby wipes. You can see how each leaf stamps differently. I stamped the leaf veins from the Autumn Leaves stamp set in Pecan Pie Ink on top of the stamped leaves. I adhered a strip of the Naturally Gilded DSP to the bottom of the panel, which I had brushed Crushed Curry and Pumpkin Pie Inks on with my Blending Brushes. I adhered the Basic White panel to a Cajun Craze mat then to the inside of the Crushed Curry card base. I added the small die cut maple leaf on the bottom of the panel, where I wanted the easel to stop, using Stampin’ Dimensionals.

Stampin' Up! Autumn Leaves Easel 6 creativestampingdesigns.com

To finish my card, I decorated a Basic White Medium Envelope. I stamped the maple leaf from the Autumn Leaves stamp set on the envelope front and flap using the same inked up baby wipes. Once again you can see how every leaf is different. I stamped the leaf veins from the Autumn Leaves stamp set in Pecan Pie Ink over the stamped leaf.
Stampin' Up! Autumn Leaves Easel 7 creativestampingdesigns.com

Thank you for stopping by my blog today. I hope you like the card and will give it a try. Happy Stamping!!

*********************************************************************************************************

If you need any stamping supplies, I’d love to be your Demonstrator. Just click HERE to go directly to my online store or drop me an email if you have any questions. 

MY CURRENT HOST CODE IS:   WRAGYZRS

Use this host code when placing an order with me. When you order $50 or greater you will receive a free gift from me! If your order is over $150, please do not use this code, but you’ll still get the free gift. The free gift is your choice of any 1 item valued up to $10.00 from the 2023-2024 Annual Catalog!  Unfortunately, packs of cardstock are no longer an option for a free gift. Shipping has become too expensive to ship and it’s costing me as much to ship as the cardstock costs. For any orders $50 or more I will also send you my monthly class tutorials.  Click HERE or go to my Customer Rewards for more details and to see what this month’s tutorials are.

Please remember to use my current Host Code and make sure that you can see my name on the final checkout page listed as your Demonstrator when you order so that you know that you’re ordering with me, and you’ll get my rewards! 

Happy Stamping, Karen

*********************************************************************************************************

In response to changing policies at Stampin’ Up – I’m adjusting my Ordering Gift policy as well.  I’m having to get a little more tough on the adding of Host codes when you place your order thru my Online Store.

Not to worry – you’re still going to get that $10 ordering gift for orders of $50 (before shipping & tax) or greater.  And the gift is still any 1 SU! product up to that $10 value – which includes some of our fun Host Sets!

But – if you DO NOT use the Host code for your orders of less than $150 (this is the RETAIL total before Shipping & Handling), then you’ll have two options:

  1. You’ll need to call Stampin’ Up! (1-800-Stamp-Up) and ask them to add it for you. They’re very helpful and will get it done quickly!  OR….
  2. If your order was over the $50 threshold but under $150, then…you’ll forfeit that $10 ordering gift and rewards – this is the Bummer Option – and I REALLY don’t want to do this, SO please remember to add my Current Host Code.

*********************************************************************************************************

Inkin’ Krew World Card Making Day Event – Saturday, October 7!

Save the date!!  Our team will be hosting a World Card Making Day event again this year!  We’ll be setting up a Facebook page where we’ll be going live and posting videos showing you card projects all day long!  

The event will be Saturday, September 7 and will start around 9 AM ET that day and run through around 9 PM ET that evening.  Replays will be available for all of the presentations if you aren’t able to watch that day. 

We’ll be posting a link to the event page a few days ahead of the event and opening it for all to attend so keep an eye out for that in early October!

Hope to see you then!

*********************************************************************************************************

Stampin’ Up! World Card Making Day Event – Saturday, October 7!
You are invited to craft along with Stampin’ Up! for about three hours, and create three unique cards for World Card Making Day! Everyone is invited and welcome and the event and registration are FREE! 

Don’t miss out on this opportunity to connect with others who love crafting as much as you do and to experience all that Stampin’ Up! has to offer.  Mark your calendars now and join us on October 7!


EVENT DETAILS

Who: Anyone!
When: October 7 from 2:00–5:00 p.m. (MT)
Where: Online
Price of Event: Free
Registration Dates: September 6 – October 7, 2023 

You can participate in the event without registering. However, registration is encouraged because it’s the best way to stay up to date regarding event details. The email address provided will only be used for event communication.

Language of Event: Most of the event will be presented in English with language interpretation voiceover and subtitles in English, French, German, and Dutch. 

Help Support : Support will be available on the event platform one hour before the event begins, during the event, and for 30 minutes following the event. 

Video on Demand: The World Card Making Day event will be recorded, and you’ll be able to access it after the live event. It will be available October 8-31. 

Click Here to open a full-size flyer showing you the stamp set bundles that will be used (including the new Heartfelt Hexagon bundle!!) for the projects on World Card Making Day.

Click Here for the measurements and card stock cuts for the three projects that will be shared at the World Card Making Day event.

*********************************************************************************************************

Celebrate The Miracle Stamp Set Available Now!!
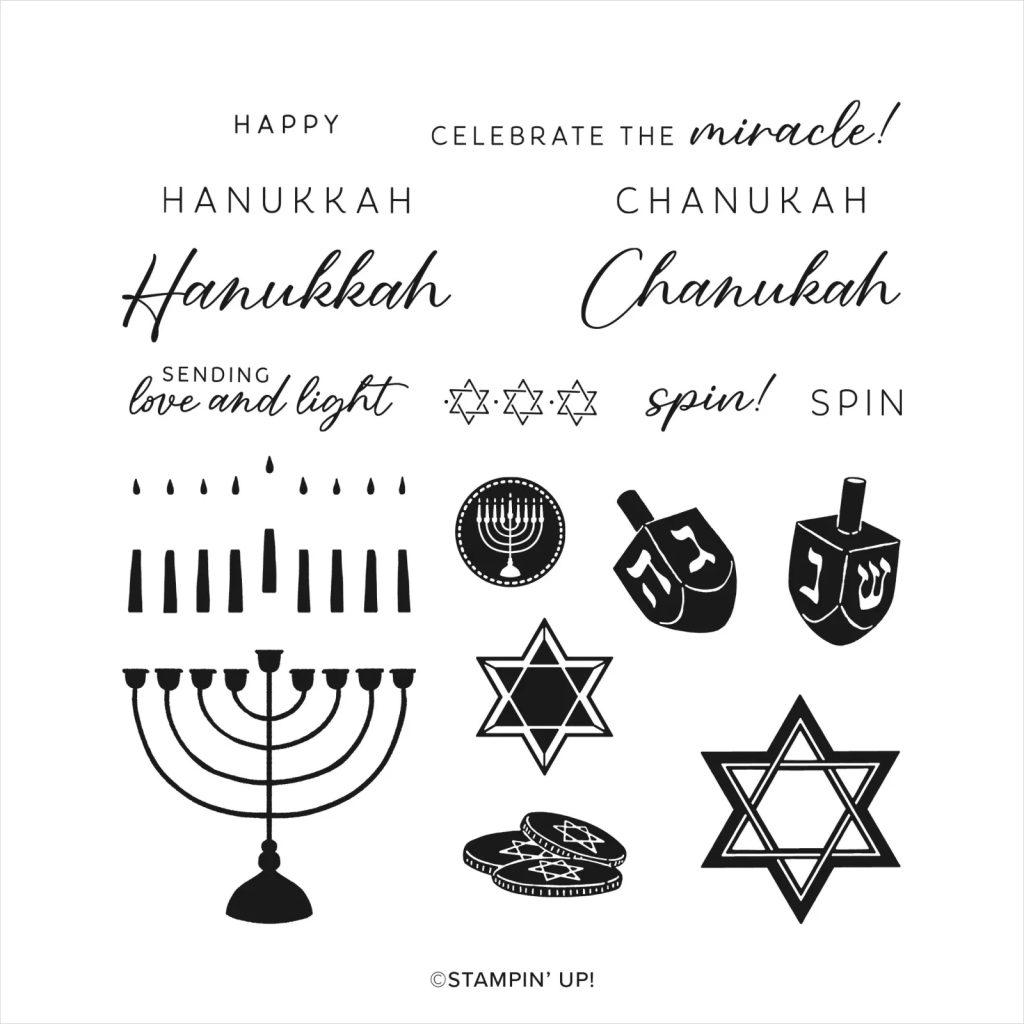
This just in!  Stampin’ Up!’s Celebrate the Miracle stamp set (item 165131) is now available as an online exclusive!  This beautiful Hanukkah stamp set has 19 stamps and is available to order now in the Online Exclusives section of the online store!

*********************************************************************************************************

New Joining Special Starting October 3 – October 31

If you’ve been thinking about joining the Stampin’ Up! community October is the perfect time.

We want to celebrate our 35th anniversary in style! From October 3 – October 31, anyone who joins our fun crafting community as a new demonstrator can choose either 35% OFF the cost of their Starter Kit or get 35% MORE product with their Starter Kit! What a deal!

Promotion Period: 3–31 October

New demonstrators can choose one of the following options for your Starter Kit:

Option 1: Get 35% OFF the normal cost of a Stampin’ Up! Starter Kit. Those who select this option will receive $125 USD worth of product for only $64.35 USD!

Option 2: Get 35% MORE product with their Starter Kit. Those who select this option will receive $168.75 USD worth of product by spending $99 USD!

No matter which option you choose for your Starter Kit, both provide free business supplies and free shipping on your Starter Kit—not to mention all the fun that comes with being part of Stampin’ Up!

FREE OnStage@Home Registration

It gets better! Those who sign up for a Starter Kit during this offer will also be automatically registered for FREE* to our virtual OnStage event on 11 November—a $77 USD value!

  • Those who sign up for this offer have the opportunity to watch the event independently, gathered together with other demonstrators, or with their Team Leader.
  • Demonstrators who join during this promotion will be automatically added to the OnStage attendees; they do not need to register separately.
  • Demonstrators who join during this promotion will also receive an email with all the information about this event.

*Please note that free registration will not include the gift box.

Stampin’ Up! events are always SO much fun!!  Bonus that you can join and attend your first even for free!!

I’d Love to have you on my team

If you’d like to join my team, I’d love to have you!  Once you join, you’ll get at least a 20% discount on all of your Stampin’ Up! purchases and you can preorder from the upcoming catalogs!

We welcome all types of Demonstrators from those only purchasing to get the discount for themselves to those who want to run a business and anywhere in between!  There’s never any pressure to sell! We’re a group that loves to stamp and share what you create.

If you have been back and forth about joining, drop me a note at creativestampingdesigns@gmail.com and we can talk about you joining.

*********************************************************************************************************

Home for the Holidays

Subscribe September 11 – October 10
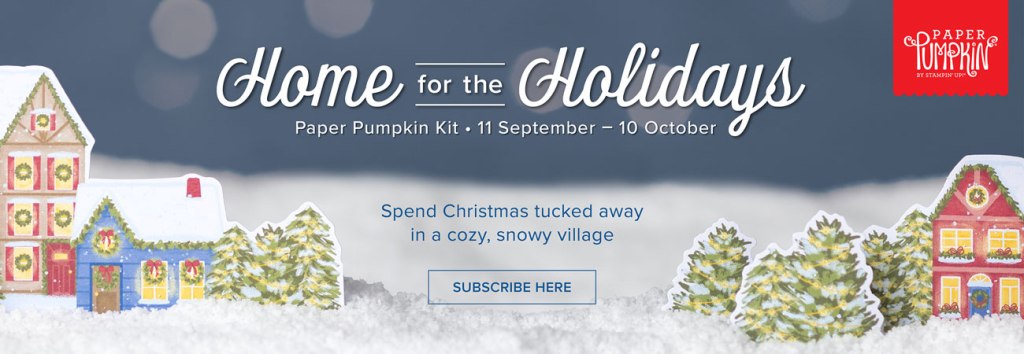
Create dazzling traditional Christmas cards with the Home for the Holidays Paper Pumpkin Kit! This kit includes eight beautiful cards—four each of two designs. Whether you want to send a few to your loved ones or fill your home with some extra special Christmas cheer, this kit has everything you need to make some sparkly, festive cards. Keep reading to learn more!
One extra fun feature of the Home for the Holidays Paper Pumpkin Kit is the bottle of glitter glue! You can use this glue to add shimmery, shiny details to the Christmas scenes on their cards. You can add some glitter to the trees, houses, snow, and more. There are endless possibilities you will have with this glue and the kit.

Bring some inspiration to your creations with the coordinating box design! This box could help create a cute village Christmas scene with your cards, and more. You could even use the box as a photo op prop! This is a fun way to make the most of the kit. Don’t let the Christmas crafts end once you finish with this kit! Since the Home for the Holidays Kit perfectly coordinates with the November Paper Pumpkin Kit, you and you will be able to extend your holiday crafting experience even further. So make sure your subscription is up to date!

This kit includes:

  • All the supplies you’ll need to create 8 sparkly and dazzling Christmas cards—4 each of 2 designs—and eight coordinating envelopes.
  • A coordinating photopolymer stamp set with endearing holiday sentiments and festive designs.
  • A Real Red Stampin’ Spot
  • A bottle of Glitter Glue
  • Beautiful Christmasy-themed precut pieces

Finished folded card size: 4-1/4″ x 5-1/2″ (10.8 x 14 cm)

Coordinating Stampin’ Up! colors: Balmy Blue, Blueberry Bushel, Cherry Cobbler, Crumb Cake, Crushed Curry, Daffodil Delight, Lemon Lolly, Mossy Meadow, Night of Navy, Old Olive, Pecan Pie, Real Red

Subscribe to the August Paper Pumpkin Kit between 11 September and 10 October by clicking here!

Note: Supplies may be limited toward the end of the subscription period.

*********************************************************************************************************

Card stock cuts for this project:

  • Basic White Cardstock 2 – 4″ X 5 1/4″ (card front & inner liner), 3″ X 3″ (leaf)
  • Cajun Craze Cardstock 2 – 4 1/8″ x 5 3/8″ (card front & inner liner mats), 1 3/4″ X 2″ (leaf)
  • Crushed Curry Cardstock 4 1/4″ X 11″ (card base scored & folded at 2 3/4″ & 5 1/2″), 4 1/4″ X 5 1/2″ (easel panel), 1″ X 2″ (leaf)
  • Pumpkin Pie Cardstock 3/4″ X 2″ (leaves)
  • Naturally Gilded Specialty Designer Series Paper (4″ X 5 1/4″ (card front), 3/4″ x 4″ (inner liner strip)
  • Oxidized Copper Specialty Paper 3″ X 3″ (leaf veins)

*********************************************************************************************************

Product List

Paper Snips

[103579]
$11.00

Stampin’ Up! Autumn Leaves Easel Fun Fold Card

Good Monday morning stamping friends. How was everyone’s weekend? I hope you will take a moment today to remember all the lives that were lost on this day 22 years ago. The horrible attack that took so many lives. I remember the day like it was yesterday, where I was, what I was doing, where my kids were and not being able to contact anyone. Both my kids were in school which got locked down until parents could get to them. It was a very scary time and so close to home. NYC is less than an hour away from where I am, and I had no clue if anything else was going to happen closer to me.

We had our quarterly team meeting yesterday and after the business part we got to do some fun stamping with other team members via zoon. My card for today was designed and presented by a team member Rosie Kean. I changed a couple things on mine to make it my own, but she chose the colors and design for us. Here’s the card that she designed for us to make.

Stampin' Up! Autumn Leaves Easel 1 creativestampingdesigns.com

I used the Stampin’ Up! Autumn Leaves Bundle along with the All About Autumn 6 X 6 Designer Series Paper for my card today.

Stampin' Up! Autumn Leaves Easel 2 creativestampingdesigns.com

I started by taking a baby wipe and placed it on a plastic tray. I dropped several drops of Copper Clay, Mossy Meadow, Crushed Curry, Cajun Craze and Pumpkin Pie ink refills on the baby wipe, overlapping some, covering large area. I inked large maple leaf from the Stampin’ Up! Autumn Leaves Photopolymer Stamp Set with the baby wipe, then stamp on the 4” x 4” Very Vanilla cardstock panel. I set it aside to let it dry.

Stampin' Up! Autumn Leaves Easel 3 creativestampingdesigns.com

I scored & folded the Pumpkin Pie card base as stated below. I adhered it to the front of the Cajun Craze card base using Multipurpose Liquid Glue. I adhered the 2 panels of All About Autumn DSP to the pumpkin Pie card base using Multipurpose Liquid Glue. I stamped the sentiment from the Autumn Leaves stamp set in Cajun Craze In on a panel of Very Vanilla. I cut the sentiment out using the Autumn Leaves Dies. I adhered it to the small card front using Stampin’ Dimensionals.

Stampin' Up! Autumn Leaves Easel 4 creativestampingdesigns.com

I cut the maple leaf image using the Autumn Leaves Dies. Using the Autumn Leaves Dies, I cut the small oak leaf from a panel of Crushed Curry and the elm leaf from a panel of Mossy Meadow. I cut the maple leaf vein from a Gold Foil Sheet. I adhered the vein to the maple leaf. I adhered the leaves to the small card front using Glue Dots. I added a few Adhesive-Backed Speckled Dots to the card front.

Stampin' Up! Autumn Leaves Easel 5 creativestampingdesigns.com

On the inside, I stamped the sentiment from the Autumn Leaves stamp set in Cajun Craze Ink on a panel of Very Vanilla. I stamped the leaf image from the Autumn Leaves stamp set, which I had inked up from the baby wipe, on the bottom of the panel. I adhered a strip of All About Autumn DSP to the top of the panel. I adhered the Very Vanilla panel to a Pumpkin Pie mat then to the inside of the Cajun Craze card base.

Stampin' Up! Autumn Leaves Easel 6 creativestampingdesigns.com

To finish my card, I decorated a Very Vanilla Medium Envelope. I stamped the leaf image from the Autumn Leaves stamp set on the envelope front which I had inked up from the inked baby wipe. I adhered a panel of All About Autumn DSP to the envelope flap.

Stampin' Up! Autumn Leaves Easel 7 creativestampingdesigns.com

Thank you for stopping by my blog today. I hope you like the card and will give it a try. Happy Stamping!!

*********************************************************************************************************

If you need any stamping supplies, I’d love to be your Demonstrator. Just click HERE to go directly to my online store or drop me an email if you have any questions. 

MY CURRENT HOST CODE IS:   P6UQN4GZ

Use this host code when placing an order with me. When you order $50 or greater you will receive a free gift from me! If your order is over $150, please do not use this code, but you’ll still get the free gift. The free gift is your choice of any 1 item valued up to $10.00 from the 2023-2024 Annual Catalog!  Unfortunately, packs of cardstock are no longer an option for a free gift. Shipping has become too expensive to ship and it’s costing me as much to ship as the cardstock costs. For any orders $50 or more I will also send you my monthly class tutorials.  Click HERE or go to my Customer Rewards for more details and to see what this month’s tutorials are.

Please remember to use my current Host Code and make sure that you can see my name on the final checkout page listed as your Demonstrator when you order so that you know that you’re ordering with me, and you’ll get my rewards! 

Happy Stamping, Karen

*********************************************************************************************************

In response to changing policies at Stampin’ Up – I’m adjusting my Ordering Gift policy as well.  I’m having to get a little more tough on the adding of Host codes when you place your order thru my Online Store.

Not to worry – you’re still going to get that $10 ordering gift for orders of $50 (before shipping & tax) or greater.  And the gift is still any 1 SU! product up to that $10 value – which includes some of our fun Host Sets!

But – if you DO NOT use the Host code for your orders of less than $150 (this is the RETAIL total before Shipping & Handling), then you’ll have two options:

  1. You’ll need to call Stampin’ Up! (1-800-Stamp-Up) and ask them to add it for you. They’re very helpful and will get it done quickly!  OR….
  2. If your order was over the $50 threshold but under $150, then…you’ll forfeit that $10 ordering gift and rewards – this is the Bummer Option – and I REALLY don’t want to do this, SO please remember to add my Current Host Code.

*********************************************************************************************************

Christmas Everywhere Kit Available

Share the joy of Christmas with everyone, everywhere with the Christmas Everywhere Kit! Featuring trees from around the world, this kit comes with everything you need to quickly create 9 cards—3 each of 3 designs—so you can send the special people in your life warm Christmas wishes wherever they are! 

This kit includes: 

  • Enough supplies to create 9 cards—3 each of 3 designs
  • 9 coordinating envelopes
  • Christmas Everywhere photopolymer stamp set
  • One Lost Lagoon Ink Spot
  • Printed card bases, printed die-cut labels and images with red glitter, adhesive, and a clear block
  • Finished card size: 5-1/2″ x 4-1/4″ (14 x 10.8 cm)
  • Coordinating colors: Granny Apple Green, Lost Lagoon, Pecan Pie, Pretty Peacock, Real Red

*********************************************************************************************************

Online Exclusive New Designer Series Paper Available

Surprise, surprise! We’re offering a special release of five beautiful new Designer Series Paper options! These papers include fabulous holiday prints, gorgeous seasonal styles, and some spectacular timeless designs. 

We originally created these papers to be part of our second Sale-A-Bration offering. However, since our next release of new Online Exclusive products won’t happen until November (and you won’t be able to find any of these papers in a catalog), we’ve adjusted our strategy and decided to release these paper options starting 6 September! That way, you have the chance to get ahead on Christmas cards, seasonal crafts, and much more. These products are available while supplies last—you don’t want to miss out! 

Sales Period: Starting 6 September

  • The special release paper options will be available in the Online Exclusives category in the online store.
  • Products will only be available while supplies last. Once products run out, they will no longer be visible in the online store.

*********************************************************************************************************

Home for the Holidays

Subscribe September 11 – October 10

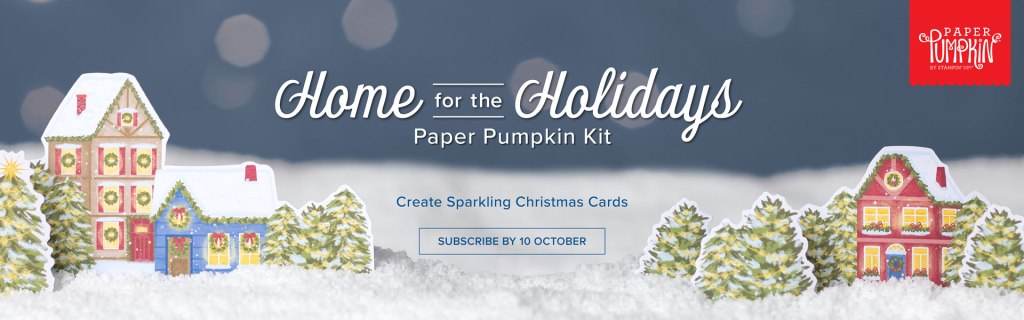
Create dazzling traditional Christmas cards with the Home for the Holidays Paper Pumpkin Kit! This kit includes eight beautiful cards—four each of two designs. Whether you want to send a few to your loved ones or fill your home with some extra special Christmas cheer, this kit has everything you need to make some sparkly, festive cards. Keep reading to learn more!

One extra fun feature of the Home for the Holidays Paper Pumpkin Kit is the bottle of glitter glue! You can use this glue to add shimmery, shiny details to the Christmas scenes on their cards. You can add some glitter to the trees, houses, snow, and more. There are endless possibilities you will have with this glue and the kit.

Bring some inspiration to your creations with the coordinating box design! This box could help create a cute village Christmas scene with your cards, and more. You could even use the box as a photo op prop! This is a fun way to make the most of the kit. Don’t let the Christmas crafts end once you finish with this kit! Since the Home for the Holidays Kit perfectly coordinates with the November Paper Pumpkin Kit, you and you will be able to extend your holiday crafting experience even further. So make sure your subscription is up to date!

This kit includes:

  • All the supplies you’ll need to create 8 sparkly and dazzling Christmas cards—4 each of 2 designs—and eight coordinating envelopes.
  • A coordinating photopolymer stamp set with endearing holiday sentiments and festive designs.
  • A Real Red Stampin’ Spot
  • A bottle of Glitter Glue
  • Beautiful Christmasy-themed precut pieces

Finished folded card size: 4-1/4″ x 5-1/2″ (10.8 x 14 cm)

Coordinating Stampin’ Up! colors: Balmy Blue, Blueberry Bushel, Cherry Cobbler, Crumb Cake, Crushed Curry, Daffodil Delight, Lemon Lolly, Mossy Meadow, Night of Navy, Old Olive, Pecan Pie, Real Red

Subscribe to the August Paper Pumpkin Kit between 11 September and 10 October by clicking here!

Note: Supplies may be limited toward the end of the subscription period.

*********************************************************************************************************

Card stock cuts for this project:

  • Cajun Craze Cardstock 4 1/4″ X 11″ (card base scored & folded at 5 1/2″)
  • Crushed Curry Cardstock 1″ X 2″ (leaf)
  • Mossy Meadow Cardstock 1″ X 1 1/2″ (leaf)
  • Pumpkin Pie Cardstock 4 1/8″ X 9 3/4″ (easel scored & folded at 2 1/4″ & 4 1/2″, 4 1/8″ x 5 3/8″ (inner liner mat)
  • Very Vanilla Cardstock 2″ X 4″ (sentiment), 4″ X 4″ (leaf), 4″ X 5 1/4″ (inner liner)
  • All About Autumn 6 X 6 Designer Series Paper 4″ X 5 1/8″ (card front panel), 2 1/8″ X 4″ (card front panel), 3/8″ X 4″ (inner liner strip), 2 1/4″ X 6″ (envelope flap)
  • Gold Foil Sheet 4″ X 4″ (vein)

*********************************************************************************************************

Product List

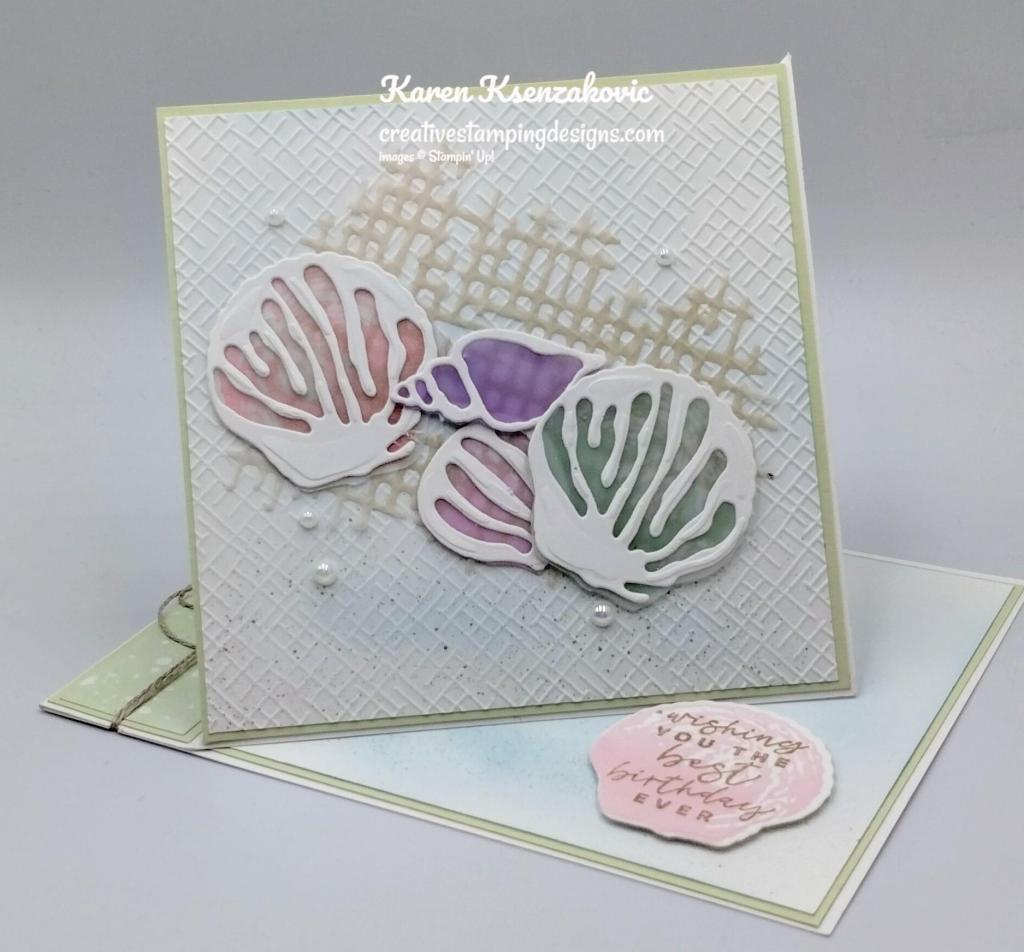
Stampin’ Up! Season of Chic for Fun Fold Friday

Good Friday morning my stamping friends welcome to my fun fold Friday. How was everyone’s week? Are you ready for the weekend? I hope you are starting to make some plans.

Today’s card I made on YouTube Live on Wednesday. If you were able to join me or watched the replay, thank you. If you’d like to watch my video and stamp along, the measurements are below along with the link to my YouTube channel. Here is my card for today.

Stampin' Up! Season of Chic Fun Fold 1 creativestampingdesigns.com

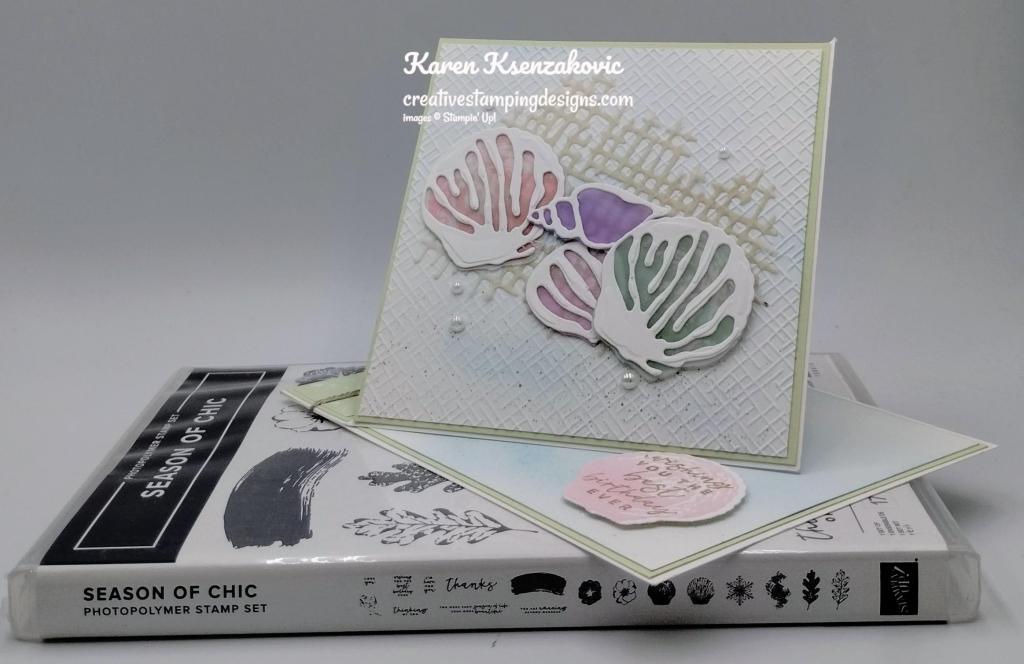
I used the Stampin’ Up! Season of Chic Photopolymer Stamp Set along with the Basics 3D Embossing Folder, Chic Dies and Hello Irresistible 6 X 6 Designer Series Paper for my diagonal easel card today.

Stampin' Up! Season of Chic Fun Fold 2 creativestampingdesigns.com

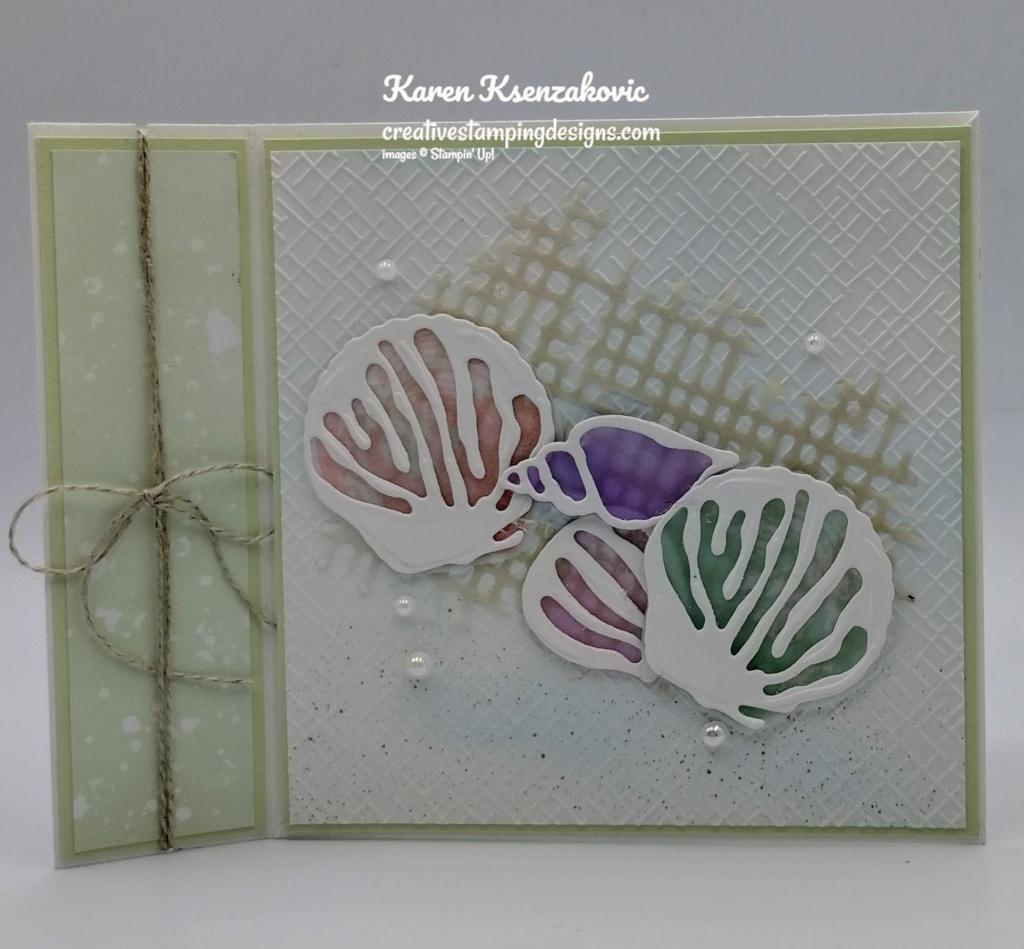
I started by scoring and folding the Basic Whtie Thick card base as stated below. I folded the card base in half at the 5 1/2″ score line. I folded the card front back at the 4 1/4″ score line. I folded the card front down along the diagonal score line. I added Multipurpose Liquid Glue between the 4 1/4″ & 5 1/2″ score lines to adhere the ‘binder’ of the book fold card together. Using a Blending Brush, I added some Balmy Blue Ink to a Basic White panel. I embossed the panel using the Basics 3D Embossing Folder. Using my Crumb Cake Stampin’ Write Marker, I flicked some Ink on the bottom of the panel to look like specks of sand. I adhered the embossed panel to a Soft Sea Foam mat using Multipurpose Liquid Glue. I adhered the layered panel to the Basic White Thick card base using Multipurpose Liquid Glue only to the bottom triangle of the card base.

Stampin' Up! Season of Chic Fun Fold 3 creativestampingdesigns.com

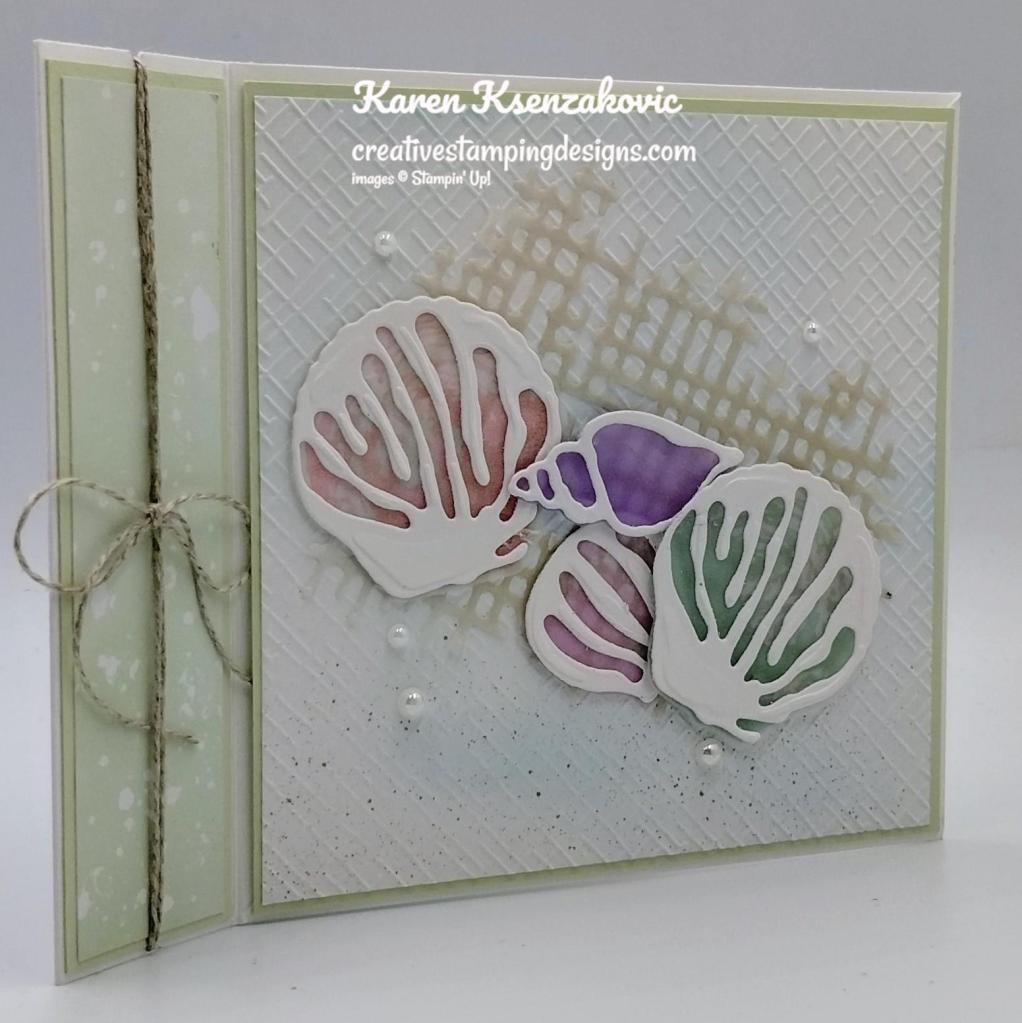
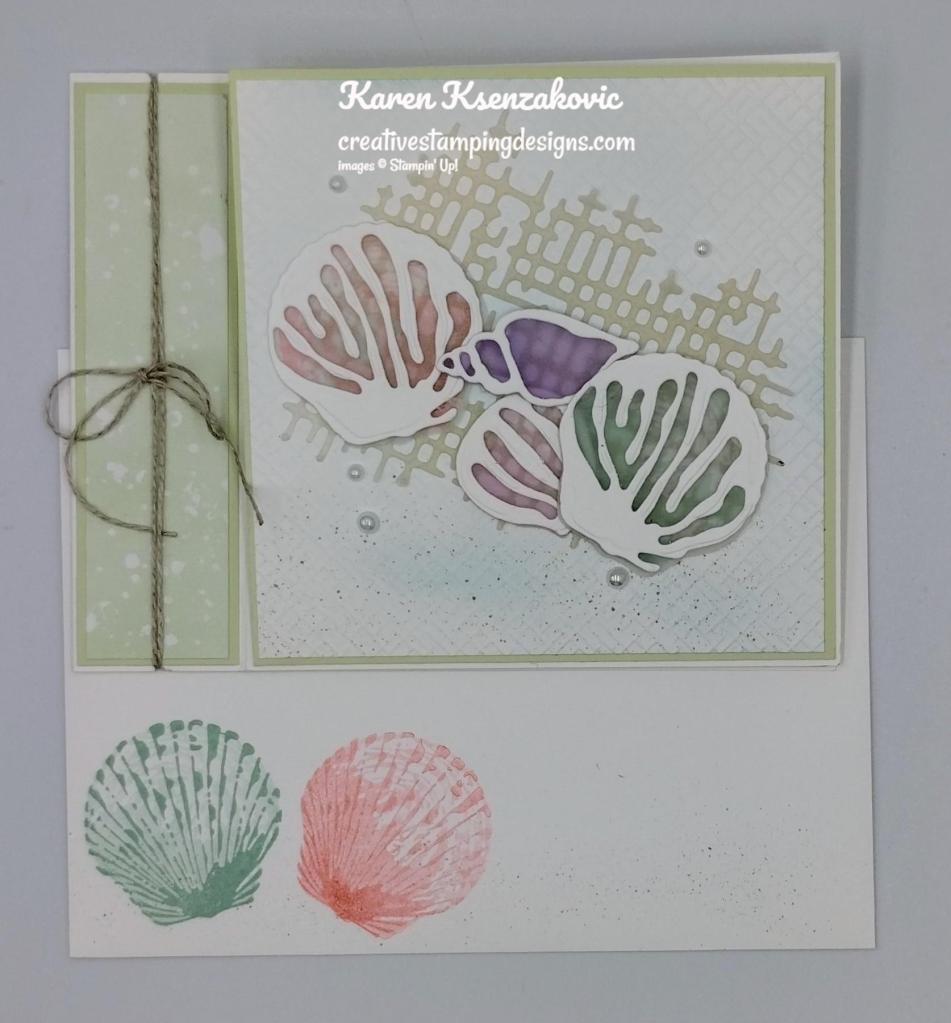
I made a slit with my Paper Snips on the top and bottom of the binder to hold the Linen Thread in place. I wrapped a piece of Linen Thread around the binder twice and tied a bow. On a piece of Vellum paper, I added some Crumb Cake Ink using the Blending Brush. Using the Chic Dies, I cut the net die from the Vellum paper. I adhered the net to the card front. From a panel of Basic White, I cut the detailed shells using the Chic Dies.

Stampin' Up! Season of Chic Fun Fold 4 creativestampingdesigns.com

On another piece of Vellum paper, I stamped the solid shell image from the Season of Chic stamp set in Flirty Flamingo Ink, stamping off once on scrap paper. I stamped the solid shell image from the Season of Chic stamp set again on the Vellum paper in Pool Party Ink. I cut the images out using the Chic Dies. Using the Blending Brush, I added Fresh Freesia Ink and Highland Heather Ink on the Vellum paper. I took the 2 smaller shell dies and traced them on the colored Vellum paper with a pencil. I fussy cut the shells using Paper Snips. I adhered all the detailed die cut shells to the Vellum cut shells.

Stampin' Up! Season of Chic Fun Fold 5 creativestampingdesigns.com

I adhered 2 of the shells to the card front over the net using Glue Dots. I adhered the other 2 shells using Stampin’ Dimensionals. I added a few Iridescent Pearls Basic Jewels to the card front.

Stampin' Up! Season of Chic Fun Fold 6 creativestampingdesigns.com

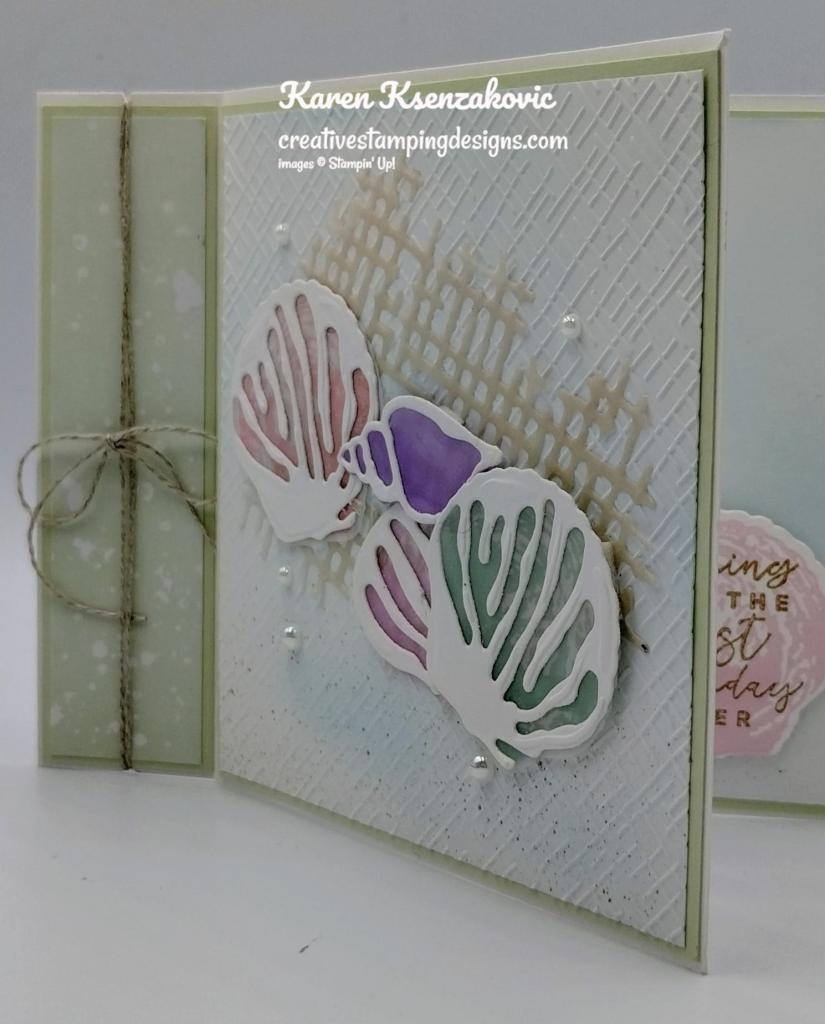
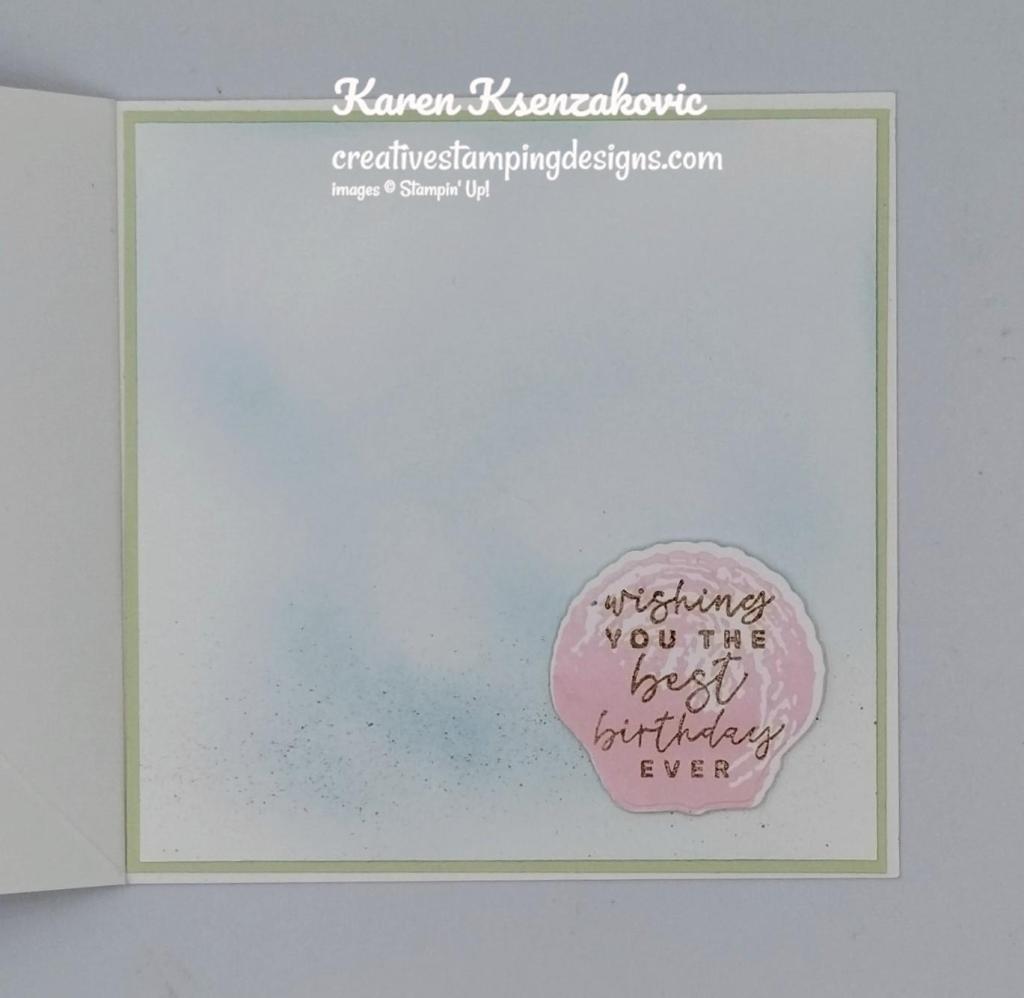
On the inside, I used my Blending Brush to add some Balmy Blue Ink on a Basic White panel. Using my Crumb Cake Stampin’ Write Marker, I flicked some ink on the bottom of the panel. I adhered the Basic White panel to a Soft Sea Foam mat then to the inside of the Basic White Thick card base. On a panel of Basic White, I stamped the seashell image from the Season of Chic stamp set in Bubble Bath Ink. I cut the shell out using the Chic Dies. I stamped the sentiment from the Season of Chic stamp set in Crumb Cake Ink in the center of the shell. I adhered the shell to the bottom of the Basic White panel using Stampin’ Dimensionals where I wanted the easel to stop.

Stampin' Up! Season of Chic Fun Fold 7 creativestampingdesigns.com

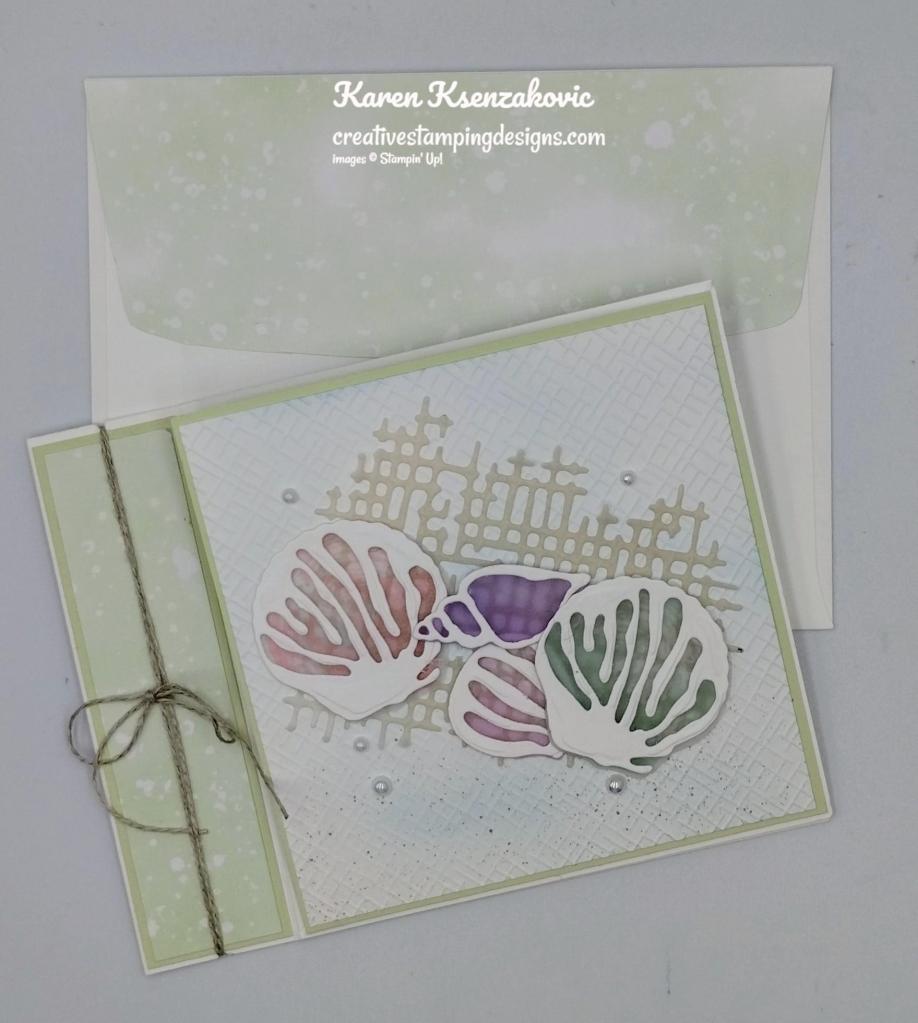
To finish my card, I decorated a Basic White Medium Envelope. Using my Crumb Cake Stampin’ Write Marker, I flicked ink on the bottom front of the envelope. I stamped the detailed shell images from the Season of Chic stamp set in Pool Party and Flirty Flamingo Inks. I stamped the solid shell images from the Season of Chic stamp set over the detailed images in Pool Party and Flirty Flamingo Inks, stamping off once on scrap paper for both. I adhered a panel of Hello Irresistible DSP to the envelope flap.

Stampin' Up! Season of Chic Fun Fold 8 creativestampingdesigns.com

Thank you for stopping by my blog today. I hope you liked my card and will give it a try. I hope you will CASE this card and please feel free to post it in the comments of my Facebook page under my post. I’d love to see your take on the card. The list of measurements are below if you’d like to stamp along while watching the video. You can watch my video on my YouTube Channel Here.

If you watch this on my YouTube channel, please remember to subscribe so that you will get notified when a new video goes live. Thank you to those that have subscribed already. Happy Stamping!!

*********************************************************************************************************

If you need any stamping supplies, I’d love to be your Demonstrator. Just click HERE to go directly to my online store or drop me an email if you have any questions. 

MY CURRENT HOST CODE IS:   MHTQEVEX

Use this host code when placing an order with me. When you order $50 or greater you will receive a free gift from me! If your order is over $150, please do not use this code, but you’ll still get the free gift. The free gift is your choice of any 1 item valued up to $10.00 from the 2023-2024 Annual Catalog!  Unfortunately, packs of cardstock are no longer an option for a free gift. Shipping has become too expensive to ship and it’s costing me as much to ship as the cardstock costs. For any orders $50 or more I will also send you my monthly class tutorials.  Click HERE or go to my Customer Rewards for more details and to see what this month’s tutorials are.

Please remember to use my current Host Code and make sure that you can see my name on the final checkout page listed as your Demonstrator when you order so that you know that you’re ordering with me, and you’ll get my rewards! 

Happy Stamping, Karen

*********************************************************************************************************

In response to changing policies at Stampin’ Up – I’m adjusting my Ordering Gift policy as well.  I’m having to get a little more tough on the adding of Host codes when you place your order thru my Online Store.

Not to worry – you’re still going to get that $10 ordering gift for orders of $50 (before shipping & tax) or greater.  And the gift is still any 1 SU! product up to that $10 value – which includes some of our fun Host Sets!

But – if you DO NOT use the Host code for your orders of less than $150 (this is the RETAIL total before Shipping & Handling), then you’ll have two options:

  1. You’ll need to call Stampin’ Up! (1-800-Stamp-Up) and ask them to add it for you. They’re very helpful and will get it done quickly!  OR….
  2. If your order was over the $50 threshold but under $150, then…you’ll forfeit that $10 ordering gift and rewards – this is the Bummer Option – and I REALLY don’t want to do this, SO please remember to add my Current Host Code.

*********************************************************************************************************

Bonus Days Going On NOW!!!

We’re bringing back one of our favorite promotions—BONUS DAYS! Because do you know what’s a great deal? Getting rewarded for all the crafting supplies you’re already going to buy! When you shop between 6–31 July and spend $50 USD you will earn a $5 USD coupon! Make sure you save all your coupons because you can redeem them (and we mean ALL of them) between 1–31 August. There’s no limit to how many coupons you can earn! So, get your ready to earn and redeem coupons!

Ordering Deadlines

Earning Period: July 6th – July 31, 2023 at 11:59 p.m. (MT)

  • Earn a $5 USD coupon for every $50 USD spent (before shipping and tax).
  • All coupon codes will be emailed right after a qualifying purchase has been made.
  • If a participant earns multiple codes from a single order, they will receive one email with multiple codes. If they earn multiple codes from multiple orders, they will receive separate emails for each code earned.
  • All order types qualify for this promotion. Phone and email orders still require an email address.
  • Orders that are started before the promotion begins will not count toward earning coupon codes. For example, if you add items to your cart before 6 July and wait to purchase until that date or later, then those items will not qualify towards earning coupons. You must add items to your cart and complete your purchase during the earning period.
  • There is no limit to the number of coupon codes participants can earn per order or throughout the duration of the earning period.

Ordering Deadlines

Redemption Period: August1– August 31, 2023 at 11:59 p.m. (MT)

  • There is no limit to the number of coupon codes participants can redeem on an order during the redemption period. If using multiple codes, they must be separated by a space.
  • Coupons may be redeemed one time only.
  • Coupon codes may be redeemed for any product (excluding Starter Kits, demonstrator supply items, and Paper Pumpkin month-to-month subscriptions).
  • New prepaid Paper Pumpkin codes may be discounted using Bonus Days coupon codes.

*********************************************************************************************************

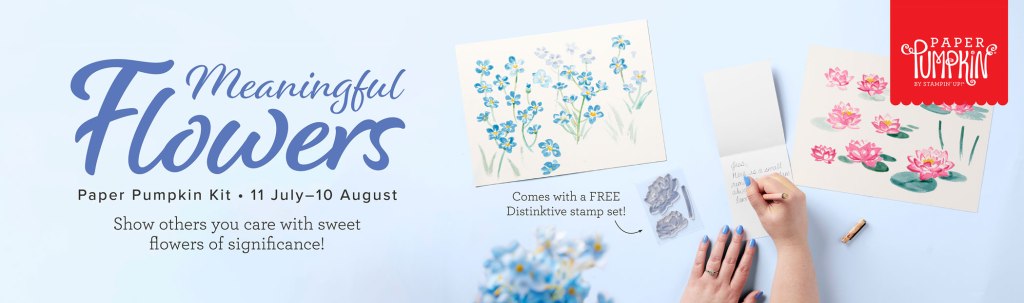
Meaningful Flowers

Subscribe Julu 11 – August 10

Discover messages of friendship and loyalty in the flowers from the August Paper Pumpkin Kit! This kit includes 8 cards, 4 each of 2 designs, and 8 coordinating envelopes. The kit is special because of the way it uses the meaning of flowers. On each card, you’ll find a small inscription of what the flowers represent. As you craft with the included vellum and watercolor paper pieces, you’ll know you’re sending a message of encouragement and loyalty to your recipients. The Meaningful Flowers Paper Pumpkin Kit is full of florals that are meant to spread hope, encouragement, and remind you of your favorite memories. The kit focuses specifically on forget-me-nots and lotuses. Their meaning is enscripted on the back of each card. Subscribe by 10 August to send beautiful paper crafts with thoughtful messages to those you love. 

And don’t wait, because anyone who subscribes to this month’s kit will get a FREE stamp set! This Distinktive stamp set is perfect for a variety of occasions! 

This kit includes:

  • 8 cards; 4 each of 2 designs
  • 8 coordinating envelopes
  • 1 photopolymer stamp set
  • 1 Pretty Peacock Ink Spot
  • Linen thread
  • Vellum and precut paper pieces
  • FREE Distinktive stamp set
  • Adhesives
  • Final card size: 4-1/4″ x 5-1/2″ (10.8 x 14 cm)

Coordinating Stampin’ Up! colors: Bubble Bath, Crushed Curry, Garden Green, Melon Mambo, Misty Moonlight, Orchid Oasis, Pretty Peacock, Tahitian Tide

Subscribe to the August Paper Pumpkin Kit between 11 July and 10 August by clicking here!

Note: Supplies may be limited toward the end of the subscription period.

*********************************************************************************************************

Card stock cuts for this project:

  • Basic White Cardstock 2 – 4″ X 4″ (card front & inner liner), 3 1/2″ X 4″ (detailed dies)
  • Basic White Thick Cardstock 4 1/4″ X 11″ (card base scored & folded at 4 1/4″ & 5 1/2″ then scored from the bottom of the 4 1/4″ score line to the top right corner)
  • Soft Sea Foam Cardstock 2 – 4 1/8″ X 4 1/8″ (card front & inner liner mats), 1 1/9″ X 4 1/8″ (side panel mat)
  • Hello Irresistible 6 X 6 Designer Series Paper 1″ X 4″ (side panel), 2 1/4″ X 6″ (envelope)
  • Vellum Paper 4″ X 5″ (shells), 4″ X 4″ (netting)

*********************************************************************************************************

Product List

Stampin’ Up! Crafting With You for Fun Fold Friday

Good Friday morning my stamping friends it’s Cinco de Mayo!!! Welcome to my fun fold Friday. How was everyone’s week? Is anyone making plans for the weekend yet?

Today’s card I made on my Facebook Live video on Wednesday. If you were able to join me or watched the replay, thank you. If you’d like to watch my video and stamp along, the measurements are below along with the links to my Facebook page and my YouTube channel. Here is my card for today.

Stampin' Up! Crafting With You Easel 1 creativestampingdesigns.com

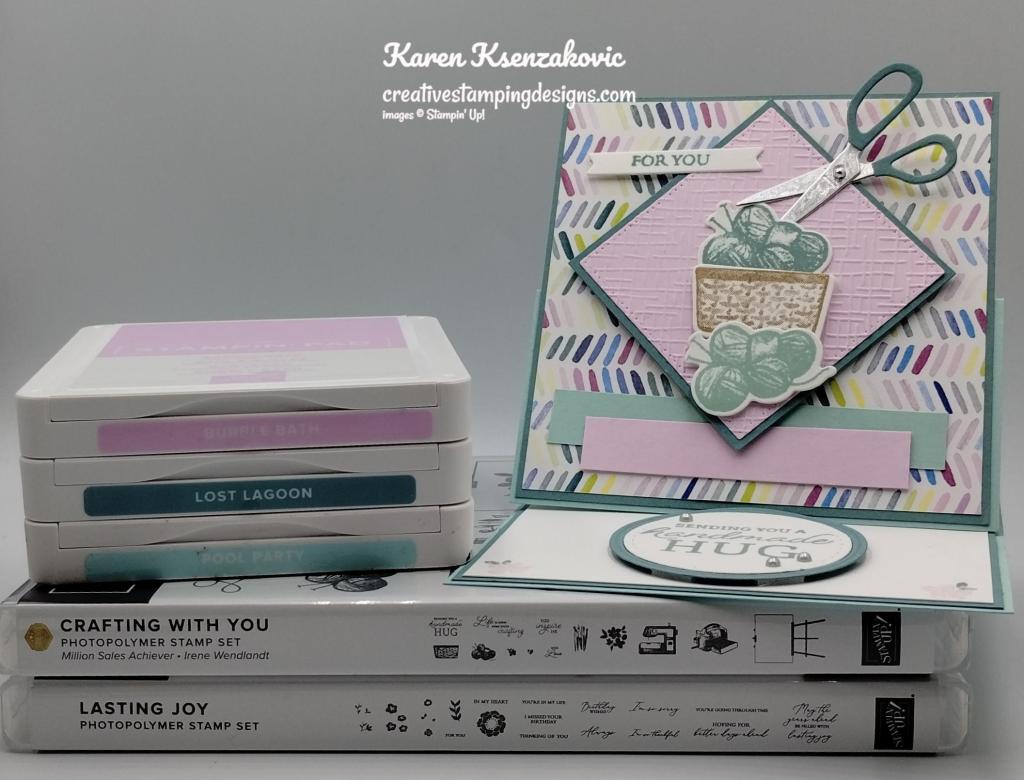
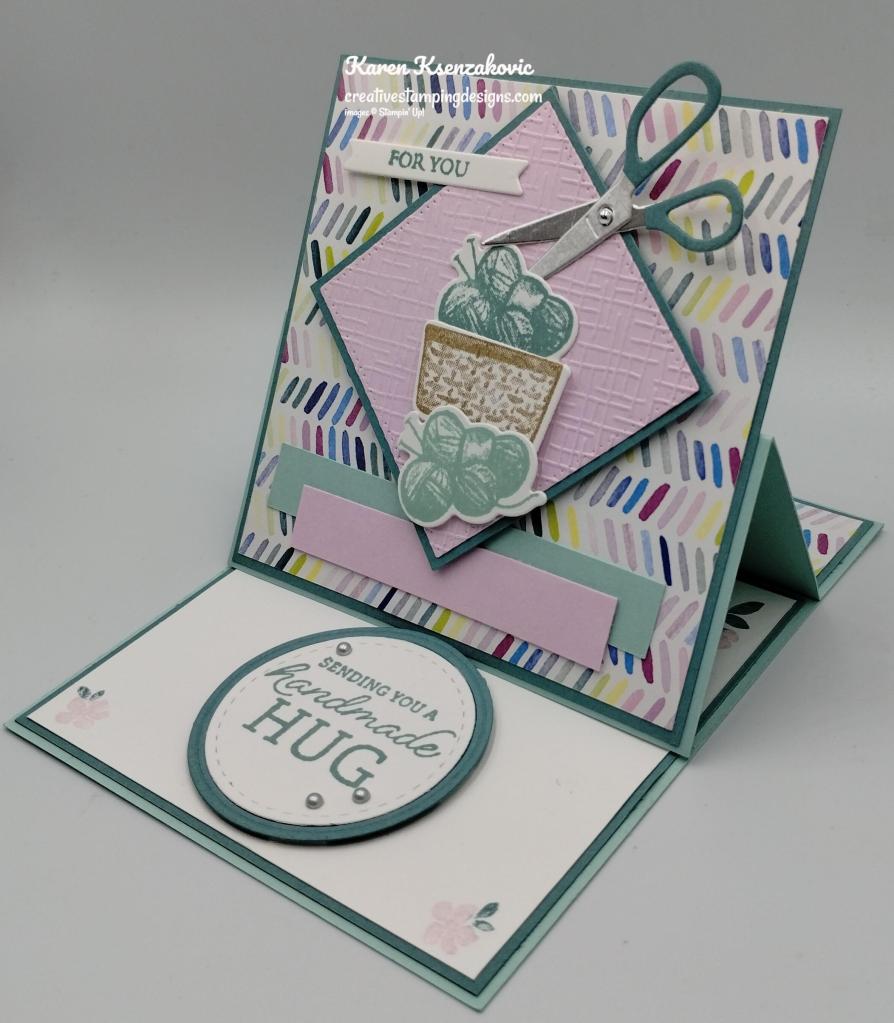
I used the new Stampin’ Up! Crafting With You Bundle along with the Stampin’ Up! Lasting Joy Photopolymer Stamp Set and Bright & Beautiful 6 X 6 Designer Series Paper for my easel card today.

I played along with The Paper Players Tic-Tac-Toe Challenge 638. I went right down the center with layers, die cuts and fun fold.

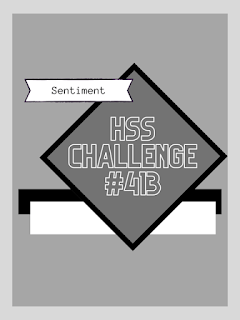
The design on the front of my card is from Hand Stamped Sentiments Challenge 413.

Stampin' Up! Crafting With You Easel 2 creativestampingdesigns.com

I started by scoring & folding the Pool Party card base as listed below. I adhered the 1 1/4″ top of the card base together using Multipurpose Liquid Glue to make a book fold card. The other fold will act as the easel. I adhered a panel of Bright & Beautiful DSP to a Lost Lagoon mat using Stampin’ Seal. I adhered a smaller panel of Bright & Beautiful DSP to a smaller Lost Lagoon mat using Stampin’ Seal. I adhered the smaller layered panel to the top of the card base (that I adhered together) using Multipurpose Liquid Glue.

Stampin' Up! Crafting With You Easel 3 creativestampingdesigns.com

I cut a panel of Bubble Bath cardstock using the 2nd largest square from the Stylish Shapes Dies. I embossed the panel using the Basics 3D Embossing Folder. I adhered the embossed panel to the card front using Stampin’ Dimensionals. I adhered the strip of Bubble Bath cardstock to the strip of Pool Party cardstock using Glue Dots. I adhered the strips just under the layered square using Multipurpose Liquid Glue.

Stampin' Up! Crafting With You Easel 4 creativestampingdesigns.com

On a panel of Basic White cardstock, I stamped the basket image from the Stampin’ Up! Crafting With You Photopolymer Stamp Set in Crumb Cake Ink. I stamped the yarn image from the Crafting With You in Lost Lagoon and Pool Party Inks. I cut the images out using the Crafting With You Dies. I adhered the basket to the embossed panel using Stampin’ Dimensionals. I adhered 1 of the yarn images behind the basket using Glue Dots and the other at the bottom of the basket using Stampin’ Dimensionals. Using the smallest die from the Countryside Corners Dies I cut the banner from the Basic White panel. I stamped the sentiment from the Lasting Joy stamp set in Lost Lagoon Ink on the banner. I adhered the sentiment to the card front using a Glue Dot and Stampin’ Dimensional. I cut the scissor die from the Crafting With You Dies from a panel of Silver Foil paper and Lost Lagoon. I cut the handles off the Lost Lagoon scissors and adhered them to the Silver Foil scissors. I adhered the scissors together with a Glue Dot and added a silver Festive Pearl in the center. I adhered the scissors to the card front using Multipurpose Liquid Glue. I adhered the card front to the bottom of the card base using Multipurpose Liquid Glue.

Stampin' Up! Crafting With You Easel 5 creativestampingdesigns.com

On the inside, I stamped the large and small flower images from the Crafting With You in the corners of the Basic Whtie panel. I inked up the stamp with Bubble Bath Ink, then used my Lost Lagoon Stampin’ Write Marker to color the leaves. I adhered the Basic White panel to a Lost Lagoon mat then to the inside of the Pool Party card base. I stamped the sentiment from the Crafting With You stamp set in Lost Lagoon Ink on a panel of Basic Whtie. I cut the sentiment out using the hoop die from the Crafting With You Dies. I cut another hoop using the Crafting With You Dies from a panel of Lost Lagoon cardstock. I adhered Stampin’ Dimensionals.to the back to hold the 2 parts together. I sniped off the top of the hoop using my Paper Snips. I adhered the sentiment to the center using Multipurpose Liquid Glue. I adhered the sentiment to the bottom of the panel. This will act as the easel stop. I added a few Festive Pearls to the sentiment.

Stampin' Up! Crafting With You Easel 6 creativestampingdesigns.com

To finish my card, I decorated a Basic White Medium Envelope. I stamped the yarn and flower images from the Crafting With You stamp set on the envelope front using Bubble Bath, Lost Lagoon and Pool Party Inks. I adhered a panel of Bright & Beautiful DSP to the envelope flap.

Stampin' Up! Crafting With You Easel 7 creativestampingdesigns.com

Thank you for stopping by my blog today. I hope you liked my card and will give it a try. I hope you will CASE this card and please feel free to post it in the comments of my Facebook page under my post. I’d love to see your take on the card. The list of measurements are below if you’d like to stamp along while watching the video. You can watch my video on my Facebook page Here.

You can also view the video on my YouTube channel Here. If you watch this on my YouTube channel, please remember to subscribe so that you will get notified when a new video goes live. I’m hoping to start doing YouTube lives soon, thanks to all that have subscribed. Happy Stamping!!

*********************************************************************************************************

If you need any stamping supplies, I’d love to be your Demonstrator. Just click HERE to go directly to my online store or drop me an email if you have any questions. 

MY CURRENT HOST CODE IS:   BR9XGSTC

Use this host code when placing an order with me. When you order $50 or greater you will receive a free gift from me! If your order is over $150, please do not use this code, but you’ll still get the free gift. The free gift is your choice of any 1 item valued up to $10.00 from the 2022-2023 Annual Catalog or the January-April 2023 Mini Catalog!  Unfortunately, packs of cardstock are no longer an option for a free gift. Shipping has become too expensive to ship and it’s costing me as much to ship as the cardstock costs. For any orders $50 or more I will also send you my monthly class tutorials.  Click HERE or go to my Customer Rewards for more details and to see what this month’s tutorials are.

Please remember to use my current Host Code and make sure that you can see my name on the final checkout page listed as your Demonstrator when you order so that you know that you’re ordering with me, and you’ll get my rewards! 

Happy Stamping, Karen

*********************************************************************************************************

In response to changing policies at Stampin’ Up – I’m adjusting my Ordering Gift policy as well.  I’m having to get a little more tough on the adding of Host codes when you place your order thru my Online Store.

Not to worry – you’re still going to get that $10 ordering gift for orders of $50 (before shipping & tax) or greater.  And the gift is still any 1 SU! product up to that $10 value – which includes some of our fun Host Sets!

But – if you DO NOT use the Host code for your orders of less than $150 (this is the RETAIL total before Shipping & Handling), then you’ll have two options:

  1. You’ll need to call Stampin’ Up! (1-800-Stamp-Up) and ask them to add it for you. They’re very helpful and will get it done quickly!  OR….
  2. If your order was over the $50 threshold but under $150, then…you’ll forfeit that $10 ordering gift and rewards – this is the Bummer Option – and I REALLY don’t want to do this, SO please remember to add my Current Host Code.

*********************************************************************************************************

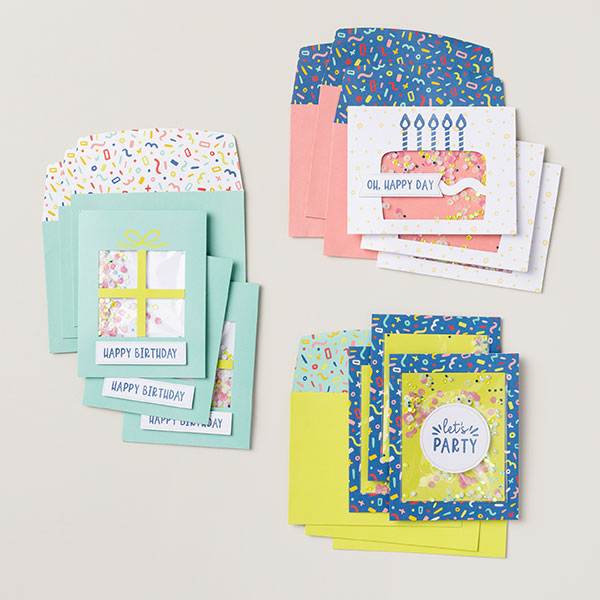
CONFETTI BIRTHDAY KIT

Shake up someone’s special day with a happy, handcrafted shaker card! The Confetti Birthday Kit, the newest addition to the Kits Collection by Stampin’ Up!, comes with everything you need to quickly create confetti shaker cards—a total of 9 cards in 3 lively designs. Celebrate in style with bright, bold colors, confetti, and birthday greetings full of joy!

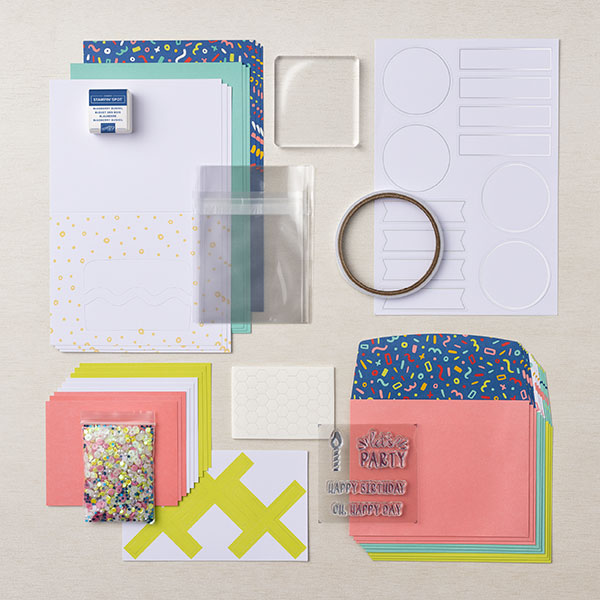
This month’s kit includes: 

  • Enough supplies to create 9 cards—3 each of 3 designs
  • 9 coordinating envelopes
  • Confetti Birthday photopolymer stamp set
  • One Blueberry Bushel Ink Spot
  • Printed card bases, card fronts, self-adhesive cellophane shaker bags, die-cut pieces, holographic foil labels, adhesive, embellishments, and a clear block
  • Finished card size: 5-1/2″ x 4-1/4″ (14 x 10.8 cm)
  • Coordinating colors: Blueberry Bushel, Coastal Cabana, Crushed Curry, Flirty Flamingo, Lemon Lime Twist, Poppy Parade

#162390 $23.00 USD

*********************************************************************************************************

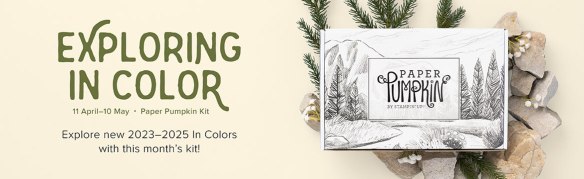
Exploring In Color

Subscribe April 11 – May 10

Say hello to mountain landscapes and new In Colors! This month’s kit features nine outdoors-themed cards in our new 2023–2025 In Colors plus exclusive FREE stickers. Want more? Get the cards & envelopes add-on (available 2 May while supplies last) and continue your creative adventure!

This kit includes:

  • All the supplies you need to create 9 card, 3 each of 3 designs, plus 9 coordinating envelopes.
  • A 7-piece all-occasion stamp set that celebrates good friends and great adventures!
  • 1 Copper Clay (new In Color!) Classic Stampin’ Spot.
  • Twine and die-cut accents
  • FREE stickers to put on your projects or anything you want—water bottles, laptops, coolers, and more!
  • Finished card size: 4-1/4″ x 5-1/2″ (10.8 x 14 cm).
  • Coordinating Stampin’ Up! colors: Boho Blue, Copper Clay, Daffodil Delight, Moody Mauve, Mossy Meadow, Pebbled Path, Wild Wheat

Subscribe to the May Paper Pumpkin Kit between 11 April 2023 and 10 May 2023 by clicking here!

Note: Supplies may be limited toward the end of the subscription period.

ADD-ON

Exploring In Color Cards & Envelopes

Available starting: 2 May, while supplies last

Price: $10.00 USD | $13.75 CAD

This add-on includes

  • 18 cards, 6 each of 3 designs
  • 18 coordinating envelopes
  • Finished card size: 4-1/4″ x 5-1/2″ (10.8 x 14 cm)

Coordinating Stampin’ Up! colors: Boho Blue, Copper Clay, Daffodil Delight, Moody Mauve, Mossy Meadow, Pebbled Path, Wild Wheat

Paper Pumpkin add-ons are cash-and-carry items, like retired Paper Pumpkin kits. See the Cash-and-Carry Sales Policy in the Policies Document for more information. 

*********************************************************************************************************

Card stock cuts for this project:

  • Basic White Cardstock 2 1/2″ X 4″ (artwork & sentiment), 4″ X 4″ (inner liner), 2 1/2″ X 2 1/2″ (inside sentiment)
  • Bubble Bath Cardstock 3″ X 3″ (card front panel), 1/2″ X 3″ (card front strip)
  • Lost Lagoon Cardstock 2 – 4 1/8″ x 4 1/8″ (card front & inner liner mats), 1 1/8″ x 4 1/8″ (side panel mat), 2 1/2″ X 2 1/2″ (artwork mat), 2 1/2″ X 2 1/2″ (inner sentiment mat), 1″ X 2 1/2″ (scissors)
  • Pool Party Cardstock 4 1/4″ x 11″ (card base scored & folded at 5 1/2″, 6 3/4″ & 8 7/8″), 1/2″
    X 3 1/2″ (card front strip)
  • Bright & Beautiful 6 X 6 Designer Series Paper 4″ X 4″ (card front), 1″ X 4″ (side panel), 2 1/4″ X 6″ (envelope flap)
  • Silver Foil Paper 1″ x 2 1/2″ (scissors)

*********************************************************************************************************

Product List

Stampin’ Up! Cottage Rose for Fun Fold Friday

Good Friday morning my stamping friends welcome to my Fun Fold Friday. How was everyone’s week? Does anyone have plans for the weekend? I’m working tomorrow, but I do have Sunday off.

Today’s card I made on my Facebook Live video on Wednesday. If you were able to join me or watched the replay, thank you. If you’d like to watch my video and stamp along, the measurements are below along with the links to my Facebook page and my YouTube channel. Here is my card for today.

Stampin' Up! Cottage Rose Fun Fold 1 creativestampingdesigns.com

I used the Stampin’ Up! Cottage Rose Bundle along with the Forever Flourishing Dies, Split Card Textures Dies, Brick & Mortar 3D Embossing Folder and Fancy Flora 6 X 6 Designer Series Paper for my easel card today.

Stampin' Up! Cottage Rose Fun Fold 2 creativestampingdesigns.com

I started by cutting a panel of Basic White cardstock using the Split Card Textures Dies. I then embossed the panel using the Brick & Mortar 3D Embossing Folder. I adhered a panel of the Fancy Flora DSP to the back of the panel using Multipurpose Liquid Glue.

Stampin' Up! Cottage Rose Fun Fold 3 creativestampingdesigns.com

On a panel of Basic White cardstock, I stamped the large flower image from the Stampin’ Up! Cottage Rose Cling Stamp Set in Soft Suede Ink. I colored the image using my Calypso Coral, Petal Pink and Soft Succulent Stampin’ Blends Markers. I cut the image our using the Cottage Flowers Dies. Using the Cottage Flowers Dies, I cut the 2 stemmed flowers from a panel of Calypso Coral cardstock. Using the Forever Flourishing Dies I cut the large leaf die from a panel of Soft Succulent cardstock, the medium leaf die from a panel of Soft Sea Foam cardstock and the eucalyptus die from a panel of Evening Evergreen cardstock. I adhered the flower to the embossed card front using Stampin’ Dimensionals. I adhered the leaf dies under the flower using Multipurpose Liquid Glue.

Stampin' Up! Cottage Rose Fun Fold 4 creativestampingdesigns.com

I scored & folded the Petal Pink card base as listed below. I adhered the Petal Pink card front mat to the bottom portion of the of the card base using Stampin’ Seal +. I adhered the card front to the mat using Multipurpose Liquid Glue. I added a Dragonfly Trinket to the top of the card front using Multipurpose Liquid Glue.

Stampin' Up! Cottage Rose Fun Fold 5 creativestampingdesigns.com

On the inside, I stamped the rose image from the Cottage Rose stamp set on the top of a Basic White panel in Soft Suede Ink. I colored the image using my Calypso Coral, Petal Pink and Soft Succulent Stampin’ Blends Markers. I stamped the sentiment from the Cottage Rose stamp set below the rose in Soft Suede Ink. I adhered the Basic White panel to a Calypso Coral mat then to the inside of the Petal Pink card base. On a panel of Basic White cardstock, I stamped the sentiment from the Cottage Rose stamp set in Soft Suede Ink and cut it out using the Lasting Label Punch. I adhered the punched-out sentiment to the bottom of the Basic White panel using Stampin’ Dimensionals where I wanted the easel to stop. I added a few Elegant Faceted Gems to the inside panel.

Stampin' Up! Cottage Rose Fun Fold 6 creativestampingdesigns.com

To finish my card, I decorated a Basic White Medium Envelope. I stamped the rose image from the Cottage Rose stamp set in Soft Suede Ink on the envelope front. I colored the image using my Calypso Coral, Petal Pink and Soft Succulent Stampin’ Blends Markers. I adhered a panel of Fancy Flora DSP to the envelope flap.

Stampin' Up! Cottage Rose Fun Fold 7 creativestampingdesigns.com

Thank you for stopping by my blog today. I hope you liked my card and will give it a try. I hope you will CASE this card and please feel free to post it in the comments of my Facebook page under my post. I’d love to see your take on the card. The list of measurements are below if you’d like to stamp along while watching the video. You can watch my video on my Facebook page Here.

You can also view the video on my YouTube channel Here. If you watch this on my YouTube channel, please remember to subscribe so that you will get notified when a new video goes live. I’m hoping to start doing YouTube lives soon, thanks to all that have subscribed. Happy Stamping!!

*********************************************************************************************************

If you need any stamping supplies, I’d love to be your Demonstrator. Just click HERE to go directly to my online store or drop me an email if you have any questions. 

MY CURRENT HOST CODE IS:    BFQ24SXS

Use this host code when placing an order with me. When you order $50 or greater you will receive a free gift from me! If your order is over $150, please do not use this code, but you’ll still get the free gift. The free gift is your choice of any 1 item valued up to $10.00 from the 2022-2023 Annual Catalog or the January-April 2023 Mini Catalog!  Unfortunately, packs of cardstock are no longer an option for a free gift. Shipping has become too expensive to ship and it’s costing me as much to ship as the cardstock costs. For any orders $50 or more I will also send you my monthly class tutorials.  Click HERE or go to my Customer Rewards for more details and to see what this month’s tutorials are.

Please remember to use my current Host Code and make sure that you can see my name on the final checkout page listed as your Demonstrator when you order so that you know that you’re ordering with me, and you’ll get my rewards! 

Happy Stamping, Karen

*********************************************************************************************************

In response to changing policies at Stampin’ Up – I’m adjusting my Ordering Gift policy as well.  I’m having to get a little more tough on the adding of Host codes when you place your order thru my Online Store.

Not to worry – you’re still going to get that $10 ordering gift for orders of $50 (before shipping & tax) or greater.  And the gift is still any 1 SU! product up to that $10 value – which includes some of our fun Host Sets!

But – if you DO NOT use the Host code for your orders of less than $150 (this is the RETAIL total before Shipping & Handling), then you’ll have two options:

  1. You’ll need to call Stampin’ Up! (1-800-Stamp-Up) and ask them to add it for you. They’re very helpful and will get it done quickly!  OR….
  2. If your order was over the $50 threshold but under $150, then…you’ll forfeit that $10 ordering gift and rewards – this is the Bummer Option – and I REALLY don’t want to do this, SO please remember to add my Current Host Code.

*********************************************************************************************************

Coming on March 1, 2023, Stampin’ Up! is going to be having Online Exclusive Products and the first will be available starting March 1st. Click Here for a printable PDF flyer with the items that will be available. If you like what you see, there is a way you can get them NOW. If you join Stampin’ Up! before the end of February, you can either add the items to your starter kit, or you can pre-order them once you join. This is just one of the perks of being a demonstrator.

Final Days of Stampin’ Up!’s Amazing Joining Special – Ends February 28

Stampin’ Up! has an amazingly awesome joining special. You get to choose what you want. All the options ship for free and include a past Paper Pumpkin Kit along with some business supplies in case you want to make this a business. There is No Obligation to sell, you do NOT have to use this as a business, you can join just to enjoy the discount for yourself. I would LOVE to have you on my team. Join as a hobby demonstrator and enjoy all the benefits of a business demonstrator.

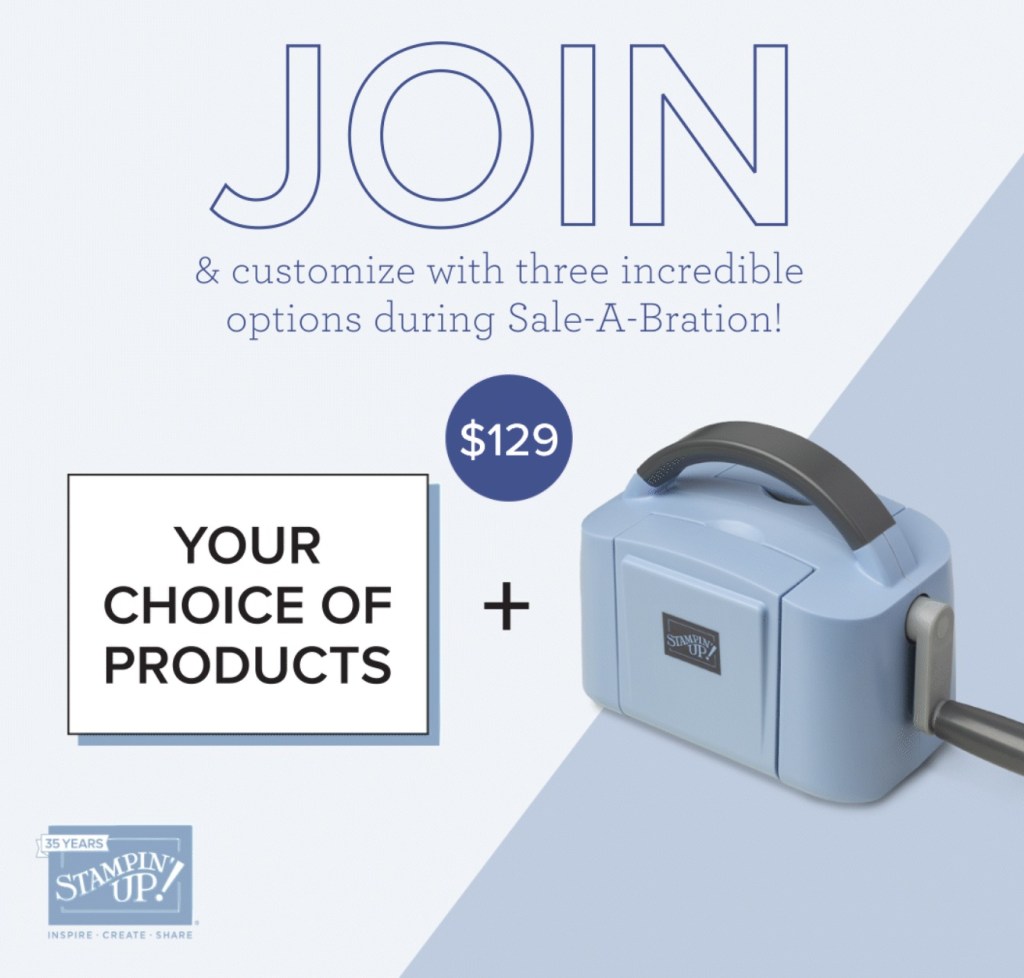
Option #1 This exclusive Boho Blue Mini Stampin’ Cut & Emboss Machine ($63 value) + Your choice of $175 of Stampin’ Up! products for only $129.00. The Boho Blue is one of the new In-Colors coming for 2023-2025.

Option #2 The original White Mini Stampin’ Cut & Emboss Machine (a $63 value), + Your choice of $175 of Stampin’ Up! products for only $129.00

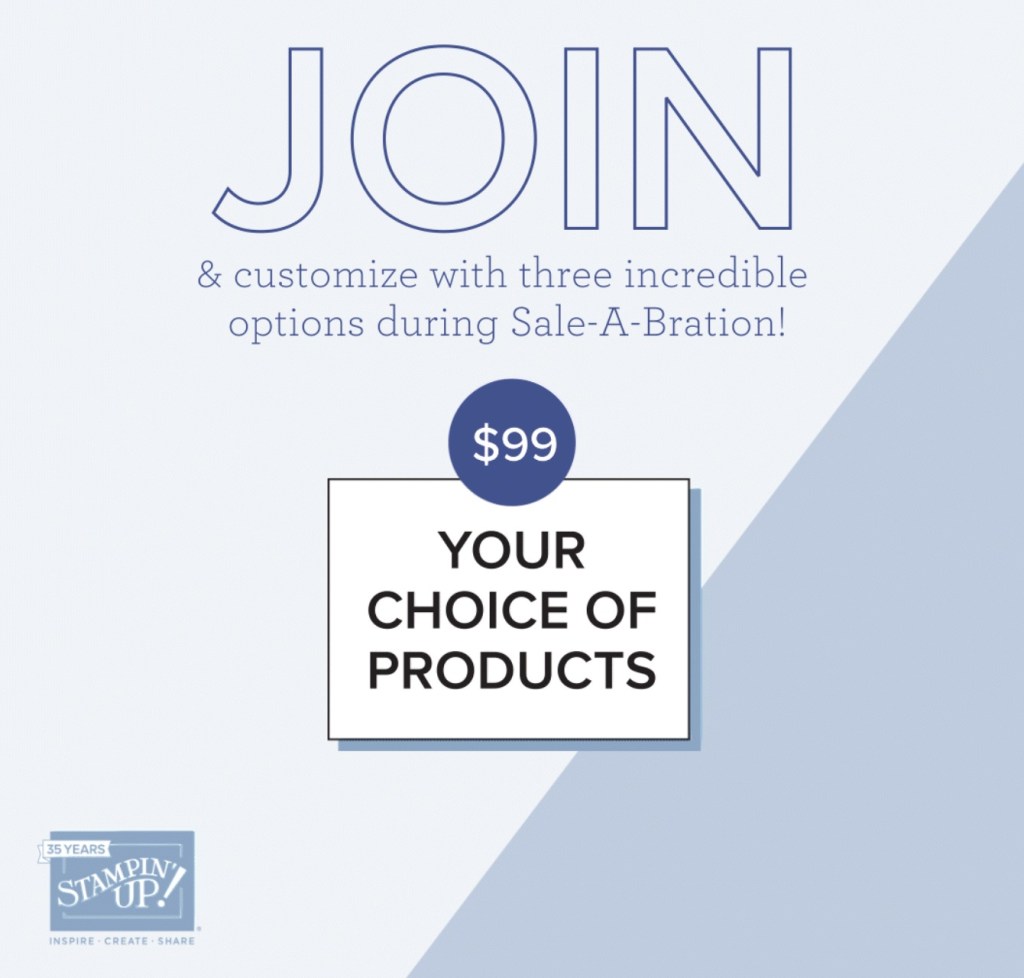
Option #3. Your choice of $175 of Stampin’ Up! products for only $99.00.

If you have a LONG shopping list, this is a great way to get everything you always want at a discount. Enjoy at least a 20% discount on the products you purchase. Why wait, this is such an awesome deal, and it only sticks around until February 28th. Join now and start enjoying that discount right away!!! Contact me at creativestampingdesigns@gmail.com and we can talk about you joining. We have people on our team from all over the United States. We get together monthly via Zoom; we have team Facebook pages where we share what we make and ask questions. This was one of the best decisions I’ve ever made, I’ve made a lot of new friends from all over.

*********************************************************************************************************

Ten Years Of Growth

Subscribe February 11 – March 10

It’s Paper Pumpkin’s 10-year anniversary and we want to celebrate how much we’ve grown! This month’s kit is all about happy greetings, organic and botanical designs digitally painted by our in-house artists, along with all-occasion sentiments to celebrate the happy moments in life and recognize the people around you who help you grow! 

And as part of our anniversary celebration, the March Paper Pumpkin Kit includes a FREE GIFT featuring a plant and pot builder to make all your projects plant-astic!

This kit includes:

  • All the supplies you need to create 9 cards: 3 each of 3 designs; and coordinating envelopes.
  • An all-occasion stamp set to recognize the people in your life who help you grow with greetings and beautiful botanical images.
  • 1 Polished Pink Classic Stampin’ Spot
  • Paper pieces and embellishments with digitally-painted designs and images.
  • Mini Stampin’ Dimensionals.
  • 1 FREE additional stamp set, which includes a plant and pot builder to make plant-astic projects!

Completed card size: 5-1/2″ x 4-1/4″ (14 x 10.8 cm)

Coordinating Stampin’ Up! colors: Shaded Spruce, Garden Green, Coastal Cabana, Orchid Oasis, Fresh Freesia, Polished Pink, Crumb Cake

Subscribe to the March Paper Pumpkin Kit between 11 February 2023 and 10 March 2023 by clicking here!

Note: Supplies may be limited toward the end of the subscription period.

*********************************************************************************************************

Card stock cuts for this project:

  • Basic White Cardstock 3 – 4″ X 5 1/4″ (card front, artwork & inner liner)
  • Calypso Coral Cardstock 2 1/4″ X 4 1/4″ (flowers), 4 1/8″ X 5 3/8″ (inner liner mat)
  • Evening Evergreen Cardstock 1″ X 5 1/2″ (sprigs)
  • Petal Pink Cardstock 4 1/4″ X 11″ (card base scored & folded at 2 3/4″ & 5 1/2″), 4 1/8″ X 5 3/8″ (card front mat)
  • Soft Sea Foam Cardstock 3″ X 4″ (leafy die)
  • Soft Succulent Cardstock 2 1/2″ X 2 1/2″ (leafy die)
  • Fancy Flora 6 X 6 Designer Series Paper 3 3/4″ X 5 1/5″ (card front panel), 2 1/4″ X 6″ (envelope flap)

*********************************************************************************************************

Product List

Stampin’ Up! Sweet Citrus for Fun Fold Friday

Good Friday morning my stamping friends welcome to my Fun Fold Friday. How was everyone’s week? Does anyone have any plans yet for the weekend? I’ll be at work tomorrow all day. I’m hoping to de-Christmas my house this weekend too, it’s time to take the decorations down. I was going to start today, but I’m not sure how much I’ll get done. Coraline starts her training classes today. I’m really looking forward to these. As good of a puppy she is, she needs that discipline, and she is one stubborn little girl.

Today’s card I made on my Facebook Live video on Wednesday. If you were able to join me or watched the replay, thank you. If you’d like to watch my video and stamp along, the measurements are below along with the links to my Facebook page and my YouTube channel. Here is my card for today.

Stampin' Up! Sweet Citrus Fun Fold 1 creativestampingdesigns.com

I used the Stampin’ Up! Sweet Citrus Bundle and the Subtle 6 X 6 Designer Series Paper for my card today.

Stampin' Up! Sweet Citrus Fun Fold 2 creativestampingdesigns.com

I started by adhering a panel of the Subtle DSP to a So Saffron card front using Multipurpose Liquid Glue. I adhered the layered panel to the bottom triangle only of the card base. I adhered a strip of the Subtle DSP to the side panel of the card base using Multipurpose Liquid Glue.

Stampin' Up! Sweet Citrus Fun Fold 3 creativestampingdesigns.com

On a panel of Basic White cardstock, I stamped the outline lemon image from the Sweet Citrus stamp set in Daffodil Delight Ink. I stamped the inside pulp image from the Sweet Citrus stamp set in So Saffron Ink over the outline image. Using the Sweet Citrus Dies and Sweet Citrus Hybrid Embossing Folder, I cut and embossed the images. On a panel of Basic White cardstock I stamped the leaf image multiple times in Granny Apple Green Ink. I cut the leaves out using the Sweet Citrus Dies. I adhered cut lemon pieces to the card front using Stampin’ Dimensionals. I adhered the leaves under the lemons using Multipurpose Liquid Glue. I added Faux Sea Glass Shapes to the lemon pieces as seeds.

Stampin' Up! Sweet Citrus Fun Fold 4 creativestampingdesigns.com

On a strip of Basic White cardstock, I stamped the sentiment from the Sweet Citrus stamp set in Smoky Slate Ink. I cut the ends of the sentiment using my Paper Snips on an angle. I adhered the sentiment to the top of the card front using Stampin’ Dimensionals. I added a couple 2021-2023 In-Color Opal Rounds to the sentiment.

Stampin' Up! Sweet Citrus Fun Fold 5 creativestampingdesigns.com

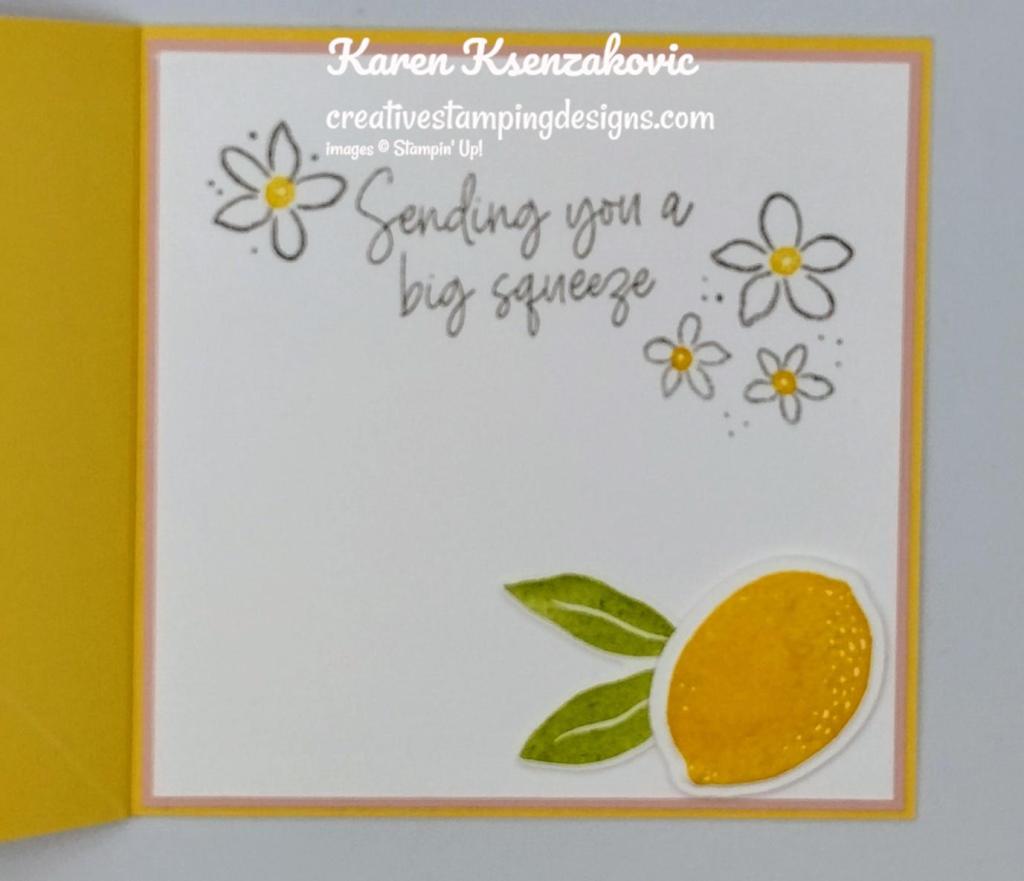
On the inside, I stamped the sentiment from the Sweet Citrus stamp set in Smoky Slate Ink on a panel of Basic White cardstock. I stamped the flower images from the Sweet Citrus stamp set on either side of the sentiment in Smoky Slate Ink and the centers in Daffodil Delight Ink. I adhered the Basic White panel to a Blushing Bride mat then to the inside of the So Saffron card base. I adhered the solid lemon image to the bottom corner of the inner liner using Stampin’ Dimensionals. I adhered the leaves under the lemon using Multipurpose Liquid Glue.

Stampin' Up! Sweet Citrus Fun Fold 6 creativestampingdesigns.com

To finish my card, I decorated a Basic White Medium Envelope. I stamped the lemon wedge image from the Sweet Citrus stamp set on the envelope front in Daffodil Delight and So Saffron Inks. I adhered a panel of the Subtle DSP to the envelope flap.

Stampin' Up! Sweet Citrus Fun Fold 7 creativestampingdesigns.com

Thank you for stopping by my blog today. I hope you liked my card and will give it a try. I hope you will CASE this card and please feel free to post it in the comments of my Facebook page under my post. I’d love to see your take on the card. The list of measurements are below if you’d like to stamp along while watching the video. You can watch my video on my Facebook page Here.

You can also view the video on my YouTube channel Here. If you watch this on my YouTube channel, please remember to subscribe so that you will get notified when a new video goes live. I’m hoping to start doing YouTube lives soon, thanks to all that have subscribed. Happy Stamping!!

*********************************************************************************************************

If you need any stamping supplies, I’d love to be your Demonstrator. Just click HERE to go directly to my online store or drop me an email if you have any questions. 

MY CURRENT HOST CODE IS:   222EBX64

Use this host code when placing an order with me. When you order $50 or greater you will receive a free gift from me! If your order is over $150, please do not use this code, but you’ll still get the free gift. The free gift is your choice of any 1 item valued up to $10.00 from the 2022-2023 Annual Catalog or the January-April 2023 Mini Catalog!  Unfortunately, packs of cardstock are no longer an option for a free gift. Shipping has become too expensive to ship and it’s costing me as much to ship as the cardstock costs. For any orders $50 or more I will also send you my monthly class tutorials.  Click HERE or go to my Customer Rewards for more details and to see what this month’s tutorials are.

Please remember to use my current Host Code and make sure that you can see my name on the final checkout page listed as your Demonstrator when you order so that you know that you’re ordering with me, and you’ll get my rewards! 

Happy Stamping, Karen

*********************************************************************************************************

In response to changing policies at Stampin’ Up – I’m adjusting my Ordering Gift policy as well.  I’m having to get a little more tough on the adding of Host codes when you place your order thru my Online Store.

Not to worry – you’re still going to get that $10 ordering gift for orders of $50 (before shipping & tax) or greater.  And the gift is still any 1 SU! product up to that $10 value – which includes some of our fun Host Sets!

But – if you DO NOT use the Host code for your orders of less than $150 (this is the RETAIL total before Shipping & Handling), then you’ll have two options:

  1. You’ll need to call Stampin’ Up! (1-800-Stamp-Up) and ask them to add it for you. They’re very helpful and will get it done quickly!  OR….
  2. If your order was over the $50 threshold but under $150, then…you’ll forfeit that $10 ordering gift and rewards – this is the Bummer Option – and I REALLY don’t want to do this, SO please remember to add my Current Host Code.

*********************************************************************************************************

Amazing Joining Special during Sale-a-bration January 5 – February 28

Starting Thursday January 5, 2023, not only does the January-April 2023 Mini Catalog go live, Sale-a-bration begins along with an amazingly awesome joining special. You get to choose what you want. All the options ship for free and include a past Paper Pumpkin Kit along with some business supplies in case you want to make this a business. There is No Obligation to sell, you do NOT have to use this as a business, you can join just to enjoy the discount for yourself. I would LOVE to have you on my team. Join as a hobby demonstrator and enjoy all the benefits of a business demonstrator.

Option #1 This exclusive Boho Blue Mini Stampin’ Cut & Emboss Machine ($63 value) + Your choice of $175 of Stampin’ Up! products for only $129.00. The Boho Blue is one of the new In-Colors coming for 2023-2025.

Option #2 The original White Mini Stampin’ Cut & Emboss Machine (a $63 value), + Your choice of $175 of Stampin’ Up! products for only $129.00

Option #3. Your choice of $175 of Stampin’ Up! products for only $99.00.

If you have a LONG shopping list, this is a great way to get everything you always want at a discount. Enjoy at least a 20% discount on the products you purchase. Why wait, this is such an awesome deal, and it only sticks around until February 28th. Join now and start enjoying that discount right away!!! Contact me at creativestampingdesigns@gmail.com and we can talk about you joining. We have people on our team from all over the United States. We get together monthly via Zoom; we have team Facebook pages where we share what we make and ask questions. This was one of the best decisions I’ve ever made, I’ve made a lot of new friends from all over.

*********************************************************************************************************

Saying Thanks Kit Available Thursday January 5

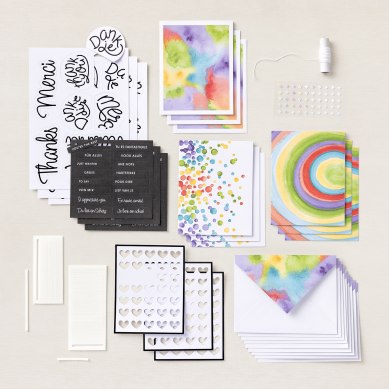
We invite you to say thank you to the people who make your day, every day with Saying Thanks all-inclusive card kit! This month’s kit has everything you need to show appreciation to family and friends who light up your life! Make nine bright, colorful cards in no time to say thank you, recognize friends, and share your gratitude with a bright watercolor wash that won’t go unnoticed! You’ll never miss an opportunity to express gratitude with this colorful kit!

This kit includes: 

  • Enough supplies to create 9 cards—3 each of 3 designs—and 9 coordinating envelopes.
  • Printed die-cut words, precut pieces, and enough adhesive to complete projects.
  • White baker’s twine and iridescent diamond sequins.
  • Finished card size: 5-1/2″ x 4-1/4″ (14 x 10.8 cm).
  • Coordinating colors: Basic Black, Daffodil Delight, Gorgeous Grape, Granny Apple Green, Poppy Parade, Tahitian Tide.

#162361 $13.00 USD | $18.00 CAD

Each kit comes with precut die cuts in Dutch, English, French and German

*********************************************************************************************************

Love Treats Kit

Get ready for the latest addition to the Kits Collection by Stampin’ Up! The Love Treats Kit comes with everything you need to make sweet, homemade crafts and spread the love this season!

This kit includes: 

  • 20 treat boxes measuring 3″ x 2″ x 15/16″ (7.6 x 5.08 x 2.3 cm)
  • One photopolymer love-themed stamp set
  • One Basic Gray Ink Spot
  • Different die-cut stickers with heart designs
  • Coordinating colors include Petal Pink and Soft Succulent
  • Building the 20 treat boxes takes less than 60 minutes to complete

161127 LOVE TREATS KIT $21 USD | $29 CAD

*********************************************************************************************************

Key To My Heart

Subscribe December 11 – January 10

Seal your love this season with the Key to My Heart Paper Pumpkin Kit! This month’s kit represents the tradition of locking a padlock on a bridge to symbolize unbreakable love. It comes with everything you need to make 9 darling love-themed cards—3 each of 3 designs. So, no matter who your dance partner or dinner date is, you can make something heartfelt for them this season.  

Plus, this month there is a special add-on! The add-on is a heart-shaped treat box. These Heart Boxes are easy to put together and will take your crafting even further. Add-ons are live during the subscription period but are only available while supplies. Act quick, and don’t miss out on these Heart Boxes filled with love! 

This kit includes:

  • This month’s kit includes everything you need to create 9 love-themed cards—3 each of 3 designs. It has coordinating envelopes, special padlock and key die cuts, adhesives, Vellum, and more!
  • This month’s kit has a unique love-theme photopolymer stamp set! With special sentiments and images that represent the tradition of locking padlocks on a bridge, there are so many ways for you to express your devoted love.
  • The Key to My Heart Paper Pumpkin Kit also comes with a Fresh Freesia Classic Stampin’ Spot.
  • This kit also has a special add-on to take your crafting even further!
  • Finished card size: 4-1/4″ x 5-1/2″ (10.8 x 14 cm)
  • Coordinating Stampin’ Up! colors: Calypso Coral, Fresh Freesia, Mango Melody, Petal Pink. The designs are accented with gold foil. 

Subscribe to the January Paper Pumpkin Kit between 11 December 2022 and 10 January 2023 by clicking here!

Note: Supplies may be limited toward the end of the subscription period.

ADD-ON

Heart Boxes Add-On

Add-on number: 162417 Available starting: 11 December Price: $11.00 USD

The add-on includes:

  • 10 treat boxes
  • Key and label stickers
  • Box size: 3″ x 4″ (7.6 x 10.2 cm)
  • Coordinating Stampin’ Up! colors: Petal Pink with gold foil

*********************************************************************************************************

Card stock cuts for this project:

  • Basic White Cardstock 4″ X 5 1/4″ (lemons), 1/2″ x 3 1/4″ (sentiment), 4″ X 4″ (inner liner), 4 1/2″ X 2 1/2″ (leaves)
  • Blushing Bride Cardstock 4 1/8″ X 4 1/8″ (inner liner mat)
  • So Saffron Cardstock 4 1/4″ x 11″ (card base scored & folded at 5 1/2″ & 4 1/4″ then scored from the bottom of the 4 1/4″ score line up to the top right corner of the card front)
  • Subtle 6 X 6 Designer Series Paper 4 1/8″ x 4 1/8″ (card front), 1 1/8″ X 4 1/8″ (side panel), 2 1/4″ x 6″ (envelope flap)

*********************************************************************************************************

Product List

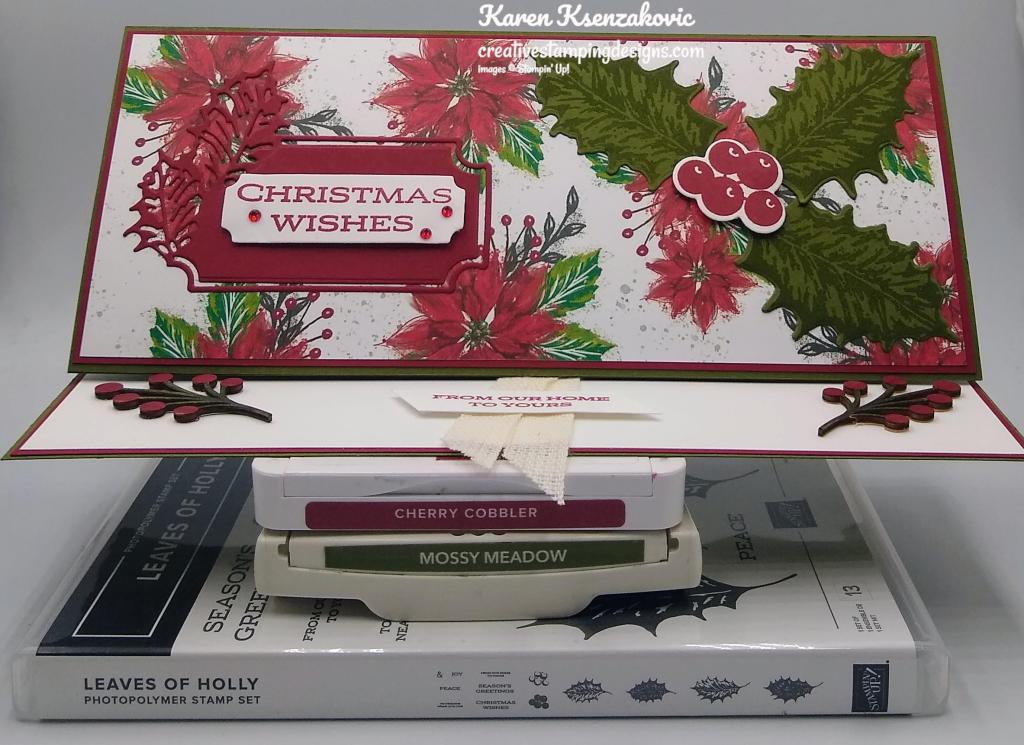
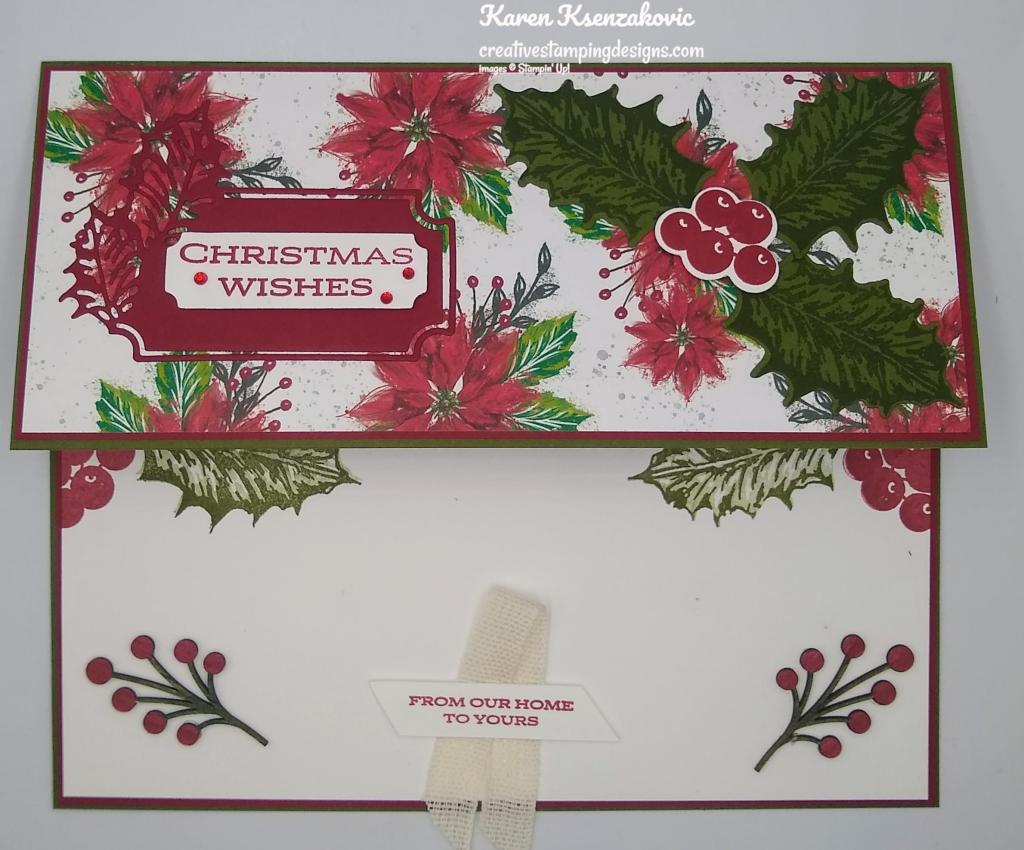
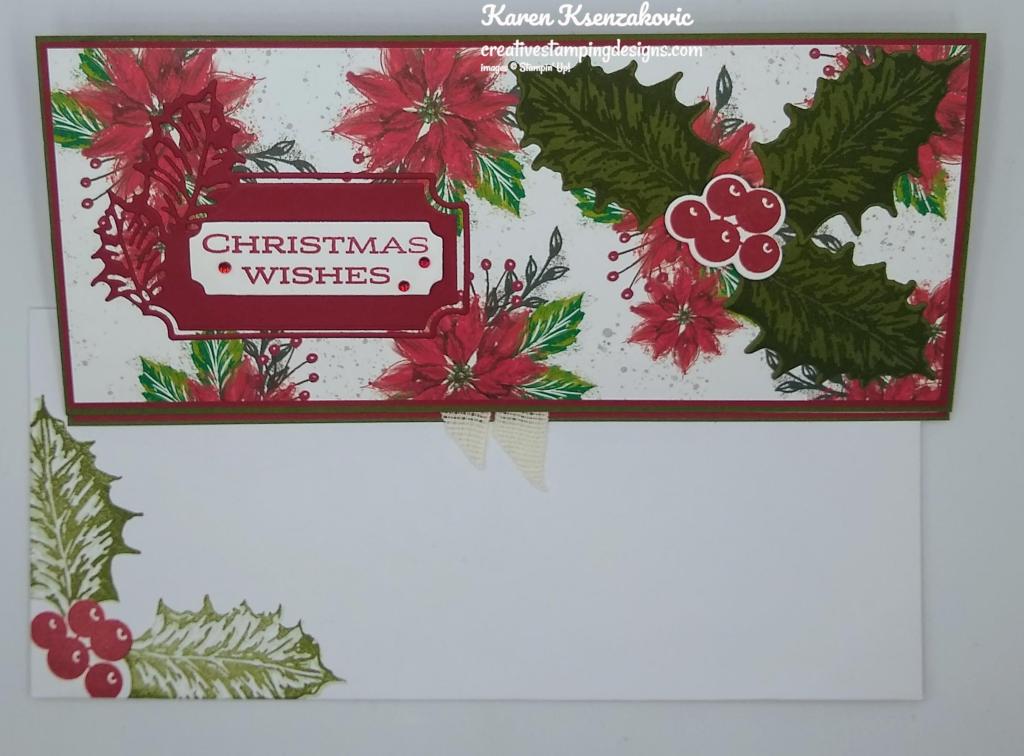
Stampin’ Up! Leaves of Holly Slimline

Good Tuesday morning my stamping friends. I hope your week has started well. I’ve got a busy one ahead of me. Today is my only day off and I’ll be working the next 6 days straight. Maybe I’ll be surprised, and they won’t schedule me for Sunday.

Today’s card is another one that we made at our quarterly team meeting a couple weeks ago. This one was designed by another one of our team members Darryl Robbins. Here’s my card for today.

Stampin' Up! Leaves of Holly Slimline 1 creativestampingdesigns.com

I used the Stampin’ Up! Leaves of Holly Bundle along with the Boughs of Holly Designer Series Paper for my card today. This was the first time I’ve made a Slimline card and I think it came out pretty good since I didn’t know what I was doing.

Stampin' Up! Leaves of Holly Slimline 2 creativestampingdesigns.com

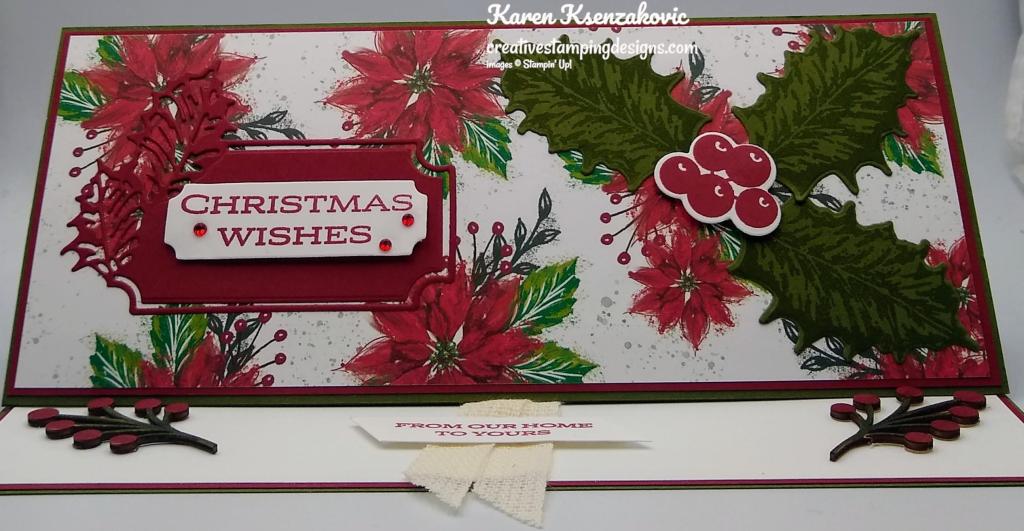
I started by adhering a panel of Boughs of Holly DSP to a Cherry Cobbler mat. I adhered the layered panel to the panel of Mossy Meadow cardstock using Multipurpose Liquid Glue. I adhered the layered panels to the 1 7/8″ section of the Mossy Meadow card base using Multipurpose Liquid Glue.

Stampin' Up! Leaves of Holly Slimline 3 creativestampingdesigns.com

Using the Holly Berry Dies, I cut the holly frame die from a panel of Cherry Cobbler cardstock. I stamped the sentiment from the Stampin’ Up! Leaves of Holly Photopolymer Stamp Set in Cherry Cobbler Ink on a panel of Basic White cardstock. I cut the sentiment out using the Holly Berry Dies. I adhered the holly frame to the card front using Multipurpose Liquid Glue. I adhered the sentiment inside the frame using Stampin’ Dimensionals.

Stampin' Up! Leaves of Holly Slimline 4 creativestampingdesigns.com

On the panel of Mossy Meadow cardstock, I stamped the smaller holly leaf image from the Leaves of Holly stamp set in Mossy Meadow Ink. I cut the leaves out using the Holly Berry Dies. On the panel of Basic White cardstock, I stamped the berry image from the Leaves of Holly stamp set in Cherry Cobbler Ink and cut them out with the Holly Berry Dies. I adhered the leaves to the card front using Multipurpose Liquid Glue. I adhered the berries over the leaves using Stampin’ Dimensionals. I added a few Red Rhinestone Basic Jewels to the card front.

Stampin' Up! Leaves of Holly Slimline 5 creativestampingdesigns.com

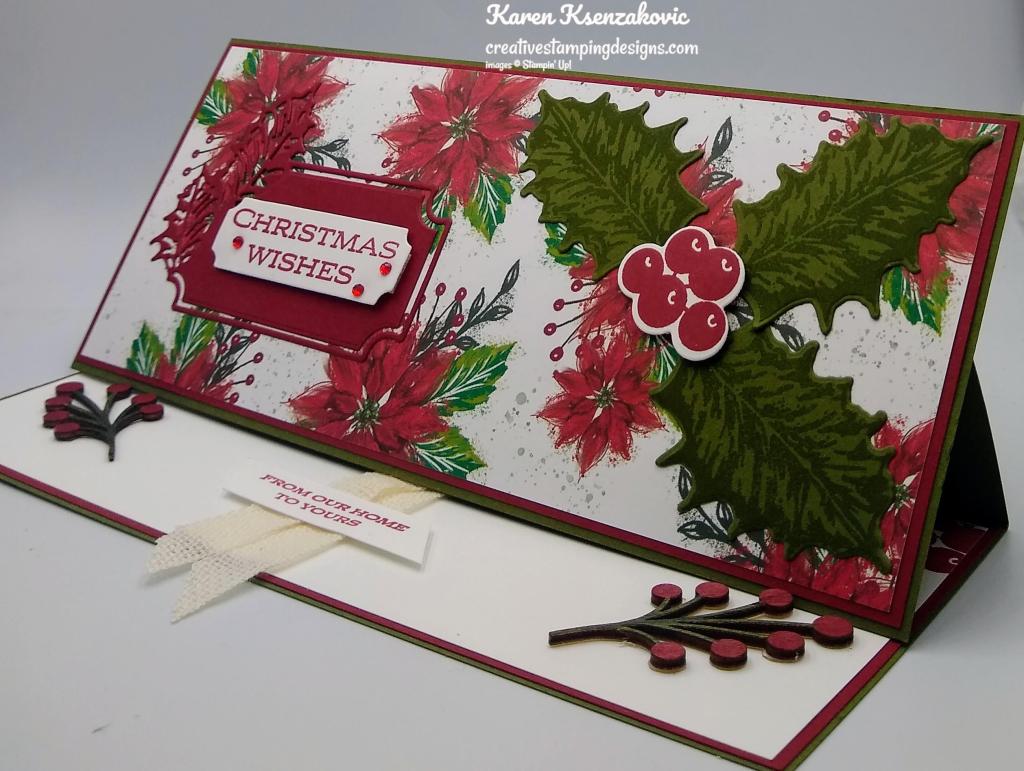
For the inside. I stamped the holly leaf images from the Leaves of Holly stamp set in Mossy Meadow Ink on the top of a Basic White panel. I stamped the berry image by the holly leaves in Cherry Cobbler Ink. I adhered the Basic White panel to a Cherry Cobbler mat and then to the inside of the Mossy Meadow card base. I stamped the sentiment from the Leaves of Holly stamp set in Cherry Cobbler Ink on a panel of Basic White cardstock. I cut the 2 ends on an angle using my Paper Snips. I adhered a piece of the Natural 1/2″ Woven Ribbon on the bottom of the panel using Stampin’ Seal. I adhered the sentiment over the ribbon using Stampin’ Dimensionals. I colored 2 of the Textural Elements using the Cherry Cobbler and Mossy Meadow Stampin’ Blends Markers. I adhered the Textural Elements on either side of the panel where I wanted the easel to stand using Glue Dots on the berry parts.

Stampin' Up! Leaves of Holly Slimline 6 creativestampingdesigns.com

To finish my card, I decorated a Slimline Envelope. I stamped the holly leaf images from the Leaves of Holly stamp set in Mossy Meadow Ink and the berry image in Cherry Cobbler Ink on the envelope front.

Thank you for stopping by my blog today. I hope you liked the slimline card and will try it. Happy Stamping!!

*********************************************************************************************************

If you need any stamping supplies, I’d love to be your Demonstrator. Just click HERE to go directly to my online store or drop me an email if you have any questions. 

MY CURRENT HOST CODE IS:   CD74ZSKH

Use this host code when placing an order with me. When you order $50 or greater you will receive a free gift from me! If your order is over $150, please do not use this code, but you’ll still get the free gift. The free gift is your choice of any 1 item valued up to $10.00 from the 2022-2023 Annual Catalog or the July – December 2022 Mini Catalog!   For any orders $50 or more I will also send you my monthly class tutorials.  Click HERE or go to my Customer Rewards for more details and to see what this month’s tutorials are.

Please remember to use my current Host Code and make sure that you can see my name on the final checkout page listed as your Demonstrator when you order so that you know that you’re ordering with me and you’ll get my rewards! 

Happy Stamping, Karen

*********************************************************************************************************

September 1 – September 30!!!

Every week in the month of September Stampin’ Up! will be offering a selection of discounted products. Discounts and product selection will vary from week to week.

Head over to my Online Store Here to see the Weekly Deals for this week.

  • New products added each week on 1, 8, 15, and 22 September.
  • Week 1: Sept 1−7, Week 2: Sept 8−14, Week 3: Sept 15−21, Week 4: Sept 22−28
  • Promotion ends 28 September.
  • Product options and discounts vary based on inventory availability.
  • All order types qualify for this promotion
  • Discounted items can be added to a Starter Kit.
  • Get the most up-to-date product information on the online store beginning 1 September.

*********************************************************************************************************

Available Now!!

Some things are great on their own but become epic when they are paired with something else: cereal and milk, toast and butter, Fred Astaire and Ginger Rogers. We may be biased, but our favorite combo is our stamp sets and dies—and that’s what the Perfect Partners promotion is all about! 

We created six new dies that coordinate with stamp sets in the 2022–2023 Annual Catalog and the July–December 2022 Mini Catalog. These coordinating dies will only be available during this promotion and will not be offered in any catalog.  

These stamp sets and dies are available separately or as a bundle. By buying the bundle, you and your customers will save 10% off the retail price. 

Put these wonderful stamp sets and dies together for more papercrafting fun!

*********************************************************************************************************

Ho Ho Ho

Subscribe September 11 – October 10

‘Tis the season to make your own Christmas cards with the Ho Ho Ho Paper Pumpkin Kit! This kit contains whimsical designs of Santa and his reindeer in a classic Christmas color palette which is sure to match various styles of holiday décor and look great on mantles everywhere. 
Each kit contains enough supplies to create 9 festive cards—3 each of 3 designs—and 9 coordinating envelopes. These cards are sure to bring the warm holiday spirit. 
And word from the North Pole is that this kit coordinates with next month’s Paper Pumpkin tag kit and the special add-on product! With so much coordination between products, you’ll have a breeze at creating a cohesive look for all your holiday gifting needs. Make this season the most wonderful time of the year for your loved ones—and for yourself!

This kit includes:

  • Ho Ho Ho Photopolymer Stamp Set
  • Early Espresso Classic Stampin’ Spot
  • Printed card bases
  • Printed envelopes
  • Printed die cuts
  • Die-cut labels
  • Iridescent foil die-cut snowflakes
  • Vellum
  • Vanilla expoy dots
  • Adhesive dots
  • Mini Dimensionals

Card size: 4-1/4″ x 5-1/2″ (10.8 x 14 cm) 

Coordinating Stampin’ Up! colors: Bermuda Bay, Cherry Cobbler, Crumb Cake, Early Espresso, Shaded Spruce, Sweet Sorbet, Very Vanilla

Subscribe to the October Paper Pumpkin Kit between 11 September and 10 October at paperpumpkin.com!

Note: Supplies may be limited toward the end of the subscription period.

*********************************************************************************************************

Card stock cuts for this project:

  • Basic White Cardstock 3″ X 4″ (sentiment & berries), 3 1/2″ X 8 1/2″ (inner liner), 1/2″ X 2″ (inside sentiment)
  • Cherry Cobbler Cardstock 2 – 3 5/8″ X 8 3/8″ (card front & inner liner mats), 3″ X 4″ (die cut panel)
  • Mossy Meadow Cardstock 7 1/2″ X 8 3/4″(card bae scored & folded at 1 7/8″ & 3 3/4″), 3 3/4″ X 8 3/4″ (easel panel), 4″ X 5 1/4″ (holly leaves)
  • Boughs of Holly Designer Series Paper 3 1/2″ X 8 1/2″ (card front)

*********************************************************************************************************

Product List

Stampin’ Up! Bouquet of Thanks for Fun Fold Friday with Video Tutorial

Good Friday morning my stamping friends welcome to my Fun Fold Friday. How are you all doing today? Are you ready for the weekend? I hope you are making some fun plans. It’s supposed to be a hot one here, last I heard was the upper 90’s.

Today’s card I made on my Facebook Live video on Wednesday. If you were able to join me or watched the replay, thank you. If you’d like to watch my video and stamp along, the measurements are below along with the links to my Facebook page and my YouTube channel. Here’s my card for today.

I used the Stampin’ Up! Bouquet of Thanks Cling Stamp Set along with the Stampin’ Up! Charming Sentiments Photopolymer Stamp Set and the 2022-2024 In-Color 6 X 6 Designer Series Paper for my easel card today.

I started by adhering a panel of the 2022-2024 In-Color DSP to a Sweet Sorbet mat using Multipurpose Liquid Glue.

I scored & folded the Crumb Cake card base as listed below. I adhered the smaller panel of Sweet Sorbet cardstock to the top section of the card base front using Multipurpose Liquid Glue. I adhered the layered panel to the bottom section of the card base front using Multipurpose Liquid Glue.

I stamped the floral image from the Bouquet of Thanks stamp set in Soft Suede Ink on a panel of Crumb Cake cardstock. I stamped the sentiment banner from the floral image on a panel of Shimmery White cardstock in Soft Suede Ink. I fussy cut the banner using my Paper Snips. I adhered the fussy cut banner to the stamped panel using Stampin’ Dimensionals. I adhered the artwork to the card front using Multipurpose Liquid Glue.

On a small panel of Shimmer White cardstock, I stamped the sentiment from the Charming Sentiments stamp set in Soft Suede Ink. I adhered the sentiment to a Sweet Sorbet mat using Stampin’ Seal.

On the inside I stamped the top of the floral image from the Bouquet of Thanks stamp set in Soft Suede Ink, stamping off twice on scrap paper, on the side of the Shimmery White panel. I adhered the Shimmery White panel to a Sweet Sorbet mat and then to the inside of the Crumb Cake card base. I figured out where I wanted to put the small sentiment and adhered it using Stampin’ Dimensionals.

To complete my card, I decorated a Basic White Medium Envelope. I stamped the flowers from the Bouquet of Thanks stamp set on the envelope front in Soft Suede Ink. I adhered a panel of the 2022-2024 In-Color DSP to the envelope flap.

Thank you for stopping by my blog today. I hope you liked my card and will give it a try. I hope you will CASE this card and please feel free to post it in the comments of my Facebook page under my post. I’d love to see your take on the card. The list of measurements are below if you’d like to stamp along while watching the video. You can watch my video on my Facebook page Here.

You can also view the video on my YouTube channel Here. Happy Stamping!!

*********************************************************************************************************

If you need any stamping supplies, I’d love to be your Demonstrator. Just click HERE to go directly to my online store or drop me an email if you have any questions. 

MY CURRENT HOST CODE IS:   GVR7KE4E

Use this host code when placing an order with me. When you order $50 or greater you will receive a free gift from me! If your order is over $150, please do not use this code, but you’ll still get the free gift. The free gift is your choice of any 1 item valued up to $10.00 from the 2021-2022 Annual Catalog or the January – June 2022 Mini Catalog!   For any orders $50 or more I will also send you my monthly class tutorials.  Click HERE or go to my Customer Rewards for more details and to see what this month’s tutorials are.

Please remember to use my current Host Code and make sure that you can see my name on the final checkout page listed as your Demonstrator when you order so that you know that you’re ordering with me and you’ll get my rewards! 

Happy Stamping, Karen

*********************************************************************************************************

FREE 2022-2024 In-Color Products Joining Special May 3 – May 31

May is a great time to pick up the Stampin’ Up! Starter Kit!!  Stampin’ Up! is offering $66.50 in FREE 2022-2024 In Color merchandise when you purchase the Starter Kit between May 3-31!

This incredible deal is in addition to the $125 of products that you normally get with your Starter Kit and the free business supplies, free shipping, a free paper Pumpkin Kit and all the fun being a part of Stampin’ Up!

The Starter Kit is only $99 + tax!!  And if you join between May 3-31, you’ll get:

  • $125 Stampin’ Up! merchandise of your choice
  • $66.50 in 2022-2024 In Color merchandise (see the list below)
  • free business supplies and catalogs
  • free random past Paper Pumpkin Kit
  • free shipping!!

The free items 2022-2024 In Color included with the Starter Kit are:

  • 2022–2024 In Color Grid Paper (item 160009)
  • 2022–2024 In Color Ink Pad Collection (item 161108)
  • 2022–2024 In Color Cardstock Collection (item 159204)
  • 2022–2024 In Color 6″ x 6″ Designer Series Paper Assortments (item 159253)

Such an awesome deal!!  And such a great time to join as a Demonstrator! 

If you are interested in learning more about becoming a Demonstrator, click Here to see all of the benefits.  You can also sign up electronically on that same page.  If you have any questions, please contact me at creativestampingdesigns@gmail.com. I’d love to talk to you more about it!

And if you’re ready to join us, click on the “join my team” banner below to head over to my Stampin’ Up! website to get started!

*********************************************************************************************************

Pick of The Crop

Subscribe May 11 – June 10

Give your card collection a reFRESH with this month’s Paper Pumpkin Kit! We’re talking FRESH ideas, designs, cards, and crafts. Each month we strive to deliver a seasonal selection, and this month is no different. It’s time to express your love, gratitude, and style with summer’s hottest trends in crafting.

Plus, this month you can purchase additional mini canvas shopping bags for a fun twist on card packaging. Just our way of expanding one of our favorite kits of the season!

This kit includes:

  • This month’s kit contains enough elements to create 9 cards—3 each of 3 designs—and 9 coordinating envelopes. This all-inclusive kit includes printed card bases, die-cut paper pieces, adhesive, and more!
  • The Pick of the Crop Paper Pumpkin Kit includes a Calypso Coral Classic Stampin’ Spot!
  • This kit’s stamp set is perfect for expressing your love, gratitude, and style. With sentiments that say “Love you a whole bunch”, “You’re the pick of the crop”, “You are the sweetest,” and so many more, you’ll be able to use this photopolymer stamp set for all of your summer projects.
  • This kit also includes specialty vellum pieces to add a fresh touch to your cards.
  • And you’ll get a Mini Shopping Bag (5-3/8″ x 6″; 13.7 x 15.2 cm) which can be used to hold a couple cards for a unique craft element. (Additional bags available to purchase separately.)
  • Card size: 4-1/4″ x 5-1/2″ (10.8 x 14 cm)
  • Envelope size: 4-1/2″ x 5-3/4″ (11.4 x 14.6 cm)
  • Coordinating colors: Blackberry Bliss, Cajun Craze, Calypso Coral, Crushed Curry, Garden Green, Night of Navy, Soft Succulent 

Available for purchase on stampinup.com starting 13 June 2022:

Mini Shopping Bags Add-On

Item Number: 161922 

Add-on details:

  • Includes 4 mini canvas bags.
  • You can fit a couple cards in each bag. Perfect for a fun twist on card packaging!
  • Stamp or color on the bags for a personalized touch.
  • Mini Shopping Bag size: 5-3/8″ x 6″ (13.7 x 15.2 cm)

SUBSCRIPTION INFORMATION

Subscribe to the June Paper Pumpkin Kit between 11 May and 10 June at paperpumpkin.com!

Note: Supplies may be limited toward the end of the subscription period.

*********************************************************************************************************

Stampin’ Up! has some new Branded Merchandise you can purchase in the Online Store. They have tumblers in all the new 2022-2024 In-Colors, a hoodie in the Stampin’ Up! Abigail Rose design. Some Abigail Rose File Folders, the 2022-2024 In-Colors Grid Paper and an Abigail Rose Poster. Click Here to go to my Online Store to see all the new merchandise.

*********************************************************************************************************

Card stock cuts for this project:

  • Crumb Cake Cardstock 4 1/4″ x 11″ (card base scored & folded at 2 3/4″ & 5 1/2″)
  • Shimmery White Cardstock 1″ X 3 1/2″ (banner sentiment), 4″ X 5 1/4″ (inner liner), 1 1/8″ x 2 1/4″ (inner liner sentiment)
  • Sweet Sorbet Cardstock 2 – 4 18″ x 5 3/8″ (card front & inner liner mats), 4 1/8″ x 2 5/8″ (top of card front panel), 1 1/4″ X 2 3/8″ (inner sentiment mat)
  • 2022-2024 In-Color 6 X 6 Designer Series Paper 4″ X 5 1/4″ (card front), 2 1/4″ X 6″ (envelope flap)

*********************************************************************************************************

Product List

Stampin’ UP Shaded Summer for Fun Fold Friday

Good Friday morning my stamping friends and welcome to my Fun Fold Friday. How was everyone’s week? Does anyone have any plans for the weekend yet? I’ll be working all weekend between both jobs. I had requested Sunday off, but I guess they didn’t see it when they made up the schedule.

Today’s card I made on my Facebook Live video on Wednesday. If you were able to join me or watched the replay, thank you. If you’d like to watch my video and stamp along, the measurements are below along with the links to my Facebook page and my YouTube channel. Here’s my card for today.

I used the Stampin’ Up! Shaded Summer Cling Stamp Set for my card along with the Summer Shadow Dies (available August 3rd as a Sale-a-bration item).

This is the template for making my card. I started by cutting a panel of Calypso Coral cardstock as in the diagram above.

I adhered 2 panels of the Petal Pink Subtle 6 X 6 Designer Series paper to the card front panels using Multipurpose Liquid Glue.

I adhered 2 more panels of the Subtle DSP to the inside card front panels using Multipurpose Liquid Glue. I made the belly band using a strip of Calypso Coral cardstock and wrapped it around the finished card. I adhered Tear & Tape to the ends of the belly band to adhere them together. I cut a panel of Petal Pink cardstock using the largest die from the Stitched So Sweetly Dies. I stamped it with the floral image from the Shaded Summer stamp set in Petal Pink Ink. I stamped the sentiment from the Stampin’ Up! Many Happenings Cling Stamp Set in Tuxedo Black Ink and cut it out using the Messages Dies. I adhered the sentiment to the top of the die cut panel using Stampin’ Dimensionals and then adhered it to the belly band using Multipurpose Liquid Glue. I added a few Champagne Rhinestones to the belly band.

For the inside panel I stamped the 2 floral images from the Shaded Summer stamp set in Petal Pink Ink on a Basic White panel. I stamped the sentiment from the Stampin’ Up! Elegantly Said Cling Stamp Set in Tuxedo Black Ink over the floral image. I adhered the Basic White panel to a Calypso Coral mat using Stampin’ Seal. I adhered the layered panel to only the bottom portion of the easel using Multipurpose Liquid Glue. I adhered a Basic White panel to a Petal Pink mat using Stampin’ Seal and then to the inside of the Calypso Coral card base using Multipurpose Liquid Glue

Using the Summer Shadow Dies (Sale-a-bration item available August 3rd). I adhered a panel of Calypso Coral and Shaded Spruce cardstocks to an Adhesive Sheet. I cut the detailed flowers from a panel of Calypso Coral cardstock. I cut the solid flowers from a panel of Petal Pink cardstock. I cut the detailed leaves from a panel of Shaded Spruce cardstock and the solid leaves from a panel of Soft Succulent cardstock. I adhered the detailed flowers and leaves to the solid flowers and leaves using the Adhesive Sheet. I adhered the flowers to the bottom of the inner liner using Stampin’ Dimensionals and adhered the leaves using a Glue Dot. I added a Champagne Rhinestone to the center of the larger flower. I didn’t stamp a sentiment on the inside. I need to write a special message for the recipient of the card.

To finish my card I decorated a Basic White Medium Envelope. I stamped the floral images from the Shaded Summer stamp set in Petal Pink on the envelope front. I adhered a panel of Petal Pink Subtle DSP to the envelope flap.

Thank you for stopping by my blog today. I hope you liked my card and will give it a try. If you do CASE this card, please feel free to post it in the comments of my Facebook page under this post. I’d love to see your take on the card. The list of measurements are below if you’d like to stamp along while watching the video. You can watch my video on my Facebook page Here.

You can also view the video on my YouTube channel Here. Happy Stamping!!

*********************************************************************************************************

If you need any stamping supplies, I’d love to be your Demonstrator. Just click HERE to go directly to my online store or drop me an email if you have any questions. 

MY CURRENT HOST CODE IS:   CEWAN9UD

Use this host code when you order $50 or greater and receive a free gift from me! If your order is over $150, please do not use this code, but you’ll still get the free gift. The free gift is your choice of any 1 item valued up to $10.00 from the 2020-2021 Annual Catalog or the January-June 2021 Mini Catalog!   For any orders $50 or more I will also send you my monthly class tutorials.  Click HERE or go to my Customer Rewards for more details and to see what this months tutorials are.

Please remember to use my current Host Code and make sure that you can see my name on the final checkout page listed as your Demonstrator when you order so that you know that you’re ordering with me and you’ll get my rewards! 

Happy Stamping, Karen!

*********************************************************************************************************

SAVE 15% ON DESIGNER SERIES PAPER JULY 1 – AUGUST 2!

We all love gorgeous Designer Series Paper, and during this incredible sale, you can enjoy a 15% discount on select papers from the 2021–2022 Annual Catalog! July is a great time to stock up and save on some of Stampin’ Up!’s most popular paper designs!

PROMOTION DETAILS:

  • Sales Period:  July 1 – August 2
  • All order types qualify for this promotion.
  • There is no limit to how many packages of Designer Series Paper may be purchased during this promotion.
  • Only select Designer Series Papers are available at a 15% discount during this promotion.
  • Orders must be placed—and closed—during the promotion period for the 15% discount to apply.
  • Designer Series Paper ordered as part of a Starter Kit or with Stampin’ Rewards qualify for the 15% discount.
  • Order Deadline:  August 2, 2021 at 11:59 PM (MT)

Click on image below for a printable PDF of the Sale Designer Series Papers

*********************************************************************************************************

The Adventure Begins

Subscribe June 11 – July 10

This image has an empty alt attribute; its file name is 07-11-21_header_the_adventure_begins.jpg

Life is full of big adventures that are best experienced together! This month’s The Adventure Begins Paper Pumpkin Kit helps you celebrate those exciting new chapters in the most creative of ways with enough supplies to create twelve motivating cards—plus coordinating envelopes—all featuring the exciting colors of nature.

Like the still moments before a great adventure, the kit’s designs contain a quiet energy that hint at all the grand possibilities of what is yet to come. Share this kit with your family and friends about to embark on a new journey and make connections while you explore and discover new levels of your creativity!

Details

  • Contains enough supplies to create twelve cards and coordinating envelopes.
  • Card size: 4-1/4” x 5-1/2” (10.8 x 14cm)
  • Envelope size: 4-1/2” x 5-3/4” (11.4 x 14.6 cm)
  • Comes with a Stampin’ Spot plus an exclusive Stamp Set.
  • Includes inspirational sentiments and adventure-themed imagery featuring these nature-inspired coordinating colors: Basic Black, Basic White, Bermuda Bay, Crushed Curry, Early Espresso, Flirty Flamingo, Garden Green, Granny Apple Green, Mango Melody, Night of Navy.

Subscribe to the July 2021 Paper Pumpkin Kit between 11 June and 10 July at paperpumpkin.com!

Note: Supplies may be limited toward the end of the subscription period.

*********************************************************************************************************

Card stock cuts for this project:

  • Basic White Cardstock 3 15/16″ x 5 1/4″ (easel panel), 4″ X 5 1/4″ (inner liner)
  • Calypso Coral Cardstock 8 1/2″ X 11″ (card base), 5 3/8″ X 4 1/16″ (easel), 3 1/2″ x 3 1/2″ (detailed flowers), 2′ X 11″ (belly band)
  • Petal Pink Cardstock 3 1/2″ X 3 1/2″ (flowers), 4 1/8″ x 5 3/8″(inner liner mat), 4″ X 3″ (sentiment mat)
  • Shaded Spruce Cardstock 2″ X 2″ (leaves)
  • Soft Succulent Cardstock 2″ X 2″ (leaves)
  • Subtle 6 X 6 Designer Series Paper 4 – 2″ X 5 3/8″ (card front panels), 2 1/2″ X 6″ (envelope)

*********************************************************************************************************

Product List

Stampin’ Up! Create With Friends for Fun Fold Friday

Good Friday morning my stamping friends and welcome to my Fun Fold Friday. How was everyone’s week? Does anyone have any plans for the long 4th of July weekend yet? I will be at Ace all day Saturday working and both places are closed for the 4th on Sunday so I have off, YAY!!!

Today’s card I made on my Facebook Live video on Wednesday. If you were able to join me or watched the replay, thank you. If you’d like to watch my video and stamp along, the measurements are below along with the links to my Facebook page and my YouTube channel. Here’s my card for today.

I used the Stampin’ Up! Create With Friends Photopolymer Stamp Set, the Stampin’ Up! Hand-Penned Petals Bundle and the Hand-Penned Designer Series Paper.

I started by scoring the card base at 4 1/4″ & 5 1/2″. I then scored from the bottom of the 4 1/4″ score line to the top right corner and folded the panel in. I adhered the left binder side together using Multipurpose Liquid Glue. I adhered a strip of the Hand-Penned DSP to the left side of the card front using Multipurpose Liquid Glue.

I cut a panel of Basic White cardstock using the largest die from the Scalloped Contours Dies. I moved the die down 3 scallops and cut again to make a square. I adhered a panel of Hand-Penned DSP to the scallop square using Multipurpose Liquid Glue. I adhered the layered panel to a Mint Macaron mat using Stampin’ Seal. I adhered the panel just to the bottom triangle of the card base using Multipurpose Liquid Glue.

On a strip of Basic White cardstock I stamped the sentiment from the Create With Friends stamp set in Mint Macaron Ink. I edged the sentiment using my Blushing Bride Stampin’ Write Marker. On a thin scrap of Basic White cardstock I stamped the sentiment from the Create With Friends stamp set in Blushing Bride Ink and adhered it to the top of the larger sentiment using Mini Stampin’ Dimensionals. I adhered the sentiment to the card front using Stampin’ Dimensionals. I added a few Genial Gems to the card front.

On the inside I stamped the sentiment from the Stampin’ Up! Hand-Penned Petals Photopolymer Stamp Set in Mint Macaron Ink on a Basic White panel. I adhered the panel to a Mint Macaron mat using Stampin’ Seal and then to the inside of the Mint Macaron card base using Multipurpose Liquid Glue. I cut the detailed floral die from from a panel of Blushing Bride cardstock using the Penned Flowers Dies. I adhered the die cut to the inside panel using Stampin’ Dimensionals, placing it on the corner to hold the easel open.

To finish my card I decorated a Basic White Medium Envelope. I stamped the large floral image from the Hand-Penned Petals stamp set in Smoky Slate Ink on the envelope front. I adhered a panel of the Hand-Penned DSP to the envelope flap.

Thank you for stopping by my blog today. I hope you liked my card and will give it a try. If you do CASE this card, please feel free to post it in the comments of my Facebook page under this post. I’d love to see your take on the card. The list of measurements are below if you’d like to stamp along while watching the video. You can watch my video on my Facebook page Here.
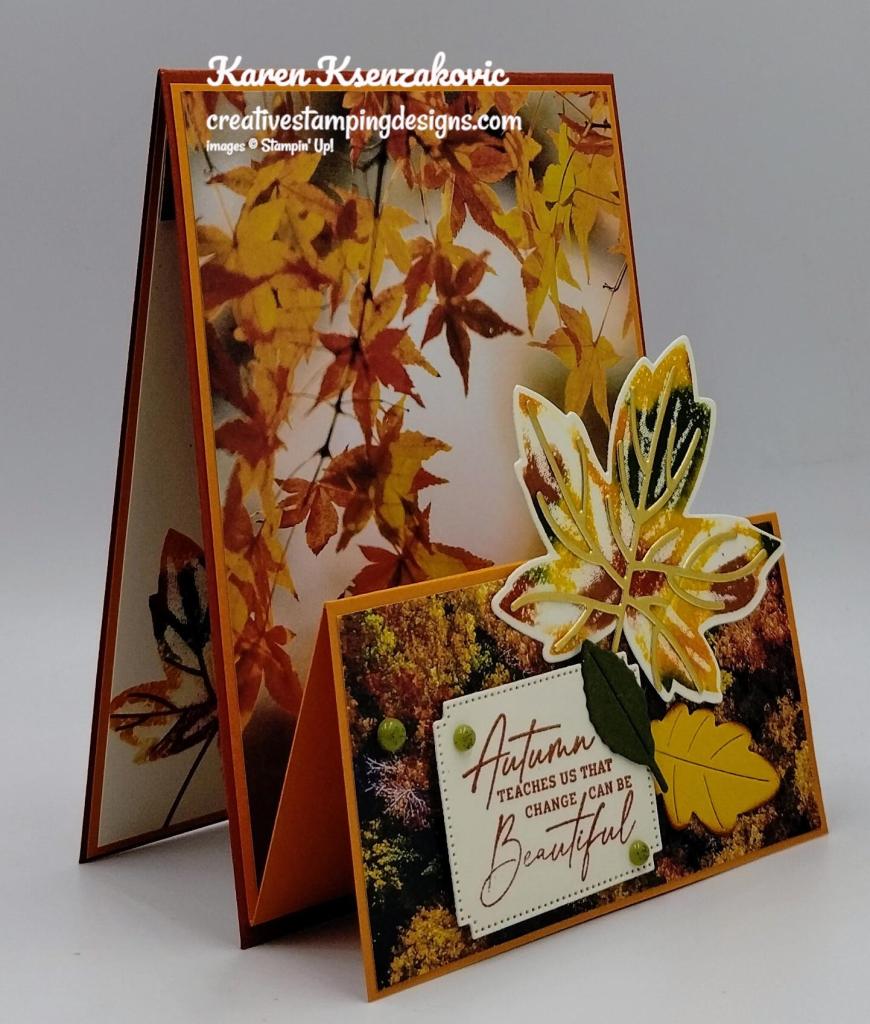
You can also view the video on my YouTube channel Here. Happy Stamping!!

*********************************************************************************************************

If you need any stamping supplies, I’d love to be your Demonstrator. Just click HERE to go directly to my online store or drop me an email if you have any questions. 
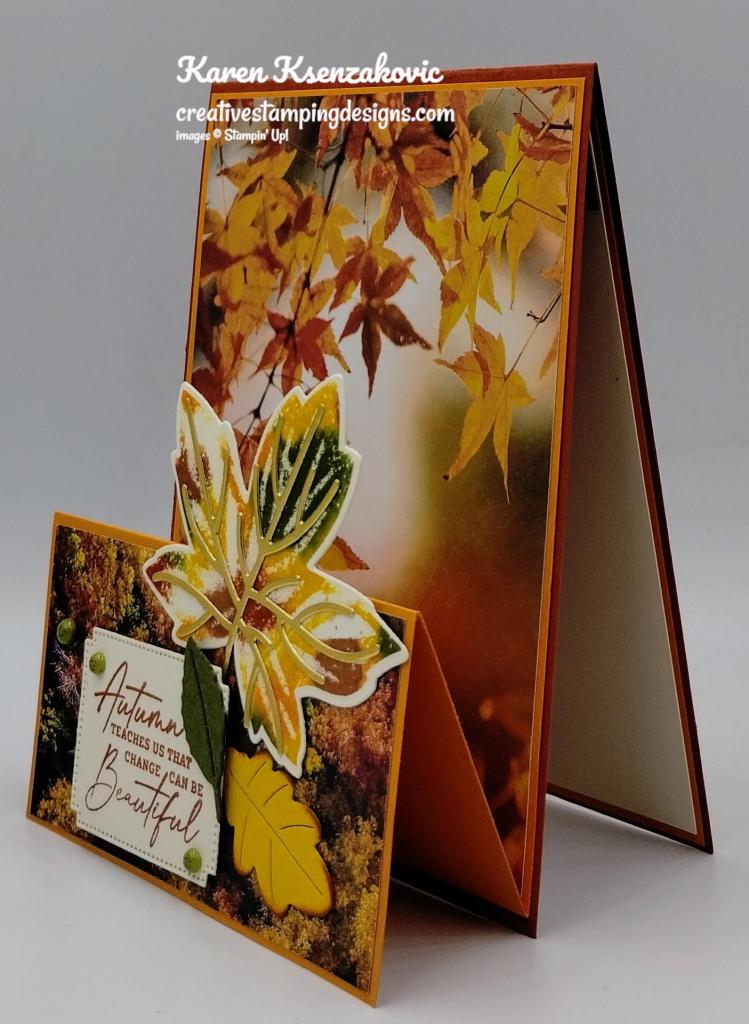
MY CURRENT HOST CODE IS:   CEWAN9UD

Use this host code when you order $50 or greater and receive a free gift from me! If your order is over $150, please do not use this code, but you’ll still get the free gift. The free gift is your choice of any 1 item valued up to $10.00 from the 2020-2021 Annual Catalog or the January-June 2021 Mini Catalog!   For any orders $50 or more I will also send you my monthly class tutorials.  Click HERE or go to my Customer Rewards for more details and to see what this months tutorials are.

Please remember to use my current Host Code and make sure that you can see my name on the final checkout page listed as your Demonstrator when you order so that you know that you’re ordering with me and you’ll get my rewards! 

Happy Stamping, Karen!

*********************************************************************************************************

SAVE 15% ON DESIGNER SERIES PAPER JULY 1 – AUGUST 2!

We all love gorgeous Designer Series Paper, and during this incredible sale, you can enjoy a 15% discount on select papers from the 2021–2022 Annual Catalog! July is a great time to stock up and save on some of Stampin’ Up!’s most popular paper designs!

PROMOTION DETAILS:

  • Sales Period:  July 1 – August 2
  • All order types qualify for this promotion.
  • There is no limit to how many packages of Designer Series Paper may be purchased during this promotion.
  • Only select Designer Series Papers are available at a 15% discount during this promotion.
  • Orders must be placed—and closed—during the promotion period for the 15% discount to apply.
  • Designer Series Paper ordered as part of a Starter Kit or with Stampin’ Rewards qualify for the 15% discount.
  • Order Deadline:  August 2, 2021 at 11:59 PM (MT)

Click on image below for a printable PDF of the Sale Designer Series Papers

*********************************************************************************************************

The Adventure Begins

Subscribe June 11 – July 10

This image has an empty alt attribute; its file name is 07-11-21_header_the_adventure_begins.jpg

Life is full of big adventures that are best experienced together! This month’s The Adventure Begins Paper Pumpkin Kit helps you celebrate those exciting new chapters in the most creative of ways with enough supplies to create twelve motivating cards—plus coordinating envelopes—all featuring the exciting colors of nature.

Like the still moments before a great adventure, the kit’s designs contain a quiet energy that hint at all the grand possibilities of what is yet to come. Share this kit with your family and friends about to embark on a new journey and make connections while you explore and discover new levels of your creativity!

Details

  • Contains enough supplies to create twelve cards and coordinating envelopes.
  • Card size: 4-1/4” x 5-1/2” (10.8 x 14cm)
  • Envelope size: 4-1/2” x 5-3/4” (11.4 x 14.6 cm)
  • Comes with a Stampin’ Spot plus an exclusive Stamp Set.
  • Includes inspirational sentiments and adventure-themed imagery featuring these nature-inspired coordinating colors: Basic Black, Basic White, Bermuda Bay, Crushed Curry, Early Espresso, Flirty Flamingo, Garden Green, Granny Apple Green, Mango Melody, Night of Navy.

Subscribe to the July 2021 Paper Pumpkin Kit between 11 June and 10 July at paperpumpkin.com!

Note: Supplies may be limited toward the end of the subscription period.

*********************************************************************************************************

Card stock cuts for this project:

  • Basic White Cardstock 4 1/4″ x 5 1/2″ (scalloped card front mat), 1 1/4″ x 2 7/8″ (sentiment), 4″ X 4″ (inner liner)
  • Blushing Bride Cardstock 3′ X 3 1/2″ (detailed flower die)
  • Mint Macaron Cardstock 4 1/4″ X 11″ (card base scored and folded at 4 1/4″, 5 1/2″ & diagonally from bottom 4 1/4″ score line to top right corner), 2 – 4 1/8″ X 4 1/8″ (card front & inner liner mats)
  • Hand-Penned Designer Series Paper 3 1/2″ X 3 1/2″ (card front), 1″ X 4″ (side panel), 2 1/2″ X 6″ (envelope flap)

*********************************************************************************************************

Product List