Stampin’ Up Woven Heirlooms Anniversary Card

Good Monday morning my fellow stampers.  How is everyone doing today?  Did you all have a nice weekend?

For today I have an anniversary card with a bit of a vintage look.  I used the Stampin’ Up Woven Heirlooms Bundle to make it.  Here’s my card.

I started by adhering a panel of Perennial Essence Designer Series Paper to a Blackberry Bliss card base using Multipurpose Liquid Glue.

Using the Heirlooms Frames Dies and 3D Embossing Folder, I cut an oval frame out of Smoky Slate cardstock and embossed it with the coordinating embossing folder.  I stamped the sentiment from the Stampin’ Up Woven Heirlooms Cling Stamp Set in Blackberry Bliss Ink on a small panel of Whisper White cardstock.  I stamped the scrolls from the Woven Heirloom stamp set in Blackberry Bliss Ink above and below the sentiment  I cut the sentiment out using the Layering Ovals Dies.

I adhered the sentiment oval to the card front using Snail.  I adhered the frame over the sentiment using Stampin’ Dimensionals.  I made a small Blackberry Bliss bow made from the Nature’s Twine and adhered it to the frame using a Glue Dot.

On the inside I stamped the sentiment from the Stampin’ Up Well Said Cling Stamp Set in Blackberry Bliss Ink in the  center or a Whisper White panel.  I stamped the small scrolls from the Woven Heirlooms stamp set in Blackberry Bliss in all 4 corners.  I adhered the Whisper White panel to the inside of the Blackberry Bliss card base using Multipurpose Liquid Glue.

To finish my card I decorated a Medium Whisper White Envelope.  I stamped the scroll images from the Woven Heirlooms stamp set in Blackberry Bliss Ink on the envelope front.  I adhered a panel of Perennial Essence DSP to the envelope flap.

Thank you for stopping by my blog today.  I hope you liked my card and will give it a try. Happy Stamping!!

****************************************************************************************************

If you need any stamping supplies, I’d be very happy to be your Demonstrator. Just click HERE to go directly to my online store or drop me an email if you have any questions. 

MY CURRENT HOST CODE IS: 66KPP6BN

For any orders $50 or more I will send you my monthly class tutorials.  Click HERE or go to my Customer Rewards to see what this months tutorials are.

Click HERE to shop the clearance rack.

Happy Stamping, Karen!

***************************************************************************************************

I’m doing a 2019 Holiday Catalog Designer Series Paper share.  Click here for more information and if you’d like to get in on it.

****************************************************************************************************

STAMPIN’ UP BONUS DAYS – COUPON REDEMTION GOING ON NOW!!

IF YOU HAVE QUESTIONS ON HOW TO REDEEM THEM, PLEASE CONTACT ME.

****************************************************************************************************

EXTRA, EXTRA!!  JOINING PROMOTION JULY 1, 2019 – AUGUST 31, 2019

From July 1 until August 31, new demonstrators will receive an additional $30 to put toward bonus products in their Starter Kit (for a total of $155 in merchandise for $99)!!  THEN, they’ll receive a $10 coupon code the following month.  Are you interested?  Keep reading to learn more!

Dates:  July 1 – August 31 at 11:50 PM MT

Details:

  • The bonus at initial sign up allows demonstrators to pick $30 more than usual.  You will pay $99 to sign up and choose $155 worth of Stampin’ Up! products in your Starter Kit.
  • Coupon codes will be sent between the fifth and seventh business day of the following month the new demonstrator signs up.
  • The email address listed in a new demonstrator’s profile will be used to send the $10 coupon code.
  • Coupon codes may be redeemed only once.
  • Coupon codes expire October 31, 2019; after this date, they will no longer be valid.
  • New demonstrators who submit their Independent Demonstrator Agreement (IDA) before July 1 or after August 31 will not be eligible for this promotion.

If you’ve ever considered purchasing that Starter Kit, now is a great time!  We’d love to have you join and get that discount for yourself or start your own business!!

If you are interested in joining my team click HERE for details or email me.  I’d love to have you on my team.

***************************************************************************************************

BONE APPETIT PAPER PUMPKIN

SUBSCRIBE TO PAPER PUMPKIN BY SEPTEMBER 10TH TO GET IN ON THE FUN
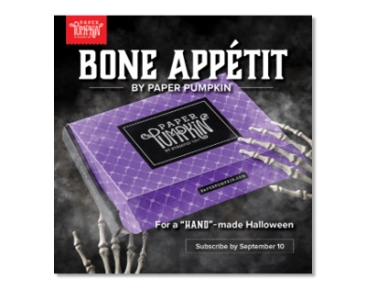
Halloween is nearly here, which means that Paper Pumpkin has been busy, busy, busy. We thought you might like “a hand” with their frightful festivities, so we designed September’s kit, Bone Appétit, with them in mind.

This kit includes 20 food-safe treat boxes, a unique and exclusive Halloween stamp set, and a spooky, special-edition box. September’s kit also gives new meaning to the word “handmade.” (Cue the scary laughter!)

This kit includes 20 food-safe treat boxes, a unique and exclusive Halloween stamp set, and a spooky, special-edition box. September’s kit also gives new meaning to the word “handmade.” (Cue the scary laughter!)

September Kit Information:
The September kit makes 20 Halloween-themed, food-safe treat boxes
Coordinating colors: Basic Black, Gorgeous Grape, Pumpkin Pie, and Whisper White
Subscribe for the September kit at paperpumpkin.com from August 11–September 10.
Supplies may be limited toward the end of the subscription period.

If you’re interested in subscribing to Paper Pumpkin, you can either sign up for a subscription where you are billed monthly for your kit or you can purchase a prepaid subscription in my online store. To see more information and to sign up for the monthly subscription, click HERE To see the options for prepaid subscriptions in my online store click HERE

****************************************************************************************************

I have gathered up a lot of retired Stamp Blackber, Embossing Folders & Dies  and put a list together for anyone interested.  I have single Stamp Sets along with Stamp Sets bundled with Dies or Punches.  Take a look and see if there is anything that you missed out on getting and would still like.  Click Here to go to my list.

****************************************************************************************************

Card stock cuts for this project:

  • Blackberry Bliss Cardstock 8 1/2″ X 5 1/2″ (card base scored and folded at 4 1/4″)
  • Smoky Slate Cardstock 4″ X 5 1/4″ (heirloom frame on card front)
  • Whisper White Cardstock 4″ X 5 1/4″ (inner liner), 3″ X 4″ (sentiment on card front)
  • Perennial Essence Designer Series Paper 4 1/8″ X 5 3/8″ (card front)

****************************************************************************************************

Product List

Stampin’ Up New Wonders for Fun Fold Friday

Good Friday morning my fellow stampers and welcome to Fun Fold Friday.  Hope you are all ready for the weekend, it’s suppose to be beautiful weather this weekend here.

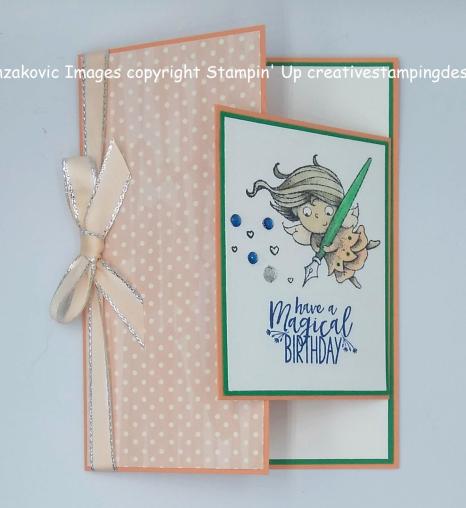
I needed a card for a sweet little girls birthday and I though I would try a new fun fold today that I’ve never made before.  I’m really having fun playing around with new folds for my cards.  I hope you are trying them along with me. I thought I would use one of my favorite Host sets for my card which I think is perfect for a little girl.  Here’s my card for today.

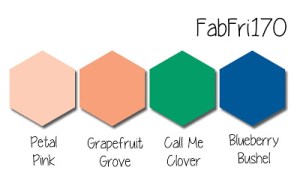
The colors for my card were inspired by Fab Friday Challenge #170.  Here are their colors.

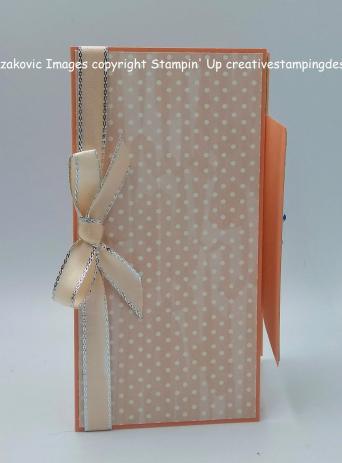
I started by adhering a panel of the Bird Ballad Designer Series Paper to the folded side of my Grapefruit Grove card front using Multipurpose Liquid Glue.  I colored a piece of the Silver 3/8″ Metallic Edged Ribbon using my Light Petal Pink Stampin’ Blends Marker.  I wrapped the ribbon around the left side of the card front and tied a bow.

On a small panel of Whisper White cardstock I stamped the fairy image from the Stampin’ Up Host Exclusive New Wonders Cling Stamp Set in Tuxedo Black Memento Ink.  I stamped the sentiment from the Stampin’ Up Magical Mermaid Cling Stamp Set in Blueberry Bushel Ink under the fairy image.  I colored the fairy image in using my Call Me Clover, Crumb Cake, Ivory and Petal Pink Stampin’ Blends Markers.  I adhered the artwork to a Call Me Clover mat using Snail.  I then adhered the matted artwork to the small Grapefruit Grove card front panel using Multipurpose Liquid Glue.  I adhered a few of the Blueberry Bushel Noble Peacock Rhinestones to the artwork along with a Clear Rhinestone Basic Jewel.

On the inside I stamped the sentiments from the Stampin’ Up Itty Bitty Birthdays Cling Stamp Set in Blueberry Bushel Ink to the center of a Whisper White panel.  I stamped another one of the fairy images from the New Wonders stamp set in Tuxedo Black Memento Ink above the sentiment on the Whisper White panel.  I colored the fairy image in using my Crumb Cake, Ivory and Petal Pink Stampin’ Blends Markers.  Now to assemble.  I adhered the 3/4″ folded edge to the back of the Whisper White panel so that the artwork folded over the inside of my card, using Multipurpose Liquid Glue.  I adhered the Whisper White panel to a Call Me Clover mat using Snail and then to the inside of the Grapefruit Grove card base using Multipurpose Liquid Glue.

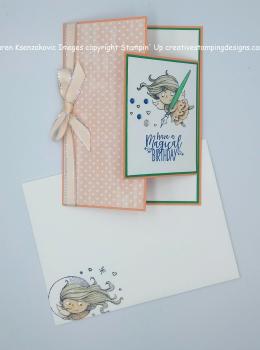
To finish my card off, I decorated a Medium Whisper White Envelope.  I stamped a fairy image from the New Wonders stamp set in Tuxedo Black Memento Ink on the envelope front and colored it in the same as I did for the card.  I adhered a panel of the Bird Ballad DSP to the envelope flap.

Thank you for stopping by my blog today.  I hope you liked my card and will give it a try.  Happy Stamping!!

****************************************************************************************************

If you need any stamping supplies, I’d be very happy to be your Demonstrator. Just click HERE to go directly to my online store or drop me an email if you have any questions. 

MY CURRENT HOST CODE IS: 66KPP6BN

For any orders $50 or more I will send you my monthly class tutorials.  Click HERE or go to my Customer Rewards to see what this months tutorials are.

Click HERE to shop the clearance rack.

Happy Stamping, Karen!

***************************************************************************************************

I’m doing a 2019 Holiday Catalog Designer Series Paper share.  Click here for more information and if you’d like to get in on it.

****************************************************************************************************

STAMPIN’ UP BONUS DAYS – COUPON REDEMTION GOING ON NOW!!

IF YOU HAVE QUESTIONS ON HOW TO REDEEM THEM, PLEASE CONTACT ME.

****************************************************************************************************

EXTRA, EXTRA!!  JOINING PROMOTION JULY 1, 2019 – AUGUST 31, 2019

From July 1 until August 31, new demonstrators will receive an additional $30 to put toward bonus products in their Starter Kit (for a total of $155 in merchandise for $99)!!  THEN, they’ll receive a $10 coupon code the following month.  Are you interested?  Keep reading to learn more!

Dates:  July 1 – August 31 at 11:50 PM MT

Details:

  • The bonus at initial sign up allows demonstrators to pick $30 more than usual.  You will pay $99 to sign up and choose $155 worth of Stampin’ Up! products in your Starter Kit.
  • Coupon codes will be sent between the fifth and seventh business day of the following month the new demonstrator signs up.
  • The email address listed in a new demonstrator’s profile will be used to send the $10 coupon code.
  • Coupon codes may be redeemed only once.
  • Coupon codes expire October 31, 2019; after this date, they will no longer be valid.
  • New demonstrators who submit their Independent Demonstrator Agreement (IDA) before July 1 or after August 31 will not be eligible for this promotion.

If you’ve ever considered purchasing that Starter Kit, now is a great time!  We’d love to have you join and get that discount for yourself or start your own business!!

If you are interested in joining my team click HERE for details or email me.  I’d love to have you on my team.

***************************************************************************************************

BONE APPETIT PAPER PUMPKIN

SUBSCRIBE TO PAPER PUMPKIN BY SEPTEMBER 10TH TO GET IN ON THE FUN

Halloween is nearly here, which means that Paper Pumpkin has been busy, busy, busy. We thought you might like “a hand” with their frightful festivities, so we designed September’s kit, Bone Appétit, with them in mind.

This kit includes 20 food-safe treat boxes, a unique and exclusive Halloween stamp set, and a spooky, special-edition box. September’s kit also gives new meaning to the word “handmade.” (Cue the scary laughter!)

This kit includes 20 food-safe treat boxes, a unique and exclusive Halloween stamp set, and a spooky, special-edition box. September’s kit also gives new meaning to the word “handmade.” (Cue the scary laughter!)

September Kit Information:
The September kit makes 20 Halloween-themed, food-safe treat boxes
Coordinating colors: Basic Black, Gorgeous Grape, Pumpkin Pie, and Whisper White
Subscribe for the September kit at paperpumpkin.com from August 11–September 10.
Supplies may be limited toward the end of the subscription period.

If you’re interested in subscribing to Paper Pumpkin, you can either sign up for a subscription where you are billed monthly for your kit or you can purchase a prepaid subscription in my online store. To see more information and to sign up for the monthly subscription, click HERE To see the options for prepaid subscriptions in my online store click HERE

****************************************************************************************************

I have gathered up a lot of retired Stamp Sets, Embossing Folders & Dies  and put a list together for anyone interested.  I have single Stamp Sets along with Stamp Sets bundled with Dies or Punches.  Take a look and see if there is anything that you missed out on getting and would still like.  Click Here to go to my list.

****************************************************************************************************

Card stock cuts for this project:

  • Call Me Clover Cardstock 4 1/8″ X 5 3/8″ (Inner liner mat), 3 3/8″ X 2 5/8″ (artwork mat)
  • Grapefruit Grove Cardstock 5 1/2″ X 7″ (card base scored and folded at 4 1/4″), 3 1/2″ X 3 1/2″ (small card front scored and folded at 3/4″)
  • Whisper White Cardstock 4″ X 5 1/4″ (inner liner), 3 1/4″ X 2 1/2″(artwork)
  • Bird Ballad Designer Series Paper 2 5/8″ X 5 3/8″ (small panel card front)

****************************************************************************************************

Product List

Stampin’ Up Seasonal Wreaths Sneak Peek Birthday Card

Good Thursday morning my fellow stampers.  The weekend is just about here.  Is anyone starting to make plans?  I’ll be working all weekend, but today I’ll be having fun walking around the Philadelphia Zoo.  Hopefully it won’t be too hot for the animals to be out.

For today’s card I used a new set in the up coming 2019 Holiday Catalog.  Take a look.

My colors were inspired by The Color Throwdown Challenge #557.  Here are their colors.

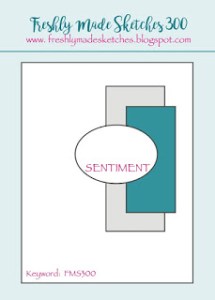
My sketch is from the Freshly Made Sketches Challenge #400.  Here is their sketch.

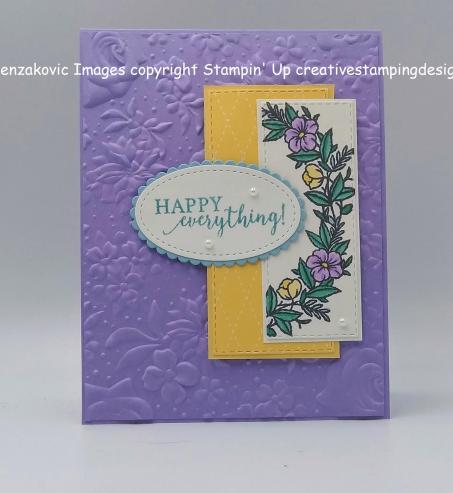
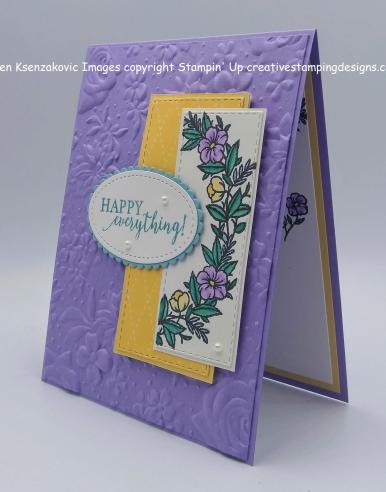
I started by embossing a Highland Heather card front using the Country Floral 3D Embossing Folder.  I adhered the embossed panel to a Highland Heather card front using Multipurpose Liquid Glue.

On a small panel of Whisper White cardstock I stamped the floral image from the Stampin’ Up Seasonal Wreaths Photopolymer Stamp Set twice in Tuxedo Black Memento Ink.  I colored the image in using my Balmy Blue, Bermuda Bay, Highland Heather and So Saffron Stampin’ Blends Markers.  I cut the image out using the Stitched Rectangle Dies and adhered it to a Whisper White mat using Snail.  Using the next size up Stitched Rectangle Die I cut a piece of So Saffron Subtle 6″ X 6″ Designer Series Paper and adhered it onto a So Saffron mat using Snail.  I adhered the artwork to the top of the matted DSP hanging off the right side using Snail and then adhered it to my card front using Stampin’ Dimensionals.

On a small piece of Whisper White cardstock I stamped the sentiment from the Seasonal Wreaths stamp set in Balmy Blue Ink.  I cut the sentiment out using the oval from my Stitched Shapes Dies.  I cut the scalloped Balmy Blue mat out using my Layering Ovals Dies and adhered the sentiment to the mat using Snail.  I adhered the matted sentiment to the card front using Stampin’ Dimensionals and a Glue Dot.  I added a few Pearl Basic Jewels to the card front.

On the inside I stamped the sentiment from the Seasonal Wreaths stamp set in Balmy Blue Ink in the center of a Whisper White panel.  I stamped the larger floral image from the Seasonal Wreaths stamp set in Tuxedo Black Memento Ink in the 2 corners.  I stamped the smaller flower from the Seasonal Wreaths stamp set in Tuxedo Black Memento Ink on either side of the sentiment.  I colored all the flowers in using my Balmy Blue, Bermuda Bay, Highland Heather and So Saffron Stampin’ Blends Markers.  I adhered the Whisper White panel to a So Saffron mat using Snail and then to the inside of my Highland Heather card base using Multipurpose Liquid Glue.

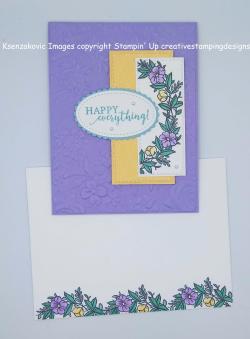
To finish my card I decorated a Medium Whisper White Envelope.  I stamped the floral image from the Seasonal Wreaths stamp set in Tuxedo Black Memento Ink on the envelope front and colored it in the same as I did for my card.  I adhered a panel of the So Saffron Subtle 6″ X 6″ DSP to the envelope flap.

Thank you for visiting my blog today.  I hope you liked my card.  This stamp set will be available on September 4th for purchase.

Happy Stamping!!

****************************************************************************************************

If you need any stamping supplies, I’d be very happy to be your Demonstrator. Just click HERE to go directly to my online store or drop me an email if you have any questions. 

MY CURRENT HOST CODE IS: 66KPP6BN

For any orders $50 or more I will send you my monthly class tutorials.  Click HERE or go to my Customer Rewards to see what this months tutorials are.

Click HERE to shop the clearance rack.

Happy Stamping, Karen!

***************************************************************************************************

I’m doing a 2019 Holiday Catalog Designer Series Paper share.  Click here for more information and if you’d like to get in on it.

****************************************************************************************************

STAMPIN’ UP BONUS DAYS – COUPON REDEMTION GOING ON NOW!!

IF YOU HAVE QUESTIONS ON HOW TO REDEEM THEM, PLEASE CONTACT ME.

****************************************************************************************************

EXTRA, EXTRA!!  JOINING PROMOTION JULY 1, 2019 – AUGUST 31, 2019

From July 1 until August 31, new demonstrators will receive an additional $30 to put toward bonus products in their Starter Kit (for a total of $155 in merchandise for $99)!!  THEN, they’ll receive a $10 coupon code the following month.  Are you interested?  Keep reading to learn more!

Dates:  July 1 – August 31 at 11:50 PM MT

Details:

  • The bonus at initial sign up allows demonstrators to pick $30 more than usual.  You will pay $99 to sign up and choose $155 worth of Stampin’ Up! products in your Starter Kit.
  • Coupon codes will be sent between the fifth and seventh business day of the following month the new demonstrator signs up.
  • The email address listed in a new demonstrator’s profile will be used to send the $10 coupon code.
  • Coupon codes may be redeemed only once.
  • Coupon codes expire October 31, 2019; after this date, they will no longer be valid.
  • New demonstrators who submit their Independent Demonstrator Agreement (IDA) before July 1 or after August 31 will not be eligible for this promotion.

If you’ve ever considered purchasing that Starter Kit, now is a great time!  We’d love to have you join and get that discount for yourself or start your own business!!

If you are interested in joining my team click HERE for details or email me.  I’d love to have you on my team.

***************************************************************************************************

BONE APPETIT PAPER PUMPKIN

SUBSCRIBE TO PAPER PUMPKIN BY SEPTEMBER 10TH TO GET IN ON THE FUN

Halloween is nearly here, which means that Paper Pumpkin has been busy, busy, busy. We thought you might like “a hand” with their frightful festivities, so we designed September’s kit, Bone Appétit, with them in mind.

This kit includes 20 food-safe treat boxes, a unique and exclusive Halloween stamp set, and a spooky, special-edition box. September’s kit also gives new meaning to the word “handmade.” (Cue the scary laughter!)

This kit includes 20 food-safe treat boxes, a unique and exclusive Halloween stamp set, and a spooky, special-edition box. September’s kit also gives new meaning to the word “handmade.” (Cue the scary laughter!)

September Kit Information:
The September kit makes 20 Halloween-themed, food-safe treat boxes
Coordinating colors: Basic Black, Gorgeous Grape, Pumpkin Pie, and Whisper White
Subscribe for the September kit at paperpumpkin.com from August 11–September 10.
Supplies may be limited toward the end of the subscription period.

If you’re interested in subscribing to Paper Pumpkin, you can either sign up for a subscription where you are billed monthly for your kit or you can purchase a prepaid subscription in my online store. To see more information and to sign up for the monthly subscription, click HERE To see the options for prepaid subscriptions in my online store click HERE

****************************************************************************************************

I have gathered up a lot of retired Stamp Sets, Embossing Folders & Dies  and put a list together for anyone interested.  I have single Stamp Sets along with Stamp Sets bundled with Dies or Punches.  Take a look and see if there is anything that you missed out on getting and would still like.  Click Here to go to my list.

****************************************************************************************************

Card stock cuts for this project:

  • Balmy Blue Cardstock 2″ X 3″ (scalloped oval sentiment mat)
  • Highland Heather Cardstock 4 1/4″ X 11″ (card base scored and folded at 5 1/2″), 4 1/8″ X 5 3/8″ (card front)
  • So Saffron Cardstock 3 13/16″ X 1 13/16″ (card front DSP mat), 4″ X 5 1/4″ (inner liner mat)
  • Whisper White Cardstock 3 3/8″ X 1 3/8″ (artwork mat), 2″ X 3″ (sentiment), 4″ X 2″ (artwork)
  • Subtle 6″ X 6″ Designer Series Paper 2″ X 4″ (card front stitched rectangle), piece for envelope flap

****************************************************************************************************

Product List

Stampin’ Up Mosaic Mood Bloom and Grow Birthday

Good Wednesday morning my fellow stampers.  We’re halfway through the week already.  Yesterday was a vey exciting day, we got to register for OnStatge in November.  I can’t wait to go and meet up with my team members and see what’s new..

For today’s card I didn’t do any stamping, except for the inside.  I really put my fussy cutting to the test with this one.  This was also one of the cards we made at my Stamp Camp last night.  I had the ladies doing a lot of fussy cutting too.  Here’s my card.

I joined in today with Seize The Birthday Challenge #172.  Their Theme is Butterflies.

I also played along with Cardz 4 Galz Challenge #103. Their Theme is ‘WINGS’.

I played along with The Flower Challenge #35.  Here is their theme. My favorite flower is a rose.

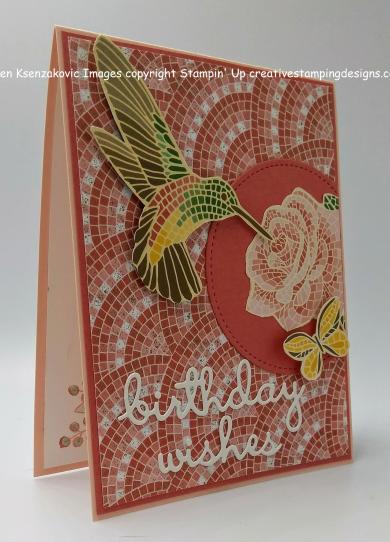
I started out by fussy cutting a butterfly, humming bird and rose from the Mosaic Mood Specialty Designer Series Paper using my Paper Snips.   I cut the larges circle from the Stitched Shapes Dies in Terracotta Tile cardstock.  I adhered the fussy cut rose to the circle using Multipurpose Liquid Glue.  I adhered the stitched circle to a the panel of Mosaic Mood Specialty DSP using Multipurpose Liquid Glue hanging off the right edge a bit.  I cut the circle even with the DSP.  I adhered the DSP to a Terracotta Tile mat using Multipurpose Liquid Glue.

I adhered the humming bird and butterfly to the card front using Stampin’ Dimensionals having them both touch the rose.

I cut the ‘birthday wishes’ sentiment out of Shimmery White cardstock using the Well Written Dies.  I adhered the sentiment to the card front using my Fine Tip Glue Pen.  I adhered the card front to a Petal Pink card base using Multipurpose Liquid Glue.

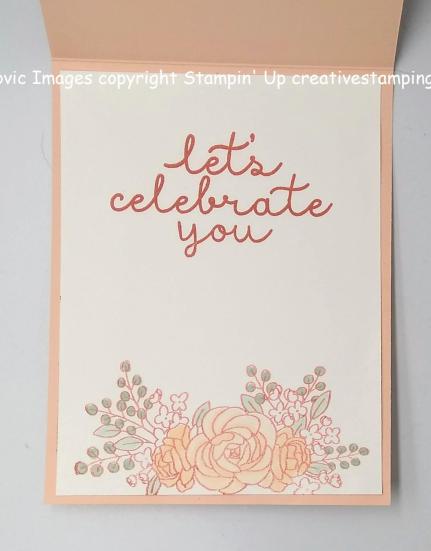
On the inside I stamped the sentiment from the Stampin’ Up Bloom & Grow Photopolymer Stamp Set in Terracotta Tile Ink in the center of a Whisper White panel.  I stamped the rose image from the Bloom & Grow stamp set in Terracotta Tile Ink on the bottom of the panel and colored only part of it in using my Mint Macaron and Petal Pink Stampin’ Blends Markers.  I adhered the Whisper White panel to the inside of the Petal Pink card base using Multipurpose Liquid Glue.

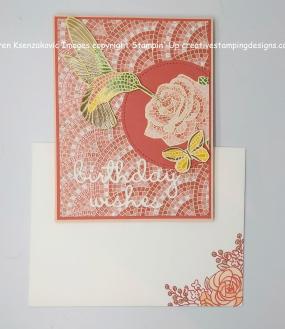
To finish my card I decorated a Medium Whisper White Envelope.  I stamped the rose image from the Bloom & Grow stamp set in Terracotta Tile Ink on the front corner of the envelope.  I adhered a piece of the Mosaic Mood Specialty DSP to the envelope flap.

Thank you for stopping by my blog today.  I hope you liked my card and will give it a try. Happy Stamping!!

****************************************************************************************************

If you need any stamping supplies, I’d be very happy to be your Demonstrator. Just click HERE to go directly to my online store or drop me an email if you have any questions. 

MY CURRENT HOST CODE IS: 66KPP6BN

For any orders $50 or more I will send you my monthly class tutorials.  Click HERE or go to my Customer Rewards to see what this months tutorials are.

Click HERE to shop the clearance rack.

Happy Stamping, Karen!

***************************************************************************************************

I’m doing a 2019 Holiday Catalog Designer Series Paper share.  Click here for more information and if you’d like to get in on it.

****************************************************************************************************

STAMPIN’ UP BONUS DAYS – COUPON REDEMTION GOING ON NOW!!

IF YOU HAVE QUESTIONS ON HOW TO REDEEM THEM, PLEASE CONTACT ME.

****************************************************************************************************

EXTRA, EXTRA!!  JOINING PROMOTION JULY 1, 2019 – AUGUST 31, 2019

From July 1 until August 31, new demonstrators will receive an additional $30 to put toward bonus products in their Starter Kit (for a total of $155 in merchandise for $99)!!  THEN, they’ll receive a $10 coupon code the following month.  Are you interested?  Keep reading to learn more!

Dates:  July 1 – August 31 at 11:50 PM MT

Details:

  • The bonus at initial sign up allows demonstrators to pick $30 more than usual.  You will pay $99 to sign up and choose $155 worth of Stampin’ Up! products in your Starter Kit.
  • Coupon codes will be sent between the fifth and seventh business day of the following month the new demonstrator signs up.
  • The email address listed in a new demonstrator’s profile will be used to send the $10 coupon code.
  • Coupon codes may be redeemed only once.
  • Coupon codes expire October 31, 2019; after this date, they will no longer be valid.
  • New demonstrators who submit their Independent Demonstrator Agreement (IDA) before July 1 or after August 31 will not be eligible for this promotion.

If you’ve ever considered purchasing that Starter Kit, now is a great time!  We’d love to have you join and get that discount for yourself or start your own business!!

If you are interested in joining my team click HERE for details or email me.  I’d love to have you on my team.

***************************************************************************************************

BONE APPETIT PAPER PUMPKIN

SUBSCRIBE TO PAPER PUMPKIN BY SEPTEMBER 10TH TO GET IN ON THE FUN

Halloween is nearly here, which means that Paper Pumpkin has been busy, busy, busy. We thought you might like “a hand” with their frightful festivities, so we designed September’s kit, Bone Appétit, with them in mind.

This kit includes 20 food-safe treat boxes, a unique and exclusive Halloween stamp set, and a spooky, special-edition box. September’s kit also gives new meaning to the word “handmade.” (Cue the scary laughter!)

This kit includes 20 food-safe treat boxes, a unique and exclusive Halloween stamp set, and a spooky, special-edition box. September’s kit also gives new meaning to the word “handmade.” (Cue the scary laughter!)

September Kit Information:
The September kit makes 20 Halloween-themed, food-safe treat boxes
Coordinating colors: Basic Black, Gorgeous Grape, Pumpkin Pie, and Whisper White
Subscribe for the September kit at paperpumpkin.com from August 11–September 10.
Supplies may be limited toward the end of the subscription period.

If you’re interested in subscribing to Paper Pumpkin, you can either sign up for a subscription where you are billed monthly for your kit or you can purchase a prepaid subscription in my online store. To see more information and to sign up for the monthly subscription, click HERE To see the options for prepaid subscriptions in my online store click HERE

****************************************************************************************************

I have gathered up a lot of retired Stamp Sets, Embossing Folders & Dies  and put a list together for anyone interested.  I have single Stamp Sets along with Stamp Sets bundled with Dies or Punches.  Take a look and see if there is anything that you missed out on getting and would still like.  Click Here to go to my list.

****************************************************************************************************

Card stock cuts for this project:

  • Petal Pink Cardstock 4 1/4″ X 11″ (card base scored and folded at 5 1/2″)
  • Terracotta Tile Cardstock 4 1/8″ X 5 3/8″ (card front mat)
  • Whisper White Cardstock 4″ X 5 1/4″ (inner liner)
  • Mosaid Mood Specialty Designer Series Paper 4″ X 5 1/4″ (card front), pieces to fussy cut and for envelope flap

****************************************************************************************************

Product List

Stampin’ Up Wrapped In Plaid Swirly Frames Sneak Peek Christmas Card

Good Tuesday morning my fellow stampers.  How is everyone doing today?  Hope your week has started off well.

I have a sneak peek for you today from the 2019 Holiday Catalog.  If you are a customer of mine you have seen this set in the catalog on page 13.  This is a pretty quick and easy card to make.  Here’s my card.

I started by stamping the large and small circles from the Stampin’ Up Swirly Frames Photopolymer Stamp Set in Versamark Ink on a Shaded Spruce card front.  I immediately sprinkled it with my Gold Stampin’ Emboss Powder and set it using my Heat Tool.  I adhered the card front to a Shaded Spruce card base using Multipurpose Liquid Glue.

I punched 3 trees out from the new gorgeous Wrapped In Plaid Designer Series Paper (available Sept 4th) using the Pine Tree Punch (available Sept 4th).  I adhered 2 of the trees using Glue Dots and the center tree using Stampin’ Dimensionals.

I cut the sentiment out from Cherry Cobbler cardstock using the  Word Wishes Dies and adhered it to the card front using Multipurpose Liquid Glue.

On the inside I stamped the sentiment from the Stampin’ Up Perfect Plaid Photopolymer Stamp Set (available Sept 4th) in Cherry Cobbler Ink in the center of a Whisper White panel.  I stamped the plaid tree image from the Perfect Plaid stamp set in Shaded Spruce Ink on the bottom of the panel.  I adhered the Whisper White panel to a Cherry Cobbler mat using Snail and then to the inside of the Shaded Spruce card base using Multipurpose Liquid Glue.

To finish my card off I decorated a Medium Whisper White Envelope.  I stamped the plaid tree from the Perfect Plaid stamp set in Shaded Spruce twice and Cherry Cobbler once on the bottom of the envelope front.  I adhered a panel of the Wrapped In Plaid DSP to the envelope flap.

Thank you for stopping by my blog today.  I hope you liked my card.  The Perfect Plaid Stamp Set, the Wrapped In Plaid Designer Series Paper and the Pine Tree Punch will be available for purchase on September 4th.

Happy Stamping!!

****************************************************************************************************

If you need any stamping supplies, I’d be very happy to be your Demonstrator. Just click HERE to go directly to my online store or drop me an email if you have any questions. 

MY CURRENT HOST CODE IS: 66KPP6BN

For any orders $50 or more I will send you my monthly class tutorials.  Click HERE or go to my Customer Rewards to see what this months tutorials are.

Click HERE to shop the clearance rack.

Happy Stamping, Karen!

***************************************************************************************************

I’m doing a 2019 Holiday Catalog Designer Series Paper share.  Click here for more information and if you’d like to get in on it.

****************************************************************************************************

STAMPIN’ UP BONUS DAYS – COUPON REDEMTION GOING ON NOW!!

IF YOU HAVE QUESTIONS ON HOW TO REDEEM THEM, PLEASE CONTACT ME.

****************************************************************************************************

EXTRA, EXTRA!!  JOINING PROMOTION JULY 1, 2019 – AUGUST 31, 2019

From July 1 until August 31, new demonstrators will receive an additional $30 to put toward bonus products in their Starter Kit (for a total of $155 in merchandise for $99)!!  THEN, they’ll receive a $10 coupon code the following month.  Are you interested?  Keep reading to learn more!

Dates:  July 1 – August 31 at 11:50 PM MT

Details:

  • The bonus at initial sign up allows demonstrators to pick $30 more than usual.  You will pay $99 to sign up and choose $155 worth of Stampin’ Up! products in your Starter Kit.
  • Coupon codes will be sent between the fifth and seventh business day of the following month the new demonstrator signs up.
  • The email address listed in a new demonstrator’s profile will be used to send the $10 coupon code.
  • Coupon codes may be redeemed only once.
  • Coupon codes expire October 31, 2019; after this date, they will no longer be valid.
  • New demonstrators who submit their Independent Demonstrator Agreement (IDA) before July 1 or after August 31 will not be eligible for this promotion.

If you’ve ever considered purchasing that Starter Kit, now is a great time!  We’d love to have you join and get that discount for yourself or start your own business!!

If you are interested in joining my team click HERE for details or email me.  I’d love to have you on my team.

***************************************************************************************************

BONE APPETIT PAPER PUMPKIN

SUBSCRIBE TO PAPER PUMPKIN BY SEPTEMBER 10TH TO GET IN ON THE FUN

Halloween is nearly here, which means that Paper Pumpkin has been busy, busy, busy. We thought you might like “a hand” with their frightful festivities, so we designed September’s kit, Bone Appétit, with them in mind.

This kit includes 20 food-safe treat boxes, a unique and exclusive Halloween stamp set, and a spooky, special-edition box. September’s kit also gives new meaning to the word “handmade.” (Cue the scary laughter!)

This kit includes 20 food-safe treat boxes, a unique and exclusive Halloween stamp set, and a spooky, special-edition box. September’s kit also gives new meaning to the word “handmade.” (Cue the scary laughter!)

September Kit Information:
The September kit makes 20 Halloween-themed, food-safe treat boxes
Coordinating colors: Basic Black, Gorgeous Grape, Pumpkin Pie, and Whisper White
Subscribe for the September kit at paperpumpkin.com from August 11–September 10.
Supplies may be limited toward the end of the subscription period.

If you’re interested in subscribing to Paper Pumpkin, you can either sign up for a subscription where you are billed monthly for your kit or you can purchase a prepaid subscription in my online store. To see more information and to sign up for the monthly subscription, click HERE To see the options for prepaid subscriptions in my online store click HERE

****************************************************************************************************

I have gathered up a lot of retired Stamp Sets, Embossing Folders & Dies  and put a list together for anyone interested.  I have single Stamp Sets along with Stamp Sets bundled with Dies or Punches.  Take a look and see if there is anything that you missed out on getting and would still like.  Click Here to go to my list.

****************************************************************************************************

Card stock cuts for this project:

  • Cherry Cobler Cardstock 4″ X 5 1/4″ (inner liner mat), 2 1/2″ X 3 1/2″ (sentiment)
  • Shaded Spruce Cardstock 8 1/2″ X 5 1/2″ (card base scored and folded at 4 1/4″), 4 1/4″ X 5 1/2″ (card front)
  • Whisper White Cardstock 3 3/4″ X 5″(inner liner)
  • Wrapped In Plaid Cardstock 3 designs to punch trees out and piece for envelope

****************************************************************************************************

Product List

Stampin’ Up Happy Tails Pet Sympathy Card

Good Monday morning my fellow stampers.  How was everyone’s weekend?  Anyone do anything fun?  I worked, but not my normal job.  I got to work at the Hungry Hound Dog Bakery we have here in town.  It’s so much fun working there, the puppies come in to visit and spend their money on treats and toys.  We bake all our own treats on the premises and they are delicious, I’ve tried quite a few.  They are all made with human edible products that are animal safe.

My card for today is NOT one I like to make.  My daughter’s best friend’s dog died last week.  It was a sudden thing, she wasn’t even sick and so very sad.  Her dog was the only dog my dog would tolerate staying in the same room with.  My dog is petrified of other dogs since she was attached when by one when she was a little puppy.  She doesn’t mind them through a fence, that she likes.  We are all going to miss JJ tremendously.   Here’s my card for today.

My card played along with CAS Colours & Sketches Challenge #334.  Here is their sketch.

My colors were inspired by Hand Stamped Sentiments Challenge #321.  Here are their colors.  Aren’t they gorgeous together.

I started by adhering a panel of the Come To Gather Designer Series Paper to a Pretty Peacock mat using Snail.  I adhered the card front to a Soft Suede card base using Stampin’ Dimensionals.

I stamped the dog image from the Happy Tails Photopolymer Stamp Set on a scrap of Whisper White cardstock in Soft Suede Ink and colored her in using my Light Soft Suede Stampin’ Blends Marker.  I punched the dog out using my Dog Builder Punch.

On a small panel of Whisper White cardstock I stamped the outline image of the dog house from the Happy Tails stamp set in Cherry Cobbler Ink.  I stamped the 2nd step of the dog house from the Happy Tails stamp set in Cherry Cobbler Ink, stamping off once, on top of the 1st one.  I adhered the Whisper White panel to a Pretty Peacock mat using Snail.  I adhered the punched out dog to the Whisper White panel using Stampin’ Dimensionals.  I colored the heart, which punched out when I punched the dog out, with my Dark Cherry Cobbler Stampin’ Blends Marker and adhered it to the dog using a Glue Dog.  I adhered the artwork to the card front using Multipurpose Liquid Glue.  I stamped the sentiment from the Happy Tails stamp set on a thin strip of Whisper White cardstock in Cherry Cobbler Ink.  I stamped the pawprints from the Happy Tails stamp set on either side of the sentiment in Soft Suede Ink.  I adhered the sentiment strip to a Pretty Peacock mat using Snail and then to the card front using Stampin’ Dimensionals and a Glue Dot.

On the inside I stamped the sentiment from Happy Tails stamp set in Cherry Cobbler Ink in the center of a Whisper Whist panel.  I stamped the paw print image from the Happy Tails stamp set in Soft Suede Ink on the bottom left of the panel.  I adhered the Whisper White panel to a Pretty Peacock mat using Snail and then to the inside of my Soft Suede card base using Multipurpose Liquid Glue.

To finish my card I decorated a Medium Whisper White Envelope.  I stamped the dog image from the Happy Tails stamp set in Soft Suede Ink on the front of the envelope and colored it in the same as I did for the card.  I stamped the paw print image from the Happy Tails stamp set in Soft Suede Ink on the envelope front too.  I adhered a panel of Come To Gather DSP to the envelope flap.

Thank you for visiting my blog today.  I hope you liked my card and will give it a try.  Happy Stamping!!

****************************************************************************************************

If you need any stamping supplies, I’d be very happy to be your Demonstrator. Just click HERE to go directly to my online store or drop me an email if you have any questions. 

MY CURRENT HOST CODE IS: 66KPP6BN

For any orders $50 or more I will send you my monthly class tutorials.  Click HERE or go to my Customer Rewards to see what this months tutorials are.

Click HERE to shop the clearance rack.

Happy Stamping, Karen!

***************************************************************************************************

I’m doing a 2019 Holiday Catalog Designer Series Paper share.  Click here for more information and to join in.

****************************************************************************************************

STAMPIN’ UP BONUS DAYS – COUPON REDEMTION GOING ON NOW!!

IF YOU HAVE QUESTIONS ON HOW TO REDEEM THEM, PLEASE CONTACT ME.

****************************************************************************************************

EXTRA, EXTRA!!  JOINING PROMOTION JULY 1, 2019 – AUGUST 31, 2019

From July 1 until August 31, new demonstrators will receive an additional $30 to put toward bonus products in their Starter Kit (for a total of $155 in merchandise for $99)!!  THEN, they’ll receive a $10 coupon code the following month.  Are you interested?  Keep reading to learn more!

Dates:  July 1 – August 31 at 11:50 PM MT

Details:

  • The bonus at initial sign up allows demonstrators to pick $30 more than usual.  You will pay $99 to sign up and choose $155 worth of Stampin’ Up! products in your Starter Kit.
  • Coupon codes will be sent between the fifth and seventh business day of the following month the new demonstrator signs up.
  • The email address listed in a new demonstrator’s profile will be used to send the $10 coupon code.
  • Coupon codes may be redeemed only once.
  • Coupon codes expire October 31, 2019; after this date, they will no longer be valid.
  • New demonstrators who submit their Independent Demonstrator Agreement (IDA) before July 1 or after August 31 will not be eligible for this promotion.

If you’ve ever considered purchasing that Starter Kit, now is a great time!  We’d love to have you join and get that discount for yourself or start your own business!!

If you are interested in joining my team click HERE for details or email me.  I’d love to have you on my team.

***************************************************************************************************

BONE APPETIT PAPER PUMPKIN

SUBSCRIBE TO PAPER PUMPKIN BY SEPTEMBER 10TH TO GET IN ON THE FUN

Halloween is nearly here, which means that Paper Pumpkin has been busy, busy, busy. We thought you might like “a hand” with their frightful festivities, so we designed September’s kit, Bone Appétit, with them in mind.

This kit includes 20 food-safe treat boxes, a unique and exclusive Halloween stamp set, and a spooky, special-edition box. September’s kit also gives new meaning to the word “handmade.” (Cue the scary laughter!)

This kit includes 20 food-safe treat boxes, a unique and exclusive Halloween stamp set, and a spooky, special-edition box. September’s kit also gives new meaning to the word “handmade.” (Cue the scary laughter!)

September Kit Information:
The September kit makes 20 Halloween-themed, food-safe treat boxes
Coordinating colors: Basic Black, Gorgeous Grape, Pumpkin Pie, and Whisper White
Subscribe for the September kit at paperpumpkin.com from August 11–September 10.
Supplies may be limited toward the end of the subscription period.

If you’re interested in subscribing to Paper Pumpkin, you can either sign up for a subscription where you are billed monthly for your kit or you can purchase a prepaid subscription in my online store. To see more information and to sign up for the monthly subscription, click HERE To see the options for prepaid subscriptions in my online store click HERE

****************************************************************************************************

I have gathered up a lot of retired Stamp Sets, Embossing Folders & Dies  and put a list together for anyone interested.  I have single Stamp Sets along with Stamp Sets bundled with Dies or Punches.  Take a look and see if there is anything that you missed out on getting and would still like.  Click Here to go to my list.

****************************************************************************************************

Card stock cuts for this project:

  • Pretty Peacock Cardstock 4 1/8″ X 5 3/8″ (card front mat), 3 1/8″ X 2 5/8″ (artwork mat), 4″ X 5 1/4″ (inner liner mat)
  • Soft Suede Cardstock 8 1/2″ X 5 1/2″ (card base scored and folded at 4 1/4″)
  • Whisper White Cardstock 3″ X 2 1/2″ (artwork), 3 3/4″ X 5″ (inner liner)
  • Come To Gather Designer Series Paper 4″ X 5 1/4″ (card front) piece for envelope

****************************************************************************************************

Product List

Stampin’ Up Floral Essence Swirly Frames Birthday Card

Good Thursday morning my fellow stampers.  How is everyone doing today? Hope everyone’s week is moving along smoothly.

I have a pretty easy card for you today, though it does look a little involved, it’s not.  I’ve used a few different stamp sets for you today.  Here’s my card.

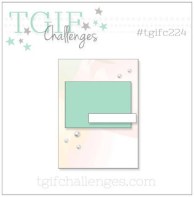
To my surprise, my card played along with a few different challenges today.  First off is TGIF Sketch Challenge #224.  Here is their sketch.

Next is Inspire. Create Colour Challenge #049.  Here are their colors.

I was also able to join in with “Just Us Girls” Trend Week Challenge #500.  Here is their theme.

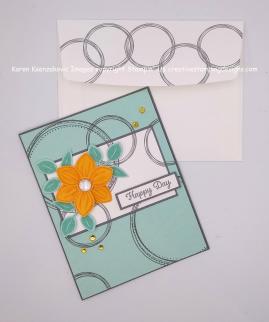
I started by adhering the small Whisper White panel to the Pool Party card front with the tiniest amount of Snail just to hold it in place.  I then randomly stamped the large and small circle images from the Stampin’ Up Swirly Frames Photopolymer Stamp Set in Basic Gray Ink on the 2 panels overlapping some of the circles.  I adhered the Whisper White panel to a Basic Gray mat using Snail.  I then adhered the matted panel to the card front using Multipurpose Liquid glue matching the circles.

On a scrap of Mango Melody cardstock I stamped the flower image from the Stampin’ Up Floral Essence Photopolymer Stamp Set in Mango Melody Ink twice.  I punched the flowers out using the Perennial Flower Punch.  I adhered the flowers together using a Glue Dot and adhered it to the artwork panel using a Stampin’ Dimensional.  I stamped the leaf image from the Floral Essence stamp set 3 times in Pool Party Ink on a scrap of Pool Party cardstock and punched them out using the Leaf Punch.  I adhered the leaves under the flower using Glue Dots.

On a small strip of Whisper White cardstock I stamped the sentiment from the Stampin’ Up Itty Bitty Birthdays Stamp Set in Basic Gray Ink.  I adhered the sentiment strip to a Basic Gray mat using Snail.  I adhered the sentiment to the card front using Stampin’ Dimensionals.  I adhered the card front to a Basic Gray card base using Stampin’ Dimensionals.  I colored a few Clear Rhinestone Basic Jewels using my Mango Melody Stampin’ Blends Markers.  I adhered the colored rhinestones to the card front.

On the inside I stamped another flower image from the Floral Essence stamp set in Basic Gray Ink on the top and bottom of a Whisper White panel.  I stamped the leaf image from the Floral Essence stamp set in Pool Party Ink around the flowers.  I colored the flowers in using my Mango Melody Stampin’ Blends Markers.  I stamped the inside of the flowers with the flower center image from the Floral Essence stamp set in Basic Gray Ink stamping off once.  I stamped the sentiment from the Floral Essence stamp set in Basic Gray Ink in the center of the panel.  I adhered the Whisper White panel to the inside of the Basic Gray card base using Multipurpose Liquid Glue.

To finish my card I decorated a Medium Whisper White Envelope.  I stamped the flower image from the Floral Essence stamp set in Basic Gray Ink on the envelope front.  I stamped the leaves from the Floral Essence stamp set in Pool Party Ink around the flowers.  I colored the flowers in the same as I did for the card.  I stamped the small circle image from the Swirly Frames stamp set in Basic Gray Ink on the envelope flap.

Thank you for stopping by my blog today.  I hope you liked my card and will give it a try. Happy Stamping!!

****************************************************************************************************

If you need any stamping supplies, I’d be very happy to be your Demonstrator. Just click HERE to go directly to my online store or drop me an email if you have any questions. 

MY CURRENT HOST CODE IS: 66KPP6BN

For any orders $50 or more I will send you my monthly class tutorials.  Click HERE or go to my Customer Rewards to see what this months tutorials are.

Click HERE to shop the clearance rack.

Happy Stamping, Karen!

***************************************************************************************************

I’m doing a 2019 Holiday Catalog Designer Series Paper share.  Click here for more information.

****************************************************************************************************

STAMPIN’ UP BONUS DAYS – COUPON REDEMTION GOING ON NOW!!

IF YOU HAVE QUESTIONS ON HOW TO REDEEM THEM, PLEASE CONTACT ME.

****************************************************************************************************

EXTRA, EXTRA!!  JOINING PROMOTION JULY 1, 2019 – AUGUST 31, 2019

From July 1 until August 31, new demonstrators will receive an additional $30 to put toward bonus products in their Starter Kit (for a total of $155 in merchandise for $99)!!  THEN, they’ll receive a $10 coupon code the following month.  Are you interested?  Keep reading to learn more!

Dates:  July 1 – August 31 at 11:50 PM MT

Details:

  • The bonus at initial sign up allows demonstrators to pick $30 more than usual.  You will pay $99 to sign up and choose $155 worth of Stampin’ Up! products in your Starter Kit.
  • Coupon codes will be sent between the fifth and seventh business day of the following month the new demonstrator signs up.
  • The email address listed in a new demonstrator’s profile will be used to send the $10 coupon code.
  • Coupon codes may be redeemed only once.
  • Coupon codes expire October 31, 2019; after this date, they will no longer be valid.
  • New demonstrators who submit their Independent Demonstrator Agreement (IDA) before July 1 or after August 31 will not be eligible for this promotion.

If you’ve ever considered purchasing that Starter Kit, now is a great time!  We’d love to have you join and get that discount for yourself or start your own business!!

If you are interested in joining my team click HERE for details or email me.  I’d love to have you on my team.

****************************************************************************************************

I have gathered up a lot of retired Stamp Sets, Embossing Folders & Dies  and put a list together for anyone interested.  I have single Stamp Sets along with Stamp Sets bundled with Dies or Punches.  Take a look and see if there is anything that you missed out on getting and would still like.  Click Here to go to my list.

****************************************************************************************************

Card stock cuts for this project:

  • Basic GrayCardstock 8 1/2″ X 5 1/2″ (card base scored and folded at 4 1/4″), 2 3/8″ X 3 3/4″ (artwork mat), 1/2″ X 2″ (sentiment mat)
  • Mango Melody Cardstock scraps for flowers
  • Pool Party Cardstock 4 1/8″ X 5 3/8″ (card front), scraps for leaves
  • Whisper White Cardstock 2 1/4″ X 3 1/2″ (artwork), 11 7/8″ X 7/16″ (sentiment strip), 4″ X 5 1/4″ (inner liner)

****************************************************************************************************

Product List

Stampin’ Up Seasonal Wreath Sneak Peek

Good Wednesday morning my fellow stampers.  How is your week going?  We’re halfway through already.  Were you able to hop around yesterday and see all the amazing projects that our team made.  If not, be sure to go back to yesterday’s post and check out everyone’s beautiful work.

For today I have another sneak peek for you.  Take a look.

My colors were inspired by Just Add Ink Challenge #469.  I just love this combination of colors.  Here are their colors.

I also joined in with  the Try Stampin’ – Or Not – On Tuesday Challenge #420.  Here is their sketch.

I also played along with Double Trouble Paper Crafting Challenge #35.
They have a 3-2-1 recipe to follow.

I started by adhering a Terracotta Tile panel of the 2019-2021 In-Color Designer Series Paper to a Terracotta Tile mat using Snail.  I then adhered it to a Grapefruit Grove card base using Multipurpose Liquid Glue.  I embossed a small panel of Grapefruit Grove cardstock using the Subtle 3D Embossing Folder and cut a Stitched Rectangle Die out of it.  I cut a larger Stitched Rectangle Die out of Terracotta Tile cardstock and adhered the Grapefruit Grove rectangle to it using Multipurpose Liquid Glue.  I adhered the rectangles to the card front using Multipurpose Liquid Glue.

Using my Triple Banner Punch, I made a banner out of a strip of Pretty Peacock cardstock.  I made another banner using the Triple Banner Punch out of a strip of Pretty Peacock 2019-2021 In-Color DSP.  I adhered the DSP banner to the cardstock banner using Snail and adhered it to the card front using Stampin’ Dimensionals.

On a small panel of Whisper White cardstock I stamped the sentiment from the Stampin’ Up Seasonal Wreath Photopolymer Stamp Set (available Sept 4th) in Grapefruit Grove Ink.  I cut the sentiment out using my Stitched Shapes Dies.  I stamped the flower image from the Seasonal Wreath stamp set in Tuxedo Black Memento Ink above the sentiment.  I colored the flower image in using my Grapefruit Grove, Pretty Peacock and Terracotta Tile Stampin’ Write Markers.  I cut out a scalloped circle mat using my Layering Circles Dies in Terracotta Tile cardstock and adhered the artwork to it using Snail.  I adhered the matted artwork to the card front using Stampin’ Dimensionals.  I added a few Pretty Peacock 2019-2021 In-Color Faceted Dots to the card front.

On the inside I stamped the sentiment from the Seasonal Wreath stamp set in Grapefruit Grove Ink in the center of a Whisper White panel.  I stamped the flower image from the Seasonal Wreath stamp set in Tuxedo Black Memento Ink along the bottom of the panel and colored them in using my Grapefruit Grove, Pretty Peacock, and Terracotta Tile Stampin’ Write Makers.  I adhered the Whisper White panel to a Pretty Peacock mat using Snail and then to the inside of the Grapefruit Grove card base using Multipurpose Liquid Glue.

To finish my card I decorated a Medium Whisper White Envelope.  I stamped the flower image from the Seasonal Wreath stamp set in Tuxedo Black Memento Ink along the bottom front of the envelope and colored them in the same as I did for the card.  I adhered a panel of the 2019-2021 In-Color DSP to the envelope flap.

Thank you for visiting my blog today.  I hope you liked my card.  The stamp set I used for today’s card will be available September 4th.  Happy Stamping!!

****************************************************************************************************

If you need any stamping supplies, I’d be very happy to be your Demonstrator. Just click HERE to go directly to my online store or drop me an email if you have any questions. 

MY CURRENT HOST CODE IS: 66KPP6BN

For any orders $50 or more I will send you my monthly class tutorials.  Click HERE or go to my Customer Rewards to see what this months tutorials are.

Click HERE to shop the clearance rack.

Happy Stamping, Karen!

****************************************************************************************************

STAMPIN’ UP BONUS DAYS – COUPON REDEMTION GOING ON NOW!!

IF YOU HAVE QUESTIONS ON HOW TO REDEEM THEM, PLEASE CONTACT ME.

****************************************************************************************************

EXTRA, EXTRA!!  JOINING PROMOTION JULY 1, 2019 – AUGUST 31, 2019

From July 1 until August 31, new demonstrators will receive an additional $30 to put toward bonus products in their Starter Kit (for a total of $155 in merchandise for $99)!!  THEN, they’ll receive a $10 coupon code the following month.  Are you interested?  Keep reading to learn more!

Dates:  July 1 – August 31 at 11:50 PM MT

Details:

  • The bonus at initial sign up allows demonstrators to pick $30 more than usual.  You will pay $99 to sign up and choose $155 worth of Stampin’ Up! products in your Starter Kit.
  • Coupon codes will be sent between the fifth and seventh business day of the following month the new demonstrator signs up.
  • The email address listed in a new demonstrator’s profile will be used to send the $10 coupon code.
  • Coupon codes may be redeemed only once.
  • Coupon codes expire October 31, 2019; after this date, they will no longer be valid.
  • New demonstrators who submit their Independent Demonstrator Agreement (IDA) before July 1 or after August 31 will not be eligible for this promotion.

If you’ve ever considered purchasing that Starter Kit, now is a great time!  We’d love to have you join and get that discount for yourself or start your own business!!

If you are interested in joining my team click HERE for details or email me.  I’d love to have you on my team.

****************************************************************************************************

I have gathered up a lot of retired Stamp Sets, Embossing Folders & Dies  and put a list together for anyone interested.  I have single Stamp Sets along with Stamp Sets bundled with Dies or Punches.  Take a look and see if there is anything that you missed out on getting and would still like.  Click Here to go to my list.

****************************************************************************************************

Card stock cuts for this project:

  • Grapefruit Grove Cardstock 8 1/2″ X 5 1/2″ (card base scored and folded at 4 1/4″), 3 1/4″ X 1 1/4″ (smaller rectangle panel)
  • Pretty Peacock Cardstock 4 1/8″ X 5 3/8″ (inner liner mat),4 1/2″ X 1 1/4″ (banner mat)
  • Terracotta Tile Cardstock 4″ X 5 1/4″ (card front mat), 3 1/2″ X 1 1/2″ (larger rectangle panel), 2 1/2″ X 2 1/2″ (scalloped circle mat)
  • Whisper White Cardstock 4″ X 5 1/4″ (inner liner), 2 1/2″ X 2 1/2″ (artwork)
  • 2019-2021 In-Color Designer Series Paper 3 7/8″ X 5 1/8″ (card front), 4 1/2″ X 1″ (banner), piece for envelope flap

****************************************************************************************************

Product List

Stampin’ Up Gather Together for Amy’s Inkin’ Krew Blog Hop

Good Tuesday morning my fellow stampers and welcome to Amy’s Inkin’ Krew Blog Hop.

The 2nd Tuesday of every month this amazing group of ladies put together a blog hop and you are guaranteed to see some gorgeous projects. This month our theme is ‘Fall Frenzy’. We can interpret this any way we would like to.  I’m excited to see what everyone comes up with.  If you are starting with me, be sure to hop around to see everyone’s projects. If you’ve hopped over from Connie Troyer’s blog, welcome to my blog and thank you for stopping by.

For today’s card I have another sneak peek for you.  I used a new bundle coming in the Holiday Catalog called Gather Together.  Here’s my card.

My card played along with the Fab Friday Challenge #169.  Here is their sketch.

I started by adhering a panel of the new Come To Gather Designer Series Paper (available Sept 4) to a Blackberry Bliss mat using Snail.  I adhered the matted DSP to a Pretty Peacock card base using Stampin’ Dimensionals.

On a small panel of Whisper White cardstock I stamped the wheat image from the Stampin’ Up Gather Together Photopolymer Stamp Set (available Sept 4) in Pretty Peacock Ink 3 times.  I cut the image out using the 2nd largest circle from the Stitched Shapes Dies.  I adhered it to a Blackberry Bliss scallop circle mat, which I had cut out using my Layering Circles Dies, using Snail and then adhered it to the card front using Stampin’ Dimensionals.  Using the Gathered Leaves Dies (available Sept 4) I cut out 4 leaves, 1 each in Cajun Craze, Crushed Curry, Cherry Cobbler and Rich Razzleberry cardstock.  I stamped the single pumpkin image from the Gather Together stamp set on a piece of Pumpkin Pie cardstock in Pumpkin Pie Ink and cut it out using the Gathered Leaves Dies.  I arranged the leaves and pumpkin on the bottom of the stitched circle the way I liked them and adhered them using Glue Dots and Stampin’ Dimensionals.

On a small panel of Whisper White cardstock I stamped the sentiment from the Gather Together stamp set in Pretty Peacock Ink and cut it out using the Rectangle Stitched Dies.  I adhered the sentiment to the card front using Stampin’ Dimensionals.

On the inside I stamped the large leaf image from the Gather Together stamp set in Crushed Curry Ink, stamping off twice, in the center of a Whisper White panel.  I stamped the sentiment from the Gather Together stamp set in Pretty Peacock Ink in the center of the leaf. I stamped the double pumpkin image from the Gather Together stamp set in Pumpkin Pie Ink on a piece of Pumpkin Pie cardstock and cut them out using the Gathered Leaves Dies.  I adhered them to the bottom of the Whisper White panel using Multipurpose Liquid Glue.  I adhered the Whisper White panel to a Blackberry Bliss mat using Snail and then to the inside of the Pretty Peacock card base using Multipurpose Liquid Glue.

To finish my card off I decorated a Medium Whisper White Envelope.  I stamped the wheat image from the Gather Together stamp set in Pretty Peacock Ink on the front of the envelope.  I adhered a panel of the Come To Gather DSP on the envelope flap.

Thank you for stopping by my blog today.  I hope you liked my card.  Now be sure to hit Previous to hop back to Connie Troyer’s blog or hit Next to head over to Amy Koenders blog. You can also click on each of the names and hop around that way. Happy Hopping!!

  1. Jaimie Babarczy:
  2. Terry Lynn Bright:
  3. Mary Deatherage:
  4. Akiko Sudano:
  5. Shirley Gentry:
  6. Karen Finkle:
  7. Paula Vincent:
  8. Connie Troyer:
  9. Karen Ksenzakovic: You Are Here
  10. Amy Koenders:

****************************************************************************************************

If you need any stamping supplies, I’d be very happy to be your Demonstrator. Just click HERE to go directly to my online store or drop me an email if you have any questions. 

MY CURRENT HOST CODE IS: 66KPP6BN

For any orders $50 or more I will send you my monthly class tutorials.  Click HERE or go to my Customer Rewards to see what this months tutorials are.

Click HERE to shop the clearance rack.

Happy Stamping, Karen!

****************************************************************************************************

STAMPIN’ UP BONUS DAYS – COUPON REDEMTION GOING ON NOW!!

IF YOU HAVE QUESTIONS ON HOW TO REDEEM THEM, PLEASE CONTACT ME.

****************************************************************************************************

EXTRA, EXTRA!!  JOINING PROMOTION JULY 1, 2019 – AUGUST 31, 2019

From July 1 until August 31, new demonstrators will receive an additional $30 to put toward bonus products in their Starter Kit (for a total of $155 in merchandise for $99)!!  THEN, they’ll receive a $10 coupon code the following month.  Are you interested?  Keep reading to learn more!

Dates:  July 1 – August 31 at 11:50 PM MT

Details:

  • The bonus at initial sign up allows demonstrators to pick $30 more than usual.  You will pay $99 to sign up and choose $155 worth of Stampin’ Up! products in your Starter Kit.
  • Coupon codes will be sent between the fifth and seventh business day of the following month the new demonstrator signs up.
  • The email address listed in a new demonstrator’s profile will be used to send the $10 coupon code.
  • Coupon codes may be redeemed only once.
  • Coupon codes expire October 31, 2019; after this date, they will no longer be valid.
  • New demonstrators who submit their Independent Demonstrator Agreement (IDA) before July 1 or after August 31 will not be eligible for this promotion.

If you’ve ever considered purchasing that Starter Kit, now is a great time!  We’d love to have you join and get that discount for yourself or start your own business!!

If you are interested in joining my team click HERE for details or email me.  I’d love to have you on my team.

****************************************************************************************************

I have gathered up a lot of retired Stamp Sets, Embossing Folders & Dies  and put a list together for anyone interested.  I have single Stamp Sets along with Stamp Sets bundled with Dies or Punches.  Take a look and see if there is anything that you missed out on getting and would still like.  Click Here to go to my list.

****************************************************************************************************

Card stock cuts for this project:

  • Blackberry Bliss Cardstock 2 – 4 1/8″ X 5 3/8″ (card front mat and inner liner mat), 3″ X 3″ (scalloped circle)
  • Pretty Peacock Cardstock 4 1/4″ X 11″ (card base scored and folded at 5 1/2″)
  • Scraps of Cajun Craze, Cherry Cobbler, Crushed Curry, Pumpkin Pie & Rich Razzleberry Cardstocks
  • Whisper White Cardstock 4″ X 5 1/4″ (inner liner), 3″ X 3″ (artwork), 3/4″ X 3″ (sentiment strip)
  • Come To Gather Designer Series Paper 4″ X 5 1/4″ (card front), piece for envelope flap

****************************************************************************************************

Product List

Stampin’ Up Natures Beauty Sneak Peek

Good Monday morning my fellow stampers.  How was everyone’s weekend?  Did anyone do anything fun or exciting?  It was a beautiful weekend here. I went for a couple walks on Sunday.  I took a walk into town in the morning and since it was still cool enough I was able to bring Jasmine for a walk.  I feel so bad not bringing her, but the pavement is just too hot for her paws.  She love walking into town, she always thinks we’re going to her store, the dog bakery.  She knows they always give her extra treats.  Unfortunately they weren’t open yet.  Then in the afternoon my family and I went over to Dukes Estate for a nice long walk.  We only walked about 3 miles this time compared to the 7 last time we went.  I can’t wait to go back there in the fall when all the leaves are changing, and it will be a little cooler then.

I have another sneak peek from the 2019 Holiday Catalog for you.  Here’s my card for you today.

I joined in with Freshly Made Sketches Challenge #400 with my card today.  Here is their sketch.

My colors were inspired by CAS Colours & Sketches Challenge #333.  Here are their colors.

I started by stamping the sentiment from Stampin’ Up A Little Lace Cling Stamp Set in Soft Suede Ink on the bottom of an Old Olive card front. I embossed the card front using the Woodland Embossing Folder and added 3 Gold Metallic Pearls to the top.

I embossed a small panel of Grapefruit Grove card stock using the Subtle 3D Embossing Folder and then adhered it to a Cajun Craze mat using Multipurpose Liquid Glue.  I adhered the matted panel to the card front using Multipurpose Liquid Glue.  I wrapped a piece of the Old Olive/Pretty Peacock 3/8″ Reversible Ribbon around the card front and using Multipurpose Liquid Glue I adhered the card front to an Old Olive card base.

On a small panel of Whisper White cardstock I stamped the tree image from the Stampin’ Up Natures Beauty Cling Stamp Set (available Sept 4) in Soft Suede Ink a couple of times.  Using my Stamping Sponges I sponged the Whisper White panel using my Grapefruit Grove Ink on the top and Old Olive Ink on the bottom.   Using the grass image from the Natures Beauty stamp set I stamped some grass around the bottom sponged area in Old Olive Ink.  I adhered the sponged panel to a Cajun Craze mat using Snail.  On a small piece of Whisper White cardstock I stamped the fox image from the Natures Beauty stamp set in Cajun Craze Ink and fussy cut the image out using my Paper Snips.  I adhered the fox to the sponged panel using Stampin’ Dimensionals and adhered the panel to the card front using Stampin’ Dimensionals.  I cut a leaf out of Cajun Craze cardstock using the Gathered Leaves Dies (available Sept 4).  I adhered the leaf to the card front using Stampin’ Dimensionals and a Glue Dot.

On the inside I stamped the fox image from the Natures Beauty stamp set in Cajun Craze Ink, stamping off once, on the bottom of a Whisper White panel.  I stamped the tree image from the Natures Beauty stamp set in Soft Suede Ink, stamping off twice, 3 times across the middle of the Whisper White panel.  I stamped the sentiment from the Stampin’ Up A Big Thank You Photopolymer Stamp Set in Soft Suede Ink in the center of the Whisper White panel.  I adhered the Whisper White panel to a Cajun Craze mat using Snail and then to the inside of the Old Olive card base using Multipurpose Liquid Glue.

To finish my card I decorated a Medium Whisper White Envelope.  I stamped the fox image from the Natures Beauty stamp set in Cajun Craze Ink on the envelope front.  I stamped the tree images from the Natures Beauty stamp set in Soft Suede Ink, some full strength and some stamped off, across the envelope flap.

Thank you for stopping by my blog today.  I hope you like my card.  This set will be available for purchase on September 4th.  Happy Stamping!!

****************************************************************************************************

If you need any stamping supplies, I’d be very happy to be your Demonstrator. Just click HERE to go directly to my online store or drop me an email if you have any questions. 

MY CURRENT HOST CODE IS: 66KPP6BN

For any orders $50 or more I will send you my monthly class tutorials.  Click HERE or go to my Customer Rewards to see what this months tutorials are.

Click HERE to shop the clearance rack.

Happy Stamping, Karen!

***************************************************************************************************

I’m doing a 2019 Holiday Catalog Designer Series Paper share.  Click here for more information.

****************************************************************************************************

STAMPIN’ UP BONUS DAYS – COUPON REDEMTION GOING ON NOW!!

IF YOU HAVE QUESTIONS ON HOW TO REDEEM THEM, PLEASE CONTACT ME.

****************************************************************************************************

EXTRA, EXTRA!!  JOINING PROMOTION JULY 1, 2019 – AUGUST 31, 2019

From July 1 until August 31, new demonstrators will receive an additional $30 to put toward bonus products in their Starter Kit (for a total of $155 in merchandise for $99)!!  THEN, they’ll receive a $10 coupon code the following month.  Are you interested?  Keep reading to learn more!

Dates:  July 1 – August 31 at 11:50 PM MT

Details:

  • The bonus at initial sign up allows demonstrators to pick $30 more than usual.  You will pay $99 to sign up and choose $155 worth of Stampin’ Up! products in your Starter Kit.
  • Coupon codes will be sent between the fifth and seventh business day of the following month the new demonstrator signs up.
  • The email address listed in a new demonstrator’s profile will be used to send the $10 coupon code.
  • Coupon codes may be redeemed only once.
  • Coupon codes expire October 31, 2019; after this date, they will no longer be valid.
  • New demonstrators who submit their Independent Demonstrator Agreement (IDA) before July 1 or after August 31 will not be eligible for this promotion.

If you’ve ever considered purchasing that Starter Kit, now is a great time!  We’d love to have you join and get that discount for yourself or start your own business!!

If you are interested in joining my team click HERE for details or email me.  I’d love to have you on my team.

****************************************************************************************************

I have gathered up a lot of retired Stamp Sets, Embossing Folders & Dies  and put a list together for anyone interested.  I have single Stamp Sets along with Stamp Sets bundled with Dies or Punches.  Take a look and see if there is anything that you missed out on getting and would still like.  Click Here to go to my list.

****************************************************************************************************

Card stock cuts for this project:

  • Cajun Craze Cardstock 2 3/8″ X 2 5/8″ (artwork mat), 2 3/8″ X 3 1/8″ (grapefurit grove mat), 4 1/8″ X 5 3/8″ (inner liner mat)
  • Grapefruit Grove Cardstock 2 1/4″ X 3″ (card front panel)
  • Old Olive Cardstock 4 1/4″ X 11″ (card base scored and folded at 5 1/2″), 4 1/8″ X 5 3/8″ (card front)
  • Whisper White Cardstock 2 1/4″ X 2 1/2″ (artwork), 4″ X 5 1/4″ (inner liner)

****************************************************************************************************

Product List